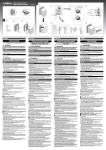
1
EFP STYLE BUILDUP KIT
CBK-55BK
電気製品は、安全のための注意事項を守らないと、火災や人
身事故になることがあります。
このオペレーションマニュアルには、事故を防ぐための重要な注意事項と製品
の取り扱いかたを示してあります。このオペレーションマニュアルをよくお読
みのうえ、製品を安全にお使いください。お読みになったあとは、いつでも見
られるところに必ず保管してください。
OPERATION MANUAL
[Japanese/English/French/German/Italian/Spanish/Chinese/Russian]
1st Edition
日本語
安全のために
電気製品は、安全のための注意事項を守らないと、火災や感電などにより死亡や
大けがなど人身事故につながることがあり、危険です。
警告表示の意味
事故を防ぐために次のことを必ずお守りください。
オペレーションマニュアルおよび
安全のための注意事項を守る
製品では、次のような表示をして
います。表示の内容をよく理解し
4 ∼ 7 ページの注意事項をよくお読みください。
てから本文をお読みください。
定期点検をする
長期間安全に使用していただくために、定期点検を実施することをおすすめしま
す。点検の内容や費用については、ソニーのサービス担当者または営業担当者に
この表示の注意事項を守らないと、
破裂・発火・発熱・液漏れにより、
ご相談ください。
死亡や大けがになることがありま
す。
故障したら使用を中止する
ソニーのサービス担当者、または営業担当者にご連絡ください。
万一、異常が起きたら
異常な音、におい、煙が出たら
この表示の注意事項を守らないと、
火災や感電などにより死亡や大け
がなど人身事故につながることが
あります。
m
a 電源を切る。
b 電源コードや接続ケーブルを抜く。
c ソニーのサービス担当者、または営業担当者に修理を依頼する。
この表示の注意事項を守らないと、
感電やその他の事故によりけがを
したり周辺の物品に損害を与えた
りすることがあります。
炎が出たら
注意を促す記号
m
すぐに電源を切り、消火する。
行為を禁止する記号
行為を指示する記号
2
目次
警告 ............................................................................................................................4
注意 ............................................................................................................................4
電池についての安全上のご注意 .....................................................................................6
電池のリサイクルについて.............................................................................................6
その他の安全上のご注意.................................................................................................7
概要 ...................................................................................................................................7
各部の名称と働き ............................................................................................................8
前面........................................................................................................................................................................8
後面........................................................................................................................................................................9
ハンドル .......................................................................................................................................................... 12
バッテリーアダプター.......................................................................................................................... 13
準備 ................................................................................................................................13
電源..................................................................................................................................................................... 13
CBK-55BK 用バッテリーアダプターを取り付ける ........................................................ 13
AC 電源を使う(DC IN 電源)....................................................................................................... 14
AXS-R5 を使う........................................................................................................................................... 14
PMW-F55/F5 を取り付ける ............................................................................................................ 14
ハンドルを取り付ける.......................................................................................................................... 15
ビューファインダーを取り付ける............................................................................................... 15
外部マイクを使う .................................................................................................................................... 16
UHF ポータブルチューナーを取り付ける(UHF ワイヤレスマイクロホン
使用時)............................................................................................................................................ 17
ライン入力用オーディオ機器を接続する .............................................................................. 18
三脚への取り付け .................................................................................................................................... 18
ビデオライトの接続 ............................................................................................................................... 19
ショルダーベルトの取り付け ......................................................................................................... 19
ショルダーパッドの位置調整 ......................................................................................................... 20
ヘッドホンプラグアダプターを使う ......................................................................................... 20
セットアップメニューの基本操作 ..............................................................................21
音声レベルの調整 .........................................................................................................22
AUDIO IN CH-1/CH-2 端子からの音声レベルを手動調整する ........................... 22
MIC IN 端子からの音声レベルを手動調整する................................................................ 22
チャンネル 3、4 への音声の記録について............................................................................ 23
使用上のご注意 .............................................................................................................24
仕様 ................................................................................................................................25
外形寸法 .......................................................................................................................................................... 26
目次
3
JP
警告
注意
指定の電源で使用する
取扱説明書に記されているバッテリー
パックまたは AC アダプターでお使いく
ださい。
指定以外の製品でのご使用は、火災の原
因となります。
AC 電源コードや DC 電源接
続コードを傷つけない
AC 電源コードや DC 電源接続コードを
傷つけると、火災や感電の原因となりま
す。
• コードを加工したり、傷つけたりしな
い
• 重い物をのせたり、引っ張ったりしな
い
• 熱器具に近づけたり、加熱したりしな
い
• コードを抜くときは、必ずプラグを
持って抜く
万一、コードが傷んだら、ソニーのサー
ビス担当者または営業担当者に交換をご
依頼ください。
油煙、湯気、湿気、ほこりの
多い場所では設置・使用しな
い
上記のような場所で設置・使用すると、
火災や感電の原因となります。
指定された接続ケーブルを使
う
この取扱説明書に記されている接続ケー
ブルを使わないと、火災や故障の原因と
なることがあります。
機器や部品の取り付けは正し
く行う
取り付け方法を誤ると本機が落下し、け
がの原因となることがあります。
カメラと機器の接続は慎重に
行う
カメラと機器との間に指を挟み、けがの
原因となることがあります。
分解しない、改造しない
分解したり、改造したりすると、感電の
原因となります。
ケーブルの抜き差しは慎重に
行う
機器とケーブルの間に指を挟み、けがの
原因となることがあります。
4
警告 /
注意
コード類は正しく配置する
電源コードや接続ケーブルは、足に引っ
ケーブルを接続したままの運
用時には最善の注意をする
かけると本機の落下や転倒などによりけ
がの原因となることがあります。
電源コードや接続ケーブルを引っかける
と、転倒や落下の原因となることがあり
充分注意して接続・配置してください。
ます。
製品の上に乗らない、重い荷
物を乗せない
雷が鳴り出したら、使用を中
止する
倒れたり、落ちたり、壊れたりして、け
落雷すると、感電のおそれがあります。
がの原因となることがあります。
雷が鳴り出したらすぐに使用を中止して
本機から離れてください。
カメラの重量にあった三脚を
使用し、三脚・雲台を確実に
固定する
ハンドルの取り付けネジは確
実に締める
カメラの重量に耐え切れない三脚または
三脚以外に取り付けて使用すると、本機
やレンズが落下し、けがをすることがあ
ります。また、三脚・雲台を確実に固定
ハンドルをカメラに固定後、ネジが緩ん
でいないか確認してください。緩んでい
るとカメラが落下し、けがの原因になり
ます。
せずにカメラから離れると、不意にカメ
ラが動いてけがをすることがあります。
指定されたカメラ以外は接続
しない
指定外のカメラを接続すると火災や故障
の原因となることがあります。
ケーブル着脱の際に指を挟ま
ない
ケーブル着脱時に指を挟むと、けがの原
因となる恐れがあります。
内部に水や異物を入れない
水や異物が入ると、火災の原因となりま
す。
万一、水や異物が入ったときは、すぐに
電源を切り、電源コードや接続ケーブル
を抜いて、ソニーのサービス担当者また
は営業担当者にご相談ください。
注意
5
電池についての安全上のご注意
電池のリサイクルについて
電池の使いかたを誤ると、液漏れ・発熱・破裂・発火・誤
飲による大けがや失明の原因となるので、次のことを必ず
守ってください。
万一、異常が起きたら
• 煙が出たら
1 機器の電源スイッチを切るか、バッテリーチャー
ジャーの電源プラグを抜く。
リチウムイオン電池は、リサイクルできます。不要になっ
たリチウムイオン電池は、金属部にセロハンテープなどの
絶縁テープを貼ってリサイクル協力店へお持ちください。
2 ソニーのサービス窓口に連絡する。
• 電池の液が目に入ったら
充電式電池の回収・リサイクルおよびリサイクル協力店に
ついては、一般社団法人 JBRC ホームページ
すぐきれいな水で洗い、直ちに医師の治療を受ける。
• 電池の液が皮膚や衣服に付いたら
http://www.jbrc.net/hp/contents/index.html を参照してく
ださい。
すぐにきれいな水で洗い流す。
• バッテリー収納部内で液が漏れたら
よくふきとってから、新しい電池を入れる。
ここでは、本機で使用可能なソニー製リチウムイオン電池
についての注意事項を記載しています。
• 充電には、ソニーの専用バッテリーチャージャーを使用
する。
• 火の中に投げ入れたり、加熱、半田付け、分解、改造を
しない。
• 直射日光の当たるところ、炎天下の車内、ストーブのそ
ばなど高温の場所で、使用・放置・充電をしない。
• ハンマーでたたくなどの強い衝撃を与えたり、踏みつけ
たりしない。
• 接点部や 3 極と # 極をショートさせたり、金属製のもの
と一緒に携帯・保管をしない。
• 所定の充電時間を超えても充電が完了しない場合は、充
電をやめる。
• 電池使用中や充電、保管時に異臭がしたり、発熱・液漏
れ・変色・変形などがあったときは、すぐに使用や充電
をやめる。
• 水や海水につけたり、濡らしたりしない。
充電のしかたについてはバッテリーチャージャーの取扱説
明書をよく読む。
6
電池についての安全上のご注意 / 電池のリサイクルについて
その他の安全上のご注意
警告
直射日光の下や火気の近くなど、高温のところにバッテ
リーを置かないでください。 注意
指定以外の電池に交換すると、破裂する危険があります。
必ず指定の電池に交換してください。
使用済みの電池は、国または地域の法令に従って処理して
ください。
概要
CBK-55BK は PMW-F55/F5 に取り付けることにより、
ショルダーカムコーダースタイルならではの安定性と操作
性を向上させるためのアクセサリーキットです。
豊富な Audio 入出力端子や肩載せ撮影時にビューファイン
ダーを覗いたまま手元でコントロールできるダイレクトス
イッチ類、ワイヤレスオーディオレシーバースロット、
オーディオコントロールパネルを備えています。
フロントコントロール部とショルダーパッドは前後に最大
70mm スライドすることができ、PL レンズや大型ポータブ
ル B4 レンズを装着した際もバランスよく肩に載せて撮影
することが可能です。
その他の安全上のご注意 / 概要
7
各部の名称と働き
前面
a AUDIO IF 端子
e 操作部(前面)
(「操作部(前面)参照」
PMW-F55/F5 と接続するときに使用します。
f オーディオ操作部(
「オーディオ操作部」参照)
b MIC IN(マイク入力)(+ 48V)端子(XLR 型、5 ピ
ン、凹)
ステレオマイクを接続する端子です。マイク用の電源
(+ 48V)はこの端子から供給されます。
c ロッドロックレバー
φ15 ロッドの取り付けや取りはずしに使用します。
取り付けるときは、ロッドロックレバーを回してロッドを
固定します。レバーが回しにくい場合は、レバーを引き出
してから操作しやすい位置まで回転させ、押してもとに戻
します。
ご注意
ロッドを取り付けていない状態では、ロックレバーを無理
に回さないでください。
d φ15 ロッド
マットボックスやフォローフォーカスが取り付け可能です。
8
各部の名称と働き
g オーディオ操作部の保護カバー
開くとオーディオ操作部が現れます(11 ページ)
。
h 拡張 IF 端子
PMW-F55/F5 と接続するときに使用します。
i 操作部(側面)
(「操作部(側面)
」参照)
j ロゼット(左右 2 箇所)
汎用のハンドグリップが取り付け可能です。
k 三脚マウント
本機を三脚に固定するとき、三脚アタッチメント(別売)
を取り付けます。
後面
a UHF ポータブルチューナー取り付け部
UHF ポータブルチューナーを取り付けます(17 ページ)。
i カメラロックレバー
本機を PMW-F55/F5 に取り付けるときに使用します。
(14 ページ)
。
b バッテリーアダプター取り付け部
付属のバッテリーアダプターを取り付けます(13 ページ)
。
c TALLY(タリー)ランプ(赤)
記録中に点灯します。CBK-55BK 本体または PMW-F55/F5
に異常が発生すると点滅します。
j ショルダーパッド
ショルダーパッド固定レバーを持ち上げると、前後方向に
位置を調節できます。
本機を肩にのせた状態で操作しやすくなるように、適当な
位置に調節します(20 ページ)。
(異常については PMW-F55/F5 の取扱説明書をご覧くださ
い。)
d 拡張 IF 端子
バッテリーアダプターや AXS-R5 を接続するときに使用し
ます。
e 端子部(後面)(
「端子部(後面)」参照)
f リリースボタン / 脱着レバー
本機を PMW-F55/F5 に取り付けるときに使用します。
(14 ページ)。
g フロントブロック
フロントブロック固定レバーを解除すると、前後方向に位
置を調整できます。
本機を肩にのせた状態で操作しやすくなるように、フロン
トブロックの位置を調整します(20 ページ参照)
。
h AUDIO スライドノブ
本機を PMW-F55/F5 に取り付けるときに使用します。
(14 ページ)。
各部の名称と働き
9
操作部(前面)
e MENU つまみ
各メニュー内の項目選択や設定値の変更をするときに使い
ます (21 ページ)
。
操作部(側面)
a REC START(記録開始)ボタン
押すと記録が始まり、もう一度押すと止まります。レンズ
にある REC ボタンと同じ動作をします。
b SHUTTER(シャッター)スイッチ
電子シャッターを使うときに ON にします。SELECT 側に
押すと、シャッタースピードの表示が切り換わります。ス
イッチの設定を切り換えると、新しい設定がビューファイ
ンダー画面に約 3 秒間表示されます。
Camera メニューの Shutter の Select が Step のときは、
SELECT 側に押すとシャッタースピードが切り換わり、
Continuous のときは、SELECT 側に押すと現在のシャッ
a GAIN/EI(ゲイン切り換え)スイッチ
撮影時の照明状態に合わせて、映像アンプのゲイン(利得)
を切り換えます。H、M、L の設定に対応するゲイン値は、
あらかじめ PMW-F55/F5 のメニューで指定します。
(設定については PMW-F55/F5 の取扱説明書をご覧くださ
い。)
Cine EI モード時は、プリセットした 3 つの EI 値に切り換
えます。
タースピードが表示され、メニューつまみを回すことで
シャッタースピードが切り換わります。
b MENU ON/OFF(メニュー表示オン/オフ)スイッチ
c MIC LEVEL(マイクレベル)つまみ
音声チャンネル 1/2/3/4 の入力レベルを調整します。
るたびに、メニューの表示/非表示が切り換わります。
d AUTO W/B BAL(ホワイトバランス/ブラックバラン
ス自動調整)スイッチ
次のようにホワイトバランスやブラックバランスを自動調
整します。
• WHITE:ホワイトバランスを自動調整する。このとき
WHITE BAL スイッチ(11 ページ)を A または B にし
ておくと、調整された値がメモリー A または B に記憶さ
れる。WHITE BAL スイッチが PRST のときは動作しな
い。
• BLACK:ブラックセットとブラックバランスを自動調
整する。
オートホワイトバランス実行中に再度 WHITE 側に倒すと、
オートホワイトバランスは中止され、元のホワイトバラン
ス状態に戻ります。
オートブラックバランス実行中に再度 BLACK 側に倒すと、
オートブラックバランスは中止され、元のブラックバラン
ス状態に戻ります。
10
各部の名称と働き
ビューファインダー画面やテスト出力画面上に設定メ
ニューを表示するときに使用します。スイッチを押し下げ
c ASSIGN.(アサイナブル)6/7/8 スイッチ
System メニューの Assignable Button で機能を割り当てま
す。
工場出荷時には Off が割り当てられています。オン/オフ
が確認できるインジケーターが付いています。
(設定については PMW-F55/F5 の取扱説明書をご覧くださ
い。)
d ASSIGN.(アサイナブル)5 スイッチ
System メニューの Assignable Button で機能を割り当てま
す。
工場出荷時には Color Bars(カラーバー信号の出力)が割
り当てられています。
(設定については PMW-F55/F5 の取扱説明書をご覧くださ
い。)
e WHITE BAL(ホワイトバランスメモリー切り換え)ス
イッチ
以下のようにホワイトバランスの調整方法を切り換えます。
• PRST:色温度をプリセット値(工場出荷時の設定は
3200K)に調整する。ホワイトバランスを調整する時間
がないときなどに合わせる。
• A または B:あらかじめ A または B に保存しておいたホワ
イトバランスの調整値を呼び出す。AUTO W/B BAL ス
イッチ(10 ページ)を WHITE 側に押すと、ホワイトバ
ランスを自動的に調整し、調整値をメモリー A またはメ
モリー B に記憶する。
Cine EI モードでは、Preset 3200K、Preset 4300K、Preset
5500K を切り換えます。
工場出荷時、Cine EI モードでは以下の設定になっていま
す。
PRST:Preset 3200K
A:Preset 4300K
B:Preset 5500K
右側のスイッチ:CH-3/4
左側のスイッチ
音声出力
CH-1/CH-3
チャンネル 3 の音声
MIX
チャンネル 3 と 4 の混合音声(ステレオ)*
CH-2/CH-4
チャンネル 4 の音声
*HEADPHONE 端子にステレオヘッドホンを接続すると、音声を
ステレオで聞くことができます。
(設定については PMW-F55/
F5 の取扱説明書をご覧ください。)
b LEVEL CH-1/CH-2/CH-3/CH-4(音声チャンネル 1/
2/3/4 録音レベル調整)つまみ
AUDIO SELECT CH-1/CH-2 スイッチ、および AUDIO
SELECT CH-3/4 スイッチを MANUAL にすると、音声
チャンネル 1、2、3、4 に記録する音声レベルを調整できま
す。
c AUDIO SELECT CH-1/CH-2(音声チャンネル 1/2
f MENU CANCEL/BACK(メニュー設定取消し/戻
る)スイッチ
CANCEL/BACK の位置に押し下げると、1つ前の階層に
戻ります。設定前の変更はキャンセルされます。
オーディオ操作部
自動/手動レベル調整切り換え)スイッチ
音声チャンネル 1 と 2 の音声レベル調整方法を個別に選択
します。
• AUTO:自動
• MANUAL:手動
ご注意
音声入力信号に AES/EBU 信号が選択されているチャンネ
ルは、録音レベルが固定になります。
d MONITOR(音量調節)つまみ
内蔵スピーカーやヘッドホンから聞こえる音量を調節しま
す。最小にすると、音声は聞こえなくなります。
e AUDIO SELECT CH-3/4(音声チャンネル 3/4 自動/
手動レベル調整切り換え)スイッチ
音声チャンネル 3 と 4 の音声レベル調整方法を同時に選択
します。
• AUTO:自動
• MANUAL:手動
f AUDIO IN CH-1/CH-2/CH-3/CH-4 (音声入力切り
a MONITOR(オーディオモニター選択)スイッチ
換えチャンネル 1/2/3/4)スイッチ
音声チャンネル 1、2、3、4 に記録する入力信号を選択しま
2 つのスイッチの組み合わせによって、内蔵スピーカーや
ヘッドホンから聞こえる音声を以下のように選択します。
す。
• FRONT:MIC IN 端子に接続したマイクからの音声入力
信号
右側のスイッチ:CH-1/2
• REAR:AUDIO IN CH-1/CH-2 端子に接続したオーディ
オ機器からの音声入力信号
左側のスイッチ
音声出力
CH-1/CH-3
チャンネル 1 の音声
MIX
チャンネル 1 と 2 の混合音声(ステレオ)*
CH-2/CH-4
チャンネル 2 の音声
• WIRELESS:本機にスロットイン UHF ポータブル
チューナーを装着したときの音声入力信号
各部の名称と働き
11
端子部(後面)
e LIVE AUDIO OUT(音声出力)端子(XLR 型、5 ピン、
凸)
オーディオチャンネル 1、2 または、オーディオチャンネル
3、4 に入力された音声信号を出力します。
出力する音声信号は、MONITOR スイッチで選択します。
ご注意
再生音は出力されません。
f AUDIO IN CH-1/CH-2(音声入力チャンネル 1/2)端
子(XLR 型、3 ピン、凹)
オーディオ機器やマイクを接続します。
a AUDIO IN(音声入力切り換え)スイッチ
AUDIO IN CH-1/CH-2 端子に入力される音声の音源を切り
換えます。
• LINE:ステレオアンプなど、外部のオーディオ信号源を
ハンドル
接続する場合
• AES/EBU:外部のデジタルオーディオ信号源を接続す
る場合
• MIC:マイクを接続する場合
b HEADPHONE(LIVE MON)端子(ステレオ、ミニ
ジャック)
ヘッドホンを接続すると E-E* 音をモニターできます。警告
ランプや警告表示の点滅・点灯に合わせて警告音も聞こえ
ます。PMW-F55/F5 の内蔵スピーカーからの音は自動的に
聞こえなくなります。
* E-E:Electric to Electric
本機に入力され、本機内部の電気回路のみを通って出力端子か
ら出力される映像信号または音声信号のことです。これによっ
て入力信号を確認できます。
ご注意
a マイクホルダー
外部マイクを取り付けます(16 ページ)
。
b ビューファインダー固定リング
ビューファインダーの位置を左右方向に調整するときにゆ
るめます(15 ページ)
。
再生音は出力されません。
c ボトムカバー
後面の端子に接続するケーブル類を保護するためのパーツ
です。
底面の取り付けネジをゆるめると、接続するマイクケーブ
ルまたはオーディオケーブルのプラグの形状に応じて、ボ
トムカバーの位置を調整することができます。調整後は、
ネジを締めてカバーを固定してください。
d +48V/OFF(+48V 外部電力供給オン/オフ)スイッ
チ
音声入力に使用するマイクによって、以下のように切り換
えます。
• +48V:外部電源供給方式のマイク
• OFF:内部電源供給方式のマイク
12
各部の名称と働き
c ビューファインダーシュー
ビューファインダーを取り付けます(15 ページ)
。
d ショルダーベルト取り付け金具
付属のショルダーベルトを取り付けます(19 ページ)
。
e アクセサリー取り付けネジ穴
• ネジ種:1/4-20UNC(× 9)
• ネジ種:3/8-16UNC(× 8)
• ネジ勘合長:9 mm 以下
ご注意
取り付けたアクセサリーに過度の衝撃を加えないでくださ
い。ネジ部が破損する恐れがあります。
バッテリーアダプター
準備
電源
バッテリーパック、または AC アダプターを介して AC 電
源を使用できます。
安全のため、下記ソニー純正以外のバッテリーを使用しな
いでください。
リチウムイオンバッテリーパック
BP-FL75
BP-L80S
AC アダプター
AC-DN2B
バッテリーアダプターの取り付け / 取りはずし方は、
「CBK-55BK 用バッテリーアダプターを取り付ける」(13
ページ)をご覧ください。
a リリースボタン / 脱着レバー
b バッテリーリリースレバー
c 拡張 IF 端子
AC-DN10
CBK-55BK 用バッテリーアダプター
を取り付ける
1
バッテリーアダプターのリリースボタンを押すと
(1)、脱着レバーがポップアップするので、脱着レ
バーを上まで引き上げる(2)
。
d DC IN(DC 電源入力)端子(14 ページ)
e LIGHT(ライト)端子(2 ピン、凹)
アントンバウアー社製のウルトラライト 2 または同等品で、
50W 以下のビデオライトを接続します(19 ページ)。
ご注意
バッテリーパック
取り付け部
バッテリーリリース
レバー
ビデオライトの点灯は記録に連動しません。
f バッテリーパック取り付け部
g DC OUT(DC 電源出力)端子
ご注意
消費電流が 1.8 A 以下の機器を接続してください。
準備
13
2
本機後面の溝にバッテリーアダプターのツメを差し込
み(1)、脱着レバーをリリースボタンによりロックさ
れるまで倒す(2)。
AC 電源を使う(DC IN 電源)
本機は AC アダプター AC-DN2B/AC-DN10(別売り)を使
用することによって、AC 電源に接続して動作させること
ができます。
AXS-R5 を使う
AXS-R5 の取り付けについては、PMW-F55/F5 の取扱説明
書をご覧ください。
PMW-F55/F5 を取り付ける
◆ PMW-F55/F5 の取り扱いについて詳しくは、PMW-F55/F5 に
付属の取扱説明書をご覧ください。
ご注意
• PMW-F55/F5のソフトウェアバージョン5.0以降で使用で
きます。
ご注意
• 脱着レバーを確実に引き上げてから装着してください。
• PMW-F55/F5 の取り付け/取りはずしは、電源を切った
状態で行ってください。
• 4 か所のツメを確実に装着してから脱着レバーを倒してく
ださい。装着不良、または破損の原因となります。
1
付属のスライドプレートを、PMW-F55/F5 の底面にコ
インなどを使って確実に締めつけて取り付ける。
バッテリーパックを使う
バッテリーパックをバッテリーアダプターのバッテリー
パック取り付け部に差し込んで、下にスライドさせてロッ
クします。
ご注意
• 装着する前に、バッテリーチャージャーを使用して充電
してください。
• 使用直後でバッテリーパックの温度が上昇した状態で充
電すると、完全に充電されないことがあります。
スライドプレート
取りはずすには
バッテリーリリースレバーを押しながらバッテリーパック
を上にスライドさせてロックをはずし、取りはずします。
ご注意
前後の取り付け向きに注意してください。
バッテリーアダプターを取りはずすには
リリースボタンを押して脱着レバーを引き上げたのち、
バッテリーアダプターを上にスライドさせながら手前に引
いてはずします。
ご注意
バッテリーアダプターを取りはずす際は、必ず手で支えな
がらはずしてください。
14
準備
2
カメラロックレバー、着脱レバー、AUDIO スライドノ
4
ブのロックを解除する。
PMW-F55/F5 を固定する。
1 カメラロックレバーを回す。
2 着脱レバーをロックするまで倒す。
3 AUDIO スライドノブを押し込む。
着脱レバー
AUDIO スライドノブ
カメラロックレバー
3
PMW-F55/F5 を本機にのせて、後ろにスライドさせる。
PMW-F55/F5 底面に取り付けたスライドプレートと本
機の溝が合うようにのせ、PMW-F55/F5 が確実に止ま
るところまで後方にスライドさせてください。
ハンドルを取り付ける
1
PMW-F55/F5 に取り付けてあるハンドルをはずす。
2
六角ネジで本機のハンドルを取り付ける(六角レンチ
サイズ:3/16)
。
ビューファインダーを取り付ける
PMW-F55/F5 で使用できるビューファインダー
DVF-L350:LCD カラービューファインダー
DVF-L700:LCD カラービューファインダー
DVF-EL100:OLED カラービューファインダー
接眼レンズを太陽に向けて放置しないでください。太陽光
が接眼レンズを通してビューファインダー内部に焦点を結
び、火災の原因となることがあります。
準備
15
ご注意
VF 端子プロテクターを取り付けるには
• ビューファインダーの取り付け / 取りはずしは、PMW-
PMW-F55/F5 および本機に付属のメジャーフックと VF 端
子プロテクターのネジで取り付けます。
F55/F5 の電源を切った状態で行ってください。
• DVF-L700 を取り付ける場合は、DVF-L700 側の POWER
(電源)スイッチを ON にした状態で PMW-F55/F5 の電
メジャーフック
源を入れてください。
VF 端子プロテクター
◆ ビューファインダーの取り付けについて詳しくは、ビューファ
インダーの取扱説明書をご覧ください。
1
ビューファインダーシューの固定リングをゆるめ、
ビューファインダーの溝を合わせて水平方向にスライ
ドさせて取り付ける。
ビューファインダーシュー
外部マイクを使う
マイクホルダー(付属)にステレオマイクロホン ECM680S/678/674(別売)を取り付けて使用することができま
す。
2
ビューファインダーの左右位置が決まったら固定リン
グを回して締め、ビューファインダーケーブルを
PMW-F55/F5 の VF 端子に接続する。
ご注意
ECM-678/674 を取り付けるには、変換ケーブル(EC0.5X3F5M)が必要です。
マイクホルダーを取り付けるには
マイクホルダーの外形をハンドルに合わせ、ねじを確実に
締めつけてハンドルに取り付けます。
マイクホルダー
ビューファインダーを取りはずすには
ビューファインダー固定リングをゆるめ、ストッパーを上
げて、ビューファインダーを取り付けたときと逆の方向に
スライドさせて抜き取ります。
マイクを取り付けるには
1
16
準備
外部マイク取り付け部の取っ手を引き上げてカバーを
開ける。
2
3
マイクを取り付け、外部マイク取付け部のカバーを元
どおり閉めてマイクを固定する。
DWR-S02D/WRR-855S を取り付けるに
は
マイクケーブルを MIC IN 端子に接続し、このマイクロ
ホンの音声を記録したいチャンネルの AUDIO IN ス
1
挿入口のカバーを固定している 4 本のネジをゆるめ、カ
バーを取りはずす。
イッチ(11 ページ)を FRONT に設定する。
2
DWR-S02D または WRR-855S を挿入し、4 本のネジを締
めて固定する。
DWR-S02D または WRR-855S
UHF ポータブルチューナーを取り付
ける(UHF ワイヤレスマイクロホン
使用時)
ソニー UHF ワイヤレスマイクロホンシステムを使用する
ときは、PMW-F55/F5 の電源をオフにしてから次のいずれ
かの UHF ポータブルチューナーを取り付けます。
• デジタルワイヤレスレシーバー DWR-S02D
• UHF シンセサイザーチューナーユニット WRR-855S
• UHF シンセサイザーダイバーシティーチューナー WRR-
3
860A/861/862
◆ UHF ポータブルチューナーの取扱説明書も併せてご覧くださ
い。
入力したいチャンネルの AUDIO IN スイッチ(11 ペー
ジ)を WIRELESS に設定する。
WRR-862 を取り付けるには(バッテリー
パック BP-L80S 使用時)
ご注意
WRR-862 を取り付けるには、別売の WRR 取り付け金具
(サービスパーツ番号:A-8278-057-B)が必要です。
詳しくは、ソニーのサービス担当者、または営業担当者に
お問い合わせください。
1
別売の WRR 取り付け金具(サービスパーツ番号:A8278-057-B)を本機の後部に取り付ける。
1 次図のように、プラスドライバーを使って取り付
け金具に付いているネジ(4 本)を締める。
ご注意
4 本のネジが確実に締められていることを確認してく
ださい。
2 取り付け金具の調整ネジをゆるめる。
3 バッテリーパックBP-L80Sの厚みに応じて取り付け
金具の位置を調整してから、調整ネジを締めて位
置を固定する。
準備
17
4 WRR-862 に付属のマウントプレートを取り付ける。
◆ WRR 取り付け金具(サービスパーツ番号:A-8278-057-B)
については、ソニーのサービス担当者または営業担当者に
お問い合わせください。
BP-L80S
ライン入力用オーディオ機器を接続す
る
ライン入力信号源として使うオーディオ機器の音声出力端
子を、AUDIO IN CH-1 または CH-2 端子に接続します。
スイッチを設定する
音声信号源を接続したチャンネルに対応する AUDIO IN 切
り換えスイッチを LINE に設定します。
調整ネジ
マウントプレート
(WRR-862 に付属)
三脚への取り付け
1
三脚アタッチメント VCT-14/U14(別売)を雲台に取り
付ける。
プラスドライバー
2
三脚アタッチメント
バッテリーパックを取り付ける。
◆ バッテリーパックの取り付けかたについては、
「バッテ
リーパックを使う」(14 ページ)をご覧ください。
3
チューナーを取り付け金具に取り付ける。
雲台
2
本機を三脚アタッチメントに取り付ける。
WRR-862
4
チューナーの電源コードを付属のバッテリーアダプ
ターの DC OUT 端子に、音声出力ケーブルを AUDIO
IN CH-1 または CH-2 端子に接続する。
5
スイッチを以下のように設定する。
アタッチメントの溝に沿って、カ
チッと音がするまで本機を前方へ
スライドさせる
• 音声出力ケーブルをつないだチャンネルに対応する
AUIDO IN 切り換えスイッチを MIC に設定する。
• 音声出力ケーブルをつないだチャンネルに該当する
AUDIO IN CH-1/CH-2/CH-3/CH-4 スイッチを REAR
に設定する。
ただし、XLR 接続自動検出機能が ON になっている
場合は、記録音声が自動で選択されるため、この操
作は不要です。
18
準備
3
カメラを前後に動かして、はずれないことを確認する。
三脚アタッチメントから本機を取りはずす
には
ショルダーベルトの取り付け
赤いボタンを押したまま、レバーを矢印の方向へ動かしま
ショルダーベルトを取り付けるには
す。
1
片方のクリップをショルダーベルト取り付け金具に取
り付ける。
ベルトを上に引っ張ってきちんと固定する
赤いボタン
レバー
ご注意
本機を取りはずした後、三脚アタッチメントのピンが元の
位置に戻らないときは、赤いボタンを押したままレバーを
矢印の方向へ動かして、ピンを元の位置に戻します。ピン
が残ったままでは、取り付けができません。
クリップ
2
同様にもう一方のクリップを、反対側のショルダーベ
ルト取り付け金具に取り付ける。
ビデオライトの接続
本機には、アントンバウアー社製のウルトラライト 2 また
は同等品のビデオライト(電源電圧 12V、最大消費電力
50W)を取り付けて使用できます。
本機の LIGHT 端子は、入力電圧(DC 入力またはバッテ
リー電圧)が 12V 以上の場合は 12V に安定化されるため、
バッテリー電圧の変化によってライトの明るさや色温度が
変化することはありません。
ご注意
ショルダーベルトを取りはずすには
• 消費電力が 50W より大きいビデオライトを接続しないで
ください。
• 入力電圧(DC 入力またはバッテリー電圧)が 12V 以下に
ここを押したまま矢印の方向へ引く
なった場合は、入力電圧の変化によってライトの明るさ
や色温度が変化します。
準備
19
ショルダーパッドの位置調整
ショルダーパッドは、フロントブロックをスライドさせる
ことで、本機とショルダーパッドの位置を以下のように変
更できます。
ショルダーパッドの位置を調整するには
1
2
3
ショルダーパッドの中央のレバーを引き上げてロック
をはずす。
ショルダーパッドを前後方向にスライドして、適当な
位置を選ぶ。
レバーを倒して固定する。
33mm
レバー
ショルダーパッド
37mm
70mm
本機を肩にのせた状態で操作しやすくなるように、フロン
トブロックとショルダーパッドの位置を調整してください。
ヘッドホンプラグアダプターを使う
PMW-F55/F5 本体のヘッドホン端子を使用するときに、ス
トレートタイプ端子のヘッドホンが使いづらい場合は、付
属のヘッドホンプラグアダプターをお使いください。
フロントブロックの位置を調整するには
1
本機底面のフロントブロック固定レバーを回して、
ロックをはずす。
2
フロントブロックを前後にスライドして、適当な位置
を選ぶ。
3
フロントブロック固定レバーを回して固定する。
フロントブロック
フロントブロック
固定レバー
20
準備
ヘッドホンプラグ
アダプター
1
セットアップメニューの
基本操作
MENU つまみを回して、文字を選択し、MENU つまみ
を押して決定する。
カーソルが次の欄に移動します。
前の欄に戻りたいときは、MENU CANCEL/BACK ス
イッチを押し下げます。
セットアップメニューを表示するには
2
本機の MENU ON/OFF スイッチを押し下げる。または
PMW-F55/F5 の MENU ボタンを押す。
設定変更を取り消すには
入力が終わったら、Done を選択して決定する。
MENU CANCEL/BACK スイッチを押し下げます。
ご注意
PMW-F55/F5 の MENU ボタンを押した後の操作、および
MENU 画面については、PMW-F55/F5 の取扱説明書をご
覧ください。ここでは本機の操作のみについて説明します。
メニュー操作を終了するには
MENU ON/OFF スイッチを OFF にします。
通常のカメラ画に戻ります。
メニューを設定するには
1
MENU つまみを回して、設定したいメニューにカーソ
ルを合わせる。
アイコン右のメニュー項目選択エリアに、選択できる
メニュー項目が表示されます。
2
MENU つまみを押す。
カーソルがメニュー項目選択エリアに移動します。
3
MENU つまみを回して、設定したいメニュー項目に
カーソルを合わせ、MENU つまみを押して決定する。
設定エリアが表示されます。
4
5
MENU つまみを回して、設定したい項目にカーソルを
合わせ、MENU つまみを押して決定する。
MENU つまみを回して、設定したい値を選び、MENU
つまみを押して決定する。
設定が変更され、変更後の状態が表示されます。
実行前に確認が必要な項目では
手順 3 で、実行前に確認が必要な項目を選択すると、いっ
たんメニューが消え、確認メッセージが表示されます。
メッセージにしたがって、実行するかキャンセルするかを
選択してください。
文字列を入力するには
タイムデータやファイル名など、文字列を設定する項目を
選択した場合は、文字列の入力エリアがハイライト表示に
なり、右端に SET が表示されます。
セットアップメニューの基本操作
21
Rear1/WRR Level:チャンネル 1 の記録レベル
音声レベルの調整
AUDIO SELECT スイッチを AUTO にすると、各チャンネ
ルに記録されるアナログ音声信号の入力レベルは自動的に
調整されます。また、手動で調整することもできます。
ご注意
AUDIO SELECT スイッチを AUTO にしても、デジタル音
声信号の入力レベルは自動調整されません。
設定値
つまみ
Side1
LEVEL(CH-1)つまみ
Front
MIC LEVEL つまみ
Front+Side1
LEVEL(CH-1)つまみと MIC LEVEL つまみの連動
Rear2/WRR Level:チャンネル 2 の記録レベル
設定値
つまみ
Side2
LEVEL(CH-2)つまみ
Front
MIC LEVEL つまみ
Front+Side2
LEVEL(CH-2)つまみと MIC LEVEL つまみの連動
ご注意
手動調整時の音声レベルの目安
− 20 dB を目安に調整します。音声レベルメーターが 0 dB
まで表示されるときは、入力音量が過大です。
過大入力
LEVEL(CH-1/CH-2)つまみと MIC LEVEL つまみの連動
を選択した場合、MIC LEVEL つまみが「0」に絞られてい
るとチャンネル 1、2 の音声を記録できません。MIC
LEVEL つまみの位置を確認してから、LEVEL(CH-1/CH2)つまみで調整してください。
MIC IN 端子からの音声レベルを手動
調整する
1
調整の目安
AUDIO IN CH-1/CH-2 端子からの
音声レベルを手動調整する
1
3
MIC LEVEL つまみを回して、通常の入力音量のとき音
声レベルメーターが− 20 dB まで表示されるように調
整する。
記録レベル調整とつまみの対応について
イッチを REAR にする。
Audio メニューの Audio Input で、フロントマイクから入
1、2 チャンネルとも記録、調整する場合は、両方の
力する音声の記録レベルの調整をどのつまみに割り当てる
かを設定できます。各メニュー項目の設定値とつまみの対
手順 1 で選んだチャンネルの AUDIO SELECT スイッチ
を MANUAL にする。
応は以下のとおりです。
MIC CH1 Level:チャンネル 1 の記録レベル
設定値
つまみ
手順 1 で選んだチャンネルの LEVEL つまみで、通常の
入力音量のときの音声レベルメーターが− 20 dB まで
Side1
LEVEL(CH-1)つまみ
Front
MIC LEVEL つまみ
表示されるように調整する。
Front+Side1
LEVEL(CH-1)つまみと MIC LEVEL つまみの連動
記録レベル調整とつまみの対応について
Audio メニューの Audio Input で、AUDIO IN CH-1/CH-2
端子に入力される音声の記録レベルの調整をどのつまみで
行うか、選択することができます。各メニュー項目の設定
値とつまみの対応は以下のとおりです。
22
3
手順 1 で選んだチャンネルの AUDIO SELECT スイッチ
を MANUAL に設定する。
AUDIO IN CH-1/CH-2 端子への入力信号を記録、調整
したいチャンネルに相当する AUDIO IN CH-1/CH-2 ス
AUDIO IN CH-1/CH-2 スイッチを REAR にする。
2
2
使用するチャンネルのAUDIO INスイッチをFRONTに
設定する。
音声レベルの調整
MIC CH2 Level:チャンネル 2 の記録レベル
設定値
つまみ
Side2
LEVEL(CH-2)つまみ
Front
MIC LEVEL つまみ
Front+Side2
LEVEL(CH-2)つまみと MIC LEVEL つまみの連動
記録音声レベルを調整するには
ご注意
MIC LEVEL つまみと LEVEL(CH-1/CH-2)つまみの連動
自動調整するには
を選択した場合、LEVEL(CH-1/CH-2)つまみが「0」に
絞られているとチャンネル 1、2 の音声が記録できません。
LEVEL(CH-1/CH-2)つまみの位置を確認してから、MIC
AUDIO SELECT CH-3/4 スイッチを AUTO にします。
手動調整するには
LEVEL つまみで調整してください。
1
チャンネル 3、4 への音声の記録につ
いて
2
AUDIO SELECT CH-3/4 スイッチを MANUAL にする。
レベル調整を行うつまみを、Audio メニューの Audio
Input > Audio CH3 Level および Audio CH4 Level で選
択する。
記録音声の選択について
Audio CH3 Level:チャンネル 3 の記録レベル
音声チャンネル 3、4 に記録される音声は、AUDIO IN CH3/CH-4 スイッチで選ぶことができます。
CH-3 スイッチ
チャンネル 3 の記録対象
FRONT
フロントマイクロホンの音声
REAR
AUDIO IN CH-1 端子に入力される音声信号
WIRELESS
ワイヤレスマイクロホンの音声
CH-4 スイッチ
チャンネル 4 の記録対象
FRONT
設定値
つまみ
Side3
LEVEL(CH-3)つまみ
Front
MIC LEVEL つまみ
Front+Side3
LEVEL(CH-3)つまみと MIC LEVEL つまみの連動
Audio CH4 Level:チャンネル 4 の記録レベル
フロントマイクロホンの音声
REAR
AUDIO IN CH-2 端子に入力される音声信号
WIRELESS
ワイヤレスマイクロホンの音声
設定値
つまみ
Side4
LEVEL(CH-4)つまみ
Front
MIC LEVEL つまみ
Front+Side4
LEVEL(CH-4)つまみと MIC LEVEL つまみの連動
音声チャンネル 3、4 の音声レベルが、ここで選択したつま
みで調整できるようになります。
AUDIO IN CH-1/CH-2 スイッチの設定と記録チャンネルの関係は以下の通りです。
オーディオ操作部の
Front MIC
後面の AUDIO IN
AUDIO IN スイッチ
Select
切り換えスイッチ
CH-1/2/3/4
メニュー
CH-1
CH-2
Mono
−
−
Front Mic(mono) Front Mic(mono) Front Mic(mono) Front Mic(mono)
Stereo
−
−
Front Mic(L-Ch) Front Mic(R-Ch) Front Mic(L-Ch) Front Mic(R-Ch)
FRONT
−
WIRELESS
CH-1
CH-2
CH-3
CH-4
LINE1 or MIC1
LINE2 or MIC2
LINE1 or MIC1
LINE2 or MIC2
−
AES / EBU
LINE or MIC
AES / EBU1-1
AES / EBU1-2
無音
LINE2 or MIC2
−
LINE or MIC
AES / EBU
LINE1 or MIC1
無音
AES / EBU2-1
AES / EBU2-2
−
AES / EBU
AES / EBU
AES / EBU1-1
AES / EBU1-2
AES / EBU2-1
AES / EBU2-2
Analog
−
−
−
Mono
Mono
Mono
Mono
Digital
−
−
−
CH-1
CH-2
CH-1
CH-2
REAR
LINE or MIC LINE or MIC
記録チャンネルの内容
LINE or MIC:LINE または MIC 選択
AES / EBU:AES/EBU 選択
Mono:Monaural Audio
L-Ch/R-Ch:Mic L-Ch/R-Ch
LINE1 or MIC1:CH-1 端子から入力された LINE または MIC 信号
LINE2 or MIC2:CH-2 端子から入力された LINE または MIC 信号
AES / EBU1-1:CH-1 端子から入力された AES/EBU 信号内の CH-1 信号
AES / EBU1-2:CH-1 端子から入力された AES/EBU 信号内の CH-2 信号
AES / EBU2-1:CH-2 端子から入力された AES/EBU 信号内の CH-1 信号
AES / EBU2-2:CH-2 端子から入力された AES/EBU 信号内の CH-2 信号
音声レベルの調整
23
結露について
使用上のご注意
本機を寒いところから急に暖かいところに持ち込んだとき
など、機器表面や内部に水滴がつくことがあります。これ
安全にご使用いただくために、「安全のために」(2 ペー
を結露といいます。結露が起きたときは電源を切り、結露
がなくなるまで放置し、結露がなくなってからご使用くだ
ジ)
、「
」(4 ページ)、
「
せてご覧ください。
さい。結露時のご使用は機器の故障の原因となる場合があ
ります。
」(4 ページ)と併
取り扱い・保管上のご注意
電解コンデンサの寿命は約 5 年です。
(常温で 1 日に 8 時間、1 カ月で 25 日間、通常に使用する
と想定した場合)
したがって、使用時間が上記より長い場合は、その分寿命
は短くなります。
強い衝撃を与えない
内部構造や外観の変形などの損傷を受けることがあります。
万一、異常が生じたときは
ソニーのサービス担当者または営業担当者にご相談くださ
い。
使用場所・保管場所
水平な場所、空調のある場所に保管してください。
本機が濡れた場合、充分に乾燥させてから保管してくださ
い。
次のような場所での使用・保管は避けてください。
• 極端に暑い所や寒い所
• 湿気の多い所
• 激しく振動する所
• 強い磁気を発生する所
• 直射日光が長時間当たる所や暖房器具の近く
バッテリー端子に関するご注意
機器に搭載されているバッテリー端子(バッテリーパック
や AC アダプターとの接点部分)は消耗品です。
振動や衝撃によって端子が変形したり、曲がったり、ある
いは長期の屋外での使用などによって表面が腐食したりす
ると、本体に電源が供給されなくなります。
長期間機器を使用していただくために、定期点検を実施す
ることをお願いします。点検につきましては、ソニーの
サービス担当者または営業担当者にご相談ください。
24
使用上のご注意
別売りアクセサリー
仕様
UHF シンセサイザーチューナーユニット WRR-855
デジタルワイヤレスレシーバー DWR-S02D
ポータブルメモリーレコーダー AXS-R5
AC アダプター AC-DN10、AC-DN2B
一般
外形寸法
約 170 × 182 × 371 mm
(幅/高さ/奥行き)
、26 ページ参照
質量
約 2.2 kg(本体およびバッテリーアダプ
ター)
電源電圧
消費電力
DC 12 V(11 V ∼ 17 V)
約 3.8 W(本体およびバッテリーアダプ
動作温度
ター)
0 ℃∼ 40 ℃
動作湿度
保存温度
20% ∼ 90%
-20 ℃∼ +60 ℃
入出力
拡張インタフェース端子
144 ピン、電源供給
オーディオ入力 XLR 3 ピン(2)
、LINE/ AES/EBU /
MIC / MIC +48V 切り換え可能
LINE:+4/0/-3 dBu
AES/EBU:AES3 準拠
オーディオ出力 XLR 5pin、+4/0/-3 dBu(平衡)
マイク入力
XLR 5pin、-70 ∼ -30 dBu
ヘッドホン出力 ステレオミニジャック
WRR
D-sub 15 ピン
アナログ CH1:-40 dBu
デジタル CH1/CH2:-40 dBFS
バッテリーアダプター
DC 入力
XLR 4 ピン、12 V DC
DC 出力
LIGHT
4 ピン、12 V DC(最大定格電流 1,8A)
2 ピン、12 V DC(50 W 以下)
付属品
バッテリーパック BP-FL75、BP-L80S
バッテリーチャージャー BC-L70、BC-L90
マイクロホン ECM-680S、ECM-678、ECM-674
マイクロホン変換ケーブル EC-0.5X3F5M(ECM-678/674
用)
仕様および外観は、改良のため予告なく変更することがあ
りますが、ご了承ください。
この装置は、クラス A 情報技術装置です。この装置を家
庭環境で使用すると電波妨害を引き起こすことがありま
す。この場合には使用者が適切な対策を講ずるよう要求
されることがあります。
VCCI-A
• お使いになる前に、必ず動作確認を行ってください。故
障その他に伴う営業上の機会損失等は保証期間中および
保証期間経過後にかかわらず、補償はいたしかねますの
でご了承ください。
• 本製品を使用したことによるお客様、または第三者から
のいかなる請求についても、当社は一切の責任を負いか
ねます。
• 諸事情による本製品に関連するサービスの停止、中断に
ついて、一切の責任を負いかねます。
通信を行う機器でセキュリティ対策を行わなかった結果、
または、通信仕様上の、やむを得ない事情により、デー
タ漏洩等、セキュリティ上の問題が発生した場合、弊社
ではそれによって生じたあらゆる損害に対する責任を負
いかねます。
バッテリーアダプター
(サービスパーツ番号:A-2067-625-)
(1)
ロッド(φ15 mm × 250 mm)(2)
ヘッドホンプラグアダプター(L 型)(1)
ハンドル(サービスパーツ番号:A-2068-023-)(1)
マイクホルダー(ハンドルに装着)
(サービスパーツ番号:A-2068-182-)
(1)
スライドプレート(サービスパーツ番号:A-2070-502-)(1)
メジャーフック(サービスパーツ番号:4-458-622-)(1)
VF 端子プロテクター
(サービスパーツ番号:A-2068-183-)
(1)
ショルダーベルト(1)
オペレーションマニュアル(1)
保証書(1)
仕様
25
外形寸法
(単位:mm)
76.8 32.8
57
79.2
182
66
130
274.4
295.1
23.1
93.7
261.3
76
351.1
208.7
26
仕様
370.9
English
Before operating the unit, please read this manual
thoroughly and retain it for future reference.
WARNING
To reduce the risk of fire or electric shock,
do not expose this apparatus to rain or
moisture.
To avoid electrical shock, do not open the
cabinet. Refer servicing to qualified
personnel only.
CAUTION
Danger of explosion if battery is incorrectly replaced.
Replace only with the same or equivalent type
recommended by the manufacturer.
When you dispose of the battery, you must obey the law in
the relative area or country.
Important Safety Instructions
•
•
•
•
•
•
•
•
•
•
•
•
Read these instructions.
Keep these instructions.
Heed all warnings.
Follow all instructions.
Do not use this apparatus near water.
Clean only with dry cloth.
Do not block any ventilation openings.
Install in accordance with the manufacturer's
instructions.
Do not install near any heat sources such as radiators,
heat registers, stoves, or other apparatus (including
amplifiers) that produce heat.
Do not defeat the safety purpose of the polarized or
grounding-type plug. A polarized plug has two blades
with one wider than the other. A grounding-type plug
has two blades and a third grounding prong. The wide
blade or the third prong are provided for your safety. If
the provided plug does not fit into your outlet, consult an
electrician for replacement of the obsolete outlet.
Protect the power cord from being walked on or pinched
particularly at plugs, convenience receptacles, and the
point where they exit from the apparatus.
Only use attachments/accessories specified by the
manufacturer.
Use only with the cart, stand, tripod, bracket, or table
specified by the manufacturer, or sold with the
apparatus. When a cart is used, use caution when moving
the cart/apparatus combination to avoid injury from tipover.
• Unplug this apparatus during lightning storms or when
unused for long periods of time.
• Refer all servicing to qualified service personnel.
Servicing is required when the apparatus has been
damaged in any way, such as power-supply cord or plug
is damaged, liquid has been spilled or objects have fallen
into the apparatus, the apparatus has been exposed to
rain or moisture, does not operate normally, or has been
dropped.
Do not install the appliance in a confined space, such as
book case or built-in cabinet.
WARNING
Batteries shall not be exposed to excessive heat such as
sunshine, fire or the like.
For the customers in the U.S.A.
This equipment has been tested and found to comply with
the limits for a Class A digital device, pursuant to part 15
of the FCC Rules. These limits are designed to provide
reasonable protection against harmful interference when
the equipment is operated in a commercial environment.
This equipment generates, uses, and can radiate radio
frequency energy and, if not installed and used in
accordance with the instruction manual, may cause
harmful interference to radio communications. Operation
of this equipment in a residential area is likely to cause
harmful interference in which case the user will be
required to correct the interference at his own expense.
You are cautioned that any changes or modifications not
expressly approved in this manual could void your
authority to operate this equipment.
All interface cables used to connect peripherals must be
shielded in order to comply with the limits for a digital
device pursuant to Subpart B of part 15 of FCC Rules.
This device complies with part 15 of the FCC Rules.
Operation is subject to the following two conditions:
(1) This device may not cause harmful interference, and
(2) this device must accept any interference received,
including interference that may cause undesired operation.
For the customers in Canada
CAN ICES-3 (A)/NMB-3(A)
For the customers in Europe
This product with the CE marking complies with the EMC
Directive issued by the Commission of the European
Community.
Compliance with this directive implies conformity to the
following European standards:
• EN55103-1 : Electromagnetic Interference(Emission)
• EN55103-2 : Electromagnetic Susceptibility(Immunity)
This product is intended for use in the following
Electromagnetic Environments: E1 (residential), E2
27
GB
(commercial and light industrial), E3 (urban outdoors), E4
(controlled EMC environment, ex. TV studio).
ATTENTION
The electromagnetic fields at the specific frequencies may
influence the picture and sound of this unit.
For the customers in Europe
Manufacturer: Sony Corporation, 1-7-1 Konan Minato-ku
Tokyo, 108-0075 Japan
For EU product compliance: Sony Deutschland GmbH,
Hedelfinger Strasse 61, 70327 Stuttgart, Germany
For the customers in the U.S.A.
SONY LIMITED WARRANTY - Please visit
http://www.sony.com/psa/warranty for important
information and complete terms and conditions of
Sony’s limited warranty applicable to this product.
For the customers in Canada
SONY LIMITED WARRANTY - Please visit
http://www.sonybiz.ca/solutions/Support.do for
important information and complete terms and
conditions of Sony’s limited warranty applicable to this
product.
For the customers in Europe
Sony Professional Solutions Europe - Standard
Warranty and Exceptions on Standard Warranty.
Please visit http://www.pro.sony.eu/warranty for
important information and complete terms and
conditions.
For the customers in Korea
SONY LIMITED WARRANTY - Please visit
http://bpeng.sony.co.kr/handler/BPAS-Start for
important information and complete terms and
conditions of Sony’s limited warranty applicable to this
product.
28
Table of Contents
Overview ............................................................................. 30
Name and Function of Parts.............................................. 31
Front panel............................................................................. 31
Rear panel.............................................................................. 32
Operating section (front) ....................................................... 33
Operating section (side)......................................................... 33
Audio operating section......................................................... 34
Connector section (rear) ........................................................ 35
Handle ................................................................................... 35
Battery adaptor ...................................................................... 36
Connection and Setup ....................................................... 36
Power supply ......................................................................... 36
Attaching a battery adaptor for the CBK-55BK.................... 36
Using AC power (DC IN power)........................................... 37
Using the AXS-R5................................................................. 37
Attaching the PMW-F55/F5 .................................................. 37
Attaching the handle.............................................................. 38
Attaching a viewfinder .......................................................... 39
Using an external microphone............................................... 40
Attaching a UHF portable tuner (for a UHF wireless microphone system) .............................................................. 40
Connecting line input audio equipment................................. 41
Tripod mounting.................................................................... 42
Connecting a video light........................................................ 42
Using the shoulder strap ........................................................ 43
Adjusting the shoulder pad position ...................................... 43
Using the headphone plug adaptor ........................................ 44
Basic Setup Menu Operations .......................................... 44
Adjusting the Audio Level ................................................. 45
Manually adjusting the audio levels of the audio inputs from the
AUDIO IN CH-1/CH-2 connectors ............................. 45
Manually Adjusting the Audio Level of the MIC IN
Connector ..................................................................... 46
Recording Audio on Channels 3 and 4.................................. 46
Important Notes on Operation .......................................... 48
Specifications ..................................................................... 48
Dimensions ............................................................................ 50
Table of Contents
29
Overview
The CBK-55BK is an accessory kit that improves stability
and operability of the shoulder camcorder style by
attaching it to the PMW-F55/F5.
The CBK-55BK has various audio input/output
connectors, direct switches that allow you to control the
PMW-F55/F5 on hand while looking through the
viewfinder when shooting with the PMW-F55/F5 on your
shoulder, wireless audio receiver slot, and audio control
panel.
The front control section and shoulder pad can be slided 70
mm (2 7/8 inches) in the front-to-rear direction. You can
maintain balance easily while shooting with the PMWF55/F5 on your shoulder when the PL lens or large
portable B4 lens is attached.
30
Overview
Name and Function of Parts
Front panel
a AUDIO IF connector
Used for connecting the CBK-55BK to the PMW-F55/F5.
f Audio operating section (See “Audio operating
section.”)
b MIC IN (microphone input) (+48 V) connector
(XLR type, 5-pin, female)
Connect a stereo microphone to this connector. The power
(+48 V) is supplied via this connector.
g Protection cover of the audio operating section
Open to access the audio operating section (see page 34).
c Rod lock lever
Used when attaching or removing Φ 15 rods.
When attaching rods, rotate the lever to lock them in place.
Whenever the lever is in a position that makes it difficult
to rotate, pull the lever out sideways and turn it to a better
position before pushing it back to continuing rotating.
Note
Do not turn the rod lock lever forcefully when the rods are
not attached.
h Expansion IF connector
Used for connecting the CBK-55BK to the PMW-F55/F5.
i Operating section (side) (See “Operating section
(side).”)
j Rosette mounts (left and right)
Used for attaching generic hand grips.
k Tripod mount
Attach the tripod adaptor (optional) when using the CBK55BK on a tripod.
d Φ 15 rods
Used to attach the matte box, follow focus, and other
accessories.
e Operating section (front) (See “Operating section
(front).”)
Name and Function of Parts
31
Rear panel
a Attachment point for the UHF portable tuner
Attach the UHF portable tuner (see page 40).
b Attachment point for the battery adaptor
Attach the supplied battery adaptor (see page 36).
c TALLY (tally) indicator (red)
Lights up during recording. This indicator flashes if an
abnormality occurs on the CBK-55BK or PMW-F55/F5.
(For details about the abnormality, refer to the operating
instructions of the PMW-F55/F5.)
d Expansion IF connector
Used for connecting the battery adaptor or AXS-R5.
e Connector section (rear) (See “Connector section
(rear).”)
f Release button/ejection lever
Used for attaching the CBK-55BK to the PMW-F55/F5
(see page 37).
g Front block
The front block position can be adjusted in the front-torear direction by releasing the front block fixing lever.
Adjust the front block position so that the CBK-55BK can
be operated easily while it is on your shoulder (see page
43).
h AUDIO slide knob
Used for attaching the CBK-55BK to the PMW-F55/F5
(see page 37).
32
Name and Function of Parts
i Camera lock lever
Used for attaching the CBK-55BK to the PMW-F55/F5
(see page 37).
j Shoulder pad
Raise the shoulder pad fixing lever to adjust the position in
the front-to-rear direction.
Adjust the position for maximum convenience when
operating the PMW-F55/F5 on your shoulder (see page
43).
Operating section (front)
e MENU knob
Changes the item selection or a setting within the menu
(see page 44).
Operating section (side)
a REC START (recording start) button
Press to start recording. Press it again to stop recording.
The effect is the same as that of the REC button on the lens.
b SHUTTER switch
Set to ON to use the electronic shutter. Push to SELECT to
switch the shutter speed setting. When this switch is
operated, the new setting appears on the viewfinder screen
for about three seconds.
When “Select” in “Shutter” of the Camera menu is set to
“Step” and the switch is pushed to SELECT, the shutter
speed is switched, and when “Select” in “Shutter” of the
Camera menu is set to “Continuous” and the switch is
pushed to SELECT, the current shutter speed is displayed,
and the shutter speed is switched by turning the MENU
knob.
c MIC (microphone) LEVEL control
Adjusts the input level of audio channels 1, 2, 3, and 4.
d AUTO W/B BAL (automatic white/black balance
adjustment) switch
Activates the automatic white/black balance adjustment
functions.
• WHITE: Adjust the white balance automatically. If the
WHITE BAL switch (see page 34) is set to A or B, the
white balance setting is stored in the corresponding
memory. If the WHITE BAL switch is set to PRST, the
automatic white balance adjustment function does not
operate.
• BLACK: Adjust the black set and black balance
automatically.
If you push the switch to WHITE once more during the
automatic white balance adjustment, the adjustment is
cancelled and the white balance setting returns to the
original setting.
If you push the switch to BLACK once more during the
automatic black balance adjustment, the adjustment is
cancelled and the black balance setting returns to the
original setting.
a GAIN/EI selector
Switches the gain of the video amplifier to match the
lighting conditions during shooting. The gain
corresponding to the H, M, and L settings can be selected
on the menu of the PMW-F55/F5. (For details on the
setting, refer to the operating instructions of the PMWF55/F5.)
Switches to the 3 types of EI values preset while in Cine EI
mode.
b MENU ON/OFF switch
Used to display the menu on the viewfinder screen or the
test signal screen. Each time the switch is pushed down,
the menu screen is turned on and off.
c ASSIGN. (assignable) 6/7/8 switches
Assign your desired functions to the switches on
“Assignable Button” of the System menu.
“Off” is assigned to the ASSIGN. 6/7/8 switches as the
factory default setting. The ASSIGN. 6/7/8 switches are
provided with an indicator to show whether a function is
assigned to the switch (on) or not (off). (For details on the
setting, refer to the operating instructions of the PMWF55/F5.)
d ASSIGN. (assignable) 5 switch
Assign your desired function to the switch on “Assignable
Button” of the System menu.
“Color Bars” (color bar output signal) is assigned to the
ASSIGN. 5 switch as the factory default setting. (For
details on the setting, refer to the operating instructions of
the PMW-F55/F5.)
Name and Function of Parts
33
e WHITE BAL (white balance memory) switch
Controls adjustment of the white balance.
• PRST: Adjust the color temperature to the preset value
(the factory default setting: 3200K). Use this setting
when you have no time to adjust the white balance.
• A or B: Recall the white balance adjustment settings
already stored in A or B. Push the AUTO W/B BAL
switch (see page 33) to WHITE, to automatically adjust
the white balance, and save the adjustment settings in
memory A or memory B.
While in the Cine EI mode, switches between Preset
3200K, Preset 4300K, and Preset 5500K.
The white balance is set to the following setting as the
factory default setting while in the Cine EI mode.
PRST: Preset 3200K
A: Preset 4300K
B: Preset 5500K
f MENU CANCEL/BACK switch
When the switch is pushed to CANCEL/BACK, the page
returns to the previous hierarchy. The settings before
changing are cancelled.
Audio operating section
Position of right-side switch: CH-3/4
Position of left- Audio output
side switch
CH-1/CH-3
Channel 3 audio
MIX
Channels 3 and 4 mixed audio (stereo)
CH-2/CH-4
Channel 4 audio
* By connecting stereo headphones to the HEADPHONE jack, you can hear
the audio in stereo. (For details on the setting, refer to the operating
instructions of the PMW-F55/F5.)
b LEVEL CH-1/CH-2/CH-3/CH-4 (audio channel 1/
2/3/4 recording level) knobs
You can adjust the audio levels to be recorded on channels
1, 2, 3, and 4 when the AUDIO SELECT CH-1/CH-2 and
AUDIO SELECT CH-3/CH-4 switches are set to
MANUAL.
c AUDIO SELECT CH-1/CH-2 (audio channel 1/2
adjustment method selection) switches
Select the audio level adjustment method for audio
channels 1 and 2.
• AUTO: Automatic adjustment
• MANUAL: Manual adjustment
Note
The recording audio level is fixed for the channel to which
the AES/EBU signal is selected for audio input signals.
d MONITOR (monitor volume adjustment) knob
Controls the volume of the sound that is output via the
built-in speaker or headphones. When the knob is turned to
the minimum position, no sound can be heard.
e AUDIO SELECT CH-3/4 (audio channel 3/4
adjustment method selection) switch
Select the audio level adjustment method for audio
channels 3 and 4 simultaneously.
• AUTO: Automatic adjustment
• MANUAL: Manual adjustment
a MONITOR (audio monitor selection) switches
By combining of the two switches, you can select audio
that you want to hear through the built-in speaker or
headphones.
Position of right-side switch: CH-1/2
Position of left- Audio output
side switch
CH-1/CH-3
Channel 1 audio
MIX
Channels 1 and 2 mixed audio (stereo)
CH-2/CH-4
Channel 2 audio
34
Name and Function of Parts
f AUDIO IN CH-1/CH-2/CH-3/CH-4 (audio channel
1/2/3/4 input selection) switches
Select the audio input signals to be recorded on audio
channels 1, 2, 3 and 4.
• FRONT: Audio input signals from the microphone
connected to the MIC IN connector
• REAR: Audio input signals from an audio device
connected to the AUDIO IN CH-1/CH-2 connectors
• WIRELESS: Audio input signals from the UHF
portable tuner if it is installed
Connector section (rear)
e LIVE AUDIO OUT connector (XLR type, 5-pin,
male)
Outputs the audio signals input on audio channels 1 and 2
or audio channels 3 and 4.
The audio signals are selected by the MONITOR switch.
Note
The playback sound cannot be output.
f AUDIO IN CH-1/CH-2 (audio channel 1 and 2
input) connectors (XLR type, 3-pin, female)
Connect audio equipment or a microphone.
a AUDIO IN selectors
Select the audio source connected to the AUDIO IN CH-1/
CH-2 connectors.
• LINE: When connecting an external audio signal source
such as a stereo amplifier
• AES/EBU: When connecting an external digital audio
signal source
• MIC: When connecting a microphone
b HEADPHONE (LIVE MON) jack (stereo,
minijack)
You can monitor the E-E* sound by connecting
headphones. When an alarm is indicated, you can hear the
alarm sound through the headphones. Plugging
headphones into the jack automatically cuts off the built-in
speaker of the PMW-F55/F5.
* E-E: Abbreviation of “Electric-to-Electric”. In E-E
mode, video and audio signals input to the camcorder are
output after passing through internal electric circuits
only. This can be used to check input signals.
Note
The playback sound cannot be output.
c Bottom cover
This is provided for protecting the cables connected to the
connectors on the rear panel.
By loosening the screws on the bottom of the CBK-55BK,
you can adjust the position of the cover depending on the
size and shape of the microphone or audio cable plugs.
After adjusting the position, tighten the screws to secure
the cover.
Handle
a Microphone holder
Attach an external microphone (see page 40).
b Viewfinder left-to-right positioning ring
Loosen this ring to adjust the left-to-right position of the
viewfinder (see page 39).
c Viewfinder fitting shoe
Attach the viewfinder (see page 39).
d Shoulder strap fitting
Attach the supplied shoulder strap (see page 43).
e Accessory mounting screw holes
• Type of screw: 1/4-20UNC (× 9)
• Type of screw: 3/8-16UNC (× 8)
• Length of engagement: 9 mm (3/8 inch) or less
Note
d +48V/OFF (48 V power supply on/off) switch
Switch to the following setting depending on the
connected microphone.
• +48V: When connecting a microphone that requires 48
V power supply
• OFF: When connecting a microphone that does not
require 48 V power supply
Do not apply excessive force to the mounted accessory. It
may damage the screw thread.
Name and Function of Parts
35
Battery adaptor
Connection and Setup
Power supply
You can use a battery pack or AC power via an AC
adaptor.
For safety, use only the Sony battery packs and AC
adaptors listed below.
Lithium-ion Battery Pack
BP-FL75
BP-L80S
AC Adaptor
AC-DN2B
AC-DN10
For attaching/removing the battery adaptor, see
“Attaching a battery adaptor for the CBK-55BK” on page
36.
Attaching a battery adaptor for the
CBK-55BK
a Release button/ejection lever
1
b Battery release lever
Press the release button (1) of the battery adaptor to
pop up the ejection lever, then raise the ejection lever
(2).
c Expansion IF connector
d DC IN connector (see page 37)
e LIGHT (video light) connector (2-pin, female)
A video light with a maximum power consumption of 50
W, such as the Anton Bauer Ultralight 2 or equivalent can
be connected (see page 42).
Note
Video light ON/OFF is not interlocked with the recording.
f Battery pack attaching part
g DC OUT connector
Note
When connecting a device, use one with current
consumption of 1.8A or less.
36
Connection and Setup
Battery pack
attaching part
Battery release
lever
2
Insert the projection of the battery adaptor into the slot
on the rear of the CBK-55BK (1), then lower the
ejection lever (2) until the battery adaptor is locked in
the release button.
Note
Remove the battery adaptor while supporting it by hand.
Using AC power (DC IN power)
The CBK-55BK works with AC power by using the AC
adaptor AC-DN2B/AC-DN10 (optional).
Using the AXS-R5
For attaching the AXS-R5, refer to the operating
instructions of the PMW-F55/F5.
Attaching the PMW-F55/F5
For details about the handling of the PMW-F55/F5, refer
to the operating instructions supplied with the PMW-F55/
F5.
Notes
• Before attaching the battery adaptor, make sure that
the ejection lever is raised.
• Before lowering the ejection lever, make sure that
the four hooks are attached securely. If the four
hooks are not attached securely, it may cause the
connection to be poor or damage the CBK-55BK
and battery adaptor.
Notes
• Requires PMW-F55/F5 software version 5.0 or later.
• Attach to or remove from the PMW-F55/F5 while the
power supply is turned off.
1
Attach the supplied slide plate to the bottom of the
PMW-F55/F5 securely by using a coin, etc.
To use Battery Pack
Insert the battery pack into the battery pack attaching part
of the battery adaptor, then slide the battery pack down to
lock it in place.
Notes
• Before use, charge the battery pack with the battery
charger.
• A warm battery pack immediately after use may not be
able to be fully recharged.
To remove a battery pack
Unlock the battery pack by sliding it up while pressing the
battery release lever, then remove it.
Slide plate
Note
Be sure to attach in the correct direction.
To remove a battery adaptor
Press the release button and raise the ejection lever, then
remove the battery adaptor by pulling it out while sliding
upward.
Connection and Setup
37
2
Release the lock of the camera lock lever, ejection
lever, and AUDIO slide knob.
4
Lock the PMW-F55/F5.
1 Turn the camera lock lever.
2 Lower the ejection lever until it is locked.
3 Push in the AUDIO slide knob.
Ejection lever
AUDIO slide knob
Camera lock lever
3
Put the PMW-F55/F5 on the CBK-55BK, then slide it
to the back.
Put the PMW-F55/F5 on aligned to the slot of the slide
plate attached to the bottom of the PMW-F55/F5 and
the CBK-55BK, then slide the PMW-F55/F5 to the
back until it stops securely.
Attaching the handle
38
Connection and Setup
1
Remove the handle that is attached to the PMW-F55/
F5.
2
Attach the handle of the CBK-55BK by using the
hexagon socket bolt (hexagonal wrench size: 3/16).
Attaching a viewfinder
Available viewfinders for the PMW-F55/F5
• DVF-L350: LCD color viewfinder
• DVF-L700: LCD color viewfinder
• DVF-EL100: OLED color viewfinder
2
Tighten the fixing ring after determining the left and
right position of the viewfinder, then connect the
viewfinder cable to the VF connector of the PMWF55/F5.
Caution
Do not leave the CBK-55BK with the eyepiece of the
viewfinder facing the sun. Direct sunlight can enter
through the eyepiece, be focused in the viewfinder, and
cause fire.
Notes
• Attach/remove the viewfinder while the PMW-F55/F5 is
turned off.
• When using the PMW-F55/F5 with the DVF-L700
attached, turn it on while the POWER switch of the
DVF-L700 is set to ON.
For details about attaching the viewfinder, refer to the
operating instructions of the viewfinder.
1
Loosen the fixing ring of the viewfinder shoe, align the
slot of the viewfinder, then attach the viewfinder by
sliding it horizontally.
Viewfinder shoe
To remove the viewfinder
Loosen the fixing ring for the viewfinder, raise the stopper,
then remove the viewfinder by sliding it in the reverse
direction for when attaching.
To attach the VF connector protector
Attach the VF connector protector with the tape measure
hook that is supplied with the PMW-F55/F5 and CBK55BK, and the screw of the VF connector protector.
Tape measure hook
VF connector protector
Connection and Setup
39
Using an external microphone
You can use the ECM-680S/678/674 stereo microphone
(optional) by attaching it to the supplied microphone
holder.
Note
To attach the ECM-678/674, the conversion cable (EC0.5X3F5M) is required.
To attach the microphone holder
Align the microphone holder to the handle, then attach it
by tightening the screw securely.
Microphone holder
Attaching a UHF portable tuner (for a
UHF wireless microphone system)
To use a Sony UHF wireless microphone system, power
the PMW-F55/F5 off and then fit one of the following
UHF portable tuners.
• DWR-S02D Digital Wireless Receiver
• WRR-855S UHF Synthesized Tuner Unit
• WRR-860A/861/862 UHF Synthesized Diversity Tuner
For details of these units, refer to the operation manuals
for them.
Note
The optional WRR tuner fitting (service part number: A8278-057-B) is required to fit the WRR-862.
For details, contact your vendor or a Sony service
representative.
To fit the DWR-S02D or WRR-855S
1
Remove the four fixing screws holding the cover of the
portable tuner/receiver housing slot.
2
Insert the DWR-S02D or WRR-855S into the housing
slot, and fasten the four fixing screws.
To attach a microphone
1
Open the cover of the external microphone attachment
part by pulling the knob up.
2
Attach the microphone, then fix the microphone by
closing the cover of the external microphone
attachment part as it was.
3
Plug the microphone cable into the MIC IN connector,
then set the AUDIO IN switch (see page 34) for the
channel on which you want to record the audio from
this microphone to FRONT.
40
Connection and Setup
DWR-S02D or WRR-855S
3
Set the AUDIO IN selector for the channel to which
you want to input audio signal to WIRELESS (see
page 35).
3
Mount the tuner on the WRR tuner fitting.
To fit the WRR-862 (when using a BP-L80S
Battery Pack)
1
Attach the WRR tuner fitting (not supplied; service
part number: A-8278-057-B) to the back of the CBK55BK.
1 Use a Phillips type screwdriver to tighten the four
screws placed in the tuner fitting as in the following
illustration.
WRR-862
4
Connect the tuner power cord to the DC OUT
connector of the supplied battery adaptor, and the
audio output cable to the AUDIO IN CH-1 or CH-2
connector.
5
Set the switches as follows.
Note
Make sure that all four screws are fully tightened.
2 Loosen the adjustment screws on the tuner fitting.
3 Adjust the tuner fitting position for a BP-L80S
Battery Pack to be attached, and tighten the
adjustment screws to fix its position.
4 Attach the mount plate supplied with the WRR862.
About the WRR tuner fitting (service part number: A8278-057-B), contact a Sony service or sales
representative.
BP-L80S
Adjustment
screws
• Set the AUDIO IN selector for the channel to which
the audio output cable is attached to MIC.
• Set the AUDIO IN CH-1/CH-2/CH-3/CH-4 switch
for the channel to which the audio output cable is
connected to REAR.
If the XLR connection automatic detection function
is on, the input signal for audio recording is selected
automatically, and therefore this setting is not
required.
Connecting line input audio
equipment
Mount plate
(supplied with
WRR-862)
Connect the audio output connector of the audio
equipment that supplies the line input signal to the AUDIO
IN CH-1 or CH-2 connector.
Switch settings
Set the AUDIO IN selector for the channel to which the
audio signal source is connected to LINE.
Phillips type
screwdriver
2
Attach the battery pack.
On how to attach the battery pack, see “To use Battery
Pack” on page 37.
Connection and Setup
41
Tripod mounting
To remove the CBK-55BK from the tripod
adaptor
1
Hold down the red button and pull the lever in the direction
of the arrow.
Attach the VCT-14/U14 Tripod Adaptor (optional) to
the tripod.
Tripod adaptor
Red button
Lever
Camera mount
2
Note
Mount the CBK-55BK on the tripod adaptor.
The tripod adaptor pin may remain in the engaged position
even after the CBK-55BK is removed. If this happens,
press the red button and move the lever as shown above
until the pin returns to the stowed position. If the pin
remains in the engaged position, you will not be able to
mount the CBK-55BK on the tripod adaptor.
Connecting a video light
With this CBK-55BK, you can use the Anton Bauer
Ultralight 2 or equivalent video light (powered by 12 V
with maximum power consumption of 50 W).
Slide the CBK-55BK forward along the
groove in the adaptor until it clicks.
3
42
Move the CBK-55BK forward and backward, and
make sure it does not detach.
Connection and Setup
The output of the LIGHT connector on the CBK-55BK is
controlled to 12 V even when the CBK-55BK is supplied
with over 12 V power (through the DC IN connector or
battery pack). The brightness or color temperature of the
light will not change according to voltage increase.
Notes
• Do not use a video light with power consumption of over
50 W.
• The brightness or color temperature of the light will
change when the voltage (supplied through the DC IN
connector or from the battery pack) is under 12 V.
Using the shoulder strap
Adjusting the shoulder pad position
To attach the shoulder strap
You can change the position of the CBK-55BK and
shoulder pad as follows by sliding the front block.
1
Fit one of the clips to a shoulder strap fitting.
Pull up the strap to lock the fitting.
33 mm (1 5/16 inches)
Clip
2
Fit the other clip to the shoulder strap fitting on the
other side of the grip in the same way as in step1.
37 mm (1 1/2 inches)
70 mm (2 7/8 inches)
Adjust the position of the front block and shoulder pad so
that the CBK-55BK can be operated easily while it is on
your shoulder.
To adjust the front block position
To remove the shoulder strap
1
Release the lock of the front block by turning the front
block fixing lever on the bottom of the CBK-55BK.
2
Select the desired position by sliding the front block
backward or forward.
3
Fix the front block by turning the front block fixing
lever.
Press here and pull in the direction
shown by the arrow to release.
Front block
Front block fixing lever
Connection and Setup
43
To adjust the shoulder pad position
1
Raise the lever in the center of the shoulder pad to
unlock the shoulder pad.
Basic Setup Menu
Operations
2
Slide the shoulder pad backward or forward until it is
in the most convenient position.
To display the setup menu
3
Lower the lever to lock the shoulder pad in the selected
position.
Push the MENU ON/OFF switch of the CBK-55BK down
or press the MENU button of the PMW-F55/F5.
Note
For operations after pressing the MENU button of the
PMW-F55/F5 and menu screen, refer to the operating
instructions of the PMW-F55/F5. In this section, only the
operations of the CBK-55BK are explained.
To make menu settings
Lever
1
Shoulder pad
Turn the MENU knob to move the cursor to the item
that you want to set.
Selectable menu items appear in the menu item
selection area to the right of the icon.
Using the headphone plug adaptor
If the headphones with a straight type connector is hard to
use while using the headphone connector of the PMWF55/F5, use the supplied headphone plug adaptor.
2
Press the MENU knob.
The cursor moves to the menu item selection area.
3
Turn the MENU knob to move the cursor to the menu
item that you want to set, and then confirm by pressing
the MENU knob.
The setting area appears.
Headphone plug
adaptor
4
Turn the MENU knob to move the cursor to the item
that you want to set, and then confirm by pressing the
MENU knob.
5
Turn the MENU knob to select the value that you want
to set, and then confirm by pressing the MENU knob.
The setting is changed and the display is updated to
show the new setting.
Items that require confirmation before execution
In step3, the menu disappears and a confirmation message
appears if you select an item that requires confirmation
before execution. Follow the instructions in the message to
execute or cancel the operation.
To enter text
When you select an item that requires text input, such as
time data or file names, the text entry field is highlighted,
and “SET” is displayed to the right.
44
Basic Setup Menu Operations
1
Turn the MENU knob to select a character, then
confirm by pressing the MENU knob.
The cursor moves to the next position.
To return to the previous position, push the MENU
CANCEL/BACK switch down.
2
When all characters are input, confirm them by
selecting “Done.”
To cancel the setting change
Push the MENU CANCEL/BACK switch down.
To exit the menu
Set the MENU ON/OFF switch to OFF.
The normal camera picture reappears.
Adjusting the Audio Level
When you set the AUDIO SELECT switch to AUTO, the
input levels of analog audio signals recorded on each
channel are adjusted automatically. You can also make
manual adjustments.
Note
Even if you set the AUDIO SELECT switch to AUTO, the
input levels of digital audio signals are not adjusted
automatically.
Target audio level for manual audio level
adjustment
Make adjustment using –20 dB as the target level.
If the audio level meter shows a maximum level of 0 dB,
then it indicates that the input audio level is excessive.
Excessive input level
Target input level
Manually adjusting the audio levels
of the audio inputs from the AUDIO
IN CH-1/CH-2 connectors
1
To adjust the signal input to the AUDIO IN CH-1 or
CH-2 connector, set the AUDIO IN CH-1 or CH-2
switch to REAR.
To adjust both input signals, set both switches to
REAR.
2
Set the AUDIO SELECT switch(es) corresponding to
the channel(s) selected in step1 to MANUAL.
3
With the LEVEL knob(s) for the channel(s) selected in
step1, make adjustment so that the audio level meter
displays up to –20 dB for a normal input volume.
Adjusting the Audio Level
45
Correspondence between recording level
adjustments and audio level controls
On “Audio Input” of the Audio menu, you can select
which audio level control controls the audio recording
level of the input to each of the AUDIO IN CH-1/CH-2
connectors. The correspondences between the settings of
the menu items and the controls are as follows.
MIC CH1 Level: Channel 1 recording level
Setting
Knob
Side1
LEVEL (CH-1) knob
Front
MIC LEVEL control
Front+Side1
LEVEL (CH-1) knob and MIC LEVEL
control (linked operation)
Rear1/WRR Level: Channel 1 recording level
Setting
Knob
MIC CH2 Level: Channel 2 recording level
Side1
LEVEL (CH-1) knob
Setting
Knob
Front
MIC LEVEL control
Side2
LEVEL (CH-2) knob
Front+Side1
LEVEL (CH-1) knob and MIC LEVEL
control (linked operation)
Front
MIC LEVEL control
Front+Side2
LEVEL (CH-2) knob and MIC LEVEL
control (linked operation)
Rear2/WRR Level: Channel 2 recording level
Note
Setting
Knob
Side2
LEVEL (CH-2) knob
Front
MIC LEVEL control
Front+Side2
LEVEL (CH-2) knob and MIC LEVEL
control (linked operation)
When you have operation of the MIC LEVEL control and
LEVEL (CH-1/CH-2) knobs linked together, if the
LEVEL (CH-1/CH-2) knobs are set to 0, the audio signals
on channels 1 and 2 cannot be recorded. Check the position
of the LEVEL (CH-1/CH-2) knobs before adjusting the
MIC LEVEL control.
Note
When you have operation of the LEVEL (CH-1/CH-2)
knobs and MIC LEVEL control linked together, if the MIC
LEVEL control is set to 0, the audio signals on channels 1
and 2 cannot be recorded. Check the position of the MIC
LEVEL control before adjusting the LEVEL (CH-1/CH-2)
knobs.
Recording Audio on Channels 3 and
4
Selecting the recorded audio
You can select the audio recorded on audio channels 3 and
4 with the AUDIO IN CH-3/CH-4 switches.
Manually Adjusting the Audio Level
of the MIC IN Connector
1
2
3
Set the AUDIO IN switch(es) that is(are) used to
FRONT.
Set the AUDIO SELECT switch(es) for the desired
channel(s) selected in step1 to MANUAL.
Turn the MIC LEVEL control and make adjustment so
that the audio level meter displays up to –20 dB for a
normal input volume.
Correspondence between recording level
adjustments and audio level controls
On “Audio Input” of the Audio menu, you can select
which audio level control controls the audio recording
level of the front microphone input. The correspondences
between the settings of the menu items and the controls are
as follows.
46
Adjusting the Audio Level
CH-3 switch
Channel 3 recording target
FRONT
Front microphone audio
REAR
Audio signal input to AUDIO IN CH-1
connector
WIRELESS
Wireless microphone audio
CH-4 switch
Channel 4 recording target
FRONT
Front microphone audio
REAR
Audio signal input to AUDIO IN CH-2
connector
WIRELESS
Wireless microphone audio
Adjusting the audio recording levels
To adjust automatically
Set the AUDIO SELECT CH-3/4 switch to AUTO.
To adjust manually
Setting
Knob
1
Set the AUDIO SELECT CH-3/4 switch to
MANUAL.
Front+Side3
LEVEL (CH-3) knob and MIC LEVEL
control (linked operation)
2
Select the knobs that adjust the audio levels “Audio
CH3 Level” and “Audio CH4 Level” in “Audio Input”
of the Audio menu.
Audio CH-4 Level: Channel 4 recording level
Audio CH-3 Level: Channel 3 recording level
Setting
Knob
Side3
LEVEL (CH-3) knob
Front
MIC LEVEL control
Setting
Knob
Side4
LEVEL (CH-4) knob
Front
MIC LEVEL control
Front+Side4
LEVEL (CH-4) knob and MIC LEVEL
control (linked operation)
You can now adjust the levels of audio channels 3 and 4
with the knobs selected here.
The relation between the AUDIO IN CH-1/CH-2 switch setting and recording channel is as follows.
AUDIO IN switch on
the audio operating
section
CH-1/2/3/4
Front MIC
Select
menu
AUDIO IN switch
on the connector
section (rear)
CH-1
CH-2
CH-1
CH-2
CH-3
CH-4
Mono
–
–
Front Mic
(Mono)
Front Mic
(Mono)
Front Mic
(Mono)
Front Mic
(Mono)
Stereo
–
–
Front Mic
(L-Ch)
Front Mic
(R-Ch)
Front Mic
(L-Ch)
Front Mic
(R-Ch)
LINE1 or
MIC1
LINE2 or
MIC2
LINE1 or
MIC1
LINE2 or
MIC2
FRONT
–
LINE or MIC LINE or MIC
–
AES/EBU
LINE or MIC
AES/EBU
1-1
AES/EBU
1-2
No sound
LINE2 or
MIC2
–
LINE or MIC
AES/EBU
LINE1 or
MIC1
No sound
AES/EBU
2-1
AES/EBU
2-2
–
AES/EBU
AES/EBU
AES/EBU
1-1
AES/EBU
1-2
AES/EBU
2-1
AES/EBU
2-2
REAR
WIRELESS
Recording channel
Analog
–
–
–
Mono
Mono
Mono
Mono
Digital
–
–
–
CH-1
CH-2
CH-1
CH-2
LINE or MIC: LINE or MIC is selected.
AES/EBU: AES/EBU is selected.
Mono: Monaural Audio
L-Ch/R-Ch: Mic L-Ch/R-Ch
LINE1 or MIC1: LINE or MIC signal input from the CH-1 connector
LINE2 or MIC2: LINE or MIC signal input from the CH-2 connector
AES/EBU1-1: CH-1 signal in the AES/EBU signal input from the CH-1 connector
AES/EBU1-2: CH-2 signal in the AES/EBU signal input from the CH-1 connector
AES/EBU2-1: CH-1 signal in the AES/EBU signal input from the CH-2 connector
AES/EBU2-2: CH-2 signal in the AES/EBU signal input from the CH-2 connector
Adjusting the Audio Level
47
Important Notes on
Operation
Specifications
General
Use and storage locations
The life expectancy of the electrolytic capacitor is about 5
years under normal operating temperatures and normal
usage (8 hours per day; 25 days per month). If usage
exceeds the above normal usage frequency, the life
expectancy may be reduced correspondingly.
Do not subject to severe shocks
Damage to the case or internal components may result.
In the event of operating problems
If you should experience problems with the unit, contact
your Sony dealer.
Operation and storage environment
Store in a level place with air conditioning.
If the unit gets wet, make sure it is completely dry before
storage.
Avoid use or storage in the following places:
• Extremely hot or cold places
• Places with high humidity
• Places with strong vibration
• Near strong magnetic fields
• In places where it receives much direct sunlight, or near
heating equipment
Dimensions (W × H × D)
Approx. 170 × 182 × 371 mm
(6 3/4 × 7 1/4 × 14 5/8 inches)
(see page 50)
Mass
Approx. 2.2 kg (4 lb. 14 oz.) (Body and
battery adaptor)
Power Requirements
DC 12 V (11 V to 17 V)
Power Consumption
Approx. 3.8 W (Body and battery
adaptor)
Operating temperature
0°C to 40°C (32°F to 104°F)
Operating humidity
20% to 90%
Storage temperature
–20°C to +60°C (–4°F to +140°F)
Input/output
The battery terminal of this unit (the connector for battery
packs and AC adaptors) is a consumable part.
Power may not be supplied to the unit properly if the pins
of the battery terminal are bent or deformed by shock or
vibrations, or if they become corroded due to prolonged
outdoor use.
Periodic inspections are recommended to keep the unit
working properly and to prolong its usable lifetime.
Contact a Sony service or sales representative for more
information about inspections.
Expansion interface connector
144-pin, supplying power
Audio input
XLR-type 3-pin (×2), LINE / AES/EBU /
MIC / MIC+48V selectable
LINE: +4/0/–3 dBu
AES/EBU: AES3 standard
Audio output XLR type, 5-pin, +4/0/–3 dBu (balanced)
Microphone input
XLR type, 5-pin, –70 dBu to –30 dBu
Headphone output
Stereo mini jack
WRR
D-sub 15-pin
Analog CH1: –40 dBu
Digital CH1/CH2: –40 dBFS
Battery Adaptor
DC input
XLR-type 4-pin, 12 V DC
DC output
4-pin, 12 V DC (maximum rated current:
1.8A)
LIGHT
2-pin, 12 V DC (less than 50 W)
On condensation
Supplied Accessories
If the unit is suddenly taken from a cold to a warm location,
or if ambient temperature suddenly rises, moisture may
form on the outer surface of the unit and/or inside of the
unit. This is known as condensation. If condensation
occurs, turn off the unit and wait until the condensation
clears before operating the unit. Operating the unit while
condensation is present may damage the unit.
Battery adaptor (service part number: A-2067-625-) (1)
Rod (Φ 15 mm × 250 mm) (2)
Headphone plug adaptor (L type) (1)
Handle (service part number: A-2068-023-) (1)
Microphone holder (pre-attached to the handle) (service
part number: A-2068-182-) (1)
Slide plate (service part number: A-2070-502-) (1)
Tape measure hook (service part number: 4-458-622-) (1)
VF connector protector (service part number: A-2068183-) (1)
Note about the battery terminal
48
Important Notes on Operation / Specifications
Shoulder strap (1)
Operation manual (1)
Options
WRR-855 UHF Synthesized Tuner Unit
DWR-S02D Digital Wireless Receiver
AXS-R5 Portable Memory Recorder
AC-DN10, AC-DN2B AC Adaptor
BP-FL75, BP-L80S Battery Pack
BC-L70, BC-L90 Battery Charger
ECM-680S, ECM-678, ECM-674 Microphone
EC-0.5X3F5M Microphone Conversion Cable (for ECM678/674)
Design and specifications are subject to change without
notice.
Notes
• Always verify that the unit is operating properly
before use. SONY WILL NOT BE LIABLE FOR
DAMAGES OF ANY KIND INCLUDING, BUT
NOT LIMITED TO, COMPENSATION OR
REIMBURSEMENT ON ACCOUNT OF THE
LOSS OF PRESENT OR PROSPECTIVE PROFITS
DUE TO FAILURE OF THIS UNIT, EITHER
DURING THE WARRANTY PERIOD OR AFTER
EXPIRATION OF THE WARRANTY, OR FOR
ANY OTHER REASON WHATSOEVER.
• SONY WILL NOT BE LIABLE FOR CLAIMS OF
ANY KIND MADE BY USERS OF THIS UNIT OR
MADE BY THIRD PARTIES.
• SONY WILL NOT BE LIABLE FOR THE
TERMINATION OR DISCONTINUATION OF
ANY SERVICES RELATED TO THIS UNIT THAT
MAY RESULT DUE TO CIRCUMSTANCES OF
ANY KIND.
SONY WILL NOT BE LIABLE FOR DAMAGES OF
ANY KIND RESULTING FROM A FAILURE TO
IMPLEMENT PROPER SECURITY MEASURES ON
TRANSMISSION DEVICES, UNAVOIDABLE
DATA LEAKS RESULTING FROM
TRANSMISSION SPECIFICATIONS, OR
SECURITY PROBLEMS OF ANY KIND.
Specifications
49
Dimensions
Unit: mm (inches)
76.8 (3 1/8) 32.8 (1 5/16)
93.7 (3 3/4)
57 (2 1/4)
79.2 (3 1/8)
182 (7 1/4)
274.4 (10 7/8)
130 (5 1/8)
66 (2 5/8)
295.1 (11 5/8)
23.1 (15/16)
261.3 (10 3/8)
76 (3)
351.1 (13 7/8)
1
208.7 (8 /4)
50
Specifications
370.9 (14 5/8)
Français
Avant d’utiliser l’appareil, veuillez lire attentivement ce
manuel et le conserver pour future référence.
AVERTISSEMENT
Afin de réduire les risques d’incendie ou
d’électrocution, ne pas exposer cet
appareil à la pluie ou à l’humidité.
Afin d’écarter tout risque d’électrocution,
garder le coffret fermé. Ne confier
l’entretien de l’appareil qu’à un personnel
qualifié.
Pour les clients en Europe
Fabricant: Sony Corporation, 1-7-1 Konan Minato-ku
Tokyo, 108-0075 Japon
Pour toute question relative à la conformité des produits
dans l’UE: Sony Deutschland GmbH, Hedelfinger Strasse
61, 70327 Stuttgart, Allemagne
Pour les clients au Canada
GARANTIE LIMITÉE DE SONY - Rendez-vous sur
http://www.sonybiz.ca/solutions/Support.do pour
obtenir les informations importantes et l’ensemble des
termes et conditions de la garantie limitée de Sony
applicable à ce produit.
ATTENTION
Il y a danger d’explosion s’il y a remplacement incorrect
de la batterie. Remplacer uniquement avec une batterie du
même type ou d’un type équivalent recommandé par le
constructeur.
Lorsque vous mettez la batterie au rebut, vous devez
respecter la législation en vigueur dans le pays ou la région
où vous vous trouvez.
FR
Ne pas installer l’appareil dans un endroit confiné, par
exemple une bibliothèque ou un placard encastré.
AVERTISSEMENT
N’exposez pas les batteries à une chaleur excessive, au
soleil ou près d’un feu par exemple.
Pour les clients au Canada
CAN ICES-3 (A)/NMB-3(A)
Pour les clients en Europe
Ce produit portant la marque CE est conforme à la
Directive sur la compatibilité électromagnétique (EMC)
émise par la Commission de la Communauté européenne.
La conformité à cette directive implique la conformité aux
normes européennes suivantes :
• EN55103-1 : Interférences électromagnétiques
(émission)
• EN55103-2 : Sensibilité électromagnétique (immunité)
Ce produit est prévu pour être utilisé dans les
environnements électromagnétiques suivants : E1
(résidentiel), E2 (commercial et industrie légère), E3
(urbain extérieur) et E4 (environnement EMC contrôlé, ex.
studio de télévision).
ATTENTION
Il est possible que des champs électromagnétiques à des
fréquences spécifiques influencent l’image et le son de cet
appareil.
51
Table des matières
Généralités ..........................................................................
Nom et fonction des pièces...............................................
Panneau avant........................................................................
Panneau arrière......................................................................
Bloc commande (avant) ........................................................
Bloc commande (latéral) .......................................................
Bloc commande audio...........................................................
Bloc connecteurs (arrière) .....................................................
Poignée ..................................................................................
Adaptateur de batterie ...........................................................
Raccordement et configuration ........................................
Sources d’alimentation..........................................................
Fixation d’un pack de batteries pour le CBK-55BK.............
Utilisation de l’alimentation secteur (Alimentation
DC IN) .........................................................................
Utilisation de l’AXS-R5........................................................
Fixation du PMW-F55/F5 .....................................................
Fixation de la poignée ...........................................................
Fixation d’un viseur ..............................................................
Utilisation d’un microphone externe.....................................
Fixation d’un tuner portable UHF (pour un système de
microphone UHF sans fil) ...........................................
Raccordement d’équipement audio d’entrée ligne................
Montage du trépied ...............................................................
Raccordement d’une lampe vidéo.........................................
Utilisation de la bandoulière .................................................
Ajustement de la position du protège-épaule ........................
Utilisation de l’adaptateur de prise pour écouteurs...............
Opérations de base du menu de configuration ...............
Ajustement du niveau audio..............................................
Ajustement manuel des niveaux audio des entrées audio en
provenance des connecteurs AUDIO IN
CH-1/CH-2 ..................................................................
Ajustement manuel du niveau audio du connecteur
MIC IN.........................................................................
Enregistrement audio sur les canaux 3 et 4...........................
Remarques importantes relatives à l’utilisation..............
Spécifications .....................................................................
Dimensions............................................................................
52
Table des matières
53
54
54
55
56
56
57
58
58
59
60
60
60
61
61
61
62
62
63
63
65
65
66
66
67
67
68
69
69
69
70
72
73
74
Généralités
Le CBK-55BK est un kit d’accessoires qui améliore la
stabilité et l’opérabilité du caméscope d’épaule en le fixant
sur le PMW-F55/F5.
Le CBK-55BK possède divers connecteurs d’entrée/sortie,
des commutateurs directs qui permettent de commander le
PMW-F55/F5 à la main tout en regardant à travers le
viseur lorsque vous effectuez des prises de vue avec le
PMW-F55/F5 sur votre épaule, une fente pour récepteur
audio sans fil et un panneau de commande audio.
Le bloc commande avant et le protège-épaule peuvent être
glissés de 70 mm (2 7/8 pouces) dans le sens avant-arrière.
Vous pouvez facilement maintenir l’équilibre lors de la
prise de vue avec le PMW-F55/F5 sur votre épaule lorsque
l’objectif PL ou le grand objectif portable B4 est fixé.
Généralités
53
Nom et fonction des pièces
Panneau avant
a Connecteur AUDIO IF
Utilisé pour connecter le CBK-55BK au PMW-F55/F5.
e Bloc commande (avant) (Voir « Bloc commande
(avant) ».)
b Connecteur MIC IN (entrée microphone) (+48 V)
(de type XLR, 5 broches, femelle)
Permet de raccorder un microphone stéréo à ce connecteur.
L’alimentation (+48 V) est fournie par l’intermédiaire de
ce connecteur.
f Bloc commande audio (Voir « Bloc commande
audio ».)
c Levier de verrouillage de tige
Utilisé lors de la fixation ou du retrait des tiges 15 Φ.
Lors de la fixation des tiges, tournez le levier pour les
verrouiller en position. Si le levier se trouve dans une
position qui l’empêche de tourner facilement, tirez le
levier sur les côtés et tournez-le dans une meilleure
position avant de le pousser de nouveau pour qu’il
continue de tourner.
Remarque
Ne forcez pas le levier de verrouillage de tige en le
tournant lorsque les tiges ne sont pas fixées.
d Tiges 15 Φ
Utilisées pour fixer le porte-caches et les autres accessoires
et suivre la mise au point.
54
Nom et fonction des pièces
g Couvercle de protection du bloc commande audio
Ouvrez-le pour accéder au bloc commande audio (voir
page 57).
h Connecteur d’interface d’extension
Utilisé pour connecter le CBK-55BK au PMW-F55/F5.
i Bloc commande (latéral) (Voir « Bloc commande
(latéral) ».)
j Montages en rosette (gauche et droit)
Utilisés pour fixer les poignées génériques.
k Fixation trépied
Fixez l’adaptateur pour trépied (en option) lors de
l’utilisation du CBK-55BK sur un trépied.
Panneau arrière
a Point de fixation pour le tuner portable UHF
Fixez le tuner portable UHF (voir page 63).
b Point de fixation pour l’adaptateur de batterie
Fixez l’adaptateur de batterie fourni (voir page 60).
c Voyant (rouge) TALLY (signalisation)
S’allume pendant l’enregistrement. Ce voyant clignote en
cas d’anomalie sur le CBK-55BK ou le PMW-F55/F5.
(Pour plus de détails au sujet de l’anomalie, consultez le
mode d’emploi du PMW-F55/F5.)
d Connecteur d’interface d’extension
Utilisé pour connecter l’adaptateur de batterie ou l’AXSR5.
h Bouton glissoir AUDIO
Utilisé pour fixer le CBK-55BK au PMW-F55/F5 (voir
page 61).
i Levier de verrouillage de la caméra
Utilisé pour fixer le CBK-55BK au PMW-F55/F5 (voir
page 61).
j Protège-épaule
Levez le levier de fixation du protège-épaule pour ajuster
la position dans le sens avant-arrière.
Ajustez la position pour un maximum de confort lors de
l’utilisation du PMW-F55/F5 sur votre épaule (voir page
67).
e Bloc connecteurs (arrière) (Voir « Bloc connecteurs
(arrière) ».)
f Bouton de déverrouillage/levier d’éjection
Utilisé pour fixer le CBK-55BK au PMW-F55/F5 (voir
page 61).
g Bloc avant
Il est possible d’ajuster la position du bloc avant dans le
sens avant-arrière en déverrouillant le levier de fixation du
bloc avant.
Ajustez la position du bloc avant pour que le CBK-55BK
puisse être commandé facilement pendant qu’il se trouve
sur votre épaule (voir page 67).
Nom et fonction des pièces
55
Bloc commande (avant)
Si vous poussez le commutateur vers BLACK une fois de
plus pendant l’ajustement automatique de la balance des
noirs, l’ajustement sera annulé et le réglage de la balance
des noirs revient au réglage original.
e Bouton MENU
Modifie la sélection des éléments ou un réglage au sein du
menu (voir page 68).
Bloc commande (latéral)
a Bouton REC START (démarrer l’enregistrement)
Appuyez dessus pour démarrer l’enregistrement. Appuyez
de nouveau dessus pour arrêter l’enregistrement. L’effet
est le même que celui du bouton REC sur l’objectif.
b Commutateur SHUTTER
Réglez-le sur ON pour utiliser l’obturateur électronique.
Poussez-le vers SELECT pour commuter le réglage de la
vitesse de l’obturateur. Lors de l’utilisation de ce
commutateur, le nouveau réglage s’affiche sur l’écran du
viseur pendant environ trois secondes.
Lorsque « Select » dans « Shutter » du menu Camera est
réglé sur « Step » et que le commutateur est poussé vers
SELECT, la vitesse de l’obturateur est commutée, et
lorsque « Select » dans « Shutter » du menu Camera est
réglé sur « Continuous » et que le commutateur est poussé
vers SELECT, la vitesse de l’obturateur actuelle s’affiche
et la vitesse de l’obturateur est commutée en tournant le
bouton MENU.
c Contrôle du LEVEL du MIC (microphone)
Ajuste le niveau d’entrée des canaux audio 1, 2, 3 et 4.
d Commutateur AUTO W/B BAL (ajustement
automatique de la balance des blancs/noirs)
Active les fonctions d’ajustement automatique de la
balance des blancs/noirs.
• WHITE : ajustez automatiquement la balance des
blancs. Si le commutateur WHITE BAL (voir page 57)
est réglé sur A ou B, le réglage de la balance des blancs
est stocké sur la mémoire correspondante. Si le
commutateur WHITE BAL est réglé sur PRST, la
fonction d’ajustement automatique de la balance des
blancs ne fonctionnera pas.
• BLACK : ajustez automatiquement le palier de noir et la
balance des noirs.
Si vous poussez le commutateur vers WHITE une fois de
plus pendant l’ajustement automatique de la balance des
blancs, l’ajustement sera annulé et le réglage de la balance
des blancs revient au réglage original.
56
Nom et fonction des pièces
a Sélecteur GAIN/EI
Ce sélecteur permet de commuter le gain de
l’amplificateur vidéo pour l’adapter aux conditions
d’éclairage pendant la prise de vue. Le gain qui correspond
aux réglages H, M et L peut être sélectionné dans le menu
du PMW-F55/F5. (Pour plus de détails au sujet du réglage,
consultez le mode d’emploi du PMW-F55/F5.)
Ce sélecteur permet de commuter vers les 3 types de
valeurs EI prédéfinies en étant dans le mode Cine EI.
b Commutateur MENU ON/OFF
Ce commutateur est utilisé pour afficher le menu sur
l’écran du viseur ou l’écran du signal de test. À chaque fois
que le commutateur est poussé vers le bas, l’écran de menu
est activé et désactivé.
c Commutateurs ASSIGN. (attribuables) 6/7/8
Attribuez vos fonctions souhaitées aux commutateurs dans
« Assignable Button » du menu System.
« Off » est attribué aux commutateurs ASSIGN. 6/7/8 en
tant que réglage par défaut d’usine. Les commutateurs
ASSIGN. 6/7/8 sont fournis avec un voyant pour montrer
si une fonction est attribuée au commutateur (activé) ou
non (désactivé). (Pour plus de détails au sujet du réglage,
consultez le mode d’emploi du PMW-F55/F5.)
d Commutateur ASSIGN. (attribuable) 5
Attribuez votre fonction souhaitée au commutateur dans
« Assignable Button » du menu System.
« Color Bars » (signal de sortie de barres de couleur) est
attribué au commutateur ASSIGN. 5 en tant que réglage
par défaut d’usine. (Pour plus de détails au sujet du
réglage, consultez le mode d’emploi du PMW-F55/F5.)
e Commutateur WHITE BAL (mémoire de la
balance des blancs)
Commande l’ajustement de la balance des blancs.
• PRST : ajustez la température de couleur sur la valeur
prédéfinie (le réglage par défaut d’usine : 3200K).
Utilisez ce réglage lorsque vous n’avez pas le temps
d’ajuster la balance des blancs.
• A ou B : rappelez les réglages d’ajustement de la balance
des blancs déjà stockés sur A ou B. Poussez le
commutateur AUTO W/B BAL (voir page 56) vers
WHITE pour ajuster automatiquement la balance des
blancs et enregistrez les réglages d’ajustement sur la
mémoire A ou sur la mémoire B.
En mode Cine EI, la commutation s’effectue entre Preset
3200K, Preset 4300K et Preset 5500K.
La balance des blancs est réglée sur le réglage suivant en
tant que réglage par défaut d’usine en étant dans le mode
Cine EI.
PRST : Preset 3200K
A : Preset 4300K
B : Preset 5500K
f Commutateur MENU CANCEL/BACK
Lorsque le commutateur est poussé vers CANCEL/BACK,
la page retourne à la hiérarchie précédente. Les réglages
avant le changement sont annulés.
Bloc commande audio
a Commutateurs MONITOR (sélection du moniteur
audio)
En combinant les deux commutateurs, vous pouvez
sélectionner le son que vous souhaitez entendre par le
haut-parleur intégré ou les écouteurs.
Position du commutateur latéral droit : CH-1/2
Position du
commutateur
latéral gauche
Sortie audio
CH-1/CH-3
Audio du canal 1
MIX
Audio mélangé (stéréo) des canaux 1 et
2
CH-2/CH-4
Audio du canal 2
Position du commutateur latéral droit : CH-3/4
Position du
commutateur
latéral gauche
Sortie audio
CH-1/CH-3
Audio du canal 3
MIX
Audio mélangé (stéréo) des canaux 3 et
4
CH-2/CH-4
Audio du canal 4
* En raccordant des écouteurs stéréo à la prise HEADPHONE, vous pouvez
entendre l’audio en stéréo. (Pour plus de détails au sujet du réglage,
consultez le mode d’emploi du PMW-F55/F5.)
b Boutons LEVEL CH-1/CH-2/CH-3/CH-4 (niveau
d’enregistrement des canaux audio 1/2/3/4)
Ces boutons permettent d’ajuster les niveaux audio à
enregistrer sur les canaux 1, 2, 3 et 4 lorsque les
commutateurs AUDIO SELECT CH-1/CH-2 et AUDIO
SELECT CH-3/CH-4 sont réglés sur MANUAL.
c Commutateurs AUDIO SELECT CH-1/CH-2
(sélection de la méthode d’ajustement des canaux
audio 1/2)
Sélectionnez la méthode d’ajustement du niveau audio des
canaux audio 1 et 2.
• AUTO : ajustement automatique
• MANUAL : ajustement manuel
Remarque
Le niveau audio d’enregistrement est fixé pour le canal sur
lequel le signal AES/EBU est sélectionné pour les signaux
d’entrée audio.
d Bouton MONITOR (ajustement du volume du
moniteur)
Ce bouton commande le volume du son émis par le hautparleur intégré ou les écouteurs. Lorsque le bouton est
réglé sur le niveau minimum, aucun son ne peut être
entendu.
Nom et fonction des pièces
57
e Commutateur AUDIO SELECT CH-3/4 (sélection
de la méthode d’ajustement des canaux audio 3/4)
Sélectionnez la méthode d’ajustement du niveau audio des
canaux audio 3 et 4 simultanément.
• AUTO : ajustement automatique
• MANUAL : ajustement manuel
f Commutateurs AUDIO IN CH-1/CH-2/CH-3/CH4 (sélection d’entrée des canaux audio 1/2/3/4)
Sélectionnez les signaux d’entrée audio à enregistrer sur
les canaux audio 1, 2, 3 et 4.
• FRONT : signaux d’entrée audio en provenance du
microphone raccordé au connecteur MIC IN
• REAR : signaux d’entrée audio en provenance d’un
dispositif audio raccordé aux connecteurs AUDIO IN
CH-1/CH-2
• WIRELESS : signaux d’entrée audio en provenance du
tuner portable UHF s’il est installé
Bloc connecteurs (arrière)
Remarque
Le son de lecture ne peut pas être émis.
c Cache inférieur
Il est fourni pour protéger les câbles raccordés aux
connecteurs du panneau arrière.
En desserrant les vis au bas du CBK-55BK, vous pouvez
ajuster la position du cache en fonction de la taille et de la
forme des fiches du microphone ou des câbles audio.
Après avoir ajusté la position, serrez les vis pour fixer le
cache.
d Commutateur +48V/OFF (alimentation 48 V
activée/désactivée)
Commutez vers le réglage suivant en fonction du
microphone raccordé.
• +48V : lors du raccordement d’un microphone
nécessitant une alimentation 48 V
• OFF : lors du raccordement d’un microphone ne
nécessitant pas d’alimentation 48 V
e Connecteur LIVE AUDIO OUT (de type XLR,
5 broches, mâle)
Ce connecteur émet les signaux audio reçus sur les canaux
audio 1 et 2 ou les canaux audio 3 et 4.
Les signaux audio sont sélectionnés par le biais du
commutateur MONITOR.
Remarque
Le son de lecture ne peut pas être émis.
a Sélecteurs AUDIO IN
Sélectionnez la source audio raccordée aux connecteurs
AUDIO IN CH-1/CH-2.
• LINE : lors du raccordement d’une source de signal
audio externe tel qu’un amplificateur stéréo
• AES/EBU : lors du raccordement d’une source de signal
audio numérique externe
• MIC : lors du raccordement d’un microphone
b Prise HEADPHONE (LIVE MON) (stéréo, miniprise)
Vous pouvez contrôler le son E-E* en raccordant des
écouteurs. En cas d’alarme, vous pouvez entendre la
tonalité d’alarme dans les écouteurs. Le haut-parleur
intégré du PMW-F55/F5 est automatiquement coupé lors
du branchement d’écouteurs dans la prise.
* E-E : abréviation d’« Electric-to-Electric ». En mode EE, les signaux vidéo et audio reçus par le caméscope sont
émis uniquement après leur passage à travers les circuits
électriques internes. Ce mode peut être utilisé pour
contrôler les signaux d’entrée.
58
Nom et fonction des pièces
f Connecteurs AUDIO IN CH-1/CH-2 (entrée du
canal audio 1 et 2) (de type XLR, 3 broches,
femelle)
Raccordez un équipement audio ou un microphone.
Poignée
a Support de microphone
Fixez un microphone externe (voir page 63).
b Bague de positionnement gauche/droite du viseur
Desserrez cette bague pour ajuster la position gauche/
droite du viseur (voir page 62).
c Griffe de fixation du viseur
Fixez le viseur (voir page 62).
d Point de fixation de la bandoulière
Fixez la bandoulière fournie (voir page 66).
e Trous des vis de fixation d’accessoire
• Type de vis : 1/4-20UNC (× 9)
• Type de vis : 3/8-16UNC (× 8)
• Longueur d’engagement : 9 mm (3/8 pouce) ou moins
Remarque
N’exercez pas une force excessive sur l’accessoire quand
il est fixé. Cela pourrait endommager le filet de vis.
e Connecteur LIGHT (lampe vidéo) (2 broches,
femelle)
Vous pouvez y brancher une lampe vidéo avec une
consommation électrique maximale de 50 W, comme
l’Anton Bauer Ultralight 2 ou une lampe équivalente (voir
page 66).
Remarque
Lampe vidéo ON/OFF n’est pas lié à l’enregistrement.
f Élément de fixation du pack de batteries
g Connecteur DC OUT
Remarque
Lorsque vous raccordez un périphérique, utilisez un
modèle dont la consommation de courant est égale ou
inférieure à 1,8 A.
Adaptateur de batterie
Pour fixer/retirer l’adaptateur de batterie, reportez-vous à
« Fixation d’un pack de batteries pour le CBK-55BK » à la
page 60.
a Bouton de déverrouillage/levier d’éjection
b Levier de déverrouillage de la batterie
c Connecteur d’interface d’extension
d Connecteur DC IN (voir page 61)
Nom et fonction des pièces
59
2
Raccordement et
configuration
Insérez la partie saillante de l’adaptateur de batterie
dans la fente située à l’arrière du CBK-55BK (1),
puis abaissez le levier d’éjection (2) jusqu’à ce que
l’adaptateur de batterie soit verrouillé dans le bouton
de déverrouillage.
Sources d’alimentation
Vous pouvez utiliser un pack de batteries ou l’alimentation
secteur par le biais d’un adaptateur secteur.
Pour des raisons de sécurité, utilisez uniquement les packs
de batteries et les adaptateurs CA Sony listés ci-dessous.
Pack de batteries Lithium-ion
BP-FL75
BP-L80S
Adaptateur secteur
AC-DN2B
AC-DN10
Fixation d’un pack de batteries pour
le CBK-55BK
Remarques
1
Appuyez sur le bouton de déverrouillage (1) de
l’adaptateur de batterie pour dégager le levier
d’éjection, puis levez-le (2).
Élément de fixation
du pack de batteries
Levier de
déverrouillage de
la batterie
• Avant de fixer l’adaptateur de batterie, assurez-vous
que le levier d’éjection est levé.
• Avant d’abaisser le levier d’éjection, assurez-vous
que les quatre crochets sont convenablement fixés.
Si les quatre crochets ne sont pas convenablement
fixés, cela peut entraîner des problèmes de
connexion ou endommager le CBK-55BK ainsi que
l’adaptateur de batterie.
Pour utiliser le pack de batteries
Insérez le pack de batteries dans l’élément de fixation situé
sur l’adaptateur de batterie, puis faites glisser le pack de
batteries vers le bas pour le bloquer en position.
Remarques
• Avant toute utilisation, chargez le pack de batteries à
l’aide du chargeur de batterie.
• Juste après utilisation, le pack de batteries est chaud et ne
pourra pas être rechargé complètement.
Pour retirer un pack de batteries
Déverrouillez le pack de batteries en le faisant glisser vers
le haut pendant que vous appuyez sur le levier de
déverrouillage de la batterie, puis retirez le pack de
batteries.
60
Raccordement et configuration
Pour retirer un adaptateur de batteries
Appuyez sur le bouton de déverrouillage et levez le levier
d’éjection, puis retirez l’adaptateur de batterie en le tirant
vers l’extérieur tout en le faisant glisser vers le haut.
Remarque
Assurez-vous de la fixer dans la direction correcte.
2
Déverrouillez le levier de verrouillage de la caméra, le
levier d’éjection et le bouton glissoir AUDIO.
Remarque
Retirez l’adaptateur de batterie tout en le soutenant avec la
main.
Levier d’éjection
Utilisation de l’alimentation secteur
(Alimentation DC IN)
Le CBK-55BK peut être alimenté sur secteur à l’aide de
l’adaptateur secteur AC-DN2B/AC-DN10 (en option).
Bouton glissoir AUDIO
Levier de verrouillage de la caméra
Utilisation de l’AXS-R5
Pour fixer l’AXS-R5, consultez le mode d’emploi du
PMW-F55/F5.
Fixation du PMW-F55/F5
Pour plus de détails au sujet de la manipulation du PMWF55/F5, consultez le mode d’emploi fourni avec le PMWF55/F5.
3
Placez le PMW-F55/F5 sur le CBK-55BK, puis
glissez-le vers l’arrière.
Placez-le PMW-F55/F5 aligné avec la fente de la
plaque coulissante fixée à la partie inférieure du
PMW-F55/F5 et du CBK-55BK, puis glissez le PMWF55/F5 vers l’arrière jusqu’à ce qu’il s’arrête
solidement.
Remarques
• Nécessite le logiciel PMW-F55/F5 version 5.0 ou
ultérieure.
• Effectuez la fixation ou le retrait à partir du PMW-F55/
F5 pendant que l’alimentation est coupée.
1
Fixez solidement la plaque coulissante fournie sur la
partie inférieure du PMW-F55/F5 à l’aide d’une pièce
de monnaie, etc.
Plaque coulissante
Raccordement et configuration
61
4
Verrouillez le PMW-F55/F5.
1 Tournez le levier de verrouillage de la caméra.
2 Abaissez le levier d’éjection jusqu’à ce qu’il soit
verrouillé.
3 Enfoncez le bouton glissoir AUDIO.
Attention
Ne laissez pas le CBK-55BK avec l’oculaire du viseur face
au soleil. Les rayons du soleil risqueraient de passer
directement à travers l’oculaire, d’être concentrés par le
viseur et de causer un incendie.
Remarques
• Fixez/retirez le viseur quand le PMW-F55/F5 est hors
tension.
• Pour utiliser le PMW-F55/F5 avec le DVF-L700 fixé,
mettez-le sous tension lorsque l’interrupteur
d’alimentation POWER du DVF-L700 est sur la position
ON.
Pour plus de détails sur la fixation du viseur, consultez le
mode d’emploi du viseur.
1
Desserrez la bague de fixation de la griffe du viseur,
alignez la fente du viseur, puis fixez celui-ci en le
faisant glisser horizontalement.
Griffe du viseur
Fixation de la poignée
1
Retirez la poignée qui est fixée au PMW-F55/F5.
2
Fixez la poignée du CBK-55BK en utilisant la vis à six
pans creux (taille de la clé à six pans : 3/16).
2
Serrez la bague de fixation après avoir déterminé les
positions gauche et droite du viseur, puis raccordez le
câble du viseur au connecteur VF du PMW-F55/F5.
Fixation d’un viseur
Viseurs disponibles pour le PMW-F55/F5
• DVF-L350 : viseur couleur LCD
• DVF-L700 : viseur couleur LCD
• DVF-EL100 : viseur couleur OLED
62
Raccordement et configuration
Pour retirer le viseur
Desserrez la bague de fixation du viseur, levez la butée,
puis retirez le viseur en le faisant glisser dans le sens
inverse de la fixation.
Pour fixer le protecteur du connecteur VF
Fixez le protecteur du connecteur VF avec sa vis et le
crochet pour mètre ruban fourni avec le PMW-F55/F5 et le
CBK-55BK.
Crochet pour mètre à ruban
Protecteur du connecteur VF
2
Fixez le microphone, puis stabilisez le microphone en
fermant le cache de la partie de fixation de microphone
externe tel qu’il était.
3
Branchez le câble du microphone dans le connecteur
MIC IN, puis réglez le commutateur AUDIO IN (voir
page 58) pour le canal sur lequel vous souhaitez
enregistrer le son à partir de ce microphone sur
FRONT.
Utilisation d’un microphone externe
Vous pouvez utiliser le microphone stéréo ECM-680S/
678/674 (en option) en le fixant sur le support de
microphone fourni.
Remarque
Pour fixer l’ECM-678/674, le câble de conversion (EC0.5X3F5M) est requis.
Pour fixer le support de microphone
Alignez le support de microphone à la poignée, puis fixezle en serrant solidement la vis.
Support de microphone
Fixation d’un tuner portable UHF
(pour un système de microphone
UHF sans fil)
Pour utiliser un système de microphone UHF Sony sans fil,
mettez le PMW-F55/F5 hors tension puis installez l’un des
tuners portables UHF suivants.
• Récepteur sans fil numérique DWR-S02D
• Tuner synthétisé UHF WRR-855S
• Tuner en diversité synthétisé UHF WRR-860A/861/862
Pour plus de détails sur ces appareils, reportez-vous à leur
manuel d’utilisation.
Remarque
Le point de fixation du tuner WRR en option (référence :
A-8278-057-B) est requis pour fixer le WRR-862.
Pour plus de détails, contactez votre revendeur ou un
technicien Sony.
Pour fixer un microphone
1
Ouvrez le cache de la partie de fixation de microphone
externe en tirant le bouton vers le haut.
Raccordement et configuration
63
Pour installer le DWR-S02D ou WRR-855S
1
3 Ajustez la position du point de fixation du tuner
pour pouvoir fixer un pack de batteries BP-L80S, et
serrez les vis d’ajustement pour stabiliser sa
position.
4 Fixez la plaque de montage fournie avec le WRR862.
Dévissez les quatre vis de fixation du cache du
logement du récepteur/tuner portable.
Au sujet du point de fixation WRR (référence : A-8278057-B), contactez un technicien ou un revendeur Sony.
BP-L80S
Vis
d’ajustement
2
Insérez le DWR-S02D ou WRR-855S dans le
logement, puis revissez les quatre vis de fixation.
Plaque de
montage (fournie
avec le WRR-862)
DWR-S02D ou WRR-855S
Tournevis à tête
cruciforme
2
Fixez le pack de batteries.
Pour plus d’informations sur la fixation du pack de
batteries, reportez-vous à « Pour utiliser le pack de
batteries » à la page 60.
3
3
Montez le tuner sur le point de fixation WRR.
Réglez le sélecteur AUDIO IN pour le canal sur lequel
vous souhaitez recevoir le signal audio, sur
WIRELESS (voir page 58).
Pour fixer le WRR-862 (lors de l’utilisation
d’un pack de batteries BP-L80S)
1
Fixez le point de fixation du tuner WRR (non fourni ;
référence : A-8278-057-B) à l’arrière du CBK-55BK.
1 Utilisez un tournevis à tête cruciforme pour serrer
les quatre vis qui se trouvent dans le point de
fixation du tuner comme dans l’illustration
suivante.
WRR-862
4
Raccordez le cordon d’alimentation du tuner au
connecteur DC OUT de l’adaptateur de batteries
fourni, et le câble de sortie audio au connecteur
AUDIO IN CH-1 ou CH-2.
5
Réglez les commutateurs comme suit.
Remarque
Assurez-vous que les quatre vis sont complètement
serrées.
2 Desserrez les vis d’ajustement sur le point de
fixation du tuner.
64
Raccordement et configuration
• Réglez le sélecteur AUDIO IN pour le canal auquel
le câble de sortie audio est raccordé à MIC.
• Réglez le commutateur AUDIO IN CH-1/CH-2/CH3/CH-4 pour le canal sur lequel le câble de sortie
audio est raccordé à REAR.
Si la fonction de détection automatique de
raccordement XLR est activée, le signal d’entrée
pour l’enregistrement audio est sélectionné
automatiquement, et donc ce réglage n’est pas
requis.
2
Montez le CBK-55BK sur l’adaptateur de trépied.
Raccordement d’équipement audio
d’entrée ligne
Raccordez le connecteur de sortie audio de l’équipement
audio qui fournit le signal d’entrée ligne au connecteur
AUDIO IN CH-1 ou CH-2.
Réglages de commutateurs
Réglez le sélecteur AUDIO IN pour le canal auquel la
source de signal audio est raccordée à LINE.
3
Montage du trépied
1
Faites glisser le CBK-55BK vers l’avant le
long de la fente de l’adaptateur jusqu’à son
déclic.
Fixez l’adaptateur de trépied VCT-14/U14 (en option)
au trépied.
Adaptateur de trépied
Déplacez le CBK-55BK vers l’avant et vers l’arrière,
et assurez-vous qu’il ne se détache pas.
Pour retirer le CBK-55BK de l’adaptateur
de trépied
Maintenez enfoncé le bouton rouge et tirez le levier dans
le sens de la flèche.
Fixation caméra
Bouton rouge
Levier
Remarque
La broche de l’adaptateur de trépied peut rester engagée,
même si le CBK-55BK a été retiré. Si c’est le cas, appuyez
sur le bouton rouge et déplacez le levier comme illustré cidessus jusqu’à ce que la broche revienne en position
rentrée. Si la broche reste engagée, vous ne pourrez pas
monter le CBK-55BK sur l’adaptateur de trépied.
Raccordement et configuration
65
Raccordement d’une lampe vidéo
Vous pouvez utiliser la lampe vidéo Anton Bauer
Ultralight 2 ou une lampe vidéo équivalente avec ce CBK55BK (alimenté en 12 V avec une consommation
électrique maximale de 50 W).
2
Placez l’autre clip sur le point de fixation de la
bandoulière situé de l’autre côté de la poignée, de la
même manière que dans l’étape 1.
La sortie du connecteur LIGHT du CBK-55BK est
commandée en 12 V, même lorsque le CBK-55BK est
alimenté par une source d’alimentation supérieure à 12 V
(via le connecteur DC IN ou un pack de batteries). La
luminosité ou la température de couleur de la lampe ne
change pas en fonction de l’augmentation de la tension.
Remarques
• N’utilisez pas une lampe vidéo dont la consommation
électrique est supérieure à 50 W.
• La luminosité ou la température de couleur de la lampe
change lorsque la tension (fournie par le connecteur DC
IN ou le pack de batteries) est inférieure à 12 V.
Utilisation de la bandoulière
Pour fixer la bandoulière
1
Placez l’un des clips sur un des points de fixation de la
bandoulière.
Tirez sur la bandoulière pour verrouiller au point de fixation.
Clip
66
Raccordement et configuration
Pour retirer la bandoulière
Appuyez ici et tirez dans la direction
indiquée par la flèche pour déverrouiller.
Ajustement de la position du
protège-épaule
Vous pouvez modifier la position du CBK-55BK et du
protège-épaule comme suit en faisant glisser le bloc avant.
Pour ajuster la position du protège-épaule
1
Relevez le levier situé au centre du protège-épaule afin
de le déverrouiller.
2
Déplacez le protège-épaule vers l’arrière ou l’avant,
jusqu’à la position qui vous convient.
3
Abaissez le levier pour verrouiller le protège-épaule
sur la position choisie.
33 mm (1 5/16 pouces)
Levier
Protège-épaule
37 mm (1 1/2 pouces)
70 mm (2 7/8 pouces)
Ajustez la position du bloc avant et du protège-épaule pour
que le CBK-55BK puisse être commandé facilement
pendant qu’il se trouve sur votre épaule.
Pour ajuster la position du bloc avant
1
Déverrouillez le bloc avant en tournant le levier de
fixation du bloc avant sur la partie inférieure du CBK55BK.
2
Sélectionnez la position souhaitée en faisant glisser le
bloc avant vers l’arrière ou vers l’avant.
3
Immobilisez le bloc avant en tournant le levier de
fixation du bloc avant.
Utilisation de l’adaptateur de prise
pour écouteurs
Si les écouteurs à connecteur de type droit sont difficiles à
utiliser lors de l’utilisation du connecteur pour écouteurs
du PMW-F55/F5, utilisez l’adaptateur de prise pour
écouteurs fourni.
Adaptateur de prise
pour écouteurs
Bloc avant
Levier de fixation du bloc avant
Raccordement et configuration
67
Opérations de base du
menu de configuration
Pour afficher le menu de configuration
Pour saisir du texte
Lorsque vous sélectionnez un élément qui nécessite une
saisie de texte, comme les données temporelles ou les
noms de fichiers, la zone de saisie de texte est mise en
surbrillance et « SET » s’affiche à droite.
1
Poussez le commutateur MENU ON/OFF du CBK-55BK
vers le bas ou appuyez sur le bouton MENU du
PMW-F55/F5.
Le curseur se place à la position suivante.
Pour revenir à la position précédente, poussez le
commutateur MENU CANCEL/BACK vers le bas.
Remarque
Pour les opérations après avoir appuyé sur le bouton
MENU du PMW-F55/F5 et l’écran de menu, consultez le
mode d’emploi du PMW-F55/F5. Dans cette section,
seules les opérations du CBK-55BK sont expliquées.
Tournez le bouton MENU pour sélectionner un
caractère puis confirmez en appuyant sur le bouton
MENU.
2
Lorsque tous les caractères ont été saisis, confirmezles en sélectionnant « Done ».
Pour annuler la modification du réglage
Pour configurer les réglages de menu
1
Tournez le bouton MENU pour placer le curseur sur
l’élément que vous souhaitez régler.
Les éléments de menu sélectionnables apparaissent
dans la zone de sélection des éléments de menu à
droite de l’icône.
2
Appuyez sur le bouton MENU.
Le curseur se place sur la zone de sélection des
éléments de menu.
3
Tournez le bouton MENU pour placer le curseur sur
l’élément de menu que vous souhaitez régler, puis
confirmez en appuyant sur le bouton MENU.
La zone de réglages apparaît.
4
Tournez le bouton MENU pour placer le curseur sur
l’élément que vous souhaitez régler, puis confirmez en
appuyant sur le bouton MENU.
5
Tournez le bouton MENU pour sélectionner la valeur
que vous souhaitez régler, puis confirmez en appuyant
sur le bouton MENU.
Le réglage a changé et l’affichage est mis à jour pour
montrer le nouveau réglage.
Éléments nécessitant une confirmation avant
l’exécution
À l’étape 3, le menu disparaît et un message de
confirmation apparaît si vous sélectionnez un élément
nécessitant une confirmation avant l’exécution. Suivez les
instructions dans le message pour exécuter ou annuler
l’opération.
68
Opérations de base du menu de configuration
Poussez le commutateur MENU CANCEL/BACK vers le
bas.
Pour quitter le menu
Réglez le commutateur MENU ON/OFF sur OFF.
L’image normale de la caméra réapparaît.
3
Ajustement du niveau
audio
Lorsque vous réglez le commutateur AUDIO SELECT sur
AUTO, les niveaux d’entrée des signaux audio
analogiques enregistrés sur chaque canal sont ajustés
automatiquement. Vous pouvez également effectuer des
ajustements manuels.
Remarque
Même si vous réglez le commutateur AUDIO SELECT sur
AUTO, les niveaux d’entrée des signaux audio
numériques ne sont pas ajustés automatiquement.
Niveau audio cible pour l’ajustement manuel du
niveau audio
Effectuez l’ajustement en utilisant –20 dB comme niveau
cible.
Si le vumètre audio affiche un niveau maximal de 0 dB,
alors cela indique que le niveau audio d’entrée est excessif.
Niveau d’entrée excessif
Avec le ou les boutons LEVEL du ou des canaux
sélectionnés à l’étape 1, effectuez les réglages afin que
le vumètre audio affiche jusqu’à –20 dB pour le
volume d’entrée normal.
Correspondance entre les ajustements du
niveau d’enregistrement et les
commandes de niveau audio
Dans « Audio Input » du menu Audio, vous pouvez
sélectionner la commande de niveau audio qui commande
le niveau d’enregistrement audio d’entrée de chacun des
connecteurs AUDIO IN CH-1/CH-2. Les correspondances
entre les réglages des éléments de menu et les commandes
sont comme suit.
Rear1/WRR Level : niveau d’enregistrement du canal 1
Réglage
Bouton
Side1
Bouton LEVEL (CH-1)
Front
Commande MIC LEVEL
Front+Side1
Bouton LEVEL (CH-1) et commande MIC
LEVEL (opération associée)
Rear2/WRR Level : niveau d’enregistrement du canal 2
Réglage
Bouton
Side2
Bouton LEVEL (CH-2)
Front
Commande MIC LEVEL
Front+Side2
Bouton LEVEL (CH-2) et commande MIC
LEVEL (opération associée)
Remarque
Niveau d’entrée cible
Ajustement manuel des niveaux
audio des entrées audio en
provenance des connecteurs AUDIO
IN CH-1/CH-2
1
2
Pour ajuster l’entrée de signal sur le connecteur
AUDIO IN CH-1 ou CH-2, réglez le commutateur
AUDIO IN CH-1 ou CH-2 sur REAR.
Lorsque le fonctionnement des boutons LEVEL (CH-1/
CH-2) et de la commande MIC LEVEL est associé, si la
commande MIC LEVEL est réglée sur 0, les signaux audio
des canaux 1 et 2 ne peuvent pas être enregistrés. Vérifiez
la position de la commande MIC LEVEL avant d’ajuster
les boutons LEVEL (CH-1/CH-2).
Ajustement manuel du niveau audio
du connecteur MIC IN
1
Réglez le ou les commutateurs AUDIO IN utilisés sur
FRONT.
Pour ajuster les deux signaux d’entrée, réglez les deux
commutateurs sur REAR.
2
Placez le ou les commutateurs AUDIO SELECT,
correspondant au canal ou aux canaux sélectionnés à
l’étape 1, sur MANUAL.
Placez le ou les commutateurs AUDIO SELECT, pour
le ou les canaux souhaités sélectionnés à l’étape 1, sur
MANUAL.
3
Tournez la commande MIC LEVEL et effectuez les
ajustements afin que le vumètre audio affiche jusqu’à
–20 dB pour un volume d’entrée normal.
Ajustement du niveau audio
69
Correspondance entre les ajustements du
niveau d’enregistrement et les
commandes de niveau audio
Dans « Audio Input » du menu Audio, vous pouvez
sélectionner la commande de niveau audio qui commande
le niveau d’enregistrement audio d’entrée du microphone
avant. Les correspondances entre les réglages des éléments
de menu et les commandes sont comme suit.
MIC CH1 Level : niveau d’enregistrement du canal 1
Réglage
Bouton
Side1
Bouton LEVEL (CH-1)
Front
Commande MIC LEVEL
Front+Side1
Bouton LEVEL (CH-1) et commande MIC
LEVEL (opération associée)
Commutateur
CH-4
Cible d’enregistrement du canal 4
FRONT
Audio du microphone avant
REAR
Entrée de signal audio par le connecteur
AUDIO IN CH-2
WIRELESS
Audio du microphone sans fil
Ajustement des niveaux d’enregistrement
audio
Pour ajuster automatiquement
Réglez le commutateur AUDIO SELECT CH-3/4 sur
AUTO.
Pour ajuster manuellement
1
Réglez le commutateur AUDIO SELECT CH-3/4 sur
MANUAL.
2
Sélectionnez les boutons qui ajustent les niveaux audio
« Audio CH3 Level » et « Audio CH4 Level » dans
« Audio Input » du menu Audio.
MIC CH2 Level : niveau d’enregistrement du canal 2
Réglage
Bouton
Side2
Bouton LEVEL (CH-2)
Front
Commande MIC LEVEL
Front+Side2
Bouton LEVEL (CH-2) et commande MIC
LEVEL (opération associée)
Remarque
Lorsque le fonctionnement de la commande MIC LEVEL
et des boutons LEVEL (CH-1/CH-2) est associé, si les
boutons LEVEL (CH-1/CH-2) sont réglés sur 0, les
signaux audio des canaux 1 et 2 ne peuvent pas être
enregistrés. Vérifiez la position des boutons LEVEL
(CH-1/CH-2) avant d’ajuster la commande MIC LEVEL.
Enregistrement audio sur les canaux
3 et 4
Sélection de l’audio enregistré
Vous pouvez sélectionner l’audio enregistré sur les canaux
audio 3 et 4 par le biais des commutateurs AUDIO IN
CH-3/CH-4.
Commutateur
CH-3
Cible d’enregistrement du canal 3
FRONT
Audio du microphone avant
REAR
Entrée de signal audio par le connecteur
AUDIO IN CH-1
WIRELESS
Audio du microphone sans fil
70
Ajustement du niveau audio
Audio CH-3 Level : niveau d’enregistrement du canal 3
Réglage
Bouton
Side3
Bouton LEVEL (CH-3)
Front
Commande MIC LEVEL
Front+Side3
Bouton LEVEL (CH-3) et commande MIC
LEVEL (opération associée)
Audio CH-4 Level : niveau d’enregistrement du canal 4
Réglage
Bouton
Side4
Bouton LEVEL (CH-4)
Front
Commande MIC LEVEL
Front+Side4
Bouton LEVEL (CH-4) et commande MIC
LEVEL (opération associée)
Vous pouvez alors ajuster les niveaux des canaux audio 3
et 4 à l’aide des boutons sélectionnés ici.
La relation entre le réglage du commutateur AUDIO IN CH-1/CH-2 et le canal d’enregistrement est comme suit.
Commutateur AUDIO
IN sur le bloc
commande audio
Menu Front
MIC Select
CH-1/2/3/4
Commutateur AUDIO IN
sur le bloc connecteurs
(arrière)
CH-1
CH-2
CH-1
CH-2
CH-3
CH-4
Mono
–
–
Microphone
avant
(Mono)
Microphone
avant
(Mono)
Microphone
avant
(Mono)
Microphone
avant
(Mono)
Stéréo
–
–
Microphone Microphone Microphone Microphone
avant (L-Ch) avant (R-Ch) avant (L-Ch) avant (R-Ch)
FRONT
–
LINE ou MIC LINE ou MIC
LINE1 ou
MIC1
LINE2 ou
MIC2
LINE1 ou
MIC1
LINE2 ou
MIC2
–
AES/EBU
LINE ou MIC
AES/EBU
1-1
AES/EBU
1-2
Aucun son
LINE2 ou
MIC2
–
LINE ou MIC
AES/EBU
LINE1 ou
MIC1
Aucun son
AES/EBU
2-1
AES/EBU
2-2
–
AES/EBU
AES/EBU
AES/EBU
1-1
AES/EBU
1-2
AES/EBU
2-1
AES/EBU
2-2
Analogique
–
–
–
Mono
Mono
Mono
Mono
Numérique
–
–
–
CH-1
CH-2
CH-1
CH-2
REAR
WIRELESS
Canal d’enregistrement
LINE ou MIC : LINE ou MIC est sélectionné.
AES/EBU : AES/EBU est sélectionné.
Mono : Monaural Audio
L-Ch/R-Ch : microphone L-Ch/R-Ch
LINE1 ou MIC1 : entrée de signal LINE ou MIC en provenance du connecteur CH-1
LINE2 ou MIC2 : entrée de signal LINE ou MIC en provenance du connecteur CH-2
AES/EBU1-1 : signal CH-1 dans l’entrée de signal AES/EBU en provenance du connecteur CH-1
AES/EBU1-2 : signal CH-2 dans l’entrée de signal AES/EBU en provenance du connecteur CH-1
AES/EBU2-1 : signal CH-1 dans l’entrée de signal AES/EBU en provenance du connecteur CH-2
AES/EBU2-2 : signal CH-2 dans l’entrée de signal AES/EBU en provenance du connecteur CH-2
Ajustement du niveau audio
71
Remarques importantes
relatives à l’utilisation
Emplacements d’utilisation et de stockage
La durée de vie du condensateur électrolytique est de 5 ans
environ, sous des températures de fonctionnement
normales et pour un usage normal (8 heures par jour,
25 jours par mois). Si l’utilisation dépasse la fréquence
d’utilisation normale, la durée de vie peut être réduite en
conséquence.
Ne le soumettez pas à des chocs violents
Le boîtier ou les composants internes pourraient être
endommagés.
En cas de problèmes de fonctionnement
En cas de problèmes avec l’appareil, contactez votre
revendeur Sony.
Environnement de fonctionnement et de
stockage
Rangez-le dans un endroit plat avec climatisation.
Si l’appareil est mouillé, assurez-vous qu’il est
complètement séché avant de le ranger.
Évitez de l’utiliser ou de le ranger dans les lieux suivants :
• lieux extrêmement chauds ou froids
• lieux à humidité élevée
• lieux aux vibrations fortes
• à proximité de champs magnétiques puissants
• dans des lieux où il reçoit beaucoup de soleil ou à
proximité d’équipement de chauffage
Remarque relative à la borne de batterie
La borne de batterie de cet appareil (le connecteur pour les
packs batterie et les adaptateurs CA) est une pièce
consommable.
L’appareil risque de ne pas être alimenté correctement si
les broches de la borne de batterie sont cintrées ou
déformées par les chocs ou les vibrations, ou si elles sont
touchées par la corrosion en raison d’une utilisation
prolongée en extérieur.
Des inspections périodiques sont recommandées pour que
l’appareil continue à fonctionner correctement et pour
prolonger la durée de son utilisation.
Contactez un vendeur ou un technicien Sony pour plus
d’informations sur les inspections.
72
Remarques importantes relatives à l’utilisation
Remarque concernant la condensation
Si l’appareil est soudainement déplacé d’un endroit froid à
un endroit chaud, ou si la température ambiante augmente
brusquement, de l’humidité peut se former sur la surface
externe de l’appareil et/ou à l’intérieur de l’appareil. Ce
phénomène est connu sous le nom de condensation. Si de
la condensation se produit, mettez l’appareil hors tension
et patientez le temps que la condensation disparaisse avant
d’utiliser l’appareil. L’utilisation de l’appareil avec de la
condensation pourrait endommager l’appareil.
Spécifications
Protecteur du connecteur VF (référence : A-2068-183-) (1)
Bandoulière (1)
Manuel d’utilisation (1)
Caractéristiques générales
Options
Dimensions (L × H × P)
Environ 170 × 182 × 371 mm
(6 3/4 × 7 1/4 × 14 5/8 pouces)
(voir page 74)
Poids
Environ 2,2 kg (4 lb. 14 oz.)
(boîtier et adaptateur de batterie)
Alimentation 12 V CC (11 V à 17 V)
Consommation électrique
Environ 3,8 W (boîtier et adaptateur de
batterie)
Température de fonctionnement
0 °C à 40 °C (32 °F à 104 °F)
Humidité de fonctionnement
20 % à 90 %
Température de stockage
–20 °C à +60 °C (–4 °F à +140 °F)
Tuner synthétisé UHF WRR-855
Récepteur sans fil numérique DWR-S02D
Enregistreur à mémoire portable AXS-R5
Adaptateur secteur AC-DN10, AC-DN2B
Pack de batteries BP-FL75, BP-L80S
Chargeur de batterie BC-L70, BC-L90
Microphone ECM-680S, ECM-678, ECM-674
Câble de conversion de microphone EC-0.5X3F5M
(pour ECM-678/674)
Entrée/Sortie
Connecteur d’interface d’extension
144 broches, fournit l’alimentation
Entrée audio
De type XLR à 3 broches (×2), LINE /
AES/EBU / MIC / MIC+48V
sélectionnable
LINE : +4/0/–3 dBu
AES/EBU : AES3 standard
Sortie audio
De type XLR, 5 broches, +4/0/–3 dBu
(balancé)
Entrée microphone
De type XLR, 5 broches, –70 dBu à
–30 dBu
Sortie écouteurs
Mini-prise stéréo
WRR
D-sub à 15 broches
CH1 analogique : –40 dBu
CH1/CH2 numérique : –40 dBFS
Adaptateur de batterie
Entrée CC
De type XLR à 4 broches, 12 V CC
Sortie CC
4 broches, 12 V CC (courant nominal
maximum : 1,8 A)
LIGHT
2 broches, 12 V CC (inférieure à 50 W)
La conception et les spécifications sont susceptibles d’être
modifiées sans préavis.
Remarques
• Vérifiez toujours que l’appareil fonctionne
correctement avant l’utilisation. Sony n’assumera
pas de responsabilité pour les dommages de
quelque sorte qu’ils soient, incluant mais ne se
limitant pas à la compensation ou au
remboursement, à cause de la perte de profits
actuels ou futurs suite à la défaillance de cet
appareil, que ce soit pendant la période de
garantie ou après son expiration, ou pour toute
autre raison quelle qu’elle soit.
• Sony n’assumera pas de responsabilité pour les
réclamations, quelle qu’elles soient, effectuées par
les utilisateurs de cet appareil ou par des tierces
parties.
• Sony n’assumera pas de responsabilité pour la
cessation ou l’interruption de tout service lié à cet
appareil, résultant de quelque circonstance que ce
soit.
Sony ne peut être tenue responsable de tout
dommage, de quelque nature que ce soit, résultant
d’une incapacité à mettre en place des mesures de
sécurité adaptées pour les dispositifs de
transmission, de fuites de données inévitables dues
aux spécifications de transmission ou de tout autre
problème de sécurité.
Accessoires fournis
Adaptateur de batterie (référence : A-2067-625-) (1)
Tige (15 mm Φ × 250 mm) (2)
Adaptateur de prise pour écouteurs (de type L) (1)
Poignée (référence : A-2068-023-) (1)
Support de microphone (fixé au préalable à la poignée)
(référence : A-2068-182-) (1)
Plaque coulissante (référence : A-2070-502-) (1)
Crochet pour mètre à ruban (référence : 4-458-622-) (1)
Spécifications
73
Dimensions
Unité : mm (pouces)
76,8 (3 1/8) 32,8 (1 5/16)
93,7 (3 3/4)
57 (2 1/4)
79,2 (3 1/8)
182 (7 1/4)
274,4 (10 7/8)
130 (5 1/8)
66 (2 5/8)
295,1 (11 5/8)
23,1 (15/16)
261,3 (10 3/8)
76 (3)
351,1 (13 7/8)
1
208,7 (8 /4)
74
Spécifications
370,9 (14 5/8)
Deutsch
Bitte lesen Sie dieses Handbuch vor der Benutzung des
Geräts sorgfältig durch und bewahren Sie es zum späteren
Nachschlagen auf.
WARNUNG
Für Kunden in Europa
Hersteller: Sony Corporation, 1-7-1 Konan Minato-ku
Tokio, 108-0075 Japan
Für EU Produktkonformität: Sony Deutschland GmbH,
Hedelfinger Strasse 61, 70327 Stuttgart, Deutschland
Um die Gefahr von Bränden oder
elektrischen Schlägen zu verringern, darf
dieses Gerät nicht Regen oder
Feuchtigkeit ausgesetzt werden.
Um einen elektrischen Schlag zu
vermeiden, darf das Gehäuse nicht
geöffnet werden. Überlassen Sie
Wartungsarbeiten stets nur qualifiziertem
Fachpersonal.
VORSICHT
Explosionsgefahr bei Verwendung falscher Batterien.
Batterien nur durch den vom Hersteller empfohlenen oder
einen gleichwertigen Typ ersetzen.
Wenn Sie die Batterie entsorgen, müssen Sie die Gesetze
der jeweiligen Region und des jeweiligen Landes
befolgen.
DE
Das Gerät nicht an Orten aufstellen, z.B. in Bücherregalen
oder Einbauschränken, wo keine ausreichende Belüftung
gewährleistet ist.
WARNUNG
Akkus dürfen keinesfalls übermäßiger Wärmeeinwirkung
ausgesetzt werden, wie z.B. Sonneneinstrahlung, Feuer
o. ä.
Für Kunden in Europa
Dieses Produkt besitzt die CE-Kennzeichnung und erfüllt
die EMV-Richtlinie der EG-Kommission.
Angewandte Normen:
• EN55103-1: Elektromagnetische Verträglichkeit
(Störaussendung)
• EN55103-2: Elektromagnetische Verträglichkeit
(Störfestigkeit)
Für die folgenden elektromagnetischen Umgebungen: E1
(Wohnbereich), E2 (kommerzieller und in beschränktem
Maße industrieller Bereich), E3 (Stadtbereich im Freien)
und E4 (kontrollierter EMV-Bereich, z.B. Fernsehstudio).
ACHTUNG
Die elektromagnetischen Felder bei den speziellen
Frequenzen können das Bild und den Ton dieses Geräts
beeinflussen.
75
Inhaltsverzeichnis
Übersicht ............................................................................. 77
Name und Funktion der Teile und Bedienelemente ........ 78
Vorderseite ............................................................................ 78
Rückseite ............................................................................... 79
Bedienbereich (vorne) ........................................................... 80
Bedienbereich (Seite) ............................................................ 80
Audiobedienbereich .............................................................. 81
Anschlussbereich (Rückseite) ............................................... 82
Griff....................................................................................... 82
Akkuadapter .......................................................................... 83
Anschlüsse und Konfiguration ......................................... 84
Stromversorgung ................................................................... 84
Anbringen eines Akkuadapters für die CBK-55BK.............. 84
Verwenden von Netzstrom (DC IN-Eingang)....................... 85
Verwenden des AXS-R5 ....................................................... 85
Anbringen am PMW-F55/F5 ................................................ 85
Anbringen des Griffs............................................................. 86
Anbringen eines Suchers....................................................... 86
Verwenden eines externen Mikrofons .................................. 87
Anbringen eines tragbaren UHF-Tuners (bei einem
UHF-Funkmikrofonsystem) ........................................ 88
Anschließen des Audiogeräts für den Leitungseingang........ 89
Anbringen des Stativs ........................................................... 89
Anschließen einer Videoleuchte ........................................... 90
Verwenden des Schulterriemens ........................................... 90
Einstellen der Schulterpolsterposition................................... 91
Verwenden des Adapters für den Kopfhörerstecker ............. 92
Grundlegende Funktionen des Einstellungsmenüs........ 92
Einstellen des Tonpegels .................................................. 93
Manuelles Einstellen der Eingangstonpegel von den
Anschlüssen AUDIO IN CH-1/CH-2 .......................... 93
Manuelles Einstellen des Tonpegels vom Anschluss MIC IN
..................................................................................... 94
Aufnehmen von Ton auf Kanal 3 und 4................................ 94
Wichtige Hinweise zum Betrieb ........................................ 96
Technische Daten............................................................... 97
Abmessungen ........................................................................ 98
76
Inhaltsverzeichnis
Übersicht
Wenn Sie die CBK-55BK als Zubehörsatz am Camcorder
PMW-F55/F5 anbringen und diesen auf der Schulter
tragen, können Sie ihn besser stabilisieren und leichter
bedienen.
Die CBK-55BK verfügt über verschiedene Audioein-/
-ausgänge, Schalter für die Direktsteuerung, mit denen Sie
den PMW-F55/F5 manuell bedienen können, während Sie
ihn bei der Aufnahme auf der Schulter tragen und durch
den Sucher schauen, einen Einschub für einen
Funkaudioempfänger und ein Audiobedienfeld.
Der vordere Bedienbereich und das Schulterpolster lassen
sich um 70 mm nach vorne bzw. hinten verschieben. Sie
können problemlos die Balance halten, wenn Sie mit dem
PMW-F55/F5 auf der Schulter aufnehmen und das PLObjektiv oder ein großes tragbares B4-Objektiv
angebracht ist.
Übersicht
77
Name und Funktion der Teile und Bedienelemente
Vorderseite
a Anschluss AUDIO IF
Zum Verbinden der CBK-55BK mit dem PMW-F55/F5.
e Bedienbereich (vorne) (Siehe „Bedienbereich
(vorne)“.)
b Anschluss MIC IN (Mikrofoneingang) (+48 V)
(XLR, 5-polig, weiblich)
Zum Anschließen eines Stereomikrofons. Die
Stromversorgung (+48 V) erfolgt über diesen Anschluss.
f Audiobedienbereich (Siehe „Audiobedienbereich“.)
c Stangenarretierhebel
Wird beim Anbringen oder Abnehmen der Φ−15-Stangen
verwendet.
Drehen Sie den Hebel beim Anbringen der Stangen, um
diese zu arretieren. Wenn sich der Hebel in einer Position
befindet, in der er sich schwer drehen lässt, ziehen Sie ihn
seitlich heraus, drehen ihn in eine bessere Position,
drücken ihn wieder hinein und drehen ihn weiter.
Hinweis
Drehen Sie den Stangenarretierhebel nicht gewaltsam,
wenn keine Stangen angebracht sind.
d Φ−15-Stangen
Zum Anbringen von Kompendium,
Schärfezieheinrichtung und anderem Zubehör.
78
Name und Funktion der Teile und Bedienelemente
g Schutzabdeckung für Audiobedienbereich
Öffnen Sie diese Abdeckung, um auf den
Audiobedienbereich zugreifen zu können (siehe Seite 81).
h IF-Erweiterungsanschluss
Zum Verbinden der CBK-55BK mit dem PMW-F55/F5.
i Bedienbereich (Seite) (Siehe „Bedienbereich
(Seite)“.)
j Rosettenhalterungen (links und rechts)
Zum Anbringen von Handgriffen anderer Hersteller.
k Stativhalterung
Zum Anbringen des Stativadapters (optional), wenn die
CBK-55BK auf einem Stativ verwendet werden soll.
Rückseite
a Befestigungspunkt für den tragbaren UHF-Tuner
Zum Anbringen des tragbaren UHF-Tuners (siehe
Seite 88).
h AUDIO-Schiebeknopf
Zum Anbringen der CBK-55BK am PMW-F55/F5 (siehe
Seite 85).
b Befestigungspunkt für den Akkuadapter
Zum Anbringen des mitgelieferten Akkuadapters (siehe
Seite 84).
i Kamerasperrhebel
Zum Anbringen der CBK-55BK am PMW-F55/F5 (siehe
Seite 85).
c TALLY-Kontrollleuchte (rot)
Leuchtet während der Aufnahme. Diese Anzeige blinkt,
wenn an der CBK-55BK oder am PMW-F55/F5
irgendeine Störung auftritt. (Einzelheiten zu Störungen
finden Sie in der Bedienungsanleitung zum PMW-F55/
F5.)
j Schulterpolster
Heben Sie den Fixierhebel für das Schulterpolster an und
verschieben Sie es nach vorne bzw. hinten.
Stellen Sie die Position so ein, dass die Bedienung des
PMW-F55/F5 auf der Schulter möglichst bequem ist
(siehe Seite 91).
d IF-Erweiterungsanschluss
Zum Anschließen des Akkuadapters oder des AXS-R5.
e Anschlussbereich (Rückseite) (Siehe
„Anschlussbereich (Rückseite)“.)
f Freigabetaste/Auswurfhebel
Zum Anbringen der CBK-55BK am PMW-F55/F5 (siehe
Seite 85).
g Vorderer Block
Sie können die Position des vorderen Blocks nach vorne
bzw. hinten verstellen, indem Sie den Fixierhebel für den
vorderen Block lösen.
Stellen Sie die Position des vorderen Blocks so ein, dass
die CBK-55BK mühelos bedient werden kann, wenn sie
auf der Schulter sitzt (siehe Seite 91).
Name und Funktion der Teile und Bedienelemente
79
Bedienbereich (vorne)
Wenn Sie den Schalter während des automatischen
Schwarzabgleichs ein weiteres Mal auf BLACK schieben,
wird der Abgleich abgebrochen und der Schwarzwert wird
auf die ursprüngliche Einstellung zurückgesetzt.
e Regler MENU
Zum Auswählen einer Option oder Ändern eines
Einstellwerts im Menü (siehe Seite 92).
Bedienbereich (Seite)
a Taste REC START (Aufnahmestart)
Zum Starten der Aufnahme. Drücken Sie die Taste zum
Stoppen der Aufnahme erneut. Die Wirkung entspricht der
der Taste REC am Objektiv.
b Schalter SHUTTER
Stellen Sie den Schalter zum Verwenden des
elektronischen Verschlusses auf ON. Stellen Sie den
Schalter auf SELECT, um die Belichtungszeiteinstellung
umzuschalten. Wenn Sie diesen Schalter betätigen,
erscheint die neue Einstellung etwa drei Sekunden lang auf
dem Sucherbildschirm.
Wenn „Select“ unter „Shutter“ im Camera-Menü auf
„Step“ gesetzt ist und dieser Schalter auf SELECT gestellt
wird, wird die Verschlusszeit umgeschaltet. Wenn
„Select“ unter „Shutter“ im Camera-Menü auf
„Continuous“ gesetzt ist und dieser Schalter auf SELECT
gestellt wird, wird die aktuelle Verschlusszeit angezeigt
und die Verschlusszeit wird durch Drehen des Reglers
MENU umgeschaltet.
c Regler MIC LEVEL (Mikrofonpegel)
Zum Einstellen des Eingangspegels für Audiokanal 1, 2, 3
und 4.
d Schalter AUTO W/B BAL (automatischer Weiß-/
Schwarzabgleich)
Zum Aktivieren der Funktionen für den automatischen
Weiß-/Schwarzabgleich.
• WHITE: Für den automatischen Weißabgleich. Wenn
der Schalter WHITE BAL (siehe Seite 81) auf A oder B
eingestellt ist, wird die Weißwerteinstellung im
entsprechenden Speicher gespeichert. Ist der Schalter
WHITE BAL auf PRST eingestellt, steht der
automatische Weißabgleich nicht zur Verfügung.
• BLACK: Für die Schwarzwerteinstellung und den
automatischen Schwarzabgleich.
Wenn Sie den Schalter während des automatischen
Weißabgleichs ein weiteres Mal auf WHITE schieben,
wird der Abgleich abgebrochen und der Weißwert wird auf
die ursprüngliche Einstellung zurückgesetzt.
80
Name und Funktion der Teile und Bedienelemente
a Wählschalter GAIN/EI
Zum Einstellen der Verstärkung durch den
Videoverstärker entsprechend den Lichtverhältnissen
beim Aufnehmen. Die mit den Einstellungen H, M und L
erzielte Verstärkung können Sie über das Menü des PMWF55/F5 auswählen. (Einzelheiten zur Einstellung finden
Sie in der Bedienungsanleitung zum PMW-F55/F5.)
Im Cine EI-Modus zum Wechseln zwischen den 3
voreingestellten EI-Werten.
b Schalter MENU ON/OFF
Zum Anzeigen des Menüs auf dem Sucherbildschirm oder
Testsignalbildschirm. Jedes Mal, wenn Sie den Schalters
nach unten schieben, wird der Menübildschirm ein- bzw.
ausgeblendet.
c Schalter ASSIGN. 6/7/8 (frei belegbare Schalter)
Weisen Sie den Schaltern unter „Assignable Button“ im
System-Menü die gewünschten Funktionen zu.
Standardmäßig ist den Schaltern ASSIGN. 6/7/8 die
Einstellung „Off“ zugewiesen. Die Schalter ASSIGN. 6/7/
8 verfügen über eine Anzeige, die angibt, ob der Schalter
mit einer Funktion belegt ist (leuchtet) oder nicht (aus).
(Einzelheiten zur Einstellung finden Sie in der
Bedienungsanleitung zum PMW-F55/F5.)
d Schalter ASSIGN. 5 (frei belegbarer Schalter)
Weisen Sie dem Schalter unter „Assignable Button“ im
System-Menü die gewünschte Funktion zu.
Standardmäßig ist dem Schalter ASSIGN. 5 die
Einstellung „Color Bars“ (Farbbalkenausgangssignal)
zugewiesen. (Einzelheiten zur Einstellung finden Sie in
der Bedienungsanleitung zum PMW-F55/F5.)
e Schalter WHITE BAL (Weißabgleichspeicher)
Zum Steuern des Weißabgleichs.
• PRST: Zum Einstellen der Farbtemperatur auf den
voreingestellten Wert (werkseitige Standardeinstellung:
3200K). Verwenden Sie diese Einstellung, wenn Sie
keine Zeit für den Weißabgleich haben.
• A oder B: Zum Abrufen der bereits unter A oder B
gespeicherten Einstellungen für den Weißabgleich.
Schieben Sie den Schalter AUTO W/B BAL (siehe
Seite 80) auf WHITE, um den automatischen
Weißabgleich auszuführen, und speichern Sie die
Einstellungen in Speicher A oder Speicher B.
Im Cine EI-Modus wird zwischen Preset 3200K, Preset
4300K und Preset 5500K gewechselt.
Für den Weißabgleich gilt im Cine EI-Modus die folgende
werkseitige Standardeinstellung.
PRST: Preset 3200K
A: Preset 4300K
B: Preset 5500K
f Schalter MENU CANCEL/BACK
Wenn der Schalter auf CANCEL/BACK geschoben wird,
wird die vorherige Menüebene wieder angezeigt. Nicht
abgeschlossene Einstellungsänderungen werden
verworfen.
Audiobedienbereich
a MONITOR-Schalter (Audiomonitorauswahl)
Anhand der Kombination der beiden Schalter können Sie
den Ton auswählen, den Sie über den integrierten
Lautsprecher oder über Kopfhörer hören wollen.
Position des rechten Schalters: CH-1/2
Position des
linken
Schalters
Audioausgabe
CH-1/CH-3
Ton von Kanal 1
MIX
Ton von Kanal 1 und 2 gemischt (stereo)
CH-2/CH-4
Ton von Kanal 2
Position des rechten Schalters: CH-3/4
Position des
linken
Schalters
Audioausgabe
CH-1/CH-3
Ton von Kanal 3
MIX
Ton von Kanal 3 und 4 gemischt (stereo)
CH-2/CH-4
Ton von Kanal 4
* Wenn Sie Stereokopfhörer an die Buchse HEADPHONE anschließen,
können Sie den Ton in Stereo wiedergeben lassen. (Einzelheiten zur
Einstellung finden Sie in der Bedienungsanleitung zum PMW-F55/F5.)
b Regler LEVEL CH-1/CH-2/CH-3/CH-4
(Aufnahmepegel von Audiokanal 1/2/3/4)
Sie können den Audiopegel, der auf Kanal 1, 2, 3 bzw. 4
aufgezeichnet werden soll, einstellen, wenn die Schalter
AUDIO SELECT CH-1/CH-2 und AUDIO SELECT CH3/CH-4 auf MANUAL gestellt sind.
c Schalter AUDIO SELECT CH-1/CH-2 (Auswahl
der Methode zum Einstellen von Audiokanal 1/2)
Wählen Sie die Methode zum Einstellen von Audiokanal 1
und 2 aus.
• AUTO: Automatische Einstellung
• MANUAL: Manuelle Einstellung
Hinweis
Der Audioaufnahmepegel ist für den Kanal fest eingestellt,
für den das AES/EBU-Signal als Audioeingangssignal
ausgewählt wurde.
d Regler MONITOR (Monitorlautstärkeeinstellung)
Zum Steuern der Lautstärke des Tons, der über den
integrierten Lautsprecher oder über Kopfhörer ausgegeben
wird. Wenn der Regler in die Position für minimale
Lautstärke gedreht wird, ist kein Ton zu hören.
e Schalter AUDIO SELECT CH-3/4 (Auswahl der
Methode zum Einstellen von Audiokanal 3/4)
Wählen Sie die Methode zum Einstellen von Audiokanal 3
und 4 gleichzeitig aus.
• AUTO: Automatische Einstellung
• MANUAL: Manuelle Einstellung
Name und Funktion der Teile und Bedienelemente
81
f Schalter AUDIO IN CH-1/CH-2/CH-3/CH-4
(Eingangswahl für Audiokanal 1/2/3/4)
Wählen Sie die Audioeingangssignale, die auf den
Audiokanälen 1, 2, 3 und 4 aufgezeichnet werden sollen.
• FRONT: Audioeingangssignale vom mit dem
Anschluss MIC IN verbundenen Mikrofon
• REAR: Audioeingangssignale von einem mit den
Anschlüssen AUDIO IN CH-1/CH-2 verbundenen
Audiogerät
• WIRELESS: Audioeingangssignale vom tragbaren
UHF-Tuner, sofern dieser installiert ist
Anschlussbereich (Rückseite)
c Untere Abdeckung
Damit werden die Kabel geschützt, die an die Anschlüsse
an der Rückseite angeschlossen sind.
Wenn Sie die Schrauben an der Unterseite der CBK-55BK
lösen, können Sie die Position der Abdeckung auf die
Größe und Form der Mikrofon- oder Audiokabelstecker
einstellen. Ziehen Sie die Schrauben nach dem Einstellen
der Position wieder an, um die Abdeckung sicher zu
befestigen.
d Schalter +48V/OFF (48-V-Stromversorgung ein/
aus)
Stellen Sie den Schalter je nach dem angeschlossenen
Mikrofon auf die folgende Position.
• +48V: Bei Anschluss eines Mikrofons, das eine 48-VStromversorgung benötigt
• OFF: Bei Anschluss eines Mikrofons, das keine 48-VStromversorgung benötigt
e Anschluss LIVE AUDIO OUT (XLR, 5-polig,
männlich)
Zum Ausgeben der Audiosignale, die auf Audiokanal 1
und 2 oder Audiokanal 3 und 4 eingespeist werden.
Die Audiosignale werden mit dem MONITOR-Schalter
ausgewählt.
a AUDIO IN-Wählschalter
Wählen Sie die mit den Anschlüssen AUDIO IN CH-1/
CH-2 verbundene Audioquelle aus.
• LINE: Bei Anschluss einer externen Audiosignalquelle
wie z. B. eines Stereoverstärkers
• AES/EBU: Bei Anschluss einer externen digitalen
Audiosignalquelle
• MIC: Bei Anschluss eines Mikrofons
b Buchse HEADPHONE (LIVE MON) (Stereo,
Minibuchse)
Sie können den E-E*-Ton prüfen, wenn Sie Kopfhörer
anschließen. Wenn ein Alarm ausgegeben wird, können
Sie den Alarmton über die Kopfhörer hören. Wenn Sie
Kopfhörer an die Buchse anschließen, wird der integrierte
Lautsprecher des PMW-F55/F5 automatisch
stummgeschaltet.
* E-E: Abkürzung für „Electric-to-Electric“. Im E-EModus werden in den Camcorder eingespeiste Videound Audiosignale nur über interne elektronische
Schaltkreise geschleust und unverändert ausgegeben.
Damit lassen sich Eingangssignale überprüfen.
Hinweis
Der Wiedergabeton kann nicht ausgegeben werden.
Hinweis
Der Wiedergabeton kann nicht ausgegeben werden.
f Anschlüsse AUDIO IN CH-1/CH-2 (Eingang für
Audiokanal 1 und 2) (XLR, 3-polig, weiblich)
Zum Anschließen eines Audiogeräts oder Mikrofons.
Griff
a Mikrofonhalter
Zum Anbringen eines externen Mikrofons (siehe Seite 87).
b Ring für Links-Rechts-Positionierung des Suchers
Lösen Sie diesen Ring, um die Links-Rechts-Position des
Suchers festzulegen (siehe Seite 86).
c Halteschuh für Sucher
Zum Anbringen des Suchers (siehe Seite 86).
82
Name und Funktion der Teile und Bedienelemente
d Schulterriemenhalterung
Zum Anbringen des mitgelieferten Schulterriemens (siehe
Seite 90).
e Bohrungen für Zubehörbefestigungsschrauben
• Schraubentyp: 1/4-20UNC (× 9)
• Schraubentyp: 3/8-16UNC (× 8)
• Einschraublänge: max. 9 mm
Hinweis
Üben Sie keine übermäßige Kraft auf das angebrachte
Zubehör aus. Andernfalls kann das Schraubengewinde
beschädigt werden.
Hinweis
Das Ein-/Ausschalten der Videoleuchte (ON/OFF) wird
nicht mit der Aufnahme synchronisiert.
f Akkuanschlussbereich
g Anschluss DC OUT
Hinweis
Wenn Sie ein Gerät anschließen, muss es eine
Stromaufnahme von maximal 1,8 A aufweisen.
Akkuadapter
Informationen zum Anbringen/Abnehmen des
Akkuadapters finden Sie unter „Anbringen eines
Akkuadapters für die CBK-55BK“ auf Seite 84.
a Freigabetaste/Auswurfhebel
b Akkulösehebel
c IF-Erweiterungsanschluss
d Anschluss DC IN (siehe Seite 85)
e Anschluss LIGHT (Videoleuchte) (2-polig,
weiblich)
Hier kann eine Videoleuchte mit einer maximalen
Leistungsaufnahme von 50 W, wie z. B. die Anton Bauer
Ultralight 2 oder eine entsprechende Leuchte,
angeschlossen werden (siehe Seite 90).
Name und Funktion der Teile und Bedienelemente
83
2
Anschlüsse und
Konfiguration
Setzen Sie die Vorsprünge des Akkuadapters in die
Aussparungen an der Rückseite der CBK-55BK ein
(1) und senken Sie dann den Auswurfhebel (2), bis
der Akkuadapter an der Freigabetaste einrastet.
Stromversorgung
Sie können einen Akku verwenden oder das Gerät über ein
Netzteil an den Netzstrom anschließen.
Verwenden Sie zur Sicherheit nur Akkus und Netzteile
von Sony, die unten aufgelistet sind.
Lithiumionenakku
BP-FL75
BP-L80S
Netzteil
AC-DN2B
AC-DN10
Anbringen eines Akkuadapters für
die CBK-55BK
1
Drücken Sie die Freigabetaste (1) des Akkuadapters,
damit der Auswurfhebel ausklappt, und heben Sie
dann den Auswurfhebel an (2).
Akkuanschlussbereich
Akkulösehebel
Hinweise
• Vergewissern Sie sich vor dem Anbringen des
Akkuadapters, dass der Auswurfhebel nach oben
gezogen ist.
• Vergewissern Sie sich vor dem Senken des
Auswurfhebels, dass die vier Haken sicher
eingesetzt sind. Wenn die vier Haken nicht sicher
eingesetzt sind, ist möglicherweise die Verbindung
schlecht oder die CBK-55BK und der Akkuadapter
können beschädigt werden.
So verwenden Sie einen Akku
Setzen Sie den Akku in den Akkuanschlussbereich des
Akkuadapters ein und schieben Sie den Akku nach unten,
so dass er einrastet.
Hinweise
• Laden Sie den Akku vor der Verwendung mit einem
Ladegerät.
• Wenn der Akku unmittelbar nach dem Gebrauch noch
warm ist, lässt er sich möglicherweise nicht vollständig
aufladen.
So nehmen Sie den Akku ab
Halten Sie zum Lösen des Akkus den Akkulösehebel
gedrückt, schieben Sie den Akku nach oben und nehmen
Sie ihn ab.
84
Anschlüsse und Konfiguration
So nehmen Sie den Akkuadapter ab
Hinweis
Drücken Sie die Freigabetaste und heben Sie den
Auswurfhebel an. Schieben Sie dann den Akkuadapter
zum Abnehmen nach oben und ziehen Sie ihn heraus.
Achten Sie darauf, die Platte richtig herum
anzubringen.
2
Hinweis
Halten Sie den Akkuadapter beim Abnehmen immer mit
einer Hand fest.
Entriegeln Sie Kamerasperrhebel, Auswurfhebel und
AUDIO-Schiebeknopf.
Auswurfhebel
Verwenden von Netzstrom (DC INEingang)
Sie können die CBK-55BK über das Netzteil AC-DN2B/
AC-DN10 (optional) mit Netzstrom betreiben.
AUDIO-Schiebeknopf
Kamerasperrhebel
Verwenden des AXS-R5
Informationen zum Anbringen des AXS-R5 finden Sie in
der Bedienungsanleitung zum PMW-F55/F5.
Anbringen am PMW-F55/F5
Einzelheiten zum Umgang mit dem PMW-F55/F5 finden
Sie in der Bedienungsanleitung zum PMW-F55/F5.
3
Setzen Sie den PMW-F55/F5 auf die CBK-55BK und
schieben Sie ihn nach hinten.
Achten Sie beim Aufsetzen des PMW-F55/F5 auf die
Aussparung für die an der Unterseite des PMW-F55/
F5 angebrachte Gleitplatte und richten Sie sie an der
CBK-55BK aus. Schieben Sie den PMW-F55/F5 bis
zum Anschlag ganz nach hinten.
Hinweise
• Die PMW-F55/F5-Software Version 5.0 oder höher ist
erforderlich.
• Achten Sie beim Anbringen am oder Abnehmen vom
PMW-F55/F5 darauf, dass die Stromversorgung
ausgeschaltet ist.
1
Bringen Sie die mitgelieferte Gleitplatte mit einer
Münze o. Ä. sicher an der Unterseite des PMW-F55/
F5 an.
Gleitplatte
Anschlüsse und Konfiguration
85
4
Befestigen Sie den PMW-F55/F5.
1 Drehen Sie den Kamerasperrhebel.
2 Senken Sie den Auswurfhebel, bis er einrastet.
3 Drücken Sie den AUDIO-Schiebeknopf nach
innen.
Anbringen eines Suchers
Für den PMW-F55/F5 erhältliche Sucher
• DVF-L350: LCD-Farbsucher
• DVF-L700: LCD-Farbsucher
• DVF-EL100: OLED-Farbsucher
Achtung
Stellen Sie die CBK-55BK nicht so ab, dass das Okular des
Suchers auf die Sonne gerichtet ist. Andernfalls kann
direktes Sonnenlicht in das Okular fallen, im Sucher
fokussiert werden und einen Brand verursachen.
Hinweise
• Achten Sie beim Anbringen oder Abnehmen des
Suchers darauf, dass der PMW-F55/F5 ausgeschaltet ist.
• Wenn Sie den PMW-F55/F5 mit angebrachtem DVFL700 verwenden, muss der Schalter POWER am DVFL700 beim Einschalten des Camcorders auf ON stehen.
Einzelheiten zum Anbringen des Suchers finden Sie in der
Bedienungsanleitung zum Sucher.
Anbringen des Griffs
1
Nehmen Sie den am PMW-F55/F5 angebrachten Griff
ab.
2
Bringen Sie den Griff der CBK-55BK mit der
Innensechskantschraube (Sechskantschlüsselgröße:
3/16) an.
86
Anschlüsse und Konfiguration
1
Lösen Sie den Fixierring am Sucherschuh, richten Sie
die Aussparung am Sucher daran aus und bringen Sie
den Sucher an, indem Sie ihn horizontal auf den Schuh
schieben.
Sucherschuh
2
Legen Sie die Links- oder Rechtsposition des Suchers
fest und ziehen Sie dann den Fixierring fest. Schließen
Sie dann das Sucherkabel an den VF-Anschluss am
PMW-F55/F5 an.
Verwenden eines externen
Mikrofons
Sie können das Stereomikrofon ECM-680S/678/674
(optional) verwenden, indem Sie es am mitgelieferten
Mikrofonhalter anbringen.
Hinweis
Zum Anbringen des ECM-678/674 ist das Adapterkabel
(EC-0.5X3F5M) erforderlich.
So bringen Sie den Mikrofonhalter an
Richten Sie den Mikrofonhalter am Griff aus und ziehen
Sie zum Anbringen die Schraube fest an.
So nehmen Sie den Sucher ab
Mikrofonhalter
Lösen Sie den Fixierring des Suchers, heben Sie den
Stopper an und nehmen Sie den Sucher ab, indem Sie ihn
in die entgegengesetzte Richtung wie beim Anbringen
verschieben.
So bringen Sie den VF-Anschlussschutz
an
Bringen Sie den VF-Anschlussschutz mithilfe des mit dem
PMW-F55/F5 und der CBK-55BK gelieferten
Massbandhakens und der Schraube des VFAnschlussschutzes an.
Massbandhaken
VF-Anschlussschutz
So bringen Sie ein Mikrofon an
1
Klappen Sie die Abdeckung des Montagebereichs für
das externe Mikrofon auf, indem Sie den Knopf nach
oben ziehen.
2
Setzen Sie das Mikrofon ein und fixieren Sie es, indem
Sie die Abdeckung des Montagebereichs für das
externe Mikrofon wieder zuklappen.
Anschlüsse und Konfiguration
87
3
Stecken Sie das Mikrofonkabel in den Anschluss MIC
IN und stellen Sie den AUDIO IN-Schalter (siehe
Seite 82) für die Kanäle, auf denen der Ton von diesem
Mikrofon aufgenommen werden soll, auf FRONT.
So montieren Sie den DWR-S02D oder
WRR-855S
1
Entfernen Sie die vier Befestigungsschrauben an der
Abdeckung auf dem Gehäuseeinschub für den
tragbaren Tuner/Empfänger.
2
Setzen Sie den DWR-S02D oder WRR-855S in den
Gehäuseeinschub ein und bringen Sie die vier
Befestigungsschrauben an.
Anbringen eines tragbaren UHFTuners (bei einem UHFFunkmikrofonsystem)
DWR-S02D oder WRR-855S
Wenn Sie ein UHF-Funkmikrofonsystem von Sony
verwenden wollen, schalten Sie den PMW-F55/F5 aus und
bringen einen der folgenden tragbaren UHF-Tuner an.
• Digitaler Funkempfänger DWR-S02D
• UHF-Synthesizer-Tuner WRR-855S
• UHF-Synthesizer-Diversity-Tuner WRR-860A/861/862
Einzelheiten zu diesen Geräten finden Sie in den
dazugehörigen Anleitungen.
Hinweis
Zum Montieren des WRR-862 ist die optionale WRRTunerhalterung (Teilenummer: A-8278-057-B)
erforderlich.
Einzelheiten dazu erhalten Sie bei Ihrem Händler oder dem
Sony-Kundendienst.
3
Stellen Sie den AUDIO IN-Wählschalter für den
Kanal, in den Sie Audiosignale einspeisen wollen, auf
WIRELESS (siehe Seite 82).
So bringen Sie den WRR-862 an (bei
Verwendung eines Akkus BP-L80S)
1
Bringen Sie die WRR-Tunerhalterung (nicht
mitgeliefert, Teilenummer: A-8278-057-B) an der
Rückseite der CBK-55BK an.
1 Ziehen Sie die vier Schrauben an der
Tunerhalterung mit einem PhillipsKreuzschlitzschraubenzieher wie in der folgenden
Abbildung zu sehen an.
88
Anschlüsse und Konfiguration
Hinweis
4
Schließen Sie das Stromversorgungskabel des Tuners
an den Anschluss DC OUT des mitgelieferten
Akkuadapters und das Audioausgangskabel an den
Anschluss AUDIO IN CH-1 oder CH-2 an.
5
Stellen Sie die Schalter folgendermaßen ein.
Achten Sie darauf, alle vier Schrauben gut
festzuziehen.
2 Lösen Sie die Einstellschrauben an der
Tunerhalterung.
3 Legen Sie die Position der Tunerhalterung so fest,
dass der Akku BP-L80S angebracht werden kann,
und ziehen Sie die Einstellschrauben an, um die
Position zu fixieren.
4 Bringen Sie die mit dem WRR-862 gelieferte
Montageplatte an.
• Stellen Sie den AUDIO IN-Wählschalter für den
Kanal, an den das Audioausgangskabel
angeschlossen ist, auf MIC.
• Stellen Sie den Schalter AUDIO IN CH-1/CH-2/
CH-3/CH-4 für den Kanal, an den das
Audioausgangskabel angeschlossen ist, auf REAR.
Wenn die automatische Erkennung der XLRVerbindung aktiviert ist, wird das Eingangssignal
für die Audioaufnahme automatisch ausgewählt und
diese Einstellung ist nicht erforderlich.
Informationen zur WRR-Tunerhalterung
(Teilenummer: A-8278-057-B) erhalten Sie beim
Sony-Kundendienst oder einem Vertriebsmitarbeiter.
Anschließen des Audiogeräts für
den Leitungseingang
BP-L80S
Einstellschrauben
Montageplatte
(mit WRR-862
geliefert)
Verbinden Sie den Audioausgang am Audiogerät, an dem
die Line-Eingangssignale ausgegeben werden, mit dem
Anschluss AUDIO IN CH-1 oder CH-2.
Schaltereinstellungen
Stellen Sie den AUDIO IN-Wählschalter für den Kanal, an
den die Audiosignalquelle angeschlossen ist, auf LINE.
Phillips-Kreuzschlitzschraubenzieher
2
1
Bringen Sie den Akku an.
Informationen zum Anbringen des Akkus finden Sie
unter „So verwenden Sie einen Akku“ auf Seite 84.
3
Anbringen des Stativs
Bringen Sie den Stativadapter VCT-14/U14 (optional)
am Stativ an.
Stativadapter
Montieren Sie den Tuner auf der WRRTunerhalterung.
Kamerahalterung
WRR-862
Anschlüsse und Konfiguration
89
2
Montieren Sie die CBK-55BK auf dem Stativadapter.
Anschließen einer Videoleuchte
Mit dieser CBK-55BK können Sie die Anton Bauer
Ultralight 2 oder eine entsprechende Videoleuchte (mit
einer Stromversorgung von 12 V und einer maximalen
Leistungsaufnahme von 50 W) verwenden.
Die Stromabgabe am Anschluss LIGHT auf der CBK55BK ist auf 12 V geregelt, auch wenn die CBK-55BK mit
Strom von über 12 V versorgt wird (über den Anschluss
DC IN oder einen Akku). Die Helligkeit oder
Farbtemperatur der Leuchte ändert sich bei einer
Spannungserhöhung nicht.
Hinweise
Schieben Sie die CBK-55BK in der Kerbe am
Adapter nach vorne, bis sie mit einem Klicken
einrastet.
3
Bewegen Sie die CBK-55BK nach vorne und hinten
und stellen Sie sicher, dass sie sich nicht löst.
• Verwenden Sie keine Videoleuchte mit einer
Leistungsaufnahme von über 50 W.
• Die Helligkeit oder Farbtemperatur der Leuchte ändert
sich, wenn die Spannung (vom Anschluss DC IN oder
einem Akku) auf unter 12 V abfällt.
Verwenden des Schulterriemens
So nehmen Sie die CBK-55BK vom
Stativadapter ab
So bringen Sie den Schulterriemen an
Halten Sie die rote Taste gedrückt und bewegen Sie den
Hebel in Pfeilrichtung.
1
Befestigen Sie einen der Clips an einer
Schulterriemenhalterung.
Ziehen Sie den Riemen nach oben,
damit die Halterung einrastet.
Rote Taste
Hebel
Clip
Hinweis
Der Stift des Stativadapters bleibt möglicherweise in der
Verriegelungsposition, auch wenn die CBK-55BK
abgenommen wurde. Drücken Sie in diesem Fall die rote
Taste und bewegen Sie den Hebel wie oben dargestellt, bis
der Stift wieder in der Ausgangsposition steht. Solange
sich der Stift in der Verriegelungsposition befindet,
können Sie die CBK-55BK nicht auf dem Stativadapter
montieren.
90
Anschlüsse und Konfiguration
2
Befestigen Sie den anderen Clip genau wie in Schritt 1
erläutert an der Schulterriemenhalterung auf der
anderen Seite des Griffs.
Einstellen der
Schulterpolsterposition
Sie können die Position von CBK-55BK und
Schulterpolster durch Verschieben des vorderen Blocks
folgendermaßen ändern.
So nehmen Sie den Schulterriemen ab
33 mm
Drücken Sie hier und ziehen Sie zum
Lösen des Riemens in Pfeilrichtung.
37 mm
70 mm
Stellen Sie die Position des vorderen Blocks und des
Schulterpolsters so ein, dass die CBK-55BK mühelos
bedient werden kann, wenn sie auf der Schulter sitzt.
So stellen Sie die Position des vorderen
Blocks ein
1
Entriegeln Sie die Sperre des vorderen Blocks, indem
Sie den Fixierhebel für den vorderen Block an der
Unterseite der CBK-55BK drehen.
2
Wählen Sie die gewünschte Position, indem Sie den
vorderen Block nach hinten oder vorne schieben.
3
Fixieren Sie den vorderen Block durch Drehen des
Fixierhebels für den vorderen Block.
Vorderer Block
Fixierhebel für den
vorderen Block
Anschlüsse und Konfiguration
91
So stellen Sie die Schulterpolsterposition
ein
Grundlegende
Funktionen des
Einstellungsmenüs
1
Ziehen Sie den Hebel in der Mitte des Schulterpolsters
nach oben, um das Schulterpolster zu entriegeln.
2
Schieben Sie das Schulterpolster nach hinten oder
vorne, bis es sich in der für Sie bequemsten Position
befindet.
So rufen Sie das Einstellungsmenü auf
Senken Sie den Hebel, um das Schulterpolster in der
ausgewählten Position zu arretieren.
Schieben Sie den Schalter MENU ON/OFF an der CBK55BK nach unten oder drücken Sie die Taste MENU am
PMW-F55/F5.
3
Hinweis
Informationen zum Vorgehen nach dem Drücken der Taste
MENU am PMW-F55/F5 und zum Menübildschirm
finden Sie in der Bedienungsanleitung zum PMW-F55/F5.
In diesem Abschnitt wird lediglich das Vorgehen mit der
CBK-55BK erläutert.
Hebel
Schulterpolster
So nehmen Sie Menüeinstellungen vor
1
Die auswählbaren Menüoptionen werden im
Auswahlbereich für Menüoptionen rechts neben dem
Symbol angezeigt.
Verwenden des Adapters für den
Kopfhörerstecker
Wenn Sie den Kopfhöreranschluss des PMW-F55/F5
verwenden und etwaige Probleme mit einem geraden
Kopfhörerstecker vermeiden wollen, verwenden Sie den
mitgelieferten Adapter für Kopfhörerstecker.
Drehen Sie den Regler MENU, um den Cursor zur
einzustellenden Option zu bewegen.
2
Drücken Sie den Regler MENU.
Der Cursor wechselt in den Auswahlbereich für
Menüoptionen.
3
Drehen Sie den Regler MENU, um den Cursor zur
einzustellenden Menüoption zu bewegen, und
bestätigen Sie dann die Auswahl, indem Sie den
Regler MENU drücken.
Der Einstellbereich erscheint.
4
Drehen Sie den Regler MENU, um den Cursor zur
einzustellenden Option zu bewegen, und bestätigen
Sie dann die Auswahl, indem Sie den Regler MENU
drücken.
5
Drehen Sie den Regler MENU, um den gewünschten
Einstellwert auszuwählen, und bestätigen Sie dann die
Auswahl, indem Sie den Regler MENU drücken.
Adapter für
Kopfhörerstecker
Die Einstellung wird geändert und die Anzeige wird
anhand der neuen Einstellung aktualisiert.
92
Grundlegende Funktionen des Einstellungsmenüs
Optionen, für deren Ausführung eine Bestätigung
erforderlich ist
Wenn Sie eine Option auswählen, deren Ausführung Sie
zunächst bestätigen müssen, wird das Menü in Schritt 3
ausgeblendet und eine Bestätigungsmeldung wird
angezeigt. Befolgen Sie die Anweisungen in der Meldung,
um die Funktion auszuführen oder abzubrechen.
So geben Sie Text ein
Wenn Sie eine Option auswählen, für die
Textinformationen wie etwa Zeitdaten oder Dateinamen
eingegeben werden müssen, wird das Texteingabefeld
hervorgehoben und „SET“ wird auf der rechten Seite
angezeigt.
1
Wählen Sie durch Drehen des Reglers MENU ein
Zeichen aus und bestätigen Sie die Auswahl durch
Drücken des Reglers MENU.
Der Cursor wechselt zur nächsten Position.
Wenn Sie zur vorherigen Position wechseln wollen,
schieben Sie den Schalter MENU CANCEL/BACK
nach unten.
2
Einstellen des Tonpegels
Wenn Sie den Schalter AUDIO SELECT auf AUTO
stellen, werden die Eingangspegel analoger Audiosignale,
die auf den einzelnen Kanälen aufgenommen werden,
automatisch eingestellt. Sie können die Einstellungen auch
manuell vornehmen.
Hinweis
Auch wenn Sie den Schalter AUDIO SELECT auf AUTO
stellen, werden die Eingangspegel digitaler Audiosignale
nicht automatisch eingestellt.
Zieltonpegel für manuelle Tonpegeleinstellung
Nehmen Sie die Einstellung mit –20 dB als Zielpegel vor.
Wenn der Tonpegelmesser einen maximalen Pegel von
0 dB zeigt, ist der Eingangstonpegel übermäßig hoch.
Übermäßiger Eingangspegel
Wenn alle Zeichen eingegeben wurden, bestätigen Sie
sie durch Auswahl von „Done“.
So verwerfen Sie die Änderung von
Einstellungen
Schieben Sie den Schalter MENU CANCEL/BACK nach
unten.
Zieleingangspegel
So schließen Sie das Menü
Stellen Sie den Schalter MENU ON/OFF auf OFF.
Das normale Kamerabild wird wieder angezeigt.
Manuelles Einstellen der
Eingangstonpegel von den
Anschlüssen AUDIO IN CH-1/CH-2
1
Zum Einstellen der am Anschluss AUDIO IN CH-1
oder CH-2 eingespeisten Signale stellen Sie den
Schalter AUDIO IN CH-1 bzw. CH-2 auf REAR.
Um die Eingangssignale an beiden Anschlüssen
einzustellen, stellen Sie beide Schalter auf REAR.
2
Stellen Sie den oder die AUDIO SELECT-Schalter für
die in Schritt 1 ausgewählten Kanäle auf MANUAL.
3
Nehmen Sie mit dem oder den LEVEL-Regler(n) für
die in Schritt 1 ausgewählten Kanäle die Einstellung
vor, so dass der Tonpegelmesser bis zu –20 dB
anzeigt, denn so erzielen Sie eine normale
Eingangslautstärke.
Einstellen des Tonpegels
93
Beziehung zwischen
Aufnahmepegeleinstellungen und
Tonpegelreglern
Beziehung zwischen
Aufnahmepegeleinstellungen und
Tonpegelreglern
Unter „Audio Input“ im Audio-Menü können Sie
auswählen, mit welchem Tonpegelregler der
Audioaufnahmepegel der an den Anschlüssen AUDIO IN
CH-1/CH-2 eingespeisten Signale gesteuert wird. Die
Einstellungen der Menüoptionen und die Regler hängen
folgendermaßen zusammen.
Unter „Audio Input“ im Audio-Menü können Sie
auswählen, mit welchem Tonpegelregler der
Audioaufnahmepegel vom vorderen Mikrofoneingang
gesteuert wird. Die Einstellungen der Menüoptionen und
die Regler hängen folgendermaßen zusammen.
MIC CH1 Level: Aufnahmepegel von Kanal 1
Rear1/WRR Level: Aufnahmepegel von Kanal 1
Einstellung
Regler
Einstellung
Regler
Side1
Regler LEVEL (CH-1)
Side1
Regler LEVEL (CH-1)
Front
Regler MIC LEVEL
Front
Regler MIC LEVEL
Front+Side1
Front+Side1
Regler LEVEL (CH-1) und MIC LEVEL
(verknüpfte Bedienung)
Regler LEVEL (CH-1) und MIC LEVEL
(verknüpfte Bedienung)
MIC CH2 Level: Aufnahmepegel von Kanal 2
Rear2/WRR Level: Aufnahmepegel von Kanal 2
Einstellung
Regler
Einstellung
Regler
Side2
Regler LEVEL (CH-2)
Side2
Regler LEVEL (CH-2)
Front
Regler MIC LEVEL
Front
Regler MIC LEVEL
Front+Side2
Front+Side2
Regler LEVEL (CH-2) und MIC LEVEL
(verknüpfte Bedienung)
Regler LEVEL (CH-2) und MIC LEVEL
(verknüpfte Bedienung)
Hinweis
Hinweis
Wenn Sie die Bedienung der Regler LEVEL (CH-1/CH-2)
und MIC LEVEL miteinander verknüpft haben und der
Regler MIC LEVEL auf 0 steht, können keine
Audiosignale auf Kanal 1 und 2 aufgenommen werden.
Prüfen Sie die Position des Reglers MIC LEVEL, bevor
Sie die Regler LEVEL (CH-1/CH-2) einstellen.
Manuelles Einstellen des Tonpegels
vom Anschluss MIC IN
1
Stellen Sie den bzw. die verwendeten AUDIO INSchalter auf FRONT.
2
Stellen Sie den oder die AUDIO SELECT-Schalter für
die gewünschten in Schritt 1 ausgewählten Kanäle auf
MANUAL.
3
94
Drehen Sie den Regler MIC LEVEL und nehmen Sie
die Einstellung vor, so dass der Tonpegelmesser bis zu
–20 dB anzeigt, denn so erzielen Sie eine normale
Eingangslautstärke.
Einstellen des Tonpegels
Wenn Sie die Bedienung der Regler MIC LEVEL und
LEVEL (CH-1/CH-2) miteinander verknüpft haben und
die Regler LEVEL (CH-1/CH-2) auf 0 stehen, können
keine Audiosignale auf Kanal 1 und 2 aufgenommen
werden. Prüfen Sie die Position der Regler LEVEL (CH-1/
CH-2), bevor Sie den Regler MIC LEVEL einstellen.
Aufnehmen von Ton auf Kanal 3 und
4
Auswählen des Aufnahmetons
Sie können den auf den Audiokanälen 3 und 4
aufgenommenen Ton mit den Schaltern AUDIO IN CH-3/
CH-4 auswählen.
Schalter CH-3
Aufnahmeziel für Kanal 3
FRONT
Ton vom Mikrofon vorne
REAR
Am Anschluss AUDIO IN CH-1
eingespeiste Audiosignale
WIRELESS
Ton vom Funkmikrofon
Audio CH-3 Level: Aufnahmepegel für Kanal 3
Schalter CH-4
Aufnahmeziel für Kanal 4
FRONT
Ton vom Mikrofon vorne
Einstellung
Regler
REAR
Am Anschluss AUDIO IN CH-2
eingespeiste Audiosignale
Side3
Regler LEVEL (CH-3)
Front
Regler MIC LEVEL
WIRELESS
Ton vom Funkmikrofon
Front+Side3
Regler LEVEL (CH-3) und MIC LEVEL
(verknüpfte Bedienung)
Einstellen der Tonaufnahmepegel
Audio CH-4 Level: Aufnahmepegel für Kanal 4
Automatische Einstellung
Stellen Sie den Schalter AUDIO SELECT CH-3/4 auf
AUTO.
Einstellung
Regler
Side4
Regler LEVEL (CH-4)
Manuelle Einstellung
Front
Regler MIC LEVEL
1
Front+Side4
Regler LEVEL (CH-4) und MIC LEVEL
(verknüpfte Bedienung)
2
Stellen Sie den Schalter AUDIO SELECT CH-3/4 auf
MANUAL.
Sie können jetzt den Pegel der Audiokanäle 3 und 4 mit
den hier ausgewählten Reglern einstellen.
Wählen Sie die Regler zum Einstellen der Tonpegel
über „Audio CH3 Level“ und „Audio CH4 Level“
unter „Audio Input“ im Audio-Menü aus.
Im Folgenden ist die Beziehung zwischen der Einstellung des Schalters AUDIO IN CH-1/CH-2 und dem Aufnahmekanal
dargestellt.
AUDIO IN-Schalter am
Audiobedienbereich
CH-1/2/3/4
Front MIC
SelectMenü
AUDIO IN-Schalter am
Anschlussbereich
(Rückseite)
CH-1
CH-2
CH-1
CH-2
CH-3
CH-4
Mono
–
–
Mik. vorne
(Mono)
Mik. vorne
(Mono)
Mik. vorne
(Mono)
Mik. vorne
(Mono)
Stereo
–
–
Mik. vorne
(L-Ch)
Mik. vorne
(R-Ch)
Mik. vorne
(L-Ch)
Mik. vorne
(R-Ch)
–
LINE oder
MIC
LINE oder
MIC
LINE1 oder
MIC1
LINE2 oder
MIC2
LINE1 oder
MIC1
LINE2 oder
MIC2
–
AES/EBU
LINE oder
MIC
AES/EBU
1-1
AES/EBU
1-2
Kein Ton
LINE2 oder
MIC2
–
LINE oder
MIC
AES/EBU
LINE1 oder
MIC1
Kein Ton
AES/EBU
2-1
AES/EBU
2-2
–
AES/EBU
AES/EBU
AES/EBU
1-1
AES/EBU
1-2
AES/EBU
2-1
AES/EBU
2-2
Analog
–
–
–
Mono
Mono
Mono
Mono
Digital
–
–
–
CH-1
CH-2
CH-1
CH-2
FRONT
REAR
WIRELESS
Aufnahmekanal
LINE oder MIC: LINE oder MIC wird ausgewählt.
AES/EBU: AES/EBU wird ausgewählt.
Mono: Monauraler Ton
L-Ch/R-Ch: Mik. L-Ch/R-Ch
LINE1 oder MIC1: Vom CH-1-Anschluss eingespeistes LINE- oder MIC-Signal
LINE2 oder MIC2: Vom CH-2-Anschluss eingespeistes LINE- oder MIC-Signal
AES/EBU1-1: CH-1-Signal im AES/EBU-Signal, das vom CH-1-Anschluss eingespeist wird
AES/EBU1-2: CH-2-Signal im AES/EBU-Signal, das vom CH-1-Anschluss eingespeist wird
AES/EBU2-1: CH-1-Signal im AES/EBU-Signal, das vom CH-2-Anschluss eingespeist wird
AES/EBU2-2: CH-2-Signal im AES/EBU-Signal, das vom CH-2-Anschluss eingespeist wird
Einstellen des Tonpegels
95
Wichtige Hinweise zum
Betrieb
Umgebungsbedingungen für Gebrauch
und Lagerung
Die Lebensdauer des Elektrolytkondensators beträgt bei
normalen Betriebstemperaturen und normaler
Verwendung etwa 5 Jahre (8 Stunden pro Tag; 25 Tage pro
Monat). Falls die Nutzung die normale
Nutzungshäufigkeit überschreitet, ist die Lebensdauer ggf.
entsprechend geringer.
Schützen Sie das Gerät vor starken Stößen
Andernfalls kann es zu Schäden am Gehäuse oder internen
Bauteilen kommen.
Bei Problemen
Sollten am Gerät Störungen auftreten, wenden Sie sich an
Ihren Sony-Händler.
Umgebungsbedingungen für Betrieb und
Lagerung
Bewahren Sie das Gerät an einem klimatisierten Ort auf
einer ebenen Fläche auf.
Wenn das Gerät nass wird, stellen Sie sicher, dass es vor
dem Lagern vollständig trocken ist.
Verwenden oder lagern Sie das Gerät möglichst nicht an
Orten, die folgenden Bedingungen ausgesetzt sind:
• Extremer Hitze oder Kälte
• Hoher Luftfeuchtigkeit
• Starken Erschütterungen
• Starken Magnetfeldern in der Nähe
• Übermäßig viel direktem Sonnenlicht oder der Wärme
von Heizgeräten in der Nähe
Hinweis zum Akkukontakt
Der Batteriekontakt dieses Geräts (der Anschluss für
Akkus und Netzteile) ist ein Verbrauchsteil.
Das Gerät wird möglicherweise nicht richtig mit Strom
versorgt, wenn die Stifte des Batteriekontakts durch Stöße
oder Vibrationen verbogen oder deformiert sind, oder
wenn sie aufgrund längerer Verwendung im Freien
korrodiert sind.
Regelmäßige Kontrollen werden empfohlen, um richtige
Funktion und lange Lebensdauer des Geräts
sicherzustellen.
Wenden Sie sich für weitere Auskünfte über Kontrollen
am Gerät an Ihren Sony-Kundendienst oder -Händler.
96
Wichtige Hinweise zum Betrieb
Feuchtigkeitskondensation
Wenn das Gerät aus einer kalten Umgebung in einen
warmen Raum gebracht wird oder die
Umgebungstemperatur schnell ansteigt, kann sich auf der
Oberfläche des Geräts bzw. im Inneren des Geräts
Feuchtigkeit ansammeln (Kondensation). Schalten Sie in
diesem Fall das Gerät aus, und warten Sie, bis die
Kondensation verdunstet ist, ehe Sie das Gerät verwenden.
Die Verwendung des Gerätes bei gebildetem
Kondenswasser kann zu Beschädigungen führen.
Technische Daten
VF-Anschlussschutz (Teilenummer: A-2068-183-) (1)
Schulterriemen (1)
Bedienungsanleitung (1)
Allgemeines
Sonderzubehör
Abmessungen (B × H × T)
ca. 170 × 182 × 371 mm
(siehe Seite 98)
Gewicht
ca. 2,2 kg (Gehäuse und Akkuadapter)
Betriebsspannung
12 V Gleichstrom (11 V bis 17 V)
Leistungsaufnahme
ca. 3,8 W (Gehäuse und Akkuadapter)
Betriebstemperatur
0 °C bis 40 °C
Luftfeuchtigkeit bei Betrieb
20 % bis 90 %
Lagertemperatur
–20 °C bis +60 °C
UHF-Synthesizer-Tuner WRR-855
Digitaler Funkempfänger DWR-S02D
Tragbares Speichergerät AXS-R5
Netzteil AC-DN10, AC-DN2B
Akku BP-FL75, BP-L80S
Ladegerät BC-L70, BC-L90
Mikrofon ECM-680S, ECM-678, ECM-674
Mikrofonadapterkabel EC-0.5X3F5M (für ECM-678/674)
Ein-/Ausgänge
IF-Erweiterungsanschluss
144-polig, mit Stromversorgung
Audioeingang XLR, 3-polig (×2), LINE / AES/EBU /
MIC / MIC+48V wählbar
LINE: +4/0/–3 dBu
AES/EBU: AES3-Standard
Audioausgang XLR, 5-polig, +4/0/–3 dBu
(symmetrisch)
Mikrofoneingang
XLR, 5-polig, –70 dBu bis –30 dBu
Kopfhörerausgang
Stereominibuchse
WRR
D-Sub, 15-polig
Analog, CH1: –40 dBu
Digital, CH1/CH2: –40 dBFS
Akkuadapter
Gleichstromeingang
XLR, 4-polig, 12 V Gleichstrom
Gleichstromausgang
4-polig, 12 V Gleichstrom (maximaler
Nennstrom: 1,8 A)
LIGHT
2-polig, 12 V Gleichstrom (weniger als
50 W)
Mitgeliefertes Zubehör
Akkuadapter (Teilenummer: A-2067-625-) (1)
Stange (Φ 15 mm × 250 mm) (2)
Adapter für Kopfhörerstecker (L-förmig) (1)
Griff (Teilenummer: A-2068-023-) (1)
Mikrofonhalter (am Griff angebracht)
(Teilenummer: A-2068-182-) (1)
Gleitplatte (Teilenummer: A-2070-502-) (1)
Massbandhaken (Teilenummer: 4-458-622-) (1)
Änderungen, die dem technischen Fortschritt dienen,
bleiben vorbehalten.
Hinweise
• Bestätigen Sie vor dem Gebrauch immer, dass das
Gerät richtig arbeitet. SONY KANN KEINE
HAFTUNG FÜR SCHÄDEN JEDER ART,
EINSCHLIESSLICH ABER NICHT BEGRENZT
AUF KOMPENSATION ODER ERSTATTUNG,
AUFGRUND VON VERLUST VON AKTUELLEN
ODER ERWARTETEN PROFITEN DURCH
FEHLFUNKTION DIESES GERÄTS ODER AUS
JEGLICHEM ANDEREN GRUND, ENTWEDER
WÄHREND DER GARANTIEFRIST ODER NACH
ABLAUF DER GARANTIEFRIST,
ÜBERNEHMEN.
• SONY KANN KEINE HAFTUNG FÜR
ANSPRÜCHE JEDER ART VON DEN
BENUTZERN DIESES GERÄTS ODER VON
DRITTER SEITE ÜBERNEHMEN.
• SONY KANN KEINE HAFTUNG FÜR DIE
BEENDIGUNG ODER EINSTELLUNG VON
DIENSTLEISTUNGEN BEZÜGLICH DIESES
GERÄTS GLEICH AUS WELCHEM GRUND
ÜBERNEHMEN.
SONY KANN KEINE HAFTUNG FÜR SCHÄDEN
JEDER ART DURCH UNTERLASSENE
GEEIGNETE SICHERHEITSMASSNAHMEN AN
ÜBERTRAGUNGSGERÄTEN, DURCH
UNVERMEIDBARE DATENPREISGABE
AUFGRUND DER
ÜBERTRAGUNGSSPEZIFIKATIONEN ODER
DURCH SICHERHEITSPROBLEME JEGLICHER
ART ÜBERNEHMEN.
Technische Daten
97
Abmessungen
Gerät: mm
76,8
57
79,2
66
130
182
274,4
295,1
23,1
93,7
76
261,3
351,1
208,7
98
Technische Daten
370,9
32,8
Italiano
Leggere attentamente questo manuale prima di utilizzare
l’unità, e conservarlo per riferimenti futuri.
AVVERTENZA
Per ridurre il rischio di incendi o scosse
elettriche, non esporre questo apparato
alla pioggia o all’umidità.
Per evitare scosse elettriche, non aprire
l’involucro. Per l’assistenza rivolgersi
unicamente a personale qualificato.
ATTENZIONE
Se una batteria non viene sostituita correttamente vi è il
rischio di esplosione. Sostituire una batteria con una
uguale o simile seguendo le raccomandazioni del
produttore.
Per lo smaltimento della batteria, attenersi alle norme in
vigore nel paese di utilizzo.
Evitate di installare l’apparecchio in uno spazio limitato,
tipo in una libreria o in un mobiletto incassato.
IT
AVVERTENZA
Le batterie non devono essere esposte a fonti di calore
eccessivo come luce solare diretta, fuoco, ecc.
Per i clienti in Europa
Questo prodotto recante il marchio CE è conforme sia alla
direttiva sulla compatibilità elettromagnetica (EMC)
emesse dalla Commissione della Comunità Europea.
La conformità a queste direttive implica la conformità alle
seguenti normative europee:
• EN55103-1 : Interferenza elettromagnetica (Emissione)
• EN55103-2 : Sensibilità ai disturbi elettromagnetici
(Immunità)
Questo prodotto è destinato all’uso nei seguenti ambienti
elettromagnetici: E1 (residenziali), E2 (commerciali e
industriali leggeri), E3 (esterni urbani) e E4 (ambienti
EMC controllati, ad esempio studi televisivi).
ATTENZIONE
I campi elettromagnetici di particolari frequenze
potrebbero interferire con l’immagine e l’audio di questa
unità.
Per i clienti in Europa
Produttore: Sony Corporation, 1-7-1 Konan Minato-ku
Tokyo, 108-0075 Giappone
Per la conformità del prodotto in ambito UE: Sony
Deutschland GmbH, Hedelfinger Strasse 61, 70327
Stuttgart, Germania
99
Tabella dei contenuti
Presentazione ................................................................... 101
Denominazione e funzione delle parti ............................ 102
Pannello anteriore................................................................ 102
Pannello posteriore.............................................................. 103
Sezione comandi (anteriore) ............................................... 104
Sezione comandi (laterale).................................................. 104
Sezione comandi audio ....................................................... 105
Sezione connettori (posteriore) ........................................... 106
Maniglia .............................................................................. 106
Adattatore della batteria ...................................................... 107
Collegamento e impostazione......................................... 108
Alimentazione ..................................................................... 108
Montaggio dell’adattatore della batteria per il
CBK-55BK ................................................................ 108
Uso dell’alimentazione CA (alimentazione DC IN) ........... 109
Uso di AXS-R5 ................................................................... 109
Montaggio su PMW-F55/F5 ............................................... 109
Montaggio della maniglia ................................................... 110
Montaggio del mirino.......................................................... 110
Uso di un microfono esterno ............................................... 111
Montaggio del sintonizzatore UHF portatile (per sistemi
microfonici UHF wireless) ........................................ 111
Collegamento dell’apparato audio di ingresso di linea ....... 113
Montaggio del treppiede ..................................................... 113
Collegamento di un illuminatore video............................... 114
Uso della tracolla................................................................. 114
Regolazione della posizione della spallina imbottita .......... 115
Utilizzo dell’adattatore spina della cuffia ........................... 115
Operazioni di base del menu di configurazione ............ 116
Regolazione del livello audio .......................................... 117
Regolazione manuale dei livelli audio degli ingressi audio
provenienti dai connettori AUDIO IN CH-1/CH-2 ... 117
Regolazione manuale del livello audio del connettore MIC IN
................................................................................... 117
Registrazione audio sui canali 3 e 4.................................... 118
Note importanti sul funzionamento ................................ 120
Specifiche tecniche .......................................................... 121
Dimensioni .......................................................................... 122
100
Tabella dei contenuti
Presentazione
Il kit CBK-55BK è un accessorio che migliora la stabilità
e la funzionalità nell’uso a spalla della telecamera, dopo
averlo montato sulla PMW-F55/F5.
Il CBK-55BK dispone di vari connettori di ingresso/uscita
e interruttori per comandare manualmente la PMW-F55/
F5 mentre si guarda nel mirino durante le riprese con la
PMW-F55/F5 portata a spalla, oltre all’alloggiamento per
ricevitore audio wireless e un pannello di controllo audio.
La sezione di comando anteriore e la spallina imbottita
possono scorrere di 70 mm in direzione fronte-retro.
L’equilibrio si mantiene facilmente durante le riprese a
spalla con la PMW-F55/F5 quando monta obiettivi PL o i
grandi portatili B4.
Presentazione
101
Denominazione e funzione delle parti
Pannello anteriore
a Connettore AUDIO IF
Per il collegamento tra CBK-55BK e PMW-F55/F5.
e Sezione comandi (anteriore) (vedere “Sezione
comandi (anteriore)”.)
b Connettore MIC IN (ingresso microfono) (+48 V)
(tipo XLR, 5 pin, femmina)
A questo connettore va collegato un microfono stereo.
L’alimentazione (+48 V) è fornita attraverso il connettore.
f Sezione comandi audio (vedere “Sezione comandi
audio”.)
c Levetta di fermo dell’asta
Usata per inserire o rimuovere le aste Φ 15.
Per montare le aste, girare la levetta fino a bloccarle nella
loro sede. Se la levetta fosse in una posizione che rende
difficile girarla, estrarla lateralmente e ruotarla su una
posizione migliore, prima di riposizionarla e continuare a
girare.
Nota
Non stringere forte la levetta di fermo se le aste non sono
inserite.
d Aste Φ 15
Per il montaggio di matte box, follow focus e altri
accessori.
102
Denominazione e funzione delle parti
g Coperchio di protezione della sezione comandi
audio
Aprire per accedere alla sezione comandi audio (vedere
pagina 105).
h Connettore IF di espansione
Per il collegamento tra CBK-55BK e PMW-F55/F5.
i Sezione comandi (laterale) (vedere “Sezione
comandi (laterale)”.)
j Attacchi a rosetta (sinistro e destro)
Per il montaggio di impugnature generiche.
k Attacco del treppiede
Montare l’adattatore del treppiede (opzionale) per
utilizzare il CBK-55BK su treppiede.
Pannello posteriore
a Attacco del sintonizzatore UHF portatile
Montaggio del sintonizzatore UHF portatile (vedere
pagina 111).
h Manopola del cursore AUDIO
Per montare il CBK-55BK sulla PMW-F55/F5 (vedere
pagina 109).
b Attacco adattatore della batteria
Montaggio dell’adattatore della batteria fornito in
dotazione (vedere pagina 108).
i Levetta di blocco della telecamera
Per montare il CBK-55BK sulla PMW-F55/F5 (vedere
pagina 109).
c Spia TALLY (registrazione) (rossa)
Accesa durante la registrazione. La spia lampeggia in caso
di funzionamento anomalo nel CBK-55BK o nella PMWF55/F5. (Per i dettagli sulle anomalie, consultare le
Istruzioni per l’uso della PMW-F55/F5.)
j Spallina imbottita
Sollevare la levetta di fissaggio della spallina imbottita,
per regolare la posizione lungo la direzione fronte-retro.
La posizione regolabile consente la massima comodità
durante l’azionamento della PMW-F55/F5 a spalla (vedere
pagina 115).
d Connettore IF di espansione
Per il collegamento dell’adattatore della batteria o
dell’AXS-R5.
e Sezione connettori (posteriore) (vedere “Sezione
connettori (posteriore)”.)
f Pulsante di rilascio/leva di espulsione
Per montare il CBK-55BK sulla PMW-F55/F5 (vedere
pagina 109).
g Blocco anteriore
La posizione del blocco anteriore può essere regolata
lungo la direzione fronte-retro, rilasciando le levetta di
fissaggio del blocco anteriore.
Regolare la posizione del blocco anteriore in modo da
consentire di manovrare comodamente il CBK-55BK
quando si porta a spalla (vedere pagina 115).
Denominazione e funzione delle parti
103
Sezione comandi (anteriore)
Premendo l’interruttore ancora una volta su BLACK
durante la regolazione automatica di bilanciamento del
nero, la regolazione viene cancellata e le impostazioni di
bilanciamento del nero tornano a quelle iniziali.
e Manopola MENU
Permette di cambiare la selezione della voce o di una
selezione all’interno del menu (vedere pagina 116).
Sezione comandi (laterale)
a Pulsante REC START (inizio registrazione)
Premere per iniziare la registrazione. Premere di nuovo per
arrestare la registrazione. Ha gli stessi effetti del pulsante
REC posto sull’obiettivo.
b Interruttore SHUTTER
Posizionarlo su ON per azionare l’otturatore elettronico.
Premere SELECT per impostare la velocità dell’otturatore
elettronico. All’azionamento dell’interruttore, sullo
schermo del mirino compare la nuova impostazione per
circa tre secondi.
Se nel menu Camera “Select” in “Shutter” è impostato su
“Step” e l’interruttore è spinto su SELECT è possibile
cambiare la velocità dell’otturatore, mentre quando nel
menu Camera “Select” in “Shutter” è impostato su
“Continuous” e l’interruttore è spinto su SELECT,
compare la velocità dell’otturatore corrente ed è possibile
cambiarla girando la manopola MENU.
c Comando MIC LEVEL (livello del microfono)
Regola il livello di ingresso dei canali audio 1, 2, 3 e 4.
d Interruttore AUTO W/B BAL (regolazione
automatica del bilanciamento bianco/nero)
Attiva le funzioni di regolazione automatica del
bilanciamento bianco/nero.
• WHITE: regola automaticamente il bilanciamento del
bianco. Quando l’interruttore WHITE BAL (vedere
pagina 105) è posto su A o B, l’impostazione di
bilanciamento del bianco viene salvata nella memoria
corrispondente. Quando l’interruttore WHITE BAL è
posto su PRST, la funzione della regolazione automatica
di bilanciamento del bianco è disattivata.
• BLACK: regola automaticamente l’impostazione del
nero e del bilanciamento del nero.
Premendo l’interruttore ancora una volta su WHITE
durante la regolazione automatica di bilanciamento del
bianco, la regolazione viene cancellata e le impostazioni di
bilanciamento del bianco tornano a quelle iniziali.
104
Denominazione e funzione delle parti
a Selettore GAIN/EI
Permette di commutare il guadagno dell’amplificatore
video, per adeguarlo alle condizioni di illuminazione
durante la ripresa. Il guadagno corrispondente alle
impostazioni H, M ed L può essere selezionato con il menu
della PMW-F55/F5. (Per i dettagli sulle impostazioni,
consultare le Istruzioni per l’uso della PMW-F55/F5.)
Permette di commutare i 3 tipi di valore EI preimpostati
durante la modalità Cine EI.
b Interruttore MENU ON/OFF
Per mostrare il menu sullo schermo del mirino o la
schermata del segnale di test. Ogni volta che si preme
l’interruttore, la schermata del menu si accende e si
spegne.
c Interruttori ASSIGN. (assegnabili) 6/7/8
Assegnare le funzioni desiderate agli interruttori, tramite
“Assignable Button” del menu System.
Agli interruttori ASSIGN. 6/7/8 viene assegnato “Off”
come impostazione di fabbrica. Gli interruttori ASSIGN.
6/7/8 sono dotati di una spia che indica se una funzione è
stata assegnata all’interruttore (accesa) o no (spenta). (Per
i dettagli sulle impostazioni, consultare le Istruzioni per
l’uso della PMW-F55/F5.)
d Interruttore ASSIGN. (assegnabile) 5
Assegnare la funzione desiderata all’interruttore, tramite
“Assignable Button” del menu System.
“Color Bars” (segnale di uscita delle color bar) viene
assegnato all’interruttore ASSIGN. 5, come impostazione
di fabbrica. (Per i dettagli sulle impostazioni, consultare le
Istruzioni per l’uso della PMW-F55/F5.)
e Interruttore WHITE BAL (memoria
bilanciamento del bianco)
Comanda la regolazione di bilanciamento del bianco.
• PRST: permette di regolare la temperatura di colore sul
valore preimpostato (impostazione predefinita di
fabbrica: 3200K). Da utilizzare quando non c’è tempo
per regolare il bilanciamento del bianco.
• A o B: richiama le impostazioni di regolazione di
bilanciamento del bianco già salvate in A o B. Premere
l’interruttore AUTO W/B BAL (vedere pagina 104) su
WHITE per regolare automaticamente il bilanciamento
del bianco, e salvare le impostazioni di regolazione nella
memoria A o nella memoria B.
In modalità Cine EI, permette di commutare tra Preset
3200K, Preset 4300K e Preset 5500K.
Il bilanciamento del bianco viene impostato sulle
impostazioni seguenti, come impostazione predefinita di
fabbrica in modalità Cine EI.
PRST: Preset 3200K
A: Preset 4300K
B: Preset 5500K
f Interruttore MENU CANCEL/BACK
Con l’interruttore premuto su CANCEL/BACK, la pagina
torna all’ordinamento precedente. Le impostazioni
precedenti al cambio vengono cancellate.
Sezione comandi audio
a Interruttori MONITOR (selezione monitor audio)
Grazie alla combinazione dei due interruttori è possibile
scegliere l’audio desiderato, da sentire con l’altoparlante
incorporato o con le cuffie.
Posizione dell’interruttore lato destro: CH-1/2
Posizione
Uscita audio
dell’interruttore
lato sinistro
CH-1/CH-3
Canale audio 1
MIX
Canali audio 1 e 2 mixati (stereo)
CH-2/CH-4
Canale audio 2
Posizione dell’interruttore lato destro: CH-3/4
Posizione
Uscita audio
dell’interruttore
lato sinistro
CH-1/CH-3
Canale audio 3
MIX
Canali audio 3 e 4 mixati (stereo)
CH-2/CH-4
Canale audio 4
* Collegando le cuffie stereo con il jack HEADPHONE, l’audio si potrà
sentire in stereo. (Per i dettagli sulle impostazioni, consultare le Istruzioni
per l’uso della PMW-F55/F5).
b Manopole LEVEL CH-1/CH-2/CH-3/CH-4 (livello
di registrazione canali audio 1/2/3/4)
È possibile regolare i livelli audio da registrare sui canali
1, 2, 3 e 4 quando gli interruttori AUDIO SELECT CH-1/
CH-2 e AUDIO SELECT CH-3/CH-4 sono posti su
MANUAL.
c Interruttori AUDIO SELECT CH-1/CH-2 (scelta
del metodo di regolazione dei canali audio 1/2)
Selezionare il metodo di regolazione del livello audio per i
canali audio 1 e 2.
• AUTO: regolazione automatica
• MANUAL: regolazione manuale
Nota
Il livello audio di registrazione viene fissato per il canale
su cui è stato selezionato il segnale AES/EBU per i segnali
di ingresso audio.
d Manopola MONITOR (regolazione volume del
monitor)
Controlla il volume sonoro inviato all’altoparlante
incorporato o alle cuffie. Quando la manopola è ruotata
sulla posizione di minimo non si sente niente.
e Interruttore AUDIO SELECT CH-3/4 (scelta del
metodo di regolazione dei canali audio 3/4)
Selezionare il metodo di regolazione del livello audio per i
canali audio 3 e 4 contemporaneamente.
• AUTO: regolazione automatica
• MANUAL: regolazione manuale
Denominazione e funzione delle parti
105
f Interruttori AUDIO IN CH-1/CH-2/CH-3/CH-4
(selezione ingresso dei canali audio 1/2/3/4)
Selezionare i segnali di ingresso audio da registrare sui
canali audio 1, 2, 3 e 4.
• FRONT: segnali di ingresso audio provenienti dal
microfono collegato al connettore MIC IN
• REAR: segnali di ingresso audio provenienti da un
dispositivo audio collegato ai connettori AUDIO IN CH1/CH-2
• WIRELESS: segnali di ingresso audio provenienti dal
sintonizzatore UHF portatile, se è stato installato
Sezione connettori (posteriore)
c Coperchio inferiore
Serve a proteggere i cavi collegati ai connettori del
pannello posteriore.
Se si allentano le viti sul fondo del CBK-55BK, si può
regolare la posizione del coperchio in base alla dimensione
e alla forma delle spine del microfono o del cavo audio.
Dopo aver regolato la posizione, stringere le viti per
assicurare il coperchio.
d Interruttore +48V/OFF (accensione/spegnimento
alimentazione 48 V)
Permette la commutazione tra le impostazioni seguenti, in
base al microfono collegato.
• +48V: per collegare un microfono con alimentazione da
48 V
• OFF: per collegare un microfono che non richiede
alimentazione da 48 V
e Connettore LIVE AUDIO OUT (tipo XLR, 5 pin,
maschio)
Emette i segnali audio di ingresso sui canali audio 1 e 2 o
sui canali audio 3 e 4.
I segnali audio sono selezionati con l’interruttore
MONITOR.
Nota
a Selettori AUDIO IN
Selezionare la sorgente audio collegata ai connettori
AUDIO IN CH-1/CH-2.
• LINE: per collegare una sorgente di segnale audio
esterna, per esempio un amplificatore stereo
• AES/EBU: per collegare una sorgente di segnale audio
digitale esterna
• MIC: per collegare un microfono
Il sonoro del playback non può essere emesso.
f Connettori AUDIO IN CH-1/CH-2 (ingresso canali
audio 1 e 2) (tipo XLR, 3 pin, femmina)
Collegare un dispositivo audio o un microfono.
Maniglia
b Presa HEADPHONE (LIVE MON) (stereo, mini)
È possibile monitorare il sonoro E-E* collegando le cuffie.
Se è scattato un allarme, si può sentire il tono di allarme
attraverso le cuffie. L’inserimento delle cuffie nella presa
esclude automaticamente l’altoparlante incorporato della
PMW-F55/F5.
* E-E: abbreviazione di “Electric-to-Electric”. In modalità
E-E, l’ingresso dei segnali audio e video del camcorder
viene emesso dopo aver attraversato solo i circuiti
elettrici interni. Questo permette di controllare i segnali
di ingresso.
a Sostegno del microfono
Montare un microfono esterno (vedere pagina 111).
Nota
Il sonoro del playback non può essere emesso.
b Anello di posizionamento da sinistra a destra del
mirino
Allentare questo anello per regolare la posizione da sinistra
a destra del mirino (vedere pagina 110).
c Pattino di inserimento del mirino
Montaggio del mirino (vedere pagina 110).
106
Denominazione e funzione delle parti
d Inserimento della tracolla
Montaggio della tracolla in dotazione (vedere pagina 114).
f Sezione di montaggio del pacco batterie
g Connettore DC OUT
e Fori delle viti per il montaggio accessori
• Tipo di vite: 1/4-20UNC (× 9)
• Tipo di vite: 3/8-16UNC (× 8)
• Lunghezza del fissaggio: 9 mm o minore
Nota
Per scegliere un dispositivo da collegare, usare quelli con
assorbimento massimo di 1,8 A.
Nota
Non stringere troppo gli accessori montati. Potrebbero
rovinarsi le filettature delle viti.
Adattatore della batteria
Per il montaggio e la rimozione dell’adattatore della
batteria, vedere “Montaggio dell’adattatore della batteria
per il CBK-55BK” a pagina 108.
a Pulsante di rilascio/leva di espulsione
b Levetta di rilascio batteria
c Connettore IF di espansione
d Connettore DC IN (vedere pagina 109)
e Connettore LIGHT (illuminatore video) (2 pin,
femmina)
È possibile collegare un illuminatore video avente potenza
massima di 50 W, per esempio l’Ultralight 2 della Anton
Bauer o equivalente (vedere pagina 114).
Nota
Il tasto ON/OFF dell’illuminatore video non è
interbloccato con la registrazione.
Denominazione e funzione delle parti
107
2
Collegamento e
impostazione
Inserire la sporgenza dell’adattatore della batteria
nella fessura sul retro del CBK-55BK (1), quindi
abbassare la leva di espulsione (2) fino a fermare
l’adattatore della batteria con il pulsante di rilascio.
Alimentazione
È possibile usare un pacco batterie o l’alimentazione CA
mediante un adattatore di corrente.
Per sicurezza, utilizzare esclusivamente i seguenti pacchi
batterie e adattatori CA Sony.
Pacco batterie agli ioni di litio
BP-FL75
BP-L80S
Adattatore di corrente
AC-DN2B
AC-DN10
Montaggio dell’adattatore della
batteria per il CBK-55BK
1
Premere il pulsante di rilascio (1) dell’adattatore
della batteria per far fuoriuscire la leva di espulsione,
e quindi sollevarla (2).
Sezione di
montaggio del
pacco batterie
Levetta di
rilascio batteria
Note
• Prima di montare l’adattatore della batteria,
verificare che la leva di espulsione sia sollevata.
• Prima di abbassare la leva di espulsione, verificare
che i quattro gancetti siano fissati saldamente. Se i
quattro gancetti non fossero fissati saldamente, il
collegamento sarà insufficiente e potrebbero
verificarsi danni al CBK-55BK e alla batteria.
Utilizzo del pacco batterie
Inserire il pacco batterie nella corrispondente sezione di
montaggio dell’adattatore della batteria, poi far scorrere il
pacco in basso per bloccarlo al suo posto.
Note
• Prima dell’uso, caricare il pacco batterie con il suo
caricatore.
• Un pacco batterie caldo appena utilizzato potrebbe non
essere in grado di ricaricarsi completamente.
Rimozione del pacco batterie
Sbloccare il pacco batterie facendolo scorrere in alto
mentre si preme la levetta di rilascio della batteria, quindi
rimuoverlo.
Rimozione dell’adattatore della batteria
Premere il pulsante di rilascio e sollevare la leva di
espulsione, quindi rimuovere l’adattatore della batteria
trascinandolo mentre si fa scorrere verso l’alto.
108
Collegamento e impostazione
2
Nota
Rimuovere l’adattatore della batteria sostenendolo con la
mano.
Rilasciare il fermo della levetta di blocco della
telecamera, della leva di espulsione e della manopola
del cursore AUDIO.
Leva di espulsione
Uso dell’alimentazione CA
(alimentazione DC IN)
Il CBK-55BK può funzionare con alimentazione in CA,
utilizzando l’adattatore di corrente AC-DN2B/AC-DN10
(opzionale).
Manopola del cursore AUDIO
Levetta di blocco della telecamera
Uso di AXS-R5
Per il montaggio di AXS-R5, consultare le Istruzioni per
l’uso della PMW-F55/F5.
Montaggio su PMW-F55/F5
Per i dettagli sull’uso della PMW-F55/F5, far riferimento
alle Istruzioni per l’uso fornite con la PMW-F55/F5.
3
Appoggiare la PMW-F55/F5 sul CBK-55BK, quindi
farlo scorrere indietro.
Appoggiare la PMW-F55/F5 allineandola alla
scanalatura della piastra laterale montata sul fondo del
PMW-F55/F5 e del CBK-55BK, quindi far scorrere la
PMW-F55/F5 indietro, fino a fermarla saldamente.
Note
• Richiede il software PMW-F55/F5 versione 5.0 o
successiva.
• Il montaggio o la rimozione dalla PMW-F55/F5 va fatto
ad alimentazione spenta.
1
Montare la piastrina laterale in dotazione sul fondo
della PMW-F55/F5, avvitandola con una moneta o
simile.
Piastrina laterale
Nota
Attenzione al verso corretto di montaggio.
Collegamento e impostazione
109
4
Fissaggio della PMW-F55/F5.
1 Girare la levetta di blocco della telecamera.
2 Abbassare la leva di espulsione fino a bloccarla.
3 Premere la manopola del cursore AUDIO.
Montaggio del mirino
Mirini disponibili per la PMW-F55/F5
• DVF-L350: mirino LCD a colori
• DVF-L700: mirino LCD a colori
• DVF-EL100: mirino OLED a colori
Precauzioni
Non lasciare il CBK-55BK con l’oculare del mirino rivolto
verso il sole. La luce diretta del sole che passa attraverso
l’oculare viene messa a fuoco dal mirino e potrebbe
provocare un incendio.
Note
• Montare/rimuovere il mirino mentre la PMW-F55/F5 è
spenta.
• Nell’utilizzare la PMW-F55/F5 con DVF-L700
montato, accenderla quando l’interruttore POWER del
DVF-L700 si trova su ON.
Montaggio della maniglia
1
Rimuovere la maniglia montata sulla PMW-F55/F5.
2
Montare la maniglia del CBK-55BK per mezzo del
bullone a brugola (dimensione della chiave esagonale:
3/16).
Per i dettagli sul montaggio del mirino, far rifermento alle
Istruzioni per l’uso del mirino.
1
Pattino del mirino
2
110
Collegamento e impostazione
Allentare l’anello di fissaggio del pattino del mirino,
allineare la scanalatura del mirino e quindi montarlo
facendolo scorrere orizzontalmente.
Stringere l’anello di fissaggio dopo aver scelto la
posizione sinistra e destra del mirino, poi collegare il
cavo del mirino sul connettore VF della PMW-F55/F5.
Rimozione del mirino
Sostegno del microfono
Allentare l’anello di fissaggio del mirino, sollevare il
fermo, quindi rimuovere il mirino facendolo scorrere nella
direzione opposta rispetto a quella di montaggio.
Montaggio della protezione del connettore
VF
Montare la protezione per il connettore VF con il gancetto
del nastro di misura, fornito in dotazione con la PMW-F55/
F5 e il CBK-55BK, e la vite della protezione del
connettore VF.
Gancetto di misura nastro
Protezione del connettore VF
Montaggio del microfono
1
Aprire il coperchio della sezione di montaggio del
microfono esterno, tirando in alto la manopola.
2
Montare il microfono, poi fissarlo chiudendo il
coperchio della sezione di montaggio del microfono
esterno come era prima.
3
Innestare il cavo del microfono nel connettore MIC
IN, quindi impostare l’interruttore AUDIO IN (vedere
pagina 106) sul canale su cui si vuole registrare
l’audio proveniente da questo microfono su FRONT.
Uso di un microfono esterno
È possibile utilizzare il microfono stereo ECM-680S/678/
674 (opzionale), montandolo sul proprio sostegno fornito
in dotazione.
Nota
Per montare l’ECM-678/674, occorre il cavo di
conversione (EC-0.5X3F5M).
Montaggio del sostegno del microfono
Allineare il sostegno del microfono alla maniglia, quindi
fissarlo stringendo la vite saldamente.
Montaggio del sintonizzatore UHF
portatile (per sistemi microfonici
UHF wireless)
Per usare un sistema microfonico UHF wireless Sony,
spegnere la PMW-F55/F5 e poi inserire uno dei seguenti
sintonizzatori UHF portatili.
• Ricevitore digitale wireless DWR-S02D
• Unità sintonizzatore UHF sintetizzato WRR-855S
• Sintonizzatore Diversity UHF sintetizzato WRR-860A/
861/862
Collegamento e impostazione
111
Per i dettagli su questi apparati, far riferimento alle loro
Istruzioni per l’uso.
Inserimento del WRR-862 (quando si usa il
pacco batterie BP-L80S)
1
Nota
Il supporto per sintonizzatore WRR (numero di parte
A-8278-057-B) è necessario per montare il sintonizzatore
opzionale WRR-862.
Per i dettagli, contattare il proprio rivenditore o un centro
assistenza Sony.
1 Stringere con un cacciavite tipo Phillips le quattro
viti poste sull’adattatore del sintonizzatore, come
qui illustrato.
Inserimento di DWR-S02D o WRR-855S
1
Montaggio del supporto per sintonizzatore WRR (non
fornito; numero di parte A-8278-057-B) sul retro del
CBK-55BK.
Nota
Verificare di avere stretto saldamente tutte le quattro
viti.
Rimuovere le quattro viti di fissaggio che sostengono
il coperchio dell’alloggiamento del sintonizzatore/
ricevitore portatile.
2 Allentare le viti di regolazione dell’adattatore del
sintonizzatore.
3 Regolare la posizione dell’adattatore del
sintonizzatore per poter montare il pacco batterie
BP-L80S e stringere le viti di regolazione per
serrarle al loro posto.
4 Montare la piastra di montaggio fornita con il
WRR-862.
Per quanto riguarda il supporto per sintonizzatore
WRR (numero di parte A-8278-057-B), contattare un
rivenditore o un centro di assistenza Sony.
2
Inserire il DWR-S02D o il WRR-855S
nell’alloggiamento ed avvitare le quattro viti di
fissaggio.
BP-L80S
Viti di
regolazione
DWR-S02D o WRR-855S
Piastra di
montaggio (fornita
con WRR-862)
Cacciavite tipo
Phillips
2
3
112
Impostare il selettore AUDIO IN sul canale in cui si
desidera immettere i segnali audio su WIRELESS
(vedere pagina 106).
Collegamento e impostazione
Montaggio del pacco batterie.
Per il montaggio del pacco batterie, vedere “Utilizzo
del pacco batterie” a pagina 108.
3
Montaggio del sintonizzatore sul suo supporto WRR.
Montaggio del treppiede
1
Fissare l’adattatore del treppiede VCT-14/U14
(opzionale) al treppiede.
Adattatore del treppiede
WRR-862
4
5
Collegare il cavo di alimentazione del sintonizzatore
sul connettore DC OUT dell’adattatore della batteria
in dotazione, ed il cavo di uscita audio al connettore
AUDIO IN CH-1 o CH-2.
Impostare gli interruttori nel modo seguente.
Attacco telecamera
2
Montare il CBK-55BK sull’adattatore del treppiede.
• Impostare il selettore AUDIO IN del canale a cui il
cavo di uscita audio è stato collegato su MIC.
• Impostare l’interruttore AUDIO IN CH-1/CH-2/
CH-3/CH-4 del canale a cui il cavo di uscita audio è
stato collegato su REAR.
Se la funzione di rilevamento automatico di
collegamento XLR è attiva, il segnale di ingresso
della registrazione audio sarà selezionato
automaticamente e questa impostazione non è
necessaria.
Collegamento dell’apparato audio di
ingresso di linea
Collegare il connettore di uscita audio dell’apparato audio
che fornisce il segnale di ingresso di linea al connettore
AUDIO IN CH-1 o CH-2.
Impostazione degli interruttori
Impostare il selettore AUDIO IN del canale a cui la
sorgente del segnale audio è stato collegato su LINE.
Far scorrere il CBK-55BK in avanti, lungo la
scanalatura nell’adattatore fino allo scatto.
3
Spostare il CBK-55BK avanti e indietro per verificare
che non si possa staccare.
Collegamento e impostazione
113
Rimozione del CBK-55BK dall’adattatore
del treppiede
Uso della tracolla
Tenere premuto il pulsante rosso e tirare la levetta in
direzione della freccia.
Montaggio della tracolla
1
Inserire una molletta su uno degli attacchi della
tracolla.
Sollevare la tracolla per bloccare gli attacchi.
Pulsante rosso
Levetta
Nota
Molletta
Il perno dell’adattatore del treppiede potrebbe rimanere in
posizione di inserimento anche dopo aver rimosso il CBK55BK. Se questo dovesse accadere, premere il pulsante
rosso e spostare la levetta come indicato, fino a quando il
perno torna in posizione abbassata. Se il perno rimane in
posizione di inserimento, non è possibile montare il CBK55BK sull’adattatore del treppiede.
2
Inserire l’altra molletta sull’attacco della tracolla
all’altro lato dell’impugnatura, come già fatto al passo
1.
Collegamento di un illuminatore
video
Insieme al CBK-55BK è possibile utilizzare l’Ultralight 2
della Anton Bauer o un illuminatore video equivalente
(alimentato da tensione a 12 V, con potenza massima di 50
W).
L’uscita del connettore LIGHT sul CBK-55BK è
comandata da un segnale a 12 V anche se il CBK-55BK
viene alimentato con tensione superiore a 12 V (mediante
il connettore DC IN o il pacco batterie). La luminosità o la
temperatura di colore della luce non si modificano con
l’aumento della tensione.
Note
• Non usare illuminatori video di potenza superiore a
50 W.
• La luminosità o la temperatura di colore della luce si
modifica se la tensione (fornita mediante il connettore
DC IN o il pacco batterie) scende sotto a 12 V.
114
Collegamento e impostazione
Rimozione della tracolla
Premere qui e tirare nella direzione
mostrata dalla freccia per rilasciare.
Regolazione della posizione della
spallina imbottita
È possibile modificare la posizione del CBK-55BK e della
spallina imbottita facendo scorrere il blocco anteriore, nel
modo seguente.
Regolazione della posizione della spallina
imbottita
1
Sollevare la levetta al centro della spallina imbottita
per sbloccarla.
2
Far scorrere la spallina imbottita avanti o indietro fino
a posizionarla nella posizione più comoda.
3
Abbassare la levetta per bloccare la spallina imbottita
nella posizione scelta.
33 mm
Levetta
Spallina imbottita
37 mm
70 mm
Regolare la posizione del blocco anteriore e della spallina
imbottita in modo da consentire di manovrare
comodamente il CBK-55BK quando si porta a spalla.
Regolazione della posizione del blocco
anteriore
1
Rilasciare il fermo del blocco anteriore girando la
corrispondente levetta di fissaggio sul fondo del CBK55BK.
2
Selezionare la posizione desiderata facendo scorrere il
blocco anteriore avanti o indietro.
3
Fermare il blocco anteriore girando la corrispondente
levetta di fissaggio.
Utilizzo dell’adattatore spina della
cuffia
Se la spina delle cuffie dotate di connettore di tipo lineare
fosse difficile da utilizzare con il connettore della cuffia
della PMW-F55/F5, si può aggiungere l’adattatore per la
spina della cuffia fornito in dotazione.
Adattatore della
spina della cuffia
Blocco anteriore
Levetta di fissaggio del
blocco anteriore
Collegamento e impostazione
115
Operazioni di base del
menu di configurazione
Visualizzazione del menu di
configurazione
Immettere un testo
Per selezionare una voce che richiede l’immissione di un
testo, per esempio una data o il nome del file, il campo di
inserimento del testo viene evidenziato e sulla destra
compare “SET”.
1
Spingere l’interruttore MENU ON/OFF del CBK-55BK in
basso, o premere il pulsante MENU della PMW-F55/F5.
Il cursore si sposta sulla posizione successiva.
Per tornare alla posizione precedente spingere
l’interruttore MENU CANCEL/BACK in basso.
Nota
Per il funzionamento successivo alla pressione del
pulsante MENU del PMW-F55/F5 e della schermata
menu, far riferimento alle Istruzioni per l’uso del PMWF55/F5. Nella presente sezione si illustra solo il
funzionamento del CBK-55BK.
Girare la manopola MENU per selezionare un
carattere, poi dare conferma premendo la manopola
MENU.
2
Dopo aver immesso tutti i caratteri, dare conferma
selezionando “Done”.
Cancellazione del cambio di impostazione
Spingere l’interruttore MENU CANCEL/BACK in basso.
Eseguire le impostazioni del menu
1
Girare la manopola MENU per spostare il cursore
sulla voce da impostare.
Le voci selezionabili del menu sono visibili nell’area
di selezione voci del menu, alla destra dell’icona.
2
Premere la manopola MENU.
Il cursore si sposta nell’area di selezione voci del
menu.
3
Girare la manopola MENU per spostare il cursore
sulla voce del menu da impostare e poi dare conferma
premendo la manopola MENU.
Compare l’area di impostazione.
4
Girare la manopola MENU per spostare il cursore
sulla voce da impostare e poi dare conferma premendo
la manopola MENU.
5
Girare la manopola MENU per selezionare il valore da
impostare e poi dare conferma premendo la manopola
MENU.
L’impostazione è cambiata e il display viene
aggiornato per mostrare le nuove impostazioni.
Voci che richiedono conferma prima
dell’esecuzione
Al passo 3 il menu scompare e si presenta un messaggio di
verifica quando si seleziona una voce che richiede verifica
prima dell’esecuzione. Seguire le istruzione del messaggio
per eseguire o annullare l’operazione.
116
Operazioni di base del menu di configurazione
Uscita dal menu
Portare l’interruttore MENU ON/OFF su OFF.
Ricompare la vista normale della telecamera.
3
Regolazione del livello
audio
Con l’impostazione dell’interruttore AUDIO SELECT su
AUTO, i livelli di ingresso dei segnali audio analogici
registrati su ciascun canale vengono regolati in modo
automatico. Si possono effettuare anche regolazioni
manuali.
Nota
Anche se si imposta l’interruttore AUDIO SELECT su
AUTO, i livelli di ingresso dei segnali audio digitali non
vengono regolati automaticamente.
Livello audio da raggiungere per la regolazione
manuale del livello audio
Eseguire la regolazione avendo come livello da
raggiungere –20 dB.
Se l’indicatore del livello audio mostra un livello massimo
di 0 dB, significa che il livello audio di ingresso è
eccessivo.
Livello di ingresso eccessivo
Con la/le manopola/e LEVEL per il canale/i
selezionato/i al passo 1, eseguire la regolazione in
modo che l’indicatore del livello audio mostri fino a
–20 dB con volume di ingresso normale.
Corrispondenza tra le regolazioni del
livello di registrazione e i comandi di
livello audio
Nella sezione “Audio Input” del menu Audio, è possibile
selezionare quale comando di livello audio controllerà il
livello di registrazione audio dell’ingresso su ciascuno dei
connettori AUDIO IN CH-1/CH-2. Le corrispondenze tra
le impostazioni delle voci del menu ed i comandi sono le
seguenti.
Rear1/WRR Level: livello di registrazione canale 1
Impostazione
Manopola
Side1
Manopola LEVEL (CH-1)
Front
Comando MIC LEVEL
Front+Side1
Manopola LEVEL (CH-1) e comando MIC
LEVEL (operazione collegata)
Rear2/WRR Level: livello di registrazione canale 2
Impostazione
Manopola
Side2
Manopola LEVEL (CH-2)
Front
Comando MIC LEVEL
Front+Side2
Manopola LEVEL (CH-2) e comando MIC
LEVEL (operazione collegata)
Nota
Livello di ingresso da raggiungere
Regolazione manuale dei livelli
audio degli ingressi audio
provenienti dai connettori AUDIO IN
CH-1/CH-2
1
Per regolare l’ingresso del segnale sul connettore
AUDIO IN CH-1 o CH-2, impostare l’interruttore
AUDIO IN CH-1 o CH-2 su REAR.
Per regolare entrambi i segnali di ingresso, impostare
entrambi gli interruttori su REAR.
2
Impostare l’interruttore/i AUDIO SELECT
corrispondente/i al canale/i selezionato/i al passo 1 su
MANUAL.
Quando si devono azionare le manopole LEVEL (CH-1/
CH-2) e il controllo MIC LEVEL collegate insieme, se il
comando MIC LEVEL è posto a 0, i segnali audio dei
canali 1 e 2 non possono essere registrati. Controllare la
posizione del comando MIC LEVEL prima di regolare le
manopole LEVEL (CH-1/CH-2).
Regolazione manuale del livello
audio del connettore MIC IN
1
Impostare l’interruttore/i AUDIO IN usato/i su
FRONT.
2
Impostare l’interruttore/i AUDIO SELECT per il
canale/i desiderato/i selezionato/i al passo 1 su
MANUAL.
3
Girare il comando MIC LEVEL ed eseguire la
regolazione in modo che l’indicatore del livello audio
mostri fino a –20 dB con volume di ingresso normale.
Regolazione del livello audio
117
Corrispondenza tra le regolazioni del
livello di registrazione e i comandi di
livello audio
Nella sezione “Audio Input” del menu Audio, è possibile
selezionare quale comando di livello audio controllerà il
livello di registrazione audio dell’ingresso del microfono
anteriore. Le corrispondenze tra le impostazioni delle voci
del menu ed i comandi sono le seguenti.
Regolazione dei livelli di registrazione
audio
Regolazione automatica
Impostare l’interruttore AUDIO SELECT CH-3/4 su
AUTO.
Regolazione manuale
1
Impostare l’interruttore AUDIO SELECT CH-3/4 su
MANUAL.
2
Selezionare le manopole che regolano i livelli audio
“Audio CH3 Level” e “Audio CH4 Level” nella
sezione “Audio Input” del menu Audio.
MIC CH1 Level: livello di registrazione canale 1
Impostazione
Manopola
Side1
Manopola LEVEL (CH-1)
Front
Comando MIC LEVEL
Front+Side1
Manopola LEVEL (CH-1) e comando MIC
LEVEL (operazione collegata)
MIC CH2 Level: livello di registrazione canale 2
Impostazione
Manopola
Side2
Manopola LEVEL (CH-2)
Front
Comando MIC LEVEL
Front+Side2
Manopola LEVEL (CH-2) e comando MIC
LEVEL (operazione collegata)
Nota
Quando si devono azionare il comando MIC LEVEL e le
manopole LEVEL (CH-1/CH-2) collegate insieme, se le
manopole LEVEL (CH-1/CH-2) sono poste a 0, i segnali
audio dei canali 1 e 2 non possono essere registrati.
Controllare la posizione delle manopole LEVEL (CH-1/
CH-2) prima di regolare il comando MIC LEVEL.
Registrazione audio sui canali 3 e 4
Selezione dell’audio registrato
È possibile selezionare l’audio registrato sui canali audio 3
e 4 con gli interruttori AUDIO IN CH-3/CH-4.
Interruttore
CH-3
Target di registrazione del canale 3
FRONT
Audio del microfono anteriore
REAR
Ingresso del segnale audio sul
connettore AUDIO IN CH-1
WIRELESS
Audio del microfono wireless
Interruttore
CH-4
Target di registrazione del canale 4
FRONT
Audio del microfono anteriore
REAR
Ingresso del segnale audio sul
connettore AUDIO IN CH-2
WIRELESS
Audio del microfono wireless
118
Regolazione del livello audio
Audio CH-3 Level: livello di registrazione canale 3
Impostazione
Manopola
Side3
Manopola LEVEL (CH-3)
Front
Comando MIC LEVEL
Front+Side3
Manopola LEVEL (CH-3) e comando MIC
LEVEL (operazione collegata)
Audio CH-4 Level: livello di registrazione canale 4
Impostazione
Manopola
Side4
Manopola LEVEL (CH-4)
Front
Comando MIC LEVEL
Front+Side4
Manopola LEVEL (CH-4) e comando MIC
LEVEL (operazione collegata)
Ora è possibile regolare i livelli dei canali audio 3 e 4 con
le manopole selezionate qui.
La corrispondenza tra le impostazioni dell’interruttore AUDIO IN CH-1/CH-2 e il canale di registrazione è la seguente.
AUDIO IN interruttore
nella sezione
comandi audio
Menu Front
MIC Select
CH-1/2/3/4
AUDIO IN interruttore
nella sezione comandi
audio
CH-1
CH-2
Mono
–
–
Mic anteriore Mic anteriore Mic anteriore Mic anteriore
(Mono)
(Mono)
(Mono)
(Mono)
Stereo
–
–
Mic anteriore Mic anteriore Mic anteriore Mic anteriore
(L-Ch)
(R-Ch)
(L-Ch)
(R-Ch)
–
LINE o MIC
LINE o MIC
LINE1 o
MIC1
LINE2 o
MIC2
LINE1 o
MIC1
LINE2 o
MIC2
–
AES/EBU
LINE o MIC
AES/EBU
1-1
AES/EBU
1-2
No audio
LINE2 o
MIC2
–
LINE o MIC
AES/EBU
LINE1 o
MIC1
No audio
AES/EBU
2-1
AES/EBU
2-2
–
AES/EBU
AES/EBU
AES/EBU
1-1
AES/EBU
1-2
AES/EBU
2-1
AES/EBU
2-2
Analogico
–
–
–
Mono
Mono
Mono
Mono
Digitale
–
–
–
CH-1
CH-2
CH-1
CH-2
FRONT
REAR
WIRELESS
Canale di registrazione
CH-1
CH-2
CH-3
CH-4
LINE o MIC: è stato selezionato LINE o MIC.
AES/EBU: è stato selezionato AES/EBU.
Mono: Audio monoaurale
L-Ch/R-Ch: Mic L-Ch/R-Ch
LINE1 o MIC1: segnale di ingresso LINE o MIC dal connettore CH-1
LINE2 o MIC2: segnale di ingresso LINE o MIC dal connettore CH-2
AES/EBU1-1: segnale CH-1 nell’ingresso del segnale AES/EBU dal connettore CH-1
AES/EBU1-2: segnale CH-2 nell’ingresso del segnale AES/EBU dal connettore CH-1
AES/EBU2-1: segnale CH-1 nell’ingresso del segnale AES/EBU dal connettore CH-2
AES/EBU2-2: segnale CH-2 nell’ingresso del segnale AES/EBU dal connettore CH-2
Regolazione del livello audio
119
Note importanti sul
funzionamento
Luoghi di utilizzo e di conservazione
La vita utile prevista del condensatore elettrolitico è di
circa 5 anni a temperature normali e in condizioni di
utilizzo normale (8 ore al giorno per 25 giorni al mese). Se
le condizioni di utilizzo eccedono i valori normali sopra
indicati, la vita prevista si ridurrà proporzionalmente.
Non sottoporre l’unità a urti eccessivi
Si potrebbero verificare danni all’involucro o ai
componenti interni.
In caso di problemi di funzionamento
Nel caso di problemi sull’apparecchiatura, contattare il
proprio rivenditore Sony.
Ambiente di funzionamento e di
conservazione
Conservare l’apparecchiatura su un piano, in un ambiente
dotato di condizionamento d’aria.
Se l’unità fosse bagnata, accertarsi che sia completamente
asciutta prima di riporla.
Evitare il funzionamento o la conservazione nei seguenti
luoghi:
• Luoghi estremamente caldi o freddi
• Luoghi ad elevata umidità
• Luoghi sottoposti a forti vibrazioni
• In prossimità di forti campi magnetici
• Luoghi con molta luce solare diretta o in prossimità di
fonti di riscaldamento
Note riguardanti i morsetti della batteria
Il morsetto della batteria dell’apparecchio (il connettore
per pacchi batteria e adattatori CA) è un prodotto di
consumo.
Se i piedini del morsetto sono piegati e deformati a causa
di urti o vibrazioni, o se vengono corrosi a causa di un uso
prolungato all’aria aperta, l’alimentazione potrebbe non
essere fornita correttamente.
Si consiglia di eseguire dei controlli periodici per
assicurare il funzionamento corretto dell’apparecchio e
prolungarne la vita utile.
Per ulteriori informazioni sui controlli, contattare il
servizio tecnico o un rappresentante Sony.
120
Note importanti sul funzionamento
In caso di formazione di condensa
Qualora l’unità venga spostata rapidamente da un
ambiente freddo a uno caldo, oppure se la temperatura
ambiente dovesse aumentare improvvisamente, è possibile
che si formi umidità sulle superfici esterne dell’unità e/o al
suo interno. Questo fenomeno è denominato
condensazione. In tal caso, spegnere l’unità ed attendere la
scomparsa della condensazione prima di riavviarla.
L’utilizzo dell’unità mentre è presente condensazione può
causare danni all’unità stessa.
Manuale operativo (1)
Specifiche tecniche
Generali
Dimensioni (L × H × P)
Circa 170 × 182 × 371 mm
(vedere pagina 122)
Peso
Circa 2,2 kg (corpo e adattatore della
batteria)
Alimentazione elettrica
CC 12 V (da 11 V a 17 V)
Potenza
Circa 3,8 W (corpo e adattatore della
batteria)
Temperatura di funzionamento
Da 0 °C a 40 °C
Umidità consentita
Da 20 % a 90 %
Temperatura di magazzinaggio
Da –20 °C a +60 °C
Ingressi/Uscite
Connettore dell’interfaccia di espansione
144-pin, con alimentazione elettrica
Ingresso audio Selezionabile Tipo XLR 3 pin (×2),
LINE / AES/EBU / MIC / MIC+48V
LINE: +4/0/–3 dBu
AES/EBU: AES3 standard
Uscita audio
Tipo XLR, 5 pin, +4/0/–3 dBu
(bilanciato)
Ingresso microfono
Tipo XLR, 5 pin, da –70 dBu a –30 dBu
Uscita cuffia
Presa stereo mini
WRR
D-sub 15 pin
Analogica CH1: –40 dBu
Digitale CH1/CH2: –40 dBFS
Adattatore della batteria
Ingresso CC
Tipo XLR 4 pin, 12 V CC
Uscita CC
4 pin, 12 V CC (corrente nominale
massima: 1,8A)
LIGHT
2 pin, 12 V CC (minore di 50 W)
Accessori in dotazione
Adattatore della batteria (numero di parte
A-2067-625-) (1)
Asta (Φ 15 mm × 250 mm) (2)
Adattatore spina della cuffia (Tipo L) (1)
Maniglia (numero di parte A-2068-023-) (1)
Sostegno del microfono (premontato sulla maniglia)
(numero di parte A-2068-182-) (1)
Piastrina laterale (numero di parte A-2070-502-) (1)
Gancetto di misura nastro (numero di parte 4-458-622-) (1)
Protezione del connettore VF (numero di parte
A-2068-183-) (1)
Tracolla (1)
Accessori opzionali
Unità sintonizzatore UHF sintetizzato WRR-855
Ricevitore digitale wireless DWR-S02D
Registratore portatile AXS-R5
Adattatore di corrente AC-DN10, AC-DN2B
Pacco batterie BP-FL75, BP-L80S
Carica batteria BC-L70, BC-L90
Microfono ECM-680S, ECM-678, ECM-674
Cavo di conversione per microfono EC-0.5X3F5M (per
ECM-678/674)
Le caratteristiche di progettazione e di natura tecnica sono
soggette a modifiche senza preavviso.
Note
• Verificare sempre che l’apparecchio stia funzionando
correttamente prima di usarlo. LA SONY NON
SARÀ RESPONSABILE DI DANNI DI
QUALSIASI TIPO, COMPRESI, MA SENZA
LIMITAZIONE A, RISARCIMENTI O RIMBORSI
A CAUSA DELLA PERDITA DI PROFITTI
ATTUALI O PREVISTI DOVUTA A GUASTI DI
QUESTO APPARECCHIO, SIA DURANTE IL
PERIODO DI VALIDITÀ DELLA GARANZIA SIA
DOPO LA SCADENZA DELLA GARANZIA, O
PER QUALUNQUE ALTRA RAGIONE.
• SONY NON SARÀ RESPONSABILE PER
RICHIESTE O RICORSI DI NESSUN TIPO
PRESENTATI DA UTENTI DI QUESTO
APPARATO O DA TERZI.
• SONY NON SARÀ RESPONSABILE PER LA
CANCELLAZIONE O LA MANCATA
CONTINUAZIONE PER QUALSIASI CAUSA O
CIRCOSTANZA DI SERVIZI CORRELATI A
QUESTO APPARATO.
SONY NON SARÀ RESPONSABILE DI DANNI DI
QUALSIASI TIPO RISULTANTI DALLA
MANCATA IMPLEMENTAZIONE DI MISURE DI
PROTEZIONE ADEGUATE SUI DISPOSITIVI DI
TRASMISSIONE, DA INEVITABILI DIFFUSIONI
DI DATI RISULTANTI DALLE SPECIFICHE
TECNICHE DELLA TRASMISSIONE O DA
PROBLEMATICHE RELATIVE ALLA SICUREZZA
DI QUALSIASI TIPO.
Specifiche tecniche
121
Dimensioni
Unità: mm
76,8
57
79,2
66
130
182
274,4
295,1
23,1
93,7
76
261,3
351,1
208,7
122
Specifiche tecniche
370,9
32,8
Español
Antes de poner en funcionamiento la unidad, lea
detenidamente este manual y consérvelo para referencias
futuras.
ADVERTENCIA
Para reducir el riesgo de electrocución, no
exponga este aparato a la lluvia ni a la
humedad.
Para evitar descargas eléctricas, no abra el
aparato. Solicite asistencia técnica
únicamente a personal especializado.
PRECAUCIÓN
Peligro de explosión si se sustituye la batería por una del
tipo incorrecto. Reemplace la batería solamente por otra
del mismo tipo o de un tipo equivalente recomendado por
el fabricante.
Cuando deseche la batería, debe cumplir con las leyes de
la zona o del país.
No instale el aparato en un lugar estrecho como en una
biblioteca o mueble integrado.
ES
ADVERTENCIA
No se deben exponer las baterías a una fuente de calor
excesivo como la luz del sol, el fuego o similar.
Para los clientes de Europa
Este producto con marcado CE cumple con las directivas
de compatibilidad electromagnética de la Comisión
Europea.
El cumplimiento de estas directivas implica la
conformidad con los siguientes estándares europeos:
• EN55103-1: Interferencia electromagnética (Emisión)
• EN55103-2: Susceptibilidad electromagnética
(Inmunidad)
Este producto ha sido diseñado para utilizarse en los
entornos electromagnéticos siguientes: E1 (zona
residencial), E2 (zona comercial e industrial ligera), E3
(exteriores urbanos), y E4 (entorno con EMC controlada,
p. ej., estudio de televisión).
ATENCIÓN
Los campos electromagnéticos de determinadas
frecuencias pueden influir sobre las imágenes y el sonido
de esta unidad.
Para los clientes de Europa
Fabricante: Sony Corporation, 1-7-1 Konan Minato-ku
Tokyo, 108-0075 Japón
Para la conformidad del producto en la UE: Sony
Deutschland GmbH, Hedelfinger Strasse 61, 70327
Stuttgart, Alemania
123
Tabla de contenidos
Descripción ....................................................................... 125
Nombre y función de los componentes ......................... 126
Panel frontal ........................................................................ 126
Panel posterior..................................................................... 127
Zona de control (delante) .................................................... 128
Zona de control (lateral)...................................................... 128
Zona de control de audio..................................................... 129
Zona de conexión (detrás)................................................... 130
Asa....................................................................................... 130
Adaptador de la batería ....................................................... 131
Conexión y configuración ............................................... 132
Alimentación ....................................................................... 132
Conexión de un adaptador de la batería para el
CBK-55BK ................................................................ 132
Uso de alimentación de CA (alimentación DC IN) ............ 133
Uso del AXS-R5 ................................................................. 133
Conexión de la PMW-F55/F5 ............................................. 133
Conexión del asa ................................................................. 134
Conexión de un visor .......................................................... 134
Uso de un micrófono externo.............................................. 135
Conexión de un sintonizador portátil UHF (para un sistema de
micrófono inalámbrico UHF) .................................... 135
Conexión de un equipo de audio de entrada de línea.......... 137
Montaje del trípode ............................................................. 137
Conexión de una luz para vídeos ........................................ 138
Uso de la correa para el hombro ......................................... 138
Ajuste de la posición de la almohadilla para el hombro ..... 139
Uso del adaptador del conector de auriculares.................... 139
Operaciones básicas del menú de configuración......... 140
Ajuste del nivel de audio ................................................. 141
Ajuste manual de los niveles de audio de las entradas de audio
en los conectores AUDIO IN CH-1/CH-2................. 141
Ajuste manual del nivel de audio del conector MIC IN...... 141
Grabación de audio en los canales 3 y 4 ............................. 142
Notas importantes sobre la utilización........................... 144
Especificaciones .............................................................. 145
Dimensiones ........................................................................ 146
124
Tabla de contenidos
Descripción
El CBK-55BK es un accesorio para mejorar la estabilidad
y el control de la videocámara PMW-F55/F5 cuando se
utiliza colocada sobre el hombro.
El CBK-55BK incorpora varios conectores de entrada/
salida, una ranura para receptor de audio inalámbrico, un
panel de control de audio e interruptores de control directo
que permiten controlar la PMW-F55/F5 con una mano
mientras mira el visor al grabar con la PMW-F55/F5 en el
hombro.
La zona de control delantera y la almohadilla para el
hombro pueden desplazarse 70 mm de delante hacia atrás.
Al grabar con la PMW-F55/F5 en el hombro con el
objetivo PL o el objetivo portátil B4 de gran tamaño
instalado, no tendrá problemas para mantener el equilibrio.
Descripción
125
Nombre y función de los componentes
Panel frontal
a Conector AUDIO IF
Se utiliza para conectar el CBK-55BK a la PMW-F55/F5.
e Zona de control (delante) (Consulte “Zona de
control (delante)”.)
b Conector MIC IN (entrada de micrófono) (+48 V)
(tipo XLR, 5 clavijas, hembra)
Conecte un micrófono estéreo a este conector. La
alimentación (+48 V) se suministra a través de este
conector.
f Zona de control de audio (Consulte “Zona de
control de audio”.)
c Palanca de bloqueo de barras
Se utiliza al montar o desmontar barras de Φ 15.
Al montar barras, gire la palanca para activar el bloqueo.
Cuando la palanca se encuentre en una posición que
dificulte el giro, tire de la palanca hacia fuera moviéndola
lateralmente y sitúela en una posición más adecuada antes
de volver a colocarla en su sitio para continuar girando.
h Conector Expansion IF
Se utiliza para conectar el CBK-55BK a la PMW-F55/F5.
i Zona de control (lateral) (Consulte “Zona de
control (lateral)”.)
j Rosetas (izquierda y derecha)
Se utilizan para montar empuñaduras genéricas.
Nota
No fuerce la palanca de bloqueo de barras al girarla si las
barras no están instaladas.
d Barras de Φ 15
Se utilizan para conectar una visera del objetivo, un
enfoque de seguimiento y otros accesorios.
126
g Tapa de protección de la zona de control de audio
Abra la tapa para acceder a la zona de control de audio
(consulte la página 129).
Nombre y función de los componentes
k Conexión para trípode
Puede conectar el adaptador de trípode (opcional) al usar
el CBK-55BK en un trípode.
Panel posterior
a Punto de conexión para sintonizador portátil UHF
Conecte el sintonizador portátil UHF (consulte la página
135).
h Regulador AUDIO
Se utiliza para acoplar el CBK-55BK a la PMW-F55/F5
(consulte la página 133).
b Punto de conexión para el adaptador de la batería
Conecte el adaptador de la batería suministrado (consulte
la página 132).
i Palanca de bloqueo de la cámara
Se utiliza para acoplar el CBK-55BK a la PMW-F55/F5
(consulte la página 133).
c Piloto TALLY (luminoso) (rojo)
Se ilumina durante la grabación. Este indicador parpadea
si se detecta un funcionamiento anómalo en el CBK-55BK
o en la PMW-F55/F5. (Para obtener información sobre el
error, consulte el manual de instrucciones de la PMW-F55/
F5.)
j Almohadilla para el hombro
Levante la palanca de fijación de la almohadilla para el
hombro para ajustar su posición de delante hacia atrás.
Ajuste la posición para trabajar con la máxima comodidad
con la PMW-F55/F5 colocada sobre el hombro (consulte
la página 139).
d Conector Expansion IF
Se utiliza para conectar el adaptador de la batería o la
AXS-R5.
e Zona de conexión (detrás) (Consulte “Zona de
conexión (detrás)”.)
f Botón de liberación/palanca de expulsión
Se utiliza para acoplar el CBK-55BK a la PMW-F55/F5
(consulte la página 133).
g Bloque frontal
La posición del bloque frontal puede ajustarse de delante
hacia atrás desbloqueando la palanca de fijación del bloque
frontal.
Ajuste la posición del bloque frontal, de modo que pueda
controlar el CBK-55BK fácilmente mientras lo tiene sobre
el hombro (consulte la página 139).
Nombre y función de los componentes
127
Zona de control (delante)
e Manecilla MENU
Modifica la opción seleccionada o un ajuste dentro del
menú (consulte la página 140).
Zona de control (lateral)
a Botón REC START (inicio de la grabación)
Púlselo para iniciar la grabación. Vuelva a pulsarlo para
detenerla. Tiene el mismo efecto que el botón REC del
objetivo.
b Interruptor SHUTTER
Sitúelo en ON para usar el obturador electrónico. Muévalo
hasta SELECT para modificar el ajuste de la velocidad del
obturador. Al utilizar este interruptor, el nuevo ajuste
aparece en la pantalla del visor durante unos tres segundos.
Cuando la opción “Select” en “Shutter” dentro del menú
Camera está ajustada en “Step” y sitúa el interruptor en
SELECT, se modifica la velocidad del obturador, y cuando
la opción “Select” en “Shutter” dentro del menú Camera
está ajustada en “Continuous” y sitúa el interruptor en
SELECT, se muestra la velocidad actual del obturador, que
puede modificarse girando la manecilla MENU.
c Control MIC (micrófono) LEVEL
Ajusta el nivel de entrada de los canales de audio 1, 2, 3 y
4.
d Interruptor AUTO W/B BAL (ajuste automático
de balance de blancos/negros)
Activa las funciones de ajuste automático de balance de
blancos/negros.
• WHITE: ajusta el balance de blancos automáticamente.
Si el interruptor WHITE BAL (consulte la página 129)
se sitúa en A o B, el ajuste del balance de blancos se
guarda en la memoria correspondiente. Si el interruptor
WHITE BAL se sitúa en PRST, no se aplica la función
de ajuste automático del balance de blancos.
• BLACK: ajusta el nivel de negro y el balance de negros
automáticamente.
Si vuelve a situar el interruptor en WHITE durante el
ajuste automático del balance de blancos, el cambio se
cancela y se aplica de nuevo el ajuste original del balance
de blancos.
Si vuelve a situar el interruptor en BLACK durante el
ajuste automático del balance de negros, el cambio se
cancela y se aplica de nuevo el ajuste original del balance
de negros.
128
Nombre y función de los componentes
a Selector GAIN/EI
Cambia la ganancia del amplificador de vídeo para
adaptarla a las condiciones de iluminación de la grabación.
La ganancia correspondiente a los ajustes H, M y L puede
seleccionarse en el menú de la PMW-F55/F5. (Para
obtener información sobre el ajuste, consulte el manual de
instrucciones de la PMW-F55/F5.)
Activa los 3 tipos de valores de EI preajustados cuando
está seleccionado el modo Cine EI.
b Botón MENU ON/OFF
Permite mostrar el menú en la pantalla del visor o la
pantalla de la señal de prueba. Cada vez que pulse el botón,
la pantalla del menú se encenderá y se apagará.
c Interruptores ASSIGN. (asignables) 6/7/8
Asigne las funciones deseadas a los interruptores desde la
opción “Assignable Button” del menú System.
Los interruptores ASSIGN. 6/7/8 tienen asignado “Off”
con la configuración predeterminada de fábrica. Los
interruptores ASSIGN. 6/7/8 cuentan con un indicador
para mostrar si el interruptor tiene una función asignada
(indicador encendido) o no (indicador apagado). (Para
obtener información sobre el ajuste, consulte el manual de
instrucciones de la PMW-F55/F5.)
d Interruptor ASSIGN. (asignable) 5
Asigne la función deseada al interruptor desde la opción
“Assignable Button” del menú System.
El interruptor ASSIGN. 5 tiene asignada la opción “Color
Bars” (señal de salida de barras de colores) con la
configuración predeterminada de fábrica. (Para obtener
información sobre el ajuste, consulte el manual de
instrucciones de la PMW-F55/F5.)
e Interruptor WHITE BAL (memoria de balance de
blancos)
Controla el ajuste del balance de blancos.
• PRST: ajusta la temperatura de color en el valor
predefinido (configuración predeterminada de fábrica:
3200K). Utilice esta opción si no tiene tiempo para
ajustar el balance de blancos.
• A o B: recupere los valores de ajuste del balance de
blancos guardados en A o B. Sitúe el interruptor AUTO
W/B BAL (consulte la página 128) en WHITE para
ajustar automáticamente el balance de blancos y guardar
los valores de ajuste en la memoria A o la memoria B.
Cuando está seleccionado el modo Cine EI, permite
alternar entre Preset 3200K, Preset 4300K y Preset 5500K.
Con la configuración predeterminada de fábrica, el
balance de blancos tiene asignados los siguientes ajustes
en el modo Cine EI.
PRST: Preset 3200K
A: Preset 4300K
B: Preset 5500K
f Interruptor MENU CANCEL/BACK
Al situar el interruptor en CANCEL/BACK, la página
regresa a la jerarquía anterior. Se cancelan los ajustes
realizados antes del cambio.
Zona de control de audio
Posición del interruptor del lado derecho: CH-1/2
Posición del
interruptor del
lado izquierdo
Salida de audio
CH-1/CH-3
Audio del canal 1
MIX
Combinación del audio de los canales 1
y 2 (estéreo)
CH-2/CH-4
Audio del canal 2
Posición del interruptor del lado derecho: CH-3/4
Posición del
interruptor del
lado izquierdo
Salida de audio
CH-1/CH-3
Audio del canal 3
MIX
Combinación del audio de los canales 3
y 4 (estéreo)
CH-2/CH-4
Audio del canal 4
* Conectando unos auriculares estéreo a la toma HEADPHONE, es posible
escuchar el audio en estéreo. (Para obtener información sobre el ajuste,
consulte el manual de instrucciones de la PMW-F55/F5.)
b Manecillas LEVEL CH-1/CH-2/CH-3/CH-4 (nivel
de grabación de los canales de audio 1/2/3/4)
Puede definir los niveles de audio que se grabarán en los
canales 1, 2, 3 y 4 cuando los interruptores AUDIO
SELECT CH-1/CH-2 y AUDIO SELECT CH-3/CH-4
están ajustados en MANUAL.
c Interruptores AUDIO SELECT CH-1/CH-2
(selección del método de ajuste de los canales de
audio 1/2)
Puede seleccionar el método de ajuste del nivel de audio de
los canales de audio 1 y 2.
• AUTO: ajuste automático
• MANUAL: ajuste manual
Nota
El nivel de audio de grabación es fijo en el caso del canal
que tiene asignada la señal AES/EBU para las señales de
entrada de audio.
a Interruptores MONITOR (selección de
monitorización de audio)
Combinando los dos interruptores, puede seleccionar el
audio que desea escuchar a través del altavoz integrado o
los auriculares.
d Manecilla MONITOR (ajuste del volumen de
monitorización)
Controla el volumen del sonido que se emite a través del
altavoz integrado o los auriculares. Si se sitúa la manecilla
en el mínimo, no se oye nada.
e Interruptor AUDIO SELECT CH-3/4 (selección
del método de ajuste de los canales de audio 3/4)
Puede seleccionar el método de ajuste del nivel de audio de
los canales de audio 3 y 4 simultáneamente.
• AUTO: ajuste automático
• MANUAL: ajuste manual
Nombre y función de los componentes
129
f Interruptores AUDIO IN CH-1/CH-2/CH-3/CH-4
(selección de entrada de los canales de audio 1/2/3/
4)
Seleccione las señales de entrada de audio que se grabarán
en los canales de audio 1, 2, 3 y 4.
• FRONT: señales de entrada de audio del micrófono
conectado al conector MIC IN
• REAR: señales de entrada de audio de un dispositivo de
audio conectado a los conectores AUDIO IN CH-1/CH2
• WIRELESS: señales de entrada de audio de un
sintonizador portátil UHF instalado
Zona de conexión (detrás)
Aflojando los tornillos de la parte inferior del CBK-55BK,
puede ajustar la posición de la tapa dependiendo del
tamaño y la forma de las clavijas del cable de audio o del
micrófono. Después de realizar el ajuste, apriete los
tornillos para fijar la tapa en su sitio.
d Interruptor +48V/OFF (activación/desactivación
de la alimentación de 48 V)
Seleccione uno de los ajustes siguientes en función del
micrófono conectado.
• +48V: al conectar un micrófono que necesite una
alimentación de 48 V
• OFF: al conectar un micrófono que no necesite una
alimentación de 48 V
e Conector LIVE AUDIO OUT (tipo XLR, 5 clavijas,
macho)
Transmite las señales de audio recibidas en los canales de
audio 1 y 2 o en los canales de audio 3 y 4.
Las señales de audio se seleccionan mediante el interruptor
MONITOR.
Nota
No puede emitirse el sonido en caso de reproducción.
a Selectores AUDIO IN
Seleccione la fuente de audio conectada a los conectores
AUDIO IN CH-1/CH-2.
• LINE: al conectar una fuente de señales de audio
externa, como un amplificador estéreo
• AES/EBU: al conectar una fuente de señales de audio
digitales externa
• MIC: al conectar un micrófono
b Toma HEADPHONE (LIVE MON) (estéreo,
minitoma)
Puede monitorizar el sonido E-E* conectando unos
auriculares. Cuando se activa una alarma, puede oírla a
través de los auriculares. Al conectar los auriculares a la
toma, se corta automáticamente el envío de audio al
altavoz integrado de la PMW-F55/F5.
* E-E: abreviatura de “Electric-to-Electric”. En el modo
E-E, las señales de vídeo y audio recibidas por la
videocámara se envían tras pasar únicamente por
circuitos eléctricos internos. Esta opción puede utilizarse
para comprobar las señales de entrada.
Nota
No puede emitirse el sonido en caso de reproducción.
c Tapa inferior
Su función es proteger los cables conectados a los
conectores del panel posterior.
130
Nombre y función de los componentes
f Conectores AUDIO IN CH-1/CH-2 (entrada de
canales de audio 1 y 2) (tipo XLR, 3 clavijas,
hembra)
Conecte un equipo de audio o un micrófono.
Asa
a Soporte para el micrófono
Acople un micrófono externo (consulte la página 135).
b Anilla de desplazamiento de izquierda a derecha
del visor
Afloje esta anilla para ajustar la posición del visor en un
movimiento de izquierda a derecha (consulte la página
134).
c Zapata de acople del visor
Acople el visor (consulte la página 134).
d Enganche de la correa para el hombro
Coloque la correa para el hombro suministrada (consulte la
página 138).
e Orificios de los tornillos para la instalación de
accesorios
• Tipo de tornillo: 1/4-20UNC (× 9)
• Tipo de tornillo: 3/8-16UNC (× 8)
• Longitud de la rosca: 9 mm o menos
Nota
La opción ON/OFF de la luz para vídeos no está vinculada
a la grabación.
f Zona de acople de la batería
g Conector DC OUT
Nota
Nota
No realice demasiada presión sobre el accesorio instalado.
Puede provocar daños en la rosca del tornillo.
Al conectar un dispositivo, asegúrese de que su consumo
energético no supere los 1,8 A.
Adaptador de la batería
Para instalar/desinstalar el adaptador de la batería,
consulte “Conexión de un adaptador de la batería para el
CBK-55BK” en la página 132.
a Botón de liberación/palanca de expulsión
b Palanca de liberación de la batería
c Conector Expansion IF
d Conector DC IN (consulte la página 133)
e Conector LIGHT (luz para vídeos) (2 clavijas,
hembra)
Puede conectarse una luz para vídeos con un consumo
energético máximo de 50 W, como la Anton Bauer
Ultralight 2 o un producto equivalente (consulte la página
138).
Nombre y función de los componentes
131
2
Conexión y configuración
Introduzca las partes que sobresalen del adaptador de
la batería en la ranura de la parte posterior del CBK55BK (1) y, después, baje la palanca de expulsión
(2) hasta que el adaptador de la batería quede
bloqueado en el botón de liberación.
Alimentación
Puede usar una batería o alimentación de CA a través de un
adaptador de CA.
Por su seguridad, utilice sólo las baterías y los adaptadores
de CA Sony que se enumeran a continuación.
Batería de ion-litio
BP-FL75
BP-L80S
Adaptador de CA
AC-DN2B
AC-DN10
Conexión de un adaptador de la
batería para el CBK-55BK
1
Pulse el botón de liberación (1) del adaptador de la
batería para desbloquear la palanca de expulsión y, a
continuación, levántela (2).
Zona de acople de
la batería
Palanca de
liberación de la
batería
Notas
• Antes de acoplar el adaptador de la batería,
compruebe que la palanca de expulsión esté
levantada.
• Antes de bajar la palanca de expulsión, asegúrese de
que los cuatro ganchos estén bien acoplados. Si los
cuatro ganchos no están bien acoplados, la conexión
puede ser mala o pueden producirse daños en el
CBK-55BK y en el adaptador de la batería.
Para usar la batería
Introduzca la batería en la zona de acople de la batería del
adaptador de la batería y, después, deslícela hacia abajo
para fijarla en su sitio.
Notas
• Antes de utilizarla, cargue la batería con el cargador de
la batería.
• Es posible que no pueda recargarse totalmente una
batería todavía caliente porque acaba de utilizarse.
Para retirar una batería
Desbloquee la batería deslizándola hacia arriba mientras
presiona la palanca de liberación de la batería y, a
continuación, retírela.
Para retirar un adaptador de la batería
Pulse el botón de liberación y levante la palanca de
expulsión. A continuación, extraiga el adaptador de la
batería deslizándolo hacia arriba.
132
Conexión y configuración
2
Nota
Desbloquee la palanca de bloqueo de la cámara, la
palanca de expulsión y el regulador AUDIO.
Retire el adaptador de la batería sujetándolo con la mano.
Palanca de expulsión
Uso de alimentación de CA
(alimentación DC IN)
El CBK-55BK puede recibir alimentación de CA
utilizando el adaptador de CA AC-DN2B/AC-DN10
(opcional).
Regulador AUDIO
Palanca de bloqueo de la cámara
Uso del AXS-R5
Para conectar el AXS-R5, consulte el manual de
instrucciones de la PMW-F55/F5.
Conexión de la PMW-F55/F5
Para obtener información sobre el uso de la PMW-F55/
F5, consulte el manual de instrucciones suministrado con
la PMW-F55/F5.
3
Coloque la PMW-F55/F5 en el CBK-55BK y,
después, deslícela hacia atrás.
Coloque la PMW-F55/F5 alineada con la ranura de la
placa instalada en la parte inferior de la PMW-F55/F5
y el CBK-55BK y, después, deslice la PMW-F55/F5
hacia atrás hasta que se detenga.
Notas
• Es necesario disponer de la versión 5.0 o posterior del
software de la PMW-F55/F5.
• La conexión y la desconexión de la PMW-F55/F5 debe
realizarse con la alimentación apagada.
1
Instale la placa suministrada en la parte inferior de la
PMW-F55/F5 utilizando una moneda, etc.
Placa
Nota
Asegúrese de instalarla en la dirección correcta.
Conexión y configuración
133
4
Bloquee la PMW-F55/F5.
1 Gire la palanca de bloqueo de la cámara.
2 Baje la palanca de expulsión hasta que quede
bloqueada.
3 Presione el regulador AUDIO.
Conexión de un visor
Visores disponibles para la PMW-F55/F5
• DVF-L350: visor en color LCD
• DVF-L700: visor en color LCD
• DVF-EL100: visor en color OLED
Precaución
No deje el CBK-55BK con el ocular del visor apuntando
hacia el sol. La luz solar directa puede entrar por el ocular,
concentrarse en el visor y provocar un incendio.
Notas
• Conecte y desconecte el visor siempre con la PMW-F55/
F5 apagada.
• Al usar la PMW-F55/F5 con el DVF-L700 conectado,
enciéndala cuando el interruptor POWER del DVFL700 esté ajustado en ON.
Para obtener información sobre la conexión del visor,
consulte el manual de instrucciones del visor.
Conexión del asa
1
1
Afloje la anilla de fijación de la zapata del visor, alinee
la ranura del visor y, a continuación, conecte el visor
deslizándolo horizontalmente.
Retire el asa conectada a la PMW-F55/F5.
Zapata del visor
2
Conecte el asa del CBK-55BK utilizando el tornillo de
cabeza hexagonal (tamaño de la llave hexagonal:
3/16).
2
134
Conexión y configuración
Apriete la anilla de fijación tras determinar la posición
izquierda y derecha del visor y, a continuación,
conecte el cable del visor al conector VF de la PMWF55/F5.
Para desconectar el visor
Para instalar un micrófono
Afloje la anilla de fijación del visor, levante el tope y, a
continuación, desconecte el visor deslizándolo en la
dirección contraria a cuando lo conectó.
1
Abra la tapa de la zona de acople del micrófono
externo tirando de la manecilla hacia arriba.
2
Conecte el micrófono y, después, fíjelo en su sitio
cerrando la tapa de la zona de acople del micrófono
externo para que quede como estaba.
3
Introduzca el cable del micrófono en el conector MIC
IN y, a continuación, sitúe el interruptor AUDIO IN
(consulte la página 130) del canal en el que desea
grabar el audio de este micrófono en FRONT.
Para conectar el protector del conector VF
Coloque el protector del conector VF con el gancho
suministrado con la PMW-F55/F5 y el CBK-55BK y el
tornillo del protector del conector VF.
Gancho
Protector del conector VF
Uso de un micrófono externo
Puede usar el micrófono estéreo ECM-680S/678/674
(opcional) conectándolo al soporte para micrófono
suministrado.
Nota
Para instalar el ECM-678/674, es necesario el cable de
conversión (EC-0.5X3F5M).
Para instalar el soporte para micrófono
Alinee el soporte para micrófono con el asa y, después,
apriete el tornillo para fijarlo en su sitio.
Soporte para el micrófono
Conexión de un sintonizador portátil
UHF (para un sistema de micrófono
inalámbrico UHF)
Para usar un sistema de micrófono inalámbrico UHF de
Sony, apague la PMW-F55/F5 y conecte uno de los
sintonizadores portátiles de UHF indicados a
continuación.
• Receptor inalámbrico digital DWR-S02D
• Unidad de sintonizador sintetizado UHF WRR-855S
• Sintonizador de diversidad sintetizado UHF WRR860A/861/862
Para obtener más información sobre estas unidades,
consulte los manuales de instrucciones respectivos.
Nota
Es necesaria la base para el sintonizador WRR opcional
(número de referencia: A-8278-057-B) para instalar el
WRR-862.
Para obtener más información, póngase en contacto con su
proveedor o con un representante de servicio de Sony.
Conexión y configuración
135
Para instalar el DWR-S02D o la WRR-855S
1
3 Ajuste la posición de la base para el sintonizador de
modo que pueda instalar una batería BP-L80S y
apriete los tornillos de ajuste para fijar su posición.
4 Coloque la placa suministrada con el WRR-862.
Retire los cuatro tornillos de fijación de la tapa que
cubre la ranura para el sintonizador portátil/receptor.
Para obtener más información sobre la base para el
sintonizador WRR (número de referencia: A-8278057-B), póngase en contacto con un representante del
servicio técnico o comercial de Sony.
BP-L80S
Tornillos de
ajuste
2
Inserte el DWR-S02D o la WRR-855S en la ranura y
apriete los cuatro tornillos de fijación.
Placa de montaje
(suministrada con
el WRR-862)
DWR-S02D o WRR-855S
Destornillador
Phillips
2
Conecte la batería.
Para obtener más información sobre cómo conectar la
batería, consulte “Para usar la batería” en la página
132.
3
3
Ajuste el selector AUDIO IN del canal cuya señal de
audio desee recibir en WIRELESS (consulte la página
130).
Monte el sintonizador en la base para sintonizador
WRR.
Para instalar el WRR-862 (al usar una
batería BP-L80S)
1
Instale la base para el sintonizador WRR (no
suministrada; número de referencia: A-8278-057-B)
en la parte posterior del CBK-55BK.
1 Utilice un destornillador Phillips para apretar los
cuatro tornillos colocados en la base para el
sintonizador, tal y como se muestra en la siguiente
ilustración.
Nota
Asegúrese de que los cuatro tornillos queden bien
apretados.
2 Afloje los tornillos de ajuste de la base para el
sintonizador.
136
Conexión y configuración
WRR-862
4
Conecte el cable de alimentación del sintonizador al
conector DC OUT del adaptador de la batería
suministrado, y el cable de salida de audio al conector
AUDIO IN CH-1 o CH-2.
5
Sitúe los interruptores en las siguientes posiciones.
2
Monte el CBK-55BK en el adaptador de trípode.
• Ajuste el selector AUDIO IN del canal al que está
conectado el cable de salida de audio en MIC.
• Ajuste el interruptor AUDIO IN CH-1/CH-2/CH-3/
CH-4 del canal al que está conectado el cable de
salida de audio en REAR.
Si está activada la función de detección automática
de la conexión XLR, la señal de entrada para la
grabación de audio se selecciona automáticamente
y, por lo tanto, no es necesario este ajuste.
Conexión de un equipo de audio de
entrada de línea
Conecte el conector de salida de audio del equipo de audio
que proporciona la señal de entrada de línea al conector
AUDIO IN CH-1 o CH-2.
Deslice el CBK-55BK hacia delante a lo largo
de la ranura del adaptador hasta que encaje.
Ajustes de los interruptores
Ajuste el selector AUDIO IN del canal al que está
conectada la fuente de la señal de audio en LINE.
3
Montaje del trípode
Para retirar el CBK-55BK del adaptador de
trípode
1
Mantenga pulsado el botón rojo y mueva la palanca en la
dirección de la flecha.
Instale el adaptador de trípode VCT-14/U14
(opcional) en el trípode.
Mueva el CBK-55BK hacia delante y hacia atrás para
asegurarse de que no se separa.
Adaptador de trípode
Botón rojo
Palanca
Soporte de cámara
Nota
Es posible que el pasador del adaptador de trípode
permanezca subido incluso después de retirar el CBK55BK. En este caso, pulse el botón rojo y mueva la palanca
tal y como se indica arriba para volver a bajar el pasador.
Si el pasador continúa subido, no podrá montar el CBK55BK en el adaptador de trípode.
Conexión y configuración
137
Conexión de una luz para vídeos
Con este CBK-55BK, puede utilizar una luz para vídeos
Anton Bauer Ultralight 2 o un dispositivo equivalente (con
una alimentación de 12 V y un consumo energético
máximo de 50 W).
2
Introduzca la otra hebilla en el enganche de la correa
para el hombro del otro lado de la empuñadura, de la
misma forma que en el paso 1.
La salida del conector LIGHT del CBK-55BK siempre
está limitada a 12 V aunque el CBK-55BK reciba más de
12 V (a través del conector DC IN o la batería). El brillo o
la temperatura del color de la luz no reflejará el aumento
de la tensión.
Notas
• No utilice una luz para vídeos con un consumo
energético superior a 50 W.
• El brillo o la temperatura del color de la luz cambiará
cuando la tensión (recibida a través del conector DC IN
o la batería) sea inferior a 12 V.
Uso de la correa para el hombro
Para instalar la correa para el hombro
1
Introduzca una de las hebillas en un enganche de la
correa para el hombro.
Tire de la correa hacia arriba para fijar el enganche.
Hebilla
138
Conexión y configuración
Para retirar la correa para el hombro
Presione aquí y tire en la dirección
indicada por la flecha para desbloquear.
Ajuste de la posición de la
almohadilla para el hombro
Puede modificar la posición del CBK-55BK y la
almohadilla para el hombro moviendo el bloque frontal, tal
y como se detalla a continuación.
Para ajustar la posición de la almohadilla
para el hombro
1
Levante la palanca situada en el centro de la
almohadilla para el hombro para desbloquear la
almohadilla para el hombro.
2
Mueva la almohadilla para el hombro hacia delante o
hacia atrás hasta que encuentre la posición óptima.
3
Baje la palanca para bloquear la almohadilla para el
hombro en la posición seleccionada.
33 mm
Palanca
Almohadilla para el hombro
37 mm
70 mm
Ajuste la posición del bloque frontal y la almohadilla para
el hombro, de modo que pueda controlar el CBK-55BK
fácilmente mientras lo tiene sobre el hombro.
Para ajustar la posición del bloque frontal
1
Desbloquee el bloque frontal girando la palanca de
fijación del bloque frontal situada en la parte inferior
del CBK-55BK.
2
Seleccione la posición deseada moviendo el bloque
frontal hacia delante o hacia atrás.
3
Fije el bloque frontal girando la palanca de fijación del
bloque frontal.
Bloque frontal
Uso del adaptador del conector de
auriculares
Si resulta complicado acoplar unos auriculares con un
conector recto al utilizar el conector de auriculares de la
PMW-F55/F5, use el adaptador del conector de auriculares
suministrado.
Adaptador del
conector de
auriculares
Palanca de fijación
del bloque frontal
Conexión y configuración
139
Operaciones básicas del
menú de configuración
Para acceder al menú de configuración
Para introducir texto
Si selecciona una opción en la que debe introducir texto,
como información sobre el tiempo o nombres de archivos,
se resalta el campo de introducción de texto y aparece
“SET” a la derecha.
1
Presione el interruptor MENU ON/OFF del CBK-55BK o
el botón MENU de la PMW-F55/F5.
El cursor se desplazará a la posición siguiente.
Para volver a la posición anterior, pulse el interruptor
MENU CANCEL/BACK.
Nota
Para obtener información sobre las operaciones
disponibles después de pulsar el botón MENU de la PMWF55/F5 y la pantalla del menú, consulte el manual de
instrucciones de la PMW-F55/F5. En este apartado, se
explican únicamente las operaciones del CBK-55BK.
Gire la manecilla MENU para seleccionar un carácter
y, después, confírmelo pulsando la manecilla MENU.
2
Cuando haya introducido todos los caracteres,
confirme que ha terminado seleccionando “Done”.
Para cancelar el cambio de un ajuste
Pulse el interruptor MENU CANCEL/BACK.
Para configurar ajustes en el menú
1
Gire la manecilla MENU para situar el cursor en la
opción que desea configurar.
Las opciones del menú que pueden seleccionarse
aparecen en la zona de selección de opciones del menú
situada a la derecha del icono.
2
Pulse la manecilla MENU.
El cursor se sitúa en la zona de selección de opciones
del menú.
3
Gire la manecilla MENU para situar el cursor en la
opción del menú que desea configurar y, después,
confirme la selección pulsando la manecilla MENU.
Aparecerá la zona de configuración.
4
Gire la manecilla MENU para situar el cursor en la
opción que desea configurar y, después, confirme la
selección pulsando la manecilla MENU.
5
Gire la manecilla MENU para seleccionar el valor que
desea configurar y, después, confirme la selección
pulsando la manecilla MENU.
Se modificará la configuración y se actualizará la
pantalla para mostrar la nueva configuración.
Opciones que requieren confirmación antes de
su ejecución
En el paso 3, desaparece el menú y aparece un mensaje de
confirmación si selecciona una opción que requiere
confirmación antes de su ejecución. Siga las instrucciones
del mensaje para ejecutar o cancelar la operación.
140
Operaciones básicas del menú de configuración
Para salir del menú
Sitúe el interruptor MENU ON/OFF en la posición OFF.
Volverá a aparecer la imagen normal de la cámara.
Ajuste del nivel de audio
Correspondencia entre los ajustes del
nivel de grabación y los controles del nivel
de audio
Si sitúa el interruptor AUDIO SELECT en AUTO, se
ajustan automáticamente los niveles de entrada de las
señales de audio analógico grabadas en cada canal. Sin
embargo, también puede realizar ajustes manualmente.
En la opción “Audio Input” del menú Audio, puede
seleccionar qué control del nivel de audio controla el nivel
de grabación del audio de la entrada recibida por cada uno
de los conectores AUDIO IN CH-1/CH-2. Aquí se indican
las correspondencias entre los ajustes de las opciones del
menú y los controles.
Nota
Aunque sitúe el interruptor AUDIO SELECT en AUTO,
los niveles de entrada de las señales de audio digital no se
ajustan automáticamente.
Nivel de audio objetivo para el ajuste manual del
nivel de audio
Realice los ajustes utilizando –20 dB como nivel objetivo.
Si el medidor de nivel de audio muestra un nivel máximo
de 0 dB, indica que el nivel de entrada del audio es
excesivo.
Nivel de entrada excesivo
Rear1/WRR Level: nivel de grabación del canal 1
Ajuste
Manecilla
Side1
Manecilla LEVEL (CH-1)
Front
Control MIC LEVEL
Front+Side1
Manecilla LEVEL (CH-1) y control MIC
LEVEL (funcionamiento vinculado)
Rear2/WRR Level: nivel de grabación del canal 2
Ajuste
Manecilla
Side2
Manecilla LEVEL (CH-2)
Front
Control MIC LEVEL
Front+Side2
Manecilla LEVEL (CH-2) y control MIC
LEVEL (funcionamiento vinculado)
Nota
Nivel de entrada objetivo
Cuando el funcionamiento de las manecillas LEVEL (CH1/CH-2) y el control MIC LEVEL están vinculados, al
ajustar el control MIC LEVEL en 0, no pueden grabarse
las señales de audio de los canales 1 y 2. Compruebe la
posición del control MIC LEVEL antes de ajustar las
manecillas LEVEL (CH-1/CH-2).
Ajuste manual de los niveles de
audio de las entradas de audio en
los conectores AUDIO IN CH-1/CH-2
Ajuste manual del nivel de audio del
conector MIC IN
1
1
Ajuste el interruptor o interruptores AUDIO IN
utilizados en FRONT.
2
Ajuste el interruptor o interruptores AUDIO SELECT
del canal o canales deseados seleccionados en el paso
1 en MANUAL.
3
Gire el control MIC LEVEL y realice los ajustes
necesarios para que el medidor de nivel de audio
muestre como máximo –20 dB para un volumen de
entrada normal.
Para ajustar la entrada de señal en el conector AUDIO
IN CH-1 o CH-2, sitúe el interruptor AUDIO IN CH1 o CH-2 en REAR.
Para ajustar las dos señales de entrada, sitúe ambos
interruptores en REAR.
2
Ajuste el interruptor o los interruptores AUDIO
SELECT correspondientes al canal o canales
seleccionados en el paso 1 en MANUAL.
3
Con la manecilla LEVEL del canal o canales
seleccionados en el paso 1, realice los ajustes
necesarios para que el medidor de nivel de audio
muestre como máximo –20 dB para un volumen de
entrada normal.
Ajuste del nivel de audio
141
Correspondencia entre los ajustes del
nivel de grabación y los controles del nivel
de audio
En la opción “Audio Input” del menú Audio, puede
seleccionar qué control del nivel de audio controla el nivel
de grabación del audio de la entrada del micrófono
delantero. Aquí se indican las correspondencias entre los
ajustes de las opciones del menú y los controles.
MIC CH1 Level: nivel de grabación del canal 1
Interruptor
CH-4
Fuente de grabación del canal 4
FRONT
Audio del micrófono delantero
REAR
Señal de audio recibida a través del
conector AUDIO IN CH-2
WIRELESS
Audio del micrófono inalámbrico
Ajuste de los niveles de grabación de
audio
Ajuste
Manecilla
Side1
Manecilla LEVEL (CH-1)
Para ajustar los niveles automáticamente
Ajuste el interruptor AUDIO SELECT CH-3/4 en AUTO.
Front
Control MIC LEVEL
Para ajustar los niveles manualmente
Front+Side1
Manecilla LEVEL (CH-1) y control MIC
LEVEL (funcionamiento vinculado)
1
Ajuste el interruptor AUDIO SELECT CH-3/4 en
MANUAL.
2
Seleccione las manecillas que ajustan los niveles de
audio “Audio CH3 Level” y “Audio CH4 Level” en la
opción “Audio Input” del menú Audio.
MIC CH2 Level: nivel de grabación del canal 2
Ajuste
Manecilla
Side2
Manecilla LEVEL (CH-2)
Front
Control MIC LEVEL
Front+Side2
Manecilla LEVEL (CH-2) y control MIC
LEVEL (funcionamiento vinculado)
Nota
Cuando el funcionamiento del control MIC LEVEL y las
manecillas LEVEL (CH-1/CH-2) están vinculados, al
ajustar las manecillas LEVEL (CH-1/CH-2) en 0, no
pueden grabarse las señales de audio de los canales 1 y 2.
Compruebe la posición de las manecillas LEVEL (CH-1/
CH-2) antes de ajustar el control MIC LEVEL.
Grabación de audio en los canales 3
y4
Selección del audio grabado
Puede seleccionar el audio grabado en los canales de audio
3 y 4 con los interruptores AUDIO IN CH-3/CH-4.
Interruptor
CH-3
Fuente de grabación del canal 3
FRONT
Audio del micrófono delantero
REAR
Señal de audio recibida a través del
conector AUDIO IN CH-1
WIRELESS
Audio del micrófono inalámbrico
142
Ajuste del nivel de audio
Audio CH-3 Level: nivel de grabación del canal 3
Ajuste
Manecilla
Side3
Manecilla LEVEL (CH-3)
Front
Control MIC LEVEL
Front+Side3
Manecilla LEVEL (CH-3) y control MIC
LEVEL (funcionamiento vinculado)
Audio CH-4 Level: nivel de grabación del canal 4
Ajuste
Manecilla
Side4
Manecilla LEVEL (CH-4)
Front
Control MIC LEVEL
Front+Side4
Manecilla LEVEL (CH-4) y control MIC
LEVEL (funcionamiento vinculado)
Ahora puede ajustar los niveles de audio de los canales 3 y
4 con las manecillas seleccionadas aquí.
La relación entre el ajuste del interruptor AUDIO IN CH-1/CH-2 y el canal de grabación se indica en la siguiente tabla.
Interruptor AUDIO IN
en la zona de control
de audio
Menú Front
MIC Select
CH-1/2/3/4
Interruptor AUDIO IN en
la zona de conexión
(detrás)
CH-1
CH-2
CH-1
CH-2
CH-3
CH-4
Mono
–
–
Micrófono
frontal
(Mono)
Micrófono
frontal
(Mono)
Micrófono
frontal
(Mono)
Micrófono
frontal
(Mono)
Estéreo
–
–
Micrófono
frontal
(L-Ch)
Micrófono
frontal
(R-Ch)
Micrófono
frontal
(L-Ch)
Micrófono
frontal
(R-Ch)
–
LINE o MIC
LINE o MIC
LINE1 o
MIC1
LINE2 o
MIC2
LINE1 o
MIC1
LINE2 o
MIC2
–
AES/EBU
LINE o MIC
AES/EBU
1-1
AES/EBU
1-2
No hay
sonido
LINE2 o
MIC2
–
LINE o MIC
AES/EBU
LINE1 o
MIC1
No hay
sonido
AES/EBU
2-1
AES/EBU
2-2
–
AES/EBU
AES/EBU
AES/EBU
1-1
AES/EBU
1-2
AES/EBU
2-1
AES/EBU
2-2
Analógico
–
–
–
Mono
Mono
Mono
Mono
Digital
–
–
–
CH-1
CH-2
CH-1
CH-2
FRONT
REAR
WIRELESS
Canal de grabación
LINE o MIC: LINE o MIC seleccionado.
AES/EBU: AES/EBU seleccionado.
Mono: audio monoaural
L-Ch/R-Ch: micrófono L-Ch/R-Ch
LINE1 o MIC1: entrada de señal LINE o MIC desde el conector CH-1
LINE2 o MIC2: entrada de señal LINE o MIC desde el conector CH-2
AES/EBU1-1: señal CH-1 en la entrada de señal AES/EBU procedente del conector CH-1
AES/EBU1-2: señal CH-2 en la entrada de señal AES/EBU procedente del conector CH-1
AES/EBU2-1: señal CH-1 en la entrada de señal AES/EBU procedente del conector CH-2
AES/EBU2-2: señal CH-2 en la entrada de señal AES/EBU procedente del conector CH-2
Ajuste del nivel de audio
143
Notas importantes sobre
la utilización
Dónde usar y guardar el equipo
La vida útil del condensador electrolítico es de unos 5 años
con las temperaturas de funcionamiento habituales y un
uso normal (8 horas al día, 25 días al mes). Si el uso supera
la frecuencia normal indicada, es posible que la vida útil se
vea reducida.
Evite la exposición a impactos fuertes
La carcasa o los componentes internos pueden sufrir
daños.
En caso de problemas de funcionamiento
Si tiene problemas con la unidad, póngase en contacto con
su distribuidor Sony.
Entorno de funcionamiento y
almacenamiento
Guarde el equipo en un sitio estable con aire condicionado.
Si la unidad se moja, séquela completamente antes de
guardarla.
Evite usar o guardar la unidad en los siguientes sitios:
• Lugares con temperaturas muy altas o muy bajas
• Lugares con una humedad alta
• Lugares con vibraciones fuertes
• Cerca de campos magnéticos fuertes
• Lugares que reciban mucha luz solar directa o cerca de
equipos de calefacción
Nota sobre el terminal de la batería
La terminal de la batería de esta unidad (el conector para
paquetes de pilas y adaptadores de CA) es una parte
consumible.
Puede que la unidad no funcione correctamente si los
contactos de las pilas están doblados o deformados debido
a algún golpe o a vibraciones o si se han corroído debido a
un uso prolongado en el exterior.
Se recomienda realizar inspecciones periódicas para que la
unidad continúe funcionando correctamente y para
prolongar su vida útil.
Contacte con el servicio de asistencia técnica de Sony o
con el responsable de ventas para obtener más información
sobre las inspecciones.
144
Notas importantes sobre la utilización
Nota sobre la condensación
Si la unidad se lleva de repente de un lugar frío a uno cálido
o si la temperatura ambiente sufre un aumento repentino,
es posible que se acumule humedad en la superficie
exterior o interior de la unidad. Este fenómeno se conoce
como condensación. Si se produce condensación, apague
la unidad y espere a que se evapore antes de ponerla en
marcha. No la utilice en ese estado, ya que podría dañarla.
Especificaciones
General
Dimensiones (an. × al. × pr.)
Aprox. 170 × 182 × 371 mm
(consulte la página 146)
Peso
Aprox. 2,2 kg (Cuerpo y adaptador de la
batería)
Requisitos de alimentación
12 V de CC (de 11 V a 17 V)
Consumo
Aprox. 3,8 W (cuerpo y adaptador de la
batería)
Temperatura de funcionamiento
De 0 °C a 40 °C
Humedad de funcionamiento
Del 20 % al 90 %
Temperatura de almacenamiento
De –20 °C a +60 °C
Entrada/salida
Conector de la interfaz de ampliación
144 clavijas, proporciona alimentación
Entrada de audio
Tipo XLR, 3 clavijas (×2), diferentes
opciones: LINE / AES/EBU / MIC /
MIC+48V
LINE: +4/0/–3 dBu
AES/EBU: estándar AES3
Salida de audio Tipo XLR, 5 clavijas, +4/0/–3 dBu
(equilibrada)
Entrada de micrófono
Tipo XLR, 5 clavijas, de –70 dBu a
–30 dBu
Salida de auriculares
Minitoma estéreo
WRR
D-sub 15 clavijas
CH1 analógico: –40 dBu
CH1/CH2 digital: –40 dBFS
Adaptador de la batería
Entrada de CC Tipo XLR, 4 clavijas, 12 V CC
Salida de CC 4 clavijas, 12 V CC (corriente nominal
máxima: 1,8 A)
LIGHT
2 clavijas, 12 V CC (menos de 50 W)
Accesorios suministrados
Adaptador de la batería (número de referencia:
A-2067-625-) (1)
Barra (Φ 15 mm × 250 mm) (2)
Adaptador del conector de auriculares (tipo L) (1)
Asa (número de referencia: A-2068-023-) (1)
Soporte para el micrófono (preinstalado en el asa)
(número de referencia: A-2068-182-) (1)
Placa (número de referencia: A-2070-502-) (1)
Gancho (número de referencia: 4-458-622-) (1)
Protector del conector VF (número de referencia:
A-2068-183-) (1)
Correa para el hombro (1)
Manual de instrucciones (1)
Opciones
Unidad de sintonizador sintetizado UHF WRR-855
Receptor inalámbrico digital DWR-S02D
Grabador de memorias portátil AXS-R5
Adaptador de CA AC-DN10, AC-DN2B
Batería BP-FL75, BP-L80S
Cargador de batería BC-L70, BC-L90
Micrófono ECM-680S, ECM-678, ECM-674
Cable de conversión de micrófono EC-0.5X3F5M
(para ECM-678/674)
El diseño y las especificaciones están sujetos a
modificaciones sin previo aviso.
Notas
• Verifique siempre que esta unidad funciona
correctamente antes de utilizarlo. SONY NO SE
HACE RESPONSABLE POR DAÑOS DE
NINGÚN TIPO, INCLUYENDO PERO NO
LIMITADO A LA COMPENSACIÓN O PAGO
POR LA PÉRDIDA DE GANANCIAS
PRESENTES O FUTURAS DEBIDO AL FALLO
DE ESTA UNIDAD, YA SEA DURANTE LA
VIGENCIA DE LA GARANTÍA O DESPUÉS DEL
VENCIMIENTO DE LA GARANTÍA NI POR
CUALQUIER OTRA RAZÓN.
• SONY NO SE HACE RESPONSABLE POR
RECLAMACIONES DE NINGÚN TIPO
REALIZADAS POR USUARIOS DE ESTA
UNIDAD O POR TERCEROS.
• SONY NO SE HACE RESPONSABLE DE LA
FINALIZACIÓN NI DE LA INTERRUPCIÓN, POR
LA CIRCUNSTANCIA QUE FUERA, DE
CUALQUIER SERVICIO RELACIONADO CON
ESTA UNIDAD.
SONY NO SE HACE RESPONSABLE POR DAÑOS
DE NINGÚN TIPO DEBIDOS A LA OMISIÓN DE
LAS MEDIDAS DE SEGURIDAD ADECUADAS EN
DISPOSITIVOS DE TRANSMISIÓN, FUGAS DE
DATOS INEVITABLES DERIVADAS DE LAS
ESPECIFICACIONES DE TRANSMISIÓN O
PROBLEMAS DE SEGURIDAD DE CUALQUIER
TIPO.
Especificaciones
145
Dimensiones
Unidad: mm
76,8
57
79,2
66
130
182
274,4
295,1
23,1
93,7
76
261,3
351,1
208,7
146
Especificaciones
370,9
32,8
中文
机型名称:肩扛式升级套件
使用产品前请仔细阅读本书,并请妥善保管。
关于废弃产品的处理
请不要将废弃的产品与一般生活垃圾一同弃置。
正确处置废弃的产品有助于避免对环境和人类健康造
成潜在的负面影响。
具体的处理方法请遵循当地的规章制度。
警告
为减少火灾或电击危险,请勿让本设备受到雨
淋或受潮。
为防止触电严禁拆开机壳,维修请咨询具备资
格人士。
注意
如果更换的电池不正确,就会有爆炸的危险。只更换
同一类型或制造商推荐的电池型号。
处理电池时,必须遵守相关地区或国家的法律。
CS
请勿将本机安装在狭窄的空间中,如书橱或壁橱。
警告
电池不得过度受热,例如受阳光暴晒或投入火中等。
电池使用安全须知
• 不得将电池充电。
• 不得将电池投入火中,加热、分解或改造。
• 应使用指定种类的电池。
• 应使用推荐期限内的电池。
• 应按极性正确安装电池。
• 应及时取出耗尽电池。
• 不得将电池新旧混用。
• 不得将电池弃于水、海水,或弄湿。
• 不得将电池放在小孩容易触及的地方。
• 严禁直接焊接电池。
• 应正确安装电池以防止电池短路。
注意
某些特定频率的电磁场可能会干扰本装置的图像和声
音。
147
目录
概述 .................................................................................... 149
部件名称和功能 .................................................................. 150
前面板................................................................................. 150
背面板................................................................................. 151
操作区 (正面)................................................................. 152
操作区 (侧面)................................................................. 152
音频操作区......................................................................... 153
接口区 (背面)................................................................. 153
手柄..................................................................................... 154
电池适配器......................................................................... 154
连接和设定.......................................................................... 155
电源..................................................................................... 155
安装 CBK-55BK 的电池适配器........................................ 155
使用交流电源 (直流输入电源)..................................... 155
使用 AXS-R5...................................................................... 156
安装 PMW-F55/F5 ............................................................. 156
安装手柄............................................................................. 157
安装取景器......................................................................... 157
使用外部麦克风................................................................. 158
安装 UHF 便携式调谐器 (用于 UHF 无线麦克风系统)
................................................................................... 158
连接线路输入音频设备..................................................... 159
三脚架安装......................................................................... 159
连接摄影灯......................................................................... 160
使用肩带............................................................................. 160
调节肩垫位置..................................................................... 161
使用耳机插头适配器......................................................... 161
基本设定菜单操作............................................................... 162
调节音频电平 ...................................................................... 163
手动调节从 AUDIO IN CH-1/CH-2 接口输入的音频的音频
电平 ........................................................................... 163
手动调节 MIC IN 接口的音频电平 .................................. 163
录制声道 3 和 4 上的音频................................................. 164
有关操作的重要说明 ........................................................... 166
规格 .................................................................................... 166
尺寸..................................................................................... 168
148
目录
概述
CBK-55BK 是辅助套件,将该套件安装到 PMW-F55/
F5 可增强肩扛式摄像机的稳定性和操作性。
CBK-55BK 具有各种音频输入 / 输出接口、直接开关
(在肩上使用 PMW-F55/F5 拍摄时,通过取景器观看
可方便控制 PMW-F55/F5)、无线音频接收器插槽和
音频控制面板。
前控制区和肩垫可在前后方向滑动 70 mm。如果安装
有 PL 镜头或大型便携式 B4 镜头,在肩上使用
PMW-F55/F5 拍摄时可轻松保持平衡。
概述
149
部件名称和功能
前面板
a AUDIO IF 接口
用于将 CBK-55BK 连接到 PMW-F55/F5。
g 音频操作区的保护盖
打开以使用音频操作区 (请参阅第 153 页)。
b MIC IN (麦克风输入)(+48 V)接口 (XLR
型、 5 针、雌接口)
将立体声麦克风连接到此接口。通过此接口供电
(+48 V)。
h 扩展 IF 接口
用于将 CBK-55BK 连接到 PMW-F55/F5。
c 连杆锁定杆
用于安装或拆卸 Φ 15 连杆。
安装连杆时,旋转锁定杆将其锁定到位。只要锁定杆
处于难以旋转的位置,将锁定杆斜向拉出,放回前转
动到更佳位置以继续旋转。
j 玫瑰花形支座 (左和右)
用于安装普通手柄。
注意
当未安装连杆时,请勿强行转动连杆锁定杆。
d Φ 15 连杆
用于安装遮片盒、跟焦器和其他附件。
e 操作区 (正面)(请参阅 “操作区 (正面)”。)
f 音频操作区 (请参阅 “音频操作区”。)
150
部件名称和功能
i 操作区 (侧面)(请参阅 “操作区 (侧面)”。)
k 三脚架支座
在三脚架上使用 CBK-55BK 时,安装三脚架适配器
(选购)。
背面板
a UHF 便携式调谐器的安装点
安装 UHF 便携式调谐器 (请参阅第 158 页)。
b 电池适配器的安装点
安装附送的电池适配器 (请参阅第 155 页)。
j 肩垫
提起肩垫固定杆可在前后方向调节位置。
在肩上操作 PMW-F55/F5 时调节位置以方便使用
(请参阅第 161 页)。
c TALLY (讯号)指示灯 (红色)
录制时点亮。如果 CBK-55BK 或 PMW-F55/F5 出现
异常,此指示灯闪烁。(有关异常的详细信息,请参
阅 PMW-F55/F5 的使用说明书。)
d 扩展 IF 接口
用于连接电池适配器或 AXS-R5。
e 接口区 (背面)(请参阅 “接口区 (背面)”。)
f 释放按钮 / 弹出杆
用于将 CBK-55BK 安装到 PMW-F55/F5 (请参阅第
156 页)。
g 前区块
通过释放前区块固定杆可以在前后方向调节前区块位
置。
调节前区块位置,以便能在肩上轻松操作 CBK-55BK
(请参阅第 161 页)。
h AUDIO 滑动旋钮
用于将 CBK-55BK 安装到 PMW-F55/F5 (请参阅第
156 页)。
i 摄像机锁定杆
用于将 CBK-55BK 安装到 PMW-F55/F5 (请参阅第
156 页)。
部件名称和功能
151
操作区 (正面)
操作区 (侧面)
a REC START (录制开始)按钮
按下开始录制。再次按下将停止录制。作用和镜头上
的 REC 按钮相同。
a GAIN/EI 选择器
切换视频放大器的增益以便在拍摄时符合光线条件。
在 PMW-F55/F5 的菜单上可以选择对应 H、 M 和 L
设定的增益。(有关设定的详细信息,请参阅 PMWF55/F5 的使用说明书。)
在 Cine EI 模式时切换到预设的 3 种 EI 值。
b SHUTTER 开关
设定为 ON 将使用电子快门。推至 SELECT 可切换快
门速度设定。操作此开关时,取景器屏幕上将出现新
的设定约三秒钟。
当摄像菜单的 “快门”中的 “选择”设定为 “步
幅”且此开关推至 SELECT 时,将切换快门速度,当
摄像菜单的 “快门”中的 “选择”设定为 “连续”
且此开关推至 SELECT 时,将显示当前快门速度,通
过转动 MENU 旋钮可以切换快门速度。
c MIC (麦克风) LEVEL 控制器
调节声道 1、 2、 3 和 4 的输入电平。
d AUTO W/B BAL (自动白 / 黑平衡调节)开关
激活自动白 / 黑平衡调节功能。
• WHITE:自动调节白平衡。如果 WHITE BAL 开关
(请参阅第 152 页)设定为 A 或 B,白平衡设定将
存储到对应的存储器中。如果 WHITE BAL 开关设
定为 PRST,自动白平衡调节功能不工作。
• BLACK:自动调节黑色设定和黑平衡。
如果在自动白平衡调节期间再次将开关推至
WHITE,调节将取消且白平衡设定将返回原始设定。
如果在自动黑平衡调节期间再次将开关推至
BLACK,调节将取消且黑平衡设定将返回原始设定。
e MENU 旋钮
在菜单内更改项目选择或设定 (请参阅第 162 页)。
152
部件名称和功能
b MENU ON/OFF 开关
用于在取景器屏幕或测试信号屏幕上显示菜单。每按
一次此开关时,将打开和关闭菜单画面。
c ASSIGN. (可指定) 6/7/8 开关
将所需功能指定到系统菜单的 “可指定按钮”上的
开关中。
出厂默认设定情况下,“关”指定到 ASSIGN. 6/7/8
开关。 ASSIGN. 6/7/8 开关带有指示灯,显示功能是
(开)否 (关)指定到开关。(有关设定的详细信
息,请参阅 PMW-F55/F5 的使用说明书。)
d ASSIGN. (可指定) 5 开关
将所需功能指定到系统菜单的 “可指定按钮”上的
开关中。
出厂默认设定情况下,“彩条”(彩条输出信号)指
定到 ASSIGN. 5 开关。(有关设定的详细信息,请参
阅 PMW-F55/F5 的使用说明书。)
e WHITE BAL (白平衡存储器)开关
控制白平衡的调节。
• PRST:将色温调节到预设值 (出厂默认设定:
3200K)。当您没有时间调节白平衡时,使用此设
定。
• A 或 B:调用 A 或 B 中已存储的白平衡调节设定。
将 AUTO W/B BAL 开关 (请参阅第 152 页)推至
WHITE,可自动调节白平衡,并将调节设定保存到
存储器 A 或存储器 B。
在 Cine EI 模式时,在预设 3200K、预设 4300K 和预
设 5500K 之间切换。
出厂默认设定情况下,在 Cine EI 模式时,白平衡设
定为以下设定。
PRST:预设 3200K
A:预设 4300K
B:预设 5500K
f MENU CANCEL/BACK 开关
当此开关推至 CANCEL/BACK 时,页面将返回到上
一层。更改之前的设定将被取消。
注意
对于选择 AES/EBU 信号作为音频输入信号的声道,
录制音频电平是固定的。
d MONITOR (监视器音量调节)旋钮
控制通过内置扬声器或耳机输出的声音音量。当旋钮
转到最小位置时,听不到声音。
音频操作区
e AUDIO SELECT CH-3/4 (声道 3/4 调节方法选
择)开关
同时选择声道 3 和 4 的音频电平调节方法。
• AUTO:自动调节
• MANUAL:手动调节
f AUDIO IN CH-1/CH-2/CH-3/CH-4 (声道 1/2/3/4
输入选择)开关
选择要在声道 1、 2、 3 和 4 上录制的音频输入信号。
• FRONT:来自连接到 MIC IN 接口的麦克风的音频
输入信号
• REAR:来自连接到AUDIO IN CH-1/CH-2接口的音
频设备的音频输入信号
• WIRELESS:来自 UHF 便携式调谐器(如有安装)
的音频输入信号
a MONITOR (音频监视器选择)开关
通过组合这两个开关,可以选择要通过内置扬声器或
耳机聆听的音频。
接口区 (背面)
右侧开关的位置:CH-1/2
左侧开关的位置
音频输出
CH-1/CH-3
声道 1 音频
MIX
声道 1 和 2 混合音频 (立体声)
CH-2/CH-4
声道 2 音频
右侧开关的位置:CH-3/4
左侧开关的位置
音频输出
CH-1/CH-3
声道 3 音频
MIX
声道 3 和 4 混合音频 (立体声)
CH-2/CH-4
声道 4 音频
* 通过将立体声耳机连接到 HEADPHONE 插孔,可以聆听立
体声音频。(有关设定的详细信息,请参阅 PMW-F55/F5 的
使用说明书。)
b LEVEL CH-1/CH-2/CH-3/CH-4 (声道 1/2/3/4 录
制电平)旋钮
当 AUDIO SELECT CH-1/CH-2 和 AUDIO SELECT
CH-3/CH-4 开关设定为 MANUAL 时,可以调节要在
声道 1、 2、 3 和 4 上录制的音频电平。
c AUDIO SELECT CH-1/CH-2 (声道 1/2 调节方法
选择)开关
选择声道 1 和 2 的音频电平调节方法。
• AUTO:自动调节
• MANUAL:手动调节
a AUDIO IN 选择器
选择连接到 AUDIO IN CH-1/CH-2 接口的音源。
• LINE:当连接立体声放大器等外接音频信号源时
• AES/EBU:当连接外接数字音频信号源时
• MIC:当连接麦克风时
b HEADPHONE (LIVE MON)插孔 (立体声,
微型插孔)
通过连接耳机可以监听 E-E* 声音。显示警报时,可
以通过耳机听到警报音。将耳机插入插孔将自动切断
PMW-F55/F5 的内置扬声器。
* E-E:“Electric-to-Electric”的缩写。在 E-E 模式
中,输入摄像机的视频和音频信号仅在通过内部电
路之后才输出。这可用于检查输入信号。
注意
无法输出播放声音。
部件名称和功能
153
c 底盖
用于保护连接到背面板上接口的电缆。
通过拧松 CBK-55BK 底部的螺钉,可以根据麦克风
和音频电缆插头的尺寸和形状调节盖子的位置。调节
位置后,拧紧螺钉以固定盖子。
d +48V/OFF (48 V 电源打开 / 关闭)开关
视连接的麦克风而定,切换到以下设定。
• +48V:当连接需要 48 V 电源的麦克风时
• OFF:当连接无需 48 V 电源的麦克风时
注意
对安装的附件不要用力过猛。这可能会导致螺纹损
坏。
电池适配器
e LIVE AUDIO OUT 接口 (XLR 型, 5 针,雄接
口)
输出在声道 1 和 2 或声道 3 和 4 上输入的音频信号。
音频信号由 MONITOR 开关选择。
注意
无法输出播放声音。
f AUDIO IN CH-1/CH-2 (声道 1 和 2 输入)接口
(XLR 型, 3 针,雌接口)
连接音频设备或麦克风。
手柄
有关如何安装 / 拆卸电池适配器,请参见第 155 页上
的 “安装 CBK-55BK 的电池适配器”。
a 释放按钮 / 弹出杆
b 电池释放杆
c 扩展 IF 接口
d 直流输入接口 (请参阅第 155 页)
a 麦克风固定架
安装外部麦克风 (请参阅第 158 页)。
b 取景器左右定位环
松开此环可调节取景器的左右位置 (请参阅第 157
页)。
c 取景器安装靴
安装取景器 (请参阅第 157 页)。
d 肩带安装接头
安装附送的肩带 (请参阅第 160 页)。
e LIGHT (摄影灯)接口 (2 针,雌接口)
可连接最大功耗为 50 W 的摄影灯,如 Anton Bauer
Ultralight 2 或同等品 (请参阅第 160 页)。
注意
摄影灯 ON/OFF 未与拍摄互锁。
f 电池安装部分
g 直流输出接口
注意
连接设备时,使用电耗 1.8A 或更少的设备。
e 附件安装螺钉孔
• 螺钉类型:1/4-20UNC (× 9)
• 螺钉类型:3/8-16UNC (× 8)
• 接合长度:9 mm 或更短
154
部件名称和功能
2
连接和设定
将电池适配器突出部分插入 CBK-55BK 后部槽口
(1),然后放下弹出杆 (2),直至电池适配
器在释放按钮中锁定。
电源
可以使用电池或者通过交流适配器连接交流电源。
为安全起见,请仅使用下列 Sony 电池和交流适配
器。
锂离子电池
BP-FL75
BP-L80S
交流适配器
AC-DN2B
AC-DN10
安装 CBK-55BK 的电池适配器
1
按电池适配器的释放按钮 (1)弹出弹出杆,然
后提起弹出杆 (2)。
注意
• 安装电池适配器前,确保弹出杆已提起。
• 放下弹出杆前,确保四个钩均已牢固连接。如
果四个钩未牢固连接,可能导致连接不良或损
坏 CBK-55BK 和电池适配器。
电池安装部分
使用电池
电池释放杆
将电池插入到电池适配器的电池安装部分,然后向下
滑动电池直至锁定到位。
注意
• 在使用之前,使用电池充电器给电池充电。
• 使用后还在发热的电池立即进行充电的话,可能无
法充足电。
拆卸电池
在按下电池释放杆的同时向上滑动电池,以解锁电
池,然后将其取出。
拆卸电池适配器
按释放按钮并提起弹出杆,然后在向上滑动时拉出并
拆下电池适配器。
注意
用手托住电池适配器将其拆下。
使用交流电源 (直流输入电源)
CBK-55BK 通过交流适配器 AC-DN2B/AC-DN10
(选购)使用交流电源工作。
连接和设定
155
3
使用 AXS-R5
将 PMW-F55/F5 放在 CBK-55BK 上,然后将其滑到
后部。
使 PMW-F55/F5 和 PMW-F55/F5 底部安装的滑动
板的插槽及 CBK-55BK 对齐放置,然后将 PMWF55/F5 滑到后部直至牢固固定。
有关安装 AXS-R5,请参阅 PMW-F55/F5 的使用说明
书。
安装 PMW-F55/F5
有关操作 PMW-F55/F5 的详细信息,请参阅 PMWF55/F5 随附的使用说明书。
注意
• 要求 PMW-F55/F5 软件版本 5.0 或更新版本。
• 在电源关闭时安装到 PMW-F55/F5 或从其中取下。
1
使用硬币等物品将附送的滑动板牢固安装到
PMW-F55/F5 的底部。
4
锁定 PMW-F55/F5。
1 转动摄像机锁定杆。
2 放下弹出杆直至其锁定。
3 按下 AUDIO 滑动旋钮。
滑动板
注意
务必以正确方向安装。
2
解除摄像机锁定杆、弹出杆和 AUDIO 滑动旋钮的
锁定。
弹出杆
AUDIO 滑动旋钮
摄像机锁定杆
156
连接和设定
安装手柄
1
拆下安装到 PMW-F55/F5 的手柄。
2
使用六角套筒螺栓 (六角扳手尺寸:3/16)安装
CBK-55BK 的手柄。
1
松开取景器热靴固定环,对齐取景器插槽,然后
水平滑动以安装取景器。
取景器热靴
2
在确定取景器左右位置后拧紧固定环,然后将取
景器电缆连接至 PMW-F55/F5 的 VF 接口。
安装取景器
PMW-F55/F5 可用的取景器
• DVF-L350:LCD 彩色取景器
• DVF-L700:LCD 彩色取景器
• DVF-EL100:OLED 彩色取景器
小心
不要将 CBK-55BK 摆放在会使取景器的接目镜朝着
太阳的位置。阳光会通过接目镜直射进入并聚焦于取
景器,最终导致着火。
注意
• 在 PMW-F55/F5 关闭时安装 / 拆卸取景器。
• 使用安装了DVF-L700的PMW-F55/F5时,请在DVFL700 的 POWER 开关设定为 ON 时将其打开。
拆卸取景器
松开取景器固定环,提起阻挡器,然后通过向与安装
时相反的方向滑动将取景器拆下。
安装 VF 接口保护器
使用 PMW-F55/F5 和 CBK-55BK 附送的卷尺钩以及
VF 接口保护器的螺钉,安装 VF 接口保护器。
卷尺钩
有关安装取景器的详情,请参见取景器的使用说明
书。
VF 接口保护器
连接和设定
157
使用外部麦克风
将 ECM-680S/678/674 立体声麦克风 (选购)安装到
附送的麦克风固定架后即可使用。
注意
若要安装 ECM-678/674,需要转换电缆
(EC-0.5X3F5M)。
安装麦克风固定架
安装 UHF 便携式调谐器 (用于 UHF 无
线麦克风系统)
若要使用 Sony UHF 无线麦克风系统,请关闭 PMWF55/F5 的电源,然后安装以下 UHF 便携式调谐器之
一。
• DWR-S02D 数字无线接收器
• WRR-855S UHF 同步调谐器装置
• WRR-860A/861/862 UHF 同步多功能调谐器
有关这些装置的详情,请参阅其使用说明书。
将麦克风固定架对齐手柄,然后拧紧螺钉进行安装。
注意
麦克风固定架
安装 WRR-862 时需要选购的 WRR 调谐器安装接头
(维修部件编号:A-8278-057-B)。
有关详情,请联系供应商或 Sony 服务代表。
安装 DWR-S02D 或 WRR-855S
1
固定住便携式调谐器 / 接收器外壳插槽的盖子,拆
卸四个固定螺钉。
2
将 DWR-S02D 或 WRR-855S 插入外壳插槽,并紧
固四个固定螺钉。
安装麦克风
1
向上拉旋钮,打开外部麦克风安装部分的盖子。
2
安装麦克风,然后盖好外部麦克风安装部分的盖
子,固定麦克风。
3
将麦克风电缆插入 MIC IN 接口,然后将想要从此
麦克风录制音频的声道所对应的 AUDIO IN 开关
(请参阅第 153 页)设定为 FRONT。
DWR-S02D 或 WRR-855S
3
158
连接和设定
将想要输入音频信号的声道所对应的AUDIO IN选
择器设定为 WIRELESS (请参阅第 154 页)。
安装 WRR-862 (使用 BP-L80S 电池时)
1
将 WRR 调谐器安装接头 (未附送;维修部件编
号:A-8278-057-B)安装到 CBK-55BK 的后部。
1 如下图所示,使用十字螺丝刀拧紧放在调谐器
安装接头上的四个螺钉。
4
将调谐器电源线连接到附送电池适配器的直流输
出接口,并且将音频输出电缆连接到 AUDIO IN
CH-1 或 CH-2 接口。
5
如下设定开关。
• 将音频输出电缆连接的声道所对应的 AUDIO IN
选择器设定为 MIC。
• 将音频输出电缆连接的声道所对应的 AUDIO IN
CH-1/CH-2/CH-3/CH-4 开关设定为 REAR。
如果 XLR 连接自动检测功能打开,将自动选择
音频录制的输入信号,因此无需此设定。
注意
确保所有四个螺钉完全拧紧。
2 拧松调谐器安装接头上的调节螺钉。
3 调节要安装的 BP-L80S 电池的调谐器安装接头
位置,并紧固调节螺钉以固定其位置。
4 安装 WRR-862 附送的支座板。
关于 WRR 调谐器安装接头 (维修部件编号:A8278-057-B),请联系 Sony 服务或销售代表。
连接线路输入音频设备
将提供线路输入信号的音频设备的音频输出接口连接
到 AUDIO IN CH-1 或 CH-2 接口。
开关设定
将音频信号源连接的声道所对应的 AUDIO IN 选择器
设定为 LINE。
BP-L80S
三脚架安装
调节螺钉
支座板 (WRR862 附送)
1
将 VCT-14/U14 三脚架适配器(选购)安装到三脚
架。
三脚架适配器
十字螺丝刀
2
安装电池。
有关如何安装电池,请参见第 155 页上的 “使用
电池”。
3
将调谐器安装在 WRR 调谐器安装接头上。
摄像机支座
WRR-862
连接和设定
159
2
将 CBK-55BK 安装到三脚架适配器上。
连接摄影灯
通过此 CBK-55BK,可以使用 Anton Bauer Ultralight 2
或同等摄影灯 (12 V 供电,最大功耗为 50 W)。
即使 CBK-55BK 由超过 12 V 的电源 (通过直流输入
接口或电池)供电, CBK-55BK 上 LIGHT 接口的输
出仍控制为 12 V。摄影灯的亮度或色温不会随电压增
加而改变。
注意
• 请勿使用功耗超过 50 W 的摄影灯。
• 当电压 (通过直流输入接口或电池提供)低于 12 V
时,摄影灯的亮度或色温会改变。
使用肩带
沿适配器的凹槽向前滑动 CBK-55BK 直
至其咔嗒到位。
3
安装肩带
前后移动 CBK-55BK,并确保其不会脱离。
1
将其中一个卡扣固定到肩带安装接头。
将 CBK-55BK 从三脚架适配器上拆下
向上拉肩带,锁定安装接头。
按住红色按钮并按箭头方向拉动拉杆。
卡扣
2
红色按钮
拉杆
注意
即使拆下 CBK-55BK 后,三脚架适配器插脚也可能
会留在接合位置。如果出现这种情况,请如上所示按
红色按钮并移动拉杆,直至插脚回到收起位置。如果
插脚留在接合位置,就无法将 CBK-55BK 安装到三
脚架适配器上。
160
连接和设定
按照与步骤 1 相同的方法,将另一个卡扣固定到手
柄另一侧的肩带安装接头。
3
拆卸肩带
转动前区块固定杆,固定前区块。
按压此处,按照箭头所示方向拉动并
松开。
前区块
前区块固定杆
调节肩垫位置
调节肩垫位置
如下滑动前区块可以变更 CBK-55BK 和肩垫的位置。
1
提起肩垫中央的拉杆,解锁肩垫。
2
前后滑动肩垫,直至其处于最方便的位置。
3
放下拉杆,在所选位置锁定肩垫。
33 mm
拉杆
肩垫
37 mm
70 mm
调节前区块和肩垫的位置,以便能在肩上轻松操作
CBK-55BK。
使用耳机插头适配器
如果使用 PMW-F55/F5 的耳机接口时难以使用带有直
型接口的耳机,请使用附送的耳机插头适配器。
调节前区块位置
1
转动 CBK-55BK 底部的前区块固定杆,解除前区
块的锁定。
2
前后滑动前区块,选择所需位置。
耳机插头适配器
连接和设定
161
基本设定菜单操作
显示设定菜单
向下推 CBK-55BK 的 MENU ON/OFF 开关或按
PMW-F55/F5 的 MENU 按钮。
注意
有关按 PMW-F55/F5 的 MENU 按钮后的操作和菜单
画面,请参阅 PMW-F55/F5 的使用说明书。在本章
节,仅介绍 CBK-55BK 的操作。
进行菜单设定
1
转动 MENU 旋钮将光标移动到想要设定的项目。
图标右侧的菜单项目选择区域出现可选菜单项
目。
2
按 MENU 旋钮。
光标移动到菜单项目选择区域。
3
转动 MENU 旋钮将光标移动到想要设定的菜单项
目,然后按 MENU 旋钮进行确认。
出现设定区域。
4
转动 MENU 旋钮将光标移动到想要设定的项目,
然后按 MENU 旋钮进行确认。
5
转动 MENU 旋钮选择想要设定的值,然后按
MENU 旋钮进行确认。
设定更改,且显示更新以显示新设定。
执行前需要确认的项目
在步骤 3 中,如果选择执行前需要确认的项目,菜单
将消失且出现确认信息。按照信息中的指示执行或取
消操作。
输入文字
选择时间数据或文件名等需要文字输入的项目时,文
字输入字段将高亮显示,且右侧显示 “SET”。
1
转动 MENU 旋钮选择字符,然后按 MENU 旋钮进
行确认。
光标移动到下一个位置。
若要返回上一个位置,请按下 MENU CANCEL/
BACK 开关。
2
162
所有字符输入后,选择 “Done”进行确认。
基本设定菜单操作
取消设定更改
按下 MENU CANCEL/BACK 开关。
退出菜单
将 MENU ON/OFF 开关设定为 OFF。
重新显示正常摄像机画面。
后部 1/WRR 等级:声道 1 录制电平
调节音频电平
将 AUDIO SELECT 开关设定为 AUTO 时,自动调节
各声道上录制的模拟音频信号的输入电平。也可以进
行手动调节。
注意
设定
旋钮
Side1
LEVEL (CH-1) 旋钮
Front
MIC LEVEL 控制器
Front+Side1
LEVEL (CH-1) 旋钮和 MIC LEVEL 控制
器 (链接操作)
后部 2/WRR 等级:声道 2 录制电平
即使将 AUDIO SELECT 开关设定为 AUTO,也不会
自动调节数字音频信号的输入电平。
手动音频电平调节的目标音频电平
以 –20 dB 作为目标电平进行调节。
如果音频电平表显示最大电平为 0 dB,则表示输入音
频电平过大。
过大输入电平
设定
旋钮
Side2
LEVEL (CH-2) 旋钮
Front
MIC LEVEL 控制器
Front+Side2
LEVEL (CH-2) 旋钮和 MIC LEVEL 控制
器 (链接操作)
注意
将 LEVEL (CH-1/CH-2) 旋钮和 MIC LEVEL 控制器的
操作链接在一起时,如果 MIC LEVEL 控制器设定为
0,则无法录制声道 1 和 2 的音频信号。调节 LEVEL
(CH-1/CH-2) 旋钮之前,先检查 MIC LEVEL 控制器
的位置。
手动调节 MIC IN 接口的音频电平
目标输入电平
手动调节从 AUDIO IN CH-1/CH-2 接口
输入的音频的音频电平
1
若要调节输入到 AUDIO IN CH-1 或 CH-2 接口的信
号,请将 AUDIO IN CH-1 或 CH-2 开关设定为
REAR。
若要同时调节两个输入信号,请将两个开关均设
定为 REAR。
2
3
将对应步骤1中所选声道的AUDIO SELECT开关设
定为 MANUAL。
对于调节步骤 1 中所选声道的 LEVEL 旋钮,使音
频电平表普通输入音量最大显示为 –20 dB。
录制电平调节和音频电平控制器之间的对应关
系
1
将使用的 AUDIO IN 开关设定为 FRONT。
2
将步骤1中选择的所需声道对应的AUDIO SELECT
开关设定为 MANUAL。
3
转动 MIC LEVEL 控制器并进行调节,使音频电平
表普通输入音量最大显示为 –20 dB。
录制电平调节和音频电平控制器之间的对应关
系
在音频菜单的 “音频输入”中,可以选择哪个音频
电平控制器控制前麦克风输入的音频录制电平。菜单
项目设定和控制器之间的对应关系如下。
麦克风 CH1 等级:声道 1 录制电平
设定
旋钮
Side1
LEVEL (CH-1) 旋钮
Front
MIC LEVEL 控制器
Front+Side1
LEVEL (CH-1) 旋钮和 MIC LEVEL 控制
器 (链接操作)
在音频菜单的 “音频输入”中,可以选择哪个音频
电平控制器控制各 AUDIO IN CH-1/CH-2 接口的输入
的音频录制电平。菜单项目设定和控制器之间的对应
关系如下。
调节音频电平
163
麦克风 CH2 等级:声道 2 录制电平
音频 CH4 等级:声道 4 录制电平
设定
旋钮
设定
旋钮
Side2
LEVEL (CH-2) 旋钮
Side4
LEVEL (CH-4) 旋钮
Front
MIC LEVEL 控制器
Front
MIC LEVEL 控制器
Front+Side2
LEVEL (CH-2) 旋钮和 MIC LEVEL 控制
器 (链接操作)
Front+Side4
LEVEL (CH-4) 旋钮和 MIC LEVEL 控制
器 (链接操作)
现在即可通过此处选择的旋钮调节音频声道 3 和 4 的
电平。
注意
将 MIC LEVEL 控制器和 LEVEL (CH-1/CH-2) 旋钮的
操作链接在一起时,如果 LEVEL (CH-1/CH-2) 旋钮
设定为 0,则无法录制声道 1 和 2 的音频信号。调节
MIC LEVEL 控制器之前,先检查 LEVEL (CH-1/
CH-2) 旋钮的位置。
录制声道 3 和 4 上的音频
选择录制的音频
可以通过 AUDIO IN CH-3/CH-4 开关选择音频声道 3
和 4 上录制的音频。
CH-3 开关
声道 3 录制目标
FRONT
前麦克风音频
REAR
AUDIO IN CH-1 接口的音频信号输入
WIRELESS
无线麦克风音频
CH-4 开关
声道 4 录制目标
FRONT
前麦克风音频
REAR
AUDIO IN CH-2 接口的音频信号输入
WIRELESS
无线麦克风音频
调节音频录制电平
若要自动调节
将 AUDIO SELECT CH-3/4 开关设定为 AUTO。
若要手动调节
1
将AUDIO SELECT CH-3/4开关设定为MANUAL。
2
选择调节音频菜单 “音频输入”中的音频电平
“音频 CH3 等级”和 “音频 CH4 等级”的旋钮。
音频 CH3 等级:声道 3 录制电平
设定
旋钮
Side3
LEVEL (CH-3) 旋钮
Front
MIC LEVEL 控制器
Front+Side3
LEVEL (CH-3) 旋钮和 MIC LEVEL 控制
器 (链接操作)
164
调节音频电平
AUDIO IN CH-1/CH-2 开关设定和录制声道之间的关系如下。
音频操作区上的AUDIO
IN 开关
CH-1/2/3/4
前部麦克风
选择菜单
接口区 (背面)上的
AUDIO IN 开关
CH-1
CH-2
CH-1
CH-2
CH-3
CH-4
单声道
–
–
前麦克风
(Mono)
前麦克风
(Mono)
前麦克风
(Mono)
前麦克风
(Mono)
立体声
–
–
前麦克风
(L-Ch)
前麦克风
(R-Ch)
前麦克风
(L-Ch)
前麦克风
(R-Ch)
LINE 或 MIC LINE 或 MIC
LINE1 或
MIC1
LINE2 或
MIC2
LINE1 或
MIC1
LINE2 或
MIC2
FRONT
–
–
AES/EBU
LINE 或 MIC
AES/EBU
1-1
AES/EBU
1-2
无声音
LINE2 或
MIC2
–
LINE 或 MIC
AES/EBU
LINE1 或
MIC1
无声音
AES/EBU
2-1
AES/EBU
2-2
–
AES/EBU
AES/EBU
AES/EBU
1-1
AES/EBU
1-2
AES/EBU
2-1
AES/EBU
2-2
模拟
–
–
–
Mono
Mono
Mono
Mono
数字
–
–
–
CH-1
CH-2
CH-1
CH-2
REAR
WIRELESS
录制声道
LINE 或 MIC: 选择 LINE 或 MIC。
AES/EBU: 选择 AES/EBU。
Mono: 单声道音频
L-Ch/R-Ch: 麦克风 L-Ch/R-Ch
LINE1 或 MIC1: 从 CH-1 接口输入的 LINE 或 MIC 信号
LINE2 或 MIC2: 从 CH-2 接口输入的 LINE 或 MIC 信号
AES/EBU1-1: 从 CH-1 接口输入的 AES/EBU 信号中的 CH-1 信号
AES/EBU1-2: 从 CH-1 接口输入的 AES/EBU 信号中的 CH-2 信号
AES/EBU2-1: 从 CH-2 接口输入的 AES/EBU 信号中的 CH-1 信号
AES/EBU2-2: 从 CH-2 接口输入的 AES/EBU 信号中的 CH-2 信号
调节音频电平
165
有关操作的重要说明
规格
使用和存放位置
一般规格
正常操作温度和使用条件下 (每天 8 小时;每月 25
天),电解质电容器的预计使用寿命约为 5 年。如果
超过上述正常使用频率,则预计使用寿命可能会相应
减少。
尺寸 (宽×高×深)
约 170 × 182 × 371 mm
(请参阅第 168 页)
质量
约 2.2 kg (装置主体和电池适配器)
电源要求
直流 12 V (11 V 至 17 V)
功耗
约 3.8 W (装置主体和电池适配器)
工作温度
0 °C 至 40 °C
工作湿度
20 % 至 90 %
存放温度
–20 °C 至 +60 °C
不要受到剧烈震动
否则外壳或内部组件可能会损坏。
如果发生操作上的问题时
如果您在使用本装置时遇到了问题,请联系您的
Sony 经销商。
输入 / 输出
操作和存放环境
存放在具有空调的水平位置。
如果本装置受潮,确保其在存放前完全干燥。
避免在以下场所使用或存放:
• 极热或极冷的场所
• 高湿度场所
• 剧烈震动的场所
• 强磁场附近
• 受到阳光直射的场所或者加热设备附近
关于电池端子的注意事项
本机的电池端子 (电池组和交流适配器的接头)是
一个可消耗部件。
如果电池端子的引脚因震动或晃动而弯曲或变形,或
者由于长时间在户外使用而腐蚀,则可能无法向本机
正常供电。
建议您进行定期检查以使本机正常运行并延长其使用
寿命。
有关检查的详细信息,请联系 Sony 服务或销售代理
商。
关于湿气凝结
如果将设备突然从寒冷的地方带到温暖的场所,或者
室温突然升高,设备的外表面和内部可能会形成水
汽。这称为冷凝。如果发生冷凝,请关闭设备电源,
待到冷凝消失后才能操作设备。冷凝仍然存在时使用
设备可能会导致设备损坏。
扩展界面接口 144 针,提供电源
音频输入
XLR型3针 (×2), LINE / AES/EBU
/ MIC / MIC+48V可选
LINE:+4/0/–3 dBu
AES/EBU:AES3 标准
音频输出
XLR 型, 5 针, +4/0/–3 dBu (平衡)
麦克风输入
XLR 型, 5 针, –70 dBu 至 –30 dBu
耳机输出
立体声微型插孔
WRR
D-sub 15 针
模拟 CH1:–40 dBu
数字 CH1/CH2:–40 dBFS
电池适配器
直流输入
XLR 型 4 针, 12 V 直流
直流输出
4 针, 12 V 直流 (最大额定电流:
1.8A)
LIGHT
2 针, 12 V 直流 (低于 50 W)
附件
电池适配器 (维修部件编号:A-2067-625-)(1)
连杆 (Φ 15 mm × 250 mm)(2)
耳机插头适配器 (L 型)(1)
手柄 (维修部件编号:A-2068-023-)(1)
麦克风固定架 (预装到手柄)
(维修部件编号:A-2068-182-)(1)
滑动板 (维修部件编号:A-2070-502-)(1)
卷尺钩 (维修部件编号:4-458-622-)(1)
VF 接口保护器 (维修部件编号:A-2068-183-)(1)
肩带 (1)
使用说明书 (1)
选购件
WRR-855 UHF 同步调谐器装置
DWR-S02D 数字无线接收器
AXS-R5 便携存储记录单元
AC-DN10, AC-DN2B 交流适配器
BP-FL75、 BP-L80S 电池
BC-L70、 BC-L90 电池充电器
ECM-680S、 ECM-678、 ECM-674 麦克风
166
有关操作的重要说明 / 规格
EC-0.5X3F5M 麦克风转换电缆
(用于 ECM-678/674)
设计和规格如有变更,恕不另行通知。
注意
• 在使用前请始终确认本机运行正常。
无论保修期内外或基于任何理由,SONY 对任何损
坏概不负责。由于本机故障造成的利润损失等,
无论是在保修期以内或者以外,SONY 均不作任何
赔偿。
• SONY 对本产品用户或第三方的任何索赔概不负
责。
• SONY 对因任何情况导致终止或停止使用本机相关
服务概不负责。
SONY 不对任何因传输设备安全措施操作不当、传
输规格导致不可避免的数据泄露或任何种类的安全
问题造成的损坏负责。
规格
167
尺寸
单位:mm
76.8
57
79.2
66
130
182
274.4
295.1
23.1
93.7
76
261.3
351.1
208.7
370.9
产品中有害物质的名称及含量
使用环境条件:
请参考装备了主体的说明书的操作条件
有害物质
部件名称
铅 (Pb)
汞 (Hg)
镉 (Cd)
六价铬 (Cr (VI))
多溴联苯 (PBB)
多溴二苯醚
(PBDE)
实装基板
×
○
○
○
○
○
外壳
附属品
×
×
○
○
○
○
○
○
○
○
○
○
本表格依据 SJ/T 11364 的规定编制。
○︰ 表示该有害物质在该部件所有均质材料中的含量均在 GB/T 26572 规定的限量要求以下。
×︰ 表示该有害物质至少在该部件的某一均质材料中的含量超出 GB/T 26572 规定的限量要求。
W1-36
168
规格
32.8
Русский
Перед началом работы с устройством
внимательно прочитайте данное руководство и
сохраните его для справки в будущем.
Комплект Модификации камеры
Сони Корпорейшн
1-7-1, Конан, Минато-ку, Токио, Япония, 108-0075
Сделано в Японии
Импортер на территории стран Таможенного
союза
ЗАО «Сони Электроникс», Россия, 123103,
Москва, Карамышевский проезд, 6
yyyy-mm или mm-yyyy, распечатанные на этом
изделии или его упаковке означают дату
производства. yyyy означает год, а mm - месяц.
Не устанавливайте прибор в ограниченном
пространстве, например на книжной полке или во
встроенном шкафу.
ВНИМАНИЕ
Электромагнитные поля определенных частот
могут влиять на изображение и звук данного
аппарата.
RU
169
Содержание
Обзор ................................................................................ 171
Название и функции деталей....................................... 172
Передняя панель ............................................................. 172
Задняя панель .................................................................. 173
Функциональная область (передняя) ......................... 174
Функциональная область (боковая) ........................... 174
Функциональная область звука ................................... 175
Область разъемов (задняя)........................................... 176
Ручка.................................................................................. 177
Адаптер батареи ............................................................. 177
Подсоединение и настройка ........................................ 178
Источник питания........................................................... 178
Крепление адаптера батареи к CBK-55BK ............... 178
Использование питания переменного тока (питание
DC IN) ...................................................................... 179
Использование AXS-R5 ................................................ 179
Крепление PMW-F55/F5 ................................................ 179
Крепление ручки............................................................. 180
Крепление видоискателя............................................... 180
Использование внешнего микрофона........................ 181
Крепление портативного устройства настройки UHF
(для системы беспроводного микрофона
UHF)......................................................................... 182
Подключение звукового оборудования линейного
входа ......................................................................... 183
Крепление штатива ........................................................ 183
Установка видеоосвещения .......................................... 184
Использование плечевого ремня................................. 184
Регулировка положения плечевой накладки............ 185
Использование адаптера разъема наушников ......... 186
Основные операции меню настройки ........................ 186
Настройка уровня звука ............................................... 187
Ручная регулировка уровней звука входов звука с
разъемов AUDIO IN CH-1/CH-2 ....................... 187
Ручная регулировка уровня звука разъема
MIC IN ..................................................................... 188
Запись звука на каналах 3 и 4....................................... 188
Важные примечания по эксплуатации ...................... 190
Технические характеристики....................................... 191
Paзмepы............................................................................. 193
170
Содержание
Обзор
CBK-55BK представляет собой комплект
принадлежностей для улучшения стабильности и
работоспособности видеокамеры при креплении
ее на плече с помощью PMW-F55/F5.
CBK-55BK оснащен различными входными/
выходными разъемами, переключателями
непосредственного управления, которые
позволяют управлять PMW-F55/F5 при просмотре
через видоискатель для съемки с помощью PMWF55/F5 на плече, беспроводного аудиоресивера и
панели управления звуком.
Переднюю область управления и плечевую
накладку можно отрегулировать на 70 мм в
переднем и заднем направлении. Можно легко
сохранять равновесие при съемке с помощью
PMW-F55/F5 на плече, если присоединен объектив
PL или большой портативный объектив B4.
Обзор
171
Название и функции деталей
Передняя панель
a Разъем AUDIO IF
Используется для подключения CBK-55BK к
PMW-F55/F5.
b Разъем MIC IN (вход микрофона) (+48 В) (тип
XLR, 5-контактный, гнездовой)
Подключите стереофонический микрофон к
этому разъему. Питание (+48 В) подается с
помощью этого разъема.
c Ручка крепления стержня
Используется для крепления или снятия стержней
Φ 15.
При креплении стержней поверните ручку для
фиксации. Если ручка находится в таком
положении, что ее тяжело поворачивать, отведите
ее вбок и поверните в более удобное положение
перед вставкой для непрерывного вращения.
Примечание
Не поворачивайте ручку крепления стержня с
усилием, если стержни не подсоединены.
172
Название и функции деталей
d Стержни Φ 15
Используются для крепления компендиума,
устройства управления фокусировкой объектива и
других принадлежностей.
e Функциональная область (передняя) (см.
“Функциональная область (передняя)”.)
f Функциональная область звука (см.
“Функциональная область звука”.)
g Защитная крышка функциональной области
звука
Откройте для получения доступа к
функциональной области звука (см. стр. 175).
h Разъем расширения IF
Используется для подключения CBK-55BK к
PMW-F55/F5.
i Функциональная область (боковая) (см.
“Функциональная область (боковая)”.)
j Крепления-розетки (левое и правое)
Используются для крепления обычных кистевых
ремней.
k Крепление штатива
Прикрепите адаптер штатива (дополнительно)
при использовании CBK-55BK на штативе.
Задняя панель
a Точка крепления портативного устройства
настройки UHF
Прикрепите портативное устройство настройки
UHF (см. стр. 182).
b Точка крепления адаптера батареи
Прикрепите прилагаемый адаптер батареи (см.
стр. 178).
c Индикатор TALLY (световой индикатор
включения) (красный)
Загорается красным во время записи. Этот
индикатор будет мигать в случае обнаружения
ненормального состояния CBK-55BK или PMWF55/F5. (Для получения дополнительной
информации о ненормальных состояниях см.
инструкцию по эксплуатации PMW-F55/F5.)
d Разъем расширения IF
Используется для подключения адаптера батареи
или AXS-R5.
e Область разъемов (задняя) (см. “Область
разъемов (задняя)”.)
g Передний блок
Положение переднего блока можно регулировать
в переднем и заднем направлении, отпустив ручку
фиксации переднего блока.
Отрегулируйте положение переднего блока,
чтобы можно было легко управлять CBK-55BK
при расположении на плече (см. стр. 185).
h Ручка AUDIO
Используется для подключения CBK-55BK к
PMW-F55/F5 (см. стр. 179).
i Запорный рычаг камеры
Используется для подключения CBK-55BK к
PMW-F55/F5 (см. стр. 179).
j Плечевая накладка
Поднимите ручку фиксации плечевой накладки
для регулировки положения в переднем и заднем
направлении.
Отрегулируйте положение для оптимального
удобства при использовании PMW-F55/F5 на плече
(см. стр. 185).
f Кнопка фиксатора/рычажок извлечения
Используется для подключения CBK-55BK к
PMW-F55/F5 (см. стр. 179).
Название и функции деталей
173
Функциональная область
(передняя)
a Кнопка REC START (запуск записи)
Нажмите, чтобы начать запись. Нажмите кнопку
еще раз, чтобы остановить запись. Действие
совпадает с действием кнопки REC на объективе.
b Переключатель SHUTTER
Установите в положение ON для использования
электронного затвора. Нажмите в положение
SELECT для переключения настройки скорости
спуска затвора. При использовании этого
переключателя новая настройка будет
отображаться на экране видоискателя в течение
приблизительно трех секунд.
Если для параметра “Select” в пункте “Shutter”
меню “Camera” установлено значение “Step”, а
переключатель установлен в положение SELECT,
скорость затвора будет переключена, а если для
параметра “Select” в пункте “Shutter” меню
“Camera” установлено значение “Continuous”, а
переключатель установлен в положение SELECT,
отобразится текущая скорость затвора, а скорость
затвора можно будет переключить поворотом
ручки MENU.
c Регулятор MIC (микрофон) LEVEL
Используется для регулировки уровня входа
аудиоканалов 1, 2, 3 и 4.
d Переключатель AUTO W/B BAL
(автоматическая регулировка баланса белого/
черного)
Включение функций автоматической
регулировки баланса белого/черного.
174
Название и функции деталей
• WHITE: автоматическая настройка баланса
белого. Если для переключателя WHITE BAL
(см. стр. 175) установлено положение A или B,
настройка баланса белого сохраняется в
соответствующей памяти. Если для
переключателя WHITE BAL установлено
положение PRST, функция автоматической
регулировки баланса белого не будет работать.
• BLACK: автоматическая регулировка черного
цвета и баланса черного.
Если переместить переключатель в положение
WHITE еще раз во время автоматической
регулировки баланса белого, регулировка
отменяется, а для настройки баланса белого
восстанавливается исходное значение.
Если переместить переключатель в положение
BLACK еще раз во время автоматической
регулировки баланса черного, регулировка
отменяется, а для настройки баланса черного
восстанавливается исходное значение.
e Ручка MENU
Изменяет выбор элемента или настройку в меню
(см. стр. 186).
Функциональная область
(боковая)
a Переключатель GAIN/EI
Выполняется переключение усиления
видеоусилителя для соответствия условиям
освещения во время съемки. Усиление,
соответствующее настройкам H, M и L, можно
выбрать в меню PMW-F55/F5. (Для получения
дополнительной информации о настройке см.
инструкцию по эксплуатации PMW-F55/F5.)
Переключение 3 типов значений предустановки
EI в режиме Cine EI.
b Переключатель MENU ON/OFF
Используется для отображения меню экрана
видоискателя или экрана тестового сигнала. При
каждом нажатии переключателя экран меню
включается или выключается.
c Переключатели ASSIGN. (назначаемые) 6/7/8
Назначьте необходимые функции
переключателям “Assignable Button” в меню
System.
Значение “Off” устанавливается для
переключателей ASSIGN. 6/7/8 в качестве
заводской настройки по умолчанию. Для
переключателей ASSIGN. 6/7/8 имеется
индикатор для указания на то, назначена какаялибо функция переключателю (вкл.) или нет
(выкл.). (Для получения дополнительной
информации о настройке см. инструкцию по
эксплуатации PMW-F55/F5.)
d Переключатель ASSIGN. (назначаемый) 5
Назначьте необходимую функцию
переключателю “Assignable Button” в меню
System.
Значение “Color Bars” (выходной сигнал цветной
полосы) назначается переключателю ASSIGN. 5 в
качестве заводской настройки по умолчанию. (Для
получения дополнительной информации о
настройке см. инструкцию по эксплуатации PMWF55/F5.)
e Переключатель WHITE BAL (память баланса
белого)
Управление регулировкой баланса белого.
• PRST: восстановление предустановленного
значения цветовой температуры (заводская
настройка по умолчанию: 3200K). Используйте
эту настройку, если нет времени на регулировку
баланса белого.
• A или B: вызов настроек регулировки баланса
белого, уже сохраненных в A или B. Установите
для переключателя AUTO W/B BAL (см. стр.
174) положение WHITE для автоматической
регулировки баланса белого и сохранения
настроек регулировки в памяти A или памяти B.
В режиме Cine EI переключение между Preset
3200K, Preset 4300K и Preset 5500K.
Для баланса белого устанавливается следующая
настройка в качестве значения по умолчанию в
режиме Cine EI.
PRST: Preset 3200K
A: Preset 4300K
B: Preset 5500K
f Переключатель MENU CANCEL/BACK
Если переключатель переведен в положение
CANCEL/BACK, страница вернется к
предыдущему уровню иерархии. Настройки до
изменения отменяются.
Функциональная область звука
a Переключатели MONITOR (выбор
аудиомонитора)
Объединив два переключателя, можно выбрать
звук, который должен выводиться через
встроенный динамик или наушники.
Положение правого переключателя: CH-1/2
Положение
Аудиовыход
левого
переключателя
CH-1/CH-3
Канал звука 1
MIX
Каналы микшированного звука 1 и 2
(стерео)
CH-2/CH-4
Канал звука 2
Положение правого переключателя: CH-3/4
Положение
Аудиовыход
левого
переключателя
CH-1/CH-3
Канал звука 3
MIX
Каналы микшированного звука 3 и 4
(стерео)
CH-2/CH-4
Канал звука 4
* Подключив стереофонические наушники к разъему
HEADPHONE, можно прослушивать стереофоническое
звучание. (Для получения дополнительной информации о
настройке см. инструкцию по эксплуатации PMW-F55/F5.)
Название и функции деталей
175
b Ручки LEVEL CH-1/CH-2/CH-3/CH-4 (уровень
записи канала звука 1/2/3/4)
Можно отрегулировать уровни звучания для
записи на каналах 1, 2, 3 и 4, если для
переключателей AUDIO SELECT CH-1/CH-2 и
AUDIO SELECT CH-3/CH-4 установлено
значение MANUAL.
c Переключатели AUDIO SELECT CH-1/CH-2
(выбор способа регулировки канала звука 1/2)
Выберите способ регулировки уровня звука для
каналов звука 1 и 2.
• AUTO: автоматическая регулировка
• MANUAL: ручная регулировка
Примечание
На канале, для которого выбран сигнал AES/EBU
для входных сигналов звука, фиксируется уровень
звука записи.
d Ручка MONITOR (регулировка громкости
монитора)
Управление громкостью звука, выходящего через
встроенный динамик или наушники. При повороте
ручки в минимальное положение звук
воспроизводиться не будет.
e Переключатель AUDIO SELECT CH-3/4
(выбор способа регулировки канала звука 3/4)
Выберите способ одновременной регулировки
уровня звука для каналов звука 3 и 4.
• AUTO: автоматическая регулировка
• MANUAL: ручная регулировка
f Переключатели AUDIO IN CH-1/CH-2/CH-3/
CH-4 (выбор входа канала звука 1/2/3/4)
Выбор входных сигналов звука для записи на
каналах звука 1, 2, 3 и 4.
• FRONT: входные сигналы звука с микрофона,
подключенного к разъему MIC IN
• REAR: входные сигналы звука с
аудиоустройства, подключенного к разъемам
AUDIO IN CH-1/CH-2
• WIRELESS: входные сигналы звука с
портативного устройства настройки UHF, если
оно установлено
Область разъемов (задняя)
a Переключатели AUDIO IN
Выберите источник звука, подключенный к
разъемам AUDIO IN CH-1/CH-2.
• LINE: при подключении внешнего источника
сигнала звука, например стереоусилителя
• AES/EBU: при подключении внешнего
источника цифрового сигнала звука
• MIC: при подключении микрофона
b Гнездо HEADPHONE (LIVE MON)
(стереофоническое, мини-разъем)
Можно управлять звуком E-E*, подключив
наушники. Для указания на предупреждение в
наушниках раздастся звуковой сигнал. При
подключении наушников в разъем автоматически
отключается звук встроенного динамика PMWF55/F5.
* E-E: сокращение от “Electric-to-Electric”. В
режиме E-E вход сигналов видео и аудио на
видеокамере выводится после прохождения
только через внутренние электрические цепи.
Это можно использовать для проверки входных
сигналов.
Примечание
Звук воспроизведения не будет выводиться.
c Нижняя крышка
Используется для защиты кабелей, подключенных
к разъемам на задней панели.
Ослабив винты в нижней части CBK-55BK, можно
отрегулировать положение крышки в зависимости
от размера и формы вилок микрофона или
аудиокабеля. После регулировки положения
затяните винты для фиксации крышки.
d Переключатель +48V/OFF (включение/
выключение источника питания 48 В)
В зависимости от подключенного микрофона
установите необходимую настройку.
• +48V: при подключении микрофона, для
которого требуется источник питания 48 В
176
Название и функции деталей
• OFF: при подключении микрофона, для
которого не требуется источник питания 48 В
e Разъем LIVE AUDIO OUT (тип XLR, 5контактный, штекерный)
Вывод входных аудиосигналов на каналах звука 1
и 2 или каналах 3 и 4.
Аудиосигналы можно выбрать с помощью
переключателя MONITOR.
Примечание
Не применяйте чрезмерные усилия к
прикрепленным принадлежностям. Это может
привести к повреждению винтовой резьбы.
Адаптер батареи
Примечание
Звук воспроизведения не будет выводиться.
f Разъемы AUDIO IN CH-1/CH-2 (вход каналов
звука 1 и 2) (тип XLR, 3-контактный,
гнездовой)
Подключите звуковое оборудование или
микрофон.
Ручка
Для получения информации о креплении/снятии
адаптера батареи см. “Крепление адаптера
батареи к CBK-55BK” на стр. 178.
a Кнопка фиксатора/рычажок извлечения
b Рычажок снятия батареи
a Держатель микрофона
Подключите внешний микрофон (см. стр. 181).
b Кольцо установки в левом и правом
положениях
Ослабьте это кольцо для регулировки в левом и
правом положениях видоискателя (см. стр. 180).
c Установочный разъем видоискателя
Прикрепите видоискатель (см. стр. 180).
d Соединение плечевого ремня
Прикрепите прилагаемый плечевой ремень (см.
стр. 184).
e Монтажные отверстия крепления
принадлежностей
• Тип винта: 1/4-20UNC (× 9)
• Тип винта: 3/8-16UNC (× 8)
• Длина зацепления: 9 мм или менее
c Разъем расширения IF
d Разъем DC IN (см. стр. 179)
e Разъем LIGHT (видеоосвещение)
(2-контактный, гнездовой)
Можно подключить видеоосвещение с
максимальным энергопотреблением 50 Вт,
например Anton Bauer Ultralight 2 или
эквивалентное (см. стр. 184).
Примечание
Режимы ON/OFF не взаимосвязаны с записью.
f Деталь крепления батарейного блока
g Разъем DC OUT
Примечание
При подключении используйте только устройства
с потреблением тока 1,8 А и менее.
Название и функции деталей
177
Подсоединение и
настройка
2
Вставьте выступ адаптера батареи в слот на
задней части CBK-55BK (1), затем опустите
рычажок извлечения (2), пока адаптер
батареи не будет зафиксирован кнопкой
фиксатора.
Источник питания
Можно использовать батарейный блок или
питание переменного тока с помощью адаптера
переменного тока.
В целях безопасности используйте только
аккумуляторные блоки и адаптеры переменного
тока Sony из списка ниже.
Литиево-ионный батарейный блок
BP-FL75
BP-L80S
Адаптер переменного тока
AC-DN2B
AC-DN10
Крепление адаптера батареи к
CBK-55BK
1
Нажмите кнопку фиксатора (1) адаптера
батареи для раскрытия рычажка извлечения,
затем поднимите рычажок извлечения (2).
Деталь крепления
батарейного блока
Рычажок снятия
батареи
Примечания
• Перед креплением адаптера батареи
убедитесь, что рычажок извлечения поднят.
• Перед опусканием рычажка извлечения
убедитесь, что четыре крючка надежно
закреплены. Если четыре крючка не
закреплены надежно, соединение может
быть ослабленным, что может стать
причиной повреждения CBK-55BK и
адаптера батареи.
Использование батарейного блока
Вставьте батарейный блок в деталь крепления
батарейного блока, затем сдвиньте батарейный
блок вниз для фиксации.
Примечания
• Перед использованием зарядите батарейный
блок с помощью зарядного устройства.
• Теплую батарею сразу после использования,
возможно, не удастся полностью зарядить.
Извлечение батарейного блока
Разблокируйте батарейный блок, сдвинув его
вверх при нажатии рычажка снятия, затем снимите
его.
178
Подсоединение и настройка
Извлечение адаптера батареи
Нажмите кнопку фиксатора и поднимите
рычажок извлечения, затем снимите адаптер
батареи, сдвинув и потянув его вверх.
Примечание
Прикрепляйте в необходимом направлении.
2
Снимите блокировку запорного рычага
камеры, рычажка извлечения и ручки AUDIO.
Примечание
Снимите адаптер батареи, удерживая его рукой.
Рычажок извлечения
Использование питания
переменного тока (питание DC IN)
CBK-55BK работает с питанием переменного тока
с помощью адаптера переменного тока AC-DN2B/
AC-DN10 (дополнительно).
Ручка AUDIO
Запорный рычаг камеры
Использование AXS-R5
Для получения информации о креплении AXS-R5
см. инструкцию по эксплуатации PMW-F55/F5.
Крепление PMW-F55/F5
Для получения дополнительной информации об
обращении с PMW-F55/F5 см. инструкцию по
эксплуатации, прилагаемую к PMW-F55/F5.
3
Установите PMW-F55/F5 на CBK-55BK, затем
задвиньте к задней части.
Установите PMW-F55/F5 в выровненном
положении в слот ползунка, прикрепленного к
нижней части PMW-F55/F5 и CBK-55BK, затем
сдвиньте PMW-F55/F5 в заднюю часть до
фиксации.
Примечания
• Требуется программное обеспечение PMW-F55/
F5 5.0 или более поздней версии.
• Крепление или снятие с PMW-F55/F5
необходимо выполнять при выключенном
источнике питания.
1
Надежно прикрепите прилагаемый ползунок к
нижней части PMW-F55/F5 монетой и т.д.
Ползунок
Подсоединение и настройка
179
4
Закрепите PMW-F55/F5.
1 Поверните запорный рычаг камеры.
2 Опустите рычажок извлечения до
фиксации.
3 Прижмите ручку AUDIO.
Крепление видоискателя
Доступные видоискатели для PMW-F55/F5
• DVF-L350: цветной видоискатель с ЖКД
• DVF-L700: цветной видоискатель с ЖКД
• DVF-EL100: цветной видоискатель на
органических светодиодах
Осторожно
Не оставляйте CBK-55BK с видоискателем,
направленным на солнце. Прямые солнечные лучи
могут попасть внутрь окуляра, сфокусироваться в
видоискателе и привести к возгоранию.
Примечания
• Выполняйте крепление/снятие видоискателя при
выключенном питании PMW-F55/F5.
• При использовании PMW-F55/F5 с
установленным DVF-L700, включайте ее, когда
для переключателя POWER DVF-L700
установлено положение ON.
Крепление ручки
1
Снимите ручку, прикрепленную к PMW-F55/
F5.
2
Прикрепите ручку CBK-55BK с помощью
болта с головкой под внутренний
шестигранник (размер шестигранного
гаечного ключа: 3/16).
180
Подсоединение и настройка
Для получения дополнительной информации о
креплении видоискателя см. инструкцию по
эксплуатации видоискателя.
1
Ослабьте кольцо крепления разъема
видоискателя, совместите слот видоискателя,
затем закрепите видоискатель, сдвинув его по
горизонтали.
Разъем видоискателя
2
Затяните кольцо крепления после определения
левого и правого положения видоискателя,
затем подключите кабель видоискателя к
разъему VF PMW-F55/F5.
Примечание
Для крепления ECM-678/674 требуется кабельпереходник (EC-0.5X3F5M).
Крепление держателя микрофона
Совместите держатель микрофона с ручкой, затем
надежно прикрепите ее винтом.
Держатель микрофона
Снятие видоискателя
Ослабьте кольцо крепления видоискателя,
поднимите фиксатор, затем снимите
видоискатель, сдвинув его в обратном
направлении крепления.
Крепление защиты разъема VF
Прикрепите защиту разъема VF с помощью
крюка мерной рулетки, прилагаемого к PMW-F55/
F5 и CBK-55BK, и винта защиты разъема VF.
Крюк мерной рулетки
Крепление микрофона
1
Откройте крышку детали крепления внешнего
микрофона, вытянув ручку.
2
Прикрепите микрофон, затем зафиксируйте
его, закрыв крышку детали крепления
внешнего микрофона в оригинальное
положение.
3
Подключите кабель микрофона к разъему
MIC IN, затем установите для переключателя
AUDIO IN (см. стр. 176) канала, с которого
будет выполняться запись звука с микрофона,
положение FRONT.
Защита разъема VF
Использование внешнего
микрофона
Можно использовать стереофонический
микрофон ECM-680S/678/674 (дополнительно),
присоединив его к прилагаемому держателю
микрофона.
Подсоединение и настройка
181
Крепление портативного
устройства настройки UHF (для
системы беспроводного
микрофона UHF)
Чтобы использовать систему беспроводного
микрофона Sony UHF, отключите питание PMWF55/F5, затем установите одно из следующих
портативных устройств настройки UHF.
• Цифровой беспроводной приемник DWR-S02D
• Синтезированное устройство настройки WRR855S UHF
• Синтезированный тюнер с поддержкой
разнесенного приема в УКВ-диапазоне WRR860A/861/862 UHF
Для получения дополнительной информации об
этих устройствах см. соответствующие
руководства по эксплуатации.
Примечание
Для установки WRR-862 потребуется
дополнительное соединение устройства настройки
WRR (номер изделия: A-8278-057-B).
Для получения дополнительной информации
обратитесь к поставщику или представителю
службы по работе с клиентами Sony.
Установка DWR-S02D или WRR-855S
1
Открутите четыре винта крепления,
удерживающие крышку портативного
устройства настройки/слота корпуса
приемника.
2
Вставьте DWR-S02D или WRR-855S в слот
корпуса и закрепите четырьмя винтами.
DWR-S02D или WRR-855S
3
Установите переключатель AUDIO IN для
канала входа сигнала звука в положение
WIRELESS (см. стр. 177).
Установка WRR-862 (при использовании
батарейного блока BP-L80S)
1
Прикрепите соединение устройства настройки
WRR (не прилагается; номер изделия: A-8278057-B) к задней части CBK-55BK.
1 С помощью крестообразной отвертки
затяните четыре винта в соединении
устройства настройки, как показано на
рисунке.
Примечание
Убедитесь, что все четыре винта надежно
затянуты.
2 Ослабьте регулировочные винты на
соединении устройства настройки.
3 Отрегулируйте положение соединения
устройства настройки для крепления
батарейного блока BP-L80S, затем затяните
регулировочные винты для их фиксации.
4 Прикрепите установочную пластину,
прилагаемую к WRR-862.
182
Подсоединение и настройка
• Установите переключатель AUDIO IN CH1/CH-2/CH-3/CH-4 канала, к которому
подключен выходной аудиокабель, в
положение REAR.
Если включена функция автоматического
определения подключения XLR, входной
сигнал записи звука будет выбран
автоматически, поэтому эта настройка не
нужна.
Для получения информации о соединении
устройства настройки WRR (номер изделия:
A-8278-057-B) обратитесь в сервисный центр
Sony или к торговому представителю.
BP-L80S
Регулировочные
винты
Установочная
пластина
(прилагается к
WRR-862)
Крестообразная
отвертка
2
Прикрепите батарейный блок.
Для получения информации о креплении
батарейного блока см. “Использование
батарейного блока” на стр. 178.
3
Закрепите устройство настройки на
соединении устройства настройки WRR.
Подключение звукового
оборудования линейного входа
Подключите выходной аудиоразъем звукового
оборудования, которое является источником
сигнала линейного входа, к разъему AUDIO IN
CH-1 или CH-2.
Настройки переключателя
Установите переключатель AUDIO IN канала, к
которому подключен источник аудиосигнала, в
положение LINE.
Крепление штатива
1
Прикрепите адаптер штатива VCT-14/U14
(дополнительно) к штативу.
Адаптер штатива
WRR-862
4
Подключите кабель питания устройства
настройки к разъему DC OUT прилагаемого
адаптера батареи, а выходной аудиокабель к
разъему AUDIO IN CH-1 или CH-2.
5
Установите переключатели следующим
образом.
Крепление камеры
• Установите переключатель AUDIO IN
канала, к которому подключен выходной
аудиокабель, в положение MIC.
Подсоединение и настройка
183
2
Закрепите CBK-55BK на адаптере штатива.
Установка видеоосвещения
С помощью CBK-55BK можно использовать
Anton Bauer Ultralight 2 или эквивалентное
видеоосвещение (с питанием 12 В с максимальным
энергопотреблением 50 Вт).
Выход разъема LIGHT на CBK-55BK управляется
питанием 12 В, даже если CBK-55BK оснащен
питанием более 12 В (с помощью разъема DC IN
или батарейного блока). Яркость или цветовая
температура не изменятся при повышении
напряжения.
Примечания
Сдвиньте CBK-55BK вперед в пазе
адаптера до щелчка.
3
Переместите CBK-55BK вперед и назад,
убедитесь, что он не отсоединяется.
• Не используйте видеоосвещение с
энергопотреблением более 50 Вт.
• Яркость или цветовая температура света не
изменятся, если напряжение (при подаче с
помощью разъема DC IN или батарейного
блока) составляет менее 12 В.
Снятие CBK-55BK с адаптера штатива
Использование плечевого ремня
Нажмите и удерживайте красную кнопку и
отведите рычаг в направлении стрелки.
Прикрепление плечевого ремня
1
Закрепите один из зажимов на соединении
плечевого ремня.
Потяните ремень вверх для фиксации соединения.
Красная кнопка
Рычажок
Примечание
Зажим
Штифт адаптера штатива может остаться в
положении зацепления даже после снятия CBK55BK. В этом случае нажмите красную кнопку и
переместите рычажок, как показано выше, пока
штифт не вернется в исходное положение. Если
штифт остается в положении зацепления, не
удастся закрепить CBK-55BK на адаптере
штатива.
184
Подсоединение и настройка
2
Закрепите другой зажим на соединении
плечевого ремня с другой стороны ручки так
же, как указано в шаге 1.
Регулировка положения плечевой
накладки
Можно изменить положение CBK-55BK и
плечевой накладки, сдвинув передний блок.
Снятие плечевого ремня
33 мм
Нажмите здесь и потяните в направлении,
указанном стрелкой, для разблокировки.
37 мм
70 мм
Отрегулируйте положение переднего блока и
плечевой накладки, чтобы можно было легко
управлять CBK-55BK при расположении на плече.
Регулировка положения переднего
блока
1
Снимите блокировку переднего блока,
повернув ручку фиксации переднего блока в
нижней части CBK-55BK.
2
Выберите необходимое положение, сдвинув
передний блок назад или вперед.
3
Закрепите передний блок, повернув его ручку
фиксации.
Передний блок
Ручка фиксации
переднего блока
Подсоединение и настройка
185
Регулировка положения плечевой
накладки
1
Поднимите рычажок в центре плечевой
накладки для снятия блокировки плечевой
накладки.
2
Сдвиньте плечевую накладку назад или вперед,
пока она не окажется в оптимальном
положении.
3
Опустите рычажок для фиксации плечевой
накладки в необходимом положении.
Основные операции
меню настройки
Отображение меню настройки
Нажмите переключатель MENU ON/OFF CBK55BK или кнопку MENU PMW-F55/F5.
Примечание
Для получения информации об операциях после
нажатия кнопки MENU PMW-F55/F5 и экране
меню см. инструкцию по эксплуатации PMW-F55/
F5. В этом разделе описаны только операции CBK55BK.
Настройки меню
1
Рычажок
Плечевая накладка
Поверните ручку MENU для перемещения
курсора на необходимый элемент для
установки.
Выбираемые элементы меню отображаются в
области выбора элемента меню справа от
значка.
Использование адаптера разъема
наушников
2
Если тяжело использовать наушники с разъемом
прямого типа с разъемом наушников PMW-F55/F5,
используйте прилагаемый адаптер разъема
наушников.
3
Нажмите ручку MENU.
Курсор переместится в область выбора
элемента меню.
Поверните ручку MENU для перемещения
курсора к элементу меню, который
необходимо установить, затем подтвердите
нажатием ручки MENU.
Отобразится область настройки.
Адаптер разъема
наушников
4
Поверните ручку MENU для перемещения
курсора к элементу, который необходимо
установить, затем подтвердите нажатием
ручки MENU.
5
Поверните ручку MENU для выбора значения,
которое необходимо установить, затем
подтвердите нажатием ручки MENU.
Настройка изменится, а дисплей обновится для
отображения новой настройки.
Элементы, требующие подтверждения перед
выполнением
В шаге 3 меню исчезнет, отобразится сообщение с
запросом подтверждения при выборе элемента,
для которого требуется подтверждение перед
186
Основные операции меню настройки
выполнением. Следуйте инструкциям в сообщении
для выполнения или отмены операции.
Ввод текста
При выборе элемента, который требует ввода
текста, например данных времени или имени
файла, будет выделена область ввода текста, а
справа отобразится “SET”.
1
Поверните ручку MENU для выбора символа,
затем подтвердите нажатием ручки MENU.
Курсор переместится к следующему
положению.
Для возврата к предыдущему положению
нажмите переключатель MENU CANCEL/
BACK.
2
После ввода всех символов подтвердите их
нажатием кнопки “Done”.
Отмена изменения настроек
Нажмите MENU CANCEL/BACK.
Настройка уровня
звука
При выборе для переключателя AUDIO SELECT
положения AUTO уровни входа аналоговых
аудиосигналов, записанных на каждом канале,
будут отрегулированы автоматически. Можно
также выполнить ручные настройки.
Примечание
Даже при установке для переключателя AUDIO
SELECT положения AUTO уровни входа
цифровых аудиосигналов не будут
отрегулированы автоматически.
Необходимый уровень звука для ручной
регулировки уровня звука
Выполните регулировку с помощью –20 дБ в
качестве необходимого уровня.
Если измеритель уровня громкости показывает
максимальный уровень 0 дБ, это указывает на
чрезмерный уровень входа звука.
Выход из меню
Чрезмерный уровень входа звука
Установите для переключателя MENU ON/OFF
положение OFF.
Отобразится нормальное изображение камеры.
Необходимый уровень входа
Ручная регулировка уровней
звука входов звука с разъемов
AUDIO IN CH-1/CH-2
1
Для регулировки входа сигнала на разъеме
AUDIO IN CH-1 или CH-2 установите для
переключателя AUDIO IN CH-1 или CH-2
положение REAR.
Для регулировки обоих входных сигналов
установите для обоих переключателей
положение REAR.
2
Установите для переключателей AUDIO
SELECT каналов, выбранных в шаге 1,
положение MANUAL.
Настройка уровня звука
187
3
С помощью ручек LEVEL каналов,
выбранных в шаге 1, выполните регулировку,
чтобы измеритель уровня громкости
отображал значение до –20 дБ для нормальной
входной громкости.
Соответствие регулировок уровня
записи и элементов управления
уровнем звука
В пункте “Audio Input” меню Audio можно
выбрать, какой элемент будет использоваться для
управления уровнем записи звука входа каждого
разъема AUDIO IN CH-1/CH-2. Соответствие
настроек элементов меню и элементов
управления.
Rear1/WRR Level: уровень записи канала 1
Настройка
Ручка
Side1
Ручка LEVEL (CH-1)
Front
Регулятор MIC LEVEL
Front+Side1
Ручка LEVEL (CH-1) и регулятор MIC
LEVEL (связанные операции)
Rear2/WRR Level: уровень записи канала 2
Настройка
Ручка
Side2
Ручка LEVEL (CH-2)
Front
Регулятор MIC LEVEL
Front+Side2
Ручка LEVEL (CH-2) и регулятор MIC
LEVEL (связанные операции)
Примечание
В случае совместных операций ручек LEVEL (CH1/CH-2) и регулятора MIC LEVEL: если для
регулятора MIC LEVEL установлено значение 0,
запись аудиосигналов на каналах 1 и 2 не удастся
выполнить. Проверьте положение регулятора
MIC LEVEL до регулировки ручек LEVEL (CH-1/
CH-2).
Ручная регулировка уровня звука
разъема MIC IN
1
2
188
Установите для используемых
переключателей AUDIO IN положение
FRONT.
Установите для переключателей AUDIO
SELECT каналов, выбранных в шаге 1,
положение MANUAL.
Настройка уровня звука
3
Поверните регулятор MIC LEVEL и
выполните регулировку, чтобы измеритель
уровня громкости отображал значение до
–20 дБ для нормальной входной громкости.
Соответствие регулировок уровня
записи и элементов управления
уровнем звука
В пункте “Audio Input” меню Audio можно
выбрать, какой элемент будет использоваться для
управления уровнем записи звука входа переднего
микрофона. Соответствие настроек элементов
меню и элементов управления описано далее.
MIC CH1 Level: уровень записи канала 1
Настройка
Ручка
Side1
Ручка LEVEL (CH-1)
Front
Регулятор MIC LEVEL
Front+Side1
Ручка LEVEL (CH-1) и регулятор MIC
LEVEL (связанные операции)
MIC CH2 Level: уровень записи канала 2
Настройка
Ручка
Side2
Ручка LEVEL (CH-2)
Front
Регулятор MIC LEVEL
Front+Side2
Ручка LEVEL (CH-2) и регулятор MIC
LEVEL (связанные операции)
Примечание
В случае совместных операций регулятора MIC
LEVEL и ручек LEVEL (CH-1/CH-2): если для
ручек LEVEL (CH-1/CH-2) установлено значение
0, запись аудиосигналов на каналах 1 и 2 не удастся
выполнить. Проверьте положение LEVEL (CH-1/
CH-2) до регулировки MIC LEVEL.
Запись звука на каналах 3 и 4
Выбор записанного звука
С помощью переключателей AUDIO IN CH-3/
CH-4 можно выбрать звук, записанный на каналах
звука 3 и 4.
Переключатель Записываемая цель канала 3
CH-3
FRONT
Звук переднего микрофона
REAR
Входной аудиосигнал на разъеме
AUDIO IN CH-1
WIRELESS
Звук беспроводного микрофона
Audio CH-3 Level: уровень записи канала 3
Переключатель Записываемая цель канала 4
CH-4
Настройка
Ручка
FRONT
Звук переднего микрофона
Side3
Ручка LEVEL (CH-3)
REAR
Входной аудиосигнал на разъеме
AUDIO IN CH-2
Front
Регулятор MIC LEVEL
Front+Side3
Ручка LEVEL (CH-3) и регулятор MIC
LEVEL (связанные операции)
WIRELESS
Звук беспроводного микрофона
Регулировка уровней записи звука
Audio CH-4 Level: уровень записи канала 4
Автоматическая регулировка
Установите для переключателя AUDIO SELECT
CH-3/4 положение AUTO.
Ручная регулировка
1
Установите для переключателя AUDIO
SELECT CH-3/4 положение MANUAL.
2
Выберите ручки, регулирующие уровни звука
“Audio CH3 Level” и “Audio CH4 Level”, в
пункте “Audio Input” меню Audio.
Настройка
Ручка
Side4
Ручка LEVEL (CH-4)
Front
Регулятор MIC LEVEL
Front+Side4
Ручка LEVEL (CH-4) и регулятор MIC
LEVEL (связанные операции)
Теперь можно отрегулировать уровни каналов
звука 3 и 4 с помощью выбранных ручек.
Соответствие настройки переключателя AUDIO IN CH-1/CH-2 и канала записи.
Переключатель
AUDIO IN
функциональной
области звука
Меню
Front MIC
Select
CH-1/2/3/4
Переключатель AUDIO
IN области разъемов
(задняя)
CH-1
CH-2
CH-1
CH-2
CH-3
CH-4
Mono
–
–
Передний
микрофон
(Mono)
Передний
микрофон
(Mono)
Передний
микрофон
(Mono)
Передний
микрофон
(Mono)
Стерео
–
–
Передний
микрофон
(L-Ch)
Передний
микрофон
(R-Ch)
Передний
микрофон
(L-Ch)
Передний
микрофон
(R-Ch)
–
LINE или
MIC
LINE или
MIC
LINE1 или
MIC1
LINE2 или
MIC2
LINE1 или
MIC1
LINE2 или
MIC2
–
AES/EBU
LINE или
MIC
AES/EBU
1-1
AES/EBU
1-2
Нет звука
LINE2 или
MIC2
–
LINE или
MIC
AES/EBU
LINE1 или
MIC1
Нет звука
AES/EBU
2-1
AES/EBU
2-2
–
AES/EBU
AES/EBU
AES/EBU
1-1
AES/EBU
1-2
AES/EBU
2-1
AES/EBU
2-2
Аналоговый
–
–
–
Mono
Mono
Mono
Mono
Цифровой
–
–
–
CH-1
CH-2
CH-1
CH-2
FRONT
REAR
WIRELESS
Канал записи
LINE или MIC: можно выбрать LINE или MIC.
AES/EBU: можно выбрать AES/EBU.
Mono: монофонический звук
L-Ch/R-Ch: микрофон L-Ch/R-Ch
LINE1 или MIC1: вход сигнала LINE или MIC с разъема CH-1
LINE2 или MIC2: вход сигнала LINE или MIC с разъема CH-2
AES/EBU1-1: сигнал CH-1 входа сигнала AES/EBU с разъема CH-1
AES/EBU1-2: сигнал CH-2 входа сигнала AES/EBU с разъема CH-1
AES/EBU2-1: сигнал CH-1 входа сигнала AES/EBU с разъема CH-2
AES/EBU2-2: сигнал CH-2 входа сигнала AES/EBU с разъема CH-2
Настройка уровня звука
189
Важные примечания по
эксплуатации
Места использования и хранения
Средний срок службы электролитического
конденсатора составляет около 5 лет при
нормальной температуре работы и нормальном
использовании (8 часов в день, 25 дней в месяц).
При более частом использовании предполагаемый
срок службы может сократиться
соответствующим образом.
Не подвергайте воздействию сильных ударов
В противном случае это может стать причиной
повреждения корпуса или внутренних
компонентов.
В случае возникновения проблем с работой
В случае возникновения проблем с устройством
обратитесь к дилеру Sony.
Условия эксплуатации и хранения
Храните в ровном месте с кондиционированием
воздуха.
Если устройство намокнет, убедитесь, что оно
полностью высохло перед хранением.
Не используйте и не храните в следующих местах.
• Места с очень высокой или низкой
температурой.
• Места с повышенным уровнем влажности.
• Места, подверженные сильной вибрации.
• Вблизи сильных магнитных полей.
• В местах, подверженных воздействию прямых
солнечных лучей, или вблизи нагревательных
приборов.
Примечание относительно клеммы
батареи
Клемма батареи данного устройства (разъем для
аккумуляторных блоков и адаптеров переменного
тока) является расходуемой деталью.
Питание может не подаваться на устройство
надлежащим образом, если штырьки клеммы
батареи изогнуты или деформированы вследствие
удара или вибраций, либо если они ржавеют из-за
длительного использования на открытом воздухе.
Рекомендуется проводить периодические осмотры
для обеспечения должной работы устройства и
увеличения срока его службы. Для получения
дополнительных сведений об осмотрах обратитесь
к представителю службы технического
обслуживания или отдела продаж компании Sony.
190
Важные примечания по эксплуатации
О конденсации
Если устройство принесли с холода в теплое
помещение или если резко повысилась
температура окружающей среды, на внешней
поверхности устройства и/или внутри устройства
может образоваться влага. Эта явление
называется конденсацией. В случае возникновения
конденсации выключите устройство и дождитесь
исчезновения влаги перед использованием
устройства. Использование влажного устройства
может привести к его повреждению.
Технические
характеристики
Общее
Размеры (Ш × В × Г)
Прибл. 170 × 182 × 371 мм
(см. стр. 193)
Масса
Прибл. 2,2 кг (корпус и адаптер
батареи)
Электропитание
12 В пост. тока (от 11 В до 17 В)
Потребляемая мощность
Прибл. 3,8 Вт (корпус и адаптер
батареи)
Рабочая температура
От 0 °C до 40 °C
Рабочая влажность
От 20 % до 90 %
Температура хранения
От –20 °C до +60 °C
Ввод/вывод
Разъем интерфейса расширения
144-контактный, подача питания
Аудиовход
Тип XLR, 3-контактный (×2),
LINE / AES/EBU / MIC /
MIC+48V по выбору
LINE: +4/0/–3 dBu
AES/EBU: стандарт AES3
Аудиовыход Тип XLR, 5-контактный,
+4/0/–3 dBu (сбалансированный)
Вход микрофона
Тип XLR, 5-контактный, от –70 dBu
до –30 dBu
Выход наушников
Стереофоническое мини-гнездо
WRR
15-контактный D-sub
Аналоговый CH1: –40 dBu
Цифровой CH1/CH2: –40 дБ полной
шкалы
Адаптер батареи
Вход постоянного тока
Тип XLR, 4-контактный, 12 В пост.
тока
Выход постоянного тока
4-контактный, 12 В пост. тока
(максимальный номинальный
ток: 1,8 А)
LIGHT
2-контактный, 12 В пост. тока
(менее 50 Вт)
Входящие в комплект принадлежности
Адаптер батареи (номер изделия: A-2067-625-) (1)
Стержень (Φ 15 мм × 250 мм) (2)
Адаптер разъема наушников (тип L) (1)
Ручка (номер изделия: A-2068-023-) (1)
Держатель микрофона (предварительно
прикреплен к ручке) (номер изделия: A-2068-182-)
(1)
Ползунок (номер изделия: A-2070-502-) (1)
Крюк мерной рулетки (номер изделия: 4-458-622-)
(1)
Защита разъема VF (номер изделия: A-2068-183-)
(1)
Плечевой ремень (1)
Руководство по эксплуатации (1)
Дополнительные принадлежности
Синтезированное устройство настройки WRR-855
UHF
Цифровой беспроводной приемник DWR-S02D
Портативное запоминающее устройство AXS-R5
Адаптер переменного тока AC-DN10, AC-DN2B
Батарейный блок BP-FL75, BP-L80S
Зарядное устройство BC-L70, BC-L90
Микрофон ECM-680S, ECM-678, ECM-674
Кабель-переходник микрофона EC-0.5X3F5M (для
ECM-678/674)
Дизайн и технические характеристики могут быть
изменены без предварительного уведомления.
Технические характеристики
191
Примечания
• Всегда проверяйте исправность устройства,
прежде чем его использовать.
КОМПАНИЯ SONY НЕ НЕСЕТ
ОТВЕТСТВЕННОСТИ ЗА КАКОЙ БЫ ТО
НИ БЫЛО УЩЕРБ, ВКЛЮЧАЯ, В
ЧАСТНОСТИ, КОМПЕНСАЦИЮ ИЛИ
ВОЗМЕЩЕНИЕ УБЫТКОВ В СВЯЗИ С
УТРАТОЙ ИЛИ НЕДОПОЛУЧЕНИЕМ
ПРИБЫЛЕЙ ИЗ-ЗА
НЕРАБОТОСПОСОБНОСТИ ЭТОГО
ОБОРУДОВАНИЯ, КАК НА
ПРОТЯЖЕНИИ ГАРАНТИЙНОГО
ПЕРИОДА, ТАК И ПОСЛЕ ИСТЕЧЕНИЯ
ГАРАНТИЙНОГО СРОКА, А ТАКЖЕ
ВСЛЕДСТВИЕ ЛЮБЫХ ИНЫХ
ВОЗМОЖНЫХ ПРИЧИН.
• КОМПАНИЯ SONY НЕ НЕСЕТ
ОТВЕТСТВЕННОСТИ ЗА ПРЕТЕНЗИИ
ЛЮБОГО РОДА, ПРЕДЪЯВЛЕННЫЕ
ПОЛЬЗОВАТЕЛЯМИ ЭТОГО ПРИБОРА
ИЛИ ТРЕТЬИМИ ЛИЦАМИ.
• КОМПАНИЯ SONY НЕ НЕСЕТ
ОТВЕТСТВЕННОСТИ ЗА
ПРЕКРАЩЕНИЕ ИЛИ ПРИОСТАНОВКУ
ПРЕДОСТАВЛЕНИЯ КАКИХ-ЛИБО
УСЛУГ, СВЯЗАННЫХ С ЭТИМ
ПРИБОРОМ, ВНЕ ЗАВИСИМОСТИ ОТ
ОБСТОЯТЕЛЬСТВ.
КОМПАНИЯ SONY НЕ НЕСЕТ
ОТВЕТСТВЕННОСТИ ЗА КАКОЙ БЫ ТО
НИ БЫЛО УЩЕРБ, ВОЗНИКШИЙ
ВСЛЕДСТВИЕ НЕСОБЛЮДЕНИЯ МЕР
ПРЕДОСТОРОЖНОСТИ ПРИ
ИСПОЛЬЗОВАНИИ УСТРОЙСТВ
ПЕРЕДАЧИ ДАННЫХ, НЕИЗБЕЖНЫХ
УТЕЧЕК ИНФОРМАЦИИ, СВЯЗАННЫХ
СО СПЕЦИФИКАЦИЯМИ ПЕРЕДАЧИ
ДАННЫХ, ИЛИ ПРОБЛЕМ
БЕЗОПАСНОСТИ ЛЮБОГО РОДА.
192
Технические характеристики
Paзмepы
Единицы измерения: мм
76,8
32,8
57
79,2
66
130
182
274,4
295,1
23,1
93,7
76
261,3
351,1
208,7
370,9
Технические характеристики
193
Қазақ тілі
Камераны түрлендіру жиынтығы
Дайындаушы: Сони Корпорейшн
Мекен-жайы: 1-7-1 Конан, Минато-ку, Токио
108-0075, Жапония
Жапонияда жасалған
Кеден одғы жеріндегі шетелден əкелуші
«Сони Электроникс» ЖАҚ, Ресей, 123103, Мəскеу,
Карамышевский өтпе көшесі, 6
Бұл өнімге не қаптамаға жазылған yyyy-mm немесе
mm-yyyy шығарылған күнін білдіреді. yyyy жылды, ал
mm айды білдіреді.
Құрылғыны кітап шкафы немесе қабырға шкафы
сияқты жабық жерге орнатпаңыз.
НАЗАР АУДАРЫҢЫЗ!
Белгілі бір жиіліктегі электромагниттік өрістер
құрылғының көрінісі мен дыбысына əсер етуі мүмкін.
Шолу
CBK-55BK – PMW-F55/F5 жабдығына бекіту арқылы
иығыңызға қойып пайдалану кезінде тұрақтылық пен
жұмыс сапасын жақсартуға арналған қосымша
жиынтық.
CBK-55BK түрлі дыбыс кірісі/шығысы
коннекторларына, иығыңыздағы PMW-F55/F5
камерасымен түсіру кезінде көрініс іздегіш арқылы
қараған уақытта қолыңыздағы PMW-F55/F5
камерасын басқаруға мүмкіндік беретін тікелей
басқару қосқыштарына, сымсыз аудио қабылдағыш
ұясына жəне дыбысты басқару тақтасына ие.
Алдыңғы басқару бөлігі мен иыққа арналған төсемді
алдан артқа қарай 70 мм-ге сырғытуға болады. PL
объективін немесе портативті үлкен B4 объективін
бекіткен кезде иығыңыздағы PMW-F55/F5
камерасымен түсірген уақытта тепе-теңдікке оңай
ұстауға болады.
194
Техникалық
сипаттамалары
Өлшемдері (Е × Б × Қ)
Шамамен 170 × 182 × 371 мм
Салмағы
Шамамен 2,2 кг (Корпус жəне батарея
адаптері)
Қуат талаптары
Тұрақты ток 12 В (11 В - 17 В)
Қуат тұтыну Шамамен 3,8 Вт (Корпус жəне батарея
адаптері)
Open Source Software
License List
[arm-sony-linux-gnueabi-armv7a-dev-busybox-1.13.408000101]
[arm-sony-linux-gnueabi-armv7a-dev-dosfstools-2.1108000101]
[arm-sony-linux-gnueabi-armv7a-dev-procps-3.2.708000101]
[linux-2.6.29-patched-armv7a]
GNU GENERAL PUBLIC LICENSE
Version 2, June 1991
Copyright (C) 1989, 1991 Free Software Foundation, Inc.
59 Temple Place, Suite 330, Boston, MA 02111-1307
USA
Everyone is permitted to copy and distribute verbatim
copies of this license document, but changing it is not
allowed.
receive or can get the source code. And you must show
them these terms so they know their rights.
We protect your rights with two steps: (1) copyright the
software, and (2) offer you this license which gives you
legal permission to copy, distribute and/or modify the
software.
Also, for each author's protection and ours, we want to
make certain that everyone understands that there is no
warranty for this free software. If the software is modified
by someone else and passed on, we want its recipients to
know that what they have is not the original, so that any
problems introduced by others will not reflect on the
original authors' reputations.
Finally, any free program is threatened constantly by
software patents. We wish to avoid the danger that
redistributors of a free program will individually obtain
patent licenses, in effect making the program proprietary.
To prevent this, we have made it clear that any patent must
be licensed for everyone's free use or not licensed at all.
The precise terms and conditions for copying, distribution
and modification follow.
Preamble
The licenses for most software are designed to take away
your freedom to share and change it. By contrast, the GNU
General Public License is intended to guarantee your
freedom to share and change free software--to make sure
the software is free for all its users. This General Public
License applies to most of the Free Software Foundation's
software and to any other program whose authors commit
to using it. (Some other Free Software Foundation
software is covered by the GNU Library General Public
License instead.) You can apply it to your programs, too.
When we speak of free software, we are referring to
freedom, not price. Our General Public Licenses are
designed to make sure that you have the freedom to
distribute copies of free software (and charge for this
service if you wish), that you receive source code or can
get it if you want it, that you can change the software or use
pieces of it in new free programs; and that you know you
can do these things.
To protect your rights, we need to make restrictions that
forbid anyone to deny you these rights or to ask you to
surrender the rights. These restrictions translate to certain
responsibilities for you if you distribute copies of the
software, or if you modify it.
For example, if you distribute copies of such a program,
whether gratis or for a fee, you must give the recipients all
the rights that you have. You must make sure that they, too,
GNU GENERAL PUBLIC LICENSE
TERMS AND CONDITIONS FOR COPYING,
DISTRIBUTION AND MODIFICATION
0. This License applies to any program or other work
which contains a notice placed by the copyright holder
saying it may be distributed under the terms of this General
Public License. The "Program", below, refers to any such
program or work, and a "work based on the Program"
means either the Program or any derivative work under
copyright law: that is to say, a work containing the
Program or a portion of it, either verbatim or with
modifications and/or translated into another language.
(Hereinafter, translation is included without limitation in
the term "modification".) Each licensee is addressed as
"you".
Activities other than copying, distribution and
modification are not covered by this License; they are
outside its scope. The act of running the Program is not
restricted, and the output from the Program is covered only
if its contents constitute a work based on the Program
(independent of having been made by running the
Program). Whether that is true depends on what the
Program does.
1. You may copy and distribute verbatim copies of the
Program's source code as you receive it, in any medium,
provided that you conspicuously and appropriately publish
on each copy an appropriate copyright notice and
Open Source Software License List
195
disclaimer of warranty; keep intact all the notices that refer
to this License and to the absence of any warranty; and
give any other recipients of the Program a copy of this
License along with the Program.
Program) on a volume of a storage or distribution medium
does not bring the other work under the scope of this
License.
You may charge a fee for the physical act of transferring a
copy, and you may at your option offer warranty protection
in exchange for a fee.
3. You may copy and distribute the Program (or a work
based on it, under Section 2) in object code or executable
form under the terms of Sections 1 and 2 above provided
that you also do one of the following:
2. You may modify your copy or copies of the Program or
any portion of it, thus forming a work based on the
Program, and copy and distribute such modifications or
work under the terms of Section 1 above, provided that you
also meet all of these conditions:
a) Accompany it with the complete corresponding
machine-readable source code, which must be
distributed under the terms of Sections 1 and 2 above
on a medium customarily used for software
interchange; or,
a) You must cause the modified files to carry
prominent notices stating that you changed the files
and the date of any change.
b) You must cause any work that you distribute or
publish, that in whole or in part contains or is derived
from the Program or any part thereof, to be licensed as
a whole at no charge to all third parties under the terms
of this License.
c) If the modified program normally reads commands
interactively when run, you must cause it, when started
running for such interactive use in the most ordinary
way, to print or display an announcement including an
appropriate copyright notice and a notice that there is
no warranty (or else, saying that you provide a
warranty) and that users may redistribute the program
under these conditions, and telling the user how to
view a copy of this License. (Exception: if the Program
itself is interactive but does not normally print such an
announcement, your work based on the Program is not
required to print an announcement.)
These requirements apply to the modified work as a whole.
If identifiable sections of that work are not derived from
the Program, and can be reasonably considered
independent and separate works in themselves, then this
License, and its terms, do not apply to those sections when
you distribute them as separate works. But when you
distribute the same sections as part of a whole which is a
work based on the Program, the distribution of the whole
must be on the terms of this License, whose permissions
for other licensees extend to the entire whole, and thus to
each and every part regardless of who wrote it.
Thus, it is not the intent of this section to claim rights or
contest your rights to work written entirely by you; rather,
the intent is to exercise the right to control the distribution
of derivative or collective works based on the Program.
In addition, mere aggregation of another work not based on
the Program with the Program (or with a work based on the
196
Open Source Software License List
b) Accompany it with a written offer, valid for at least
three years, to give any third party, for a charge no
more than your cost of physically performing source
distribution, a complete machine-readable copy of the
corresponding source code, to be distributed under the
terms of Sections 1 and 2 above on a medium
customarily used for software interchange; or,
c) Accompany it with the information you received as
to the offer to distribute corresponding source code.
(This alternative is allowed only for noncommercial
distribution and only if you received the program in
object code or executable form with such an offer, in
accord with Subsection b above.)
The source code for a work means the preferred form of the
work for making modifications to it. For an executable
work, complete source code means all the source code for
all modules it contains, plus any associated interface
definition files, plus the scripts used to control compilation
and installation of the executable. However, as a special
exception, the source code distributed need not include
anything that is normally distributed (in either source or
binary form) with the major components (compiler, kernel,
and so on) of the operating system on which the executable
runs, unless that component itself accompanies the
executable.
If distribution of executable or object code is made by
offering access to copy from a designated place, then
offering equivalent access to copy the source code from
the same place counts as distribution of the source code,
even though third parties are not compelled to copy the
source along with the object code.
4. You may not copy, modify, sublicense, or distribute the
Program except as expressly provided under this License.
Any attempt otherwise to copy, modify, sublicense or
distribute the Program is void, and will automatically
terminate your rights under this License. However, parties
who have received copies, or rights, from you under this
License will not have their licenses terminated so long as
such parties remain in full compliance.
5. You are not required to accept this License, since you
have not signed it. However, nothing else grants you
permission to modify or distribute the Program or its
derivative works. These actions are prohibited by law if
you do not accept this License. Therefore, by modifying or
distributing the Program (or any work based on the
Program), you indicate your acceptance of this License to
do so, and all its terms and conditions for copying,
distributing or modifying the Program or works based on
it.
6. Each time you redistribute the Program (or any work
based on the Program), the recipient automatically
receives a license from the original licensor to copy,
distribute or modify the Program subject to these terms and
conditions. You may not impose any further restrictions on
the recipients' exercise of the rights granted herein. You
are not responsible for enforcing compliance by third
parties to this License.
7. If, as a consequence of a court judgment or allegation of
patent infringement or for any other reason (not limited to
patent issues), conditions are imposed on you (whether by
court order, agreement or otherwise) that contradict the
conditions of this License, they do not excuse you from the
conditions of this License. If you cannot distribute so as to
satisfy simultaneously your obligations under this License
and any other pertinent obligations, then as a consequence
you may not distribute the Program at all. For example, if
a patent license would not permit royalty-free
redistribution of the Program by all those who receive
copies directly or indirectly through you, then the only way
you could satisfy both it and this License would be to
refrain entirely from distribution of the Program.
8. If the distribution and/or use of the Program is restricted
in certain countries either by patents or by copyrighted
interfaces, the original copyright holder who places the
Program under this License may add an explicit
geographical distribution limitation excluding those
countries, so that distribution is permitted only in or among
countries not thus excluded. In such case, this License
incorporates the limitation as if written in the body of this
License.
9. The Free Software Foundation may publish revised and/
or new versions of the General Public License from time to
time. Such new versions will be similar in spirit to the
present version, but may differ in detail to address new
problems or concerns.
Each version is given a distinguishing version number. If
the Program specifies a version number of this License
which applies to it and "any later version", you have the
option of following the terms and conditions either of that
version or of any later version published by the Free
Software Foundation. If the Program does not specify a
version number of this License, you may choose any
version ever published by the Free Software Foundation.
10. If you wish to incorporate parts of the Program into
other free programs whose distribution conditions are
different, write to the author to ask for permission. For
software which is copyrighted by the Free Software
Foundation, write to the Free Software Foundation; we
sometimes make exceptions for this. Our decision will be
guided by the two goals of preserving the free status of all
derivatives of our free software and of promoting the
sharing and reuse of software generally.
NO WARRANTY
It is not the purpose of this section to induce you to infringe
any patents or other property right claims or to contest
validity of any such claims; this section has the sole
purpose of protecting the integrity of the free software
distribution system, which is implemented by public
license practices. Many people have made generous
contributions to the wide range of software distributed
through that system in reliance on consistent application of
that system; it is up to the author/donor to decide if he or
she is willing to distribute software through any other
system and a licensee cannot impose that choice.
11. BECAUSE THE PROGRAM IS LICENSED FREE
OF CHARGE, THERE IS NO WARRANTY FOR THE
PROGRAM, TO THE EXTENT PERMITTED BY
APPLICABLE LAW. EXCEPT WHEN OTHERWISE
STATED IN WRITING THE COPYRIGHT HOLDERS
AND/OR OTHER PARTIES PROVIDE THE
PROGRAM "AS IS" WITHOUT WARRANTY OF ANY
KIND, EITHER EXPRESSED OR IMPLIED,
INCLUDING, BUT NOT LIMITED TO, THE IMPLIED
WARRANTIES OF MERCHANTABILITY AND
FITNESS FOR A PARTICULAR PURPOSE. THE
ENTIRE RISK AS TO THE QUALITY AND
PERFORMANCE OF THE PROGRAM IS WITH YOU.
SHOULD THE PROGRAM PROVE DEFECTIVE, YOU
ASSUME THE COST OF ALL NECESSARY
SERVICING, REPAIR OR CORRECTION.
This section is intended to make thoroughly clear what is
believed to be a consequence of the rest of this License.
12. IN NO EVENT UNLESS REQUIRED BY
APPLICABLE LAW OR AGREED TO IN WRITING
If any portion of this section is held invalid or
unenforceable under any particular circumstance, the
balance of the section is intended to apply and the section
as a whole is intended to apply in other circumstances.
Open Source Software License List
197
WILL ANY COPYRIGHT HOLDER, OR ANY OTHER
PARTY WHO MAY MODIFY AND/OR
REDISTRIBUTE THE PROGRAM AS PERMITTED
ABOVE, BE LIABLE TO YOU FOR DAMAGES,
INCLUDING ANY GENERAL, SPECIAL,
INCIDENTAL OR CONSEQUENTIAL DAMAGES
ARISING OUT OF THE USE OR INABILITY TO USE
THE PROGRAM (INCLUDING BUT NOT LIMITED
TO LOSS OF DATA OR DATA BEING RENDERED
INACCURATE OR LOSSES SUSTAINED BY YOU OR
THIRD PARTIES OR A FAILURE OF THE PROGRAM
TO OPERATE WITH ANY OTHER PROGRAMS),
EVEN IF SUCH HOLDER OR OTHER PARTY HAS
BEEN ADVISED OF THE POSSIBILITY OF SUCH
DAMAGES.
END OF TERMS AND CONDITIONS
How to Apply These Terms to Your New Programs
If you develop a new program, and you want it to be of the
greatest possible use to the public, the best way to achieve
this is to make it free software which everyone can
redistribute and change under these terms.
To do so, attach the following notices to the program. It is
safest to attach them to the start of each source file to most
effectively convey the exclusion of warranty; and each file
should have at least the "copyright" line and a pointer to
where the full notice is found.
<one line to give the program's name and a brief idea
of what it does.>
Copyright (C) <year> <name of author>
This program is free software; you can redistribute it
and/or modify it under the terms of the GNU General
Public License as published by the Free Software
Foundation; either version 2 of the License, or (at your
option) any later version.
This program is distributed in the hope that it will be
useful, but WITHOUT ANY WARRANTY; without
even the implied warranty of MERCHANTABILITY
or FITNESS FOR A PARTICULAR PURPOSE. See
the GNU General Public License for more details.
You should have received a copy of the GNU General
Public License along with this program; if not, write to
the Free Software Foundation, Inc., 59 Temple Place,
Suite 330, Boston, MA 02111-1307 USA
Also add information on how to contact you by electronic
and paper mail.
If the program is interactive, make it output a short notice
like this when it starts in an interactive mode:
Gnomovision version 69, Copyright (C) year name of
author
Gnomovision comes with ABSOLUTELY NO
WARRANTY; for details type `show w'.
This is free software, and you are welcome to
redistribute it under certain conditions; type `show c'
for details.
The hypothetical commands `show w' and `show c' should
show the appropriate parts of the General Public License.
Of course, the commands you use may be called something
other than `show w' and `show c'; they could even be
mouse-clicks or menu items--whatever suits your
program.
You should also get your employer (if you work as a
programmer) or your school, if any, to sign a "copyright
disclaimer" for the program, if necessary. Here is a sample;
alter the names:
Yoyodyne, Inc., hereby disclaims all copyright interest
in the program `Gnomovision' (which makes passes at
compilers) written by James Hacker.
<signature of Ty Coon>, 1 April 1989
Ty Coon, President of Vice
This General Public License does not permit incorporating
your program into proprietary programs. If your program
is a subroutine library, you may consider it more useful to
permit linking proprietary applications with the library. If
this is what you want to do, use the GNU Library General
Public License instead of this License.
[arm-sony-linux-gnueabi-armv7a-dev-glibc-2.11.208000105]
GNU LESSER GENERAL PUBLIC LICENSE
Version 2.1, February 1999
Copyright (C) 1991, 1999 Free Software Foundation, Inc.
59 Temple Place, Suite 330, Boston, MA 02111-1307
USA
Everyone is permitted to copy and distribute verbatim
copies of this license document, but changing it is not
allowed.
[This is the first released version of the Lesser GPL. It also
counts as the successor of the GNU Library Public
License, version 2, hence the version number 2.1.]
Preamble
198
Open Source Software License List
The licenses for most software are designed to take away
your freedom to share and change it. By contrast, the GNU
General Public Licenses are intended to guarantee your
freedom to share and change free software--to make sure
the software is free for all its users.
This license, the Lesser General Public License, applies to
some specially designated software packages--typically
libraries--of the Free Software Foundation and other
authors who decide to use it. You can use it too, but we
suggest you first think carefully about whether this license
or the ordinary General Public License is the better
strategy to use in any particular case, based on the
explanations below.
When we speak of free software, we are referring to
freedom of use, not price. Our General Public Licenses are
designed to make sure that you have the freedom to
distribute copies of free software (and charge for this
service if you wish); that you receive source code or can
get it if you want it; that you can change the software and
use pieces of it in new free programs; and that you are
informed that you can do these things.
To protect your rights, we need to make restrictions that
forbid distributors to deny you these rights or to ask you to
surrender these rights. These restrictions translate to
certain responsibilities for you if you distribute copies of
the library or if you modify it.
For example, if you distribute copies of the library,
whether gratis or for a fee, you must give the recipients all
the rights that we gave you. You must make sure that they,
too, receive or can get the source code. If you link other
code with the library, you must provide complete object
files to the recipients, so that they can relink them with the
library after making changes to the library and recompiling
it. And you must show them these terms so they know their
rights.
We protect your rights with a two-step method: (1) we
copyright the library, and (2) we offer you this license,
which gives you legal permission to copy, distribute and/
or modify the library.
To protect each distributor, we want to make it very clear
that there is no warranty for the free library. Also, if the
library is modified by someone else and passed on, the
recipients should know that what they have is not the
original version, so that the original author's reputation
will not be affected by problems that might be introduced
by others.
Finally, software patents pose a constant threat to the
existence of any free program. We wish to make sure that
a company cannot effectively restrict the users of a free
program by obtaining a restrictive license from a patent
holder. Therefore, we insist that any patent license
obtained for a version of the library must be consistent
with the full freedom of use specified in this license.
Most GNU software, including some libraries, is covered
by the ordinary GNU General Public License. This license,
the GNU Lesser General Public License, applies to certain
designated libraries, and is quite different from the
ordinary General Public License. We use this license for
certain libraries in order to permit linking those libraries
into non-free programs.
When a program is linked with a library, whether statically
or using a shared library, the combination of the two is
legally speaking a combined work, a derivative of the
original library. The ordinary General Public License
therefore permits such linking only if the entire
combination fits its criteria of freedom. The Lesser
General Public License permits more lax criteria for
linking other code with the library.
We call this license the "Lesser" General Public License
because it does Less to protect the user's freedom than the
ordinary General Public License. It also provides other
free software developers Less of an advantage over
competing non-free programs. These disadvantages are the
reason we use the ordinary General Public License for
many libraries. However, the Lesser license provides
advantages in certain special circumstances.
For example, on rare occasions, there may be a special
need to encourage the widest possible use of a certain
library, so that it becomes a de-facto standard. To achieve
this, non-free programs must be allowed to use the library.
A more frequent case is that a free library does the same
job as widely used non-free libraries. In this case, there is
little to gain by limiting the free library to free software
only, so we use the Lesser General Public License.
In other cases, permission to use a particular library in nonfree programs enables a greater number of people to use a
large body of free software. For example, permission to
use the GNU C Library in non-free programs enables
many more people to use the whole GNU operating
system, as well as its variant, the GNU/Linux operating
system.
Although the Lesser General Public License is Less
protective of the users' freedom, it does ensure that the user
of a program that is linked with the Library has the
freedom and the wherewithal to run that program using a
modified version of the Library.
The precise terms and conditions for copying, distribution
and modification follow. Pay close attention to the
difference between a "work based on the library" and a
Open Source Software License List
199
"work that uses the library". The former contains code
derived from the library, whereas the latter must be
combined with the library in order to run.
GNU LESSER GENERAL PUBLIC LICENSE
TERMS AND CONDITIONS FOR COPYING,
DISTRIBUTION AND MODIFICATION
0. This License Agreement applies to any software library
or other program which contains a notice placed by the
copyright holder or other authorized party saying it may be
distributed under the terms of this Lesser General Public
License (also called "this License"). Each licensee is
addressed as "you".
A "library" means a collection of software functions and/
or data prepared so as to be conveniently linked with
application programs (which use some of those functions
and data) to form executables.
The "Library", below, refers to any such software library
or work which has been distributed under these terms. A
"work based on the Library" means either the Library or
any derivative work under copyright law: that is to say, a
work containing the Library or a portion of it, either
verbatim or with modifications and/or translated
straightforwardly into another language. (Hereinafter,
translation is included without limitation in the term
"modification".)
"Source code" for a work means the preferred form of the
work for making modifications to it. For a library,
complete source code means all the source code for all
modules it contains, plus any associated interface
definition files, plus the scripts used to control compilation
and installation of the library.
Activities other than copying, distribution and
modification are not covered by this License; they are
outside its scope. The act of running a program using the
Library is not restricted, and output from such a program
is covered only if its contents constitute a work based on
the Library (independent of the use of the Library in a tool
for writing it). Whether that is true depends on what the
Library does and what the program that uses the Library
does.
1. You may copy and distribute verbatim copies of the
Library's complete source code as you receive it, in any
medium, provided that you conspicuously and
appropriately publish on each copy an appropriate
copyright notice and disclaimer of warranty; keep intact all
the notices that refer to this License and to the absence of
any warranty; and distribute a copy of this License along
with the Library.
200
Open Source Software License List
You may charge a fee for the physical act of transferring a
copy, and you may at your option offer warranty protection
in exchange for a fee.
2. You may modify your copy or copies of the Library or
any portion of it, thus forming a work based on the Library,
and copy and distribute such modifications or work under
the terms of Section 1 above, provided that you also meet
all of these conditions:
a) The modified work must itself be a software library.
b) You must cause the files modified to carry
prominent notices stating that you changed the files
and the date of any change.
c) You must cause the whole of the work to be licensed
at no charge to all third parties under the terms of this
License.
d) If a facility in the modified Library refers to a
function or a table of data to be supplied by an
application program that uses the facility, other than as
an argument passed when the facility is invoked, then
you must make a good faith effort to ensure that, in the
event an application does not supply such function or
table, the facility still operates, and performs whatever
part of its purpose remains meaningful.
(For example, a function in a library to compute square
roots has a purpose that is entirely well-defined
independent of the application. Therefore, Subsection
2d requires that any application-supplied function or
table used by this function must be optional: if the
application does not supply it, the square root function
must still compute square roots.)
These requirements apply to the modified work as a whole.
If identifiable sections of that work are not derived from
the Library, and can be reasonably considered independent
and separate works in themselves, then this License, and
its terms, do not apply to those sections when you
distribute them as separate works. But when you distribute
the same sections as part of a whole which is a work based
on the Library, the distribution of the whole must be on the
terms of this License, whose permissions for other
licensees extend to the entire whole, and thus to each and
every part regardless of who wrote it.
Thus, it is not the intent of this section to claim rights or
contest your rights to work written entirely by you; rather,
the intent is to exercise the right to control the distribution
of derivative or collective works based on the Library.
In addition, mere aggregation of another work not based on
the Library with the Library (or with a work based on the
Library) on a volume of a storage or distribution medium
does not bring the other work under the scope of this
License.
3. You may opt to apply the terms of the ordinary GNU
General Public License instead of this License to a given
copy of the Library. To do this, you must alter all the
notices that refer to this License, so that they refer to the
ordinary GNU General Public License, version 2, instead
of to this License. (If a newer version than version 2 of the
ordinary GNU General Public License has appeared, then
you can specify that version instead if you wish.) Do not
make any other change in these notices.
Once this change is made in a given copy, it is irreversible
for that copy, so the ordinary GNU General Public License
applies to all subsequent copies and derivative works made
from that copy.
This option is useful when you wish to copy part of the
code of the Library into a program that is not a library.
4. You may copy and distribute the Library (or a portion or
derivative of it, under Section 2) in object code or
executable form under the terms of Sections 1 and 2 above
provided that you accompany it with the complete
corresponding machine-readable source code, which must
be distributed under the terms of Sections 1 and 2 above on
a medium customarily used for software interchange.
If distribution of object code is made by offering access to
copy from a designated place, then offering equivalent
access to copy the source code from the same place
satisfies the requirement to distribute the source code, even
though third parties are not compelled to copy the source
along with the object code.
5. A program that contains no derivative of any portion of
the Library, but is designed to work with the Library by
being compiled or linked with it, is called a "work that uses
the Library". Such a work, in isolation, is not a derivative
work of the Library, and therefore falls outside the scope
of this License.
However, linking a "work that uses the Library" with the
Library creates an executable that is a derivative of the
Library (because it contains portions of the Library), rather
than a "work that uses the library". The executable is
therefore covered by this License. Section 6 states terms
for distribution of such executables.
When a "work that uses the Library" uses material from a
header file that is part of the Library, the object code for the
work may be a derivative work of the Library even though
the source code is not. Whether this is true is especially
significant if the work can be linked without the Library,
or if the work is itself a library. The threshold for this to be
true is not precisely defined by law.
If such an object file uses only numerical parameters, data
structure layouts and accessors, and small macros and
small inline functions (ten lines or less in length), then the
use of the object file is unrestricted, regardless of whether
it is legally a derivative work. (Executables containing this
object code plus portions of the Library will still fall under
Section 6.)
Otherwise, if the work is a derivative of the Library, you
may distribute the object code for the work under the terms
of Section 6. Any executables containing that work also
fall under Section 6, whether or not they are linked directly
with the Library itself.
6. As an exception to the Sections above, you may also
combine or link a "work that uses the Library" with the
Library to produce a work containing portions of the
Library, and distribute that work under terms of your
choice, provided that the terms permit modification of the
work for the customer's own use and reverse engineering
for debugging such modifications.
You must give prominent notice with each copy of the
work that the Library is used in it and that the Library and
its use are covered by this License. You must supply a
copy of this License. If the work during execution displays
copyright notices, you must include the copyright notice
for the Library among them, as well as a reference
directing the user to the copy of this License. Also, you
must do one of these things:
a) Accompany the work with the complete
corresponding machine-readable source code for the
Library including whatever changes were used in the
work (which must be distributed under Sections 1 and
2 above); and, if the work is an executable linked with
the Library, with the complete machine-readable
"work that uses the Library", as object code and/or
source code, so that the user can modify the Library
and then relink to produce a modified executable
containing the modified Library. (It is understood that
the user who changes the contents of definitions files
in the Library will not necessarily be able to recompile
the application to use the modified definitions.)
b) Use a suitable shared library mechanism for linking
with the Library. A suitable mechanism is one that (1)
uses at run time a copy of the library already present
on the user's computer system, rather than copying
library functions into the executable, and (2) will
operate properly with a modified version of the library,
if the user installs one, as long as the modified version
is interface-compatible with the version that the work
was made with.
Open Source Software License List
201
c) Accompany the work with a written offer, valid for
at least three years, to give the same user the materials
specified in Subsection 6a, above, for a charge no
more than the cost of performing this distribution.
d) If distribution of the work is made by offering
access to copy from a designated place, offer
equivalent access to copy the above specified
materials from the same place.
e) Verify that the user has already received a copy of
these materials or that you have already sent this user
a copy.
For an executable, the required form of the "work that uses
the Library" must include any data and utility programs
needed for reproducing the executable from it. However,
as a special exception, the materials to be distributed need
not include anything that is normally distributed (in either
source or binary form) with the major components
(compiler, kernel, and so on) of the operating system on
which the executable runs, unless that component itself
accompanies the executable.
It may happen that this requirement contradicts the license
restrictions of other proprietary libraries that do not
normally accompany the operating system. Such a
contradiction means you cannot use both them and the
Library together in an executable that you distribute.
7. You may place library facilities that are a work based on
the Library side-by-side in a single library together with
other library facilities not covered by this License, and
distribute such a combined library, provided that the
separate distribution of the work based on the Library and
of the other library facilities is otherwise permitted, and
provided that you do these two things:
a) Accompany the combined library with a copy of the
same work based on the Library, uncombined with any
other library facilities. This must be distributed under
the terms of the Sections above.
b) Give prominent notice with the combined library of
the fact that part of it is a work based on the Library,
and explaining where to find the accompanying
uncombined form of the same work.
8. You may not copy, modify, sublicense, link with, or
distribute the Library except as expressly provided under
this License. Any attempt otherwise to copy, modify,
sublicense, link with, or distribute the Library is void, and
will automatically terminate your rights under this
License. However, parties who have received copies, or
rights, from you under this License will not have their
licenses terminated so long as such parties remain in full
compliance.
202
Open Source Software License List
9. You are not required to accept this License, since you
have not signed it. However, nothing else grants you
permission to modify or distribute the Library or its
derivative works. These actions are prohibited by law if
you do not accept this License. Therefore, by modifying or
distributing the Library (or any work based on the
Library), you indicate your acceptance of this License to
do so, and all its terms and conditions for copying,
distributing or modifying the Library or works based on it.
10. Each time you redistribute the Library (or any work
based on the Library), the recipient automatically receives
a license from the original licensor to copy, distribute, link
with or modify the Library subject to these terms and
conditions. You may not impose any further restrictions on
the recipients' exercise of the rights granted herein. You
are not responsible for enforcing compliance by third
parties with this License.
11. If, as a consequence of a court judgment or allegation
of patent infringement or for any other reason (not limited
to patent issues), conditions are imposed on you (whether
by court order, agreement or
otherwise) that contradict the conditions of this License,
they do not excuse you from the conditions of this License.
If you cannot distribute so as to satisfy simultaneously
your obligations under this License and any other pertinent
obligations, then as a consequence you may not distribute
the Library at all. For example, if a patent license would
not permit royalty-free redistribution of the Library by all
those who receive copies directly or indirectly through
you, then the only way you could satisfy both it and this
License would be to refrain entirely from distribution of
the Library.
If any portion of this section is held invalid or
unenforceable under any particular circumstance, the
balance of the section is intended to apply, and the section
as a whole is intended to apply in other circumstances.
It is not the purpose of this section to induce you to infringe
any patents or other property right claims or to contest
validity of any such claims; this section has the sole
purpose of protecting the integrity of the free software
distribution system which is implemented by public
license practices. Many people have made generous
contributions to the wide range of software distributed
through that system in reliance on consistent application of
that system; it is up to the author/donor to decide if he or
she is willing to distribute software through any other
system and a licensee cannot impose that choice.
This section is intended to make thoroughly clear what is
believed to be a consequence of the rest of this License.
12. If the distribution and/or use of the Library is restricted
in certain countries either by patents or by copyrighted
interfaces, the original copyright holder who places the
Library under this License may add an explicit
geographical distribution limitation excluding those
countries, so that distribution is permitted only in or among
countries not thus excluded. In such case, this License
incorporates the limitation as if written in the body of this
License.
13. The Free Software Foundation may publish revised
and/or new versions of the Lesser General Public License
from time to time. Such new versions will be similar in
spirit to the present version, but may differ in detail to
address new problems or concerns.
PARTY WHO MAY MODIFY AND/OR
REDISTRIBUTE THE LIBRARY AS PERMITTED
ABOVE, BE LIABLE TO YOU FOR DAMAGES,
INCLUDING ANY GENERAL, SPECIAL,
INCIDENTAL OR CONSEQUENTIAL DAMAGES
ARISING OUT OF THE USE OR INABILITY TO USE
THE LIBRARY (INCLUDING BUT NOT LIMITED TO
LOSS OF DATA OR DATA BEING RENDERED
INACCURATE OR LOSSES SUSTAINED BY YOU OR
THIRD PARTIES OR A FAILURE OF THE LIBRARY
TO OPERATE WITH ANY OTHER SOFTWARE),
EVEN IF SUCH HOLDER OR OTHER PARTY HAS
BEEN ADVISED OF THE POSSIBILITY OF SUCH
DAMAGES.
END OF TERMS AND CONDITIONS
Each version is given a distinguishing version number. If
the Library specifies a version number of this License
which applies to it and "any later version", you have the
option of following the terms and conditions either of that
version or of any later version published by the Free
Software Foundation. If the Library does not specify a
license version number, you may choose any version ever
published by the Free Software Foundation.
14. If you wish to incorporate parts of the Library into
other free programs whose distribution conditions are
incompatible with these, write to the author to ask for
permission. For software which is copyrighted by the Free
Software Foundation, write to the Free Software
Foundation; we sometimes make exceptions for this. Our
decision will be guided by the two goals of preserving the
free status of all derivatives of our free software and of
promoting the sharing and reuse of software generally.
NO WARRANTY
15. BECAUSE THE LIBRARY IS LICENSED FREE OF
CHARGE, THERE IS NO WARRANTY FOR THE
LIBRARY, TO THE EXTENT PERMITTED BY
APPLICABLE LAW. EXCEPT WHEN OTHERWISE
STATED IN WRITING THE COPYRIGHT HOLDERS
AND/OR OTHER PARTIES PROVIDE THE LIBRARY
"AS IS" WITHOUT WARRANTY OF ANY KIND,
EITHER EXPRESSED OR IMPLIED, INCLUDING,
BUT NOT LIMITED TO, THE IMPLIED
WARRANTIES OF MERCHANTABILITY AND
FITNESS FOR A PARTICULAR PURPOSE. THE
ENTIRE RISK AS TO THE QUALITY AND
PERFORMANCE OF THE LIBRARY IS WITH YOU.
SHOULD THE LIBRARY PROVE DEFECTIVE, YOU
ASSUME THE COST OF ALL NECESSARY
SERVICING, REPAIR OR CORRECTION.
16. IN NO EVENT UNLESS REQUIRED BY
APPLICABLE LAW OR AGREED TO IN WRITING
WILL ANY COPYRIGHT HOLDER, OR ANY OTHER
How to Apply These Terms to Your New Libraries
If you develop a new library, and you want it to be of the
greatest possible use to the public, we recommend making
it free software that everyone can redistribute and change.
You can do so by permitting redistribution under these
terms (or, alternatively, under the terms of the ordinary
General Public License).
To apply these terms, attach the following notices to the
library. It is safest to attach them to the start of each source
file to most effectively convey the exclusion of warranty;
and each file should have at least the "copyright" line and
a pointer to where the full notice is found.
<one line to give the library's name and a brief idea of
what it does.>
Copyright (C) <year> <name of author>
This library is free software; you can redistribute it
and/or modify it under the terms of the GNU Lesser
General Public License as published by the Free
Software Foundation; either version 2.1 of the
License, or (at your option) any later version.
This library is distributed in the hope that it will be
useful, but WITHOUT ANY WARRANTY; without
even the implied warranty of MERCHANTABILITY
or FITNESS FOR A PARTICULAR PURPOSE. See
the GNU Lesser General Public License for more
details.
You should have received a copy of the GNU Lesser
General Public License along with this library; if not,
write to the Free Software Foundation, Inc., 59 Temple
Place, Suite 330, Boston, MA 02111-1307 USA
Also add information on how to contact you by electronic
and paper mail.
Open Source Software License List
203
You should also get your employer (if you work as a
programmer) or your school, if any, to sign a "copyright
disclaimer" for the library, if necessary. Here is a sample;
alter the names:
Yoyodyne, Inc., hereby disclaims all copyright interest
in the library `Frob' (a library for tweaking knobs)
written by James Random Hacker.
The following notices are required to satisfy the license
terms of the software that we have mentioned in this
document:
<signature of Ty Coon>, 1 April 1990
Ty Coon, President of Vice
This product includes software developed by Adam Glass.
This product includes software developed by Bill Paul.
This product includes software developed by Brini.
This product includes software developed by Causality
Limited.
This product includes software developed by Charles M.
Hannum.
This product includes software developed by Christian E.
Hopps.
This product includes software developed by Christopher
G. Demetriou.
This product includes software developed by Christopher
G. Demetriou for the NetBSD Project.
This product includes software developed by Christos
Zoulas.
This product includes software developed by Gardner
Buchanan.
This product includes software developed by Gordon W.
Ross
This product includes software developed by Manuel
Bouyer.
This product includes software developed by Mark
Brinicombe.
This product includes software developed by Rolf
Grossmann.
This product includes software developed by TooLs
GmbH.
This product includes software developed by the NetBSD
Foundation, Inc. and its contributors.
This product includes software developed by the RiscBSD
team.
This product includes software developed by the
University of California, Berkeley and its contributors.
This product includes software developed by the
University of California, Lawrence Berkeley Laboratory
and its contributors.
This product includes software developed by the
University of California, Lawrence Berkeley Laboratory.
This product includes software developed for the NetBSD
Project by Wasabi Systems, Inc.
This product includes software developed for the NetBSD
Project by Matthias Drochner.
That's all there is to it!
[nbl]
Copyright (c) 1994-2004 The NetBSD Foundation, Inc.
All rights reserved.
Redistribution and use in source and binary forms, with or
without modification, are permitted provided that the
following conditions are met:
1. Redistributions of source code must retain the above
copyright notice, this list of conditions and the following
disclaimer.
2. Redistributions in binary form must reproduce the above
copyright notice, this list of conditions and the following
disclaimer in the documentation and/or other materials
provided with the distribution.
3. All advertising materials mentioning features or use of
this software must display the following
acknowledgement:
This product includes software developed by the
NetBSD Foundation, Inc. and its contributors.
4. Neither the name of The NetBSD Foundation nor the
names of its contributors may be used to endorse or
promote products derived from this software without
specific prior written permission.
THIS SOFTWARE IS PROVIDED BY THE REGENTS
AND CONTRIBUTORS ``AS IS'' AND ANY EXPRESS
OR IMPLIED WARRANTIES, INCLUDING, BUT NOT
LIMITED TO, THE IMPLIED WARRANTIES OF
MERCHANTABILITY AND FITNESS FOR A
PARTICULAR PURPOSE ARE DISCLAIMED. IN NO
EVENT SHALL THE REGENTS OR CONTRIBUTORS
BE LIABLE FOR ANY DIRECT, INDIRECT,
INCIDENTAL, SPECIAL, EXEMPLARY, OR
CONSEQUENTIAL DAMAGES (INCLUDING, BUT
NOT LIMITED TO, PROCUREMENT OF
SUBSTITUTE GOODS OR SERVICES; LOSS OF USE,
DATA, OR PROFITS; OR BUSINESS
INTERRUPTION) HOWEVER CAUSED AND ON
ANY THEORY OF LIABILITY, WHETHER IN
CONTRACT, STRICT LIABILITY, OR TORT
204
(INCLUDING NEGLIGENCE OR OTHERWISE)
ARISING IN ANY WAY OUT OF THE USE OF THIS
SOFTWARE, EVEN IF ADVISED OF THE
POSSIBILITY OF SUCH DAMAGE.
Open Source Software License List
[arm-sony-linux-gnueabi-armv7a-dev-openssl-with-ec0.9.8x-08000102]
LICENSE ISSUES
The OpenSSL toolkit stays under a dual license, i.e. both
the conditions of the OpenSSL License and the original
SSLeay license apply to the toolkit.
See below for the actual license texts. Actually both
licenses are BSD-style Open Source licenses. In case of
any license issues related to OpenSSL
please contact [email protected].
OpenSSL License
Copyright (c) 1998-2008 The OpenSSL Project. All rights
reserved.
EVENT SHALL THE OpenSSL PROJECT OR ITS
CONTRIBUTORS BE LIABLE FOR ANY DIRECT,
INDIRECT, INCIDENTAL, SPECIAL, EXEMPLARY,
OR CONSEQUENTIAL DAMAGES (INCLUDING,
BUT NOT LIMITED TO, PROCUREMENT OF
SUBSTITUTE GOODS OR SERVICES; LOSS OF USE,
DATA, OR PROFITS; OR BUSINESS
INTERRUPTION) HOWEVER CAUSED AND ON
ANY THEORY OF LIABILITY, WHETHER IN
CONTRACT, STRICT LIABILITY, OR TORT
(INCLUDING NEGLIGENCE OR OTHERWISE)
ARISING IN ANY WAY OUT OF THE USE OF THIS
SOFTWARE, EVEN IF ADVISED OF THE
POSSIBILITY OF SUCH DAMAGE.
Redistribution and use in source and binary forms, with or
without modification, are permitted provided that the
following conditions are met:
This product includes cryptographic software written by
Eric Young ([email protected]). This product includes
software written by Tim Hudson ([email protected]).
1. Redistributions of source code must retain the above
copyright notice, this list of conditions and the following
disclaimer.
/
2. Redistributions in binary form must reproduce the above
copyright notice, this list of conditions and the following
disclaimer in the documentation and/or other materials
provided with the distribution.
Copyright (C) 1995-1998 Eric Young
([email protected])
All rights reserved.
3. All advertising materials mentioning features or use of
this software must display the following acknowledgment:
"This product includes software developed by the
OpenSSL Project for use in the OpenSSL Toolkit. (http://
www.openssl.org/)"
4. The names "OpenSSL Toolkit" and "OpenSSL Project"
must not be used to endorse or promote products derived
from this software without prior written permission. For
written permission, please contact [email protected].
5. Products derived from this software may not be called
"OpenSSL" nor may "OpenSSL" appear in their names
without prior written permission of the OpenSSL Project.
6. Redistributions of any form whatsoever must retain the
following acknowledgment:
"This product includes software developed by the
OpenSSL Project for use in the OpenSSL Toolkit (http://
www.openssl.org/)"
THIS SOFTWARE IS PROVIDED BY THE OpenSSL
PROJECT ``AS IS'' AND ANY EXPRESSED OR
IMPLIED WARRANTIES, INCLUDING, BUT NOT
LIMITED TO, THE IMPLIED WARRANTIES OF
MERCHANTABILITY AND FITNESS FOR A
PARTICULAR PURPOSE ARE DISCLAIMED. IN NO
Original SSLeay License
This package is an SSL implementation written by Eric
Young ([email protected]).
The implementation was written so as to conform with
Netscapes SSL.
This library is free for commercial and non-commercial
use as long as the following conditions are aheared to. The
following conditions apply to all code found in this
distribution, be it the RC4, RSA, lhash, DES, etc., code;
not just the SSL code. The SSL documentation included
with this distribution is covered by the same copyright
terms except that the holder is Tim Hudson
([email protected]).
Copyright remains Eric Young's, and as such any
Copyright notices in the code are not to be removed. If this
package is used in a product, Eric Young should be given
attribution as the author of the parts of the library used.
This can be in the form of a textual message at program
startup or in documentation (online or textual) provided
with the package.
Redistribution and use in source and binary forms, with or
without modification, are permitted provided that the
following conditions are met:
1. Redistributions of source code must retain the copyright
notice, this list of conditions and the following disclaimer.
2. Redistributions in binary form must reproduce the above
copyright notice, this list of conditions and the following
Open Source Software License List
205
disclaimer in the documentation and/or other materials
provided with the distribution.
3. All advertising materials mentioning features or use of
this software must display the following
acknowledgement:
"This product includes cryptographic software written by
Eric Young ([email protected])"
The word 'cryptographic' can be left out if the rouines from
the library being used are not cryptographic related :-).
4. If you include any Windows specific code (or a
derivative thereof) from the apps directory (application
code) you must include an acknowledgement:
"This product includes software written by Tim Hudson
([email protected])"
THIS SOFTWARE IS PROVIDED BY ERIC YOUNG
``AS IS'' AND ANY EXPRESS OR IMPLIED
WARRANTIES, INCLUDING, BUT NOT LIMITED
TO, THE IMPLIED WARRANTIES OF
MERCHANTABILITY AND FITNESS FOR A
PARTICULAR PURPOSE ARE DISCLAIMED. IN NO
EVENT SHALL THE AUTHOR OR CONTRIBUTORS
BE LIABLE FOR ANY DIRECT, INDIRECT,
INCIDENTAL, SPECIAL, EXEMPLARY, OR
CONSEQUENTIAL DAMAGES (INCLUDING, BUT
NOT LIMITED TO, PROCUREMENT OF
SUBSTITUTE GOODS OR SERVICES; LOSS OF USE,
DATA, OR PROFITS; OR BUSINESS
INTERRUPTION) HOWEVER CAUSED AND ON
ANY THEORY OF LIABILITY, WHETHER IN
CONTRACT, STRICT LIABILITY, OR TORT
(INCLUDING NEGLIGENCE OR OTHERWISE)
ARISING IN ANY WAY OUT OF THE USE OF THIS
SOFTWARE, EVEN IF ADVISED OF THE
POSSIBILITY OF SUCH DAMAGE.
The licence and distribution terms for any publically
available version or derivative of this code cannot be
changed. i.e. this code cannot simply be copied and put
under another distribution licence
[including the GNU Public Licence.]
/
本製品は、T-Engine フォーラム(www.t-engine.org)の
μT-License に基づき μT-Kernel ソースコードを利用して
います。
206
Open Source Software License List
このマニュアルに記載されている事柄の著作権は当社にあ
り、説明内容は機器購入者の使用を目的としています。
従って、当社の許可なしに無断で複写したり、説明内容
(操作、保守等)と異なる目的で本マニュアルを使用するこ
とを禁止します。
The material contained in this manual consists of information
that is the property of Sony Corporation and is intended
solely for use by the purchasers of the equipment described
in this manual.
Sony Corporation expressly prohibits the duplication of any
portion of this manual or the use thereof for any purpose
other than the operation or maintenance of the equipment
described in this manual without the express written
permission of Sony Corporation.
Les donnees contenues dans ce manuel sont des
informations dont Sony Corporation est proprietaire et qui
sont destinees exclusivement a l’usage par les acquereurs
de l’equipement decrit dans ce manuel.
Sony Corporation interdit formellement la copie de quelque
partie que ce soit de ce manuel ou son emploi pour tout
autre but que des operations ou entretiens de l’equipement
a moins d’une permission ecrite de Sony Corporation.
Das in dieser Anleitung enthaltene Material besteht aus
Informationen, die Eigentum der Sony Corporation sind, und
ausschlieslich zum Gebrauch durch den Kaufer der in dieser
Anleitung beschriebenen Ausrustung bestimmt sind.
Die Sony Corporation untersagt ausdrucklich die
Vervielfaltigung jeglicher Teile dieser Anleitung oder den
Gebrauch derselben fur irgendeinen anderen Zweck als die
Bedienung oder Wartung der in dieser Anleitung
beschriebenen Ausrustung ohne ausdruckliche schriftliche
Erlaubnis der Sony Corporation.
Le informazioni contenute nel presente manuale sono di
proprieta di Sony Corporation e il relativo uso e destinato
solamente agli acquirenti dell’apparecchio descritto in
questo documento.
Sony Corporation vieta espressamente la duplicazione in
parte o per intero di questo manuale e il suo utilizzo per
scopi differenti dal funzionamento o manutenzione
dell’apparecchio ivi descritto, senza previo permesso scritto
di Sony Corporation.
El material de este manual contiene informacion que es
propiedad de Sony Corporation y se destina al uso por parte
de los compradores del equipo descrito en este manual.
Sony Corporation prohibe expresamente la duplicacion de
cualquier parte de este manual o el uso del mismo para
cualquier proposito diferente al funcionamiento o el
mantenimiento del equipo descrito en este manual sin la
autorizacion expresa por escrito de Sony Corporation.
Материалы этого руководства содержат
информацию, которая является собственностью
корпорации Sony Corporation и предназначена
исключительно для использования покупателями
оборудования, описанного в этом руководстве.
Корпорация Sony Corporation явно запрещает
копирование любых частей этого руководства или
использование его для любых целей, кроме
эксплуатации и обслуживания оборудования,
описанного в этом руководстве, без прямого
письменного разрешения корпорации Sony
Corporation.
CBK-55BK (SYM/CN)
4-564-733-01 (1)
Sony Corporation
Printed in Japan
2014.11 08
© 2014