1
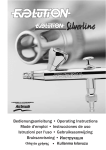
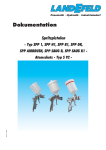
AIRBRUSH Guns
AIRBRUSh-Pistolen
Version 13.11-1.0
OPERATING INSTRUCTIONS
BEDIENUNGSANLEITUNG
Airbrushpistole Profi-AirBrush
Double-Action-Gun 128 D 0,35
(Artikelnr: AB01117)
Airbrushpistole Profi-AirBrush
Double-Action-Gun 134 D 0,3
(Artikelnr: AB01115)
Airbrushpistole Profi-AirBrush
Double-Action-Gun 134s
(Artikelnr: AB01121)
Airbrushpistole Profi-AirBrush
Double-Action-Gun 182 D 0,5
(Artikelnr: AB01111)
Airbrushpistole Profi-AirBrush
Gravity Double-Action-Gun 116 D 0,3
(Artikelnr: AB01118)
Airbrushpistole Profi-AirBrush
Gravity Double-Action-Gun 130 D 0,3
(Artikelnr: AB01116)
Airbrushpistole Profi-AirBrush
Gravity Double-Action-Gun 180 D 0,2
(Artikelnr: AB01112)
Airbrushpistole Profi-AirBrush
Gravity Dual-Action-Gun 186 D 0,3
(Artikelnr: AB01110)
13.11-1.0
Airbrush- Sandstrahlpistole
Sandy I
(Artikelnr: AB01122)
Technical changes, misprints and mistakes reserved! Newest information about our products can be found online
Technische Änderungen, Druckfehler und Irrtümer vorbehalten! Aktuelle Informationen zu unseren Produkten finden Sie auf:
http://www.profi-pumpe.de
2 English
Airbrushpistole Profi-AirBrush
Gravity Single-Action-Gun 150 D 0,3
(Artikelnr: AB01113)
Airbrushpistole Profi-AirBrush
Airbrushpistole Profi-AirBrush
Gravity Single-Action-Gun
Single-Action-Gun 138 D 0,8
2000G1 D 0,8 (Artikelnr: AB01120) (Artikelnr: AB01123)
Airbrushpistolen Set Profi
AirBrush x-Action Gun 188k
0,35/0,25
(Artikelnr: AB01119)
Contents
1. Introduction . ................................................................................................................. 3
2. In general ...................................................................................................................... 3
3. Ranges of application ................................................................................................... 3
4. Operation directory/Troubleshooting . .......................................................................... 3
5. Security tips................................................................................................................... 4
6. Maintance ..................................................................................................................... 4
7. Guarantee regulations ................................................................................................... 4
8. Technical Data/Details ............................................................................................ 8–20
8.1 Profi-Airbrush sandblasting gun Sandy I . ......................................................................................................................... 8
8.2 Profi-Airbrush Double Action Gun 128 D 0.35 . ............................................................................................................... 9
8.3 Profi-AirBrush Double-Action-Gun 134 D 0,3 ............................................................................................................... 10
8.4 Profi-AirBrush Double-Action-Gun 134s ........................................................................................................................ 11
8.5 Profi-AirBrush Double-Action-Gun 182 D 0,5 ............................................................................................................... 12
8.6 Profi-AirBrush Gravity Double-Action-Gun 116 D 0,3 .................................................................................................. 13
8.7 Profi-AirBrush Gravity Double-Action-Gun 130 D 0,3 .................................................................................................. 14
8.8 Profi-AirBrush Gravity Double-Action-Gun 180 D 0,2 .................................................................................................. 15
8.9 Profi-AirBrush Gravity Double-Action-Gun 186 D 0,3 .................................................................................................. 16
8.10 Profi-AirBrush Gravity Single-Action-Gun 150 D 0,3 ................................................................................................. 17
8.11 Profi-AirBrush Gravity Single-Action-Gun 2000G1 0,8 . ............................................................................................. 18
8.12 Profi-AirBrush Single-Action-Gun 138 D 0,8 . ............................................................................................................. 19
8.13 Profi-Set X-Action-Gun 188k 0,35/0,25 . ...................................................................................................................... 20
9. Putting into operation ................................................................................................. 21
10. Important note . ........................................................................................................... 22
Back to Contents
English 3
1. INTRODUCTION
We would like to congratulate you on the purchase of your airbrush gun. We appreciate your trust. That‘s why functional security
and operational safety stands on first place for us.
Please read this Instruction Manual carefully and thoroughly before operating the tool to get best performance.
2. IN GENERAL
The airbrush guns are developed according to the newest stand of technology, manufactured with much care and go under strict
intensive controls.
Make sure after unpacking that the data given on the type label match with the included operating instructions. In the case of
doubt is not to be used. Transport damages are immediately to be reported to the package distributor on the shipping invoice and
to us in written form.
3. RANGES OF APPLICATION
Airbrush guns can be used in:
l
hobbies/models
l
Bodypainting
l
Fingernail painting
l
cosmetic
l
craftwork spraying
l
And much more
The airbrush gun can be also used for providing air source for medical, environment protect, breed aquatics Indnstrial, food
Industrial, chemical industrial, laboratory and so on.
4. OPERATION DIRECTORY / TROUBLESHOOTING
The Original air hose have rubber airproof inside; the user can make the airtight by hand, and get good performance. If the air
hose is not original, usually the air hose and air compressor cannot be well airproof. If the air hose should not be tight, this will
affect the auto-stop function of the compressor and the spray pattern negatively. Then turn off the compressor and check the
gauge. However, 100% airtight is only effective for auto stop function air compressor. Teflon tape can be used to prevent leakage.
Connect the air compressor, air hose and airbrush gun (or other air tools), plug into the mains supply, turn on the switch, and then
the air compressor will start work. The gauge will show the max pressure, and you can adjust the working pressure by adjusting
the pressure adjustor (only for models with pressure gauge and pressure regulator).
Checking the air leakage. Please do not use the air to pressure reach the max pressure (auto stop function), for the compressors
do not have auto stop function, please turn off the switch. Then check the needle of pressure gauge, if the needle on gauge is very
steady, it is means the airtight is verv good. If the needle decline down quickly, it means there is air leakage in some place of
connection. Please check and make it airtight. Or any small leakage will affect the performance of the compressor. (lt may lead to
frequently auto stop and auto start)
A compressors maximum pressure is the highest pressure it can build up. When a connected airbrush gun is opened, it is precisely with this pressure that compresssed air in itially shoots out through the airbrush nozzle. In contrast, the working pressure is
the constant pressure the compressor can maintain during airbrushing. The level of this working pressure depends, on the other
hand. the nozzle diameter of the airbrush to which it is connected; the larger the nozzle diameter, the greater the amount of air
wich can escape and the lower the compressor‘s working pressure.
4 English
Back to Contents
5. SECURITY TIPS
l
Keep away from children! It is not a toy!
l
The airbrush gun should not be taken by persons commissioning, which are under the influence of alcohol, drugs or
medication.
l
Please, check before every use that the electrical connections as well as the cable are intact.
l
Moreover, it is not recommended to carry out technical modifications. First it is not sure whether these changes are technically flawless and secondly no guarantee can be therefore granted.
l
Obey absolutely valid regulations on the electrical security.
l
Pay attention to the Ambient temperatures between +5 and +40 ° C.
l
Never pull on the power cord or the pressure hose.
l
Never leave the appliance exposed to dust, acids, vapors, explosive or flammable gasses or atmospheric agents (rain, sun, fog,
snow).
l
The airbrush gun may be used only in well ventilated area and will not be used in areas with steam or moisture, or near water.
l
Never use the appliance in your bare feet or with wet hands or feet.
l
Never pull on the electrical cable or hose
l
Restricted section in the tubing or cables
l
The compressor has not to be stored with the plug inserted. Children or persons who are mentally not be able to operate the
compressor, may not play or work with the device.
l
The device is to be secured / protected through a RCD circuit breaker (release current 30 mA).
l
The airbrush gun should not be used if it is damaged.
The manufacturer explains:
l
To take over no responsibility in the case of accidents or damages on the basis of carelessness or disregard to the instructions
in this book.
l
To reject every responsibility for the damages which originate from the improper use of the device
6. MAINTANCE
The servicing and maintenance work are according to our operating instructions to be carried out, the safety regulations are
absolutely to be followed.
Clean airbrush gun IMMEDIATELY after use with suitable solvent and dry thoroughly with compressed air. No residues in the
gun may be located. In the presence of deposits in the airbrush gun and a damage, which leads back to, the right to legal warranty
is void..
The following controls should be carried out regularly:
l
That the hoses are not bent or broken
l
Checking the air leakage
Caution!: Before any work with the airbrush gun the security tips are to be followed
7. GUARANTEE REGULATIONS
For all manufacturer defects and material defects we grant the legal guarantee time (new and unused product). In such cases we
take over the exchange or the repair of the device. Forwarding expenses are not carried by us.
For all manufacturing and material defects is a legal guarantee (new and unused goods). In such instances, we accept exchange
or repair of the airbrush.
Shipping costs and consequential damages are only covered by us, unless we are legally obliged to do. Our service is delivered
only in Germany. Return shipping from abroad can only be taken so far, to the extent that we in Germany (or, if EU law is applicable in Germany) are required by law.
The guarantee is not valid with:
l
Material wear (sealing rings, impeller wheels, impeller chambers)
l
Unjustified interventions or changes in the device
l
Damages by selffault
l
Improper servicing and improper use
Moreover, we give no damage compensation for secondary damages! Deutsch 5
Inhaltsverzeichnis
1.
2.
3.
4.
5.
6.
7.
8.
Vorwort ......................................................................................................................... 6
Allgemeines .................................................................................................................. 6
Anwendungsbereiche . .................................................................................................. 6
Benutzungshinweise/Problembehebung ....................................................................... 6
Sicherheitshinweise....................................................................................................... 7
Wartung . ....................................................................................................................... 7
Garantiebestimmung . ................................................................................................... 7
Technische Daten/Risszeichnungen ....................................................................... 8–20
8.1 Profi-Airbrush Sandstrahlpistole Sandy I .......................................................................................................................... 8
8.2 Profi-Airbrush Double Action Gun 128 D 0.35 . ............................................................................................................... 9
8.3 Profi-AirBrush Double-Action-Gun 134 D 0,3 ............................................................................................................... 10
8.4 Profi-AirBrush Double-Action-Gun 134s ....................................................................................................................... 11
8.5 Profi-AirBrush Double-Action-Gun 182 D 0,5 ............................................................................................................... 12
8.6 Profi-AirBrush Gravity Double-Action-Gun 116 D 0,3 .................................................................................................. 13
8.7 Profi-AirBrush Gravity Double-Action-Gun 130 D 0,3 . ................................................................................................ 14
8.8 Profi-AirBrush Gravity Double-Action-Gun 180 D 0,2 . ................................................................................................ 15
8.9 Profi-AirBrush Gravity Double-Action-Gun 186 D 0,3 . ................................................................................................ 16
8.10 Profi-AirBrush Gravity Single-Action-Gun 150 D 0,3 ................................................................................................. 17
8.11 Profi-AirBrush Gravity Single-Action-Gun 2000G1 0,8 .............................................................................................. 18
8.12 Profi-AirBrush Single-Action-Gun 138 D 0,8 . ............................................................................................................. 19
8.13 Profi-Set X-Action-Gun 188k 0,35/0,25 ....................................................................................................................... 20
9. Inbetriebnahme ........................................................................................................... 22
10. Wichtige Hinweise . .................................................................................................... 23
6 Deutsch
Zurück zum Inhaltsverzeichnis
1. VORWORT
Zum Kauf Ihrer Airbrush-Pistole möchten wir Sie recht herzlich beglückwünschen. Wir wissen Ihr Vertrauen zu schätzen.
Aus diesem Grund stehen bei uns Funktions- und Betriebssicherheit an erster Stelle.
Lesen Sie bitte diese Bedienungsanleitung sorgfältig durch, bevor Sie das Gerät in Betrieb nehmen.
2. ALLGEMEINES
Die Airbrush-Pistolen sind nach dem neuesten Stand der Technik entwickelt, mit größter Sorgfalt gefertigt und unterliegen
strengen Qualitätskontrollen.
Vergewissern Sie sich nach dem Auspacken, dass die auf dem Typenschild angegebenen Daten mit den vorgesehenen
Betriebsbedingungen übereinstimmen. Im Zweifelsfall ist der Betrieb zu unterlassen. Transportschäden sind unverzüglich
von dem Speditionsunternehmen auf Lieferschein zu bestätigen und uns schriftlich mitzuteilen.
3. ANWENDUNGSBEREICHE
Die Airbrush-Pistolen eignen sich unter anderen für:
l
Modelbau
l
Körperbemalungen (Bodypainting)
l
Kunsthandwerk
l
Kosmetik
l
Tatoo
l
Und vieles mehr
Ebenso können die Airbrush-Pistolen als Druck-Luftquelle in der Medizin, Lebensmittel Industrie, chemische Industrie,
Laboratorien usw. verwendet werden.
4. BENUTZUNGSHINWEISE/PROBLEMBEHEBUNG
Die Luftschläuche für Airbrush-Pistolen sind luftdicht. Wenn der Luftschlauch nicht dicht sein sollte, wirkt sich dies auf die
Autostop-Funktion des Kompressors und auf das Spritzbild negativ aus. Danach schalten Sie den Kompressor ab und überprüfen
Sie das Manometer. Abdichtung der Verschraubungen kann mit Hilfe von Teflonband erfolgen.
Um die Airbrush-Pistole in Betrieb zu nehmen, müssen Sie den Luftschlauch, die Airbrush-Pistole oder andere Luftwerkzeuge
mit dem Kompressor verbinden, den Kompressor an das Stromnetz anschließen und den Kompressor anschalten. Das Manometer
wird den maximalen Druck anzeigen und Sie können den Arbeitsdruck mit dem Druckregler einstellen (nur bei Modellen mit
Manometer und Druckregler).
Bitte verwenden Sie das Druckluftwerkzeug nicht, wenn sich die Autostop-Funktion ausgeschaltet hat. Schalten Sie den Kompressor ein, bis er auf „Auto-Stop“ geht. Danach schalten Sie den Kompressor und überprüfen Sie das Manometer. Wenn der
Druck konstant bleibt, zeigt dies, dass die Luftdichtigkeit sehr gut ist. Falls der Druck schnell absinkt, zeigt dies, dass irgendeine
Verbindungsstelle undicht ist. Bitte überprüfen Sie dies und dichten Sie es ab. Ansonsten wird jedes kleine Leck die Leistungsfähigkeit des Kompressors beeinträchtigen (wiederholte Auto-Stop- und Auto-Start-Vorgänge).
Der maximale Arbeitsdruck eines Kompressors ist der höchste Druck, den der Kompressor aufbauen kann. Wenn ein angeschlossener Airbrush geöffnet wird, schießt die anfangs komprimierte Luft durch die Airbrush-Düse. Im Gegensatz dazu ist der Arbeitsdruck der konstante Druck, den der Kompressor während des Betriebs aufrecht erhalten kann. Die Höhe des Arbeitsdrucks hängt
andererseits ab vom Düsendurchmesser der Airbrush-Pistole, mit der er verbunden ist. Je größer der Düsendurchmesser der Düse
ist, desto größer die Luftmenge, die entweichen kann und umso niedriger der Arbeitsdruck des Kompressors.
l
Wir empfehlen, für gute Airbrush-Ergebnisse stets Kompressoren mit einem Druckausgleichstank zu verwenden.
Zurück zum Inhaltsverzeichnis
Deutsch 7
5. SICHERHEITSHINWEISE
l
Von Kindern fernhalten! Es ist kein Spielzeug!
l
Die Airbrush-Pistole darf nicht von Personen in Betrieb genommen werden, die unter dem Einfluss von Alkohol, Drogen oder
Medikamenten stehen.
l
Bitte überprüfen Sie vor jeder Inbetriebnahme die elektrischen Anschlüsse, Unversehrtheit des Kabels sowie, dass alle
Schrauben festgezogen sind.
l
Es ist NICHT zu empfehlen auf eigene Faust technische Veränderungen durchzuführen. Erstens ist nicht sichergestellt, ob
diese Modifikation technisch einwandfrei ist, zudem verfällt der Garantieanspruch.
l
Unbedingt geltende Vorschriften zur elektrischen Sicherheit und Unfallverhütung befolgen
l
Umgebungstemperatur zwischen +5 und +40°C beachten
l
Niemals am stromführenden Kabel oder am Schlauch ziehen
l
Das Gerät nie Staub, Säure, Dämpfen, explosiven oder brennbaren Gasen oder atmosphärischen Einflüssen (Regen, Sonne,
Nebel, Schnee) aussetzen.
l
Der Kompressor darf nur in gut belüfteten Räumen und nicht in Bereichen mit Dampf oder Feuchtigkeit oder in der Nähe von
Wasser benutzt werden.
l
Das Gerät niemals barfuss oder mit nassen Händen bzw. Füßen benutzen.
l
Querschnittsverengung im Schlauch oder Kabel vermeiden
l
Der Kompressor darf nicht mit eingestecktem Stecker gelagert werden. Kinder oder Personen, die geistig nicht zum Umgang
mit dem Gerät in der Lage sind, dürfen nicht mit dem Gerät spielen oder arbeiten.
l
Das Gerät ist durch einen FI- Schutzschalter mit Auslösestrom von 30 mA abzusichern!
l
Die Airbrush-Pistole darf nicht benutzt werden, wenn sie beschädigt ist.
Der Hersteller erklärt,
l
keine Verantwortung im Fall von Unfällen oder Schäden aufgrund von Fahrlässigkeit oder Missachtung der Anweisungen in
diesem Buch zu übernehmen
l
jede Verantwortung für Schäden, die durch die unsachgemäße Verwendung des Geräts entstehen, abzulehnen
6. WARTUNG
Die Wartungs- und Instandhaltungsarbeiten sind gemäß unserer Bedienungsanleitung durchzuführen, die entsprechenden Sicherheitsvorschriften sind unbedingt zu beachten.
Pistolen nach Gebrauch SOFORT mit geeigneten Lösungsmittel reinigen und mit Druckluft trockenspülen. Es dürfen sich keine
Ablagerungen in der Pistole bilden. Bei Vorhandensein jeglicher Fremdablagerungen in der Airbrush-Pistole und einem Schadensbild, welches darauf zurück geführt werden kann, entfällt der Anspruch auf gesetzliche Gewährleistung.
Folgende Kontrollen sollten regelmäßig durchgeführt werden:
l
Saubere Führung der Leitungen (z.B. keinen Knick)
l
Überprüfung von Undichtigkeiten
Hinweise: Vor jeder Arbeit mit der Airbrush-Pistole sind die Sicherheitshinweise zu beachten!
7. GARANTIEBESTIMMUNGEN
Für alle Fabrikations- und Materialfehler besteht die gesetzliche Gewährleistungt (neue und ungebrauchte Ware). In solchen
Fällen übernehmen wir den Umtausch oder die Reparatur der Airbrush-Pistole.
Versandkosten und Folgeschäden werden von uns nur insofern getragen, soweit wir dazu gesetzlich verpflichtet sind.
Wir erbingen unsere Serviceleistungen in Deutschland. Rücksendekosten aus dem Ausland können nur insofern übernommen
werden, soweit wir dazu in Deutschland (bzw. soweit EU Recht in Deutschland anwendbar ist) gesetzlich verpflichtet sind.
Die Garantie gilt nicht bei:
l
Materialverschleiß (z.B. Dichtungen)
l
Unberechtigten Eingriffen oder Veränderungen an der Airbrush-Pistole
l
Beschädigungen durch Selbstverschulden
l
Unsachgemäßer Wartung und unsachgemäßem Betrieb
Außerdem leisten wir keinerlei Schadensersatz für Folgeschäden!
8
Back to Contents/Zurück zum Inhaltsverzeichnis
8. TECHNICAL DATA/TECHNISCHE DATEN Airbrush-Pistolen
8.1 Airbrush sandblasting gun Sandy I
8.1 Airbrush Sandstrahlpistole Sandy I
l 1 AirBrush sandblasting gun Sandy I
l 1 Tank top with 15ml Capacity
l 1 Blasting medium: 150g
l 1 Adapter: 1/8 „to 1/4“
l 1 Air hose: 1.8 m
l 1 Wrench
l 1 Storage box
l 1 Operating manual
l
1 Stk. AirBrush Sandstrahlpistole Sandy I
l
1 Stk. Aufsatzbehälter mit
15ml Fassungsvermögen
l
1 Stk. 150g Strahlgut
l
1 Stk. Adapter 1/8“ auf 1/4“
l
1 Stk. Druckluftschlauch 1,8m
l
1 Stk. Werkzeugschlüssel
l
1 Stk. Aufbewahrungsbox
l
1 Stk. Bedienungsanleitung
Specifications
l Nozzle diameter: 0.5mm
l Working pressure: 2 - 4.5bar
l Max. Working pressure (Pmax :): 4.5bar
l Blast medium: 15ml aluminum
l Material gun: Aluminum
l Dimensions (LxWxH): 25x18x5cm
l Total weight: 0.5kg
Technische Daten
l
Düsendurchmesser: 0,5mm
l
Arbeitsdruck: 2 - 4,5bar
l
max. Arbeitsdruck (Pmax:): 4,5bar
l
Strahlgutbehälter: 15ml Alu
l
Material Pistole: Aluminium
l
Maße (LxBxH): ca. 25x18x5cm
l
Gesamtgewicht: 0,5kg
Parts Details
Back to Contents/Zurück zum Inhaltsverzeichnis
8.2 Airbrush Gun/-pistole Profi-AirBrush Double Action Gun 128 D 0.35
l 1 Professional airbrush „Dual Action I“
l 1 High quality PVC hose: 1.5 m
l 1 Chrome color mixing container: 7ml
l 2 Exchangeable color glass container
with a lid: 20ml
l 1 Needle: 0.35mm
l 1 Storage box
l l Operating manual
l
1 Stk. Profi-Airbrush „Dual Action I“
l
1,5m hochwertiger PVC-Schlauch
l
1 Stk. 7ml verchromter Farbmischbehälter
l
2 Stk. wechselbare 20ml
Glas-Farbbehälter mit Deckel
l
1 Stk. 0,35mm Nadel
l
1 Stk. Aufbewahrungsbox
l
1 Stk. Bedienungsanleitung
Specifications
l Working pressure: 1 - 3.5bar
l Nozzle: 0.35mm
l Air inlet: 1/8“
l Color adjustment screw
l Weight: 350g
l Storage: 19x11x5cm
Technische Daten
l
Arbeitsdruck: 1 - 3,5bar
l
Düse: 0,35mm
l
Luftanschluss: 1/8“ Zoll
l
Farbregulierungsschraube
l
Gewicht: 350g
l
Aufbewahrungsbox: 19x11x5cm
9
10
Back to Contents/Zurück zum Inhaltsverzeichnis
8.3 Airbrush Gun/-pistole Profi-AirBrush Double-Action-Gun 134 D 0,3
l 1 Professional airbrush
„Double Action 134 Gun“
l 1 Color mixing container, metal,
attached to the gun: 7ml
l 1 Glass color container with cover,
side mounting: 22ml
l 1 Needle: 0.3mm
l 1 Storage box
l 1 Operating manual
l
1 Stk. Profi-Airbrush
„Double Action Gun 134“
l
1 Stk. 7ml Farbmischbehälter,
Metall, auf der Pistole befestigt
l
1 Stk. 22ml Glas-Farbbehälter
mit Deckel, seitliche Befestigung
l
1 Stk. 0,3mm Nadel
l
1 Stk. Aufbewahrungsbox
l
1 Stk. Bedienungsanleitung
Specifications
l Working pressure: 1 - 3.5bar
l Nozzle: 0.3 mm
l Air inlet: 1/8“
l Weight: 310g
l Storage: 19x11x5cm
Technische Daten
l
Arbeitsdruck: 1 - 3,5bar
l
Düse: 0,3mm
l
Luftanschluss: 1/8“
l
Gewicht: 310g
l
Aufbewahrungsbox: 19x11x5cm
Back to Contents/Zurück zum Inhaltsverzeichnis
8.4 Airbrush Gun/-pistole Profi-AirBrush Double-Action-Gun 134s
l
1 Professional airbrush
„Double Action Gun 134s“
l
1 Mixing tank, Mounted on the gun,
metal: 7ml
l
1 Glass ink container with cover,
side mounting: 22ml
l
1 Knurled for color adjustment
l
1 Needle: 0.2mm / 0.3mm / 0.5mm
l
1 Storage box
l
1 Operating manual
l
1 Stk. Profi-Airbrush
„Double-Action-Gun 134s“
l
1 Stk. 7ml Farbmischbehälter,
Metall, auf der Pistole befestigt
l
1 Stk. 22ml Glas-Farbbehälter
mit Deckel, seitliche Befestigung
l
1 Stk. Rändelschraube zur Farbregulierung
l
1 Stk. 0,2mm / 0,3mm / 0,5mm Nadel
l
1 Stk. Aufbewahrungsbox
l
1 Stk. Bedienungsanleitung
Specifications
l
Working pressure: 1 - 3.5bar
l
Nozzle: 0.3 mm
l
Color adjustment screw
l
Air inlet: 1/8“
l
Weight: 310g
l
Storage: 19x11x5cm
Technische Daten
l
Arbeitsdruck: 1 - 3,5bar
l
Düse: 0,3mm
l
Farbregulierungsschraube
l
Luftanschluss: 1/8“
l
Gewicht: 310g
l
Aufbewahrungsbox: 19x11x5cm
Parts Details
11
12
Back to Contents/Zurück zum Inhaltsverzeichnis
8.5 Airbrush Gun/-pistole Profi-AirBrush Double-Action-Gun 182 D 0,5
l
1 Professional airbrush
„Dual-Action 182 Gun“
l
1 Mixing tank: 22ml
l
1 Knurled for color adjustment
l
1 Needle: 0.5mm
l
1 Storage box
l
1 Operating manual
l
1 Stk. Profi-Airbrush
„Dual-Action-Gun 182“
l
1 Stk. 22ml Farbmischbehälter
l
1 Stk. Rändelschraube zur Farbregulierung
l
1 Stk. 0,5mm Nadel
l
1 Stk. Aufbewahrungsbox
l
1 Stk. Bedienungsanleitung
Specifications
l
Working pressure: 1 - 3.5bar
l
Nozzle: 0.5mm
l
Ink reservoir: 22ml
l
Air inlet: 1/8“
l
Weight: 320g
l
Storage: 19x11x5cm
Technische Daten
l
Arbeitsdruck: 1 - 3,5bar
l
Düse: 0,5mm
l
Farbbehälter: 22ml
l
Luftanschluss: 1/8“
l
Gewicht: 320g
l
Aufbewahrungsbox: 19x11x5cm
Back to Contents/Zurück zum Inhaltsverzeichnis
8.6 Airbrush Gun/-pistole Profi-AirBrush Gravity Double-Action-Gun 116 D 0,3
l
1 Professional airbrush
„Gravity Double Action I“
l
1 Color encoder rate: 7ml
l
1 Color encoder rate: 10ml
l
1 Knurled for color adjustment
l
1 Needle: 0.3mm
l
1 Nozzle wrench
l
1 Storage box
l
1 Operating manual
l
1 Stk. Profi-Airbrush
„Gravity Double-Action I“
l
1 Stk. 7ml Farbgeberaufsatz
l
1 Stk. 10ml Farbgeberaufsatz
l
1 Stk. Rändelschraube zur Farbregulierung
l
1 Stk. 0,3mm Nadel
l
1 Stk. Düsenschlüssel
l
1 Stk. Aufbewahrungsbox
l
1 Stk. Bedienungsanleitung
Specifications
l
Working pressure: 1 - 3.5bar
l
Nozzle: 0.3mm
l
Weight: 320g
l
Storage: 19x11x5cm
Technische Daten
l
Arbeitsdruck: 1 - 3,5bar
l
Düse: 0,3mm
l
Gewicht: 320g
l
Aufbewahrungsbox: 19x11x5cm
Parts Details
13
14
Back to Contents/Zurück zum Inhaltsverzeichnis
8.7 Airbrush Gun/-pistole Profi-AirBrush Gravity Double-Action-Gun 130 D 0,3
l
1 Professional airbrush
„Gravity Double Action 130 Gun“
l
1 Color encoder set (fix): 7ml
l
1 Knurled for color adjustment
l
1 Nozzle wrench
l
1 Needle: 0.3mm
l
1 Storage box
l
1 Operating manual
l
1 Stk. Profi-Airbrush
„Gravity-Double-Action-Gun 130“
l
1 Stk. 7ml Farbgeberaufsatz (fix)
l
1 Stk. Rändelschraube zur Farbregulierung
l
1 Stk. Düsenschlüssel
l
1 Stk. 0,3mm Nadel
l
1 Stk. Aufbewahrungsbox
l
1 Stk. Bedienungsanleitung
Specifications
l
Working pressure: 1 - 3.5bar
l
Nozzle: 0.3mm
l
Needle: 0.3mm
l
Color Encoder Kit: 7ml
l
Color adjustment screw
l
Connector: 1/8“
l
Weight: 320g
l
Storage: 19x11x5cm
Technische Daten
l
Arbeitsdruck: 1 - 3,5bar
l
Düse: 0,3mm
l
Nadel: 0,3mm
l
Farbgeberaufsatz: 7ml
l
Farbregulierungsschraube
l
Anschluss: 1/8“ Zoll
l
Gewicht: 320g
l
Aufbewahrungsbox: 19x11x5cm
Back to Contents/Zurück zum Inhaltsverzeichnis
8.8 Airbrush Gun/-pistole Profi-AirBrush Gravity Double-Action-Gun 180 D 0,2
l
1 Professional airbrush
„Dual-Action Gravity Gun 180“
l
1 Color encoder rate (fixed) 9ml with lid
l
1 Knurled for color adjustment
l
1 Needle 0.2mm
l
1 Storage box
l
1 Operating manual
Specifications
l
Working pressure: 1 - 3.5 bar
l
Nozzle: 0.2 mm
l
Color adjustment screw
l
Air inlet: 1/8“
l
Weight: 300g
l
Storage: 19x11x5cm
l
1 Stk. Profi-Airbrush
„Gravity Dual-Action-Gun 180“
l
1 Stk. 9ml Farbgeberaufsatz (fix)
inkl. Deckel
l
1 Stk. Rändelschraube zur Farbregulierung
l
1 Stk. 0,2mm Nadel
l
1 Stk. Aufbewahrungsbox
l
1 Stk. Bedienungsanleitung
Technische Daten
l
Arbeitsdruck: 1 - 3,5bar
l
Düse: 0,2mm
l
Farbregulierungsschraube
l
Luftanschluss: 1/8“
l
Gewicht: 300g
15
16
Back to Contents/Zurück zum Inhaltsverzeichnis
8.9 Airbrush Gun/-pistole Profi-AirBrush Gravity Double-Action-Gun 186 D 0,3
l
1 Professional airbrush
„Dual-Action Gravity Gun 186 GB 0.3“
l
1 Color encoder rate 2ml
l
1 Metal color encoder rate:
3ml / 13ml with lid
l
1 Knurled for color adjustment
l
1 Operating manual
l
1 Stk. Profi-Airbrush
„Gravity Dual-Action-Gun 186 D 0,3“
l
1 Stk. 2ml Farbgeberaufsatz
l
1 Stk. Metall-Farbgeberaufsatz
mit Deckel 3ml und 13ml
l
1 Stk. Rändelschraube zur Farbregulierung
l
1 Stk. Bedienungsanleitung
Specifications
l
Working pressure: 1 - 3.5bar
l
Nozzle: 0.3mm
l
Color adjustment screw
l
Weight: 400g
l
Storage: 18x10x4,5cm
Technische Daten
l
Arbeitsdruck: 1 - 3,5bar
l
Düse: 0,3mm
l
Farbregulierungsschraube
l
Gewicht: 400g
l
Aufbewahrungsbox: 18x10x4,5cm
Parts Details
1. Needle Cap
2. Nozzle Cap
3. Nozzle
4. O-Ring for Nozzle Cap
5. Needle
6. O-Ring for Needle Guide
7. Needle Guide
8. Operation Lever
9. Lever Guide
10. Stopper
11. Needle Chucking Guide
12. Spring
13. Spring Case
14. Needle Chucking Net
15. Standard- Handle Adjusting
16. Adjusting Screw
17. Guide Screw
18. Lever Guide O-Ring
19. Valve O-Ring
20. Valve Body
21. Valve Rod O-Ring
22. Valve Rod
23. Valve Spring
24. Valve Screw
25. O-Ring for Hose Connector
26. Hose Connector
27. Nozzle Spanner
28. O-Ring
29. Setscrew
30. O-Ring
31. Adjuster
32. Gravity Cup 2ml
33. Cap
34. Gravity Cup 13ml
35. Cap
36. Gravity Cup 3ml
Back to Contents/Zurück zum Inhaltsverzeichnis
8.10 Airbrush Gun/-pistole Profi-AirBrush Gravity Single-Action-Gun 150 D 0,3
l
1 Professional airbrush
„Gravity Single Action Gun 150“
l
1 Mixing tanks (plastic): 20ml
l
1 Knurled for color adjustment
l
1 Storage box
l
1 Nozzle and needle: 0.3mm
l
1 Air hose: 1.5m
l
1 Operating manual
l
1 Stk. Profi-Airbrush
„Gravity Single-Action-Gun 150“
l
1 Stk. 20ml Farbmischbehälter (Plastik)
l
1 Stk. Rändelschraube zur Farbregulierung
l
1 Stk. Aufbewahrungsbox
l
1 Stk. 0,3mm Düse und Nadel
l
1,5m Luftschlauch
l
1 Stk. Bedienungsanleitung
Specifications
l
Working pressure: 1 - 3.5bar
l
Nozzle: 0.3mm
l
Color adjustment screw
l
Air inlet: 1/8“
l
Weight: 400g
l
Storage: 19x11x5cm
Technische Daten
l
Arbeitsdruck: 1 - 3,5bar
l
Düse: 0,3mm
l
Farbregulierungsschraube
l
Luftanschluss: 1/8“
l
Gewicht: 400g
l
Aufbewahrungsbox: 19x11x5cm
Parts Name
17
18
Back to Contents/Zurück zum Inhaltsverzeichnis
8.11 Airbrush Gun/-pistole Profi-AirBrush Gravity Single-Action-Gun 2000G1 0,8
l
l Spray gun
„Single Action 2000G1“
l
l Metal container: 100ml
l
l Needle: 0.8mm
l
l Nozzle: 0.8mm
l
1 Operating manual
l
1 Stk. Lackierpistole
„Single-Action 2000G1“
l
1 Stk. Metallbehälter 100ml
l
1 Stk. 0,8mm Nadel
l
1 Stk. 0,8mm Düse
l
1 Stk. Bedienungsanleitung
Specifications
lWorking pressure: 3 - 3.5bar
lNozzle: 0.8 mm
lColor adjustment screw
lAir inlet: 1/4“
lWeight: 280g
Technische Daten
lArbeitsdruck: 3 - 3,5bar
l
Düse: 0,8mm
l
Farbregulierungsschraube
l
Luftanschluss: 1/4“
l
Gewicht: 280g
Parts List
Back to Contents/Zurück zum Inhaltsverzeichnis
8.12 Airbrush Gun/-pistole Profi-AirBrush Single-Action-Gun 138 D 0,8
l
1 Professional airbrush
„Single Action Gun 138“
l
2 Mixing tanks (plastic): 22ml
l
1 Knurled for color adjustment
l
1 Storage box
l
1 Nozzle and needle: 0.5mm
l
1 Air hose: 1.5m
l
1 Operating manual
l
1 Stk. Profi-Airbrush
„Single-Action-Gun 138“
l
2 Stk. 22ml Farbmischbehälter (Plastik)
l
1 Stk. Rändelschraube zur Farbregulierung
l
1 Stk. Aufbewahrungsbox
l
1 Stk. 0,5mm Düse und Nadel
l
1,5m Luftschlauch
l
1 Stk. Bedienungsanleitung
Specifications
l
Working pressure: 1 - 3.5bar
l
Nozzle: 0.5mm
l
color adjustment screw
l
Air connection: M5
l
Weight: 300g
l
Storage: 19x11x5cm
Technische Daten
l
Arbeitsdruck: 1 - 3,5bar
l
Düse: 0,5mm
l
Farbregulierungsschraube
l
Luftanschluss: M5
l
Gewicht: 300g
l
Aufbewahrungsbox: 19x11x5cm
Parts List
19
20
Back to Contents/Zurück zum Inhaltsverzeichnis
8.13 Airbrush Gun/-pistole Profi-Set X-Action-Gun 188k 0,35/0,25
l
1 Professional airbrush „Dual Action 128 Gun“
l
1 Professional airbrush „Dual Action 208“
l
1 High quality PVC hose: 1.5 m
l
1 Chrome color mixing container: 2ml
l
1 Glass color container with lid: 20ml
l
1 Needle: 0.2 mm
l
1 Needle: 0.35 mm
l
1 Pipette
l
1 Storage box
l
1 Operating manual
l
1 Stk. Profi-Airbrush „Dual Action Gun 128“
l
1 Stk. Profi-Airbrush „Dual Action 208“
l
1,5m hochwertiger PVC-Schlauch
l
1 Stk. 2ml verchromter Farbmischbehälter
l
1 Stk. 20ml Glas-Farbbehälter mit Deckel
l
1 Stk. 0,2mm Nadel
l
1 Stk. 0,35mm Nadel
l
1 Stk. Pipette
l
1 Stk. Aufbewahrungsbox
l
1 Stk. Bedienungsanleitung
Technical data „Dual Action 128 Gun“
l
Working pressure: 1 - 3.5 bar
l
Nozzle: 0.35 mm
l
Air inlet: 1/8 „inch
l
Color adjustment screw
l
Weight: 350g
Technische Daten „Dual Action Gun 128“
l
Arbeitsdruck: 1 - 3,5bar
l
Düse: 0,35mm
l
Luftanschluss: 1/8“ Zoll
l
Farbregulierungsschraube
l
Gewicht: 350g
Technical data „Dual Action 208 Gun“
l
Working pressure: 1 - 3.5 bar
l
Nozzle: 0.2 mm
l
Air inlet: 1/8 „inch
l
Color adjustment screw
l
Weight: 270g
Technische Daten „Dual Action Gun 208“
l
Arbeitsdruck: 1 - 3,5bar
l
Düse: 0,2mm
l
Luftanschluss: 1/8“ Zoll
l
Farbregulierungsschraube
l
Gewicht: 270g
Back to Contents
English 21
9. Putting into operation
1. Before use
Before putting into operation,and especially after any repair work, check to see that all nuts and bolts are tight.
Always disconnect the unlt from the air supply before carrylng out any repalr work.
1. a) Mount the noule set tightlyAllgn the air nozzle so that the number stamped lnto it can be read from thefront the rlght way
round.
b)Blow out the air hose before attaching it to the air connection (l/4“).(Air hose pressure-resistant.upto min. 10 bar and solvent-resistant. Total electric resistance:less than 100 million Ohm).
c)The paint spray gun has been treated with an anticorrosive agent before leaving the factory and must therefore ge flushed out
thoroughly with thinner before use.
2. Adjusting the volume of air using the comprossed-air micrometer
The air supply can be regulated extremely fine to suit all operational conditions. Micrometer in vertical position (parallel to gun
body) = maximum atomization. Micrometer in horizontal position (across gun body) = minimum atomization (for blending, etc.)
During Operation, never remove hollow screw by using the small hollow key in Order to remove the micrometer.
3. Reduction of the material volume
The volume of material flowing from the nozzle and thus the needle stroke can be reduced steplessly by screwing in the materialvolume regulation screw.
4. Changing the nozzleset
Always Change the complete nozzle set whenever changing nozzle size. These components, that consist of air cap, fluid nozzle
and paint needle, are supplied as a complete set. Insert paint nozzle before paint needle.
5. Exchanging the air piston and air piston packing
To replace the air piston remove the hollow screw and detach the air micrometer. Pull out spring and air piston Exchange the air
piston. Unscrew stuffing box screw and remove the old packing. Now insert new Packing with flat end first and gently tighten
stuffing box screw towards packing.
6. Cleaning and maintenance
a) Flush the material-conveying parts of the gun thoroughly with thinner.
b) Clean the air nozzle with a paint brush or brush. Do not immerse the nozzle in thinner.
c) Under no circumstances try to clean clogged orifices using an unsuitable tool, since the slightest amount of damage adversely
affects the spray pattern.
7.lnternal nozzle pressure
At an entrance pressure of 43 psi and more at the air inlet, the internal nozzle pressure exceeds 10 psi. The maximum is stamped
onto the gun body.
Possible failures in operation
1. Trouble: Gun leaks from fluid tip.
Cause: Foreign substances between fluid tip and needle prevent sealing.
Repair: Clean fluid needle and fluid nozzle in thinner or use new set nozzle.
2. Trouble: Paint merges from fluid needle - needle sealing.
Cause: Self tensioning needle sealing damaged or lost.
Repair: Replace needle sealing.
3. Trouble: Spray pattern in sickle shape.
Cause: Horn air holes or air circuit clogged.
Repair: Soak in thinner, afterwards clean with the nozzle-cleaning needle.
4. Trouble: Drop like or oval shaped pattern.
Cause: Dirt on fluid pin tip or air outlet.
Repair: Turn air nozzle by 180 degrees. If defective pattern remains, clean fluid tip pin and air circuit.
22 Deutsch
Back to Contents/Zurück zum Inhaltsverzeichnis
5. Trouble: Paint Spray flutters.
Cause: Too little material in cup, fluid nozzle not tight, self-adjusting, needle sealing damaged, nozzle set dirty or damaged.
Repair: Refill material, tighten parts, if necessary clean or replace parts.
6. Trouble: Material bubbles or boils in paint cup.
Cause: Atomization air flows through the paint Channel to the cup. The paint nozzle is not sufficiently tightened. Air nozzle is
not completely screwed on, the air net clogged and the seat is defective or nozzle Insert zs damaged.
Repair: Tighten parts accordingly, clean or replace.
10. Important note: please pay attention before commissioning the airbrush!
l Please, note that in dependence of the device used (compressor/gun) the color must be diluted.
l Your airbrush gun must be cleaned thoroughly after each color change, otherwise the residual color mixes with the newly filled color.
Moreover, the very fine nozzle will be clogged by dried ink. The gun should be cleaned with thinner and water. Especially the
nozzles, which are subject to wear, will have longer lifetime by careful cleaning .
l Please, inform yourself in the literature or on the Internet about the working methods and techniques before starting work .
l Please, check the funktion of the gun with clean water. Is the function correctly given, the technology of the gun is perfect.
l Please connect compressor, hose and gun always tight. Avoid oscillatingly opening (constant on and off) of the compressor in order
to reduce wear and to save energy.
l We sell only tested products. These are strictly for personal use.
l Claims for damages for improper disassembly and cleaning can not be accepted.
l Complaints about contaminated airbrush guns with paint,residues, could not be recognized .
9. Inbetriebnahme
1. Vor der Inbetriebnahme
Vor der Benutzung und speziell nach Reparaturarbeiten, überprüfen Sie ob alle Muttern und Schrauben fest sitzen.
Trennen Sie IMMER die Pistole von der Luftzufuhr, sobald Sie daran Reparaturarbeiten vornehmen möchten.
1.1 Bringen Sie die Düse fest an. Bringen Sie die Luftdüse so an, dass die Ziffer , welche in diese eingearbeitet ist (bei manchen Typen
nicht vorhanden), von der Vorderseite aus in der korrekten, aufrechten Position sichtbar ist.
b) Lassen Sie die Luft aus dem Druckschlauch ab, bevor Sie diese mit dem Luftschlauch verbinden (1/4“)
c) Manche Airbrush Pistolen werden vor dem Verlassen der Fabrik mit einer Antikorosions-Lösung behandelt, weshalb Sie diese
vor Benutzung einmal mit einem Verdünner durchblasen müssen, sonst ist die Funktion nicht gewährleistet.
2. Einstellen des Luft-Volumens von mit dem Luft-Mikrometer
Die Luftzufuhr kann extrem fein reguliert werden, um an alle Betriebsbedingungen angepasst zu werden. Ist das Luft-Mikrometer
in vertikaler Position (parallel zum Pistolenkörper) = ist maximale Zerstäubung eingestellt. Ist das Luft-Mikrometer in horizontaler
Position (quer zum Pistolenkörper) = ist minimale Zerstäubung eingestellt (zum Mischen, etc.). Niemals während des Betriebes die
Hohlschraube mit dem kleinen Imbussanschluss entfernen
3. Verringerung des Farbvolumens
Das Volumen der fließenden Farbe aus der Düse und damit der Nadelhub kann stufenlos durch Einschrauben der Farb-Volumen Regulierschraube reduziert werden.
4. Ändern des Düsensatzes
Wechseln Sie immer den kompletten Düsensatz, wenn sie die Düsengröße ändern möchten. Diese Teile, die aus Luftkappe, Düse und
Farbnadel bestehen, werden als komplettes Set geliefert. Setzen Sie die Farbdüse vor der Farbnadel ein.
5. Austausch des Luftkolben und der Luftkolbenverpackung
Um den Luftkolben zu ersetzen, entfernen Sie die Hohlschraube und nehmen Sie das Luft-Mikrometer ab. Ziehen Sie Feder und den
Luftkolben heraus. Tauschen Sie den Luftkolben aus. Schrauben Sie die Stopfbuchsschraube ab und entfernen Sie die alte Packung.
Stecken Sie nun die neue Verpackung mit dem flachen Ende zuerst ein ziehen Sie die Schraube leicht Richtung Verpackung an.
Zurück zum Inhaltsverzeichnis
Deutsch 23
6. Reinigung und Pflege
a) Spülen Sie die Farb-Förderteile der Pistole gründlich mit Verdünner.
b) Reinigen Sie die Luftdüse mit einem Pinsel oder einer Bürste. Tauchen Sie die Düse nicht in Verdünner.
c) Benutzen Sie zum Reinigen der Düsen nur die entsprechenden Reinigungsnadeln. Unter keinen Umständen versuchen, verstopfte
Öffnungen mit unsachgemäßen Gegenständen zu reinigen, da schon die kleinstee Beschädigung eine Veränderung der Sprühleistung
bewirken kann.
7. Düseninnendruck
Bei einem Eingangsdruck von 3bar und mehr am Lufteinlass, übersteigt der Düseninnendruck 0,69bar. Das Maximum der Pistole
können Sie am Pistolengehäuse ablesen (bei manchen Pistolentypen nicht aufgeprägt).
Mögliche Fehlerquellen
1. Problem: Die Pistole tropft aus der Düse.
Ursache: Ein Fremdkörper zwischen Düse und Nadel verhindert eine Abdichtung.
Lösung: Farbnadel und –düse ausbauen und in Verdünner reinigen – oder neues Düsenset benutzen.
2. Problem: Farbe gelangt von der Farbnadel an die Nadeldichtung
Ursache: Selbstspannende Nadelabdichtung beschädigt oder nicht vorhanden.
Lösung: Nadelabdichtung austauschen.
3. Problem: Das Spritzbild ist sichelförmig.
Ursache: Luftlöcher oder Luftkreislauf verstopft.
Lösung: In Verdünner einweichen, danach mit den Düsen-Reinigungsnadeln reinigen.
4. Problem: Das Spritzbild ist Tropfen- / ovalförmig.
Ursache: Schmutz auf dem Düsenzäpfchen oder dem Luftauslass.
Lösung. Luftdüse um 180° drehen, wenn das Muster sich nicht verändert, das Düsenzäpfchen und die Luftführung reinigen.
5. Problem: Ungleichmäßiger, stotternder Farbstrahl
Ursache: Zu wenige Farbe im Behälter; Farbdüse nicht angezogen; selbsteinstellende Nadelabdichtung beschädigt; Düsenset
schmutzig oder beschädigt.
Lösung: Farbe nachfüllen; Teile anziehen; falls notwendig die Teile säubern oder austauschen.
6.Problem: Material sprudelt im Farbbecher
Ursache: Zerstäubungsluft strömt durch den Farbkanal zum Farbbecher. Die Farbdüse ist nicht genügend angezogen. Luftdüse ist
nicht vollständig aufgeschraubt, Luftkreis verstopft oder der Sitz und Düseneinsatz sind beschädigt und defekt.
Lösung: Teile anziehen; falls notwendig die Teile säubern oder austauschen.
10. Wichtige Hinweise: Vor der Inbetriebnahme der Airbrushpistole bitte unbedingt beachten!
l
Bitte beachten Sie, daß in Abhängigkeit vom benutzten Gerät (Kompressor/Pistole) die verwendete Farbe entsprechend verdünnt
werden muß.
l
Ihre Airbrushpistole muß nach jedem Farbwechsel gründlich gereinigt werden, die Restfarbe mischt sich sonst mit der neu
eingefüllten Farbe. Darüber hinaus kann die sehr feine Düse durch angetrocknete Farbe verstopfen. Die Pistole sollte regelmäßig
mit Verdünner und Wasser gereinigt werden. Besonders die Düsen, die Verschleiß unterliegen, bleiben durch sorgfältige Reinigung
länger funktionsfähig.
l
Bitte informieren Sie sich in der einschlägigen Literatur oder im Internet über die Arbeitsweisen und Arbeitstechniken vor Beginn
der Arbeit.
l
Bitte prüfen Sie vorab die Funktion der Pistole mit sauberem Wasser. Ist eine ordungsgemäße Funktion gegeben, so ist die Technik
der Pistole einwandfrei.
l
Bitte verbinden Sie Kompressor, Druckschlauch und Pistole stets dicht. Vermeiden Sie das Takten (ständiges Ein- und Ausschalten)
des Kompressors, um Verschleiß zu reduzieren und Energie zu sparen.
l
Wir verkaufen ausschließlich geprüfte Qualitätsprodukte. Diese sind ausschließlich für den privaten Gebrauch bestimmt.
l
Reklamationen für Schäden bei unsachgemäßer Demontage und Reinigung können nicht anerkannt werden.
l
Reklamationen bei mit Farbresten verunreinigten Airbrushpistolen können nicht anerkannt werden.
Back to Contents/Zurück zum Inhaltsverzeichnis
Imprint/Impressum
1A Profi Handels GmbH
www.profi-pumpe.de
Email: [email protected]
Tel.: (+49) 0611-9 45 87 76-0
Fax: (+49) 0611-9 45 87 76-11