1
D
F
Bedienungsanleitung
Operating manual
Notice d’emploi
ST 725
LN
LE
NE
R PE
V
k
R ISO
2500V
M
ms
mA
ms
mA
180°
LEAK
0°
B
BENNING ST 725
STORE
RECALL
ON/OFF
press 2 sec.
250 V
500 V
IPE
IB
30 mA
RCD
3
Phase
D
Bedienungsanleitung
Operating manual
Mehrsprachige Anleitung auf beigefügter CD und unter
www.benning.de
Multilingual manuals on included CD and at
ST 725
LN
LE
NE
R PE
V
k
R ISO
2500V
M
ms
mA
ms
mA
180°
LEAK
0°
B
BENNING ST 725
STORE
RECALL
ON/OFF
press 2 sec.
250 V
500 V
IPE
IB
30 mA
RCD
3
Phase
DF
9 L
J
K
ST 725
R PE
R ISO
M
mA
LEAK
8
ON/OFF
press 2 sec.
2
IPE
IB
3
4
5
250 V
500 V
30 mA
RCD
3
Phase
7
6
Bild 1:
Fig. 1: Fig. 1:
Gerätefrontseite
Appliance front face
Partie avant de l’appareil
J
9
L
Bild 2:
Fig. 2: Fig. 2:
Geräteoberseite
Top side of the device
Face supérieure de l'appareil
01/ 2015
BENNING ST 725
DF
Bild 3:
Fig. 3: Fig. 3: Spannungsmessung an externer Schutzkontaktsteckdose
Voltage measurement on external shock-proof socket
Mesure de tension sur une prise de courant de sécurité
externe
ST 725
LN
LE
NE
R PE
V
k
R ISO
2500V
V
M
ms
mA
ms
mA
180°
LEAK
0°
B
STORE
RECALL
ON/OFF
press 2 sec.
250 V
500 V
Bild 4:Prüfung von Geräten der Schutzklasse I (Geräte
mit Schutzleiter und berührbaren leitfähigen Teilen
die am Schutzleiter angeschlossen sind)
Fig. 4:Testing of devices of protection class I (devices
with protective conductor and accessible
conductive parts which are connected to the
protective conductor)
Fig. 4: Contrôle des appareils de la classe de protection
I (les appareils avec conducteur de protection et
avec des pièces touchables conductrices qui sont
connectées au conducteur de protection)
IPE
IB
30 mA
RCD
ST 725
LN
LE
NE
R PE
V
k
R ISO
2500V
M
ms
mA
ms
mA
180°
LEAK
0°
B
STORE
RECALL
ON/OFF
press 2 sec.
250 V
500 V
01/ 2015
IPE
IB
30 mA
RCD
BENNING ST 725
3
Phase
3
Phase
DF
Bild 5:Prüfung von Geräten der Schutzklasse II
(Schutzisolierte Geräte ohne Schutzleiter und mit
berührbaren leitfähigen Teilen) bzw. Prüfung von
Geräten der Schutzklasse III (Schutzkleinspannung)
Fig. 5:Testing of devices of protection class II (shock-proof
devices without protective conductor and with
accessible conductive parts) and testing of devices of
protection class III (safety extra-low voltage)
Fig. 5: Contrôle des appareils de la classe de protection
II (appareils à double isolation sans conducteur
de protection et avec des pièces touchables
conductrices) et contrôle des appareils de la classe
de protection III (basse tension de protection)
ST 725
LN
LE
NE
R PE
V
k
R ISO
2500V
M
ms
mA
ms
mA
180°
LEAK
0°
B
STORE
RECALL
ON/OFF
press 2 sec.
250 V
500 V
IPE
IB
30 mA
RCD
3
Phase
Bild 6a: Prüfung von Geräteanschlussleitungen mit Kaltgerätestecker
Fig. 6a: Testing of device connecting cables with IEC connector
Fig. 6a: Contrôle des câbles de connexion d'appareil avec fiche mâle CEI
ST 725
LN
LE
NE
R PE
V
k
R ISO
2500V
M
ms
mA
ms
mA
180°
LEAK
0°
B
STORE
RECALL
ON/OFF
press 2 sec.
250 V
500 V
01/ 2015
BENNING ST 725
IPE
IB
30 mA
RCD
3
Phase
DF
Bild 6b: Prüfung von Leitungen, Mehrfachverteilern und Leitungsroller
Fig. 6b: Testing of lines, multiple distributors and cable reels
Fig. 6b: Contrôle de câbles, de câbles de distribution multiple et
d'enrouleurs de câble
ST 725
LN
LE
NE
R PE
V
k
R ISO
2500V
M
ms
mA
ms
mA
180°
LEAK
0°
B
STORE
RECALL
ON/OFF
press 2 sec.
250 V
500 V
IPE
IB
30 mA
RCD
3
Phase
Bild 7a: Prüfung 3-phasiger Geräte über passive Messadapter
Fig. 7a: Testing of three-phase appliances by means
of passive measuring adapters
Fig. 7a: Contrôle d'appareils triphasés au moyen
d'adaptateurs de mesure passifs
ST 725
LN
LE
NE
R PE
V
k
R ISO
2500V
500V
M
ms
mA
ms
mA
180°
LEAK
EA
0°
B
STORE
RECALL
ON/OFF
press 2 sec.
250 V
500 V
Option 044122, 044123, 044147
01/ 2015
BENNING ST 725
IPE
IB
30 mA
RCD
3
Phase
DF
Bild 7b: Prüfung 3-phasiger Geräte über aktive
Messadapter (isolierte Aufstellung des
Prüfobjektes)
Fig. 7b: Testing of three-phase appliances by means of
active measuring adapters (test object placed
on insulated surface)
Fig. 7b: Contrôle d'appareils triphasés au moyen
d'adaptateurs de mesure actifs (mise en place
isolée de l'objet de contrôle)
ST 725
LN
LE
NE
R PE
V
k
R ISO
2500V
M
ms
mA
ms
mA
180°
LEAK
0°
B
STORE
RECALL
Option:
044140
044141
ON/OFF
press 2 sec.
250 V
500 V
IPE
IB
30 mA
RCD
3
Phase
Bild 8a: Prüfung festinstallierter FI/RCD Schutzschalter (IΔN 30 mA)
Fig. 8a: Testing of permanently installed RCDs (IΔN 30 mA)
Fig. 8a: Contrôle de dispositifs différentiels fixes « RCD » (IΔN 30 mA)
ST 725
LN
LE
NE
R PE
V
k
R ISO
2500V
M
ms
mA
ms
mA
180°
LEAK
0°
B
STORE
RECALL
ON/OFF
press 2 sec.
250 V
500 V
01/ 2015
BENNING ST 725
IPE
IB
30 mA
RCD
3
Phase
DF
Bild 8b: Prüfung mobiler FI/PRCD Schutzschalter (IΔN 30 mA)
Fig. 8b: Testing of portable PRCDs (IΔN 30 mA)
Fig. 8b: Contrôle de dispositifs différentiels portatifs « PRCD » (IΔN 30 mA)
ST 725
LN
LE
NE
R PE
V
k
R ISO
2500V
M
ms
mA
ms
mA
180°
LEAK
0°
B
STORE
RECALL
ON/OFF
press 2 sec.
250 V
500 V
Bild 9:
Fig. 9:
Fig. 9:
Batterie-/ Sicherungswechsel
Battery/ fuse replacement
Remplacement des piles/ fusibles
01/ 2015
BENNING ST 725
IPE
IB
30 mA
RCD
3
Phase
DF
Bild 10. Optionales Zubehör/ Optional accessories/ Accessoires en option
Drucker BENNING PT 1
BENNING PT 1 printer
Imprimante BENNING PT 1
(044150)
Thermopapierrollen (20 Stück),
Prüfplaketten „Nächster Prüftermin“
Rolls of thermographic paper (20 pieces)
Test badges "next test"
Rouleaux de papier thermosensible (20 pièces) Plaquettes d'essai « Next test date »
(044151)
(756212)
Passive Messadapter/ Passive measuring adapters/ Adaptateurs de mesure passifs:
16 A 5-polig/ -pin/ -broches (044122),
32 A 5-polig/ -pin/ -broches (044123)
16 A + 32 A 5-polig/ -pin/ -broches
+ 16 A 3-polig/ -pin/ -broches
(044147)
16 A 3-polig/ -pin/ -broches (044143)
32 A 5-polig/ -pin/ -broches (044144)
Aktive Messadapter/ Active measuring adapters/ Adaptateurs de mesure actifs:
16 A 5-polig/ -pin/ -broches (044140)
32 A 5-polig/ -pin/ -broches (044141)
Leckstromzange/ leakage current clamp/
Pince de courant de fuite
BENNING CM 9 (044065)
Messadapter für Leckstromzange/ Measuring adapters for leakage current clamp/
Adaptateurs de mesure pour pince de courant de fuite:
16 A 5-polig/ -pin/ -broches (044127)
32 A 5-polig/ -pin/ -broches (044128)
01/ 2015
16 A 3-polig/ -pin/ -broches (044131)
BENNING ST 725
D
Bedienungsanleitung
BENNING ST 725
Gerätetester zur sicherheitstechnischen Prüfung ortsveränderlicher elektrischer Geräte/Betriebsmittel
- Prüfung elektrischer Geräte gemäß DIN VDE 0701-0702, DGUV Vorschrift 3 (früher
BGV A3), ÖVE/ÖNORM E 8701, NEN 3140
- Prüfung von Leitungsrollern, Mehrfachverteilern und Kaltgeräteleitungen
- Prüfung 3-phasiger elektrischer Geräte über optionale Messadapter
- Auslösezeitmessung von fest installierten FI/RCD- und mobilen FI/PRCD-Schutzschaltern
- Spannungsmessung an externer Schutzkontaktsteckdose
Inhaltsverzeichnis
1. Benutzerhinweise
2. Sicherheitshinweise
3. Lieferumfang und optionales Zubehör
4. Gerätebeschreibung
5. Allgemeine Angaben
6. Umgebungsbedingungen
7. Elektrische Angaben
7.1 Schutzleiterwiderstand
7.2 Isolationswiderstand
7.3 Schutzleiter- und Berührungsstrom über Ersatzableitstromverfahren
7.4 Schutzleiterstrom über Differenzstromverfahren
7.5 Berührungsstrom über direktes Messverfahren
7.6 Leitungstest
7.7 Auslösezeitmessung von FI/RCD Schutzschalter
7.8 Schutzleiterstrom über direktes Messverfahren (optionale Messadapter 044140
bzw. 044141)
7.9 Spannungsmessung an externer Schutzkontaktsteckdose
7.10 Grenzwerte gemäß DIN VDE 0701-0702
8. Prüfen mit dem BENNING ST 725
8.1 Vorbereiten der Prüfung
8.2Ein-/Ausschalten
8.3 Prüfung der Netzspannung an externer Schutzkontaktsteckdose
8.4Prüfablauf
9. Prüfung elektrischer Geräte nach DIN VDE 0701-0702
9.1 Prüfung 1-phasiger Geräte der Schutzklasse I
9.2 Prüfung 1-phasiger Geräte der Schutzklasse II/III
9.3 Leitungstest
9.3.1 Prüfung von Kaltgeräteleitungen (IEC-Adapterleitungen)
9.3.2 Prüfung von Leitungsroller, Mehrfachverteilern und Verlängerungsleitungen
9.4 Prüfung 3-phasiger Geräte
9.4.1 Passive Prüfung
9.4.2 Aktive Prüfung
9.5 Prüfung von 30 mA FI/RCD-Schutzschalter
9.5.1 Prüfung festinstallierter FI/RCD-Schutzschalter
9.5.2 Prüfung mobiler FI/PRCD-Schutzschalter
10. Messwertspeicher
10.1 Messwerte speichern
10.2 Messwerte aufrufen
10.3 Messwertspeicher löschen
10.4 Messwertspeicher über USB-Schnittstelle auslesen
10.5 Messwerte drucken
10.6 Einstellen von Datum und Uhrzeit
11. Instandhaltung
11.1 Sicherstellen des Gerätes
11.2 Reinigung
11.3 Batteriewechsel
11.4 Sicherungswechsel
11.5 Kalibrierung
11.6 Ersatzteile
11.7 Umweltschutz
1.Benutzerhinweise
Diese Bedienungsanleitung richtet sich an
-
-
Elektrofachkräfte (EF), befähigte Personen und
Elektrotechnisch unterwiesene Personen (EuP)
Das BENNING ST 725 ist zur Messung in trockener Umgebung vorgesehen (näheres hierzu im
Abschnitt 6: Umgebungsbedingungen).
01/ 2015
BENNING ST 725
1
D
In der Bedienungsanleitung und auf dem BENNING ST 725 werden folgende Symbole verwendet:
Warnung vor elektrischer Gefahr!
Steht vor Hinweisen, die beachtet werden müssen, um Gefahren für Menschen zu
vermeiden.
Achtung Dokumentation beachten!
Das Symbol gibt an, dass die Hinweise in der Bedienungsanleitung zu beachten
sind, um Gefahren zu vermeiden.
Dieses Symbol auf dem BENNING ST 725 bedeutet, dass das BENNING ST 725
konform zu den EU-Richtlinien ist.
Dieses Symbol erscheint in der Anzeige für entladene Batterien. Sobald das
Batteriesymbol blinkt, tauschen Sie umgehend die Batterien gegen neue Batterien
aus. Geladene Batterien sind auch für die Messung im Netzbetrieb notwendig.
(AC) Wechsel- Spannung oder Strom.
Erde (Spannung gegen Erde).
Schutzklasse I
Schutzklasse II
2. Sicherheitshinweise
Das Gerät ist gemäß
DIN VDE 0404-1 und -2
DIN EN 61010-1 (VDE 0411-1)
DIN EN 61010-2-030 (VDE 0411-2-030)
DIN EN 61557-1, -2, -4 und -10 (VDE 0413-1, -2, -4 und -10)
gebaut und geprüft und hat das Werk in einem sicherheitstechnisch einwandfreien Zustand verlassen. Um diesen Zustand zu erhalten und einen gefahrlosen Betrieb sicherzustellen, muss
der Anwender die Hinweise und Warnvermerke beachten, die in dieser Anleitung enthalten sind.
Fehlverhalten und Nichtbeachtung der Warnungen kann zu schwerwiegenden Verletzungen
oder zum Tode führen.
Extreme Vorsicht bei Arbeiten um blanke Leiter oder Hauptleitungsträger. Ein
Kontakt mit Leitern kann einen Elektroschock verursachen.
Das BENNING ST 725 darf nur in Stromkreisen der Überspannungskategorie II
mit max. 300 V Leiter gegen Erde benutzt werden.
Beachten Sie, dass Arbeiten an spannungsführenden Teilen und Anlagen
grundsätzlich gefährlich sind. Bereits Spannungen ab 30 V AC und 60 V DC
können für den Menschen lebensgefährlich sein.
Das Gerät darf nur an ein Einphasen-Netz 230 V, 50 Hz mit einer Vorsicherung 16 A
angeschlossen werden. Beachten Sie, dass die maximale Schaltleistung/Lampenlast der Prüfsteckdose des BENNING ST 725, siehe Abschnitte 7.4 und 7.5., nicht
überschritten wird. Eine Überschreitung kann zur Auslösung der Sicherungen
und zur Beschädigung des BENNING ST 725 führen. Beschädigungen aufgrund
einer Überlast sind von möglichen Garantieansprüchen ausgeschlossen.
Vermeiden Sie wiederholte Schutzleiter- und Berührungsstrommessungen mit
2 x 5 Minuten Messdauer an Prüfobjekten mit hoher Stromaufnahme (16 A).
Eine wiederholte Messung bei maximaler Last (16 A) kann das Geräteinnere
und somit auch die Geräteoberfläche erwärmen.
Die Messung des Schutzleiterwiderstandes kann durch parallel geschaltete
Impedanzen von zusätzlichen Betriebsstromkreisen und durch Ausgleichsströme verfälscht werden.
Die Messung des Schutzleiter- und Isolationswiderstandes darf nur an spannungslosen Anlageteilen durchgeführt werden.
01/ 2015
BENNING ST 725
2
D
Vor jeder Inbetriebnahme überprüfen Sie das Gerät und die Leitungen auf
Beschädigungen.
Ist anzunehmen, dass ein gefahrloser Betrieb nicht mehr möglich ist, ist das Gerät außer
Betrieb zu setzen und gegen unbeabsichtigten Betrieb zu sichern.
Es
-
-
-
-
-
ist anzunehmen, dass ein gefahrloser Betrieb nicht mehr möglich ist,
wenn das Gerät oder die Messleitungen sichtbare Beschädigungen aufweisen,
wenn das Gerät nicht mehr arbeitet,
nach längerer Lagerung unter ungünstigen Verhältnissen,
nach schweren Transportbeanspruchungen,
wenn das Gerät oder die Messleitungen feucht sind.
Um eine Gefährdung auszuschließen
- berühren Sie die Leitungen nicht an den blanken Messspitzen,
- stecken Sie die Leitungen in die entsprechend gekennzeichneten Buchsen
am Messinstrument
Wartung:
Das Gerät nicht öffnen, es enthält keine durch den Benutzer wartbaren Komponenten. Reparatur und Service kann nur durch qualifiziertes Personal erfolgen.
Reinigung:
Das Gehäuse regelmäßig mit einem Tuch und Reinigungsmittel trocken
abwischen. Kein Poliermittel oder Lösungsmittel verwenden.
3. Lieferumfang und optionales Zubehör
Zum Lieferumfang des BENNING ST 725 gehören:
3.1 ein Stück BENNING ST 725,
3.2 ein Stück Prüfleitung mit Abgreifklemme,
3.3 ein Stück Kaltgeräteleitung (IEC-Adapterleitung),
3.4 ein Stück Netzanschlussleitung ,
3.5 ein Stück Kompakt-Schutztasche,
3.6 ein Stück USB-Verbindungskabel (A-Stecker auf Micro-B-Stecker),
3.7 sechs Stück 1,5 V Mignon-Batterien/ Typ AA, IEC LR6 zur Erstbestückung ,
3.8 eine Bedienungsanleitung,
3.9 ein Stück CD-ROM mit Download-/ Treiber-Software, mehrsprachige Bedienungsanlei
tung und Informationsmaterial.
Hinweis auf Verschleißteile:
-Das BENNING ST 725 enthält zwei Sicherungen zum Überlastschutz:
Zwei Stück Sicherungen Nennstrom 16 A, 250 V, F, Trennvermögen ≥ 500 A, D = 5 mm,
L = 20 mm (T. Nr. 10019440)
- Das BENNING ST 725 benötigt sechs 1,5-V-Batterien/Typ AA, IEC LR6
Hinweis auf optionales Zubehör:
- Tragbarer Drucker BENNING PT 1 für die schnelle Prüfprotokollerstellung vor Ort, Thermodirektverfahren, inkl. Netzteil und wiederaufladbarer Ni/MH Akkupack (044150)
- Thermopapierrollen (20 Stück), Rollenbreite/-länge: 58 mm/13 m (044151)
- Prüfplaketten „Nächster Prüftermin“, 300 Stück (756212)
Passive Messadapter:
- Messadapter für ein-/ dreiphasige Verbraucher (passiv, ohne netzspannungsabhängige
Schalteinrichtungen) zur Messung von RPE, RISO und IEA:
- 16 A CEE-Kupplung 3-polig - 16 A Schutzkontaktstecker (044143)
- 32 A CEE-Kupplung 3-polig - 16 A Schutzkontaktstecker (044144)
- 16 A + 32 A CEE-Kupplung 5-polig + 16 A CEE-Kupplung (3-polig) - 16 A Schutzkontakt
stecker (044147)
- 16 A CEE-Kupplung 5-polig - 16 A Schutzkontaktstecker (044122)
- 32 A CEE-Kupplung 5-polig - 16 A Schutzkontaktstecker (044123)
Aktive Messadapter:
- Messadapter für dreiphasige Verbraucher (aktiv, mit netzspannungsabhängigen Schalteinrichtungen) zur Messung von RPE und IPE (direkte Messung) unter Betriebsbedingung:
- 16 A CEE 5-polig aktiv (044140)
- 32 A CEE 5-polig aktiv (044141)
alternativ:
- Leckstromzange BENNING CM 9 zur Messung von Differenz-, Schutzleiter- und Laststrom
an ein- und dreiphasigen Verbrauchern (044065)
-Messadapter für Leckstromzange BENNING CM 9, Leiter einzeln herausgeführt und doppelt
01/ 2015
BENNING ST 725
3
D
isoliert:
- 16 A Schutzkontaktkupplung - 16 A Schutzkontaktstecker (044131)
- 16 A CEE-Kupplung 5-polig - 16 A CEE-Stecker 5-polig (044127)
- 32 A CEE-Kupplung 5-polig - 32 A CEE-Stecker 5-polig (044128)
- Prüfprotokoll-Formulare “Prüfung elektrischer Geräte” können Sie kostenlos downloaden
unter www.benning.de
siehe Bild 10: Optionales Zubehör
4. Gerätebeschreibung
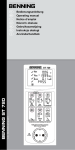
siehe Bild 1:
Gerätefrontseite
siehe Bild 2:
Geräteoberseite
Die in Bild 1 und 2 angegebenen Anzeige- und Bedienelemente werden wie folgt bezeichnet:
1 Prüfsteckdose, zum Anschluss des zu prüfenden Gerätes,
2
-Taste, Prüfung von Geräten der Schutzklasse I (Geräte mit Schutzleiter und berührbaren leitfähigen Teilen, die am Schutzleiter angeschlossen sind),
3
-Taste, Prüfung von Geräten der Schutzklasse II (Schutzisolierte Geräte ohne Schutzleiter und mit berührbaren leitfähigen Teilen) bzw. Prüfung von Geräten der Schutzklasse III
(Schutzkleinspannung),
4
-Taste, Prüfung des Schutzleiterstromes (Differenzmessung) bzw. Berührungsstromes
(direkte Messung) unter Betriebsbedingung (Prüfling wird mit Netzspannung versorgt)
5
-Taste, Reduzierung der Prüfspannung auf 250 VDC bzw. 500 VDC für Isolationswiderstandsmessung
6
-Taste, Prüfung von 30 mA FI/RCD-Schutzschaltern
7
-Taste, Prüfung 3-phasiger Geräte unter Betriebsbedingung über optionale Messadapter
(044140, 044141)
8 Digitalanzeige, zeigt den Prüffortschritt und einzelne Messergebnisse,
9 4 mm Prüfbuchse, zum Anschluss der Prüfleitung mit Abgreifklemme
J Kaltgerätestecker (IEC-Stecker), zum Anschluss der Kaltgeräteleitung
K Netzanschlussbuchse, zum Anschluss der Netzspannung (230 V, 50 Hz), zur Spannungsmessung an externer Schutzkontaktsteckdose bzw. zum Anschluss der Messsignalleitung
des Messadapters 16 A CEE 3-phasig aktiv (044140)/ 32 A CEE 3-phasig aktiv (044141).
L Serielle PS/2-Buchse für optionalen Drucker BENNING PT 1 (044150)
-Taste, zur Speicherung der angezeigten Messwerte (Displaywerte)
-Taste, zum Aufrufen der gespeicherten Messwerte (Displaywerte)
-Taste, zum Ausdruck der angezeigten oder gespeicherten Messwerte auf den Drucker
BENNING PT 1
USB-Schnittstelle (Micro-B-Buchse), zum Anschluss des USB-Verbindungskabels
5. Allgemeine Angaben
Das BENNING ST 725 führt elektrische Sicherheitsüberprüfungen nach DIN VDE 0701-0702,
DGUV Vorschrift 3 (früher BGV A3) und ÖVE/ ÖNORM E8701 aus.
Eigenständig überprüft das BENNING ST 725 die Art des angeschlossenen Prüfobjekts und gibt
dem Benutzer einen Hinweis bei unkorrekter Auswahl der Prüfablaufs [2...3]: Voreingestellte
Grenzwerte und Messergebnisse mit gut/ schlecht Aussage erleichtern die Bewertung der Prüfung.
- Bei voller Batteriekapazität ermöglicht das BENNING ST 725 eine Anzahl von ca. 2500 Geräteprüfungen.
- Geräteabmessungen:
(L x B x H) = 270 x 115 x 55 mm
- Gerätegewicht: 1100 g
6. -
-
-
-
-
-
-
-
Umgebungsbedingungen
Das BENNING ST 725 ist für Messungen in trockener Umgebung vorgesehen.
Barometrische Höhe bei Messungen: Maximal 2000 m
Überspannungskategorie/Aufstellungskategorie: IEC 61010-1 → 300 V Kategorie II,
Verschmutzungsgrad: 2,
Schutzart: IP 40 (DIN VDE 0470-1, IEC/EN 60529)
4 - erste Kennziffer: Schutz gegen kornförmige Fremdkörper
0 - zweite Kennziffer: Kein Wasserschutz,
EMC: EN 61326-1,
Arbeitstemperatur und relative Luftfeuchte:
Bei Arbeitstemperatur von 0 °C bis 30 °C: relative Luftfeuchte kleiner 80 %,
Bei Arbeitstemperatur von 31 °C bis 40 °C: relative Luftfeuchte kleiner 75 %,
Lagerungstemperatur: Das BENNING ST 725 kann bei Temperaturen von - 25 °C bis
+ 65 °C (Luftfeuchte 0 bis 80 %) gelagert werden. Dabei sind die Batterien aus dem Gerät
herauszunehmen.
7. Elektrische Angaben
Bemerkung: Die Messgenauigkeit wird angegeben als Summe aus
- einem relativen Anteil des Messwertes und
01/ 2015
BENNING ST 725
4
D
- einer Anzahl von Digit (d.h. Zahlenschritte der letzten Stelle).
Diese Messgenauigkeit gilt bei Temperaturen von 18 °C bis 28 °C und einer relativen Luftfeuchtigkeit kleiner 80 %.
7.1Schutzleiterwiderstand
Messbereich
Auflösung
0,05 Ω - 19,99 Ω
0,01 Ω
Messgenauigkeit
5 % ± 2 Digit
Prüfstrom:
> 200 mA (2 Ω)
Leerlaufspannung:
4V-9V
Voreingestellter Grenzwert:
0,3 Ω
7.2Isolationswiderstand
Messbereich
Auflösung
Messgenauigkeit
0,1 MΩ - 19,99 MΩ
0,01 MΩ
5 % ± 2 Digit
Prüfspannung:
250 VDC/ 500 VDC, + 20 %, - 0 %
Prüfstrom:
> 1 mA, < 2 mA bei 2 kΩ
Voreingestellter Grenzwert:
1 MΩ (SK I), 2 MΩ (SK II)
7.3 Schutzleiter- und Berührungsstrom über Ersatzableitstromverfahren
Messbereich
Auflösung
0,25 mA - 19,99 mA
0,01 mA
Messgenauigkeit
5 % ± 2 Digit
Prüfspannung:
40 VAC, 50 Hz
Prüfstrom:
< 10 mA bei 2 kΩ
Voreingestellter Grenzwert:
3,5 mA (SK I), 0,5 mA (SK II)
7.4 Schutzleiterstrom über Differenzstromverfahren
Messbereich
Auflösung
Messgenauigkeit
0,25 mA - 19,99 mA
0,01 mA
5 % ± 2 Digit
Nennspannung:
230 V ± 10 % (wie Netzeinspeisung)
Bemessungsstrom:
16 A
Max. Schaltleistung:
3000 VA
Max. Lampenlast:
1000 W
Max. Messdauer:
30 s
Voreingestellter Grenzwert:
3,5 mA (SK I)
Fremdspannungsfestigkeit:
max. 276 V
Bei nicht-sinusförmiger Stromversorgung ist ein zusätzlicher Fehler zu berücksichtigen:
Crest-Factor von > 1,4 bis 2,0 zusätzlicher Fehler + 0,4 %
Fremdfelder können das Messergebnis zusätzlich beeinflussen.
7.5 Berührungsstrom über direktes Messverfahren
Messbereich
Auflösung
Messgenauigkeit
0,1 mA - 1,99 mA
0,01 mA
5 % ± 2 Digit
Nennspannung:
230 V ± 10 % (wie Netzeinspeisung)
Bemessungsstrom:
16 A
Max. Schaltleistung:
3000 VA
Max. Lampenlast:
1000 W
Max. Messdauer:
30 s
01/ 2015
BENNING ST 725
5
D
Voreingestellter Grenzwert:
0,5 mA (SK II)
Fremdspannungsfestigkeit:
max. 276 V
Bei nicht-sinusförmiger Stromversorgung ist ein zusätzlicher Fehler zu berücksichtigen:
Crest-Factor von >1,4 bis 2,0, zusätzlicher Fehler + 3,1 %
7.6Leitungstest
- Messung des Schutzleiterwiderstandes gemäß 7.1
- Messung des Isolationswiderstandes gemäß 7.2
- Leitungsbruchprüfung von Außenleiter (L) und Neutralleiter (N)
- Kurzschlussprüfung von Außenleiter (L) und Neutralleiter (N)
7.7 Auslösezeitmessung von FI/RCD Schutzschalter
Messbereich
Auflösung
Messgenauigkeit
10 ms - 500 ms
1 ms
5 % ± 2 Digit
Prüfstrom/Polarität:
30 mA sinusförmig/0° und 180°
150 mA sinusförmig/0° und 180°
Voreingestellter Grenzwert:
200 ms (30 mA), 40 ms (150 mA)
7.8 Schutzleiterstrom über direktes Messverfahren (optionale Messadapter 044140 bzw.
044141)
Messbereich
0,25 mA - 9,99 mA
Auflösung
Messgenauigkeit
0,01 mA
5 % ± 2 Digit
Nennspannung:
3 x 400 V ± 10 % (wie Netzeinspeisung)
Bemessungsstrom:
16 A bzw. 32 A
Voreingestellter Grenzwert:
3,5 mA
7.9 Spannungsmessung an externer Schutzkontaktsteckdose
Messbereich
Auflösung
Messgenauigkeit
Überlastschutz
50 V - 270 VAC
1V
5 % ± 2 Digit
300 V
Anzeige:
- Spannung zwischen Außenleiter (L) und Neutralleiter (N)
- Spannung zwischen Außenleiter (L) und Erdleiter (PE)
- Spannung zwischen Neutralleiter (N) und Erdleiter (PE)
7.10 Grenzwerte gemäß DIN VDE 0701-0702, bzw. ÖVE/ ÖNORM E 8701-1
Hinweis:
Voreingestellte Grenzwerte in Fettdruck sind im BENNING ST 725 hinterlegt.
Schutzklasse I
Schutzleiter
widerstand
RPE
Für Leitungen mit einem
Bemessungsstrom ≤ 16 A:
≤ 0,3 Ω bis 5 m Länge,
je weitere 7,5 m: zusätzlich 0,1 Ω,
max. 1 Ω,
Für Leitungen mit höheren
Bemessungsströmen gilt der berechnete ohmsche Widerstandswert
Isolationswiderstand
RISO
≥ 1 MΩ
≥ 2 MΩ für den Nachweis
der sicheren Trennung (Trafo)
≥ 0,3 MΩ bei Geräten mit
Heizelementen
Schutzleiterstrom
IEA/ ILEAK
01/ 2015
Schutzklasse II, III
Leitungsprüfung
≤ 0,3 Ω
(siehe SK I)
≥ 2 MΩ (SK II),
≥ 0,25 MΩ (SK III),
≥ 1 MΩ
≤ 3,5 mA
an leitfähigen Teilen mit
PE-Verbindung
1 mA/ kW bei Geräten mit
Heizelementen P > 3,5 kW
BENNING ST 725
6
D
Berührungsstrom
IEA/ ILEAK
≤ 0,5 mA
an leitfähigen Teilen ohne
PE-Verbindung
≤ 0,5 mA
an leitfähigen
Teilen ohne
PE-Verbindung
8. Prüfen mit dem BENNING ST 725
8.1 Vorbereiten der Prüfung
Benutzen und lagern Sie das BENNING ST 725 nur bei den angegebenen Lager- und Arbeitstemperaturbedingungen, vermeiden Sie dauernde Sonneneinstrahlung.
- Angaben von Nennspannung und Nennstrom auf den Sicherheitsmessleitungen überprüfen.
- Starke Störquellen in der Nähe des BENNING ST 725 können zu instabiler Anzeige und zu
Messfehlern führen.
Vor jeder Inbetriebnahme überprüfen Sie das Gerät, die Leitungen und das
Prüfobjekt auf Beschädigungen.
Beachten Sie, dass die maximale Schaltleistung/Lampenlast der Prüfsteckdose
des BENNING ST 725, siehe Abschnitte 7.4 und 7.5., nicht überschritten
wird. Eine Überschreitung kann zur Auslösung der Sicherungen und zur
Beschädigung des BENNING ST 725 führen. Beschädigungen aufgrund einer
Überlast sind von möglichen Garantieansprüchen ausgeschlossen.
Der Stecker der Netzanschlussleitung ist in die Buchse K des BENNING ST 725
nur in einer Position einsteckbar (siehe weiße Markierung). Üben Sie auf den
Stecker der Netzanschlussleitung keine Kraft aus, um Beschädigungen am
BENNING ST 725 zu vermeiden.
Vor Prüfbeginn ist das Prüfobjekt einzuschalten. (Netzschalter ein)
Bei Anschluss des BENNING ST 725 an Netzspannung wird das Prüfobjekt während der Schutzleiter-/Berührungsstrommessung mit Netzspannung versorgt.
Kontrollieren Sie die ordnungsgemäße Funktion des Prüfobjektes während der
Messung!
Zu Beginn der Prüfung ist zu prüfen, ob der gewählte Prüfablauf zur Schutz
klasse des angeschlossenen Prüfobjektes stimmt.
8.2 Ein-, Ausschalten des BENNING ST 725
- Durch gleichzeitiges betätigen der Tasten 2 + 3 für ca. 3 Sekunden wird das
BENNING ST 725 eingeschaltet, Signaltöne bestätigen dies. Erneutes drücken der Tasten
schaltet das Gerät aus.
-
Das BENNING ST 725 schaltet sich nach ca. 1 Minuten selbstständig ab. (APO, Auto-Power-Off). Es schaltet sich wieder ein, wenn die Tasten 2 + 3 betätigt werden. Ein Signalton
signalisiert die selbsttätige Abschaltung des Gerätes.
8.3 Prüfung der Netzspannung an externer Schutzkontaktsteckdose
- Schließen Sie die Netzanschlussleitung an die Netzanschlussbuchse K des
BENNING ST 725 an.
- Schließen Sie den Schutzkontaktstecker an die zu überprüfende Schutzkontaktsteckdose
an. Bei anliegender Netzspannung wird die Spannungsmessung automatisch gestartet.
- Abhängig der Außenleiterlage (rechts oder links) der Schutzkontaktsteckdose werden die
Spannungspotentiale zwischen den Anschlussklemmen L, N und PE für ca. 3 Sekunden im
Display angezeigt.
01/ 2015
BENNING ST 725
7
D
oder
-
Falls die Spannungspotentiale innerhalb nachfolgender Grenzwerte liegen, erscheint ein
neben den LN-, LE- und NE-Symbolen.
LN
195 V - 253 V
LE
195 V - 253 V
NE
< 30 V
LN
oder
195 V - 253 V
LE
< 30 V
NE
195 V - 253 V
Es werden nur die Spannungspotentiale zwischen den einzelnen Anschlüssen
L, N und PE gemessen. Die Messung gibt keine Aussage über die fachgerechte
Installation der Schutzkontaktsteckdose. Kein Warnhinweis bei gefährlicher
Berührungsspannung des PE-Leiters!
Das BENNING ST 725 darf nicht dauerhaft an Netzspannung angeschlossen
werden.
- Nach 3 Sekunden schaltet das BENNING ST 725 automatisch in den Bereitschaftsmodus zurück.
siehe Bild 3:
Spannungsmessung an externer Schutzkontaktsteckdose
8.4Prüfablauf
Das BENNING ST 725 führt elektrische Sicherheitsüberprüfungen nach DIN VDE 0701-0702
bzw. ÖVE/ ÖNORM E 8701 aus. Ausführliche Informationen zu den Prüfungen und Grenzwerten
sind den Normen in der aktuellen Fassung zu entnehmen.
Eigenständig überprüft das BENNING ST 725 die Art des angeschlossenen Prüfobjekts und gibt
den Benutzer einen Hinweis bei falsch vorgewähltem Prüfablauf [2...3].
Hinweis:
- Das BENNING ST 725 kann Prüfungen im Batteriebetrieb und im Netzbetrieb mit Anschluss
der 230 V Netzspannung durchführen. Im Batteriebetrieb ist zu beachten, dass die Messung
des Schutzleiter- und Berührungsstromes im Ersatzableitstromverfahren durchgeführt wird.
Dieses Verfahren ist für Prüfobjekte geeignet, die keine netzspannungsabhängigen Schaltelemente (z.B. Netzteile) enthalten.
- Ist der interne Aufbau des Prüfobjekts unbekannt oder enthält das Prüfobjekt netzspannungsabhängige Schaltelemente, ist die Prüfung im Netzbetrieb mit Anschluss der 230 V Netzspannung
durchzuführen. Sobald das BENNING ST 725 über die Buchse K mit Netzspannung versorgt wird,
erfolgt die Schutzleiterstrom-/Berührungsstrommessung automatisch im Differenzstrom-/direkten
Messverfahren unter Betriebsbedingungen des Prüfobjekts.
- Die Prüfspannung für die Isolationswiderstandsmessung ist gemäß Norm auf 500 VDC voreingestellt. Für Prüfobjekte mit integrierten Überspannungsableitern und für elektronische
Geräte bei denen Bedenken gegen eine Prüfspannung von 500 VDC besteht, kann die Prüfspannung über
-Taste 5 auf 250 VDC reduziert werden.
9.
Prüfung elektrischer Geräte/ Betriebsmittel nach DIN VDE 0701-0702, bzw. ÖVE/
ÖNORM E 8701
Vor Prüfbeginn ist das Prüfobjekt einer Sichtprüfung zu unterziehen, bei evtl.
Beschädigungen ist die Prüfung abzubrechen.
9.1 Prüfung von Geräten der Schutzklasse I
Prüfung von Geräten mit Schutzleiter und berührbaren leitfähigen Teilen, die am Schutzleiter
angeschlossen sind.
- Das Prüfobjekt muss an die Prüfsteckdose 1 des BENNING ST 725 angeschlossen werden.
- Stecken Sie den 4 mm Sicherheitsstecker der Prüfleitung mit Abgreifklemme in die 4 mm Sicherheitsbuchse 9 und stellen Sie eine Verbindung mit einem Metallteil des Prüfobjekts her.
- Für Netzbetrieb (Schutzleiterstrom im Differenzverfahren, Prüfobjekt in Funktion!) Stecker
der Netzanschlussleitung in Buchse K und Schutzkontaktstecker in eine abgesicherte
Schutzkontaktsteckdose (230 V, 50 Hz, 16 A) einstecken.
- Die Prüfspannung der RISO-Messung kann im Bedarfsfall über
-Taste 5 auf 250 VDC
reduziert werden. Die eingestellte Prüfspannung wird kurzzeitig im Display 8 eingeblendet.
Eine erneute Tastenbetätigung schaltet auf die voreingestellte 500 VDC Prüfspannung um.
01/ 2015
BENNING ST 725
8
D
-
-
-
-
Schalten Sie das Prüfobjekt ein.
Durch drücken der
-Taste 2 startet der automatische Prüfablauf.
Die Prüfung beginnt mit der Messung des Schutzleiterwiderstandes RPE.
Falls RPE größer als 1 Ω ist, wird der Messwert von RPE im Display angezeigt und ein
erscheint neben dem RPE-Symbol. Der Abbruch wird durch den Hinweis „FAIL“ im Display bestätigt.
-
Falls RPE größer als der zulässige Grenzwert (≤ 0,3 Ω bis 5 m Länge) aber kleiner 1 Ω ist,
wird der Messwert ohne eine Bewertung angezeigt, das Symbol „tAble“ erscheint im Display
und der Prüfablauf wird angehalten. Der verantwortliche Prüfer bestimmt anhand der Grenzwerttabelle (siehe Abschnitt 7.10 oder der Tabelle auf der Rückseite des BENNING ST 725)
und der Leitungslänge des Prüfobjekts ob der angezeigte Messwert akzeptabel ist.
Durch drücken der
-Taste 2 wird der Messwert positiv bewertet und ein
erscheint
neben dem RPE-Symbol. Der Prüfablauf wird fortgesetzt.
Durch drücken der
-Taste 3 wird der Messwert negativ bewertet und ein
erscheint
neben dem RPE-Symbol. Der Abbruch wird durch den Hinweis „FAIL“ im Display bestätigt.
-
Falls RPE kleiner als der zulässige Grenzwert ist, wird der Messwert von RPE angezeigt und
ein
erscheint neben dem RPE-Symbol. Die Messung von RPE wird nun wiederholt mit vertauschter Polarität durchgeführt und der höchste Messwert beider Messungen wird angezeigt.
Nach bestandener Prüfung von RPE wird die Prüfung des Isolationswiderstandes gestartet.
-
Sollte im Display „Lo LOAD“ erscheinen, überprüfen Sie, ob das Prüfobjekt eingeschaltet ist.
-
-
Durch drücken der Taste 2 wird bei zu geringer Last (RL-N > 6 kΩ) der Prüfablauf fortgesetzt.
Sollte im Display „HIGH LOAD“ erscheinen, weist dies auf eine zu hohe Last (RL-N << 14 Ω, ILast >
16 A) im Prüfobjekt hin. Eventuell besteht die Gefahr eines Kurzschlusses bzw. eines Erdschlusses.
Prüfen Sie, ob im Prüfobjekt ein Kurzschluss zwischen Außen- (L) und Neutralleiter (N) vorliegt.
Sollte kein Kurzschluss vorliegen, kann durch drücken der Taste 2 der Prüfablauf fortgesetzt werden.
Falls der Isolationswiderstand RISO größer als der zulässige Grenzwert ist, erscheint ein
neben dem RISO-Symbol.
-
-
01/ 2015
BENNING ST 725
9
D
BENNING ST 725 im Netzbetrieb:
- Das BENNING ST 725 unterbricht den Prüfablauf nach der RISO-Messung und fordert den
Anwender durch eine blinkende Anzeige „ILEAK“ auf, die 230 V Netzspannung auf die Prüfsteckdose 1 zu schalten. Vergewissern Sie sich, dass der Prüfling gesichert ist und drücken
Sie die
-Taste 4, um den Schutzleiterstrom im Differenzstromverfahren zu messen.
- Die Messung des Schutzleiterstromes (Differenzstromverfahren) startet nur bei korrekt anliegender Netzspannung.
Schritt 1 von 2:
-
Nach einer Messzeit von 5 Sekunden oder durch eine erneute Betätigung der Taste 4 wird
das Netz umgepolt und der Schutzleiterstrom wird mit umgepolter Netzspannung („L/N“ –
„N/L") gemessen. Der höchste Messwert beider Messungen wird angezeigt.
Schritt 2 von 2:
-
-
Falls der Schutzleiterstrom kleiner als der zulässige Grenzwert ist, erscheint ein
neben
dem ILEAK-Symbol.
Die Gesamtprüfung gilt als bestanden, wenn das Symbol „PASS“ im Display erscheint.
alternativ:
BENNING ST 725 im Batteriebetrieb (ohne Netzversorgung):
- Ebenso erscheint ein
neben dem IEA-Symbol, falls der Schutzleiterstrom IEA (Ersatzableitstromverfahren) kleiner als der zulässige Grenzwert ist.
- Die Prüfung gilt als bestanden, wenn das Symbol „PASS“ im Display erscheint.
siehe Bild 4:Prüfung von Geräten der Schutzklasse I (Geräte mit Schutzleiter und berührbaren leitfähigen Teilen die am Schutzleiter angeschlossen sind)
Hinweis zur Messung des Schutzleiterwiderstandes:
-
Die Messung des Schutzleiterwiderstandes RPE kann alternativ auch als Dauermessung
(max. 2 x 90 Sek.) durchgeführt werden. Drücken Sie hierzu die Taste 2 für ca. > 5
Sekunden bis das Symbol im Display erscheint. Bewegen Sie die Anschlussleitung
des Prüfobjektes über die komplette Länge, um eine Schwachstelle oder einen Bruch in
der Schutzleiterbahn festzustellen. Das BENNING ST 725 erfasst fortlaufend den aktuellen Messwert im Display und hinterlegt den Maximalwert im Speicher. Durch erneuten
Druck auf die Taste 2 wird die Messung mit vertauschter Polarität durchgeführt. Eine
erneute Betätigung der Taste 2 zeigt den Maximalwert von RPE im Display an und führt
den Prüfablauf, wie unter Abschnitt 9.1 beschrieben, weiter fort.
Hinweis zur Messung des Schutzleiterstromes im Netzbetrieb:
-
Die Messung des Schutzleiterstromes ILEAK kann alternativ auch als Dauermessung
(max. 2 x 5 Minuten) durchgeführt werden. Drücken Sie hierzu die Taste 4 für ca. > 5
Sekunden, um die Dauermessung zu starten. Nach 5 Minuten erfolgt die Umpolung der
Netzspannung („L/N“ – „N/L") automatisch. Durch eine frühere Betätigung der Taste 4
kann die Umpolung der Netzspannung manuell durchgeführt bzw. die Messung durch
eine weitere Betätigung der Taste 4 beendet werden.
Beachten Sie, dass das BENNING ST 725 nicht dafür ausgelegt ist wiederholte Dauer01/ 2015
BENNING ST 725
10
D
messungen mit hohem Laststrom durchzuführen. Sollte die zulässige interne Betriebstemperatur überschritten werden, wird das Symbol „StOP“ und „hot“ im Display eingeblendet. In diesem Fall ist das BENNING ST 725 vom Netz zu trennen und kann nach
einer ausreichenden Abkühlphase erneut eingesetzt werden.
Hinweis zur Messung des Berührungsstromes:
-
Berührbare leitfähige Teile, die nicht mit dem Schutzleiter verbunden sind, sind gemäß
Abschnitt 9.2 zu prüfen. Das BENNING ST 725 muss für die Messung des Berührungsstromes (direktes Verfahren) mit 230 V Netzspannung betrieben werden.
-
Bei der Berührungsstrommessung im direkten Messverfahren darf kein Teil des Prüfobjektes eine Verbindung zum Erdpotential haben. Das Prüfobjekt ist isoliert aufzustellen.
Ansonsten könnten Ableitströme gegen Erde das Messergebiss beeinflussen.
9.2Prüfung von Geräten der Schutzklasse II (Schutzisoliert) und von Geräten der
Schutzklasse III (Schutzkleinspannung)
Prüfung von Geräten ohne Schutzleiter und mit berührbaren leitfähigen Teilen.
- Das Prüfobjekt muss an die Prüfsteckdose 1 des BENNING ST 725 angeschlossen werden.
- Stellen Sie eine Verbindung zwischen der 4 mm Prüfbuchse 9 und einem Metallteil des
Prüfobjekts mittels der Prüfleitung mit Abgreifklemme her.
- Für Netzbetrieb (Berührungsstrom im direkten Verfahren, Prüfobjekt in Funktion!) Stecker
der Netzanschlussleitung in Buchse K und Schutzkontaktstecker in eine abgesicherte
Schutzkontaktsteckdose (230 V, 50 Hz, 16 A) einstecken.
- Die Prüfspannung der RISO-Messung kann im Bedarfsfall über
-Taste 5 auf 250 VDC
reduziert werden. Die eingestellte Prüfspannung wird kurzzeitig im Display 8 eingeblendet.
Eine erneute Tastenbetätigung schaltet auf die voreingestellt 500 VDC Prüfspannung um.
-
-
-
Schalten Sie das Prüfobjekt ein.
Durch drücken der
-Taste 3 startet der automatische Prüfablauf.
Sollte im Display „Lo LOAD“ erscheinen, überprüfen Sie, ob das Prüfobjekt eingeschaltet ist.
-
-
Durch drücken der Taste 3 wird bei zu geringer Last (RL-N > 6 kΩ) der Prüfablauf fortgesetzt.
Sollte im Display „HIGH LOAD“ erscheinen, weist dies auf eine zu hohe Last (RL-N << 14 Ω,
ILast > 16 A) im Prüfobjekt hin. Eventuell besteht die Gefahr eines Kurzschlusses bzw. eines
Erdschlusses. Prüfen Sie, ob im Prüfobjekt ein Kurzschluss zwischen Außen- (L) und Neutralleiter (N) vorliegt.
Sollte kein Kurzschluss vorliegen, kann durch drücken der
-Taste 3 der Prüfablauf fortgesetzt werden.
Falls der Isolationswiderstand RISO größer als der zulässige Grenzwert ist, erscheint ein
neben dem RISO-Symbol.
-
-
BENNING ST 725 im Netzbetrieb:
- Das BENNING ST 725 unterbricht den Prüfablauf nach der RISO-Messung und fordert den
Anwender durch eine blinkende Anzeige „ILEAK“ auf, die 230 V Netzspannung auf die Prüfsteckdose 1 zu schalten. Vergewissern Sie sicher, dass der Prüfling gesichert ist und drücken Sie die
-Taste 4, um den Berührungsstrom ILEAK (direktes Verfahren) zu messen.
- Die Messung des Berührungsstromes im direkten Verfahren startet nur bei korrekt anliegender Netzspannung.
01/ 2015
BENNING ST 725
11
D
Schritt 1 von 2:
-
ach einer Messzeit von 5 Sekunden oder durch eine erneute Betätigung der Taste 4 wird
N
das Netz umgepolt und der Berührungsstrom wird mit umgepolter Netzspannung („L/N“ –
„N/L") gemessen. Der höchste Messwert beider Messungen wird angezeigt.
Schritt 2 von 2:
-
-
Falls der Berührungsstrom kleiner als der zulässige Grenzwert ist, erscheint ein
neben
dem ILEAK-Symbol.
Die Gesamtprüfung gilt als bestanden, wenn das Symbol „PASS“ im Display erscheint.
alternativ:
BENNING ST 725 im Batteriebetrieb (ohne Netzversorgung):
- Ebenso erscheint ein
neben dem IEA-Symbol, falls der Berührungsstrom IEA (Ersatzableitstromverfahren) kleiner als der zulässige Grenzwert ist.
- Die Prüfung gilt als bestanden, wenn das Symbol „PASS“ im Display erscheint.
siehe Bild 5:Prüfung von Geräten der Schutzklasse II (Schutzisolierte Geräte ohne
Schutzleiter und mit berührbaren leitfähigen Teilen) bzw. Prüfung von Geräten der Schutzklasse III (Schutzkleinspannung)
Hinweis zur Messung des Berührungsstromes im Netzbetrieb:
- Bei der Berührungsstrommessung im direkten Messverfahren darf kein Teil des Prüfobjektes
eine Verbindung zum Erdpotential haben. Das Prüfobjekt ist isoliert aufzustellen. Ansonsten
könnten Ableitströme gegen Erde das Messergebnis beeinflussen.
- Die Messung des Berührungsstromes ILEAK kann alternativ auch als Dauermessung (max.
2 x 5 Minuten) durchgeführt werden. Drücken Sie hierzu die Taste 4 für ca. > 5 Sekunden
um die Dauermessung zu starten. Nach 5 Minuten erfolgt die Umpolung der Netzspannung
(„L/N“ – „N/L") automatisch. Durch eine frühere Betätigung der Taste 4 kann die Umpolung
der Netzspannung manuell durchgeführt bzw. die Messung durch eine weitere Betätigung
der Taste 4 beendet werden.
Beachten Sie, dass das BENNING ST 725 nicht dafür ausgelegt ist wiederholte Dauermessungen mit hohem Laststrom durchzuführen. Sollte die zulässige interne Betriebstemperatur überschritten werden, wird das Symbol „StOP“ und „hot“ im Display eingeblendet. In diesem Fall ist das BENNING ST 725 vom Netz zu trennen und kann nach einer ausreichenden
Abkühlphase erneut eingesetzt werden.
Hinweis zur Messung des Isolationswiderstandes bei Prüfobjekten des Schutzklasse III:
- Aufgrund des voreingestellten Grenzwertes von 2 MΩ für Prüfobjekte der Schutzklasse II,
ist bei der Prüfung von Prüfobjekten der Schutzklasse III zu beachten, dass Messwerte
zwischen den Grenzwerten von 2 MΩ (SK II) bis 0,25 MΩ (SK III) mit einem
neben dem
RISO-Symbol dargestellt werden. In diesem Fall ist der Messwert von der befähigten Person
zu beurteilen.
01/ 2015
BENNING ST 725
12
D
9.3Leitungstest
Der Leitungstest kann zur Prüfung von Kaltgeräteleitungen (Geräteanschlussleitungen mit Kaltgerätekupplung) als auch zur Prüfung von Leitungsroller, Mehrfachverteilern und Verlängerungsleitungen genutzt werden.
9.3.1 Prüfung von Kaltgeräteleitungen (IEC-Adapterleitungen)
- Entfernen Sie den Stecker der Netzanschlussleitung aus Buchse K des BENNING ST 725.
- Schließen Sie die zu prüfende Kaltgeräteleitung über den Kaltgerätestecker J an das
BENNING ST 725 an.
- Durch drücken der
-Taste 2 startet der automatische Prüfablauf.
- Die Prüfung beginnt mit der Messung des Schutzleiterwiderstandes RPE.
- Je nach Grenzwertüber- oder -unterschreitung wird ein
oder ein
neben dem RPESymbol angezeigt.
Der Schutzleiterwiderstand ist abhängig von Länge und Querschnitt der zu
prüfenden Leitung.
-
-
Falls RPE größer als der zulässige Grenzwert (≤ 0,3 Ω bis 5 m Länge) aber kleiner 1 Ω
ist, wird der Messwert ohne eine Bewertung angezeigt, das Symbol „tAble“ erscheint im
Display und der Prüfablauf wird angehalten. Der verantwortliche Prüfer bestimmt anhand
der Grenzwerttabelle (siehe Abschnitt 7.10 oder der Tabelle auf der Rückseite des
BENNING ST 725) und der Leitungslänge des Prüfobjekts ob der angezeigte Messwert
akzeptabel ist.
Durch drücken der
-Taste 2 wird der Messwert positiv bewertet und ein
erscheint
neben dem RPE-Symbol. Der Prüfablauf wird fortgesetzt.
Durch drücken der
-Taste 3 wird der Messwert negativ bewertet und ein
erscheint
neben dem RPE-Symbol. Der Abbruch wird durch den Hinweis „FAIL“ im Display bestätigt.
Typische Widerstandswerte von Leitungen sind der Tabelle 1 zu entnehmen.
Querschnitt
Länge
1,0 mm²
1,5 mm²
2,5 mm²
5m
0,1 Ω
0,06 Ω
0,04 Ω
10 m
0,2 Ω
0,12 Ω
0,08 Ω
25 m
0,5 Ω
0,3 Ω
0,2 Ω
50 m
1,0 Ω
0,6 Ω
0,4 Ω
Tabelle 1:
-
-
-
-
Widerstandwerte des Schutzleiters in Abhängigkeit von Länge und Querschnitt
Nach bestandener Prüfung von RPE wird automatisch die Isolationswiderstandsmessung
durchgeführt.
Je nach Grenzwertüber- oder -unterschreitung wird ein
oder ein
neben dem RISOSymbol angezeigt.
Nach bestandener Prüfung von RISO wird der Außenleiter (L) und der Neutralleiter (N) auf
Leitungsbruch und Kurzschluss überprüft. Eine bestandene Leitungsbruch- und Kurzschlussprüfung wird über ein
neben dem
und dem Symbol „Good“ angezeigt.
Das Symbol „PASS“ bestätigt die erfolgreiche Prüfung des kompletten Prüfablaufs.
- Sollte die Leitungsbruch- oder die Kurzschlussprüfung nicht bestanden sein, wird an Stelle
des Symbol „Good“ eines der folgende Symbole angezeigt:
- Symbol „OPEN“:
01/ 2015
BENNING ST 725
13
D
Bestätigt den Leitungsbruch von Außenleiter (L) oder Neutralleiter (N)
- Symbol „Shor“:
Bestätigt den Kurzschluss zwischen Außenleiter (L) und Neutralleiter (N)
siehe Bild 6a: Prüfung von Geräteanschlussleitungen mit Kaltgerätestecker
Hinweis zur Messung des Schutzleiterwiderstandes:
-
Die Messung des Schutzleiterwiderstandes RPE kann alternativ auch als Dauermessung
(max. 2 x 90 Sek.) durchgeführt werden. Drücken Sie hierzu die Taste 2 für ca. > 5
Sekunden bis das Symbol im Display erscheint. Bewegen Sie die Anschlussleitung
des Prüfobjektes über die komplette Länge, um eine Schwachstelle oder einen Bruch in
der Schutzleiterbahn festzustellen. Das BENNING ST 725 erfasst fortlaufend den aktuellen Messwert im Display und hinterlegt den Maximalwert im Speicher. Durch erneuten
Druck auf die Taste 2 wird die Messung mit vertauschter Polarität durchgeführt. Eine
erneute Betätigung der Taste 2 zeigt den Maximalwert von RPE im Display an und führt
den Prüfablauf wie unter Abschnitt 9.3.1 beschrieben weiter fort.
9.3.2 Prüfung von Leitungsroller, Mehrfachverteilern und Verlängerungsleitungen
- Entfernen Sie den Stecker der Netzanschlussleitung aus Buchse K des BENNING ST 725.
- Schließen Sie die im Lieferumfang befindliche Kaltgeräteleitung (IEC-Adapterleitung) an
den Kaltgerätestecker J des BENNING ST 725 an.
- Die zu prüfende Leitung wird an die Prüfsteckdose 1 und den Schutzkontaktstecker der
Kaltgeräteleitung angeschlossen.
- Durch drücken der Taste 2 startet der automatische Prüfablauf.
- Der weitere Prüfablauf entspricht dem Prüfablauf von Abschnitt 9.3.1.
siehe Bild 6b: Prüfung von Leitungen, Mehrfachverteilern und Leitungsroller
Hinweis zur Prüfung 3-phasiger Leitungen:
-
Entfernen Sie den Stecker der Netzanschlussleitung aus Buchse K des
BENNING ST 725.
-
Die 3-phasige Leitung muss über die optionalen passiven Messadapter (044122,
044123 oder 044147) an die Prüfsteckdose 1 des BENNING ST 725 angeschlossen
werden.
-
Stecken Sie den 4 mm Sicherheitsstecker der Prüfleitung mit Abgreifklemme in die
4 mm Sicherheitsbuchse 9 und stellen Sie eine Verbindung mit dem PE-Leiter der
CEE-Kupplung her.
-
Drücken Sie die
-Taste 2, um den automatischen Prüfablauf zur Messung von RPE,
RISO, und IEA zu starten.
9.4 Prüfung 3-phasiger Geräte
9.4.1 Passive Prüfung
Zur passiven Prüfung 3-phasiger Geräte (Prüfobjekt ist nicht in Betrieb) entfernen Sie die Netzanschlussleitung von dem BENNING ST 725. Zur Anwendung kommen die passiven Mess
adapter (044122, 044123 und 044147), bei denen die Außenleiter L1, L2 und L3 in der 5-poligen
CEE-Kupplung gebrückt sind. Die Messung des Schutzleiter-/ Berührungsstromes erfolgt im Ersatzableitstromverfahren. Die Prüfung erfolgt wie bei den einphasigen Geräten unter Punkt 9.1
und 9.2 beschrieben (BENNING ST 725 im Batteriebetrieb, ohne Netzversorgung).
siehe Bild 7a: Prüfung 3-phasiger Geräte über passive Messadapter
9.4.2 Aktive Prüfung
Die aktive Prüfung 3-phasiger Prüfobjekte erfolgt mit den optionalen Messadaptern 16 A CEE
5-polig aktiv (044140) bzw. 32 A CEE 5-polig aktiv (044141) unter Betriebsbedingung.
- Stecken Sie den CEE-Stecker des Prüfobjektes in die CEE-Kupplung des Messadapters
und schließen Sie den CEE-Stecker des Messadapter an ein abgesichertes Versorgungsnetz (3 x 400 V, N, PE, 50 Hz, 16 A/32 A).
- Die Messsignalleitung des Messadapters ist mit der Netzanschlussbuchse K des
BENNING ST 725 zu verbinden.
- Stecken Sie den 4 mm Sicherheitsstecker der Prüfleitung mit Abgreifklemme in die 4 mm
Sicherheitsbuchse 9 des BENNING ST 725 und stellen Sie eine Verbindung mit einem Metallteil des Prüfobjekts her.
- Stellen Sie sicher, dass der Prüfling gesichert ist und schalten Sie den Prüfling ein.
- Durch drücken der
-Taste 7 startet der automatische Prüfablauf.
- Sollte eine Berührungsspannung an dem Metallteil des Prüfobjekts anliegen, wird die Messung abgebrochen und folgender Warnhinweis im Display eingeblendet:
01/ 2015
BENNING ST 725
14
D
-
-
Andernfalls startet die Messung des Schutzleiterwiderstandes RPE mit automatischer Polaritätsumkehr und der höchste Messwert beider Messungen wird im Display eingeblendet.
Nach bestandener Prüfung von RPE erfolgt die Messung des Schutzleiterstromes ILEAK als
Dauermessung für max. 30 Sekunden. Durch drücken der
-Taste 7 kann die Messung
vorzeitig beendet werden.
- Falls der Schutzleiterstrom kleiner als der zulässige Grenzwert ist, erscheint ein
neben
dem ILEAK-Symbol.
- Die Gesamtprüfung gilt als bestanden, wenn das Symbol „PASS“ im Display erscheint.
-
Eine Betätigung der
-Taste 7 ohne vorherigen Anschluss des Messadapters an das
ENNING ST 725 führt zu folgendem Warnhinweis im Display:
B
siehe Bild 7b:Prüfung 3-phasiger Geräte über aktive Messadapter (isolierte Aufstellung des
Prüfobjektes)
Hinweis:
- Die Schutzleiterstrommessung erfolgt über einen Stromwandler im Schutzleiter des
Messadapters (044140 bzw. 044141) im direkten Messverfahren. Das Prüfobjekt ist isoliert
aufzustellen. Kein Teil des Prüfobjektes darf eine Verbindung zum Erdpotential haben. Ansonsten könnten Ableitströme gegen Erde das Messergebiss beeinflussen.
- Ist es nicht möglich das Prüfobjekt isoliert aufzustellen, kann die Schutzleiterstrommessung
alternativ im Differenzstromverfahren über die Leckstromzange BENNING CM 9 (044065)
durchgeführt werden. Hierzu ist das Prüfobjekt über die optionalen Messadapter (044127
bzw. 044128) in Betrieb zu nehmen und mit der Leckstromzange alle aktiven Leiter (L1,
L2, L3 und N) zu umschließen. Der Schutzleiterstrom wird von der BENNING CM 9 im
Differenzstromverfahren gemessen.
9.5 Prüfung von 30 mA FI/RCD-Schutzschalter
Das BENNING ST 725 ermöglicht die Auslösezeitmessung von fest installierten FI/RCD-Schutzschaltern und von mobilen FI/PRCD-Schutzschaltern mit 30 mA Nennfehlerstrom. In der automatischen Prüfabfolge wird die Auslösezeit des 1-fachen Nennfehlerstroms (0°/ 180° Anfangspolarität) und des 5-fachen Nennfehlerstroms (0°/ 180° Anfangspolarität) gemessen.
Durch Erzeugung eines Fehlerstromes von 30 mA wird nachgewiesen, dass der FI/RCD Schutzschalter bei Erreichen des Nennfehlerstromes auslöst. Sollte der Grenzwert der maximalen Berührungsspannung von 50 V überschritten werden, wird das Symbol „UB >50 V“ in dem Display
eingeblendet und die Prüfung wird gestoppt.
01/ 2015
BENNING ST 725
15
D
Vor der Prüfung eines FI/RCD-Schutzschalters ist der 4 mm Sicherheitsstecker
der Prüfleitung aus der Prüfsteckdose 9 zu entfernen.
Die Messung kann beeinflusst werden durch:
-Eine eventuell vorhandene Spannung zwischen Schutzleiter der Schutzkontaktsteckdose und Erde
- Ableitströme im Stromkreis hinter dem FI/RCD-Schutzschalter
- Weitere Erdungseinrichtungen
- Betriebsmittel, die hinter dem FI/RCD-Schutzschalter angeschlossen sind
und eine Verlängerung der Auslösezeit verursachen, z.B. Kondensatoren
oder umlaufende Maschinen
9.5.1 Prüfung festinstallierter FI/RCD-Schutzschalter
- Schließen Sie die Kaltgeräteleitung an den Kaltgerätestecker J des B
ENNING ST 725 an.
- Stecken Sie den Schutzkontaktstecker in eine Schutzkontaktsteckdose, die vom zu überprüfenden FI/RCD-Schutzschalter abgesichert ist und schalten Sie den FI/RCD Schutzschalter
ein.
- Durch drücken der
-Taste 6 wird die Prüfung des FI/RCD-Schutzschalters gestartet.
- Sollte das Symbol „rESET“ im Display verbleiben und die Symbole „LN“ und „LE“ blinken,
drehen Sie den Schutzkontaktstecker in der Schutzkontaktsteckdose um 180° und betätigen
Sie die
-Taste 6 erneut um die Prüfung zu starten.
- Immer wenn das Symbol „rESEt“ im Display eingeblendet wird, schalten Sie den FI/RCD
Schutzschalter wieder ein.
- Das BENNING ST 725 erzeugt einen Fehlerstrom von 30 mA mit positiver (0°) bzw. negativer (180°) Anfangspolarität. Der FI/RCD-Schutzschalter löst aus und die Auslösezeiten des
1-fachen Nennfehlerstromes werden gemessen.
- Falls die Auslösezeit kleiner als der Grenzwert (200 ms) ist, erscheint ein
neben der
Auslösezeit.
- Anschließend erzeugt das BENNING ST 725 einen Fehlerstrom von 150 mA mit positiver
(0°) bzw. negativer (180°) Anfangspolarität. Der FI/RCD-Schutzschalter löst aus und die
Auslösezeiten des 5-fachen Nennfehlerstromes werden gemessen.
- Falls die Auslösezeit kleiner als der Grenzwert (40 ms) ist, erscheint ein
neben der
Auslösezeit.
- Die Prüfung gilt als bestanden, wenn das Symbol „PASS“ im Display erscheint.
siehe Bild 8a:
Prüfung festinstallierter FI/RCD-Schutzschalter (IΔN = 30 mA)
Hinweis:
- Durch Erzeugung eines Fehlerstromes von 30 mA wird nachgewiesen, dass der FI/RCD
Schutzschalter bei erreichen des Nennfehlerstromes auslöst. Sollte der Grenzwert der maximalen Berührungsspannung von 50 V überschritten werden, wird das Symbol „UB > 50 V“
in dem Display eingeblendet und die Prüfung wird gestoppt.
c
Die Messung kann beeinflusst werden durch:
- Eine eventuell vorhandene Spannung zwischen Schutzleiter der
Schutzkontaktsteckdose und Erde
- Ableitströme im Stromkreis hinter dem FI/RCD-Schutzschalter
- Weitere Erdungseinrichtungen
- Betriebsmittel, die hinter dem FI/RCD-Schutzschalter angeschlossen sind
und eine Verlängerung der Auslösezeit verursachen, z.B. Kondensatoren
oder umlaufende Maschinen
9.5.2 Prüfung mobiler FI/PRCD-Schutzschalter
- Stecker der Netzanschlussleitung in die Buchse des BENNING ST 725 einstecken.
- Schutzkontaktstecker in eine 230 V Schutzkontaktsteckdose einstecken. Bei anliegender
Netzspannung wird die Spannungsmessung automatisch gestartet.
- Abhängig der Außenleiterlage (rechts oder links) der Schutzkontaktsteckdose werden die
Spannungspotentiale zwischen den Anschlussklemmen L, N und PE für ca. 2 Sekunden im
Display angezeigt.
01/ 2015
BENNING ST 725
16
D
oder
- Stecken Sie den mobilen FI/PRCD-Schutzschalter in die Prüfsteckdose 1 des
BENNING ST 725.
- Schließen Sie die im Lieferumfang befindliche Kaltgeräteleitung an den Kaltgerätestecker
J des BENNING ST 725 an und stecken Sie den Schutzkontaktstecker wie in Bild 7b
dargestellt in den mobilen FI/PRCD-Schutzschalter. Der Kabelaustritt muss Richtung
Display zeigen!
- Durch drücken der
-Taste 6 wird die Netzspannung auf die Prüfsteckdose 1 geschaltet.
Im Display erscheint „rCd“ und „rESEt“.
- Schalten Sie den mobilen FI/PRCD-Schutzschalter ein.
- Sollte das Symbol „rESET“ im Display verbleiben und die Symbole „LN“ und „LE“ blinken,
prüfen Sie, ob der mobile FI/PRCD eingeschaltet ist. Falls eingeschaltet, drehen Sie den
Schutzkontaktstecker der Kaltgeräteleitung im mobilen FI/PRCD-Schutzschalter um 180°
und starten Sie die Prüfung erneut.
- Immer bei Einblendung des Symbols „rESEt“ im Display schalten Sie den mobilen FI/RCD
Schutzschalter wieder ein.
- Das BENNING ST 725 erzeugt einen Fehlerstrom von 30 mA mit positiver (0°) bzw. negativer
(180°) Anfangspolarität. Der mobile FI/PRCD-Schutzschalter löst aus und die Auslösezeiten
des 1-fachen Nennfehlerstromes werden gemessen.
- Falls die Auslösezeit kleiner als der Grenzwert (200 ms) ist, erscheint ein
neben der
Auslösezeit.
- Anschließend erzeugt der BENNING ST 725 einen Fehlerstrom von 150 mA mit positiver
(0°) bzw. negativer (180°) Anfangspolarität. Der mobile FI/PRCD-Schutzschalter löst aus
und die Auslösezeiten des 5-fachen Nennfehlerstromes werden gemessen.
- Falls die Auslösezeit kleiner als der Grenzwert (40 ms) ist, erscheint ein
neben der
Auslösezeit.
- Die Prüfung gilt als bestanden, wenn das Symbol „PASS“ im Display erscheint.
Hinweis:
Einige mobile FI/PRCD-Typen (z.B. PRCD-S, PRCD-K) schalten L, N und PE allpolig ab und das
BENNING ST 725 erkennt somit keine Verbindung zwischen Kaltgerätestecker J und Prüfsteckdose 1. Die Prüfung dieser FI/PRCD-Typen hat gemäß Punkt 9.5.1 "Prüfung festinstallierter FI/
RCD-Schutzschalter" zu erfolgen, indem der mobile FI/PRCD-Schutzschalter in eine Netzsteckdose eingesteckt wird, die nicht über einen weiteren FI/RCD-Schutzschalter abgesichert ist.
siehe Bild 8b: Prüfung mobiler FI/PRCD-Schutzschalter (IΔN = 30 mA)
10. Messwertspeicher
Das BENNING ST 725 besitzt einen Messwertspeicher, um die Messwerte von 999 Prüfobjekten
zu speichern.
10.1 Messwerte speichern
- Sobald der Prüfablauf beendet ist und das Prüfergebnis vorliegt, drücken Sie die
-Taste , um die angezeigten Messwerte im ersten freien Speicherplatz zu speichern. Die
Speicherung wird mit dem Symbol "STORE" und der Speicherplatznummer im Display 8
bestätigt. Die
-Taste bleibt bis zur Durchführung einer weiteren Prüfung gesperrt,
um eine doppelte Speicherung zu vermeiden. Mit jeder erneuten Speicherung wird
die Speicherplatznummer automatisch um eine Speicherstelle erhöht. Sobald alle 999
Speicherstellen belegt sind, wird das Symbol „FULL“ im Display 8 eingeblendet.
01/ 2015
BENNING ST 725
17
D
10.2 Messwerte aufrufen
- Drücken Sie die
-Taste , um die gespeicherten Messwerte mit der zugehörigen Spei
cherplatznummer wieder aufzurufen. Das Symbol "RECALL" erscheint im Display 8.
- Durch erneutes Drücken der
-Taste wird zum nächsten Speicherplatz gewechselt.
- Durch Drücken der
-Taste kann zum vorherigen Speicherplatz gewechselt werden.
10.3 Messwertspeicher löschen
- Drücken Sie die
-Taste , um die gespeicherten Messwerte mit der zugehörigen Spei
cherplatznummer wieder aufzurufen. Das Symbol "RECALL" erscheint im Display 8.
- Zum Löschen des kompletten Messwertspeichers die
-Taste und
-Taste drücken
bis der Zählerstand wieder auf Null gesetzt ist und "no dAtA" im Display 8 erscheint.
10.4 Messwertspeicher über USB-Schnittstelle auslesen
Um die Messwerte über die USB-Schnittstelle auszulesen, müssen Sie einmalig von der bei
liegenden CD-ROM den Hardwaretreiber aus dem Verzeichnis „Treiber-driver“ und anschließend
das Downloadprogramm aus dem Verzeichnis „Programm-program“ auf Ihrem PC installieren.
Für den Datendownload führen Sie folgende Schritte aus:
- Entfernen Sie alle Anschlussleitungen und Prüfobjekte vom BENNING ST 725.
- Verbinden Sie das BENNING ST 725 über das USB-Verbindungskabel mit dem PC.
- Der Hardwaretreiber installiert sich auf einem freien COM-Port und bestätigt, sobald die
neue Hardware benutzt werden kann.
- Der verwendete COM-Port ist über den Geräte-Manager Ihres Systems ersichtlich.
- Starten Sie das Programm „BENNING Datalogger“, klicken Sie unter Optionen auf
„COM-Ports aktualisieren" und wählen den entsprechenden COM-Port aus. Klicken Sie
anschließend auf „Download“.
- Drücken Sie am BENNING ST 725 die
-Taste für ca. 5 Sek. bis der Download erfolgt
und der komplette Messwertspeicher ausgelesen wird.
- Die Messwerte können als (*.csv) oder (*.txt)-Datei gespeichert werden.
- Durch Klicken auf „Öffnen“ können die Messwerte z. B. über ein Tabellenkalkulationsprogramm
geöffnet werden.
10.5 Messwerte drucken
- Zur Nutzung der Druckfunktion müssen Sie den optionalen Drucker BENNING PT 1
(044150) über das serielle Druckerkabel mit der PS2 Buchse L des BENNING ST 725
verbinden.
- Sobald der Prüfablauf beendet ist und das Prüfergebnis vorliegt oder ein Prüfergebnis über
die
-Taste aufgerufen wurde, können Sie durch Betätigung der
-Taste einen
Prüfbeleg ausdrucken.
- Das BENNING ST 725 schaltet den Drucker BENNING PT 1 mit jedem Druckbefehl
automatisch an und aus.
Prüfung gemäss DIN VDE 0701-0702
Ident-Nr.
__________________
Prüfobjekt
__________________
Speicherplatz-Nr.
001
Datum
17.07.2014
Prüfung
RPE:
RISO:
UISO:
IPE:
Messwert
Grenzwert
0,10 Ω
>19,99 Ω
500 V
< 0,15 mA
0,3 Ω
1,0 MΩ
Prüfergebnis
3,50 mA
bestanden
Prüffirma
______________________
Prüfer
______________________
Beispiel eines Prüfprotokols
01/ 2015
BENNING ST 725
18
D
10.6 Einstellen von Datum und Uhrzeit
Das BENNING ST 725 besitzt eine integrierte Echtzeituhr, um jeden Speichervorgang ein Datum-Zeitstempel hinzuzufügen.
Für die Einstellung von Datum und Uhrzeit führen Sie folgende Schritte aus:
- Schalten Sie das BENNING ST 725 durch gleichzeitiges Betätigen der
-Taste 2 und
-Taste 3 aus.
- Drücken und halten Sie die
-Taste und betätigen Sie gleichzeitig die
-Taste 2 und
-Taste 3.
- Das Datum-/Uhrzeitformat wird wie folgt angezeigt:
MM.DD = Monat (1-12).Tag (1-31)
YYYY = Jahr
HH.mm = Stunden (0-23).Minuten (0-59)
SS = Sekunden (0-59)
- Drücken Sie die
-Taste 2 um ein Datum/ Uhrzeitfeld anzuwählen.
- Ein blinkendes Feld verdeutlicht, dass dieses Feld eingestellt werden kann.
- Über die
-Taste
und die
-Taste wird der Wert erhöht bzw. verringert.
Mit jeder Änderung wird das Sekundenfeld auf Null gesetzt.
- Schalten Sie das Gerät durch gleichzeitiges Betätigen der
-Taste 2 und
-Taste 3 aus,
um die Einstellung zu speichern.
11. Instandhaltung
Vor dem Öffnen das BENNING ST 725 unbedingt spannungsfrei machen!
Elektrische Gefahr!
Die Arbeit am geöffneten BENNING ST 725 unter Spannung ist ausschließlich Elektrofachkräften vorbehalten, die dabei besondere Maßnahmen zur Unfallverhütung treffen müssen.
So machen Sie das BENNING ST 725 spannungsfrei, bevor Sie das Gerät öffnen:
- Schalten Sie das Prüfgerät aus
- Trennen Sie alle Anschlussleitungen vom Gerät
11.1 Sicherstellen des Gerätes
Unter bestimmten Voraussetzungen kann die Sicherheit im Umgang mit dem BENNING ST 725
nicht mehr gewährleistet sein; zum Beispiel bei:
- Sichtbaren Schäden am Gehäuse,
- Fehlern bei Messungen,
- Erkennbaren Folgen von längerer Lagerung unter unzulässigen Bedingungen und
- Erkennbaren Folgen von außerordentlicher Transportbeanspruchung.
In diesen Fällen ist das BENNING ST 725 sofort abzuschalten, von den Prüfstellen zu entfernen
und gegen erneute Nutzung zu sichern.
11.2 Reinigung
Reinigen Sie das Gehäuse äußerlich mit einem sauberen und trockenen Tuch (Ausnahme spezielle Reinigungstücher). Verwenden Sie keine Lösungs- und/ oder Scheuermittel, um das Gerät
zu reinigen. Achten Sie unbedingt darauf, dass das Batteriefach und die Batteriekontakte nicht
durch auslaufendes Batterie-Elektrolyt verunreinigt werden.
Falls Elektrolytverunreinigungen oder weiße Ablagerungen im Bereich der Batterie oder des Batteriegehäuses vorhanden sind, reinigen Sie auch diese mit einem trockenen Tuch.
11.3 Batteriewechsel
Vor dem Öffnen das BENNING ST 725 unbedingt spannungsfrei machen!
Elektrische Gefahr!
Das BENNING ST 725 wird durch sechs 1,5 V-Mignon-Batterien/Typ AA (IEC LR6) gespeist.
Ein Batteriewechsel ist erforderlich, wenn in der Anzeige 8 das Batteriesymbol erscheint.
So wechseln Sie die Batterien (siehe Bild 9):
- Schalten Sie das BENNING ST 725 aus.
- Legen Sie das BENNING ST 725 auf die Frontseite und lösen Sie die Schraube vom Batteriedeckel.
- Heben Sie den Batteriedeckel (im Bereich der Gehäusevertiefungen) vom Unterteil ab.
- Heben Sie die entladenen Batterien aus dem Batteriefach.
- Legen Sie dann die Batterien in die dafür vorgesehenen Stellen im Batteriefach (achten Sie
bitte unbedingt auf die korrekte Polung der Batterien).
- Rasten Sie den Batteriedeckel an das Unterteil an, und ziehen Sie die Schraube an.
siehe Bild 9:
Batterie-/Sicherungswechsel
01/ 2015
Leisten Sie Ihren Beitrag zum Umweltschutz! Batterien dürfen nicht in den
Hausmüll. Sie können bei einer Sammelstelle für Altbatterien bzw. Sondermüll
abgegeben werden. Informieren Sie sich bitte bei ihrer Kommune.
BENNING ST 725
19
D
11.4 Sicherungswechsel
Vor dem Öffnen das BENNING ST 725 unbedingt spannungsfrei machen!
Elektrische Gefahr!
Das BENNING ST 725 wird durch zwei eingebaute Sicherungen (16 A, 250 V, F, D = 5 mm, L =
20 mm), (10019440) vor Überlastung geschützt.
So wechseln Sie die Sicherungen (siehe Bild 9):
- Schalten Sie das BENNING ST 725 aus.
- Legen Sie das BENNING ST 725 auf die Frontseite und lösen Sie die Schraube vom Batteriedeckel.
- Heben Sie den Batteriedeckel (im Bereich der Gehäusevertiefungen) vom Unterteil ab.
- Heben Sie ein Ende der defekten Sicherung seitlich mit einem Schlitzschraubendreher aus
dem Sicherungshalter.
- Entnehmen Sie die defekte Sicherung vollständig aus dem Sicherungshalter.
- Setzen Sie die neue Sicherung ein. Verwenden Sie nur Sicherungen mit gleichem
Nennstrom, gleicher Nennspannung, gleichem Trennvermögen, gleicher Auslösecharakteristik und gleichen Abmessungen.
- Rasten Sie den Batteriedeckel an das Unterteil an, und ziehen Sie die Schraube an.
siehe Bild 9: Batterie-/Sicherungswechsel
11.5 Kalibrierung
Um die angegebenen Genauigkeiten der Messergebnisse zu erhalten, muss das Gerät regelmäßig durch unseren Werksservice kalibriert werden. Wir empfehlen ein Kalibrierintervall von
einem Jahr. Senden Sie hierzu das Gerät an folgende Adresse:
Benning Elektrotechnik & Elektronik GmbH & Co. KG
Service Center
Robert-Bosch-Str. 20
D – 46397 Bocholt
11.6 Ersatzteile
Sicherungen F 16 A, 250 V, Trennvermögen ≥ 500 A, D = 5 mm, L = 20 mm, T.Nr. 10019440
11.7 Umweltschutz
Bitte führen Sie das Gerät am Ende seiner Lebensdauer den zur Verfügung stehen
den Rückgabe- und Sammelsystemen zu.
01/ 2015
BENNING ST 725
20
Operating instructions
BENNING ST 725
Appliance tester for safety-related testing of portable electrical devices and equipment
- testing of electrical appliances according to DIN VDE 0701-0702, DGUV Regulation 3
(former BGV A3), NEN 3140
- testing of cable reels, multiple distributors and IEC power cords
- testing of three-phase electrical appliances by means of optional measuring adapters
- tripping time measurement of permanently installed RCDs and portable RCDs (PRCDs)
- voltage measurement on external shock-proof socket
Table of contents
1. User notes
2. Safety note
3. Scope of delivery and optional accessories
4. Unit description
5. General information
6. Ambient conditions
7. Electrical specifications
8. Measuring with the BENNING ST 725
8.1 Preparations for measuring
8.2 Switching the BENNING ST 725 ON/ OFF
8.3 Testing the mains voltage on external shock-proof socket
8.4 Testing procedure
9.Testing of electrical devices / equipment according to DIN VDE 0701-0702 and ÖVE/
ÖNORM E 8701
9.1 Testing of devices of protection class I
9.2 Testing of devices of protection class II/ III
9.3 Cord test
9.3.1 Testing of IEC power cords (IEC adapter cables)
9.3.2 Testing of cable reels, multiple distributors and extension cables
9.4 Testing of three-phase appliances
9.4.1 Passive testing
9.4.2 Active testing
9.5 Testing of 30 mA RCDs
9.5.1 Testing of permanently installed RCDs
9.5.2 Testing of portable RCDs (PRCDs)
10. Measured value memory
10.1 Storing measured values
10.2 Calling measured values
10.3 Deleting the measured value memory
10.4 Reading out the measured value memory via the USB interface
10.5 Printing measured values
10.6. Setting the date and time
11. Maintenance
11.1 Securing the instrument
11.2 Cleaning
11.3 Battery replacement
11.4 Fuse replacement
11.5 Calibration
11.6 Spare parts
11.7 Environmental note
1. User notes
These operating instructions are intended for
-
-
qualified electricians, competent persons and
electrotechnically trained persons
The BENNING ST 725 is intended for making measurements in dry environment (More details
in Section 6. “Ambient conditions”).
01/ 2015
BENNING ST 725
21
The following symbols are used in these operating instructions and on the BENNING ST 725:
Warning of electrical danger!
Indicates instructions which must be followed to avoid danger to persons.
Important, comply with the documentation!
The symbol indicates that the information provided in the operating instructions must
be complied with in order to avoid risks.
This symbol on the BENNING ST 725 means that the BENNING ST 725 complies
with the EU directives.
This symbol appears on the display to indicate discharged batteries. As soon as the
battery symbol flashes, immediately replace the batteries by new ones. Charged
batteries are also required for measuring in mains operating mode.
(AC) Alternating voltage or current.
Ground (Voltage against ground).
Protection class I
Protection class II
2. Safety note
The instrument is built and tested in accordance with
DIN VDE 0404-1 and -2
DIN EN 61010-1 (VDE 0411-1)
DIN EN 61010-2-030 (VDE 0411-2-030)
DIN EN 61557-1, -2, -4 and -10 (VDE 0413-1, -2, -4 and -10)
and has left the factory in perfectly safe technical state. To maintain this state and ensure safe
operation of the appliance tester, the user must observe the notes and warnings given in these
instructions at all times. Improper handling and non observance of the warnings might involve
severe injuries or danger to life.
WARNING! Be careful when working with bare conductors or main line carrier!
Contact with live conductors will cause an electric shock!
The BENNING ST 725 may be used only in power circuits within the overvoltage
category II with a conductor for 300 V AC max. to earth.
Remember that work on electrical components of all kinds is dangerous. Even
low voltages of 30 V AC and 60 V DC may be dangerous to human life.
The device must be connected to a single-phase mains with 230 V, 50 Hz,
pre-fuse 16 A only. Please make sure not to exceed the maximum breaking
capacity/ lamp load of the test socket of the BENNING ST 725 (see chapters 7.4
and 7.5). Exceeding the values might cause tripping of the fuses and damaging
of the BENNING ST 725. Damages due to overload are excluded from possible
warranty claims.
Do not carry out repeated protective conductor or contact current
measurements with a measuring duration of 2 x 5 minutes at test objects with
high current consumption (16 A). Repeated measurements at maximum load
(16 A) might heat up the inside of the device and thus also its surface.
The protective conductor resistance measurement might be distorted by
impedances connected in parallel of additional operating circuits and by
transient currents.
Measurements of the protective conductor resistance and of the insulating
resistance must be carried out at idle system parts only.
Before starting the appliance tester up, always check it for signs of damage.
Should it appear that safe operation of the appliance tester is no longer possible, it should be
shut down immediately and secured to prevent it being switched on accidentally.
01/ 2015
BENNING ST 725
22
It may be assumed that safe operation is no longer possible:
- if the instrument show visible signs of damage
- if the appliance tester no longer functions
- after long periods of storage under unfavourable conditions
- after being subjected to rough transport
- the device is exposed to moisture.
In order to prevent danger
- do not touch the bare measuring probe tips of the measuring leads,
- plug the leads into the correspondingly marked jacks at the measuring
instrument
Maintenance:
Do not open the tester, because it contains no components which can be
repaired by the user. Repair and service must be carried out by qualified
personnel only!
Cleaning:
Regularly wipe the housing by means of a dry cloth and cleaning agent. Do not
use any polishing agents or solvents!
3. Scope of delivery and optional accessories
The scope of delivery for the BENNING ST 725 comprises:
3.1 One BENNING ST 725,
3.2 One test lead with alligator clip,
3.3 One IEC power cord (IEC adapter cable)
3.4 One mains connection cable
3.5 One compact protective pouch,
3.6 One USB connecting cable (A plug to Micro-B plug),
3.7 Six 1.5-V-batteries/ type AA (IEC LR6) fitted in the unit as initial equipment,
3.8 One operating manual
3.9One CD-ROM with download/driver software, multilingual operating manual and
information material
Parts subject to wear:
- The BENNING ST 725 is provided with two fuses for overload protection:
two fuses with a nominal current of 16 A, 250 V, F, breaking capacity ≥ 500 A, D = 5 mm, L =
20 mm (part no. 10019440)
- The BENNING ST 725 is supplied by six 1.5 V batteries/ type AA (IEC LR6).
Note on optional accessories:
- Portable printer BENNING PT 1 for printing test records rapidly on site, direct thermal
printing process, incl. Mains supply unit and rechargeable Ni/MH battery pack (044150)
- Rolls of thermographic paper (20 pieces), roll width / length: 58 mm /13 m (044151)
- Test badges "next test", 300 pieces (756212)
Passive measuring adapters:
- Measuring adapter for single- and three-phase loads (passive, without mains voltagedependent switching devices) for RPE, RISO (insulating resistance) and IEA (alternative
leakage current) measurements:
- 16 A CEE coupling (3-pin) - 16 A shock-proof plug (044143)
- 32 A CEE coupling (3-pin) - 16 A shock-proof plug (044144)
- 16 A + 32 A CEE coupling (5-pin) + 16 A CEE coupling (3-pin) - 16 A shock-proof plug
(044147)
- 16 A CEE coupling (5-pin) - shock-proof plug (044122)
- 32 A CEE coupling (5-pin) - shock-proof plug (044123)
Active measuring adapters:
- Measuring adapter for three-phase loads (active, with mains voltage-dependent switching
devices) for RPE and IPE measurements (direct measurement) under operating conditions:
- 16 A CEE adapter (5-pin), active (044140)
- 32 A CEE adapter(5-pin), active (044141)
As an alternative:
- BENNING CM 9 leakage current clamp for measuring the differential current, protective
conductor current and load current of single-phase and three-phase loads (044065)
- Measuring adapter for BENNING CM 9 leakage current clamp, conductors led through
individually, with double insulation:
- 16 A shock-proof coupling - 16 A shock-proof plug (044131)
- 16 A CEE coupling (5-pin) - CEE plug (5-pin) (044127)
- 32 A CEE coupling (5-pin) - CEE plug (5-pin) (044128)
01/ 2015
BENNING ST 725
23
- Test certificate forms for "Testing of electrical devices" are available for download free of
charge at www.benning.de
See figure 10: Optional accessories
4. Unit description
See figure 1:
Appliance front face
See figure 2:
Top side of the device
The display and operator control elements specified in Fig. 1 and 2 are designated as follows:
1 Test socket, for connecting the device to be tested,
2
-key, testing of devices of protection class I (devices with protective conductor and
accessible conductive parts which are connected to the protective conductor),
3
-key, testing of devices of protection class II (shock-proof devices without protective
conductor and with accessible conductive parts) and testing of devices of protection class III
(safety extra-low voltage),
4
-key, testing the protective conductor current (differential measurement) or contact
current (direct measurement) under operating conditions (test sample is supplied with mains
voltage)
5
-key, reducing the testing voltage to 250 VDC or 500 VDC for measuring the insulating
resistance
6
-key, testing of 30 mA RCDs
7
-key, testing of three-phase devices under operating conditions (044140, 044141)
8 Digital display, indicates the test progress and individual measuring results,
9 4 mm test socket, for connecting the test lead with alligator clip
J IEC connector, for connecting the IEC power cord
K Mains connection socket, for connecting the mains voltage (230 V, 50 Hz), for voltage
measurement at external shock-proof socket or for connecting the measuring signal cable of
the measuring adapter (16 A CEE adapter, three-phase, active (044140)/ 32 A CEE adapter,
threephase, active (044141))
L Serial PS/2 port for optional printer BENNING PT 1 (044150)
M
-key, for storing the displayed measured values (display values)
N
-key, for calling stored measured values (display values)
O
-key, for printing the displayed or stored measured values by means of the printer
BENNING PT 1
USB interface (Micro-B socket), for connection of the USB connecting cable
5. General information
The BENNING ST 725 is intended for electrical safety tests according to DIN VDE 0701-0702,
DGUV Regulation 3 (former BGV A3) and ÖVE/ ÖNORM E8701.
Automatically, the BENNING ST 725 verifies the type of the connected test object and informs
the user in case of incorrect selection of the testing procedure [2...3]: preset limiting values and
measuring results with "pass/ fail" information make it easier to evaluate the test.
- At full battery capacity, the BENNING ST 725 allows to carry out approx. 2,500 device tests.
- Appliance dimensions:
(L x W x H) = 270 x 115 x 55 mm
- Appliance weight: 1100 g
6. -
-
-
-
-
Ambient conditions
The BENNING ST 725 is intended for making measurements in dry environment.
Maximum barometric elevation for making measurements: 2000 m,
Over voltage category/ setting category: IEC 61010-1 → 300 V category II,
Contamination class: 2,
Protection class: IP 40 (DIN VDE 0470-1 IEC/ EN 60529)
IP 40 means: Protection against access to dangerous parts and protection against solid
impurities of a diameter > 1 mm, (4 - first index). No protection against water, (0 - second
index).
- EMC: EN 61326-1
- Operating temperature and relative humidity:
For operating temperatures from 0 °C to 30 °C: relative humidity less than 80 %
For operating temperatures from 31 °C to 40 °C: relative humidity less than 75 %
- Storage temperature: The BENNING ST 725 can be stored at any temperature within the
range of - 25 °C to + 65 °C (relative humidity from 0 to 80 %). The battery should be removed
from the instrument for storage.
7. Electrical specifications
Note: The measuring accuracy is specified as the sum of
- a relative fraction of the measured value and
- a number of digits (i.e. counting steps of the last digit).
This specified measuring accuracy is valid for temperatures within the range of 18 °C to 28 °C
and relative humidity lower than 80 %.
01/ 2015
BENNING ST 725
24
7.1 Protective conductor resistance
Measuring range
Resolution
0.05 Ω - 19.99 Ω
0.01 Ω
Measuring accuracy
5 % ± 2 digits
Testing current:
> 200 mA (2 Ω)
Open-circuit voltage:
4V-9V
Preset limiting value:
0.3 Ω
7.2 Insulating resistance
Measuring range
Resolution
Measuring accuracy
0.1 MΩ - 19.99 MΩ
0.01 MΩ
5 % ± 2 digits
Testing voltage:
250 VDC/ 500 VDC, + 20 %, - 0 %
Testing current:
> 1 mA, < 2 mA at 2 kΩ
Preset limiting value:
1 MΩ (protection class I), 2 MΩ (protection class II)
7.3Protective conductor current and contact current by means of alternative leakage
current measurement method
Measuring range
Resolution
0.25 mA - 19.99 mA
0.01 mA
Measuring accuracy
5 % ± 2 digits
Testing voltage:
40 VAC, 50 Hz
Testing current:
< 10 mA at 2 kΩ
Preset limiting value:
3.5 mA (protection class I), 0.5 mA (protection class II)
7.4 Protective conductor current (differential current measurement method)
Measuring range
Resolution
Measuring accuracy
0.25 mA - 19.99 mA
0.01 mA
5 % ± 2 digits
Nominal voltage:
230 V ± 10 % (as mains feed-in)
Rated current:
16 A
Max. breaking capacity:
3000 VA
Max. lamp load:
1000 W
Max. measuring duration:
30 seconds
Preset limiting value:
3.5 mA (protection class I)
Resistance to external voltages:
max. 276 V
For non-sinusoidal current supply, an additional error has to be considered:
crest factor of > 1.4 to 2.0, additional error + 0.4 %
External magnetic fields might influence the measuring result additionally.
7.5 Contact current (direct measurement method)
Measuring range
Resolution
Measuring accuracy
0.1 mA - 1.99 mA
0.01 mA
5 % ± 2 digits
Nominal voltage:
230 V ± 10 % (as mains feed-in)
Rated current:
16 A
Max. breaking capacity:
3000 VA
Max. lamp load:
1000 W
Max. measuring duration:
30 seconds
Preset limiting value:
0.5 mA (protection class II)
01/ 2015
BENNING ST 725
25
Resistance to external voltages:
max. 276 V
For non-sinusoidal current supply, an additional error has to be considered:
crest factor of > 1.4 to 2.0, additional error + 3.1 %
7.6 Cord test
- measurement of the protective conductor resistance according to 7.1
- measurement of the insulating resistance according to 7.2
- line break testing of the external conductor (L) and the neutral conductor (N)
- short-circuit testing of the external conductor (L) and the neutral conductor (N)
7.7 Tripping time measurement of RCDs
Measuring range
Resolution
Measuring accuracy
10 ms - 500 ms
1 ms
5 % ± 2 digits
Testing current / polarity:
30 mA sinussoidal/0° and 180°
150 mA sinussoidal /0° and 180°
Preset limiting value:
200 ms (30 mA), 40 ms (150 mA)
7.8
Protective conductor current (direct measurement method) (optional measuring
adapters 044140 or 044141)
Measuring range
Resolution
Measuring accuracy
0.25 mA - 9.99 mA
0.01 mA
5 % ± 2 digits
Nominal voltage:
3 x 400 V ± 10 % (as mains feed-in)
Rated current:
16 A or 32 A
Preset limiting value:
3.5 mA
7.9 Voltage measuring on external shock-proof socket
Measuring range
Resolution
Measuring accuracy
Overload protection
50 V - 270 VAC
1V
5 % ± 2 digits
300 V
Display:
- voltage between the external conductor (L) and the neutral conductor (N)
- voltage between the external conductor (L) and the ground conductor (PE)
- voltage between the neutral conductor (N) and the ground conductor (PE)
7.10 Limiting values according to DIN VDE 0701-0702 and ÖVE/ ÖNORM E 8701-1
Note:
Limiting values preset in bold are stored in the BENNING ST 725.
Protection class I
Protective
conductor
resistance
RPE
For cords with rated current ≤ 16 A:
≤ 0.3 Ω up to a length of 5 m, per
further 7.5 m: additional 0.1 Ω,
max. 1 Ω,
For cords with higher rated currents the calculated ohmic resistance
value applies.
Insulating
resistance
RISO
≥ 1 MΩ
≥ 2 MΩ for proving safe disconnection (transformer)
≥ 0.3 MΩ for devices with heating
element
Protective
conductor
current
IEA/ ILEAK
≤ 3.5 mA
on conductive parts with PE connection
1 mA/ kW for devices with heating
elements P > 3.5 kW
Contact
current
IEA/ ILEAK
≤ 0.5 mA
on conductive parts without
PE connection
01/ 2015
Protection class
II, III
Line test
≤ 0,3 Ω
(see protection
class I)
≥ 2 MΩ
(protection class II),
≥ 0.25 MΩ
(protection class III)
≥ 1 MΩ
≤ 0.5 mA
on conductive parts
without
PE connection
BENNING ST 725
26
8. Measuring with the BENNING ST 725
8.1 Preparations for measuring
Operate and store the BENNING ST 725 only at the specified storage and operating temperatures conditions. Do not permanently expose the device to sunlight.
- Check rated voltage and rated current details specified on the safety measuring leads.
- Strong sources of interference in the vicinity of the BENNING ST 725 might lead to unstable
readings and measuring errors.
Before starting the BENNING ST 725, always check the device, the lines and the
test object for damages.
Please make sure not to exceed the maximum breaking capacity/ lamp load of
the test socket of the BENNING ST 725 (see chapters 7.4 and 7.5). Exceeding the
values might cause tripping of the fuses and damaging of the BENNING ST 725.
Damages due to overload are excluded from possible warranty claims.
The plug of the mains connection cable can be connected with the socket K of
the BENNING ST 725 in one position only (see white mark). Do not exert force
to the plug of the mains connection cable in order to avoid damaging of the
BENNING ST 725.
Before starting the test, switch the test object on (mains switch ON).
If the BENNING ST 725 is connected to the mains voltage, the test object will be
supplied with mains voltage during the protective conductor/ contact current
measurement. During measurement, check the test object for proper functioning!
At the beginning of the test it has to be checked whether the selected testing
procedure complies with the protection class of the connected test object.
8.2 Switching the BENNING ST 725 ON/ OFF
- Press and hold the keys 2 and 3 for approx. 3 seconds to switch the BENNING ST 725 on.
Acoustic signals confirm that the device is switched on. Press the keys again to switch the
device off.
-
After approx. 2 minutes, the BENNING ST 725 switches off automatically (APO, Auto
Power-Off). It switches on again when the keys 2 and 3 are pressed. An acoustic signal
indicates that the device has switched off automatically.
8.3 Testing the mains voltage on external shock-proof socket
- Connect the mains connection cable to the mains connection socket K of the
BENNING ST 725.
- Connect the shock-proof plug to the shock-proof socket to be tested. With the mains voltage
being applied, the voltage measurement will start automatically.
- Depending on the external conductor position (right or left) of the shock-proof socket, the
voltage potentials between the connecting terminals L, N and PE will be shown on the
display for approx. 3 seconds.
or
-
If the voltage potentials are within the following limiting values, there will be a
"LN", "LE" and "NE" symbols.
01/ 2015
BENNING ST 725
next to the
27
LN
195 V - 253 V
LE
195 V - 253 V
NE
< 30 V
LN
or
195 V - 253 V
LE
< 30 V
NE
195 V - 253 V
Only the voltage potentials between the individual connections L, N and PE are
measured. The measurement does not provide any information on the proper
installation of the shock-proof socket. There will be no warning in case of a
dangerous contact voltage of the PE conductor!
The BENNING ST 725 must not be permanently connected to the mains voltage!
- After approx. 3 seconds, the BENNING ST 725 automatically switches to stand-by mode.
See figure 3:
Voltage measurement on external shock-proof socket
8.4 Testing procedure
The BENNING ST 725 is intended for electrical safety tests according to DIN VDE 0701-0702
and ÖVE/ ÖNORM E 8701. Please refer to the current version of the standards for detailed
information concerning the tests and limiting values.
Automatically, the BENNING ST 725 verifies the type of the connected test object and informs
the user in case of incorrect preselection of the testing procedure [2...3].
Note:
- The BENNING ST 725 can be used for tests in battery operating mode and in mains
operating mode with connection of a mains voltage of 230 V. In battery operating mode, it
has to be observed that the protective conductor current and contact current measurement
is carried out by means of the alternative leakage current measurement method. This
method is appropriate for test objects which do not contain any mains voltage-dependent
switching elements (e.g. mains supply units).
- If the internal structure of the test object is not known or if it contains mains voltagedependent switching elements, the test has to be carried out in mains operating mode with
connection of a mains voltage of 230 V. As soon as the BENNING ST 725 is supplied with
mains voltage via the jack K, the protective conductor current/ contact current measurement
will be carried out automatically by means of the differential current/ direct measurement
method under operating conditions of the test object.
- The testing voltage for insulating resistance measurement is preset to 500 VDC according
to the applicable standard. For test objects with integrated overvoltage arresters and for
electronic devices for which there are objections regarding a testing voltage of 500 VDC, the
testing voltage can be reduced to 250 VDC by means of the
-key 5.
9.Testing of electrical devices / equipment according to DIN VDE 0701-0702 and ÖVE/
ÖNORM E 8701
Prior to test, a visual inspection of the test object has to be carried out. In case
of possible damages, the test must be stopped.
9.1 Testing of devices of protection class I
Testing of devices with protective conductor and accessible conductive parts which are connected to the protective conductor.
- Connect the test object to the test socket 1 of the BENNING ST 725.
- Plug the 4 mm safety plug of the test lead with alligator clip into the 4 mm safety socket 9
and establish a connection with a metal part of the test object.
- For mains operating mode (protective conductor current by means of differential current
measurement method, test object in operation!): Connect the plug of the mains connection
cable with the socket K and the shock-proof plug with a protected shock-proof socket
(230 V, 50 Hz, 16 A).
- If necessary, the testing voltage of the RISO (insulating resistance) measurement can be
reduced to 250 VDC by means of the
-key 5. The selected testing voltage is briefly shown
on the display 8. Press the key again to switch back to the preset testing voltage of 500 VDC.
- Switch the test object on.
- Press the
-key 2 to start the automatic testing procedure.
- The test starts with measuring the protective conductor resistance RPE.
- If RPE is higher than 1 Ω, the measured value of RPE will be shown on the display and a
will appear next to the RPE symbol. "FAIL" appears on the display to confirm that the
measurement has been stopped.
01/ 2015
BENNING ST 725
28
-
If RPE is higher than the admissible limiting value (≤ 0.3 Ω up to a length of 5 m) but lower
than 1 Ω, the measured value will be displayed without a rating, the “tAble” symbol will
appear on the display and the test procedure will be stopped. The responsible testing staff
determines by means of the limiting value table (see section 7.10 or the table on the rear
of the BENNING ST 725) and by means of the line length of the test object whether the
displayed measured value is acceptable or not.
Press the
-key 2 to give the measured value a positive rating and a
will be displayed
next to the RPE symbol. The test procedure will be continued.
3
Press the
-key to give the measured value a negative rating and a
will be displayed
next to the RPE symbol. "FAIL" appears on the display to confirm that the measurement has
been stopped.
-
If RPE is lower than the admissible limiting value, the measured value of RPE is shown and
a
appears next to the RPE symbol. Now, the RPE measurement is carried out again with
reversed polarity and the highest measured value of both measurements will be displayed.
After the RPE test has been passed, the test of the insulating resistance is started.
-
If "Lo LOAD" is shown on the display, please check whether the test object is switched on.
- Press the key 2 to continue the testing procedure in case of the load being too low (RL-N >
6 kΩ).
- If "HIGH LOAD“ is shown on the display, this indicates an excessive load (RL-N << 14 Ω,
ILAST (ILOAD) > 16 A) of the test object. There might be danger of a short-circuit or of an earth
fault. Check whether there is a short-circuit between the external conductor (L) and neutral
conductor (N) of the test object.
- If there is no short-circuit, you can continue with the testing procedure by pressing the key
2.
- If the insulating resistance RISO is higher than the admissible limiting value, a
appears
next to the RISO symbol.
BENNING ST 725 in mains operating mode:
- The BENNING ST 725 interrupts the testing procedure after the RISO (insulating resistance)
01/ 2015
BENNING ST 725
29
measurement and requests the user to switch the mains voltage of 230 V to the test socket
1 by showing a flashing "ILEAK" symbol. Make sure that the test sample is protected and
press the
-key 4 to measure the protective conductor current by means of the differential
current measurement method.
- The protective conductor current measurement (differential current measurement method)
only starts as soon as the mains voltage is correct applied.
step 1 of 2:
-
After a measuring time of 5 seconds or by pressing the key 4, mains polarity will be
reversed and the protective conductor current will be measured with reversed mains voltage
("L/N" - "N/L"). The highest measured value of both measurements will be displayed. (step 2
of 2)
step 2 of 2:
- If the protective conductor current is lower than the admissible limiting value, a
shown next to the ILEAK symbol.
- The overall test is considered to be passed, if "PASS" is shown on the display.
will be
As an alternative:
BENNING ST 725 in battery operating mode (without mains supply):
- Similarly, a
will be shown next to the IEA symbol, if the protective conductor current IEA (alternative leakage current measurement method) is lower than the admissible limiting value.
- The test is considered to be passed, if "PASS" is shown on the display.
See figure 4:
esting of devices of protection class I (devices with protective conductor and
T
accessible conductive parts which are connected to the protective conductor)
Note on measuring the protective conductor resistance:
- Alternatively, the measurement of the protective conductor resistance RPE can be carried out
as permanent measurement (max. 2 x 90 seconds). For this purpose press the key 2 for
approx. > 5 seconds until the symbol appears on the display. Check the connecting line of
the test object by bending it over the entire length in order to detect weak points or a break of
the protective conductor. The BENNING ST 725 continuously records the current measured
value on the display and stores the maximum value in the memory. By pressing the key
2 again, the measurement is carried out with reversed polarity. Press the key 2 again to
indicate the maximum value of RPE on the display and to continue the testing procedure as
described in section 9.1.
Note on measuring the protective conductor current in mains operating mode:
- Alternatively, the measurement of the protective conductor current ILEAK can be carried
out as permanent measurement (max. 2 x 5 minutes). Press the key 4 for approx. > 5
seconds to start permanent measurement. After 5 minutes, the polarity of the mains voltage
will be reversed automatically ("L/N" - "N/L"). By pressing the key 4 earlier, the mains
voltage polarity reversal can be activated manually and by pressing the key 4 again, the
measurement can be stopped.
Please observe that the BENNING ST 725 is not designed for carrying out repeated
01/ 2015
BENNING ST 725
30
permanent measurements at a high load current. If the admissible internal operating
temperature is exceeded, the "StOP" and "hot" symbols will be shown on the display. In this
case, the BENNING ST 725 must be disconnected from the mains and can be used again
after a sufficient cooling phase.
Note on measuring the contact current:
- Accessible conductive parts which are not connected with the protective conductor have to
be tested as described in section 9.2. For measuring the contact current (direct measurement
method), the BENNING ST 725 has to be operated with a mains voltage of 230 V.
- During contact current measurement by means of the direct measurement method, no part
of the test object must have a connection to the earth potential. The test object must be
placed onto an insulated surface. Otherwise, leakage currents to earth might influence the
measuring result.
9.2Testing of devices of protection class II (shock-proof) and of devices of protection
class III K (safety extra-low voltage)
Testing of devices without protective conductor and with accessible conductive parts
- Connect the test object to the test socket 1 of the BENNING ST 725.
- Establish a connection between the 4 mm test socket 9 and a metal part of the test object
by means of the test lead with alligator clip.
- For mains operating mode (contact current by means of the direct measurement method,
test object in operation!): Connect the plug of the mains connection cable with the socket K
and the shock-proof plug with a protected shock-proof socket (230 V, 50 Hz, 16 A).
- If necessary, the testing voltage of the RISO (insulating resistance) measurement can be
reduced to 250 VDC by means of the
-key 5. The selected testing voltage is briefly shown
on the display 8. Press the key again to switch back to the preset testing voltage of 500 VDC.
-
-
-
Switch the test object on.
Press the
-key 3 to start the automatic testing procedure.
If "Lo LOAD" is shown on the display, please check whether the test object is switched on.
- Press the key 3 to continue the testing procedure in case of the load being too low (RL-N >
6 kΩ).
- If "HIGH LOAD“ is shown on the display, this indicates an excessive load (RL-N << 14 Ω, ILAST
(ILOAD) > 16 A) of the test object. There might be danger of a short-circuit or of an earth
fault. Check whether there is a short-circuit between the external conductor (L) and neutral
conductor (N) of the test object.
- If there is no short-circuit, you can continue with the testing procedure by pressing the
-key 3.
- If the insulating resistance RISO is higher than the admissible limiting value, a
appears
next to the RISO symbol.
BENNING ST 725 in mains operating mode:
- The BENNING ST 725 interrupts the testing procedure after the RISO (insulating resistance)
measurement and requests the user to switch the mains voltage of 230 V to the test socket
1 by showing a flashing "ILEAK" symbol. Make sure that the test sample is protected and
press the
-key 4 to measure the contact current ILEAK (direct measurement method).
- The contact current by means of the direct measurement method only starts as soon as the
mains voltage is correct applied.
01/ 2015
BENNING ST 725
31
step 1 of 2:
-
After a measuring time of 5 seconds or by pressing the key 4, mains polarity will be reversed
and the contact current will be measured with reversed mains voltage ("L/N" - "N/L"). The
highest measured value of both measurements will be displayed. (step 2 of 2)
step 2 of 2:
- If the contact current is lower than the admissible limiting value, a
will be shown next to
the ILEAK symbol.
- The overall test is considered to be passed, if "PASS" is shown on the display.
As an alternative:
BENNING ST 725 in battery operating mode (without mains supply):
- Similarly, a
will be shown next to the IEA symbol, if the contact current IEA (alternative
leakage current measurement method) is lower than the admissible limiting value.
- The test is considered to be passed, if "PASS" is shown on the display.
See figure 5:
Testing of devices of protection class II (shock-proof devices without protective conductor and with accessible conductive parts) and testing of devices of
protection class III (safety extra-low voltage)
Note on measuring the contact current in mains operating mode:
- During contact current measurement by means of the direct measurement method, no part
of the test object must have a connection to the earth potential. The test object must be
placed onto an insulated surface. Otherwise, leakage currents to earth might influence the
measuring result.
- Alternatively, the measurement of the contact current ILEAK can be carried out as permanent
measurement (max. 2 x 5 minutes). Press the key 4 for approx. > 5 seconds to start
permanent measurement. After 5 minutes, the polarity of the mains voltage will be reversed
automatically ("L/N" - "N/L"). By pressing the key 4 earlier, the mains voltage polarity
reversal can be activated manually and by pressing the key 4 again, the measurement can
be stopped.
Please observe that the BENNING ST 725 is not designed for carrying out repeated
permanent measurements at a high load current. If the admissible internal operating
temperature is exceeded, the "StOP" and "hot" symbols will be shown on the display. In this
case, the BENNING ST 725 must be disconnected from the mains and can be used again
after a sufficient cooling phase.
Note on measuring the insulating resistance for test objects of protection class III:
- Due to the preset limiting value of 2 MΩ for test objects of protection class II, for the testing
of test objects of protection class III it has to be observed that measured values between
the limiting values of 2 MΩ (protection class II) and up to 0.25 MΩ (protection class III) are
indicated with a
next to the RISO symbol. In this case, the measured value has to be
evaluated by a competent person.
01/ 2015
BENNING ST 725
32
9.3 Cord test
The cord test can be used both for the testing of IEC power cords (device connecting cables
with IEC coupler) and for the testing of cable reels, multiple distributors and extension cables.
9.3.1 Testing of IEC power cords (IEC adapter cables)
- Disconnect the plug of the mains connection cable from the socket K of the B
ENNING ST 725.
- Connect the IEC power cord to be tested to the BENNING ST 725 by means of the IEC
connector J.
- Press the
-key 2 to start the automatic testing procedure.
- The test starts with measuring the protective conductor resistance RPE.
- Depending on whether the value is higher or lower than the limiting value, a
or a
is
indicated next to the RPE-symbol.
The protective conductor resistance depends on the length and cross-section
of the line to be tested.
-
-
If RPE is higher than the admissible limiting value (≤ 0.3 Ω up to a length of 5 m) but lower
than 1 Ω, the measured value will be displayed without a rating, the “tAble” symbol will
appear on the display and the test procedure will be stopped. The responsible testing staff
determines by means of the limiting value table (see section 7.10 or the table on the rear
of the BENNING ST 725) and by means of the line length of the test object whether the
displayed measured value is acceptable or not.
Press the
-key 2 to give the measured value a positive rating and a
will be displayed
next to the RPE symbol. The test procedure will be continued.
Press the
-key 3 to give the measured value a negative rating and a
will be displayed
next to the RPE symbol. "FAIL" appears on the display to confirm that the measurement has
been stopped.
Please refer to Table 1 for typical resistance values of lines.
Cross-section
Length
1.0 mm²
1.5 mm²
2.5 mm²
5m
0.1 Ω
0.06 Ω
0.04 Ω
10 m
0.2 Ω
0.12 Ω
0.08 Ω
25 m
0.5 Ω
0.3 Ω
0.2 Ω
50 m
1.0 Ω
0.6 Ω
0.4 Ω
Table 1: Resistance values of the protective conductor depending on length and cross-section
- After the RPE test has been passed, the measurement of the insulating resistance is carried
out automatically.
- Depending on whether the value is higher or lower than the limiting value, a
or a
is
indicated next to the RISO symbol.
- After the RISO test has been passed, the external conductor (L) and the neutral conductor
(N) are checked for line breaks and short-circuits. A passed test regarding line breaks and
short-circuits is indicated by a
next to the
and the "Good“ symbol.
- The "PASS" symbol confirms successful testing of the entire testing procedure.
-
If the test regarding line breaks and short-circuits has failed, one of the following symbols is
indicated instead of the "Good" symbol:
- "OPEN" symbol:
01/ 2015
BENNING ST 725
33
confirms a line break of the external conductor (L) or neutral conductor (N)
- "Shor" symbol:
confirms a short-circuit between the external conductor (L) and the neutral conductor (N)
See figure 6a: Testing of device connecting cables with IEC connector
Note on measuring the protective conductor resistance:
- Alternatively, the measurement of the protective conductor resistance RPE can be carried
out as permanent measurement (max. 2 x 90 seconds). For this purpose press the key 2
for approx. > 5 seconds until the symbol appears on the display. Check the connecting
line of the test object by bending it over the entire length in order to detect weak points
or a break of the protective conductor. The BENNING ST 725 continuously records the
current measured value on the display and stores the maximum value in the memory. By
pressing the key 2 again, the measurement is carried out with reversed polarity. Press the
key 2 again to indicate the maximum value of RPE on the display and to continue the testing
procedure as described in section 9.3.1.
9.3.2 Testing of cable reels, multiple distributors and extension cables
- Disconnect the plug of the mains connection cable from the socket K of the B
ENNING ST 725.
- Connect the IEC power cord (IEC adapter cable) included in the scope of delivery to the IEC
connector J of the BENNING ST 725.
- Connect the line to be tested to the test socket 1 and to the shock-proof socket of the IEC
power cord.
- Press the key 2 to start the automatic testing procedure.
- The further testing procedure corresponds to the testing procedure described in section
9.3.1.
See figure 6b: Testing of lines, multiple distributors and cable reels
Note on testing three-phase lines:
-
Disconnect the plug of the mains connection cable from the socket K of the
BENNING ST 725.
-
The three-phase line must be connected to the test socket 1 of the BENNING ST 725
by means of the optional passive measuring adapters (044122, 044123 or 044147).
-
Plug the 4 mm safety plug of the test cable with alligator clip into the 4 mm safety socket
9 and establish a connection with the PE conductor of the CEE coupling.
-
Press the
-key 2 to start the automatic test procedure for measuring RPE, RISO and IEA.
9.4 Testing of three-phase appliances
9.4.1 Passive testing
For passive testing of three-phase appliances (test object is not running), disconnect the mains
connection cable from the BENNING ST 725. Testing is carried out by means of the passive
measuring adapters (044122, 044123 and 044147) with the external conductors L1, L2 and L3
of the 5-pin CEE coupling being bridged. The protective conductor current / contact current is
measured by means of the alternative leakage current measurement method. Testing is carried
out as described for single-phase appliances in chapter 9.1 and 9.2 (BENNING ST 725 in battery
operating mode, without mains supply).
See figure 7a: Testing of three-phase appliances by means of passive measuring adapters
9.4.2 Active testing
The active testing of three-phase test objects is carried out by means of the optional measuring
adapters 16 A CEE, 5-pin, active (044140) or 32 A CEE, 5-pin, active (044141) under operating
conditions.
- Connect the CEE plug of the test object with the CEE coupling of the measuring adapter and
connect the CEE plug of the measuring adapter to a protected supply mains (3 x 400 V, N,
PE, 50 Hz, 16 A/ 32 A).
- Connect the measuring signal cable of the measuring adapter with the mains connection
socket K of the BENNING ST 725.
- Connect the 4 mm safety plug of the test lead with alligator clip with the 4 mm safety socket
9 of the BENNING ST 725 and establish a connection with a metal part of the test object.
- Make sure that the test sample is protected and switch it on.
- Press the
-key 7 to start the automatic testing procedure.
- If a contact voltage is applied to the metal part of the test object, measurement will be
interrupted and the following warning will be shown on the display:
01/ 2015
BENNING ST 725
34
-
Otherwise, the measurement of the protective conductor resistance (RPE) will be started with
automatic polarity reversal and the highest measured value of both measurements will be
shown on the display.
- After the RPE test has been passed, the test of the protective conductor current ILEAK will be
carried out as permanent measurement for max. 30 seconds. Press the
-key 7 to finish
early the measurement.
- If the protective conductor current is lower than the admissible limiting value, a
shown next to the ILEAK symbol.
- The overall test is considered to be passed, if "PASS" is shown on the display.
will be
- When pressing the
-key 7 without previously connecting the measuring adapter to the
BENNING ST 725, the following warning will be shown on the display:
See figure 7b: T
esting of three-phase appliances by means of active measuring adapters (test
object placed on insulated surface)
Note:
- The protective conductor current measurement is carried out using a current transformer
in the protective conductor of the measuring adapter (044140 or 044141) and by means of
the direct measurement method. The test object must be placed onto an insulated surface.
No part of the test object must have a connection to the earth potential. Otherwise, leakage
currents to earth might influence the measuring result.
- If it is not possible to place the test object onto an insulated surface, the protective conductor
current measurement can be carried out alternatively by means of the differential current
measurement method using the BENNING CM 9 leakage current clamp (044065). For this,
the test object must be put into operation by means of the optional measuring adapters
(044127 or 044128) and all active conductors (L1, L2, L3 and N) must be clamped by means
of the leakage current clamp. The BENNING CM 9 measures the protective conductor
current by means of the differential current measurement method.
9.5 Testing of 30 mA RCDs
The BENNING ST 725 allows measuring the tripping time of permanently installed RCDs and of
portable RCDs (PRCDs) with a nominal fault current of 30 mA. In the automatic test sequence,
the tripping time of the one-fold nominal fault current (initial polarity of 0°/ 180°) and of the fivefold nominal fault current (initial polarity of 0°/ 180°) is measured.
By generating a fault current of 30 mA, it is proven that the RCD will trip when the nominal fault
current is reached. If the limiting value of the maximum contact voltage of 50 V is exceeded, the
"UB > 50 V" symbol will be shown on the display and the testing will be stopped.
01/ 2015
BENNING ST 725
35
Before testing an RCD, the 4 mm safety plug of the test cable must be
disconnected from the test socket 9.
Measurement might be influenced by:
- a possibly existing voltage between the protective conductor of the
shockproof socket and earth
- leakage currents in the circuit behind the RCD
- further earthing equipment
- equipment which is connected behind the RCD and which will cause a
longer tripping time, e.g. capacitors or rotating machines
9.5.1 Testing of permanently installed RCDs
- Connect the IEC power cord to the IEC connector J of the BENNING ST 725.
- Connect the shock-proof plug to a shock-proof socket which is protected by the RCD to be
tested and switch on the RCD.
- Press the
-key 6 to start the RCD test.
- If the "rESET" symbol is still shown on the display and the "LN" and "LE" symbols are
flashing, turn the shock-proof plug in the shock-proof socket by 180° and press the
-key
6 again to start the test.
- Whenever the "rESEt" symbol appears on the display, switch the RCD on again.
- The BENNING ST 725 generates a fault current of 30 mA with positive (0°) or negative
(180°) initial polarity. The RCD trips and the tripping times of the one-fold nominal fault
current are measured.
- If the tripping time is less than the limiting value (200 ms), a
will be shown next to the
tripping time.
- Subsequently, the BENNING ST 725 generates a fault current of 150 mA with positive (0°) or
negative (180°) initial polarity. The RCD trips and the tripping times of the five-fold nominal
fault current are measured.
- If the tripping time is less than the limiting value (40 ms), a
will be shown next to the
tripping time.
- The test is considered to be passed, if "PASS" is shown on the display.
See figure 8a: Testing of permanently installed RCDs (IΔN = 30 mA)
Note:
- By generating a fault current of 30 mA, it is proven that the RCD will trip when the nominal
fault current is reached. If the limiting value of the maximum contact voltage of 50 V is
exceeded, the "UB > 50 V" symbol will be shown on the display and the testing will be
stopped.
c
Measurement might be influenced by:
-
a possibly existing voltage between the protective conductor of the
shockproof socket and earth
- leakage currents in the circuit behind the RCD
- further earthing equipment
- equipment which is connected behind the RCD and which will cause a
longer tripping time, e.g. capacitors or rotating machines
9.5.2 Testing of portable RCDs (PRCDs)
- Connect the plug of the mains connection cable to the jack K of the BENNING ST 725.
- Connect the shock-proof plug to a 230 V shock-proof socket. With the mains voltage being
applied, the voltage measurement will start automatically.
- Depending on the external conductor position (right or left) of the shock-proof socket, the
voltage potentials between the connecting terminals L, N and PE will be shown on the
display for approx. 2 seconds.
01/ 2015
BENNING ST 725
36
or
-
-
-
-
-
-
-
-
-
-
-
Connect the portable RCD (PRCD) to the test socket 1 of the BENNING ST 725.
Connect the IEC power cord included in the scope of delivery to the IEC connector J of the
BENNING ST 725 and connect the shock-proof plug to the portable RCD (PRCD) as shown
in figure 7b. The cable outlet must point towards the display!
Press the
-key 6 to switch the mains voltage to the test socket 1. The "rCd" and "rESEt"
symbols are shown on the display.
Switch the portable RCD (PRCD) on.
If the "rESET" symbol is still shown on the display and the "LN" and "LE" symbols are
flashing, please verify whether the portable RCD (PRCD) is switched on. If it is switched on,
turn the shock-proof plug of the IEC power cord in the portable RCD (PRCD) by 180° and
start the test again.
Whenever the "rESEt" symbol appears on the display, switch the portable RCD (PRCD) on again.
The BENNING ST 725 generates a fault current of 30 mA with positive (0°) or negative
(180°) initial polarity. The portable RCD (PRCD) trips and the tripping times of the one-fold
nominal fault current are measured.
If the tripping time is less than the limiting value (200 ms), a
will be shown next to the
tripping time.
Subsequently, the BENNING ST 725 generates a fault current of 150 mA with positive (0°) or
negative (180°) initial polarity. The portable RCD (PRCD) trips and the tripping times of the
five-fold nominal fault current are measured.
If the tripping time is less than the limiting value (40 ms), a
will be shown next to the
tripping time.
The test is considered to be passed, if "PASS" is shown on the display.
Note:
Some portable PRCD types (e.g. PRCD-S, PRCD-K) switch off L, N and PE on all poles so that
the BENNING ST 725 does not detect any connection between the IEC connector J and the
test socket 1. Testing of these PRCD types must be carried out according to chapter 9.5.1 "Testing of permanently installed RCDs" by connecting the portable RCD (PRCD) to a mains socket
which is not protected by another RCD.
See figure 8b: Testing of portable PRCDs (IΔN = 30 mA)
10. Measured value memory
The BENNING ST 725 is equipped with a measured value memory to store the measured values
of 999 test objects.
10.1 Storing measured values
- As soon as the test sequence is completed and the test result is available, press the
-key
M to store the displayed measured values to the first free storage location. The storage will
be confirmed by the "STORE" symbol and the storage location number shown on the display
8. The
-key M will be blocked until another test is carried out in order to prevent double
storage. With each new storage, the storage location number will be increased automatically
by one storage location. As soon as all 999 storage locations are occupied, the "FULL"
symbol will be shown on the display 8.
01/ 2015
BENNING ST 725
37
10.2 Calling measured values
- Press the
-key N to recall the stored measured values with the corresponding storage
location number. The "RECALL" symbol is shown on the display 8.
- Press the
-key N again to go to the next storage location.
- Press the
-key M to go to the previous storage location.
10.3 Deleting the measured value memory
- Press the
-key N to recall the stored measured values with the corresponding storage
location number. The "RECALL" symbol is shown on the display 8.
- To delete the entire measured value memory, press the
-key M and the
-key N until
the counter reading is reset to zero and "no dAtA" is shown on the display 8.
10.4 Reading out the measured value memory via the USB interface
To read out the measured values via the USB interface P, you have to install the hardware driver
from the "Treiber-driver" directory on the enclosed CD-ROM and then the download program
from the CD-ROM's "Programm-program" directory on your PC once.
In order to download the data, please proceed as follows:
- Disconnect all connection cables and test objects from the BENNING ST 725.
- Connect the BENNING ST 725 to your PC by means of the USB connecting cable.
- The hardware driver is installed automatically on a free COM port and confirms that the new
hardware can be used.
- The COM port used can be viewed by means of the Device Manager of your system.
- Start the "BENNING Datalogger" program, go to "Tools", click "Refresh Ports" and select the
corresponding COM port. Then, click "Download".
- Press the
-key N of the BENNING ST 725 for approx. 5 seconds until the download
takes place and the entire measured value memory is read out.
- The measured values can be stored as a (*.csv) or (*.txt) file.
- Click "Open" to open the measured values e.g. by means of a spreadsheet program.
10.5 Printing measured values
- To use the print function, connect the optional printer BENNING PT 1 (044150) to the PS2
jack L of the BENNING ST 725 by means of the serial printer cable.
- As soon as the test sequence is completed and the test result has been called by means of
the
-key M, it is possible to print a test document by pressing the
-key O.
- The BENNING ST 725 switches the BENNING PT 1 printer on and off automatically with
every print command.
Prüfung gemäss DIN VDE 0701-0702
Ident-Nr.
__________________
Prüfobjekt
__________________
Speicherplatz-Nr.
001
Datum
17.07.2014
Prüfung
RPE:
RISO:
UISO:
IPE:
Messwert
Grenzwert
0,10 Ω
>19,99 Ω
500 V
< 0,15 mA
0,3 Ω
1,0 MΩ
Prüfergebnis
3,50 mA
bestanden
Prüffirma
______________________
Prüfer
______________________
Example of a test certificate
10.6 Setting the date and time
The BENNING ST 725 is equipped with an integrated real-time clock which automatically adds a
date/ time stamp can be added to each storage process.
01/ 2015
BENNING ST 725
38
To set the date and the time, carry out the following steps:
- Switch the BENNING ST 725 off by pressing the
-key 2 and the
-key 3 simultaneously.
- Press and hold the
-key N and simultaneously press the
-key 2 and the
-key 3.
- The date / time format is displayed as follows:
MM.DD = month (1-12).day (1-31)
YYYY = year
HH.mm = hours (0-23).minutes (0-59)
SS = seconds (0-59)
- Press the
-key 2 to select a date / time field.
- As soon as the field is flashing, the value for that field can be set.
- Press the
-key M or the
-key N to increase or decrease the value.
Every change resets the field for the seconds to zero.
- Switch the device off by simultaneously pressing the
-key 2 and the
-key 3 to store
the setting.
11.Maintenance
Before opening the BENNING ST 725, make sure that it is free of voltage!
Electrical danger!
Work on the opened BENNING ST 725 under voltage must be carried out by skilled
electricians with special precautions for the prevention of accidents only!
Make sure that the BENNING ST 725 is free of voltage as described below before opening the
instrument:
- Switch the tester off.
- Remove all connecting cables from the object.
11.1 Securing the instrument
Under certain circumstances safe operation of the BENNING ST 725 is no longer ensured, for
example in the case of:
- Visible damage of the casing.
- Incorrect measurement results.
- Recognisable consequences of prolonged storage under improper conditions.
- Recognisable consequences of extraordinary transportation stress.
In such cases the BENNING ST 725 must be switched off immediately, disconnected from the
measuring points and secured to prevent further utilisation.
11.2 Cleaning
Clean the exterior of the housing with a clean dry cloth (exception: special cleaning wipers).
Avoid using solvents and/ or scouring agents for cleaning the instrument. It is important to make
sure that the battery compartment and battery contacts are not contaminated by leaking electrolyte. If electrolyte contamination or white deposits occur in the area of the batteries or battery
compartment, clean them too with a dry cloth.
11.3 Battery replacement
Before opening the BENNING ST 725, make sure that it is free of voltage!
Electrical danger!
The BENNING ST 725 is supplied by means of six 1.5 V batteries/ type AA (IEC LR6).
A battery replacement (see Figure 9) is required, if the battery symbol appears on the display
unit 8.
Proceed as follows to replace the batteries:
- Switch the BENNING ST 725 off.
- Put the BENNING ST 725 face down and unscrew the screw of the battery compartment
cover.
- Lift off the battery compartment cover (in the area of the housing slots) from the bottom part
of the battery compartment.
- Remove the discharged batteries from the battery compartment.
- Then, insert the new batteries into the battery compartment at the provided places (please
observe correct polarity of the batteries).
- Lock the battery compartment cover into place on the bottom part and tighten the screw.
See figure 9: Battery/ fuse replacement
01/ 2015
Make your contribution to environmental protection! Do not dispose of
discharged batteries in the household garbage. Instead, take them to a
collecting point for discharged batteries and special waste material. Please
inform yourself in your community.
BENNING ST 725
39
11.4 Fuse replacement
Before opening the BENNING ST 725, make sure that it is free of voltage!
Electrical danger!
The BENNING ST 725 is protected against overload by means of two built-in fuses (16 A, 250 V,
F, D = 5 mm, L = 20 mm) (10019440).
Proceed as follows to replace the fuse (see Figure 9):
- Switch the BENNING ST 725 off.
- Put the BENNING ST 725 face down and unscrew the screw of the battery compartment
cover.
- Lift off the battery compartment cover (in the area of the housing slots) from the bottom part
of the battery compartment.
- Laterally lift one side of the defective fuse off the fuse holder by means of a slotted
screwdriver.
- Completely remove the defective fuse from the fuse holder.
- Insert the new fuse. Only use fuses of the same nominal current, nominal voltage, nominal
breaking capacity, tripping characteristic and dimensions.
- Lock the battery compartment cover into place on the bottom part and tighten the screw.
See figure 9: Battery/ fuse replacement
11.5 Calibration
To maintain the specified accuracy of the measurement results, the instrument must be recalibrated at regular intervals by our factory service. We recommend a recalibration interval of one
year. Send the appliance to the following address:
BENNING Elektrotechnik & Elektronik GmbH & Co. KG
Service Centre
Robert-Bosch-Str. 20
D - 46397 Bocholt
11.6 Spare parts
Fuses F 16 A, 250 V, breaking capacity ≥ 500 A, D = 5 mm, L = 20 mm, part no. 10019440
11.7 Environmental note
At the end of the product’s useful life, please dispose of the device at collection
points provided in your community.
01/ 2015
BENNING ST 725
40
F
Notice d’emploi
BENNING ST 725
Contrôleur d'appareil pour les tests de sécurité d'appareils et d'équipements électriques portables
-
contrôle d'appareils électriques conformément à DIN VDE 0701-0702, DGUV directive
3 ( auparavant BGV A3 )
-
contrôle des enrouleurs de câble, des câbles de distribution multiple et des câbles d'alimentation CEI
-
contrôle d'appareils électriques triphasés au moyen d'adaptateurs de mesure en option
-
mesure du temps de déclenchement des dispositifs différentiels fixes « RCD » et des
dispositifs différentiels portatifs « PRCD »
-
mesure de tension sur une prise de courant de sécurité externe
Sommaire
1. Remarques à l’attention de l’utilisateur
2. Consignes de sécurité
3. Contenu de l'emballage et accessoires en option
4. Description de l’appareil
5. Indications générales
6. Conditions d’environnement
7. Indication des valeurs électriques
7.1 Résistance de conducteur de la terre de protection
7.2 Résistance d’isolement
7.3 Courant de conducteur de la terre de protection, courant de contact en utilisant la
méthode courant de fuite équivalent
7.4 Courant du conducteur de protection au moyen de la mesure du courant différentiel
7.5 Courant de contact au moyen de la mesure directe
7.6 Test de ligne
7.7 Mesure du temps de déclenchement des dispositifs différentiels « RCD »
7.8 Courant du conducteur de protection au moyen de la mesure directe ( adaptateurs de mesure en option 044140 ou 044141 )
7.9 Mesure de tension sur une prise de courant de sécurité externe
7.10 Valeurs limites selon DIN VDE 0701-0702
8. Mesure avec le BENNING ST 725
8.1 Préparation de la mesure
8.2 Mise en marche/ en arrêt
8.3 Contrôle de la tension secteur sur une prise de courant de sécurité externe
8.4 Procédure de contrôle
9. Contrôle d'appareils et d'équipements électriques conformément à DIN VDE 0701-0702
9.1 Contrôle d'appareils de la classe de protection I
9.2 Contrôle d'appareils de la classe de protection II/ III
9.3 Test de ligne
9.3.1 Contrôle de câbles d'alimentation CEI ( câble d'adaptateur CEI )
9.3.2 Contrôle d'enrouleurs de câble, de câbles de distribution multiple et de rallonges
électriques
9.4 Contrôle des appareils triphasés
9.4.1 Contrôle passif
9.4.2 Contrôle actif
9.5 Contrôle de dispositifs différentiels «RCD » de 30 mA
9.5.1 Contrôle de dispositifs différentiels fixes « RCD »
9.5.2 Contrôle de dispositifs différentiels portatifs « PRCD »
10. Mémoire de valeurs mesurées
10.1 Enregistrer les valeurs mesurées
10.2 Appeler les valeurs mesurées
10.3 Supprimer la mémoire de valeurs mesurées
10.4 Lecture de la mémoire de valeurs mesurées au moyen de l'interface USB
10.5 Imprimer les valeurs mesurées
10.6 Réglage de l'heure et de la date
11. Entretien
11.1 Rangement sûr de l’appareil
11.2 Nettoyage
11.3 Remplacement des piles
11.4 Remplacement des fusibles
11.5 Étalonnage
11.6 Pièces de rechange
11.7 Information sur l’environnement
1. Remarques à l’attention de l’utilisateur
Cette notice d’emploi s’adresse aux
-
-
électrotechniciens, personnes qualifiées et
personnes instruites dans le domaine électrotechnique
01/ 2015
BENNING ST 725
41
F
Le BENNING ST 725 est conçu pour effectuer des mesures dans un environnement sec (pour de
plus amples informations, consulter la section 6 « Conditions d’environnement »).
Les symboles suivants sont utilisés dans cette notice d’emploi et sur le BENNING ST 725:
Attention ! Danger électrique !
Se trouve devant les remarques devant être respectées afin d‘éviter tout risque pour
les personnes.
Attention ! Se conformer à la documentation !
Ce symbole indique qu‘il faut tenir compte des remarques contenues dans cette
notice d‘emploi pour éviter les risques.
Ce symbole sur le contrôleur BENNING ST 725 signifie que le BENNING ST 725 est
conforme aux directives de l'UE.
Ce symbole apparaît sur l’écran et indique que les piles sont déchargées. Dès que le
symbole de pile clignote, remplacez les piles par des piles neuves immédiatement.
Les piles chargées sont également nécessaire afin d'effectuer des mesures en cas
d'alimentation par secteur.
(CA) Tension alternative ou courant alternatif.
Terre (tension à la terre).
Classe de protection I.
Classe de protection II.
2. Consignes de sécurité
Cet appareil a été fabriqué et contrôlé conformément à
DIN VDE 0404-1 et -2
DIN EN 61010-1 (VDE 0411-1)
DIN EN 61010-2-030 (VDE 0411-2-030)
DIN EN 61557-1, -2, -4 et -10 (VDE 0413-1, -2, -4 et -10)
et a quitté les ateliers de production dans un état technique parfait. Pour conserver cet état et
garantir un service sans risques, l’utilisateur doit se conformer aux remarques et aux avertissements contenus dans cette notice d’utilisation. Un maniement incorrect de l'appareil et la non
observation des avertissements pourraient provoquer des blessures graves ou danger de mort !
Attention ! Soyez prudents si vous travaillez avec les conducteurs denudés ou
avec des lignes principales. Il y a le risque d'un électrochoc très dangereux au
toucher de conducteurs !
Le BENNING ST 725 doit être utilisé uniquement dans des circuits électriques
de la catégorie de protection contre les surtensions II avec des conducteurs
de max. 300 V AC à la terre.
Veuillez noter que les travaux au niveau d‘éléments et d‘installations
conducteurs de tension sont toujours dangereux. Déjà les tensions de 30 V CA
et 60 V CC peuvent être mortelles.
m
L'appareil ne doit être connecté qu'à un réseau de 230 V, 50 Hz avec un fusible amont de 16 A. Faites attention à ce que le maximum de la puissance
de coupure / puissance de lampe de la prise de test de l'appareil BENNING
ST 725 (voir chapitres 7.4 et 7.5) ne soit pas dépassé. Un dépassement pourrait entraîner le déclenchement des fusibles et l'endommagement de l'appareil
BENNING ST 725. Des dommages dû à une surcharge ne sont pas couverts
par la garantie.
m
Evitez d'effectuer des mesures répétées du courant du conducteur de protection et du courant de contact avec une durée de mesure de 2 x 5 minutes
aux objets de contrôle avec une haute consommation de courant ( 16 A ). Une
mesure répétée à charge maximale (16 A) peut échauffer l'intérieur de l'appareil
et par conséquent aussi la surface de l'appareil.
01/ 2015
BENNING ST 725
42
F
m
La mesure de la résistance du conducteur de protection peut être faussée par
des impédances connectées en parallèle des circuits de service supplémentaires et par des courants transitoires.
La mesure de la résistance du conducteur de protection et de la résistance
d'isolement ne doit être effectuée qu'aux parties de l'installation hors tension.
c
Assurez-vous, avant chaque mise en marche, que l‘appareil ne sont pas détériorés.
Si l’on considère que l’utilisation sans risques n’est plus possible, il faut mettre l’appareil hors
service et le protéger contre toute utilisation involontaire.
Une utilisation sans risques n’est plus possible
- quand l’appareil présentent des détériorations visibles,
- quand l’appareil ne fonctionne plus,
- après un stockage prolongé dans de mauvaises conditions,
- après des conditions difficiles de transport.
- si l’appareil est mouillé.
Afin d’exclure tout risque
-ne touchez pas les parties dénudées des câbles au niveau des pointes de
mesure,
-raccordez les câbles aux douilles de l'instrument de mesure qui sont pourvues de marquages correspondants
c
Entretien :
N'ouvrez pas l'appareil de mesure, parce qu'il ne contient pas des composants
qui peuvent être réparés par l'utilisateur. Toute réparation et tout service ne
peuvent être fait que par du personnel qualifié.
m
Nettoyage :
Nettoyer le contrôleur régulièrement avec un chiffon sec et un détergent.
N'utilisez jamais des produits de polissage ou des solvants.
3. Contenu de l'emballage et accessoires en option
Les composants suivants font partie de la fourniture du BENNING ST 725 :
3.1 un BENNING ST 725,
3.2 un câble d'essai avec pince crocodile,
3.3 un câble d'alimentation CEI (câble adaptateur CEI)
3.4 un câble d'alimentation secteur
3.5 un étui compact de protection,
3.6 un câble de raccordement USB ( connecteur type A sur connecteur type Micro-B ),
3.7 six piles rondes de 1,5 V mignon (IEC LR 6/ AA) montées initialement dans l’appareil,
3.8 une notice d’emploi.
3.9 un CD-ROM avec logiciel de téléchargement / de pilotes, mode d'emploi multilingue et
matériel d'information
Remarque concernant les pièces d’usure :
- L'appareil BENNING ST 725 contient deux fusibles afin de protéger l'appareil contre les
surcharges :
deux fusibles avec un courant nominal de 16 A, 250 V, F, avec une puissance de coupure ≥
500 A, D = 5 mm, L = 20 mm (Réf. 10019440)
- Le BENNING ST 725 est alimenté par six piles rondes incorporées de 1,5 V mignon (IEC
LR6/ AA).
Remarque concernant les accessoires en option :
- imprimante portable BENNING PT 1 pour la création rapide de rapports d'essais sur site,
impression thermique directe, y compris un bloc d'alimentation et un pack d'accus rechargeable au Ni/MH ( 044150 )
- rouleaux de papier thermosensible ( 20 pièces ), largeur / longueur du rouleaux : 58 mm/
13 m ( 044151 )
- plaquettes d'essai « Next test date », 300 pièces ( 756212 )
Adaptateurs de mesure passifs :
- adaptateur de mesure pour appareils monophasés et triphasés (passif, sans organes de
manœuvre dépendants de la tension secteur) afin d'effectuer les mesures RPE, RISO et IEA :
- coupleur CEE 16 A à trois broches - fiche mâle de sécurité 16 A ( 044143 )
- coupleur CEE 32 A à trois broches - fiche mâle de sécurité 16 A ( 044144 )
- coupleur CEE 16 A + 32 A à cinq broches + coupleur CEE 16 A à trois broches - fiche
01/ 2015
BENNING ST 725
43
F
-
-
mâle de sécurité 16 A ( 044147 )
coupleur CEE 16 A à cinq broches - fiche mâle de sécurité ( 044122 )
coupleur CEE 32 A à cinq broches - fiche mâle de sécurité ( 044123 )
Adaptateurs de mesure actifs :
- adaptateur de mesure pour appareils triphasés (actif, avec organes de manœuvre dépendants de la tension secteur)
afin d'effectuer les mesures RPE et IPE (mesure directe) sous conditions de fonctionnement:
- adaptateur de mesure CEE 16 A à cinq broches, actif ( 044140 )
- adaptateur de mesure CEE 32 A à cinq broches, actif ( 044141 )
Alternativement :
- pince de courant de fuite BENNING CM 9 pour la mesure du courant différentiel, du courant
du conducteur de protection et du courant de charge sur les appareils monophasés et triphasés ( 044065 )
- adaptateur de mesure pour la pince de courant de fuite BENNING CM 9, les conducteurs
sortis séparément et avec double isolation :
- coupleur de sécurité 16 A - fiche mâle de sécurité ( 044131 )
- coupleur CEE 16 A à cinq broches - fiche mâle CEE à cinq broches ( 044127 )
- coupleur CEE 32 A à cinq broches - fiche mâle CEE à cinq broches ( 044128 )
-
Les formulaires de rapport d'essais « Contrôle d'appareils électriques » peuvent être téléchargés gratuitement sur www.benning.de
voir fig. 10 : accessoires en option
4. Description de l’appareil
voir fig. 1: partie avant de l’appareil
voir fig. 2: face supérieure de l'appareil
Les éléments d’affichage et de commande représentés à la fig. 1 et 2 sont les suivants:
1 Prise de test, afin de raccorder l'appareil à tester,
2 Touche
, contrôle des appareils de la classe de protection I (les appareils avec conducteur de protection et avec des pièces touchables conductrices qui sont connectées au
conducteur de protection),
3 Touche
, contrôle des appareils de la classe de protection II (appareils à double isolation
sans conducteur de protection et avec des pièces touchables conductrices) et contrôle des
appareils de la classe de protection III (basse tension de protection),
4 Touche
, contrôle du courant du conducteur de protection (mesure du courant différentiel) ou du courant de contact (mesure directe) sous conditions de fonctionnement (l'objet de
contrôle est alimenté en tension secteur)
5 Touche
, réduction de la tension d'essai à 250 VDC ou 500 VDC pour la mesure de la
résistance d'isolement
6 Touche
, contrôle de dispositifs différentiels « RCD » de 30 mA
7 Touche
, contrôle d'appareils triphasés sous conditions de fonctionnement ( adaptateurs
de mesure en option 044140 ou 044141 )
8 Afficheur à cristaux liquides (LCD), affiche le progrès du contrôle et des résultats de
mesure individuels,
9 Douille de test 4 mm, afin de raccorder le câble d'essai avec pince crocodile
J Fiche mâle CEI (connecteur CEI), afin de raccorder le câble d'alimentation CEI
K Prise d'alimentation secteur, pour le raccordement de la tension secteur (230 V, 50 Hz),
pour la mesure de tension sur une prise de courant de sécurité externe ou pour le raccordement du câble de signal de mesure de l'adaptateur de mesure CEE de 16 A, actif ( 044140 )/
de 32 A, actif ( 044141 )
L Port PS/2 sériel pour imprimante BENNING PT 1 ( 044150 ) en option
M Touche
, pour l'enregistrement des valeurs mesurées affichées ( valeurs affichées )
N Touche
, pour l'appel des valeurs mesurées enregistrées ( valeurs affichées )
O Touche
, pour l'impression des valeurs mesurées affichées ou enregistrées au moyen de
l'imprimante BENNING PT 1
P Interface USB ( prise femelle Micro-B ), pour la connexion du câble de raccordement USB
5. Indications générales
Le contrôleur BENNING ST 725 sert à effectuer des contrôles de sécurité conformément à DIN
VDE 0701-0702, DGUV directive 3 ( auparavant BGV A3 ) et ÖVE/ ÖNORM E8701.
L'appareil BENNING ST 725 contrôle automatiquement le type de l'objet de contrôle connecté et
indique à l'utilisateur la présélection incorrecte de la procédure de contrôle [2...3]: Les valeurs
limites préréglées et les résultats de mesure avec information « bon/ mauvais » facilitent l'évaluation du contrôle.
- Avec pleine capacité des piles, l'appareil BENNING ST 725 permet d'effectuer 2500
contrôles d'appareils environ.
- Dimensions de l’appareil : (L x l x h) = 270 x 115 x 55 mm
Masse de l’appareil : 1100 g
01/ 2015
BENNING ST 725
44
F
6.
-
-
-
-
-
Conditions d’environnement
Le BENNING ST 725 est conçu pour procéder à la mesure dans des environnements secs,
Hauteur barométrique pour les mesures : maximum 2000 m,
Catégorie de surtension/ catégorie d’implantation: IEC 61010-1 → 300 V catégorie II,
Degré d’encrassement: 2,
Type de protection: IP 40 (DIN VDE 0470-1 IEC/ EN 60529),
IP 40 signifie: protection contre l’accès aux composants dangereux et protection contre les
impuretés solides > 1 mm de diamètre, (4 - premier indice).
Aucune protection contre l’eau, (0 - second indice).
- EMC: EN 61326-1
- Température de travail et humidité relative de l’air:
Avec une température de travail de 0 °C à 30 °C: humidité relative de l’air inférieure à 80 %,
Avec une température de travail de 31 °C à 40 °C: humidité relative de l’air inférieure à 75 %,
- Température de stockage: Le BENNING ST 725 peut être stocké à des températures de
- 25 °C à + 65 °C (humidité de l’air de 0 à 80 %). Pour cela, il faut retirer la pile hors de
l’appareil.
7. Indication des valeurs électriques
Remarque: La précision de mesure est la somme
- d’une part relative de la valeur mesurée et
- d’un nombre de chiffres (c.-à-d. les chiffres de la dernière position).
Cette précision de mesure est valable pour des températures comprises entre 18 °C et 28 °C et
pour une humidité relative de l’air inférieure à 80 %.
7.1 Résistance de conducteur de la terre de protection
Plage de mesure
Résolution
0,05 Ω - 19,99 Ω
0,01 Ω
Précision de mesure
5 % ± 2 chiffres
Courant de test:
> 200 mA (2 Ω)
Tension à circuit ouvert:
4V-9V
Valeur limite préréglée:
0,3 Ω
7.2 Résistance d’isolement
Plage de mesure
Résolution
Précision de mesure
0,1 MΩ - 19,99 MΩ
0,01 MΩ
5 % ± 2 chiffres
Tension de test:
250 VDC/ 500 VDC, + 20 %, - 0 %
Courant de test:
> 1 mA, < 2 mA de 2 kΩ
Valeur limite préréglée:
1 MΩ (classe de protection I), 2 MΩ (classe de protection II)
7.3Courant de conducteur de la terre de protection, courant de contact en utilisant la
méthode courant de fuite équivalent
Plage de mesure
Résolution
0,25 mA - 19,99 mA
0,01 mA
Tension de test:
Précision de mesure
5 % ± 2 chiffres
40 VAC, 50 Hz
Courant de test:
< 10 mA de 2 kΩ
Valeur limite préréglée:
3,5 mA (classe de protection I), 0,5 mA (classe de protection II)
7.4 Courant du conducteur de protection au moyen de la mesure du courant différentiel
Plage de mesure
Résolution
Précision de mesure
0,25 mA - 19,99 mA
0,01 mA
5 % ± 2 chiffres
Tension nominale:
230 V ± 10 % (comme l'alimentation par le secteur)
Courant assigné:
16 A
Puissance de coupure max.:
3000 VA
Puissance de lampe max.:
1000 W
Durée de mesure max.:
30 s
01/ 2015
BENNING ST 725
45
F
Valeur limite préréglée:
3,5 mA (classe de protection I)
Insensibilité aux tensions
étrangères:
max. 276 V
Pour une alimentation en courant non sinusoïdale, il faut tenir compte d'une erreur supplémentaire:
facteur de crête de > 1,4 à 2,0: erreur supplémentaire de 0,4 %
Le résultat de mesure peut en outre être influencé par des champs parasites.
7.5 Courant de contact au moyen de la mesure directe
Plage de mesure
Résolution
Précision de mesure
0,1 mA - 1,99 mA
0,01 mA
5 % ± 2 chiffres
Tension nominale:
230 V ± 10 % (comme l'alimentation par le secteur)
Courant assigné:
16 A
Puissance de coupure max.:
3000 VA
Puissance de lampe max.:
1000 W
Durée de mesure max.:
30 s
Valeur limite préréglée:
0,5 mA (classe de protection II)
Insensibilité aux tensions
étrangères:
max. 276 V
Pour une alimentation en courant non sinusoïdale, il faut tenir compte d'une erreur supplémentaire:
facteur de crête de > 1,4 à 2,0: erreur supplémentaire de 3,1 %
7.6 Test de ligne
- mesure de la résistance du conducteur de protection selon 7.1
- mesure de la résistance d'isolement selon 7.2
- test de rupture de ligne du conducteur extérieur (L) et du conducteur neutre (N)
- essai en court-circuit du conducteur extérieur (L) et du conducteur neutre (N)
7.7 Mesure du temps de déclenchement des dispositifs différentiels « RCD »
Plage de mesure
Résolution
Précision de mesure
10 ms - 500 ms
1 ms
5 % ± 2 chiffres
Courant de test/ polarité:
30 mA sinusoïdal/0° und 180°
150 mA sinusoïdal/0° und 180°
Valeur limite préréglée:
200 ms (30 mA), 40 ms (150 mA)
7.8Courant du conducteur de protection au moyen de la mesure directe ( adaptateurs de
mesure en option 044140 ou 044141 )
Plage de mesure
0,25 mA - 9,99 mA
Résolution
Précision de mesure
0,01 mA
5 % ± 2 chiffres
Tension nominale:
3 x 400 V ± 10 % (comme l'alimentation par le secteur)
Courant assigné:
16 A resp. 32 A
Valeur limite préréglée:
3,5 mA
7.9 Mesure de tension sur une prise de courant de sécurité externe
Plage de mesure
Résolution
Précision de mesure
Protection contre les surcharges
50 V - 270 VAC
1V
5 % ± 2 chiffres
300 V
Affichage :
- tension entre le conducteur extérieur (L) et le conducteur neutre (N)
- tension entre le conducteur extérieur (L) et le conducteur de terre (PE)
- tension entre le conducteur neutre (N) et le conducteur de terre (PE)
01/ 2015
BENNING ST 725
46
F
7.10 Valeurs limites selon DIN VDE 0701-0702 et ÖVE/ ÖNORM E 8701-1
Remarque:
Les valeurs limites préréglées imprimées en gras sont mémorisées dans l'appareil
BENNING ST 725.
Classe de protection I
Résistance
du
conducteur
de protection
RPE
Résistance
d'isolement
RISO
Courant du
conducteur
de
protection
IEA/ ILEAK
Courant de
contact
IEA/ ILEAK
Classe de
protection II, III
pour les lignes avec un courant
assigné ≤ 16 A :
≤ 0,3 Ω jusqu'à une longueur de 5 m,
pour 7,5 m supplémentaires:
plus 0,1 Ω, max. 1 Ω,
pour les lignes avec des courants
assignés plus hauts, il s'applique
la valeur de résistance ohmique
calculée
Test de ligne
≤ 0,3 Ω
(voir classe de
protection I)
≥ 1 MΩ
≥ 2 MΩ pour la preuve d'une
≥ 2 MΩ (classe de
séparation sûre (transformateur)
protection II),
≥ 0,3 MΩ pour les appareils avec des ≥ 0,25 MΩ (classe
éléments de chauffage
de protection III),
≥ 1 MΩ
≤ 3,5 mA
aux pièces conductrices avec
connexion PE
1 mA/ kW pour les appareils avec
des éléments de chauffage
P > 3,5 kW
≤ 0,5 mA
aux pièces conductrices sans
connexion PE
≤ 0,5 mA
aux pièces
conductrices sans
connexion PE
8. Mesurer avec le BENNING ST 725
8.1 Préparation de la mesure
Utilisez et stockez le BENNING ST 725 uniquement conformément aux conditions de températures de service et de stockage; évitez de l’exposer longtemps aux rayons du soleil.
- Contrôlez les indications de tension nominale et de courant nominal sur les câbles de mesure de sécurité.
- Toutes fortes sources de parasites à proximité du BENNING ST 725 peuvent entraîner un
affichage instable et des erreurs de mesure.
Assurez-vous, avant chaque mise en marche, que l'appareil, les câbles et
l'objet de contrôle ne sont pas endommagés.
Faites attention à ce que le maximum de la puissance de coupure / puissance
de lampe de la prise de test de l'appareil BENNING ST 725 (voir chapitres 7.4 et
7.5) ne soit pas dépassé. Un dépassement pourrait entraîner le déclenchement
des fusibles et l'endommagement de l'appareil BENNING ST 725. Des
dommages dû à une surcharge ne sont pas couverts par la garantie.
La fiche du câble d'alimentation secteur ne peut être insérée dans la douille
K de l'appareil BENNING ST 725 que dans une seule position (voir marque
blanche). N'exercez aucune force à la fiche du câble d'alimentation secteur afin
d'éviter un endommagement de l'appareil BENNING ST 725.
Avant de commencer le contrôle, allumez l'objet de contrôle (interrupteur
d'alimentation sur « Marche »).
Si l'appareil BENNING ST 725 est raccordé à la tension secteur, l'objet de
contrôle sera alimenté en tension secteur pendant la mesure du conducteur de
protection / du courant de contact. Assurez-vous du fonctionnement correct de
l'objet de contrôle pendant la mesure !
Avant de commencer le contrôle, assurez-vous que la procédure de contrôle
sélectionnée convient à la classe de protection de l'objet de contrôle connecté.
01/ 2015
BENNING ST 725
47
F
8.2 Mise en marche/ en arrêt du contrôleur BENNING ST 725
- L'appareil BENNING ST 725 est allumé en maintenant appuyées les touches 2 et 3 pour 3
secondes environ. La mise en marche est confirmée par signaux acoustiques. Appuyez sur
les touches encore une fois afin d'éteindre l'appareil.
-
Après 2 minutes environ, l'appareil BENNING ST 725 s'éteint automatiquement (APO, AutoPower-Off). L'appareil s'allume de nouveau quand les touches 2 et 3 sont appuyées. Un
signal acoustique signale l'arrêt automatique de l'appareil.
8.3 Contrôle de la tension secteur sur une prise de courant de sécurité externe
- Branchez le câble d'alimentation secteur à la prise d'alimentation secteur K de l'appareil
BENNING ST 725.
- Connectez la fiche mâle de sécurité à la prise de courant de sécurité à contrôler. Lorsque la
tension du secteur est appliquée, la mesure de tension est lancée automatiquement.
- En fonction de la position du conducteur extérieur (à droite ou à gauche) de la prise de
courant de sécurité, les potentiels de tension entre les bornes L, N et PE sont affichés pour
3 secondes environ.
ou
-
Au cas où les potentiels de tension seraient entre les valeurs limites suivantes, une
affichée à côté des symboles « LN », « LE » et « NE ».
LN
195 V - 253 V
LE
195 V - 253 V
NE
< 30 V
LN
ou
sera
195 V - 253 V
LE
< 30 V
NE
195 V - 253 V
Seuls les potentiels de tension entre les raccordements individuels L, N et
PE sont mesurés. La mesure ne donne aucune information sur l'installation
appropriée de la prise de courant de sécurité. Pas d'avertissement en cas d'une
tension de contact dangereuse du conducteur PE !
Il ne faut jamais brancher l'appareil BENNING ST 725 à la tension secteur en
permanence.
- Après 3 secondes, l'appareil BENNING ST 725 retourne automatiquement en mode veille.
voir figure 3:
mesure de tension sur une prise de courant de sécurité externe
8.4 Procédure de contrôle
Le contrôleur BENNING ST 725 sert à effectuer des contrôles de sécurité conformément à DIN
VDE 0701-0702 et ÖVE/ ÖNORM E 8701. Pour plus d'informations concernant les contrôles et
les valeurs limites, référez-vous aux versions actuelles des normes correspondantes.
L'appareil BENNING ST 725 contrôle automatiquement le type de l'objet de contrôle connecté et
indique à l'utilisateur la présélection incorrecte de la procédure de contrôle [2...3].
Remarque:
- L'appareil BENNING ST 725 permet d'effectuer des contrôles en mode d'alimentation par
piles ou en mode d'alimentation par secteur. En mode d'alimentation par piles, il faut effectuer la mesure du courant du conducteur de protection et du courant de contact au moyen de
la mesure alternative du courant de fuite. Ce type de mesure convient aux objets de contrôle
qui ne contiennent pas des organes de manoeuvre dépendants de la tension secteur (par
ex. des blocs d'alimentation).
- Au cas où la structure interne de l'objet de contrôle ne serait pas connue ou l'objet de
contrôle contiendrait des organes de manoeuvre dépendants de la tension secteur, le
01/ 2015
BENNING ST 725
48
F
contrôle doit être effectué en mode d'alimentation par secteur avec branchement de la tension secteur de 230 V. Dès que l'appareil BENNING ST 725 est alimenté en tension secteur
K, la mesure du courant du conducteur de protection / du courant de contact est effectuée
automatiquement au moyen de la mesure du courant différentiel / de la mesure directe sous
conditions de fonctionnement de l'objet de contrôle.
- La tension d'essai pour la mesure de la résistance d'isolement est préréglée à 500 VDC
conformément à la norme. Pour les objets de contrôle avec des coupe-circuits de surtension
et pour les appareils électroniques pour lesquelles il y a des objections contre une tension
d'essai de 500 VDC, il est possible de réduire la tension d'essai à 250 VDC au moyen de la
5.
touche
9.Contrôle d'appareils et d'équipements électriques conformément à DIN VDE 07010702 et ÖVE/ ÖNORM E 8701
Avant de commencer le contrôle, effectuez un contrôle visuel de l'objet de
contrôle. Au cas où l'objet de contrôle serait endommagé, interrompez le
contrôle.
9.1 Contrôle d'appareils de la classe de protection I
Contrôle des appareils avec conducteur de protection et avec des pièces touchables conductrices qui sont connectées au conducteur de protection
- Raccordez l'objet de contrôle à la prise de test 1 du contrôleur BENNING ST 725.
- Branchez le connecteur de sécurité 4 mm du câble d'essai à la douille de sécurité 9 et
établissez une connexion avec une pièce métallique de l'objet de contrôle.
- Pour le mode d'alimentation par secteur (courant du conducteur de protection au moyen de
la mesure du courant différentiel, l'objet de contrôle en marche !), insérez la fiche du câble
d'alimentation secteur dans la douille K et la fiche de sécurité dans une prise de courant de
sécurité protégée (230 V, 50 Hz, 16 A).
- Au besoin, il est possible de réduire la tension d'essai de la mesure RISO à 250 VDC au moyen
5. La tension d'essai sélectionnée sera affichée brièvement sur l'écran
de la touche
8. Appuyez sur la touche encore une fois afin de passer à la tension d'essai préréglée de
500 VDC.
- Allumez l'objet de contrôle.
2 afin de commencer le contrôle automatique.
- Appuyez sur la touche
- Le contrôle commence avec une mesure de la résistance du conducteur de protection RPE.
- Si la valeur RPE est supérieur 1 Ω,, la valeur mesurée RPE est affichée sur l'écran et le symbole
est affiché à côté du symbole « RPE ». L'interruption du contrôle est confirmée par
l'information « FAIL » sur l'écran.
-
-
Si RPE est supérieur que la valeur limite admissible (≤ 0,3 Ω jusqu'à une longueur de 5 m)
mais inférieur à 1 Ω, la valeur mesurée sera affichée sans jugement positif, le symbole
« tAble » sera affiché sur l'écran et la procédure de contrôle sera arrêtée. Le contrôleur
responsable détermine au moyen du tableau des valeurs limites ( voir paragraphe 7.10 ou
le tableau sur la face arrière de l'appareil BENNING ST 725 ) et au moyen de la longueur du
câble de l'objet de contrôle, si la valeur mesurée affichée est acceptable.
2 afin de juger la valeur mesurée positivement et un
Appuyez sur la touche
est
affiché à côté du symbole RPE. La procédure de contrôle est continuée.
3 afin de juger la valeur mesurée négativement et un
Appuyez sur la touche
est
affiché à côté du symbole RPE. L'interruption du contrôle est confirmée par l'information
« FAIL » sur l'écran.
Si RPE est inférieur à la valeur limite admissible, la valeur mesurée RPE est affichée et le
symbole
est affiché à côté du symbole RPE. Maintenant, la mesure RPE est répétée avec
01/ 2015
BENNING ST 725
49
F
polarité inversée et la valeur mesurée maximale des deux mesures est affichée. Suite au
contrôle RPE réussi, le contrôle de la résistance d'isolement est lancé.
-
Au cas où « Lo LOAD » est affiché sur l'écran, vérifiez si l'objet de contrôle est allumé.
- Appuyez sur la touche 2 afin de continuer le contrôle en cas d'une charge trop faible (RL-N
> 6 kΩ).
- Si « HIGH LOAD » est affiché sur l'écran, cela indique une charge excessive (RL-N << 14 Ω,
ILAST (Charge) > 16 A) dans l'objet de contrôle. Eventuellement, il y a danger d'un courtcircuit
ou d'un défaut à la terre. Vérifiez s'il y a un court-circuit entre le conducteur extérieur (L) et
le conducteur neutre (N) dans l'objet de contrôle.
- S'il n'y pas de court-circuit, continuez le contrôle en appuyant sur la touche 2.
- Si la résistance d'isolement RISO est supérieure à la valeur limite admissible, le symbole
est affiché à côté du symbole RISO.
L'appareil BENNING ST 725 en mode d'alimentation par secteur :
- Suite à la mesure RISO, l'appareil BENNING ST 725 interrompt la procédure de contrôle et
demande l'utilisateur au moyen de l'affichage clignotante « ILEAK » de commuter la tension
secteur de 230 V à la prise de test 1. Assurez-vous que l'objet de contrôle est protégé et
4 afin de mesurer le courant du conducteur de protection au
appuyez sur la touche
moyen de la mesure du courant différentiel.
- La mesure du courant du conducteur de protection (mesure du courant différentiel) est lancée seulement, si la tension secteur est présente correcte.
Pas 1 de 2 :
-
Après un temps de mesure de 5 secondes ou en appuyant de nouveau sur la touche 4, la
polarité du réseau est inversée et le courant du conducteur de protection est mesuré à une
tension secteur inversée (« L/N » - « N/L »). La valeur mesurée maximale des deux mesures
est affichée.
Pas 2 de 2 :
- Si le courant du conducteur de protection est inférieur à la valeur limite admissible, le symbole
est affiché à côté du symbole « ILEAK ».
- Le contrôle entier est considéré comme réussi, si le symbole « PASS » est affiché sur
l'écran.
01/ 2015
BENNING ST 725
50
F
Alternativement :
L'appareil BENNING ST 725 en mode d'alimentation par piles (sans alimentation par secteur):
- De même, le symbole
est affiché à côté du symbole « IEA », si le courant du conducteur de protection IEA (mesure alternative du courant de fuite) est inférieur à la valeur limite
admissible.
- Le contrôle est considéré comme réussi, si le symbole « PASS » est affiché sur l'écran.
voir figure 4:
c ontrôle des appareils de la classe de protection I (les appareils avec conducteur de protection et avec des pièces touchables conductrices qui sont connectées au conducteur de protection)
Remarque concernant la mesure de la résistance du conducteur de protection:
- Alternativement, la mesure de la résistance du conducteur de protection RPE peut être effectuée en tant que mesure permanente (max. 2 x 90 secondes). Pour cela, appuyez sur la
touche 2 pour > 5 secondes environ jusqu'à ce que le symbole soit affiché sur l'écran.
Agitez le câble de raccordement de l'objet de contrôle sur toute sa longueur afin de détecter
un point faible ou une rupture du conducteur de protection. L'appareil BENNING ST 725
saisit de manière continue la valeur mesurée actuelle sur l'écran et enregistre la valeur
maximale dans la mémoire. Appuyez encore une fois sur la touche 2 afin d'effectuer la
mesure avec polarité inversée. Appuyez encore une fois sur la touche 2 afin d'afficher la
valeur maximale RPE sur l'écran et de continuer le contrôle comme décrit au chapitre 9.1.
Remarque concernant la mesure du courant du conducteur de protection en mode d'alimentation par secteur :
- Alternativement, la mesure du courant du conducteur de protection ILEAK peut être effectuée
en tant que mesure permanente (max. 2 x 5 minutes). Appuyez sur la touche 4 pour > 5
secondes environ afin de lancer la mesure permanente. Après cinq minutes, la polarité de la
tension secteur (« L/N » - « N/L ») est inversée automatiquement. En appuyant sur la touche
4 plus tôt, il est possible d'inverser la polarité de la tension secteur manuellement et en
appuyant de nouveau sur la touche 4, il est possible de terminer la mesure.
Veuillez tenir compte du fait que l'appareil BENNING ST 725 n'est pas conçu afin d'effectuer
des mesures continues répétées à un courant de charge élevé. Au cas où la température
de service interne admissible serait dépassé, les symboles « StOP » et « hot » sont affichés
sur l'écran. Dans ce cas, l'appareil BENNING ST 725 doit être débranché du secteur et peut
être utilisé de nouveau après une phase de refroidissement suffisante.
Remarque concernant la mesure du courant de contact :
- Les pièces touchables conductrices qui ne sont pas connectées au conducteur de protection
doivent être contrôlées conformément au chapitre 9.2. Pour la mesure du courant de contact
(mesure directe), l'appareil BENNING ST 725 doit être exploité avec une tension secteur de
230 V.
- Pour la mesure du courant de contact au moyen de la mesure directe, aucune partie de
l'objet de contrôle ne doit être connectée au potentiel de la terre. L'objet de contrôle doit être
mis en place de manière isolée. Sinon, des courants de fuite par rapport à la terre pourraient
influencer le résultat de mesure.
9.2Contrôle d'appareils de la classe de protection II et d'appareils de la classe de
protection III (basse tension de protection)
Contrôle des appareils sans conducteur de protection et avec des pièces touchables conductrices
- Raccordez l'objet de contrôle à la prise de test 1 du contrôleur BENNING ST 725.
- Établissez une connexion entre la douille de test 4 mm 9 et une pièce métallique de l'objet
de contrôle au moyen du câble d'essai avec pince crocodile.
- Pour le mode d'alimentation par secteur (courant de contact au moyen de la mesure directe,
l'objet de contrôle en marche !), insérez la fiche du câble d'alimentation secteur dans la
douille K et la fiche de sécurité dans une prise de courant de sécurité protégée (230 V,
50 Hz, 16 A).
- Au besoin, il est possible de réduire la tension d'essai de la mesure RISO à 250 VDC au moyen
5. La tension d'essai sélectionnée sera affichée brièvement sur l'écran
de la touche
8. Appuyez sur la touche encore une fois afin de passer à la tension d'essai préréglée de
500 VDC.
01/ 2015
BENNING ST 725
51
F
-
-
-
Allumez l'objet de contrôle.
Appuyez sur la touche 3 afin de commencer le contrôle automatique.
Au cas où « Lo LOAD » est affiché sur l'écran, vérifiez si l'objet de contrôle est allumé.
- Appuyez sur la touche 3 afin de continuer le contrôle en cas d'une charge trop faible (RL-N
> 6 kΩ).
- Si « HIGH LOAD » est affiché sur l'écran, cela indique une charge excessive (RL-N << 14 Ω,
ILAST (Charge) > 16 A) dans l'objet de contrôle. Eventuellement, il y a danger d'un courtcircuit
ou d'un défaut à la terre. Vérifiez s'il y a un court-circuit entre le conducteur extérieur (L) et
le conducteur neutre (N) dans l'objet de contrôle.
- S'il n'y pas de court-circuit, continuez le contrôle en appuyant sur la touche 3.
- Si la résistance d'isolement RISO est supérieure à la valeur limite admissible, le symbole
est affiché à côté du symbole RISO.
L'appareil BENNING ST 725 en mode d'alimentation par secteur :
- Suite à la mesure RISO, l'appareil BENNING ST 725 interrompt la procédure de contrôle et
demande l'utilisateur au moyen de l'affichage clignotante « ILEAK » de commuter la tension
secteur de 230 V à la prise de test 1. Assurez-vous que l'objet de contrôle est protégé et
4 afin de mesurer le courant de contact ILEAK (mesure directe).
appuyez sur la touche
- La mesure du courant de contact au moyen de la mesure directe est lancée seulement, si la
tension secteur est présente correcte.
Pas 1 de 2 :
- Après un temps de mesure de 5 secondes ou en appuyant de nouveau sur la touche 4, la
polarité du réseau est inversée et le courant de contact est mesuré à une tension secteur
inversée (« L/N » - « N/L »). La valeur mesurée maximale des deux mesures est affichée.
Pas 2 de 2 :
-
Si le courant de contact est inférieur à la valeur limite admissible, le symbole
est affiché
à côté du symbole « ILEAK ».
- Le contrôle entier est considéré comme réussi, si le symbole « PASS » est affiché sur
l'écran.
01/ 2015
BENNING ST 725
52
F
Alternativement :
L'appareil BENNING ST 725 en mode d'alimentation par piles (sans alimentation par secteur):
- De même, le symbole
est affiché à côté du symbole « IEA », si le courant de contact IEA
(mesure alternative du courant de fuite) est inférieur à la valeur limite admissible.
- Le contrôle est considéré comme réussi, si le symbole « PASS » est affiché sur l'écran.
voir figure 5:
contrôle des appareils de la classe de protection II (appareils à double isolation
sans conducteur de protection et avec des pièces touchables conductrices) et
contrôle des appareils de la classe de protection III (basse tension de protection)
Remarque concernant la mesure du courant de contact en mode d'alimentation par secteur:
- Pour la mesure du courant de contact au moyen de la mesure directe, aucune partie de
l'objet de contrôle ne doit être connectée au potentiel de la terre. L'objet de contrôle doit être
mis en place de manière isolée. Sinon, des courants de fuite par rapport à la terre pourraient
influencer le résultat de mesure.
- Alternativement, la mesure du courant de contact ILEAK peut être effectuée en tant que mesure permanente (max. 2 x 5 minutes). Appuyez sur la touche 4 pour > 5 secondes environ
afin de lancer la mesure permanente.
Après cinq minutes, la polarité de la tension secteur est inversée automatiquement (« L/N
» - « N/L »). En appuyant sur la touche 4 plus tôt, il est possible d'inverser la polarité de la
tension secteur manuellement et en appuyant de nouveau sur la touche 4, il est possible
de terminer la mesure.
Veuillez tenir compte du fait que l'appareil BENNING ST 725 n'est pas conçu afin d'effectuer
des mesures continues répétées à un courant de charge élevé. Au cas où la température
de service interne admissible serait dépassé, les symboles « StOP » et « hot » sont affichés
sur l'écran. Dans ce cas, l'appareil BENNING ST 725 doit être débranché du secteur et peut
être utilisé de nouveau après une phase de refroidissement suffisante.
Remarque concernant la mesure de la résistance d'isolement pour les objets de contrôle
de la classe protection III:
- À cause de la valeur limite préréglée de 2 MΩ pour les objets de contrôle de la classe de protection II, assurez-vous lors du contrôle des objets de contrôle de la classe de protection III
que les valeurs mesurées entre les valeurs limites de 2 MΩ (classe de protection II) jusqu'à
0,25 MΩ (classe de protection III) sont affichées avec un symbole
à côté du symbole
RISO. Dans ce cas là, la valeur mesurée doit être évaluée par une personne qualifiée.
9.3 Test de ligne
Le test de ligne peut être utilisé non seulement pour le contrôle de câbles d'alimentation CEI
(câbles de connexion d'appareil avec coupleur CEI) mais aussi pour le contrôle des enrouleurs
de câble, de câbles de distribution multiple et de rallonges électriques
9.3.1 Contrôle de câbles d'alimentation CEI ( câble d'adaptateur CEI )
- Enlevez la fiche du câble d'alimentation secteur de la prise K de l'appareil BENNING ST 725.
- Connectez le câble d'alimentation CEI à contrôler à l'appareil BENNING ST 725 au moyen
de la fiche mâle CEI J.
2 afin de commencer le contrôle automatique.
- Appuyez sur la touche
- Le contrôle commence avec une mesure de la résistance du conducteur de protection RPE.
- En fonction du dépassement ou sous-dépassement de la valeur limite, un symbole
ou
est affiché à côté du symbole RPE.
-
La résistance du conducteur de protection dépend de la longueur et de la
section transversale du câble à contrôler.
Si RPE est supérieur que la valeur limite admissible (≤ 0,3 Ω jusqu'à une longueur de 5 m)
mais inférieur à 1 Ω, la valeur mesurée sera affichée sans jugement positif, le symbole
« tAble » sera affiché sur l'écran et la procédure de contrôle sera arrêtée. Le contrôleur
responsable détermine au moyen du tableau des valeurs limites ( voir paragraphe 7.10 ou
le tableau sur la face arrière de l'appareil BENNING ST 725 ) et au moyen de la longueur du
câble de l'objet de contrôle, si la valeur mesurée affichée est acceptable.
2 afin de juger la valeur mesurée positivement et un
Appuyez sur la touche
est
affiché à côté du symbole RPE. La procédure de contrôle est continuée.
01/ 2015
BENNING ST 725
53
F
3 afin de juger la valeur mesurée négativement et un
Appuyez sur la touche
est
affiché à côté du symbole RPE. L'interruption du contrôle est confirmée par l'information
« FAIL » sur l'écran.
-
Vous trouverez les résistances typiques des câbles dans le tableau 1.
Section du câble
Longueur
1,0 mm²
1,5 mm²
2,5 mm²
5m
0,1 Ω
0,06 Ω
0,04 Ω
10 m
0,2 Ω
0,12 Ω
0,08 Ω
25 m
0,5 Ω
0,3 Ω
0,2 Ω
50 m
1,0 Ω
0,6 Ω
0,4 Ω
tableau 1:Résistances du conducteur de protection en fonction de la longueur et de la section
du câble
-
Suite au contrôle RPE réussi, la mesure de la résistance d'isolement est effectuée automatiquement.
- En fonction du dépassement ou sous-dépassement de la valeur limite, un symbole
ou
est affiché à côté du symbole RISO.
- Suite au contrôle RISO réussi, le conducteur extérieur (L) et le conducteur neutre (N) sont
contrôler en vue d'une rupture de fil et d'un court-circuit. Un contrôle de rupture de fil et un
essai en court-circuit réussis sont affichés au moyen d'un symbole à
côté des symboles
et « Good ».
- Le symbole « PASS » confirme que la procédure de contrôle entière est réussie.
-
Si le contrôle de rupture de fil et l'essai en court-circuit ne sont pas réussis, un des symboles
suivants est affiché au lieu du symbole « Good » :
- le symbole « OPEN » :
confirme qu'il y a une rupture de fil du conducteur extérieur (L) ou du conducteur neutre (N)
- le symbole « Shor » :
Confirme qu'il y a un court-circuit entre le conducteur extérieur (L) et le conducteur
neutre (N)
voir figure 6a: Contrôle des câbles de connexion d'appareil avec fiche mâle CEI
Remarque concernant la mesure de la résistance du conducteur de protection:
- Alternativement, la mesure de la résistance du conducteur de protection RPE peut être effectuée en tant que mesure permanente (max. 2 x 90 secondes). Pour cela, appuyez sur la
touche 2 pour > 5 secondes environ jusqu'à ce que le symbole soit affiché sur l'écran.
Agitez le câble de raccordement de l'objet de contrôle sur toute sa longueur afin de détecter
un point faible ou une rupture du conducteur de protection. L'appareil BENNING ST 725
saisit de manière continue la valeur mesurée actuelle sur l'écran et enregistre la valeur
maximale dans la mémoire. Appuyez encore une fois sur la touche 2 afin d'effectuer la
mesure avec polarité inversée. Appuyez encore une fois sur la touche 2 afin d'afficher la
valeur maximale RPE sur l'écran et de continuer le contrôle comme décrit au chapitre 9.3.1.
9.3.2Contrôle d'enrouleurs de câble, de câbles de distribution multiple et de rallonges
électriques
- Enlevez la fiche du câble d'alimentation secteur de la prise K de l'appareil BENNING ST 725.
- Raccordez le câble d'alimentation CEI (câble adaptateur CEI) compris dans le contenu de
l'emballage à la fiche mâle CEI J de l'appareil BENNING ST 725.
01/ 2015
BENNING ST 725
54
F
- Connectez le câble à contrôler à la prise de test 1 et à la fiche mâle de sécurité du câble
d'alimentation CEI.
- Appuyez sur la touche 2 afin de commencer le contrôle automatique.
- La suite du contrôle correspond à la procédure de contrôle du chapitre 9.3.1.
voir figure 6b: contrôle de câbles, de câbles de distribution multiple et d'enrouleurs de câble
Remarque concernant le contrôle des lignes triphasées :
-
Enlevez la fiche du câble d'alimentation secteur de la prise K de l'appareil
BENNING ST 725.
-
La ligne triphasée doit être raccordée à la prise de test 1 de l'appareil BENNING ST 725
au moyen des adaptateurs de mesure passifs en option ( 044122, 044123 ou 044147 ).
-
Branchez le connecteur de sécurité 4 mm du câble d'essai avec pince crocodile à la douille
de sécurité 9 et établissez une connexion avec le conducteur PE du coupleur CEE.
2 afin de lancer le contrôle automatique pour la mesure des
-
Appuyez sur la touche
valeurs RPE, RISO et IEA.
9.4 Contrôle des appareils triphasés
9.4.1 Contrôle passif
Pour le contrôle passif d'appareils triphasés ( l'objet de contrôle n'est pas en service ), débranchez le câble d'alimentation secteur de l'appareil BENNING ST 725. Utilisez les adaptateurs de
mesure passifs ( 044122, 044123 et 044147 ) pour lesquels les conducteurs extérieurs L1, L2 et
L3 du coupleur CEE à cinq broches sont pontés. La mesure du courant du conducteur de protection / courant de contact est effectuée au moyen de la mesure alternative du courant de fuite.
Le contrôle est effectué comme il est décrit pour les appareils triphasés aux chapitres 9.1 et 9.2
( l'appareil BENNING ST 725 en mode d'alimentation par piles, sans alimentation par secteur ).
voir figure 7a : contrôle d'appareils triphasés au moyen d'adaptateurs de mesure passifs
9.4.2 Contrôle actif
Le contrôle actif d'appareils triphasés est effectué sous conditions de fonctionnement au moyen
des adaptateurs de mesure CEE de 16 A, à cinq broches, actifs ( 044140 ) ou de 32 A, à cinq
broches, actifs ( 044141 ) en option.
- Branchez la fiche CEE de l'objet de contrôle au coupleur CEE de l'adaptateur de mesure et
branchez la fiche CEE de l'adaptateur de mesure à un réseau d'alimentation protégé (3 x
400 V, N, PE, 50 Hz, 16 A/ 32 A).
- Branchez le câble de signal de mesure de l'adaptateur de mesure à la prise d'alimentation
secteur K de l'appareil BENNING ST 725.
- Branchez le connecteur de sécurité 4 mm du câble d'essai à la douille de sécurité 4 mm 9
de l'appareil BENNING ST 725 au moyen d'une pince crocodile et établissez une connexion
avec une pièce métallique de l'objet de contrôle.
- Assurez-vous que l'objet de contrôle est protégé et allumez l'objet de contrôle.
7 afin de lancer le contrôle automatique.
- Appuyez sur la touche
- Au cas où une tension de contact serait présente à la pièce métallique de l'objet de contrôle,
la mesure est interrompue et l'avertissement suivant est affiché sur l'écran :
-
Sinon, la mesure de la résistance du conducteur de protection RPE est lancée avec inversion
automatique de la polarité et la valeur mesurée maximale des deux mesures est affichée sur
l'écran environ.
- Suite au contrôle RPE réussi la mesure du courant du conducteur de protection ILEAK est
effectuée en tant que mesure permanente pendant 30 secondes. Appuyez sur la touche
7 il est possible de terminer prématurément la mesure.
- Si le courant du conducteur de protection est inférieur à la valeur limite admissible, le symbole
est affiché à côté du symbole « ILEAK ».
01/ 2015
BENNING ST 725
55
F
-
Le contrôle est considéré comme réussi, si le symbole « PASS » est affiché sur l'écran.
-
7 serait appuyée sans connexion préalable de l'adaptateur de
Au cas où la touche
mesure à l'appareil BENNING ST 725, l'avertissement suivant est affiché sur l'écran :
voir figure 7b : contrôle d'appareils triphasés au moyen d'adaptateurs de mesure actifs
( mise en place isolée de l'objet de contrôle )
Remarque :
- La mesure du courant du conducteur de protection est effectuée au moyen d'un transformateur de courant dans le conducteur de protection de l'adaptateur de mesure ( 044140 ou
044141 ) en utilisant la mesure directe. L'objet de contrôle doit être mis en place de manière
isolée. Aucune partie de l'objet de contrôle ne doit être connectée au potentiel de terre.
Sinon, des courants de fuite par rapport à la terre pourraient influencer le résultat de mesure.
- S'il n'est pas possible de mettre en place l'objet de contrôle de manière isolée, la mesure du
courant du conducteur de protection peut être effectuée au moyen de la pince de courant
de fuite BENNING CM 9 ( 044065 ) en utilisant la mesure du courant différentiel. Pour cela,
il faut mettre en service l'objet de contrôle au moyen des adaptateur de mesure en option
( 044127 ou 044128 ) et pincer tous les conducteurs actifs ( L1, L2, L3 et N ) au moyen de
la pince de courant de fuite. Le courant du conducteur de protection est mesuré par la pince
de courant de fuite BENNING CM 9 au moyen de la mesure du courant différentiel.
9.5 Contrôle de dispositifs différentiels «RCD » de 30 mA
L'appareil BENNING ST 725 permet de mesurer le temps de déclenchement des dispositifs
différentiels fixes « RCD » et des dispositifs différentiels portatifs «PRCD » avec un courant de
défaut nominal de 30 mA. Pendant le déroulement de contrôle automatique, le temps de déclenchement du courant de défaut nominal simple ( polarité initiale de 0° / 180° ) et celui du courant
de défaut nominal quintuple ( polarité initiale de 0° / 180° ) sont mesurés.
En générant un courant de défaut de 30 mA, il est prouvé que le dispositif différentiel « RCD
» déclenche dès que le courant de défaut nominal est atteint. Au cas où la valeur limite de la
tension de contact maximale de 50 V serait dépassée, le symbole « UB > 50 V » est affiché sur
l'écran et le contrôle est arrêté.
Avant de contrôler un dispositif différentiel « RCD », il faut débrancher le
connecteur de sécurité 4 mm du câble d'essai de la prise de test 9.
La mesure peut être influencée par :
-une tension éventuelle entre le conducteur de protection de la prise de
courant de sécurité et la terre
- des courants de fuite dans le circuit derrière le dispositif différentiel « RCD »
- d'autres dispositifs de mise à la terre
- des équipements électriques connectés derrière le dispositif différentiel «
RCD » qui causent une prolongation du temps de déclenchement (par ex.
condensateurs ou machines rotatives)
9.5.1 Contrôle de dispositifs différentiels fixes « RCD »
- Raccordez le câble d'alimentation CEI à la fiche mâle CEI J de l'appareil BENNING ST 725.
- Branchez la fiche mâle de sécurité à une prise de courant de sécurité protégée par le dispositif différentiel « RCD » à contrôler et allumez le dispositif différentiel « RCD ».
6 afin de lancer le contrôle du dispositif différentiel « RCD ».
- Appuyez sur la touche
- Au cas où le symbole « rESET » resterait sur l'écran et les symboles « LN » et « LE » clignoteraient, tournez la fiche mâle de sécurité dans la prise de courant de sécurité sur 180°
6 afin de lancer le contrôle.
et appuyez de nouveau sur la touche
- Rallumez le dispositif différentiel « RCD » chaque fois que le symbole « rESEt » est affiché
01/ 2015
BENNING ST 725
56
F
sur l'écran.
L'appareil BENNING ST 725 génère un courant de défaut de 30 mA avec une polarité initiale
positive (0°) ou négative (180°). Le dispositif différentiel « RCD » déclenche et la mesure des
temps de déclenchement du courant de défaut nominal simple est effectuée.
- Si le temps de déclenchement est inférieur à la valeur limite ( 200 ms ), le symbole
apparaît à côté du temps de déclenchement.
- Ensuite, l'appareil BENNING ST 725 génère un courant de défaut de 150 mA avec une polarité initiale positive (0°) ou négative (180°). Le dispositif différentiel « RCD » déclenche et la
mesure des temps de déclenchement du courant de défaut nominal quintuple est effectuée.
- Si le temps de déclenchement est inférieur à la valeur limite ( 40 ms ), le symbole
apparaît à côté du temps de déclenchement.
- Le contrôle est considéré comme réussi, si le symbole « PASS » est affiché sur l'écran.
-
voir figure 8a : contrôle de dispositifs différentiels fixes « RCD » ( IΔN 30 mA )
Remarque :
- En générant un courant de défaut de 30 mA, il est prouvé que le dispositif différentiel
« RCD » déclenche dès que le courant de défaut nominal est atteint. Au cas où la valeur
limite de la tension de contact maximale de 50 V serait dépassée, le symbole « UB > 50 V »
est affiché sur l'écran et le contrôle est arrêté.
c
La mesure peut être influencée par :
- une tension éventuelle entre le conducteur de protection de la prise de
courant de sécurité et la terre
- des courants de fuite dans le circuit derrière le dispositif différentiel « RCD »
- d'autres dispositifs de mise à la terre
- des équipements électriques connectés derrière le dispositif différentiel
« RCD » qui causent une prolongation du temps de déclenchement (par ex.
condensateurs ou machines rotatives)
9.5.2 Contrôle de dispositifs différentiels portatifs « PRCD »
- Insérez la fiche du câble d'alimentation secteur à la prise K de l'appareil BENNING ST 725.
- Insérez la fiche mâle de sécurité dans une prise de courant de sécurité 230 V. Lorsque la
tension du secteur est appliquée, la mesure de tension est lancée automatiquement.
- En fonction de la position du conducteur extérieur ( à droite ou à gauche ) de la prise de
courant de sécurité, les potentiels de tension entre les bornes L, N et PE sont affichés sur
l'écran pour 2 secondes environ.
ou
- Raccordez le dispositif différentiel portatif « PRCD » à la prise de test 1 de l'appareil
BENNING ST 725.
- Raccordez le câble d'alimentation CEI compris dans le contenu de l'emballage à la fiche
mâle CEI J de l'appareil BENNING ST 725 et raccordez la fiche mâle de sécurité au dispositif différentiel portatif « PRCD » comme l'illustre la figure 7b. La sortie de câbles doit être
orienté vers l'écran !
6 afin d'appliquer la tension secteur à la prise de test 1. Les
- Appuyez sur la touche
symboles « rCd » et « rESEt » sont affichés sur l'écran.
- Allumez le dispositif différentiel portatif « PRCD ».
- Au cas où le symbole « rESET » resterait sur l'écran et les symboles « LN » et « LE » clignoteraient, vérifiez si le dispositif différentiel portatif « PRCD » est allumé. S'il est bien allumé,
tournez la fiche mâle de sécurité du câble d'alimentation CEI dans le dispositif différentiel
portatif « PRCD » sur 180° et lancez le contrôle de nouveau.
- Rallumez le dispositif différentiel portatif « PRCD » chaque fois que le symbole « rESEt » est
affiché sur l'écran.
01/ 2015
BENNING ST 725
57
F
-
L'appareil BENNING ST 725 génère un courant de défaut de 30 mA avec une polarité initiale
positive (0°) ou négative (180°). Le dispositif différentiel portatif « PRCD » déclenche et la
mesure des temps de déclenchement du courant de défaut nominal simple est effectuée.
- Si le temps de déclenchement est inférieur à la valeur limite ( 200 ms ), le symbole
apparaît à côté du temps de déclenchement.
- Ensuite, l'appareil BENNING ST 725 génère un courant de défaut de 150 mA avec une
polarité initiale positive (0°) ou négative (180°). Le dispositif différentiel portatif « PRCD »
déclenche et la mesure des temps de déclenchement du courant de défaut nominal quintuple est effectuée.
- Si le temps de déclenchement est inférieur à la valeur limite ( 40 ms ), le symbole
apparaît à côté du temps de déclenchement.
- Le contrôle est considéré comme réussi, si le symbole « PASS » est affiché sur l'écran.
Remarque :
Certains types de dispositifs différentiels portatifs « PRCD » ( PRCD-S, PRCD-K ) coupent L,
N et PE sur tous les pôles et, par conséquent, l'appareil BENNING ST 725 ne détecte aucune
connexion entre la fiche mâle CEI J et la prise de test 1. Le contrôle de ces types de dispositifs
différentiels portatifs « PRCD » doit être effectué conformément au chapitre 9.5.1 « Contrôle de
dispositifs différentiels fixes RCD » en branchant le dispositif différentiel portatif « PRCD » à une
prise secteur qui n'est pas protégée par un autre dispositif différentiel « RCD ».
voir figure 8b : contrôle de dispositifs différentiels portatifs « PRCD » ( IΔN 30 mA )
10. Mémoire de valeurs mesurées
L'appareil BENNING ST 725 est pourvu d'une mémoire de valeurs mesurées afin d'enregistrer
les valeurs mesurées de 999 objet de contrôle.
10.1 Enregistrer les valeurs mesurées
- Dès que le déroulement de contrôle est fini et le résultat est disponible, appuyez sur la
M afin d'enregistrer les valeurs mesurées affichées au premier emplacement
touche
de mémoire libre. L'enregistrement est confirmé en affichant le symbole « STORE » et le
M restera bloquée
numéro de l'emplacement de mémoire sur l'écran 8. La touche
jusqu'à ce qu'un autre contrôle soit effectué afin d'éviter un double enregistrement. Avec
chaque nouveau enregistrement, le numéro de l'emplacement de mémoire sera augmenté
automatiquement d'un emplacement de mémoire. Dès que tous les 999 emplacements de
mémoire sont occupés, le symbole « FULL » est affiché sur l'écran 8.
10.2 Appeler les valeurs mesurées
N afin d'appeler les valeurs mesurées enregistrées ainsi que
- Appuyez sur la touche
leurs numéros d'emplacement de mémoire correspondants. Le symbole « RECALL » est
affiché sur l'écran 8.
N encore une fois afin de passer au prochain emplacement de
- Appuyez sur la touche
mémoire.
M
- Appuyez sur la touche
afin de passer au dernier emplacement de mémoire.
10.3 Supprimer la mémoire de valeurs mesurées
N afin d'appeler les valeurs mesurées enregistrées ainsi que
- Appuyez sur la touche
leurs numéros d'emplacement de mémoire correspondants. Le symbole « RECALL » est
affiché sur l'écran 8.
M
- Afin de supprimer la mémoire de valeurs mesurées entière, appuyez sur les touches
N jusqu'à ce que le compteur soit remis à zéro et le symbole « no dAtA » est affiché
et
8.
sur l'écran
01/ 2015
BENNING ST 725
58
F
10.4 Lecture de la mémoire de valeurs mesurées au moyen de l'interface USB
Afin de lire les valeurs mesurées au moyen de l'interface USB P, installez sur votre PC une fois
seulement le pilote matériel du répertoire « Treiber-driver » et ensuite le logiciel de téléchargement du répertoire « Programm-program » disponibles sur le CD-ROM fourni.
Pour le téléchargement des données, procédez comme suit :
- Enlevez tous les câbles de raccordement ainsi que tous les objets de contrôle de l'appareil
BENNING ST 725.
- Raccordez l'appareil BENNING ST 725 à votre PC au moyen du câble de raccordement
USB.
- Le pilote matériel s'installe automatiquement sur un port COM libre et confirme que le nouveau matériel peut être utilisé.
- Le port COM utilisé est affiché dans le gestionnaire de périphériques de votre système.
- Lancez le logiciel « BENNING Datalogger », cliquez sur « Tools » ( Options ), puis sur
« Refresh Ports » ( Misa à jour des ports ) et sélectionnez le port COM correspondant.
Ensuite, cliquez sur « Download » ( « Téléchargement » ).
N de l'appareil BENNING ST 725 pour cinq secondes environ
- Appuyez sur la touche
jusqu'à ce que le téléchargement soit effectué et la mémoire de valeurs mesurées entière
soit lue.
- Les valeurs mesurées peuvent être enregistrées en tant que fichier (*.csv) ou (*.txt).
- Cliquez sur « Open » ( Ouvrir ) afin d'ouvrir les valeurs mesurées par exemple au moyen
d'un tableur.
10.5 Imprimer les valeurs mesurées
- Afin d'utiliser la fonction d'impression, raccordez l'imprimante BENNING PT 1 (044150) en option au port PS/2 L de l'appareil BENNING ST 725 au moyen du câble sériel de l'imprimante.
- Dès que le déroulement de contrôle est fini et le résultat est disponible ou un résultat a
M, vous pouvez appuyez sur la touche
afin
été appelé au moyen de la touche
d'imprimer un document d'essais.
- À chaque commande d'impression, l'appareil BENNING ST 725 allume et éteint l'imprimante
BENNING PT 1 automatiquement.
Prüfung gemäss DIN VDE 0701-0702
Ident-Nr.
__________________
Prüfobjekt
__________________
Speicherplatz-Nr.
001
Datum
17.07.2014
Prüfung
RPE:
RISO:
UISO:
IPE:
Messwert
Grenzwert
0,10 Ω
>19,99 Ω
500 V
< 0,15 mA
0,3 Ω
1,0 MΩ
Prüfergebnis
3,50 mA
bestanden
Prüffirma
______________________
Prüfer
______________________
Exemple d'un rapport d'essais
10.6 Réglage de l'heure et de la date
L'appareil BENNING ST 725 est pourvu d'un horloge en temps réel intégré afin d'ajouter un
horodateur à chaque enregistrement.
Afin de régler la date et l'heure, procédez comme suit :
2 et
3 en même
- Éteignez l'appareil BENNING ST 725 en appuyant sur les touches
temps.
N et appuyez sur les touches
2 et
3 en même
- Maintenez appuyée la touche
temps.
- La date et l'heure sont affichées comme suit :
MM.DD = mois (1-12).jour (1-31)
YYYY = année
HH.mm = heures (0-23).minutes (0-59)
SS = secondes (0-59)
2 afin de sélectionner un champ de l'heure / de la date.
- Appuyez sur la touche
- Dès que le champ clignote, ce champ peut être réglé.
M ou
N afin d'augmenter ou de diminuer la valeur réglée.
- Appuyez sur la touche
À chaque modification, le champ des secondes est remis à zéro.
2 et
3 en même temps afin d'enre- Éteignez l'appareil en appuyant sur les touches
gistrer le réglage.
01/ 2015
BENNING ST 725
59
F
11.Entretien
Il faut absolument mettre le BENNING ST 725 hors tension avant de l‘ouvrir !
Danger électrique !
Seuls des électrotechniciens devant prendre des mesures particulières pour éviter les
accidents sont autorisés à procéder à des travaux sur le BENNING ST 725 ouvert sous tension.
Procédure à suivre pour mettre le BENNING ST 725 hors tension avant de l‘ouvrir:
- Éteignez l'appareil de contrôle.
- Déconnectez tous les câbles de connexion de l'appareil.
11.1
Rangement sûr de l’appareil
Dans certaines conditions, la sécurité de travail avec le BENNING ST 725 peut ne plus être
garantie ; par exemple dans les cas suivants :
- dommages visibles sur le boîtier,
- erreurs lors des mesures,
- conséquences visibles d’un stockage prolongé dans des conditions inadéquates et
- conséquences visibles de conditions difficiles de transport.
Dans ces cas, il faut mettre le BENNING ST 725 immédiatement hors circuit, le retirer du point
de mesure et le protéger de manière à ne plus être utilisé.
11.2 Nettoyage
Nettoyez l’extérieur du boîtier avec un chiffon propre et sec (seule exception : les chiffons de
nettoyage spéciaux). N’utilisez ni solvants ni produit de récurage pour nettoyer l’appareil. Veiller
absolument à ce que le logement et les contacts des piles ne soient pas souillés par de l’électrolyte de pile.
Dans ce cas ou en cas de dépôts blancs à proximité des piles ou dans le logement, nettoyez-les
également avec un chiffon sec.
11.3 Remplacement des piles
Il faut absolument mettre le BENNING ST 725 hors tension avant de l‘ouvrir !
Danger électrique !
Le BENNING ST 725 est alimenté par six piles incorporées de 1,5 V/ AA (IEC LR 06).
Il est nécessaire de remplacer les piles quand le symbole de piles 8 apparaît sur l’affichage.
Remplacez les piles de la manière suivante (voir fig. 9):
- Éteignez l'appareil BENNING ST 725.
- Posez l'appareil BENNING ST 725 sur la face avant et dévissez la vis du couvercle du
compartiment à piles.
- Soulevez le couvercle du compartiment à piles (au niveau des cavités du boîtier) de la partie
inférieure de l'appareil.
- Enlevez les piles déchargées du compartiment à piles.
- Insérez les piles dans le compartiment à piles aux positions correspondantes (veillez à la
bonne polarité).
- Encliquetez le couvercle du compartiment à piles dans la partie inférieure du boîtier et vissez
la vis.
voir figure 9:
remplacement des piles/ fusibles
Apportez votre contribution à la protection de l‘environnement! Ne jetez pas
les piles dans les ordures ménagères. Vous pouvez les remettre à un point de
récupération des piles usées ou des déchets spéciaux. Veuillez vous informer
auprès de votre commune.
11.4 Remplacement des fusibles
Il faut absolument mettre le BENNING ST 725 hors tension avant de l‘ouvrir !
Danger électrique !
L'appareil BENNING ST 725 est protégé contre des surcharges par deux fusibles intégrés (16 A,
250 V, F, D = 5 mm, L = 20 mm) (10019440).
Remplacez les fusibles de la manière suivante (voir fig. 9):
- Éteignez l'appareil BENNING ST 725.
- Posez l'appareil BENNING ST 725 sur la face avant et dévissez la vis du couvercle du
compartiment à piles.
- Soulevez le couvercle du compartiment à piles (au niveau des cavités du boîtier) de la partie
inférieure de l'appareil.
- Enlevez une extrémité du fusible défectueux du porte-fusible au moyen d'un tournevis plat.
- Enlevez le fusible défectueux complètement du porte-fusible.
- Insérez le fusible neuf. N'utilisez que de fusibles nécessitant les mêmes valeurs de courant
nominal, tension nominale, puissance de coupure, caractéristique de déclenchement et
dimensions.
01/ 2015
BENNING ST 725
60
F
-
Encliquetez le couvercle du compartiment à piles dans la partie inférieure du boîtier et vissez
la vis.
voir figure 9:
remplacement des piles/ fusibles
11.5 Étalonnage
Pour conserver la précision spécifiée des résultats de mesure, il faut faire étalonner régulièrement l’appareil par notre service clients. Nous conseillons de respecter un intervalle d’étalonnage d’un an. Envoyez, pour cela, l’appareil à l’adresse suivante:
Benning Elektrotechnik & Elektronik GmbH & Co. KG
Service Center
Robert-Bosch-Str. 20
D - 46397 Bocholt
11.6 Pièces de rechange
Fusibles F 16 A, 250 V, avec une puissance de coupure ≥ 500 A, D = 5 mm, L = 20 mm, Réf.
10019440
11.7 Information sur l’environnement
Une fois le produit en fin de vie, veuillez le déposer dans un point de recyclage
approprié.
01/ 2015
BENNING ST 725
61
Benning Elektrotechnik & Elektronik GmbH & Co. KG
Münsterstraße 135 - 137
D - 46397 Bocholt
Phone: +49 (0) 2871 - 93 - 0 • Fax: +49 (0) 2871 - 93 - 429
www.benning.de • E-Mail: [email protected]