1
INSTRUCTION GUIDE
English
Congratulations! You are now the owner of a Spray Commander training system with
remote control designed for your dog’s education. Your new Spray Commander system
can be used to interrupt any of your dog’s unwanted behaviours such as running away
and chasing, stealing objects or food, digging, jumping on guests, etc. This system will
improve and strengthen dog-owner relationships because the correction is associated
with the action and not the owner. It will allow you to redirect your dog’s attention and
behaviour while promoting a healthy emotional state.
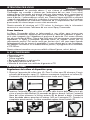
This instruction guide and enclosed CD will provide you with all the
information required to maximize the efficiency of your new Spray Commander.
How it works
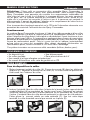
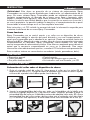
Spray Commander uses a remote control and a harmless spray collar to re-direct the
attention of the distracted or misbehaving dog, or one that has learned that obedience
is optional. It can be activated at a distance up to 85 m. In addition to having two levels
of spray to disrupt unwanted behaviours, the Spray Commander also incorporates a
sound signal for positive reinforcement. You can use it to let your dog know when the
behaviour he is engaged in is acceptable. The sound becomes a reward for your dog.
For more information on positive training, please refer to the enclosed CD.
This innovative system causes no secondary effects (fear, burns, pain).
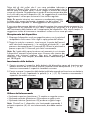
THE KIT INCLUDES
•
•
•
•
•
•
Spray device
Remote control
Adjustable collar
Can of stainfree, hypo-allergenic spray
Two 6-volt alkaline batteries
Instruction guide with warranty card and CD
PREPARATION
Adjusting the collar to the spray device
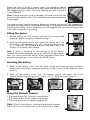
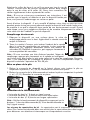
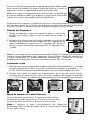
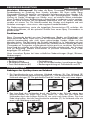
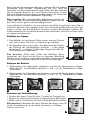
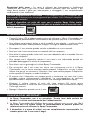
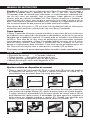
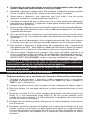
1. Remove the keeper from the black collar (A). Pass the black collar (B) through the
loops of the spray device (C). Put the keeper back on the collar (D). The curved
edge of the keeper should face inward.
A
B
C
D
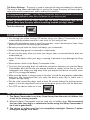
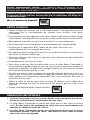
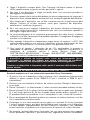
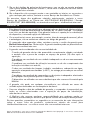
2. Feed the free end of the collar into the slot of the buckle that is closest to the Multivet
logo (A) from the back to the front. Then, thread the free end of the collar through
the outside slot (B) from the front to the back. The free end should now hang on the
outside, then thread the keeper (C). When you have completed this section, the
assembled collar looks as illustrated (D).
A
B
C
D