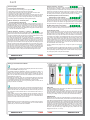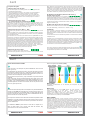
1
1
Bedienungsanleitung Version 1.2
BEDIENUNGSANLEITUNG
Version 1.3
► www.robbe.com
2-3
Wir gratulieren Ihnen, dass Sie sich für den Kauf eines HeliCommand
entschieden haben.
Kein anderes für Modell-Hubschrauber auf dem Markt befindliches System
kann sowohl die Fluglage als auch die horizontale Flugposition stabilisieren.
Ursprünglich entstammt der HeliCommand einem professionellen
Autopilot-System für kommerzielle Film- und Vermessungshubschrauber und
basiert auf mehreren neuartigen, patentrechtlich geschützten Systemen.
Das Einsatzspektrum umfasst sowohl Anfänger, die zwar mit allen Funktionen
ihres Modells vertraut sind, aber noch keine stabile Fluglage halten können,
ferner Fortgeschrittene, die ihre Fähigkeiten ausbauen und bei verringerter Stabilisierung trainieren, als auch Profis, die sich ganz auf die wichtigen
Funktionen Ihrer Flugshow konzentrieren wollen.
Als Anfänger wird Sie HeliCommand in die Lage versetzen, den Heli schweben
zu lassen, langsame Rundflüge zu machen und leichter zu trainieren.
Eines sei hier nochmals deutlich angesprochen: trotz dieses einzigartigen Systems muss der Pilot wachsam sein und sollte sich nicht zu Flugmanövern
hinreißen lassen, die Ihn oder andere in Gefahr bringen
Allen, die elektronische Hilfsmittel beim Helifliegen kategorisch ablehnen, sei hier versichert: HeliCommand wurde nicht entwickelt, um
Fluglehrer oder Schulungen zu ersetzen, sondern um effektives Weiterlernen zu
ermöglichen und sicherer zu fliegen.
2
3
4-5
HeliCommand 3A No. 8493
HeliCommand RIGID No. 8495
• Mit „Autopilot“-Funktion, stabilisiert alle horizontalen Steuer-Bewegungen:
Neigung, Geschwindigkeit, Position
• Zusatzkanal („Pilot-Kanal“) für Einstellung der Stabilisierungs-Stärke und
Umschaltung zwischen Horizontal-Modus und Positions-Modus
• Integrierter Heading-Lock-Kreisel, Taumelscheibenmischer und
Trimm-Automatik
• Zweiter Zusatzkanal („AUX-Kanal“) für Kreiselempfindlichkeit und -Modus
(Normal/ Heading Lock) oder wahlweise für die Trimm-Automatik.
• Konfigurieren ohne PC-Anschluss durch einfachen Einlern-Vorgang für fast
alle Taumelscheiben-Typen bis zu 3 Kopfservos
• Failsafe bei Funk-Ausfall (bei PPM /FM) in Positions-Stabilisierung
und pitch auf ‚hold‘
• Für Verbrenner- und Elektro-Hubschrauber
• Einsetzbar sowohl im Freien als auch in der Halle
• PC-Adapter, als Zubehör erhältlich, für weitere Einstellungen wie:
Erforderliche Justage bei HR4-Anlenkung, Option Trimmautomatik, FreilaufFunktion für Vorwärtsflug, Optimierungen für Autopilot und Heck-Kreisel etc.
.
• Besitzt alle Merkmale von HeliCommand 3A und 3D, sowie zusätzlich:
• RIGID-Modus zur Stabilisierung von paddellosen Rotorköpfen, hocheffektiv
gegen Aufbäumen und Unterschneiden des Modells bei hoher
Geschwindigkeit und Windböen.
• erübrigt das Neutral-Trimmen der Roll- und Nick-Funktion.
• RIGID-Modus stabilisiert sowohl (2 bis Mehrblatt-) Hubschrauber mit
paddellosem Kopf als auch herkömmliche Hubschrauber mit Paddelstange.
• Über den Pilot-Kanal kann gewählt werden: Horizontal-Modus,
Positions-Modus, RIGID-Modus.
• RIGID- und Horizontal- Modus funktionieren auch ohne Sichtkontakt des
optischen Sensors zum Boden, so dass bei Verzicht auf den
Positions-Modus keine Öffnung im Hubschrauber-Rumpf erforderlich ist.
• elektronische Linearisierung gegen mechanische Verspannungen
(Winkelverschiebung) für H4-Anlenkung
• Zur Einstellung des RIGID-Modus ist der PC-Adapter zwingend erforderlich
(No. 84942000). Ohne PC-Adapter sind werkseitig die Parameter des
HeliCommand 3D voreingestellt.
HeliCommand 3D No. 8494
• Besitzt alle Merkmale der Grundversion „3A“ und zusätzlich:
• Horizontal-Stabilisierung für Rückenflug
• Erweiterte Einstellmöglichkeiten über PC-Adapter (No. 84942000)
(zusätzliche Experten-Einstellungen zur Optimierung des 3D-Modus
und Steuerverhaltens)
4
5
6-7
Inhalt
Tipps zum Fliegen
LED-Anzeige
Erläuterung der Möglichkeiten
Pilot-Kanal
Heck-Kreisel
Trimm-Automatik
Failsafe
Höhere Versionen des HeliCommand
8
9
10
11
12
12
13
Kurzanleitung - Das Wichtigste
14
Einbau
16
Heckrohr erden
Einbau-Ort
Montage am Heckrohr
Hinweise bei Verbrenner-Motoren
Einstellung
Bei Elektroantrieb
Factory-Reset
Sender einstellen
Sender-Neutralstellungen einlernen
HeliCommand konfigurieren
Einstell-Modus
Einstellung HeliCommand RIGID
17
17
18
19
22
22
22
22
22
23
23
26
Erstflug
28
Einfliegen
Bei Verbrenner-Hubschraubern: Vibrationstest
Trimmen
28
28
30
6
Starten und Landen
Schweben
Steuerausschläge
Wirkung des Opto-Sensors
Bei Dunkelheit oder bei Überfliegen optisch glatter Flächen
Hallen-Flug
Kontrast-Prüfung
Verwendung der Versionen
HeliCommand 3A
HeliCommand 3D oder aufwärts
3D-Manöver
HeliCommand-RIGID
Hinweise
Für geübte Piloten: Unterschiede im Handling
Einsatzbereich
32
32
32
32
33
33
33
33
34
34
34
34
34
34
35
35
Vorsichtsmaßnahmen
Wir empfehlen
36
36
Haftungsausschluss
Gewährleistung
37
37
Fehlerbehebung
38
Technische Daten
Lieferumfang
Zubehör
Service
40
40
41
41
Impressum
41
HeliCommand-Funktionsmerkmale
(nach Gruppen der Einstellsoftware geordnet)
42
7
8-9
LED-Anzeige
Erläuterung der Möglichkeiten
Grundsätzlich gibt es 3 verschiedene Betriebsarten:
LED rot = Autopilotfunktion abgeschaltet
LED gelb = Horizontal-Modus
LED grün = Positions-Modus
Horizontal-Modus „gelb
gelb“: Stellt den Hubschrauber bei Loslassen der Roll und
Nick Steuergeber in Horizontallage. Dies funktioniert absolut unabhängig von
der optischen Bodenbmeschaffenheit. Bei Hallenflug ist entweder dieser Modus zu wählen oder unbedingt der Hinweis auf Seite 33 zu beachten.
Positions-Modus „grün“: Zusätzlich zum Horizontal-Modus wird auch die Position des Modells stabilisiert. Die stärkste Stabilisierung, für „automatisches“
Schweben und langsame Rundflüge, arbeitet am effektivsten in ca. 0,5 ... 2
Meter Höhe über natürlichem Untergrund (Gras, Steine etc.). Bei Loslassen
der Roll- und Nick-Steuergeber wird der Hubschrauber aktiv auf Stillstand abgebremst. Lediglich die Pitch /Gasfunktion muss weiterhin gesteuert werden.
Ein eventuelles langsames Abdriften des Modells in der Schwebe-Position
kann sehr einfach von Hand korrigiert werden. Für langsame Rundflüge in Bodennähe lässt sich mit kleinem Nick-Ausschlag eine Vorwärtsgeschwindigkeit
einstellen und mit dem Heck-Knüppel die Richtung wie beim Auto lenken.
Für rasche Rundflüge oder in Höhen oberhalb ca. 5 m würde dieser Modus
wegen der eigenen Steuer-Aktionen des Autopiloten eher stören; hierfür ist auf
Horizontal-Modus „gelb“ umzuschalten.
RIGID-Modus: Ist eine vierte Betriebsart im HeliCommand RIGID: Lagehaltende Stabilisierung („für paddellose Rotorköpfe“), die parallel zu den vorstehend
beschriebenen 3 Modi arbeitet. Siehe Seite 5
Zusätzlich zu den vorstehend beschriebenen Autopilot-Funktionen bietet der
HeliCommand die weiteren Funktionen Taumelscheiben-Mischer,
Heckrotorkreisel und Trimm-Automatik.
8
9
10-11
Pilot-Kanal
Heck-Kreisel
Ein Anschluss dieses Zusatzkanals wird empfohlen, um im Flug zwischen den
3 Modi zu wählen, als auch die gewünschte Stabilisierungs-Stärke einzustellen. Es empfiehlt sich ein Schieberegler oder ein 3-Stufen-Schalter mit wählbaren Ausgabewerten zu verwenden. Je nach Modell muss die Empfindlichkeit
angepasst werden.
Wird der Pilot-Kanal nicht am Empfänger angeschlossen, so gilt eine Voreinstellung, die werksseitig auf Positions-Modus mit +70% eingestellt ist, sich für
viele Modelle als Grundeinstellung eignet und über den PC-Adapter beliebig
geändert werden kann.
Der HeliCommand besitzt einen integrierten Piezo-Kreisel, der wahlweise in
Normal- oder Heading-Lock-Modus betrieben werden kann.
Die Empfindlichkeitseinstellung und Umschaltung (Heading-Lock / Normal)
erfolgt über einen zweiten Zusatzkanal „AUX-Kanal“.
Wird der AUX-Kanal nicht am Empfänger angeschlossen, so wirkt die interne
Voreinstellung, die werkseitig auf ca. +65% Heading Hold festgelegt ist und
mittels des PC-Adapters geändert werden kann.
Bei Tendenz zum Pendeln: schnelleres Heckservo verwenden, oder die
Empfindlichkeit verringern (AUX-Kanal oder PC). Der Kreisel eignet sich auch
für schnelle Digitalservos.
Per PC-Adapter sind weitere Einstellungen möglich, wie z.B Wegbegrenzung
und Pitch-zu-Heck-Mischung (die hinter dem Kreisel eingemischt wird und
daher auch bei Heading-Lock funktioniert); bei den Versionen 3D und RIGID
zusätzlich Experten-Einstellungen, wie z.B. Delay (Einrast-Verhalten) und
Haltebereich.
Alternativ zum integrierten Kreisel kann man einen externen Kreisel direkt am
Empfänger anschließen. Dabei ist folgendes unbedingt zu beachten:
1. Es dürfen keine Drehraten schneller als 400°/s vorkommen, sonst besteht
Gefahr erheblicher Störungen.
2. Wird später doch der interne Kreisel benutzt, so müssen vorher eventuelle
interne Auto-Trimmwerte gelöscht und die Kreisel-Wirk-Richtung geprüft
werden.
Schieber weiter zur Mitte vermindert die Empfindlichkeit
und macht dieAutopilot-Korrekturen langsamer.
Gleichzeitig lässt sich dann der Autopilot schon mit
kleineren Steuer-Ausschlägen von Hand übersteuern.
10
11
12-13
Trimm-Automatik
Höhere Versionen des HeliCommand
Empfehlenswert, aber nicht zwingend erforderlich. Funktioniert unabhängig
vom Autopilot und ist eine wesentliche Erleichterung für Anfänger und Profis.
Hierzu benötigt man am Sender auf einem Zusatzkanal eine Taste oder einen
Kippschalter mit rückfedernder Moment-Funktion (bei manchen Sendern kann
hierzu auch der Lehrer-Schalter umprogrammiert werden). Der AUX-Kanal
muss per PC auf die Trimm-Funktion konfiguriert werden. Während des Fluges
genügt ein kurzer Knopfdruck, um automatisch die Trimmung für Roll, Nick und
Gier zu erledigen. Dies bleibt gespeichert und kann beliebig wiederholt werden.
Der Automatik genügen ca. 8 Sekunden Schwebeflug, um korrekte Trimmwerte zu ermitteln. Diese werden bei Tastendruck sofort aktiviert. Die Trimmautomatik verbessert auch die Performance des eingebauten Heck-Kreisels, falls
der nötige neutrale Anstellwinkel des Heckrotors nicht gut justiert ist.
HeliCommand 3D
Zur Aktivierung wird per PC-Adapter der AUX-Kanal als Trimm-Eingang
konfiguriert. (Der Heck-Kreisel-Eingang wird hierfür geopfert, was aber mit
PC-Adapter gut möglich ist, da dort die Kreisel-Empfindlichkeit einstellbar ist).
Die Trimmung wird ausgelöst durch Wechsel des AUX-Signal auf + 100%
(> ca. 60%). Die gesendete Funktion ist an der LED durch rotes Flimmern
erkennbar (wenn zugeordnet).
Der Trimm-Kanal darf nicht durch andere eventuell im Sender programmierten
Geber-Aktionen belegt sein und unbemerkt ausgelöst werden können, und soll
nur im Flug betätigt werden (nicht zu verwechseln mit der SET-Taste).
Löschen der internen AutoTrimm-Werte: erfolgt durch Aufruf des Einstellmodus (Seite 23) und dann neu Einschalten.
Stabilisiert sowohl Normalfluglage als auch Rückenfluglage; in Rückenfluglage
eingeschränkt auf Horizontal-Stabilisierung („gelb“), weil die Positions-Haltung
(„grün“) eine Sichtverbindung vom CCD-Sensor zum Boden benötigt.
Dies genügt, um Rückenschweben und Kunstflug erheblich zu erleichtern.
Bei CCD-Sensor-Richtung zum Himmel sind zwar Entstörungen gegen optische Störeinflüsse vorgesehen. Sicherheitshalber sollte der Stabilisierungsmodus zum Kunst- oder Rückenflug stets vorher von „grün“ auf „gelb“ umgeschaltet werden.
Dies ist besonders für Hallenflug wichtig! (Wie auch bei raschem Rundflug
oder Flug in großen Höhen.)
Weitere wichtige Hinweise: siehe „Tipps zum Fliegen“ Seite 32
HeliCommand RIGID
Für Rotorköpfe ohne Paddelstange ist nur der HeliCommand RIGID zulässig
und nur im aktivierten RIGID-Modus. Andernfalls könnte zwar unter Umständen
das Schweben funktionieren, aber es besteht die Gefahr, dass durch erhöhte
Wende-Raten eine interne Sensor-Übersteuerung mit erheblicher Störung des
Horizontal-Modus auftritt!
Alle Einstellmöglichkeiten sind über den PC-Adapter erreichbar und in der
HeliCommand-Einstellsoftware ausführlich erklärt, sofern man den Gerätetyp
HeliCommand RIGID ausgewählt hat. Ohne Einstellung per PC-Adapter verhält sich der HeliCommand RIGID wie der „HeliCommand 3D“ (Seite 27).
HeliCommand Profi
Failsafe
Bei FM / PPM wird ein Funk-Ausfall unverzögert durch folgende Aktionen
überbrückt: Roll, Nick, Gier auf neutral, Pitch auf letzte empfangene Stellung,
Stabilisierung auf Positionsmodus 65%.
Funk-Störungen kann das Failsafe nur teilweise eliminieren; für optimale Sicherheit empfehlen wir PCM-Anlagen.
Für besonders hochwertige Modellhubschrauber, sowie für industrielle
Hubschrauber und für kommerzielle Anwendung wie Film, Foto, und Vermessungs-Aufgaben, etc. ist die Profi-Ausführung des HeliCommand vorgesehen. Sie ist für höchste Präzision ausgelegt und besitzt weitere wesentliche
Bordinstrumente, u.a. Zusatz-Optiken zur redundanten Abdrift-Erkennung,
größere Flughöhen sowie Höhen-Stabilisierung.
Mehr Informationen unter: www.HeliCommand.com
12
13
14-15
Kurzanleitung - Das Wichtigste
Einstellung und Fliegen wurde auf größtmögliche Einfachheit ausgelegt.
Angesichts der komplexen Funktionen eines Hubschraubers sollte man sich
als „Heli-Einsteiger“ aber unbedingt von einem hubschraubererfahrenen
„Kollegen“ beim ersten Einfliegen helfen lassen.
Alle mit
markierten Stellen in der Anleitung sind besonders wichtig und
auch für Profis zu beachten!
Einbau
• Unbedingt eine elektrisch leitende Verbindung als Potentialausgleich
zwischen Heckrohr, Motorgehäuse und Chassis herstellen
• je höher der Einbau-Ort, desto ruhiger ist der Positions-Modus in
Bodennähe und desto besser die Empfindlichkeits-Einstellung.
• Einbaulage senkrecht mit ungehinderter Sicht des Sensors zum Boden und auf
sicheren Halt achten!
• wichtige Hinweise für Verbrenner-Helis und ausführliche Einbau-Tipps:
siehe Seite 19
Sender
Es dürfen keine Mischfunktionen für Nick, Roll und Heck-Servo aktiv sein,
sondern stets Einzelservo (H1)-Modus, da der HeliCommand stets mit seinem
internen Mischer arbeitet.
Einschalten
Unmittelbar nach dem Einschalten läuft im HeliCommand ein Selbsttest
(LED blitzt 8x)
Währenddessen muss der Hubschrauber waagerecht und absolut still stehen.
Rotes Dauerblinken der LED = Fehlermeldung (siehe Seite 8).
Starten
Nicht starten bevor sich die Servos bewegen lassen! Steuerprobe ist deshalb
wichtig, weil das Gas-Servo bzw. der Motorregler auch dann startbar wäre,
wenn alle anderen Servos noch kein Signal erhalten und sich nicht steuern
lassen - z.B. weil der Selbsttest noch läuft oder ein Fehler erkannt wurde.
Fliegen
Bitte grundsätzlich die Vorsichtsmaßnahmen beachten (Seite 36).
Insbesondere darf der fliegende Hubschrauber auch bei eingeschaltetem
Positions-Modus nie unbeobachtet gelassen werden, da jederzeit mit
gelegentlichem Driften oder Störeinflüssen gerechnet werden muss.
• Hallenflug: Beachten Sie unbedingt die Hinweise auf Seite 33
• Kein Akro(3D)-Flug oder Rückenlage mit der 3A-Version. Siehe Seite 34
• Modelle ohne Stabistange dürfen nur mit der RIGID-Version und nur bei
aktiviertem RIGID-Modus stabilisiert werden, siehe Seite 34
Konfigurieren
Zur Abstimmung auf Modell und RC-Anlage ist eine einmalige Konfiguration
erforderlich (Seite 23).
Außer es passt die werkseitige Einstellung (Seite 22).
• Durch Funkstörungen, Fremd-Sender, etc. verursachte Abstürze
können trotz integriertem Failsafe und der Stabilisierung nicht
100%-ig vermieden werden.
Wir empfehlen PCM-Anlagen und sorgfältige Prüfung der Antennenführung.
Auf jeden Fall müssen vor dem Erstflug sowohl die Steuer-Richtungen, als
auch die Sensor-Richtungen in allen 3 Achsen geprüft werden ! (Seite 28)
• Harte Belastungen, Vibrationen und Alterung können naturgemäß die
Genauigkeit mindern und eine Neueinstellung der werkseitigen Kalibrierung
und Temperatur-Kompensationen erfordern, um beste Genauigkeit zu erhalten.
Dies ist durch den Robbe-Service möglich.
14
15
16-17
Einbau
Heckrohr erden
Zunächst unbedingt eine elektrisch leitende Verbindung als Potentialausgleich
zwischen Heckrohr, Motorgehäuse und Chassis herstellen. Auch Carbon leitet.
Besonders der Riemenantrieb im Heckrohr wirkt wie ein ‚Bandgenerator‘.
Bei Missachtung und Kabelführung am Heckrohr können durch Funkenschlag
sogar Servos (nicht der HeliCommand) gestört werden und in Endstellung
laufen.
Einbau-Ort
Je höher der Einbau, desto ruhiger ist der Positions-Modus in Bodennähe und
die Größe der Empfindlichkeitseinstellung. Bei vielen Modellen sind günstige
Orte die Seitenwand des Heck-Servos, oder mit dem beiliegenden Montagewinkel, z.B. am Heckrohr, Heck-Servo, Chassis oder vorne im Rumpf.
Die Montagefläche soll solide sein und nicht nachgeben, um Resonanzen zu
vermeiden.
Einbaulage
Senkrecht mit CCD-Sensor nach unten. Alle 4 Orientierungs-Richtungen sind
möglich.
Freie Sicht des Sensors zum Boden
Notwendig ist eine freie Sicht für den CCD-Sensor nach unten. Der Querschnitt
des Sichtkegels ist quadratisch mit 15° x 15° Öffnung, d.h. mittig unter dem
Sensor muss ein Quadrat mit einer minimalen Seitenlänge
S = Fensteröffnung(15mm) + [0,28 * Gehäuseabstand]
frei sein (siehe Abbildung links). Haube gegebenenfalls ausschneiden. Antennenkabel oder andere Objekte dürfen keinesfalls in den Strahl kommen !
Für Einbau in geschlossenem Rumpf
Entweder eine Öffnung ausschneiden (Größe: siehe Formel oben oder Abbildung links) oder ohne Sensor-Sicht, unter Verzicht auf den Positions-Modus.
Hierzu Sensor-Fenster mit dunklem Klebeband zukleben.
Dann ist statt dem Positions-Modus nur der Horizontal-Modus aktiv.
16
17
18-19
Montage am Heck-Servo
Horizontallage
Für besseren Bodenabstand ist es vor allem bei kleinen Modellen sinnvoll, die
Einbauposition so hoch zu wählen, dass gerade noch sicherer Abstand zur
Paddelstange bleibt, auch wenn sich diese neigt.
Hierzu kann der Haltewinkel auch auf der Oberseite des Heck-Servos oder
einer anderen Auflage befestigt werden. Dort keinen Schaumstoff verwenden, sondern den Winkel starr befestigen. Alternativ den HeliCommand ohne
Winkel an das Gehäuse des Heck-Servos kleben.
Möglichst genau senkrecht, bezogen auf die Hauptrotorwelle, ausrichten!
Schräger Einbau wird wegen eines elektronischen Ausgleichs erst bei
Heck-Bewegungen bemerkbar.
Kleinst-Hubschrauber mit besonders großen Anstellwinkeln haben eine
stärkere Schräglage im Schwebeflug, um den stärkeren Heckrotor-Schub
auszugleichen. Dies kann per PC-Adapter angepasst werden oder siehe
Kapitel „Fehlerbehebung“ (Seite 38).
Montage am Heckrohr
Hinweise bei Verbrenner-Motoren
Mitgelieferten Einbau-Winkel mit Kabelbinder am Heckrohr sicher straffziehen.
Dann den HeliCommand rückseitig mit 2 Streifen Klebe-Schaumstoff festkleben. Nach dem Einfliegen zusätzlich am Rohr mit Kleber gegen Verdrehen
sichern: Uhu-Hart oder Sekundenkleber verwenden. Doppel-Klebeband ist zu
weich.
Vibrationsschutz
Dem Vibrationsschutz besonderes Augenmerk schenken!
Deshalb mit weichen Klebe-Schaumstoff, nicht ganzflächig ankleben, sondern
nur 2 sehr schmale Streifen am oberen und unteren Rand der Gehäuserückwand verwenden. Die Montagefläche muss daher mindestens so hoch sein
wie der HeliCommand.
• Unbedingt weit vom Auspuff entfernt anbringen.
• Gegen die unsichtbaren Vibrationen vom Motor ist Vibrationsschutz
besonders wichtig. Sollte bei laufendem Motor der HeliCommand trotz
korrekter Montage fühlbar vibrieren, empfehlen wie eine zusätzliche
Vibrationsdämpfung. Oftmals eignet sich hierfür Klettband hinter dem
Schaumstoffstreifen.
Sicherste Möglichkeit: Eine Metallplatte 3mm Alu oder 1,5mm Stahl zuerst
direkt auf den HeliCommand kleben, dann die Schaumstoffstreifen
zwischen dieser Platte und der Montagefläche anbringen. Mit Gummiring
sichern !
Oder Montage ggf. an anderer, vibrationsgeschützter Stelle erwägen.
• Gegen Irritation des Sensors durch Rauchwolken empfehlen wir, den Motor
nicht unnötig fett einzustellen.
Sicherstellen, dass der HeliCommand nie verrutschen oder sich lösen kann.
Andernfalls würde im Autopilot-Modus das Modell eine Schräglage einnehmen
bzw. unsteuerbar werden.
Ölspuren vor dem Ankleben restlos entfernen.
Gegen die Gefahr, dass sich das Schaum-Klebeband löst, empfehlen wir, den
HeliCommand zusätzlich mit dünnem Gummiband zu sichern.
18
• Gegen Verschmutzung empfehlen wir, unter dem Sensor zusätzlich ein
Schutzrohr oder (besser) ein quadratisches Kästchen anzubringen
(dessen Innenmaße entsprechend dem Sichtkegel festlegen) und das
Fenster regelmäßig bis zum Rand zu säubern.
19
20-21
Anschluss
Jede moderne Fernsteuerung besitzt Heli-Mischer, die z.B. bei einer 3-PunktAnlenkung dafür sorgen, dass sich die Servos im richtigen Zusammenspiel
bewegen. Mit dem HeliCommand muss dies jedoch im integrierten Mischer
erfolgen. Deshalb wählen Sie bitte in Ihrer Fernsteuerung ein ungemischtes
Heliprogramm („H1“/Einzelservo), so dass bei Knüppel-Bewegung in jede
Achse sich jeweils nur ein einzelnes Servo bewegt! Ist das der Fall, können Sie
mit dem Anschluß beginnen. (Fragen Sie ggf. beim Hersteller Ihres Senders,
wie diese Einstellung zu finden ist. Alternative (wenn keine Gaskurve nötig
ist): kein Heli-Programm einstellen, sondern ein Standard- (Basis-) Programm
wählen. Dies garantiert auch die ungemischte Übertragung der Schieber bzw.
Schalter für die Zusatzkanäle.
Achtung: Für H4-Anlenkung ist der PC-Adapter zwingend erforderlich !
• Das mitgelieferte RC-Modul (mit Kabel-Verteilung) wird zwischen
Empfänger und Servos angeschlossen.
Es kann mit Klett- oder Doppelklebeband auf dem Empfänger befestigt
werden.
• Es müssen mindestens die Eingänge Roll, Nick und Pitch am Empfänger
angeschlossen werden.
• Anschlüsse PILOT und AUX sind optional. Diese Kabel am Empfänger dort
anschließen, wo die verwendete RC-Anlage die betreffenden Geber
(Schieber oder Schalter) überträgt.
• Der HeliCommand schaltet sich mit dem Einschalten des Empfängers ein.
• Unbenutzte Eingangskabel können verstaut werden, indem man sie um
180° verdreht in nicht benutzte Steckplätze des Empfängers oder des
RC-Moduls einsteckt.
• Den leeren Steckplatz am HeliCommand mit Klebefilm abdecken.
(Schmutzschutz).
20
21
22-23
Einstellung
Nach Einbau oder Änderungen am Sender muss der HeliCommand einmalig
auf Modell und Sender abgestimmt werden, außer alles entspricht werkseitiger
Standardeinstellung, z.B. Sender Robbe-Futaba, Modelle Spirit LI oder Typen
mit gleichen Servorichtungen und Einbaulage = runde Gehäuseseite rechts.
Wichtig: In jedem Fall vor dem Erstflug die Sensor- und Steuer-Probe
durchführen (Seite 28) !
Möglichkeiten zur Einstellung wahlweise mit:
a) SET-Taste: hier beschrieben, fast alle Taumelscheibentypen bis 3 Servos.
b) PC-Adapter: Hier nur Punkte A bis D-Schritt 1.
Für den Rest: siehe Einstell-Software, beginnend mit dem Auslesen der
Daten aus dem HeliCommand. Erforderlich bei H4-Anlenkung und evtl. bei
besonders seltenen Typen !
Bei Elektroantrieb
Gegen unbeabsichtigtes Loslaufen unbedingt Antriebsmotor(en) abstecken
oder Empfänger mit separater Batterie speisen !
A) Factory-Reset
Rücksetzen auf Auslieferungszustand. Löscht alle Einstellungen, auch die
nur über den PC-Adapter erreichbaren. Hierzu den HeliCommand während
gedrückter SET-Taste einschalten, dann die Taste ein zweites Mal mind. 5s
lang drücken, bis LED rot-grün-wechselnd blinkt.
Das Einlernen kann jederzeit beliebig wiederholt werden. Der HeliCommand
kennt jetzt die Signale, die als Befehl „Neutral & Stillstand“ gelten sollen.
Deshalb muss das Einlernen immer dann wiederholt werden, wenn am Sender
die Trimmung wesentlich verändert wurde. Die Trimmung selbst wird durch
das Einlernen nicht beeinflusst. Trimmungen deshalb nach dem Einlernen
belassen. (Diese müssen lediglich bei Änderungen am internen Mischer ggf.
korrigiert werden.)
Wenn Automatik-Trimmung verwendet wird, dann wird am Sender nie
getrimmt, sondern die Nick- und Roll-Trimmer stets neutral gelassen.
D) HeliCommand konfigurieren
Der Hubschrauber muss mechanisch zumindest grob justiert sein (Neutrallage von Taumelscheibe und Heckrotor). Der Einlernvorgang kann nur funktionieren, wenn Eingangs-Kabel und Servos korrekt angeschlossen sind und
eventuelle Mischfunktionen am Sender komplett abgeschaltet sind. Im Zweifel
probeweise irgendwelche Servos direkt am Empfänger anschließen und sicherstellen dass jeder Kanal nur eine einzige Knüppel-Funktion empfängt und
auf welchem Kanal, und dann wieder richtig anschließen.
Dann einfach die folgenden Schritte durchgehen:
Einstell-Modus aufrufen
Sender-Neutralstellung einlernen (siehe Punkt C).
Dabei aber SET-Taste mindestens 3s drücken bis LED grün blinkt (Löscht
gleichzeitig die internen Auto-Trimmwerte).
Servos laufen nun (je nach Einstellschritt) nicht oder anders als normal.
B) Sender einstellen
Alle Taumelscheiben-Mischfunktionen müssen ausgeschaltet bleiben. Wege
für Nick und Roll am Sender ca. 100% oder höchstens geringfügig mindern.
Expo darf bleiben. Sender mit 1,6 ms-Norm (Multiplex) müssen auf UNI-Modus
gestellt werden. Wenn der eingebaute Heading-Hold-Kreisel verwendet wird,
müssen im Sender alle Heck-Mischer ausgeschaltet sein.
C) Sender-Neutralstellungen einlernen
• Steuerknüppel auf Neutral und Pitch auf Minimum stellen, Trimmungen auf
Neutral oder, wenn der Hubschrauber schon mit HeliCommand eingeflogen
wurde und nur kleine Trimmwerte eingestellt sind, die eingeflogene
Trimmung lassen.
• SET-Taste 1s drücken bis LED grün leuchtet, dann wieder loslassen
und ausschalten, fertig. Falls rote LED leuchtet: siehe Seite 8.
22
Einstellen und speichern für jeden Schritt (1-5)
Erfolgt durch die unten erklärten Steuerknüppel-Aktionen und langes Drücken
der SET-Taste.
Einstellschritt wechseln
Aktueller Schritt (1-5) wird angezeigt durch die Blinkanzahl. Nach Aufruf
erscheint zuerst Schritt 1. SET-Taste kurz tippen schaltet ohne Änderung der
Einstellung zum nächsten Schritt weiter (und von Schritt 5 wieder zu 1).
Somit lassen sich Einstellungen beliebig wiederholen. Zum Erst-Abgleich aber
bitte alle Schritte, wie hier beschrieben, der Reihe nach durchgehen.
Einstell-Modus beenden
Ist jederzeit durch Abschalten möglich.
23
24-25
Die Einstell-Schritte
1) Knüppel-Richtung einlernen
• Im Einstellmodus muss die LED regelmäßig grün blinken, Elektroantrieb
muss ausgesteckt sein.
• Jetzt SET-Taste lange drücken und bei gedrückter Taste folgende
Vollausschläge am Sender machen (Reihenfolge egal):
Roll rechts, Nick vor, Heck Nase-rechts, und wieder neutral, Pitch max. und
so lassen.
Jetzt Taste loslassen. Der Richtungssinn darf ab jetzt nicht mehr am
Sender verändert werden! (außer absichtliche Pitch-Umkehr).
2) Servo-Richtung „Pitch“
(und Erkennung der Anlenkung H1/ tri-link)
LED muss 2x blinken (ggf. weiterschalten durch Tippen der SET-Taste).
Wenn man am Knüppel Pitch hochfährt,
soll die Taumelscheibe
gleichmäßig und ohne Neigung nach oben gehen. Mit seitlichen Ausschlägen
am Roll-Knüppel kann man unter 10 Möglichkeiten vor- oder zurück-schaltend
die richtige auswählen. Abspeichern durch langen SET-Tastendruck (>1s).
Mit Roll-Ausschlägen hin-und herschaltend die richtige Heckservo-Drehrichtung auswählen: Bei Heck-Knüppel nach rechts soll die Nase nach rechts wenden. Hierfür muss der Heckrotor nach rechts blasen. Jetzt lässt sich der Heckrotor-Neutralpunkt justieren, da im Schritt 4 das Heading-hold abgeschaltet ist.
Einstellung prüfen und durch langen SET-Tastendruck (>1s) abspeichern.
5a) Einbaulage (Sensor-Richtung) und Rotor-Drehrichtung
LED muss 5x blinken (ggf. weiterschalten durch Tippen der SET-Taste).
Der HeliCommand muss seine Einbau-Orientierung kennen, d.h. ob seine
runde Gehäuse-Seite nach rechts, links, vorne oder hinten weist.
Programmieren Sie dies, indem Sie mit dem Roll- bzw. Nick-Knüppel die
Taumelscheibe auf die betreffende Seite neigen und, während die Neigrichtung stimmt, mit langem SET-Tastendruck (>1s) bestätigen.
5b) Drehrichtung des Hauptrotors
Im Schritt 5 den Heck-Steuerknüppel in die selbe Richtung ausschlagen wie die
Rotor-Drehrichtung (von oben gesehen) und abspeichern mit SET-Taste > 1 s.
Abschließend
3 ) Servo-Richtungen „Nick“ und „Roll“
LED muss 3x blinken (ggf. weiterschalten durch Tippen der SET-Taste). NickKnüppel soll die Taumelscheibe gleichmäßig neigen ohne ihre Höhe zu ändern. Mit Roll-Ausschlägen kann man unter 2 oder 8 Möglichkeiten vor- oder
zurückschaltend die richtige auswählen.
Bei Einzelservo-Anlenkung: Nur mit Rechts-Roll-Ausschlägen zwischen den 2
Möglichkeiten umschalten. Falls zusätzlich die Roll-Richtung umgedreht werden muss: einen lang dauernden Roll-Ausschlag nach links (> 1,5s) und mit
Links-Roll-Ausschlägen testen (nur möglich bei Geräteversionen mit zweistelligem Code-Aufdruck auf dem Typenschild links der Artikelnummer. Bei anderen
Anlenkungs-Typen stimmt die Roll-Richtung nach dem Speichern automatisch.
Andernfalls sind Servo-Anschlüsse vertauscht oder Roll- oder Pitch-Richtung
falsch eingelernt. In diesem Fall die Schritte wiederholen). Abspeichern durch
langen SET-Tastendruck (>1s ► LED blinkt 4x). Jetzt müssten alle 3 TaumelRichtungen stimmen. Falls Taumelscheibe schief, jetzt mechanisch justieren.
4) Servo-Richtung „Heck“
Bei Gebrauch eines externen Kreisels diesen Punkt überspringen !
LED muss 4x blinken (ggf. weiterschalten durch Tippen der SET-Taste).
Neu einschalten und Steuerprobe machen. Am Sender nun ggf. Weg-Reduzierungen einstellen, gegen Anstoßen und für den richtigen Pitch-Bereich
(Ausschläge sind u.U. anders als die eines vorher im Sender bestandenen
Mischers).
Starke Weg-Minderungen sollten über den PC-Adapter im HeliCommand
eingestellt werden.
Falls Taumelscheibe nicht exakt horizontal liegt, jetzt nachjustieren.
Zur groben Justage: Es soll im mittleren Pitch-Bereich einen Punkt geben, an
dem alle Servo-Hörner gleichzeitig neutral stehen. Andernfalls Servohörner
abschrauben und richtig einsetzen.
Zur Fein-Justage: Schubstangen einstellen. End-Justage ist auch mit der
Sender-Trimmung möglich; diese danach mit SET-Taste neu einlernen (Schritt
C).
Bei Sendern mit verschiedenen Flugzuständen müssen alle Flugzustände, in
denen der HeliCommand aktiv ist, identische Trimmwerte haben!
(Im Rigid-Modus ist dies besonders wichtig).
24
25
26-27
Einstellung HeliCommand RIGID
Es gibt folgende RIGID-Möglichkeiten:
Vor dem Einsatz in paddellosem Hubschrauber bitte unbedingt den
RIGID-Modus (per PC) aktivieren.
Die lagehaltende Stabilisierung („Kopf-Kreisel“) hält eine einmal gesteuerte
Neigung fest und verhindert Aufbäumen auch gegen Wind, soweit es die
Reaktionskraft des Hubschraubers vermag. Im übrigen steuert sich der Hubschrauber wie gewohnt.
Man sieht die Funktion an der Taumelscheibe, da sie in der gesteuerten
Schräglage verbleibt.
Je nach Einstellung ist vor dem Start Vorsicht geboten, damit die Taumelscheibe nicht versehentlich (durch langsames Driften oder unbeabsichtigte
Ausschläge) zu stark schräg steht und dass die RIGID-Empfindlichkeit nicht zu
hoch eingestellt ist. Sie muss nicht, wie bei Heck-Kreiseln oft praktiziert, knapp
an die Grenze zum Pendeln hochgestellt werden.
Modus [AUS]
entspricht dem HeliCommand 3D. Nicht für paddellose Hubschrauber !
Modus [FEST]
Paddellose Hubschrauber dürfen mit dem HeliCommand unbedingt nur mit
eingeschaltetem RIGID-Modus fliegen! Andernfalls besteht die Gefahr dass zu
hohe Roll-/Nick-Raten entstehen, welche die Sensoren intern übersteuern und
den Horizontal-Modus sowie den Positions-Modus erheblich irritieren können!
aktiviert die RIGID -Funktion ständig (zusätzlich zum am Pilotkanal wählbaren
Hor.- und Pos.-Modus). Besondere Vorsicht wegen der RIGID-Empfindlichkeit,
weil sie in diesem Modus nicht über den Pilot-Kanal während des Fluges einstellbar ist und zu hohe Werte gefährliche Schlinger- oder Pendelbewegungen
bewirken können. Einstellung nur über den PC unter „RIGID-Empfindlichkeit“!
Modus [FADER]
Bei Scale-Modellen ist die Kopf-Anlenkung in der Regel auf etwa halbierten
Ausschlag eingestellt. Dies kann beim Einbau des HeliCommand rückgängig
gemacht werden, d.h. Ausschläge mechanisch erhöhen, um optimale Stabilisierungskraft zu erhalten.
Die RIGID-Stabilisierung ist per PC aktivierbar. Bitte sehen Sie, nachdem die
Grund-Version installiert wurde, nach der aktuellsten Softwareversion unter
www.robbe.com/rsc im Bereich Downloads nach.
26
Deaktiviert Hor.- und Pos.-Modus. Das Steuern entspricht dem des „herkömmlichen“ Hubschraubers, Neigung muss aktiv gesteuert werden! In beiden Hälften des Pilot-Kanals (Schieber) wird nur die RIGID-Stabilisierung eingeblendet, bis zum Maximalwert der am PC einstellbaren „RIGID-Empfindlichkeit“.
Die Maximalstellung am Schieber (Richtung egal) entspricht genau der Mittelstellung im Modus [FEST]. Schieber zur Mitte reduziert die Empfindlichkeit
des „Kopf-Kreisels“ (für Nick und Roll gleichermaßen) auf 33%. Geeignet zum
Finden der optimalen RIGID-Empfindlichkeit. Wird später auf Modus [FEST]
gewechselt, sollte man entsprechend der gefundenen Schieberstellung die RIGID-Empfindlichkeit am PC prozentual verringern. (Bsp.: Rigid-Empf. Roll=7,
Schieber ca. 70%, d.h. neue Rigid-Empf.=7x70%=4,9; also 5 einstellen!)
27
28-29
Erstflug
Vor dem Erstflug Sensor- und Steuerprobe für alle
Sensor-Richtungen
• Neutralstellung, Richtungssinn und Ausschlag aller Knüppel und Servos
• Pilot-Kanal und ggf. Autotrimm-Taste: anhand der Leuchtdiode.
(Trimm bitte nur mit Pitch auf Minimum. Dann ist Trimm-Kanal sichtbar aber
ohne Wirkung).
• Alle 3 Sensor-Richtungen. Falscher Richtungssinn würde zum Absturz
führen. Stabilisierung auf Modus „gelb“ stellen und das Modell von Hand
nacheinander um alle 3 Achsen kurz hin und her bewegen: seitlich neigen,
vorwärts neigen und drehen. Auf jede Bewegung müssen die betreffenden
Servos mit der entgegengesetzten Aktion reagieren: Taumelscheibe will
horizontal bleiben, die Vorderseiten der Heckrotorblätter bewegen sich
entgegen der Heck-Schwenkrichtung.
• Reichweiten-Test mit eingeschobener Antenne.
Einfliegen
Anfängern empfehlen wir, zur Prüfung der Einstellungen und zum Erstflug die
Hilfe eines hubschraubererfahrenen Modellbau-Kollegen einzuholen.
(Hinweise zum Trimmen: siehe Seite 30)
Bei Verbrenner-Hubschraubern: Vibrationstest
Weil extreme Vibrationen oder Körperschall am Sensor die Funktion erheblich
stören können, sind zum Einfliegen drei Überprüfungen nötig:
1) Mit der Hand fühlen, ob das Gehäuse des HeliCommand vibriert.
2) Vor dem Abheben auf Modus „gelb“ schalten und beobachten, ob die
Taumelscheibe bei allen Drehzahlen ruhig bleibt.
3) Zunächst im Modus „AUS“ starten und den Autopilot sicherheitshalber erst
nur kurz ein- und wieder ausschalten. Dies ggf. bei verschiedenen
Motordrehzahlen wiederholen.
Bei Störungen bitte Einbauhinweise auf Seite 16 beachten.
28
Start
Am Start soll der Hubschrauber möglichst waagerecht stehen.
Wird der Hubschrauber steil oder kopfüber gehalten, sollte der HeliCommand
vor dem Start erneut eingeschaltet werden. Bei solchen Neigungen entstehen
Gravitationskräfte quer zur Rotorwelle, die im Flug nicht auftreten und die Arbeitsweise der Sensoren irritieren können.
Steuerprobe vor jedem Start
Steuerbarkeit und Neutralstellung der Taumelscheibe auch mit eingeschaltetem
Autopilot prüfen! Nie starten, bevor sich alle Servos bewegen lassen!
Empfindlichkeits-Einstellung
Zum Einfliegen mit reduzierter Empfindlichkeits-Einstellung beginnen!
Einstellungen über 70% in beiden Modi sind nicht für alle Hubschrauber
zulässig, andernfalls können je nach Typ und Einbau-Höhe deutliche
Pendelbewegungen auftreten, vor allem bei geringem Abstand zwischen Sensor und Boden (< 0,5 m). Die (Schieber-) Stellung muss daher beim Einfliegen
ausprobiert werden.
Empfindlichkeit so einstellen, dass im grünen Positions-Modus bei ca. 0,5 m
Flughöhe eine optimale Stabilisierung erreicht wird.
Bei Pendelbewegung ► vermindern. Bei unkontrolliertem Driften ► erhöhen.
Empfindlichkeit muss nicht (wie bei Heck-Kreiseln üblich) hart an der Grenze
zum Schwingen eingestellt werden.
Weichere Einstellung ergibt ein besseres Flugbild, das weniger durch
spontane Steuer-Aktionen des Autopiloten gestört wird.
Für Hubschrauber mit extrem trägen oder extrem agilen Verhalten sind u.U. die
über PC-Adapter erreichbaren zusätzlichen Einstellungen empfehlenswert, um
die Stabilisierung zu optimieren.
Bei rascher Vorwärtsfahrt bremst der HeliCommand von sich aus nur langsam
ab. Der Hubschruber muss aktiv gesteuert werden, wenn man mit starkem
Steuerausschlag den Autopilot übersteuert hatte.
Per PC-Adapter lässt sich eine Option „Vorwärts-Freilauf“ variabel einstellen.
29
30-31
Trimmen
Wenn die Trimm-Automatik nicht verwendet wird, dann ist es besser, erst bei
ausgeschaltetem Autopilot zu trimmen.
Danach, und immer wenn die Trimmstellungen am Sender wesentlich verstellt
wurden, sollte die Sender-Neutralstellung mit der SET-Taste erneut eingelernt
werden (Seite 22).
In den ersten Sekunden nach dem Start ist die Genauigkeit der Stabilisierung
reduziert.
Die Genauigkeit erhöht sich jedoch von selbst nach ca. 10 Sekunden Flugzeit.
Deshalb bei aktivem Autopilot nicht gleich trimmen, sondern erst abwarten.
Danach ist meist keine Trimmung mehr erforderlich.
Falls Trimmung mit und ohne Stabilisierung unterschiedlich ist:
Sender-Neutralstellung einlernen (Seite 22)
Mit Trimm-Automatik
Einfach die Autotrimm-Taste am Sender betätigen, egal in welchem
Stabilisierungs-Modus. Vorher muss der Hubschrauber lediglich ca. 8 Sekunden in annähernd ruhigem Flugzustand gewesen sein.
Trimmt stets passend für Neutralstellung des Senders, wie sie im HeliCommand eingelernrt wurde. Deshalb kann nicht gleichzeitig die Roll- und NickTrimmung am Sender verstellt werden. Wenn sie verstellt wurden, muss dies
erneut als „Sender-Neutralstellung“ eingelernt werden (Seite 22), bevor man
die Autotrim-Taste am Sender wieder benutzt.
Heck-Trimmung
Am Sender so trimmen, dass das Servo im Heading-Hold-Modus nicht
weg läuft. Wenn „Auto-Trim“ nicht verwendet wird, empfiehlt sich, wie bei
jedem Heck-Kreisel, bei abgeschaltetem Heading-Lock-Modus mechanisch
zu trimmen, um beim Umschalten zwischen Heading-Lock und Normal
Trimm-Unterschiede zu vermeiden.
Sensor-bedingtes Driften bei Temperatur-Wechsel oder längerem Betrieb
kann durch Neu-Einschalten neutralisiert werden. (Nicht durch die Trimm-Automatik; diese korrigiert nur die Servo-Mitten).
30
31
32-33
Tipps zum Fliegen
Wirkung des Opto-Sensors
Man kann den Autopilot vor dem Start oder auch im Flug einschalten.
Wichtig: Die Empfindlichkeit nie höher stellen als beim Einfliegen festgelegt.
Der Positions-Modus funktioniert ganz ohne sichtbaren Horizont und daher
auch neben Bäumen etc.
Als Heli-Einsteiger überfliegt man am besten zunächst nur normale Untergründe
(Rasen, Plätze, Steine etc.).
Damit ist garantiert, dass die Stabilisierung stets in voller Stärke arbeitet.
Schweben
Bei Dunkelheit oder bei Überfliegen optisch glatter Flächen
Starten und Landen
Wenn der Positions-Modus am meisten gebraucht wird, nämlich in
Bodennähe, wirkt er am stärksten. Umgekehrt erlaubt der HeliCommand bei
größeren Flughöhen mehr freie Bewegung.
Als Anfänger am besten mit 0,5 ... 1,5m Flughöhe beginnen. Dies ist außerdem
am leichtesten lernbar. Fliegt man höher, dann ist als Rettung die Flucht nach
oben sicherer. Positions-Modus-Wirkung bis in ca. 3 Meter Höhe bei Windstille,
bei Wind bis ca. 1m. Horizontal-Modus wirkt immer.
Die Stabilisierung kann nur im Flug richtig arbeiten.
Am Boden stehend muss der Hubschrauber bei drehendem Rotor weiterhin
von Hand überwacht werden!
Steuerausschläge
(Wasser, Schnee, Autodächer, glatte ungemusterte Hallenböden etc.)
Hier ist auch im Modus „grün“ (Positions-Modus) nur der Horizontal-Modus
aktiv, wenn der optische Boden-Sensor keinen ausreichenden Kontrast
erkennt. Kurze Ausfälle werden durch die intelligente Software
unbemerkt überbrückt. Bei längerem Fehlen des Kontrastes wird die Regelung
automatisch durch die übrigen Instrumente übernommen, man muss dann die
Hubschrauber-Position im Auge behalten und gegebenenfalls leicht
nachsteuern.
Bei den genannten Bedingungen soll man sicherheitshalber von Beginn an
den Horizontal-Modus „gelb“ wählen, oder man vergewissert sich mit der
Kontrast-Prüfung (s.unten).
Der Autopilot lässt sich, auch bei maximal eingestellter Stärke, von Hand
übersteuern, und zwar ab ca. 50% Steuergeber-Ausschlag der Nick- bzw.
Rollfunktion. (Nach Neutralisierung der Roll und Nicksteuergeber ist sofort
wieder der Autopilot aktiv). Für Beginner empfiehlt sich daher, mit kleinen
Ausschlägen zu steuern und am Sender eine Expo-Funktion einzustellen!
Hallen-Flug
Ein im Sender verminderter Ausschlag (Dual Rate) kann u.U. die manuelle Übersteuer-Möglichkeit verhindern. Um aus Sicherheitsgründen eine
Übersteuerungs-Möglichkeit zu behalten, sollte dann gleichzeitig auch
der Pilot-Kanal verringert werden. Hat man einen Sender mit mehreren
Flugzuständen, kann der Pilotkanal über die Flugzustandsprogrammierung auf
unterschiedliche Werte voreingestellt werden. Permanente Steuerweg-Reduzierungen werden besser per PC-Adapter im HeliCommand eingestellt.
Kontrast-Prüfung
Modus „gelb“ verwenden. Modus „grün“ ist tabu, es sei denn, man überprüft
vorher den Kontrast aus verschiedenen Abständen (s. unten) und schränkt
sich auf Normalfluglage ein
(Im Positions-Modus „grün“ auch beim HeliCommand 3D kein Rückenflug in
Hallen oder Gebäuden!)
Im Positions-Modus „grün“ zeigt ein Flimmern der LED, wenn Kontrast oder
Helligkeit nicht ausreichen und der HeliCommand auf Horizontal-Modus
„gelb“ umschaltet. Dies kann man in Bodennähe sowie aus verschiedenen
Abständen zum Boden prüfen.
Die Reaktion des Sensors kann man prüfen, indem man im Positions-Modus
„grün“ die Hand mit ca. 20 cm Abstand unter dem HeliCommmand horizontal
bewegt.
32
33
34-35
Verwendung der Versionen
Hinweise
HeliCommand 3A
• Über hohen Gräsern oder losem Laub etc. sicherheitshalber höher fliegen oder
auf den Horizontal-Modus „gelb“ umschalten, weil sich im Abwind bewegende Objekte den Positions-Modus verfälschen.
Diese Grundversion ist nicht geeignet für Akro- und 3D-Manöver.
Hierfür ist der HeliCommand 3D oder RIGID vorgesehen!
HeliCommand 3D oder aufwärts
Bei kurzen 3D-Manövern (einzelne Überschläge) kann der Horizontal-Modus „gelb“ zur Unterstützung eingeschaltet bleiben. Dieser Modus stabilisiert
sowohl Normalflug als auch Rückenflug. Die Stabilisierung ist bequem von
Hand übersteuerbar und der Grad der Hand-Steuerung ist am Pilot-Kanal
einstellbar.
Eine Vielzahl weiterer Einstellmöglichkeiten ist mit dem PC-Adapter möglich.
Einsatzmöglichkeit ist besonders für einzelne Wechsel zwischen positivem
und negativem Schweben. Auch zur Verwendung als „Not-Knopf“ kann die
Stabilisierung dazugeschaltet werden, wobei aber folgendes wichtig ist:
3D-Manöver
Für intensiv fortlaufende Manöver (Mehrfach-Loopings, Rollen, etc.) sollte
auch der HeliCommand 3D vorher ausgeschaltet werden und kann frühestens
15 Sekunden danach wieder zugeschaltet werden.
Dies gilt auch für zahlreiche Mehrfach-Turns, da diese unter bestimmten
Umständen die horizontale Neutral-Erkennung verfälschen können.
HeliCommand RIGID
Sofern per PC-Adapter der RIGID-Modus aktiviert wurde, minimiert dieser die
Einflüsse von Windböen und das Aufbäumen im Fahrtwind.
3D- und Akro-Flug sind uneingeschränkt möglich und werden in der Präzision
unterstützt.
Beim Zuschalten der Horizontal- oder der Positions-Stabilisierung gilt das
gleiche wie für den HeliCommand 3D, siehe oben.
34
• Bei Temperatursprüngen bitte vor dem Einschalten mindestens 5 Minuten
zum Angleichen warten, und nicht unter -5°C und über +50°C verwenden.
(bei abgeschalteter Stabilisierung zwischen - 10° ... + 50° C verwendbar)
Am besten erst kurz vor dem Start einschalten und den Hubschrauber
dann nicht mehr von Hand bewegen, sondern waagerecht stehen lassen.
• Nicht bei Regen verwenden wegen Kurzschlussgefahr!
• Falls nach 90°...180°-Heck-Drehungen ein Drift erkennbar ist, lässt sich die
Einbaulage optimieren (siehe Fehlerbehebung Seite 38).
Für geübte Piloten: Unterschiede im Handling
• Zum Fliegen von Turns ist die Stabilisierung abzuschalten, weil sie ja
versuchen würde, Horizontallage herzustellen.
• Positions-Modus „grün“ nur für Schweben und Langsamflug in Bodennähe
verwenden!
• Zum Erreichen starker Neigungen, z.B. zum Abbremsen aus hoher
Geschwindigkeit, sind stärkere Steuerausschläge nötig, als ohne
Stabilisierung. Für Autorotation: Empfindlichkeit herabsetzen.
• In Kurven hält man die Soll-Neigung mit Roll fest. Andernfalls will sich der
Hubschrauber gerade richten.
Einsatzbereich
Zur Erleichterung der Steuerung für Hubschrauber im Hobby-Bereich.
Achtung: Nicht vorgesehen für bemannte Luftfahrzeuge oder für militärische
Anwendungen! Zuwiderhandlungen sind strengstens untersagt und werden als
Lizenzverletzung verfolgt!
Die Modellbau-Ausführungen HeliCommand 3A, 3D und RIGID sind
außerdem nicht geeignet zum Gebrauch in bebauten Gebieten, neben oder über
Gebäuden und Einrichtungen.
Für professionelle Anwendungen wie Foto-, Film-, Vermessungs-Flüge, etc. ist
der HeliCommand Profi vorgesehen (siehe Seite 13).
35
36-37
Vorsichtsmaßnahmen
Haftungsausschluss
Der Begriff „Autopilot“ bedeutet nicht, dass das Fliegen völlig selbstständig
erfolgt!
Es wird, genau wie auch beim herkömmlichen Modellhubschrauber-Fliegen,
besondere Vorsicht und Übung vorausgesetzt.
Ein Autopilot kann Gefahren der Fehlbedienung grundsätzlich nicht
ausschließen. Es ist sogar denkbar, dass noch weitere Risiken auftreten,
etwa dass man durch die bequeme Steuerung zu erhöhter Leichtfertigkeit
verleitet wird, oder dass ungeübte Piloten in Situationen fliegen, die sie bei einem
technischen Ausfall nicht mehr beherrschen.
Zudem sind mit dem Autopiloten mehr technische und somit störbare
Instrumente beteiligt als sonst.
Bekanntlich können Fluginstrumente prinzipiell gestört werden oder ausfallen.
Was die Sicherheit betrifft, sollte man sich nie ausschließlich auf die
Stabilisierung verlassen und stets alle nötigen Vorsichtsmaßnahmen treffen.
Für Einbau, Einstellung und Betrieb des Autopiloten sowie eines
Hubschraubers sind Sachkenntnisse erforderlich. Fehler und Unachtsamkeiten
können Unfälle mit schwerwiegenden Personen- und Sachschäden oder auch
Verkehrsunfällen zur Folge haben. Da Hersteller und Verkäufer keinen Einfluss
auf ordnungsgemäße Handhabung haben, wird auf diese Gefahren hiermit
ausdrücklich hingewiesen. Eine Haftung für jegliche Schäden, die aus dem
Betrieb resultieren, auch aufgrund von Störungen der eingebauten Instrumente
oder der Signalübertragung, ist grundsätzlich und soweit im gesetzlichen
Rahmen möglich, ausgeschlossen.
Wir empfehlen
• Immer genug Schutzabstand vor Personen und Gegenständen einhalten
und bedachtsam fliegen
• Die Wucht drehender Rotorblätter nicht unterschätzen. Größere Modelle
zum Üben hinter einem Schutz-Netz oder Fußballtor fliegen, wie es bei
vielen Modellflugplätzen eingerichtet ist.
• Als Anfänger den Rat eines Hubschrauber-erfahrenen Piloten einholen,
besonders beim Einfliegen.
• Den Stabilisierungsgrad entsprechend den Umweltbedingungen einstellen.
Den Autopilot stets so betreiben, dass er im Flug auf manuelle Steuerung
umgeschaltet werden kann, oder zumindest so einstellen, dass eine
manuelle Übersteuerungsmöglichkeit besteht.
• Je nach gesetzlichen Bestimmungen sollte auf zugelassenen
Modellflugplätzen oder von Besiedlung und Verkehrsstraßen entfernt
geflogen werden.
• Abstand zu Radarstationen, Sendemasten und anderen Funk-Störquellen.
• Bei Modelflugzeugen ist eine Haftpflichtversicherung erforderlich.
• Fliegenden Hubschrauber stets im Auge behalten.
• Diese Warnhinweise bei Weitergabe an Dritte stets mitgeben.
Gewährleistung
Für dieses Gerät übernehmen wir eine Gewährleistung von 24 Monaten.
Als Beleg für den Beginn und den Ablauf dieser Gewährleistung dient der‚
Kassenzettel Ihres Modellbau-Fachhändlers, welcher beim Erwerb des
Gerätes ausgestellt wurde. Eventuelle Reparaturen verlängern den Gewährleistungszeitraum nicht. Während dieser Zeit werden evtl. auftretende Funktionsmängel sowie Fabrikations- oder Materialfehler kostenlos von uns behoben.
Weitergehende Ansprüche z. B. bei Folgeschäden, sind ausgeschlossen.
Der Transport zu uns muss frei erfolgen, der Rücktransport zu Ihnen erfolgt
ebenfalls frei. Unfreie Sendungen können nicht angenommen werden.
Für Transportschäden und Verlust Ihrer Sendung können wir keine Haftung
übernehmen. Wir empfehlen eine entsprechende Versicherung.
Zur Bearbeitung Ihrer Gewährleistungsansprüche müssen folgende
Voraussetzungen erfüllt werden:
• Legen Sie Ihrer Sendung den Kaufbeleg (Kassenzettel) bei.
• Die Geräte wurden gemäss der Bedienungsanleitung betrieben.
• Es wurden nur empfohlene Stromquellen und original robbe Zubehör
verwendet.
• Feuchtigkeitsschäden, Fremdeingriffe, Überspannungen, Überlastungen
und mechanische Beschädigungen liegen nicht vor.
• Fügen Sie sachdienliche Hinweise zur Auffindung des Fehlers oder des
Defektes bei.
36
37
38-39
Fehlerbehebung
Servos laufen nicht ► siehe Seite 8 „LED-Anzeige“
Zittern oder Pendeln im Positions-Modus, vor allem in Bodennähe
• Empfindlichkeit verringern
• niedrige Einbauposition? ► möglichst hoch einbauen, siehe Seite 17
• am PC wurde Nick /Roll- Ausschlag oder „Hor-Empf.“ zu weit abgesenkt?
Keine Stabilität im Positions-Modus
• Sensor-Fenster verschmutzt?
► Bei Verbrennern vor Auspuff schützen und regelmäßig reinigen
• Untergrund ohne Kontraste, wie z.B. Schneefläche, glatter Asphalt,
Wasser? ► Horizontal-Modus einschalten
• Trimmung nicht eingelernt? ► siehe Seite 30
• Empfindlichkeit weiter hochstellen?
• Starke Abgaswolken im Sichtstrahl?
► Motor weniger fett einstellen und weiter vom Auspuff entfernt einbauen.
• Antennenkabel oder sonstige Hindernisse im Sichtstrahl des Sensors?
► siehe 1.Absatz auf Seite 17: „Einbau“
• Viel loses Laub oder hohe Gräser etc, die sich im Abwind bewegen?
► Horizontal-Modus einschalten.
Keine ruhige Fluglage, auch im Horizontal-Modus
• Vibrationen (sichtbare oder unsichtbare) oder zu starker Körperschall am
Gehäuse (besonders bei Verbrenner)?
► Beachte Einbau > Montage und Einbau > Verbrenner.
• Schaum-Klebeband nicht in 2 schmalen horizontalen Streifen verwendet ?
► beachte Seite 16
Trimmung mit und ohne Stabilisierung verschieden
• Nach dem Start erhöht sich die Stabilisiergenauigkeit automatisch innerhalb
einiger Sekunden Flugzeit.
• Trimmung am Sender verstellt?
► Neutralstellung neu einlernen.
• Starker Temperaturwechsel?
► zum Akklimatisieren dem Gerät ca. 5 Minuten Zeit geben
und neu einschalten.
• Starke Vibrationen?
► siehe Fehler „keine ruhige Fluglage“
38
Trimmautomatik trimmt nicht exakt
• Besteht gleichzeitig eine Trimmung im Sender?
► Seite 30 beachten entweder Trimmung einlernen oder am Sender nicht
verstellen.
• Ist Pitch-Minimum und Richtung korrekt eingelernt?
► ohne Pitch wird Auto-trimmung verhindert
Abdrift nach Heck-Drehungen
• Einbau-Lage nicht exakt vertikal, oder Leicht-Hubschrauber mit hohem
Anstellwinkel?
► Optimierung durch Fliegen einer 90°-Rechtswendung aus dem
Schwebeflug, bei Stabilisierung im Modus „gelb“.
Wenn der Hubschrauber vor der Viertel-Pirouette stillstand aber hinterher
stets in eine bestimmte Richtung abdriftet, kann die Einbaulage optimiert
werden.
Bei Abdrift schräg links-vorwärts (bezüglich neuer Lage), den
HeliCommand weiter nach links neigen, umgekehrt bei Drift nach
rechts-hinten.
Bei Abdrift nach rechts-vorwärts, den HeliCommand etwas nach vorne
neigen, umgekehrt bei Drift nach links-rückwärts.
Rückenlage:
Abweichung der Rollmitte beim Rücken-Schweben, oder nach Wechsel
zurück
► Einstellung Heckschub-Ausgleich optimieren
(per PC-Adapter, siehe PC-Einstellsoftware).
Drift nach Akro-Manövern (Turns, Rollen etc.)
• HeliCommand 3A verwendet?
► nicht für Rückenflug oder steile Fluglagen geeignet ! ► auf 3D aufrüsten.
• Fremder Heck-Kreisel verwendet und Drehrate > 400°/s?
► Drehrate verringern (Seite 25)
• Viele durchlaufende Drehungen wie Vielfach-Turns, Rollen, Loopings
geflogen?
► Hinweise Seite 34 beachten!
Heck-Servo nicht mittig
• Interner Gyro erst nachträglich verwendet?
► Auto-Trimmwerte löschen.
39
40-41
Technische Daten
Zubehör
Betriebsspannung:
4,8 ... 6 Volt (4 ... 5 NC)
Stromverbrauch:
55mA (bei 5V)
Abmessung:
55 x 35 x 22,5 mm
Gewicht mit Kabel:
33g
• PC-Adapter mit Software-CD No. 84942000
• Ersatz-RC-Modul (zum Wechseln in mehrere Modelle):
(für HeliCommand mit 4 Stiften im Steckplatz) No. 8494-4000
(für HeliCommand mit 3 Stiften im Steckplatz) No. 8494-3000
incl. Montagewinkel, Klettband und O-Ringe zum Tausch des HeliCommand
Hauptgerätes
Temperaturbereich:
im Modus ‚AUS‘:
-5° ... +50°C,
-10° ... + 50° C
Heli Mischer:
H1/ H2/ H3 / H3 (140°) / H4 / H4 (+45°)
RC-Modul passend für:
Robbe-Futaba PPM / PCM 1024 / PCM G3 Modulation
Graupner/JR PPM 8, PPM 12, SPCM Modulation
MPX PPM8, PPM 12 mit Uni Modulation
Sowie andere Sender mit Standard 1,5 ms Neutralstellung
Update der Versionen im robbe Service
(siehe RobbeKatalog)
Service
robbe – Service
Metzloser Strasse 36
D-36355 Grebenhain
Tel.: 0049-6644-87-777
Fax: 0049-6644-7412
Lieferumfang
•
•
•
•
•
•
HeliCommand Hauptgerät
RC-Modul (mit Kabel-Verteilung)
Montagewinkel
Klebe-Schaumstoff: 2 Satz je 2 Streifen
Kabelbinder
Anleitung
Impressum
robbe Modellsport GmbH & Co. KG
Postfach 1108
D-36352 Grebenhain
Internet: www.robbe.com
E-Mail: [email protected]
Tel.: 0049 (0) 6644 / 870
Fax: 0049 (0) 6644 / 7412
40
41
42-43
Notizen:
______________________________________________________________
______________________________________________________________
______________________________________________________________
______________________________________________________________
______________________________________________________________
______________________________________________________________
______________________________________________________________
______________________________________________________________
______________________________________________________________
______________________________________________________________
______________________________________________________________
______________________________________________________________
______________________________________________________________
______________________________________________________________
______________________________________________________________
______________________________________________________________
______________________________________________________________
______________________________________________________________
______________________________________________________________
42
43
1
Instructions V 1.2
INSTRUCTIONS
Version 1.3
► www.robbe.com
2-3
Congratulations on your decision to purchase a HeliCommand.
No other commercially produced system for model helicopters can stabilise the
horizontal flight position in addition to the horizontal attitude.
The HeliCommand was originally developed from a professional auto-pilot
system for commercial helicopters employed in filming and surveying, and is
based on several innovative technologies (international patents pending).
The range of potential applications covers beginners and advanced pilots. However, beginners should be familiar with their model’s functions, even if they
are not yet able to maintain a stable flight attitude when flying. It is ideal for
advanced pilots who are expanding their flying skills and wish to practise flying
with reduced stabilisation, as well as pro-standard pilots who wish to concentrate entirely on the important functions of their flight display.
If you are a beginner, the HeliCommand will enable you to hover the helicopter,
carry out slow circuits and generally practise more easily. However, one point
which should be addressed here is that the pilot must be attentive, and should
not let this unique system seduce him into trying manoeuvres which could endanger himself or others.
To anyone who categorically shuns all electronic aids for helicopter flying, we
have this to say: please be reassured: the HeliCommand was not developed
with the aim of replacing flight tutors and training procedures; its sole purpose
is to help modellers learn to fly safely, and to promote safer flying.
2
3
4-5
HeliCommand 3A No. 8493
HeliCommand RIGID No. 8495
• With “auto-pilot” function, stabilises all horizontal control movements:
inclination (tilt), speed, position
• Auxiliary „pilot“ channel for adjusting stabilisation effect and switching
between horizontal mode and position mode
• Integral heading-lock gyro, swashplate mixer and automatic trim
• Second auxiliary channel (“AUX channel”) for gyro gain and mode
(normal/heading lock); optionally for automatic trim.
• Can be configured without connection to a PC by simple learning procedure,
for almost all rotor head linkage types with up to 3 servos
• Fail-safe if radio link fails (PPM / FM only): switches to position stabilisation,
collective pitch to ‘hold’.
• Suitable for internal-combustion and electric-powered helicopters
• Can be used indoors and in the open air
• PC adaptor available as accessory for supplementary settings, including:
setup as necessary for HR4-linkage, automatic trim option, freewheel
function for forward flight, optimised settings for auto-pilot and tail rotor gyro.
• Includes all the features of the HeliCommand 3A and 3D, plus:
• RIGID mode for stabilising flybar-less rotor heads, highly effective in pre
venting ballooning and tuck-under at high speed and in gusty conditions.
• Eliminates the need for aileron (roll-axis) and elevator (pitch-axis) trim
functions.
• RIGID mode stabilises flybar-less helicopters (two or more rotor blades) as
well as conventional flybar-equipped helicopters.
• The pilot channel can be used to select: horizontal mode, position mode,
RIGID mode.
• RIGID and horizontal modes even function without visual contact
between the optical sensor and the ground, i.e. no opening is required in the
helicopter fuselage if you do not need to use position mode.
• Electronic linearisation to compensate for mechanical irregularities
(angular offset) when using the H4 swashplate linkage.
• The PC adaptor (No. 84942000) is required for setting Rigid mode.
Without the PC adaptor the HeliCommand 3D makes use of the parameters
which are pre-set at the factory.
HeliCommand 3D No. 8494
• Includes all the features of the basic “3A” version, plus:
• Horizontal stabilisation for inverted flying
• Expanded set-up facilities via PC adaptor (No. 84942000) (additional Expert
settings for optimising 3D mode and control characteristics).
4
5
6-7
Index
LED Display
8
Description of facilities
9
Pilot channel
Tail rotor gyro
Automatic trim
Fail-safe
The upgrade versions of HeliCommand
Brief instructions - the essentials
Installation
Electrical earth
On-board location
Mounting the unit on the tail boom
Notes regarding internal combustion engines
Setting up
Electric-powered helicopter
Factory reset
Setting up the transmitter
Calibrating (learning) the transmitter neutral points
Configuring the HeliCommand
Setting up the HeliCommand RIGID
First flight
Test-flying
Internal-combustion helicopters: vibration test
Trimming
6
10
11
12
12
13
Tips for flying
Take-off and landing
Hovering
Control travels
Effect of the opto-sensor
In darkness, or when overflying optically smooth surfaces
Indoor flying
Checking the contrast
32
32
32
32
33
33
33
33
14
Versions and applications
34
16
HeliCommand 3A
HeliCommand 3D and above
3D manoeuvres
HeliCommand RIGID
34
34
34
34
17
17
18
19
22
22
22
22
22
23
26
28
28
28
30
Notes
For skilful pilots: differences in handling
Range of applications
35
35
35
Safety measures
We recommend
36
36
Liability exclusion
Guarantee
37
37
Fault-finding
38
Specification
Set contents
40
40
Accessories
Service
41
41
Imprint
41
7
8-9
LED Display
Description of facilities
Basically the HeliCommand offers three different modes of operation:
= auto-pilot function switched off
LED red
LED yellow = horizontal mode
LED green = position mode
Horizontal mode („yellow
yellow“): moves the helicopter to the horizontal attitude if
you release the aileron (roll-axis) and elevator (pitch-axis) controls.
This works totally independently of the optical quality of the ground surface.
For indoor flying you should select this mode; if you do not wish to, please read
the notes on page 29.
Position mode („green“): in this mode the unit stabilises the model’s position
as well as its horizontal attitude. This is the most powerful stabilisation, and
is ideal for “automatic” hovering and slow circuits. It works most effectively at
heights of about 0.5 to 2 metres above a natural surface (grass, gravel etc.).
If you release the aileron and elevator controls, the system actively brakes the
helicopter until it is stationary; all the pilot has to control is the collective pitch /
throttle function. If the model exhibits any slow drift at the hover, this can very
easily be corrected manually. For slow circuits close to the ground, you can set
a forward speed by keeping a slight constant push on the elevator stick, then
direct the model using the tail rotor stick (just like steering a car).
For higher speed and for flying at heights above about 5 m, this mode would
tend to be a nuisance because of its corrective actions; in this case you should
switch to horizontal mode („yellow“).
RIGID mode: this is a fourth mode of operation only available with the
HeliCommand RIGID: it is designed for flybar-less rotor heads, stabilising and
maintaining the helicopter’s attitude (see page 5).
Rigid mode can be combined to working parallel with the three modes described above. These options are explained on page 26.
In addition to the previously described auto-pilot functions, the HeliCommand
offers the following supplementary functions:
swashplate mixer, tail rotor gyro, and automatic trim.
8
9
10-11
Pilot channel
Tail rotor gyro
We recommend that you use this auxiliary channel as it enables you to switch
between the three modes, and also to set the desired stabilisation power. It
is advisable to use a slider or a three-position switch with selectable output
values for the pilot channel. The gain (sensitivity) must be adjusted to suit the
model.
If the pilot channel is not connected to the receiver, a pre-set value applies
which is: position mode with a setting of +70%; this is a suitable setting for many
models, and can be changed to any value you like using the PC adaptor.
The HeliCommand features an integral gyro with piezo sensor, which can be
operated in either normal or heading-lock mode. A second auxiliary channel
(“AUX channel”) is used to adjust the gain setting, and to switch between heading-lock and normal mode.
If the AUX channel is not connected to the receiver, the internal default setting
applies. This is heading hold mode set to about +65%; it can be adjusted using
the PC adaptor.
If you detect a tendency for the helicopter to oscillate (tail swings to and fro),
use a faster tail rotor servo, or reduce the gyro gain using the AUX channel or
PC. The gyro is suitable for use with high-speed digital servos.
Further adjustments can be made using the PC adaptor, e.g. travel limiting
and collective pitch > tail rotor mixing; the latter is mixed in after the gyro, and
therefore also works in heading lock mode.
The versions 3D and Rigid provide additional „expert“ adjustments e.g. delay
and “hold“- range“.
If you do not wish to use the integral gyro, an external gyro can be connected
directly to the receiver. In this case please note the following points:
1. Yaw turn rates above 400° / sec. are not allowed, since they might
seriously disturb the stabilisation system.
2. If you subsequently decide to use the internal gyro, you must first erase
any internal auto-trim values, and check the sensor direction of the gyro.
Slider more towards the center reduces the sensitivity and slows down
the auto pilot corrections.
Additionally, the auto pilot can be
overridden by smaller stick deflections.
10
11
12-13
Automatic trim
The upgrade versions of HeliCommand
This is recommended, but is not absolutely essential. Auto-trim works independently of the auto-pilot, and makes life considerably easier for beginner and
pro-pilot alike. To use it, your transmitter needs a momentary (self-centring)
button or a toggle switch, assigned to an auxiliary channel. Many transmitters
feature a Trainer switch which can be re-programmed for this purpose. The
AUX channel has to be configured as the trim function using a PC. When the
model is flying, a brief button-press is sufficient to record the trims automatically for aileron, elevator and rudder (tail rotor). The settings are stored in
the unit, but can be revised at any time. The automatic trim function requires
around eight seconds of steady hovering in order to record the correct trim
values; they can then be called up immediately by pressing the button. ((kann
bei Platzmangel raus:)) Automatic trim can also improve the performance of
the integral tail rotor gyro if the neutral pitch angle of the tail rotor blades is not
adjusted properly.
HeliCommand 3D
To activate auto-trim, the AUX channel has to be configured as the trim input
using the PC adaptor. (The tail rotor gyro input is sacrificed for this, but this
presents no problems when using the PC adaptor, as it can be used to adjust
gyro gain.) The trim is triggered by switching the AUX signal to +100%
(> approx. 60%).
The LED flickers red (if assigned) to indicate that auto-trim has been sent.
Note that the trim channel must not be assigned to any other transmitter control
actions which you may have programmed, as you might then trigger auto-trim
accidentally. The trim switch should only be operated with the model in flight
(unlike the SET-button).
For erasing the internal auto-trim values:
call up the set-up mode (page 23), and then switch on again.
This version stabilises both the normal flight attitude and the inverted flight
attitude. (in inverted flight this is limited to horizontal stabilisation („yellow“),
because position holding („green“) requires a visual link between the CCD sensor and the ground.
Even so, this is sufficient to make inverted hovering and aerobatics very much
easier.) The system does include optical interference suppression for situations where the CCD sensor is directed towards the sky, but for safety’s sake
the stabilisation mode should always be switched from „green“ to „yellow“ before you start a session of aerobatics or inverted flight.
This is particularly important for indoor flying, but also for high-speed circuits
and flying at fairly high altitudes.
Additional important notes: see “Tips on flying”, page 32
HeliCommand RIGID
If your rotor head has no flybar, you must use the HeliCommand RIGID, and
you must activate RIGID mode.
If not, you might find that hovering works properly, but the danger is of increased turning rates which could overload an internal sensor, with risk of serious
problems in the stabilisation system!
All the RIGID-Mode set-up functions can be accessed using the PC adaptor;
they are explained in detail in the HeliCommand set-up software; once you
have selected HeliCommand RIGID as the device type. If you do not change
the set-up using the PC adaptor, the HeliCommand RIGID behaves exactly like
the HeliCommand 3D (page 27).
HeliCommand Profi
Fail-safe
If you are using an FM / PPM system, the auto-pilot immediately responds to a
radio link failure by carrying out the following actions: aileron, elevator, tail rotor
to neutral, collective pitch to the last received position, stabilisation to position
mode, set to 65%. Fail-safe is not capable of eliminating all radio interference.
For optimum security we recommend the use of PCM systems.
The professional version of the HeliCommand is designed for particularly valuable model helicopters as well as for industrial helicopters and commercial
applications such as filming, still photography, surveying etc. It is designed for
maximum possible precision, and features important supplementary airborne
instruments and other features including auxiliary optics for redundant drift detection, greater flight altitudes and altitude stabilisation.
For more information please visit: www.Helicommand.com
12
13
14-15
Brief instructions - the essentials
Switching on
The unit is as simple as we could make it in terms of setting-up and flying.
However, if you are a beginner to helicopters it is really essential to ask a friend
with experience of flying these machines to help you at the initial test-flying
stage, as the functions of a helicopter are very complex.
When the HeliCommand is switched on, it carries out a self-test
(LED flashes 8 x).
During this period the helicopter must be standing horizontal and must be left
untouched.
LED flashes red continuously: error message (page 8)
This double page and all the points marked with an exclamation mark
are particularly important, and should be read carefully even by pro-standard
pilots.
Take-off
Installation
Don’t take the model off before the servos are responding to the controls!
It is important to check the controls because the throttle servo or speed controller would respond to the transmitter even if all the other servos were not yet
receiving a signal; this might be because the self-test is still running, or because
an error has been detected.
• An electrical connection must be created as an earth between the tail boom,
the motor crankcase and the helicopter chassis.
• The higher in the model the unit is installed, the smoother the stabilisation in
position mode when close to the ground, and the larger the gain setting you
can safely use.
• Please ensure that the unit is set vertically, securely fixed in the model, and
with an absolutely unobstructed view between the sensor and the ground.
• Important notes for internal-combustion helicopters and comprehensive
installation tips: see page 19.
Please observe the safety measures (page 36) at all times.
In particular, never take your eyes off the helicopter in the air even when position mode is switched on, as occasional drift or interference influences may occur
at any time without warning.
Transmitter
• Indoor flying: please be sure to read the notes on page 33
All the mixer functions for elevator, aileron and tail rotor must be disabled:
always set single-servo (H1) mode, as the HeliCommand is designed to use its
own internal mixer exclusively.
• Do not fly inverted or attempt aerobatics (3D) with the 3A version;
see page 34
Configuration
• Models without a flybar can only be stabilised using the RIGID version, and
only then if RIGID mode is activated; see page 34
The unit must be configured in order to match it to the model and the
RC system; this only needs to be carried out once (page 23).
If the standard default settings suit your model and RC system (page 22) this
setup can be omitted.
Before the first flight with the system it is essential to check the control directions and the sensor directions on all three axes! (Seite 28)
14
Flying
• Even though the system incorporates integral fail-safe and stabilisation circuits, it is not capable of avoiding all crashes caused by radio interference,
other transmitters etc. We recommend that you use a PCM system, and
check the aerial deployment in the model very carefully.
• Severe stress, vibration and ageing will eventually take their toll on system
accuracy, and may require a readjustment of the internal calibrations and
temperature compensation values if good precision is to be maintained.
This work can be carried out by any Robbe Service Centre.
15
16-17
Installation
Electrical earth
An electrical connection must be created as an earth between the tail boom,
the motor crankcase and the helicopter chassis. Note that carbon is a conductive material. Belt drives inside the tail boom are particularly dangerous, as
they act as a high voltagte generator. If you ignore this, cables running along
the tail boommay conduct sparks (which have already caused servos - not the
HeliCommand itself- to run to one end-point).
On-board location
The higher the installation in the model, the smoother the stabilisation effect
in position mode at very low altitude, and the larger the gain setting you can
safely use. In many models a suitable location is one side of the tail rotor servo,
or - using the mounting bracket supplied - the tail boom, the tail rotor servo, the
chassis or the fuselage nose.
The mounting surface should be solid and should not “give”, as this could generate resonance effects.
Installed attitude
Vertical, with sensor facing down.
Any of the four possible directions can be used.
Unobstructed view between the sensor and the ground
The cross-section of the vision cone is square, with an open angle of 15° x 15°.
For this reason you must arrange an unobstructed square vertically below the
sensor, with at least the side length
S = window size (15mm) + [0,28 * distance from window]
(see drawing).
It is important that neither the aerial wire nor anything else can get in the way
of the vision beam!
Installation in an enclosed fuselage
Cut an opening in the fuselage (see above for size); alternatively do not cut a
hole (no sensor view), and manage without position mode. In this case cover
the sensor window with dark adhesive tape.
If you do this, you can only exploit horizontal mode, and not position mode.
16
17
18-19
Mounting the unit on the tail rotor servo
Horizontal attitude
Especially with small models, it makes sense to install the unit as high as possible in order to obtain maximum ground distance. This means: as close as
possible under the flybar, with a safety margin for maximum flybar travel. The
mounting bracket supplied can often be fixed to the top of the tail rotor servo or
some other support. Do not use foam under the bracket, fix the bracket rigidly.
Alternatively stick the HeliCommand to the tail rotor servo case (with foam
tape) without using the mounting bracket.
Set the unit as close to vertical as possible, i.e. parallel to the main rotor shaft!
The electronic compensation means that an angled installation would only be
noticeable when the pilot gives a tail rotor command.
Miniature helicopters with particularly large blade pitch angles invariably hover
with a more pronounced tilt; this is necessary to counter-act for the greater tail
rotor thrust. You can compensate for this tilt using the PC adaptor, or see the
page 38: „fault-finding“.
Mounting the unit on the tail boom
Notes regarding internal combustion engines
Fix the supplied mounting bracket to the tail boom using a cable tie, pulling
it really tight. The HeliCommand can then be fixed to the bracket by applying
two strips of double-sided foam tape to the back of the unit. Once test-flying
is complete, secure it against rotation relative to the boom, using UHU-hart or
cyano-acrylate glue. Double-sided foam tape is too soft for this purpose.
Protect from vibration
Please take particular care to protect the unit from vibration!
Use soft self-adhesive foam tape, but don’t apply it to the whole of the surface;
instead just stick two very narrow strips right at the top and bottom edges of
the back panel. This means that the mounting surface must be at least as tall
as the HeliCommand itself.
• The unit must be installed as far from the exhaust as possible.
• Effective vibration protection is very important, as invisible vibration from the
engine can be a particular problem. If you can feel the HeliCommand unit
vibrating when the engine is running -even though it is installed as directedwe recommend additional vibration damping measures. Velcro (hook-andloop) tape behind the cell foam is often a suitable solution.
The safest option is a metal plate (3 mm aluminium or 1.5 mm steel) which
is first stuck to the HeliCommand; the foam strips are then applied between
this plate and the mounting surface. Additionally secure the HeliCommand
with thin rubber band.
Alternatively you could consider installing the unit in a different location,
where vibration is not so severe.
• Avoid running the motor unnecessarily rich, to avoid clouds of smoke
confusing the sensor.
Ensure that the HeliCommand cannot shift or come loose, as this could cause the model to take up an inclined attitude in auto-pilot mode, rendering it
uncontrollable.
Remove all traces of oil residue before sticking the unit in place.
We recommend that you wrap a thin rubber band round the HeliCommand to
guard against the risk of the self-adhesive foam tape coming loose.
18
• To prevent soiling we recommend that you install a protective tube,
or (better) a cubic box under the sensor. Its internal dimensions must take
the vision cone into account. Be sure to clean the window regularly right to
the edges.
19
20-21
Connections
All modern radio control systems include helicopter mixers which ensure that
the servos move as required, for example, the superimposed servo movements required for a three-point swashplate linkage.
However, when the HeliCommand is used, the mixing must be carried out
using the unit’s integral mixer. For this reason please select an unmixed helicopter program (“H1” / single servo) at your transmitter, so that only one servo
moves when you move any transmitter stick in any single plane. Once this is
the case, you can start connecting the system. If you are not sure how to set up
the radio control system, please ask the transmitter manufacturer. Alternatively
- if a throttle curve is not required - select a standard (base) program instead of
a helicopter program. This also guarantees that the signals from the auxiliary
channel sliders and switches are also transferred without any mixing.
Attention: if using an H4 swashplate linkage, the PC adaptor is necessary.
• The RC module (with cable distributor) supplied in the set must be
connected between the receiver and the servos.
It can be attached to the receiver using Velcro or double-sided tape.
• You must connect at least the aileron, elevator and collective pitch inputs to
the receiver.
• The PILOT and AUX connections are optional. Connect these cables to the
receiver output sockets to which the associated transmitter controls (sliders
or switches) of your RC system are assigned.
• The HeliCommand switches itself on when you switch the receiver on.
• Unused input cables can be stowed away by turning them through 180° and
connecting them to unused sockets on the receiver or the RC module.
• Cover the vacant socket on the HeliCommand with adhesive tape to prevent
soiling.
20
21
22-23
Setting up
When you have installed the system, or made changes at the transmitter, the
HeliCommand must be set up (only once) to match the model and transmitter,
unless you wish to leave everything at the default settings: e.g. Robbe-Futaba
transmitter, Spirit LI model helicopter, or a similar type with the same servo
directions and with round side of HeliCommand facing to the right.
Important: it is essential to check the sensors and the control directions
before flying the model for the first time (page 28)!
Optional set-up facilities:
a) Using the SET button: as described below, for (almost) all swashplate
types up to 3 servos.
b) Using the PC adaptor: in this case only steps A to D-step1 are required.
Then see the set-up software, begin with reading the data from HeliCommand. This is necessary if you are using an H4 swashplate linkage (or possibly some rare types of swashplate linkage).
Electric-powered helicopter
Be sure to disconnect the drive motor or motors to prevent them bursting into
life accidentally; alternatively connect the receiver to a separate battery!
then release it again and switch off. Job done. (If the LED becomes red: p. 8)
The calibration process can be repeated at any time. The HeliCommand now
“knows” the signals which correspond to the “neutral and stationary” command.
For this reason the calibration must always be repeated if you move the transmitter trims substantially. The trim itself is not influenced by the calibration process. For this reason please leave the trims alone once the unit has “learned”
the settings; you will only need to correct them if you make changes to the unit’s
internal mixer. When using the auto-trim option , the transmitter’s trims must
never be used; you can just leave the elevator and aileron trims at neutral.
D) Configuring the HeliCommand
The helicopter’s mechanical systems (neutral position of swashplate and tail
rotor) must be adjusted at least approximately. The calibration process can
only work properly if the input cables and servos are correctly connected, and
if any mixer functions at the transmitter are completely disabled. If in doubt,
connect any servo directly to receiver in order to insure that each channel only
responds to one stick function and to find the proper channel of each function.
Reconnect again. You should now simply run through the following steps:
Calling up the set-up mode
A) Factory reset
This resets the unit to the factory default state; it erases all settings, including
those which are only accessible using the PC adaptor. Switch on the HeliCommand with the SET button pressed in, then hold the button pressed in a second
time for at least five seconds until the LED flashes red-green alternating.
Calibrate the transmitter neutral setting (see above „C“), but holding the SET
button pressed in for at least three seconds until the LED flashes green. This
simultaneously erases the internal auto-trim values. The servos will now not run,
or will run differently to normal, according to the stage of the set-up procedure.
Setting up and storing for each step (1-5)
B) Setting up the transmitter
All swashplate mixer functions must be switched off permanently. Set the elevator and aileron travels at the transmitter to around 100%. Values for Expo
can be set. Transmitters with 1.6 ms norm (Multiplex) must be set to the UNI
mode (1.5 ms). If the integral heading-hold gyro is used, all tail rotor mixers
must be switched off at the transmitter.
C) Calibrating (learning) the transmitter neutral points
• Set the transmitter sticks to neutral, collective pitch to minimum, trims to
neutral, or - if you have already test-flown the helicopter using the
HeliCommand and only small trim values are set - leave the trims where set.
• Hold the SET button pressed in for one second until the LED glows green,
22
This is carried out using the stick actions described below,combined with a long
press on the SET button.
Changing the set-up step
The current step (1 - 5) is indicated by the number of flashes. When you call up setup mode, step 1 appears first. Press the SET button briefly to move on to the next
step without changing the setting; this also takes you back from step 5 to step 1. You
can repeat the settings as often as you like using this method. However, for the initial set-up procedure please run through all the steps in turn, as described below.
Close set-up mode
This is possible at any time simply by switching the system off.
23
24-25
The set-up steps
1) Learning the stick direction
• In set-up mode the LED will flash green at regular intervals.
Check that any electric power system is disconnected.
• Hold SET button pressed in, and move the transmitter controls to their
full travel (in any order) with the button pressed in:
Right-aileron, elevator forward (push), right yaw (tail rotor stick), then neutral
again; collective pitch maximum and leave it there. Now release the button.
From this point on you must not change the direction of any channel at the
transmitter (apart from deliberately reversing collective pitch).
2) Servo direction(s) “collective pitch”
(and recognizing linkage type)
The LED must flash twice (press SET button briefly if necessary to move on to
the appropriate step). If you now increase the collective pitch stick setting, the
swashplate should rise evenly, without tilting. You can now select the right one
from the ten possible options, working forward or back by moving the aileron
stick to either side. Store the correct setting with a long press on the SET button
(> 1 second until LED flashes 3 times).
4) Servo direction, “tail rotor”
(If external gyro is used, skip this step.) The LED must flash four times (press
SET button briefly if necessary). Select correct direction of tail rotor servo by
moving the aileron stick to either side: with tail rotor stick to the right, the nose
should move to the right, the tail rotor must “blow” to the right. You can now adjust the tail rotor neutral point, since heading hold is disabled in Step 4. Check
the setting, and store it with a long press on the SET button (>1 second).
5a) Installed position (sensor direction)
and direction of rotor rotation
The LED must flash five times (press SET button briefly if necessary). The HeliCommand now needs to know its installed orientation, i.e. whether the round
side of its housing is facing right, left, forward or back. Program this by moving
the aileron or elevator stick towards the appropriate side of the swashplate,
then give SET button a long press (>1 second) while direction of tilt is correct.
5b) Direction of main rotor rotation
In step 5 move tail rotor stick in same direction as the direction of rotation of the
main rotor (viewed from above), and store with the SET button (>1 second).
Concluding the setup
3) Servo directions „elevator“ (+ „aileron“)
The LED must flash three times (press SET button briefly if necessary). The
elevator stick should now tilt the swashplate evenly, without changing its height.
You can now select the right one from the two or eight possible options, working
forward or back by moving the aileron stick to either side.
For single servo linkage type only: choose amongst the 2 possibilities using
right roll stick movements only. If additionally the aileron (roll) direction has to
be changed, hold the aileron stick to the left for a longer time (1.5 s) and test
with left stick movements. (available only with HeliCommand versions carrying
a two-figure code on the label, left of the part No.) With other linkage types, the
direction of aileron travel should automatically be correct after storing; otherwise the servo connections are swapped over, or the aileron or pitch stick direction have been “learned” incorrectly; in that case repeat the procedure). Store
the setting with a long press on the SET button (>1 second until LED flashes
four times). Now all three directions of swashplate travel should be correct.
If the swashplate is not level, adjust the mechanical linkages at this point.
Switch on again and check the controls. Set any travel reductions at the transmitter to prevent mechanical fouling, and set the correct collective pitch range
(because travels may now be different to those set when you were using the
transmitter’s mixer). Any major travel reductions should be set in the HeliCommand using the PC adaptor. The swashplate should now be exactly horizontal;
if not, adjust it at this stage.Coarse adjustment: there should be a point in the
middle of the collective pitch range where all the servo output arms are at
neutral simultaneously. If not, unscrew the output arms and replace them in the
correct position. For fine-tuning: adjust the pushrods. Final adjustment is also
possible using the transmitter trims; if you do this, use the SET button so that
the HeliCommand “learns” them again.
Activate a RIGID mode (using the PC) if using the system in a flybar-less
helicopter.
For transmitters featuring multiple flight modes (phases): It is important to have
identical trim values for all flight modes while the HeliCommand is activated !
This is particularly important in Rigid mode. Activate a RIGID mode (using the
PC) if using the system in a flybar-less helicopter.
24
25
26-27
Setting up the HeliCommand RIGID
The available Rigid-options are shown in the drawing:
Before using the system in a flybar-less helicopter please note that it is essential to activate RIGID mode (using the PC).
The attitude-maintenance stabilisation (“head gyro”) maintains an angle of inclination once set, and prevents the model from ballooning up into wind - to
the extent of the helicopter’s control system‘s power to provide the corrective
action. You can observe this function at the swashplate, as it will remain in the
inclined attitude you have set.
Depending on the setting, some care is required before take-off to ensure that
the swashplate is not accidentally set at too great an angle (through slow drift
or accidental movement), and that the RIGID gain is not set too high.
Unlike usual practice with tail gyros, the gain setting does not need to be set
hard up to the limit of oscillation!
[OFF] mode
This corresponds to HeliCommand 3D. Not suitable for flybar-less helicopters!
The HeliCommand must only be used to control flybar-less helicopters with the
Rigid mode switched on !! Otherwise there is a risk of generating excessive
aileron / elevator rates; this could overload the sensors internally, and this in
turn could have a serious adverse effect on the horizontal mode and the position mode!
Scale models often have their swashplate travels mechanically reduced to
about half of „conventional“ aileron and elevator travels. When employing the
HeliCommand, we recommend to undo the reduction, i.e. increase the machanical throw in order to achieve optimum stability.
Rigid stabilisation has to be activated using the PC. Please check www.robbe.
com/rsc under ‚downloads‘ or www.helicommand.com for the latest software
update, after you have done the basic installation.
26
[FIX] mode
Activates the RIGID function permanently (in addition to Horizontal and Position mode as defined by Pilot Channel).
Take particular care with the RIGID gain, because you cannot reduce it in this
mode during flight using the pilot channel, and excessive values can generate
dangerous lurching or oscillating movements. Adjustment here is only available
via “sens. gain” setting in the PC (not via the “pilot channel default” setting).
[FADER] mode
Disables Hor. and Pos. mode, so the handling is like a „normal“ helicopter, i.e. the
attitude has to be controlled manually. On both sides of the pilot channel (transmitter slider) only RIGID stabilisation is superimposed symmetrically as far as the
maximum value of “RIGID sens. gain”, which can be set via PC. Slider end on either
side equals the center position of the [FIX] mode! With slider at centre point, gain
(“head gyro” for elevator and aileron equally) is reduced to 33%. This mode is
suitable for finding the optimum RIGID-gain setting. If later you switch to the
[FIX] mode, you should reduce the gain setting via PC by the same proportion
as found on the pilot slider. (E.g. Rigid-sens-gain (roll)=7, Slider=70%: new
Rigid gain=7x70%=4.9, i.e. set to 5)
27
28-29
First flight
Before the first flight you must carry out a check of the
sensors and controls for all sensor directions
• Neutral setting, directional sense of all stick and servo movements.
• Pilot channel and (if used) auto-trim button: check by LED.
(before checking auto-trim, please set collective pitch to minimum.
This prevents the trim channel from doing a (blind) trim action, yet allows
the LED to show the autotrim trigger.
• All three sensor directions. Any sensor working in the wrong direction would
cause the helicopter to crash. Set the stabilisation to “yellow” mode and briefly
move the model to and fro by hand, working around all three primary axes: tilt
to the side, tilt forward and rotate. At each movement the appropriate servos
must respond with the opposite action: the swashplate should try to remain
horizontal, the front faces of the tail rotor blades should move in the opposite
direction to the tail swing direction.
• Carry out a range check with the transmitter aerial collapsed.
Test-flying
If you are a beginner, we recommend that you ask a modelling friend with experience of helicopters to check the settings and help you with the first flight.
Notes on trimming: see pages 12 + 30
Internal-combustion helicopters: vibration test
Severe vibration or body resonance can cause serious problems with the correct operation of the sensor; three checks are therefore necessary:
1) Place your hand on the case of the HeliCommand unit and feel whether it is
vibrating.
2) Before take-off, switch to “yellow” mode and observe whether the
swashplate stays level at all rotational speeds.
3) Take off initially in “OFF” mode, then switch the auto-pilot only briefly on
and off again, as a first try for safety’s sake. If applicable, repeat this at
different motor speeds.
If problems occur, please refer to the installation notes on page 16
28
At take-off
Prior to take-off the helicopter should be standing as level as possible. If you have
to hold the helicopter inverted or at a steep angle before flying, switch the HeliCommand off, then on again before take-off. (When angled in this way, the gravitational
forces are applied perpendicular to the rotor shaft which do not occur in normal
flight, and these can have an adverse effect on the operation of the sensors.)
Checking the controls before each flight
Steuerbarkeit und Neutralstellung der Taumelscheibe auch mit eingeschaltetem
Autopilot prüfen! Nie starten, bevor sich die Servos bewegen lassen!
Gain setting
Start the test-flying schedule with a reduced gain setting! Not all helicopters
will tolerate settings above 70% in both modes, as severe oscillatory movements may occur, depending on the type and installed height of the unit. This
applies in particular when the distance between the sensor and the ground is
very small (< 0.5 m). The optimum (slider) position must therefore be tried out
during test-flying.
Set the gain so that optimum stabilisation is achieved in the “green” Pos mode
at an altitude of about 0.5 m.
If oscillation occurs ► reduce. If it drifts uncontrolled ► increase.
With tail rotor gyros it is usual practice to set the gain hard up against the limit
of oscillation, but this is not necessary with the Pilot channel of the HeliCommand. “Softer” settings look better in flight, as the model’s flight path is affected
less directly by the auto-pilot’s spontaneous control actions.
If your helicopter is extremely unresponsive or extremely agile, you may find it
necessary to optimise the stabilising effect by making use of the supplementary settings which are available via the PC adaptor.
During high-speed flight the HeliCommand only brakes the model slowly by
itself. This means: if you override the auto-pilot by giving powerful control commands (see page 34), you will have to control the helicopter actively.
Please note that a variable “forward freewheel” option can be set using the
PC adaptor.
29
30-31
Trimming
If the automatic trim is not used, then it is better to set the trims initially with the
auto-pilot switched off.
After this, and always when the transmitter trim positions have been changed
significantly, the transmitter neutral setting should be re-calibrated using the
SET button (see page 22).
In the first few seconds after take-off, the accuracy of the stabilisation system
is reduced, but precision automatically increases after about ten seconds of
flying.
For this reason, when the auto-pilot is active, it is good to wait a little while,
rather than setting the trim immediately. In most cases the trim does not need
to be readjusted after this.
If the trim is different with and without stabilisation: the transmitter neutral setting needs to be re-calibrated (page 22).
With automatic trim
Simply press the auto-trim button on the transmitter, regardless of the stabilisation mode you are using. The helicopter only needs to have been in an
approximately steady flight state for about eight seconds before you do this.
The trim always refers to the transmitter’s neutral setting, as calibrated in the
HeliCommand unit. For this reason it is not possible to adjust the aileron and
elevator trim on the transmitter at the same time (in fact, you can tape over the
trim sliders!). However, if you do move them, the new values must be “learned”
again as the “transmitter neutral setting” (page 22) before you use the auto-trim
button on the transmitter again.
Heck-Trimmung
The transmitter trim slider is only used to adjust for stationary servo position,
while in heading hold mode, and then to be left in that position.; this adjustment
can be done on the ground. If you are not using “auto-trim”, we recommend
that you additionally trim the tail rotor mechanically with heading lock switched
off, as this will avoid trim value differences when you switch between heading
lock and normal. If sensor drift occurs due to temperature fluctuations or after a
long period of operation, this can be eliminated by switching the unit on again.
(Don’t use the automatic trim for this; this only corrects the servo centres.)
30
31
32-33
Tips for flying
Take-off and landing
Cou can switch the auto-pilot on before take-off or during the flight.
Important: never set the gain higher than the optimum value established
during the test-flying schedule.
Hovering
The effect of position mode is strongest when the helicopter is flying close to
the ground. At the other extreme, the HeliCommand gives you more latitude for
free movement at greater altitudes.
If you are a beginner, start by flying at a height of around 0.5 - 1.5 m; in any
case this is the easiest altitude at which to learn. If you fly higher and get into
difficulties, the safest direction of escape is upwards. Position mode is effective
up to a height of around 3 metres in flat calm conditions; up to about 1 m if
windy. Horizontal mode is effective in any condition.
The stabilising effect only works properly when the helicopter is flying.
When the machine is standing on the ground with the rotor spinning, it must
be controlled manually!
Control travels
The auto-pilot can be overridden manually even when gain is set to maximum;
it is overridden if you move the aileron or elevator transmitter controls past
about 50%. (When you neutralise the aileron and elevator controls, the autopilot becomes active again immediately.) If you are a beginner we therefore
recommend that you control your model with small stick deflections, and set
Expo at the transmitter!
If you reduce travel at the transmitter (Dual Rates), this might disable the manual override facility. For safety reasons you must however retain a means of
overriding the system, and this can be achieved by reducing the pilot channel
at the same time. If your transmitter features multiple flight modes (phases),
you can pre-set the pilot channel to different values using flight mode programming. If you wish to reduce control travel permanently, we recommend that you
carry out the changes on the HeliCommand using the PC adaptor.
During high-speed flight, the HeliCommand will only brake the model slowly by
itself This means: if you override the auto-pilot by giving powerful control
commands, you will have to control the helicopter actively in order to slow it
down, i.e. you should not carry out such manoeuvres unless you are confident
of the control commands required.
Effect of the opto-sensor
Position mode works entirely without a visible horizon; that is why it also operates properly close to trees etc.
If you are a beginner to helicopters it is best to restrict your flying to normal
ground surfaces (grass, gravel etc.) This should ensure that maximum stabilising effect is always available.
In darkness, or when overflying optically smooth surfaces
(water, snow, car roofs, smooth unpatterned indoor floors etc.)
In such cases, i.e. when the optical ground sensor cannot detect sufficient
contrast, only horizontal mode will be active even when the unit is set to “green”
(position) mode. Brief contrast interruptions are bridged by the intelligent software, and will not be noticed by the pilot. However, if the contrast remains too
low for a long period, the remaining instruments automatically take the stabilising role; if this should happen, you will need to keep an eye on the helicopter’s
position and, if necessary, correct it with slight stick deflections. .
If you have to fly under the conditions stated above, for safety’s sake you
should select “yellow” horizontal mode beforehand. If you are unsure, check
the contrast as described below.
Indoor flying
Use “yellow” mode. “Green” mode is taboo unless you check the floor contrast from different distances (see below) and limit yourself to normal flight
attitude (in “green” position mode don’t fly inverted indoors - even with the
HeliCommand 3D !).
Checking the contrast
In the “green” position mode the LED will flicker to warn you that the contrast or
brightness is not sufficient; this means that the HeliCommand has automatically switched to “yellow” horizontal mode. You can check this close to the ground
and at various distances above ground.
Also, the sensor’s response can be watched, by setting “green” position mode
and moving your hand under the HeliCommand at a distance of about 30 cm.
32
33
34-35
Versions and applications
Notes
HeliCommand 3A
• Over tall grass, loose foliage etc. it is always better in the interests of safety
to fly fairly high, because objects moving about in the rotor downdraught may
adversely affect position mode, or switch to the horizontal “yellow” mode.
This basic Version is not suitable for aerobatics and 3D manoeuvres.
The HeliCommand 3D and RIGID are designed specifically for this type of flying!
HeliCommand 3D and above
For brief 3D flying (single turn-around manoeuvres) the “yellow” horizontal
mode can be left switched on to provide support. This mode provides stabilisation in normal flight and inverted flight. You can still override the stabilisation
manually. The degree of manual control can be varied using the pilot channel,
and a wide range of additional adjustment facilities is available using the PC
adaptor.
One particular use is for switching between positive and negative hovering.
The stabilisation can also be switched on for use as an “emergency knob”, but
please note the following points in this regard:
• If the model is subject to a rapid change in temperature, please wait for at least
five minutes for the system to settle down before you switch on, and do not
use the system below -5°C or above +50°C. (If the stabilisation is switched off,
it can be used between -10°C and +50°C.) It is best to switch on only just be
fore take-off, and then to leave the helicopter level, i.e. avoid touching it in any
way.
• If drift is detectable after a 90° ... 180° tail rotor rotation, the installed attitude
in the model can be optimized (see fault-finding).
• Don’t use the system in the rain - short circuit hazard!
3D manoeuvres
For agile 3D manoeuvres with a multitude of subsequently flown rolly, loopings
etc, even the HeliCommand 3D should be switched to OFF (red) beforehand,
and not switched on again until at least 15 - 20 seconds after the manoeuvring
has finished.
The same applies to multiple stall-turns, since these may affect the horizontal
neutral detection under certain circumstances.
HeliCommand RIGID
Activating RIGID mode using the PC adaptor minimises the effects of wind
gusts and ballooning when flying into wind or in high speed.
In this mode unrestricted 3D flying and aerobatics are possible, and can be
carried out with excellent accuracy.
When you switch on horizontal or position stabilisation, the same applies as
stated for the HeliCommand 3D; see above.
34
For skilful pilots: differences in handling
• Switch off the stabilisation before flying stall-turns, because - of course - the
system would try to return the helicopter to the horizontal attitude.
• Use “green” position mode only for hovering and for slow flying close to the
ground!
• To incline the helicopter at large angles, e.g. in order to brake from high speed,
you will need to apply larger control deflections than without stabilisation.
For auto-rotation: reduce the gain.
• To fly smooth turns hold the nominal angle of bank with aileron, otherwise the
helicopter will try to right itself.
Range of applications
The system is designed to make it easier to control model helicopters as used
by hobby pilots.
Caution! Not designed for manned vehicles or for military purposes. Infringement
is strictly prohibited; breaches of this rule will be pursued as a licence violation.
The modelling versions HeliCommand 3A, 3D and RIGID are not suitable for
use in built-up areas, close to or above buildings and installations.
For professional applications such as still photography / filming / surveying etc.
the HeliCommand Profi should always be used. See on page 13.
35
36-37
Safety measures
Liability exclusion
The term “auto-pilot” does not mean that the model flies completely
automatically!
As with any conventional model helicopter flying, great care and practice are
required when using this product.
No auto-pilot is capable of eliminating the dangers of operational errors. It
could even be argued that the risks are greater with such an aid, because the
ease of control could allow a pilot to become careless, or sway less trained
pilots into flying in situations where they cannot regain control if a technical
fault should occur.
Technical instruments are liable to failure, and a helicopter fitted with an
auto-pilot incorporates more items which could go wrong.
As everyone knows, flight instruments are not immune to problems and failure.
In the interests of safety, no pilot should ever rely exclusively on the stabilisation system, and pilots should satisfy all required safety measures at all times.
Specialised knowledge and expertise are required in order to install, set up and
operate the auto-pilot and the helicopter itself. Errors and negligence can result
in accidents, which may cause serious personal injury, damage to property or
traffic accidents. Since the manufacturer and retailer are unable to ensure that
you handle the product correctly and competently, we can do no more than
expressly point out these hazards. We deny liability for any damage resulting
from the use of our products, from problems in the installed instruments and
from failure of the signal transmission link, unless such denial contravenes
statutory requirements.
We recommend
• Always keep your model a safe distance from persons and objects, and fly in
a cautious, conscientious manner.
• Do not under-estimate the energy contained in spinning rotor blades.
For practice-flying with the larger model helicopters we recommend that you fly
behind a safety net or football goal, as are present at many model flying sites.
• If you are a beginner, ask a model pilot with experience of helicopters to help
and advise you - especially when test-flying a new model or a first installation
of the HeliCommand.
• Set the stabilisation level to suit the ambient conditions. Always operate the
auto-pilot in such a way that you can switch it to manual control in flight, or at
least in such a way that you can override it in an emergency.
• Always fly at approved model flying sites, well away from residential areas
and public roads, and observe legal requirements.
• Keep well clear of radar stations, radio transmitter masts and other potential
sources of radio interference.
• Third-party insurance is in most places a basic essential when flying model aircraft.
• Never take your eyes off the helicopter when it is flying.
• If you ever pass on this product, be sure to pass on these warning notes to
the new owner.
Guarantee
We guarantee this device for a period of 24 months. The till receipt given to
you when you purchased the product serves as proof of the start and finish of
the guarantee period. Any repairs carried out under guarantee do not extend
the guarantee period. During the guarantee period we will correct any functional defects, material faults or production faults at no cost to you. We will not
consider additional claims, e.g. for consequent damage. Goods must be sent
to us pre-paid; we will pay return carriage. We will not accept packages sent
without pre-paid postage. We accept no liability for transport damage or the
loss of your shipment; we recommend that you take out suitable insurance to
cover this risk.
The following requirements must be fulfilled if your guarantee claim is to be
processed:
• You must send the till receipt to us together with the product.
• You must have operated the unit in accordance with the operating instructions.
• You must have used only recommended power sources and genuine robbe
accessories.
• There must be no damage present caused by damp, unauthorised
intervention, excess voltage, overload or mechanical stress.
• Please include a brief but accurate description of the fault, to help us locate
the problem.
36
37
38-39
Fault-finding
Servos do not move ► see page 8 „LED indicators“
Jitter or oscillation in position mode, especially when close to the ground
• Reduce gain of position mode
• Installed position too low?
► Install as high as possible, see page 17
• try increase PC-setting of aileron & elevator travel and hor-sens-gain.
Machine is not stable in position mode, especially at higher altitude
• Sensor window dirty?
► Protect from exhaust (glow models), clean regularly
• Low-contrast ground surface, e.g. snow, smooth asphalt, water?
► Switch to horizontal mode
• Trim not “learned” correctly? see page 30
• Increase gain further? ► via Pilot channel or PC
• Dense clouds of exhaust gas in the vision beam?
► Set motor leaner, and install unit further away from the exhaust.
• Aerial wire or other obstacles in the sensor view beam?
(see first paragraph on page 17, “Installation”)
• Much loose foliage or tall grass etc., moving in the rotor downdraught?
► Switch to horizontal mode.
Flight attitude not steady, in position and in horizontal mode
• Vibration (visible or invisible), or excessive body resonance affecting the case
(especially with glow motors)?
► See Installation > Internal-combustion engines.
• Double-sided foam tape not applied as two narrow horizontal strips?
► See page 16
Trim discrepancies with and without stabilisation
• After take-off the accuracy of stabilisation increases automatically within a
few seconds of flying.
• Transmitter trims moved?
► Calibrate (“learn”) the neutral setting again.
• Severe temperature fluctuations?
► Leave the unit for about five minutes to acclimatise, then switch on again.
• Severe vibration?
► See “Flight attitude not steady” fault
38
Automatic trim not working accurately
• Have you moved the transmitter trims?
► See page 30. Either re-calibrate the trim or avoid touching the transmitter
trims.
Drift after tail rotor swing
• Unit not installed exactly vertical; lightweight helicopter with high blade pitch
angle?
► Optimise by flying a 90° right-hand turn from the hover, with stabilisation
set to “yellow” mode. If the helicopter was stationary before the
quarter-pirouette, but always drifts in a particular direction afterwards, then
the installed location can be optimised.
If the model drifts at an angle left / forward (relative to the new position),
incline the HeliCommand further to the left; the reverse applies if it drifts right
/ rearward.
If the machine drifts right / forward, tilt the HeliCommand slightly forward; do
the reverse if it drifts left / rearward.
Inverted flight:
Roll centre deviation when hovering inverted, or after switching back
► Optimise the setting „neutral tilt compensation“
(using the PC adaptor; see PC set-up software).
Drift after aerobatic manoeuvres (stall-turns, rolls etc.)
• HeliCommand 3A in use?
► Not suitable for inverted flight or steep flight attitudes!
► upgrade to 3D.
• External tail rotor gyro in use, and rotational (yaw) rate > 400° / second?
► Reduce rotational rate (Seite 25)
• Completed a series of full rotations, such as multiple stall-turns, rolls or
loops?
► See notes on page 34!
Tail rotor servo not at centre
• External gyro used recently?
► Erase auto trim values.
39
40-41
Specification
Accessories
Operating voltage:
4,8 ... 6 Volt (4 ... 5 NC)
Current drain:
55mA (bei 5V)
Dimensions:
55 x 35 x 22,5 mm
Weight incl. cables:
33g
Temperature range:
in ‚OFF‘ mode:
-5° ... +50°C,
-10° ... + 50° C
Helicopter mixer:
H1/ H2/ H3 / H3 (140°) / H4 / H4 (+45°)
RC module suitable for use with:
Robbe-Futaba PPM / PCM 1024 / PCM G3 modulation
Graupner/JR PPM 8, PPM 12, SPCM modulation
MPX PPM8, PPM 12 with UNI modulation
And other transmitters with standard 1.5 ms neutral position.
• PC adaptor with software CD No. 84942000
• Spare RC module (for use in additional models):
(for HeliCommand with 4-pin socket) No. 8494-4000
(for HeliCommand with 3-pin socket) No. 8494-3000
incl. Mounting bracket, hook-and-loop tape and o-rings to change
HeliCommand main unit
Version update: robbe Service Centres
(see robbe catalogue)
Service
robbe – Service
Metzloser Strasse 36
36355 GREBENHAIN
Tel.: 0049-6644-87-777
Fax: 0049-6644-7412
Set contents
•
•
•
•
•
•
HeliCommand main unit
RC module (with cable distributor)
Mounting bracket
Self-adhesive double-sided foam tape, 2 sets, 2 strips each
Cable tie
Instructions
Imprint
robbe Modellsport GmbH & Co. KG
Postfach 1108
D-36352 Grebenhain
Internet: www.robbe.com
E-Mail: [email protected]
Tel.: 0049 (0) 6644 / 870
Fax: 0049 (0) 6644 / 7412
40
41
42-43
Notes:
Notes:
______________________________________________________________
______________________________________________________________
______________________________________________________________
______________________________________________________________
______________________________________________________________
______________________________________________________________
______________________________________________________________
______________________________________________________________
______________________________________________________________
______________________________________________________________
______________________________________________________________
______________________________________________________________
______________________________________________________________
______________________________________________________________
______________________________________________________________
______________________________________________________________
______________________________________________________________
______________________________________________________________
______________________________________________________________
______________________________________________________________
______________________________________________________________
______________________________________________________________
______________________________________________________________
______________________________________________________________
______________________________________________________________
______________________________________________________________
______________________________________________________________
______________________________________________________________
______________________________________________________________
______________________________________________________________
______________________________________________________________
______________________________________________________________
______________________________________________________________
______________________________________________________________
______________________________________________________________
______________________________________________________________
______________________________________________________________
______________________________________________________________
42
43
1
Bedienungsanleitung Version 1.2
MODE D‘EMPLOI
Version 1.3
► www.robbe.com
2-3
Nous vous félicitons de l’achat du système HeliCommand que vous venez
d’effectuer.
Il n’existe pas d’autre système sur le marche qui soit en mesure de stabiliser
les modèles réduits d’hélicoptères aussi bien dans leur assiette que dans leur
position de vol horizontale.
L’origine du système HeliCommand est un système de pilotage automatique
professionnel pour les hélicoptères à usage commercial, pour la prise de vues
ou pour effectuer des mesures, il est élaboré à partir de plusieurs systèmes
brevetés d’un type nouveau.
Son domaine d’intervention couvre aussi bien les besoins des pilotes débutants qui sont certes parfaitement familiarisés avec les fonctions de leur modèle
mais pas encore en mesure de préserver la stabilité des diverses assiettes,
que les besoins des pilotes expérimentés souhaitant développer leurs capacités et s’entraîner avec une stabilisation réduite, et que ceux des professionnels
souhaitant se concentrer complètement sur les fonctions de leur spectacle.
En tant que débutant, le système HeliCommand vous permettra d’effectuer de
longs vols stationnaires avec votre hélicoptère, le longs vols circulaires et des
séances d’entraînement simplifiées.
Une remarque préliminaire toutefois : malgré les qualités exceptionnelles de
ce système, le pilote doit rester très attentif et éviter de se laisser emballer
pas ses manœuvres susceptibles de le mettre en danger ou d’y exposer les
autres.
À l’adresse de ceux qui refusent catégoriquement une assistance électronique
pour le pilotage des hélicoptères : le système HeliCommand n’a pas été développé pour remplacer un moniteur ou les stages de pilotage indispensables
mais pour accroître leurs connaissances effectives et pour leur permettre de
voler plus sûrement.
2
3
4-5
HeliCommand 3A No. 8493
HeliCommand RIGID No. 8495
• Avec fonction „pilote automatique“, stabilise tous les mouvements horizon
taux pilotés : Inclinaison, vitesse; position
• Voie complémentaire („voie pilote“) par la mise au point de l‘importance de
la stabilisation et la commutation entre mode horizontal et mode Position
• Gyroscope avec verrouillage de la trajectoire (Heading-Lock), dispositif de
mixage du plateau cyclique et Dispositif de réglage de précision (Trimm)
automatisé
• Seconde voie complémentaire („voie AUX“) pour la sensibilité du gyroscope
et le mode (normal/ Heading Lock) ou, facultativement pour dispositif de
réglage de précision (Trimm) automatisé
• Configurer sans branchement d‘un micro-ordinateur à l‘aide d‘une simple
procédure d‘apprentissage pour pratiquement tous les types de plateaux
cycliques jusqu’à 3 servos de tête de rotor
• Sécurité intégrée, en présence d‘une panne de transmission (avec PPM /
FM), avec saut dans la stabilisation de position et le pas sur ‚hold‘
• Pour hélicoptères à moteur thermique et à moteur électrique
• Mise en oeuvre possible aussi bien en plein air que dans une salle
• Adaptateur de micro-ordinateur disponible comme accessoire pour d’autres
mises au point, telles que: ajustement indispensable pour l’asservissement
de type HR4, l’option automatisme de mise au point, la fonction roue libre
pour le vol de translation avant, Optimisation des mises au point pour le
pilote automatique et le gyroscope de queue, etc.
• Comporte toutes les caractéristiques des systèmes HeliCommand 3A et
3D, avec en plus:
• Le mode RIGID pour la stabilisation des têtes de rotor sans masselottes
stabilisatrices, haute efficacité,
contre l‘autocabrage et le décrochage des modèles lorsque la
vitesse et les coups de vents sont plus importants
• Rend le réglage de précision au neutre des fonctions de roulis et de tangage inutile
• Le mode RIGID stabilise aussi bien (bipales et au-delà) les hélicoptères
munie d‘une tête sans masselottes que les hélicoptères normaux munis de
masselottes stabilisatrices
• La voie pilote permet de sélectionner : le mode horizontal, le mode position,
le mode RIGID
• Les modes RIGID- et horizontal fonctionnent également sans contact visuel
du capteur optique par rapport au sol, de sorte que si on se passe du mode
position, il n‘est pas nécessaire de réaliser un trou dans le fuselage
• Linéarisation électronique contre les contraintes mécaniques (décalage angulaire) pour l‘asservissement de type H4
• Pour la mise au point du mode RIGID-Mil est absolument indispensable de
disposer de l‘adaptateur pour micro-ordinateur (réf. 84942000).
Sans adaptateur pour micro-ordinateur, les paramètres du système HeliCommand 3D sont préréglés dans nos ateliers
HeliCommand 3D No. 8494
• Toutes les caractéristiques de la version de base „3A“ avec en plus:
• Stabilisation horizontale pour le vol dos
• Possibilités de mise eu point étendues à l‘aide d‘un adaptateur pour
micro-ordinateur (réf. 84942000)
(réglages experts supplémentaires pour l‘optimisation du mode 3D et du
comportement en vol)
4
5
6-7
Sommaire
Indicateur à LED
8
Clarification des possibilités
9
Voie pilote
Gyroscope de queue
Dispositif de réglage de précision (Trimm) automatisé
Sécurité intégrée (Failsafe)
Versions supérieures du système HeliCommand
10
11
12
12
13
Notice abrégée - l‘essentiel
14
Montage
16
Mise à la masse de la flèche du rotor arrière
Position d’implantation
Montage sur la flèche du rotor arrière
Recommandations concernant les modèles à moteur thermique
Réglage
En présence d’un entraînement électrique
Remise à zéro à l’usine (Factory-Reset)
Mettre l’émetteur au point
Enseigner les positions neutres à l’émetteur
Configurer le système HeliCommand
Le mode mise au point
Réglage du système HeliCommand RIGID
Le premier vol
Essai en vol
Avec les hélicoptères à moteur thermique: Essai de vibration
Réglage de précision (trimm)
6
17
17
18
19
Quelques conseils de pilotage
Décoller et atterrir
Vol stationnaire
Débattements de commande
Effet du capteur optique
Au crépuscule ou pour survoler des surfaces optiquement planes
Vol en salle
Contrôle du contraste
32
32
32
32
33
33
33
33
Exploitation des différentes versions
34
HeliCommand 3A
HeliCommand 3D ou versions supérieures
Manoeuvres 3D
HeliCommand RIGID
34
34
34
34
À noter
Pour les pilotes expérimentés: différences de manipulation
Domaine d‘intervention
35
35
35
22
22
22
22
22
23
23
26
Consignes de sécurité
Nos recommandations
36
36
Exclusion de la responsabilité
Garantie
37
37
Élimination des dérangements
38
Caractéristiques techniques
Contenu de la livraison
Accessoires
Service après-vente
40
40
41
41
Impression
41
28
28
28
30
7
8-9
Indicateur à LED
Clarification des possibilités
En principe, il existe trois modes d‘exploitation différents:
LED rouge = fonction pilote automatique coupée
LED jaune = mode horizontal
LED vert = mode position
Mode horizontal „jaune
jaune“: Ramène l‘hélicoptère à une assiette horizontale
lorsqu‘on relâche les manches de commande du roulis et du tangage. Le principe s‘applique absolument sans relation avec la structure du sol. Pour le vol
en salle il est impératif ou bien de sélectionner ce mode et ou bien de consulter
l‘indication de la page 33.
Mode position „vert“: En plus du mode horizontal, c‘est également la position
du modèle qui est stabilisée. La stabilisation la plus effective pour le vol stationnaire „automatique“ et les vols circulaires lents, agit le plus efficacement
à une altitude de 0,5 à 2 mètres approximativement au-dessus du sol naturel
(herbe, pierres, etc.). Si on relâche les manches de commande du roulis et du
tangage, l‘hélicoptère décélère activement jusqu‘à l‘immobilisation. Seule la
fonction pas/gaz doit rester asservie. Il est très aisé de réparer à la main une
dérive lente éventuelle du modèle dans la position de vol stationnaire. Pour de
lents vols circulaires au voisinage du sol, il est possible d‘établir une vitesse
de translation avant à l‘aide d‘un léger débattement en tangage et de piloter la
direction comme en mode Auto avec le manche du rotor arrière.
Pour les vols circulaires rapides ou à des altitudes supérieures à 5 m approximativement, ce mode risquerait d‘être perturbant à cause des propres actions
de commande du pilote automatique; dans ce cas, il faut commuter sur mode
horizontal „jaune“.
Mode RIGID: Représente le quatrième mode du système HeliCommand: stabilisation continue („pour les têtes de rotor sans masselottes stabilisatrices“),
travaillant parallèlement aux 3 modes décrits précédemment. Cf. page 5.
En plus des fonctions de pilotage automatique décrites précédemment, le système HeliCommand propose d‘autres fonctions: dispositif de mixage du plateau cyclique, gyroscope de rotor arrière et dispositif automatique de réglage
de précision).
8
9
10-11
Voie pilote
Gyroscope de queue
Il est recommandé de brancher cette voie supplémentaire pour être en mesure
de passer de l‘un à l‘autre des trois autres modes en cours de vol et également pour être en mesure d‘établir l‘importance de la stabilisation souhaitée.
Il est recommandé d‘utiliser un curseur ou un interrupteur à trois étages avec
possibilité de sélectionner les valeurs de sortie. En fonction du modèle, il peut
s‘avérer nécessaire d‘ajuster la sensibilité.
Si la voie pilote n‘est pas raccordée au récepteur, prévaut la valeur prédictive
établie à l‘usine avec le mode position à +70%, ce qui représente une valeur
initiale appropriée à de nombreux modèles et qu‘il est possible de modifier à
volonté avec l‘adaptateur pour micro-ordinateur.
La système HeliCommand est équipé d‘un gyroscope piézo intégré qu‘il est
possible d‘exploiter facultativement en mode normal ou en mode avec verrouillage de trajectoire (Heading-Lock).
Le réglage de la sensibilité et la commutation (de Heading-Lock / sur Normal)
interviennent à l‘aide d‘une seconde voie complémentaire „voie AUX“.
Si la voie AUX n‘est pas raccordée au récepteur, c‘est le réglage initial de
+65% Heading Hold approximativement qui prévaut et qu‘il est possible de
modifier à l‘aide de l‘adaptateur pour micro-ordinateur.
Si le modèle a tendance à effectuer un mouvement pendulaire : utiliser un
servo de rotor arrière plus rapide, ou réduire la sensibilité (voie AUX ou microordinateur). Le gyroscope est également approprié aux servos numériques
rapides.
D‘autres mises au point sont possibles avec un adaptateur pour micro-ordinateur, ainsi, par exemple, la limitation de la course et le mixage du pas vers le
rotor arrière (le mixage intervenant en aval du gyroscope, il fonctionne donc
également en présence d‘un verrouillage (Heading-Lock)) sur les versions 3D
et RIGID sont également possibles les réglages experts tels que la temporisation (Delay = comportement d‘enclenchement) et gamme de maintien.
En alternance avec le gyroscope intégré, il est possible de raccorder un gyroscope externe directement au récepteur. En l’occurrence, observer impérativement ce qui suit :
1. Des coefficient de rotation supérieurs à 400°/s ne doivent en aucun cas
apparaître sinon, risque de dérangements graves.
Curseur plus vers le milieu réduit la sensibilité et
exécute les corrections du pilote automatique plus
lentement.
2. Si, ultérieurement, on utilise quand même le gyroscope interne, il faut
éventuellement d‘abord effacer les valeurs de réglage de précision automatiques internes et contrôler la direction de l‘action du gyroscope.
Simultanément le pilote automatique peut être déjà
surrégulé par de petits débattements de commande
manuelle.
10
11
12-13
Dispositif de réglage de précision (Trimm) automatisé
Versions supérieures du système HeliCommand
À recommander mais pas absolument indispensable. Fonctionne indépendamment
du pilote automatique et représente une simplification sensible pour le débutant et
le professionnel. À ce titre, il faut disposer sur l‘émetteur d‘un bouton sur une voie
complémentaire ou d‘un interrupteur à bascule avec fonction de moment à ressort
de rappel. (Sur certains émetteurs il est également possible à cette fin de reprogrammer un interrupteur d‘écolage (moniteur-élève). La voie AUX doit être configurée sur la fonction de réglage de précision (Trimm) à l‘aide d‘un micro-ordinateur.
Il suffit alors pendant le vol d‘une courte pression sur le bouton pour exécuter automatiquement le réglage de précision du roulis, du tangage et sur l‘axe de lacet.
Cette configuration reste en mémoire et peut être reprise à volonté. L‘automatisme
se contente de 8 secondes approximativement de vol stationnaire pour déterminer
des valeurs de réglage de précision correctes. Celles-ci seront immédiatement activées par pression sur un bouton. Le dispositif automatique de réglage de précision
améliore également les performances du gyroscope de rotor arrière implanté au
cas où l‘angle d‘attaque neutre du rotor arrière n‘est pas parfaitement réglé.
Pour l‘activation, configurer la voie AUX comme entrée de réglage de précision via
l‘adaptateur pour micro-ordinateur. (L‘entrée du gyroscope arrière est sacrifiée à
cette fin, ce qui est toutefois aisé à réaliser avec l‘adaptateur de micro-ordinateur
étant donné qu‘il est possible d‘y régler la sensibilité du gyroscope). Le réglage est
déclenché par le changement du signal AUX sur + 100%
(> approx. 60%). La fonction émise est identifiable sur la LED par un scintillement
rouge (lorsqu‘elle est affectée).
La voie de réglage de précision ne doit pas être affectée par d‘autres actions de
transmetteurs programmées sur l‘émetteur et doit pouvoir être enclenchée sans se
faire remarquer et uniquement en vol (ne pas confondre avec la touche SET).
Effacer les valeurs de réglage de précision internes :
Accéder au mode mise au point (page 23) puis remettre en marche.
Stabilise aussi bien l‘assiette de vol normale que l‘assiette de vol dos, l‘assiette
de vol dos est limitée à la stabilisation horizontale („jaune“), étant donné que
le maintien de la position („vert“) a besoin de la liaison optique avec le sol du
capteur CCD.
Cela suffit pour simplifier grandement le vol dos stationnaire et la voltige.
Lorsque le capteur CCD est dirigé vers le ciel, sont naturellement prévus des
dispositifs d‘antiparasitage contre les influences optiques perturbatrices, pour
des raisons de sécurité il faut toutefois commuter au préalable le mode stabilisation de vol de voltige en vol dos de „vert“ à „jaune“.
Cette mesure est particulièrement importante pour le vol en salle! (Tout comme
en ce qui concerne le vol circulaire et le vol à haute altitude).
Autres indications importantes : Cf. „Conseils de vol“ page 32
HeliCommand 3D
HeliCommand RIGID
Pour les têtes de rotor sans masselottes de stabilisation seul le système HeliCommand RIGID est admissible et uniquement lorsque le mode RIGID est activé. Sinon, dans certaines circonstances le vol stationnaire serait susceptible
de fonctionner mais le danger existe que, à cause du coefficient de virage plus
important, un comportement survireur du capteur interne se manifeste avec
perturbation importante du mode horizontal !
Toutes les possibilités de mise au point sont accessibles par adaptateur pour
micro-ordinateur et très largement détaillées dans le logiciel de mise au point
du système HeliCommand dès que l‘on a sélectionné le type d‘appareil HeliCommand RIGID. Sans mise au point via l‘adaptateur de micro-ordinateur, le
système HeliCommand RIGID se comporte comme le système „HeliCommand
3D“ (page 27).
Sécurité intégrée (Failsafe)
HeliCommand Profi
Sur les ensembles de radiocommande FM / PPM, une panne de transmission
est immédiatement pontée par les actions suivantes: retour au neutre du roulis,
du tangage et de l‘axe de lacet, le pas revient sur la dernière position reçue,
stabilisation du mode position sur 65%.
Les signaux parasites ne sont éliminés que partiellement par le système de
sécurité intégrée. Pour une sécurité optimale, nous recommandons les ensembles de radiocommande à modulation PCM.
Pour les modèles d‘hélicoptère particulièrement précieux, de même que pour
les hélicoptères industriels et les applications commerciales telles que prises
de vues, films, tâches métrologiques, etc., nous recommandons la version
PROFI du système HeliCommand. Il est conçu pour la très grande précision
et comporte encore d‘autres instruments de bord importants, entre autres, des
optiques supplémentaires avec détection redondante de la dérive, des altitudes de vol plus importantes et la stabilisation en altitude.
Pour plus d‘informations, consulter notre site : www.HeliCommand.com
12
13
14-15
Notice abrégée - l‘essentiel
Mettre en marche
La mise au point et le vol ont été ramenés à la plus grande simplicité possible.
Étant donné la complexité des fonctions d‘un hélicoptère, il est absolument
impératif, si l‘on est „pilote d‘hélicoptère débutant“ de demander l‘assistance
d‘un „collègue“ expérimenté pour la première sortie.
Immédiatement après la mise en marche, le système HeliCommand effectue
un autotest (LED clignote 8x).
Pendant ce temps, il faut que l‘hélicoptère soit parfaitement vertical et absolument immobile. La LED reste allumée en permanence en rouge = message de
dérangement (page 8).
Tous les emplacements repérés par
dans la notice sont particulièrement
importants et même les professionnels doivent en tenir compte!
Démarrer
Montage
• Réaliser impérativement une connexion conductrice comme liaison équipotentielle entre le rotor arrière, le carter du moteur et le châssis.
• Plus le lieu d‘implantation est élevé et plus calme est le mode position au
voisinage du sol et donc meilleur le réglage de la sensibilité.
• Installer le capteur en position d‘implantation verticale avec une vue sans
entraves du capteur vers le sol en veillant à ce qu‘il soit parfaitement maintenu dans son support !
• Consignes importantes concernant les hélicoptères à moteur thermique et
conseils d‘implantation détaillés, Cf. page 19.
Émetteur
Aucune fonction de mixage de tangage, de roulis ou du servo du rotor arrière
ne doit être activée mais toujours le mode servo unique (H1) étant donné que
le système HeliCommand travaille systématiquement avec son dispositif de
mixage interne.
Configurer
Pour accorder le modèle et l‘ensemble de radiocommande, il est indispensable
d‘effectuer une configuration initiale unique (page 23).
Sauf si le réglage établi à l‘usine est approprié (page 22).
De toute manière, avant le premier vol, il faut contrôler aussi bien le sens
des débattements que la direction de l‘efficacité des capteurs sur les 3 axes!
(Page 28)
14
Ne jamais décoller avant que les servos ne se meuvent! Voilà pourquoi il est
indispensable d‘effectuer un essai de pilotage car le servo des gaz ou la variateur du moteur sont susceptibles de démarrer également lorsque tous les
autres servos n‘obtiennent encore aucun signal et ne sont donc pas asservis
- parce que le l‘autotest est en cours d‘exécution ou qu‘un dérangement a été
détecté.
Voler
Observer scrupuleusement les mesures de précaution indiquées (page 36).
Même lorsque le mode position est en marche, observer systématiquement
l‘hélicoptère particulièrement en vol étant donné qu‘il est toujours possible
qu‘intervienne une dérive ou que des incidences perturbantes se manifestent.
• Vol en salle : Observer impérativement les consignes fournies page 33
• Ne pas effectuer de figures de voltige (3D) ni ne voler en vol dos avec la
version 3A. Cf. page 34
• Les modèles équipés d‘une barre stabilisatrice ne doivent être stabilisés
qu‘à l‘aide de la version RIGID le mode RIGID étant activé, Cf. page 34
• Il n‘est pas possible à 100% d‘éviter les chutes provoquées par des
signaux parasites, par d‘autres émetteurs, etc. malgré le dispositif
de sécurité intégrée. Nous recommandons l‘emploi d‘ensembles
de radiocommande à modulation PCM et un contrôle particulièrement attentif de l‘agencement de l‘antenne.
• Les charges rudes, les vibrations et le vieillissement sont susceptibles de
réduire naturellement la précision et d‘exiger un recalibrage à l‘usine et des
compensations de chaleur pour restaurer la précision.
Cette intervention est proposée par le service technique après-vente robbe.
15
16-17
Montage
Mise à la masse de la flèche du rotor arrière
Réaliser d‘abord impérativement une connexion conductrice comme liaison
équipotentielle entre le rotor arrière, le carter du moteur et le châssis. Le carbone est également conducteur.
L‘entraînement à courroie dans la flèche du rotor arrière fonctionne comme un
‚générateur à ruban‘. Le non-respect de cette mesure et l‘agencement de brins
sur la flèche sont susceptibles, par étincelage, de détériorer les servos (pas le
système HeliCommand) et à se déplacer en fin de course.
Lieu d‘implantation
Plus le lieu d‘implantation est élevé et plus calme est le mode position au
voisinage du sol et donc meilleur le réglage de la sensibilité. Sur de nombreux
modèles, l‘emplacement idéal est constitué par la paroi latérale du servo du
rotor arrière, ou à l‘aide de l‘équerre de montage jointe, par exemple à la flèche
du rotor arrière, servo du rotor arrière, châssis ou à l‘avant au fuselage.
La surface de montage doit être solide et ne pas s‘affaisser pour éviter les
résonances.
Position d’implantation
Verticalement avec le capteurs vers le bas. Toutes les 4 directions d‘orientation
sont possibles.
Visibilité dégagée du capteur vers le sol
Il est absolument indispensable que le capteur optique dispose d‘une vue parfaitement dégagée vers le bas. La section du cône de balayage est carrée
avec une ouverture de 15° x 15 °, c’est-à-dire qu’au centre sous le capteur, il
faut dégager un carré présentant un côté d’au moins
S = ouverture de la fenêtre (15mm) + [0,28 * écart du boîtier]
(Cf. illustration à gauche). Si nécessaire, découper la cabine. Le fil d’antenne ni
tout autre objet ne doivent s’engager dans le faisceau de balayage !
Pour une implantation dans une coque fermée
Ou bien découper une ouverture (taille: Cf. la formule citée ci-dessus ou
l’illustration à gauche) ou sans capteur en faisant l’impasse sur le mode positionnement. Dans ce cas, boucher la fenêtre du capteur avec un morceau de
ruban adhésif sombre.
Ensuite, au lieu du mode positionnement, n’activer que le mode horizontal.
16
17
18-19
Montage au servo arrière
Assiette horizontale
Pour une meilleure garde au sol, il est rationnel, surtout sur les petits modèles,
de choisir une position d’implantation suffisamment haute qu’il subsiste encore tout juste un écart sûr par rapport à la barre stabilisatrice même lorsqu’elle
est penchée.
Pour ce faire, il est possible der fixer l’équerre de maintien également sur la
partie supérieure du servo de rotor arrière ou un autre support. Éviter d’utiliser
de la mousse plastique à cet endroit mais fixer l’équerre de manière parfaitement rigide. Il est également possible, alternativement, de coller le système
HeliCommand directement sur le boîtier sans l’entremise de l’équerre.
Aligner autant que possible parfaitement à la verticale par rapport à l’arbre du
rotor principal.
Une implantation inclinée ne se manifestera qu’avec les déplacements du modèle à cause d’une compensation électronique.
Les plus petits hélicoptères avec un angle d’attaque particulièrement important
présente une inclinaison plu prononcée en vol stationnaire pour compenser la
poussée plus importante du rotor arrière. Il est possible d’ajuster ce point à
l’aide de l’adaptateur pour micro-ordinateur ou consulter le chapitre „suppression des dérangements“ (page 38).
Montage sur la flèche du rotor arrière
Recommandations concernant les modèles à moteur thermique
Fixer le montant de mise en place livré avec des ligatures de câbles à la flèche
du rotor arrière en veillant à serrer parfaitement. Coller ensuite le système HeliCommand sur la face arrière à l’aide de deux morceaux de mousse plastique
adhésive. Après avoir effectué le premier essai en vol, renforcer le collage à
la flèche de manière à éviter tout décalage. Utiliser de la colle dure de marque
Uhu ou de la colle cyanoacrylate. Le ruban adhésif double face est trop mou.
Protection contre les vibrations
Il faut être très attentif à la protection contre les vibrations !
Voilà pourquoi il faut coller avec de la mousse plastique adhésive souple non
pas sur toute la surface mais en appliquant que deux bandes très étroites au
bord inférieur et au bord supérieur de la paroi arrière du boîtier. La surface de
montage doit donc être au moins aussi haute que le système HeliCommand.
S’assurer que le système HeliCommand ne soit jamais en mesure de glisser
ou de se défaire, si c’était le cas, en mode pilote automatique le modèle prendrait une assiette inclinée ou deviendrait absolument ingouvernable.
Retirer absolument toute trace de graisse avant de coller.
Pour éviter tout risque de décollage de la mousse plastique adhésive, nous recommandons de fixer en plus le système HeliCommand avec un élastique fin.
18
• Veiller à installer le système aussi loin que possible du pot d’échappement.
• protection contre les vibrations est particulièrement importante à cause des
vibrations invisibles du moteur. Si malgré une implantation parfaitement correcte, le système HeliCommand vibrait de manière sensible lorsque le moteur tourne, nous recommandons la mise en place d’un amortissement
complémentaire des vibrations. À ce titre, une bande Velcro au dos de la
bande de mousse adhésive est parfaitement appropriée.
Possibilité offrant le plus de sécurité : Coller d’abord une plaque de métal
(alu de 3mm ou acier de 1,5mm d’épaisseur) directement sur le système
HeliCommand puis appliquer les bandes de mousse plastique adhésives
entre cette plaque et la surface de montage. Fixer avec un élastique !
Ou alors, tenter le montage éventuellement à un autre emplacement moins
exposé aux vibrations.
• Pour éviter de troubler le capteur par des nuages de fumée, veiller à ne pas
voler avec mélange trop gras du moteur.
• Pour éviter tout encrassement nous recommandons d’installer en plus sous
le capteur un tube de protection ou (encore mieux) un petit caisson carré
(dont les cotes intérieures correspondent au cône de balayage) et nettoyer
régulièrement la fenêtre jusqu’au bord.
19
20-21
Raccordement
Tout ensemble de radiocommande moderne est équipé d’un dispositif de mixage pour hélicoptères, se chargeant, par exemple pour un asservissement
trois points, d’assurer un mouvement synchronisé correct des servos. Avec
le système HeliCommand, il faut toutefois que ce mixage intervienne dans
le dispositif de mixage intégré. Voilà pourquoi nous vous recommandons de
sélectionner sur votre émetteur un programme hélicoptère sans mixage („H1“/
servo unique), de sorte qu’un mouvement de manche, quel que soit l’axe, un
seul servo se déplace ! Lorsque cette mise au point est exécutée, commencer
le branchement. (Si nécessaire, interroger le fabricant de votre ensemble de
radiocommande saur la manière d’effectuer ce réglage.) Alternativement (en
l’absence de nécessité de disposer d’une courbe des gaz) : ne pas sélectionner de programme hélicoptère mais un programme standard (de base).
Ce principe assure également un transfert sans mixage des curseurs ou des
interrupteurs des voies supplémentaires.
Attention : pour l’asservissement de type H4, l’adaptateur pour micro-ordinateur est absolument indispensable !
• Le module RC livré avec le système (avec distribution par cordon) est à inter caler entre le récepteur et les servos.
Il est possible de le fixer sur l’émetteur avec des morceaux de bande Velcro
ou de morceaux d’adhésif double face.
• Il faut que moins que les entrées roulis, tangage et pas soient raccordés au
récepteur.
• Les branchements PILOT et AUX sont optionnels. Raccorder ces cordons
au récepteur où l’ensemble de radiocommande utilisé transmet les actionneurs appropriés (curseurs ou interrupteurs).
• Le système HeliCommand se met en marche à la mise en marche du
récepteur.
• Il est possible d’agencer les cordons d’entrée non utilisés en les tournant de
180° et en les plantant dans des emplacements non utilisés du récepteur ou
du module RC.
• Recouvrir l’emplacement de branchement vide sur le système HeliCommand avec un morceau de ruban adhésif.
(Protection contre l’encrassement)
20
21
22-23
Réglage
Après la mise en place ou des modifications il faut faire coïncider une fois le système HeliCommand avec le modèle réduit et l’émetteur, sans cela, correspond le réglage standard
effectué dans nos ateliers, par exemple, les émetteurs Robbe-Futaba, les modèles Spirit
LI ou les types avec même sens de rotation des servos et position d’implantation = arrondi
du boîtier à droite.
Important: Dans tous les cas avant le premier vol, effectuer un essai des
capteurs et de la commande (page 28)!
Possibilités de mise au point au choix avec:
a) Touche SET-Taste: décrite ici, pratiquement tous les types de plateaux cy
cliques jusqu’à 3 servos
b) Adaptateur pour micro-ordinateur : ici uniquement les points A à D de
l’étape 1. Pour le reste: Cf. le logiciel de mise au point en commençant la
lecture des caractéristiques en provenance du système HeliCommand. Indispensable pour l’asservissement de type H4 et éventuellement pour des
types d’asservissement particulièrement rares !
En présence d’un entraînement électrique
Pour éviter tout démarrage intempestif du moteur défaire la connexion du (des) moteur(s)
d’entraînement ou alimenter le récepteur avec une alimentation autonome !
A) Remise à zéro à l’usine (Factory-Reset)
Remise à zéro à l’état connu à la livraison. Efface toutes les mises au point également celles
qui ne sont accessibles qu’à l’aide de l’adaptateur pour micro-ordinateur. À cette fin, mettre
le système HeliCommand en marche pendant que vous maintenez la pression sur la touche
SET, puis represser sur la touche pendant au moins 5 secondes, jusqu’à ce que la LED
rouge-verte clignote en alternance.
B) Mettre l’émetteur au point
Toutes les fonctions de mixage du plateau cyclique doivent être coupées. Sur l’émetteur
réduire les débattements du tangage et roulis d’approx. 100% ou tout au plus légèrement.
Expo doit rester. Les émetteurs équipés de la norme 1,6 ms (Multiplex) doivent être disposés sur le mode UNI. Si vous utilisez le gyroscope à correction automatique (Heading-Hold)
implanté, il faut sur l’émetteur que tous les dispositifs de mixage du rotor arrière soient
coupés.
C) Enseigner les positions neutres à l’émetteur
• Disposer les manches au neutre et le pas sur le minimum, les dispositifs
de réglage de précision (trimms) au neutre ou, si l’hélicoptère a déjà volé
avec le système HeliCommand, et que seules de petites valeurs de
trimm sont établies, conserver les réglages de précision établis lors du premier vol.
22
• Appuyer sur la touche SET pendant 1s jusqu’à ce que la LED verte
s’allume, relâcher ensuite la touche et couper le système, la mise au point
est terminée (si la LED rouge s’allume : Cf. page 8).
Il est possible de reprendre à tout moment l’apprentissage des valeurs. Le système HeliCommand connaît dès lors les signaux qui sont valables pour l’instruction „neutre & immobilisation“. C’est pourquoi il est indispensable de reprendre l’apprentissage systématiquement
lorsque les réglages ont été sensiblement modifiés sur l’émetteur. Le réglage de précision
lui-même ne subit aucune influence due à l’apprentissage. Voilà pourquoi également il faut
les conserver en temps normal. (Il suffit simplement en présence de modifications sur les
dispositifs de mixage internes de les corriger, si nécessaire).
Lorsqu’on utilise l’automatisme du réglage de précision, les trimms sur l’émetteur ne sont
jamais utilisés, on laisse les trimms de tangage et de roulis systématiquement sur neutre.
D) Configurer le système HeliCommand
Mécaniquement il faut que l’hélicoptère soit au moins grossièrement mis au point (position
neutre du plateau cyclique et du rotor arrière). La procédure d’apprentissage ne peut fonctionner que lorsque le cordon d’admission et les servos sont correctement raccordés et que
les fonctions de mixage éventuelles sur l’émetteur sont complètement coupées. En cas de
doute, à titre d’essai raccorder n’importe quels servos directement au récepteur et s’assurer
que chaque voie n’est asservie que par une seule fonction sur manche et de quelle voie il
s’agit, puis rétablir le raccordement initial.
Exécuter ensuite les étapes de la séquence suivante:
Accéder au mode mise au point
Enseigner la position neutre à l’émetteur (Cf. point C). Pour ce faire, presser la touche SET
au moins pendant 3s jusqu’à ce que la LED verte clignote (Efface simultanément les valeurs
internes de réglage automatiques).
Les servos ne marchent (en fonction de l’étape de mise au point) plus ou marchent autrement que normalement.
Mise au point et sauvegarde de chaque étape (1-5)
Intervient par les actions des manches de commande décrites ci-dessous et une longue
pression sur la touche SET.
Changer d’étape de mise au point
L’étape de mise au point actuelle (1-5) est indiquée par le nombre clignotant. Après l’accès
apparaît d’abord l’étape 1. Appuyer brièvement sur la touche SET pour passer à l’étape
sans changement de l’étape actuelle (puis de l’étape 5 de nouveau à l’étape 1). Il est possible ainsi de reprendre tous les réglages à volonté. Pour le premier calibrage toutefois passer
par toutes les étapes successives dans la séquence décrite ici.
Achever le mode mise au point
Toujours possible en coupant l’alimentation.
23
24-25
Les étapes de mise au point
1) Apprentissage du sens de déplacement du manche
• En mode mise au point, il faut que la LED clignote régulièrement en vert,
l’entraînement électrique doit être débranché.
• Presser maintenant longtemps sur la touche SET et en maintenant la
touche pressée exécuter les débattements intégraux suivants sur l’émetteur
(la séquence est indifférente): roulis vers la droite, tangage vers l’avant, rotor arrière nez vers la droite puis retour au neutre, pas max. et demeurer
ainsi. Relâcher la touche maintenant. À partir de maintenant, ne plus changer les directions sur l’émetteur (sauf inversion volontaire du pas).
2) Direction servo „Pas“
(et identification de l‘asservissement H1/ tri-link)
La LED doit clignoter 2x (si nécessaire poursuivre en appuyant sur la touche SET).
Lorsqu’on augmente le pas à l’aide du manche, il faut que le plateau cyclique se déplace
régulièrement et sa inclinaison. Avec des débattements latéraux sur le manche de roulis il
est possible de choisir entre 10 possibilités en commutant vers l’avant ou vers l’arrière pour
sélectionner la bonne. Sauvegarder en appuyant plus longtemps sur la touche SET (>1s).
3 ) Directions des servos de „tangage“ (et de „roulis“)
La LED doit clignoter 3x (si nécessaire poursuivre en appuyant sur la touche SET). Le manche de tangage doit incliner régulièrement le plateau cyclique sans en modifier la hauteur.
Avec des débattements du manche de roulis il est possible de sélectionner la bonne parmi
2 ou 8 possibilités en commutant vers l’avant ou vers l’arrière.
Lorsque l’asservissement est assuré par un seul servo : commuter uniquement entre les 2
possibilités pas des débattements de roulis vers la droite. Si, en plus, il faut inverser la direction du roulis : effectuer un long débattement prolongé du manche de roulis vers la gauche
(> 1,5s) et, avec des débattements de roulis vers la gauche (possible uniquement avec des
versions d’appareils disposant d’une impression codée à deux caractères sur la plaque
signalétique à gauche du numéro de l’article. Avec les autres types d’asservissement, la
direction du roulis est automatiquement correcte après la sauvegarde. Sinon, ce sont les
connecteurs du servo qui sont inversés ou la direction du roulis ou du pas qui ont été mal
apprises par l’appareil. Dans ce cas, reprendre la séquence de réglage au début).
Sauvegarder en appuyant plus longtemps sur la touche SET (>1s ► la LED clignote 4x).
Maintenant il faut que les trois directions cycliques coïncident.
Si le plateau cyclique est de travers, l’ajuster mécaniquement maintenant.
4) Direction servo „Rotor arrière“
Si vous utilisez un gyroscope extérieur, sautez ce chapitre de la notice !
La LED doit clignoter 4x (si nécessaire poursuivre en appuyant sur la touche SET). Avec des
débattements de roulis alternativement dans les deux sens, sélectionner le sens de rotation
correct du servo du rotor arrière : Lorsqu’on déplace le manche du rotor arrière vers la droite, il faut que le nez de l’appareil se déplace vers la droite et dans ce cas, il faut que le rotor
arrière « souffle » vers la droite. Ensuite il est possible de mettre le point neutre du rotor arrière au point car à l’étape 4 la correction automatique (Heading-hold) est coupée. Contrôler
le réglage et le sauvegarder en appuyant plus longtemps sur la touche SET (>1s).
5a) Localisation de l’implantation (direction du capteur) et sens
de rotation du rotor
La LED doit clignoter 5x (si nécessaire poursuivre en appuyant sur la touche SET).
Le système HeliCommand doit connaître l’orientation de son implantation, c’est-à-dire qu’il
doit savoir si la partie arrondie de son boîtier est dirigée vers la droite, vers la gauche, vers
l’avant ou vers l’arrière.
Effectuez cette programmation en déplaçant le manche de roulis ou le manche de tangage pour incliner le plateau cyclique dans la direction souhaitée et, lorsque la direction de
l’inclinaison est correcte, confirmez en appuyant longuement sur la touche SET (>1s).
5b) Sens de rotation du rotor principal
Dans l’étape 5 de la séquence de programmation, effectuer un débattement du manche de
commande du rotor arrière dans la même direction que le sens de rotation du rotor principal
(en vue plongeante) et sauvegarder en actionnant la touche SET > 1 s.
Pour terminer
Remettre en marche et effectuer un essai de pilotage. Maintenant, sur l’émetteur, établir des
limitations de course, si nécessaire, les exécuter et les attribuer au secteur correct du pas (il
se peut que, dans certaines circonstances les débattements soient différents de ceux d’un
dispositif de mixage antérieur implanté dans un émetteur).
Il est recommandé d’établir les réductions importantes de course à l’aide der l’adaptateur de
micro-ordinateur dans le système HeliCommand.
Si le plateau cyclique n’est pas parfaitement horizontal, en rectifier maintenant la position.
Pour une mise au point grossière: dans la gamme médiane du pas doit se trouver un point
auquel tous les palonniers de servo se trouvent simultanément au neutre. Si ce n’est pas le
cas, dévisser les palonniers de servo et les remettre correctement en place.
Pour une mise au point de précision: mettre la timonerie au point. La mise au point de précision est également possible avec les trimms sur l’émetteur, confirmer le réapprentissage
en actionnant la touche SET (Étape C).
Sur les émetteurs présentant plusieurs assiettes de vol, il faut que toutes les assiettes de
vol dans lesquelles le système HeliCommand intervient présentent des valeurs de trimm
identiques!
(Ce principe est particulièrement important dans le mode RIGID).
24
25
26-27
Réglage du système HeliCommand RIGID
Les possibilités du mode RIGID sont les suivantes :
Avant la mise en oeuvre du système sur un hélicoptère sans masselotte stabilisatrices, il est indispensable d’activer le mode RIGID (via un
micro-ordinateur).
La stabilisation de maintien d’assiette („gyroscope de tête“) conserve une inclinaison ayant été pilotée une fois et empêche le cabrage de l’appareil contre
le vent pour autant que l’effort de réaction de l’hélicoptère soit suffisant. Autrement l’hélicoptère se pilote comme d’habitude.
La fonction est repérable sur le plateau cyclique étant donné que celui-ci demeure dans la position inclinée pilotée.
En fonction du réglage, il est recommandé d’être prudent au décollage afin
d’éviter que le plateau cyclique se trouve tout à coupe trop incliné de manière
intempestive (à cause d’une dérive prolongée ou de débattements non souhaités) et que la sensibilité RIGID ne soit pas trop importante. Elle ne doit pas,
comme s’est souvent le cas avec les gyroscopes de rotor arrière, être réglée
trop haute à la limite du balancement.
Mode [ARRET]
correspond au système HeliCommand 3D. Non pas destiné aux hélicoptères sans
masselottes!
Mode [FIXE]
Le système HeliCommand ne doit piloter les hélicoptères sans masselottes
qu’avec le mode RIGID en marche !! Sinon risquent d’apparaître des coefficients de roulis/tangage trop importants qui surrégulent les capteurs internes et
sont susceptibles de causes des problèmes au mode horizontal et au mode
positions !
Sur les maquettes, l’asservissement de la tête doit être établi approximativement sur la moitié du débattement. Il est possible d’annuler le principe avec
l’implantation du système HeliCommand, c’est-à-dire d’augmenter mécaniquement les débattements pour obtenir le meilleur effort de stabilisation.
La stabilisation RIGID est activable par micro-ordinateur. Une fois que vous
avez installé la version de base, consultez les chargements possibles sous
www.robbe.com/rsc pour disposer de la version la plus actuelle.
26
active la fonction RIGID en permanence (en plus des modes horizontal et position sélectionnables sur la voie pilote).
La plus grande prudence est recommandée à cause de la sensibilité de RIGID car elle n’est
pas réglable en cours de vol, via la voie pilote, et que des valeurs trop importantes risquent
de provoquer des mouvements de roulis ou des oscillations. Le réglage sous „sensibilité
RIGID“ n’est possible que via un micro-ordinateur!
Mode [FADER (fondu)]
Désactive les modes horizontal et position (le pilotage correspond à celui d’un hélicoptère
„courant, l’inclinaison devant être asservie activement !). Dans les deux moitiés de la voie
pilote (curseur) apparaît en surimpression uniquement la stabilisation RIGID jusqu’à la valeur maximale de la „sensibilité RIGID“ qu’il est possible d’établir avec le micro-ordinateur.
La position maximale sur le curseur (quelle que soit la direction) correspond exactement à
la position médiane dans le mode [FIXE]. Le curseur vers le milieu réduit la sensibilité (du
„gyroscope de tête “ de la même manière pour le tangage et le roulis) à 33%. Approprié à
la recherche de la sensibilités RIGID optimale. Si vous passez plus tard en mode [FIXE], il
est recommandé de réduire au pourcentage la sensibilité RIGID sur le micro-ordinateur en
fonction de la position trouvée pour le curseur. (Exemple : sensib. Rigid, roulis =7, curseur
approx. 70%, c’est-à-dire établir nouvelle sensibilité. Rigid =7x70%=4,9; soit 5 !)
27
28-29
Le premier vol
Avant le premier vol, effectuer un essai des capteurs et des
commandes dans toutes les directions des capteurs
• Position neutre, sens du déplacement et débattement de tous les manches
et servos
• Voie pilote et, si nécessaire, touche de trimm automatique : à l’aide de la
diode électroluminescente. (Trimm svp uniquement avec pas sur minimum.
La voie de trimm est alors visible mais sans efficience).
• Toutes les 3 directions des capteurs. Un sens de déplacement incorrecte
provoquerait une chute. Disposer ka stabilisation sur mode „jaune“ et déplacer ensuite le modèle à la main successivement et brièvement en va-etvient dans chacune des directions: incliner latéralement et incliner puis
tourner vers l’avant. Pour chaque mouvement, les servos concernés doivent
réagir et réagir avec un déplacement antagoniste: Le plateau cyclique tend
vouloir rester à l’horizontale, le bord d’attaque des pales du rotor arrière se
déplace dans le sens contraire de la direction de pivotement du rotor arrière.
• Effectuer un test de portée avec l’antenne escamotée.
Essai en vol
Nous recommandons au début, pour les contrôles de fonction et pour le premier vol de se faire assister par un modéliste expérimenté dans pilotage des hélicoptères. Consignes concernant le réglage de précision (trimm) : Cf. page 30.
Avec les hélicoptères à moteur thermique:
Essai de vibration
Étant donné que des vibrations externes ou que les bruits de structure sont
susceptible de perturber sensiblement la fonction des capteurs, il est indispensable d’effectuer trois contrôles avant l’essai en vol:
1) En y apposant la main, vérifier sur le boîtier du HeliCommand vibre.
2) Avant de décoller, commuter sur mode „jaune“ et observer si le plateau
cyclique conserve son calme quel que soit le régime.
3) Démarrer d’abord en mode „ARRET“ et, à titre de sécurité, ne mettre le
pilote automatique en marche que très brièvement avant de le couper. Re
prendre cette procédure avec divers régimes du moteur.
En présence de dérangements, consulter les consignes d’implantation de
la page 16.
Démarrage
Au décollage, l’hélicoptère doit se trouver autant que possible à
l’horizontale. Si l’hélicoptère a été tenu à l’envers ou dans une position très
inclinée, arrêter puis remettre le système HeliCommand en marche avant de
décoller. Avec de telles inclinaisons apparaissent des efforts de gravitation,
de travers sur l’arbre du rotor, tels qu’ils n’apparaissent pendant le vol et qui
risqueraient de troubler les capteurs).
Essai des fonctions de pilotage avant chaque décollage
Contrôler la maniabilité et la position neutre du plateau cyclique également
lorsque le pilote automatique est en marche ! Ne jamais décoller avant que les
servos ne se meuvent!
Réglage de la sensibilité
Pour l’essai en vol, commencer avec un réglage réduit de la sensibilité !
Tous les réglages ne sont pas forcément admissibles au-delà de 65 % dans
les deux modes pour tous les hélicoptères, des mouvements pendulaires inopinés peuvent apparaître en fonction du type de modèle et de la hauteur
d’implantation, particulièrement lorsque l’écart est faible entre le capteur et le
sol (< 0,5 m). Il est donc impératif de tester la position (des curseurs) avant le
vol d’essai. Régler la sensibilité de telle sorte que dans le mode Position vert, à
une altitude de 0,5 m approximativement, on obtienne une stabilisation optimale. En présence de mouvements oscillants ► réduire. En présence d’un dérive
intempestive ► augmenter. La sensibilité ne doit pas (comme c’est le cas habituellement pour les gyroscope de queue) être établie tout juste à la limite du
balancement. Un réglage moins limite présente une meilleure silhouette en vol,
peu troublée par les actions de pilotage spontanées du pilote automatique.
Pour les hélicoptères au comportement très lent ou au comportement très
agile il est recommandé d’effectuer les réglages supplémentaires accessibles
uniquement à l’aide de l’adaptateur pour micro-ordinateur, afin d’optimiser la
stabilisation.
Avec des mouvements de translation rapide vers l’avant, le HeliCommand
ne freine que très lentement de par lui-même. L’hélicoptère doit être piloté
activement, lorsqu’on a sollicité de manière excessive le pilote automatique
par de grands débattements de gouvernes. Avec l’adaptateur pour micro-ordinateur il est possible de régler de manière variable une option „translation
avant-roue libre“.
28
29
30-31
Réglage de précision (trimm)
Réglage de précision du rotor arrière
Lorsqu’on n’utilise pas le trimm automatique, il est préférable d’effectuer le
réglage de précision que lorsque le pilote automatique est coupé.
Ensuite et systématiquement lorsque les positions de trimm ont été déplacées sensiblement sur l’émetteur, il faut réapparendre la position neutre de
l’émetteur avec la touche SET (page 22).
Dans les premières secondes après le démarrage, la précision de la stabilisation est nettement réduite.
La précision croît toutefois d’elle-même après 10 secondes de vol environ.
Voilà pourquoi, lorsque le pilote automatique est en marche, il ne faut pas manipuler immédiatement les réglages de précision mais patienter tout d’abord.
Ensuite il n’est généralement plus nécessaire de toucher au réglage de
précision.
Si le réglage de précision est différent avec et sans stabilisation:
réapprendre la position neutre de l’émetteur (page 22).
Disposer les trims sur l’émetteur de telle sorte que le servo ne s’emballe pas
en mode de correction automatique (Heading-Hold). Lorsqu’on n’utilise pas
„Auto-Trim“, il est recommandé, comme pour chaque gyroscope de rotor arrière, d’effectuer les réglages mécaniques de précision que lorsque le mode de
correction automatique (Heading-Lock) est coupé pour éviter, lorsqu’on passe
de correction automatique à normal, que des différences de réglage de précision apparaissent:
La dérive des capteurs conditionnées par les variations thermiques ou par la
mise en oeuvre prolongée ne peut être neutralisée qu’avec une remise en
marche.
(Non pas par l’automatisme de réglage de précision qui ne corrige que les
position médianes des servos).
Avec le dispositif de réglage de précision (Trimm) automatisé
Actionner simplement la touche Autotrimm sur l’émetteur, quel que soit le mode
de stabilisation en cours. Au préalable, il suffit que l’hélicoptère se soit trouvé
pendant 8 secondes environ dans une assiette de vol quasiment calme.
Disposer le trimm toujours de manière appropriée à la position neutre de
l’émetteur, telle qu’elle a été apprise par le système HeliCommand. Voilà pourquoi il n’est pas possible de décaler simultanément les trimms de roulis et de
tangage sur l’émetteur. (Ce dispositif de réglage de précision peut être cachés
sous un morceau de ruban adhésif !)
Ou, s’ils ont été déréglés, il faut les réapprendre sous forme de „position
neutre de l’émetteur“ (page 22), avant qu’on réutilise la touche Autotrim sur
l’émetteur.
30
31
32-33
Quelques conseils de pilotage
Décoller et atterrir
Il est possible de démarrer le pilote automatique avant le décollage mais également en cours de vol. Important: ne jamais établir la sensibilité plus haute
qu’elle ne l’était pour l’essai en vol.
Vol stationnaire
Lorsque le mode Position est le mode le plus utilisé, principalement à
l’approche du sol, c’est celui qui agit avec le plus d’effet. Et, a contrario, le
système HeliCommand propose plus de liberté au pilotage à des altitudes plus
importantes.
En tant que débutant, il est recommandé de commencer d’abord à des altitudes de 0,5 à 1,5m. C’est de toute manière qui est le plus facile à apprendre.
Lorsque l’on vole à une altitude plus élevée, la fuite vers le haut est toujours la
solution la plus sûre. L’effet du mode Position est sensible jusqu’à une altitude
de 3 mètres environ par vent calme et par vent fort, jusqu’à 1 mètre environ. Le mode horizontal est toujours efficace. La stabilisation ne peut travailler
correctement qu’en vol. Au sol, lorsque le rotor tourne, il faut toujours que
l’hélicoptère soit surveillé à la main!
Débattements de commande
Il est toujours possible, même lorsque l’effet le plus fort a été établi, de surréguler le pilote automatique manuellement, et cela à partir de 50% environ du
débattement de commande de la fonction de tangage ou de la fonction de roulis. (Après neutralisation des actionneurs du roulis ou du tangage, le pilote automatique reprend tous ses droits). Pour les débutant, il est donc recommandé
de piloter avec de petits débattements et d’établir une fonction exponentielle
sur l’émetteur!
Une limitation du débattement dans l’émetteur (Dual Rate) est susceptible,
dans certaines circonstances, de gêner la surrégulation manuelle. Pour conserver une possibilité de surréguler, pour des motifs de sécurité, il faut donc
simultanément aussi réduite la voie pilote. Lorsqu’on dispose d’un émetteur
avec plusieurs assiettes de vol, il est possible de programmer la voie pilote à
l’aide de la programmation des assiettes de vol sur des valeurs diverses. Il est
plus aisé d’établir les réductions permanentes de course des servos dans le
système HeliCommand à l’aide de l’adaptateur pour micro-ordinateur.
Effet du capteur optique
Le mode Position fonctionne intégralement sans horizon visible et donc également au voisinage d’arbres, etc.
En tant que pilote débutant en modèle réduit, il est recommandé de ne survoler
d’abord que des sols normaux (gazons, places, pierre, etc.).
On est sûr ainsi que la stabilisation fonctionne systématiquement à pleine
puissance.
Au crépuscule ou pour survoler des surfaces optiquement
planes
(Eau, neige, toits d’autos, sols de salles de sport sans motif prononcé, etc.).
Dans ce cas de figure, également en mode „vert“ (mode Position) seul le mode
horizontal est actif lorsque le capteur optique du sol ne détecte pas suffisamment de contraste. Les „absences“ brèves sont couvertes sans qu’on le remarque par le logiciel intelligent. Lorsque le contraste manque plus longtemps, la
régulation est reprise automatiquement par les autres instruments, il faut alors
avoir la position de l’hélicoptère à l’oeil et, si nécessaire, corriger légèrement
aux manches.
Lorsque les conditions sont telles que décrites précédemment, pour plus de
sécurité, il est recommandé de sélectionner le mode horizontal „jaune“, ou
alors on s’assure à l’aide du contrôle de contraste (Cf. ci-dessous).
Vol en salle
Sélectionner le mode „jaune“. Le mode „vert“ n’est pas autorisé sauf si l’on
effectue un contrôle de contraste avec des écarts divers (Cf. ci-dessous) et
qu’on se limite à une assiette de vol normale
(En mode Position „vert“ même avec le système HeliCommand 3D, pas de vol
dos en salle ou dans des locaux quelconques !)
Contrôle du contraste
En mode Position „vert“ le scintillement de la LED indique que le contraste ou
la clarté sont insuffisants et le système HeliCommand passe automatiquement
au mode horizontal „jaune“. Il est possible d’effectuer ce contrôle à proximité
du sol de même qu’avec plusieurs écarts différents par rapport au sol.
Il est possible de vérifier la réaction du capteur en déplaçant la main à approximativement 20 cm horizontalement sous le système HeliCommand en mode
Position „vert“.
32
33
34-35
Exploitation des différentes versions
HeliCommand 3A
Cette version de base n’est pas appropriée aux manoeuvres de voltige ni à la
voltige 3D. Pour ces types d’applications c’est le système HeliCommand 3D
ou RIGID qui sont prévus!
HeliCommand 3D ou versions supérieures
Pour les manoeuvres 3D courtes (looping unique) le mode horizontal „jaune“
peut demeurer en marche pour fournir une assistance. Ce mode stabilise aussi
bien le vol normal que le vol dos. Il est très aisé de surréguler manuellement et
le degré de commande manuel est réglable sur la voie pilote.
Un nombre incroyable d’autres possibilités d’intervention est disponible avec
l’adaptateur micro-ordinateur, particulièrement pour les alternances uniques
entre vol stationnaire positif et vol stationnaire négatif. Également son utilisation est possible comme „bouton d’arrêt d’urgence“ permettant de joindre la
stabilisation en tenant toutefois compte des points suivants:
Manoeuvres 3D
Pour les manoeuvres successives ininterrompues (loopings enchaînés, rouleaux, etc.) il est préférable de couper le système HeliCommand 3D au préalable et de le rétablir au plus tôt 15 secondes après.
Ceci s’applique également aux nombreux retournements multiples, car ceuxci sont susceptibles, dans certaines circonstances, de fausser l’identification
neutre horizontale.
À noter
• Au-dessus d’herbes hautes ou de feuillage espacé etc. voler autant que
possible plus haut, pour plus de sécurité, car les objets se trouvant dans
l’air refoulé risques de fausser le mode Position ou commuter en mode horizontal „jaune“,
• En présence de variations subites de température, attendre au moins 5 minutes avant de mettre en marche afin qu’un équilibre puisse être atteint et
ne pas utiliser en dessous de -5°C ni au-dessus de +50°C.
(lorsque la stabilisation est coupée, utilisable entre - 10° et + 50° C)
De préférence, mettre brièvement avant le démarrage sous tension
et ne plus modifier la position de l’hélicoptère à la main mais le laisser à
l’horizontale.
• Ne pas utiliser sous la pluie, risque de court-circuit !
• Si après des rotations à partir du rotor arrière de 90° à 180° se mani feste
une dérive décelable, optimiser l’implantation (Cf. suppression des erreurs).
Pour les pilotes expérimentés: différences de manipulation
• Pour effectuer des retournements il faut couper la stabilisation, car elle tenterait de rétablir l’assiette horizontale.
• N’utiliser le mode Position „vert“ que pour le vol stationnaire et le vol lent à
l’approche du sol.
• Pour atteindre des inclinaisons plus importantes, par exemple pour freiner
à partir d’une vitesse plus importante, il faut des débattements plus importants à la commande que sans stabilisation. Pour l’autorotation: réduire la
sensibilité.
• Dans les virages, maintenir l’inclinaison de consigne à l’aide du roulis, sinon
l’hélicoptère tentera de retrouver un cap rectiligne.
Domaine d‘intervention
HeliCommand RIGID
Pour autant qu’il ait été activé à l’aide de l’adaptateur micro-ordinateur, le mode
RIGID diminue les incidences de sautes de vent et le cabrage dans le vent
relatif.
Le vol 3D et acrobatique sont possibles sans aucune restriction et sont assistés au niveau de la précision.
Lorsqu’on ajoute la stabilisation horizontale ou de position, même principe que
pour le système HeliCommand 3D, Cf. ci-dessus.
34
Pour simplifier les pilotage des hélicoptères de loisir.
Attention ! Pas conçu pour des vols à passagers ni applications militaires. Il est
strictement interdit de contrevenir à ces consignes, toute infraction à la licence
fera l‘objet de poursuites.
Les versions du système HeliCommand 3A, 3D et RIGID destinées au modélisme ne sont en outre pas conçues pour une exploitation dans des zones
urbaines, à côté ou au-dessus d’immeubles ou de bâtiments.
Le HeliCommand Profi est conçu pour des applications professionnelles telles
que vols photographiques, de prise de vues cinéma ou de mesure, Cf. p. 13.
35
36-37
Consignes de sécurité
Exclusion de la responsabilité
La notion de „pilote automatique“ ne signifie en aucun cas que le vol intervient entièrement
automatiquement !
Tout comme avec les modèle réduits d’hélicoptères normaux, le pilotage est également
soumis à une grande prudence et exige un bon entraînement.
Un pilote automatique n’est pas non plus en mesure d’exclure les fautes de pilotage. Il est
même pensable que les risques sont même plus importants, car la simplification du pilotage
a tendance à nuire à la concentration ou à cultiver l’insouciance des pilotes débutants et leur
négligence éventuelle en présence d’une panne technique.
Par ailleurs, le pilote automatique représente un instrument embarqué en plus et donc exige
plus de connaissance techniques et représente un facteur de dysfonctionnement possible
supplémentaire.
En principe tous les instruments de vols peuvent être perturbés ou tomber en panne.
En ce qui concerne la sécurité, ne jamais se confier complètement á la stabilisation et
prendre systématiquement toutes les mesures de sécurité qui s’imposent.
Des connaissances techniques spécifiques sont indispensables pour la mise en place,
le réglage et l’exploitation du pilote automatique et d’un hélicoptère radiocommandé. Les
erreurs et l’inattention peuvent provoquer des accidents graves sur des personnes et de
dommages matériels ou provoquer des accidents de la route. Le fabricant et le vendeur
n’ont aucune influence sur la correction de la manipulation et en signale dont expressément
les dangers. Nous déclinons toute responsabilité, dans le cadre des dispositions légales
concernant les dommages résultants de l’exploitation du produit et des dérangements des
instrument de bord ou de la transmission des signaux.
Nos recommandations
• Préserver systématiquement un certain intervalle par rapport aux personnes
et aux objets et voler parfaitement concentré.
• L’énergie cinétique de pales en rotation n’est pas à négliger. Pour
s’entraîner avec des modèles de grande taille, voler à l’abri d’un filet de protection ou d’un filet de but par exemple, dispositifs existants sur de nombreux terrains de vol.
• Les pilotes débutants tenteront autant que possible de se faire aider par
un pilote d’hélicoptère expérimenté, particulièrement pour les premières
sorties.
• Établir un degré de stabilisation en fonction des conditions environnementales. Exploitez systématiquement le pilote automatique de telle
manière qu’il soit possible de commuter sur mode manuel en cours de vol,
ou, tout au moins, le régler de telle manière qu’il existe une possibilité de
surrégulation manuelle.
• En fonction des dispositions légales, les vols de modèles réduits doivent intervenir sur des terrains habilités et à distance de lotissements ou de routes
à grande circulation.
• Piloter à distance des station radar, des pylônes de retransmission et autres
sources de perturbations éventuelles.
• Il est indispensable d’avoir pris une assurance de responsabilité civile avant
de piloter un modèle réduit.
• Maintenir systématiquement à l’oeil un hélicoptère en train de voler.
• Si vous confiez votre modèle à une tierce personne, lui transmettre également les textes d’avertissement.
Garantie
Pour cet appareil nous offrons une garantie de 24 mois.
Le bon d‘achat fourni par le détaillant spécialiste de l’appareil constitue le certificat initial de
garantie. Des réparations éventuelles ne prolongent pas la couverture de la garantie. Les
carences de fonctionnement, les défauts de fabrication ou les défauts matériels apparaissant pendant la garantie sont remplacés par nous gratuitement.
Tout autre réclamation, par exemple de dommages secondaires, sont exclues.
Le transport intervient franco de port de même que pour le renvoi. Les envois non affranchis
ne seront pas pris en considération.
Nous ne sommes pas responsables des dommages dus au transport ou de la perte de votre
envoi. Nous vous recommandons de contracter une assurance appropriée.
Pour que les réclamations couvertes par la garantie puissent être traitées, il faut que les
conditions suivantes soient satisfaites:
• Joindre le bon d‘achat à l‘envoi.
• Les appareils ont été exploités conformément aux prescription de la notice
de mise en œuvre.
• Les sources d‘alimentation employées sont celles qui ont été recommandées par robbe, seules des pièces de rechange originales ont été
utilisées.
• Absence de dommages dus à l‘humidité, à des interventions extérieures, à
des surtensions, à des surcharges ou des dégradations mécaniques.
• Joindre une description du dérangement ou du défaut afin d‘en faciliter la
réparation.
36
37
38-39
Élimination des dérangements
Les servos ne tournent pas ► Cf. page 8 „Affichage à LED“
Tremblements ou balancements en mode Position particulièrement au voisinage du
sol
• Diminuer la sensibilité
• Position d’implantation trop basse? ► installer le plus haut possible
Cf. page- 17
• Le débattement tangage/roulis ou le paramètre „sensib.hor..“ a-t-il été réduit
excessivement sur le micro-ordinateur ?
Absence de stabilité en mode Position
• Optique du capteur encrassée ?
► Sur les modèles à moteur thermique protéger le capteur des gaz
d’échappement et le nettoyer régulièrement.
• Absence de contraste au sol, par exemple paysage enneigé, asphalte lisse,
plan d’eau? ► Mettre le mode horizontal en marche.
• Réglage de précision non appris ? ► Cf. Page 30
• Augmenter la sensibilité ?
• Dégagement important de gaz dans le faisceau de balayage du capteur ?
► Régler les moteur moins „gras“ et installer le capteur plus loin du pot
d’échappement.
• Antenne souple ou autres obstacles dans le faisceau de balayage du
capteur?
► Cf. 1er paragraphe de la page 17: „Mise en place“
• Beaucoup de feuilles ou d’herbes hautes, etc. dans le vent relatif ?
► Mettre le mode horizontal en marche.
Pas d’assiette de vol calme même en mode horizontal
• Vibrations (visibles et invisibles) ou bruit de structure excessifs sur le carter
(particulièrement lorsqu’il s’agit d’un moteur thermique) ?
► Tenir compte de remarques fournies pour la mise en place > Montage
et installation > moteur thermique.
• Le ruban adhésif en mousse plastique n’a pas été implanté sous forme de 2
bandes étroites ? ► Cf. page 16
Mise au point différente avec et sans stabilisation
• Après le décollage la précision de la stabilisation croît automatiquement en
l’espace de quelques secondes de vol.
• Réglage de précision déréglé sur l’émetteur ?
► Réapprendre la position neutre.
• Variations importantes de la température ?
► Donner approx. 5 minutes à l’appareil pour s’acclimater et redémarrer.
• Vibrations importantes ?
► Cf. Dérangement „Absence d’assiette de vol calme“
38
L’automatisme de réglage de précision manque de précision
• Existe-t-il simultanément un dispositif de réglage sur l’émetteur ?
► Terni compte des indications de la page 30, soit réapprendre le réglage,
soit ne rien changer sur l’émetteur.
• Le pas minimum et sa direction ont-ils été correctement appris ?
► Sans pas, le réglage automatique subit une inhibition.
Dérive après rotation au rotor arrière
• La position d’implantation n’est pas exactement verticale ou l’hélicoptère
léger dispose d’un angle d’attaque trop important ?
► Optimiser en effectuant un virage de 90° vers la droite à partir d’une assiette de vol stationnaire avec stabilisation en mode „jaune“.
Lorsque l’hélicoptère avant un quart de pirouette était immobilisé
mais ensuite dérive systématiquement dans une direction, il est possible
d’optimiser la position d’implantation.
En présence d’une dérive de travers vers la gauche en marche avant (en
relation avec la nouvelle assiette), incliner le système HeliCommand plus
encore vers la gauche et inversement s’il s’agit d’une dérive vers la droite en arrière.
Lorsque la dérive se manifeste vers la droite à l’avant, incliner le système
HeliCommand légèrement vers l’avant, inversement s’il s’agit d’une dérive vers la gauche en arrière.
Vol dos:
Écart par rapport au milieu du roulis en vol stationnaire dos ou après changement en
arrière
► Optimiser l’anticouple du rotor arrière (à l’aide de l’adaptateur de microordinateur, Cf. logiciel de mise au point du micro-ordinateur).
Dérive après des figures de voltige (loopings, rouleaux, etc.)
• Avez-vous utilisé HeliCommand 3A ?
► N’est pas approprié au vol dos ni aux assiettes de vol escarpées !
► Passer au système 3D.
• Disposez-vous d’un gyroscope arrière d’un autre fabricant et d’un coefficient de rotation > 400°/s ?
► Réduire le coefficient de rotation (page 25)
• Avez-vous effectué des rotations constantes tels que retournements successifs, rouleaux, loopings ?
► Tenir compte des consignes de la page 34 !
Le servo du rotor de queue n’est pas centré
• N’avez-vous utilisé le gyroscope interne qu’ultérieurement ?
► Effacer les valeurs de réglage automatique.
39
40-41
Caractéristiques techniques
Accessoires
Tension de service:
4,8 ... 6 Volt (4 ... 5 NC)
Consommation:
55mA (bei 5V)
Encombrement:
55 x 35 x 22,5 mm
Poids avec cordon:
33g
Plage de températures:
en mode ‚ARRET‘:
-5° ... +50°C,
-10° ... + 50° C
• Adaptateur pour micro-ordinateur avec logiciel sur CD, réf. 84942000
• Module de radiocommande de rechange (pour permettre le changement sur
plusieurs modèles):
(pour le système HeliCommand à 4 broches dans l’emplacement
d’implantation), réf. 8494-4000
(pour le système HeliCommand à 3 broches dans l’emplacement
d’implantation), réf. 8494-3000
avec équerre de montage, bande Velcro et joints toriques pour le remplacement de l’appareil principal du système HeliCommand
Dispositif de mixage Heli:
H1/ H2/ H3 / H3 (140°) / H4 / H4 (+45°)
Module de radiocommande approprié aux ensembles suivants:
Robbe-Futaba PPM / PCM 1024 / Modulation PCM G3
Graupner/JR PPM 8, PPM 12, Modulation SPCM
MPX PPM8, PPM 12 avec Modulation Uni
De même que d’autres émetteurs avec une position neutre standard
de 1,5 ms.
Contenu de la livraison
•
•
•
•
•
•
Appareil principal du système HeliCommand
Module radiocommande (avec distribution par câble)
Équerre de montage
Adhésif en mousse plastique 2 jeux de 2 bandes
Ligature de câbles
Notice de mise en oeuvre
Mise à jour des versions auprès du service après-vente robbe
(Cf. Catalogue robbe)
Service après-vente
robbe – Service
Metzloser Strasse 36
D-36355 Grebenhain
Tél.: 0049-6644-87-777
Télécopie: 0049-6644-7412
Impression
robbe Modellsport GmbH & Co. KG
Postfach 1108
D-36352 Grebenhain
Internet: www.robbe.com
E-Mail: [email protected]
Tél.: 0049 (0) 6644 / 870
Télécopie: 0049 (0) 6644 / 7412
40
41
42-43
Notes:
Notes:
______________________________________________________________
______________________________________________________________
______________________________________________________________
______________________________________________________________
______________________________________________________________
______________________________________________________________
______________________________________________________________
______________________________________________________________
______________________________________________________________
______________________________________________________________
______________________________________________________________
______________________________________________________________
______________________________________________________________
______________________________________________________________
______________________________________________________________
______________________________________________________________
______________________________________________________________
______________________________________________________________
______________________________________________________________
______________________________________________________________
______________________________________________________________
______________________________________________________________
______________________________________________________________
______________________________________________________________
______________________________________________________________
______________________________________________________________
______________________________________________________________
______________________________________________________________
______________________________________________________________
______________________________________________________________
______________________________________________________________
______________________________________________________________
______________________________________________________________
______________________________________________________________
______________________________________________________________
______________________________________________________________
42
43
1
Bedienungsanleitung Version 1.2
ISTRUZIONI PER L’USO
Version 1.3
► www.robbe.com
2-3
Congratulazioni per aver acquistato il sistema HeliCommand.
Nessun`altro sistema disponibile per modelli di elicotteri sul mercato, è in grado di stabilizzare sia l’assetto di volo che l’inclinazione del modello.
Tale dispositivo di pilota automatico è stato originariamente concepito e destinato per elicotteri impiegati in ambiti professionali come videoriprese e operazioni di rilevazione; il suo funzionamento è affidato e garantito da molteplici
ed innovativi sistemi integrati al suo interno e protetti da brevetti.
L’HeliCommand può essere utilizzato indistintamente dai piloti principianti che
dimostrino comunque già familiarità con tutte le funzioni del modello, ma che
non siano ancora in grado di mantenere quest’ultimo stabile in volo, così come
anche dai piloti esperti per affinare le proprie capacità con un livello di stabilizzazione inferiore. Il dispositivo si dimostra infine particolarmente indicato
anche per i professionisti che vogliono concentrarsi sullo svolgimento delle
figure acrobatiche principali.
L’HeliCommand aiuterà i principianti a compiere voli stazionari e a compiere i
primi voli circolari in tutta sicurezza.
Si avverte tuttavia ancora esplicitamente che, nonostante l’ausilio di questo
apparecchio innovativo, il pilota deve rimanere sempre vigile sullo svolgimento
del volo, senza intraprendere manovre che possano in qualche modo mettere
a rischio l’incolumità propria o delle altre persone.
A tutti coloro che rifiutano categoricamente ogni tipo di ausilio elettronico durante il volo, si ricorda che l’HeliCommand non è stato concepito per sostituire
gli istruttori o le scuole di volo, ma per consentire di migliorare ulteriormente la
tecnica di pilotaggio e renderla più sicura.
2
3
4-5
HeliCommand 3A No. 8493
HeliCommand RIGID No. 8495
• Stabilizza tutti i movimenti in orizzontale del modello grazie alla funzione
“autopilota”: inclinazione, velocità e posizione
• Canale supplementare per la regolazione dell’intensità di stabilizzazione e
per la commutazione tra modalità orizzontale e modalità di posizionamento
• Giroscopio con funzione Heading-Lock, miscelatore del piatto oscillante e
trim automatico già integrati
• Secondo canale supplementare (canale “AUX”) per la regolazione della
sensibilità del giroscopio e per la selezione della modalità (Normale/Heading
Lock), oppure a scelta per il trim automatico
• La configurazione avviene tramite una semplice procedura, senza la
necessità del collegamento col PC e per quasi tutti i tipi di piatti oscillanti fino
a 3 servi
• Failsafe: in caso di interruzione del segnale (per PPM/FM) porta il modello in
posizione di stabilizzazione e il pitch su posizione di “hold”
• Indicato per elicotteri elettrici o a motore a scoppio
• Utilizzabile sia all’aperto che al chiuso
• Adattatore per PC, disponibile come accessorio,per le regolazioni di: comandi
HR4, trim automatico opzionale, funzione ruota libera per volo in avanti,
regolazione ottimale per autopilota, giroscopio di coda etc.
• Comprende tutte le funzioni delle versioni HeliCommand “3A” e “3D” ed in
aggiunta:
• Modalità RIGID per la stabilizzazione di teste rotore prive di asta palette,
particolarmente efficace contro i movimenti repentini del modello ad alta
velocità o sotto raffiche di vento
• rende superfluo il centraggio dei trim per le funzioni Roll e Nick
• la modalità RIGID stabilizza sia elicotteri a due o più pale privi di asta palette,
che anche elicotteri comuni provvisti di asta palette
• Possibilità di selezione tra Modalità orizzontale, modalità di posizione e mo
dalità RIGID mediante il canale Pilot
• Le modalità RIGID e orizzontale funzionano anche senza il “contatto visivo”
del sensore ottico con il terreno. In questo modo, rinunciando alla
modalità di posizione, non viene resa necessaria alcuna apertura sulla
fusoliera del modello
• Linearizzazione elettronica nei comandi a 4 servi (spostamento angolare) per
contrastare tensionamenti meccanici per comandi tipo H4
• Per la regolazione della modalità RIGID è assolutamente necessario
l’adattatore per PC (Art.N. 84942000). Senza l’utilizzo dell’adattatore
vengono utilizzati i parametri della HeliCommand 3D impostati in fabbrica.
HeliCommand 3D No. 8494
• Comprende tutte le funzioni della versione base “3A” ed in aggiunta:
• Stabilizzazione orizzontale per il volo rovescio
• Maggiori possibilità di regolazione attraverso l’adattatore per PC
(Art.N. 84942000)
(ulteriori regolazioni per esperti per l’ottimizzazione della modalità 3D e della
risposta ai comandi)
4
5
6-7
Contenuto
Visualizzazione LED
8
Descrizione delle possibilità
9
Canale Pilot
Giroscopio di coda
Trim automatico
Failsafe
Versioni superiori dell’HeliCommand
10
11
12
12
13
Brevi istruzioni per l’uso – Nozioni basilari
14
Montaggio
16
Messa a terra del trave di coda
Posizione di montaggio
Montaggio sul trave di coda
Avvertenze per il montaggio su elicotteri con motore a scoppio
Impostazione
Elicotteri con motore elettrico
Factory-Reset
Regolazione della trasmittente
Trimmaggio della trasmittente
Configurazione dell’HeliCommand
Richiamare la modalità di regolazione
Regolazione
Regolazione HeliCommand Rigid
Volo di collaudo
Il volo
Controllo delle vibrazioni per elicotteri con motore a scoppio
Trimmaggio
6
17
17
18
19
Consigli per il volo
Decollo e atterraggio
Volo stazionario
Escursioni dei comandi
Efficacia del sensore ottico
Volo nel buio o sopra superfici riflettenti
Volo indoor (palestre)
Verifica del contrasto
32
32
32
32
33
33
33
33
Utilizzo delle diverse versioni
34
HeliCommand 3A
HeliCommand 3D o superiori
Manovre 3D
HeliCommand RIGID
34
34
34
34
Avvertenze
Per piloti esperti: differenze nelle manovre in volo
Ambiti di utilizzo del dispositivo
35
35
35
22
22
22
22
22
23
23
23
26
28
28
28
30
Norme per la sicurezza
Suggerimenti
36
36
Scarico di responsabilità
Garanzia
37
37
Risoluzione dei problemi
38
Dati tecnici
Contenuto della confezione
Accessori
Assistenza
40
40
41
41
Editore
41
7
8-9
Visualizzazione LED
Descrizione delle possibilità
Di base esistono 3 differenti modalità di utilizzo:
LED rosso
LED giallo
LED verde
= Funzione autopilota disinserita
= Modalità orizzontale
= Modalità di posizione
Modalità orizzontale „giallo
giallo“: riporta l’elicottero in assetto orizzontale non
appena vengono lasciati i comandi del Roll e del Nick. Tale modalità è
assolutamente indipendente dal rilevamento ottico del terreno. Per voli indoor
(es: palestre) è necessario selezionare questa modalità, oppure rispettare tassativamente le avvertenze riportate a pagina 33.
Modalità di posizione „verde“: tale modalità stabilizza anche la posizione del
modello, oltre a svolgere anche la funzione di modalità orizzontale. Il livello
più intenso di regolazione, utile per eseguire un volo stazionario “automatico”
e tranquilli voli circolari, è efficace a ca. 0,5 … 2 metri di altezza, sopra terreni
naturali (erba, pietre etc.).L’elicottero viene riportato in “quiete” attiva lasciando
i comandi Roll e Nick.. E’ necessario soltanto continuare a comandare il gas /
Pitch. L’eventuale lenta tendenza alla deriva del modello dal volo stazionario
può essere facilmente contrastata con i comandi manuali. Per lenti voli circolari
nelle vicinanze del terreno è possibile impostare una velocità di avanzamento
con il comando del Nick per poi pilotare con la leva di comando della coda la
direzione come per una automobile.
Tale modalità non è indicata per voli veloci, o ad altezze superiori a 5m. ca.,
dal momento che le correzioni dell’autopilota sarebbero di disturbo; di conseguenza, in questi casi, occorre attivare il dispositivo sulla modalità orizzontale
“giallo“.
Modalità RIGID: rappresenta la quarta modalità di utilizzo, disponibile nella
versione HeliCommand RIGID: essa consente la stabilizzazione della posizione per elicotteri con testa rotore priva di stabilizzatore. Tale modalità funziona
in parallelo con le 3 modalità descritte in precedenza. Vedi pag. 5.
Oltre alle funzioni di autopilota descritte in precedenza, l’HeliCommand dispone anche delle funzioni miscelazione del piatto oscillante, giroscopio per
rotore di coda e trim automatico.
8
9
10-11
Canale Pilot
Giroscopio di coda
Per poter selezionare in volo una delle tre modalità di stabilizzazione, oltre che
per regolarne l’intensità, si raccomanda il collegamento di un canale aggiuntivo. Si suggerisce di utilizzare a tal fine un cursore oppure un interruttore a 3
posizioni con valori selezionabili.
Occorre regolare l’intensità in base al tipo di modello.
Qualora il canale Pilot non venga collegato alla ricevente, rimangono effettive
le impostazioni di base regolate in fabbrica. Esse prevedono la modalità di
posizione con valore pari al 70%; tale impostazione ben si adatta alla maggior parte di modelli, e può comunque essere modificata a piacere attraverso
l’adattatore per PC
.
L’HeliCommand dispone di un giroscopio piezoelettrico già integrato al suo interno, in grado di funzionare sia in modalità normale che anche Heading Lock.
L’impostazione della sensibilità ed il passaggio di modalità (Heading Lock /
Normale) avvengono attraverso un secondo canale aggiuntivo “AUX”.
Qualora il canale “AUX” non venga collegato alla ricevente, rimangono effettive
le impostazioni interne di base regolate in fabbrica. Esse prevedono la modalità Heading Hold con intensità pari al 70%; tale impostazione può comunque
essere modificata a piacere attraverso l’adattatore per PC.
Qualora si manifesti la tendenza all’ ”effetto pendolo”: adoperare un servo di
coda più rapido, oppure diminuire la sensibilità (canale AUX oppure PC). Il
giroscopio dell’HeliCommand è compatibile anche con servi digitali veloci.
Mediante l’adattatore per PC è possibile regolare altri parametri quali ad esempio la limitazione dell’escursione e la miscelazione combinata Pitch - rotore di
coda (funzionante anche in modalità Heading-Lock). Le versioni 3D e RIGID
dispongono in aggiunta anche di regolazioni per esperti, quali ad es. delay
(ritardo) e mantenimento.
In alternativa al giroscopio integrato è anche possibile utilizzare un giroscopio
esterno, collegandolo direttamente alla ricevente. Qualora venga eseguita tale
operazione è necessario osservare quanto segue:
1.
Non possono essere impostate regolazioni
In caso contrario esiste il rischio di disturbi.
superiori
al
400%.
2.
Qualora venga utilizzato in seguito il giroscopio dell’HeliCommand,
è necessario cancellare prima gli eventuali valori interni di auto trim e
verificare il verso di funzionamento del giroscopio.
Lo spostamento del cursore verso il centro diminuisce la
sensibilità e rende più lente le correzioni dell‘autopilota.
Contemporaneamente il pilota è in grado di sopravanzare
l‘autopilota con i comandi manuali.
10
11
12-13
Trim automatico
Versioni superiori dell’HeliCommand
L’utilizzo di questa funzione risulta raccomandabile, anche se non strettamente
necessario. Essa funziona indipendentemente dall’autopilota e rappresenta un
valido aiuto ed una valida semplificazione per principianti ed esperti. Tale funzione necessita di un tasto o di un interruttore a levetta con molla su un canale
supplementare della trasmittente. (Per talune trasmittenti è possibile anche riprogrammare la funzione allievo-maestro a tale scopo). Il canale AUX deve
essere configurato sulla funzione di trim mediante PC. Durante le fasi di volo
è sufficiente premere un tasto per configurare automaticamente il trim del Roll,
Nick e dell’imbardata. Tale configurazione rimane poi memorizzata e può poi
essere ripetuta a piacere. Sono sufficienti 8 secondi di volo stazionario per consentire al sistema automatico di elaborare i corretti valori di trim che possono
poi essere attivati in seguito premendo un pulsante. Il trim automatico migliora
inoltre anche le prestazioni del giroscopio di coda integrato, qualora l’angolo
neutrale di regolazione del rotore di coda non risulti regolato correttamente.
HeliCommand 3D
Per l’attivazione occorre configurare il canale AUX come ingresso per il trim
mediante l’adattatore per PC. (In questo caso viene sacrificato l’ingresso destinato al giroscopio di coda senza alcun problema, dal momento che mediante
l’adattatore per PC è possibile regolare la sensibilità del giroscopio). Il trim viene
disattivato portando il segnale AUX sul valore + 100% (> 60% ca.). L’attivazione
della funzione trasmessa viene confermata dal lampeggio rosso sul LED (qualora risulti associato).
Il canale trim non deve risultare occupato da altri comandi programmati sulla trasmittente e non può essere spento inavvertitamente. Esso deve essere
azionato solamente in volo (da non confondersi con il tasto SET).
Per cancellare i valori interni di auto trim: richiamare la modalità di regolazione
(pagina 23), quindi accendere nuovamente.
Stabilizza sia la posizione in volo normale che in volo rovescio. In quest’ultimo
caso rimane attiva solamente la modalità di stabilizzazione orizzontale
(“giallo “), dal momento che la modalità di mantenimento della posizione
(“verde”) necessita per funzionare del “contatto visivo” tra sensore CCD e terreno, condizione impossibile durante il volo rovescio.
Tale modalità consente comunque di facilitare notevolmente l’esecuzione del
volo rovescio ed acrobatico. Occorre quindi passare per sicurezza dalla modalità di stabilizzazione “verde” a quella “giallo “ prima di iniziare il volo, anche
se il sistema è predisposto contro i possibili disturbi ottici derivanti dal contatto
visivo tra sensore CCD e cielo.Tale commutazione da modalità “verde” a quella
“giallo“ è fondamentale e assolutamente necessaria per i voli indoor dentro
palestre! (Così come anche per voli circolari veloci o voli ad alte quote).
Per le altre avvertenze importanti consultare il paragrafo: “Consigli per il volo”
a pagina 32.
HeliCommand RIGID
Per elicotteri privi di stabilizzatore, è prevista la versione HeliCommand RIGID
in modalità RIGID. Simili elicotteri potrebbero compiere voli stazionari anche in
modalità normale, tuttavia vi sarebbe il rischio che per manovre veloci la modalità di posizionamento venisse disturbata!
Tutte le regolazioni disponibili in tale modalità sono configurabili attraverso
l’adattatore per PC, e sono dettagliatamente illustrate nell’apposito Software
HeliCommand non appena viene selezionato il tipo HeliCommand RIGID.
Se l’HeliCommand RIGID non viene programmato tramite PC, esso si
comporta come la versione “HeliCommand 3D” (pag. 27).
Failsafe
Nelle riceventi in FM / PPM, il sistema neutralizza eventuali interruzioni nella
trasmissione e le contrasta eseguendo le seguenti azioni: comandi Roll, Nick e
imbardata sul neutro, Pitch sull’ultima posizione ricevuta prima dell’interruzione
e stabilizzazione impostata sulla modalità di posizione con intensità 65%.
Il sistema Failsafe è in grado di eliminare solo in parte i disturbi di trasmissione.
Raccomandiamo l’utilizzo di apparecchiature in PCM al fine di ottenere la massima sicurezza nella trasmissione dei segnali.
HeliCommand Profi
Per modelli di elicotteri particolarmente costosi,impieghi commerciali come riprese aeree, rilevazioni etc, è stato concepita la versione HeliCommand-Profi,
comprendente al suo interno strumentazioni aggiuntive (tra gli altri sensori ottici
supplementari per misurazione della deriva, stabilizzazione a quote di volo più
elevate) per garantire livelli di stabilizzazione ancora più elevati.
Per maggiori informazioni visitare: www.HeliCommand.com
12
13
14-15
Brevi istruzioni per l’uso – Nozioni basilari
Tutte le regolazioni ed il volo sono state concepite per risultare quanto più
semplici possibile.
Considerato il complesso funzionamento di un elicottero, è comunque opportuno che i piloti principianti si lascino assistere dai “colleghi” più esperti durante
i primi voli.
Tutti i paragrafi contrassegnati con il simbolo
sono particolarmente importanti e devono essere presi in considerazione anche dai piloti più esperti!
Montaggio
• Realizzare un collegamento elettrico tra trave di coda, carter motore e
fusoliera (confronta illustrazione)
• più alta risulta essere la posizione di montaggio dell’HeliCommand, più
tranquilla ed efficace risulterà essere la modalità di posizionamento nelle
vicinanze del suolo e di conseguenza migliore anche la regolazione della
sensibilità
• montare l’unità perpendicolarmente, prestando attenzione a lasciare libero lo
spazio tra il sensore ed il suolo. Verificare inoltre che l’unità risulti ben fissata
in posizione
• altre avvertenze per gli elicotteri a scoppio insieme a dettagliati consigli per il
montaggio sono elencati a pag.19
Accensione
Dopo l’accensione l’HeliCommand esegue un breve test di funzionamento
(LED lampeggiante 8x). Durante tale fase è assolutamente necessario che
l’elicottero rimanga completamente fermo in posizione orizzontale. Un eventuale lampeggio rosso continuo indica una notifica di errore (pag.8).
Avvio
Non cominciare prima che sia possibile comandare tutti i servi! Tale verifica
risulta importante dal momento che sarebbe possibile comandare il solo servo
del gas (o il comando motore) anche quando invece tutti gli altri servi non
sarebbero attivi, per esempio poiché è ancora attivo il test di funzionamento
oppure poiché il sistema ha rilevato un errore.
Il volo
Si prega di osservare le norme per la sicurezza (pag. 36) prima del volo.
Occorre in particolare modo sorvegliare sempre l’elicottero in volo, anche se
risulta attiva la modalità di posizionamento; è necessario infatti controllare
sempre la deriva o altri disturbi che potrebbero spostare il modello.
• Per voli in palestre: rispettare assolutamente le norme riportate a pagina 33
Trasmittente
• Non compiere voli acrobatici (3D) o voli rovesci con la versione
HeliCommand 3A. Consultare pag. 34.
Per il funzionamento del sistema occorre che non sia attiva alcuna funzione
di miscelazione per i servi del Nick, Roll e coda. Deve invece essere attiva la
modalità H1 (servi singoli), dal momento che l’HeliCommand funziona con la
funzione di miscelazione già integrata al suo interno.
• Modelli di elicotteri sprovvisti di barra stabilizzatrice possono essere
stabilizzati solamente con la versione RIGID, con modalità RIGID attivata,
vedi pag 34.
Configurazione
Per configurare l’unità con il proprio modello e con la propria attrezzatura
RC è necessaria una sola operazione di configurazione all’inizio dell’utilizzo
(pag.23).
Altrimenti rimangono attive le regolazioni eseguite in fabbrica (pag. 22).
In ogni caso occorre verificare prima del volo iniziale sia le direzioni dei comandi che anche le direzioni dei sensori lungo tutti i 3 assi (pag.28).
14
• Il dispositivo di stabilizzazione ed il sistema Failsafe
non sono in grado di evitare al 100% eventuali incidenti causati
da disturbi di trasmissione o trasmittenti non idonee.
Raccomandiamo pertanto di utilizzare apparecchiature in PCM e di verificare
con cura la trasmissione dei segnali da parte dell’antenna.
• Forti carichi applicati sull’unità, così come anche vibrazioni e
invecchiamento, possono pregiudicare la precisione del sistema e richiedere
un reset ed una nuova calibrazione per ri-ottenere la migliore precisione.
Tali operazioni sono effettuate dal centro assistenza Robbe.
15
16-17
Il montaggio
Messa a terra del trave di coda
Realizzare tassativamente una conduttura elettrica con funzione di bilanciamento di potenziale tra trave di coda, carter motore e fusoliera. Anche il carbonio è idoneo per tale scopo.
(In particolar modo, la trasmissione a cinghia posteriore funziona da “generatore di banda”). In caso contrario, i disturbi possono danneggiare i servi (non
l’HeliCommand) e portarli a fine corsa.
Posizione di montaggio
Più alta risulta essere la posizione di montaggio dell’HeliCommand, più tranquilla risulterà essere la modalità di posizionamento nelle vicinanze del suolo e di conseguenza migliore anche la regolazione della sensibilità. Per molti
modelli, la posizione ideale di montaggio può essere rappresentata dalla parte laterale dei servi di coda; in alternativa è possibile il montaggio mediante
l’apposita squadretta di fissaggio ad es. sul trave di coda, sul servo di coda,
sulla fusoliera oppure sul lato anteriore della capottino.
Disposizione di montaggio
Perpendicolare con il sensore rivolto verso il basso; sono possibili tutte le 4
direzioni di orientamento.
Visuale del sensore
Per il corretto funzionamento è indispensabile che il sensore ottico disponga
della visuale sottostante libera. La sezione visiva del sensore ha un’apertura di
dimensioni 15° x 15° ; questo comporta che sotto il sensore deve rimanere un
“quadrato visivo” libero da impedimenti, di dimensioni
S= apertura visiva(15mm) + [0,28 * distanza dal sensore]
(vedi figura a sinistra). Ritagliare se necessario la capottina per lasciare
un’apertura di tali dimensioni. Il cavo dell’antenna e altri oggetti non devono
assolutamente rientrare nel campo visivo del sensore!
Montaggio dentro la fusoliera
Ritagliare un’apertura (confrontare formula in alto oppure immagine a sinistra),
oppure non utilizzare il sensore visivo rinunciando però alla modalità di posizione. Coprire la visuale del sensore con del nastro adesivo scuro qualora si opti
per quest’ultima possibilità.
In questo caso risulta attiva e disponibile la sola modalità orizzontale e non
quella di posizionamento.
16
17
18-19
Montaggio sul servo di coda
Posizionamento orizzontale
Per modelli di piccole dimensioni è particolarmente indicato, al fine di migliorare la distanza dal terreno, selezionare la posizione di montaggio quanto più
in alto possibile e comunque in modo da lasciare una distanza di sicurezza
dall’asta palette anche quando questa si inclina.
E’ possibile fissare la squadretta di montaggio sul lato superiore del servo di
coda, oppure su un’altra superficie. Non utilizzare gommapiuma qualora si
utilizzi la squadretta di montaggio (fissaggio rigido). In alternativa è possibile
incollare l’HeliCommand sul servo di coda senza utilizzare la squadretta di
montaggio.
Disporre in posizione perpendicolare rispetto all’albero del rotore principale!
Qualora il dispositivo venga montato storto, il bilanciamento elettronico
influenzerà i movimenti della coda per tentare di stabilizzare il modello.
Elicotteri di piccoli dimensioni con grandi angoli di incidenza mantengono una
posizione inclinata durante il volo stazionario, per compensare la maggior spinta del rotore di coda. Tale situazione può essere regolata mediante l’adattatore
per PC. In alternativa consultare anche il capitolo “risoluzione dei problemi”
(pag.38).
Montaggio sul trave di coda
Assicurare saldamente l’unità insieme al componente angolare di fissaggio
sul trave di coda mediante fascetta fermacavo. Incollare quindi anche la parte
posteriore dell’HeliCommand con due strisce di gommapiuma adesiva. Dopo il
volo di collaudo, incollare l’unità sul trave di coda con del collante idoneo (UhuHart o colla istantanea). Il nastro biadesivo non è sufficiente.
Protezione contro vibrazioni
Prestare particolare attenzione a mantenere l’HeliCommand al riparo da
vibrazioni!
Incollare pertanto 2 sottili strisce di gommapiuma adesiva sul lato posteriore
dell’apparecchio. Tali strisce non devono ricoprire l’intera superficie: devono
essere posizionate sui lati superiore ed inferiore della superficie posteriore.
La superficie di fissaggio deve essere alta almeno quanto l’HeliCommand.
Avvertenze per il montaggio su elicotteri
con motore a scoppio
• Montare assolutamente distante dalla marmitta.
• L’isolamento dalle vibrazioni è particolarmente importante contro le vibrazioni
impercettibili dei motori a scoppio. Qualora l’HeliCommand dovesse
comunque vibrare visibilmente nonostante il montaggio corretto, si
suggerisce di installare una ulteriore protezione contro le vibrazioni.
Di norma è sufficiente applicare del velcro dietro le strisce adesive di
collegamento.
Alternativa più sicura: incollare una piastrina in metallo (3mm alu oppure
1,5mm acciaio) direttamente sull’HeliCommand , quindi applicare della
gommapiuma adesiva tra questa piastrina e la superficie di fissaggio.
Assicurare l’insieme mediante un elastico!
In alternativa, montare l’HeliCommand in altre sedi più protette contro
vibrazioni.
• Per evitare di danneggiare il sensore con il fumo di scarico, non regolare il
motore troppo grasso se non strettamente necessario.
Accertarsi che l’HeliCommand risulti ben saldo in posizione e non possa
scivolare o allentarsi; in caso contrario il modello assumerebbe una posizione
storta in modalità autopilota e diventerebbe ingovernabile.
Rimuovere completamente eventuali residui di olio prima di incollare l’unità
sul supporto.
Assicurare comunque l’HeliCommand anche mediante un elastico
nell’eventualità che la gommapiuma adesiva si allenti.
18
• Consigliamo comunque di applicare in aggiunta un tubetto oppure (meglio)
una cornice quadrata (con misure interne corrispondenti a quelle della
finestra del sensore) sotto il sensore per meglio proteggerlo dallo sporco.
Pulire inoltre regolarmente la visuale del sensore fino ai bordi.
19
20-21
Collegamento
Ogni trasmittente moderna dispone della miscelazione per elicotteri; nel caso
di miscelazione a tre punti,per esempio, essa provvede affinché i servi si muovano contemporaneamente nella giusta direzione. Con l’HeliCommand, tutto
questo avviene grazie al miscelatore interno già integrato. Di conseguenza
occorre selezionare nella trasmittente un programma per elicotteri privo di miscelazione (“H1”/servo singolo), in modo che spostando lo stick di comando si
muova un solo servo! Compiuta tale operazione è possibile cominciare con il
collegamento del dispositivo (rivolgersi se necessario al distributore della trasmittente per conoscere come attivare tale operazione). In alternativa (se non
occorre la curva di programmazione del gas), non selezionare alcuna impostazione e scegliere un programma standard (base). Tale opzione evita anche la
miscelazione degli interruttori e dei cursori per i canali aggiuntivi.
Attenzione:
per comandi tipo H4 è assolutamente necessario l’adattatore per PC!
• Il modulo RC (con divisione dei cavi) compreso nella confezione viene
collegato tra ricevente e servi. Esso può essere fissato alla ricevente
mediante nastro biadesivo oppure velcro.
• Devono essere collegati alla ricevente almeno i canali del Roll, Nick e Pitch.
• I collegamenti per i canali PILOT e AUX sono opzionali. Collegare i
relativi cavi alle uscite della ricevente corrispondenti ai relativi comandi
(cursori o interruttori).
• L’HeliCommand si accende non appena viene accesa la trasmittente.
• I cavi inutilizzati possono essere girati di 180° ed inseriti negli ingressi
inutilizzati della ricevente o del modulo RC.
• Coprire la presa in ingresso libera sull’HeliCommand con una pellicola
adesiva per proteggerla contro lo sporco.
20
21
22-23
Impostazione
Terminato il montaggio del dispositivo, e comunque dopo ogni modifica effettuata nella programmazione della trasmittente, occorre configurare soltanto la prima volta l’HeliCommand
con la trasmittente ed il modello. Altrimenti rimangono attive le impostazioni standard di
fabbrica che prevedono trasmittente tipo Robbe-Futaba e modelli tipo Spirit LI o altri con
medesimo verso di funzionamento dei servi. Per questi casi la posizione di montaggio
dell’HeliCommand deve essere con la parte rotonda dell’involucro rivolta verso destra.
Importante: Eseguire sempre in ogni caso la verifica di funzionamento dei comandi e del
sensore prima di ogni volo (pag. 28)!
Per configurare le impostazioni è possibile agire in due modi:
a) tasto SET: per tutti i tipi di piatti oscillanti fino a 3 servi
(tale regolazione è quella descritta in seguito).
b) Adattatore per PC: per questa modalità vengono illustrati in seguito solo
i punti da B fino a D del punto 1!
Tale procedura può essere ripetuta a piacere quando lo si desideri. In questo modo
l’HeliCommand riconosce i segnali validi per i comandi “Neutro e posizione di riposo”.
Di conseguenza occorre ripetere il centraggio ogniqualvolta vengono modificati sensibilmente i trimmaggi sulla trasmittente. Il centraggio non influenza i comandi del trim; non
modificare pertanto i trim dopo il centraggio (essi vanno modificati solo dopo modifiche nella
miscelazione interna).
Se invece viene utilizzato il trim automatico, non occorre mai modificare il trimmaggio sulla
trasmittente: i trim del Nick e del Roll vanno lasciati a metà corsa (neutro).
D) Configurazione dell’HeliCommand
Scollegare assolutamente il motore elettrico o collegare la ricevente con una batteria separata al fine di evitare un avvio improvviso del motore!
L’elicottero deve essere già regolato almeno in parte meccanicamente (centraggio del piatto
oscillante e del rotore di coda). La configurazione può avvenire soltanto se i cavi ed i servi
sono collegati correttamente e se tutte le funzioni di miscelazione sulla trasmittente sono
spente. In caso di dubbio, effettuare una prova collegando i servi direttamente alla ricevente
e verificando che un movimento dello stick comandi un solo canale (verificare anche quale
canale). Al termine ri-collegare correttamente tutti i cavi.
Seguire semplicemente i passi seguenti per completare la configurazione:
A) Factory-Reset
Richiamare la modalità di regolazione
Elicotteri con motore elettrico
Serve per ripristinare i parametri iniziali impostati in fabbrica. Cancella tutte le regolazioni,
anche quelle accessibili attraverso l’adattatore per PC. Per compiere tale operazione tenere
premuto il tasto SET , quindi accendere il dispositivo. Premere quindi il tasto una seconda
volta e mantenerlo premuto per almeno 5 secondi fino a quando non lampeggiano alternativamente i LED rosso-verde.
Effettuare il trimmaggio della trasmittente (vedi punto C).
Premere il tasto SET per almeno 3 secondi fino a quando lampeggia il LED verde.
(Tale procedura azzera automaticamente i valori interni di trim automatico).
A questo punto i servi non funzionano (a seconda del livello di regolazione), oppure funzionano diversamente dalla norma.
B) Regolazione della trasmittente
Regolazione e memorizzazione di ciascun livello (1-5)
Tutte le funzioni di miscelazione del piatto oscillante devono essere azzerate. Ridurre sulla
trasmittente l’escursione per il Nick e il Roll al 100% ca. o comunque al minimo. La funzione expo può rimanere attiva. Le trasmittenti (Multiplex) con modalità 1,6 ms-Norm devono
essere impostate sulla modalità UNI. Se si utilizza il giroscopio integrato con funzione Heading-Hold, è necessario disattivare sulla trasmittente tutte le miscelazioni di coda.
C) Trimmaggio della trasmittente
• Portare gli stick di comando a metà corsa (neutro) e lo stick del pitch sul
minimo. Anche i trim devono essere centrati. In alternativa, se l’elicottero ha
già compiuto dei voli con l’HeliCommand , e sono stati impostati valori minimi
di trim, è possibile lasciare questi ultimi senza dover eseguire nuovamente il
centraggio.
• Premere il tasto SET per 1 secondo fino a quando non si illumina il LED
verde, quindi rilasciare il tasto e spegnere l’unità: la procedura è terminata
(in caso lampeggi il LED rosso: consultare pag. 8).
22
Tali procedure avvengono muovendo lo stick di comando come indicato in ciascun paragrafo e premendo dopo a lungo il tasto SET.
Cambio del livello di regolazione
Il numero di lampeggi segnala il livello in cui ci si trova (1-5).A ciascun livello di regolazione
è associata la modifica di un parametro. Dopo aver richiamato la modalità appare per primo
il livello 1. Premere brevemente il tasto SET per accedere al livello di regolazione seguente
(e per tornare dal livello 5 di nuovo al 1).
E’ quindi possibile ripetere ogni regolazione ogniqualvolta lo si desideri. La prima volta procedere però nell’ordine indicato di seguito.
Termine della modalità di regolazione
E’ possibile uscire ogni momento dalla modalità di regolazione spegnendo
l’apparecchio.
23
24-25
I livelli di regolazione
1) Configurazione della direzione dello stick di comando
• Il LED verde deve lampeggiare regolarmente nella modalità di regolazione.
Il motore elettrico deve essere scollegato.
• Mantenendo premuto a lungo il tasto SET, spostare fino a fine corsa
i seguenti comandi sulla trasmittente (l’ordine è indifferente):
roll a destra, Nick in avanti, coda con la punta verso destra, nuovamente
neutro, Pitch al massimo.
Rilasciare a ora il tasto SET.
I versi dei comandi non possono più essere
modificati a questo punto! (eccetto l’inversione volontaria del Pitch).
2) Direzione del servo “Pitch”
(und Erkennung der Anlenkung H1/ tri-link)
Il LED deve lampeggiare 2 volte (se necessario premere il tasto SET).
Spingendo in alto lo stick di comando del Pitch (passo), il piatto oscillante deve alzarsi della
medesima misura in tutti i punti senza inclinarsi. Spostando lateralmente il comando del Roll
è possibile selezionare la modalità di attivazione corretta tra 10 possibilità. Una volta eseguita la regolazione, è sufficiente premere a lungo il tasto SET (>1s) per memorizzarla.
Spostando lo stick di comando di coda verso destra, la punta deve spostarsi verso destra
ed il rotore di coda deve volgersi verso destra. Regolare ora il centraggio del rotore di coda
dal momento che la funzione Heading-Hold è disattivata. Una volta eseguita e verificata la
regolazione, è sufficiente premere a lungo il tasto SET (>1s) per memorizzarla.
5a) Posizione di montaggio (direzione del sensore)
e verso di rotazione del rotore
Il LED deve lampeggiare 5 volte (se necessario premere il tasto SET).
L’unità HeliCommand deve riconoscere la propria posizione di montaggio, ovvero se la sua
parte curva è rivolta verso destra, sinistra, avanti o indietro. Programmare pertanto l’unità
spostando lo stick del Roll o del Nick in modo da fare inclinare il piatto oscillante dalla parte
corrispondente (quella in cui si trova la parte curva dell’HeliCommand); mentre il piatto è
inclinato dalla parte corretta, tenere premuto il tasto SET per più di un secondo.
5b) Verso di rotazione del rotore principale
Nel livello di regolazione nr. 5, spostare lo stick di comando della coda nella medesima
direzione in cui ruota il rotore principale (visto dall’alto); memorizzare quindi la selezione
mantenendo premuto il tasto SET >1s.
3 ) Direzioni dei servi “Nick” (e „Roll“)
Il LED deve lampeggiare 3 volte (se necessario premere il tasto SET).
Azionando lo stick di comando del Nick, il piatto oscillante deve inclinarsi della medesima
angolazione in tutti i punti, senza tuttavia alzarsi.. Spostando il comando del Roll è possibile
selezionare la modalità di attivazione corretta tra 2 o 8 possibilità.
Per i comandi con servo singolo: selezionare le 2 modalità possibili spostando lo stick del
Roll verso destra. Qualora fosse necessario per caso invertire la direzione del Roll procedere come segue: portare lo stick di comando a fine corsa a sinistra e tenerlo in tale posizione
(>1.5 s), quindi procedere rilasciandolo e spostandolo alcune volte verso sinistra (possibile
solamente per dispositivi con codice identificativo a due cifre, riportato sulla targhetta a
sinistra del numero dell’articolo). Per tipi di comando differenti, la direzione del Roll coincide
automaticamente dopo la memorizzazione. Altrimenti sono stati invertiti tra loro i collegamenti dei servi, oppure sono state configurate in maniera errata le direzioni del Roll o del
Pitch. (In questo caso ripetere le regolazioni).
Una volta eseguita la regolazione, è sufficiente premere a lungo il tasto SET (>1s; ►LED
lampeggia 4x) per memorizzarla. A questo punto dovrebbero risultare corrette tutte le 3
direzioni di spostamento del piatto oscillante.
Qualora quest’ultimo risulti storto, regolarlo ora meccanicamente.
4) Direzioni del servo di comando di coda
Qualora venga utilizzato un giroscopio esterno, saltare questo punto!
Il LED deve lampeggiare 4 volte (se necessario premere il tasto SET). Selezionare il corretto
verso di rotazione del servo di coda spostando lo stick di comando del Roll avanti e indietro.
Conclusione
Accendere nuovamente l’unità ed effettuare una prova di tutti i comandi.
Regolare se necessario sulla trasmittente la riduzione della corsa dei servi
(le escursioni sono differenti rispetto a quelle presenti nei programmi di
miscelazione della trasmittente).
Riduzioni
maggiori
nell’escursione
dei
servi
possono
essere
impostate
attraverso l’adattatore per PC.
Regolare ora il piatto oscillante qualora esso non risulti esattamente orizzontale.
Regolazione grossolana: con il Pitch a metà corsa deve esserci un punto per il quale tutte
le squadrette dei servi risultino centrate (neutro). In caso contrario svitare le squadrette e
regolarle correttamente.
Regolazione fine: regolare le lunghezze dei tiranti. La regolazione finale è possibile anche
con il trim della trasmittente. In questo caso configurare in seguito nuovamente il trim con
il tasto SET (punto C).
Le trasmittenti che dispongono di condizioni di volo differenti memorizzate al loro interno, devono avere i medesimi valori di trim in tutte quelle condizioni di volo in cui è attivo
l’HeliCommand.
24
25
26-27
Regolazione HeliCommand Rigid
Essa comprende le seguenti possibilità di regolazione:
Prima di utilizzare il dispositivo in elicotteri privi di asta palette, attivare
assolutamente (tramite PC) la modalità RIGID.
La stabilizzazione mantiene un’inclinazione prefissata ed impedisce lo spostamento del modello a seguito di raffiche di vento fino a quando la forza di
reazione dell’elicottero lo consente. In condizioni normali l’elicottero si pilota
come di consuetudine.
Il funzionamento del sistema è visibile attraverso il piatto oscillante, che in
questo caso rimane inclinato nella direzione di comando.
Prestare attenzione prima del volo affinché il piatto oscillante non risulti eccessivamente inclinato (effetto deriva) e la sensibilità RIGID non sia impostata troppo alta. Quest’ultima non deve essere infatti troppo alta, come invece
spesso accadde per i giroscopi di coda.
Modus [SPENTO]
Tale modalità corrisponde alla versione HeliCommand 3D.
Non adatta per elicotteri privi di asta palette!
Gli elicotteri privi di stabilizzatore (asta palette) possono volare con
l’HeliCommand soltanto con la modalità RIGID attivata!! In caso contrario c’è
il rischio di valori di Roll e Nick troppo elevati, in grado di sovralimentare il
sistema e disturbare notevolmente la modalità di posizione!
Per i modelli riproduzione, il comando della testa rotore è normalmente impostato con escursione dimezzata. Durante il montaggio dell’HeliCommand
incrementare meccanicamente l’escursione del meccanismo al fine di ottenere
un livello di stabilizzazione ottimale.
La modalità di stabilizzazione RIGID è attivabile attraverso il PC. Una volta
installata la versione base, controllare di frequente il sito web www.robbe.
com/rsc (area download) per eventuali aggiornamenti software disponibili da
scaricare.
La modalità RIGID è attivabile tramite PC.
26
Modus [ATTIVO]
Per tenere costantemente attiva la modalità RIGID (insieme alle modalità
orizzontale e di posizione selezionabili dal canale Pilot).
In questo caso prestare particolare attenzione poiché la sensibilità della
funzione RIGID non è regolabile attraverso il canale Pilot durante il volo.
Valori troppo elevati di sensibilità rischiano di causare pericolosi effetti di rollio o di pendolo. La regolazione della sensibilità “RIGID” può avvenire soltanto attraverso il PC!
Modus [FADER]
Disattiva le modalità di stabilizzazione orizzontale e di posizione (il pilotaggio del modello avviene tradizionalmente senza ausili. Il pilota deve comandare attivamente
l’inclinazione del modello!) Nel canale Pilot (cursore) viene integrata solamente la stabilizzazione RIGID, la cui sensibilità è regolabile tramite PC fino al suo valore massimo La
posizione massima sul cursore (in entrambe le direzioni) corrisponde esattamente alla
posizione centrale della modalità [ATTIVO].
Spostando il cursore a metà, si abbassa la sensibilità (del “giroscopio di testa”, per Nick
e Roll in eguale misura) al valore di 33%. Particolarmente indicato per trovare la migliore
sensibilità RIGID. Qualora in seguito si passi alla modalità [ATTIVO], sarà necessario
diminuire per PC la posizione del cursore della sensibilità (Es: Sensibilità RIGID Roll=7,
cursore ca. 70%, ovvero impostare la nuova sensibilità RIGID su 5 = 7x70%=4.9)
27
28-29
Volo di collaudo
Eseguire delle prove sulle direzioni dei comandi
e sul sensore prima del volo iniziale
• Verificare il centraggio, il verso e l’escursione degli stick di comando e dei servi
• Per il canale Pilot ed il tasto di trim automatico: controllare il diodo luminoso
(Trim con Pitch al minimo. In questo modo è attivo il canale del trim, senza
tuttavia alcun effetto).
• Verificare il funzionamento del sensore lungo i tre assi. Il verso contrario di funzionamento causerebbe la caduta del modello. Procedere come segue: impostare la stabilizzazione sul livello “giallo” , quindi inclinare con la mano il modello in sequenza avanti
ed indietro lungo tutti i tre assi (lateralmente, inclinazione in avanti e rotazione). Per
ogni spostamento è necessario che i corrispettivi servi reagiscano in direzione opposta:
il piatto oscillante rimarrà orizzontale, mentre i lati anteriori delle pale del rotore di coda
si sposteranno in senso contrario rispetto alla direzione del movimento.
• Eseguire anche un test a lunga distanza con antenna inserita.
Il volo
Consigliamo ai piloti principianti di rivolgersi ai colleghi più esperti per controllare le
regolazioni e compiere il volo di collaudo.
(Per i consigli sul trimmaggio consultare pag.)
Controllo delle vibrazioni per elicotteri
con motore a scoppio
Dal momento che forti vibrazioni sul sensore sono in grado di disturbare notevolmente il
corretto funzionamento, sono necessarie tre verifiche prima di cominciare a volare:
1) Porre la mano a contatto con l’unità HeliCommand per riscontrare la
presenza di vibrazioni sul medesimo.
2) Attivare la modalità „giallo“ prima del decollo ed osservare se il piatto
oscillante rimane stabile a tutti i regimi di rotazione.
3) Partire quindi con la modalità “Spento” . Accendere e spegnere brevemente
l’autopilota per effettuare un controllo di sicurezza. Ripetere tale procedura
a diversi regimi di rotazione.
In caso di disturbi osservare quanto riportato a pagina 16 riguardo la
modalità di installazione.
28
Avvio
Mantenere l’elicottero in posizione orizzontale prima della partenza.
Se l’elicottero viene tenuto inclinato o capovolto prima dell’avvio, è necessario riavviare
nuovamente l’HeliCommand prima della partenza.
(Tali inclinazioni causano l’insorgenza di forze altrimenti non presenti durante le fasi di
volo, in grado di disturbare il sensore).
Controllo dei comandi prima di ogni volo
Verificare la manovrabilità ed il centraggio del piatto oscillante anche con l’autopilota
inserito.
Non avviare il modello fino a quando i servi non si muovono!
Regolazione della sensibilità
Effettuare il volo di collaudo con bassi valori di sensibilità!
Valori di sensibilità oltre il 65% (per entrambe le modalità) non vengono sopportati da
tutti i modelli; in alcuni casi, in base al tipo ed alla posizione di montaggio, possono
insorgere effetti pendolo notevoli, specialmente a basse quote di volo (<0,5m). Verificare quindi la posizione del cursore di comando prima del volo di collaudo. Regolare la
sensibilità in modo da raggiungere una stabilizzazione ottimale nella modalità di posizionamento ad una quota di 0,5m ca.
In caso di “effetto pendolo” ► diminuire il livello di sensibilità. In caso di deriva incontrollata ► aumentare il livello.
Diversamente dai giroscopi di coda, in questo caso la sensibilità non deve essere regolata vicino alla soglia di oscillazione.
Un livello più basso comporta manovre di volo migliori e regolari, meno influenzate
dall’intervento spontaneo di correzione dell’autopilota.
Per elicotteri agili sono particolarmente indicate le regolazioni supplementari disponibili
attraverso l’adattatore per PC, utili per migliorare ulteriormente la stabilità del velivolo.
L’HeliCommand frena lentamente l’elicottero quando si eseguono veloci voli di avanzamento. In questi casi il pilota deve comandare attivamente l’elicottero quando con i
comandi oltrepassa le correzioni del pilota automatico.
Mediante l’adattatore per PC è possibile selezionare a piacere una apposita funzione
denominata “volo libero di avanzamento” (Vorwärts Freilauf”).
29
30-31
Trimmaggio
Se non si intende utilizzare il trimmaggio automatico, è preferibile eseguire il
trimmaggio con il dispositivo spento.
Successivamente, e comunque dopo ogni sostanziale modifica dei trim sulla
trasmittente, è necessario configurare il centraggio della trasmittente mediante
il tasto SET (pag.22).
La precisione di stabilizzazione del dispositivo risulta particolarmente ridotta
durante i primi secondi di volo. Essa incrementa tuttavia automaticamente già
dopo 10 s di volo; si raccomanda pertanto di non trimmare i comandi quando
l’autopilota è attivo, ma di aspettare pochi secondi.
Di norma. trascorso tale periodo non risulta più necessario alcun trimmaggio.
Qualora il trimmaggio risulti differente con la stabilizzazione attivata e non:
configurare il centraggio della trasmittente (pag.22).
Trim automatico
Azionare semplicemente sulla trasmittente il tasto di trimmaggio automatico,
indipendentemente dalla modalità di stabilizzazione. Prima di compiere tale
operazione occorre che l’elicottero rimanga per 8s ca. in volo tranquillo..
Il trim provvede al centraggio della trasmittente, precedentemente configurata
sull’HeliCommand. Di conseguenza non è possibile spostare contemporaneamente i trim del Roll e del Nick sulla trasmittente.
In alternativa, qualora essi siano stati spostati, occorre ripetere la configurazione del “centraggio della trasmittente” (pag.22), prima di poter utilizzare nuovamente il tasto di trim automatico.
Trimmaggio di coda
Regolare i trim sulla trasmittente in modo che in modalità Heading-Hold il servo
non si sposti. Se non viene utilizzata la funzione di trim automatico, si raccomanda di regolare meccanicamente il trim con modalità Heading-Lock disattivata (come per i normali giroscopi di coda). Tale procedura consente di evitare
regolazioni differenti del trim tra modalità normale e modalità Heading-Lock.
L’eventuale tendenza del modello alla deriva, causata dalla variazione di
temperatura o da un utilizzo prolungato può essere neutralizzata mediante una
ri-accensione del dispositivo.
(Non attraverso il trim automatico: esso corregge soltanto il centraggio dei
servi).
30
31
32-33
Consigli per il volo
Efficacia del sensore ottico
Decollo e atterraggio
E’ possibile attivare l’autopilota prima del decollo o anche direttamente in volo.
Importante: Non impostare mai la sensibilità su valori più elevati rispetto a quelli
del primo volo di collaudo.
La modalità di posizionamento funziona completamente anche in assenza di
orizzonte visibile e quindi anche nelle vicinanze di alberi etc…
Per i piloti principianti si consiglia comunque di volare sopra superfici normali
(prati, piazzali, sassi etc.)
In questo modo è garantita la massima efficacia nella stabilizzazione.
Volo stazionario
La modalità di posizionamento risulta maggiormente efficace nelle vicinanze del
suolo. Per quote di volo maggiori, l’HeliCommand lascia invece maggiori libertà
di movimento.
Ai principianti si consiglia di iniziare pilotando il modello ad una quota compresa
tra 0,5 e 1,5 m per agevolare l’apprendimento della tecnica di pilotaggio. A quote
superiori rimane più sicura la “via di fuga” verso l’alto. La modalità di posizione è
efficace fino a 3 metri di altezza ca. in assenza di vento; è sempre efficace fino
ad 1m. di altezza in presenza di vento.
La stabilizzazione funziona correttamente solo in volo.
Quando l’elicottero si trova a terra con il rotore in funzionamento, sorvegliarlo
sempre e se necessario agire manualmente sui comandi!
Volo nel buio o sopra superfici riflettenti
(Acqua, neve, tetti di automobili, superfici di palestre prive di moquette etc…)
In questi casi risulta funzionante soltanto la modalità orizzontale anche se è attiva
la modalità “verde” (posizionamento), dal momento che il sensore non dispone del contrasto sufficiente. Brevi interruzioni del segnale vengono compensati
automaticamente dal software intelligente. In caso di interruzione prolungata, il
comando viene trasferito automaticamente agli strumenti usuali; in questo caso è
necessario che il pilota tenga il modello ben osservato e lo comandi leggermente
quando necessario.
Nelle condizioni citate in precedenza è opportuno attivare all’inizio la modalità orizzontale “gialla” per maggiore sicurezza, oppure eseguire una verifica del
contrasto (vedi oltre).
Escursioni dei comandi
E’ possibile sopravanzare con i comandi l’autopilota, anche quando l’intensità
impostata è massima, oltrepassando il 50% ca. della corsa del comando del
Roll e Nick. (Dopo aver neutralizzato i comandi del Roll e Nick torna subito attivo
l’autopilota). Si raccomanda pertanto ai principianti di pilotare il modello con minime escursioni sugli stick di comando e di impostare una funzione esponenziale
(expo) sulla trasmittente!
La possibilità di sopravanzare il pilota automatico viene impedita se l’escursione
dei comandi sulla trasmittente è ridotta (funzione Dual Rate). Per mantenere la
possibilità di sopravanzare il pilota automatico (per sicurezza) deve essere in
questo caso ridotto anche il canale Pilot. Se si dispone di una trasmittente con
diverse condizioni di volo programmate, è possibile impostare il canale Pilot su
diversi valori attraverso la programmazione delle condizioni di volo. Le riduzioni permanenti nella corsa dei comandi vengono regolate al meglio attraverso
l’adattatore per PC.
Volo indoor (palestre)
Utilizzare la modalità „giallo“. Non utilizzare la modalità „verde“ per alcun motivo;
verificare al limite prima il contrasto a distanze differenti (vedi oltre) e limitarsi alla
condizione di volo normale.
(Anche per la versione HeliCommand 3D non eseguire voli rovesci in palestre o
all’interno di altri edifici nella modalità di posizione „verde“!)
Verifica del contrasto
Un tremolio del LED nella modalità di posizione „verde“ segnala che il contrasto
o la luce circostante non sono sufficienti; in questi casi, quindi, occorre disattivare
la modalità “verde” per passare a quella “gialla” orizzontale. E’ possibile verificare tale situazione nelle vicinanze dal suolo e anche a diverse altezze.
E’ inoltre possibile verificare direttamente la reazione del sensore muovendo orizzontalmente la mano a distanza di 20cm ca. sotto l’HeliCommand (quest’ultimo
deve essere attivato nella modalità di posizione “verde”)
32
33
34-35
Utilizzo delle diverse versioni HeliCommand
Avvertenze
HeliCommand 3A
• Si consiglia di volare a quote più elevate qualora ci si trovi sopra erba alta
o superfici completamente coperte da fogliame; in condizioni di vento, il
movimento degli oggetti sottostanti potrebbe disturbare la modalità di
posizionamento. In alternativa attivare la modalità „gialla“.
Questa versione non è adatta per l’esecuzione di manovre acrobatiche e manovre
3D. Per tali scopi sono previste le versioni 3D e RIGID!
HeliCommand 3D o superiori
Per compiere rapide manovre 3D è possibile lasciare attivata la modalità
“gialla” come ausilio. Essa stabilizza il modello sia in volo normale che in volo
rovescio. La stabilizzazione del sistema è facilmente “oltrepassabile” con i comandi
manuali. Tramite il canale Pilot è possibile regolare l’intensità dei comandi manuali.
L’adattatore per PC consente inoltre la regolazione di numerosi altri parametri. Particolarmente utile è la possibilità di gestire il passaggio tra volo stazionario normale
a rovescio.
La stabilizzazione può inoltre svolgere la funzione di “interruttore di
emergenza”. In questo caso occorre tuttavia osservare quanto segue:
Manovre 3D
Per evoluzioni in volo particolarmente impegnative e prolungate (sequenza di looping, virate, etc.) è preferibile disattivare prima l’HeliCommand 3D per poi riattivarlo
trascorsi almeno 15 secondi dalle evoluzioni.
Tale avvertenza vale anche quando vengono eseguite numerose virate in sequenza, dal momento che in particolari circostanze queste sono in grado di falsare il
riconoscimento dell’orizzonte neutro.
HeliCommand RIGID
Una volta attivata la modalità RIGID attraverso PC, il dispositivo minimizza gli influssi negativi di raffiche di vento sul volo del modello e la tendenza di quest’ultimo
a cabrare.
Tale versione consente di compiere la piena totalità di voli acrobatici e 3D e risulta
anche un valido ausilio.
Per passare dalla modalità orizzontale a quella di posizione valgono i medesimi
accorgimenti elencati per l’HeliCommand 3D (vedi sopra).
34
• In caso di elevati sbalzi di temperatura, attendere 5 minuti dopo l’accensione
per consentire al dispositivo di adattarsi. Non utilizzare mai con temperature inferiori a -5°C e superiori a +50°C. (utilizzabile tra -10°C … +50°C se la
stabilizzazione è spenta). Accendere eventualmente il dispositivo prima
dell’utilizzo e lasciare momentaneamente il modello in posizione orizzontale.
• Non utilizzare in caso di pioggia: rischio di cortocircuiti!
• Se si avverte un effetto deriva sul modello a seguito di rotazioni di 90°…180°
della coda, spostare e migliorare la posizione di montaggio del dispositivo
(vedi risoluzione degli errori).
Per piloti esperti: differenze nelle manovre in volo
• Disattivare la stabilizzazione per compiere virate in sequenza, dal
momento che essa tenterebbe inesorabilmente di riportare il modello in
posizione orizzontale.
• Utilizzare la modalità di stabilizzazione della posizione „verde“ soltanto per
compiere voli stazionari e voli lenti in vicinanza del terreno!
• Per inclinare notevolmente il modello, per esempio durante il rallentamento
da velocità elevate, occorrono grandi escursioni nei comandi, senza
stabilizzazione. Per eseguire l’autorotazione: diminuire la sensibilità.
• per compiere le virate mantenere l’inclinazione con il comando Roll;
il dispositivo tenderà altrimenti a riportare il modello in posizione orizzontale.
Ambiti di utilizzo del dispositivo
Per agevolare il comando di elicotteri destinati al modellismo. Il dispositivo non è
concepito per velivoli militari con equipaggio e/o per scopi militari. Eventuali trasgressioni sono vietate e saranno perseguite come violazione della licenza.
Le versioni HeliCommand 3A, 3D e RIGID per modellismo non possono essere
utilizzate nelle vicinanze di edifici o tetti di abitazioni, così come anche nei pressi di
zone con costruzioni.
La versione HeliCommand Profi è destinata ai modelli di elicotteri di elevato valore,
o anche ai modelli dedicati a scopi commerciali come riprese video o fotografiche,
rilevamenti, etc.(vedi pag.13).
35
36-37
Norme per la sicurezza
Scarico di responsabilità
Il termine “autopilota” non significa che il volo del modello avviene in maniera
totalmente autonoma!
Come per il normale pilotaggio di elicotteri radiocomandati, sono richiesti al
pilota attenzione ed esercizi di pratica per l’apprendimento.
L’autopilota non è in grado di escludere completamente i rischi derivanti da
un errore di pilotaggio. Risulta anche possibile che insorgano altri rischi, derivanti dall’accresciuta leggerezza causata dal pilotaggio più semplice, oppure
dal fatto che piloti inesperti pilotino il modello in situazioni complesse, che non
sarebbero più in grado di affrontare in caso di interruzione nel funzionamento
dell’HeliCommand dovuto a cause tecniche.
L’autopilota integra inoltre molteplici dispositivi tecnologici soggetti a possibili
disturbi o malfunzionamenti durante l’utilizzo.
L’utente finale deve sempre osservare tutte le norme di prevenzione e sicurezza e non affidarsi soltanto esclusivamente al sistema di stabilizzazione.
Il montaggio, l’installazione e l’utilizzo dell’autopilota e anche dell’elicottero
richiedono una certa attenzione da parte dell’utente. Eventuali errori e disattenzioni possono causare incidenti con persone o cose così come anche incidenti nel traffico. Il produttore richiama esplicitamente l’utente su tali rischi, dal
momento che né il produttore, né tantomeno il rivenditore possono avere alcun
controllo sul corretto utilizzo del prodotto e delle relative norme per la sicurezza
da parte dell’utente finale. Non ci assumiamo pertanto alcuna responsabilità in
principio, per quanto ammesso all’interno dell’ambito legislativo, per qualsiasi
tipo di danno risultante dall’utilizzo dell’apparecchio, sia esso dovuto a disturbi
degli strumenti interni o alla trasmissione dei segnali.
Suggerimenti
• Tenere sempre una distanza di sicurezza tra il modello e persone o oggetti
nelle vicinanze. Volare sempre con attenzione.
• Non sottovalutare il pericolo derivante dal movimento delle pale e la relativa
potenza. Qualora si impari a volare su un modello di grandi dimensioni,
ripararsi dietro una rete protettiva o una porta da calcio, come già predisposto
in molti campi di volo.
• I modellisti principianti si rivolgano ai colleghi più esperti per avere consigli
specialmente durante i primi voli.
• Impostare il livello di stabilizzazione dell’HeliCommand in base alle
condizioni ambientali circostanti. Predisporre il dispositivo in modo da poter
attivare i comandi manuali in volo, oppure fare in modo di poterlo
sopravanzare manualmente con i comandi.
• In base alle norme vigenti, pilotare l’elicottero ove consentito: nei campi di
volo autorizzati e lontano da abitazioni o strade trafficate.
• Mantenersi lontano da stazioni radar, ripetitori e altre possibili sorgenti di
segnali di disturbo.
• L’utilizzo di modelli radiocomandati richiede un’assicurazione R.C. da parte
dell’utente.
• Mantenere sempre sotto controllo il modello in volo.
• Comunicare sempre queste avvertenze anche a terze persone.
Garanzia
Questo prodotto è coperto da una garanzia di 24 mesi. Per l’inizio di tale garanzia fa fede lo scontrino emesso dal negoziante al momento dell’acquisto.
Eventuali riparazioni non allungano la durata della garanzia.
Ci impegniamo a riparare gratuitamente eventuali difetti di fabbricazione o del
materiale o malfunzionamenti sorti durante questo periodo.
Sono escluse altre richieste, per esempio danni verificatisi successivamente.
Il trasporto verso la nostra sede e il ritorno al cliente non avviene a nostre spese. Non possiamo accettare merce comprendente le spese di spedizione.
Non ci assumiamo alcuna responsabilità per danni o per perdite della merce
dovuti al trasporto. Vi suggeriamo a questo proposito di assicurare la merce.
Affinché la garanzia sia valida, occorre rispettare le seguenti norme:
• Allegare sempre alla merce lo scontrino o la ricevuta di acquisto.
• Tutti gli apparecchi sono stati utilizzati seguendo le relative istruzioni
per l’uso.
• Sono stati utilizzati solamente accessori originali robbe e fonti di
alimentazione raccomandate.
• Non è prevista la garanzia contro guasti derivanti da inversioni di polarità,
sovraccarichi, manomissione da parte di estranei, umidità e danni
meccanici.
• Allegare inoltre eventuali indizi utili per rintracciare il guasto o il difetto.
36
37
38-39
Risoluzione dei problemi
I servi non funzionano ► consultare pag. 8 “Visualizzazioni del LED”
• Vibrazioni di forte intensità?
► Consultare il paragrafo “condizione di volo non stabile”
Tremolio
o
effetto
pendolo
nella
modalità
di
posizionamento,
specialmente nelle vicinanze del terreno
• Diminuire la sensibilità del dispositivo
• Posizione di montaggio troppo bassa? ► Montare l’unità preferibilmente in
alto, vedi pag. 17
• Impostazione tramite PC della corsa del Nick/Roll o sensibilità (“Hor-Empf”)
troppo bassi?
Il Trim automatico non funziona correttamente
• È attivo contemporaneamente un trimmaggio sulla trasmittente?
► Consultare pag.30: configurare il trim, oppure non modificarlo
trasmittente.
• Sono configurati correttamente la direzione ed il minimo del pitch?
► Il trim automatico non funziona correttamente senza Pitch
Nessuna stabilità nella modalità di posizione
• Visuale del sensore sporca?
► Proteggere dai gas di scarico e pulire accuratamente e regolarmente
qualora il dispositivo venga montato su un elicottero con motorizzazione a
scoppio
• Superficie sottostante priva di contrasto, come ad es. neve, asfalto liscio,
acqua? ► Attivare la modalità orizzontale
• Configurazione trim non eseguita? ► Vedi pag. 30
• Aumentare la sensibilità?
• Abbondanti fumi di scarico nel raggio visivo del sensore?
► Regolare il motore con una carburazione più magra e montare il dispositivo
più lontano dallo scarico.
• Cavo dell’antenna o altri oggetti presenti nel campo visivo del sensore?
► Consultare il primo paragrafo di pag. 17: “montaggio”
• Erba alta o notevole quantità di fogliame in movimento per il vento?
► Attivare la modalità di posizione.
Condizione di volo non stabile, nemmeno in modalità di posizione
• Presenza di vibrazioni (percettibili o impercettibili) o rumori troppo forti sul
dispositivo (specialmente in elicotteri con motore a scoppio)?
► Rispettare le indicazioni di montaggio > fissaggio > motore a scoppio.
• Sono state utilizzate le due sottili strisce orizzontali di gommapiuma
adesiva? ► Consultare pagina 16
Trimmaggio differente con stabilizzazione attiva e non
• Il livello di stabilizzazione aumenta automaticamente trascorsi alcuni secondi
dopo l’avvio.
• Modificato il trimmaggio sulla trasmittente?
► Configurare nuovamente il centraggio trim.
• Brusco cambio di temperatura?
► Lasciare 5 minuti ca. al dispositivo per ambientarsi, quindi riaccenderlo
nuovamente.
38
sulla
Comparsa dell’effetto deriva dopo rotazioni della coda
• Posizione di montaggio del dispositivo non esattamente verticale, oppure
l’elicottero leggero presenta un angolo di incidenza troppo alto?
► ottimizzare il funzionamento agendo come segue: partendo dal volo stazionario,
compiere una virata a destra di 90°, con la stabilizzazione attivata sul “giallo”.
Se dopo la virata, il corpo dell’elicottero rimane fermo, mentre la coda tende a spostarsi
in una determinata direzione, allora occorre migliorare la posizione di montaggio del
dispositivo.
Se l’effetto deriva è rivolto verso sinistra-avanti, inclinare l’HeliCommand ulteriormente
verso sinistra; agire al contrario se la deriva è rivolta verso destra-indietro.
Se l’effetto deriva è rivolto verso destra-avanti, inclinare l’HeliCommand
ulteriormente verso sinistra; agire al contrario se la deriva è rivolta verso
sinistra-indietro.
Posizionamento per volo rovescio:
Variazione del centraggio del Roll durante il volo rovescio, oppure nel passaggio a
volo normale
► Ottimizzare la regolazione del bilanciamento della spinta di coda
(Attraverso l’adattatore per PC; vedi software di regolazione).
Effetto deriva a seguito di manovre acrobatiche (virate, avvitamenti,etc.)
• Si utilizza l’HeliCommand 3A?
► Non adatto per volo rovescio o assetti estremi del modello in volo!
► Utilizzare la versione 3D.
• Si utilizza un giroscopio esterno con regimi di rivoluzione >400°/s?
► Diminuire la regolazione del regime di rivoluzione (Pag.25)
• Vengono eseguite molteplici evoluzioni in sequenza (virate strette,
looping,avvitamenti etc.)?
► Osservare le avvertenze riportate a pag. 34!
Servo di coda non centrato
• Il giroscopio interno integrato è stato utilizzato solo in un secondo tempo?
► Azzerare i valori di trim automatico.
39
40-41
Dati tecnici
Accessori
Tensione di alimentazione:
4,8 ... 6 Volt (4 ... 5 NC)
Consumo:
55mA (a 5V)
Dimensioni:
55 x 35 x 22,5 mm
Peso con cavi:
33g
Intervallo di temperatura:
con modalità “spenta”:
-5° ... +50°C,
-10° ... + 50° C
Miscelazioni per elicottero:
H1/ H2/ H3 / H3 (140°) / H4 / H4 (+45°)
Compatibilità Modulo RC:
Robbe-Futaba PPM / PCM / PCM 1024 /Modulazione PCM G3
Graupner/JR PPM 8, PPM 12, Modulazione SPCM
MPX PPM8,PPM 12 con modulazione Uni
Inoltre tutte le altre trasmittenti con risoluzione standard 1,5 ms
• Adattatore per PC con software CD No. 84942000
• Modulo sostitutivo RC (per il trasferimento su diversi modelli):
(per HeliCommand con contatto a 4 spine) No. 8494-4000
(per HeliCommand con contatto a 3 spine) No. 8494-3000
comprende la squadretta di fissaggio, il velcro, gli O-Ring di ricambio per
l’unità principale HeliCommand
L’aggiornamento e la modifica delle diverse versioni avvengono nel centro
assistenza Robbe. (Vedi catalogo generale Robbe)
Assistenza
Assistenza - robbe
Metzloser Strasse 36
D-36355 Grebenhain
Tel.: 0049-6644-87-777
Fax: 0049-6644-7412
Contenuto della confezione
• Dispositivo HeliCommand
• Modulo RC (con cavi)
• Squadretta di fissaggio
• Gommapiuma adesiva: 2 set con 2 strisce ciascuno
• Fascetta fermacavo
• Istruzioni per l’uso
Editore
robbe Modellsport GmbH & Co. KG
Postfach 1108
D-36352 Grebenhain
Internet: www.robbe.com
E-Mail: [email protected]
Tel.: 0049 (0) 6644 / 870
Fax: 0049 (0) 6644 / 7412
40
41
42-43
Note:
Note:
______________________________________________________________
______________________________________________________________
______________________________________________________________
______________________________________________________________
______________________________________________________________
______________________________________________________________
______________________________________________________________
______________________________________________________________
______________________________________________________________
______________________________________________________________
______________________________________________________________
______________________________________________________________
______________________________________________________________
______________________________________________________________
______________________________________________________________
______________________________________________________________
______________________________________________________________
______________________________________________________________
______________________________________________________________
______________________________________________________________
______________________________________________________________
______________________________________________________________
______________________________________________________________
______________________________________________________________
______________________________________________________________
______________________________________________________________
______________________________________________________________
______________________________________________________________
______________________________________________________________
______________________________________________________________
______________________________________________________________
______________________________________________________________
______________________________________________________________
______________________________________________________________
______________________________________________________________
______________________________________________________________
______________________________________________________________
______________________________________________________________
42
43
1
Bedienungsanleitung Version 1.2
MANUAL DE INSTRUCCIONES
Version 1.3
► www.robbe.com
2-3
Queremos felicitarle por haberse decidido a comprar un HeliCommand.
Ningún otro sistema para helicópteros de modelismo del mercado puede estabilizar tanto la situación de vuelo como la posición de vuelo horizontal.
Originalmente el HeliCommand viene de un sistema de piloto automático profesional para helicópteros comerciales que realizan filmaciones y mediciones y
está basado en varios sistemas novedosos, protegidos con patentes.
Puede ser utilizado tanto por debutantes que conozcan todas las funciones
de su modelo, pero que no pueden mantener una situación de vuelo estable,
por pilotos con experiencia que quieren ampliar su capacidad y entrenar con
estabilización reducida así como por profesionales que quieren concentrarse
totalmente en las funciones importantes de su exhibición de vuelo.
Con el HeliCommand, el debutante puede poner el helicóptero en vuelo estacionario, hacer vuelos lentos y entrenar con más facilidad.
No obstante, hemos de hacer hincapié en lo siguiente – a pesar de este sistema único, el piloto debe estar constantemente atento y no debería dejarse
llevar a realizar maniobras de vuelo que pueden ponerle en peligro a él o a
otras personas.
Queremos asegurar otra vez a todos aquellos que rechazan medios electrónicos de ayuda para volar un helicóptero, que el HeliCommand no fue desarrollado para sustituir profesores o instrucciones, sino para facilitar una continuación del aprendizaje efectivo y para volar de forma más segura.
2
3
4-5
HeliCommand 3A No. 8493
HeliCommand RIGID No. 8495
• Con función de “piloto automático”, estabiliza todos los movimientos de
mando horizontales: inclinación, velocidad, posición
• Canal adicional (“canal piloto”) para el ajuste de la potencia de estabilizacióne inversión entre modo horizontal y modo de posición.
• Giroscopio Heading-Lock integrado, mezclador del plato cíclico y automatismo de trim.
• Segundo canal adicional (“Canal Aux.”) para la sensibilidad y el modo del
giroscopio (normal / Heading Lock) o a elección para el automatismo del
trim.
• Configuración sin conexión al PC mediante un proceso de entrada sencillo
(hasta 3 servos de cabeza HR3).
• Failsafe para cuando falla la señal (con PPM/FM) en estabilización de posición y pitch en “hold”.
• Para helicópteros con motor de explosión y motor eléctrico.
• Puede utilizarse tanto en el interior como en el exterior.
• Ajustes adicionales con adaptador al PC como: opción automatismo de
trim, función de rueda libre para el vuelo hacía delante, ajuste de la articulación HR4, optimización del ajuste para piloto automático y giroscopio de
cola.
• Contiene todas las características de HeliCommand 3 A y 3D, así como:
• Modo RIGID para la estabilización de cabezas de rotor sin pala estabilizadora, especialmente efectivo cuando el modelo quiere encabritarse o bajar el
morro con velocidades elevadas o ráfagas de viento.
• Hace innecesario el trim neutral de las funciones Roll y Nick.
• El modo RIGID estabiliza tanto helicópteros (de 2 o más palas) con cabeza sin palas estabilizadoras, como helicópteros convencionales con barra
estabilizadora.
• Mediante el canal piloto se puede seleccionar: modo horizontal, modo de
posición, modo RIGID.
• El modo RIGID y el modo horizontal funcionan también sin contacto de visibilidad con el suelo del sensor óptico. Así que no hace falta hacer ninguna apertura en el fuselaje del helicóptero, cuando se renuncia al modo de
posición.
• Alineación electrónica contra tensiones mecánicas (desplazamientos angulares) para articulación H4.
• Para ajustar el modo RIGID, el adaptador al PC (no. 84942000) resulta imprescindible. Sin adaptador al PC, los parámetros del HeliCommand 3 D
vienen preajustados de fábrica.
HeliCommand 3D No. 8494
• Contiene todas las características de la versión básica “3 A” y además:
• Estabilización horizontal para el vuelo invertido.
• Posibilidades ampliadas de ajuste a través de un adaptador al PC (No.
84942000) (ajuste adicional para expertos para la optimización del modo
3D y el comportamiento del mando).
4
5
6-7
Contenido
Indicaciones por LED
8
Explicaciones de las Posibilidades
9
Consejos para el vuelo
32
32
32
32
33
33
33
33
Canal piloto
10
Giroscopio de Cola
11
Despegar y aterrizar
Vuelo estacionario
Debatimientos de los mandos
Acción del sensor óptico
En la oscuridad o al sobrevolar superficies ópticamente planas
Vuelo en recintos cerrados
Verificación del contraste
Automatismo del Trim
12
Uso de las versiones
34
HeliCommand 3D o más
Maniobras 3D
HeliCommand RIGID
Para pilotos con experiencia: Diferencias en el manejo
Aplicación
34
34
34
35
35
Medidas de precaución
Recomendamos
36
36
Haftungsausschluss
Garantía
37
37
Características técnicas
Contenido
40
40
Accesorios
Servicio de Atención al Cliente
Impresión
41
41
41
Failsafe
12
Versiones más sofisticadas del HeliCommand
13
Instrucciones abreviadas – Lo más importante
14
Instalación
16
Poner a masa el tubo de cola
Lugar de instalación
Montaje
Consejos para motores de explosión
17
17
18
19
Ajuste
22
En el caso de propulsión eléctrica
Factory-Reset
Ajustar la emisora
Entrar las posiciones neutrales en la emisora
Configurar el HeliCommand
Seleccionar el modo de ajuste
Con HeliCommand RIGID
22
22
22
22
23
23
26
Primer vuelo
28
Vuelo de rodaje
Helicópteros con motor de explosión: test de vibración
Trimar
28
28
30
6
7
8-9
Indicaciones por LED
Explicaciones de las Posibilidades
Básicamente existen 3 diferentes posibilidades de uso:
= Función de piloto automático desconectado
LED rojo
LED amarillo = Modo horizontal
LED verde = Modo de posición
Modo horizontal „amarillo
amarillo“: Pone el helicóptero en posición horizontal al soltar
el emisor de mando de roll y nick. Funciona absolutamente independiente de
las características ópticas del suelo. Al volar dentro de una sala, hay que seleccionar este modo o tener en cuenta los consejos en página 33.
Modo de posición „verde“: Aparte del modo horizontal se estabiliza también la
posición del modelo. La estabilización más potente para el vuelo estacionario
“automático” y para vuelos lentos, trabaja de forma más efectiva en 0,5…2
metros de altura aprox. sobre terreno natural (hierba, piedras, etc.). Al soltar
el emisor de mando roll y nick, el helicóptero queda frenado activamente hasta parar. Solamente hace falta continuar el mando de la función pitch / gas.
Una eventual deriva lenta del modelo durante el vuelo estacionario puede ser
corregida fácilmente de forma manual. Para vuelos lentos cerca del suelo, se
puede ajustar una velocidad de avance mediante el debatimiento nick y se
puede manejar la dirección mediante el stick de cola igual que en un coche.
Para vuelos rápidos o vuelos en alturas de más de 5 mts., este modo más bien
molesta a causa de las acciones propias de mando del piloto automático; para
ello cambiar al modo horizontal („amarillo“).
Modo RIGID: Es un cuarto modo de uso en el HeliCommand RIGID: Estabilización que mantiene la posición (“para cabezas de rotor sin palas estabilizadoras”), que trabaja paralelamente a los 3 modos descritos anteriormente.
Vea página 5.
Aparte de las funciones de piloto automático descritos antes, el HeliCommand
ofrece también las funciones mezclador del plato cíclico, giroscopio del rotor
de cola y automatismo de trim.
8
9
10-11
Canal piloto
Giroscopio de Cola
Se recomienda tener una conexión de este canal adicional. Sirve para seleccionar entre los 3 modos durante el vuelo, así como regular la potencia
deseada de estabilización. Recomendamos utilizar un cursor o un conmutador
de 3 fases con valores de salida ajustables. Según el modelo, es necesario
adaptar la sensibilidad.
Si no se conecta el canal piloto en el receptor, entonces vale un pre-ajuste,
que viene de fábrica y está en el modo de posición con +70%. Este ajuste
sirve de ajuste básico para muchos modelos y puede modificarse a través del
adaptador del PC.
El HeliCommand dispone de un pequeño giroscopio piezo integrado, el cual
puede ser usado tanto en el modo normal como en el modo Heading-Lock.
Se realiza el ajuste de sensibilidad y la inversión (Heading-Lock / normal) a
través de un segundo canal adicional “Canal AUX.”.
Si no se conecta el canal AUX en el receptor, entonces funciona el pre-ajuste
interno que está fijado de fábrica a aprox. +65% Heading Hold. Se puede modificar mediante el adaptador al PC.
Cuando tiende a oscilar, usar un servo de cola más rápido o reducir la sensibilidad (canal AUX. o PC). El giroscopio sirve también para servos digitales
más rápidos.
El adaptador al PC permite otros ajustes, como por ejemplo limitación del recorrido y mezcla de pitch a cola (que se mezcla detrás del giroscopio y por
tanto funciona también con Heading Lock); en las versiones 3 D y RIGID,
además ajustes de experto, como por ejemplo delay (comportamiento de
encaje)y área de retención.
De forma alternativa al giroscopio integrado, se puede conectar un giroscopio
externo directamente al receptor. Para ello es necesario tener en cuenta lo
siguiente:
1. No deben existir tasas de giro de más de 400º/s, de lo contrario existe el
peligro de tener interferencias importantes.
Al acercar el cursor hacía el centro,
se reduce la sensibilidad y se
ralentizan las correcciones del piloto
automático.
2. Si se utilizara posteriormente el giroscopio interno, entonces es necesario
borrar eventuales valores de auto-trim internos y verificar la dirección de
giro del giroscopio.
Al mismo tiempo, se puede sobremodular de forma manual el piloto
automático con debatimientos más
pequeños del mando.
10
11
12-13
Automatismo del Trim
Versiones más sofisticadas del HeliCommand
Recomendable, pero no necesario. Funciona independiente del piloto automático y es una facilidad considerable para debutantes y profesionales. Para ello
resulta necesario una tecla o un conmutador de clip con función momentánea
con recuperación elástica, situado en un canal adicional en la emisora. (En
algunas emisoras se puede reprogramar para ello también el conmutador de
monitor). El canal AUX tiene que ser configurado mediante PC a las funciones
de trim. Durante el vuelo basta con pulsar un botón, para resolver de forma
automática el trim para roll, nick y guiño. Estos datos se guardan y pueden
repetirse cuando se quiere. El automatismo necesita aprox. 8 segundos de
vuelo estacionario para determinar valores correctos de trim. Estos valores
se activan inmediatamente al pulsar una tecla. El automatismo de trim mejora
también el performance del giroscopio de cola integrado, si el ángulo de incidencia neutral del rotor de cola no está bien ajustado.
HeliCommand 3D
Mediante el adaptador del PC se configura el canal AUX como entrada de trim
para su activación. (Para ello se sacrifica la entrada del giroscopio de cola, lo
cual es posible con el adaptador al PC, ya que allí se puede ajustar la sensibilidad del giroscopio). Se inicia el trim al cambiar la señal AUX a + 100% (>
aprox. 60%). Se puede reconocer la función enviada cuando el LED parpadea
en rojo (si está asignado).
No se puede ocupar el canal del trim por otras acciones del emisor programadas eventualmente en la emisora, porque podría ser activado sin darse cuenta. Solamente hay que accionarlo en vuelo (no confundirlo con la tecla SET).
Borrar los valores internos de auto trim:
Seleccionar el modo de ajuste (página 23) y reiniciar.
Estabiliza tanto la situación de vuelo normal como la situación de vuelo invertido en posición de vuelo invertido reducido a estabilización horizontal (“amarillo”), porque el mantenimiento de la posición (“verde”) necesita una conexión
visual desde el sensor CCD a suelo.
Esto es suficiente para facilitar considerablemente el vuelo invertido y el vuelo
acrobático.
El sensor CCD en dirección al cielo, está provisto de antiparasitarios contra influencias de distorsión óptica. No obstante conviene por motivos de seguridad
cambiar el modo de estabilización para vuelo acrobático y vuelo invertido de
antes “verde” a “amarillo”.
¡Esto es especialmente importante para vuelos en recintos cerrados! (Igual
que en vuelos rápidos y en vuelos a grandes alturas).
Puede encontrar más consejos en “Consejos para volar” en página 32.
HeliCommand RIGID
Para cabezas de rotor sin barra estabilizadora está autorizado solamente el
HeliCommand RIGID y solamente con el modo RIGID activado. De la otra
manera podría funcionar el vuelo estacionario, pero existe el peligro que por
tasas elevadas de giros, se produzca una saturación interna del sensor con
considerables distorsiones del modo horizontal!
Todas las posibilidades de ajuste están alcanzables a través del adaptador al
PC y están detalladamente explicados en el software de ajuste del HeliCommand, si se ha elegido el tipo HeliCommand RIGID. Sin ajustar el adaptador
al PC, el HeliCommand RIGID se comporta igual que el “HeliCommand 3D”
(página 27).
Failsafe
HeliCommand Profi
En FM / PPM se cubre una falta de señal inmediatamente por las siguientes
acciones: roll, nick, guiñada a neutral, pitch a la última posición recibida, estabilización a modo de posición 65%.
El failsafe solamente puede eliminar de forma parcial interferencias de la señal. Para tener una seguridad óptima, recomendamos los equipos PCM.
La versión Profi (profesional) de HeliCommand está prevista para helicópteros
de modelismo especialmente costosos, así como para helicópteros industriales
para la aplicación comercial como tareas de filmación, fotos y medición, etc.
Está preparada para la mayor precisión y posee otros instrumentos de a bordo
esenciales, entre otros ópticas adicionales para el reconocimiento redundante
de desvíos, mayores alturas de vuelo así como estabilización de altura.
Puede encontrar más información bajo: www.HeliCommand.com
12
13
14-15
Instrucciones abreviadas – Lo más importante
Hemos diseñado el ajuste y vuelo lo más fácil posible.
Dada las funciones complejas de un helicóptero, es conveniente que un “debutante de helicóptero” pida ayuda a un “colega” con experiencia para el primer
vuelo de rodaje.
Todos los sitios marcados con
para profesionales.
son especialmente importantes, también
Puesta en marcha
Inmediatamente después de ponerlo en marcha, el HeliCommand realiza un
auto-test (el LED parpadea 8x).
Durante este tiempo, el helicóptero debe estar absolutamente quieto en posición horizontal.
Parpadeo continuo del LED en rojo = aviso de error (página 8).
Arranque
Instalación
• Realizar sin falta una conexión de conducción eléctrica como equilibrio potencial entre rotor de cola, carcasa del motor y chasis.
• Cuanto más arriba el sitio de instalación, tanto más tranquilo el modo de
posición cerca del suelo y por tanto mejor el ajuste de la sensibilidad.
• Instalar de forma vertical y vigilar que el sensor tenga la visión
hacía al suelo libre de obstáculos. Vigilar también que quede fijado de forma segura!
• En página 19 puede ver consejos importantes para helicópteros con motor
de explosión y consejos detallados para la instalación.
Emisora
No pueden estar activadas funciones de mezcla para servos nick, roll y cola,
sino siempre modo (H1) servo individual. El HeliCommand trabaja siempre con
un mezclador interno.
Configuración
Para la adaptación al modelo y al equipo de radio control, es necesaria una
configuración única (página 23).
Excepto que encaje el ajuste de fábrica (página 22).
En todos los casos es necesario verificar antes del primer vuelo las direcciones de mando, las direcciones de los sensores en los 3 ejes. (página 28).
14
No arrancar antes de que los servos se dejen mover! Es importante realizar
una prueba de los mandos, porque el servo de gas o el variador del motor
también pueden arrancar cuando todos los demás servos aún no han recibido
señal y no aceptan mando – por ejemplo, porque el auto-test aún no está
finalizado o un error haya sido reconocido.
Volar
Respetar siempre las medidas de precaución (página 36).
Nunca dejar sin vigilancia el helicóptero en vuelo, aunque el modo de posición
esté conectado, porque en cualquier momento pueden producirse desvíos o
influencias de distorsión.
• Vuelo en recintos cerrados: Tener en cuenta sin falta los consejos en página 33.
• No vuelos acrobáticos (3D) o vuelo invertido con la versión 3 A. Vea página
34.
• Los modelos sin barra estabilizadora solamente pueden estabilizarse con la
versión RIGID y solamente con el modo RIGID activado, vea página 34.
• A pesar del failsafe integrado y de la estabilización,
no se pueden evitar al 100% caídas producidas a causa
de interferencias de la señal, emisoras ajenas etc.
• Esfuerzos duros, vibraciones y envejecimiento pueden naturalmente reducir
la precisión y requerir un nuevo ajuste de la calibración y compensación de
la temperatura de fábrica, para tener la máxima precisión.
Esto es posible en el Servicio de Atención al Cliente de Robbe.
15
16-17
Instalación
Poner a masa el tubo de cola
Primero es necesario realizar una conexión de conducción eléctrica como
compensación potencial entre tubo de cola, carcasa de motor y chasis. El
carbono también es conductor. (Especialmente la propulsión por correa en
el tubo de cola tiene un efecto como un “generador de Van de Graaf”). Al no
respetarlo y al guiar los cables en el tubo de cola, ha ocurrido que a causa de
una chispa incluso los servos quedaron distorsionados (no el HeliCommand)
y han ido a la posición final.
Lugar de instalación
Cuanto más arriba esté instalado, tanto más tranquilo el modo de posición
cerca del suelo y el tamaño del ajuste de precisión. Un sitio adecuado en
muchos modelos es la pared lateral del servo de cola o mediante los ángulos
de montaje por ejemplo en el tubo de cola, servo de cola, chasis o en la parte
delantera del fuselaje.
La superficie de montaje debe ser sólida y no ceder para evitar resonancias.
Posición de instalación
Vertical con el sensor hacía abajo. Las 4 direcciones de orientación son
posibles.
Visibilidad libre del sensor hacía el suelo
La visibilidad libre para el sensor óptico hacía el suelo es necesaria. La sección del cono de visibilidad es cuadrada con aperturas 15º x 15º, es decir en
el centro debajo del sensor debe estar abierto un cuadrado con las longitudes
laterales mínimas
S = apertura ventana (15 mm.) + (0,28 * distancia carcasa)
(vea foto a la izquierda). Si es necesario, recortar la cabina. Cables de antena
u otros objetos no deben obstaculizar el rayo!
Instalar en el fuselaje cerrado
O recortar una apertura (tamaño: vea la fórmula arriba o el dibujo a la izquierda) o sin visibilidad del sensor, renunciando al modo de posición. Para ello
tapar la ventana del sensor con cinta adhesiva oscura.
Entonces queda activado solo el modo horizontal en vez del modo de
posición.
16
17
18-19
Montaje en el servo de cola
Posición horizontal
Para mantener una mejor distancia al suelo, sobre todo en el caso de modelos
pequeños, tiene sentido seleccionar la posición de instalación lo más elevada
posible, de manera que quede una distancia segura a la barra estabilizadora,
aunque esta se incline.
Para ello se puede fijar el ángulo de soporte también en la cara superior del
servo de cola o en otro soporte. No utilizar piezas de espuma, sino fijar el
ángulo de forma rígida. De forma alternativa se puede encolar el ángulo en la
carcasa del servo de cola.
Alinear lo más vertical posible en referencia al árbol del rotor principal!
A causa de la compensación electrónica, se nota una instalación inclinada
solamente con los movimientos de la cola.
Helicópteros miniaturas con ángulos de incidencia especialmente grandes,
tienen una posición inclinada más acentuada en el vuelo estacionario para
compensar el mayor empuje del rotor de cola. Esto puede ser adaptado mediante el adaptador al PC o como puede ver en capítulo “Corrección de Errores”
(página 38).
Montaje en el tubo de cola
Consejos para motores de explosión
Tensar de forma segura el ángulo incluido para la instalación mediante abrazaderas de serrete en el tubo de cola. A continuación encolar el HeliCommand
por la parte trasera con 2 tiras adhesivas de espuma. Después del vuelo de
rodaje, asegurarlo con adhesivo en el tubo contra torsiones. Utilizar cianocrilato. Cinta adhesiva de doble cara resulta demasiado blanda.
Protección a la vibración
Vigilar especialmente la protección a la vibración!
Por esto motivo no encolar espuma adhesiva en toda la superficie sino utilizar
solamente 2 tiras muy estrechas en el canto superior e inferior de la pared trasera de la carcasa. La superficie de montaje debe ser por tanto como mínimo
tan alta como el HeliCommand.
• Instalar sin falta lejos del escape.
• Contra las vibraciones invisibles del motor, es especialmente importante
tener una protección a la vibración. Si el HeliCommand con el motor en
marcha vibra sensiblemente a pesar de un montaje correcto, recomendamos
utilizar una amortiguación adicional. Muchas veces sirve para ello cinta
velcro detrás de la cinta adhesiva.
La posibilidad más segura: Encolar primero una placa de aluminio de 3 mm o
una placa de acero de 1,5 mm. directo en el HeliCommand, entonces encolar
las tiras de espuma entre esta placa y la superficie de montaje. Asegurar con
goma elástica!
O considerar el montaje en otro sitio más protegido a las vibraciones.
• Para evitar irritaciones del sensor a causa de humo, no cebar el motor
demasiado.
Asegurarse que el HeliCommand no pueda moverse o quedar suelto, porque
el modelo podría tomar una posición inclinada en el modo de piloto automático
y resultar imposible de controlar.
Antes de encolar, quitar completamente las manchas de aceite.
Contra el peligro que la cinta adhesiva de espuma pueda desprenderse, recomendamos asegurar el HeliCommand además con gomas elásticas finas.
18
• Contra la suciedad, recomendamos fijar debajo del sensor un tubo de protección o (mejor) una cajita cuadrada (cuyas medidas interiores deben
sersegún el cono de visibilidad) y limpiar regularmente la ventana hasta el
canto.
19
20-21
Conexión
Todas las radios modernas disponen de mezclador para helicópteros, que se
ocupan por ejemplo en una articulación de 3 puntos que los servos se mueven
en un juego correcto. Con el HeliCommand hay que hacer esto con el mezclador integrado. ¡Por este motivo, elija en su radio un programa de helicóptero
sin mezcla (“H1” /servo individual), para que el movimiento del stick en cada
eje mueva solamente un solo servo! Si es así, puede empezar con la conexión.
Si es necesario, pregunte al fabricante de su emisora como encontrar este
ajuste. Alternativa (cuando no hace falta una curva de gas): no ajustar ningún
programa de helicóptero, sino seleccionar un programa estándar (base) Esto
garantiza también la transmisión sin mezcla del cursor o del conmutador para
los canales adicionales.
Atención: El adaptador al PC resulta imprescindible para la articulación H4!
• Conectar el módulo RC (con distribución de cables) entre receptor y servos.
Puede fijarse en el receptor con cinta velcro o cinta adhesiva dos caras.
• Conectar como mínimo las entradas roll, nick y pitch en el receptor.
• Las conexiones PILOTO y AUX son opcionales. Conectar estos cables en
el receptor donde el equipo de radio control usado transmite los emisores
en cuestión (cursores o conmutadores).
• El HeliCommand desconecta al desconectar el receptor.
• Cables de entrada no usados, pueden guardarse girándolos 180º y enchufándolos en sitios de enchufe no usados del receptor o del módulo de
RC.
• Tapar el sitio de enchufe vacío en el HeliCommand con film adhesivo (para
que no se ensucie).
20
21
22-23
Ajuste
Después de instalar o modificar la emisora, es necesario ajustar el HeliCommand
una sola vez al modelo y a la emisora, excepto cuando todo corresponde al ajuste
estándar de fábrica: por ejemplo emisora Robbe-Futaba, modelo Spirit LI, o tipos
similares con el mismo sentido de dirección del servo y forma de instalación = la
parte redonda de la carcasa a la derecha.
Importante:Es imprescindible realizar el test del sensor y del mando antes
del primer vuelo (página 28)!
Posibilidades del ajuste opcional:
a) Tecla SET: Descrito aquí. Casi todos los platos cíclicos con 3 servos.
b) Adaptador al PC: Aquí solamente los puntos B hasta D, paso 1.
Para el resto: vea software de ajuste, empezando con la selección de los
datos del HeliCommand. ¡Necesario para la articulación H4 y
eventualmente con otros tipos raros!
En el caso de propulsión eléctrica
Para evitar arranques no intencionados, desenchufar el (los) motor(es) de propulsión o alimentar el receptor con batería separada !
A) Factory-Reset
Retroceder al estado de suministro. Borra todos los ajustes, incluso aquellos a los
que se tiene acceso solamente a través del adaptador al PC. Para ello conectar el
HeliCommand mientras pulsa la tecla SET, a continuación pulsar la tecla una segunda vez como mínimo 5 seg., hasta que el LED rojo-verde parpadee alternando.
B) Ajustar la emisora
Todas las funciones de mezcla del plato cíclico deben estar apagadas. Reducir los
recorridos para nick y roll en la emisora aprox. 100% o ligeramente como máximo.
Expo puede mantenerse. Poner las radios con norma 1,6 ms (Multiplex) al modo
UNI. Cuando se utiliza el giroscopio Heading-Hold integrado, desconectar todos los
mezcladores de cola en la emisora.
Se pueden repetir las entradas cuando se quiere. El HeliCommand conoce ahora las
señales, que sirven para dar la orden “neutral & paro”.
Por este motivo es necesario repetir las entradas siempre cuando se ha modificado
mucho el trim en la emisora. El trim mismo no queda afectado por las entradas. Por
tanto dejar los trims después de entrarlos. (Solamente modificarlos si es necesario,
cuando se hacen cambios en el mezclador interno).
Cuando se utiliza el trim automático, entonces no se trima nunca en la emisora, sino
se deja el trim de nick y roll en posición neutral.
D) Configurar el HeliCommand
El helicóptero tiene que estar como mínimo justificado mecánicamente de
forma aproximada (posición neutral del plato cíclico y del rotor de cola).
El proceso de entrada puede funcionar solamente, cuando el cable de
entrada y los servos están correctamente conectados y apagados eventuales
funciones de mezcla en la emisora. En el caso de duda, conectar como prueba algunos servos directamente en el receptor y asegurar que cada canal recibe una sola
función de stick y en que canal y volver a conectar.
A continuación seguir los siguientes pasos:
Seleccionar el modo de ajuste
Entrar posición neutral de la emisora (vea punto C).
Para ello pulsar la tecla SET como mínimo 3 seg. Hasta que parpadea el LED verde
(Borra al mismo tiempo los valores internos de auto trim).
Ahora los servos no funcionan (según el paso de ajuste) o funcionan diferentes de
lo normal.
Ajustar y memorizar cada paso (1-5)
Se realiza mediante las acciones del stick de mando, explicadas abajo y mediante
una pulsación larga de la tecla SET.
Cambiar el paso de ajuste
C) Entrar las posiciones neutrales en la emisora
• Poner el stick de mando en neutral y el pitch a mínimo, los trims en neutral,
o cuando el helicóptero ya ha hecho el vuelo de rodaje con HeliCommand y
solamente tiene ajustados pequeños valores de trim, dejar el trim del rodaje.
• Pulsar la tecla SET durante 1 seg. Hasta que se ilumine el LED verde, soltar la tecla y apagar, listo (si se ilumina el LED rojo, ver página 8).
El paso actual (1-5) queda indicado con la cantidad de parpadeos. Después de seleccionar, aparece primero paso 1. Pulsar brevemente la tecla SET, pasa sin modificar el ajuste al paso siguiente (y desde paso 5 de nuevo a paso 1).
De esta forma se pueden repetir los ajustes siempre cuando se quiere. Para el primer ajuste pasar por todos los pasos, uno tras otro, tal como descrito aquí.
Finalizar el modo de ajuste
Es siempre posible al desconectar.
22
23
24-25
Los pasos de ajuste
1) Entrar la dirección del stick
• En el modo de ajuste, el LED debe parpadear en verde, la propulsión eléctrica debe estar desenchufada.
• Ahora pulsar la tecla set durante un rato y realizar con la tecla pulsada los
siguientes debatimientos completos en la emisora (el orden da igual):
Roll derecha, nick delante, cola morro derecha, y de nuevo neutral, pitch
max. y dejarlo así. Ahora soltar la tecla. A partir de este momento no se pue
de cambiar el sentido de dirección en la emisora! (excepto en inversión intencionada del pitch).
2) Direcciones del servo “Pitch”
(y reconocimiento de l articulación H1/tri-link)
El LED tiene que parpadear 2 veces, si es necesario, continuar pulsando la tecla
SET. Cuando se sube en el stick pitch, el plato cíclico debería subir de forma constante y sin inclinación. Con debatimientos laterales en el stick roll, se puede seleccionar el correcto entre 10 posibilidades al ir hacía delante o atrás. Se memoriza
mediante una pulsación larga de la tecla SET (>1 seg.).
3) Direcciones del servo “Nick” y „Roll“
El LED tiene que parpadear 3 veces (si es necesario, continuar pulsando la tecla
SET).
El stick nick debe inclinar el plato cíclico de forma constante sin modificar su altura.
Con los debatimientos roll se puede seleccionar el correcto entre 2 o 8 posibilidades
al ir hacía delante o atrás.
Con articulación de un solo servo: Solo cambiar entre las 2 posibilidades con debatimientos Roll a la derecha. Si además hay que girar la dirección del Roll: un debatimiento Roll largo hacía la izquierda (> 1,5 seg.) y verificar con debatimientos Roll
a la izquierda (solamente posible en versiones de aparatos con impresión de code
de dos cifras en la plaquita identificadora a la izquierda del código del artículo. En el
caso de otros tipos de articulación, la dirección del Roll es la buena automáticamente
después de memorizar. De lo contrario hay un cambio de conexiones de servos o se
han entrado mal las direcciones de Roll y Pich. En este caso, repetir los pasos.
Se memoriza mediante una pulsación larga de la tecla SET (>1 seg. El LED parpadea 4x). Ahora las 3 direcciones del plato cíclico deben ser correctas.
Si el plato cíclico está inclinado, justificar mecánicamente.
4) Dirección del servo “Heck”
Si utiliza un giroscopio externo, saltar este punto!
El LED tiene que parpadear 4 veces (si es necesario, continuar pulsando la tecla
SET). Seleccionar la correcta dirección de giro del servo de la cola, moviendo los
debatimientos roll hacía delante y hacía atrás. Cuando el stick de la cola se mueve
a la derecha, el morro debería moverse hacía la derecha y para ello el rotor de cola
debe soplar hacía la derecha. Ahora se puede justificar el punto neutral del rotor
de cola, ya que en paso 4 el Heading-Hold está desconectado. Verificar el ajuste y
memorizarlo mediante una pulsación larga de la tecla SET (>1s).
5a) Situación de instalación (dirección del sensor) y
sentido de giro del rotor
El LED tiene que parpadear 5x (si es necesario, continuar pulsando la tecla SET).
El HeliCommand debe conocer su orientación de instalación, es decir si la parte
redonda de su carcasa da a la derecha, a la izquierda, adelante o atrás. Programar
esto, inclinando el plato cíclico con el stick de roll o de nick al lado correspondiente y
mientras que la dirección de inclinación esté correcta, confirmarlo con una pulsación
larga de la tecla SET (>1s).
5b) Dirección de giro del rotor principal
Debatir el stick de mando de la cola en la misma dirección que el sentido de giro del
rotor (visto desde arriba) y memorizar con la tecla set > 1 seg.
Finalizando
Volver a conectar y verificar los mandos. Si es necesario, ajustar ahora en la emisora reducciones de recorrido, contra rebotes y para el área correcto de pitch (los
debatimientos pueden ser diferentes de los de un mezclador existente anteriormente
en la emisora).
Fuertes reducciones de recorrido deberían ajustarse en el HeliCommand mediante
el adaptador al PC.
Si el plato cíclico no está exactamente en posición horizontal, reajustar ahora. Para
el ajuste aproximado: En el área central del pitch debe existir un punto en el cual
todos los horns de los servos están simultáneamente en posición neutral. Si no es
así, desenroscar los horns de los servos y fijarlos correctamente. Para la justificación
fina, ajustar la barra de transmisión. La justificación final también es posible con el
trim de la emisora; volver a entrarla mediante la tecla SET.
En el caso de emisoras con diferentes estados de vuelo, todos los estados de vuelo
en los cuales el HeliCommand es activo, deben tener valores idénticos de trim! (Esto
es especialmente importante en el modo RIGID).
24
25
26-27
Ajuste de HeliCommand RIGID
Existen las siguientes posibilidades (RIGID):
Antes de usarlo en un helicóptero sin palas estabilizadoras, activar el modo
RIGID (por el PC).
La estabilización que mantiene la posición (“giroscopio de cabeza”) mantiene
una inclinación, entrada una sola vez, y evita que el modelo se encabrite contra el viento, mientras que la fuerza de reacción del helicóptero lo permita. Por
lo demás controla el helicóptero como de costumbre.
Se ve la función en el plato cíclico, ya que se mantiene en la posición inclinada
ordenada.
Según el ajuste hay que vigilar antes del despegue que el plato cíclico no esté
por error demasiado inclinado (por una deriva lenta o debatimientos no intencionados), y que la sensibilidad RIGID no esté ajustada demasiado alta. No es
necesario ajustarla a la frontera de la oscilación, tal como se practica muchas
veces con giroscopios de cola.
Modo [PARO]
Corresponde al HeliCommand 3D. No adecuado para helicópteros sin palas
estabilizadoras!
Modo [FIJO]
El HeliCommand solamente puede volar helicópteros sin palas estabilizadoras
cuando el modo RIGID está conectado! De lo contrario existe el peligro, que
se producen tasas de roll / nick demasiado altas, los cuales pueden dar mando
excesivo a los sensores internos y por tanto irritar considerablemente tanto el
modo horizontal como el modo de posición!
En maquetas, la articulación de la cabeza está normalmente ajustada a medio
debatimiento. Se puede retroceder esto al instalar el HeliCommand, es decir
aumentar los debatimientos de forma mecánica, para obtener una fuerza ótpima de estabilización.
La estabilización RIGID se puede activar a través del PC. Después de instalar la versión básico, vea la versión más actual del software, bajo
www.robbe.com/rsc en el área de downloads.
26
Activa constantemente la función RIGID (además del modo horizontal y de
posición seleccionable en el canal piloto).
Cuidado especial con la
sensibilidad del RIGID, porque en este modo no se la puede ajustar
durante el vuelo mediante el canal piloto y podría causar en el caso de valores
demasiado altos, movimientos peligrosos de balanceo o pendulares.
El ajuste solamente es posible bajo “sensibilidad RIGID”!
MODO [FADER]
Desactiva el modo horizontal y el modo de posición (el mando corresponde al de un
helicóptero “convencional”, es necesario dar mando activo a la inclinación) En ambas
mitades del canal piloto (cursor) se inserta ahora la estabilización RIGID, hasta el valor
máximo de la sensibilidad RIGID que se pueda ajustar en el PC. La posición máxima
en el cursor (no importa en que dirección) corresponde exactamente al centro en el
modo (FIJO). El cursor hacía el centro reduce la sensibilidad (del “giroscopio de la cabeza” para nick y roll de forma igual) al 33%. Adecuado para encontrar la sensibilidad
óptima RIGID. Si se cambia posteriormente a modo (FIJO), se debería reducir de forma
porcentual la sensibilidad RIGID según la posición del cursor encontrada. (Ejemplo:
Recep. RIGID Roll=7, cursor aprox. 70%, es decir nueva recepción RIGID = 7 x 70%=
4,9; entonces ajustar 5!)
27
28-29
Primer vuelo
Despegue
Antes del primer vuelo, es necesario hacer una prueba del
sensor y de los mandos para todas las direcciones del sensor
• Posición neutral, sentido de dirección y debatimiento de todos los sticks y
servos
• Canal piloto y quizás la tecla auto trim: mediante el diodo iluminado.
(Trim al mínimo solamente con pitch. Entonces el canal de trim está visible
pero sin eficacia).
• Todas las 3 direcciones del sensor. El sentido de dirección equivocado llevaría a la caída del modelo. Poner el modo de estabilización a “amarillo” y
mover el modelo brevemente a mano en los 3 ejes hacía delante y hacía
atrás: inclinar hacía un lado, inclinar hacía delante y girar. Los servos correspondientes tienen que reaccionar a cada movimiento con la acción contraria. El plato cíclico quiere mantenerse horizontal, las partes delanteras de
las palas del rotor de cola se mueven en sentido opuesto a la dirección de
giro de la cola.
• Test de alcance con antena entrada.
Vuelo de rodaje
Recomendamos a los debutantes pedir ayuda a un colega con experiencia
para realizar la verificación de los ajustes y para el primer vuelo.
(Consejos para el trim: vea página 30)
Helicópteros con motor de explosión: test de vibración
Siendo que vibraciones extremas o sonido conducido a través de cuerpos sólidos pueden distorsionar considerablemente la función en el sensor, es necesario realizar tres tests antes del vuelo de rodaje:
1) Verificar con la mano, si la carcasa del HeliCommand vibra.
2) Antes de despegar, cambiar a modo „amarillo“ y observar, si el plato cíclico permanece quieto con todas las revoluciones.
3) Primero arrancar en el modo “PARO” y conectar el piloto automático por
seguridad solamente de forma breve y volver desconectarlo. Repetir esto
con diferentes revoluciones del motor si es necesario.
Si hay distorsiones, tener en cuenta los consejos de instalación en página
16.
28
Para el despegue, el helicóptero debería estar en posición horizontal.
Si se mantiene el helicóptero de forma inclinada o por encima de la cabeza,
entonces debería conectar el HeliCommand de nuevo antes del despegue.
(Tales inclinaciones provocan fuerzas de gravitación transversales al árbol del
rotor, que no se producen durante el vuelo y pueden irritar la forma de trabajo
de los sensores).
Prueba de mando antes de cada despegue
Verificar la maniobrabilidad y la posición neutral del plato cíclico también con
el piloto automático conectado! Nunca despegar antes de que los servos
se dejen mover!
Ajuste de la sensibilidad
Para el vuelo de rodaje, empezar con un ajuste reducido de la sensibilidad!
Ajustes por encima del 65% en los dos modos no son admitidos para todos
los helicópteros. Según el tipo y la altura de instalación, podrían producirse
movimientos pendulares acentuados, sobre todo cuando la distancia entre el
sensor y el suelo es muy pequeña (< 0,5 m.). Por este motivo hay que comprobar la posición (del cursor) antes del vuelo de rodaje.
Ajustar la sensibilidad hasta alcanzar una estabilización optima en el modo de
posición verde con aprox. 0,5 m. de altura de vuelo.
Con movimientos pendulares ► evitar. En el caso de desvíos no controlados
► aumentar. No es necesario ajustar la sensibilidad (como es habitual en los
giroscopios de cola) justo a la frontera de la oscilación.
Un ajuste más suave da una mejor imagen de vuelo, que queda menos distorsionado a causa de acciones espontáneos de mando del piloto automático.
Para helicópteros con un comportamiento extremadamente lento o extremadamente ágil, puede ser recomendable hacer ajustes adicionales mediante el
adaptador al PC, para optimizar la estabilización.
Durante el vuelo rápido de avance, el HeliCommand frena muy despacio por
si solo. Hay que controlar el helicóptero de forma activa cuando se ha dado
mando excesivo al piloto automático con un debatimiento del mando fuerte.
Mediante el adaptador al PC, se puede ajustar una opción “hacía delante – rueda libre”
29
30-31
Trimar
Cuando no se usa el automatismo del trim, entonces es mejor trimar cuando el
piloto automático está apagado.
Después y siempre cuando la posición del trim en la emisora ha sido cambiado
esencialmente, conviene entrar de nuevo la posición neutral del trim mediante
la tecla SET (página 22).
Durante los primeros segundos después del despegue, la precisión de la estabilización esta reducida.
La precisión aumenta no obstante de forma automática al cabo de unos 10
segundos de vuelo.
Por eso no trimar enseguida cuando el piloto automático está activo, sino
esperar.
Entonces casi no resulta necesario trimar.
Si el trim con y sin estabilización es diferente:
Entrar la posición neutral de la emisora (página 22).
Con trim automático
Simplemente pulsar la tecla auto trim en la emisora, independiente en que
modo de estabilización esté. El helicóptero debe estar antes durante unos 8
segundos en un estado de vuelo tranquilo.
Trima siempre de acuerdo a la posición neutral de la emisora, tal como ha sido
entrada en el HeliCommand. Por este motivo no se puede cambiar simultáneamente el trim de roll y el de nick en la emisora. (¡Se puede pegar este trim!) O,
cuando han sido cambiados, hay que entrarla de nuevo como “posición neutral
de la emisora (página 22), antes de volver a utilizar la tecla trim automático
en la emisora.
Trim de la cola
Trimar en la emisora de manera que el servo no huya en el modo Heading
Hold. Cuando no esta el “auto trim”, se recomienda trimar de forma mecanica
cada giroscopio de cola con el modo Heading Hold apagado, para evitar diferencias del trim entre Heading Lock y Normal al cambiar.
Desvíos debidos al sensor cuando cambia la temperatura o durante un uso
prolongado, pueden ser neutralizados reiniciando.
(No a través del automatismo del trim, este corrige solamente los centros del
servo).
30
31
32-33
Consejos para el vuelo
Despegar y aterrizar
Se puede conectar el piloto automático antes del despegue o también durante
el vuelo.
Importante: Nunca poner la sensibilidad más fuerte de la que se ha fijado
durante el vuelo de rodaje.
Acción del sensor óptico
El modo de posición funciona sin horizonte visible, por tanto incluso cerca de
árboles, etc.
El debutante debería sobrevolar de momento solamente terrenos normales
(césped, plazas, piedras, etc.)
Esto garantiza que la estabilización trabaja siempre en plena potencia.
Vuelo estacionario
Cuando se usa más el modo de posición, naturalmente cerca del suelo, es
cuando es más eficaz. En contrario, el HeliCommand ermite más movimientos
libres en mayores alturas de vuelo.
El debutante debería empezar con alturas de vuelo entre 0,5 …1,5 mts. Esto
es lo más fácil para aprender. Si se vuela más alto, resulta más seguro para
el salvamento el escape hacía arriba. El rendimiento del modo de posición es
aprox. 3 metros de altura cuando hay calma, y hasta aprox. 1 metro con viento.
El modo horizontal es siempre eficiente.
La estabilización puede trabajar correctamente solo en el vuelo.
Cuando el helicóptero está en el suelo con el rotor girando, debe ser vigilado
de forma manual!
En la oscuridad o al sobrevolar superficies ópticamente planas
(Agua, nieve, techos de coches, suelos de salas lisos, sin dibujos, etc.)
Aquí también está solamente activo el modo horizontal en el modo “verde”
(modo de posición), cuando el sensor del suelo no reconoce suficiente contraste. Fallos breves están cubiertos por el software inteligente sin darse cuenta. Cuando el contraste falta durante más tiempo, los demás instrumentos se
hacen cargo automáticamente de la regulación, por tanto conviene vigilar la
posición del helicóptero y si es necesario controlarlo.
Cuando se dan estas condiciones, es conveniente seleccionar por seguridad
desde el inicio el modo horizontal “amarillo”, o asegurarse con el test de contraste (descrito más abajo).
Debatimientos de los mandos
El piloto automático se deja sobremodular de forma manual, incluso con la
máxima potencia seleccionada, es decir a partir de aprox. 50% de debatimiento del emisor de mando de la función nick o roll. (Después de neutralizar el
emisor de mando de roll y el de nick, el piloto automático vuelve a ser activo).
Para los debutantes se recomienda por eso, dar mando con pequeños debatimientos y ajustar una función exponencial en la emisora!
Un debatimiento reducido en la emisora (Dual Rate) puede en circunstancias evitar la posibilidad de sobremodular manualmente. Si por razones de
seguridad se quiere mantener una posibilidad de sobremodular, entonces el
canal piloto debería ser reducido al mismo tiempo. Si tiene una emisora con
diferentes estados de vuelo, se puede preseleccionar el canal piloto a través
de la programación del estado de vuelo a diferentes valores. Es mejor ajustar
reducciones permanentes del recorrido de mando en el HeliCommand mediante el adaptador al PC.
Vuelo en recintos cerrados
Utilizar el modo „amarillo“. El modo „verde“ es tabú, solamente es posible si se
verifica antes el contraste desde diferentes distancias (vea a continuación) y si
se limita a la posición de vuelo normal.
(No realizar vuelos invertidos en recintos cerrados en el modo de posición
“verde”, incluso con el HeliCommand 3D!)
Verificación del contraste
En el modo de posición „verde“, un parpadeo del LED indica cuando el contraste o la claridad no son suficientes y cuando el HeliCommmand cambia a
modo horizontal „amarillo“. Se puede verificar esto cerca del suelo y desde
diferentes distancias.
Se puede verificar la reacción del sensor, moviendo la mano horizontalmente
unos 20 cm. debajo del HeliCommmand en el modo de posición “verde”.
32
33
34-35
Uso de las versiones
Consejos
HeliCommand 3A
• Cuando se sobrevuela hierba alta o hojas sueltas, volar más alto por seguridad, ya que objetos que se mueven en el viento descendiente pueden fal
sificar el modo de posición o cambiar al modo horizontal „amarillo“.
Esta versión básica no es adecuada para maniobras acrobáticas y 3D.
Para esto está previsto el HeliCommand 3D o RIGID!
HeliCommand 3D o más
Cuando se trata de maniobras 3D cortas, se puede conectar como apoyo el
modo horizontal „amarillo“. Este modo estabiliza tanto el vuelo normal como
el vuelo invertido. Se puede sobremodular la estabilización cómodamente a
mano y ajustar el grado del mando manual en el canal piloto.
Mediante el adaptador al PC se dispone de una gran cantidad de otras posibilidades de ajuste. Las posibilidades de acción sirven sobre todo para el cambio
individual entre el vuelo estacionario positivo y negativo. También se puede
conectar la estabilización como “botón de emergencia”, pero es importante
tener en cuenta lo siguiente:
Maniobras 3D
Para maniobras intensivas (múltiples loopings, toneles, etc.), el HeliCommand 3D se debería apagar antes y volver a conectarlo como mínimo 15 seg.
después.
Esto vale también para giros múltiples, ya que estos pueden falsificar el reconocimiento neutral horizontal en determinadas circunstancias.
• Cuando hay cambios de temperatura, esperar como mínimo 5 minutos
antes de conectar y no utilizarlo debajo de -5º C o por encima de +50ºC.
Con la estabilización desconectada, se puede usarlo entre – 10º… + 50º C.
Lo mejor es conectarlo justo antes del despegue. Entonces ya no se sujeta
el helicóptero con la mano, sino se deja en posición horizontal.
• No usarlo cuando llueve, porque existe el peligro de un cortocircuito!
• Si después de giros de la cola desde 90º….180º, se reconoce un desvío, se
puede optimizar la situación de instalación (vea corrección de errores).
Para pilotos con experiencia: Diferencias en el manejo
• Para hacer turns hay que apagar la estabilización, porque intentaría volver
a la posición horizontal.
• Utilizar el modo de posición “verde” solamente para vuelos estacionarios y
vuelos lentos cerca del suelo!
• Para alcanzar inclinaciones fuertes, por ejemplo para frenar desde velocidad alta, son necesarios debatimientos del mando más fuertes, que sin
estabilización. Para la autorotación: reducir la sensibilidad.
• Mantener la inclinación deseada en las curvas con roll, de lo contrario, el
helicóptero quisiera ponerse recto.
Aplicación
HeliCommand RIGID
Si se ha activado el modo RIGID mediante el adaptador al PC, este minimiza
la influencia de ráfagas de viento y que el modelo se encabrite en el viento
causado por el vuelo.
Vuelos 3D y vuelos acrobáticos son posibles sin límite y quedan apoyados
además en su precisión.
Al conectar la estabilización horizontal o de posición, vale lo mismo que para
el HeliCommand 3D, vea arriba.
34
Para facilitar el mando de helicópteros en el área del modelismo.
Atención! No está previsto para vehículos aéreos tripulados o para aplicaciones militares. Infringirlo está determinantemente prohibido y será perseguido
como violación de la licencia!
Las versiones de modelismo HeliCommand 3A, 3D y RIGID no son adecuados para el uso en áreas construidas, al lado o encima de edificios e
instalaciones.
El HeliCommand Profi está previsto para realizar vuelos para hacer fotografías, filmaciones o mediciones, etc., vea página 13.
35
36-37
Medidas de precaución
Haftungsausschluss
La denominación “piloto automático” no significa que el vuelo se realiza completamente automático!
Al igual que al volar helicópteros de modelismo convencionales, se presupone
una especial atención y práctica.
Un piloto automático no puede excluir peligros de un uso erróneo. Se puede
incluso pensar que pueden aparecer aún mas riesgos. Podría ser que el piloto actúe con más negligencia a causa del mando cómodo o que pilotos sin
experiencia vuelen en situaciones, que no podrían dominar en el caso de un
fallo técnico.
Además con el piloto automático participan más instrumentos técnicos y por
tantoás instrumentos que pueden distorsionarse.
Es conocido que instrumentos de vuelo pueden distorsionarse o pueden fallar.
En cuanto a la seguridad, no fiarse nunca exclusivamente de la estabilización
y tomar todas las medidas de seguridad necesarias.
Para instalar, ajustar y utilizar el piloto automático, así como un helicóptero
hacen falta conocimientos específicos. Errores y negligencias pueden causar accidentes con daños graves de personas y materiales e incluso pueden
causar accidentes de tráfico. Ya que el fabricante y el vendedor no tienen
ninguna influencia en el manejo reglamentario, avisamos expresamente de estos peligros. Por tanto excluimos dentro del marco legal toda responsabilidad
para aquellos daños, que resulten del uso, incluso a causa de distorsiones de
instrumentos integrados o de la transmisión de señales.
Recomendamos
• Siempre mantener una distancia de protección suficiente de personas y de
objetos y volar con cuidado.
• No infravalorar la fuerza de las palas del rotor en rotación. Para practicar
con modelos mayores, volarlos detrás de una red de protección o de una
portería de fútbol, tal como está previsto en muchos campos de vuelo de
aviones de modelismo.
• El debutante debería pedir consejo a un piloto con experiencia, sobre todo
antes de hacer el vuelo de rodaje.
• Ajustar el grado de estabilización según las condiciones del entorno.
Siempre manejar el piloto automático para poder cambiar a mando manual
durante el vuelo, o como mínimo ajustarlo de tal manera que exista la posibilidad de sobremodulación manual.
• Según determinaciones legales, se debería volar en campos de vuelo autorizados o lejos de urbanizaciones y de carreteras.
• Mantener distancia con estaciones de radar, antenas emisoras o otras
fuentes de distorsión de la señal.
• Para los aviones de modelismo resulta necesario tener un seguro de responsabilidad civil.
• Vigilar constantemente los helicópteros en vuelo.
• Al pasar el modelo a terceros, indicar siempre estos consejos se seguridad.
Garantía
Para este instrumento ofrecemos una garantía de 24 meses. El ticket de caja
expedido por su establecimiento especializado, donde adquirió el instrumento,
sirve de comprobante para el inicio y el final de la garantía. Eventuales reparaciones no prolongan el tiempo de la garantía. Durante este tiempo, arreglamos
de forma gratuita defectos de funcionamiento así como defectos de fabricación
o defectos materiales. Otras exigencias, como por ejemplo daños por falla,
quedan excluidas.
El transporte a nosotros debe ser a portes pagados, el transporte de vuelta
también será a portes pagados. Envíos a portes debidos no se aceptarán.
No nos podemos responsabilizar de daños ocurridos durante el transporte o
de la pérdida del paquete durante el transporte. Recomendamos hacer un
seguro.
Para poder tramitar sus derechos de garantía, deben cumplirse las siguientes
condiciones:
• Debe incluir en su envío el ticket de caja.
• Los instrumentos han sido utilizados siguiendo el manual de instrucciones.
• Se utilizaron solamente fuentes de corriente recomendados y accesorios
originales de robbe.
• No hay daños por humedad, ni intervenciones ajenas, ni sobre tensiones, ni
sobrecargas ni daños mecánicos.
• Incluir consejos útiles para encontrar el error o el defecto.
36
37
38-39
Corrección de errores
Los servos no funcionan ► vea página 8 “indicación del LED”
Temblor o oscilación en modo de posición, sobre todo cerca del suelo
• Reducir la sensibilidad
• Posición de instalación baja?►instalar lo más arriba posible, vea página 17
• Se ha bajado demasiado el debatimiento nick / roll o la “recepción horizontal” en el PC?
No hay estabilidad en el modo de posición
• Está sucia la ventana del sensor? ► En el caso de motores de explosión,
proteger del escape y limpiar regularmente
• Fondo sin contraste, por ejemplo área nevada, asfalto liso, agua?
► Conectar modo horizontal
• Trim no entrado? ► vea página 30
• Incrementar la sensibilidad?
• Fuertes nubes de humo en el rayo de visualización?
► No encebar tanto el motor y montar más lejos del escape
• Cables de antena u otros obstáculos en el rayo de visualización del sensor?
► Vea primer párrafo en página 17: “Instalación”
• Muchas hojas sueltas o hierbas altas que se mueven en el viento
descendiente? ► Conectar el modo horizontal
Estado de vuelo intranquilo, incluso en el Modo horizontal
• Vibraciones (visibles o invisibles) o demasiado ruido propagado por estructuras sólidas (especialmente en el caso de motores de explosión)? ► Tener
en cuenta la instalación > montaje e instalación > motor de explosión
• No ha utilizado la cinta adhesiva de espuma en 2 tiras finas horizontales?
► Tener en cuenta página 16
Trim diferente con y sin estabilización
• Después del despegue en unos segundos de tiempo de vuelo, aumenta la
precisión de la estabilización
• Trim desajustado en la emisora? ► Volver a entrar posición neutral
• Fuerte cambio de temperaturas? ► Dar al instrumento unos 5 minutos de
tiempo para aclimatizarse y volver a conectar
• Vibraciones fuertes?
► Ver error “estado de vuelo intranquilo”
38
El automatismo del trim no es exacto
• Hay al mismo tiempo otro trim en la emisora?
► Tener en cuenta página 30, o entrar trim o no modificar en la emisora.
• Está correctamente entrado el pitch mínimo y la dirección?
► Sin el pitch se suprime el trim automático
Desvió según giros de la cola
• La instalación no es exactamente vertical o se trata de un helicóptero ligero
con un fuerte ángulo de incidencia?
► Optimización al volar un giro de 90º a la derecha desde el vuelo estacionario, con estabilización en el modo “amarillo”.
Si el helicóptero estaba parado antes del cuarto de pirueta pero después
se desvía en una dirección determinada, se puede optimizar la situación
de la instalación.
Si se desvía hacía la izquierda–delante de forma transversal (respecto
a la nueva posición), inclinar el HeliCommand un poco más hacía la iz
quierda y al revés, si se desvía hacía la derecha–atrás. Cuando se des
vía hacía la derecha–delante, inclinar el HeliCommand un poco más
hacíadelante y al revés, si se desvía hacía la izquierda–derecha.
Vuelo invertido:
Desviación del centro de roll durante el vuelo invertido o después del cambio
► Optimizar el ajuste de la compensación del empuje de cola.
(con el adaptador al PC, vea software de ajuste del PC)
Desvío después de maniobras acrobáticas (turns, toneles, etc.)
• Ha utilizado HeliCommand 3A?
► No es adecuado para vuelo invertido o situaciones inclinados de vuelo!
► reequipar a 3D.
• Ha utilizado un giroscopio de cola ajeno y tiene una tasa de giro >
400º/seg.?
► Reducir la tasa de giro (página 25)
• Ha volado muchos giros, tales como giros múltiples, toneles, loopings?
► Tener en cuenta los consejos de página 34!
El servo de cola no está en el centro
• Ha utilizado posteriormente un giroscopio interno?
► Borrar los valores de trim automático
39
40-41
Características técnicas
Accesorios
Tensión nominal:
4,8 ... 6 voltios (4 ... 5 NiCad)
Consumo:
55mA (con 5V)
Dimensiones:
55 x 35 x 22,5 mm.
Peso con cable:
33g.
• Adaptador al PC con CD del software No.84942000
• Módulo RC de recambio (para cambiar a diferentes modelos):
(para HeliCommand con 4 clavijas en el sitio de enchufe) No. 8494-4000
(para HeliCommand con 3 clavijas en el sitio de enchufe) No. 8494-3000
incluido ángulo de montaje, cinta velcro o juntas tóricas para cambiar el
aparato principal del HeliCommand
Área de temperatura: -5° ... +50°C,
en modo “PARO”: -10° ... + 50° C
Actualización de la versión en el robbe Service
(vea catálogo de Robbe)
Mezclador helicóptero: H1/ H2/ H3 / H3 (140°) / H4 / H4 (+45°)
Módulo RC adecuado para:
Modulación Robbe Futaba PPM / PCM 1024 / PCM G3
Modulación Graupner/JR PPM 8, PPM 12, SPCM
MPX PPM8, PPM 12 con modulación uni
Así como otras emisoras con posición neutral estándar 1,5 mts.
Servicio de Atención al Cliente
robbe – Service
Metzloser Strasse 36
D-36355 GREBENHAIN
Tel.: 0049-6644-87-777
Fax: 0049-6644-7412
Contenido
•
•
•
•
•
•
HeliCommand, aparato principal
Módulo RC (con distribución por cable)
Ángulo de montaje
Espuma adhesiva: 2 juegos de 2 tiras
Abrazaderas de serrete
Instrucciones
Impresión
robbe Modellsport GmbH & Co. KG
Postfach 1108
D-36352 Grebenhain
Internet: www.robbe.com
E-Mail: [email protected]
Tel.: 0049 (0) 6644 / 870
Fax: 0049 (0) 6644 / 7412
40
41
42-43
Notas:
Notas:
______________________________________________________________
______________________________________________________________
______________________________________________________________
______________________________________________________________
______________________________________________________________
______________________________________________________________
______________________________________________________________
______________________________________________________________
______________________________________________________________
______________________________________________________________
______________________________________________________________
______________________________________________________________
______________________________________________________________
______________________________________________________________
______________________________________________________________
______________________________________________________________
______________________________________________________________
______________________________________________________________
______________________________________________________________
______________________________________________________________
______________________________________________________________
______________________________________________________________
______________________________________________________________
______________________________________________________________
______________________________________________________________
______________________________________________________________
______________________________________________________________
______________________________________________________________
______________________________________________________________
______________________________________________________________
______________________________________________________________
______________________________________________________________
______________________________________________________________
______________________________________________________________
______________________________________________________________
______________________________________________________________
______________________________________________________________
______________________________________________________________
42
43
44