1
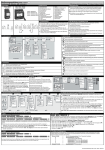
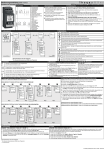
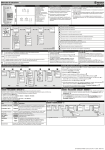
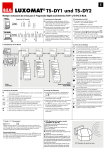
Bedienungsanleitung (Seite 1 von 2) D KNX Jahreszeitschaltuhr 6144/40 1. Sicherheitshinweise Anschlussbilder ! !!WARNUNG!! Es besteht Lebensgefahr durch einen elektrischen Schlag oder Brandgefahr!! => Einbau, Anschluss und Montage dürfen ausschließlich von einer entsprechend geschulten Elektrofachkraft durchgeführt werden! => Vor Montage- und Installationsarbeiten muss das Gerät spannungsfrei geschaltet werden! => Beschädigte Geräte dürfen nicht in Betrieb bzw. müssen sofort außer Betrie b genommen werden! ! Nur an die geeignete Spannung anschließen [KNX-Busspannung (Nennspannung 29V)] ! Bei Eingriffen oder Änderungen am Gerät erlischt die Garantie! ! Das Gerät ist so zu installieren, dass auch außergewöhnlich hohe Störstrahlung die Funktion nicht beeinträchtigen kann! ! Installation und Anschluss dürfen nur entsprechend den nationalen Bau - und Elektrovorschriften / Sicherheitsbestimmungen durchgeführt werden! ! Beachten Sie die Vorschriften und Hinweise aus dem Handbuch „Haus- und Gebäudesystemtechnik“ des ZVEI/ZVEH. Dies gilt insbesondere für die fachgerechte Verlegung der Busleitungen und die Inbetriebnahme des KNX Gerätes. 2. Erstinbetriebnahme 3. DCF / GPS / BUS-Zeit / GPS: Der Schaltcomputer ist für den Empfang eines Zeitsignals vorbereitet. Der Die Schaltuhr wird im Sleep-Modus ausgeliefert. Das Display ist aus. DCF ist nicht im Lieferumfang enthalten. Drücken Sie die -Taste (1 Sekunde). Die Displayanzeige erscheint. Funkempfänger Schaltuhr ist mit dem aktuellen Datum, der Uhrzeit und der Netzspannung abschalten Die europäischen Sommerzeitregel voreingestellt. Funkempfänger nach Anschlussbild anschließen Sie die gewünschte Sprache mit den -Tasten ein und Netzspannung einschalten Stellen bestätigen Sie mit . (Hinweis: Mit der -Taste können Sie jederzeit einen Schritt zurück) Datum, Uhrzeit und Sommerzeitregel falls nötig mit den einstellen und jeweils mit bestätigen. 4. Funktionsübersicht -Tasten Verwendung der BUS-Zeit als Zeitstandard für die Schaltuhr: Wenn die BUS Zeit als „Master-Zeit“ für die Schaltuhr fungieren soll, dann müssen folgende Einstellungen in der Uhr vorgenommen werden (bitte beachten Sie auch die Erläuterungen in der Applikations-Software): Einstellungen => Sommerzeit => Ohne Optionen => DCF => GMT Offset 00h Sommerzeit 5. Symbolerklärung Kanal eingeschaltet / Programmierung EIN Kanal ausgeschaltet / Programmierung AUS Für das aktuelle Datum ist ein Permanentprogramm aktiv. Aktueller Schaltzustand beruht auf programmierter Standardschaltzeit . I Z W X F D 6. Tastenfunktion 1. Wechsel von Automatik-Modus in den Eingabe-Modus. 2. Zurück-Funktion (Eine Ebene zurück). 1. Eingabe-Modus: Auswahlmöglichkeit zwischen verschiedenen Optionen. 2. Eingabe-Modus: Verändern der blinkenden Stelle. 1. Automatik-Modus: Ein- oder Ausschalten eines Kanals bis zur nächsten programmierten Schaltzeit. 2. Automatik-Modus: Tastendruck länger als 3 sec. = Permanentschaltung. Akt. Schaltzustand beruht auf manueller Umschaltung des Programms und wird durch das gespeicherte Programm bei der nächsten Schaltzeit geändert. Akt. Schaltzustand beruht auf manueller Umschaltung oder programmierter Permanent -Schaltzeit und bleibt erhalten, bis manuell zurückgesetzt wird. Wochentage Montag ... Sonntag; im Programmier-Modus zeigen Unterstriche an, welche Wochentage aktiviert sind. Aktueller Schaltzustand beruht auf einer Impuls-Schalzeit Aktueller Schaltzustand beruht auf einer Zyklus-Schaltzeit (Taktgeberfunktion) Wochentagsfunktion: Schaltzeit nach Datum unter Berücksichtigung der jährlichen Verschiebung der Wochentage. Wird bei „Programm löschen“ angezeigt. 1x-Funktion aktiv: Die programmierte Schaltzeit wird nur einmal ausgeführt Schaltprogramm / Schaltzeit mit Osterfunktion aktiv: Schaltprogramm berücksichtigt die jährliche Verschiebung von Ostern und korrigiert das Datum der Schaltzeit(en). DCF/GPS: Der Schaltcomputer empfängt das Zeitsignal Schaltuhr ist über PIN gesperrt; PIN-Eingabe erforderlich. 1. Aktivieren der Schaltuhr durch Betätigen länger als 1 Sekunde (Ohne Netzspannung). 2. Bestätigen der Auswahl oder der Programmierung (Eine Ebene tiefer). 7. Bedienhinweise 8. Kanal ON OFF / Permanent P (ohne Netz): Taste für 1 Sekunde betätigen, das Kanal ON OFF Gangreserve Display schaltet ein. können Sie Kanäle der -Taste gelangen Sie in der Programmierung immer einen Durch Druck der Kanaltasten Mit manuell schalten. Diese manuelle Schaltung wird durch Schritt / eine Ebene zurück. das Hand-Symbol dargestellt und bleibt bis zur nächsten Schluss einer kompletten Eingabe erscheint Ende. Bestätigen Am programmierten Schaltung gültig. sie Ende mit wechseln Sie zum Automatik-Modus zurück. Am Schluss mancher Eingaben können Sie mit den -Tasten zwischen Ende oder Weiter wählen. Bestätigen Sie Weiter Manuelle Permanentschaltung P mit der -Taste werden die Daten übernommen und Sie wechseln zum Anfang der Eingabe zurück. Bei Auswahl Ende während der Eingabe geht die Uhr ohne Übernahme der Daten in den Automatik-Modus. 9. Programmiermenu Permanentschaltung durch 3-Sek.-Druck auf die entsprechende Kanaltaste. Kanal ist dauernd an bzw. dauernd aus. Schaltzustand bleibt bis zur erneuten manuellen Umschaltung (3-Sek.-Druck) erhalten. 11. Beispiel einer Programmierung für STANDARD Schaltzeiten (EIN und AUS) 10. Standardschaltzeiten (Wochenprogramm) A. Möchten Sie eine Standard-Schaltzeit ( EIN, AUS) programmieren, bestätigen Sie den Menu-Punkt Standard mit . B. Für eine normale Einschaltzeit oder Ausschaltzeit wählen Sie mit den oder EIN an und bestätigen Sie Ihre Auswahl mit . -Tasten den Menupunkt AUS C. In dieser Ebene müssen Sie anhand der -Tasten für jeden Wochentag wählen, ob geschaltet wird „ Ja“ oder ob nicht geschaltet wird „ Nein“. Bestätigen sie jeweils Ihre Auswahl mit . D. Zeiteinstellung: Stunden und dann . Minuten und dann . E. Kontrollabfrage: Ist die blinkende Schaltzeit-Zusammenfassung richtig, bestätigen Sie die Abfrage mit der -Taste. Mit der Taste stehen weitere Optionen zur Auswahl ( Aendern/ Löschen/ Ende). F. Möchten Sie die Programmierung fortsetzten, bestätigen Sie Naechste Schaltzeit mit . Möchten Sie die Programmierungen beenden, wechseln Sie mit zum Punkt Ende und bestätigen Sie dies mit . TIPP: Nutzen Sie die Kopierfunktion um Schaltzeiten von einem Kanal auf den anderen zu kopieren. **Die Zyklusfunktion wird erst nach Aktivierung (Punkt 13) angeboten 12. Zyklus Standardprogramm (Wochenprogramm): 13. Zyklus Optionen Optionen -> Zyklus -> Zyklus 1 - 4 -> … Programm -> Neue Schaltzeit -> Kanal A/B/C/D -> Standard -> … Sie haben die Möglichkeit 4 verschiedene Zyklen zu definieren. Diese Zyklen können im Menü Optionen unter dem Punkt Zyklus Sonderprogramm ( Sonder-Wochen-Programm nach Datum aktiviert = Jahresprogramm): aktiviert, definiert bzw. deaktiviert werden (die max. Impulsdauer bzw. Impulspause beträgt jeweils 9:59:59 h:mm:ss): Programm -> Neue Schaltzeit -> Kanal A/B/C/D -> Sonderprogramm -> SP-Eingabe -> Programmnummer -> … Die Zyklusfunktion wird erst nach Aktivierung als Schaltzeit im Programmiermodus angeboten Weitere Verwendung der Zyklusfunktion: Externer Eingang / Kanaltasten Die Zyklus-Funktion bietet Ihnen die Möglichkeit eine periodische Schaltzeit zu programmieren. Die Uhr fungier t dabei als Taktgeber und taktet zwischen Einschaltimpuls und Impulspause. Die max. Impulsdauer bzw. Impulspause beträgt 9:59:59 Wählen Sie im Menü Optionen den Unterpunkt Zyklus aus und bestätigen Sie Ihre Eingabe mit . h:mm:ss. Wählen Sie mit den -Taste einen der 4 definierbaren Zyklen ( Zyklus 1 - 4) aus und bestätigen Sie Ihre Eingabe mit . Sofern Sie noch keinen Zyklus definiert und aktiviert haben , wird Ihnen die Zyklusfunktion NICHT als Schaltzeit Aktivieren Sie den Zyklus in dem Sie mit den Tasten von Nein auf Ja wechseln und mit bestätigen. angeboten. Erst wenn Sie einen der 4 möglichen Zyklen im Menü Optionen unter dem Optionspunkt Zyklus (Punkt Legen Sie die Impulsdauer „Einzeit‘‘ fest ( -> …). 13) aktivieren und definieren, können Sie eine Zyklus-Schaltzeit programmieren. Legen Sie die Impulspause „Pause‘‘ fest ( -> …). Die Zyklus-Schaltzeit wird durch andere Schaltzeiten ( Ein, Aus, Impuls) oder einer anderen Zyklus-Schaltzeit Bestätigen Sie Ende mit . beendet / überschrieben 14. Impuls Standardprogramm (Wochenprogramm): Programm -> Neue Schaltzeit -> Kanal A/B/C/D -> Standard -> … Sonderprogramm (Jahresprogramm): Programm -> Neue Schaltzeit -> Kanal A/B/C/D -> Sonderprogramm -> SP-Eingabe -> Programmnummer -> … Die Impuls-Funktion bietet Ihnen die Möglichkeit, eine Ein-Schaltzeit mit festgelegter Schaltdauer zu programmieren. Die Uhr schaltet nach der programmierten Impuls-Dauer (Impuls bis zu 59:59 mm:ss) wieder aus. KNX Jahreszeitschaltuhr 6144/40 - 0073-1-8545 15. Prioritäten der Schaltprogramme Standardschaltzeiten, Sonderprogramme, Zusatzschaltzeiten und Permanentprogramme werden entspre chend Ihrer Priorität ausgeführt (Nach Kanal und Datum). Mit Ausnahme von Zusatzschaltzeiten setzen höher priorisierte Schaltzeiten und Schalt programme niedriger priorisierte außer Funktion: Höchste Priorität Manuelle Permanentschaltung (3 Sek. Tastendruck Kanaltaste) Permanentprogramm nach Datum Zusatzschaltzeiten Sonderprogramm 10 nach Datum Sonderprogramm .... nach Datum Sonderprogramm 01 nach Datum Niedrigste Priorität Standardprogramm / Wochenprogramm Busch-Jaeger Elektro GmbH, Freisenbergstraße 2, 58513 Lüdenscheid, Tel: 02351 956-1600, www.BUSCH-JAEGER.de Bedienungsanleitung (Seite 2 von 2) D KNX Jahreszeitschaltuhr 6144/40 16.Eingabe eines Sonderprogrammes Die Funktion als Jahresuhr wird über Sonder(Wochen)programme erfüllt. Sie haben die Möglichkeit bis zu zehn Sonderprogramme einzugeben ( Sonder-Programm-Nummer 01 –> Sonder-Programm-Nummer 10). Erst nach Aktivierung (SP Aktivierung nach Datum siehe Punkt 17) wird ein Sonderprogramm ausgeführt. Einige Regeln für die Programmierung der Sonderprogramme Sie müssen bei der Eingabe eines Sonderprogrammes die Programm-Nummer festlegen. ( Programm-Nummer 01 – Programm-Nummer 10) Je Sonderprogramm können, innerhalb der Speicherkapazität, beliebig viele Schaltzeiten programmiert werden: ( SP Ein, SP Aus, SP Zyklus, SP Impuls) Die Festlegung der Programmlaufzeit (Datum) erfolgt bei Aktivierung des Sonderprogrammes (Punkt 17) Jedes Sonderprogramm kann, innerhalb der Speicherkapazität, beliebig oft aktiviert werden (Punkt 17) Bei Aktivierung eines Sonderprogrammes werden nur die Schaltzeiten des Sonderprogrammes ausgeführt, das Standardprogramm ist zu diesem Datum außer Funktion. Sonderprogramme werden entsprechend Ihrer Priorität ausgeführt (Punkt 15) TIPP: Nutzen Sie die Kopierfunktion um Schaltzeiten von einem Kanal auf den anderen zu kopieren **Die Zyklusfunktion wird erst nach Aktivierung (Punkt 13) angeboten 17. Aktivierung eines Sonderprogrammes Erst nach Aktivierung der Sonderprogramme werden diese ausgeführt (Bitte beachten Sie die Priorität der Sonderprogramme (Punkt 15)). Sonderprogramme können, innerhalb der Speicherkapazität, beliebig oft aktiviert werden. Nach dem Sie festgelegt haben welches Sonderprogramm ( Programm-Nummer) für welche Programmlaufzeit ( Startdatum bis Enddatum) aktiviert werden soll, stehen Ihnen folgende weitere Optionen zur Verfügung: Ohne Sonderfunktion: Schaltprogramm läuft jährlich fix nach eingestelltem Datum ab Osterfunktion: Schaltprogramm berücksichtigt die jährliche Verschiebung von Ostern und Mit korrigiert das Datum in den Folgejahren entsprechend. (Vom Osterfest aus werden fast alle christlichen Feiertage wie Aschermittwoch, Christi Himmelfahrt oder Pfingsten berechnet) Mit 1xFunktion: Sonderprogramm wird einmalig nach Datum ausgeführt. TIPP: Nutzen Sie die Kopierfunktion um Schaltzeiten von einem Kanal auf den anderen zu kopieren 18. Zusatzschaltzeiten 19. Permanentprogramm Programm -> Neue Schaltzeit -> Kanal A/B/C/D -> Zusatz Schaltzeit -> … Programm -> Neue Schaltzeit -> Kanal A/B/C/D -> Permanent -> … Zusatzschaltzeiten ermöglichen Ihnen einzelne Schaltzeiten nach Datum zu programmieren. Zusatzschaltzeiten setzten niedriger priorisierte Schaltzeiten und Schaltprogramme nicht außer Funktion. Das Permanentprogramm (Ferienprogramm) ermöglicht Ihnen die Programmierung einer permanenten Einschaltung oder Ausschaltung eines Kanals nach Datum (Tageweise). Sie haben die Möglichkeit beliebig viele Permanentschaltungen, entsprechend der Speicherkapazität, je Kanal zu programmieren. Nach dem Sie festgelegt haben für welche Programmlaufzeit (Startdatum bis Enddatum) permanent ein- bzw. ausgeschaltet werden soll, stehen Ihnen folgende weitere Optionen zur Verfügung: Nach dem Sie die Schaltzeitfunktionalität ( ZS Ein, ZS Aus, ZS Zyklus, ZS Impuls) und das Datum der Zusatzschaltzeit festgelegt haben, stehen Ihnen weitere Optionen zur Verfügung: Ohne Sonderfunktion: Schaltzeit wird jährlich fix nach eingestelltem Datum ausgeführt. Mit Wochentagsfunktion: Schaltzeit nach Datum unter Berücksichtigung der jährlichen Verschiebung der Wochentage. (Bsp.: Programmierung einer Schaltzeit die jährlich wiederholend am jedem zweiten Samstag im Februar ausgeführt wird) Mit 1xFunktion: Schaltzeit wird einmalig nach Datum ausgeführt. Ohne Sonderfunktion: Schaltprogramm läuft jährlich fix nach eingestelltem Datum ab Osterfunktion: Schaltprogramm berücksichtigt die jährliche Verschiebung von Ostern und Mit korrigiert das Datum in den Folgejahren entsprechend. (Vom Osterfest aus werden fast alle christlichen Feiertage wie Aschermittwoch, Christi Himmelfahrt oder Pfingsten berechnet) Mit 1xFunktion: Sonderprogramm wird einmalig nach Datum ausgeführt. 20. Kanaltasten Optionen -> Kanaltasten -> … Übersicht Funktion „Kanaltasten“: Im Menü Optionen finden Sie den Punkt Kanaltasten. Über diesen Menüpunkt können Sie Sie haben die Möglichkeit über den Optionspunkt Kanaltasten die Funktionalität der einzelnen Kanäle festzulegen. Haben Sie dem Kanal eine der Funktionen zugeordnet können Sie diese definierte Funktion mittels eines Tastendrucks auf die Kanaltaste oder optional mittels eines Signals am externen den Ausgangs-/Schaltkanälen verschiedene Funktionalitäten zuweisen. Haben Sie dem Kanal Eingang (Taster oder Schalter, sofern aktiviert) auslösen. Für jeden Kanal können Sie eine der folgenden Funktionen festlegen: eine der Funktionen (Siehe Übersicht Funktion „Kanaltasten“) zugeordnet können Sie diese definierte Funktion mittels einem Tastendruck auf die Gerätetaste oder optional mittels eines Wechselfunktion (Standardeinstellung) : Durch Betätigung der Kanaltaste oder optional durch ein externes Eingangssignal (Taster oder Schalter) wird externen Eingangssignals (Taster oder Schalter) auslösen. Die Zuordnung der Tasten zu den der Schaltzustand des verknüpften Kanals gewechselt ( ON -> OFF bzw. OFF -> ON). Dies entspricht einer manuellen, gewöhnlichen SchaltungsKanälen ist wie folgt: vorwegnahme. Kanal A => Gerätetaste A / Kanal B => Gerätetaste B / … Timer Funktion: Durch Betätigung der Kanaltaste oder optional durch ein externes Eingangssignal (Taster oder Schalter) schaltet der entsprech ende Kanal EIN und der Timer startet. Nach Ablauf der Timer-Zeit schaltet der Kanal wieder AUS. Erhält der Kanal während dem Ablauf der Timerzeit erneut ein Signal reagiert die Uhr wie folgt: Signal durch Betätigung der entsprechenden Kanaltaste = Timer stoppt und der Kanal schaltet AUS. Externes Eingangssignal (Taster oder Schalter) = Timer wird neu gestartet / Treppenlicht-Zeitschaltfunktion -> Nachschaltbar. Zyklus 1 - 4: Durch Betätigung der Kanaltaste oder optional durch ein externes Eingangssignal (Taster oder Schalter) startet die Zyklus -Funktion. ACHTUNG: Die Zyklusfunktion wird erst in der Auswahl angeboten, wenn der Zyklus vorab im Menü Optionen unter dem Menüpunkt Zyklus aktiviert und definiert wurde. Perm Ein: Durch Betätigung der Kanaltaste oder optional durch ein externes Eingangssignal (Taster oder Schalter) schaltet die Uhr perma nent Ein. Dieser Schaltzustand bleibt erhalten bis zu erneuter manueller Betätigung der Gerätetaste. Perm Aus: Durch Betätigung der Kanaltaste oder optional durch ein externes Eingangssignal (Taster oder Schalter) schaltet die Uhr perma nent AUS. Dieser Schaltzustand bleibt erhalten bis zu erneuter manueller Betätigung der Gerätetaste. **Die Zyklusfunktion wird erst nach Aktivierung (Punkt 13) angeboten Die Wechsel-, die Timerfunktion, sowie die Funktion Zyklus werden durch das gespeicherte Schalt -Programm oder durch eine manuelle Schaltvorwegnahme übersteuert!!! 21. Weitere Einstellungen 22. Programm Ändern Menu-Punkt Hauptmenu Programm Abfrage Abfrage Schaltzeiten / Abfrage Speicherplatz Kopie der Schaltzeiten von einem Kanal zum anderen. Kanal wird Programm dabei nicht überschrieben, sondern mit zusätzlichen Schaltzeiten gefüllt. Löschen der Schaltzeit(en). Sie haben die Möglichkeiten alle Programm Kanäle, einen Kanal oder einzelne Schaltzeiten zu löschen. Einstellungen Einstellung Datum und Uhrzeit Einstellungen Sommerzeiteinstellungen Einstellungen Sprachauswahl Zurücksetzen auf Auslieferungszustand. ! Datum, Uhrzeit und Schaltzeiten gehen verloren Programm Kopieren Programm Löschen Datum Sommerzeit Sprache Werkseinstellungen Zähler PIN-Code Reset-Funktion Anwendungen Programm -> Programm Aendern -> … Programm Einstellungen Anzeige der Betriebsstunden und Schaltimpulse je Kanal und für Schaltuhr gesamt Sie können die Schaltuhr mit einem 4-stelligen PIN-Code sperren. Diesen Code können Sie bearbeiten, aktivieren oder deaktivieren. Option Sollten Sie ihn vergessen haben, wenden Sie sich bitte an unseren Kundendienst. Betätigen Sie gleichzeitig alle 4 Fronttasten für 3 Sekunden. Die Schaltuhr wird zurückgesetzt. Schaltzeiten werden nicht gelöscht! Datum und Uhrzeit werden gelöscht -> Ansonsten wie Erstinbetriebnahme (2). Option KNX Jahreszeitschaltuhr 6144/40 - 0073-1-8545 Im Menu Programm Aendern haben Sie die Möglichkeiten programmierte Schalzeiten je Kanal zu ändern. 23. Datenschlüssel Folgende Optionen stehen Ihnen bei Anschluss des Datenschlüssels zur Verfügung: Daten Sichern: Speichern der Daten (Schaltzeiten) von der Uhr auf den Datenschlüssel. Vorhandene Daten-Sicherung wird überschrieben. Uhr programmieren: Laden der Daten (Schaltzeiten) vom Datenschlüssel auf die Uhr. Alle gespeicherten Schaltzeiten auf der Uhr werden überschrieben. Schlüssel Funktion: Abspielen der auf dem Schlüssel gespeicherten Schaltzeiten. Die interne Programmierung wird unterdrückt. Schlüssel anschauen: Abfrage der auf dem Schlüssel gespeicherten Schaltzeiten / Speicherplatz. Datenschlüssel Daten Sichern Uhr Programmi Schlüssel funktion Schlüssel anschauen Busch-Jaeger Elektro GmbH, Freisenbergstraße 2, 58513 Lüdenscheid, Tel: 02351 956-1600, www.BUSCH-JAEGER.de Instruction Manual (Site 1/2) GB KNX time switch 6144/40 Directory Connection diagram 1. Safety instructions ! !!ATTENTION!! DANGER OF LIFE / RISK OF FIRE AND ELECTRIC SHOCK!! => Installation and assembly of electrical equipment must be carried out only by professional electricia n! => Disconnect device from power supply for wiring and installation purposes! => Defective devices have to be put out of service immediately!!! ! Connect only to suitable supply voltage [KNX bus voltage (nominal voltage 29V)]. ! Warranty void if housing opened by unauthorised person! ! The electronic circuit is protected against a wide range of external influences. Incorrect operating may occur if external in fluences exceed certain limits! ! Installation and assembly of electrical equipment must be in accordance with national building, electrical and safety codes! ! Observe the regulations and instructions in the ZVEI/ZVEH handbook (building system technology). Especially the professional installation of the bus lines and the professional installation and start-up of KNX devices must be observed! 2. Initial operation 3. DCF / GPS / BUS-time / GPS: The time switch can process a time signal. The antenna is not included in The time switch is delivered in sleep-mode, the display is switched off. DCF delivery of the time switch. Press -button for 1 second. current date and time is already programmed and European Disconnect power supply voltage The daylight savings time is activated. Connect the antenna as indicated by the connection diagram the desired language by pressing -buttons and confirm it by Connect supply voltage Select pressing . (Remark: By pressing you move one step backwards To use the BUS-time as standard for the time switch: from the current position) Please set as follows (please also check the manual of the application software): If required, date, time and daylight savings time mode can be adjusted Adjustments => Summertime => Disabled S/W Time also by pressing -buttons and a subsequent confirmation with . Options 4. Menu overview => DCF => GMT Offset 00h 5. Symbol legend Channel is switched ON Channel is switched OFF For the current date the “holiday program” / “permanent by date” is activated Standard programming step Current state is based on a manual over-ride. The state will be cancelled with the next programming step Current state is based on a manual over-ride. The state is permanent until terminated manually I Z W X F D 6. Key function 1. To access the Enter-mode (program, adjustments, options) from the automatic-mode. 2. To revert to the beginning of the current (sub-) menu. 1. To adjust the flashing digit. 2. To scroll through a choice 1. Automatic-mode: To switch the channel ON or OFF until the next programming step occurs. 2. Automatic-mode: A push longer than 3 sec. = Permanent switching status (7). Days of the week Monday, Tuesday, ... Sunday; The underscores indicate if the program is active for the days above Current state is based on a switching time with pulse function Current state is based on a switching time with cycle function Weekday function: Switching time is entered by date but is shifted for future years in respect of the weekday (E.g. Tuesday this year... Tuesday next year). Element within sub-menu “program delete” 1x-Function active: The switching time will be executed only once. Switching function / switching time with Easter function: The switching function takes into account the yearly shift of Easter holiday for future years and changes the date of the switching program accordingly. DCF: The time switch receives the signal for the DCF -77 time standard The time switch is locked; to unlock the device the PIN has to be entered 1. To activate the time switch when operated without power supply. 2. To confirm the selection or the entered data. 7. Handling advice 8. Channel ON OFF / Permanent P time switch is programmable without external power supply Channel ON OFF The after pressing the -button. pushing -buttons a manual switch of the channels To. revert one step or one level back while in the Enter-Mode press By take place. The resulting switching status is marked with completion of a (sub-) menu confirming end will return the the hand-symbol and remains until the next programming After step occurs. (temporary over-ride) device into the automatic-mode. With the choice changes from end to continue . By confirming continue the time switch returns to the beginning of Permanent switching status P the current (sub-) menu. confirming end before completion, the time switch returns When to the automatic-mode without saving the entered data. 9. Programming menu By pressing the corresponding channel button for more than 3 sec. the channel is permanently switched ON or OFF. The status remains until the next manual switching occurs (> 3 sec.). (permanent over-ride) 11. Example for the programming of STANDARD switching times (ON and OFF) 10. Standard weekly program A. If you want to program a standard weekly switching time ( on, off) confirm Standard with B. For regular switching times choose on or off with -buttons and confirm with . . C. Within this level you activate the days of the week (1…7) on which the switching time should h appen. With you activate “yes” or deactivate “no” the corresponding date. Confirm each day with . D. Adjustment of the time: Hours and . Minutes and . E. Verify the entered switching time: If the flashing summary of the programming step is correct, veri fy on or off with . After verification you have the choice between edit/delete and end with F. If you want to proceed with programming, confirm next switching with To leave the programming menu confirm end. . . Information: You can easily transfer switching times from one channel to the other if you use the copy function. **The cycle function will only be available if it is activated (point 13) 12. Cycle Standard weekly program: 13. Cycle options Options -> Cycle -> Cycle 1 - 4 -> … Program -> new program -> channel A/B/C/D -> Standard -> … You have the possibility to define 4 different Cycles. For these purposes choose menu Options and sub-menu Cycle. The different Special (weekly) program (to be activated by date for the yearly function) : cycles can be activated, defined or deactivated (the max. value for pulse or pause is 9:59:59 h:mm:ss): Program -> new program -> channel A/B/C/D -> Special-program -> SP-entry -> program-number -> … Choose menu Options and sub-menu Cycle and confirm with . Select with -buttons one out of the 4 cycles ( Cycle 1 - Cycle 4) and confirm with . For the cycle function it is possibile to enter a periodic switching time. The time switch acts as a recycling timer and switches between pulse (ON) and pause (OFF). The max. value for pulse and pause is 9:59:59 h:mm:ss. Activate the cycle by changing No to Yes with -buttons and subsequent confirming with . If you haven’t defined and activated a cycle, the cycle function will not be available as switching time. Therefore you Define duration of the pulse „on-time‘‘ ( -> …). have to activate and define at least one of the four cycles within menu Options and sub-menu Cycle (point 13). Define duration of the pause „off time‘‘ ( -> …). The cycle switching time will be terminated by another switching time ( on, off, pulse) or by another cycle switching Confirm End with . time. The cycle is now offered within the programming menu. Further applications of the cycle function in combination with: External Input function and/or Channel keys function. 14. Pulse Standard weekly program: Program -> new program -> channel A/B/C/D -> Standard -> … Special (weekly) program (to be activated by date for the yearly function): Program -> new program -> channel A/B/C/D -> Special-program -> SP-entry -> program-number -> … The pulse function provides you the opportunity of programming a switching time with a defined duration. As soon as the pulse-duration has expired the time switch switches OFF automatically (the duration of the pulse is up to 59:59 mm:ss). KNX Jahreszeitschaltuhr 6144/40 - 0073-1-8545 15. Priorities of the switching programs Standard switching times, Special programs, Extra switching times and Permanent by date are executed according to their corresponding priority (by channel and date) All switching programs except Extra switching times, suspend all other switching programs with lower priority: highest priority manual over-ride Permanent (3 sec. push) Permanent by date Extra switching time Special program 10 by date Special program ... by date Special program 01 by date lowest priority Standard weekly program Busch-Jaeger Elektro GmbH, Freisenbergstraße 2, 58513 Lüdenscheid, Tel: 02351 956-1600, www.BUSCH-JAEGER.de Instruction Manual (Site 2/2) GB KNX time switch 16.Special program Entry The yearly function of the switch is realised by special (weekly) programs which can be called up by date. Up to 10 special (weekly) programs can be entered ( Program-Number 01 –> Program-Number 10). Execution of the Special program only after activation by date (SP activation see point 17). Some rules for the programming of Special programs Define the program number in which the new step will be an element before a new switching step is entered. ( Program-number 01 – Program-number 10) The number of switching times which can be programmed in each special program is only limited by the total number of free memory locations: ( SP on, SP off, SP cycle, SP pulse) The dates of the year during which the special program should be applied can be entered within the activation menu (point 17) Each special program can be activated as often as there are memory locations are available (point 17) During the activation dates of special programs only switching steps of the special program with highest pr iority will be executed. Remaining special and standard programs are disabled. Please note the priorities of the different switching programs (point 15) Information: You can easily transfer switching times from one channel to the other if you use the copy function. ** The cycle function will only be offered if it is activated (point 13) 17. Special program activation by date A special program will only be executed if it is activated (and if it has the highest priority of all active switching programs (point 15)). Special programs can be activated as often as free memory lo cations are available. You can choose the special program ( Program-Number), the dates for activation ( Startdate until End-date) and additionally following options: special function: Special program will be applied each year fixed to the entered Without dates Easter function: The time switch takes into account the yearly shift for Easter holiday for With the following years and corrects the activation dates. (For programs relative to Easter, Pentecost Carnival, Ascension,...) With 1xfunction: Special program will be applied only once. Information: You can easily transfer switching times from one channel to the other if you use the copy function. 18. Extra switching time 19. Permanent program Program -> new program -> channel A/B/C/D -> Extra switching time -> … Program -> new program -> channel A/B/C/D -> permanent -> … These programming steps are single switching times by date. Extra switching times do not disable switching programs with lowe r priority. The permanent by date program (holiday program) is a permanently on or off status of the channel for the programmed dates. The number of switching times is only limited by the total number of free memory locations. Adjust channel, switching function and the duration by date. The following options are additionally available for the permanent by date program: Adjust the switching function ( AT on, AT off, AT cycle, AT pulse) and the date on which the extra switching time will be executed. The following options are additionally available for the Extra switching time: Without special function: The switching time will be applied each year fixed to the entered date. With weekday function: The switching date takes into account the yearly shift of the weekday of the month . (E.g.: The switching date is always the second Saturday in February for the current and the following years) With 1xFunction: The switching time will be applied only once. Without special function: The program will be applied each year fixed to the entered dates. Easter function: The time switch takes into account the yearly shift for Easter holiday for With following years and corrects the activation dates. (For programs relative to Easter, Pentecost Carnival, Ascension,...). With 1xfunction: The Program will be applied only once. 20. Channel keys Overview „channel-keys“ functions: If you have assigned a specific response function to a channel, this switching function will occur if you push the channel -button on the front plate of the time switch (or if the external input for this channel is activated and a signal is applied to th e input). For each channel one out of the following functions can be defined: These response functions will only be carried out when using the channel-keys of the time Change function (default setting) : By pressing the channel key (or optionally using the external input) the switching status changes from ON to OFF or switch (manual over-ride) or optionally when activating the channel with the external input. Thus, OFF to ON. This corresponds to a standard manual over-ride of the channel. a programmed switching time will be executed as usual, independent of the settings within this Timer function: By pressing the channel key (or optionally using the external input) the Timer starts and the corresponding channel switches ON. After channel-key-menu. the expiry of the Timer-time the channel switches OFF. If the channel receives another signal before the expiry of time the time switch reacts as follows: After pressing the channel-button = Timer stops and the channel switches OFF. The correlation between the channel-keys and the channels is as follows: Signal on the external input = Timer restarts/ Staircase lighting timer -> Resettable. channel A => channel key A (push-button “A” of the device) / channel B => channel key B … Cycle 1 - 4: By pressing the channel key (or optionally using the external input) the cycle function starts. Attention: This function is only available if the cycle is activated and defined in advance within menu Options and submenu Cycle. Perm on: By pressing the channel key (or optionally using the external input) the channel switches permanently ON. This status remains active until the channel key of the device is pressed again. Perm off: By pressing the channel key (or optionally using the external input) the channel switches permanently OFF. This status remains active until the channel key of the device is pressed again. The Change function, Timer function and Cycle functions will be overridden by the regular switching program or by a manual ov er-ride!!! Options -> channel-keys -> … Within the Options menu you will find submenu channel-keys. Here you have the opportunity to assign different response functions to the output channels. ** The cycle function will only be offered if it is activated (point 13) 21. Additional adjustments 22. Program modify Menu Program -> Program modify -> … Main menu Program query Program Program copy Program Program delete Program Date-Time Summertime Language Factory Defaults Application To query the programming steps and remaining me mory locations Copy from one channel to another. Memory of the channel won’t be overwritten; the copied switching steps appear additionally. ! Permanent by date function is not copied! Adjustment Adjustment Adjustment Deletion of switching time(s). The program for all channels, single channels and single programming steps within on channel can be deleted. Adjustment of date and time Adjustment of the daylight saving time mode (ON/OFF) Choice of languages Adjustment Reset to the state of delivery. ! Date, time and switching program will be lost! Counter Options Displays the hour counter and pulse counter for each channel and the time switch itself. PIN-Code Options The time switch can be locked with a 4-digit PIN-Code. The code can be adjusted, activated and deactivated. If you have forgotten the Code please call customer service. Reset-Function Within Program modify each single switching time can be modified. 23. Data-key With a Data-key following activities are possible: Save data: Writes the data from the time switch into the memory of the Data-key. Program timeswitch: Writes the data located inside the Key into the memory. Key function: The time switch will solely apply programming steps from the Data -key. The switching program of the time switch is suppressed. Key readout: To query the switching program of the Data-key. Press all front keys for 2 seconds. The time switch is reset. The values for date and time will be deleted and have to be re-entered. The switching program has not been deleted! KNX Jahreszeitschaltuhr 6144/40 - 0073-1-8545 Busch-Jaeger Elektro GmbH, Freisenbergstraße 2, 58513 Lüdenscheid, Tel: 02351 956-1600, www.BUSCH-JAEGER.de