1
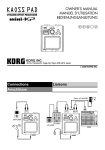
Precautions Location Using the unit in the following locations can result in a malfunction. • In direct sunlight • Locations of extreme temperature or humidity • Excessively dusty or dirty locations • Locations of excessive vibration • Close to magnetic fields Power supply Please connect the designated AC adapter to an AC outlet having the correct voltage. Do not connect it to an AC outlet having a voltage other than that specified for your unit. Interference with other electrical devices Radios and televisions placed nearby may experience reception interference. Operate this unit at a suitable distance from radios and televisions. Handling To avoid breakage, do not apply excessive force to the switches or controls. Care 4015-2 Yanokuchi, Inagi-city, Tokyo 206-0812 Japan 2007 KORG INC. If the exterior becomes dirty, wipe it with a clean, dry cloth. Do not use liquid cleaners such as benzene or thinner, or cleaning compounds or flammable polishes. Keep this manual After reading this manual, please keep it for later reference. Keeping foreign matter out of your equipment Connections Anschlüsse Liaisons Option: AC ADAPTER AC Adapter (sold separately) AC Connect the optional AC adapter to the DC 4.5 V jack. Be sure to set the ON/STANDBY switch to the STANDBY position before connecting the AC adapter. Be sure to use only the specified AC adapter. Adaptateur secteur (vendu séparément) DC4.5V LINE OUT Branchez l’adaptateur secteur optionnel sur la prise DC 4.5 V. N’oubliez pas de régler le commutateur ON/STANDBY sur la position STANDBY avant de brancher l’adaptateur secteur. Veillez à utiliser seulement l’adaptateur secteur spécifié. Netzteil (getrennt erhältlich) MIXER PHONES Schließen Sie das optionale Netzteil an die Buchse DC 4.5V an. Stellen Sie den ON/STANDBY-Schalter auf STANDBY, bevor Sie das Netzteil anschließen. Verwenden Sie nur das vorgeschriebene Netzteil. Never set any container with liquid in it near this equipment. If liquid gets into the equipment, it could cause a breakdown, fire, or electrical shock. Be careful not to let metal objects get into the equipment. If something does slip into the equipment, unplug the AC adapter from the wall outlet. Then contact your nearest Korg dealer or the store where the equipment was purchased. IMPORTANT NOTICE TO CONSUMERS This product has been manufactured according to strict specifications and voltage requirements that are applicable in the country in which it is intended that this product should be used. If you have purchased this product via the internet, through mail order, and/or via a telephone sale, you must verify that this product is intended to be used in the country in which you reside. WARNING: Use of this product in any country other than that for which it is intended could be dangerous and could invalidate the manufacturer’s or distributor’s warranty. Please also retain your receipt as proof of purchase otherwise your product may be disqualified from the manufacturer’s or distributor’s warranty. THE FCC REGULATION WARNING (for USA) This equipment has been tested and found to comply with the limits for a Class B digital device, pursuant to Part 15 of the FCC Rules. These limits are designed to provide reasonable protection against harmful interference in a residential installation. This equipment generates, uses, and can radiate radio frequency energy and, if not installed and used in accordance with the instructions, may cause harmful interference to radio communications. However, there is no guarantee that interference will not occur in a particular installation. If this equipment does cause harmful interference to radio or television reception, which can be determined by turning the equipment off and on, the user is encouraged to try to correct the interference by one or more of the following measures: • Reorient or relocate the receiving antenna. • Increase the separation between the equipment and receiver. • Connect the equipment into an outlet on a circuit different from that to which the receiver is connected. • Consult the dealer or an experienced radio/TV technician for help. Unauthorized changes or modification to this system can void the user’s authority to operate this equipment. Notice regarding disposal (for EU) If this “crossed-out wheeled bin” symbol is shown on the product or in the operating manual, you must dispose of the product in an appropriate way. Do not dispose of this product along with your household trash. By disposing of this product correctly, you can avoid environmental harm or health risk. The correct method of disposal will depend on your locality, so please contact the appropriate local authorities for details. Specifications Connectors: LINE OUT jacks (RCA jacks), PHONES jack (Stereo mini phone jacks) Power supply: four alkaline AA (LR6) batteries (6 V) Battery life: approximately five hours (with alkaline batteries) Dimensions: 106 mm (W) x 129 mm (D) x 29 mm (H) / 4.17" (W) x 5.08" (D) x 1.14" (H) Weight: 163 g / 5.75 oz. (without batteries) Included items: owner’s manual, parameter sheet, four AA “test” batteries Options (sold separately): AC adapter ( , DC4.5V ) * Specifications and appearance are subject to change without notice for improvement. * All other product and conpany names are trademarks or registerd trademarks of their respective holders. Selecting a program pressed, the KAOSSILATOR will switch from the key setting back to the program selection state. The KAOSSILATOR will also return to the program selection state automatically after five seconds, if no additional setting operations are performed. When applying a Key to certain Programs, noise may occur or no sound may be produced. Turning the power off reverts to the default value [ ]. Turn the PROGRAM/VALUE knob to select one of the 100 programs, from *.00–*.99 (* indicates the category). Setting the BPM Thank you for purchasing Korg’s KAOSSILATOR dynamic phrase synthesizer. In order to enjoy your KAOSSILATOR, please read this owner’s manual carefully and retain it for future reference. Volume knob KAOSSILATOR Controls & Jacks The VOLUME knob affects only the headphone volume. The VOLUME knob will not affect the LINE OUT volume. DC jack LINE OUT jacks PROGRAM/VALUE knob Operation Playing the touch pad LOOP STATUS indicator Display TAP/BPM button ON/STANDBY switch LOOP REC/PLAY button SCALE button Move your finger around on (or tap on) the touchpad to control the sound. The parameters controlled by the X axis and Y axis are shown on the PROGRAM LIST. Touching the extreme outer edges won’t control the sound. Using the gate arpeggiator Touch pad GATE ARP indicator GATE ARP button VOLUME PHONES jack Changing the Batteries The display will indicate “Lo” when the batteries are running low. When this occurs, please replace the batteries as soon as possible. “Test” batteries are provided so that you can verify that your KAOSSILATOR operates properly. These batteries may have a shorter than expected lifespan . When the batteries become unusable, remove them immediately. You should also remove the batteries if you won't be using the unit for an extended period of time. 1. Set the ON/STANDBY switch to the STANDBY position. 2. Slide the battery case cover on the bottom panel in the direction of the arrow to open it. 3. Install four AA batteries (Use alkaline only). Note the polarity (+, -) and be sure the batteries are inserted with the correct orientation. 4. Close the battery case cover. Turning the power on/off Turning the power on Set the ON/STANDBY switch to the ON position. Turning the power off Set the ON/STANDBY switch to the STANDBY position. If you're using the KAOSSILATOR on battery power, don't forget to turn the power off when you are through using it. Press the GATE ARP button; the GATE ARP indicator will light. Now when you play the touch pad, the KAOSSILATOR will “gate” the sound using the currently selected gate arpeggiator pattern. Selecting a gate arpeggiator pattern 1. Press and hold the GATE ARP button; the display will indi]. cate the currently selected pattern number [ 2. Turn the PROGRAM/VALUE knob to select a gate arpeggiator pattern from G.00–G.49. 3. Press and hold the GATE ARP button again and the KAOSSILATOR will switch back to the program selection state. The KAOSSILATOR will also return to the program selection state automatically after five seconds, if no additional setting operations are performed. The Arp cannot be applied to certain programs—please refer to the PROGRAM LIST. Turning the power off reverts to the default value [ ]. Selecting the scale 1. Press the SCALE button; the display will indicate the abbreviation of the currently selected scale. 2. Turn the PROGRAM/VALUE knob to select the scale. 3. Press the SCALE button again and the KAOSSILATOR will switch from the scale setting back to the program selection state. The KAOSSILATOR will also return to the program selection state automatically after five seconds, if no additional setting operations are performed. The Scale cannot be applied to certain programs—please refer to the PROGRAM LIST. Turning the power off reverts to the default value [ ] (Ionian). Selecting the key (root note/octave) 1. While holding down the SCALE button, press the TAP button; the display will indicate the current key. ], C#4=[ ], C3=[ ], C5=[ ] C4=[ 2. Turn the PROGRAM/VALUE knob to select the key. 3. While the display is still showing the Key Select function, press the TAP button again with the SCALE button de- 1. Press the TAP button; the current BPM setting will be displayed. 2. Manual: Turn the PROGRAM/VALUE knob while the BPM setting is displayed to change the BPM setting. 3. Tap Tempo: Hit the TAP button several times in tempo with your song, the detected BPM will be used as the current setting. 4. Press and hold the TAP button and the KAOSSILATOR will switch from the BPM setting back to the program selection state. The KAOSSILATOR will also return to the program selection state automatically after five seconds, if no additional setting operations are performed. Turning the power off reverts to the default value [120]. Loop (Phrase) recording The KAOSSILATOR can record and playback phrases and patterns that you play on the touch pad - loop style. During playback, you can play along. You can even add another layer to the loop recording. This process can be repeated, adding new layers. Phrases Can be up to 8 beats (2 bars of 4/4) in length. 1. Press and hold the LOOP REC/PLAY button. The LOOP STATUS indicator will light red and you can record by playing the touchpad. 2. When you release the LOOP REC/PLAY button, the LOOP STATUS indicator will light green. Playback will continue, but recording will stop. 3. If you press the LOOP REC/PLAY button during loop playback, the LOOP STATUS indicator will go out and playback will stop. 4. If you press the LOOP REC/PLAY button while playback is stopped, the LOOP STATUS indicator will light green, and the recorded phrase will start. Overdubbing (layering) recorded phrases Once you have recorded a phrase, you can play along, or you can add another layer on top (overdub) of the recorded phrase. Once you get a layered phrase that you like, you can save it. That way, if you add additional layers that you don’t like, you can go back and start again from this last saved version. 1. If you hold down the LOOP REC/PLAY button for an ex] tended period of time after the phrases are recorded, [ ] (Playback: the numerical figure shows (Stopped) or [ the beat position) will be displayed. 2. Continue to hold down the LOOP REC/PLAY button and turn ] (Fix) appears in the PROGRAM/VALUE knob so that [ the display. When you release the LOOP REC/PLAY button, the recorded phrase/layers are saved. 3. Press and hold the LOOP REC/PLAY button to start recording as you make new layers. 4. If you do not like the new phrases, continue to hold down the LOOP REC/PLAY button and turn the PROGRAM/VALUE ] (Cancel) appears in the display. When knob so that [ you release the LOOP REC/PLAY button, only the newly recorded phrases will be deleted. 5. If you want to merge the newly recorded phrases with the saved phrases, continue to hold down the LOOP REC/PLAY ] button and turn the PROGRAM/VALUE knob so that [ appears on the display. When you release the LOOP REC/ PLAY button, the newly recorded phrases will be mixed with the saved phrases. 6. To delete all recorded phrases and layers, continue to hold down the LOOP REC/PLAY button and turn the PROGRAM/ VALUE knob so that [ ] (Clear) appears in the display. When you release the LOOP REC/PLAY button, all phrases including the saved phrases will be completely deleted. The display blinks and the LOOP STATUS indicator lights orange while each process is being performed. When the power is turned off, all recorded phrases including the saved phrases will be deleted. Deleting elements of recorded phrases During playback, if you hold down the LOOP REC/PLAY button and press the SCALE button, the phrase elements played when the SCALE button is depressed will be deleted. During ] (Deleting: the numerical figure shows the this operation, [ beat position) will appear in the display. In addition, if you press the SCALE button while you are recording sounds with the LOOP REC/PLAY button depressed during playback of the recorded phrase, the reproduced phrases ] will previously recorded will be replaced with new ones. [ appear on the display. The operations above don't delete the saved phrases. Setting the length of each phrase 1. While holding down the LOOP REC/PLAY button, press the TAP button. The display will indicate the current phrase length for recording and playback. ] =1/16, [ ] =1/8, [ ] =1/4, [ ] =1/2 [ ] =1, [ ] =2, [ ] =4, [ ] =8 [ 2. Turn the PROGRAM/VALUE knob to set the phrase length for recording and playback. 3. If you press the TAP button again with the LOOP REC/PLAY button depressed, the KAOSSILATOR will switch from the length setting back to the program selection state. The KAOSSILATOR will also return to the program selection state automatically after fifteen seconds, if no additional setting operations are performed. When the BPM setting is between 20 and 37.5, the actual length for recording and playback will be 1/4 of the indicated length. When the BPM setting is between 37.5 and 75.0, the actual length for recording and playback will be 1/2 of the indicated length. Turning the power off reverts to the default value [ ]. Y AXIS Ambient Depth, Vibrato Pan, Delay Cutoff Cutoff Level Feedback Mod OSC Sync Pitch Decay Time Delay&AutoPan Depth Mod Depth Cutoff Cutoff Octave Bass Note Sequence Speed Formant LFO Speed Cutoff LFO Speed Echo Time, Feedback Pitch Mod Depth Breath Pressure Velocity LFO Speed Sound Character 2nd Strings Level Sound Character Velocity Breath Pressure 2nd Reed Level Breath Pressure Cutoff, Pitch EG Decay Time Cutoff Distortion LFO Speed Cutoff Cutoff Cutoff Cutoff Decay Time Mod Depth Mod Depth Cutoff Cutoff Cutoff Cutoff Cutoff Cutoff Decay Time 3rd Percussion SCALE GATE ARP CHORD X AXIS Note Note Note Note Note Note Note Note Note Note Note Note Note Note, Pan Note Note Note Note Note Note Note Note Note Note Note Note Note Note Note Note Note Note Note Note Note Note Note Note Note Note Note Note Note Note Note Note Note Note Note Note SE Program Name Ambient Lead LR 5th Lead Unison Lead Tell Min Feedback Lead Sync Lead Square Bell Wide Saw Lead XMod Lead Square Lead Unison Sweep 3Octave Lead XY Scale Wave Seq Digital Talk LFO Lead XMod Saw Lead Flap Lead Tape Bell Lead Pitch Mod Lead Trumpet Piano Digerido Electric Sitar Duo Strings VPM Bell Jazz Guitar Tenor Sax Harmonica Flute Hoover Kick Bass Reso Bass Acid Bass Sync LFO Bass Unison Bass Boost Bass XMod Bass Fall Bass VPM Bass Modulation Bass Dark Bass Ring Bass Square Bass Dist Saw Bass MG Bass Bit Bass Synth Bass Valve Bass Organ Bass DRUM No. L.00 L.01 L.02 L.03 L.04 L.05 L.06 L.07 L.08 L.09 L.10 L.11 L.12 L.13 L.14 L.15 L.16 L.17 L.18 L.19 a.20 a.21 a.22 a.23 a.24 a.25 a.26 a.27 a.28 a.29 b.30 b.31 b.32 b.33 b.34 b.35 b.36 b.37 b.38 b.39 b.40 b.41 b.42 b.43 b.44 b.45 b.46 b.47 b.48 b.49 PATTERN BASS ACOUSTIC LEAD PROGRAM LIST No. c.50 c.51 c.52 c.53 c.54 c.55 c.56 c.57 c.58 c.59 S.60 S.61 S.62 S.63 S.64 S.65 S.66 S.67 S.68 S.69 S.70 S.71 S.72 S.73 S.74 S.75 S.76 S.77 S.78 S.79 d.80 d.81 d.82 d.83 d.84 d.85 d.86 d.87 d.88 d.89 P.90 P.91 P.92 P.93 P.94 P.95 P.96 P.97 P.98 P.99 Program Name Trance Chord Sine Chord Organ Chord Sweep Chord Choir Chord Power Chord BPF Chord E.Piano Chord Rave Chord Chord Hit Kaoss Drone Rise & Fall Feedback Loop L->R Noise Filter 8bit Game Metal Siren Missile Random Beam Saber Synth Looper Ring Mod SFX Square LFO Dot Eat Voice Looper Sweep Jet Reflection SFX Drop BD/SD1 Zap/HH Conga BD/SD2 Breakdown XMod Perc BD/SD3 Timpani Filter Snare BD/SD4 Grain Beat1 Bass&Drum HPF Drum Grain Beat2 Beat Box Dirty Drum Grain Beat3 House Auto Techno Electro X AXIS Note Note Note Note Note Note Note Note Note Note Cutoff Note Feedback Filter Note Cutoff Note Note, Cutoff LFO Speed, Cutoff Missile, Hit Note Modulator Note Cutoff, Looper Speed Note Note, LFO Speed Loop Pitch Note, Looper Speed, Pan Note, Pan Comb Freq Note Cutoff BD, SD Zap, HH, Pan Conga Hi/Low BD, SD Decay Time Pitch BD, SD Note Noise Cutoff BD, SD Pattern Bass Note Pattern Pattern Pattern Pattern Pattern Pattern Bass Note Noise Cutoff Y AXIS Cutoff Octave Drawbar Level LFO Speed Formant Sound Character Cutoff Chord (Maj7, min7) Cutoff Chord (Maj7, min7) Feedback Rise, Fall Delay Time LFO Speed Resonance Pitch Mod Depth LFO Speed Pitch Mod Depth Decay Time LFO Speed Mod Depth Looper, Noise Level LFO Depth Cutoff Dot Eat Looper, Formant LFO Speed Feedback Decay Time Impulse Speed Sound Character Decay Time Mute SD Decay Time Ambient Depth Mod Depth, Mod Pitch BD Pitch, SD Level Velocity SD Body Level Reverse Grain Depth Pattern, Flanger Depth Cutoff, Delay Depth Grain Speed Delay Depth Decimator Depth Grain Depth Delay Depth Pattern, Cutoff Noise Decay, Delay Depth SCALE GATE ARP Réglez le commutateur ON/STANDBY sur la position STANDBY. Si vous utilisez le KAOSSILATOR sur piles, n’oubliez pas de le mettre hors tension après l’avoir utilisé. ○ ○ ○ ○ ○ ○ ○ ○ Vermeiden Sie das Aufstellen des Geräts an Orten, an denen • es direkter Sonneneinstrahlung ausgesetzt ist; • hohe Feuchtigkeit oder Extremtemperaturen auftreten können; • Staub oder Schmutz in großen Mengen vorhanden sind; • das Gerät Erschütterungen ausgesetzt sein kann. • in der Nähe eines Magnetfeldes. Enregistrement en boucle (phrase) Le KAOSSILATOR peut enregistrer et reproduire en boucle des phrases et des motifs créés sur le pavé tactile. Pendant la reproduction, vous pouvez jouer en même temps. Vous pouvez même ajouter une autre couche à l’enregistrement en boucle. Ce processus peut être répété, avec l’addition de nouvelles couches. Les phrases peuvent durer jusqu’à 8 battements (2 mesures 4/4). 1. Appuyez sur la touche LOOP REC/PLAY et maintenez-la enfoncée. Le témoin LOOP STATUS s’allumera en rouge et vous pourrez enregistrer en jouant sur le pavé tactile. 2. Quand vous relâchez la pression sur la touche LOOP REC/ PLAY, le témoin LOOP STATUS s”allumera en vert. La re- ○ ○ ○ ○ ○ ○ ○ ○ ○ ○ ○ ○ ○ Vermeiden Sie bei der Bedienung von Schaltern und Reglern unangemessenen Kraftaufwand. Reinigung Bei auftretender Verschmutzung können Sie das Gehäuse mit einem trockenen, sauberen Tuch abwischen. Verwenden Sie keinerlei Flüssigreiniger wie beispielsweise Reinigungsbenzin, Verdünnungs- oder Spülmittel. Verwenden Sie niemals brennbare Reiniger. Bedienungsanleitung Bewahren Sie diese Bedienungsanleitung gut auf, falls Sie sie später noch einmal benötigen. Flüssigkeiten und Fremdkörper Stellen Sie niemals Behältnisse mit Flüssigkeiten in der Nähe des Geräts auf. Wenn Flüssigkeit in das Gerät gelangt, können Beschädigung des Geräts, Feuer oder ein elek-trischer Schlag die Folge sein. Beachten Sie, daß keinerlei Fremdkörper in das Gerät gelangen. Sollte ein Fremdkörper in das Gerät gelangt sein, so trennen Sie es sofort vom Netz. Wenden Sie sich dann an Ihren KORG-Fachhändler. Hinweis zur Entsorgung (nur EU) Wenn dieses „durch gestrichener Müllkübel“ Symbol auf dem Produkt oder in der Bedienungsanleitung erscheint, müssen Sie dieses Produkt sachgemäß als Sondermüll entsorgen. Entsorgen Sie dieses Produkt nicht im Haushaltsmüll. Durch richtige Entsorgung verhindern Sie Umwelt- oder Gesundheitsgefahren. Die geltenden Vorschriften für richtige Entsorgung sind je nach Bestimmungsland unterschiedlich. Bitte informieren Sie sich bei der zuständigen Behörde über die bei Ihnen geltenden Vorschriften zur Entsorgung. WICHTIGER HINWEIS FÜR KUNDEN Dieses Produkt wurde unter strenger Beachtung von Spezifikationen und Spannungsanforderungen hergestellt, die im Bestimmungsland gelten. Wenn Sie dieses Produkt über das Internet, per Postversand und/oder mit telefonischer Bestellung gekauft haben, müssen Sie bestätigen, dass dieses Produkt für Ihr Wohngebiet ausgelegt ist. WARNUNG: Verwendung dieses Produkts in einem anderen Land als dem, für das es bestimmt ist, verwendet wird, kann gefährlich sein und die Garantie des Herstellers oder Importeurs hinfällig lassen werden. Bitte bewahren Sie diese Quittung als Kaufbeleg auf, da andernfalls das Produkt von der Garantie des Herstellers oder Importeurs ausgeschlossen werden kann. * Die übrigen in dieser Bedienungsanleitung erwähnten Firmen-, Produkt-, Formatnamen usw. sind Warenzeichen oder eingetra-gene Warenzeichen der rechtlichen Eigentümer und werden ausdrücklich anerkannt. Vielen Dank, dass Sie sich für den dynamischen Phrase-Synthesizer KAOSSILATOR von Korg entschieden haben Um einen störungsfreien Betrieb und eine optimale Ausnutzung des KAOSSILATOR sicherzustellen, lesen Sie das Handbuch sorgfältig durch und bewahren es dann zur späteren Bezugnahme griffbereit auf. KAOSSILATOR Bedienelemente und Buchsen ○ ○ ○ ○ ○ ○ ○ ○ ○ ○ ○ ○ ○ ○ ○ ○ ○ ○ ○ ○ ○ ○ ○ ○ ○ ○ ○ ○ ○ ○ ○ ○ ○ ○ ○ ○ ○ ○ ○ ○ ○ ○ ○ ○ ○ ○ ○ ○ ○ ○ ○ ○ ○ ○ ○ ○ ○ ○ ○ ○ ○ ○ ○ ○ ○ ○ ○ ○ ○ ○ ○ ○ ○ ○ ○ ○ ○ ○ Bedienung LOOP STATUS-Anzeige Display ON/STANDBY-Schalter TAP/BPM-Taste LOOP REC/PLAY-Taste SCALE-Taste Prises LINE OUT (prises CINCH), prise PHONES (prise mini-phone stéréo 3,5 mm) Alimentation : 4 piles alcalines format AA (LR6) (6V) Durée de vie des piles : environ cinq heures (avec des piles alcalines) Dimensions : 106 mm (L) X 129 mm (P) X 29 mm (H) Poids : 163 g (sans les piles) Accessoires inclus : manuel de l’utilisateur, feuille de paramètres, quatre piles AA pour “essai”. Options (vendues séparément) : adaptateur secteur ( , DC 4.5V) * L’apparence et les spécifications techniques peuvent être sujettes à modifications sans avis préalable pour améliorations. * Tous les autres noms de produits et de compagnies sont des marques de fabrique ou des marques déposées de leurs propriétaires respectifs. ○ ○ Bornes : GATE ARP-Anzeige ○ Spécifications ○ ○ ○ ○ ○ ○ ○ ○ ○ PROGRAM/VALUE-Knopf GATE ARP-Taste Touch-Pad VOLUME-Regler ○ L’afficheur indiquera “Lo” quand les piles seront épuisées. Veuillez les remplacer dès que possible. Les piles inclues sont fournies afin que vous puissiez vérifier le bon fonctionnement de l’appareil. Leur durée de vie sera probablement plus courte que la normale. Si les piles sont complètement épuisées, retirez-les immédiatement. Vous devez également retirer les piles si vous n’utilisez pas l’appareil pendant longtemps. 1. Réglez le commutateur ON/STANDBY sur la position STANDBY. 2. Faites glisser dans le sens de la flèche le couvercle du logement des piles se trouvant sous l’appareil pour l’ouvrir. 3. Mettez quatre piles AA en place (utilisez seulement des piles alcalines). Assurezvous que les piles sont insérées dans le bon sens (+, -). 4. Refermez le couvercle du logement des piles. Dieser kann bei in der Nähe aufgestellten Rundfunkempfängern oder Fernsehgeräten Empfangsstörungen hervorrufen. Betreiben Sie solche Geräte nur in einem geeigneten Abstand von diesem Erzeugnis. PHONES-Buchse ○ Remplacement des piles Störeinflüsse auf andere Elektrogeräte ○ VOLUME Prise PHONES Schließen Sie das beiliegende Netzteil nur an eine geeignete Steckdose an. Verbinden Sie es niemals mit einer Steckdose einer anderen Spannung. DC-Buchse ○ Pavé tactile 1. Appuyez sur la touche TAP. Le réglage du BPM actuel sera affiché. 2. Manuel : Tournez le bouton PROGRAM/VALUE pendant que la valeur du BPM est affichée pour changer le réglage du BPM. 3. Tap Tempo : Frappez plusieurs fois sur la touche TAP en synchronisation avec votre morceau, et la valeur de BPM détectée sera utilisée comme réglage. 4. Appuyez sur la touche TAP et maintenez-la enfoncée. Le KAOSSILATOR passera du réglage du BPM au mode de sélection de programme. Le KAOSSILATOR reviendra aussi automatiquement en mode de sélection de programme après cinq secondes, si aucun réglage supplémentaire n’est effectué. Mettre l’appareil hors tension réinitialise le BPM à sa valeur par défaut [120]. Stromversorgung LINE OUT-Buchsen ○ Réglage du BPM Touche GATE ARP Aufstellungsort Ersetzen der Batterien ○ Touche SCALE 1. Tout en maintenant la touche LOOP REC/PLAY enfoncée, appuyez sur la touche TAP. L’afficheur indiquera la longueur de la phrase actuelle pour l’enregistrement et la lecture. ] =1/16, [ ] =1/8, [ ] =1/4, [ ] =1/2 [ ] =1, [ ] =2, [ ] =4, [ ] =8 [ 2. Tournez le bouton PROGRAM/VALUE pour régler la longueur de la phrase actuelle pour l’enregistrement et la lecture. 3. Si vous appuyez de nouveau sur la touche TAP alors que la touche LOOP REC/PLAY est enfoncée, le KAOSSILATOR passera du réglage de longueur au mode de sélection de programme. Le KAOSSILATOR reviendra aussi automatiquement en mode de sélection de programme après quinze secondes, si aucun réglage supplémentaire n’est effectué. Si le réglage du BPM est compris entre 20 et 37.5, la longueur actuelle d’enregistrement et de lecture sera 1/4 de la longueur indiquée. Si le réglage du BPM est compris entre 37.5 et 75.0, la longueur actuelle d’enregistrement et de lecture sera 1/2 de la longueur indiquée Mettre l’appareil hors tension réinitialise la longueur à ]. sa valeur par défaut [ ○ Touche TAP/BPM Touche LOOP REC/PLAY Réglage de la longueur de chaque phrase ○ Bouton PROGRAM/VALUE 1. Tout en maintenant la touche SCALE enfoncée, appuyez sur la touche TAP. L’afficheur indiquera la clé actuelle. ], C#4=[ ], C3=[ ], C5=[ ] C4=[ 2. Tournez le bouton PROGRAM/VALUE pour sélectionner la clé. 3. Alors que l’afficheur indique la fonction Key Select, appuyez de nouveau sur la touche TAP alors que la touche SCALE est enfoncée. Le KAOSSILATOR reviendra en mode de sélection de programme. Le KAOSSILATOR reviendra aussi automatiquement en mode de sélection de programme après cinq secondes, si aucun réglage supplémentaire n’est effectué. Lorsque vous appliquez une clé à certains programmes, du bruit peut survenir ou le son peut être coupé. Mettre l’appareil hors tension réinitialise la clé à leur va]. leur par défaut [ Pendant la lecture, si vous maintenez la touche LOOP REC/ PLAY enfoncée et appuyez sur la touche SCALE, les éléments de la phrase, reproduits quand la touche SCALE est ] enfoncée, seront effacés. Pendant cette opération, [ (effacement : les chiffres indiquent la position du battement) apparaîtra sur l'afficheur. De plus, si vous appuyez sur la touche SCALE pendant un enregistrement avec la touche LOOP REC/PLAY enfoncée, au cours de la lecture de la phrase enregistrée, les phrases reproduites précédemment enregistrées seront remplacées ] apparaîtra sur l'afficheur. par de nouvelles. [ Les opérations présentées ci-dessus n'effacent pas les phrases sauvegardées. ○ Prise DC Prises LINE OUT Sélection de la clé (fondamentale/ octave) Effacement d’éléments des phrases enregistrées ○ Commandes et prises du KAOSSILATOR 1. Appuyez sur la touche SCALE. L'afficheur indiquera l'abréviation correspondant à la gamme actuellement sélectionnée. 2. Tournez le bouton PROGRAM/VALUE pour sélectionner la gamme. 3. Appuyez de nouveau sur la touche SCALE et le KAOSSILATOR passera du réglage de gamme au mode de sélection de programme. Le KAOSSILATOR reviendra aussi automatiquement en mode de sélection de programme après cinq secondes, si aucun réglage supplémentaire n'est effectué. Cette fonction ne peut pas être appliquée à certains programmes—veuillez vous reporter à PROGRAM LIST. Mettre l'appareil hors tension réinitialise la gamme à sa ] (ionienne). valeur par défaut [ ○ Merci d’avoir fait l’acquisition du synthétiseur de phrases dynamique KAOSSILATOR de Korg. Afin de pouvoir l’apprécier, nous vous conseillons de lire attentivement le présent manuel et de le conserver pour une utilisation future. Sélection de la gamme ○ REMARQUE IMPORTANTE POUR LES CLIENTS Ce produit a été fabriqué suivant des spécifications sévères et des besoins en tension applicables dans le pays où ce produit doit être utilisé. Si vous avez acheté ce produit via l’internet, par vente par correspondance ou/et vente par téléphone, vous devez vérifier que ce produit est bien utilisable dans le pays où vous résidez. ATTENTION: L’utilisation de ce produit dans un pays autre que celui pour lequel il a été conçu peut être dangereuse et annulera la garantie du fabricant ou du distributeur. Conservez bien votre récépissé qui est la preuve de votre achat, faute de quoi votre produit ne risque de ne plus être couvert par la garantie du fabricant ou du distributeur. 1. Appuyez sur la touche GATE ARP et maintenez-la enfoncée. L'afficheur indiquera le numéro de motif actuellement ]. sélectionné [ 2. Tournez le bouton PROGRAM/VALUE pour sélectionner un motif de G.00 à G.49. 3. Appuyez sur la touche GATE ARP et maintenez-la enfoncée. Le KAOSSILATOR passera du Sélection d’un motif Gate au mode de sélection de programme. Le KAOSSILATOR reviendra aussi automatiquement en mode de sélection de programme après cinq secondes, si aucun réglage supplémentaire n'est effectué. Cette fonction ne peut pas être appliquée à certains programmes—veuillez vous reporter à PROGRAM LIST. Mettre l'appareil hors tension réinitialise le motif à sa va]. leur par défaut [ ○ Si ce symbole “Poubelle barrée” est imprimé sur le produit ou dans le manuel de l’utilisateur, vous devez vous débarrasser du produit de la manière appropriée. Ne jetez pas ce produit avec vos ordures ménagères. En vous débarrassant correctement d u p r o d u i t , vo u s p r év i e n d r e z l e s d o m m a g e s environnementaux et les risques sanitaires. La méthode correcte d'élimination dépendra de votre lieu d’habitation, aussi veuillez contacter les autorités locales concernées pour les détails. Sélection d’un motif Gate ○ Notice concernant l’élimination du produit (UE seulement) Appuyez sur la touche GATE ARP. Le témoin GATE ARP s’allumera. Si vous utilisez alors le pavé tactile, le KAOSSILATOR activera le motif Gate actuellement sélectionné. ○ Ne placez jamais de récipient contenant du liquide près de l’instrument. Si le liquide se renverse ou coule, il risque de provoquer des dommages, un court-circuit ou une électrocution. Veillez à ne pas laisser tomber des objets métalliques dans le boîtier (trombones, par ex.). Si cela se produit, débranchez l’alimentation de la prise de courant et contactez votre revendeur korg le plus proche ou la surface où vous avez acheté l’instrument. Utilisation de l’arpégiateur avec fonction Gate ○ Evitez toute intrusion d’objets ou de liquide Vous pouvez contrôler le son en frottant votre doigt sur le pavé tactile ou en tapant dessus. Les paramètres contrôlés par les axes X axis et Y sont indiqués dans PROGRAM LIST. Toucher les bords extrêmes ne contrôlera pas le son. ○ Après avoir lu ce manuel, veuillez le conser ver soigneusement pour toute référence ultérieure. Fonctionnement du pavé tactile ○ Conservez ce manuel Tournez le bouton PROGRAM/VALUE pour sélectionner un des 100 programmes, de *.00 à *.99 (* indique la catégorie). ○ Lorsque l’instrument se salit, nettoyez-le avec un chiffon propre et sec. Ne vous servez pas d’agents de nettoyage liquides tels que du benzène ou du diluant, voire des produits inflammables. Sélection d’un programme ○ Entretien Le bouton VOLUME affecte seulement le volume du casque. Le bouton VOLUME n’affectera pas le volume de LINE OUT. ○ Pour éviter de les endommager, manipulez les commandes et les boutons de cet instrument avec soin. Bouton VOLUME ○ Maniement Fonctionnement Une fois que vous aurez enregistré une phrase, vous pourrez jouer en même temps ou ajouter à la phrase enregistrée une autre couche. Une fois obtenue une phrase multicouches satisfaisante, vous pourrez la sauvegarder. De cette façon, si vous ajoutez des couches supplémentaires que vous n’aimez pas, vous pourrez revenir en arrière et recommencer à partir de cette dernière version sauvegardée. 1. Si vous maintenez la touche LOOP REC/PLAY enfoncée pendant une certaine période de temps après l’enregistre] (arrêt) ou [ ] (reproduction : ment des phrases, [ les chiffres indiquent la position du battement) sera affiché. 2. Continuez à maintenir la pression sur la touche LOOP REC/PLAY et tournez le bouton PROGRAM/VALUE de telle ] (fixé) apparaisse sur l’afficheur. façon que [ Lorsque vous relâchez la pression sur la touche LOOP REC/ PLAY, les phrase/couches enregistrées sont sauvegardées. 3. Appuyez et maintenez la pression sur la touche LOOP REC/PLAY pour commencer l’enregistrement en ajoutant de nouvelles couches. 4. Si vous n’aimez pas les nouvelles phrases, continuez à maintenir la touche LOOP REC/PLAY enfoncée et tournez ] (anle bouton PROGRAM/VALUE de telle façon que [ nuler) apparaisse sur l’afficheur. Quand vous relâcherez la touche LOOP REC/PLAY, seules les phrases nouvellement enregistrées seront effacées. 5. Si vous souhaitez mélanger les phrases nouvellement enregistrées avec les phrases sauvegardées, continuez à maintenir la pression sur la touche LOOP REC/PLAY et tournez ] aple bouton PROGRAM/VALUE de telle façon que [ paraisse sur l’afficheur. Quand vous relâcherez la touche LOOP REC/PLAY, les phrases nouvellement enregistrées seront mélangées avec les phrases sauvegardées. 6. Pour effacer toutes les phrases et les couches enregistrées, continuez à maintenir la touche LOOP REC/PLAY enfoncée et tournez le bouton PROGRAM/VALUE de telle fa] (effacer) apparaisse sur l’afficheur. Quand çon que [ vous relâcherez la touche LOOP REC/PLAY, toutes les phrases, y compris celles sauvegardées, seront complètement effacées. L’afficheur clignote et le témoin LOOP STATUS s’allume en orange pendant l’exécution de chaque processus. Si l’appareil est mis hors tension, toutes les phrases, y compris celles sauvegardées, seront complètement effacées. ○ Les postes de radio et de télévision situés à proximité peuvent par conséquent souffrir d’interférences à la réception. Veuillez dès lors faire fonctionner cet appareil à une distance raisonnable de postes de radio et de télévision. Témoin GATE ARP Enregistrement fractionné de phrases (surimpression) ○ Interférences avec d’autres appareils électriques Commutateur ON/STANDBY Mise hors tension ○ Branchez l’adaptateur secteur fourni à une prise secteur de tension appropriée. Evitez de brancher l’adaptateur à une prise de courant dont la tension ne correspond pas à celle pour laquelle l’appareil est conçu. Témoin LOOP STATUS Afficheur Réglez le commutateur ON/STANDBY sur la position ON. Vorsichtsmaßnahmen ○ Alimentation Mise sous tension ○ L’utilisation de cet instrument dans les endroits suivants peut en entraîner le mauvais fonctionnement. • En plein soleil • Endroits très chauds ou très humides • Endroits sales ou fort poussiéreux • Endroits soumis à de fortes vibrations • A proximité de champs magnétiques ○ Emplacement production continuera, mais l’enregistrement s’arrêtera. 3. Si vous appuyez sur la touche LOOP REC/PLAY pendant la reproduction en boucle, le témoin LOOP STATUS s’éteindra et la reproduction s’arrêtera. 4. Si vous appuyez sur la touche LOOP REC/PLAY pendant que la lecture est arrêtée, le témoin LOOP STATUS s’allumera en vert et la reproduction de la phrase enregistrée commencera. ○ Mise sous/hors tension ○ Précautions Das Display zeigt „Lo" an, wenn die Batterien schwach werden. Bitte ersetzen Sie die Batterien in diesem Fall so schnell wie möglich. Die mitgelieferten Batterien dienen zur Prüfung der KAOSSILATOR-Funktionen und können eine kürzere Lebensdauer als normale Batterien haben. Wenn die Batterien unbrauchbar werden, müssen sie sofort entnommen werden. Sie sollten die Batterien auch entfernen, wenn Sie das Gerät voraussichtlich längere Zeit nicht brauchen. 1. Stellen Sie den ON/ S TA N D B Y- S c h a l t e r a u f STANDBY. Auswählen der Tonart (Grundton/Oktave) ○ ○ ○ ○ ○ ○ ○ ○ ○ ○ ○ ○ ○ ○ ○ ○ ○ ○ ○ ○ ○ ○ ○ ○ ○ ○ ○ ○ ○ ○ ○ ○ ○ ○ ○ ○ ○ ○ ○ ○ ○ ○ ○ ○ ○ ○ ○ ○ ○ ○ ○ ○ ○ ○ ○ ○ ○ ○ ○ ○ ○ ○ ○ ○ ○ ○ ○ ○ ○ ○ ○ ○ ○ ○ ○ ○ ○ ○ ○ ○ ○ ○ ○ ○ ○ ○ ○ ○ ○ ○ ○ 1. Betätigen Sie bei gedrückt gehaltener LOOP REC/PLAYTaste die TAP-Taste. Das Display zeigt die aktuelle Phrasenlänge für Aufnahme und Wiedergabe an. [ ] =1/16, [ ] =1/8, [ ] =1/4, [ ] =1/2 ] =1, [ ] =2, [ ] =4, [ ] =8 [ 2. Drehen Sie am PROGRAM/VALUE-Knopf, um die Phrasenlänge für Aufnahme und Wiedergabe einzustellen. 3. Wenn Sie die TAP-Taste bei gedrückter LOOP REC/PLAYTaste erneut betätigen, schaltet der KAOSSILATOR vom Längeneinstellmodus wieder in den Programmauswahlmodus zurück. Auch wenn fünfzehn Sekunden lang keine weitere Bedienung erfolgt, schaltet der KAOSSILATOR von selbst wieder auf Programmauswahl. Bei einer BPM-Einstellung zwischen 20 und 37.5 ist die tatsächliche Länge für Aufnahme und Wiedergabe 1/4 der angezeigten Länge. Bei einer BPM-Einstellung zwischen 37,5 und 75.0 ist die tatsächliche Länge für Aufnahme und Wiedergabe 1/2 der angezeigten Länge. Nach dem Ausschalten wird wieder der Standardwert [ ] vorgegeben. Technische Daten ○ ○ ○ ○ ○ ○ ○ ○ ○ ○ ○ ○ ○ ○ ○ ○ L I N E O U T- B u c h s e n ( R C A Buchsen), PHONES-Buchse (Stereo-Miniklinkenbuchse) vier Alkali-Mignonzellen (AA, LR6) (6V) Stromversorgung: Batterielebensdauer: ca. fünf Stunden (mit Alkalibatterien) 106 mm (B) x 129 mm (T) x 29 mm (H) Abmessungen: Gewicht: 163 g (ohne Batterien) Lieferumfang: Bedienungsanleitung, Parameterblatt, vier „Test“-Mignonzellen Optionen (getrennt erhältlich): Netzteil ( ○ Anschlüsse: ○ ○ ○ ○ ○ ○ ○ ○ Der KAOSSILATOR kann Phrasen und Muster, die Sie auf dem Touch-Pad spielen, mit der Loop-Funktion aufnehmen und wiedergeben. Während der Wiedergabe können Sie dazuspielen. Sie können sogar ein weiteres Layer zu einer LoopAufzeichnung hinzufügen. Dieser Vorgang lässt sich wiederholen, um neue Layer hinzuzufügen. Phrasen können bis zu 8 Taktschläge (2 Takte bei 4/4) lang sein. ○ Aufnehmen einer Phrase (Loop) ○ ○ 1. Drücken Sie die TAP-Taste. Die aktuelle BPM-Einstellung wird angezeigt. 2. Manuelle Einstellung: Stellen Sie, während der BPM-Wert angezeigt wird, das gewünschte Tempo mit dem PROGRAM/ VALUE-Knopf ein. 3. Tempovorgabe: Klopfen Sie die TAP-Taste im Songtempo mehrmals an. Das erfasste Tempo wird als BPM-Wert eingesetzt. 4. Wenn Sie die TAP-Taste länger gedrückt halten, schaltet der KAOSSILATOR wieder in den Programmauswahlmodus. Auch wenn fünf Sekunden lang keine Bedienung erfolgt, schaltet der KAOSSILATOR von selbst wieder auf Programmauswahl. Nach dem Ausschalten wird wieder der Standardwert [120] vorgegeben. ○ Festlegen des Tempos (BPM) ○ ○ 1. Betätigen Sie bei gedrückt gehaltener SCALE-Taste die TAPTaste. Die aktuelle Tonart wird auf dem Display angezeigt. C4=[ ], C#4=[ ], C3=[ ], C5=[ ] 2. Drehen Sie am PROGRAM/VALUE-Knopf, um eine Tonart zu wählen. 3. Wenn Sie, während das Display noch die Tonart-Auswahlfunktion anzeigt, die TAP-Taste bei gedrückter SCALE-Taste erneut betätigen, schaltet der KAOSSILATOR wieder in den Programmauswahlmodus. Auch wenn fünf Sekunden lang keine Bedienung erfolgt, schaltet der KAOSSILATOR von selbst wieder auf Programmauswahl. Bei gewissen Programmen kann die Wahl einer Tonart zur Folge haben, dass Rauschen auftritt oder kein Ton erzeugt wird. Nach dem Ausschalten wird wieder der Standardwert ] vorgegeben. [ Einstellen der Länge jeder Phrase ○ 1. Drücken Sie die SCALE-Taste. Die Abkürzung der gegenwärtig gewählten Tonleiter wird auf dem Display angezeigt. 2. Drehen Sie am PROGRAM/VALUE-Knopf, um eine Tonleiter zu wählen. 3. Wenn Sie die SCALE-Taste ein weiteres Mal drücken, schaltet der KAOSSILATOR wieder in den Programmauswahlmodus. Auch wenn fünf Sekunden lang keine Bedienung erfolgt, schaltet der KAOSSILATOR von selbst wieder auf Programmauswahl. SCALE kann auf gewisse Programme nicht angewendet werden—Einzelheiten siehe PROGRAMMLISTE. Nach dem Ausschalten wird wieder der Standardwert [ ] (Ionisch) vorgegeben. Wenn Sie während der Wiedergabe bei gedrückt gehaltener LOOP REC/PLAY-Taste die SCALE-Taste betätigen, werden die Elemente gelöscht, die beim Drücken der SCALE-Taste gerade wiedergegeben wurden. Während dieses Vorgangs erscheint [ ] (Löschen: numerischer Wert = Taktschlagposition) im Display. Sie können außerdem während der Wiedergabe der aufgenommenen Phrase bei gedrückter LOOP REC/PLAY-Taste die SCALE-Taste betätigen, um die zuvor aufgenommenen Phrasen zu löschen durch neue Phrasen zu ersetzen. [ ] erscheint im Display. Gespeicherte Phrasen werden bei den oben angeführten Vorgängen nicht gelöscht. ○ Auswählen der Tonleiter Löschen von Elementen aufgenommener Phrasen ○ 1.Halten Sie die GATE ARP-Taste gedrückt. Die Nummer [ ] des gegenwärtig gewählten Musters wird auf dem Display angezeigt. 2. Drehen Sie am PROGRAM/VALUE-Knopf, um eines der Gate-Arpeggiator-Muster von G.00 bis G.49 zu wählen. 3. Wenn Sie die GATE ARP-Taste länger gedrückt halten, schaltet der KAOSSILATOR wieder in den Programmauswahlmodus. Auch wenn fünf Sekunden lang keine Bedienung erfolgt, schaltet der KAOSSILATOR von selbst wieder auf Programmauswahl. ARP kann auf gewisse Programme nicht angewendet werden—Einzelheiten siehe PROGRAMMLISTE. Nach dem Ausschalten wird wieder der Standardwert [ ] vorgegeben. ○ Auswählen eines Gate-Arpeggiator-Musters ○ Drücken Sie die GATE ARP-Taste. Die GATE ARP-Anzeige leuchtet zur Bestätigung auf. Wenn Sie nun das Touch-Pad berühren, verarbeitet der KAOSSILATOR den Sound gemäß dem gegenwärtig gewählten Gate-Arpeggiator-Muster. ○ Verwendung des Gate-Arpeggiators ○ Sie können den Sound durch Reiben (oder Klopfen) mit dem Finger auf dem Touch-Pad steuern. Die entlang der Achsen X und Y steuerbaren Parameter sind in der PROGRAMMLISTE aufgeführt. Berührungen ganz am Rand haben keinen Einfluss auf den Sound. ○ Bedienung des Touch-Pads ○ Drehen Sie zum Auswählen eines der 100 Programme von *.00 bis .99* (* bezeichnet die Kategorie) den PROGRAM/ VALUE-Knopf. ○ Auswählen eines Programms ○ Der VOLUME-Regler wirkt nur auf die Kopfhörerlautstärke. Die LINE OUT-Lautstärke ändert sich beim Verstellen des VOLUME-Reglers nicht. ○ Lautstärkeregler ○ Betrieb Sie können zu einer aufgenommenen Phrase dazuspielen und eine weitere Phrase (Layer) auf die bereits aufgezeichnete legen (Overdubbing). Sobald die gewünschte Layer-Struktur vorliegt, können Sie sie speichern. Auf diese Weise können Sie, wenn Ihnen ein neues Layer nicht gefällt, wieder bei der gespeicherten Version weitermachen. 1. Wenn Sie nach Aufnehmen der Phrasen die LOOP REC/ PLAY-Taste längere Zeit gedrückt halten, wird [ ] (gestoppt) ] (Wiedergabe: numerischer Wert = Taktschlagoder [ position) angezeigt. 2. Halten Sie die LOOP REC/PLAY-Taste weiter gedrückt und drehen Sie am PROGRAM/VALUE-Knopf, bis [ ] (FIX = festhalten) im Display erscheint. Beim Loslassen der LOOP REC/PLAY-Taste wird die aufgenommene Phrase/Layer-Struktur gespeichert. 3. Halten Sie die LOOP REC/PLAY-Taste gedrückt, um die Aufnahme für ein neues Layer zu starten.. 4. Sollten Ihnen neue Phrasen nicht gefallen, halten Sie die LOOP REC/PLAY-Taste weiter gedrückt und drehen Sie am PROGRAM/VALUE-Knopf, bis [ ] (Can = abbrechen) im Display erscheint. Beim Loslassen der LOOP REC/PLAY-Taste werden nur die neu aufgenommenen Phrasen gelöscht. 5. Wenn Sie die neu aufgenommenen Phrasen auf die gespeicherten legen möchten, halten Sie die LOOP REC/PLAYTaste weiter gedrückt und drehen Sie am PROGRAM/VALUEKnopf, bis [ ] im Display erscheint. Beim Loslassen der LOOP REC/PLAY-Taste werden die neu aufgenommenen Phrasen mit den gespeicherten gemischt. 6. Zum Löschen aller aufgezeichneten Phrasen und Layer halten Sie die LOOP REC/PLAY-Taste weiter gedrückt und drehen Sie am PROGRAM/VALUE-Knopf, bis [ ] (Clr = löschen) im Display erscheint. Beim Loslassen der LOOP REC/ PLAY-Taste werden alle Phrasen einschließlich der gespeicherten komplett gelöscht. Beim Ausführen eines Vorgangs blinkt das Display, und die LOOP STATUS-Anzeige leuchtet orange. Beim Ausschalten werden alle Phrasen einschließlich der gespeicherten Phrasen gelöscht. ○ Stellen Sie den ON/STANDBY-Schalter auf STANDBY. Wenn Sie den KAOSSILATOR mit Batteriestrom betreiben, vergessen Sie nicht, das Gerät nach der Verwendung auszuschalten. Hinzufügen weiterer Layer zu aufgezeichneten Phrasen (Overdubbing) ○ Ausschalten des Geräts ○ Stellen Sie den ON/STANDBY-Schalter auf ON. ○ Einschalten des Geräts ○ Ein- und Ausschalten 1. Halten Sie die LOOP REC/PLAY-Taste gedrückt. Die LOOP STATUS-Anzeige leuchtet rot, und Sie können die Aufnahme durch Spielen auf dem Touch-Pad starten. 2. Beim Loslassen der LOOP REC/PLAY-Taste leuchtet die LOOP STATUS-Anzeige grün. Die Wiedergabe wird fortgesetzt, die Aufnahme stoppt jedoch. 3. Wenn Sie die LOOP REC/PLAY-Taste während der LoopWiedergabe drücken, erlischt die LOOP STATUS-Anzeige, und die Wiedergabe stoppt. 4. Wenn Sie die LOOP REC/PLAY-Taste bei gestoppter Wiedergabe drücken, leuchtet die LOOP STATUS-Anzeige grün, und die aufgenommene Phrase wird wiedergegeben. ○ 2. Schieben Sie den Batteriefachdeckel an der Unterseite in die Richtung des Pfeils zum Öffnen ab. 3. Setzen Sie vier Mignonzellen (AA, LR6 - ausschließlich Alkalibatterien verwenden) ein. Stellen Sie sicher, dass die Batterien mit richtiger Polung (+, -) eingesetzt werden. 4. Schließen Sie den Batteriefachdeckel.