1
ANLEITUNG FÜR EINBAU, BEDIENUNG UND WARTUNG
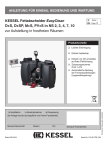
KESSEL Fettabscheider EasyClean
D+S, D+SP, M+S, PV+S in NS 2, 3, 4, 7, 10
zur Aufstellung in frostfreien Räumen
D
Seite 1
GB Page 73
Produktvorteile
Leichte Einbringung
Einfach bedienbar
o Installation
o Inbetriebnahme
o Einweisung
der Anlage wurde durchgeführt von Ihrem Fachbetrieb:
Name/UnterschriftDatumOrt
Stand 2014/05
Stempel Fachbetrieb
Technische Änderungen vorbehalten
Einfach vor Ort umrüstbar
auf linke Fließrichtung
Zulassungsnummer
Z-54.1-474
Sach-Nr. 010-917DE_EN

Inhaltsverzeichnis
1Einleitung
5
1.1
Produktbeschreibung, allgemein....................................................................................... 5
1.2
Anlagentypen C D E F....................................................................................................... 5
1.3Typenschild........................................................................................................................ 6
1.4Lieferumfang...................................................................................................................... 7
1.5
Allgemeine Hinweise zu dieser Betriebs- und Wartungsanleitung..................................... 7
1.6
Baugruppen und Funktionsmerkmale................................................................................ 8
1.6.1Schaltgerät......................................................................................................................... 10
2Sicherheit
13
2.1
Bestimmungsgemäße Verwendung................................................................................... 13
2.2
Personalauswahl und -qualifikation................................................................................... 13
2.3
Organisatorische Sicherheits-Maßnahmen....................................................................... 13
2.4
Gefahren, die vom Produkt ausgehen............................................................................... 14
2.4.1 Gefahr durch elektrischen Strom und Kabel...................................................................... 14
2.4.2 Gefahr durch Hitzeentwicklung an der/den Pumpe/n........................................................ 14
2.4.3 Rutschgefahr beim Entleeren der Anlage.......................................................................... 14
2.4.4 Infektionsgefahr bei Kontakt mit dem Abwasser................................................................ 14
3Montage
3.1
15
Empfehlungen zum Aufstellort / Betrieb............................................................................. 15
3.2Einbauvorschlag................................................................................................................ 15
3.3
Fettabscheideranlage aufstellen / montieren..................................................................... 16
3.3.1 Zu- und Ablauf montieren.................................................................................................. 16
3.3.2 Schauglas montieren......................................................................................................... 17
3.3.3 DirektEntleerungsrohr montieren - C D............................................................................. 18
3.3.4 Pumpe montieren.............................................................................................................. 18
3.3.5 Mechanisches Zwei-Wege-Ventil montieren - E................................................................ 19
3.3.6 Elektrisches Zwei-Wege-Ventil montieren - F.................................................................... 20
3.3.7 DirektEntleerungsrohr montieren - E F.............................................................................. 20
3.3.8 Druckrohr montieren - C D................................................................................................. 21
3.3.9 Druckrohr montieren - E F................................................................................................. 22
3.3.10 Fülleinrichtung montieren.................................................................................................. 23
3.3.11 Schraubventil montieren - E.............................................................................................. 24
3.3.12 Magnetventile montieren - F.............................................................................................. 24
3.3.13SonicControl Sensor montieren (Option) - F..................................................................... 25
2 / 144
V 1.0

3.3.14 Fernbedienung montieren - F............................................................................................ 26
3.4
Schaltgerät montieren und initialisieren ............................................................................ 27
3.4.1 Schaltgerät für Anlagentyp D............................................................................................. 27
3.4.2 Schaltgerät für Anlagentyp E............................................................................................. 30
3.4.3 Schaltgerät für Anlagentyp F............................................................................................. 33
3.5
Erstbefüllung und Druckprüfung........................................................................................ 36
3.5.1 Funktionskontrolle Anlagentyp C....................................................................................... 36
3.5.2 Funktionskontrolle Anlagentyp D....................................................................................... 37
3.5.3 Funktionskontrolle Anlagentyp E....................................................................................... 38
3.5.4 Funktionskontrolle Anlagentyp F........................................................................................ 39
4Betrieb
41
4.1
Einschalten Anlagentyp C.................................................................................................. 41
4.2
Einschalten Anlagentyp D.................................................................................................. 41
4.3
Einschalten Anlagentyp E.................................................................................................. 42
4.4
Einschalten Anlagentyp F.................................................................................................. 42
5
Entleerung durchführen
5.1
Entleerung Anlagentyp C................................................................................................... 44
5.2
Entleerung Anlagentyp D................................................................................................... 45
5.3
Entleerung Anlagentyp E................................................................................................... 46
5.4
Entleerung Anlagentyp F................................................................................................... 48
6
Einstellungen, Bedienmenü
6.1
Anlagentyp D..................................................................................................................... 50
6.2
Anlagentyp E..................................................................................................................... 52
6.3
Anlagentyp F...................................................................................................................... 53
7
Technische Daten
7.1
Allgemeine technische Daten / Anschlusswerte................................................................ 58
43
50
58
7.2Drehmomente.................................................................................................................... 58
7.3
Voraussetzungen / Berechnungsgrundlagen..................................................................... 58
7.4Anschlussverbindungen..................................................................................................... 59
7.5
Maßzeichnung und Gewichtstabelle.................................................................................. 60
7.6
Einstellungen (Entleerungszeiten)..................................................................................... 61
8Wartung
62
8.1Wartungsintervalle............................................................................................................. 62
8.2
Wartung SonicControl durchführen (Option)...................................................................... 62
8.3Fehlersuche....................................................................................................................... 63
8.4
V 1.0
Fettabscheider reinigen..................................................................................................... 65
3 / 144

9
Anlagenpass / Werksabnahme
66
10Gewährleistung
67
11
68
Generalinspektion / Wartungsanforderung
1Notizen
69
12DOP
70
4 / 144
V 1.0
Einleitung
1
Einleitung
Sehr geehrte Kundin
sehr geehrter Kunde,
wir freuen uns, dass Sie sich für den Erwerb eines unserer Produkte entschieden haben. Sicher wird dieses Ihre
Anforderungen in vollem Umfang erfüllen. Wir wünschen ihnen einen reibungslosen und erfolgreichen Einbau.
Im Bemühen unseren Qualitätsstandard auf höchstmöglichem Niveau zu halten, sind wir natürlich auch auf Ihre
Mithilfe angewiesen. Bitte teilen Sie uns Möglichkeiten zur Verbesserung unserer Produkte mit.
Haben Sie Fragen? Wir freuen uns auf Ihre Kontaktaufnahme.
1.1
Produktbeschreibung, allgemein
Die Fettabscheideranlage ist gemäß EN 1825 konzipiert. Das Abscheidegut kann jederzeit und bei laufendem
Betrieb abgesaugt / abgepumpt werden. Je nach Ausführung ist die Fettabscheideranlage mit einer elektrischen
Anlagensteuerung und Pumpe sowie verschiedenen Regelventilen ausgerüstet. Ein Schauglas ermöglicht die
Sichtkontrolle des im Anlagenbehälter angesammelten Fettes.
1.2
Anlagentypen C D E F
Die Fettabscheideranlage wird in diesen Ausführungen hergestellt:
2 Magnetventile
EasyClean M+S Mix & Pump
„D+S-P“
EasyClean PV+S Auto Mix & Pump
„PV+S“
„M+S“
x
x
5 / 144
x
x
x
x*
x
x
x
x
x*
x
x
x
Zwei-Wege-Ventil, manuell
RemoteControl**
x
Zwei-Wege-Ventil, elektrisch
Schauglas
E
EasyClean D+SP Auto Mix
* Optional
** Kabelgebundene Fernbedienung
V 1.0
Fülleinrichtung
EasyClean D+S Mix
F
DirektEntleerungsrohr
Schaltgerät Typ
Anlagentyp
(Kennung für Montage)
C
D
x
Anlagenbezeichnung
x
Einleitung
1.3
Typenschild
Informationen auf dem Typenschild Fettabscheideranlage
10 Revisionsstand der Hardware
52 Materialbezeichnung
53 Materialnummer
52
55 Norm
53
80
79
Bahnhofstraße 31
D-85101 Lenting
56 Freitext / Erklärung
10
78
57 Freitext / Erklärung
55
77
58 Freitext / Erklärung
56
76
59 Freitext / Erklärung
57
58
75 Freitext / Erklärung
75
Made in Germany
76 Werkstoff
59
Abb. [1] 77 Zulassung
78 Bruttogewicht
79 Fertigungsdatum
80 Auftragsnummer
Informationen auf dem Typenschild Steuergerät
1
2
3
4
5
6
7
8
9
10
11
12
1
Bezeichnung des Schaltgerätes
2
Material-Nummer des Schaltgerätes
Anschlussspannung und Anschlussfrequenz
Stromaufnahmebereich
3
4
Schutzart (IP)
Bahnhofstraße 31
D-85101 Lenting
FA PV 400
7
363-232 (363-412)
Ue: 400 VAC - 50 Hz
Ie: 6,3 - 10,0 A
IP 54
5
Seriennummer des Schaltgerätes
8
10
Ersatzteilnummer des Schaltgerätes
9
11
Schutzklasse I - Schutzerdung
6
Gefahrenzeichen (elektr. Schaltgerät)
CE Kennzeichnung
SerNr. XXXX
RevStd. X.X
12
SachNr. 363-310
Problemstoff Elektrogerät - Entleerung nicht über den
Hausmüll!
Abb. [2] Revisionsstand der Hardware
6 / 144
V 1.0
Einleitung
1.4
Lieferumfang
–– Fettabscheideranlage (siehe 1.6)
–– Betriebs- und Wartungsanleitung
1.5
Allgemeine Hinweise zu dieser Betriebs- und Wartungsanleitung
Verwendete Symbole und Legenden
<1>
[2]
•
3.
–
Kursiv
Hinweis im Text auf eine Legendennummer in einer Abbildung
Bezug auf eine Abbildung
Arbeitsschritt
Arbeitsschritt in nummerierter Reihenfolge
Aufzählung
Kursive Schriftdarstellung: Bezug zu einem Abschnitt / Punkt im Steuerungs-Menü
VORSICHT: Warnt vor einer Gefährdung von Personen und Material. Eine Missachtung
der mit diesem Symbol gekennzeichneten Hinweise kann schwere Verletzungen und
Materialschäden zur Folge haben.
Hinweis: Technische Hinweise, die besonders beachtet werden müssen.
Um die Lesbarkeit der Beschreibungen zur Bedienung der Schaltgeräte nicht unnötig zu beeinträchtigen,
wurde darauf verzichtet, Details zu beschreiben, die im Umgang mit einer Menüsteuerung als gängig und
selbstverständlich betrachtet werden können.
Soll z.B. eine Rubrik wie Wartung ausgewählt werden, ist anstelle von
Pfeiltaste unten betätigen => Eintrag Wartung auswählen =>Taste OK betätigen
die Aufforderung „Wartung auswählen“ zu lesen.
V 1.0
7 / 144
Einleitung
1.6
Baugruppen und Funktionsmerkmale
Abbildung zeigt Anlagentyp F
17
30
28
13
16
11
35
22
18
27
26
24
Abb. [3] 11 Schauglas
13 Typenschild
16 Zulauf*
17 Fülleinrichtung
18 DirektEntleerungsrohr
22 Druckrohr
24 Pumpe (Reinigen und Schreddern)
26 Umschaltventil
27 Stellmotor Umschaltventil (Anlagentyp F)
28 Schaltgerät (Anlagentyp D E F)
30 Revisionsdeckel
35 Ablauf*
* Zu- und Ablauf können gegenseitig getauscht werden
8 / 144
V 1.0
Einleitung
Abbildungen der Anlagentypen (C D E)
E
D
C
Abb. [4] V 1.0
9 / 144
Einleitung
1.6.1 Schaltgerät
1.6.1.1 Schaltgerät „M+S“ für Anlagentyp E
C D E F
Fettabscheider/Greas Seperator “M“
64
LED
Betriebsbereit
70
Start / Stop
Entleerungsbetrieb Start / Stop
69
71
73
LED
Alarm
LED
64
Alarm LED
69
71
Quittierung des akustischen Alarms
73
Pumpenlauf-LED
70
Abb. [5] 10 / 144
V 1.0
Einleitung
1.6.1.2 Schaltgerät „PV+S“ für Anlagentyp F
C D E F
Allgemeines
Die Menüsteuerung verfügt über einen Bedien- und einen Standbymodus.
Erfolgt über einen Zeitraum von ca. 60 Sekunden keine Betätigung einer der Tasten, wird automatisch der
Standbymodus aktiviert, die Hintergrundbeleuchtung des Displays ist dann ausgeschaltet.
Bedienung, Funktionstasten
64
66
67
68
69
70
71
72
73
LED
Pfeil oben
Pfeil unten
ESC
LED
Start / Stop
Alarm
OK
LED
Betriebsbereit
Fettabscheider/Grease Seperator „PV“
Blättern im Menü
64
Blättern im Menü
Löschen einer Eingabe, zurück
Alarm LED
69
71
66
73
Entleerungsbetrieb Start / Stop
70
Quittierung des akustischen Alarms
Bestätigen einer Eingabe, nächste Ebene
Pumpenlauf-LED
68
67
72
Abb. [6] V 1.0
11 / 144
Einleitung
Displayanzeige
74
75
74
Nummer des Menüs
75
Name des Menüs
Abb. [7] 12 / 144
V 1.0
Sicherheit
2
Sicherheit
2.1
Bestimmungsgemäße Verwendung
Die Fettabscheideranlage ist ausschließlich dafür vorgesehen das Abwasser von Abscheidegut und Fett zu
befreien.
Ein Einsatz der Anlage in explosionsgefährdeter Umgebung ist unzulässig.
Alle nicht durch eine ausdrückliche und schriftliche Freigabe des Herstellers erfolgten
–– Um- oder Anbauten
–– Verwendungen von nicht originalen Ersatzteilen
–– Durchführungen von Reparaturen durch nicht vom Hersteller autorisierten Betrieben oder Personen
können zum Verlust der Gewährleistung führen.
Nachträgliche Erweiterungen von Kessel- Fettabscheideranlagen müssen durch den Kessel-Werkskundendienst
abgewickelt werden.
2.2
Personalauswahl und -qualifikation
Personen, die Fettabscheideranlage bedienen und/oder montieren, müssen
–– mindestens 18 Jahre alt sein.
–– für die jeweiligen Tätigkeiten ausreichend geschult sein.
–– die einschlägigen technischen Regeln und Sicherheitsvorschriften kennen und befolgen.
Der Betreiber entscheidet über die erforderlichen Qualifikationen für das
–– Bedienpersonal
–– Wartungspersonal
–– Instandhaltungspersonal
Der Betreiber hat dafür Sorge zu tragen, dass nur qualifiziertes Personal am Fettabscheider tätig wird.
Qualifiziertes Personal sind Personen, die durch ihre Ausbildung und Erfahrung sowie ihrer Kenntnisse
einschlägiger Bestimmungen, gültiger Normen und Unfallverhütungsvorschriften die jeweils erforderlichen
Tätigkeiten ausführen und dabei mögliche Gefahren erkennen und vermeiden können.
Arbeiten an elektrischen Bauteilen dürfen nur von dafür ausgebildetem Fachpersonal und unter Einhaltung aller
geltenden Regelungen der Unfallverhütungsvorschriften (UVVen) vorgenommen werden.
2.3
Organisatorische Sicherheits-Maßnahmen
Die Betriebs- und Wartungsanleitung ist stets an der Fettabscheideranlage verfügbar zu halten.
V 1.0
13 / 144
Sicherheit
2.4
Gefahren, die vom Produkt ausgehen
2.4.1 Gefahr durch elektrischen Strom und Kabel
Alle spannungsführenden Bauteile sind gegen unbeabsichtigte Berührung sowie Spritzwasser aus allen
Richtungen (IP 54) geschützt. Vor einem Öffnen von Gehäuseabdeckungen, Steckern und Kabeln sind
diese spannungsfrei zu machen. Arbeiten an elektrischen Bauteilen dürfen nur von Fachpersonal (Siehe 2.2)
durchgeführt werden.
Die elektrischen Komponenten der Fettabscheideranlage sind nicht gegen Überflutung gesichert. Für
alle elektrischen Arbeiten an der Anlage gilt die VDE 0100. Die Anlage muss über eine FehlerstromSchutzeinrichtung (RCD) mit einem Bemessungsfehlerstrom von ≤ 30mA versorgt werden. Das Schaltgerät
steht unter Spannung und darf nicht geöffnet werden. Nur Elektrofachkräfte dürfen Arbeiten an den
elektrischen Einrichtungen durch - führen. Der Begriff Elektrofachkraft ist in der VDE 0105 definiert.
2.4.2 Gefahr durch Hitzeentwicklung an der/den Pumpe/n
Laufen die Antriebsmotoren der Pumpen über einen längeren Zeitraum, können Temperaturen von über 70° C
entstehen. Beim Berühren besteht die Gefahr von Verbrennungen.
2.4.3 Rutschgefahr beim Entleeren der Anlage
Bei Reinigungsarbeiten kann fetthaltige Flüssigkeit und/oder Fett den Boden benetzen. Dadurch besteht
Rutschgefahr. Ausgetretene Flüssigkeit und/oder Fett unmittelbar beseitigen und geeignetes Schuhwerk
tragen.
2.4.4 Infektionsgefahr bei Kontakt mit dem Abwasser
Das Abwasser enthält Bakterien. Bei Kontakt mit Schleimhäuten, Augen, Wunden oder bei einer Aufnahme
in den Körper besteht Infektionsgefahr. Mit Abwasser in Berührung gekommene Körperteile sofort reinigen,
verunreinigte Kleidung wechseln. Persönliche Schutzausrüstung tragen.
14 / 144
V 1.0
Montage
3
Montage
3.1
Empfehlungen zum Aufstellort / Betrieb
–– Raum mit guter Belüftung oder/und Ventilation sowie ebener und ausreichend tragfähiger Aufstellfläche.
–– Raumtemperatur mindestens 15° C.
–– Abgedichteter Bodenbelag mit integrierter Ablaufstelle.
–– Warm- und Kaltwasseranschluss
–– Raumhöhe mindestens 60 cm höher als die Fettabscheideranlage, damit bei Reinigungsarbeiten die
Revisionsdeckel geöffnet werden können.
–– Freier Arbeitsraum, mindestens 1 m, vor der Fettabscheideranlage.
–– Zulauf mit Beruhigungsstrecke von min. 1 m (Gefälle 1:50). Übergang bauseitiges Fallrohr zur
Beruhigungsstrecke mit 2x 45°-Bögen ausgestattet1.
–– Ist die Zulaufleitung länger als 10 m, muss diese separat entlüftet sein.
–– Fremdkörper (Besteck, Kronkorken, Senftüten, Knochen etc.) stören bzw. beschädigen den Abscheidebetrieb,
sowie die Schlammrückführungspumpe (Option). Wir empfehlen den Einbau eines Grobfanges.
3.2
Einbauvorschlag
Abb. [8]
1)
V 1.0
Verringerung der Gefahr des Leersaugens von Siphons und Geruchsverschlüssen. Weniger Lufteintrag und -bewegung
sowie Geruchs- und Schaumbildung im Abscheider.
15 / 144
Montage
3.3
Fettabscheideranlage aufstellen / montieren
Die Fettabscheideranlage ist im befülltem Zustand schwer. Achten Sie auf einen ausreichend tragfähigen
Untergrund (siehe „Technische Daten“, Seite 58).
• Fettabscheideranlage auf ebener und ausreichend tragfähige Fläche aufstellen. Die Anschlüsse für
Zulauf <16> und Ablauf <35> können gegenseitig ausgetauscht werden.
Bohrungen für Anbauteile und Rohrleitungen sind mit einer Bohrglocke anzufertigen. Dort, wo
Durchgangsdichtungen vorgesehen sind, dürfen die Bohrkanten zur Erreichung einer optimalen Abdichtung
nicht entgratet werden. Die Bohrgeschwindigkeit* muss so gewählt werden, dass es nicht zu thermischen
Verformungen der Schnittfläche kommt.
*Empfehlung: 500m/s (Drehzahl Bohrglocke 1.300 U/min bei Ø 120 mm, Ø 120 mm = KESSEL-Art. Nr.:50101)
Drehmomente für die Schraubverbindungen sind im Kapitel 7.2 gelistet. Sicherstellen, dass diese
entsprechend berücksichtigt werden.
Arbeitsreihenfolge für die Montage
Die einzelnen Arbeitsschritte sind den jeweiligen Anlagentypen (C D E F) zugeordnet (siehe Kapitel 1.2).
3.3.1 Zu- und Ablauf montieren
C D E F
55 16
47
• Rohrleitungsverbindungen zur Hausinstallation an Zulauf <16> und
Ablauf <35> herstellen.
Sollen die Anschlüsse gegenseitig getauscht werden, diese jeweils
zusammen mit den Schrauben <55> und Dichtungen <47> demontieren
und entsprechend tauschen. Sicherstellen, dass die Dichtungen
ausreichend gefettet sind.
47
35
55
Abb. [9]
16 / 144
V 1.0
Montage
3.3.2 Schauglas montieren
C D E F
57
11
56
• Vertiefung<B> in der Aufnahme für das Schauglas mittels
Bohrglocke (Ø 162 mm) ausbohren.
• Schauglas <11> zusammen mit der Dichtung <56> mit den
Schrauben <57> befestigen.
Abb. [10]
Bei einem Umbau Dichtung<56> einfetten.
V 1.0
17 / 144
B
Montage
3.3.3 DirektEntleerungsrohr montieren - C D
C D E F
A
34
Zur optimalen Abdichtung die Bohrkanten nicht entgratet.
42
34
42
• Befestigungsschellen <34> an den Aufnahmen <A und B> am
Anlagenbehälter mit den Schrauben <42> montieren.
• Bohrung <C> in der Anbohrfläche erstellen (Bohrglocke, Ø 118 mm).
B
18
C
44
• Durchgangsdichtung <44> in das Bohrloch einsetzen.
Abb. [11]
• DirektEntleerungsrohr <18> in die Durchgangsdichtung
hineinstecken und an den Befestigungsschellen <34> montieren.
• Gewebeschlauch mit 2 Schraubschellen und 10 Nm Drehmoment
auf PE-Rohr DN 70 mit Spiegelwulst verbinden. Falls auf ein
Stahlrohr gegeangen wird mit längskraftschlüssiger Verbindung.
3.3.4 Pumpe montieren
C D E F
Zur optimalen Abdichtung die Bohrkanten nicht entgratet.
• Bohrung <C> in der Anbohrfläche erstellen (Bohrglocke, Ø 118 mm).
• Durchgangsdichtung <40> in das Bohrloch einsetzen.
• Ansaugstutzen für Pumpe <21> in die Durchgangsdichtung
hineinstecken.
21
40
C
Abb. [12]
18 / 144
V 1.0
Montage
• Pumpe <24> auf Schallisolationsmatte <33>positionieren und
mit den Schellen<37> und dem Verbindungsstück <38> mit dem
Ansaugstutzen <21>verbinden.
• Pumpe zusammen mit Schallisolationsmatte mit dem Boden
verschrauben (mitgeliefertes Befestigungsmaterial).
24
Der elektrische Anschluss wird bei der Installation des
Schaltgerätes beschrieben.
33 37 38
Abb. [13]
3.3.5 Mechanisches Zwei-Wege-Ventil montieren - E
C D E F
26
• Ventil <26> mit dem Verbindungsstück <38> und den Schellen <37>
an der Pumpe befestigen.
37
38
37
Abb. [14]
V 1.0
19 / 144
37
21
Montage
3.3.6 Elektrisches Zwei-Wege-Ventil montieren - F
C D E F
41
• Ventil <26> mit dem Verbindungsstück <38> und den Schellen <37>
an der Pumpe befestigen.
• Stellmotor <27> mit den Schrauben <41> auf dem Ventil montieren.
•
27
26
37
38
37
Abb. [15]
3.3.7 DirektEntleerungsrohr montieren - E F
C D E F
A
• Befestigungsschelle <34> an der Aufnahme <A> am
Anlagenbehälter mit der Schraube <42> montieren.
42
• DirektEntleerungsrohr <18> an der Befestigungsschelle <34> lose
befestigen.
34
• DirektEntleerungsrohr <18> mit den Schellen<37> und dem
Verbindungsstück <38> am Ventil befestigen.
• Befestigungsschelle <34> festziehen.
37
Abbildung zeigt elektrisches Zwei-Wege-Ventil
20 / 144
38
37
Abb. [16]
V 1.0
Montage
3.3.8 Druckrohr montieren - C D
C D E F
Das Druckrohr ist je nach Ausführung 2- oder 3-teilig. Der Fettabscheider mit der Nenngröße 10 ist mit zwei
oberen Druckrohren <36> ausgestattet (Y-Stück nach Verbindungsstück <38>).
• Bohrung <C> in der Anbohrfläche erstellen (Bohrglocke, Ø 110 mm).
• Befestigungsschelle <34> an der Aufnahme <A> am
Anlagenbehälter mit der Schraube <42> montieren.
42
• Unteres Druckrohr <22> an der Befestigungsschelle <34> lose
befestigen.
34
22
• Unteres Druckrohr <22> mit den Schellen<37> und dem
Verbindungsstück <38> an der Pumpe befestigen.
37
38
• Befestigungsschelle <34> festziehen.
37
Abb. [17]
37
36
38
• Oberes Druckrohr <36> mit den Schellen<37> und dem
Verbindungsstück <38> am unteren Druckrohr <22>
befestigen und mit der Dichtung <59> am Anlagenbehälter
befestigen.
37
22
Abb. [18]
V 1.0
21 / 144
A
C
Montage
3.3.9 Druckrohr montieren - E F
C D E F
Das Druckrohr ist je nach Ausführung 2- oder 3-teilig. Der Fettabscheider mit der Nenngröße 10 ist mit zwei
Oberen Druckrohren <36> ausgestattet (Y-Stück nach Verbindungsstück <38>).
• Kreisrunde Öffnung <C> am Abscheidebehälter mittels Bohrglocke (Ø 110 mm) erstellen.
• Befestigungsschelle <34> an der Aufnahme <A> am
Anlagenbehälter mit der Schraube <42> montieren.
• Unteres Druckrohr <22> an der Befestigungsschelle <34> lose
befestigen.
42
22
34
A
C
• Unteres Druckrohr <22> mit den Schellen<37> und dem
Verbindungsstück <38> am Ventil befestigen.
• Befestigungsschelle <34> festziehen.
37 38
37
Abb. [19]
22 / 144
V 1.0
Montage
• Oberes Druckrohr <36> mit den Schellen<37> und dem
Verbindungsstück <38> am unteren Druckrohr <22> befestigen und
mit der Dichtung am Anlagenbehälter befestigen.
36
37
38
59
37
22
Abb. [20]
3.3.10 Fülleinrichtung montieren
C D E F
45
Zur optimalen Abdichtung die Bohrkanten nicht entgratet.
B
17
A
• Befestigungsschelle <34> an der Aufnahme <A> am
Anlagenbehälter mit der Schraube <42> montieren.
• Kreisrunde Öfnung <B> in der Aufnahme für die Fülleinrichtung
ausschneiden (Bohrglocke, Ø 70 mm).
• Durchgangsdichtung <45> in das Bohrloch einsetzen.
• Fülleinrichtung <17> in die Durchgangsdichtung <45> stecken und
an der Befestigungsschelle <34> festschrauben.
V 1.0
23 / 144
34 42
Abb. [21]
Montage
3.3.11 Schraubventil montieren - E
C D E F
50
Das Ventil muss waagerecht montiert werden.
• Schraubventil(e) <50> in die Wasser-Zulaufleitung(en) montieren.
Abb. [22]
3.3.12 Magnetventile montieren - F
C D E F
Das Ventil muss waagerecht montiert werden.
51
• Magnetventile <51> wie abgebildet installieren und entsprechend an
die Wasserleitungen (kalt / warm1) anschließen.
Der elektrische Anschluss wird bei der Installation des Schaltgerätes
beschrieben.
Abb. [23]
1)
Warmwasser ist Empfehlung
24 / 144
V 1.0
Montage
3.3.13 SonicControl Sensor montieren (Option) - F
C D E F
43
45
44
42
• Revisionsdeckel über dem Auslaufbauwerk öffnen.
81
• Sensorhalter <44> mit den Schrauben<45> am
Auslaufbauwerk <43> wie abgebildet montieren.
• Sensor <42> an der Halterung befestigen und gegen den
Anschlag <81> drehen.
• Kreisrunde Öffnung <A> erstellen (Ø 19 mm) und mitgelieferte
Kabeldurchführung montieren.
Abb. [24]
A
• Kabel des Sensors durch die Kabeldurchführung <58> führen.
Sicherstellen, dass die Kabeldurchführung fachgerecht montiert und
zugeschraubt ist.
Für Wartungszwecke muss ca. 1 m Kabellänge vorgesehen werden,
damit der Sensor aus dem Anlagenbehälter herausgehoben werden
kann.
• Falls die Fließrichtung geändert wird, muss auch SonicControl
auf die Ablaufseite montiert werden. Hierzu wird der Blindstopfen
auf der Einlaufseite und die Kabelverschraubung A (M16 x 1,5)
auf der Ablaufseite ausgebaut und getauscht.
Abb. [25] unten (25a)
• Revisionsdeckel schließen.
Fettabscheider > NS 10
Behälterwand < = 10 mm
Bohrung ø 14,5 mm
Kabelverschraubung*
58
M16 x 1,5
V 1.0
25 / 144
Sensorkabel
Montage
3.3.14 Fernbedienung montieren - F
C D E F
53
Bediengerät Fernbedienung an gewünschter Position wie folgt
montieren.
• Schrauben <52> mit Dübeln <53> (oder geeigneten
Befestigungsmaterialien) so montieren, dass die
Fernbedienung <54> daran eingehängt werden kann. Im
Lieferumfang ist eine Bohrschablone enthalten.
Der elektrische Anschluss wird bei der Installation des
Schaltgerätes beschrieben.
26 / 144
52
54
Abb. [26]
V 1.0
Montage
3.4
Schaltgerät montieren und initialisieren
3.4.1 Schaltgerät für Anlagentyp D
C D E F
3.4.1.1 Montage des Schaltgeräts „D+S-P“
Montageort so wählen, dass das Typenschild gut lesbar ist (regelmäßige Inspektionen).
• Montageort für das Schaltgerät „D+S-P“ auswählen (Kabellängen Pumpe und Magnetventile berücksichtigen)
Achtung, Gefahr durch elektrischen Strom! Das Schaltgerät darf nur geöffnet werden, wenn der
Netzanschluss getrennt ist.
• Hauptschalter <23> in Position OFF bringen.
• Schrauben <25> lösen.
25
• Gehäuse aufklappen.
23
• Gehäuse am vorgesehenen Ort montieren, dazu alle vier
Befestigungsmöglichkeiten in den Ecken verwenden. Im
Lieferumfang ist eine Bohrschablone enthalten.
Abb. [27]
V 1.0
27 / 144
Montage
3.4.1.2 Elektrische Anschlüsse herstellen
• Anschlüsse gemäß Anschlussplan herstellen (nachstehend und im Gehäusedeckel des Schaltgerätes).
Anschlussplan
OFF ON
gn bl
PE N
T3
2 4 6 NC A2
L3
T2
L2
bl
L1
gnge
T1
or
or
ws
TF1
PE
bl
gn
gr
bl
gn
or
gr
bl
gr
bl
or
gn
gn
1
2
gnge
1
2
gnge
ws
ws
sw
bl
bl
ws
sw
gr
or
bl
gr
bl
bl
bl
ws
or
A
or
or
ws
br
gn
gn
1 2 PE 1
1 2345
or
bl
gr
gr
gr
gr
RS485
gr
2 PE
1 2 PE 1 2 PE
br ws gn
PE
U VW
M
A1
A1
A2
A2
or or or or bl ws sw bl bl
A B GNDP+ P-+12VLINGNDSHD
sw bl gn
L1
a
b
c
d
e
f
PE
g
363-315
Abb. [28]
a
Netz
c
Ventil Warmwasser
b
d
e
f
g
Pumpe
Ventil Kaltwasser
Potentialfreier Kontakt Warnung
Potentialfreier Kontakt Alarm
Fernbedienung
• Gehäuse zuklappen. und Schrauben <25> festziehen.
28 / 144
V 1.0
Montage
3.4.1.3 Initialisierung des Schaltgeräts
Ein Trockenlauf der Pumpe(n) ist unbedingt zu vermeiden. Taste Start / Stop nicht betätigen!
• Stromversorgung Schaltgerät einschalten und Hauptschalter in Position ON bringen, im Display erscheint das
Menü 3.8.1.
Wird im Display nicht das Menü 3.8.1 (die Initialisierung) angeboten, wurde das Schaltgerät bereits initialisiert.
In diesem Fall sind die eingestellten Parameter (gemäß nachfolgender Aufstellung) über das Bedienmenü zu
überprüfen (Bedienung des Schaltgeräts und Bedienmenü Seite 50).
Bei der Initialisierung werden folgende Eingaben erwartet:
–– Sprache
–– Datum / Uhrzeit
–– Nenngröße
–– Anzahl und Leistung der Pumpen
Sprache
• OK betätigen.
• Landessprache mit den Pfeiltasten auswählen und mit OK übernehmen, das Menü Datum/Uhrzeit wird
angezeigt.
Datum / Uhrzeit
• Die jeweils blinkende Ziffer in Datum und Uhrzeit einstellen und mit OK übernehmen. Nach der letzten
Eingabe erscheint das Menü Nenngröße. Der Termin für die Entleerung (Wartungstermin, 90 Tage) ist
automatisch gespeichert (Ändern siehe 6.1, Menü 2).
Nenngröße
• Nenngröße gemäß Angabe auf dem Typenschild auswählen und mit OK übernehmen, das Menü Anzahl
Pumpen wird angezeigt.
Anzahl Pumpen
• Anzahl Pumpen / Leistungsgröße (Siehe Typenschild der Pumpe(n)) auswählen und OK betätigen, die
Initialisierung ist abgeschlossen und im Display wird das Menü Systeminfo mit den soeben durchgeführten
Einstellungen angezeigt.
V 1.0
29 / 144
Montage
Montage
3.4.2 Schaltgerät für Anlagentyp E
C D E F
3.4.2.1 Montage des Schaltgeräts „M+S“
• Montageort für das Schaltgerät „M+S“ auswählen (Kabellänge Pumpe berücksichtigen).
Achtung, Gefahr durch elektrischen Strom! Das Schaltgerät darf nur geöffnet werden, wenn der
Netzanschluss getrennt ist.
• Hauptschalter <23> in Position OFF bringen.
• Schrauben <25> lösen.
• Gehäuse aufklappen.
25
23
• Gehäuse am vorgesehenen Ort montieren, dazu alle vier
Befestigungsmöglichkeiten in den Ecken verwenden. Im
Lieferumfang ist eine Bohrschablone enthalten.
Abb. [29]
V 1.0
30 / 144
V 1.0
Montage
3.4.2.2 Elektrische Anschlüsse herstellen
• Anschlüsse gemäß Anschlussplan herstellen (nachstehend und im Gehäusedeckel des Schaltgerätes).
Anschlussplan
gn bl
PE N
T1
T2
T3
2 4 6 NCA2
w
bl
gr
gr
w
gr
bl
gr
w
bl
gr
bl
or
w
bl
or
or
TF2
or
gr
TF1
or
gn
PE
1 2 3 4 5
5
a
bl
w
bl
PE
e
6
d1
c
b
1
2
d
d2
3
4
d3
5
6
363-311
Abb. [30]
a
Netz
c
Potentialfreier Kontakt Warnung / Alarm
b
d
d1
d2
d3
V 1.0
Pumpe
Fernbedienung (Bei Anschluss der Fernbedienung Brücke <e> entfernen)
EIN
AUS
Kontrollleuchte Pumpe in Betrieb
31 / 144
Montage
3.4.2.3 Initialisierung des Schaltgeräts
Ein Trockenlauf der Pumpe(n) ist unbedingt zu vermeiden. Tast Start / Stop nicht betätigen!
• Nenngröße (NS) gemäß Angabe auf dem Typenschild einstellen, dazu die DIP-Schalter (rechts oberen auf
der Platine) wie folgt einstellen:
NS 2
ON
DIP
1 2 3 4
NS 3
ON
DIP
1 2 3 4
NS 4
ON
DIP
1 2 3 4
NS 7
ON
DIP
1 2 3 4
NS 10
ON
DIP
1 2 3 4
• Gehäuse zuklappen.
• Schrauben <25> festziehen.
32 / 144
V 1.0
Montage
3.4.3 Schaltgerät für Anlagentyp F
C D E F
3.4.3.1 Montage des Schaltgeräts „PV+S“
• Montageort für das Schaltgerät „PV+S“ auswählen (Kabellängen Pumpe und Magnetventile berücksichtigen).
Achtung, Gefahr durch elektrischen Strom! Das Schaltgerät darf nur geöffnet werden, wenn der
Netzanschluss getrennt ist.
• Hauptschalter <23> in Position OFF bringen.
• Schrauben <25> lösen.
25
• Gehäuse aufklappen.
23
• Gehäuse am vorgesehenen Ort montieren, dazu alle vier
Befestigungsmöglichkeiten in den Ecken verwenden. Im
Lieferumfang ist eine Bohrschablone enthalten.
Abb. [31]
V 1.0
33 / 144
Montage
3.4.3.2 Elektrische Anschlüsse herstellen
• Anschlüsse gemäß Anschlussplan herstellen (nachstehend und im Gehäusedeckel des Schaltgerätes).
OFF ON
gn bl
PE N
T3
2 4 6 NC A2
2 4 6 NC A2
L3
bl
T2
L2
L1
gnge
T1
2
TF1
gnge
gr
bl
gn
or
gr
bl
gr
bl
or
gn
gn
PE
gn
1
gr
gr
gr
2
gnge
1
In2
1
bl
gn
In1
gr
gr
2
gnge
bl
bl
ws
bl
ws
sw
2
1
bl
or
ws
sw
4
3
ws
gr
or
bl
gr
bl
bl
RS485
In3
or
or
ws
A
or
or
or
ws
br
gn
1 2 3 4 5 PE
1 2
PE
1 2 PE 1
2 PE
2
14
36
5
20 21 22 10 11 12 13
14 15
br ws gn
41
1 2 3
PE
or or or or bl ws sw bl bl
1 2 PE 1 2 PE
M
A B GNDP+ P-+12VLINGNDSHD
L1L1
U VW
M
1 ph.
sw bl gn
PE
A1
A1
A2
A2
L1
S1
a
b
c
d
e
f1
f2
S2
g
PE
S3
h
i
363-312
Abb. [32]
a
Netz
c
Stellmotor
b
d
e
f1
f2
g
h
i
Pumpe
Ventil Warmwasser
Ventil Kaltwasser
Potentialfreier Kontakt Warnung
Potentialfreier Kontakt Alarm
Endschalter Stellmotor
SonicControl Sensor (Option)
Anschluss Fernbedienung (Option)
• Gehäuse zuklappen.
• Schrauben <25> festziehen.
34 / 144
V 1.0
Montage
3.4.3.3 Initialisierung des Schaltgeräts
Ein Trockenlauf der Pumpe(n) ist unbedingt zu vermeiden. Taste Start / Stop nicht betätigen!
• Stromversorgung Schaltgerät einschalten und Hauptschalter in Position ON bringen, im Display wird das
Menü 3.8.1. angezeigt
Wird im Display nicht die Initialisierung (Menü 3.8.1 ) angeboten, wurde das Schaltgerät bereits initialisiert.
In diesem Fall sind die eingestellten Parameter (gemäß nachfolgender Aufstellung) über das Bedienmenü zu
überprüfen (Bedienung des Schaltgeräts und Bedienmenü Seite 53).
Bei der Initialisierung werden folgende Eingaben erwartet:
–– Sprache
–– Datum / Uhrzeit
–– SonicControl Sensor und Anlagenart (Option)
–– Norm
–– Nenngröße
–– Anzahl und Leistung der Pumpen
Sprache
• OK betätigen.
• Landessprache mit den Pfeiltasten auswählen und mit OK übernehmen, das Menü Datum/Uhrzeit wird
angezeigt.
Datum / Uhrzeit
• Die jeweils blinkende Ziffer in Datum und Uhrzeit einstellen und mit OK übernehmen. Nach der letzten
Eingabe erscheint, sofern ein SonicControl Sensor angeschlossen ist das Menü SonicControl, wenn nicht das
Menü Norm. Der Termin für die Entleerung (Wartungstermin, 90 Tage) ist automatisch gespeichert (Ändern
siehe Menüpunkt 2.4, Kapitel 6.3 ).
SonicControl Sensor
Ist ein SonicControl (Option) angeschlossen, Frage mit „ja“ beantworten, sonst weiter mit „nein“, das Menü Norm
wird angezeigt.
Wenn „ja“:
• Passworteingabe (muss bei KESSEL bezogen werden).
• Anlagenart aus der Displayauswahl auswählen und mit OK übernehmen, es wird das Menü Norm
angezeigt.
V 1.0
35 / 144
Montage
Norm
• Euro-Norm 1825 auswählen und mit OK übernehmen, es wird das Menü Nenngröße angezeigt.
Nenngröße
• Nenngröße gemäß Angabe auf dem Typenschild auswählen und mit OK übernehmen, das Menü Anzahl
Pumpen wird angezeigt.
Anzahl Pumpen
• Anzahl Pumpen / Leistungsgröße (Siehe Typenschild der Pumpe(n)) auswählen und OK betätigen, die
Initialisierung ist abgeschlossen und im Display wird das Menü Systeminfo mit den soeben durchgeführten
Einstellungen angezeigt.
3.5
Erstbefüllung und Druckprüfung
• Sicherstellen, dass sich keine Fremdstoffe oder Verunreinigungen im Fettabscheider befinden.
• Gesamte Fettabscheideranlage vollständig mit Wasser befüllen1 (bis Anlagenüberlauf am Ablauf <35>).
• Druckprüfung durchführen, dazu
• Zwei Revisionsdeckel öffnen.
• Ablauf und Zulauf mit geeigneten Mitteln verschließen.
• Fettabscheideranlage vollständig2 mit Wasser befüllen und sicherstellen, dass keine Undichtigkeiten
vorliegen.
• Funktionstüchtigkeit von Ablauf und Zulauf wieder herstellen
3.5.1 Funktionskontrolle Anlagentyp C
C D E F
• Pumpe einschalten.
• Mittels Sichtkontrolle durch das Schauglas sicherstellen, dass durch das Druckrohr <22> (siehe Abb. [33])
Wasser in den Anlagenbehälter gepumpt wird.
• Pumpe ausschalten.
• Sicherstellen, dass dass Frischwasser zugeführt werden kann.
Die Betriebsbereitschaft des Anlagentyps C ist hergestellt.
1)
2)
Per Hand oder bei Anlagentyp F über Schaltgerät, Handbetrieb, Funktion Füllen
Bis auf 2 cm unterhalb der Revisionsöffnung befüllen.
36 / 144
V 1.0
Montage
3.5.2 Funktionskontrolle Anlagentyp D
C D E F
Funktion Pumpe prüfen
22
• Schaltgerät „D+S-P“ einschalten, Menü 0, Systeminfo wird
angezeigt.
• Taste OK betätigen, Menü 1 wird angezeigt.
• Wartung => Handbetrieb => Reinigen+Schreddern auswählen, die
Pumpe wird eingeschaltet.
• Mittels Sichtkontrolle durch das Schauglas sicherstellen, dass durch
das Druckrohr <22> Wasser in den Anlagenbehälter gepumpt wird.
• Taste ESC betätigen, die Pumpe wird abgeschaltet.
Abb. [33]
Funktion Magnetventil Warmwasser1 prüfen
Im Menü Wartung wie folgt einstellen:
• Handbetrieb => Ventil Teil-Füllen auswählen, das Magnetventil wird angesteuert. Sicherstellen, dass das
Wasser über die Fülleinrichtung in den Anlagenbehälter läuft.
Funktion Magnetventil Kaltwasser prüfen
Im Menü Wartung wie folgt einstellen:
• Wartung => Handbetrieb => Ventil Füllen, das Magnetventil wird angesteuert. Sicherstellen, dass das Wasser
über die Fülleinrichtung in den Anlagenbehälter läuft.
• Funktion Fernbedienung prüfen (Option)
• Initialisierung und Funktionsprüfung des SonicControl gemäß der mitgelieferten Betriebsanleitung durchführen
(Optional).
Die Betriebsbereitschaft des Anlagentyps D ist hergestellt.
1)
V 1.0
Warmwasser ist Empfehlung
37 / 144
Montage
3.5.3 Funktionskontrolle Anlagentyp E
C D E F
• Schaltgerät „M+S“ einschalten.
22
Sicherstellen, dass sich das Umschaltventil nicht in Position
„Entsorgen“ befindet, d er Inhalt des Anlagenbehälter würde
abgepumpt werden.
• Umschaltventil <26> auf Position Reinigen und Schreddern
einstellen (Griff nach Rechts).
• Taste Start / Stop betätigen, die Pumpe beginnt zu laufen.
• Mittels Sichtkontrolle durch das Schauglas sicherstellen, dass durch
das Druckrohr <22> Wasser in den Anlagenbehälter gepumpt wird.
• Taste Start / Stop betätigen, die Pumpe ist abgeschaltet.
26
Abb. [34]
Funktion Wasserzulauf prüfen
• Abwechselnd Kaltwasser und Warmwasserzulauf1 aufdrehen und sicherstellen, dass das Wasser über die
Fülleinrichtung in den Anlagenbehälter läuft.
• Initialisierung und Funktionsprüfung des SonicControl gemäß der mitgelieferten Betriebsanleitung durchführen
(Optional).
Die Betriebsbereitschaft des Anlagentyps E ist hergestellt.
1)
Warmwasser ist Empfehlung
38 / 144
V 1.0
Montage
3.5.4 Funktionskontrolle Anlagentyp F
C D E F
Funktion Pumpe / Reinigen und Schreddern prüfen
• Schaltgerät „PV+S“ einschalten.
• Taste Start / Stop betätigen, Menü Wartung wird angezeigt.
• Automatikbetrieb auswählen und OK drücken, Menü
Automatikbetrieb wird angezeigt.
• OK betätigen, der Automatikbetrieb startet, nach Ablauf der
Zeitverzögerung (wird im Display angezeigt) startet die Pumpe.
• Mittels Sichtkontrolle durch das Schauglas sicherstellen, dass durch
das Druckrohr <22> Wasser in den Anlagenbehälter gepumpt wird.
• Zwei mal Taste ESC betätigen und Entleerung abbrechen? mit OK
bestätigen, die Pumpe ist abgeschaltet und betriebsbereit.
22
Abb. [35]
Funktion Stellmotor Umschaltventil prüfen
Im Menü Wartung wie folgt einstellen:
• Handbetrieb => Teil leeren, der Stellmotor bewegt das Ventil in die passende Position, anschließend läuft die
Pumpe an. Läuft die Pumpe sofort an, befand sich das Ventil bereits in der vorgesehenen Position.
• ESC, die Pumpe wird abgeschaltet => Mischen, der Stellmotor bewegt das Ventil in die entgegengesetzte
Position, anschließend läuft die Pumpe an.
• ESC, die Pumpe wird abgeschaltet => Teil leeren, der Stellmotor bewegt das Ventil in die entgegengesetzte
Position, anschließend läuft die Pumpe an.
• ESC, die Pumpe wird abgeschaltet, der Stellmotor ist betriebsbereit.
Funktion Magnetventil Warmwasser1 prüfen
Im Menü Wartung wie folgt einstellen:
• Handbetrieb => Spülen, das Magnetventil wird angesteuert. Sicherstellen, dass das Wasser über die
Fülleinrichtung in den Anlagenbehälter läuft.
Funktion Magnetventil Kaltwasser prüfen
Im Menü der Anlagensteuerung wie folgt einstellen:
• Wartung => Handbetrieb => Füllen, das Magnetventil wird angesteuert. Sicherstellen, dass das Wasser über
die Fülleinrichtung in den Anlagenbehälter läuft.
1)
V 1.0
Warmwasser ist Empfehlung
39 / 144
Montage
Funktion SonicControl Sensor prüfen (Option)
Im Menü der Anlagensteuerung wie folgt einstellen:
• Wartung => Handbetrieb => SonicControl => Messung starten? => OK eine Messung wird durchgeführt und
das Ergebnis angezeigt. Erscheint keine Fehlermeldung, ist der SonicControl-Sensor betriebsbereit.
• Funktion Fernbedienung prüfen (Option)
Die Fernbedienung stellt die gleichen Bedienungsmerkmale zur Verfügung wie das Schaltgerät.
• Initialisierung und Funktionsprüfung des SonicControl gemäß der mitgelieferten Betriebsanleitung durchführen
(Optional).
Die Betriebsbereitschaft des Anlagentyps F ist hergestellt.
40 / 144
V 1.0
Betrieb
4
Betrieb
Der Fettabscheider separiert Fette, Öle und Schlamm aus dem Abwasser. Für die Entleerung der separierten
Stoffe kommen je nach Anlagentyp unterschiedliche Verfahren und / oder Schaltgeräte zum Einsatz (Siehe 1.2).
4.1
Einschalten Anlagentyp C
C D E F
Der Fettabscheider ist nach erfolgreicher Funktionskontrolle (siehe 3.5.1) betriebsbereit.
4.2
Einschalten Anlagentyp D
C D E F
Nach erfolgreicher Funktionskontrolle (siehe 3.5.2) kann die
Fettabscheideranlage eingeschaltet werden, dazu:
65
• Hauptschalter einschalten*. Nach erfolgreichem Systemtest
erscheint im Display <65> das Menü 0 Systeminfo und die grüne
LED <64> leuchtet, die Fettabscheideranlage ist betriebsbereit.
* Das Einschalten des Hauptschalters ist nur zur Entleerung notwendig.
Wird nach dem Einschalten das Menue 3.8.1 Sprache angezeigt,
Initialisierung durchführen (3.4.2.3).
V 1.0
41 / 144
Abb. [36]
64
Betrieb
4.3
Einschalten Anlagentyp E
C D E F
64
Nach erfolgreicher Funktionskontrolle (siehe 3.5.3) kann die
Fettabscheideranlage eingeschaltet werden, dazu:
• Hauptschalter einschalten*. Nach erfolgreichem Systemtest leuchtet
die grüne LED <64>, die Fettabscheideranlage ist betriebsbereit.
* Das Einschalten des Hauptschalters ist nur zur Entleerung notwendig.
Abb. [37]
4.4
Einschalten Anlagentyp F
C D E F
Nach erfolgreicher Funktionskontrolle (siehe 3.5.4) kann die
Fettabscheideranlage eingeschaltet werden, dazu:
65
64
• Hauptschalter einschalten*. Nach erfolgreichem Systemtest
erscheint im Display <65> das Menü 0 Systeminfo und die grüne
LED <64> leuchtet, die Fettabscheideranlage ist betriebsbereit.
* Das Einschalten des Hauptschalters ist nur zur Entleerung notwendig.
Ausnahme: Es ist ein SonicControl-Sensor (siehe 3.3.13) installiert.
Abb. [38]
Wird nach dem Einschalten das Menue 3.8.1 Sprache angezeigt,
Initialisierung durchführen (3.4.3.3).
42 / 144
V 1.0
Entleerung durchführen
5
Entleerung durchführen
Allgemeines
Die Entleerungszyklen der verschiedenen Anlagentypen sind darauf abgestimmt bei mittlerem
Verschmutzungsgrad des Abwassers den Anlagenbehälter bei gleichzeitig bestmöglicher Reinigung vollständig
zu entleeren. Ein Trockenlaufen der Pumpe ist bauartbedingt ausgeschlossen (Ausnahme: Erst- oder
Wiederinbetriebnahme).
Anlagentyp D F
C D E F
Die Laufzeiten der Pumpe (Abpumen + Reinigen und Schreddern) basieren eben so wie die zugeführten
Warmwassermengen1 auf Erfahrungswerten. Sollte das Reinigungsergebnis nicht zufriedenstellen ausfallen,
können die Laufzeiten in der Menüsteuerung der Schaltgeräte verändert werden.
1)
V 1.0
Berechnungsgrundlage: Wasserzufuhr 23m³ pro Stunde.
43 / 144
Entleerung durchführen
5.1
Entleerung Anlagentyp C
C D E F
Ablaufschema Entleerungszyklus (Euro Norm 1825)
A
Entleerungszeitraum
1
Pumpe läuft (Reinigen und Schreddern)
B
2
3
4
Entleerungsfahrzeug pumpt ab
Zulauf Warmwasser*
Zulauf Kaltwasser
Zeitraum, bis Pegelstand ca. 10 cm abgesenkt wurde
* empfohlen
A
B
4
1
2
3
Abb. [39]
Entleerung durchführen
• Absaugschlauch des Entleerungsfahrzeugs an das DirektEntleerungsrohr anschließen und das Abpumpen
starten.
• Ist der Pegelstand ca. 10 cm abgesunken, Pumpe (Reinigen und Schreddern) einschalten.
• Wenn der Anlagenbehälter ca. 1 Drittel geleert ist, Warmwasserzulauf öffnen.
• Ist der Anlagenbehälter fast entleert, Pumpe und Warmwasserzulauf abstellen.
Wird der Anlagenbehälter nach der Entleerung nicht wieder mit Wasser befüllt (Pegelstand Oberkante
Schauglas), können Fette und Schwebstoffe ungehindert in die Kanalisation gelangen.
• Ist der Anlagenbehälter vollständig entleert, Absaugschlauch des Entleerungsfahrzeugs demontieren und
Anlagenbehälter vollständig mit Kaltwasser befüllen.
44 / 144
V 1.0
Entleerung durchführen
5.2
Entleerung Anlagentyp D
C D E F
Ablaufschema Entleerungszyklus (Euro Norm 1825)
A
B
1
2
3
4
A
Einstellung
im Menü
Entleerungszeitraum
A1 Automatikbetrieb (Reinigen und Schreddern, Teilfüllen)
A2 Befüllen des Anlagenbehälters (Start durch Bediener)
Entleerungsfahrzeug pumpt ab
Pumpe läuft (Reinigen und Schreddern)
3.1.1
Ventil Füllen (Zulauf Kaltwasser, Start durch Bediener)
3.1.3
Ventil Teilfüllen (Zulauf Warmwasser*)
3.1.2
Zeitverzögerung bis Pumpe (1) startet, damit Pegelstand ca. 10 cm abgesenkt wird
* empfohlen
3.1.4
A2
A1
B
4
1
2
3
Abb. [40]
Entleerung durchführen
• Schaltgerät einschalten.
• Absaugschlauch des Entleerungsfahrzeugs an das DirektEntleerungsrohr anschließen.
• Automatikbetrieb starten, nach Ablauf der Zeitverzögerung1 <4>, wird die Pumpe automatisch für die der
Nenngröße entsprechenden Zeit1 eingeschaltet.
• Anschließend wird die Funktion Teilf-Füllen1 aktiviert.
Wird der Anlagenbehälter nach der Entleerung nicht wieder mit Wasser befüllt (Pegelstand Oberkante
Schauglas), können Fette und Schwebstoffe ungehindert in die Kanalisation gelangen.
• Wenn der Anlagenbehälter vollständig entleert ist, Absaugschlauch des Entleerungsfahrzeugs demontieren.
• Funktion Befüllung starten? mit OK aktivieren, der Anlagenbehälter wird vollständig mit Kaltwasser befüllt.
• Anschließend die Abfrage Befüllung erfolgreich beendet! mit OK quitiieren und Schaltgerät ausschalten.
1)
V 1.0
Zeitraum kann im Menü eingestellt werden (siehe Tabelle über Abb. [40])
45 / 144
Entleerung durchführen
5.3
Entleerung Anlagentyp E
C D E F
Ablaufschema Entleerungszyklus (Euro Norm 1825)
A
B
C
D
Entleerungszeitraum
A1 Manueller Betrieb (Pumpenlaufzeiten)
A2 Befüllen des Anlagenbehälters (durch Bediener)
Entleerungsfahrzeug angeschlossen
Pumpe läuft
C1 Pumpe ein (Abpumpen, zum Entleerungsfahrzeug)
C2 Pumpe ein (Reinigen und Schreddern)
Umschalten des Ventils durch Bediener
D1 Schaltposition Abpumpen
D2 Schaltposition Reinigen und Schreddern
E
Zulauf Warmwasser* (Teil-Füllen, Ein- Ausschalten durch Bediener)
G
Entleerungzeiten (siehe Seite 61)
F
Zulauf Kaltwasser (Füllen, Ein- Ausschalten durch Bediener)
* empfohlen
A
A1
A2
B
C1
C2
C
D1
D2
D
E
F
G
1
2
3
4
5 6
7
8 9
10 11
12
13
Abb. [41]
46 / 144
V 1.0
Entleerung durchführen
Entleerung durchführen
• Schaltgerät einschalten.
• Absaugschlauch des Entleerungsfahrzeugs an das DirektEntleerungsrohr anschließen
• Taste Start / Stop betätigen, der Entleerungsablauf <A1> ist aktiviert. Die Pumpe wird manuell ein- und
ausgeschaltet. An den jeweiligen Schaltpunkten muss, je nach Anforderung des Entleerungszyklus (siehe
Abb. [41]) das Umschaltventil betätigt bzw, die Warmwasserzufuhr auf- und zugedreht werden.
Empfehlung: Platzieren Sie die Grafik (Abb. [41]) an der Fettabscheideranlage. Dadurch sind die Zeitpunkte,
an denen Bedienungen durchzuführen sind (Schaltpunkte der Ventile), stets ablesbar.
• Nach Erreichen des Endes des Abschnittes A1 Schlauchverbindung zum Entleerungsfahrzeugs entfernen.
• Schaltgerät ausschalten.
Wird der Anlagenbehälter nach der Entleerung nicht wieder mit Wasser befüllt (Pegelstand Oberkante
Schauglas), können Fette und Schwebstoffe ungehindert in die Kanalisation gelangen.
• Anlagenbehälter vollständig mit Kaltwasser befüllen.
V 1.0
47 / 144
Entleerung durchführen
5.4
Entleerung Anlagentyp F
C D E F
Ablaufschema Entleerungszyklus (Euro Norm 1825)
A
B
C
D
E
G
Einstellung im Menü
Entleerungszeitraum
A1 Automatikbetrieb
A2 Befüllen des Anlagenbehälters (Start durch Bediener)
Entleerungsfahrzeug angeschlossen
Pumpe läuft automatisch
C1 Pumpe ein (Abpumpen, zum Entleerungsfahrzeug)
1.6.1. / -3 / -6 / -9 / -12
C2 Pumpe ein (Reinigen und Schreddern)
1.6.2 / -5 / -8 / -11
Umschalten des Ventils
D1 Schaltposition Abpumpen
D2 Schaltposition Reinigen und Schreddern
Zulauf Warmwasser* (Teil-Füllen), automatisch
1.6.4 / -7 / -10
Entleerungsschritte (siehe 7.6 Einstellungen (Entleerungszeiten) auf Seite
61)
1.6.13
* empfohlen
A
A1
A2
B
C1
C2
C
D1
D2
D
E
F
G
1
2
3
4
5 6
7
8 9
10 11
12
13
Abb. [42]
48 / 144
V 1.0
Entleerung durchführen
Entleerung im Automatikbetrieb durchführen
(Die im Automatikbetrieb ablaufenden Schritte können einzeln über den Handbetrieb angesteuert werden)
• Schaltgerät einschalten.
• Schlauchverbindung zum Entleerungsfahrzeugs an das DirektEntleerungsrohr herstellen.
• Taste Start / Stop betätigen, Menü Wartung wird angezeigt.
• Automatikbetrieb auswählen und OK drücken, Menü Automatikbetrieb wird angezeigt.
• Automatikbetrieb starten auswählen, der Entleerungsablauf <A1> ist aktiviert. Die Funktionen
Pumpenlaufzeiten, Warmwasserzulauf sowie das Umstellen des Ventils werden automatisch wie in Abb. [42]
dargestellt durchgeführt.
• Schlauchverbindung zum Entleerungsfahrzeugs entfernen.
Wird der Anlagenbehälter nach der Entleerung nicht wieder mit Wasser befüllt (Pegelstand Oberkante
Schauglas), können Fette und Schwebstoffe ungehindert in die Kanalisation gelangen.
• Schaltgerät ggf. ausschalten.
V 1.0
49 / 144
Einstellungen, Bedienmenü
6
Einstellungen, Bedienmenü
6.1
Anlagentyp D
C D E F
Schaltgerät „D+S-P
Allgemeine Hinweise und „Bedienmodus aktivieren“, siehe 6.3
Bedienmenü
0
Systeminfo
1
Informationen
1.1
1.2
2
3
Wartung
Einstellungen
Betriebsstunden
Logbuch
1.1.1
Gesamtlaufzeit
1.1.2
Laufzeit Pumpe
1.1.3
Anläufe Pumpe
1.1.4
Netzausfall
1.2.1
zuletzt aufgetretenes E&F
1.2.2
davor aufgetretenes E&F
1.2.3
davor aufgetretenes E&F
1.2.4
…
1.3
Steuerungstyp
wechselnde Anzeige bei SonicControl Option (4s)
1.4
Wartungstermin
1.4.1
Letzte Wart. Abscheider
1.4.2
Nächste Wart. Abscheider
1.5
Akt. Messwerte
1.5.1
Drehfeld
1.6
Parameter
1.6.1
Reinigen+Schreddern
1.6.2
Ventil Teil-Füllen
1.6.3
Ventil Füllen
1.6.4
Einschaltverzögerung
1.6.30
Zugriff RemoteControl
2.1.1
Reinigen+Schreddern
2.1.2
Ventil Teil-Füllen
2.1.3
Ventil Füllen
2.1
Handbetrieb
2.2
Automatikbetrieb
2.3
SDS
2.4
Wartungstermin
2.5
Freischalt. RemoteControl
3.1
Parameter
Einstellung in Absprache mit Werkskundendienst vornehmen
50 / 144
2.3.1
Test Pumpe 1
2.3.2
Test Ventil Teil-Füllen
2.3.3
Test Ventil Füllen
2.3.4
Test Pumpe 2
2.3.1
letzte Wart. Abscheider
2.3.2
nächste Wart. Abscheider
2.5.1
Freischaltdauer
2.5.2
Deaktivieren
3.1.1
Reinigen+Schreddern
3.1.2
Ventil Teil-Füllen
3.1.3
Ventil Füllen
3.1.4
Einschaltverzögerung
V 1.0
Einstellungen, Bedienmenü
3.2
Profilspeicher
3.3
Datum/Uhrzeit*
3.4
Anzahl Pumpen*
3.6
3.7
3.8
3.9
Nenngröße*
Kommunikation
Sprache*
Experten-Modus
3.1.30
Zugriff RemoteControl
3.2.1
Parameter speichern
3.2.2
Parameter laden
3.4.1
1 Pumpe 4-6,4A
3.4.2
2 Pumpen 4-6,4A
3.4.3
1 Pumpe 6,5-8A
3.4.4
2 Pumpen 6,5-8A
3.6.1
NS2
3.6.2
NS3
3.6.3
NS4
3.6.4
NS7
3.6.5
NS10
3.7.1
Stationsname
3.7.2
Eigene Nummer
3.7.3
Modemtyp
3.7.4
PIN
3.7.5
SMS-Zentrale
3.7.6
SMS-Ziel 1
3.7.7
SMS-Ziel 2
3.7.8
SMS-Ziel 3
3.7.9
Status
3.8.1
Deutsch
3.8.2
English
3.8.3
Francais
3.8.4
Italiano
3.8.5
Nederlands
3.8.6
Polski
3.9.1
Ein Verzögerung
3.9.2
Grenzlaufzeit
3.10 Rücksetzen
* Diese Parameter werden bei der Initialisierung und nach „Rücksetzen“ des Schaltgeräts zur Eingabe erwartet.
s
V 1.0
51 / 144
Einstellungen, Bedienmenü
6.2
Anlagentyp E
C D E F
Schaltgerät „M+S“
Einstellungen
Siehe 3.4.2.3, Nenngrößen mittels Dippschalter einstellen.
52 / 144
V 1.0
Einstellungen, Bedienmenü
6.3
Anlagentyp F
C D E F
Schaltgerät „PV+S“
Allgemeines
Fettabscheider/Grease Seperator „PV+S“
Die Menüsteuerung verfügt über einen Bedien- und einen Stand-byModus. Im Bedienmodus können die System-Einstellungen durch
das Bedienmenü über das Display angezeigt und eingestellt werden.
Erfolgt über einen Zeitraum von ca. 60 Sekunden keine Betätigung
einer der Tasten, wird automatisch der Stand-by-Modus aktiviert, die
Hintergrundbeleuchtung des Displays ist dann ausgeschaltet.
Navigationstasten für das Menü
66
67
68
72
Pfeil oben
Pfeil unten
ESC
OK
66
68
Blättern im Menü
Blättern im Menü
67
72
Abb. [43]
Löschen einer Eingabe, zurück
Bestätigen einer Eingabe, nächste Ebene
Bedienmodus aktivieren
• Taste OK <72> am Bedienfeld betätigen, Hintergrundbeleuchtung
des Displays leuchtet und der Startbildschirm (Systeminfo) wird
angezeigt.
• OK <72> betätigen, Ebene 1 des Bedienmenü wird aktiviert.
Fettabscheider/Grease Seperator „PV+S“
Notiz: Je nach Konfiguration kann die Displayanzeige abweichen.
Die Nummer der jeweiligen Menüebene <63> wird in Ziffernform in der
obersten Displayzeile dargestellt.
72
Abb. [44]
V 1.0
53 / 144
Einstellungen, Bedienmenü
Bedienmenü
0
Systeminfo
1
Informationen
1.1
1.2
Betriebsstunden
Logbuch
1.1.1
Gesamtlaufzeit
1.1.2
Laufzeit Pumpe
1.1.3
Anläufe Pumpe
1.1.4
Netzausfall
1.1.5
Laufzeit SonicControl
1.1.6
Betr. über Alarm-Niv.
1.1.7
Betr. über Alarm-Temp.
1.1.8
Anzahl der Entleerungen
1.2.1
zuletzt aufgetretenes E&F
1.2.2
davor aufgetretenes E&F
1.2.3
davor aufgetretenes E&F
1.2.4
…
1.3
Steuerungstyp wechselnde Anzeige bei SonicControl Option (5s)
1.4
Wartungstermin
1.5
1.6
1.7
Akt. Messwerte
Parameter
Messdaten
54 / 144
1.4.1
Letzte Wart. Abscheider
1.4.2
Nächste Wart. Abscheider
1.4.3
Letzte Wart. SonicControl
1.4.4
Nächste Wart. SonicControl
1.5.1
Drehfeld
1.5.3
Schicht-Dicke
1.5.4
Temperatur
1.6.1
Teil leeren
1.6.2
Mischen
1.6.3
Leeren
1.6.4
Füllen
1.6.5
Mischen
1.6.6
Leeren
1.6.7
Füllen
1.6.8
Spülen
1.6.9
Leeren
1.6.10
Füllen
1.6.11
Spülen
1.6.12
Leeren
1.6.13
Füllen
1.6.14
Alarm Schichtdicke
1.6.15
Voralarm Schichtdicke
1.6.16
Alarm-Temperatur
1.6.17
Messbereichsanfang
1.6.18
Messbereichsende
1.6.19
Messintervall
1.6.20
Niveau-Abgleich
1.6.21
Intervall RegelEntleerung
1.6.30
Zugriff RemoteControl
1.7.1
zuletzt ermittelte Schicht-Dicke und Temp
1.7.2
davor ermittelte Schicht-Dicke und Temp
V 1.0
Einstellungen, Bedienmenü
2
Wartung
1.8
Entleerung
2.1
Handbetrieb
2.2
Automatikbetrieb
2.3
SDS
2.4
2.5
3
Einstellungen
3.1
Wartungstermin
Freischalt. RemoteControl
Parameter
Einstellung in Absprache mit Werkskundendienst vornehmen
V 1.0
55 / 144
1.7.3
davor ermittelte Schicht-Dicke und Temp
1.7.4
…
1.8.1
letzte Entleerung
1.8.2
RegelEntleerung
2.1.1
Teil leeren
2.1.2
Mischen
2.1.3
Leeren
2.1.4
Füllen
2.1.5
Mischen
2.1.6
Leeren
2.1.7
Füllen
2.1.8
Spülen
2.1.9
Leeren
2.1.10
Füllen
2.1.11
Spülen
2.1.12
Leeren
2.1.13
Füllen
2.1.14
Linkslauf
2.1.15
SonicControl
2.3.1
Test Pumpe 1
2.3.2
Test Stellmotor 1
2.3.3
Test Pumpe 2
2.3.4
Test Stellmotor 2
2.3.5
Test Pumpe 3
2.3.1
letzte Wart. Abscheider
2.3.2
nächste Wart. Abscheider
2.3.3
letzte Wart. SonicControl
2.3.4
nächste Wart. SonicControl
2.5.1
Freischaltdauer
2.5.2
Deaktivieren
3.1.1
Teil leeren
3.1.2
Mischen
3.1.3
Leeren
3.1.4
Füllen
3.1.5
Mischen
3.1.6
Leeren
3.1.7
Füllen
3.1.8
Spülen
3.1.9
Leeren
3.1.10
Füllen
3.1.11
Spülen
3.1.12
Leeren
3.1.13
Füllen
3.1.14
Alarm Schichtdicke
3.1.15
Voralarm Schichtdicke
Einstellungen, Bedienmenü
3.2
Profilspeicher
3.3
Datum/Uhrzeit*
3.4
Anzahl Pumpen*
3.5
3.6
3.7
3.8
3.9
Norm*
Nenngröße*
Kommunikation
Sprache*
Experten-Modus
56 / 144
3.1.16
Alarm-Temperatur
3.1.17
Messbereichsanfang
3.1.18
Messbereichsende
3.1.19
Messintervall
3.1.20
Niveau-Abgleich
3.1.20
Intervall RegelEntleerung
3.1.30
Zugriff RemoteControl
3.2.1
Parameter speichern
3.2.2
Parameter laden
3.4.1
1 Pumpe 4-6,4A
3.4.2
2 Pumpen 4-6,4A
3.4.4
1 Pumpe 6,5-8A
3.4.5
2 Pumpen 6,5-8A
3.5.1
DIN 4040
3.5.2
DIN Erdeinbau
3.5.3
Euro-Norm 1825
3.5.4
Euro-Norm Erdeinbau
3.6.1
NS2
3.6.2
NS3
3.6.3
NS4
3.6.4
NS7
3.6.5
NS10
3.6.6
NS15
3.6.7
NS20
3.6.8
NS25
3.6.9
NS30
3.6.10
NS35
3.6.11
NS S
3.7.1
Stationsname
3.7.2
Eigene Nummer
3.7.3
Modemtyp
3.7.4
PIN
3.7.5
SMS-Zentrale
3.7.6
SMS-Ziel 1
3.7.7
SMS-Ziel 2
3.7.8
SMS-Ziel 3
3.7.9
Status
3.8.1
Deutsch
3.8.2
English
3.8.3
Francais
3.8.4
Italiano
3.8.5
Nederlands
3.8.6
Polski
3.9.1
Ein Verzögerung
3.9.2
Grenzlaufzeit
V 1.0
Einstellungen, Bedienmenü
3.10
Rücksetzen
3.11
SonicControl*
3.12
Anlagenart*
3.9.3
Leitfähigkeit
3.9.4
Dichte
3.9.5
Trigger
3.9.6
SNR
3.9.7
Rauschen
3.9.8
Alarm Sensor trocken
3.12.1
Tier. Fett 60%
3.12.2
Pflanz. Fett 60%
3.12.3
Pflanz. Öl 60%
3.12.4
Tier. Fett 90%
3.12.5
Pflanz. Fett 90%
3.12.6
Pflanz. Öl 90%
* Diese Parameter werden bei der Initialisierung und nach „Rücksetzen“ des Schaltgeräts zur Eingabe erwartet.
V 1.0
57 / 144
Technische Daten
7
Technische Daten
7.1
Allgemeine technische Daten / Anschlusswerte
Betriebsspannung
400 V AC 50 Hz
Pumpe, Anschlusswert
400 V AC 50 Hz
Pumpe, Gewicht
ca. 27 kg
Leistung Stand-by (Schaltgerät)
ca. 5 W
Schutzart (Gesamtanlage)
IP 54
Erforderliche Sicherung
C 16A
Bauseits nach VDE 0100
7.2
FI 30 mA
Drehmomente
Beschreibung / Verwendung
Drehmoment Nm
Türbandschraube A2 blank 6x40
4,5 ±0,5
PT-Schraube 100x30 A2
7
PT-Schraube KB60x30 WN 1411
4,5 ±0,5
Profilschelle / am Anlagenbehälter
3
Sicherungs-Sechskantschraube M8x30
Rohrschelle D=120
PT-6-Kantschraube K80x40 WN 1447
T30
T50
T30
ISK 10mm
10
Nuss 13mm
8-10
Nuss 13mm
8-10
Rohrschelle D=84
7.3
Schlüsselweite
5,5 ±0,5
Nuss 13mm
Nuss 13mm
Voraussetzungen / Berechnungsgrundlagen
Die Parameter für den Betrieb (Entleerung) der Fettabscheideranlage basieren auf diesen Werten:
–– Fördermenge (Saugleistung) des Entleerungsfahrzeug 10 l/s = 36m³/h.
–– Kalt- / Warmwasserversorgung 1,7 l/s = 6,1 m³/h (DN 25, 4 bar).
–– Raumtemperatur mindestens +15° C.
58 / 144
V 1.0
Technische Daten
SG* „PV+S“
SG* „M+S“
SG* „D+SP“
Klemmverbindung
15
100 m Nicht verlängern - Austausch
Schukostecker
1,25
Nicht verlängern - Austausch
100 m durch NYM 3x1,5mm² oder
Ölflex Classic 110
H05VV-F
3x1,0mm²
kein Kabel
montiert
nein
Fülleinrichtung
1“
Magnetventil
1“
Druckrohrverbindung
DN 70 E-Schweißmuffe
Plasson Muffe PN 10
Gewebeschlauch mit 2
Schraubschellen
Storz-B-Verbindung
2 1/2“
* Schaltgerät
V 1.0
59 / 144
-
40 m
-
40 m
-
40 m
Verlängerung
Ja
maximale Länge
Kabellänge in m
Fernbedienung
LIYCY
3x0,34 mm²
Stecker-Verbindung
Fernbedienung
Abschirmung
Anschlussverbindungen
Kabeltyp
7.4
Montage mit NYM 5x2,5mm²
bei max. Länge (Abhängig von
Gesamtanlage - Nennleistung)
Technische Daten
7.5
Maßzeichnung und Gewichtstabelle
DN/OD
l
h1
h2
h3
h4
420
a
b
b1
Nenngröße
DN
OD
a
Einbringung l
Einbringung b
b1
h1
h2
h3
h4
Schlammspeicher
Abwasserinhalt
Abscheider
Fettspeicher
Gesamtvolumen
Fettschichtdicke
100%
Schlammschichtdicke 50%
Abb. [45]
NS 2
100
110
1500
1735
680
860
985
1055
1435
1765
200 l
400 l
100 l
600 l
170
195
NS 3
100
110
1500
1735
680
860
985
1055
1435
1765
300 l
300 l
120 l
600 l
170
263
NS 4
100
110
1880
2115
680
860
985
1055
1435
1765
400 l
400 l
160 l
800 l
170
275
NS 7
150
160
1910
2145
940
1130
1185
1255
1655
1890
700 l
650 l
280 l
1350 l
210
325
NS 10
150
160
2590
2820
940
1130
1185
1255
1655
1890
1000
l
900 l
400 l
1900 l
210
338
Leergewicht (ca. kg) für Variante PVS
NS 2
160
NS 3
165
NS 4
178
NS 7
226
NS 10
272
60 / 144
V 1.0
V 1.0
61 / 144
Füllen
13
Leeren
Leeren
Spülen
Spülen
Leeren
Spülen
Spülen
Leeren
Spülen
Spülen
Leeren
Spülen
Leeren
Stellung
Umschaltventil
80
10
15
55
10
25
55
10
35
55
35
70
15
NS2
80
10
15
55
10
25
55
10
35
55
35
70
15
NS3
100
20
180
100
20
180
100
20
180
100
80
190
30
NS4
195
20
40
160
20
75
160
20
110
160
110
215
45
265
25
50
225
25
100
225
25
150
225
155
305
65
NS7 NS10
B Laufzeit in Sekunden
aus
ein
ein
aus
ein
ein
aus
ein
ein
aus
ein
ein
ein
Pumpe
ein
aus
aus
aus
aus
aus
aus
aus
aus
aus
aus
aus
aus
Ventil
Katlwasser
Bis Überlauf der
Anlage
Bis die Pumpe
leerläuft
ca. 25 cm
Füllhöhe
Bis die Pumpe
leerläuft
ca. 25 cm
Füllhöhe
Bis die Pumpe
leerläuft
ca. 25 cm
Füllhöhe
Bis die Pumpe
leerläuft
Wasserspiegel
um 30 cm senken
Hinweis
Nach Förderhöhe, Temperatur und Wasserdruck sind die Zeiten zu optimieren. Durchfluss Magentventil DN 25 bei 4 bar 23 m3/h
aus
ein
aus
ein
aus
aus
ein
aus
aus
ein
aus
aus
aus
Ventil
Warmwasser
Jeder Programmschritt kann übersprungen werden, indem man die Sollzeit auf 0 stellt.
Leeren
Spülen
11
12
Füllen
10
Spülen
8
Leeren
Füllen
7
9
Leeren
Mischen
5
6
Füllen
4
Mischen
2
Leeren
TeilLeeren
1
3
Funktion
7.6
A
Technische Daten
Einstellungen (Entleerungszeiten)
Spalte A: Entleerungsschritte
Spalte B: Laufzeiten. (Bei Anlagenvariante F über Menü 3.1.1 bis 3.1.13 einstellbar)
Wartung
8
Wartung
Vor einem Öffnen von Gehäuseabdeckungen, Steckern und Kabeln sind diese spannungsfrei zu machen.
Arbeiten an elektrischen Bauteilen dürfen nur von Fachpersonal (Siehe 2.2) durchgeführt werden.
8.1
Wartungsintervalle
Der Wartungstermin für die Fettabscheideranlage kann im Menü 2. Wartung / 2.4 Wartungstermin eingestellt
werden. Werkseitig wird automatisch ein Zeitraum von 12 Monaten, berechnet auf den Zeitpunkt der
Initialisierung, eingestellt. Er kann jederzeit verändert werden.
Die Fettabscheideranlage ist jährlich durch einen Sachkundigen* zu warten. Neben den Maßnahmen der
Entleerung sind dabei folgende Arbeiten durchzuführen:
* Als „sachkundig“ werden Personen des Betreibers oder beauftragter Dritter angesehen, die auf Grund ihrer
Ausbildung, ihrer Kenntnisse und ihrer durch praktische Tätigkeit gewonnenen Erfahrungen sicherstellen, dass
sie Bewertungen oder Prüfungen im jeweiligen Sachgebiet sachgerecht durchführen.
–– Kontrolle der Innenwandflächen der Fettabscheideranlage,
–– Funktionskontrolle der elektrischen Einrichtungen und Installationen, sofern vorhanden.
–– Die Feststellungen und durchgeführten Arbeiten sind im Betriebstagebuch zu erfassen und zu bewerten.
–– Die mechanischen bzw. elektromechanischen Baugruppen, wie Pumpen, Ventile, Schauglas, Absperrorgane
usw. sind zu warten.
8.2
Wartung SonicControl durchführen (Option)
Jährliche Reinigung der Sensorfinger (Siehe Seite 25).
• Revisionsdeckel öffnen
• Kabeldurchführung des Sensorkabels lockern und das Kabel ca. einen Meter in den Innenraum des
Anlagenbehälters hineinziehen.
• Sensor aus seiner Halterung (Klip) nehmen und reinigen (entfetten).
• Sensor sinngemäß in umgekehrter Reihenfolge wieder einbauen und Funktionskontrolle durchführen (Seite
39).
62 / 144
V 1.0
Wartung
8.3
Fehlersuche
Störung
Mögliche Ursache
Maßnahme(n)
Kein oder wenig
Fett fließt ab
Raumtemperatur unter 15°C
Länger beheizen, Raumtemperatur anheben
Grobstoffe verstopfen Ventil
Fettabzug
Zuführung von Grobstoffen vermeiden (Grobfang)
Pumpenleistung
bei der
Entleerung zu
gering
Förderhöhe zu groß für die Leistung
der Pumpe
Langsamer Aufbau einer festen
Fettschicht
Pumpen laufen
Motorschutzschalter hat ausgelöst
nicht an. Zu
Motor ist blockiert
geringe Leistung Motor dreht zu schwer
Die Pumpe der Fettabscheideranlage durch die Pumpe des
Entleerungsfahrzeug (absaugen) unterstützen
Auch bei kalt fließenden Ölen regelmäßig beheizen
Siehe ggf. Displaymeldung am Schaltgerät
Blockade entfernen (Sicherheitshinweise beachten)
Fehler in der Stromversorgung: Es
fehlen eine oder zwei Phasen oder
starke Stromschwankungen
Netzanschluss auf Phasenausfall prüfen
Starke und
ungewöhnliche
Geräusche
Motor / Pumpenteile sind blockiert
Blockade entfernen (Sicherheitshinweise beachten)
Keine Anzeige
am Schaltgerät
Netzausfall
Drehrichtung Pumpe falsch
Schaltgerätesicherung defekt
Drehfeld richtig anschließen. Sicherstellen, dass nicht
die Funktion Linkslauf (nur Anlagen mit entsprechendem
Schaltgerät) aktiviert ist
Stromversorgung sicherstellen
Sicherung erneuern (Fachpersonal)
Meldungen am Schaltgerät „D+S-P“, Anlagentyp D
Anzeige
Ursache
Motorschutz
Motorschutzschalter hat ausgelöst
Drehfeldfehler
falsches Drehfeld bei Netzanschluss
Relaisschaltspiele
V 1.0
Drehfeld richtig anschließen
Stromwert Pumpe falsch eingestellt
Stromwert richtig einstellen
Überhöhter Strom aufgrund
Phasenausfall
Netzanschluss auf Phasenausfall prüfen
Leistungsschütz hat mehr als
100.000 Schaltspiele durchgeführt
Meldung kann quittiert werden. Meldung erscheint nach
weiteren 1.000 Schaltspielen erneut. Der Leistungsschütz
durch den Kundendienst austauschen lassen
Motorstrom aufgrund defekter oder
blockierter Pumpe zu hoch
Phasenfehler
Maßnahme(n)
Eine der Phasen nicht mehr
vorhanden
Blockade entfernen (Sicherheitshinweise beachten)
Netzanschluss am Schaltgerät prüfen
Fehlerstromschutzschalter prüfen
63 / 144
Wartung
Temperaturfehler
Wicklungstemperaturschalter hat
ausgelöst
Unterstrom
Der minimale Strom der Pumpe
wurde unterschritten. (Das Kabel
vom Schaltgerät zum Motor
wurde könnte unterbrochen oder
beschädigt sein)
Überstrom
Relaisfehler
Der maximale Strom der Pumpe
wurde überschritten. (z.B. Blockade)
Leistungsschütz schaltet nicht mehr
Selbstrückstellend bei Motorabkühlung,
Fehlermeldung mit Alarmtaste quittieren, bei weiteren
Temperaturfehlermeldungen bitte Kundendienst
kontaktieren
Kabel prüfen und ggf. reparieren
Pumpe tauschen falls defekt
Blockade entfernen (Sicherheitshinweise beachten)
Pumpe tauschen falls defekt
Spannungsversorgung Schaltgerät ausschalten und
Leistungsschütz durch Kundendienst austauschen lassen
Meldungen am Schaltgerät „PV+S“, Anlagentyp F
Anzeige
Ursache
Maßnahme(n)
Fehler Stellmotor
Endschalter des Stellmotors werden
nicht erreicht
Anschlüsse der Endschalter überprüfen
Ventil auf Blockaden überprüfen
Drehfeldfehler
Motorschutz
falsches Drehfeld bei Netzanschluss
Motorschutzschalter hat ausgelöst.
Stromwert Pumpe falsch eingestellt
Stromwert richtig einstellen
Überhöhter Strom aufgrund
Phasenausfall
Netzanschluss auf Phasenausfall prüfen
Eine der Phasen nicht mehr
vorhanden
Netzanschluss am Schaltgerät prüfen
Motorstrom aufgrund defekter oder
blockierter Pumpe zu hoch
Phasenfehler
Drehfeld richtig anschließen
Blockade entfernen (Sicherheitshinweise beachten)
Fehlerstromschutzschalter prüfen
Relaisschaltspiele Leistungsschütz hat mehr als
100.000 Schaltspiele durchgeführt
Meldung kann quittiert werden. Meldung erscheint nach
weiteren 1.000 Schaltspielen erneut. Der Leistungsschütz
durch den Kundendienst austauschen lassen
Temperaturfehler
Wicklungstemperaturschalter hat
ausgelöst
Unterstrom
Der minimale Strom der Pumpe
wurde unterschritten. (Das Kabel
vom Schaltgerät zum Motor
wurde könnte unterbrochen oder
beschädigt sein)
Selbstrückstellend bei Motorabkühlung,
Fehlermeldung mit Alarmtaste quittieren, bei weiteren
Temperaturfehlermeldungen bitte Kundendienst
kontaktieren
Kabel prüfen und ggf. reparieren
Pumpe kurz im Linkslauf betreiben („Wartung“ -->
„Handbetrieb“ --> „Linkslauf“)
Pumpe tauschen falls defekt
64 / 144
V 1.0
Wartung
Überstrom
Der maximale Strom der Pumpe
wurde überschritten. (z.B. Blockade)
Blockade entfernen (Sicherheitshinweise beachten)
Pumpe kurz im Linkslauf betreiben („Wartung“ -->
„Handbetrieb“ --> „Linkslauf“)
Pumpe tauschen falls defekt
Relaisfehler
Leistungsschütz schaltet nicht mehr
Spannungsversorgung Schaltgerät ausschalten und
Leistungsschütz durch Kundendienst austauschen lassen
Permanente Geruchsbildung
Störung
Mögliche Ursache
Maßnahme
Entlüftungsleitung fehlt, Querschnitt
zu klein
Bauseitig nachrüsten
Anlagenteile sind undicht
Undichtigkeiten beseitigen
Geruchsbelästigung Abwasserleitungen undicht.
Geschlossener Raum ohne jeden
Luftaustausch
8.4
Festsitz und Dichtungen kontrollieren, ggf. instand setzen
Entlüftungsmöglichkeiten schaffen, zwangsgeführte
Entlüftung
Fettabscheider reinigen
•
•
•
•
Sicherstellen, dass kein Abwasser mehr zulaufen kann.
Anlagenbehälter entleeren, wie unter Entleerung (siehe Kapitel 5) beschrieben.
Spannungsversorgung trennen.
Beide Revisionsdeckel des Anlagebehälters abmontieren.
Fettabscheideranlage nicht mit einem Wasserdruck von mehr als 5 bar und einer Wassertemperatur
von mehr als 50° C reinigen. Dichtungen nicht mit Hochdruck-Reiniger bearbeiten. Falls Seife
zur Reinigung verwendet wurde, die Rückstände heraus spülen / absaugen, sie könnten zu
Funktionsstörungen führen.
•
•
•
•
Alle Komponenten mit warmem Wasser reinigen.
Sofern vorhanden, SonicControl-Sensor reinigen.
Beide Revisionsdeckel des Anlagebehälters montieren.
Druckprüfung und anschließende Funktionskontrolle durchführen (siehe Kapitel 3.5).
Sind alle Anlagenkomponenten dicht, kann der Fettabscheider wieder in Betrieb genommen werden.
V 1.0
65 / 144
66 / 144
Datum
Name des Prüfers
Die Anlage wurde vor Verlassen des Werks auf Vollständigkeit und Dichtheit überprüft
Bezeichnung 2
Bezeichnung 1
Dichte
Volumen
Maße
Norm/Zulassung
Rev.Std./Werkstoff/Gewicht
Mat.Nr./Auftr.-Nr./Fert. Datum
9
Mat. Bez.
Anlagenpass / Werksabnahme
Anlagenpass / Werksabnahme
V 1.0
Gewährleistung
10
Gewährleistung
1. Ist eine Lieferung oder Leistung mangelhaft, so hat KESSEL nach Ihrer Wahl den Mangel durch
Nachbesserung zu beseitigen oder eine mangelfreie Sache zu liefern. Schlägt die Nachbesserung zweimal fehl
oder ist sie wirtschaftlich nicht vertretbar, so hat der Käufer/Auftraggeber das Recht, vom Vertrag zurückzutreten
oder seine Zahlungspflicht entsprechend zu mindern. Die Feststellung von offensichtlichen Mängeln muss
unverzüglich, bei nicht erkennbaren oder verdeckten Mängeln unverzüglich nach ihrer Erkennbarkeit schriftlich
mitgeteilt werden. Für Nachbesserungen und Nachlieferungen haftet KESSEL in gleichem Umfang wie für den
ursprünglichen Vertragsgegenstand. Für Neulieferungen beginnt die Gewährleistungsfrist neu zu laufen, jedoch
nur im Umfang der Neulieferung. Es wird nur für neu hergestellte Sachen eine Gewährleistung übernommen.
Die Gewährleistungsfrist beträgt 24 Monate ab Auslieferung an unseren Vertragspartner. § 377 HGB findet
weiterhin Anwendung. Über die gesetzliche Regelung hinaus erhöht die KESSEL AG die Gewährleistungsfrist
für Leichtflüssigkeitsabscheider, Fettabscheider, Schächte, Kleinkläranlagen und Regenwasserzisternen auf 20
Jahre bezüglich Behälter. Dies bezieht sich auf die Dichtheit, Gebrauchstauglichkeit und statische Sicherheit.
Voraussetzung hierfür ist eine fachmännische Montage sowie ein bestimmungsgemäßer Betrieb entsprechend
den aktuell gültigen Einbau- und Bedienungsanleitungen und den gültigen Normen.
2. KESSEL stellt ausdrücklich klar, dass Verschleiß kein Mangel ist. Gleiches gilt für Fehler, die aufgrund
mangelhafter Wartung auftreten. Hinweis: Das Öffnen von versiegelten Komponenten oder Verschraubungen
darf nur durch den Hersteller erfolgen. Andernfalls können Gewährleistungsansprüche ausgeschlossen sein.
Stand 01.06.2010
V 1.0
67 / 144
Generalinspektion / Wartungsanforderung
11
Generalinspektion / Wartungsanforderung
Der Betreiber einer Abscheideranlage ist nach den geltenden gesetzlichen Grundlagen, sowie nach DIN EN 1825 / DIN
4040-100 verpflichtet, die Anlage vor Inbetriebnahme, sowie wiederkehrend alle 5 Jahre einer Generalinspektion mit
Dichtheitsprüfung zu unterziehen. Diese Prüfung darf nur von einer fachkundigen Person durchgeführt werden. Gerne
bieten wir Ihnen die Generalinspektion durch einen unabhängigen Sachverständigen an.
Wartungsanforderung
Für Sie ist es wichtig, die Qualität und Funktionsfähigkeit Ihrer Anlage immer auf dem besten Stand zu halten, gerade
wenn es um die Voraussetzung für eine Gewährleistung geht.
Wenn Sie die Wartung über den Hersteller der Anlage durchführen lassen, gewährleisten wir Ihnen eine ständige
Aktualisierung und Pflege Ihrer Anlage.
………………………………………………………………………………………………………………………………………
Sie möchten ein Angebot zum Wartungsvertrag / Generalinspektion bekommen? Bitte kopieren Sie diese Seite und faxen
sie vollständig ausgefüllt an folgende Fax. Nr.: 08456/27-173
Bei Fragen können Sie sich auch gerne an unseren Service wenden Tel. Nr.: 08456/27-462
Angebot einer Generalinspektion oder eines Wartungsvertrages für Abscheideranlagen
Bitte senden Sie mir ein unverbindliches Angebot zur Wartung o
Absender Generalinspektion o
zu. (Bitte ankreuzen)
Typenschilddaten:
Name:_____________________________
Bahnhofstraße 31
D-85101 Lenting
Strasse: ___________________________
PLZ/Ort:___________________________
Ansprechpartner:____________________
Tel-Nr.:____________________________
Angebotsempfänger
Name:_____________________________
Strasse: ___________________________
PLZ/Ort:___________________________
Ansprechpartner:____________________
Made in Germany
Tel-Nr.:____________________________
Objekt
Name:_____________________________
Strasse: ___________________________
PLZ/Ort:___________________________
Ansprechpartner:____________________
Tel-Nr.:____________________________
68 / 144
V 1.0
Notizen
1
Notizen
69 / 144
V 1.0
DOP
12
DOP
70 / 144
V 1.0
DOP
V 1.0
71 / 144
Führend in Entwässerung
6 4
Privater Wohnungsbau
ohne Kanalanbindung
1 2 3 4
5
1 2 3 4
Öffentlicher Bau
z.B. Krankenhaus
5
Öffentlicher Bau
z.B. Freizeitanlagen
1 2 3 4
5
Gewerblicher Bau
z.B. Hotel
4 5
Gewerblicher Bau
z.B. Industriebau
2 3 5
Gewerblicher Bau
z.B. Tankstellen
1 2 3 4
Privater Wohnungsbau
Ein- und Mehrfamilienhaus
1 Rückstauverschlüsse
2 Rückstauhebeanlagen
3 Hebeanlagen
4 Abläufe / Rinnen
5 Abscheider
6 Kleinkläranlagen
INSTRUCTIONS FOR INSTALLATION, OPERATION AND MAINTENANCE
KESSEL Grease separator EasyClean
D+S, D+SP, M+S, PV+S in NS 2, 3, 4, 7, 10
for set-up in frost-free rooms
Product advantages
Easy installation
Easy operation
Easy to convert to lefthand flow direction on site
o Installation
o Initial operation o Instruction
for the system was carried out by your specialist company:
Name/signatureDateCity
Status 2014/05
Stamp of specialist company
Subject to technical modifications
Approval number
Z-54.1-474
Part no. 010-917DE_EN

1
Table of contents
1
Table of contents
74
1Introduction
77
1.1
Product description, general.............................................................................................. 77
1.2
System types C D E F....................................................................................................... 77
1.3
Type plate.......................................................................................................................... 78
1.4
Scope of supply................................................................................................................. 79
1.5
General instructions on using these operating and maintenance instructions................... 79
1.6
Component assemblies and functional properties............................................................. 80
1.6.1 Control unit........................................................................................................................ 82
2Safety
85
2.1
Correct use........................................................................................................................ 85
2.2
Staff selection and qualification......................................................................................... 85
2.3
Organisational safety measures........................................................................................ 85
2.4
Risks caused by the product.............................................................................................. 86
2.4.1 Hazard through electrical current and cables.................................................................... 86
2.4.2 Hazard through heat development at the pump(s)............................................................ 86
2.4.3 Danger of slipping when emptying the system.................................................................. 86
2.4.4 Risk of infection when coming into contact with the wastewater....................................... 86
3Set-up
87
3.1
Recommendations for the set-up location / operation....................................................... 87
3.2
Installation suggestion....................................................................................................... 87
3.3
Setting up / installing the grease separator system........................................................... 88
3.3.1 Fitting the inlet and outlet................................................................................................... 88
3.3.2 Fitting the viewing window................................................................................................. 89
3.3.3 Fitting the direct emptying pipe - C D................................................................................ 90
3.3.4 Fitting the pump................................................................................................................. 90
3.3.5 Fitting the mechanical two-directional valve - E................................................................. 91
3.3.6 Fitting the electrical two-directional valve - F..................................................................... 92
3.3.7 Fitting the direct emptying pipe - E F................................................................................. 92
3.3.8 Fitting the pressure pipe - C D........................................................................................... 93
3.3.9 Fitting the pressure pipe - E F........................................................................................... 94
3.3.10 Fitting the filling device...................................................................................................... 95
3.3.11 Fitting the screw-type valve - E.......................................................................................... 96
3.3.12 Fitting the solenoid valves - F............................................................................................ 96
3.3.13 Fitting the SonicControl sensor (option) - F....................................................................... 97
74 / 144
V 1.0

3.3.14 Fitting the remote control - F.............................................................................................. 98
3.4
Installing and initialising the control unit ........................................................................... 99
3.4.1 Control unit for system type D........................................................................................... 99
3.4.2 Control unit for system type E............................................................................................ 102
3.4.3 Control unit for system type F............................................................................................ 105
3.5
Initial filling and pressure test............................................................................................ 108
3.5.1 Function check system type C........................................................................................... 108
3.5.2 Function check system type D........................................................................................... 109
3.5.3 Function check system type E........................................................................................... 110
3.5.4 Function check system type F........................................................................................... 111
4Operation
113
4.1
Switching on system type C............................................................................................... 113
4.2
Switching on system type D............................................................................................... 113
4.3
Switching on system type E............................................................................................... 114
4.4
Switching on system type F............................................................................................... 114
5Emptying
115
5.1
Emptying system type C.................................................................................................... 116
5.2
Emptying system type D.................................................................................................... 117
5.3
Emptying system type E.................................................................................................... 118
5.4
Emptying system type F.................................................................................................... 120
6
Settings, operating menu
6.1
System type D................................................................................................................... 122
6.2
System type E.................................................................................................................... 124
6.3
System type F.................................................................................................................... 125
7
Technical data
7.1
General technical data / connection values....................................................................... 130
122
130
7.2Torques.............................................................................................................................. 130
7.3
Pre-conditions / basis for calculation................................................................................. 130
7.4Connections....................................................................................................................... 131
7.5
Dimensional drawing and weight table.............................................................................. 132
7.6
Settings (emptying times).................................................................................................. 133
8Maintenance
134
8.1
Maintenance intervals........................................................................................................ 134
8.2
Carry out maintenance on SonicControl (option)............................................................... 134
8.3Troubleshooting................................................................................................................. 135
8.4
V 1.0
Cleaning the grease separator.......................................................................................... 137
75 / 144

9
System passport / factory approval
138
10Warranty
139
11
General inspection / maintenance requirements
140
12
Declaration of performance
141
76 / 144
V 1.0
Introduction
1
Introduction
Dear customer,
sehr geehrter Kunde,
We are pleased that you have decided to buy one of our products. This will certainly completely match your
requirements. We wish you smooth and successful installation.
In trying to keep our quality standard as high as possible, we rely on your help of course. Please let us know of any
possible improvements we could make to our product.
Have you got any questions? We look forward to you getting in touch.
1.1
Product description, general
The grease separator system has been designed in accordance with EN 1825. The waste can be extracted /
pumped off at any time and without interrupting operation. Depending on the version, the grease separator system
is equipped with an electrical system control and various different control valves. A viewing window allows visual
inspection of the grease collected in the tank.
1.2
System types C D E F
The grease separator system is made in these versions:
2 solenoid valves
EasyClean M+S Mix & Pump
“D+S-P”
EasyClean PV+S Auto Mix & Pump
“PV+S”
“M+S”
x
x
77 / 144
x
x
x
x*
x
x
x
x
x*
x
x
x
Two-directional valve, manual
RemoteControl**
x
Two-directional valve, electric
Viewing window
E
EasyClean D+SP Auto Mix
* Optional
** Wired remote control||
V 1.0
Filling device
EasyClean D+S Mix
F
Direct emptying pipe
Control unit type
System type
(marking for installation)
C
D
x
System designation
x
Introduction
1.3
Type plate
Information on the grease separator system type plate
10 Hardware revision status
52 Material description
53 Material number
52
55 Standard
53
80
79
Bahnhofstraße 31
D-85101 Lenting
56 Free text / explanation
10
78
57 Free text / explanation
55
77
58 Free text / explanation
56
76
59 Free text / explanation
57
58
75 Free text / explanation
75
Made in Germany
76 Material
59
Abb. [1] 77 Approval
78 Gross weight
79 Date of manufacture
80 Order number
Information on the control type plate
1
2
3
4
5
6
7
8
9
10
11
12
1
Designation of the control unit
Material number of the control unit
2
Connection voltage and connection frequency
Current consumption range
3
4
Protective rating (IP)
Bahnhofstraße 31
D-85101 Lenting
FA PV 400
7
363-232 (363-412)
Ue: 400 VAC - 50 Hz
Ie: 6,3 - 10,0 A
IP 54
5
Serial number of the control unit
8
10
Spare parts numbers of the control unit
9
11
Protective class I - protective earth
6
Hazard labels (electr. control unit)
CE marking
SerNr. XXXX
RevStd. X.X
12
SachNr. 363-310
Problematic electrical device material – do not dispose
of with household waste
Abb. [2] Hardware revision status
78 / 144
V 1.0
Introduction
1.4
Scope of supply
–– Grease separator system (see 1.6)
–– Operating and maintenance instructions
1.5
General instructions on using these operating and maintenance instructions
Symbols and keys used
<1>
[2]
•
3.
–
Italics
Reference in the text to a legend number in an illustration
Reference to an illustration
Working step
Working step in numbered sequence
List
Italic case design: Reference to a section / item in the control menu
CAUTION: Warns of a risk to persons and material. Ignoring the instructions marked with this
symbol can lead to serious injuries and material damage.
Note: Technical notes which must be given particular attention.
To make the legibility of the control unit operating instructions as simple as possible, we have refrained from
describing details which can be considered standard and obvious when using a menu control.
If, for example, a section such as Maintenance is to be selected, then the manual does not read
Actuate cursor down key => Select entry Maintenance => Actuate OK key,
it simply contains the instruction “SelectMaintenance ”.
V 1.0
79 / 144
Introduction
1.6
Component assemblies and functional properties
Illustration shows system type F
17
30
28
13
16
11
35
22
18
27
26
24
Abb. [3] 11 Viewing window
13 Type plate
16 Inlet*
17 Filling device
18 Direct emptying pipe
22 Pressure pipe
24 Pump (cleaning and shredding)
26 Switchover valve
27 Actuator motor switchover valve (system type F)
28 Control unit (system type D E F)
30 Inspection cover
35 Outlet*
* Inlet and outlet can be mutually replaced
80 / 144
V 1.0
Introduction
Illustrations of the system types (C D E)
E
D
C
Abb. [4] V 1.0
81 / 144
Introduction
1.6.1 Control unit
1.6.1.1 Control unit “M+S” for system type E
C D E F
Fettabscheider/Greas Seperator “M“
64
LED
Ready for operation
70
Start / Stop
Emptying operation start / stop
69
71
73
LED
Alarm
LED
64
Alarm LED
69
71
Acknowledgement of the acoustic alarm
73
Pump run LED
70
Abb. [5] 82 / 144
V 1.0
Introduction
1.6.1.2 Control unit “PV+S” for system type F
C D E F
General points
The menu control has an operating mode and a standby mode.
If no keys are actuated over a period of approx. 60 seconds, standby mode is activated automatically and the
background lighting of the display is switched off.
Operation, function keys
64
LED
Ready for operation
67
Arrow down
Scroll in the menu
66
68
69
70
71
72
73
Arrow up
ESC
LED
Start / Stop
Alarm
OK
LED
Fettabscheider/Grease Seperator „PV“
Scroll in the menu
64
69
Deletion of an entry, back
71
66
Alarm LED
73
Emptying operation start / stop
70
Acknowledgement of the acoustic alarm
Confirmation of an entry, next level
Pump run LED
68
67
72
Abb. [6] V 1.0
83 / 144
Introduction
Display
74
75
74
Number of the menu
75
Name of the menu
Abb. [7] 84 / 144
V 1.0
Safety
2
Safety
2.1
Correct use
The grease separator system has been exclusively designed for clearing wastewater of waste and grease.
The system must not be used in a potentially explosive environment.
Any
–– conversions or attachments
–– use of non-genuine spare parts
–– carrying out of repairs by companies or persons not approved by the manufacturer
which has been carried out without the express and written permission of the manufacturer can lead to a loss of
warranty.
Later extensions to the Kessel grease separator systems must be carried out by the Kessel factory customer
services.
2.2
Staff selection and qualification
People who operate and/or fit the grease separator system must be
–– at least 18 years old.
–– have been sufficiently trained for the respective tasks.
–– be familiar with and follow the respective technical rules and safety regulations.
The owner-operator decides on the required qualifications for the
–– operating staff
–– maintenance staff
–– repair staff
The owner-operator must ensure that only qualified staff work on the grease separator.
Qualified staff are members of staff who, on the basis of their training and experience as well as their knowledge
of the relevant instructions, valid standards and accident prevention regulations, can carry out the required tasks
and both recognise and avoid any possible hazards.
Work on electrical components may only be carried out by specially trained specialist staff and under adherence
to all the valid accident prevention regulations (UVV).
2.3
Organisational safety measures
The operating and maintenance instructions must always be kept near to the grease separator system.
V 1.0
85 / 144
Safety
2.4
Risks caused by the product
2.4.1 Hazard through electrical current and cables
All live components are protected against unintentional contact as well as splashwater from all directions (IP
54). Before housing covers, plugs and cables are opened, they must be made voltage-free. Work on electrical
components may only be carried out by specialist staff (see 2.2).
The electrical components of the grease separator system are not secured against flooding. VDE 0100 applies
for all electrical work on the unit. The unit must be supplied through a residual-current-operated protected
device (RCD) with residual current of ≤ 30 mA. The control unit is live and must not be opened. Only qualified
electricians may carry out work on electrical equipment. The term qualified electrician is defined in VDE 0105.
2.4.2 Hazard through heat development at the pump(s)
If the drive motors of the pumps run over a longer period, temperatures of more than 70°C can be produced.
Risk of burning when touched.
2.4.3 Danger of slipping when emptying the system
During cleaning work, greasy liquid and/or grease can wet the floor. This results in a slipping hazard. Always
eliminate any liquid and/or grease that has leaked immediately, and wear suitable footwear.
2.4.4 Risk of infection when coming into contact with the wastewater
The wastewater contains bacteria. There is a risk of infection in the event of contact with mucous membranes,
eyes, wounds or when absorbed in the body. Any parts of the body which come into contact with wastewater
should be cleaned immediately, change soiled clothing. Wear personal protective equipment.
86 / 144
V 1.0
Set-up
3
Set-up
3.1
Recommendations for the set-up location / operation
–– Well vented or ventilated room and one with level set-up area capable of bearing an appropriate load.
–– Room temperature at least 15°C.
–– Sealed floor covering with integrated drain.
–– Hot and cold water connections
–– Room height at least 60 cm higher than the grease separator system so that the inspection covers can be
opened during cleaning work.
–– Free working space of at least 1 m in front of the grease separator system.
–– Inlet with stilling section of min. 1 m (gradient 1:50). Transition from on-site drainpipe to stilling section
equipped with 2x45° bends1.
–– If the inlet pipe is longer than 10 m it must be vented separately.
–– Objects (cutlery, crown corks, mustard sachets, bones etc.) interfere with or damage separating operation and
the sludge recirculation pump (option). We recommend fitting a coarse particle strainer.
3.2
Installation suggestion
Abb. [8]
1) Reducing the risk of suctioning siphons and odour traps dry. Less air penetration and movement as well as odour and foam
formation in the separator.
V 1.0
87 / 144
Set-up
3.3
Setting up / installing the grease separator system
When full, the grease separator system is heavy. Make sure it is placed on a surface with a sufficient loadbearing capacity (see “Technical data”, page <?>).
• Set the grease separator system up on a level surface that is capable of bearing a sufficient load. The
connections for inlet <16> and outlet <35> can be mutually replaced.
Bore holes for attachment parts and pipes must be prepared using a drilling adapter. Wherever all-round
seals are planned, the drilling edges must not be deburred in order to achieve an optimum seal. The drilling
speed* must be chosen in such a way that there is no thermal deformation of the cutting surface.
*Recommendation: 500m/s (speed of drilling adapter 1,300 rpm with Ø 120 mm, Ø 120 mm = KESSEL-Art. no.50101)
Torques for the screw connections are listed in chapter 7.2. Make sure these are heeded accordingly.
Installation working sequence
The individual working steps are assigned to the respective system types (C D E F) (see chapter 1.2).
3.3.1 Fitting the inlet and outlet
C D E F
55 16
47
• Set up pipework connections to the domestic installation at inlet
<16> and outlet <35>.
If the connections are to be mutually swapped, remove them together
with the screws <55> and seals <47> and swap them accordingly. Make
sure that the seals have been sufficiently lubricated.
47
35
55
Abb. [9]
88 / 144
V 1.0
Set-up
3.3.2 Fitting the viewing window
C D E F
57
11
56
• Use a drilling adapter (Ø 162 mm) to drill out the recess<B> in the
viewing window holder.
• Fix the viewing window <11> and the seal <56> using the screws
<57>.
Abb. [10]
Grease seal <56> for conversion.
V 1.0
89 / 144
B
Set-up
3.3.3 Fitting the direct emptying pipe - C D
C D E F
A
34
Do not deburr the drilling edges for optimum sealing.
42
34
• Use the screws <42> to fit attachment clamps <34> to the seats <A
and B> on the system tank.
• Prepare drill hole <C> in the scored area (drilling adapter, Ø
118 mm).
42
B
18
C
44
• Insert the all-round seal <44> into the drill hole.
Abb. [11]
• Push the direct emptying pipe <18> into the all-round seal and fit on
the attachment clamps <34>.
• Braided hose with 2 screw clamps and 10 Nm torque to connect PE pipe DN 70 with bead.
If it is passed to a steel tube with longitudinal force-fit connection.
3.3.4 Fitting the pump
C D E F
Do not deburr the drilling edges for optimum sealing.
• Prepare drill hole <C> in the scored area (drilling adapter, Ø
118 mm).
• Insert the all-round seal <40> into the drill hole.
Insert the suction pipe joint for the pump <21> into the
all-round seal.
90 / 144
21
40
C
Abb. [12]
V 1.0
Set-up
• Position the pump <24> on sound-absorbent mat <33> and connect
to the suction pipe joint <21> using the clamps <37> and the
connection piece <38>.
• Bolt the pump and the sound-absorbent mat to the ground (using the
fastening material provided).
24
The electrical connection is described for control unit
installation.
33 37 38
Abb. [13]
3.3.5 Fitting the mechanical two-directional valve - E
C D E F
26
• Fix the valve <26> to the pump using the connection piece <38> and
the clamps <37>.
37
38
37
Abb. [14]
V 1.0
91 / 144
37
21
Set-up
3.3.6 Fitting the electrical two-directional valve - F
C D E F
41
27
• Fix the valve <26> to the pump using the connection piece <38> and
the clamps <37>.
• Fit the actuator motor <27> to the valve using the screws <41>.
•
26
37
38
37
Abb. [15]
3.3.7 Fitting the direct emptying pipe - E F
C D E F
A
• Use the screw <42> to fit attachment clamp <34> to the seat <A> on
42
the system tank.
• Fix the direct emptying pipe <18> loosely to the attachment clamp
<34>.
34
• Use the clamps <37> and the connection piece <38> to fix the direct
emptying pipe to the valve.
• Tighten the attachment clamp <34>.
37
Illustration shows electrical two-directional valve
92 / 144
38
37
Abb. [16]
V 1.0
Set-up
3.3.8 Fitting the pressure pipe - C D
C D E F
Depending on the version, the pressure pipe has 2 or 3 parts. The grease separator nominal size 10 is
equipped with two upper pressure pipes <36> (Y-piece after connection piece <38>).
• Prepare drill hole <C> in the scored area (drilling adapter, Ø 110 mm).
• Use the screw <42> to fit attachment clamp <34> to the seat <A> on
the system tank.
• Fix the lower pressure pipe <22> loosely to the attachment clamp
<34>.
• Use the clamps <37> and the connection piece <38> to fix the lower
pressure pipe to the valve.
42
34
A
22
37
38
• Tighten the attachment clamp <34>.
37
Abb. [17]
37
• Use the clamps <37> and the connection piece <38> to fix the
upper pressure pipe <36> to the lower pressure pipe <22> and
fix to the system tank with the seal <59>.
36
38
37
22
Abb. [18]
V 1.0
93 / 144
C
Set-up
3.3.9 Fitting the pressure pipe - E F
C D E F
Depending on the version, the pressure pipe has 2 or 3 parts. The grease separator nominal size 10 is
equipped with two upper pressure pipes <36> (Y-piece after connection piece <38>).
• Use the drilling adapter (Ø 110 mm) to make a circular opening <C> on the separator tank.
• Use the screw <42> to fit attachment clamp <34> to the seat <A> on
the system tank.
• Fix the lower pressure pipe <22> loosely to the attachment clamp
<34>.
42
22
34
A
C
• Use the clamps <37> and the connection piece <38> to fix the lower
pressure pipe to the valve.
• Tighten the attachment clamp <34>.
37 38
37
Abb. [19]
94 / 144
V 1.0
Set-up
• Use the clamps <37> and the connection piece <38> to fix the upper
pressure pipe <36> to the lower pressure pipe <22> and fix to the
system tank with the seal.
36
37
38
59
37
22
Abb. [20]
3.3.10 Fitting the filling device
C D E F
45
Do not deburr the drilling edges for optimum sealing.
B
17
A
• Use the screw <42> to fit attachment clamp <34> to the seat <A> on
the system tank.
• Cut a circular opening <B> in the seat for the filling device
(drilling adapter, Ø 70 mm).
• Insert the all-round seal <45> into the drill hole.
Abb. [21]
• Insert the filling device <17> into the all-round seal <45> and screw
to the attachment clamp <34>.
V 1.0
34 42
95 / 144
Set-up
3.3.11 Fitting the screw-type valve - E
C D E F
50
The valve must be fitted horizontally.
• Fit the screw-type valve(s) <50> into the water supply pipe(s).
Abb. [22]
3.3.12 Fitting the solenoid valves - F
C D E F
The valve must be fitted horizontally.
51
• Install the solenoid valves <51> as shown and connect to the water
pipes (cold / hot1) accordingly.
The electrical connection is described for control unit installation.
Abb. [23]
1) Hot water is recommended
96 / 144
V 1.0
Set-up
3.3.13 Fitting the SonicControl sensor (option) - F
C D E F
43
44
45
42
• Open the inspection cover above the outlet fitting.
• Use the screws <45> to fit the sensor holder <44> to the outlet fitting
<43> as shown.
81
• Fix the sensor <42> to the bracket and turn against the stop<81>
• Prepare a circular opening <A> (Ø 19 mm) and fit the cable duct
provided.
Abb. [24]
A
• Route the sensor cable through the cable duct <58>. Make sure
that the cable duct has been fitted properly and is screwed closed.
For maintenance purposes, approx. 1 m of cable must be left so
that the sensor can be pulled out of the system tank.
• In the case that the inlet / outlet of the EasyClean grease separator
are swapped, the SonicControl must be located in the outlet side
of the grease separator.
•
• To accomplish this the blind plug on the inlet side of the grease
separator and the cable socket (A)(M16x1.5) located on the outlet
side of the grease separator must be interchanged.
• Close the inspection cover.
Abb. [25]
Abb. [25a]
Fettabscheider > NS 10
Behälterwand < = 10 mm
Bohrung ø 14,5 mm
Kabelverschraubung*
58
M16 x 1,5
V 1.0
97 / 144
Sensorkabel
Set-up
3.3.14 Fitting the remote control - F
C D E F
53
Fit the remote control unit in the required position as follows.
• Mount the screws <52> with dowel plugs <53> (or suitable
attachment material) in such a way that the remote control <54> can
be attached to them. A drilling template is included in the scope of
supply.
52
54
The electrical connection is described for control unit installation.
Abb. [26]
98 / 144
V 1.0
Set-up
3.4
Installing and initialising the control unit
3.4.1 Control unit for system type D
C D E F
3.4.1.1 Installing the control unit “D+S-P”
Choose the installation location in such a way that the type plate is easily legible (regular inspections).
• Choose the installation location for the control unit “D+S-P” (taking pump cable lengths and solenoid valves
into consideration)
Caution, beware of electric current! The control unit may only be opened when it has been
disconnected from the mains.
• Put the main switch <23> into the OFF position.
• Loosen the screws <25>.
25
• Open the housing.
23
• Mount the housing in the designated place, using all four attachment
possibilities in the corners. A drilling template is included in the scope
of supply.
Abb. [27]
V 1.0
99 / 144
Set-up
3.4.1.2 Setting up the electrical connections
• Set up connections according to the wiring diagram (below and in the control unit housing cover).
Wiring diagram
OFF ON
gn bl
PE N
T3
2 4 6 NC A2
L3
T2
L2
bl
L1
gnge
T1
or
or
ws
or
TF1
PE
or
bl
gn
gr
bl
gn
gr
bl
gr
bl
gn
gn
1
1
2
gnge
or
bl
ws
ws
sw
bl
ws
bl
ws
sw
bl
gr
or
bl
gr
bl
bl
or
A
or
or
ws
br
gn
gn
1 2 PE 1
1 2345
gr
gr
gr
gr
2
gnge
RS485
gr
2 PE
1 2 PE 1 2 PE
br ws gn
PE
U VW
M
A1
A1
A2
A2
or or or or bl ws sw bl bl
A B GNDP+ P-+12VLINGNDSHD
sw bl gn
L1
a
b
c
d
e
f
PE
g
363-315
Abb. [28]
a
Mains
c
Hot water valve
b
d
e
f
g
Pump
Cold water valve
Potential-free switch contact “Warning”
Potential-free switch contact “Alarm”
Remote control
• Close the housing and tighten the screws <25>.
100 / 144
V 1.0
Set-up
3.4.1.3 Initialising the control unit
Care must always be taken that the pump(s) do(es) not run dry. Do not press the Start / Stop key.
• Switch the control unit power supply on and put the main switch in the ON position, menu 3.8.1 appears in the
display.
If menu 3.8.1 (initialisation) is not offered on the display, the control unit has already been initialised. In this
case, the parameters set (according to the following list) must be checked using the operating menu (for
operation of the control unit and operating menu page <?>).
The following entries are expected during initialisation:
–– Language
–– Date / time
–– Nominal size
–– Number and capacity of the pumps
Language
• Press OK.
• Use the cursors to select the required language and confirm by pressing OK, the menu Date/time is shown.
Date / time
• Set the respectively flashing numbers in the date and time display and confirm by pressing OK. After the
last entry, the menu Nominal sizewill appear. The date for emptying (maintenance date, 90 days) is saved
automatically (see 6.1 menu 2 on how to change this).
Nominal size
• Select the nominal size in accordance with details on the type plate and confirm by pressing OK, the menu
Number of pumps is shown.
Number of pumps
• Select number of pumps / pump capacity (see pump(s) type plate) and press OK; initialisation is completed
and the menu System information with the settings just made will appear.
V 1.0
101 / 144
Set-up
3.4.2 Control unit for system type E
C D E F
3.4.2.1 Installing the control unit “M+S”
• Choose the installation location for the control unit “M+S” (taking pump cable length into consideration).
Caution, beware of electric current! The control unit may only be opened when it
has been disconnected from the mains.
• Put the main switch <23> into the OFF position.
• Loosen the screws <25>.
• Open the housing.
25
23
• Mount the housing in the designated place, using all four attachment
possibilities in the corners. A drilling template is included in the
scope of supply.
Abb. [29]
V 1.0
102 / 144
V 1.0
Set-up
3.4.2.2 Setting up the electrical connections
• Set up connections according to the wiring diagram (below and in the control unit housing cover).
Wiring diagram
gn bl
PE N
T1
T2
T3
2 4 6 NCA2
w
bl
gr
gr
w
gr
bl
gr
w
bl
gr
bl
or
w
bl
or
or
TF2
or
gr
TF1
or
gn
PE
1 2 3 4 5
5
a
bl
w
bl
PE
e
6
d1
c
b
1
2
d
d2
3
4
d3
5
6
363-311
Abb. [30]
a
Mains
c
Potential-free switch contact “Warning” / “Alarm”
b
d
d1
d2
d3
V 1.0
Pump
Remote control (remove bridge <e> when remote control is connected)
ON
OFF
Control pump in operation
103 / 144
Set-up
3.4.2.3 Initialising the control unit
Care must always be taken that the pump(s) do(es) not run dry. Do not press the Start / Stop key.
• Set the nominal size (NS) according to specifications on the type plate, to do this set the DIP switch (top right
on the board) as follows:
NS 2
ON
DIP
1 2 3 4
NS 3
ON
DIP
1 2 3 4
NS 4
ON
DIP
1 2 3 4
NS 7
ON
NS 10
DIP
1 2 3 4
ON
DIP
1 2 3 4
• Close the housing.
• Tighten the screws <25>.
104 / 144
V 1.0
Set-up
3.4.3 Control unit for system type F
C D E F
3.4.3.1 Installing the control unit “PV+S”
• Choose the installation location for the control unit “PV+S” (taking pump cable lengths and solenoid valves
into consideration)
Caution, beware of electric current! The control unit may only be opened when it has been
disconnected from the mains.
• Put the main switch <23> into the OFF position.
• Loosen the screws <25>.
25
• Open the housing.
23
• Mount the housing in the designated place, using all four attachment
possibilities in the corners. A drilling template is included in the scope
of supply.
Abb. [31]
V 1.0
105 / 144
Set-up
3.4.3.2 Setting up the electrical connections
• Set up connections according to the wiring diagram (below and in the control unit housing cover).
OFF ON
gn bl
PE N
T3
2 4 6 NC A2
2 4 6 NC A2
L3
bl
T2
L2
L1
gnge
T1
2
TF1
gnge
gr
bl
gn
or
gr
bl
gr
bl
or
gn
gn
PE
gn
1
gr
gr
gr
2
gnge
1
In2
1
bl
gn
In1
gr
gr
2
gnge
bl
bl
ws
bl
ws
sw
2
1
bl
or
ws
sw
4
3
ws
gr
or
bl
gr
bl
bl
RS485
In3
or
or
ws
A
or
or
or
ws
br
gn
1 2 3 4 5 PE
1 2
PE
1 2 PE 1
2 PE
2
14
36
5
20 21 22 10 11 12 13
14 15
br ws gn
41
1 2 3
PE
or or or or bl ws sw bl bl
1 2 PE 1 2 PE
U VW
M
A B GNDP+ P-+12VLINGNDSHD
L1L1
M
1 ph.
sw bl gn
PE
A1
A1
A2
A2
L1
S1
a
b
c
d
e
f1
f2
S2
g
PE
S3
h
i
363-312
Abb. [32]
a
Mains
c
Actuator motor
b
d
e
f1
f2
g
h
i
Pump
Hot water valve
Cold water valve
Potential-free switch contact “Warning”
Potential-free switch contact “Alarm”
Actuator motor limit switch
SonicControl sensor (option)
Remote control connection (option)
• Close the housing.
• Tighten the screws <25>.
106 / 144
V 1.0
Set-up
3.4.3.3 Initialising the control unit
Care must always be taken that the pump(s) do(es) not run dry. Do not press the Start / Stop key.
• Switch the control unit power supply on and put the main switch in the ON position, menu 3.8.1 is shown on
the display.
If initialisation (menu 3.8.1) is not offered on the display, the control unit has already been initialised. In this
case, the parameters set (according to the following list) must be checked using the operating menu (for
operation of the control unit and operating menu page <?>).
The following entries are expected during initialisation:
–– Language
–– Date / time
–– SonicControl sensor and system type (option)
–– Standard
–– Nominal size
–– Number and capacity of the pumps
Language
• Press OK.
• Use the cursors to select the required language and confirm by pressing OK, the menu Date/time is shown.
Date / time
• Set the respectively flashing numbers in the date and time display and confirm by pressing OK. If a
SonicControl sensor is fitted, the SonicControlmenu appears after the last entry; if not, the Standardmenu
will appear. The date for emptying (maintenance date, 90 days) is saved automatically (see menu item 2.4,
chapter 6.3 on how to change this).
SonicControl Sensor
If a SonicControl sensor (option) is connected, answer the question with “yes”, otherwise answer “no” and the
Standard menu is displayed.
If “yes”:
• Enter password (must be obtained from KESSEL).
• Select the system type from the display and confirm by pressing OK, the Standardmenu will appear.
V 1.0
107 / 144
Set-up
Standard
• Select Euro standard 1825 and confirm by pressing OK, the Nominal sizemenu will appear.
Nominal size
• Select the nominal size in accordance with details on the type plate and confirm by pressing OK, the menu
Number of pumps is shown.
Number of pumps
• Select number of pumps / pump capacity (see pump(s) type plate) and press OK; initialisation is completed
and the menu System information with the settings just made will appear.
3.5
Initial filling and pressure test
• Make sure that there are no external materials or soiling in the grease separator.
• Fill the grease separator system completely with water1 (up to system overflow on the outlet <35>).
• Carry out pressure test, to do this
• open two inspection covers.
• Seal outlet and inlet using suitable means.
• Fill the grease separator system completely2 with water and make sure there are no leaks.
• Make the inlet and outlet functional again.
3.5.1 Function check system type C
C D E F
• Switch the pump on.
• Carry out visual inspection through the viewing window to ensure that water is being pumped through the
pressure pipe <22> into the system tank (see Fig. [33]).
• Switch the pump off.
• Make sure that fresh water can be supplied.
System type C is now ready for operation.
1) By hand or with system type F via control unit, manual operation, function Fill
2) Up to 2 cm below the inspection opening.
108 / 144
V 1.0
Set-up
3.5.2 Function check system type D
C D E F
Check pump function
22
• Switch the control unit “D+S-P” on; menu 0 System information is
shown.
• Press OK, menu 1 is shown.
• Select Maintenance => Manual operation => Cleaning+shredding,
the pump is switched on.
• Carry out visual inspection through the viewing window to ensure
that water is being pumped through the pressure pipe <22> into the
system tank.
• Press the ESC key, the pump is switched off.
Abb. [33]
Check function of hot water solenoid1
Carry out the following settings in the Maintenance menu:
• Manual operation => Part-fill valve the solenoid is triggered. Make sure that the water runs into the system
tank via the filling device.
Check function of cold water solenoid
Carry out the following settings in the Maintenance menu:
• Maintenance => Manual operation => Part-fill valvethe solenoid is triggered. Make sure that the water runs
into the system tank via the filling device.
• Check function of remote control (option)
• Carry out initialisation and functional test of the SonicControl in accordance with the operating instructions
provided (optional).
System type D is now ready for operation.
1) Hot water is recommended
V 1.0
109 / 144
Set-up
3.5.3 Function check system type E
C D E F
• Switch control unit “M+S” on.
22
Make sure that the switchover valve is not in the “Disposal” position
since in this case the contents of the system tank would not be
pumped off.
• Set the switchover valve <26> to the cleaning and shredding position
(handle to the right).
• Press Start / Stop, the pump starts to run.
• Carry out visual inspection through the viewing window to ensure
that water is being pumped through the pressure pipe <22> into the
system tank.
• Press Start / Stop button, the pump switches off.
26
Abb. [34]
Check water supply function
• Open the cold water and hot water1 supplies alternately and make sure that the water flows through the filling
device into the system tank.
• Carry out initialisation and functional test of the SonicControl in accordance with the operating instructions
provided (optional).
System type E is now ready for operation.
1) Hot water is recommended
110 / 144
V 1.0
Set-up
3.5.4 Function check system type F
C D E F
Check function of pump / cleaning and shredding
• Switch control unit “PV+S” on.
• Press Start / Stop key, menu Maintenance is shown.
• Select Automatic operation and press OK, menu Select Automatic
operation is shown.
• Press OK, automatic operation starts, after the time delay has
expired (is shown on display) the pump starts up.
• Carry out visual inspection through the viewing window to ensure
that water is being pumped through the pressure pipe <22> into the
system tank.
• Press the ESC key twice and confirm Cancel emptying? by pressing
OK, the pump is switched off and ready for operation.
22
Abb. [35]
Check function of the switchover valve actuator motor
In the menu Maintenance carry out the following settings:
• Manual operation => Part emptythe actuator motor moves the valve to the right position, then the pump starts
to run. If the pump starts up immediately, the valve was already in the designated position.
• ESC, the pump is switched off => Mixthe actuator motor moves the valve in the opposite direction, then the
pump starts to run.
• ESC, the pump is switched off => Part emptythe actuator motor moves the valve in the opposite direction,
then the pump starts to run.
• ESC, the pump is switched off, the actuator motor is ready for operation.
Check function of hot water solenoid1
In the menu Maintenance carry out the following settings:
• Manual operation => Rinsethe solenoid is triggered. Make sure that the water runs into the system tank via
the filling device.
Check function of cold water solenoid
Carry out the following settings in the system control menu:
• Maintenance => Manual operation => Fillthe solenoid is triggered. Make sure that the water runs into the
system tank via the filling device.
1) Hot water is recommended
V 1.0
111 / 144
Set-up
Check function of SonicControl sensor (option)
Carry out the following settings in the system control menu:
• Maintenance => Manual operation => SonicControl => Start measurement? => OK, measurement is carried
out and the result shown. If no fault message appears, the SonicControl sensor is ready for operation.
• Check function of remote control (option)
The remote control has the same operating features as the control unit.
• Carry out initialisation and functional test of the SonicControl in accordance with the operating instructions
provided (optional).
System type F is now ready for operation.
112 / 144
V 1.0
Operation
4
Operation
The grease separator separates greases, oils and sludge out of the wastewater. Different methods and/or control
units are used for emptying the separated materials, depending on the system type (see 1.2).
4.1
Switching on system type C
C D E F
The grease separator is ready for operation following successful function check (see 3.5.1).
4.2
Switching on system type D
C D E F
The grease separator system can be switched on after successful
function check (see 3.5.2), for this purpose:
65
• Switch the main switch on*. After the successful system test, the
menu 0 System information appears in the display <65> and the
green LED <64> lights up; the grease separator system is ready for
operation.
* The main switch only needs to be switched on for emptying.
If menu 3.8.1 Language is displayed after switch-on, carry out
initialisation (3.4.2.3).
V 1.0
113 / 144
Abb. [36]
64
Operation
4.3
Switching on system type E
C D E F
64
The grease separator system can be switched on after successful
function check (see 3.5.3), for this purpose:
• Switch the main switch on*. After the successful system test the
green LED <64> lights up, the grease separator system is ready for
operation.
* The main switch only needs to be switched on for emptying.
Abb. [37]
4.4
Switching on system type F
C D E F
The grease separator system can be switched on after successful
function check (see 3.5.4), for this purpose:
65
64
• Switch the main switch on*. After the successful system test, the
menu 0 System information appears in the display <65> and the
green LED <64> lights up; the grease separator system is ready for
operation.
* The main switch only needs to be switched on for emptying.
Exception: A SonicControl sensor (see 3.3.13) is installed.
Abb. [38]
If menu 3.8.1 Language is displayed after switch-on, carry out
initialisation (3.4.3.3).
114 / 144
V 1.0
Emptying
5
Emptying
General points
The emptying cycles for the different system types are tuned so that with a medium degree of soiling, the
system tank is emptied completely and at the same time cleaned as well as possible. The pump design makes it
impossible for the pump to run dry (exception: initial operation or putting back into operation).
System type D F
C D E F
The pump running times (pump off + Cleaning and shredding) as well as the quantities of hot water1 supplied
are based on empirical values. If the cleaning result is not satisfactory, the running times can be changed in the
control unit menu.
1) Basis for calculation: Water supplied at 23m³ per hour.
V 1.0
115 / 144
Emptying
5.1
Emptying system type C
C D E F
Workflow diagram for emptying cycle (Euro standard 1825)
A
Emptying period
1
Pump running (cleaning and shredding)
B
2
3
4
Emptying vehicle is pumping off
Hot water* inlet
Cold water inlet
Time until level has fallen by approx. 10 cm
* recommended
A
B
4
1
2
3
Abb. [39]
Emptying
• Connect the suction hose of the emptying vehicle to the direct emptying pipe and start pumping.
• Once the level has fallen by about 10 cm, switch the pump on (cleaning and shredding).
• When the system tank is about 1 third empty, open the hot water inlet.
• Once the system tank is almost empty, stop the pump and the hot water inlet.
If the system tank is not filled with water again after emptying (level upper edge of viewing window), greases and
suspended matter can flow freely into the sewage system.
• Once the system tank is completely empty, remove the extraction hose from the emptying vehicle and fill the
system tank completely with cold water.
116 / 144
V 1.0
Emptying
5.2
Emptying system type D
C D E F
Workflow diagram for emptying cycle (Euro standard 1825)
A
B
1
2
3
4
Setting
in the menu
Emptying period
A1 Automatic operation (cleaning and shredding, part-filling)
A2 Filling of the system tank (start through operator)
Emptying vehicle is pumping off
Pump running (cleaning and shredding)
3.1.1
Fill valve (cold water inlet, start through operator)
3.1.3
3.1.2
Part-fill valve (hot water inlet*)
Time delay until pump (1) starts, so that level falls by approx. 10 cm
* recommended
A
3.1.4
A2
A1
B
4
1
2
3
Abb. [40]
Emptying
• Switch the control unit on.
• Connect the extraction hose of the emptying vehicle to the direct emptying pipe.
• Start Automatic operation, after the time delay has expired1 <4>, the pump is automatically switched on for the
time corresponding to the nominal size1.
• Then the function part-fill1 is activated.
If the system tank is not filled with water again after emptying (level upper edge of viewing window), greases and
suspended matter can flow freely into the sewage system.
• When the system tank is completely empty, remove the extraction hose from the emptying vehicle.
• Function Start filling? Activate with OK, the system tank is filled completely with cold water.
• Then acknowledge the message Filling completed successfully! by pressing OK and switch the control unit off.
1) Period can be set in the menu (see table above Fig. [40])
V 1.0
117 / 144
Emptying
5.3
Emptying system type E
C D E F
Workflow diagram for emptying cycle (Euro standard 1825)
A
B
C
D
Emptying period
A1 Manual operation (pump running times)
A2 Filling of the system tank (through operator)
Emptying vehicle connected
Pump running
C1 Pump on (pump off to the emptying vehicle)
C2 Pump on (cleaning and shredding)
Valve switchover by the operator
D1 Switching position Pump off
D2 Switching position Cleaning and shredding
E
Hot water* inlet (Part-fill,switching on and off by operator)
G
Emptying times (see page 133)
F
Cold water inlet (Fill,switching on and off by operator)
* recommended
A
A1
A2
B
C1
C2
C
D1
D2
D
E
F
G
1
2
3
4
5 6
7
8 9
10 11
12
13
Abb. [41]
118 / 144
V 1.0
Emptying
Emptying
• Switch the control unit on.
• Connect the extraction hose of the emptying vehicle to the direct emptying pipe.
• Press Start / Stop key, emptying workflow <A1> is activated. The pump is switched on and off manually.
Depending on the requirement of the emptying cycle, (see Fig. [41]) the switchover valve must be actuated at
the respective switching points or the hot water supply must be opened and closed.
Recommendation: Position the illustration (Fig. [41]) near the grease separator system. Then the times when
operation is required (valve switching points) can always be read off.
• After the end of section A1, remove the hose connection to the emptying vehicle.
• Switch the control unit off.
If the system tank is not filled with water again after emptying (level upper edge of viewing window), greases and
suspended matter can flow freely into the sewage system.
• Fill the system tank completely with cold water.
V 1.0
119 / 144
Emptying
5.4
Emptying system type F
C D E F
Workflow diagram for emptying cycle (Euro standard 1825)
A
B
C
D
E
G
Setting in the menu
Emptying period
A1 Automatic operation
A2 Filling of the system tank (start through operator)
Emptying vehicle connected
Pump runs automatically
1.6.1. / -3 / -6 / -9 / -12
C1 Pump on (pump off to the emptying vehicle)
1.6.2 / -5 / -8 / -11
C2 Pump on (cleaning and shredding)
Valve switchover
D1 Switching position pump off
D2 Switching position cleaning and shredding
1.6.4 / -7 / -10
Hot water* inlet (Part fill), automatic
1.6.13
Emptying steps (see 7.6 (Emptying times) on page 133)
* recommended
A
A1
A2
B
C1
C2
C
D1
D2
D
E
F
G
1
2
3
4
5 6
7
8 9
10 11
12
13
Abb. [42]
120 / 144
V 1.0
Emptying
Emptying in automatic operation
(The automatic operation steps can be triggered individually through manual operation)
• Switch the control unit on.
• Set up hose connection between the disposal vehicle and the direct emptying pipe.
• Press Start / Stop key, menu Maintenance is shown.
• Select Automatic operation and press OK, menu Automatic operation is shown.
• Select Start automatic operation emptying workflow <A1> is activated. The functions pump run times, hot
water inlet and valve switchover are carried out automatically as shown in Fig. [42].
• Remove the hose connection to the emptying vehicle.
If the system tank is not filled with water again after emptying (level upper edge of viewing window), greases and
suspended matter can flow freely into the sewage system.
• Switch the control unit off if necessary.
V 1.0
121 / 144
Settings, operating menu
6
Settings, operating menu
6.1
System type D
C D E F
Control unit “D+S-P”
General instructions and “activate operating mode” see 6.3
Operating menu
0
System information
1
Information
1.1
1.2
2
Maintenance
Settings
Log book
1.1.1
Total operating time
1.1.2
Pump running time
1.1.3
Pump start-ups
1.1.4
Power failure
1.2.1
Most recent I&F
1.2.2
I&F previous to that
1.2.3
I&F previous to that
1.2.4
…
1.3
Control unit type
Alternating display on SonicControl option (4s)
1.4
Maintenance date
1.4.1
Last maintenance separator
1.4.2
Next maintenance separator
1.5.1
Rotary field
1.5
Current measured values
1.6
Parameters
2.1
Manual operation
2.2
Automatic operation
2.3
SDS
2.4
3
Operating hours
Maintenance date
2.5
Clearance RemoteControl
3.1
Parameters
Carry out setting in agreement with factory Customer Services
122 / 144
1.6.1
Cleaning+shredding
1.6.2
Part-fill valve
1.6.3
Fill valve
1.6.4
Switch-on delay
1.6.30
RemoteControl access
2.1.1
Cleaning+shredding
2.1.2
Part-fill valve
2.1.3
Fill valve
2.3.1
Test pump 1
2.3.2
Test part-fill valve
2.3.3
Test fill valve
2.3.4
Test pump 2
2.3.1
Last maintenance separator
2.3.2
Next maintenance separator
2.5.1
Clearance period
2.5.2
Disable
3.1.1
Cleaning+shredding
3.1.2
Part-fill valve
3.1.3
Fill valve
3.1.4
Switch-on delay
V 1.0
Settings, operating menu
3.2
Profile memory
3.3
Date/time*
3.4
Number of pumps*
3.6
3.7
3.8
3.9
Nominal size*
Communication
Language*
Expert mode
3.1.5
RemoteControl access
3.2.1
Save parameters
3.2.2
Load parameters
3.4.1
1 pump 4-6.4A
3.4.2
2 pumps 4-6.4A
3.4.3
1 pump 6.5-8A
3.4.4
2 pumps 6.5-8A
3.6.1
NS2
3.6.2
NS3
3.6.3
NS4
3.6.4
NS7
3.6.5
NS10
3.7.1
Plant name
3.7.2
Own number
3.7.3
Modem type
3.7.4
PIN
3.7.5
Text message switchboard
3.7.6
Text message destination 1
3.7.7
Text message destination 2
3.7.8
Text message destination 3
3.7.9
Status
3.8.1
Deutsch
3.8.2
English
3.8.3
Français
3.8.4
Italiano
3.8.5
Nederlands
3.8.6
Polski
3.9.1
On delay
3.9.2
Limit running time
3.10 Reset
* These parameters must be entered during initialisation and after a control unit “reset”.
s
V 1.0
123 / 144
Settings, operating menu
6.2
System type E
C D E F
Control unit “M+S”
Settings
See 3.4.2.3, set nominal sizes using DIP switch.
124 / 144
V 1.0
Settings, operating menu
6.3
System type F
C D E F
Control unit “PV+S”
General points
Fettabscheider/Grease Seperator „PV+S“
The menu control has an operating mode and a standby mode. In
operating mode, the system settings can be shown and set on the
display using the operating menu. If no keys are actuated over a period
of approx. 60 seconds, standby mode is activated automatically and the
background lighting of the display is switched off.
66
Navigation keys for the menu
66
67
68
72
Arrow up
Scroll in the menu
ESC
Deletion of an entry, back
68
Arrow down Scroll in the menu
OK
Confirmation of an entry, next level
67
72
Abb. [43]
Activating operating mode
• Press the OK <72> key on the control panel, the background lighting
of the display lights up and the start screen (System information) is
shown.
• Press OK <72>, level 1 of the operating menu is activated.
Fettabscheider/Grease Seperator „PV+S“
Note: The display can vary depending on the configuration.
The number of the respective menu level <63> is shown in the form of
digits in the top display line.
72
Abb. [44]
V 1.0
125 / 144
Settings, operating menu
Operating menu
0
System information
1
Information
1.1
1.2
Operating hours
Log book
1.1.1
Total operating time
1.1.2
Pump running time
1.1.3
Pump start-ups
1.1.4
Power failure
1.1.5
SonicControl runtime
1.1.6
Op. above alarm level
1.1.7
Op. above alarm temp.
1.1.8
Number of emptying cycles
1.2.1
Most recent I&F
1.2.2
I&F previous to that
1.2.3
I&F previous to that
1.2.4
…
1.3
Alternating display on SonicControl option (5s)
1.4
Maintenance date
1.5
1.6
1.7
Current measured values
Parameters
Measured data
126 / 144
1.4.1
Last maintenance separator
1.4.2
Next maintenance separator
1.4.3
Last maintenance SonicControl
1.4.4
Next maintenance SonicControl
1.5.1
Rotary field
1.5.3
Layer thickness
1.5.4
Temperature
1.6.1
Part empty
1.6.2
Mix
1.6.3
Empty
1.6.4
Fill
1.6.5
Mix
1.6.6
Empty
1.6.7
Fill
1.6.8
Rinse
1.6.9
Empty
1.6.10
Fill
1.6.11
Rinse
1.6.12
Empty
1.6.13
Fill
1.6.14
Layer thickness alarm
1.6.15
Layer thickness pre-alarm
1.6.16
Temperature alarm
1.6.17
Start of measuring range
1.6.18
End of measuring range
1.6.19
Measuring interval
1.6.20
Level comparison
1.6.21
Regular emptying interval
1.6.30
RemoteControl access
1.7.1
Last layer thickness and temperature
determined
V 1.0
Settings, operating menu
2
Maintenance
1.8
Emptying
2.1
Manual operation
2.2
Automatic operation
2.3
SDS
2.4
2.5
3
Settings
3.1
Maintenance date
Clearance RemoteControl
Parameters
Carry out setting in agreement with factory Customer Services
V 1.0
127 / 144
1.7.2
Layer thickness and temperature
determined before that
1.7.3
Layer thickness and temperature
determined before that
1.7.4
…
1.8.1
Last emptying cycle
1.8.2
Regular emptying
2.1.1
Part empty
2.1.2
Mix
2.1.3
Empty
2.1.4
Fill
2.1.5
Mix
2.1.6
Empty
2.1.7
Fill
2.1.8
Rinse
2.1.9
Empty
2.1.10
Fill
2.1.11
Rinse
2.1.12
Empty
2.1.13
Fill
2.1.14
Counter-clockwise rotation
2.1.15
SonicControl
2.3.1
Test pump 1
2.3.2
Test actuator motor 1
2.3.3
Test pump 2
2.3.4
Test actuator motor 2
2.3.5
Test pump 3
2.3.1
Last maintenance separator
2.3.2
Next maintenance separator
2.3.3
Last maintenance SonicControl
2.3.4
Next maintenance SonicControl
2.5.1
Clearance period
2.5.2
Disable
3.1.1
Part empty
3.1.2
Mix
3.1.3
Empty
3.1.4
Fill
3.1.5
Mix
3.1.6
Empty
3.1.7
Fill
3.1.8
Rinse
3.1.9
Empty
3.1.10
Fill
3.1.11
Rinse
3.1.12
Empty
Settings, operating menu
3.2
Profile memory
3.3
Date/time*
3.4
Number of pumps*
3.5
3.6
3.7
3.8
Standard*
Nominal size*
Communication
Language*
128 / 144
3.1.13
Fill
3.1.14
Layer thickness alarm
3.1.15
Layer thickness pre-alarm
3.1.16
Alarm temperature
3.1.17
Start of measuring range
3.1.18
End of measuring range
3.1.19
Measuring interval
3.1.20
Level comparison
3.1.20
Regular emptying interval
3.1.21
RemoteControl access
3.2.1
Save parameters
3.2.2
Load parameters
3.4.1
1 pump 4-6.4A
3.4.2
2 pumps 4-6.4A
3.4.4
1 pump 6.5-8A
3.4.5
2 pumps 6.5-8A
3.5.1
DIN 4040
3.5.2
DIN installation in the ground
3.5.3
Euro standard 1825
3.5.4
Euro standard installation in the ground
3.6.1
NS2
3.6.2
NS3
3.6.3
NS4
3.6.4
NS7
3.6.5
NS10
3.6.6
NS15
3.6.7
NS20
3.6.8
NS25
3.6.9
NS30
3.6.10
NS35
3.6.11
NS S
3.7.1
Plant name
3.7.2
Own number
3.7.3
Modem type
3.7.4
PIN
3.7.5
Text message switchboard
3.7.6
Text message destination 1
3.7.7
Text message destination 2
3.7.8
Text message destination 3
3.7.9
Status
3.8.1
German
3.8.2
English
3.8.3
Français
3.8.4
Italiano
3.8.5
Nederlands
V 1.0
Settings, operating menu
3.9
Expert mode
3.10
Reset
3.11
SonicControl*
3.12
Type of system*
3.8.6
Polski
3.9.1
On delay
3.9.2
Limit running time
3.9.3
Conductivity
3.9.4
Density
3.9.5
Trigger
3.9.6
SNR
3.9.7
Noise
3.9.8
Sensor dry alarm
3.12.1
Animal fat 60%
3.12.2
Vegetable fat 60%
3.12.3
Vegetable oil 60%
3.12.4
Animal fat 90%
3.12.5
Vegetable fat 90%
3.12.6
Vegetable oil 90%
* These parameters must be entered during initialisation and after a control unit “reset”.
V 1.0
129 / 144
Technical data
7
Technical data
7.1
General technical data / connection values
Operating voltage
Pump, connection value
Pump, weight
Stand-by power (control unit)
Protective rating (complete system)
400 V AC 50 Hz
400 V AC 50 Hz
approx. 27 kg
approx. 5 W
IP 54
C 16A
Fuse required
FI 30 mA
On-site according to VDE 0100
7.2
Torques
Description / use
Door hinge screw A2 bright 6x40
Torque Nm
Spanner size
7
T50
4.5 ±0.5
PT-screw 100x30 A2
PT-screw KB60x30 WN 1411
4.5 ±0.5
3
Profile clamp / on system tank
Hexagon safety screw M8x30
10
Pipe clamp D=120
8-10
Pipe clamp D=84
8-10
PT-hexagon screw K80x40 WN 1447
7.3
5.5 ±0.5
T30
T30
ISK 10mm
Spanner socket
13 mm
Spanner socket
13 mm
Spanner socket
13 mm
Spanner socket
13 mm
Pre-conditions / basis for calculation
The parameters for operation (emptying) of the grease separator system are based on the following values:
–– Pumping quantity (extraction capacity) of the emptying vehicle 10 l/s = 36 m³/h.
–– Cold/hot water supply 1.7 l/s = 6.1 m³/h (DN 25, 4 bar).
–– Room temperature at least 15°C.
130 / 144
V 1.0
Technical data
CU* “PV+S”
CU* “M+S”
CU* “D+SP”
Filling device
Clamp-connection
15
Two-pin earthed plug
1.25
H05VV-F
3x1.0mm²
No cable
fitted
No
1“
Solenoid valve
1“
Pressure pipe
connection
DN 70 E-welding muff
Plasson muff PN 10
fabric hose with 2 screw
clamps
Storz-B connection
2 1/2“
* Control unit
V 1.0
131 / 144
Extension
Yes
Maximum length
Cable length in m
Remote control
LIYCY
3x0.34 mm²
Plug connection
Remote control
Shielding
Connections
Cable type
7.4
100 m Do not extend - replace
Do not extend - replace by NYM
100 m 3x1.5mm² or
Ölflex Classic 110
-
40 m
-
40 m
-
40 m
Installation with NYM 5x2.5mm²
at max. length (depending on
complete system - nom. capacity)
Technical data
7.5
Dimensional drawing and weight table
DN/OD
l
h1
h2
h3
h4
420
a
b
b1
Installation b
b1
h1
h2
h3
h4
Wastewater content
sludge trap
Wastewater content
separator
Grease separator
Total volume
Grease layer
thickness 100%
Sludge layer
thickness 50%
1735
680
860
985
1055
1435
1765
200 l
400 l
100 l
600 l
170
195
1735
680
860
985
1055
1435
1765
300 l
300 l
120 l
600 l
170
263
1880
2115
680
860
985
1055
1435
1765
400 l
400 l
160 l
800 l
170
275
1910
2145
940
1130
1185
1255
1655
1890
700 l
650 l
280 l
1350 l
210
325
2590
2820
940
1130
1185
1255
1655
1890
1000
l
900 l
400 l
1900 l
210
338
Nominal size
Installation I
Abb. [45]
DN
OD
a
NS 2
100
110
1500
NS 3
100
110
1500
NS 4
100
110
NS 7
150
160
NS 10
150
160
Leergewicht (ca. kg) für Variante PVS
NS 2
160
NS 3
165
NS 4
178
NS 7
226
NS 10
272
132 / 144
V 1.0
V 1.0
133 / 144
Rinse
Empty
80
10
15
55
10
25
55
10
35
55
35
70
15
NS2
80
10
15
55
10
25
55
10
35
55
35
70
15
NS3
100
20
180
100
20
180
100
20
180
100
80
190
30
NS4
195
20
40
160
20
75
160
20
110
160
110
215
45
265
25
50
225
25
100
225
25
150
225
155
305
65
NS7 NS10
off
on
on
off
on
on
off
on
on
off
on
on
on
Pump
off
off
on
on
off
off
on
off
off
on
off
off
off
Hot water
valve
on
off
off
off
off
off
off
off
off
off
off
off
off
Cold water
valve
Until the system
overflows
Until the pump
runs empty
approx. 25 cm
filling height
Until the pump
runs empty
approx. 25 cm
filling height
Until the pump
runs empty
approx. 25 cm
filling height
Until the pump
runs empty
Reduce water
level by 30 cm
Note
After lifting height, temperature and water pressure, the times are to be optimized. Flow Magentventil DN 25 at 4 bar 23 m3 / h
Each program step can be omitted by putting the reference time to 0.
Fill
13
Empty
Rinse
Empty
12
11
Rinse
Fill
Empty
Rinse
10
Rinse
8
Rinse
Empty
Fill
7
Empty
Rinse
Rinse
Empty
Rinse
Empty
Position
switchover
valve
9
Empty
Mix
5
6
Fill
4
Mix
2
Empty
Partempty
1
3
Function
7.6
A
Technical data
Settings (emptying times)
Column A: Emptying steps
Column B: Running times, (With system variant F adjustable through menu 3.1.1 to 3.1.13)
Maintenance
8
Maintenance
Before housing covers, plugs and cables are opened, they must be made voltage-free. Work on electrical
components may only be carried out by specialist staff (see 2.2).
8.1
Maintenance intervals
The maintenance date for the grease separator system can be set in menu 2. Maintenance / 2.4 Maintenance
date . In the factor, a period of 12 months is set automatically, calculated from when initialisation takes place. It
can be changed at any time.
The grease separator system must be serviced once a year by a qualified person*. In addition to emptying, the
following jobs must be carried out:
* The term “qualified” is used to describe employees at the owner-operators or from third parties who, on account
of their training, knowledge and practical experience, can guarantee that they carry out evaluations or tests in a
professional way in the respective field.
–– Check on the interior wall areas of the grease separator system
–– Functional check on the electrical devices and installations, as appropriate.
–– Records of the findings and work carried out must be kept in the operating log and evaluated.
–– The mechanical and/or electro-mechanical assemblies such as pumps, valves, viewing window, shut-off
devices etc. are to be maintained.
8.2
Carry out maintenance on SonicControl (option)
Annual cleaning of the sensor fingers (see page 97).
• Open inspection cover
• Loosen the cable duct for the sensor cable and pull the cable about one metre into the inside of the system
tank.
• Take the sensor out of the bracket (clip) and clean it (de-grease).
• Replace the sensor in reverse order and carry out functional check (page 111).
134 / 144
V 1.0
Maintenance
8.3
Troubleshooting
Malfunction
Possible cause
Measure(s)
No or too little
grease flows out
Room temperature below 15°C
Heat longer, increase room temperature
Coarse materials are blocking the
grease extraction valve
Avoid coarse materials (use coarse material screen)
Pumping
capacity too low
during emptying
Pumps do not
start. Too little
capacity
Pumping height too large for pump
capacity
Slow build-up of a solid grease layer
Support the pump of the grease separator system by the
pump on the emptying vehicle (suction)
Heat regularly even in the case of oils which flow when cold
Motor protection switch has triggered See display message on control unit if appropriate
Motor is blocked
Remove block (heed safety instructions)
Fault in the power supply: One or
two phases or missing or there are
heavy fluctuations in current
Check mains connection for phase error
Loud and
unusual noises
Motor / pump parts are blocked
Remove block (heed safety instructions)
No display on
the control unit
Power failure
Motor turns sluggishly
Direction of pump rotation is wrong
Control unit fuse faulty
Connect rotary field correctly. Make sure that the
counter-clockwise rotation function (only on systems with
corresponding control unit) is not activated
Ensure power supply
Replace fuse (specialist staff)
Messages on the control unit “D+S-P”, system type D
Display
Cause
Motor protection
Motor protection switch has triggered
Rotary field fault
Wrong rotary field for mains
connection
Current value for pump set wrong
Motor current too high due to faulty
or blocked pump
Phase error
Relay switching
cycles
Temperature fault
V 1.0
Measure(s)
Connect rotary field correctly
Set current value correctly
Remove block (heed safety instructions)
Excessive current due to phase error Check mains connection for phase error
One of the phases is no longer
available
Check the mains connection on the control unit
Check fault-current circuit breaker
Winding protection switch has
triggered
Automatic reset when motor has cooled, acknowledge
fault message with alarm key, contact Customer Services if
further temperature fault messages occur
Power contactor has carried out
more than 100,000 switching cycles
Message can be acknowledged. Message appears again
after a further 1,000 switching cycles. Have the power
contactor replaced by Customer Services
135 / 144
Maintenance
Undercurrent
Overcurrent
Relay fault
The minimum pump current has not
been reached. (The cable from the
control unit to the motor could be
interrupted or damaged)
Check the cable and repair if necessary
Power contactor no longer switches
Switch off the voltage supply to the control unit and have
Customer Services replace the power contactor.
The maximum pump current has
been exceeded. (e.g. block)
Replace the pump if faulty
Remove block (heed safety instructions)
Replace the pump if faulty
Messages on the control unit “PV+S”, system type F
Display
Cause
Measure(s)
Actuator motor
fault
Limit switches of actuator motor are
not reached
Check limit switch connections
Check valve for blockage
Current value for pump set wrong
Set current value correctly
Rotary field fault
Motor protection
Wrong rotary field for mains
connection
Connect rotary field correctly
Motor protection switch has
triggered.
Motor current too high due to faulty
or blocked pump
Remove block (heed safety instructions)
Excessive current due to phase error Check mains connection for phase error
Phase error
One of the phases is no longer
available
Check the mains connection on the control unit
Relay switching
cycles
Power contactor has carried out
more than 100,000 switching cycles
Message can be acknowledged. Message appears again
after a further 1,000 switching cycles. Have the power
contactor replaced by Customer Services
Temperature fault
Coil protection switch has triggered
Automatic reset when motor has cooled, acknowledge
fault message with alarm key, contact Customer Services if
further temperature fault messages occur
Undercurrent
The minimum pump current has not
been reached. (The cable from the
control unit to the motor could be
interrupted or damaged)
Check the cable and repair if necessary
Check fault-current circuit breaker
Operate the pump in counter-clockwise direction briefly
(“Maintenance” --> “Manual operation” --> “Counterclockwise rotation”)
Replace the pump if faulty
Overcurrent
The maximum pump current has
been exceeded. (e.g. block)
Remove block (heed safety instructions)
Operate the pump in counter-clockwise direction briefly
(“Maintenance” --> “Manual operation” --> “Counterclockwise rotation”)
Replace the pump if faulty
136 / 144
V 1.0
Maintenance
Relay fault
Power contactor no longer switches
Switch off the voltage supply to the control unit and have
Customer Services replace the power contactor.
Permanent odour development
Malfunction
Odour pollution
Possible cause
Wastewater pipes leaking.
Action
Check firm fit and seals, repair if necessary
No vent pipe, cross-section too small Retrofit on-site
8.4
Closed room with no air exchange
Create venting possibilities, forced venting
System parts are leaking
Eliminate leaks
Cleaning the grease separator
•
•
•
•
Make sure that no more wastewater can be fed into it.
Empty the system tank as described under „Emptying“ (see chapter 5).
Disconnect the voltage supply.
Take both inspection covers off the system tank.
Do not clean the grease separator system using a water pressure of more than 5 bar and a water
temperature of more than 50°C. Do not use a high-pressure cleaner on seals. If soap is used for
cleaning, rinse out / extract the residue, as otherwise it could lead to functional problems.
•
•
•
•
Clean all components with hot water.
Clean the SonicControl sensor, if fitted.
Fit both inspection covers on the system tank.
Carry out pressure test and subsequent functional check (see chapter 3.5).
If all the system components are airtight the grease separator can be put into operation again.
V 1.0
137 / 144
138 / 144
Date
Name of the tester
The system was checked for completeness and for leaks before it left the factory.
Designation 2
Designation 1
Layer thickness
Volume
Dimensions
Standard/Approval
Rev.hrs./Material/Weight
Mat. no./Order no./Prod. Date
9
Mat. Des.
System passport / factory approval
System passport / factory approval
V 1.0
Warranty
10
Warranty
1. If a delivery or performance is faulty, KESSEL has the right to choose whether to eliminate the fault through
rework or deliver a fault-free product. If the rework fails twice or is not economically feasible, the purchaser/
client has the right to withdraw from the contract or correct his obligation to pay accordingly. The establishment
of obvious faults must be notified in writing immediately, in the case of non-detectable or concealed faults
directly after discovery. KESSEL is liable for rework and repeated delivery to the same extent as for the original
contractual product. The warranty period for new deliveries starts again, but only covers the scope of the new
part delivered, not the whole system. Warranty is only accepted for newly manufactured products. The warranty
period is 24 months from delivery to our contractual partner. § 377 German Commercial Code (HGB) still applies.
KESSEL AG extends the warranty period for light liquid separators, grease separators, chambers, septic systems
and rainwater cisterns to 20 years with regard to the tank. This applies to airtightness, suitability for use and
static safety. The pre-condition is expert installation as well as proper operation in line with the currently valid
installation and operating instructions and the applicable standards.
2. KESSEL makes expressly clear that wear is not a fault. The same applies to faults that occur on account of
faulty maintenance. Note: Sealed components or screw connections may only be opened by the manufacturer.
Otherwise warranty claims can become void.
Status 01.06.2010
V 1.0
139 / 144
General inspection / maintenance requirements
11
General inspection / maintenance requirements
The owner-operator of a separator system is obliged according to valid legal principles as well as according to DIN EN
1825 / DIN 4040-100 to subject the system to a general inspection with leak test before commissioning and repeated
every 5 years. This test may only be carried out by a technical expert. We will be happy to send you a quotation for the
general inspection by an independent expert.
Maintenance requirements
For you, it is important that the quality and functional ability of your system is kept at the best possible standard,
particularly when this is the pre-condition for warranty conditions.
If you have the maintenance carried out by the manufacturer of the system, we guarantee you continued updating and
care for your system.
………………………………………………………………………………………………………………………………………
Would you like a quotation for a maintenance contract / general inspection? Please copy this page, complete it and then
fax it to the following no. +49 (0)8456/27-173
If you have any questions please do not hesitate to contact our Service department under the no. +49 (0)8456/27-462
Quotation for general inspection or a maintenance contract for separator systems
Please send me a non-binding quotation for maintenance o
accordingly)
Sender General inspection o
zu. (Please mark with a cross
Type plate data:
Name:_____________________________
Bahnhofstraße 31
D-85101 Lenting
Street: ___________________________
Postcode/City:___________________________
Contact:____________________
Tel. no.:____________________________
Person receiving quotation
Name:_____________________________
Street: ___________________________
Postcode/City:___________________________
Contact:____________________
Made in Germany
Tel. no.:____________________________
Property
Name:_____________________________
Street: ___________________________
Postcode/City:___________________________
Contact:____________________
Tel. no.:____________________________
140 / 144
V 1.0
Notes
12
V 1.0
Notes
141 / 144
Declaration of performance
13
Declaration of performance
142 / 144
V 1.0
Declaration of performance
V 1.0
143 / 144
Leading in Drainage
6 4
Private homes without
public sewage connection
1 2 3 4
5
1 2 3 4
Public buildings
(e.g. hospital)
5
Public buildings
(e.g. leisure facility)
1 2 3 4
5
Commercial buildings
(e.g. hotel)
4
5
Commercial buildings
(e.g. industrial / manufacturing facilities)
2 3 5
Commercial buildings
(e.g. gas/petrol station)
1 2 3 4
Private homes/multifamily
apartments/flats
1 Backwater valves
2 Wastewater Lifting system
3 Lifting stations
4 Drains and Channels
5 Separators
6 Septic Systems