1
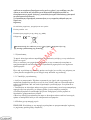
1.
1.1
1.2
1.2.1
1.3
1.3.1
1.4
1.4.1
1.5
1.5.1
ι
µ
µι
%#
'(
'(
'(
'(
2.
2.1
2.2
2.3
2.4
2.5
2.6
2.7
2.8
2.8.1
2.8.2
2.9
2.9.1
2.9.2
2.10
2.11
2.12
2.13
ι
! ι / # ι
ι
! ι
µ # ) *
) (
µ
# * υ
)ι υ
#)
υ ι (
(
ι
ι
*)
.µι
/ * ι
υ µι
(
T
A
ι*
M
I
S
ι
ι
ι υ)
υ # υ ) υ #ι
)
ιµ
υ0 ι # ( ιµ
1 µι µ
υ
.ι ( µ
(
) .
# ))υ# ι ( µ
* )ι
3
µ )
υ ) ( υ
µ
5 )!
ι υ)
υ #) ) µµ
# υ µ
1 µι µ
υ 6)
) (Boiler)
3ι ! ι
@
A ι#
µ ι
υ#
! ι / %#
! ι
@
B . µ )ι
)
'υ )
/ D)
/ #ι υ
E ι µ
υ * υ# υ µ
(
υ)
/ ι
)
υ )
ι . )ι µ (
!υ# )
#
0
ι
ι ! ) µ
#
#) 6 µ
ι υ)
#ι υ / )
# υ * υ #) µ # ι .
υ
I
U
C
υ
υ .
1.
1.1. ι
G υ
υH
υ
υ
ι
ι (µ@
( *)
µ
µ ι
ι)ι .
!υ# )
#
µ ι
)ι
*)
.
.
. 6)
ι υ)
ι*
ι
,
υ
µ
#
ι
υ#
*) ι H
# )
υ υ .
J# ι
µ6 ι ι
ι υ)
,
υ )
* ι ι 6 ι ι
*)
υ# )
!υ# )
#
ι υ)
υ υ
ι
Dυ
! #)
) !
'υµ# )0
#)
ι
υ
! ι
ι ι
)ι
ι
µ- υ *)
#ι υ
* ι
0 µ . # @ (
ι#
# )- @υ
ι ,
ι 6
#)
@
,
ι
ι
ι
.0
ι
)!
ι υ)
,
)!
, . #) # ι
υ#
! ι #-
υ # υ ) υ #ι
*. ι
! @ H ι
)ι
!
#ι υ .
ι0
µ# )
#
ι µ
υ -.
υ#
ι *( ι
ι
1.2
(
ι
(
ι)
,
- 10 µ )0
.
µ
υ •
•
• ι
• ι
# υ
)ι #ι
! * )H ι ι
- υ. #
µ :
ι
υ µ
#!
υ6 18/8 304,
ι
υ µ
ι
ιµ µ
ι υ *
ι υ) ,
(
ι # - . )ι µ- υ,
µ (# )! # ι
#
ι ( υ µ 0µ
ι µ
ι
ιµ
#-)
: # ( # *)
#ι υ* µ
ι
ι # ( ιµ
#ι
- # )ι0 ,
µι )- ) υ
# )ι6
ι
#ι6 )υ
.
@ι ι - ι N
)6ι , υµ# )ι µ6 µ υ υ
- ιι
! ) µ
ι ι . ιµ
#) ) ,
- ι
ι ι
µι ) (.
T
A
• ι
• ι
• ι
M
I
S
I
• ι
1.2.1
µι
µη
U
C
ι
! ι / # ι
µ
µµ
η
η
! "
*+ µ
* * -*
µ
'-µ ω µ
#
' (%
* * -*
.
ι
.
µ
η
2004/ 108/ EK (EMC)
η
ω
µ
)
υ
µµ
µµ
#$ %
µ
#
&#
µ
)
*
* -
&#
*
27
* -
#
ω
η
µ
' (% &#
µ, ω
*
µ -*
,
2002/96/
2003 )
µ - ( // )
2006/ 95/
η
µ
η
µ
27
ω
2002/95/
#
*
2003,
µ
! "
#$ %
*+ µ
.
µ.
µ
&#
*
µ,
-
,
,
*
*
0
µ
µ +
*
µ
* -
µ
µ -.
*
µ
+
* +
ω
)
* *+
ω
µµ
+
*-* ω
µ
µ
*
* -
*
.
µ
ι
- υ.
G
µ
ι
@ )µ-H
ι
) O- :
ι - υ. xxV
G
ι (µ
υ* -
G' µ
( .* 50Hz).
και
ηµ
O
µ
α
α
.
1.3
I
#(
ι ( υ υµ@
1.3.1 Y#
•
!
# )#
#ι ι υ)
•/ # .
# ) *
•G υ
ι ). .
•
#) # ι
1.4 '(
U
C
υ
( µ
υ
T
A
M
I
S
/ # )- # υ )ι #ι
# )
ιµ
!
υ ) (.
J
ι υ
ι
υµ * µ
(µ@
#) µ # ι . ( #)ι µ
#) ι ) @0 .
)ι
η
#) # ι
ι*
ι
(
ι
µ
υ
υ #) # ι
ι *υ-
) υµ
*.
#ι
ι
υ ) (µ
υ .
υ
ι
! ι
υ υ
. !
υ υ ι H µι
#µ@ι6
@
!
ι
ι ι - ( #ι#)- #
##
)
υ υ ) #)ι
.
# υ )ι #ι
*0)
) ( ι ) (µ
(
@ #) # ι
ι # ) 0
υ #) # ι
# . . )ιH- ι .
*-µ
( *) ιµ # ι0
@ ι.
#ι υ*
ι #)ι
# υ )ι #ι
. )ι
µ
. )ι ι - υ µ# ) υ.
µ
# ) *
' G: G (
µ
ι ι *( υ
#) ι ) @
µ @ ) .'
! υ ι
µ
.
# )
. )-).
ι #) # ι
.
ι υ)
) (
# ) *
) ( #) # ι
@
.
#) µ
# ι .
)0
,
α
α
α
µ α
µ α
µ .* (
µ
α α α !
µ
α
α)
•'
- ) @
) ( #) # ι
υ
# .
#ι ) @
DIN 1988.
• )ι #(
υ υ #) # ι ! # υ.
*
) (.
•
- ) @
) ( #) # ι
* ι
)ι
ι µ )
mm ι
(
µ
3/4
.
• )ι
.
υ υ
ι υ) #) # ι )υ.µι ( . ) . .
#$% %&': G
*ι
(
υ (# υ).
1.4.1 '(
µ
•H )
#) # ι
)
# * υ
#
)
# *
)
# ) υ
*ι
# )ι
#
)
16
µι
5 bar
υ
#$% %&':
G
)ι
(
#) # ι
ι
T
A
#) # ι
ι ! * )ι
ι
) υ. E
# υ
µ# )
# .
)ι -
@
µ ι
6
υ
1.5 '(
!
ι
6
#) µ # ι
ι - 6 )(
(@υ ι ) ).
)
υ .
#’ υ.
()ι # * υ - -# υ #) 6 #
ι ι
µ ( ι@0 ι ),
#- ) ) * υ #’ υ.
ι - @) ι
@ # υ ι . ι
) ι ι
µ .
#$% %&':
(-#
υ
µ
υ
υ υ# υ
) (
υ
# * υ
/ # υ
ι 2 bar
. µ
# . . N - ) #- )ι µ
. (# # υ ) υ) #)ι ι . ι
ι µ
ι υN - )
µ .
M
I
S
I
U
C
#) µ
# ι . µ-
)ι #ι
ι υ)
µ
N ) (µ
υ
ι
υ ) (µ
( # υ.υ .
#-
) - .
µ
. (# # υ ) υ.
#) # ι #) µ # ι .
) ι
(
).
υ
) # ι
) . ( ι #) ι ) @
DIN VDE D100 µ
ι*
µ µ , ι -) ι (
EVU, ι * ι
ZH 1/37 . . @
ι 7.2 - .0
ι
ι ι *( υ
#) ι ) @
ι
#)- N
υ* µ
.
G υ υ
ι* #) # ι
υ .
)ι
. )
)ι
# ) * µ
0 ι (# υ HO7 RN-F µ
(@ι
υ υ
#- @ ) .
1.5.1 '(
G
#)
#)
)ι
@
υ ι ) . ( ι
υ ι
ι
-
(
υ
υ
* ι υ .
ι* #) Z# .
(
ι
υ
ι
!
.µι
@
υ µι
ι µι
*.
ι .'
ι (6 . # ) ) @ 1.5).
(
H
µ
υ - #) # ι
#ι#
υ µι
υ
(. 1ι
ι! «α
υ #) # ι
υ µ
)ι
(,
ι *( υ
2.
ι
ι
.µι
! ι
(
υµ# )ι @.
#
# υ)
αµ
».
#) # ι
υ υ µι (
DIN VDE.
(
υ
*.
ιµ
ι
µ
υ
)
ι
.µι
ιµ 6
6)
υ #)
µ-
µ
υ ι (
µ ι
(µ@
*)
2.1 / * ι
/
ι
ι*
* ι * )
)ι ι
. (# υ # υ
# υ υ# )* ι
. # υ )ι .
2.2
ι
ι
ι υ)
G υ υ *) ιµ # ι
ι #
@ ι H ι , # )ι , µ * ι) # )
µ Hι
.
) ! ι ι ι )
( #
# ( ιµ
# υ )ι #ι
.
/
µ ι
(
ι
µ
υ#
µµ
@
(,
#
ι
#- )ι µ
) @
#
υ υ υ
)υ
ι ,µ )
,µ 6 H
# ! )
).
2.3 )
ιµ
υ0
ι ι
/ # .
ι6 µ
/ # )ι
ι µ ).
#
.
ι
υ
-
) υ #ι
ι
. )ι µ
υ0 -#
# #) )*-µ
#- *)
υ
T
A
υ6 H
# υ. (
ι
#ι ,
*0) υ
ι
ι µ * ι) # ) υ #) # ι
. )H
ι
ι
’ υ.
µ
@
- (*) µ
).
ι µ
# υ * υ ). ι
# @ µ !
µ *)0µ
ι ι ( (* µι 6ι µ *
M
I
S
I
U
#ι µ,µ
ι
ι # ( ιµ
C
υ
υ# υ
υ
# @(
µ
υ#
6 ( µ
υ @ ) υ .0
ι
#)ι ## .
@
(, υ ( ι #- ι , @
#.
'
υ
υµ
@
ι
* υ ! ) . υ#
µµ
@
2.4 1 µι µ
) υ# )
.ι ( µ
ιµµ
@
(
) . ) )
.ι
# µ )(
µ
( ι
µ ι (,
)-
! # (
υ
ι
#
(.
(
)ι , @ ι H ι , #ι
. .#. µ
#
,
#) 6 #-µ
#) # ι
υµ# ( µ !( υ (H µι
/ # .
µ * ι) # ) υ
6 #)
.
/ µ * ι) # ) υ µ# ) ( #
.ι. ) # ι
# @ (
( . 1ι
# @(
)- # υ µ
, #) # ι
υ#
µµ
υ@
,* ) #
#) 6 #-µ
# .
. # )#
. (
.
ι µ #)
.ι .
υ ,
ι -*ι
#-
#- υ . ι - υ ι - µ
(. )
υ# )@-)
##
υ
ι ι .ι (.
ι
) @
2.5 ) .
# )ι
ι
) ( #) # ι
# ))υ#
.
ι
(µ
# ) µ
* )ι
υ
µ
(. ) ι.
µ
µ
/ # ))υ# ι - # υ . *) ιµ # ι
#) # ι
ι
ι # υ )ι
#ι
. @ ( #ι υ*.
υ ι 0µ
. )µ )
ι υ)
ι
ι #’
υ.
# ))υ# ι µ
* )ι.
# υ )ι * ι
µ
µ
# ))υ# ι ( # . (µ
ι
µ
ι! DETERGENT
*
υ # ))υ# ι (.
) ιµ # ι
#
ι ι
# ))υ# ι - µ
@)-.
'
υ
υµ
*) ιµ # ι
ι # ))υ# ι - .0
ι υ )- υ
µ
υ
ι υ
υ
.
#$% %&' :
G
G'
/
'
%
υ # ))υ# ι ( ! )
ι ##) µ
ι
( . '’ υ µ
υ
υ
υ # ))υ# ι (
.
ι )- ) # # ))υ# ι ( # ) H ι ) ι
# υ µ
, 0 υ# )6 ι # # ))υ# ι (
( ) #
µ
ι
ι
ι # )ι
#
υ -*)
ι # )ι6
.
A
/^ '
G
)-
ι #-
T
A
2.6 3
µ )
υ ) ( υ
µ
/ # υ
M
I
S
I
)ι ι . υ υ -µ
µ
ιµ
ι! RINSE AID
µ )
)υ.µ H ι #)
µ# )
)υ.µι
- (µ@
µ
*) ιµ # ι (µ
υ ι ι - - # ))υ#
υ # υ ) υ #ι
.
') @
6
)(.µι
@ )
) (-), 0 ) @
.
#υ!
ι ) (+). '
υ ι (µ
ι ι υµ
#)
#ι - υ ! υ ι
µ
#
)
υ υ ).
U
C
)ι
ι )
ι . ι ’
υ
µ υ# )* ι ) (µ ,
%
*
υ
3 bG:
µ )
ι
)) @ ι
υι
ι (
µ
υ υ ,
ι0
µ )
# ( ιµ .
*) ιµ # ι
. )ι ι
υ#- ι! υ
(#
υ
υ ,
)
))-@
*
υ
ι
υ
)ι - # ι
#-
) (
ι
#
µ
υ
@ ) ι
#ι.υµ (µ
#ι6 )(
./ # .
ι (.
µ ι
υ ) (,
#ι υ*
(µ
ιµ
ι
ι
ι 0
υ)
ι (
0
ι 0
υ)
ι (
)(.µι
ι)
(
(
ι#) 0# υ
#-
@ )
.
υ
#ι
#) # ι
ι
ι
#) # ι
.
*
υ
υ.
-#
ι
()ι ι -# # υ
ι*
@ ι 0
# ) * ) (µ
.
ι υ)
ι 0
ι
- , ι .
ι # )
*
# .
ι
ι ( #)ι #ι υ)
ι
ι µ
#)0
# υ # )ι * υ
#(
υ ι
.
υ
.
)
2.7 5 )!
1 µι µ
ι υ)
υ 6)
υ #) ) µµ
# υ µ
)
•
!
@ )
))-@
* ι # . .
.
υ.
•
!
υ# )* ι
* ι ι *.
υ# *
υ.
• ) µ # ι
(
µ
# ) *
) ( ιµ
# * υ
(µ@
µ ι
• ι
ι -# ON-OFF, ( . 1). ( υ)
POWER)
• / # υ )ι
µ H ι υ -µ
)- µ *)ι
)ι µ
.µ
) (.
•
6 ι
ι ι
υ*
4
#
µ
* ι - ι )*ι
. )µ
υ
6)
) (boiler).
•J
. )µ .
)- υ 6)
) 6 ι
ι*
ι ι
υ*
ι
6 ι
ι ι
υ*
5
#
µ
* ι- ι
)- υ
υ )* H ι
. )µ
ι.
•' µ
µµ
•J
1:'
.6
ι
µ
35 (
. )µ
.ι 35 35)
ι.
ι υ
ι ι
υ*
υ*
.4 υ *H ι
T
A
-
# υ
)ι
ι
µ
ι
ιµ
# ( ι.
υµ
#-) , # . (µ
.ι µ
( (#ι , # )ι
#)
υµ
#-) . )ι
ι
υ
.ι ( µ
( @)
H υµ
0
* υ # µ )υ .
.
υ υ#
µµ
) @0 #- υ .
• * υµ # ))υ# ι µ
* )ι
# υ )ι ι . ι
# ))υ# ι (. !
6 .µ- # )
υ * υ # . υ
υ ) ( υ
µ
ι # ))υ# ι (.
• 1ι
)* ι #)- ) µµ # (
#ι H υµ
ι -# START
2.
' µ
1500 ( (# Hood) #)- ) µµ # (
)* H ι µ
ιµ
#-)
.
•
ι
M
I
S
I
U
C
• υ -µ
)* H ι #)- ) µµ # (
# υ ι ) 2 # (min) ( - #µ
# υ ι . υ #ι
#) ) µµ
) 0 υ -*)
6 ι
ι ι
υ*
6
υ #) ) µµ
,#
ι! 6 H
( # υ # .
µ
-.
•' µ
υ*
•
- ι
!
• @
7
2:5
#-)
6 ι.
ι0 ι #)- )
#-)
ι6
)
υ
#υ υ .
µ
# ( ιµ µ@ ι
) (,
ι µ# )
•A . # # ))υ#
• )- ! # (µ
µ υN
•
# )
# υ )
•A .
ι !
υ0
ι
µµ # (
# υ
6
.ι µ
0 υ
ι
(
ι
)ι
ι ι
. )
ι υ)
υ*
#) ) µµ
( .
)
( # υ6 -
#- 6) µι
µ ι ## ι #- ι
- υ. :
ι (
*
µ
)- # υ µ
# )ι ι µ
ι
ι*
( υ
µ
! # υµ
.ι
ι
ι
-
.
• ι ) #
) (
! # υµ
• µ
. )µ )
) (# υ µ
•/ @ ) * υ 6 υ 0 ι
* ι
%
#
3 bG: 1ι
( )
)ι
) (.
2.8 3ι
! ι
#
ι
µ
# .
ι ι
#
υ
)ι
# .
@
%# )* ι )(.µι
@
#-)
# υ ι -# ι
ι υ)
υ υ
ι ) ι
υ# υ µ
,
#-)
! ι
. .
%# )* ι . )µ #)
# υ
ι
µ
µ
# )ι ι!
υµ )
µ υ -µ
#
)!
ι
#
ι -# ι
# ) * ) (µ
# )#
υ# )@-) ι .
%# )* υ . )µ
@ ι
# )#
υ# ). )µ
2.8.1 A ι#
µ
ι
3
#ι ) # ι
υ
* ι
µ
) # . 1ι
υ.(
ι
υ
υ υ *) ιµ # ι .
# )#
. υ
/
)G *)
,
#) µ #
* υ
µ
•A
#
2.9 'υ
G N
υ#
@ )-µ
)# υ ι
υ 6)
)
υ
! ι / %#
! ι
-# υ
υ
T
A
υ
#) µ # ι
#
*-µ
6 6 # υ #) (#
. υ - ι *( ι #
ι ι
ι
υ #) 6 #-µ
υ * ι)ι µ (.
M
I
S
ι υ #
υ
υ #- υ
# )#
-# υ
υ
# (, ι
I
U
)
# ) * ) (µ
ι* .
@
# υ )ι #ι
ι #- ιµ .
υ )
ι #ι ι-).
υ # υ ) υ #ι
ι ( ι µ#µ # υ
)H υ ι )
) . ι
υ
*-µ υ ι ( υ .
2.8.2 B . µ )ι
•B
•B
•B
•
ι
*
( #
#) # ι
υ
ι# υ
C
ι
-#
ι υ)
υ υ S1
ι - ι -# / ι
@ ι
6
/6)(
ι
# # ) *
) (
# υ µ
@ ι)0
υ# )* ι
@#)0
ι
ι -# ON-OFF 1 ι
# @υ υ# ). )µ
υ
υ ι 6 )0 H µι0
# υ )ι .
# υ )ι * ι
ι µ
υ ) µ
ι -# N0 3
µ
µ *)ι
ι ι
.
)
/ D)
/ #ι
υ
ι υ)
ι
@
*)
µ# ) (
!
- * ι)ι µυ υ , .0
ιµ
)
ι0 *)
ι
ι* #) ι ) @0 @)
ι . )ι µ (.
@
ι . ( µµ
υ#
!
ι
υ#
!
υ - ι *( ι - @ )
υ υ0 (GSG) .0
ι
υ* µ
ZH 1 ι VBG.
)
ι *υ-
ι
!
υ -µ υ # )
@
#) ι ) @0 ι
#)- N
%
µ
3 bG: )ι #- ι )
. )ι µ (
υ )
,
υ υ #) # ι
ι υ
µ
µ
υ # ) *
)ι ( ) (µ
µ
υ
µ υ
ι ( ι -# /
@ ι .G υ υ
#) # ι #
N
µ
)- µ
. )ι ι - υN
#
, ι
*-µ
υ
) (
)ι
ι* µ# )
# )
ι
ι
ι υ)
ι
#)
) # ! (µ
ι #)
)
υ υ .
'
υ ι (µ
υ N
! υ ι
µ υ #ι (
* ι - υµ6- ι υ
J
ι )
/ #ι υ ,
) @
ι
υ
υ# ) @ /- µ
ι)
.
υ ι
ι
υ
@
ι
)
!
µ
ι#)
)
ι #
ι) ( µ
υ )
υ
0# υ
##
)
ι ι )
υ )
#) µ # ι ( ι
υ υ
ι0 *)
µ H µ
#) # ι
.
υ .
ι # )
#.*. ι )
υ )
ι0 #) # ι
#
υ.
@
.
2.9.1 E ι
µ
υ
•B
•
ι
• 1ι
µ
#ι µ
• @ ι)
•b # (
ι
-#
ι υ)
# υ )µ
#ι υ
ι #
υ
µ
#- ι ι ! ι
@
µ µ
µ
ι !
, µ
µ
)
)µ * ι 0
T
A
M
I
S
υ# υ µ
I
υ υ
# υ µ
6
µ extra
- υ
ι ι
@ )
ι . )
ι
# µ
(on-off)
H
υ# )* ι .
ι µ
υ ) (µ
ι ι - µ# υ .
#)
ι µ ) * (µ
)-.
)(
υ*- υ#
µµ .
U
C
'
υ * ι #
υ
µ µ
µ
#) # ι
ι υ)
ι#
* ) @ ) .
B
ι ) ι µ
ι υ)
#-) #) # ι
ι* ( ι # @ (
ι
µι υ)
µ0 ).
2.9.2 /
ι
)
υ
*) ι
# υ µ
ι
#
# . 0
ιµ # (µ
ι
)
ι
υ
) @
# ) µ
ι) . G υ
ι µι
ι*
υ
#
)
. )ι µ (
µ
#) # ι
@ ι)
# )ι ) @-µ
)
! υ ) , . )H
#)
ι µ
)- ι
µ µ
µ
) @
ι) . G )
υ . #) # ι
#)
* .
' b/ /G 'l'/G m 'G /l D A/ l B
. )H
υ υ )
ι #ι υ .
υ , #) # ι
*υ )
υ
! υ ) µ
/ % B/ b %/G
)
ι*µ )
!
ι
µ
.
# )
. )H
υ υ µ H - )- ι . )ι
/) N
ι @ ) µ ) µ
6 . ι
) ( ι
υ * ι
0 υ . / µ ) #- * υ6 #) # ι
# )ι# ι .
µ
µ
ι * υ6
ι
µ # )#
µ
. )
ι
()µ , 6 ()
#. υ
#
µ
@
υµ#
υ µ
#ι@ ι , ι
ι ι µι )- )
# .
µ# )
#)
υ * µ ι µυ)ι .
*) ιµ # ι
6 ()
#- # υµ ) #
ι - @υ ι
()µ .
) # ι #) !
ι
#
#)
(.υ
µ * ) !
#ι@ ι . /
! # (
µ
. )- )' υ# .υµ H υµ - ι ι 6)
(
* υ6
µι υ)
ι #- µυ . )ι ι ( (#.*. υ
6 H ι * 0)ι ).
µι υ)
,# ) #
ι - ι ι
#- µι )ι
υ# υ µ
6
υ, ι #
υ - *) ι
'
υ ι (µ
υ )
υ
#
)
µ
# )
*)
* µ
( )υ 0
ι*
µ# )
# )
υ
H ι
ι
@
.
.
)
@
! υ ι
µ υ #ι (
υ υ ).
2.10 !υ# )
#
υ
# υ.υ .
)
2.11
0
υ
ι
µ
ι) (
υ ).
*)
#ι -
U
6 ()
#, ι
ι
0
.
υ)ι ) ι #ι@ ι
#@
ι
*)
)
υ ι - . )ι ι - # υ
H
ι
# υ # )ι * ι
ι υ)
T
A
ι#)-
# υ
M
I
S
I
#) 6
ι
υ µ# ) υ.
@
ι ι
. )ι ι
*) ιµ # ι0
#
ι
ι #ι@ ι
υ
ι#)-
)ι
ι*0µ
υ
)-) # . ι
υ υ . 1ι
ι ι υµ
#)
#ι - (
ι)
#-
υ
#
,# )
#-
(µ
#
C
ι ! ) µ
J
ι
ι
! ) µ
.
6)
! υ ι
µ
#ι ι#)- #
ι)
##
)
υ υ
#’ υ.
ι) .
' # )#
# ) ## ι
#) # ι #
#
@ )
(#
ι
ι)ι - )ι.µυ
υ υ
. υ .
6)
#ι
# υ
ι #ι
µ
υ υ
.
•' µ
2.12 #
3:'
υµ# ) µ
#) 6
µ
)
ι υ)
(
µ
CONTENTS
1. Installation instructions
1.1
1.2
1.2.1
1.3
1.3.1
1.4
1.4.1
1.5
1.5.1
Introduction
Advantages
Legal provisions / Requirements
Installation
Installation suggestions
Connection to the water supply
Drainage connection
Electrical Network connection
Protective duct connection and voltage compensation
2. Operating instructions
2.1
2.2
2.3
2.4
2.5
2.6
2.7
2.8
2.8.1
2.8.2
2.9
2.9.1
2.9.2
2.10
2.11
2.12
2.13
Technical data
Instructions for the dishwasher’s regular operation
Preparation of dishes for washing
Filling of basket
Manual filling of detergent
Rinse-aid dozer
Starting the washing program - Filling the boiler
Safety provisions
Further significant indications / Safety indications
Daily works
Maintenance / Care / Repair
Unloading dishwasher (dispenser)
Regular maintenance and cleaning works
Customer service
Spare parts, Accessories and Components
Troubleshooting
Repairs / works made on this appliance.
T
A
M
I
S
I
U
C
1. Installation instructions
1.1. Introduction
This appliance complies with the needs of modern and professional cooking.
Please read these instructions carefully before operating this appliance.
In this manual you will find all significant safety indications, as well as other essential
information needed for the regular start-up - and operation itself - of the appliance.
The person undertaking, on behalf of the user, the installation, start-up, maintenance
and repair of the dishwasher, should be familiar with the operating instructions or
trained by our customer service department.
This is the only way to ensure the correct operation of the appliance and to avoid extra
repair expenses.
Keep these instructions in a safe place for future reference.
As a condition to any warranty service obligation, the client must complete and send
the Warranty Certificate to our company within 10 days of purchase date.
1.2 Advantages
This dishwasher has the following advantages:
• is made of Stainless Steel 18/8 304
• is manufactured and tested for continuous operation.
• easy and simple cleaning
• no jamming during the door opening and closing: simple use
• perfect dish and glass washing
• less environmental pollution
• excellent and friendly service; all spare parts available
• reduced water consumption
1.2.1
T
A
M
I
S
Legal provisions / Requirements
I
Compliance with the EU Directives
U
This equipment complies with the requirements of Directives 2006/95/EU «on Low
Voltage» (LVD) and 2004/108/EU «on Electromagnetic Compatibility» (EMC) and
C
carries the
mark.
You can obtain a copy of the declaration of conformity from your supplier.
This product complies with the requirements of Directive 2002/95/EC OF THE
EUROPEAN PARLIAMENT AND OF THE COUNCIL of 27 January 2003
on the restriction of the use of certain hazardous substances in electrical and
electronic equipment and carries the following mark
Waste disposal
According to the Directive 2002/95/EC OF THE EUROPEAN PARLIAMENT AND
OF THE COUNCIL of 27 January 2003 on the restriction of the use of certain
hazardous substances in electrical and electronic equipment (AHHE), the products
and their parts covered by this directive should non be disposed of with regular
garbage but be returned to the point of sale or be transferred to a recycling centre for
electrical and electronic appliances.
For further information address to the local authorities.
Marking
The product carries the following marks:
Input voltage xxV
Required voltage frequency (e.g. 50Hz)
The marks
and
The manufacturer is not responsible for any damage ensuing from faulty connection
of the appliance.
1.3 Installation
This dishwasher is delivered with water inlet and outlet hoses.
According to its construction, the connection of the machine to water and power
supply must be performed by an authorized and locally recognized installer by
keeping the existing specifications.
Before connecting the appliance, check that the connection data on the data plate
(voltage and connected load) match the mains electricity supply.
1.3.1
T
A
Installation suggestions
M
I
S
• Open the package. Before setting up the appliance, check it for any externally
visible damage due to transportation. If in any doubt, call for a specialist to check it
(from the authorized local dealer who sold the appliance).
• Place the dishwasher at the installation area, close to the necessary water and power
supply (the ground should be sufficiently stable).
• The appliance should be placed horizontally. Possible inclinations should be
corrected using a spirit level.
• Following the successful installation, the dishwasher should be cleaned thoroughly
with a conventional detergent before it is put into operation.
I
U
C
1.4 Connection to the water supply
ATTENTION: The connection with the water supply should be made according to the
current safety standards.
The dishwasher may be connected only to a cold water supply.*(In case you want
to connect it to a hot water supply, please contact our company)
• The water supply hose should have a flap valve (non-return valve) according to DIN
1988.
• The water supply hose/pipe should be rinsed before the appliance’s connection.
• The water supply hose/pipe should have a minimum internal diameter of 16 mm and
the connection with the hose should be 3/4 inch.
• All hose collars should be adjusted in a fixed position before the appliance is put
into operation.
ATTENTION: The water pressure must be between 2 and 5 bar.
1.4.1 Drainage connection
The outflow is accomplished through gravity force (natural flow). The outlet hose
should be connected either directly to the main drainage - where a pipette for odours
is anticipated, or water runs directly to a drainage well in the ground, which has a
pipette for odours.
ATTENTION: The outlet hose should not be placed higher than a level (as given for
each appliance's type) from the lower side of the dishwasher’s dispenser.
1.5 Electrical Network connection
ATTENTION: All electrical work must be carried out by a suitably qualified and
competent person.
The dishwasher operates under specific voltage depending on the type of the
dishwasher.
You should supply the power, depending on the appliance’s power reception (the
electrical connection should be made by authorized electricians).
Specifications should be met according to the corresponding parts of DIN, VDE,
D100, the EVU connection terms, the relevant ZH 1/37, chapter 7.2 - as well as the
current specifications for accident prevention.
Respectively, the appliance must be connected to a direct power supply electrical
installation through an HO7 RN-F cable with load relief of the appliance.
T
A
M
I
S
1.5.1 Protective duct connection and voltage compensation
I
The electrical safety of this appliance is ensured only if the protective duct has been
connected and checked properly. The corresponding specifications should be met at
this point (see paragraph 1.5).
In addition, the appliance should include a voltage compensation system. For this
reason, the backside of the appliance has a screw with the indication «voltage
compensation».
Following the electrical connection, the action of the protective duct, the voltage
compensation and the insulation value should be checked according to the existing
provisions of DIN VDE.
U
C
2. Operating instructions
2.1 Technical data
You can find the technical data of each appliance at the adhesive label of the
dishwasher.
2.2 Instructions for the dishwasher’s regular operation
The appliance is exclusively used to clean dishes, cups, glasses, silverware, etc.
following their use during lunches/dinners.
You should pay special attention that the items to be washed are suitably placed for
dishwashing.
Silverware should be cleaned from food residues, if not washed right after lunch /
dinner (colouring and spots from certain foodstuffs).
Do not wash in this appliance items which has been in contact with acids, mineral oil,
grease, gasoline or colours and solvents (industrial chemicals).
2.3 Preparation of dishes for washing
Do not let food residues dry onto the dishes. In order to avoid filter blockage as well
as the cleaning water to become dirty quickly, you should remove large food residues,
olive pips, lemon peels, tooth picks, etc., before you place the dishes in the basket.
We recommend you to leave in water for a while or rinse the glassware that has food
residues dried on.
2.4 Filling of basket
Put glasses, cups, large plates, etc. with the opening facing down in the anticipated
baskets. Do not pile one on top of the other.
Glasses should not touch each other (damage in glass, stains due to contact).
Place cutlery in the appropriate basket made of synthetic material, with the handle
facing down.
Silverware may be placed freely on the levelled plastic basket.
In any case, you should avoid overloading the basket.
Water supply hoses should remain free (not blocked or stretched).
T
A
M
I
S
I
2.5 Manual filling of detergent
U
The detergent to be used should be suitable for dishwashers. After the recommended
operating temperature is accomplished, you may put the detergent directly into the
dispenser.
If the dishwasher has an integrated detergent pump, we put the pump's elastic pipe
indicated as DETERGENT in the detergent dispenser.
Use exclusively detergent with little foam effect.
We recommend that you use detergent and rinse aid from the same manufacturer.
C
ATTENTION: Do not use detergent for hand-wash.
The correct detergent dosage depends on the water hardness and the amount of dirt on
the dishes. Follow the dosage information of the detergent’s manufacturer.
Less detergent quantity affects negatively the washing result, while more detergent
quantity does not present better results, but rather more consumption and
environmental pollution.
2.6 Rinse aid dozer
The dishwashers have an automatic rinse aid dozer. Put the elastic pipe indicated as
"RINSE AID" in the storage compartment.
The dozer is adjusted from the manufacturer’s premises at its maximum value and
may be adjusted accordingly - depending on water hardness, how dirty the dishes are,
and the detergent used - following the successful installation of the dishwasher.
Turning the adjustment screw clockwise, the flow is reduced (-), turning it counterclockwise the flow is increased (+). We recommend that you let the constructor to
adjust it (or the specialized personnel of the authorized local dealer who sold the
appliance).
Before you perform these works, you should turn off the switch of the appliance or
turn off the corresponding switches so that no current flows, or turn off the power
supply switch.
INDICATION: The dozer should not operate while dry, since it will loose its suction
properties. It is necessary that you have filled the storage compartment before the
appliance’s installation, so that the dozer operates correctly during the first wash.
Do not use caustic products. If you do not follow this indication, you will not be
covered by the guarantee.
2.7 Starting the washing program - Filling the boiler
• Check that the suction filter, in the tank, has been placed in the correct position.
• Check that the overflow hose is inserted correctly in its inlet.
• Make the connection with water supply and drainage according to the instructions.
• Push ON-OFF switch (No.1) (or turn to the position POWER).
• The dishwasher is automatically filled with water up to the set water level.
• The indicator lights on (N .4) showing us that the boiler’s heating has started.
• When the water of the boiler is heated, the corresponding LED lights off (N .4) and
a new LED lights on (N .5) showing us that the water in the dispenser is heating up.
T
A
M
I
S
I
U
Note 1: At the model 35 (basket 35 x 35) the indicator No. 4 continues to light on
while the boiler is heating.
C
• When this LED lights off, then the dishwasher is ready for wash.
• Open the door. Insert the basket with the items (dishes, glasses, etc.). Before
inserting the basket with the items, be sure that all food residues have been removed.
• Add the liquid detergent manually in the dispenser, unless the dishwasher has a
detergent pump. Check the level of the rinse aid and detergent storage compartment.
• In order for the washing program to start, push the START button (Button No. 2). At
the model 1500 (Hood type) the washing program starts closing the door.
• The washing program, lasting 2 min., starts automatically, while at the same time
the LED N .6 of the program’s start lights on, washing and rinsing the items inserted.
Note 2: If the door does not close properly, the dishwasher does not function and the
LED No. 7 lights on.
• When the washing program is finished, the program LED (N .6) lights off. Open the
door and remove the basket with the clean items.
• Let them dry.
If, following the wash, there are stains from dirt or water spots, the cause may be one
of the following:
• Wrong quantity of detergent in respect of water.
• Rinsing water with high capacity of mineral elements.
• Insufficient quantity of rinse aid during rinsing.
• Wrong loading of the items in the basket.
• Low water pressure during rinsing.
• Low water temperature during washing.
• Filters are clogged or miss-positioned.
RECOMMENDATION: For a better result, especially with glasses, use water
softener.
2.8 Safety arrangements
There is a safety adjustment at the door, which interrupts the appliance’s operation
during washing, if the door opens by mistake.
There is thermal protection integrated in the pump motor winding with automatic
start-up, which interrupts power supply to the pump, in case of overcharge.
There are thermal safety fuses, which interrupt the power supply in case of boiler or
dispenser overheating.
T
A
2.8.1 Further significant indications / Safety indications
M
I
S
No technical modifications are allowed in this appliance. The manufacturer is not
responsible for any possible damages resulting due to modifications. The same applies
in case that the appliance is used for any other purpose except the one anticipated, in
case of fault or improper use.
The water inside the dishwasher is not potable.
Use, maintenance and repair of dishwasher should be performed only by persons
familiar with these works and informed for any possible risks.
I
U
2.8.2 Daily works
C
• Turn off the operation switch of the appliance S1.
• Turn off the main switch / fuses.
• Turn off water supply faucet.
• Empty the washing dispenser removing the overflow hose after turning off the
switch ON-OFF No. 1 to avoid overcharging the tank and causing damage to the
dishwasher.
• If the dishwasher is equipped with a draining pump, keep the respective button (No.
3) pressed until the tank-dispenser is empty.
2.9 Maintenance / Care / Repair
The perfect operation and safe use may be ensured only through the correct use of the
appliance, as well as the compliance with the operation instructions, the
corresponding specifications and the care and cleaning indications.
This applies both for the compliance of the provisions of law on appliance safety
(GSG) and the existing specifications of ZH 1 and VBG on accident prevention.
RECOMMENDATION: Before cleaning or maintenance works, the appliance should
not be connected with voltage through the installed main switch / fuse. The appliance
should never be sprayed with water or high pressure cleaning aid, because any
insertion of water in the electrical elements may affect the regular operation of the
appliance as well as the protection against electrical shock (insulating protection).
We recommend that you prepare a relevant maintenance agreement for all
maintenance and repair works with our company (or with a service team / workshop
of an authorized local dealer who sold the appliance).
All works / repairs performed in this appliance must be reported on the last page of
the operating instructions, along with the signature / company name.
Substantially, no safety arrangement should be put out of operation. If the
disassembly of individual safety arrangements is required, e.g. for maintenance or
repair works, the reassembly of the relevant safety arrangements should be performed
immediately after the completion of works.
2.9.1 Unloading the water from the dishwasher’s tank (dispenser)
• Turn OFF the power of the dishwasher
• Empty the washing dispenser removing the overflow hose.
• If the dishwasher is equipped with a draining pump, keep the respective button
(No.3) pressed until the tank-dispenser is empty.
• Remove the filter and clean it carefully with water.
• Rinse the washing compartment to remove any dirt residues.
Then, reassemble the parts in reverse order. The appliance should never operate
without a filter.
During non-operation, the door should remain half-open or completely open (in order
to avoid odours).
T
A
M
I
S
I
U
C
2.9.2 Regular maintenance and cleaning works
Regularly, you should remove the rotating arms and sprinkler, clean them carefully
with water and reposition the parts in reverse order. This work should be performed
with great care.
PAY ATTENTION TO THE CORRECT POSITION OF FILTERS AND
SPRINKLER!
Do not clean the sprinkler’s injectors with tools or sharp objects.
You may clean the appliance with warm water and conventional cleaning aids. Rub
with water and then let it dry. The stainless steel parts should be treated with special
means for steel and you should never clean them with steel wire, brush, etc. Also, you
should never let them touch the surface, since even the lightest contact with the
surfaces may cause rust formation.
You should use brushes made of polymer plastic or natural brushes or thin wire.
You should take care to move towards the smoothing direction, so that you will not
scratch the surface. Finally, rinse with clean water and dry thoroughly.
We remind you that corrosion (rust formation) on stainless steel surfaces is not
created by itself, but rather due to the use of improper cleaning aid (e.g. whitening or
particularly caustic cleaning aid based on chlorine).
Following a particular period of use, calcium sediments are formed in the internal
walls of the dispenser (due to mineral particles in the water), which may affect the
correct operation of the appliance. For this reason, regular removing of salt formations
is required.
We recommend letting this work (removing of salt formations) to be performed by
specialized personnel (or by an authorized local dealer who sold the appliance).
2.10 Customer service
If you face any problems during the use of your appliance, we kindly ask you to refer
to our company (or to the authorized local dealer who sold the appliance).
2.11 Spare parts, Accessories and Components
All spare parts and components can be found in the authorized local dealer, who sold
this appliance, or directly in our company.
In case of claims or complaints, you should necessarily report the model and serial
number of the appliance / machine. These can be found on the label that is attached on
the appliance.
•
T
A
M
I
S
Note 3: Complete and send directly the Warranty Certificate.
I
2.12 Troubleshooting
C
U
INHALTSVERZEICHNIS
1. Aufstellungsanleitung
1.1.
1.2.
1.2.1.
1.3.
1.3.1.
1.4.
1.4.1.
1.5.
1.5.1.
Einleitung
Vorteile
Gesetzliche Bestimmungen / Anforderungen
Aufstellung
Aufstellungshinweise
Wasseranschluss
Abwasseranschluss
Netzanschluss
Schutzleiteranschluss und Potentialausgleich
2. Bedienungsanleitung
2.1.
2.2.
2.3.
2.4.
2.5.
2.6.
2.7.
2.8.
2.8.1.
2.8.2.
2.9.
2.9.1.
2.9.2.
2.10.
2.11.
2.12.
2.13.
Technische Daten
Hinweise für den ordnungsgemäßen Gebrauch des Geschirrspülers
Vorbereitung des zu spülenden Geschirrs
Auffühlen des Geschirrkorbes
Manuelle Reinigerzugabe
Klarspülmittel dosierer
Inbetriebnahme des Spülprogramms - Füllen des Boilers
Sicherheitsanordnungen
Weitere wichtige Hinweise / Sicherheitshinweise
Tägliche Arbeiten
Wartung / Pflege / Reparatur
Leeren des Waschtanks
Regelmäßige Instandhaltungs- - und Reinigungsarbeiten
Kundendienst
Ersatz- und Zubehörteile
Behebung von Funktionsstörungen
Reparaturen / Arbeiten, welche an dieser Maschine ausgeführt
werden
T
A
M
I
S
I
U
C
1. Aufstellungsanleitung
1.1. Einleitung
Dieses Gerät ist auf die Bedürfnisse der Gastronomie und Großküchen ausgerichtet.
Bevor Sie diese Maschine in Betrieb nehmen, lesen Sie die Gebrauchsanleitung
sorgfältig durch.
Sie finden darin alle wichtigen Sicherheitshinweise, sowie weitere notwendige
Angaben, die für eine ordnungsgemäße Inbetriebnahme - und den Betrieb selbst erforderlich sind.
Jede Person, die im Betrieb des Anwenders mit der Aufstellung, Inbetriebnahme,
Wartung und Reparatur des Geschirrspülers beauftragt ist, muss die Betriebsanleitung
gelesen haben, oder durch unseren Kundendienst eingewiesen sein.
Nur dann wird eine einwandfreie Funktion der Maschine gewährleistet, und unnötige
Service Kosten werden vermieden.
Bewahren Sie dieses Heft so auf, dass ein Nachschlagen jeder Zeit möglich ist.
Wir bitten Sie die Garantiekarte sorgfaltig auszufühlen und diese innerhalb von zehn
Tagen vom Kauf in die Firma zuzuschicken, damit die Garantie gültig ist.
1.2. Vorteile
Dieser Geschirrspüler zeichnet sich durch folgende Vorteile aus:
• Er ist aus rostfreiem Stahl 18/8 304 hergestellt
• Das Gerät ist für den Dauerbetrieb ausgelegt
• Leichte und einfache Reinigung
• Keine Klemmgefahr beim Öffnen und Schließen der Tür: unkomplizierte
Bedienbarkeit
• Ideales Geschirr- und Gläserwaschen
• Geringere Umweltbelastung
• Servicefreundlich, da alle Ersatzteile stets erhältlich sind
• Wirtschaftlicher Wasserverbrauch
T
A
M
I
S
I
1.2.1. Gesetzliche Bestimmungen / Anforderungen
Einhaltung der EU Richlinien
Der Geschirrspüler erfüllt die Anforderungen der Richtlinie 2006/95/EU für
Niederspannung und der Richtlinie 2004/108/EU für elektromagnetische
U
C
Kompatibilität (EMC) und trägt die
Marke.
Sie erhalten eine Kopie der Konformitätserklärung von Ihrem Lieferanten.
Dieses Produkt entspricht den Anforderungen der Richtlinie 2002/95/EUdes
Europäischen Parlaments und des Rates vom 27. Januar 2003 zur Beschränkung der
Verwendung bestimmter gefährlicher Stoffe in elektrischen und elektronischen
Geräten und führt die folgende Marke:
Entsorgung
Gemäß der Richtlinie 2002/95/EG des Europäischen Parlaments und des Rates vom
27. Januar 2003 zur Beschränkung der Verwendung bestimmter gefährlicher Stoffe in
Elektro-und Elektronikgeräten (AHHE), sollen die Produkte und ihre Teile, die unter
dieser Richtlinie nicht als regelmäßiger Müll beseitigt werden, an den Point of Sale
oder in einer Recycling-Zentrum für elektrische und elektronische Geräte beigebracht
werden.
Für weitere Informationen wenden Sie sich bitte an die Reinigungsdienste der
Gemeinde.
Kennzeichnungen
Die folgenden Kennzeichnungen werden an dem Produkt angewandt:
Eingangspannung xxV.
Erforderliche Spannungsfrequenz (z.B. 50 Hz).
Die Marken
und
Der Hersteller haftet nicht für jede möglichen Schäden, die durch mangelhafte
Installation entstanden sind.
1.3. Aufstellung
Dieser Geschirrspüler wird mit Wasserzulauf- und Wasserablaufschlauch geliefert.
Alle bauseitigen Maschinenanschlüsse dürfen nur von unterwiesenen und örtlich
zugelassenen Installateuren, unter Beachtung der geltenden Vorschriften, ausgeführt
werden.
Vor der Installation des Gerätes ist die Übereinstimmung von Stromart und
Netzspannung mit den Angaben auf dem Typenschild der Maschine zu überprüfen.
T
A
1.3.1. Aufstellungshinweise
• Verpackung entfernen. Maschine auf Transportschäden untersuchen. Im
Zweifelsfall vom Fachmann, vom ermächtigten örtlichen Vertreter der
Firma - von dem die Maschine gekauft wurde -, überprüfen
lassen, bevor Sie letzte in Betrieb nehmen.
• Geschirrspüler in der Nähe der erforderlichen Wasseranschlüsse und des
Stromanschlusses aufstellen. Der Boden soll ausreichend stabil sein.
• Die Maschine ist waagerecht aufzustellen. Eventuelle Unebenheiten
sind unter Verwendung einer Wasserwaage auszugleichen.
• Nach erfolgter Installation ist der Geschirrspüler vor Inbetriebnahme mit
handelsüblichem Reiniger gründlich zu reinigen.
M
I
S
I
U
C
1.4. Wasseranschluss
ACHTUNG: Der Wasseranschluss ist unter Beachtung der geltenden
Sicherheitsvorschriften durchzuführen.
Der Geschirrspüler ist für den Anschluss mit Kaltwasserversorgung geeignet. (Wenn
Sie sich einen Anschluss mit Warmwasserversorgung wünschen, wenden Sie sich
bitte an die Firma).
• An die Wasserzuleitung soll ein Rückschlagventil nach DIN 1988
angebracht werden.
• Vor dem Anschluss der Maschine muss der Wasser Zulauf Schlauch
durchgespült werden.
• Die Wasserzulaufleitung muss einen Innendurchmesser von mind. 16mm
haben, und der Rohranschluss 3/4 Zoll haben.
• Vor Inbetriebnahme der Maschine sind alle Wasser Anschluss Stellen zu
kontrollieren.
Achtung: Der nötige Zulauf Wasserdruck beträgt mindestens 2 bar und der Maximale
5 bar (entsprechend dem Typ).
1.4.1. Abwasseranschluss
Bei diesem Modell erfolgt der Auslauf durch die Schwerkraft. Der Auslaufschlauch
ist entweder direkt an den bauseitigen Hauptabfluss anzuschließen, wobei ein
Geruchsverschluss vorzusehen ist, oder das Abwasser direkt in einen mit
Geruchsverschluss versehenen Sammelschacht im Fußboden abfließen zu lassen.
Achtung: Der Ablaufschlauch darf nicht über eine bestimmte Höhe (siehe § 2.1
Technische Daten) - von der Geräteunterkante - verlegt sein. Wenn die Maschine eine
Wasserpumpe hat, soll der Abfluss höher gestellt werden.
1.5. Netzanschluss
Achtung: Der elektrische Netzanschluss muss unbedingt nur von einem
Elektroinstallateur installiert werden.
Der Geschirrspüler ist für eine bestimmte Spannung, entsprechend dem Typ
ausgelegt. Entsprechend der Leistungsaufnahme des Gerätes ist die Absicherung des
Stromkreises vorzunehmen. Wenden Sie sich an einen Amtlich zugelassenen
Elektriker für den elektrischen Anschluss zu.
T
A
Es sind die Vorschriften nach DIN VDE D100 mit den entsprechenden Teilen, die
EVU – Anschluss Bedingungen, die zutreffenden ZH 1/37 - u.a. Abschnitt 7.2 - sowie
die einschlägigen Unfallverhütungsvorschriften zu beachten.
Das Gerät ist entsprechend an die elektrische Hausinstallation fester Stromversorgung
mit einem Kabel Typ H07 RN-F über Gerätezugentlastung anzuschließen.
M
I
S
I
U
1.5.1. Schutzleiteranschluss und Potentialausgleich
C
Die elektrische Sicherheit dieses Gerätes ist nur dann gewährleistet, wenn der
Schutzleiter ordnungsgemäß angeschlossen und geprüft worden ist. Hierbei sind die
entsprechenden Bestimmungen (siehe Punkt 1.5) zu beachten.
Ferner ist das Gerät in ein Potentialausgleichssystem einzubeziehen. Hierzu befindet
sich eine mit dem Hinweis "Potentialausgleich, oder voltage compensation"
gekennzeichnete Schraube an der Rückseite der Maschine.
Nach dem elektrischen Anschluss ist die Wirksamkeit des Schutzleiters, das
Potentialausgleich und der Isolationswert nach den einschlägigen DIN VDEBestimmungen zu prüfen.
2. Bedienungsanleitung
2.1. Technische Daten
Sie finden die technischen Daten von jedem Gerät auf dem Aufkleber des
Geschirrspülers.
2.2. Hinweise für den ordnungsgemäßen Gebrauch des Geschirrspülers
Die Maschine ist ausschließlich zum Reinigen von Geschirr, wie Teller, Tassen,
Gläser, Besteck usw. aus dem Lebensmittelbereich vorgesehen, nach dessen
Benutzung.
Achten Sie bitte darauf, dass die zu spülenden Teile spülmaschinenfest sind.
Silbergeschirr und Silberbestecke sind von Speiseresten zu befreien. Wenn diese nicht
unmittelbar nach der Mahlzeit gespült werden könnten Verfärbungen und Flecken
durch bestimmte Speisen erscheinen.
Gegenstände welche mit Säuren, Ölen, Fetten, Benzin oder Farben in Kontakt
gekommen sind, sind in dieser Maschine nicht zu spülen.
2.3. Vorbereitung des zu spülenden Geschirrs
Das Abtrocknen der Speisereste ist zu vermeiden. Um die Verstopfung des Filters und
eine rasche Verschmutzung des Spülwassers zu verhindern, sind grobe Speisereste,
Olivenkerne, Zitronenschalen, Zahnstocher u.a. vor der Beschickung zu entfernen.
Wir empfehlen, Gläsergeschirr mit angetrockneten Speiseresten vorher einzuweichen
und / oder abzubrausen.
T
A
2.4. Auffüllen des Geschirrkorbes
Gläser, Tassen, Schalen usw. mit der Öffnung nach unten und nicht übereinander
gestapelt in die dafür vorgesehenen Körbe einsetzen.
Gläser dürfen sich nicht berühren um Glasschäden und Berührungsflecken zu
vermeiden.
Die Bestecke mit dem Griff nach unten in die vorgesehenen Kunststoffbehälter
einsortieren.
Die Besteckteile können auch lose in den engmaschigen Flachkorb gelegt werden.
Die Überladung des Korbes ist auf jeden Fall zu vermeiden.
Die Wasserführungsrohre sind freizuhalten.
M
I
S
I
U
C
2.5. Manuelle Reinigerzugabe oder mit integriertem Peristaltikpumpe
Der zu verwendende Reiniger soll für gewerbliche Geschirrspüler geeignet sein. Er
wird nach erreichen der empfohlenen Betriebstemperatur direkt in den Spültank
gegeben.
Bei integrierter Reinigerpumpe stellen Sie den Pumpenschlauch mit dem Zeichen
DETERGENT in den Reinigerbehälter.
Ausschließlich schaumarmen Reiniger verwenden.
Empfehlenswert ist, sowohl den Reiniger, als auch dass Klarspülmittel vom gleichen
Hersteller zu verwenden (Achtung: Kein übliches Spülmittel für Abwasch
verwenden!).
Die richtige Dosierung des Reinigers hängt von der Wasserhärte und der
Verschmutzung des Geschirrs ab: richten Sie sich nach den Angaben des
Reinigerherstellers.
Eine zu geringe Menge an Reiniger beeinträchtigt das Spülergebnis negativ. Eine
übermäßige Menge an Reiniger bringt keinen Vorteil, sondern kostet Sie nur unnötig
Geld und belastet die Umwelt.
2.6. Klarspülmitteldosierer
Die Geschirrspüller sind mit einem automatischen Absaugdosierer ausgestattet. Der
Filter, des entsprechenden Zulaufschlauches mit der Anzeige “RINCE AID", soll in
einem mit flüssigem Klarspülmittelbehälter eingetaucht werden.
Der Dosierer wird werkseitig auf Maximalwert eingestellt und kann nach erfolgter
Installation des Geschirrspülers - je nach Wasserhärte, Geschirrverschmutzung und
des zu verwendenden Reinigers - entsprechend eingestellt werden.
Durch Drehen der Einstellschraube im Uhrzeigersinn wird der Durchfluss verringert
(-), durch Drehen gegen den Uhrzeigersinn wird der Durchfluss erhöht (+). Es wird
empfohlen, die Einstellung vom Werk (oder vom Fachpersonal des ermächtigten,
örtlichen Vertreters, von dem die Maschine gekauft wurde) durchführen zu lassen.
Die Maschine ist vor Ausführung dieser Arbeiten mit dem Hauptschalter bzw. den
entsprechenden Sicherungen spannungslos zu schalten, oder die Netzspannung
auszuschalten, so dass es keine Gefahr eines Stromschlags besteht.
HINWEIS: Der Dosierer darf niemals trocken laufen, da er andernfalls seine
Ansaugfähigkeit verliert. Es ist unerlässlich, den Vorratsbehälter bereits bei der
Installation der Maschine zu füllen, so dass der Dosierer vom ersten Spülgang an
ordnungsgemäß arbeiten kann.
Keine ätzenden Produkte verwenden. Bei Nichtbeachtung dieser Hinweise erlischt
jeglicher Garantieanspruch.
T
A
M
I
S
2.7. Inbetriebnahme Spülprogramms - Füllen des Boilers
I
• Überprüfen Sie, ob der Ansaugfilter im Tank an der richtigen Stelle gestellt ist.
• Überprüfen Sie, ob das Überlaufrohr im Tank richtig eingesetzt ist.
• Überprüfen Sie, ob die Abwasser- und Wasseranschluss ordnungsgemäß
durchgeführt sind.
• Drücken Sie den Taster ON - OFF (Nr.1). (Oder drehen Sie in Position POWER).
• Die Maschine füllt sich bis zum richtigen Wasserstand automatisch.
• Die Anzeige leuchtet (N .4) während sich das Wasser im Boiler aufheizt.
• Sobald das Wasser im Boiler die erwünschte Temperatur erreicht hat, erlischt der
Leuchter die entsprechende anzeige, LED (N .4), und eine weitere leuchtet auf
(N .5).
Diese deutet die Erwärmung des Wassers im Tank auf.
U
C
Bemerkung 1: Im Modell Barline 35 leuchtet die Lampe LED (N .4), solange der
Tank sich erwärmt.
• Sobald keine LED mehr leuchtet ist die Spülmaschine bereit für den Spülgang.
• Man öffnet die Tür. Man legt den Glasskorb oder den Tellerkorb hinein in der
Spülmaschine, nachdem man alle Essensreste entfernt hat. Man schließt die Tür.
•Geben Sie die nötigen Mengen an Spülmittel per Hand in Tank, ausgenommen die
Maschine hat eine Reinigerpumpe. Überprüfen Sie die Höhe des Klarspüler- und
Reinigungsmittelbehälters.
• Um das Programm zu starten, drückt man auf den Knopf START (Nr.2).
Beachten Sie dass bei dem Modell 1500 (Hood) das Spüllprogramm automatisch
mit dem Türschliessen angefangen wird.
• Die Laufzeit per Zyklus dauert ca. 2 Minuten, ausgenommen die Modelle, die ein
Wahlprogramm haben. Es wird gespült und nachgespült. Während der Laufzeit
leuchtet die entsprechende Anzeige auf (N .6).
Bemerkung 2: Wenn die Tür nicht richtig geschlossen ist, funktioniert die Maschine
nicht und die Lampe No 7 leuchtet.
• Sobald das Spülprogramm beendet ist, erlischt die Kontrolllampe.
Tür öffnen und den Korb mit dem sauberen Geschirr herausnehmen.
• Die, aus der Maschine entnommenen Teilen, abtropfen und an der Luft
trocknen lassen.
Sollten nach dem Spülgang Spuren von Schmutz, Wassertropfen o.a. auftreten,
können die Ursachen auf Folgendes zurückführen:
• Nachspülwasser mit hohem Mineralgehalt
• Falsche Dosierung des Reinigers im Verhältnis zum Spülwasser
• Unzureichende Dosierung des Klarspülers bei der Nachspülung
• Falsche Anordnung des Geschirrs in den Körben
• Fließwasserdruck bei Nachspülung zu niedrig
• Temperatur des Spülwassers zu niedrig
• Verstopfte Filter, oder nicht richtig gestellte Filter
T
A
M
I
S
HINWEIS: Um Kalkablagerungen insbesondere auf Gläser zu vermeiden, muss das
Wasser zum Spülen enthärtet werden.
I
2.8. Sicherheitsanordnungen
U
C
Ein Türsicherheitsschalter unterbricht den Maschinenbetrieb während des
Waschvorganges, wenn die Tür versehentlich geöffnet werden sollte.
Ein Thermoschutz ist in der Wicklung des Pumpenmotors eingebaut. Dieser
selbstständiger Wiedereinschaltbarer Thermoschutz, unterbricht die Stromversorgung
der Pumpe im Falle einer Überlastung.
Im Falle von Überhitzung des Boilers oder des Behälters wird die Stromversorgung
durch eingebaute Thermosicherungen unterbrochen.
2.8.1. Weitere wichtige Hinweise / Sicherheitshinweise
An dieser Maschine dürfen keine Veränderungen, in technischer Hinsicht
vorgenommen werden. Für eventuell daraus resultierende Schäden haftet der
Hersteller nicht. Dies gilt auch für den Fall, dass das Gerät zweckentfremdet
betrieben, falsch bedient oder unsachgemäß behandelt wird.
Das Wasser in der Spülmaschine ist kein Trinkwasser.
Der Geschirrspüler darf nur von Personen genutzt, gewartet und repariert werden, die
hiermit vertraut und über eventuell auftretende Gefahren unterrichtet sind.
2.8.2. Tägliche Arbeiten
• Geschirrspüler über den Geräteschalter S1 ausschalten
• Hauptschalter / Sicherungen ausschalten
• Wasserversorgungsabsperrhahn schließen
• Waschtank durch Herausziehen des Überlaufrohres entleeren, nachdem Sie zuerst
den Schalter auf OFF gedreht haben, damit eine Überhitzung des Tankwiderstandes
vermieden wird.
•Wenn die Maschine eine Ablaufpumpe hat, drücken Sie den Schalter No 3 bis der
Tank leer wird.
2.9. Wartung / Pflege / Reparatur
Eine Gewähr für eine einwandfreie Funktion und Betriebssicherheit kann nur bei
sachgemäßer Handhabung der Maschine, sowie der Beachtung der Hinweise in der
Betriebsanleitung, der entsprechenden Vorschriften sowie der Pflege- und
Reinigungshinweise zugesichert werden.
Dies gilt auch im Hinblick auf die Einhaltung der Bestimmungen des
Gerätesicherheitsgesetzes (GSG), sowie der geltenden Unfallverhütungsvorschriften
ZH1 und VBG.
T
A
HINWEIS: Vor den Reinigungs- bzw. Wartungsarbeiten ist die Maschine über den
Hauptschalter / Sicherung spannungsfrei zu schalten. Das Gerät darf niemals mit
einem Wasserstrahl oder einem Hochdruckreiniger abgespritzt werden, da das
eventuelle Eindringen von Wasser in die elektrischen Bauteile den ordnungsgemäßen
Betrieb bzw. den Schutz gegen elektrischen Schlag (Isolationsschutzwert) des Gerätes
beeinträchtigen könnte.
Wir empfehlen für alle Wartungs- und Reparaturarbeiten mit der Firma, bzw. dem
ermächtigten, örtlichen Vertreter von dem die Maschine gekauft wurde, einen
entsprechenden Wartungsvertrag abzuschließen.
Alle Arbeiten / Reparaturen, die an dieser Maschine ausgeführt werden, sind auf der
letzten Seite der Betriebsanleitung gegen Unterschrift und Firmen Name einzutragen.
M
I
S
I
U
C
Sicherheitsanordnungen dürfen grundsätzlich nicht außer Betrieb gesetzt werden. Ist
eine Demontage einzelner Sicherheitsanordnungen z.b. bei Wartungs- oder
Reparaturarbeiten erforderlich, hat unmittelbar nach Abschluss der Arbeiten die
Remontage der entsprechenden Sicherheitseinrichtungen zu erfolgen.
2.9.1. Leeren des Waschtanks
• Spülmaschine ausschalten.
• Waschtank durch Herausziehen des Überlaufrohres entleeren.
• Falls die Spüllmaschine mit einer Wassertankentleerungspumpe
ausgestatet ist, den entsprechenden Knopf (Nr.3) gedrückt halten bis das
Wasser abgelaufen ist.
• Den Filter des Waschtanks herausnehmen und unter fließendem Wasser
sorgfältig reinigen.
• Den Tank auswaschen, um eventuelle Reste auszuspülen.
Ein Einbau der Teile erfolgt danach in umgekehrter Reihenfolge. Die Maschine
niemals ohne Filter in Betrieb nehmen.
Die Tür ist während der Ruhepause halb offen oder ganz offen zu lassen um
Geruchsbildung zu vermeiden.
2.9.2. Regelmäßige Instandhaltungs- und Reinigungsarbeiten
In Bestimmten Zeitabständen die drehbaren Wasch- und Sprüharme herausnehmen
und sorgfältig unter Wasser reinigen und in umgekehrter Reihenfolge wieder
einbauen.
Diese Arbeit ist mit sehr großen Aufmerksamkeit durchzuführen.
AUF RICHTIGEN SITZ DER FILTER UND DER SPRÜHARME ACHTEN!
Die Sprühdüsen nicht mit Werkzeug oder spitzen Gegenständen reinigen.
Sie können die Maschine mit warmem Wasser und handelsüblichem Reinigungsmittel
reinigen. Mit Wasser nachwischen und anschließend trocknen lassen. Die
Edelstahlteile sollten mit einem speziellen Edelstahlmittel behandelt und unter keinen
Umständen mit Stahlwolle, Stahlbürsten o.a. gereinigt werden. Diese auch niemals
auf den Oberflächen liegen lassen, da kleinste Ablagerungen auf den Oberflächen
Rostbildung verursachen könnten.
Bürsten aus Kunststoff / Naturborsten oder feine Edelstahlwolle verwenden.
Es ist darauf zu achten, diese immer in Richtung der Satinierung zu bewegen, um die
Oberfläche nicht zu verkratzen. Anschließend mit frischem Wasser nachspülen und
gründlich abtrocknen.
T
A
M
I
S
I
Wir weisen daraufhin, dass die Korrosion (Rostbildung) auf Edelstahlflächen nicht
von diesen selbst verursacht, sondern immer auf die Verwendung ungeeigneter
Reinigungsmittel (z.B. Bleichmittel oder besonders ätzende Mittel auf Chlorbasis)
zurückzuführen ist.
U
C
Nach einer gewissen Betriebsdauer konnten sich an den Innenwänden des Waschtanks
(aufgrund des Mineralgehaltes im Wasser) Kalkablagerungen bilden, welche die
einwandfreie Betriebsweise der Maschine beeinträchtigen können. Daher ist, eine
regelmäßige Entsalzung, vorzunehmen.
Es wird empfohlen, diese Entsalzungsarbeiten von qualifiziertem Fachpersonal der
Firma, oder des ermächtigten, örtlichen Vertreters, von dem die Maschine gekauft
wurde, ausführen zu lassen.
2.10. Kundendienst
Sollten Sie beim Gebrauch Ihres Gerätes auf Schwierigkeiten stoßen, wenden Sie sich
bitte an die Firma bzw. den ermächtigten, örtlichen Vertreter, von dem die Maschine
gekauft wurde.
2.11. Ersatz- und Zubehörteile
Alle Ersatz- und Zubehörteile erhalten Sie bei dem ermächtigten, örtlichen Vertreter
der Firma, von dem die Maschine gekauft wurde, oder direkt bei der Firma.
Bei Anforderungen oder Reklamationen unbedingt die Modellen- und
Fabrikationsnummer des Gerätes / der Maschine angeben. Diese finden Sie auf dem
Gerätetypenschild.
Bemerkung 3 Schicken Sie bitte unmittelbar die audgefüllte Garandiekarte.
2.12. Behebung von Funktionsstörungen
T
A
I
M
I
S
C
U
CONTENUS
1. Installation
1.1
1.2
1.2.1.
1.3
1.4
1.5
1.5.1.
Introduction
Avantages
Dispositions juridiques/ Revendications
Conseils d’installation
Connexion avec le système de drainage
Connexion avec le réseau
Connexion avec conducteur de protection et compensation de
tension
2. Mode d’emploi
2.1
2.2
2.3
2.4
2.5
2.6
2.7
2.8
2.8.1
2.8.2
2.9
2.9.1
2.9.2
2.10
2.11
2.12
2.13
Caractéristiques techniques
Conseils sur le fonctionnement normal du Lave-Vaisselle.
Préparer les ustensiles pour le lavage.
Remplir le panier avec les ustensiles.
Ajouter le détergent à main
Doseur de produit de polissage
Mettre en marche du programme de lavage- Remplir la chaudière
(boiler)
Dispositifs de sécurité
Autres conseils importants / Conseils de sécurité
Opérations quotidiennes
Entretien / Soin/ Réparation
Vidange de la cuve
Opérations régulières d’entretien et de nettoyage
Service Clients
Pièces de rechange et accessoires
Résoudre des problèmes de fonctionnement
Réparations/ Opérations déjà réalisées sur la machine
T
A
M
I
S
I
U
C
1. Installation
1.1 Introduction
Cette machine est conforme aux besoins de la gastronomie et de la cuisine
professionnelle.
Avant de mettre l’appareil en marche lire ce guide d’utilisation et d’entretien au
complet. Vous y trouverez des renseignements de sécurité importants ainsi que tous
les données nécessaires pour la mise en route régulière de la machine.
Toute personne chargée par l’utilisateur de la tâche de l’installation, la mise en
marche et l’entretien du lave-vaisselle et sa réparation doit avoir lu le mode d’emploi
ou être formé dans notre service clients. Ce sont les conditions qui assurent le bon
fonctionnement de la machine et évitent des frais de réparation superflus.
Conservez ce manuel pour référence ultérieure.
Afin que la garantie puisse prendre effet, vous devrez nous renvoyer la carte de
garantie dûment complété dans un délai maximum de 10 jours suivant l’achat de votre
lave-vaisselle.
1.2 Avantages
Le lave-vaisselle en question présente les avantages suivants:
• Il est construit d’Acier Inoxydable 18/8 304
• Est fabriquée pour fonctionner sans arrêt
• Le nettoyage est facile et simple
• Pas de blocage pendant l’ouverture et la fermeture de la porte:
utilisation simple
• Lavage impeccable d’assiettes et de verres
• Pollution de l’environnement réduite
• Service clients amical car tous les accessoires sont disponibles par
avance.
• Economique quant à l’eau consommée.
T
A
M
I
S
I
U
C
1.2.1 Dispositions Juridiques/ Revendications
Conformité aux directives européennes
Cet appareil remplit les conditions fixées par la directive 2006/95/UE sur la basse
tension ainsi que les conditions fixées par la norme 2004/108/UE sur la compatibilité
électromagnétique (EMC) et porte la marque
.
Vous pouvez demander une copie de la déclaration de conformité de votre
fournisseur.
Cet appareil remplit les conditions fixées par la directive 2002/95/CE DU
PARLEMENT EUROPÉEN ET DU CONSEIL du 27 janvier 2003 relative à la
limitation de l'utilisation de certaines substances dangereuses dans les équipements
électriques et électroniques et porte la marque
Gestion des Déchets
Conformément à la DIRECTIVE 2002/96/CE DU PARLEMENT EUROPÉEN ET
DU CONSEIL du 27 janvier 2003 relative aux déchets d’équipements électriques et
électroniques (DEEE) tous les objets ou les composants d’objets qui sont compris à
les directives ne doivent pas être jetés après usage parmi les déchets ménagers mais
doivent être renvoyé au point de vente ou à tout autre lieu indiqué de recyclage
d’équipements électriques et électroniques.
Pour informations ultérieures, veuillez consulter vos services municipaux.
Marques
Cet produit porte les marques ci-dessous:
Tension d’entrée . xxV
Fréquence de tension nécessaire (p.e. 50Hz).
Le marque
et
T
A
Le fabricant n’a pas la responsabilité pour les dommages provenant par la fausse
installation de la machine.
1.3 Installation
M
I
S
I
U
Le présent lave-vaisselle est livré avec des tuyaux d’admission et de décharge. Tout
raccord de la machine conformément à sa fabrication doit être effectué par le
technicien indiqué et autorisé au niveau local en respectant les normes en vigueur.
C
Avant de faire le raccord électrique on doit vérifier si le courant et la tension du
réseau sont compatibles avec les caractéristiques sur la plaquette de la machine.
1.3.1 Conseils sur l’installation
• Ouvrir l’emballage. Examiner la machine pour constater s’il y a des
dommages éventuels provoqués par le transport. En cas de doute il
faut faire venir une personne spécialisée (de la part du concessionnaire
local qui a vendu la machine) avant de la mettre en route.
• Mettre le lave-vaisselle sur le lieu d’installation près de la prise d’eau et
d’électricité nécessaire (le sol doit être suffisamment nivelé).
• La machine doit être placée horizontalement. Des dénivellations du sol
éventuelles doivent être rectifiées au moyen d’une équerre.
• Après son installation réussie, le lave-vaisselle doit être soigneusement
nettoyé avec un produit de lessive vendu dans le marché.
1.4 Raccord Hydrique
ATTENTION: Le raccord hydrique doit être effectué suivant les normes de sécurité
en vigueur.
Le lave-vaisselle peut être connecté seulement avec une prise d’eau froide. *(Si
vous voulez connecter le lave-vaisselle avec une prise d’eau chaud, veuillez
contacter notre société).
• Le tuyau de remplissage doit être muni par le fabricant avec un volet de
réglage conformément à DIN 1988.
• Le tuyau de remplissage doit être rincé avant de connecter la machine.
• Le diamètre intérieur du tuyau de remplissage doit être au moins 16mm
et la connexion avec le tuyau doit être 3/4’’.
• Tous les manchons des tuyaux doivent être fixés à une position stable
avant de mettre la machine en route.
ATTENTION: La pression d’eau minimale doit atteindre les 2 bars, tandis que la
pression ne doit pas excéder les 5 bars.
1.4.1 Connexion avec le système de drainage
En ce qui concerne l’écoulement de l’eau, il s’effectue par la gravité. Le tuyau
d’écoulement doit être directement connecté avec le système de drainage principal,
où une pipette a été prévue pour empêcher les mauvaises odeurs, où l’eau coule
directement dans un puits de drainage au sol qui est également muni d’une pipette
pour les odeurs.
T
A
M
I
S
ATTENTION: Le tuyau d’écoulement ne doit pas être placé à une hauteur supérieure
de la côté, la plus bas, de la cuve du lave-vaisselle. Si l’ appareil a une pompe de
drainage de la cuve, le tuyau d’écoulement peut être placé à une hauteur supérieure.
I
U
1.5 Connexion avec le réseau de distribution d’électricité
C
ATTENTION: Le raccord électrique doit être effectué exclusivement par
l’électricien adéquat.
Le lave-vaisselle fonctionne à une tension spécifique. Le courant doit correspondre à
la prise de courant de la machine (consulter un électricien certifié pour le raccord
électrique).
Les normes conformes à DIN VDE D100 doivent être respectées avec les parties
correspondantes, les conditions de connexion EVU, les relatifs ZH1/37 et autres,
chapitre 7.2 - ainsi que les normes en vigueur sur la prévention des accidents.
La machine doit respectivement être connectée avec une prise électrique à tension
stable avec un câble HO7 RN-F muni d’un dispositif de soulagement de charge de la
machine.
1.5.1 Connexion du tuyau protecteur et compensation de tension
La sécurité de la machine en ce qui concerne l’électricité est assurée uniquement si le
tuyau de protection a été connecté et vérifié de la façon indiquée. Là il faut respecter
les normes correspondantes (voir le paragraphe 1.5)
La machine doit être en plus inclue dans un système de compensation de tension. Pour
cette raison il y a sur le côté arrière de la machine une vis portant l’indication
«compensation de tension» ou «voltage compensation».
Le fonctionnement du tuyau de protection, la compensation de tension et la valeur
d’isolation conformément aux normes DIN VDE doivent être vérifiés suite au raccord
électrique.
2. Mode d’Emploi
2.1 Caractéristiques Techniques
On peut trouver les caractéristiques techniques de chaque modèle sur l’étiquette du
type de l’appareil.
2.2 Conseils sur le fonctionnement normal du lave-vaisselle
Cette machine est exclusivement destinée à nettoyer des ustensiles tels comme
assiettes, tasses, verres, fourchettes, couteaux, cuillères et d`autres, après leur
utilisation lors des repas.
Il faut faire attention avec aux ustensiles que an met dans la machine. Il y a certains
ustensiles qui ne doivent pas être nettoyés par un lave-vaisselle.
Les ustensiles et les couteaux, fourchettes et cuillères en argent doivent être nettoyés
des restes des aliments au cas où ils ne seraient pas lavés directement après les repas
pour n’avoir pas des colorations et taches dues à certains aliments.
T
A
M
I
S
I
Il ne faut pas mettre dans la machine des objets qui ont été laissés au contact
d’oxydes, d’huiles minérales, de graisse, d’essence ou de peinture.
U
C
2.3 Préparer les ustensiles avant de les laver
Il faut éviter de laisser les restes sécher. Afin que le filtre ne soit pas bouché et l’eau
du lavage ne devienne pas sale trop vite, on doit avant de mettre les ustensiles dans le
panier, enlever les grands morceaux de restes, des noyaux d’olives, d’écorce de citron,
des cure-dents et des autres.
Il est recommandé de laisser mouiller dans l’eau ou de rincer les objets en verre sur
lesquels il y a des restes devenus sèches.
2.4 Remplir le panier avec des ustensiles
Placer les verres, les tasses, les plats et autres ustensiles ayant l’ouverture vers le bas
et de façon à ce qu’ils ne soient pas entassés les uns sur les autres dans les paniers
prévus pour cette raison. Les verres ne doivent pas être en contact. Le verre pourrait
être endommagé ou des taches pourraient se provoquer par le contact.
Arranger les couverts dans le panier prévu en matière plastique avec le manche placé
vers le bas.
Les couverts peuvent être également mis de façon libre dans le panier plat et
métallique recouvert de matière plastique. Il ne faut jamais surcharger le panier.
Les tuyaux de remplissage doivent se maintenir libres.
2.5 Ajouter du détergent à la main ou avec de doseur électrique.
Le détergent à utiliser doit être destiné à des lave-vaisselle. Après avoir obtenu la
température recommandée, on introduit le détergeant directement dans la cuve.
Si le lave-vaisselle a de doseur électrique du détergent incorpore, on met la fin avec le
filtre d’inox du tube élastique avec l’indication DETERGENT, dans le compartiment
d’emmagasinage.
Il faut utiliser exclusivement un détergeant peu mousseux.
Il est recommandé d’utiliser un détergent et un produit de polissage du même
fabriquant.
ATTENTION: n’utiliser pas détergents pour le lavage de la vaisselle à la main.
La quantité de détergent à utiliser dépend de la dureté de l’eau et du degré de saleté
des ustensiles: il faut tenir compte des données fournies par le fabricant du détergent.
Si on n’utilise pas assez de détergent, la vaisselle ne sera pas parfaitement lavée. Si on
utilise trop de détergent, le résultat ne s’améliore pas. C’est une dépense superflue qui
pollue l’environnement.
T
A
2.6 Doseur du produit de polissage
M
I
S
Les lave-vaisselle ont des valves automatiques des rinçages. Mettez la fin du tube
élastique avec le filtre plastique qui porte l’indication « RINSE AID » dans le
compartiment d’emmagasinage propre.
Le doseur est réglé par l’usine à sa valeur maximale et peut être réglé selon la dureté
de l’eau, le degré de saleté des ustensiles et le détergent utilisé après l’installation
réussie du lave-vaisselle.
En tournant le vis de réglage dans le sens des aiguilles de la montre, le flux est réduit
(-), en tournant le vis dans le sens inverse des aiguilles de la montre, le flux augmente
(+). Il est recommandé de charger notre société (ou le personnel autorisé de son
concessionnaire local qui a vendu la machine) avec la tâche du réglage.
Avant d’effectuer ces opérations il faut fermer le bouton central installé dans la
machine à l’usine ou fermer les boutons correspondants pour éliminer le courant ou le
bouton général d’électricité.
I
U
C
SUGGESTION: Le doseur ne doit pas fonctionner à sec car il perdra sa capacité. Il est
nécessaire d’avoir rempli le compartiment d’emmagasinage avant d’installer la
machine pour que le doseur puisse fonctionner normalement dès le premier lavage.
Ne pas utiliser des produits caustiques. Ce cas n’est pas couvert par la garantie.
2.7 Mise en marche du programme de lavage- Remplissage de la chaudière
• Vérifier si le filtre d’absorption a été bien installé à sa place.
• Vérifier si le tuyau de trop-plein a été bien inséré dans sa place.
• Effectuer la connexion avec la prise d’eau et le drainage selon les
instructions.
• Appuyer sur le bouton ON/OFF (No1) (ou tourner le sélecteur de fonction à la
position POWER).
• Le lave-vaisselle se remplit d’eau automatiquement jusqu’au niveau
indiqué.
• La lampe témoin (N .4) s’allume ce qui signifie que le chauffage de la
chaudière (boiler) a commencé.
• Quand l’eau de la chaudière est chauffée la lampe témoin
correspondante s’éteigne (N .4) et un autre s’allume (N .5) montrant
que l’eau dans la cuve commence à être chauffée.
Note 1: Au modèle 35 (panier 35x35) la lampe témoin No. 4 continue à clignoter
montrant que l’eau dans la cuve commence à être chauffée.
• Quand cette lampe témoin s’éteindra le lave-vaisselle est prêt à laver.
• On ouvre la porte. On place le panier avec les ustensiles (des plats, des assiettes
e.t.c.) et on ferme la porte. Avant d’introduire le panier avec les ustensiles on
prend soin d’éliminer toutes les restes d’aliments sur eux.
• On introduit le détergent à la main dans la cuve. Les lave-vaisselle avec de doseur
électrique d`détergent sont exceptes. Examiner le degré de remplissage du
compartiment du produit de polissage.
• Pour faire commencer le lavage on appuie sur le bouton START (N .2). Au modèle
1500 (type Hood) le programme de lavage commence en fermant la porte.
• Automatiquement, le programme de lavage se met en route et dure 2
min. (à l’exception des modèles qui ont le sélecteur de programme) et la lampe
témoin (N .6) de mise en route du programme s’allume en lavant et en rinçant les
ustensiles placés à l’intérieur.
• Aussitôt que le programme de lavage est fini, la lampe témoin du
programme s’éteigne (N .6). Ouvrir la porte et sortir le panier avec les
ustensiles propres.
• Laisser les ustensiles qu’on a sortis de la machine s’égoutter et sécher.
T
A
M
I
S
I
U
S’il y a, après le lavage, des taches de saleté ou des traces d’eau cela pourrait être dû à
l’une des causes suivantes:
• Le rapport entre la quantité du détergent utilisée et la quantité d’eau
n’a pas été juste.
• L’eau de rinçage contient trop d’éléments métalliques.
• Quantité de produit de polissage insuffisante au cours du rinçage.
• Mauvais placement des ustensiles dans le panier.
• Pression d’eau insuffisante lors du rinçage.
• Température basse d’eau de lavage.
• Les filtres sont bouchés ou mal placés.
C
Note 2: Pour un résultat optimal, spécialement aux verres, utiliser un adoucisseur de
l’eau.
2.8 Dispositifs de sécurité
Il y a un dispositif de sécurité sur la porte qui interrompt l’opération de l’appareil lors
du lavage dans le cas où la porte s’ouvrerait par accident.
Il y a une protection thermale intégrée à l’enroulement du moteur de la pompe dotée
d’un système de re-démarrage automatique qui interrompt l’alimentation en électricité
en cas de sur chargement.
Il y a deux fusibles qui interrompent l’alimentation en électricité en cas de sur
chauffage de la chaudière ou de la cuve.
2.8.1 Autres conseils importants / Conseils de sécurité
Il est interdit d’effectuer quelconque modification technique sur cet appareil. Le
fabricant n’est pas tenu responsable de dommages éventuels qui pourraient en
résulter. Cela est valable aussi dans le cas où l’appareil serait utilisé pour un objectif
autre que celui prévu, en cas d’erreur ou d’opération impropre.
L’eau dans le lave-vaisselle n’est pas potable.
L’usage, l’entretien et toute réparation du lave-vaisselle ne doivent être réalisés que
par des personnes connaissant bien ce type des travaux après être informées sur tous
les risques éventuels.
2.8.2 Opérations quotidiennes
• Fermez le bouton S1 de l’appareil.
• Fermez le bouton principal / les fusibles.
• Fermez le robinet d’alimentation en eau.
• Evacuez la cuve en enlevant le tuyau de trop-plein.
• Si la machine a de pompe électrique du drainage, appuyez sur le bouton No. 3
jusque l`eau de cuve soit sortie.
T
A
M
I
S
I
2.9 Entretien / Soin / Réparation
U
Le fonctionnement parfait et l’usage sûr ne peuvent être assurés qu’à travers la propre
opération de l’appareil, ainsi que par la conformité avec le mode d’emploi, les normes
respectives et les conseils de soin et de nettoyage.
Cela s’applique à l’observation tant des provisions de la loi en matière de sécurité des
appareils (GSG) que des normes en vigueur relatives à la prévention d’accidents ZH 1
et VBG.
C
SUGGESTION: Avant tout travail de nettoyage ou d’entretien, l’appareil ne doit pas
être branché sur le voltage travers le bouton principal installe ou le fusible. Evitez de
pulvériser de l’eau ou d’autres moyens de nettoyage de pression élevée sur l’appareil
parce que toute introduction d’eau sur les éléments électriques peut affecter le
fonctionnement normal de l’appareil aussi bien que la protection d’isolation.
Nous vous conseillons de conclure un contrat relatif d’entretien pour tous les travaux
d’entretien et de réparation avec notre société (ou avec un atelier de service du
concessionnaire local qui a vendu l’appareil).
Tous les travaux / réparations qui sont réalisées sur cet appareil doivent être
présentées sur la dernière page du mode d’emploi avec la signature et le nom de la
société.
Normalement, aucun dispositif de sécurité ne doit être mis hors de service. Au cas où
le démontage de dispositifs de sécurité isolés s’avérerait nécessaire, par exemple pour
des travaux d’entretien ou de réparation, le remontage des dispositifs de sécurité en
question devrait être exécuté aussitôt après l’achèvement des travaux.
2.9.1 Vidange de la cuve
• Fermez le bouton (on-off) de l’appareil.
• Evacuez la cuve en enlevant le tuyau de trop-plein.
• Si l’ appareil a une pompe de drainage de la cuve, appuyez sur le bouton (No3)
jusque l’ eau est sortie.
• Enlevez le filtre et nettoyez-le soigneusement avec de l’eau courante.
• Rincez le compartiment de lavage afin d’éloigner toutes restes de saleté.
Par la suite, remontez les pièces dans l’ordre inverse. L’appareil ne doit jamais
fonctionner sans un filtre.
Lors de périodes de non-fonctionnement, la porte doit rester semi-ouverte ou
entièrement ouverte (afin d’éviter les odeurs).
2.9.2 Opérations régulières d’entretien et de nettoyage
Enlevez les bras rotatifs de lavage et le sprinkler sur une base régulière, en les
nettoyant soigneusement avec de l’eau et en remettant en place les pièces dans l’ordre
inverse. Ce travail doit être exécuté très attentivement.
T
A
M
I
S
FAITES ATTENTION A LA PLACE CORRECTE DES FILTRES ET DU
SPRINKLER!
I
Ne nettoyez pas les injecteurs du sprinkler avec des outils ou des objets pointus.
U
Vous pouvez nettoyer l’appareil avec de l’eau chaude et des moyens de nettoyage
vendus dans le marché. Frottez avec de l’eau et laisser-le sécher. En ce qui concerne
les pièces en acier vous devez les soigner par des moyens spécialement désignés pour
l’acier. Ne les nettoyez jamais avec un fil en acier, une brosse etc. En plus, ne laissez
jamais ces pièces toucher la surface parce que même le contact le plus insignifiant
peut entraîner la formation de rouille.
Utilisez des brosses en plastique polymère ou des brosses naturelles ou du fil fin.
Faites attention, et nettoyez dans le sens de lissage pour ne pas gratter la surface.
Enfin, rincez à l’eau claire et séchez minutieusement.
C
Nous vous rappelons que la corrosion (formation de rouille) sur les surfaces en acier
n’est pas créée à elle seule mais elle est toujours due à l’usage d’un moyen de
nettoyage impropre (par exemple, un moyen de blanchissage ou un moyen de
nettoyage particulièrement caustique à base de chlorite).
Après l’écoulement d’une certaine période d’usage, des dépôts de calcium ou de
magnésium sont formés dans les parois internes de la cuve (en raison d’éléments
minéraux contenus dans l’eau) qui peuvent affecter le bon fonctionnement de
l’appareil. Pour cela, un dessalage régulier est exigé.
Nous vous conseillons de confier le travail de décalcification au personnel spécialisé
(ou à un atelier du concessionnaire local auquel l’appareil a été acheté).
2.10 Service Clients
Au cas où vous auriez des problèmes en utilisant votre appareil, nous vous prions de
vous adresser à la notre société (ou au concessionnaire local auquel l’appareil a été
acheté).
2.11 Pièces de rechange et accessoires
Vous pouvez vous procurer toutes les pièces de rechange et accessoires au
concessionnaire local auquel l’appareil a été acheté ou directement à notre société.
En cas de demandes ou de plaintes, vous devez indiquer le type et le numéro de série
de l’appareil. Ceux-ci se trouvent sur l’étiquette du type de l’appareil.
Note 3: Nous renvoyer promptement la carte de garantie dûment complété.
2.12 Restitution d’anomalies de fonctionnement
T
A
I
M
I
S
C
U