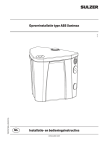
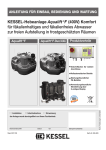
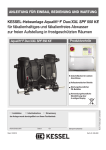
1
ANLEITUNG FÜR EINBAU, BETRIEB UND WARTUNG
KESSEL Pumpstation Aqualift F XL
- Trockene Aufstellung
D
Seite 1
GB
Page 41
F
Page 81
I Pagina 121
NL Pagina 161
PL Strona 201
Produktvorteile
Für fäkalienfreies und
fäkalienhaltiges Abwasser
Installation
Inbetriebnahme
Einweisung
der Anlage wurde durchgeführt von Ihrem Fachbetrieb:
Name/UnterschriftDatumOrt
Stand 2015/02
Stempel Fachbetrieb
Technische Änderungen vorbehalten
Trockene Aufstellung =
sauberer Arbeitsraum
3 m Grundwasserbeständig
Schaltgerät mit
Selbstdiagnosefunktion
Sach-Nr. 010-695

Inhaltsverzeichnis
1Einleitung
4
1.1
Produktbeschreibung, allgemein....................................................................................... 4
1.2
Allgemeine Hinweise zu dieser Betriebs- und Wartungsanleitung..................................... 5
1.3Funktionsprinzip................................................................................................................. 6
1.4Typenschild........................................................................................................................ 7
1.5Lieferumfang...................................................................................................................... 8
1.6
Anzeigen, Bedientasten und deren Funktionen................................................................ 8
1.7
Baugruppen und Funktionsmerkmale................................................................................ 9
10
2Sicherheit
2.1
Bestimmungsgemäße Verwendung................................................................................... 10
2.2
Personalauswahl und -qualifikation................................................................................... 10
2.3
Organisatorische Sicherheits-Maßnahmen....................................................................... 10
2.4
Gefahren, die vom Produkt ausgehen............................................................................... 11
2.4.1 Gefahr durch besondere Örtlichkeit / Umgebungsbedingungen........................................ 11
2.4.2 Gefahr durch elektrischen Schlag bei abgeschraubtem Stecker....................................... 11
2.4.3 Gefahr durch gesundheitsgefährdende Atmosphäre......................................................... 11
2.4.4 Gefahr für die Gesundheit................................................................................................. 11
2.4.5 Gefahr durch Lärm............................................................................................................. 11
2.4.6Explosionsgefahr............................................................................................................... 11
2.4.7 Gefahr durch Hitze............................................................................................................. 12
2.4.8 Gefahr durch unerwartetes Anlaufen einer Pumpe............................................................ 12
2.4.9 Gefahr des Ertrinkens im Anlagenschacht......................................................................... 12
3Montage
13
3.1
Allgemeines zur Montage.................................................................................................. 13
3.2
Zulauf montieren................................................................................................................ 13
3.3
Anschluss für Handmembranpumpe vorsehen.................................................................. 13
2 / 240
2015/02

3.4
Abwasserpumpen(n) montieren......................................................................................... 14
3.5
Kleinkompressor zur Lufteinperlung montieren................................................................. 15
3.6
Schaltgerät montieren........................................................................................................ 15
3.7
KESSEL Tele-Control-Modem montieren.......................................................................... 15
3.8
Elektrische Anschlüsse und Anschlüsse Niveausensoren herstellen................................ 16
3.9Erstinbetriebnahme............................................................................................................ 18
3.9.1 Schaltgerät initialisieren..................................................................................................... 18
3.9.2 KESSEL Tele-Control-Modem für Fehlermeldungen einrichten......................................... 19
3.9.3 Anpassung der Schaltpunkte für Lufteinperlung................................................................ 19
3.9.4Funktionskontrolle.............................................................................................................. 19
20
4Betrieb
4.1
Funktionen der Schalter..................................................................................................... 20
4.2Einschalten........................................................................................................................ 20
4.3
Display, Anzeigen / Informationen...................................................................................... 20
4.4
Funktionen aller Tasten / Anzeigen.................................................................................... 21
4.5
Alarm Quittieren................................................................................................................. 21
4.6Ausschalten....................................................................................................................... 21
5
Einstellungen Bedienmenü
22
5.1Bedienmenü....................................................................................................................... 23
6Wartung
6.1
29
Allgemeine Hinweise für die Wartung................................................................................ 29
6.2Wartungsintervalle............................................................................................................. 29
6.3Wartungsvorbereitung........................................................................................................ 30
6.3.1Wartungskarte.................................................................................................................... 31
7Fehlersuche
34
8
36
Technische Daten
8.1Pumpen............................................................................................................................. 36
8.2Förderstrom....................................................................................................................... 37
2015/02
8.3
Anzugsmomente Schraubverbindungen............................................................................ 37
8.4
Abmessungen, Volumen.................................................................................................... 37
9
Leistungserklärung /DOP
38
3 / 240
Einleitung
1
Einleitung
Sehr geehrte Kundin
sehr geehrter Kunde,
wir freuen uns, dass Sie sich für den Erwerb eines unserer Produkte entschieden haben. Sicher wird dieses Ihre
Anforderungen in vollem Umfang erfüllen. Wir wünschen ihnen einen reibungslosen und erfolgreichen Einbau.
Im Bemühen unseren Qualitätsstandard auf höchstmöglichem Niveau zu halten, sind wir natürlich auch auf Ihre
Mithilfe angewiesen. Bitte teilen Sie uns Möglichkeiten zur Verbesserung unserer Produkte mit.
Haben Sie Fragen? Wir freuen uns auf Ihre Kontaktaufnahme.
1.1
Produktbeschreibung, allgemein
Die KESSEL Pumpstation Aqualift F XL (im folgenden Pumpstation benannt) ist für das Abpumpen von
fäkalienfreiem und fäkalienhaltigem Abwasser vorgesehen. Der Abwasserbehälter nimmt die Pumpe(n) und
den/die Niveausensor(en) auf. Die Baugruppen sind auf das mitgelieferte KESSEL-Schaltgerät abgestimmt. Die
Pumpstation wird mit unterschiedlichen Abwasserpumpen ausgeliefert.
Die Schaltsignale der Sensoren für den Abwasserpegel werden im Schaltgerät elektronisch verarbeitet. Als
Niveaugeber wird ein Drucksensor verwendet. Ist das Füllvolumen erreicht, wird das Abpumpen aktiviert. Ist der
Pegelstand wieder entsprechend abgesunken, wird das Abpumpen beendet.
Sind zwei Abwasserpumpen angeschlossen, werden diese je nach Füllvolumen und Positionierung der
Niveausensoren entweder einzeln oder gemeinsam eingeschaltet.
Auf den Abwasserbehälter können verschiedene Elemente des Schachtsystems (010-701) montiert werden. Der
Abwasserbehälter stellt dann zusammen mit dem darauf befestigten Funktionselement das Bodenelement des
Schachtes dar. Bei zeit- und sachgerechter Montage ist zum Zeitpunkt der Montage der Pumpstation der Schacht
vollständig montiert.
4 / 240
2015/02
Einleitung
1.2
Allgemeine Hinweise zu dieser Betriebs- und Wartungsanleitung
Diese Betriebs- und Wartungsanleitung ist nur in Verbindung der Betriebs- und Montageanleitung des
Schaltgeräts Aqualift F Comfort 400V (Sach-Nr. 010-532), bzw. Aqualift F Comfort 230 V (Sach-Nr. 010-910)
vollständig.
Verwendete Symbole und Legenden
<1>
[2]
•
3.
–
Kursiv
Hinweis im Text auf eine Legendennummer in einer Abbildung
Bezug auf eine Abbildung
Arbeitsschritt
Arbeitsschritt in nummerierter Reihenfolge
Aufzählung
Kursive Schriftdarstellung: Bezug zu einem Abschnitt / Punkt im Steuerungs-Menü
VORSICHT: Warnt vor einer Gefährdung von Personen und Material. Eine Missachtung
der mit diesem Symbol gekennzeichneten Hinweise kann schwere Verletzungen und
Materialschäden zur Folge haben.
Hinweis: Technische Hinweise, die besonders beachtet werden müssen.
Um die Lesbarkeit der Beschreibungen zur Bedienung der Schaltgeräte nicht unnötig zu beeinträchtigen,
wurde darauf verzichtet, Details zu beschreiben, die im Umgang mit einer Menüsteuerung als gängig und
selbstverständlich betrachtet werden können.
Soll z.B. eine Rubrik wie Wartung ausgewählt werden, ist anstelle von
Pfeiltaste unten betätigen => Eintrag Wartung auswählen =>Taste OK betätigen
die Aufforderung „Wartung auswählen“ zu lesen.
2015/02
5 / 240
Einleitung
1.3
Funktionsprinzip
normale Einbauhöhe
Abb. [1] niedrigste Einbauhöhe
Abb. [2] 6 / 240
2015/02
Einleitung
1.4
Typenschild
Informationen auf dem Typenschild
1
2
4
5
6
7
8
9
10
2015/02
1
Material-Nummer der Anlage
Anschlussspannung und Anschlussfrequenz
2
Hydraulische Daten
3
Allgemeine Daten
4
Seriennummer
5
Fertigungsdatum
6
Revisionsstand
10
Aqualift
XY
xxxxx
U = xxxV xxHz I = x,xA P1 = x,xkW
Q = xxm³/h
H = xxm
S3 xx% ED IP xx (3mWS /48h)
Ser.Nr. xxxxxxx
Auftr.Nr.: xxxxxxx
RevStd.: X.X TT.MM.JJ JJ DIN-EN 12050-1
8
7
Normenbezeichnung
Auftragsnummer
Abb. [3] 7 / 240
9
www.kessel.com
3
Bezeichnung der Anlage
Einleitung
1.5
Lieferumfang
14
Schaltgerät mit eigener Montageanleitung
16
Betriebs- und Wartungsanleitung
17
Anschlussplan, im Gehäusedeckel des Schaltgerätes
19
Bohrschablone für Schaltgerät
18
20
21
23
Befestigungsmaterial für Schaltgerät
23
Anlagenbehälter (Bodenelement des Schachtsystems)
Schachtsystem, bestehend aus verschiedenen Elementen
mit eigener Montageanleitung (ohne Abbildung)
20
Abwasserpumpe(n)
2 Stück 45°-Bögen DN 150 mit Rohrdurchführungsdichtung
(ohne Abb.)
16
Abb. [4] 19
18
17
1.6
Anzeigen, Bedientasten und deren Funktionen
Siehe 4.4 auf Seite 21
14
Abb. [5] 8 / 240
2015/02
Einleitung
1.7
Baugruppen und Funktionsmerkmale
14
23
14
23
24
24
25
25
20
20
27
27
22
22
26
26
28
28
Abb. [6] Abb. [7] normale Einbauhöhe
niedrige Einbauhöhe
14
Schaltgerät
22
Typenschild
20
23
24
Abwasserpumpen
Druckleitung
25
Rückflussverhinderer mit Absperrschieber
27
Niveaufühler (Drucksensor)
26
28
2015/02
Anlagenbehälter (Bodenelement des Schachtsystems)
Zulauf
Anschluss Entlüftungsleitung
9 / 240
Sicherheit
2
Sicherheit
2.1
Bestimmungsgemäße Verwendung
Die Pumpstation dient als Entwässerungsanlage für fäkalienhaltiges und –freies, häusliches und gewerbliches
Abwasser, montiert in einem begehbaren KESSEL-Schachtsystem, unterschiedlicher Höhe und Ausprägung.
2.2
Personalauswahl und -qualifikation
Personen, die die Pumpstation montieren, müssen
–– mindestens 18 Jahre alt sein.
–– für die jeweiligen Tätigkeiten ausreichend geschult und qualifiziert sein.
–– die einschlägigen technischen Regeln und Sicherheitsvorschriften kennen und befolgen.
Qualifiziertes Personal sind Personen, die durch ihre Ausbildung und Erfahrung sowie ihrer Kenntnisse
einschlägiger Bestimmungen, gültiger Normen und Unfallverhütungsvorschriften die jeweils erforderlichen
Tätigkeiten ausführen und dabei mögliche Gefahren erkennen und vermeiden können.
Arbeiten an elektrischen Bauteilen dürfen nur von dafür ausgebildetem Fachpersonal und unter Einhaltung aller
geltenden Regelungen der Unfallverhütungsvorschriften (UVVen) vorgenommen werden.
2.3
Organisatorische Sicherheits-Maßnahmen
Die Betriebs- und Wartungsanleitung ist stets verfügbar zu halten.
10 / 240
2015/02
Sicherheit
2.4
Gefahren, die vom Produkt ausgehen
2.4.1 Gefahr durch besondere Örtlichkeit / Umgebungsbedingungen
Gefahr durch giftige und gesundheitsgefährdende Dämpfe, Gase und Stoffe (z. B. Bakterien, Viren). Befindet
sich die Pumpstation in einem Schacht, sind darin notwendige Arbeiten ausschließlich durch Fachpersonal
(Siehe 2.2) durchzuführen.
2.4.2 Gefahr durch elektrischen Schlag bei abgeschraubtem Stecker
Am Schaltgerät (nur 230V-Ausführung) besteht die Gefahr eines elektrischen Stromschlags, wenn einer der
Stecker für die Stromversorgung der Pumpen demontiert ist. Die Überwurfmutter des elektrischen Steckers
muss so fest montiert sein, dass sie werkzeugfrei (z.B. durch Kinder) nicht gelöst werden kann (siehe 3.8).
2.4.3 Gefahr durch gesundheitsgefährdende Atmosphäre
Bei Arbeiten in der Schacht besteht die Gefahr, dass die Atmosphäre im Schachtsystem
gesundheitsgefährdend ist. Auf ausreichende Belüftung achten und ggf. Sicherheitseinrichtungen wie z.B.
Multigaswarngerät verwenden.
2.4.4 Gefahr für die Gesundheit
Die Pumpstation fördert fäkalienhaltiges Abwasser, welches gesundheitsgefährdende Stoffe enthalten kann.
Sicherstellen, dass kein direkter Kontakt zwischen dem Abwasser oder davon verschmutzten Anlagenteilen
mit Augen, Mund oder Haut stattfindet. Bei einem direkten Kontakt die betroffene Körperstelle sofort gründlich
reinigen und ggf. desinfizieren. Persönliche Schutzausrüstung tragen.
2.4.5 Gefahr durch Lärm
Der Betrieb der Pumpstation kann einen hohen Lärmpegel verursachen. Tragen Sie bei Bedarf entsprechende
Schutzausrüstung und sorgen sie für schalldämmende Maßnahmen.
2.4.6 Explosionsgefahr
Das Innere des Abwasserbehälters kann als explosionsgefährdeter Raum (EN 12050) gelten. Durch
biologische Faulprozesse können brennbare Gase (Schwefelwasserstoff, Methangas) entstehen. Vor dem
Öffnen des Abwasserbehälters (z.B. Demontage Pumpe) für ausreichenden Luftaustausch in der Schacht
sorgen.
Ist der Abwasserbehälter geöffnet, sicherstellen, dass keine Zündquellen in unmittelbarer Umgebung
vorhanden sind (z.B. Betrieb elektrischer Geräte ohne gekapselten Motor, Metallbearbeitung, Rauchen etc.).
2015/02
11 / 240
Sicherheit
2.4.7 Gefahr durch Hitze
Gefahr von Verbrennungen beim Berühren heißer Oberflächen. Abwasserpumpen entwickeln bei längerem
Lauf eine hohe Temperatur an der Gehäuseoberfläche. Schutzausrüstung (Handschuhe) tragen oder Pumpen
entsprechend abkühlen lassen.
2.4.8 Gefahr durch unerwartetes Anlaufen einer Pumpe
Ist die Pumpstation nicht vom Netz getrennt, kann jede Pumpe unvermittelt anlaufen. Pumpen ausschließlich
durch Fachpersonal und bei freigeschalter sowie gegen unbeabsichtigtes Wiedereinschalten abgesicherter
Ablage ausbauen.
2.4.9 Gefahr des Ertrinkens im Anlagenschacht
Ein Anlagenschacht kann z.B. bei Überschwemmungen innerhalb kurzer Zeit voll Wasser laufen. Besteht
das Risiko von eindringendem Wassers, darf der Schacht so lange nicht betreten werden, bis ein gefahrloser
Aufenthalt darin möglich ist.
Öffnen der Pumpe nicht erlaubt;
Pumpe ist IP68 dicht. Kein Eintritt von Feuchtigkeit bei fachgerechter Montage. FI vorsehen
12 / 240
2015/02
Montage
3
Montage
Gefahr durch giftige und gesundheitsgefährdende Dämpfe, Gase und Stoffe (z. B. Bakterien, Viren). Alle an
der Pumpstation notwendige Arbeiten ausschließlich durch Fachpersonal (Siehe 2.2) durchführen.
3.1
Allgemeines zur Montage
Die Pumpstation wird entsprechend den auf einer Baustelle üblichen Bauabschnitten zu unterschiedlichen
Zeitpunkten montiert und in Betrieb genommen.
Einbau des Anlagenbehälter (Bodenelement des Schachtsystems) in den Schacht.
Anschluss von Abwasserzu- und -ablauf sowie der Druckleitung, über die das Abwasser abgepumpt wird.
Montage des Schachtsystems, aufbauend auf dem Anlagenbehälter. Nicht in dieser Anleitung beschrieben.
1. Montage der lose gelieferten Baugruppen, beginnend mit Kapitel 3.4.
2. Montage Schaltgerät und Anschluss der elektrischen Komponenten (Kapitel 3.8).
3. Erstinbetriebnahme (Kapitel 3.9).
Sicherstellen, dass die unter 1. genannten Arbeiten vollständig abgeschlossen sind.
3.2
Zulauf montieren
• Beide 45°-Bögen <1> zusammen mit der
Rohrdurchführungsdichtung fachmännisch montieren
3.3
Anschluss für Handmembranpumpe vorsehen
Wie in Abb. [18] auf Seite 30 dargestellt oberhalb der
Rückstauebene einen Anschluss <2> (Revisionsstück) für eine
Handmembranpumpe in der Entlüftungsleitung vorsehen.
2015/02
13 / 240
Abb. [8] Montage
3.4
Abwasserpumpen(n) montieren
• Abwasserpumpe(n) mit den Schrauben <1> befestigen (Anzugsmoment 7Nm).
1
1
Abb. [9] Abb. [10] normale Einbauhöhe
niedrige Einbauhöhe
14 / 240
2015/02
Montage
3.5
Kleinkompressor zur Lufteinperlung montieren
(Option)
Luftschlauch gemäß der mitgelieferten Montageanleitung anschließen.
3.6
Schaltgerät montieren
Schaltgerät gemäß der dem Schaltgerät beiliegenden Anleitung montieren.
3.7
KESSEL Tele-Control-Modem montieren
(Option) KESSEL Tele-Control-Modem gemäß der diesem Schaltgerät beiliegenden Anleitung montieren.
2015/02
15 / 240
Montage
3.8
Elektrische Anschlüsse und Anschlüsse Niveausensoren herstellen
Sicherstellen, dass das Schaltgerät während den Montagearbeiten von der Spannungsversorgung
getrennt ist.
Gefahr von elektrischem Schlag bei unbeabsichtigten Berühren abgeschraubter Steckverbindungen
(z.B. durch Kinder). Sicherstellen, dass alle elektrischen Anschlussverbindungen - sofern vorhanden wie abgebildet befestigt werden (Anzugsmoment).
Abb. [11]
16 / 240
2015/02
Montage
• Pumpe(n) an den Steckverbindungen <b und c> anschließen.
b
c
e
d
Abb. [12] • Anschlüsse der Niveaufühler wie folgt herstellen.
Alarmsensor
Drucksensor
Anschluss (Abb. [12])
Farbkodierung Kabel
e
-
d
rot
• Alle Kabel der elektrischen Komponenten und die Leitung des Drucksensors sicher verlegen. Empfehlung:
Befestigung an den an der Schachtwand montierbaren Kabelrohrschellen.
Den Druckschlauch (Anschluss e) des Tauchrohrs (Drucksensor) so verlegen, dass er stetig ansteigend
verläuft. Somit wird einer eventuellen Kondenswasserbildung vorgebeugt, das zu Störungen führen könnte.
2015/02
17 / 240
Montage
3.9
Erstinbetriebnahme
Ein Trockenlauf der Abwasserpumpe(n) ist unbedingt zu vermeiden, sie könnten beschädigt werden. Niemals
Abwasserpumpen einschalten, wenn der Abwasserbehälter nicht mindestens bis zum Pegelstand Minimum
befüllt ist.
3.9.1 Schaltgerät initialisieren
• Schaltgerät mit Netzspannung versorgen, die Initialisierung beginnt. Während für ca. 4 Sekunden die LED‘S
leuchten, werden die elektrischen Bauteile überprüft, die Batterie für die Netzausfall-Meldung aktiviert und das
Menü 3.10. Sprache angezeigt. Anschließend kann die Initialisierung durchgeführt werden.
Bei der Initialisierung werden folgende Eingaben erwartet:
Sprache
–– Datum / Uhrzeit
–– Produkttyp
–– Anlagenvariante
–– Leistungsgröße
–– Wartungsintervall
Sprache
• OK betätigen
• Landessprache mit den Pfeiltasten auswählen und mit OK bestätigen, das Menü Datum/Uhrzeit wird
angezeigt.
Datum / Uhrzeit
• Die jeweils blinkende Ziffer in Datum und Uhrzeit einstellen und mit OK bestätigen. Nach der letzten Eingabe,
wird das Menü Produkttyp angezeigt.
Produkttyp
• Pumpstation Aqualift Mono oder Duo auswählen und mit OK bestätigen, das Menü Anlagenvariante wird
angezeigt.
Anlagenvariante
• Passende Anlagenvariante auswählen und mit OK bestätigen, das Menü Leistungsgrösse wird angezeigt.
Leistungsgrösse
• Passende Leistungsgröße auswählen und mit OK bestätigen, das Menü Wartungstermin wird angezeigt.
Wartungsintervall
• Gewünschten Wartungsfrist auswählen oder entsprechend eingeben und mit OK bestätigen, das Menü
Systeminfo wird angezeigt, die Initialisierung ist abgeschlossen.
18 / 240
2015/02
Montage
3.9.2 KESSEL Tele-Control-Modem für Fehlermeldungen einrichten
(Option) Im Menüpunkt 3.9 kann eingestellt werden, welche Ereignisse der Pumpstation an welche SMSEmpfänger gesendet werden.
3.9.3 Anpassung der Schaltpunkte für Lufteinperlung
(Option) Sofern ein Kleinkompressor für die Lufteinperlung installiert ist, folgende Anpassung vorgenommen:
•
•
•
•
•
•
Sicherstellen, dass der Anlagenbehälter befüllt ist.
Kleinkompressor ausschalten.
Pumpstation einschalten.
Im Bedienmenü 1.5.4 den angezeigten Messwert (mm) notieren.
Kleinkompressor einschalten.
Offsetwert ermitteln, dazu den Bedienmenü 1.5.4 angezeigten Messwert vom zuvor notierten Messwert
abziehen.
• Offsetwert im Bedienmenü 3.1.14 Lufteinperlung Offset eingeben, die Schaltpunkte sind angepasst.
3.9.4 Funktionskontrolle
Die Funktionskontrolle gemäß den auf der Wartungskarte (siehe 6.3.1) gelisteten Tätigkeiten durchführen.
2015/02
19 / 240
Betrieb
4
Betrieb
Alle Rückflussverhinderer mit Absperrschieber müssen während dem Betrieb der Pumpstation geöffnet und
verriegelt sein (nach oben herausgezogen, siehe <25> auf Seite 9).
4.1
Funktionen der Schalter
4.2
Einschalten
28
29
30
32
• Hauptschalter <28> in Position I (ON) drehen, nach erfolgreichem
Systemtest erscheinen im Display <29> die Anlageninformationen
und die grüne LED <30> leuchtet, das Schaltgerät ist betriebsbereit.
31
Abb. [13] 4.3
Display, Anzeigen / Informationen
Im Display werden verschiedene Betriebszustände mit Textanzeigen dargestellt. Über das Menü 1 (siehe
Betriebsanleitung des Schaltgerätes) sind alle Systemparameter abrufbar.
Der Flüssigkeitspegel im Abwasserbehälter wird im Display (Füllstand) in mm angezeigt.
(0 bedeutet, er ist unterhalb der messbaren Höhe)
20 / 240
2015/02
Betrieb
4.4
Funktionen aller Tasten / Anzeigen
19
LED
Pumpe 1
21
LED
Alarm
20*
22
66
67
68
LED
LED
Pfeil oben
Pfeil unten
Pumpe 2
Betriebsbereit
Blättern im Menü
Blättern im Menü
ESC
Löschen einer Eingabe, zurück
71
Pumpe / Test
Pumpe 1 EIN / AUS
73*
Pumpe / Test
69
72
Alarm
OK
Quittierung des akustischen Alarms
Bestätigen einer Eingabe, nächste
Ebene
Pumpe 2 EIN / AUS
Abb. [14] * Pumpstation Ausführung DUO (2 Pumpen)
4.5
Alarm Quittieren
Ist ein Zustand aufgetreten, der einen Alarm auslöste (z.B. Fehler an einer Pumpe, Pegelstand des Abwassers
erreichte Alarm-Niveau) leuchtet die Alarm-LED <21>. Im Display wird ggf. eine Fehlermeldung im Klartext
ausgegeben. Nach der Beseitigung der Ursache für den Alarm, kann der Alarm durch Drücken der Taste <69>
quittiert werden.
–– Alarmton ausschalten: Taste <69> 1x drücken.
–– Alarm quittieren: Taste <69> 1x drücken und >5 Sekunden gedrückt halten.
4.6
Ausschalten
• Hauptschalter in Position O (OFF) drehen, ein Alarmsignal ertönt und die Alarm-LED <21> blinkt.
• Alarmsignal ausschalten, dazu Taste <69> so lange gedrückt halten, bis im Display das Alarmsymbol
durchgestrichen dargestellt wird.
• Schaltgerät ausschalten, dazu Taste <69> so lange gedrückt halten, bis das Display und die Alarm-LED
ausgeschaltet werden.
Die Pumpstation ist ausgeschaltet.
2015/02
21 / 240
Einstellungen Bedienmenü
5
Einstellungen Bedienmenü
Allgemeines
Die Menüsteuerung des Schaltgeräts verfügt über einen Bedien- und
einen Standbymodus.
Im Bedienmodus können die Systemeinstellungen über das Display
angezeigt und eingestellt werden.
Erfolgt über einen Zeitraum von ca. 60 Sekunden keine Betätigung
einer der Tasten, wird automatisch der Standbymodus aktiviert, die
Hintergrundbeleuchtung des Displays ist dann ausgeschaltet
66
Pfeil oben
68
ESC
67
72
Pfeil unten
OK
Navigationstasten für das Menü
Blättern im Menü
66
68
72
67
Blättern im Menü
Löschen einer Eingabe, zurück
Bestätigen einer Eingabe, nächste Ebene
Abb. [15] Bedienmodus aktivieren
• Taste OK <72> am Bedienfeld betätigen, Hintergrundbeleuchtung
des Displays leuchtet und der Startbildschirm (Systeminfo) wird
angezeigt.
- bzw. Schwimmeranzeige
Menü öffnen
• OK <72> betätigen, Ebene 1 des Menüs (siehe 7.1, Menüstruktur)
wird aktiviert.
72
Abb. [16] 22 / 240
2015/02
Einstellungen Bedienmenü
Navigation im Menü
Aktion
Bedienung
Menüpunkt zur Bearbeitung
aktivieren
OK, ist ein Menü-Unterpunkt vorhanden, wird dieser invertiert dargestellt.
Menüpunkt auswählen
Einstellwert anzeigen bearbeiten
Menü verlassen
Pfeil oben / Pfeil unten, ausgewählter Menüpunkt wird invertiert
dargestellt
OK, Wert wird angezeigt bzw. zur Einstellung invertiert dargestellt
ESC, aktuelle Ebene verlassen, schaltet eine Ebene höher
Menüstruktur
33
Die Nummer <33> der jeweiligen Menüebene wird in Ziffernform in der
obersten Displayzeile dargestellt.
Datum:
Uhrzeit:
Rückstau:
Klappe:
xx.xx.xx
xx:xx:xx
nein
offen
Fehler/Ereignisse (Statuszeile)
Befindet sich das Schaltgerät im Modus Handbetrieb
(Menü 2.1.1), findet z.B. auch kein niveaugesteuertes
Abpumpen statt.
Abb. [17] 5.1
Bedienmenü
Nummer
Menü
0
Systeminfo
1
Informationen
1.1
Betriebsstunden
Einheit
Wertebereich
1.1.1
Gesamtlaufzeit
h
0...999999
1.1.2
Laufzeit Pumpe 1
h
0...999999
1.1.3
Laufzeit Pumpe 2
h
0...999999
1.1.4
Anläufe Pumpe 1
-
0…18000000
1.1.5
Anläufe Pumpe 2
-
0…18000000
1.1.6
Netzausfall
h
0...999999
1.1.7
Energieverbrauch
kWh
0...999999
1.2
Logbuch
2015/02
23 / 240
Einstellungen Bedienmenü
Nummer
Menü
Einheit
zuletzt aufgetretenes E&F
bis zu 256 E&Fs
Wertebereich
davor aufgetretenes E&F
davor aufgetretenes E&F
1.3
Steuerungstyp
1.4
Wartungstermin
1.4.1
Letzte Wartung
TT.MM.JJJJ
1.4.2
Nächste Wartung
TT.MM.JJJJ
1.5
akt. Messwerte
1.5.1
Netz-Spannung
V
1.5.2
Netz-Strom
A
1.5.3
Batterie-Spannung
V
1.5.4
Füllstand
mm
1.6
Parameter
0…999
1.6.1
Höhe Stauglocke
cm
0...999
1.6.2
Einschaltsperre
s
0...999
1.6.3
Messbereich
cm
0...999
1.6.4
EIN1-Niveau
mm
0…999
1.6.5
EIN2-Niveau
mm
0...999
1.6.6
AUS1-Niveau
mm
0...999
1.6.7
Alarm-Niveau
mm
0...999
1.6.8
Ein-Verzögerung
s
0…999
1.6.9
Nachlaufzeit
s
0...999
1.6.11
Pumpenmodus
Auswahl: Grundlast-Spitzenlast oder Lastwechsel
1.6.10
Grenzlaufzeit
min
0...999
1.6.11
Grenzlaufzahl
-
0...999999
A
0...10,0
1.6.12
min. Strom
1.6.13
max. Strom
1.6.14
LEP-Offset
1.6.15
auto SDS
1.6.16
S1/S3 Betrieb
2
Wartung
2.1
Automatikbetrieb
2.1.1
Automatikbetrieb
2.2
SDS
2.3
Wartungstermin
2.3.1
nächste Wartung
mm:hh - dd.mm.yy
2.3.2
letzte Wartung
mm:hh - dd.mm.yy
2.4
Wartung durchgeführt
2.5
Wartungsintervall
2.5.1
3 Monate
2.5.2
6 Monate
2.5.3
12 Monate
2.5.4
Manuelle Wartung
2.5.5
Kein Wartungsintervall
Tage
S1 Betrieb / S3 Betrieb
Ein Aus
24 / 240
2015/02
Einstellungen Bedienmenü
Nummer
Menü
2.6
Kalibrierung
3
Einstellungen
3.1
Parameter
Einheit
Wertebereich
3.1.1
Höhe Stauglocke
cm
0...999
3.1.2
Einschaltsperre
s
0...999
3.1.3
Messbereich
cm
0...999
3.1.4
EIN1-Niveau
mm
0…999
3.1.5
EIN2-Niveau
mm
0...999
3.1.6
AUS1-Niveau
mm
0...999
3.1.7
Alarm-Niveau
mm
0...999
3.1.8
Ein-Verzögerung
s
0…999
3.1.9
Nachlaufzeit
s
0...999
3.1.10
Grenzlaufzeit
min
0...999
3.1.11
Grenzlaufzahl
-
0...999999
A
0...10,0
0...99
3.1.12
min. Strom
3.1.13
max. Strom
3.1.14
LEP-Offset
mm
Tage
3.1.15
auto SDS
3.1.16
S1/S3 Betrieb
3.2
Profilspeicher
3.2.1
eingebbarer Name
3.2.2
eingebbarer Name
3.2.3
eingebbarer Name
3.3
Datum/Uhrzeit
3.4
Anlagen-Konfig
3.5
Produkttyp
3.5.1
Hebeanlage Aqualift Mono
3.5.2
Hebeanlage Aqualift Duo
3.5.3
Pumpstation Aqualift Mono
3.5.4
Pumpstation Aqualift Duo
3.6
Anlagenvariante
3.6.1
F
3.6.2
F XL 200 l
3.6.3
F XL 300 l
3.6.4
F XL 450 l
3.6.5
Sonder-Hebeanlage
3.6.6
F Duo
3.6.7
F XL 200 l Duo
3.6.8
F XL 300 l Duo
3.6.9
F XL 450 l Duo
3.6.10
Sonder-Hebeanlage
3.6.11
F ATEX Mono
3.6.12
F Mono
3.6.13
F AP 501 Mono LW 800
2015/02
S1 Betrieb / S3 Betrieb
TT.MM.JJJJ / hh:mm:ss
25 / 240
Einstellungen Bedienmenü
Nummer
Menü
Einheit
3.6.14
F AP 501 Mono LW 1000
3.6.15
Sonder-Pumpstation ohne ATEX
3.6.16
Sonder-Pumpstation ATEX
3.6.17
F ATEX Duo
3.6.18
F Duo
3.6.19
F AP 501 Duo LW 800
3.6.20
F AP 501 Duo LW 1000
3.6.21
Sonder-Pumpstation ohne ATEX
3.6.22
Sonder-Pumpstation ATEX
3.7
Leistungsgrösse
3.7.1
SPF 1500
3.7.2
SPF 3000
3.7.3
SPF 4500
3.7.4
SPF 5500
3.7.5
TPF 1,9kW
3.7.6
TPF 1,3 kW
3.7.7
Ama Porter
3.7.8
Sonderpumpe
3.7.9
400 V / 2,5 - 4 A
3.7.10
400 V / 4 - 6,3 A
3.7.11
400 V / 6,3 - 10 A
3.7.12
400 V / 9 - 12 A
3.8
Sensor-Konfig.
3.8.1
Drucksensor
3.8.2
Drucksensor+Alarm
3.8.3
Drucksensor+Komp
3.8.4
Druck+ Komp+Alarm
3.8.5
Schwimmer
3.8.6
Pegelsonde
3.8.7
Pegelsonde + Alarm
3.8.8
Membranschalter
3.9
Kommunikation
3.9.1
Stationsname
3.9.2
Eigene Nr.
3.9.3
Modemtyp
3.9.4
PIN
3.9.5
SMS-Zentrale
3.9.6
SMS-Ziel 1
3.9.7
SMS-Ziel 2
3.9.8
SMS-Ziel 3
3.9.9
Status
3.10
Sprache
3.10.10
Deutsch
3.10.11
English
3.10.12
Francais
26 / 240
Wertebereich
2015/02
Einstellungen Bedienmenü
Nummer
Menü
3.10.13
Italiano
3.10.14
Polski
3.10.15
Nederlands
3.11
Rücksetzen
3.12
Experten-Modus
Einheit
Wertebereich
0 - 99
3.12.1
Netz-Einschaltverzögerung
s
3.12.2
Batterieüberwachung
ein/aus
3.12.3
Schwelle Batterie
V
3.12.4
Alternierender Betrieb
ein/aus
3.12.5
Max. Schaltspiele
#
0 - 18,0
1000 - 999.999
Nach Reset oder bei Erstinitialisierung werden nach dem Einschalten die folgenden Einstellungen abgefragt:
3.10
Sprache
3.10.1
Deutsch
3.10.2
English
3.10.3
Francais
3.10.4
Italiano
3.10.5
Polski
3.10.6
Nederlands
3.3
Datum/Uhrzeit
3.5
Produkttyp
3.5.1
Hebeanlage Aqualift Mono
3.5.2
Hebeanlage Aqualift Duo
3.5.3
Pumpstation Aqualift Mono
3.5.4
Pumpstation Aqualift Duo
3.6
Anlagenvariante
3.6.1
F
3.6.2
F XL 200 l
3.6.3
F XL 300 l
3.6.4
F XL 450 l
3.6.5
Sonder-Hebeanlage
3.6.6
F Duo
3.6.7
F XL 200 l Duo
3.6.8
F XL 300 l Duo
3.6.9
F XL 450 l Duo
3.6.10
Sonder-Hebeanlage
3.6.11
F ATEX Mono
3.6.12
F Mono
3.6.13
F AP 501 Mono LW 800
3.6.14
F AP 501 Mono LW 1000
3.6.15
Sonder-Pumpstation ohne ATEX
3.6.16
Sonder-Pumpstation ATEX
3.6.17
F ATEX Duo
3.6.18
F Duo
3.6.19
F AP 501 Duo LW 800
2015/02
27 / 240
Einstellungen Bedienmenü
Nummer
Menü
Einheit
3.6.20
F AP 501 Duo LW 1000
3.6.21
Sonder-Pumpstation ohne ATEX
3.6.22
Sonder-Pumpstation ATEX
3.7
Leistungsgrösse
3.7.1
SPF 1500
3.7.2
SPF 3000
3.7.3
SPF 4500
3.7.4
SPF 5500
3.7.5
TPF 1,9kW
3.7.6
TPF 1,3 kW
3.7.7
Ama Porter
3.7.8
Sonderpumpe
3.7.9
400 V / 2,5 - 4 A
3.7.10
400 V / 4 - 6,3 A
3.7.11
400 V / 6,3 - 10 A
3.7.12
400 V / 9 - 12 A
3.1.16
S1/S3 Betrieb
2.5
Wartungsintervall
3.1.16
S1/S3 Betrieb
2.5.1
3 Monate
2.5.2
6 Monate
2.5.3
12 Monate
2.5.4
Manuelle Wartung
2.5.5
Kein Wartungsintervall
Wertebereich
S1 Betrieb / S3 Betrieb
28 / 240
2015/02
Wartung
6
Wartung
Vor einem Öffnen von Gehäuseabdeckungen, Steckern und Kabeln (auch an den potentialfreien Kontakten)
sind diese spannungsfrei zu machen. Arbeiten an elektrischen Bauteilen dürfen nur von Fachpersonal
(Siehe 2.2) durchgeführt werden.
6.1
Allgemeine Hinweise für die Wartung
Bei Wartungsarbeiten darf weder auf elektrische Komponenten, Leitungsverbindungen oder Kabel
gestiegen werden.
Gefahr durch giftige und gesundheitsgefährdende Dämpfe, Gase und Stoffe (z. B. Bakterien, Viren). Befindet
sich die Pumpstation in einem Schacht, sind darin notwendige Arbeiten ausschließlich durch Fachpersonal
(Siehe 2.2) durchzuführen.
Gefahr des Ertrinkens im Anlagenschacht. Ein Anlagenschacht kann z.B. bei Überschwemmungen innerhalb
kurzer Zeit voll Wasser laufen. Besteht das Risiko von eindringendem Wassers, darf der Schacht so lange
nicht betreten werden, bis ein gefahrloser Aufenthalt darin möglich ist.
Nach jeder Wartungsarbeit an der Pumpstation Funktionsprüfung durchführen (siehe 6.3.1).
6.2
Wartungsintervalle
Der Wartungstermin kann im Menü 2. Wartung / 2.4 Wartungstermin eingestellt werden (siehe Anleitung
Schaltgerät). Ist der Wartungstermin erreicht, wird das im Display mit einer Klartextmeldung angezeigt.
Wartung von Hebeanlagen
Die Pumpstation muss regelmäßig durch einen hierfür Fachkundigen gewartet werden. Die Zeitabstände dürfen
nicht größer sein als:
- 1/4 Jahr bei Anlagen in gewerblichen Betrieben
- 1/2 Jahr bei Anlagen in Mehrfamilienhäusern
- 1 Jahr bei Anlagen in Einfamilienhäusern
Pro Wartung ist ein Wartungsprotokoll mit Angabe aller durchgeführten Arbeiten und der wesentlichen Daten zu
erstellen.
Soweit Mängel festgestellt werden, die nicht behoben werden können, sind diese dem Anlagenbetreiber von
dem die Wartung durchführenden Fachkundigen sofort schriftlich gegen Quittung zu melden.
2015/02
29 / 240
Wartung
6.3
Wartungsvorbereitung
Muss der Anlagenbehälter entleert werden, kann
das über ein in der Entlüftungsleitung installiertes
Revisionsstück (2) erfolgen. Hierzu eine geeignete
Pumpe mit Schlauch (1) verwenden.
Abb. [18] 30 / 240
2015/02
Wartung
6.3.1 Wartungskarte
Inspektion-/Wartung Pumpstation Aqualift F XL
Objektbezeichnung
Objekt
Strasse
PLZ, Ort
Kontakt
Anlagenvariante
Seriennummer
Mono
Duo
Pumpentyp
1
2
Sicherheitshinweise für die Wartung
Vor dem Öffnen des Abwasserbehälters für ausreichende Belüftung des Raumes sorgen. Zündquellen fern
halten und nicht rauchen. Sicherstellen, dass die Pumpe(n) Umgebungstemperatur angenommen haben.
Zu- und Ablaufleitungen müssen vor einer Arbeitsaufnahme entleert und drucklos sein. Pegelstand im
Abwasserbehälter muss sich unterhalb der Befestigungsebene (Pumpenflansch) der Abwasserpumpen
befinden. Aggressive Reinigungsmittel können Dichtungen beschädigen. Reinigungsarbeiten mit warmem
Wasser und Bürste durchführen.
Wartungsleistungen nach EN 12056-4 u. DIN 1986 Teil 3
LNr.
Prüfung
Erledigungsvermerk
ja
Sichtkontrolle
1
Anlageneinbau entspricht o. g. Norm und Herstellervorgaben (soweit sichtbar)
2
Fehlermeldung vorhanden?
4
Anlage freischalten (Netzstecker ziehen)!!
3
2015/02
Funktion gegeben
31 / 240
nein
Wartung
LNr.
Prüfung
Erledigungsvermerk
ja
5
Druckschalter
5.2
Optische Kontrolle Druckschalter
5.1
5.3
5.4
5.5
5.6
5.7
Tauchrohr entnehmen und reinigen, Pumpe entnehmen und Behälter reinigen
Steigende Verlegung der Steuerleitung (stetig steigend)
Tauchrohr
Tauchrohr entnehmen und reinigen
Anschluss Lutschlauch prüfen
Klemmring und Verschraubung auf richtigen Sitz prüfen
6
Batterie oder Akku messen
7.1
Isolationswiderstand messen
9
Stromaufnahme Pumpe
7
8
10
11
nein
Wert IST________
Pumpe
Wert IST________
Strom wieder zuschalten
Betriebsbereitschaft
Logbuch auslesen
Wartungstätigkeiten
12
13
14
15
16
17
18
19
20
21
22
Visuelle Kontrolle: Alle Anlagenkomponenten auf Vollständigkeit, festen Sitz,
Unversehrtheit sowie Dichtigkeit überprüfen.
Absperrschieber überprüfen
Der (die) Absperrschieber müssen sich einwandfrei und leichtgängig bedienen lassen.
Anlage für Wartung vorbereiten, entleeren
• Zulauf verschließen bzw. sicherstellen, dass kein Abwasser zufließen kann.
• Anlage leerpumpen, dazu entweder Wasser einfüllen, bis Pumpe 1 anläuft.
Wasserzufuhr
abstellen, die Pumpe läuft, bis Pegelstand „Minimum“ erreicht ist oder
• Pumpe über das Schaltgerät (Handsteuerung) ansteuern, bis Abwasserbehälter
entleert ist.
Achtung: Gefahr von Materialschäden! Pumpe darf nicht trockenlaufen.
Stromversorgung der Anlage abstellen und gegen unbeabsichtigtes
Wiedereinschalten sichern.
Wenn vorhanden, Absperrschieber in der Druckleitung schließen.
Druckleitung entleeren, dazu Anlüftvorrichtung (wie nachstehend beschrieben, alle
vorhandenen Rückflussverhinderer) in Position OFFEN bringen, das Wasser läuft aus
der Druckleitung in den Abwasserbehälter.
Anlüftvorrichtung wieder in Position ZU bringen
Revisionsdeckel abschrauben.
Tauchrohr abmontieren.
Sicherstellen, dass sich der Pegelstand im Abwasserbehälter unterhalb des
Pumpenflansches befindet. Ggf. Abwasserbehälter leerpumpen.
Rückflussverhinderer überprüfen
32 / 240
2015/02
Wartung
Ergebnisbericht
Verwendete Ersatzteile
Verbleib der ausgetauschten Ersatzteile
Beim Auftraggeber
Beim Leistungsempfänger
Anlage betriebsbereit an Kunden übergeben
Werkskundendienst/Fachmann Stempel
Ort, Datum
Unterschrift KESSEL AG/Werkskundendienst
Name in Druckbuchstaben/Unterschrift Auftraggeber
2015/02
33 / 240
Fehlersuche
7
Fehlersuche
Anzeigetext Netzausfall
Sondenfehler
Druckfehler
Batteriefehler
Wartungstermin (blinkt)
Pumpenfehler 1 bzw. 2
Unterstrom
Pumpenfehler 1 bzw. 2
Ueberstrom
Relaisfehler 1 bzw. 2
Netzausfall
Mögliche Ursache
Abhilfemaßnahme
Verbindungsschlauch SchaltgerätDrucksensor undicht
Verbindungsschlauch prüfen und ggf.
tauschen
Kabel Schaltgerät-Alarmsonde
(optional) unterbrochen
Batterie fehlt, ist defekt oder
Spannung kleiner 13,5V.
Wartungstermin ist erreicht
Kein Wartungstermin eingegeben
minimale Stromaufnahme der Pumpe
unterschritten
Kabel Schaltgerät-Pumpe
unterbrochen
Pumpe defekt“
maximale Stromaufnahme der Pumpe
überschritten, ggf. Blockade des
Laufrads
Leistungsschütz schaltet nicht ab
Energieversorgung ausgefallen
Gerätesicherung ausgefallen
Hauptschalter defekt
Netzzuleitung unterbrochen
Kabel prüfen und ggf. tauschen, Sonde
prüfen und ggf. tauschen
Batterieanschluss prüfen, ggf. Batterie
tauschen.
Wartung durchführen
Wartungstermin eingeben (siehe 2.3 im
Bedienmenü)
Kabel prüfen ggf. tauschen, Pumpe
prüfen ggf. tauschen.
Pumpe säubern und Laufrad auf
Leichtgängigkeit überprüfen, ggf.
erneuern
Schaltgerät vom Netz trennen, Schütz
austauschen.
keine, allgemeiner Netzausfall
Sicherung prüfen
Hauptschalter prüfen
Netzzuleitung prüfen
Bei bewusstem Ausschalten,
Schaltgerät herunterfahren (siehe 4.6
auf Seite 21)
Temperatur ueberschritten
Wicklungstemperaturschalter hat
ausgelöst
Phasenfehler
Phase L1, L2 oder L3 nicht vorhanden Anschluss Netzkabel und Sicherungen
prüfen
Drehfeldfehler
Motorschutz 1 bzw. 2
falsches Drehfeld des
Netzanschlusses
Selbstrückstellend bei Motorabkühlung
Fehlermeldung quittiert sich nach
erfolgreichem Wiedereinschaltversuch
von selbst. Bei anhaltendem
Temperaturfehler Pumpe tauschen.
2 Phasen der Zuleitung tauschen
Motorschutzschalter hat ausgelöst
eingestellt
Stromwert gemäß Pumpe einstellen
Pumpenstrom aufgrund defekter oder
blockierter Pumpe zu hoch.
Blockade entfernen
Überhöhter Strom aufgrund
Phasenausfall“
Netz auf Phasenausfall prüfen
Motorschutzschalter falsch
34 / 240
Pumpe tauschen falls defekt
2015/02
Fehlersuche
Druckabfall
Relaisschaltspiele 1 bzw. 2
Grenzlaufzeit 1 bzw. 2
Grenzlaufzahl 1 bzw. 2
2015/02
Schlauch an der Verschraubung zum
Tauchrohr (oder Tauchglocke) bzw.
Schaltgerät undicht.
Dichtheit des Drucksensor-Systems
prüfen
Pumpe läuft zu lange pro
Pumpvorgang
Anlagenauslegung prüfen ggf.
Kundendienst informieren
Maximale Schaltspiele überschritten
Pumpe läuft zu häufig in kurzer Zeit
35 / 240
Kann quittiert werden. Kundendienst
informieren. Fehler erscheint nach
weiteren 1000 Schaltspielen
Anlagenauslegung prüfen ggf.
Kundendienst informieren
Technische Daten
8
Technische Daten
8.1
Pumpen
Pumpe
Gewicht [kg]*
Leistung P1 [kW]
Leistung P2 [kW]
Drehzahl [U/min]
Betriebsspannung [V] 50 Hz
Nennstrom [A]
Förderleistung max. [m³/h]
Förderhöhe max. [m]
Förderguttemperatur max. [°C]
1400
1500
1,6
1,4
24
24
1,1
3,2
4,5
2,7
26
3,7
1415
2845
2845
7,3
2,7
5,4
7,7
230
400
38
400
40
7
8
45
40
12
400
53
17
IP68
I
Motorschutz
extern
Steckertyp
Betriebsart
4500
1370
Schutzklasse
Erforderliche Absicherung
3000
25
1,1
Schutzart
Anschlusskabel
SPF
Direktanschluss
10 m, 7 x 1,5 mm²
Siehe Betriebsanleitung Schaltgerät
S3/S1
*Ausführung für S1 Betrieb. Bei S3-Betrieb 2 kg schwerer.
36 / 240
2015/02
Technische Daten
8.2
Förderstrom
Förderstrom Q [m³/h] bei Förderhöhe H [m]
Pumpe
SPF..
2
4
1400 *
36
26,1 12,5
1500 *
37,5 28,2 15,8
3000 *
46
4500 *
* S3/S1
H [m]
20
18
16
14
12
10
8
6
4
2
0
6
8
10
12
14
16
18
H [m]
Q [m³/h]
40,1 34,4 28,3 22
15,6 8,8
53,4 48,4 42,9 37,5 30
Q [m³/h]
1,8
Q [m³/h]
22,5 13,1 Q [m³/h]
** S3
SPF 1500
SPF 4500
SPF 3000
0
10
20
30
40
50
60 Q [m3/h]
Abb. [19] 8.3
Anzugsmomente Schraubverbindungen
Pumpe an Pumpenflansch
7 Nm
Rückflussverhinderer (Kunststoff) und Schrauben an den Sonden
2,5 Nm
Tauchrohr
8.4
Abmessungen, Volumen
Höhe: Siehe Anleitung Technikschacht LW 1000 (Sach-Nr. 010-701).
Der Außendurchmesser beträgt ca. 1.200 mm
Nutzvolumen ca 160 Liter
Behältervolumen ca. 335 Liter
2015/02
37 / 240
5 Nm
Leistungserklärung /DOP
9
Leistungserklärung /DOP
38 / 240
2015/02
Leistungserklärung /DOP
2015/02
39 / 240
Führend in Entwässerung
6 4
Privater Wohnungsbau
ohne Kanalanbindung
1 2 3 4
5
1 2 3 4
Öffentlicher Bau
z.B. Krankenhaus
5
Öffentlicher Bau
z.B. Freizeitanlagen
1 2 3 4
5
Gewerblicher Bau
z.B. Hotel
4 5
Gewerblicher Bau
z.B. Industriebau
2 3 5
Gewerblicher Bau
z.B. Tankstellen
1 2 3 4
Privater Wohnungsbau
Ein- und Mehrfamilienhaus
1 Rückstauverschlüsse
2 Rückstauhebeanlagen
3 Hebeanlagen
4 Abläufe / Rinnen
5 Abscheider
6 Kleinkläranlagen
INSTRUCTIONS FOR INSTALLATION, OPERATION AND
MAINTENANCE
KESSEL Pumping station Aqualift F XL
- Dry set-up
Product advantages
Installation Commissioning Instructional briefing
for the system was carried out by your specialist company:
Name/signatureDateCity
Status 2015/02
Stamp of specialist company
Part no. 010-695
Subject to technical modifications
For wastewater with and
without sewage
Dry set-up = clean
working space
Resistant to groundwater
up to 3 m
Control unit with selfdiagnosis function

Table of contents
1Introduction
44
1.1
Product description, general.............................................................................................. 44
1.2
General instructions on using these operating and maintenance instructions................... 45
1.3
How it works...................................................................................................................... 46
1.4
Type plate.......................................................................................................................... 47
1.5
Scope of supply................................................................................................................. 48
1.6
Displays, operating keys and their functions..................................................................... 48
1.7
Component assemblies and functional properties............................................................. 49
50
2Safety
2.1
Correct use........................................................................................................................ 50
2.2
Staff selection and qualification......................................................................................... 50
2.3
Organisational safety measures........................................................................................ 50
2.4
Risks caused by the product.............................................................................................. 51
2.4.1 Risk caused by special location / ambient conditions........................................................ 51
2.4.2 Risk of electric shock when plug has been screwed off..................................................... 51
2.4.3 Risk caused by hazardous atmosphere............................................................................. 51
2.4.4 Health risks........................................................................................................................ 51
2.4.5 Risk caused by noise......................................................................................................... 51
2.4.6 Explosion hazard............................................................................................................... 51
2.4.7 Risk caused by heat.......................................................................................................... 52
2.4.8 Risk caused by unexpected pump start-up........................................................................ 52
2.4.9 Risk of drowning in the system chamber........................................................................... 52
3Installation
53
3.1
General points related to installation................................................................................. 53
3.2
Installing the inlet............................................................................................................... 53
3.3
Planning a connection for manual diaphragm pump......................................................... 53
42 / 240
2015/02

3.4
Installing the wastewater pump(s)..................................................................................... 54
3.5
Installing the small compressor for air bubble formation................................................... 55
3.6
Installing the control unit.................................................................................................... 55
3.7
Installing the KESSEL tele-control modem........................................................................ 55
3.8
Establishing electrical connections and connections to the level sensors......................... 56
3.9
Initial operation.................................................................................................................. 58
3.9.1 Initialising the control unit.................................................................................................. 58
3.9.2 Setting up the KESSEL tele-control modem for fault messages........................................ 58
3.9.3 Adapting the switching points for air bubble formation...................................................... 59
3.9.4 Functional check................................................................................................................ 59
60
4Operation
4.1
Switch functions................................................................................................................. 60
4.2
Switching on...................................................................................................................... 60
4.3
Displays / information........................................................................................................ 60
4.4
Functions of all keys / displays.......................................................................................... 61
4.5
Acknowledging the alarm................................................................................................... 61
4.6
Switching off....................................................................................................................... 61
5
Operating menu settings
5.1
Operation menu............................................................................................................... 63
62
6Maintenance
69
6.1
General maintenance information...................................................................................... 69
6.2
Maintenance intervals........................................................................................................ 69
6.3
Preparing for maintenance work........................................................................................ 70
6.3.1 Maintenance card.............................................................................................................. 71
7Troubleshooting
74
8
76
Technical data
8.1Pumps................................................................................................................................ 76
2015/02
8.2
Pumping flow..................................................................................................................... 77
8.3
Tightening torques for screw connections......................................................................... 77
8.4
Dimensions, volume.......................................................................................................... 77
9
Declaration of conformity
78
43 / 240
Introduction
1
Introduction
Dear
customer,
We are pleased that you have decided to buy one of our products. This will certainly completely match your
requirements. We wish you smooth and successful installation.
In trying to keep our quality standard as high as possible, we rely on your help of course. Please let us know of any
possible improvements we could make to our product.
Have you got any questions? We look forward to you getting in touch.
1.1
Product description, general
The KESSEL pumping station Aqualift F XL (referred to as „pumping station“ from here onwards) has been designed
for pumping off wastewater with and without sewage. The wastewater tank houses the pump(s) and the level
sensor(s). All the assemblies have been matched to the KESSEL control unit included. The pumping station is
delivered with different wastewater pumps.
The sensor switching signals for the wastewater level are processed electronically in the control unit. A pressure
sensor is used as a level sensor. When the filling volume has been reached, the pump-off function is activated.
When the level has fallen accordingly again, pumping off is ended.
If two wastewater pumps are connected, they are switched on either individually or together, depending on the
filling volume and positioning of the level sensors.
Different elements of the chamber system (010-701) can be mounted onto the wastewater tank. Together with the
functional element mounted on it, the wastewater tank then represents the base element of the chamber. When
installation is done in the correct order and professionally, the inspection chamber is already completely installed
when the pumping station is installed.
44 / 240
2015/02
Introduction
1.2
General instructions on using these operating and maintenance instructions
These operating and maintenance instructions are only complete in combination with the operating and maintenance
instructions of the Aqualift F Comfort 400 V (part no. 010-532) or Aqualift F Comfort 230 V (part no. 010-910)
Symbols and legends used
<1>
[2]
•
3.
–
Italics
Reference in the text to a legend number in an illustration
Reference to an illustration
Working step
Working step in numbered sequence
List
Italic case design: Reference to a section / item in the control menu
CAUTION: Warns of a risk to persons and material. Ignoring the instructions marked with this
symbol can lead to serious injuries and material damage.
Note: Technical notes which must be given particular attention.
To avoid the descriptions of control unit operation becoming unnecessarily difficult to read, no menu prompting
details are described if these can be considered standard and self-explanatory.
If, for example, a section such as Maintenance is to be chosen, the manual does not read
Press down cursor key => Select entry Maintenance => Press OK key
Instead, it simply reads “SelectMaintenance ”
2015/02
45 / 240
Introduction
1.3
How it works
normal installation height
Ill. [1] minimum installation height
Ill. [2] 46 / 240
2015/02
Introduction
1.4
Type plate
Information on the type plate
1
Name of the system
3
Connection voltage and connection frequency
2
5
6
7
8
9
10
2015/02
2
Hydraulic data
3
General data
4
Date of manufacture
6
Serial number
5
Revision index
10
Aqualift
XY
xxxxx
U = xxxV xxHz I = x,xA P1 = x,xkW
Q = xxm³/h
H = xxm
S3 xx% ED IP xx (3mWS /48h)
Ser.Nr. xxxxxxx
Auftr.Nr.: xxxxxxx
RevStd.: X.X TT.MM.JJ JJ DIN-EN 12050-1
8
7
Standard designation
Order number
Ill. [3] 47 / 240
9
www.kessel.com
4
1
Material number of the sytem
Introduction
1.5
Scope of supply
14
Control unit with separate installation instructions
16
Operating and maintenance instructions
17
Connection diagram, in the control unit housing cover
19
Drilling template for the control unit
18
20
21
23
Fastening material for the control unit
23
System tank (base element of the chamber system)
Chamber system, comprising different elements with suitable
installation instructions (not shown)
20
Wastewater pump(s)
2 x 45° elbow with pipe duct seal DN 150 (not shown)
16
Ill. [4] 19
18
17
1.6
Displays, operating keys and their functions
See 4.4 on page 61
14
Ill. [5] 48 / 240
2015/02
Introduction
1.7
Component assemblies and functional properties
14
23
14
23
24
24
25
25
20
20
27
27
22
22
26
26
28
28
Ill. [6] Ill. [7] normal installation height
low installation height
14
Control unit
22
Type plate
20
23
24
25
26
27
28
2015/02
System tank (base element of the chamber system)
Wastewater pumps
Pressure pipe
Backwater preventer with shut-off valve
Inlet
Level sensor (pressure sensor)
Connection for vent pipe
49 / 240
Safety
2
Safety
2.1
Correct use
The pumping station is used as a draining system for wastewater with and without sewage, domestic and
industrial wastewater, installed in an accessible KESSEL chamber system of differing heights and designs.
2.2
Staff selection and qualification
Persons who install the pumping station must
–– be at least 18 years old.
–– have been sufficiently trained and be sufficiently qualified for the respective tasks.
–– be familiar with and follow the respective technical rules and safety regulations.
Qualified staff are members of staff who, on the basis of their training and experience as well as their knowledge
of the relevant instructions, valid standards and accident prevention regulations, can carry out the required tasks
and both recognise and avoid any possible hazards.
Work on electrical components may only be carried out by specially trained specialist staff and under adherence
to all the valid accident prevention regulations (UVV).
2.3
Organisational safety measures
The operating and maintenance instructions must always be kept available.
50 / 240
2015/02
Safety
2.4
Risks caused by the product
2.4.1 Risk caused by special location / ambient conditions
Risk caused by toxic and hazardous vapours, gases and substances (e. g. bacteria, viruses). If the pumping
station is located in an inspection chamber, any necessary work must always be done by specialist staff (see
2.2).
2.4.2 Risk of electric shock when plug has been screwed off
There is a risk of electric shock at the control unit (230V model type only) if one of the plugs for power supply
to the pumps has been dismantled. The union nut on the electric plug must be fitted so tightly that it cannot be
loosened without a tool (e.g. by children) (see 3.8).
2.4.3 Risk caused by hazardous atmosphere
There is a risk of a hazardous atmosphere occurring in the chamber during work. Make sure the system is well
aerated and use safety equipment such as e.g. a multi-gas warning device if appropriate.
2.4.4 Health risks
The pumping station pumps wastewater with sewage which can contain hazardous substances. Make sure
eyes, mouth or skin do not come into direct contact with the wastewater or parts of the system soiled by it. In
the case of direct contact, the part of the body affected must be washed thoroughly immediately and disinfected
if necessary. Wear personal protective equipment.
2.4.5 Risk caused by noise
Operation of the pumping station can cause a high noise level. Wear appropriate protective equipment if
necessary and take sound-insulating measures.
2.4.6 Explosion hazard
The inside of the wastewater tank can be classified as a potentially explosive space (EN 12050). Biological
digestion processes can result in combustible gases (hydrogen sulphide, methane gas). Before opening the
wastewater tank (e.g. to dismantle the pump), make sure there is a sufficient exchange of air in the chamber.
When the wastewater tank is open, make sure there are no sources of ignition nearby (e.g. operation of
electrical devices without encapsulated motor, metalworking, smoking etc.).
2015/02
51 / 240
Safety
2.4.7 Risk caused by heat
Risk of burning by touching hot surfaces. When in operation for longer periods, wastewater pumps develop a
high temperature on the housing surface. Wear protective equipment (gloves) or allow the pumps to cool down
accordingly.
2.4.8 Risk caused by unexpected pump start-up
Any pump can start up at any time if the pumping station is not disconnected from the power supply. Always
have specialist staff remove the pumps and only after the system has been cleared and secured against being
switched on again unintentionally.
2.4.9 Risk of drowning in the system chamber
In the event of a flood, a system chamber can fill with water within a very short time. If there is a risk of water
entering, the inspection chamber must not be entered until there is no danger involved.
The pump must not be opened;
the pump is sealed to IP68. No humidity will enter provided the pump is installed correctly. Provide a fault
current circuit breaker
52 / 240
2015/02
Installation
3
Installation
Risk caused by toxic and hazardous vapours, gases and substances (e. g. bacteria, viruses). Always have any
necessary work on the pumping station done by specialist staff (see 2.2).
3.1
General points related to installation
The pumping station is installed and put into operation at different times according to the usual construction
phases on a building site.
1. Installation of the system tank (base element of the chamber system) in the inspection chamber.
Connection of wastewater inlet and outlet, as well as connection of the pressure pipe via which the
wastewater is pumped off.
Installation of the chamber system, starting from the system tank. Not described in this manual.
2. Installation of the separately delivered assemblies, starting with chapter 3.4.
3. Installation of the control unit and connection of the electrical components (chapter 3.8).
4. Initial operation (chapter 3.9).
Make sure that the work listed under 1. has been fully completed.
3.2
Installing the inlet
• Install both 45° elbows <1> correctly together with the pipe duct
seal
3.3
Planning a connection for manual diaphragm pump
As shown in Fig. [18] on page 70 a connection <2> (inspection
coupler) must be planned in the vent pipe above the backwater level
for a manual diaphragm pump.
2015/02
53 / 240
Ill. [8] Installation
3.4
Installing the wastewater pump(s)
• Fix the wastewater pump(s) in place using the screws <1> (tightening torque 7 Nm).
1
1
Ill. [9] Ill. [10] normal installation height
low installation height
54 / 240
2015/02
Installation
3.5
Installing the small compressor for air bubble formation
(Option)
Connect the air hose in accordance with the installation instructions provided.
3.6
Installing the control unit
Install the control unit in accordance with the instructions enclosed with the unit.
3.7
Installing the KESSEL tele-control modem
(Option) Install the KESSEL tele-control modem in accordance with the instructions enclosed with this unit.
2015/02
55 / 240
Installation
3.8
Establishing electrical connections and connections to the level sensors
Make sure that the control unit is disconnected from the power supply during installation work.
Risk of electric shock caused by the unintentional touching of plug-type connections which have been
screwed off (e.g. by children). Make sure that all electrical connections – if present – are fastened as
shown (tightening torque).
Ill. [11]
56 / 240
2015/02
Installation
• Connect pump(s) to the plug-type connections <b and c>.
b
c
e
d
Ill. [12] • Establish connections for the level sensor as follows.
Alarm sensor
Pressure sensor
Connection (Fig. [12])
Colour coding cable
e
-
d
red
• Route all cables for the electric components and the pressure sensor line safely. Recommendation:
attachment to the cable pipe clamps that can be mounted on the wall of the inspection chamber.
Route the pressure hose (connection e) of the immersion pipe (pressure sensor) in such a way that it always
runs at a rising gradient. This prevents condensation forming which could lead to malfunctions.
2015/02
57 / 240
Installation
3.9
Initial operation
Avoid the wastewater pump(s) running dry at all costs, it/they could become damaged. Never switch
wastewater pumps on if the wastewater tank is not filled at least to the minimum level.
3.9.1 Initialising the control unit
• Connect the control unit to the mains supply, initialisation begins. While the LEDs light up for approx. 4
seconds, the electrical components are checked, the battery for power outage signals actuated and menu
3.10. Language displayed. Then initialisation can be carried out.
During initialisation, the following input is expected:
Language
–– Date / Time
–– Product type
–– System variant
–– Capacity
–– Maintenance interval
Language
• Press OK
• Select the required language using the cursor keys and confirm with OK, the date/time menu then appears.
Date / Time
• Set the flashing figures in date and time one by one and confirm with OK. Following the last entry, the menu
Product type appears.
Product type
• Select pumping station Aqualift Mono or Duo and confirm with OK, the menu System variant appears.
System variant
• Select the appropriate system variant and confirm with OK, the menu Capacity appears.
Capacity
• Select the appropriate capacity and confirm with OK, the menu Maintenance date appears.
Maintenance interval
• Select the maintenance interval you require or enter accordingly and confirm with OK, the menu System
information appears, initialisation is complete.
3.9.2 Setting up the KESSEL tele-control modem for fault messages
(Option) In menu item 3.9, it is possible to define which incidents of thepump stationare to be sent to which text
message recipient.
58 / 240
2015/02
Installation
3.9.3 Adapting the switching points for air bubble formation
(Option) If a small compressor for air bubble formation is installed, it must be adapted as follows:
•
•
•
•
•
•
Make sure that the system tank is full.
Switch the small compressor off.
Switch thepump station on.
Note the measured value (mm) displayed in operating menu 1.5.4.
Switch the small compressor on.
Determine the offset value, to do this subtract the measured value now displayed in operating menu 1.5.4
from the measured value you noted before.
• Enter the offset value in operating menu 3.1.14 air bubble formation offset, the switching values have now
been adapted.
3.9.4 Functional check
Carry out the functional check in accordance with the activities listed on the maintenance card (see 6.3.1).
2015/02
59 / 240
Operation
4
Operation
All backwater preventers with shut-off valves must be opened and locked during operation of the pumping
station (pulled up and out, see <25> on page 49).
4.1
Switch functions
4.2
Switching on
28
29
30
32
• Turn the main switch <28> to position I (ON), following a successful
system test the system information appears in the display <29>
and the green LED <30> lights up, the control unit is ready for
operation.
31
Ill. [13] 4.3
Displays / information
Various operating states with text are shown on the display. All the system parameters can be retrieved via menu
1 (see the control unit operating manual).
The level of liquid in the wastewater tank is shown on the display (filling level) in mm.
(0 means it is below the measurable height)
60 / 240
2015/02
Operation
4.4
Functions of all keys / displays
19
LED
Pump 1
21
LED
Alarm
20*
22
66
67
68
69
LED
LED
Cursor up
Cursor down
ESC
Alarm
71
Pump / Test
73*
Pump / Test
72
OK
Pump 2
Ready for operation
Scrolling in the menu
Scrolling in the menu
Deletion of an entry, back
Acknowledge the acoustic alarm
Pump 1 ON / OFF
Confirmation of an entry, next level
Pump 2 ON / OFF
Ill. [14] * Pumping station model type DUO (2 pumps)
4.5
Acknowledging the alarm
If a state occurs which triggers an alarm (e.g. fault on a pump, level of the wastewater has reached the alarm
level), the alarm LED <21> will light up. A plain text fault message may be shown on the display. After the cause
of the alarm has been eliminated, the alarm can be acknowledged by pressing key <69>.
–– To switch the alarm sound off: Press key <69> 1x
–– To acknowledge the alarm: Press key <69> 1x and keep pressed for longer than 5 seconds.
4.6
Switching off
• Turn the main switch to position O (OFF), an alarm signal is sounded and the alarm LED <21> flashes.
• Switch the alarm signal off, to do this keep key <69> pressed until the alarm symbol on the display is shown
crossed out.
• Switch the control unit off, to do this keep key <69> pressed until the display and the alarm LED are switched
off.
The pumping station is switched off.
2015/02
61 / 240
Operating menu settings
5
Operating menu settings
General information
The control unit menu prompting has an operating and a standby
mode.
In operating mode the system settings can be displayed and adjusted
on the display.
If over a period of approx. 60 seconds none of the keys are pressed,
standby mode is activated automatically, the background lighting of the
display is then switched off.
66
Cursor up
68
ESC
67
72
Navigation keys for the menu
Scrolling in the menu
66
68
72
67
Cursor down Scrolling in the menu
OK
Deletion of an entry, back
Confirmation of an entry, next level
Ill. [15] Activating operating mode
• Press the OK <72> key on the control panel, the background lighting
of the display lights up and the start window (system information)
appears.
- bzw. Schwimmeranzeige
Opening the menu
• Press OK <72>, level 1 of the menu (see 7.1 Menu structure) is
activated.
72
Ill. [16] 62 / 240
2015/02
Operating menu settings
Navigation in the menu
Action
Operation
Activate menu point for editing
OK. If a menu sub-item exists, this is shown inverted.
Select menu item
Display or edit set value
Quit menu
Cursor up / cursor down, selected menu item is shown inverted
OK, value is displayed or shown inverted for setting
ESC, leave current level, moves up a level
Menu structure
33
The number <33> of the respective menu level is shown as a figure in
the top line on the display.
Datum:
Uhrzeit:
Rückstau:
Klappe:
xx.xx.xx
xx:xx:xx
nein
offen
Fehler/Ereignisse (Statuszeile)
If the control unit is in manual mode (menu 2.1.1) no levelcontrolled pumping off takes place either, for example.
Ill. [17] 5.1
Operation menu
Number
Menu
Unit
Value range
0
System information
1
Information
1.1
Operating hours
1.1.1
Total running time
h
0...999999
1.1.2
Run time pump 1
h
0...999999
1.1.3
Run time pump 2
h
0...999999
1.1.4
Starts pump 1
-
0…18000000
1.1.5
Starts pump 2
-
0…18000000
1.1.6
Power outage
h
0...999999
1.1.7
Energy usage
kWh
0...999999
1.2
Log book
most recent I&F
up to 256 I&Fs
I&F previous to that
2015/02
63 / 240
Operating menu settings
Number
Menu
Unit
Value range
I&F previous to that
1.3
Control unit type
1.4
Maintenance date
1.4.1
Last maintenance
DD.MM.YYYY
DD.MM.YYYY
1.4.2
Next maintenance
1.5
Curr. measured values
1.5.1
Mains voltage
V
1.5.2
Mains power
A
1.5.3
Battery voltage
V
1.5.4
Filling level
mm
0…999
1.6
Parameters
1.6.1
Height of immersion pipe
cm
0...999
1.6.2
Switch lock
s
0...999
1.6.3
Measuring range
cm
0...999
1.6.4
ON1 level
mm
0…999
1.6.5
ON2 level
mm
0...999
1.6.6
OFF1 level
mm
0...999
1.6.7
Alarm level
mm
0...999
1.6.8
On delay
s
0…999
0...999
1.6.9
Run-on time
s
1.6.11
Pump mode
Selection: Basic load-peak load or load change
1.6.10
Max. run time
min
0...999
1.6.11
Max. run occur
-
0...999999
A
0...10.0
1.6.12
Min. current
1.6.13
max. current
1.6.14
LEP offset
1.6.15
auto SDS
1.6.16
S1/S3 operation
2
Maintenance
2.1
Automatic operation
2.1.1
Automatic operation
2.2
SDS
2.3
Maintenance date
2.3.1
Next maintenance
mm:hh - dd.mm.yy
2.3.2
Last maintenance
mm:hh - dd.mm.yy
2.4
Maintenance done
2.5
Maintenance interval
2.5.1
3 months
2.5.2
6 months
2.5.3
12 months
2.5.4
Manual maintenance
2.5.5
No maintenance interval
2.6
Calibration
days
S1 operation / S3 operation
On Off
64 / 240
2015/02
Operating menu settings
Number
Menu
Unit
Value range
3
Settings
3.1
Parameters
3.1.1
Height of immersion pipe
cm
0...999
3.1.2
Switch lock
s
0...999
3.1.3
Measuring range
cm
0...999
3.1.4
ON1 level
mm
0…999
3.1.5
ON2 level
mm
0...999
3.1.6
OFF1 level
mm
0...999
3.1.7
Alarm level
mm
0...999
3.1.8
On delay
s
0…999
3.1.9
Run-on time
s
0...999
3.1.10
Max. run time
min
0...999
3.1.11
Max. run occur
-
0...999999
3.1.12
Min. current
A
0...10.0
3.1.13
max. current
3.1.14
LEP offset
mm
0...99
days
3.1.15
auto SDS
3.1.16
S1/S3 operation
3.2
Profile memory
3.2.1
Name to be entered
3.2.2
Name to be entered
3.2.3
Name to be entered
3.3
Date/time
3.4
System config
3.5
Product type
3.5.1
Lifting station Aqualift Mono
3.5.2
Lifting station Aqualift Duo
3.5.3
Lifting station Aqualift Mono
3.5.4
Lifting station Aqualift Duo
3.6
System variant
3.6.1
F
3.6.2
F XL 200 l
3.6.3
F XL 300 l
3.6.4
F XL 450 l
3.6.5
Special lifting station
3.6.6
F Duo
3.6.7
F XL 200 l Duo
3.6.8
F XL 300 l Duo
3.6.9
F XL 450 l Duo
3.6.10
Special lifting station
3.6.11
F ATEX Mono
3.6.12
F Mono
3.6.13
F AP 501 Mono LW 800
2015/02
S1 operation / S3 operation
DD.MM.YYYY / hh:mm:ss
65 / 240
Operating menu settings
Number
Menu
Unit
3.6.14
F AP 501 Mono LW 1000
3.6.15
Special pumping station without
ATEX
3.6.16
Special pumping station ATEX
3.6.17
F ATEX Duo
3.6.18
F Duo
3.6.19
F AP 501 Duo LW 800
3.6.20
F AP 501 Duo LW 1000
3.6.21
Special pumping station without
ATEX
3.6.22
Special pumping station ATEX
3.7
Capacity
3.7.1
SPF 1500
3.7.2
SPF 3000
3.7.3
SPF 4500
3.7.4
SPF 5500
3.7.5
TPF 1.9kW
3.7.6
TPF 1.3 kW
3.7.7
Ama Porter
3.7.8
Special pump
3.7.9
400 V / 2.5 - 4 A
3.7.10
400 V / 4 - 6.3 A
3.7.11
400 V / 6.3 - 10 A
3.7.12
400 V / 9 - 12 A
3.8
Sensor config
3.8.1
Pressure sensor
3.8.2
Pressure sensor+alarm
3.8.3
Pressure sensor+comp
3.8.4
Pressure+comp+alarm
3.8.5
Float switch
3.8.6
Level sensor
3.8.7
Level sensor + alarm
3.8.8
Diaphragm switch
3.9
Communication
3.9.1
Station name
3.9.2
Own no.
3.9.3
Modem type
3.9.4
PIN
3.9.5
Text message-Headquarters
3.9.6
Text message-Destination 1
3.9.7
Text message-Destination 2
3.9.8
Text message-Destination 3
3.9.9
State
3.10
Language
66 / 240
Value range
2015/02
Operating menu settings
Number
Menu
3.10.10
Deutsch
3.10.11
English
3.10.12
Français
3.10.13
Italiano
3.10.14
Polski
3.10.15
Nederlands
3.11
Reset
3.12
Expert mode
Unit
Value range
0 - 99
3.12.1
Power-up delay
s
3.12.2
Battery monitoring
on/off
3.12.3
Battery threshold
V
3.12.4
Alternating operation
on/off
3.12.5
Max. operating cycles
#
After reset or during first initialisation, the following settings are queried after switch-on:
3.10
Language
3.10.1
Deutsch
3.10.2
English
3.10.3
Français
3.10.4
Italiano
3.10.5
Polski
3.10.6
Nederlands
3.3
Date/time
3.5
Product type
3.5.1
Lifting station Aqualift Mono
3.5.2
Lifting station Aqualift Duo
3.5.3
Lifting station Aqualift Mono
3.5.4
Lifting station Aqualift Duo
3.6
System variant
3.6.1
F
3.6.2
F XL 200 l
3.6.3
F XL 300 l
3.6.4
F XL 450 l
3.6.5
Special lifting station
3.6.6
F Duo
3.6.7
F XL 200 l Duo
3.6.8
F XL 300 l Duo
3.6.9
F XL 450 l Duo
3.6.10
Special lifting station
3.6.11
F ATEX Mono
3.6.12
F Mono
3.6.13
F AP 501 Mono LW 800
3.6.14
F AP 501 Mono LW 1000
2015/02
67 / 240
0 - 18.0
1000 - 999,999
Operating menu settings
Number
Menu
Unit
3.6.15
Special pumping station without
ATEX
3.6.16
Special pumping station ATEX
3.6.17
F ATEX Duo
3.6.18
F Duo
3.6.19
F AP 501 Duo LW 800
3.6.20
F AP 501 Duo LW 1000
3.6.21
Special pumping station without
ATEX
3.6.22
Special pumping station ATEX
3.7
Capacity
3.7.1
SPF 1500
3.7.2
SPF 3000
3.7.3
SPF 4500
3.7.4
SPF 5500
3.7.5
TPF 1.9kW
3.7.6
TPF 1.3 kW
3.7.7
Ama Porter
3.7.8
Special pump
3.7.9
400 V / 2.5 - 4 A
3.7.10
400 V / 4 - 6.3 A
3.7.11
400 V / 6.3 - 10 A
3.7.12
400 V / 9 - 12 A
3.1.16
S1/S3 operation
2.5
Maintenance interval
3.1.16
S1/S3 operation
2.5.1
3 months
2.5.2
6 months
2.5.3
12 months
2.5.4
Manual maintenance
2.5.5
No maintenance interval
Value range
S1 operation / S3 operation
68 / 240
2015/02
Maintenance
6
Maintenance
Before housing covers, plugs and cables (including those on potential-free contacts) are opened they must be
switched voltage-free. Work on electrical components may only be carried out by specialist staff (see 2.2).
6.1
General maintenance information
No climbing on electrical components, pipe connections or cables during maintenance work.
Risk caused by toxic and hazardous vapours, gases and substances (e. g. bacteria, viruses). If the pumping
station is located in an inspection chamber, any necessary work must always be done by specialist staff (see
2.2).
Risk of drowning in the system chamber. In the event of a flood, a system chamber can fill with water within a
very short time. If there is a risk of water entering, the inspection chamber must not be entered until there is no
danger involved.
After all maintenance work, carry out a function test on the pumping station (see 6.3.1).
6.2
Maintenance intervals
The maintenance date can be set in the menu 2. Maintenance / 2.4 Maintenance date (see control unit
instructions). When the maintenance date has arrived, this will be indicated by a plain text message on the
display.
Maintenance of lifting stations
The pumping station must be maintained regularly by a technical specialist. The intervals must not exceed:
- 3 months for systems in commercial use
- 6 months for systems in multi-familiy homes
- 1 year for systems in private use
A maintenance protocol with details of all the work carried out and the main data must be prepared for all
maintenance work.
In as far as faults are found which cannot be eliminated, the system operator must be notified immediately in
writing by the maintenance expert, and must confirm receipt of this notification.
2015/02
69 / 240
Maintenance
6.3
Preparing for maintenance work
If the system tank has to be emptied, this can be
done via a revision coupler (2) installed in the vent
pipe. Use a suitable pump with hose (1) for this
purpose.
Ill. [18] 70 / 240
2015/02
Maintenance
6.3.1 Maintenance card
Inspection/maintenance pumping station Aqualift F XL
Name of the building
Building
Street
Postcode, city
Contact
System variant
Mono
Duo
Serial number
Pump type
1
2
Maintenance safety notes
Before opening the wastewater tank, ensure the room is sufficiently ventilated. Keep sources of ignition away
and do not smoke. Make sure that the pump(s) are at ambient temperature.
Inlet and outlet pipes must be emptied and pressure-less before work is started. The level in the wastewater
tank must be below the attachment level (pump flange) of the wastewater pumps. Aggressive cleaning agents
can damage seals. Use hot water and a brush for cleaning work.
Maintenance work according to EN 12056-4 and DIN 1986 Part 3
No.
Test
Done record
yes
Visual inspection
1
2
3
4
5
5.1
5.2
5.3
5.4
2015/02
System installation complies with the above-mentioned standard and manufacturer‘s
specifications (as far as can be seen)
Fault message pending?
Function given
Isolate the system (disconnect the mains plug)!
Pressure switch
Remove the immersion pipe and clean it, remove the pump and clean the tank
Visual check pressure switch
Rising routing of the control pipe (constant gradient)
Immersion pipe
71 / 240
no
Maintenance
No.
Test
Done record
yes
5.5
Remove the immersion pipe and clean it
5.7
Check the clamping ring and screw attachment for a correct fit
5.6
6
Check the air hose connection
Measure battery or rechargeable battery value ACTUAL____________
7
Pump
7.1
Measure insulation resistance value ACTUAL________
8
Switch the power on again
10
Readiness for operation
9
11
no
Pump current consumption
Readout log book
Maintenance jobs
12
13
14
Visual check: Check all the system components for completeness, a firm fit, sound
condition and water-tightness.
Check the shut-off valve
The shut-off valve(s) must be able to be operated easily and smoothly.
Prepare the system for maintenance, empty
• Close the inlet and/or make sure that no wastewater can flow in.
• Pump the system empty, to do this either fill with water until pump 1 starts up. Stop
water supply, the pump runs until the „minimum“ level is reached, or
• Actuate the pump via the control unit (manual control) until the wastewater tank is
empty.
Caution: Risk of material damage! Pump must not run dry.
15
16
17
18
19
20
21
22
Switch off the power supply to the system and secure it from being switched on again
unintentionally.
If available, close the shut-off valve in the pressure pipe.
Empty the pressure pipe, to do this move the ventilation device (as described below,
all the backwater preventers) slowly to the OPEN position, the water runs out of the
pressure pipe into the wastewater tank.
Move the ventilation device slowly back to the CLOSED position.
Screw the inspection cover off.
Remove the immersion pipe.
Make sure that the level in the wastewater tank after pumping is below the pump
flange. If necessary, pump the wastewater tank empty.
Check the backwater preventer
72 / 240
2015/02
Maintenance
Result report
Spare parts used
At the client‘s
Whereabouts of the spare parts replaced
At the service customer‘s
System ready for operation and handed over to the customer
Stamp Factory Customer Service/Technician
Place, date
Signature KESSEL AG/Factory Customer Service
Name in printed letters/Signature of client
2015/02
73 / 240
Troubleshooting
7
Troubleshooting
Display text power outage
Probefault
Pressure fault
Battery fault
Maintenance due (flashing)
Possible cause
Remedial measure
Connection hose control unit-pressure
sensor leaking
Check the connection hose and
replace if necessary
Cable interrupted between control unit
and alarm probe (option)
Battery is missing, is faulty or voltage
less than 13.5V.
The maintenance date has been
reached
No maintenance date entered
Pump fault 1 or 2
undercurrent
Current consumption of pump below
the minimum value
Cable interrupted between control unit
and pump
Pump faulty
Pump fault 1 or 2 overcurrent Maximum current consumption of
pump exceeded, perhaps impeller
blockage
Relay fault 1 or 2
Power contactor does not switch off
Power outage
Power supply has failed
Device fuse has failed
Main switch faulty
Mains supply cable interrupted
Check cable and replace if necessary,
check probe and replace if necessary.
Check battery connection, if necessary
Replace battery.
Carry out maintenance
Enter the maintenance date (see 2.3 in
the operating menu)
Check cable and replace if necessary,
check pump and replace if necessary.
Clean the pump and check the
impeller for smooth running, replace if
necessary
Disconnect the control unit from the
mains, replace the contractor.
None, general power outage
Check fuse
Check main switch
Check mains supply cable
When switching off intentionally, shut
down control unit (see 4.6 on page
61)
Temperature exceeded
Winding temperature switch has
triggered
Phase fault
Phase L1, L2 or L3 not available
Check power supply cable and fuses
Motor protection 1 or 2
Motor protection switch has triggered
Set
Set current value according to pump
Pumping current too high due to faulty
or blocked pump.
Remove blockage
Increased current due to phase failure
Check power supply for phase failure
Rotary field fault
Wrong rotary field for mains
connection
Motor protection switch set incorrectly
74 / 240
Self-resetting when the motor cools
down, fault message acknowledged
automatically when switched on
successfully again. Replace pump if
the temperature fault persists.
Swap 2 phases of power cable
Replace pump if faulty
2015/02
Troubleshooting
Pressure loss
Hose on the screw fitting to the
immersion pipe (or plunger) or control
unit leaking.
Check airtightness of the pressure
sensor system
Pump is running too long per pumping
process
Check system design, if necessary
inform Customer Services
Relay operating cycles 1 or 2 Maximum operating cycles exceeded
Max run time 1 or 2
Max run occur 1 or 2
2015/02
Pump starts up too often at short
intervals
75 / 240
Can be acknowledged. Inform
Customer Services. Fault appears after
a further 1000 operating cycles
Check system design, if necessary
inform Customer Services
Technical data
8
Technical data
8.1
Pumps
Pump
Weight [kg]*
Capacity P1 [kW]
Capacity P2 [kW]
Speed [rpm]
Operating voltage [V] 50 Hz
Nominal current [A]
Max. pumping capacity [m³/h]
Max. pumping height [m]
Max. temperature of material to be
conveyed [°C]
1400
1500
1.6
1.4
24
SPF
24
1.1
1.1
3.2
4.5
2.7
26
3.7
1370
1415
2845
2845
7.3
2.7
5.4
7.7
230
400
38
400
40
7
8
45
40
IP68
Motor protection
external
Protective class
12
400
53
17
I
Plug type
Direct connection
Connection cable
Mode of operation
4500
25
Protective rating
Required fuse protection
3000
10 m, 7 x 1.5 mm²
See control unit operating instructions
S3/S1
*Version for S1 operation. 2 kg heavier for S3 operation.
76 / 240
2015/02
Technical data
8.2
Pumping flow
Pumping flow Q [m³/h] at pumping height H [m]
Pump
SPF..
2
4
1400 *
36
26.1 12.5
Q [m³/h]
1500 *
37.5 28.2 15.8
Q [m³/h]
3000 *
46
4500 *
6
8
10
40.1 34.4 28.3 22
12
14
15.6 8.8
53.4 48.4 42.9 37.5 30
16
18
1.8
H [m]
Q [m³/h]
22.5 13.1 Q [m³/h]
* S3/S1 ** S3
H [m]
20
18
16
14
12
10
8
6
4
2
0
SPF 1500
SPF 4500
SPF 3000
0
10
20
30
40
50
60 Q [m3/h]
Ill. [19] 8.3
Tightening torques for screw connections
Pump at pump flange
7 Nm
Backwater preventer (polymer) and screws on the probes
2.5 Nm
Immersion pipe
8.4
5 Nm
Dimensions, volume
Height: See instructions for technical chamber LW 1000 (part. no. 010-701).
The outer diameter is approx. 1,200 mm
Useful volume approx. 160 litres
Tank volume approx. 335 litres
2015/02
77 / 240
Declaration of conformity
9
Declaration of conformity
78 / 240
2015/02
Declaration of conformity
2015/02
79 / 240
Leading in Drainage
6 4
Private homes without
public sewage connection
1 2 3 4
5
1 2 3 4
Public buildings
(e.g. hospital)
5
Public buildings
(e.g. leisure facility)
1 2 3 4
5
Commercial buildings
(e.g. hotel)
4
5
Commercial buildings
(e.g. industrial / manufacturing facilities)
2 3 5
Commercial buildings
(e.g. gas/petrol station)
1 2 3 4
Private homes/multifamily
apartments/flats
1 Backwater valves
2 Wastewater Lifting system
3 Lifting stations
4 Drains and Channels
5 Separators
6 Septic Systems
INSTRUCTIONS DE POSE, D‘UTILISATION ET
DE MAINTENANCE
KESSEL Poste de pompage Aqualift F XL
- installation sèche
Avantages du produit
L‘installation La mise en service L‘initiation
a été effectuée par votre revendeur spécialisé :
Nom / Signature
Version 2015/02
Date Lieu
Cachet du revendeur spécialisé
Référence 010-695
Sous réserve de modifications techniques
Pour eaux grises et eaux
vannes
Installation sèche =
espace de travail propre
Étanche aux eaux
souterraines jusqu‘à
3 mètres
Gestionnaire avec
fonction d‘autodiagnostic

Sommaire
1
Introduction
84
1.1
Description générale du produit......................................................................................... 84
1.2
Informations d‘ordre général concernant ces instructions d‘utilisation et de
maintenance...................................................................................................................... 85
1.3
Principe de fonctionnement............................................................................................... 86
1.4
Plaque signalétique........................................................................................................... 87
1.5
Fournitures......................................................................................................................... 88
1.6
ffichages, touches de commande et leurs fonctions.......................................................... 88
1.7
Sous-groupes et éléments fonctionnels............................................................................. 89
2
Sécurité
2.1
Utilisation conforme à l‘usage prévu.................................................................................. 90
2.2
Sélection et qualification du personnel.............................................................................. 90
2.3
Consignes de sécurité organisationnelles......................................................................... 90
2.4
Risques liés au produit...................................................................................................... 91
90
2.4.1 Risque lié à des lieux particuliers / aux conditions ambiantes........................................... 91
2.4.2 Risque lié au coup électrique en cas de fiche dévissée.................................................... 91
2.4.3 Risque lié aux atmosphères nuisibles à la santé............................................................... 91
2.4.4 Risque pour la santé.......................................................................................................... 91
2.4.5 Risque lié aux nuisances sonores..................................................................................... 91
2.4.6 Risques d‘explosion........................................................................................................... 91
2.4.7 Risque lié à la chaleur....................................................................................................... 92
2.4.8 Risque lié au démarrage imprévu d‘une pompe................................................................ 92
2.4.9 Risque de se noyer dans le regard.................................................................................... 92
3
Montage
3.1
Conseils de montage d‘ordre général................................................................................ 93
3.2
Montage de l‘entrée........................................................................................................... 93
93
82 / 240
2015/02

3.3
Prévoir un raccord pour la pompe à main.......................................................................... 93
3.4
Montage de la/des pompe/s d‘assainissement.................................................................. 94
3.5
Montage du compresseur de faible puissance pour le barbotage à l‘air........................... 95
3.6
Montage du gestionnaire................................................................................................... 95
3.7
Montage du modem de télécontrôle KESSEL................................................................... 95
3.8
Réalisation des connexions électriques et des raccordements des capteurs de niveau... 96
3.9
Première mise en service.................................................................................................. 98
3.9.1 Initialisation du gestionnaire.............................................................................................. 98
3.9.2 Configuration du modem de télécontrôle KESSEL spécifique aux messages d‘erreur..... 99
3.9.3 Adaptation des points de commutation du barbotage à l‘air.............................................. 99
3.9.4 Contrôle du fonctionnement............................................................................................... 99
4
Fonctionnement
100
4.1
Fonctions des interrupteurs............................................................................................... 100
4.2
Mise en circuit.................................................................................................................... 100
4.3
Écran, affichages / informations........................................................................................ 100
4.4
Fonctions de toutes les touches / affichages..................................................................... 101
4.5
Acquittement de l‘alarme................................................................................................... 101
4.6
Mise hors circuit................................................................................................................. 101
5
Configurations du menu de commande
5.1
Menu de commande........................................................................................................ 103
6
Maintenance
6.1
Conseils de maintenance d‘ordre général......................................................................... 109
6.2
Intervalles de maintenance................................................................................................ 109
6.3
Préparation de la maintenance.......................................................................................... 110
102
109
6.3.1 Carte de maintenance....................................................................................................... 111
2015/02
7
Aide au diagnostic
114
8
Caractéristiques techniques
116
8.1
Pompes.............................................................................................................................. 116
8.2
Débit de refoulement......................................................................................................... 117
8.3
Couples de serrage des raccords à vis............................................................................. 117
8.4
Dimensions, volume.......................................................................................................... 117
9
Déclaration de conformité
118
83 / 240
Introduction
1
Introduction
Chère cliente,
Cher client,
Nous vous félicitons de votre achat d‘un produit KESSEL. Ce produit sera certainement en mesure de répondre à
toutes vos attentes. Nous vous souhaitons une mise en place sans faille et réussie.
Nous tentons de maintenir un niveau de qualité aussi élevé que possible de nos produits et avons évidemment
besoin de votre collaboration. Nous vous serions reconnaissants de nous communiquer toutes les possibilités de
perfectionner nos produits.
Avez-vous des questions ? Nous nous réjouissons de votre prise de contact.
1.1
Description générale du produit
Le poste de pompage KESSEL Aqualift F XL(ci-après nommé le poste de pompage) est destiné au refoulement
des eaux grises et des eaux vannes, donc des eaux usées contenant des matières fécales ou non. La/les
pompes et le/les capteurs de niveau sont logé(e)s dans le bac collecteur des eaux usées. Tous les composants
sont adaptés au gestionnaire KESSEL fourni.
Le gestionnaire procède au traitement électronique des signaux de commutation des détecteurs du niveau
des eaux usées. Le détecteur de niveau est un capteur de pression. Le refoulement est activé dès l‘atteinte du
niveau de remplissage. La mise en marche d‘une ou de deux pompes d‘assainissement est nécessaire suivant le
modèle respectif. Le pompage s‘arrête dès que le niveau est à nouveau inférieur au niveau défini.
Si deux pompes d‘assainissement sont raccordées, ces dernières seront activées individuellement ou
collectivement suivant le volume de remplissage et le positionnement des capteurs de niveau.
Le montage de différents éléments du système de regard (010-701) est possible sur le bac collecteur des eaux
usées. Le bac collecteur des eaux usées ainsi que l‘élément fonctionnel y étant fixé constituent l‘élément de
base du regard dans ce cas. Lors d‘un montage correct et en temps utile, le regard est complètement monté au
moment du montage du poste de pompage.
84 / 240
2015/02
Introduction
1.2
Informations d‘ordre général concernant ces instructions d‘utilisation et de maintenance
Ces instructions d‘utilisation et de maintenance ne sont complètes qu‘en combinaison avec les instructions
d‘utilisation et de montage du gestionnaire Aqualift F Comfort 400 V (Référence 010-532) ou Aqualift F Comfort
230 V (Référence 010-910.
.
Pictogrammes et légendes utilisés
<1>
[2]
•
3.
–
Italique
Information dans le texte attirant l‘attention sur un numéro de légende dans une figure
Renvoi à une figure
Étape opératoire
Étape opératoire par ordre d‘apparition numéroté
Énumération
Caractères en italique : renvoi à une section / point dans le menu de commande
ATTENTION: avertit d‘un danger corporel et matériel. Une inobservation des informations
caractérisées par ce pictogramme risque de provoquer des blessures et des dégâts matériels
graves.
Observation: informations techniques à observer en particulier.
En vue de faciliter la lisibilité des descriptions et l‘utilisation du gestionnaire, nous avons renoncé à décrire les
détails spécifiques à toute manipulation de menus habituellement connue de tous.
Si vous devez par exemple sélectionner la rubrique Maintenance dans le menu, l‘instruction respective ne sera
pas
Appuyez sur la touche fléchée du bas => sélection du point de menu Maintenance => validez avec la touche OK
mais sélectionner uniquement «°Maintenance ».
2015/02
85 / 240
Introduction
1.3
Principe de fonctionnement
hauteur de pose normale
Fig. [1] hauteur de pose la plus basse
Fig. [2] 86 / 240
2015/02
Introduction
1.4
Plaque signalétique
Informations figurant sur la plaque signalétique
1
Désignation du installation
3
Tension et fréquence d‘alimentation
2
5
6
7
8
9
10
2015/02
2
Donnes hydrauliques
3
Données d‘ordre général
4
Date de fabrication
6
Numéro de série
5
Version de mise à jour
10
Aqualift
XY
xxxxx
U = xxxV xxHz I = x,xA P1 = x,xkW
Q = xxm³/h
H = xxm
S3 xx% ED IP xx (3mWS /48h)
Ser.Nr. xxxxxxx
Auftr.Nr.: xxxxxxx
RevStd.: X.X TT.MM.JJ JJ DIN-EN 12050-1
8
7
Désignation normative
Numéro de commande
Fig. [3] 87 / 240
9
www.kessel.com
4
1
Numéro du matériau du installation
Introduction
1.5
Fournitures
14
Gestionnaire avec de propres instructions de montage
16
Instructions de service et de maintenance
17
Schéma de raccordement dans le couvercle du boîtier du
gestionnaire
18
19
20
21
23
Matériel de fixation du gestionnaire
23
Gabarit de perçage pour le gestionnaire
Bac collecteur (élément de base du système de regard)
Système de regard composé de différents éléments avec de
propres instructions de montage (non reproduits)
20
Pompe(s)
2 coudes de 45° DN 150 avec passage de tuyau à joint
d‘étanchéité (non reproduits)
16
Fig. [4] 19
18
1.6
ffichages, touches de commande et leurs fonctions
17
Voir 4.4 à la page 101
14
Fig. [5] 88 / 240
2015/02
Introduction
1.7
Sous-groupes et éléments fonctionnels
14
23
14
23
24
24
25
25
20
20
27
27
22
22
26
26
28
28
Fig. [7] Fig. [8] hauteur de pose normale
basse hauteur de pose
14
20
Bac collecteur (élément de base du système de regard)
23
Pompes d‘assainissement
22
24
Plaque signalétique
Conduite de refoulement
25
Dispositif antireflux avec vanne d‘arrêt
27
Détecteur de niveau (capteur de pression)
26
28
2015/02
Gestionnaire
Entrée
Raccord de la conduite de purge d‘air
89 / 240
Sécurité
2
Sécurité
2.1
Utilisation conforme à l‘usage prévu
Le poste de pompage sert de système d‘assainissement pour les eaux vannes et eaux grises, eaux domestiques
et industrielles ; il est monté dans un système de regard KESSEL à ouverture de visite praticable et disponible de
différentes hauteurs et formes.
2.2
Sélection et qualification du personnel
Les personnes affectées au montage du poste de pompage doivent
–– être âgées d‘au moins 18 ans.
–– disposer d‘une qualification suffisante et appropriée aux activités à mettre en pratique.
–– connaître et être capables de donner suite aux règles techniques et consignes de sécurité respectives.
Les personnes qualifiées sont des personnes capables d‘effectuer les activités nécessaires et d‘identifier
d‘éventuels dangers en raison de leur formation, expérience et familiarisation, ainsi qu’en raison de leurs
connaissances des normes, dispositions et prescriptions de prévention des accidents respectives en vigueur.
Les travaux sur des éléments électriques demeurent réservés au domaine de compétence de personnes dûment
formées et doivent se faire dans le respect de toutes les réglementations des prescriptions de prévention des
accidents en vigueur.
2.3
Consignes de sécurité organisationnelles
Les instructions d‘utilisation et de maintenance doivent être disponibles en permanence.
90 / 240
2015/02
Sécurité
2.4
Risques liés au produit
2.4.1 Risque lié à des lieux particuliers / aux conditions ambiantes
Risque lié aux vapeurs, gaz et substances toxiques ou nuisible à la santé (p. ex. les bactéries, virus). Les
travaux à effectuer sur un poste de pompage logé dans un regard demeurent réservés au domaine de
compétence exclusif de personnes qualifiées (voir 2.2).
2.4.2 Risque lié au coup électrique en cas de fiche dévissée
Attention au risque d‘un coup électrique sur le gestionnaire (uniquement modèle à 230 volts) si l‘une des fiches
d‘alimentation en courant des pompes a été démontée. Effectuer le serrage à bloc de l‘écrou-raccord de la
fiche d‘alimentation électrique de sorte qu‘elle ne soit pas desserrable sans outils (par ex. par des enfants)
(voir 3.8).
2.4.3 Risque lié aux atmosphères nuisibles à la santé
L‘atmosphère dans le regard peut nuire à la santé lors de travaux à effectuer dans le système de regard. Veiller
toujours à une ventilation suffisante et utiliser des équipements et dispositifs de sécurité tels qu‘un appareil
multigaz.
2.4.4 Risque pour la santé
Le poste de pompage refoule des eaux vannes susceptibles de contenir des substances nuisibles à la santé.
Veiller à exclure tout risque d‘un contact direct entre les eaux usées ou les éléments souillés du poste avec les
yeux, la bouche ou la peau. En cas de contact direct, nettoyez minutieusement et désinfectez la zone du corps
touchée, au besoin. Porter un équipement de protection personnelle.
2.4.5 Risque lié aux nuisances sonores
Le poste de pompage risque de causer un niveau sonore élevé en fonctionnement. Portez un équipement de
protection adéquat au besoin et prévoyez une insonorisation appropriée.
2.4.6 Risques d‘explosion
L‘intérieur du bac collecteur des eaux usées est considéré comme zone à risque d‘explosion (EN 12050). Les
processus de décomposition biologique peuvent former des gaz inflammables (acide sulfhydrique, méthane).
Avant d‘ouvrir le bac collecteur des eaux usées (p. ex. en vue du démontage de la pompe), veiller à un
échange d‘air suffisant dans le regard.
Il est interdit de fumer ou d‘utiliser des sources d‘allumage à proximité directe du poste tant que le bac
collecteur des eaux usées est ouvert (p. ex. les appareils électriques sans moteur blindé, le travail du métal, le
fait de fumer etc.).
2015/02
91 / 240
Sécurité
2.4.7 Risque lié à la chaleur
Risque de brûlures au contact des surfaces chaudes Les pompes d‘assainissement développent une
température élevée à la surface du carter après un fonctionnement de longue durée. Porter un équipement de
protection (des gants) ou patienter jusqu‘au refroidissement des pompes.
2.4.8 Risque lié au démarrage imprévu d‘une pompe
Chaque pompe peut démarrer subitement si le poste de pompage n‘est pas séparé du réseau. Le démontage
des pompes doit exclusivement se faire par des personnes qualifiées en veillant à ce que le poste soit
déconnecté et bloqué contre une remise en marche par inadvertance.
2.4.9 Risque de se noyer dans le regard
Le regard du poste peut se remplir d‘eau en très peu de temps, p. ex. lors d‘une inondation. Il est impératif, tant
que le risque d‘une infiltration ou d‘un écoulement d‘eau dans le regard existe, de patienter jusqu‘à ce qu‘un
séjour dans le regard soit possible sans risque.
Il est interdit d‘ouvrir la pompe ;
la pompe est étanche suivant IP68. La pénétration d‘humidité est exclue si le montage a été effectué dans les
règles de l‘art. Prévoir un disjoncteur FI
92 / 240
2015/02
Montage
3
Montage
Risque lié aux vapeurs, gaz et substances toxiques ou nuisible à la santé (p. ex. les bactéries, virus). Tous
les travaux à effectuer sur un poste de pompage demeurent réservés au domaine de compétence exclusif de
personnes qualifiées (voir 2.2).
3.1
Conseils de montage d‘ordre général
La pose, le montage et la mise en service du poste de pompage sont effectués le moment donné suivant les
tranches de travaux à effectuer habituellement sur le chantier.
1. Mise en place du bac collecteur (élément de base du système de regard) dans le regard.
Raccordement de l‘entrée et de la sortie des eaux usées et de la conduite de refoulement destinée au
refoulement des eaux usées.
Montage du système de regard qui s‘appuie sur le bac collecteur du poste. Non décrit dans ces instructions.
2. Montage des composants en pièces détachées en commençant par le chapitre 3.4.
3. Montage du gestionnaire et connexion des composants électriques (chapitre 3.8).
4. Première mise en service (chapitre 3.9).
S‘assurer que tous les travaux mentionnés suivant 1. ont été complètement effectués.
3.2
Montage de l‘entrée
• Faire monter les deux coudes de 45° <1> ensemble avec le
passage de tuyau à joint d‘étanchéité par un homme du métier
3.3
Prévoir un raccord pour la pompe à main
Suivant la Fig. [18] à la page 110, prévoir un raccord <2> (pièce de
révision) pour une pompe à main dans la conduite de purge d‘air audessus du niveau de reflux.
2015/02
93 / 240
Fig. [9] Montage
3.4
Montage de la/des pompe/s d‘assainissement
• Fixer la/les pompe/s d‘assainissement avec les vis <1> (couple de serrage 7 Nm).
1
1
Fig. [10] Fig. [11] hauteur de pose normale
basse hauteur de pose
94 / 240
2015/02
Montage
3.5
Montage du compresseur de faible puissance pour le barbotage à l‘air
(En option)
Raccorder le tuyau d‘alimentation en air suivant les instructions de montage fournies.
3.6
Montage du gestionnaire
Monter le gestionnaire suivant les instructions jointes au gestionnaire.
3.7
Montage du modem de télécontrôle KESSEL
(En option) monter le modem de télécontrôle KESSEL suivant les instructions jointes au gestionnaire.
2015/02
95 / 240
Montage
3.8
Réalisation des connexions électriques et des raccordements des capteurs de niveau
S‘assurer que le gestionnaire a été coupé de l‘alimentation en tension pendant les travaux de montage.
Risque de coups électriques en cas de contact par inadvertance avec des fiches de raccordement
dévissées (p. ex. par des enfants). S‘assurer que tous les raccordements électriques – si existants –
ont été fixés suivant la figure (attention aux couples de serrage).
Fig. [12]
96 / 240
2015/02
Montage
Raccorder les pompe/s aux fiches de raccordement <b et c>.
b
c
e
d
Fig. [13] • Établir les raccords des détecteurs de niveau comme suit.
Capteur d‘alarme
Capteur de pression
Raccord (Fig. [12])
Code couleur du câble
e
-
d
rouge
• Veiller à la pose fiable de tous les câbles des composants électriques et de la conduite du capteur de
pression. Recommandation : Fixation aux colliers de serrage des câbles à monter à la paroi du regard.
Poser le tuyau de refoulement (raccord <e>) du tube submersible (capteur de pression) en pente ascendante
permanente. Une telle pose prévient la formation éventuelle d‘eau de condensation susceptible de provoquer
des anomalies.
2015/02
97 / 240
Montage
3.9
Première mise en service
Exclure tout fonctionnement à sec de la/des pompe(s) d‘assainissement qui risquerait de les détériorer. Ne
jamais mettre les pompes d‘assainissement en marche tant que le bac collecteur des eaux usées n‘est pas
rempli jusqu‘au niveau minimum.
3.9.1 Initialisation du gestionnaire
• Établir l‘alimentation en tension de réseau du gestionnaire et l‘initialisation démarre. Les diodes brillent
pendant env. 4 secondes et ceci suffit pour contrôler les composants électriques et pour activer la batterie en
cas de message de panne de réseau et de mode d‘urgence et pour afficher le menu 3.10. de sélection de la
langue. L‘initialisation peut être effectuée par la suite.
L‘initialisation impose de procéder aux saisies suivantes :
Langue
–– Date / Heure
–– Type de produit
–– Variante
–– Puissance nominale
–– Intervalle de maintenance
Langue
• Valider <OK>
• Sélectionner la langue souhaitée avec les touches fléchées et valider la sélection en appuyant sur <OK> ; le
menu Date / Heure s‘affiche.
Date / Heure
• Saisir le chiffre clignotant correspondant à la date et à l‘heure et valider en appuyant sur <OK>. Après la
dernière saisie, l‘écran affiche le menu du Type de produit .
Type de produit
• Sélectionner le poste de pompage Aqualift Mono ou Duo et valider en appuyant sur <OK> ; le menu Variante
s‘affiche.
Variante
• Sélectionner le modèle adéquat et valider en appuyant sur <OK> ; le menu Puissance nominale s‘affiche.
Puissance nominale
• Sélectionner la puissance nominale adéquate et valider en appuyant sur <OK> ; le menu Cycle de
maintenance s‘affiche.
•
Intervalle de maintenance
• Sélectionner le délai de maintenance souhaité ou saisir l‘intervalle correspondant et valider en appuyant sur
<OK> ; le menu Info système s‘affiche et l‘initialisation est achevée.
98 / 240
2015/02
Montage
3.9.2 Configuration du modem de télécontrôle KESSEL spécifique aux messages d‘erreur
(En option) Le point de menu 3.9 permet de configurer les événements du poste de relevage de reflux à envoyer
par texto à quels destinataires.
3.9.3 Adaptation des points de commutation du barbotage à l‘air
(En option) Si un compresseur de faible puissance pour le barbotage à l‘air est installé, procéder à l‘adaptation
suivante :
•
•
•
•
•
•
S‘assurer que le bac collecteur est rempli.
Mettre le compresseur de faible puissance hors circuit.
Mettre le poste de relevage de reflux en circuit.
Prendre note de la valeur mesurée (mm) affichée dans le menu de commande 1.5.4.
Mettre le compresseur de faible puissance en circuit.
Déterminer le déport, pour ce faire déduire la valeur affichée maintenant dans le menu de commande 1.5.4 de
la valeur mesurée et notée au préalable.
• Saisir la valeur du déport dans le menu de commande 3.1.14 Déport du barbotage à l‘air ; les points de
commutation sont adaptés.
3.9.4 Contrôle du fonctionnement
Procéder au contrôle du fonctionnement suivant les activités référencées sur la carte de maintenance (voir 6.3.1).
2015/02
99 / 240
Fonctionnement
4
Fonctionnement
Tous les dispositifs antireflux à vanne d‘arrêt doivent demeurer ouverts pendant le fonctionnement du poste de
pompage et être verrouillés (retirer vers le haut, voir <25> à la page <?>).
4.1
Fonctions des interrupteurs
4.2
Mise en circuit
28
29
30
32
• Tourner l‘interrupteur principal <28> en position I (ON), après un
test réussi du système, l‘écran <29> affiche les informations du
système et la diode verte <30> brille ; le gestionnaire est en ordre
de marche.
31
Fig. [14] 4.3
Écran, affichages / informations
L‘écran affiche différents états de fonctionnement avec les textes correspondants. Tous les paramètres du
système sont consultables via le menu 1 (voir les instructions d‘utilisation du gestionnaire).
Le niveau du liquide dans le bac collecteur des eaux usées est affiché à l‘écran (niveau) en mm.
(0 signifie que le niveau est inférieur à une hauteur mesurable)
100 / 240
2015/02
Fonctionnement
4.4
Fonctions de toutes les touches / affichages
19
Diode
Pompe 1
21
Diode
Alarme
20*
22
66
67
68
Diode
Diode
Flèche vers le Feuilletage du menu
bas
ESC
Alarme
72
OK
73*
En ordre de marche
Flèche vers le Feuilletage du menu
haut
69
71
Pompe 2
Annulation d‘une saisie, retour à
l‘action précédente
Acquittement de l‘alarme acoustique
Pompe / test
Pompe 1 MARCHE / ARRÊT
Pompe / test
Pompe 2 MARCHE / ARRÊT
Validation d‘une saisie, passage au
niveau consécutif
Fig. [15] * Poste de relevage de reflux modèle DUO (2 pompes)
4.5
Acquittement de l‘alarme
Si un état susceptible de déclencher une alarme s‘est présenté (p. ex. une erreur concernant une pompe,
l‘atteinte du niveau d‘alarme des eaux usées), la diode d‘alarme <21> brille. L‘écran affiche éventuellement un
message d‘erreur libellé en clair. Éliminer la cause de l‘alarme, puis acquitter l‘alarme en appuyant sur la touche
<69>.
–– Débrancher l‘alarme acoustique : appuyer 1 fois sur la touche <69>.
–– Acquittement de l‘alarme : appuyer 1 fois sur la touche <69> pendant 5 secondes sans interruption.
4.6
Mise hors circuit
• Tourner l‘interrupteur principal en position O (OFF), un signal d‘alarme retentit et la diode d‘alarme <21>
clignote.
• Débrancher le signal d‘alarme en appuyant sur la touche <69> jusqu‘à ce que le pictogramme de l‘alarme
affiché à l‘écran soit barré.
• Débrancher le gestionnaire en appuyant sur la touche <69> jusqu‘à la mise hors circuit de l‘écran et de la
diode d‘alarme.
Le poste de pompage est débranché.
2015/02
101 / 240
Configurations du menu de commande
5
Configurations du menu de commande
En général
La commande du menu du gestionnaire dispose d‘un mode de
commande et d‘un mode de veille.
Le menu de commande permet d‘afficher et de paramétrer les
configurations du système.
Si aucune touche n‘est actionnée en l‘espace d‘environ 60 secondes,
le mode de veille est activé automatiquement et le rétroéclairage de
l‘écran s‘éteint
66
67
68
72
Touches de navigation du menu
Flèche vers
le haut
Feuilletage du menu
Flèche vers
le bas
Feuilletage du menu
OK
Validation d‘une saisie, passage au niveau
consécutif
ESC
66
68
72
67
Fig. [16] Annulation d‘une saisie, retour à l‘action
précédente
Activation du mode de commande
• Appuyer sur la touche <OK> (<72>) du panneau de commande : le
rétroéclairage de l‘écran est activé et l‘écran initial (Info système)
s‘affiche.
- bzw. Schwimmeranzeige
Ouverture d‘un menu
• Appuyer sur <OK> (<72>) pour activer le niveau 1 du menu de
commande (voir 7.1, Arborescence du menu).
72
Fig. [17] 102 / 240
2015/02
Configurations du menu de commande
Navigation dans le menu
Action
Commande
Activer le point de menu pour
l‘éditer
OK, l‘affichage d‘un sous-point de menu existant est inversé.
Sélectionner un point de menu
Éditer l‘affichage de la valeur de
consigne
Quitter le menu
Flèche vers le haut / flèche vers le bas, l‘affichage du point de menu
sélectionné est inversé
OK, la valeur est affichée ou l‘affichage est inverti pour le réglage
ESC, quitter le niveau actuel et passer au niveau supérieur
Arborescence du menu
33
Le numéro du niveau de menu respectif <33> est affiché comme
chiffre dans la ligne supérieure de l‘écran.
Datum:
Uhrzeit:
Rückstau:
Klappe:
Si le gestionnaire est en mode manuel (menu 2.1.1), aucun
refoulement commandé suivant le niveau ne se produira.
xx.xx.xx
xx:xx:xx
nein
offen
Fehler/Ereignisse (Statuszeile)
Fig. [18] 5.1
Menu de commande
Numéro
Menu
Unité
Plage de valeurs
0
Info système
1
Informations
1.1
Heures de service
1.1.1
Durée totale
h
0...999999
1.1.2
Durée de marche de la pompe 1
h
0...999999
1.1.3
Durée de marche de la pompe 2
h
0...999999
1.1.4
Démarrages de la pompe 1
-
0...18000000
1.1.5
Démarrages de la pompe 2
-
0...18000000
1.1.6
Panne de réseau
h
0...999999
2015/02
103 / 240
Configurations du menu de commande
Numéro
Menu
Unité
Plage de valeurs
1.1.7
Consommation d‘énergie
kWh
0...999999
1.2
Journal
Événements & Erreurs
dernièrement survenu(s)
jusqu‘à 256
Événements &
Erreurs
Événements&Erreurs survenus
auparavant
Événements&Erreurs survenus
auparavant
1.3
Type de commande
1.4
Cycle de maintenance
1.4.1
Maintenance précédente
JJ.MM.AAAA
JJ.MM.AAAA
1.4.2
Maintenance suivante
1.5
Valeurs mesurées actuellement
1.5.1
Tension de réseau
V
1.5.2
Courant de réseau
A
1.5.3
Tension de la batterie
V
1.5.4
Niveau
mm
1.6
Paramètres
0...999
1.6.1
Hauteur cloche retenue
cm
0...999
1.6.2
Blocage de mise en marche
s
0...999
1.6.3
Plage de mesure
cm
0...999
1.6.4
Niveau MARCHE1
mm
0...999
1.6.5
Niveau MARCHE2
mm
0...999
1.6.6
Niveau ARRÊT1
mm
0...999
1.6.7
Niveau d‘alarme
mm
0...999
1.6.8
Marche de la décélération
s
0...999
0...999
1.6.9
Durée de fonctionnement par inertie s
1.6.11
Mode de pompage
Sélection : Charge de base-charge de pointe ou
charge alternante
1.6.10
Durée limite de marche
min
0...999
1.6.11
Nombre limite de mises en marche
-
0...999999
A
0...10,0
1.6.12
Courant minimum
1.6.13
Courant maximum
1.6.14
Offset LEP
1.6.15
auto SDS
1.6.16
Fonctionnement S1/S3
Jours
2
Maintenance
2.1
Mode automatique
2.1.1
Mode automatique
2.2
SDS
2.3
Cycle de maintenance
2.3.1
Maintenance suivante
Fonctionnement S1 /
fonctionnement S3
Marche Arrêt
mm :hh - jj.mm.aa
104 / 240
2015/02
Configurations du menu de commande
Numéro
Menu
Unité
2.3.2
Maintenance précédente
2.4
Maintenance effectuée
2.5
Intervalle de maintenance
2.5.1
3 mois
2.5.2
6 mois
2.5.3
12 mois
2.5.4
Maintenance manuelle
2.5.5
Pas d‘intervalle de maintenance
2.6
Calibrage
3
Configurations
3.1
Paramètres
3.1.1
Hauteur cloche retenue
Plage de valeurs
mm :hh - jj.mm.aa
cm
0...999
3.1.2
Blocage de mise en marche
s
0...999
3.1.3
Plage de mesure
cm
0...999
3.1.4
Niveau MARCHE1
mm
0...999
3.1.5
Niveau MARCHE2
mm
0...999
3.1.6
Niveau ARRÊT1
mm
0...999
3.1.7
Niveau d‘alarme
mm
0...999
3.1.8
Marche de la décélération
s
0...999
3.1.9
Durée de fonctionnement par inertie s
0...999
3.1.10
Durée limite de marche
min
0...999
3.1.11
Nombre limite de mises en marche
-
0...999999
3.1.12
Courant minimum
A
0...10,0
3.1.13
Courant maximum
3.1.14
Offset LEP
mm
0...99
3.1.15
auto SDS
Jours
3.1.16
Fonctionnement S1/S3
3.2
Mémoire du profil
3.2.1
nom pouvant être saisi
3.2.2
nom pouvant être saisi
3.2.3
nom pouvant être saisi
3.3
Date / Heure
3.4
Configuration du système
3.5
Type de produit
3.5.1
Poste de relevage Aqualift Mono
3.5.2
Poste de relevage Aqualift Duo
3.5.3
Poste de pompage Aqualift Mono
3.5.4
Poste de pompage Aqualift Duo
3.6
Variante
3.6.1
F
3.6.2
F XL 200 l
3.6.3
F XL 300 l
2015/02
Fonctionnement S1 /
fonctionnement S3
JJ.MM.AAAA / hh :mm :ss
105 / 240
Configurations du menu de commande
Numéro
Menu
Unité
3.6.4
F XL 450 l
3.6.5
Poste de relevage spécial
3.6.6
F Duo
3.6.7
F XL 200 l Duo
3.6.8
F XL 300 l Duo
3.6.9
F XL 450 l Duo
3.6.10
Poste de relevage spécial
3.6.11
F ATEX Mono
3.6.12
F Mono
3.6.13
F AP 501 Mono LW 800
3.6.14
F AP 501 Mono LW 1000
3.6.15
Station pompage spéciale sans
ATEX
3.6.16
Station pompage spéciale ATEX
3.6.17
F ATEX Duo
3.6.18
F Duo
3.6.19
F AP 501 Duo LW 800
3.6.20
F AP 501 Duo LW 1000
3.6.21
Station pompage spéciale sans
ATEX
3.6.22
Station pompage spéciale ATEX
3.7
Puissance nominale
3.7.1
SPF 1500
3.7.2
SPF 3000
3.7.3
SPF 4500
3.7.4
SPF 5500
3.7.5
TPF 1,9 kW
3.7.6
TPF 1,3 kW
3.7.7
Ama Porter
3.7.8
Pompe spéciale
3.7.9
400 V / 2,5 à 4 A
3.7.10
400 V / 4 à 6,3 A
3.7.11
400 V / 6,3 à 10 A
3.7.12
400 V / 9 à 12 A
3.8
Configuration des capteurs
3.8.1
Capteur de pression
3.8.2
Capteur de pression+alarme
3.8.3
Capteur de pression+comp
3.8.4
Pression+comp+alarme
3.8.5
Flotteur
3.8.6
Sonde de niveau
3.8.7
Sonde de niveau + alarme
3.8.8
Interrupteur manométrique à
membrane
3.9
Communication
106 / 240
Plage de valeurs
2015/02
Configurations du menu de commande
Numéro
Menu
3.9.1
Nom de l‘unité
3.9.2
Propre n°
3.9.3
Type de modem
3.9.4
PIN
3.9.5
Texto à tous
3.9.6
Texto cible 1
3.9.7
Texto cible 2
3.9.8
Texto cible 3
3.9.9
État
3.10
Langue
3.10.10
Deutsch
3.10.11
English
3.10.12
Français
3.10.13
Italiano
3.10.14
Polski
3.10.15
Nederlands
3.11
Remise à zéro
3.12
Mode expert
3.12.1
Temporisation de mise en circuit du
réseau
Unité
Plage de valeurs
s
0 à 99
3.12.2
Surveillance de la batterie
marche / arrêt
3.12.3
Seuil de la batterie
V
3.12.4
Fonctionnement en alternance
marche / arrêt
3.12.5
Nombre maximal de cycles de
commutation
#
0 à 18,0
1000 à 999 999
Suite à une remise à zéro ou lors de la première initialisation, les configurations suivantes sont interrogées après la
mise en circuit :
3.10
Langue
3.10.1
Deutsch
3.10.2
English
3.10.3
Français
3.10.4
Italiano
3.10.5
Polski
3.10.6
Nederlands
3.3
Date / Heure
3.5
Type de produit
3.5.1
Poste de relevage Aqualift Mono
3.5.2
Poste de relevage Aqualift Duo
3.5.3
Poste de pompage Aqualift Mono
3.5.4
Poste de pompage Aqualift Duo
3.6
Variante
3.6.1
F
3.6.2
F XL 200 l
3.6.3
F XL 300 l
2015/02
107 / 240
Configurations du menu de commande
Numéro
Menu
Unité
3.6.4
F XL 450 l
3.6.5
Poste de relevage spécial
3.6.6
F Duo
3.6.7
F XL 200 l Duo
3.6.8
F XL 300 l Duo
3.6.9
F XL 450 l Duo
3.6.10
Poste de relevage spécial
3.6.11
F ATEX Mono
3.6.12
F Mono
3.6.13
F AP 501 Mono LW 800
3.6.14
F AP 501 Mono LW 1000
3.6.15
Station pompage spéciale sans
ATEX
3.6.16
Station pompage spéciale ATEX
3.6.17
F ATEX Duo
3.6.18
F Duo
3.6.19
F AP 501 Duo LW 800
3.6.20
F AP 501 Duo LW 1000
3.6.21
Station pompage spéciale sans
ATEX
3.6.22
Station pompage spéciale ATEX
3.7
Puissance nominale
3.7.1
SPF 1500
3.7.2
SPF 3000
3.7.3
SPF 4500
3.7.4
SPF 5500
3.7.5
TPF 1,9 kW
3.7.6
TPF 1,3 kW
3.7.7
Ama Porter
3.7.8
Pompe spéciale
3.7.9
400 V / 2,5 à 4 A
3.7.10
400 V / 4 à 6,3 A
3.7.11
400 V / 6,3 à 10 A
3.7.12
400 V / 9 à 12 A
3.1.16
Fonctionnement S1/S3
2.5
Intervalle de maintenance
3.1.16
Fonctionnement S1/S3
2.5.1
3 mois
2.5.2
6 mois
2.5.3
12 mois
2.5.4
Maintenance manuelle
2.5.5
Pas d‘intervalle de maintenance
108 / 240
Plage de valeurs
Fonctionnement S1 / fonctionnement S3
2015/02
Maintenance
6
Maintenance
Débrancher impérativement les fiches d‘alimentation et câbles (y compris au niveau des contacts libres) avant
d‘ouvrir les recouvrements ou caches des carters ou boîtiers. Les travaux sur les composants électriques
demeurent réservés au domaine de compétence d‘électriciens qualifiés (voir 2.2).
6.1
Conseils de maintenance d‘ordre général
Il est interdit de monter sur les composants électriques, les raccords de tuyauterie ou les câbles
lors d‘interventions de maintenance.
Risque lié aux vapeurs, gaz et substances toxiques ou nuisible à la santé (p. ex. les bactéries, virus). Les
travaux à effectuer sur un poste de pompage logé dans un regard demeurent réservés au domaine de
compétence exclusif de personnes qualifiées (voir 2.2).
Risque de se noyer dans le regard. Le regard du poste peut se remplir d‘eau en très peu de temps, p. ex. lors
d‘une inondation. Il est impératif, tant que le risque d‘une infiltration ou d‘un écoulement d‘eau dans le regard
existe, de patienter jusqu‘à ce qu‘un séjour dans le regard soit possible sans risque.
Effectuer un contrôle du fonctionnement après chaque intervention de maintenance sur le poste de pompage
(voir 6.3.1).
6.2
Intervalles de maintenance
Le réglage du cycle de maintenance s‘effectue dans le menu 2. Maintenance / 2.4 Cycle de maintenance (voir les
instructions du gestionnaire). L‘atteinte du cycle de maintenance est affichée à l‘écran par un message libellé en
clair.
Maintenance du relevage
La maintenance du poste de pompage est imposée périodiquement par un spécialiste qualifié. Les intervalles ne
doivent pas dépasser :
- 3 mois pour les postes à utilisation commerciale et industrielle
- 6 mois pour les postes à utilisation Immeuble
- un an pour les postes à utilisation domestique
Chaque intervention doit faire l‘objet d‘un rapport de maintenance indiquant tous les travaux effectués et les
principales données.
Dans l‘hypothèse de la constatation de défauts impossibles à éliminer, le spécialiste chargé de la maintenance
devra signaler les défauts à l‘exploitant du poste dans l‘immédiat par écrit moyennant confirmation.
2015/02
109 / 240
Maintenance
6.3
Préparation de la maintenance
Le vidage du bac collecteur peut se faire via une
pièce de révision (2) installé dans la conduite
de purge d‘air. Pour ce faire, utiliser une pompe
adéquate avec un tuyau (1)
Fig. [19] 110 / 240
2015/02
Maintenance
6.3.1 Carte de maintenance
Inspection / maintenance du poste de pompage Aqualift F
Désignation de l‘ouvrage
Ouvrage
Rue
Code postal, ville
Contact
Variante
Numéro de série
Mono
Type de pompe
1
Duo
2
Consignes de sécurité spécifiques à la maintenance
Veiller à une ventilation suffisante de la pièce avant d‘ouvrir le bac collecteur des eaux usées. Éloigner toutes
les sources d’allumage et ne pas fumer. S‘assurer que la/les pompe(s) est/sont à température ambiante.
Vider et dépressuriser les conduites d‘entrée et de sortie avant d‘entamer les travaux. Le niveau dans le bac
collecteur des eaux usées doit se situer au-dessous du niveau de fixation (de la bride de pompe) des pompes
d‘assainissement. Les nettoyants agressifs risquent de détériorer les joints. Utiliser de l‘eau chaude et une
brosse pour le nettoyage.
Prestations de maintenance suivant EN 12056-4 et DIN 1986, partie 3
N°
ordre
Contrôle
Avis d‘exécution
Oui
Contrôle visuel
1
2
3
2015/02
La pose du système correspond à la norme et aux prescriptions du fabricant
mentionnées ci-dessus (si visibles)
Message d‘erreur actif ?
Fonction existante
111 / 240
Non
Maintenance
N°
ordre
4
Contrôle
Oui
Interrupteur manométrique
5.2
Vérification visuelle de l‘interrupteur manométrique
5.4
Tube plongeur
5.3
Extraire le tube plongeur et le nettoyer, extraire la pompe et nettoyer le bac
Pose ascendante de la conduite de commande (pente ascendante)
5.5
Extraire et nettoyer le tube plongeur
5.7
Contrôler le logement correct de la bague de serrage et du vissage
5.6
Contrôler le raccord du tuyau d‘alimentation en air
6
Mesurer la batterie ou l‘accu valeur RÉELLE________
7.1
Mesurer la résistance d‘isolement valeur RÉELLE________
7
Pompe
8
Remettre sous tension
10
Disponibilité au fonctionnement
9
11
Non
Activer le système (retirer la fiche de secteur) !!
5
5.1
Avis d‘exécution
Puissance absorbée de la pompe
Exporter le journal de bord
Interventions de maintenance
12
13
14
Contrôle visuel : Vérifier tous les composants du poste quant à leur exhaustivité, le
logement correct et à bloc des pièces, leur intégrité et leur étanchéité.
Vérification de la vanne d‘arrêt
La/les vanne(s) d‘arrêt doivent être en parfait état et fonctionner en souplesse.
Préparation du poste à la maintenance, vidage
• Fermer l‘entrée ou s‘assurer que les eaux usées ne peuvent plus couler dans le bac.
• Vider le système, pour ce faire, ajouter de l‘eau jusqu‘à ce que la pompe 1 démarre.
Arrêter l‘apport d‘eau
et la pompe fonctionne jusqu‘à l‘atteinte du niveau « minimum» ou
• commander la pompe via le gestionnaire (commande manuelle) jusqu‘à ce que le
bac collecteur des eaux usées soit vide.
Attention : Risque de dégâts matériels ! La pompe ne doit pas fonctionner à sec.
15
16
17
18
19
Débrancher l‘alimentation en électricité du poste et la bloquer contre une remise en
marche par inadvertance.
Si montée, fermer la vanne d‘arrêt dans la conduite de refoulement.
Vider la conduite de refoulement : amener le dispositif de ventilation (tous les
dispositifs antireflux existants comme décrit ci-après) en position OUVERTE, l‘eau
coule de la conduite de refoulement dans le bac collecteur des eaux usées.
Ramener le dispositif de ventilation en position FERMÉE.
Dévisser le couvercle de maintenance.
112 / 240
2015/02
Maintenance
N°
ordre
Contrôle
Oui
20
Démonter le tube plongeur.
22
Vérification du dispositif antireflux
21
Avis d‘exécution
S‘assurer que le niveau existant dans le bac collecteur des eaux usées soit inférieur à
la bride de pompe. Au besoin, vider le bac collecteur des eaux usées par pompage.
Rapport sur les
résultats
Pièces de rechange
utilisées
Où les pièces de rechange échangées sont-elles restées
Chez le donneur d‘ordre
Chez le destinataire de la prestation
Poste remis au client en ordre de marche
SAV du fabricant / spécialiste Cachet
Lieu, date
Signature de KESSEL AG/SAV du fabricant
Nom en caractères d‘imprimerie/Signature du
donneur d‘ordre
2015/02
113 / 240
Non
Aide au diagnostic
7
Aide au diagnostic
Texte d’affichage d’une
panne de secteur
Cause possible
Remède
Pression erronée
Interruption du câble entre le
gestionnaire et la sonde d‘alarme
(option)
Défaut d‘étanchéité du tuyau souple
d‘accouplement reliant le gestionnaire
et le capteur de pression
Vérifier le câble et le remplacer si
nécessaire, contrôler la sonde et la
remplacer si nécessaire.
Batterie manque, est défectueuse ou
tension inférieure à 13,5 volts
Contrôler le branchement de la
batterie, remplacer la batterie si
nécessaire
Erreur spéciale
Défaut de la batterie
Cycle de maintenance
(clignote)
Erreur de la pompe 1 ou 2,
courant trop faible
Le cycle de maintenance est atteint
Aucun cycle de maintenance n’a été
sais
Contrôle le tuyau souple
d‘accouplement et le remplacer si
nécessaire
Exécuter l’intervention de maintenance
Saisir le cycle de maintenance (voir 2.3
du menu de commande)
Non-atteinte de la puissance absorbée Vérifier le câble et le remplacer si
minimale de la pompe
nécessaire, contrôler la pompe et la
remplacer si nécessaire.
Interruption du câble entre le
gestionnaire et la pompe
Erreur de la pompe 1 ou 2,
surintensité de courant
Erreur du relais 1 ou 2
Panne de réseau
Pompe défectueuse
Dépassement de la puissance
absorbée maximale de la pompe,
blocage du rotor le cas échéant
Nettoyer la pompe et contrôler la
souplesse de fonctionnement du rotor,
remplacer si nécessaire
Panne de l’alimentation en énergie
néant, panne de secteur générale
Contacteur de puissance ne
déconnecte pas
Séparer le gestionnaire du réseau,
remplacer le contacteur
Fusible tombé en panne
Contrôler le fusible
Interruption de la conduite
d’alimentation
Contrôler la conduite d’alimentation
Interrupteur principal défectueux
Dépassement de la
température
Déclenchement de l’interrupteur
commandé par la température
d’enroulement
Erreur de phase
Phase L1, L2 ou L3 inexistante
Défaut de champ
magnétique rotatif
Raccordement erroné du champ
magnétique rotatif
114 / 240
Contrôler l’interrupteur principal
Lors d’une mise hors circuit
intentionnelle, arrêter le gestionnaire
progressivement (voir 4.6 à la page 21)
Remise à zéro automatique après
le refroidissement du moteur ; le
message d’erreur est automatiquement
acquitté après une tentative de remise
en circuit réussie. Remplacer la
pompe en cas d’erreur de température
durable.
Contrôler le raccord du cordon
d’alimentation et les fusibles
Permuter 2 phases du câble principal
2015/02
Aide au diagnostic
Disjoncteur de protection du
moteur 1 ou 2
Déclenchement du disjoncteur de
protection du moteur
arrêt
Régler l’intensité du courant suivant la
pompe
Courant de la pompe trop élevé en
raison d’une pompe défectueuse ou
bloquée
Éliminer le blocage
Disjoncteur de protection du moteur
erroné
Chute de pression
Excès de courant dû à une défaillance Contrôler l’existence d’une défaillance
de phase
de phase du réseau
Défaut d’étanchéité du tuyau
au niveau du raccord à vis du
tube plongeur (ou de la cloche
d’immersion) et/ou du gestionnaire.
Contrôler l’étanchéité du système du
capteur de pression
Nombre limite de mises en
marche 1 ou 2
Pompe fonctionne trop longtemps par
opération de pompage
Nombre limite de mises en
marche 1 ou 2
Pompe fonctionne trop fréquemment
en peu de temps
Contrôler le dimensionnement et
informer le service après vente si
nécessaire
Cycles de commutation du
relais 1 ou 2
2015/02
Remplacer la pompe défectueuse le
cas échéant
Dépassement du nombre maximal de
cycles de commutation
115 / 240
Acquittement possible. Informer le
service après vente. Erreur réapparaît
après 1000 autres cycles de
commutation.
Contrôler le dimensionnement et
informer le service après vente si
nécessaire
Caractéristiques techniques
8
Caractéristiques techniques
8.1
Pompes
Pompe
Poids [kg]*
Puissance P1 [kW]
Puissance P2 [kW]
Régime [tr/min]
Tension de service [V] 50 Hz
Courant nominal [A]
Capacité de refoulement maxi [m³/h]
Hauteur de relevage maxi [m]
Température du fluide refoulé maxi
[°C]
1400
1500
1,6
1,4
24
24
1,1
3,2
4,5
2,7
26
3,7
1415
2845
2845
7,3
2,7
5,4
7,7
230
400
38
400
40
7
8
45
40
12
400
53
17
IP68
I
Protection du moteur
externe
Type de fiche
Mode de fonctionnement
4500
1370
Catégorie de protection
Protection par fusible nécessaire
3000
25
1,1
Type de protection
Câble de raccordement
SPF
Raccordement direct
10 m, 7 x 1,5 mm²
Voir le mode d‘emploi du gestionnaire
S3/S1
*Modèle pour fonctionnement S1. Poids augmenté de 2 kg si service S3.
116 / 240
2015/02
Caractéristiques techniques
8.2
Débit de refoulement
Débit de refoulement Q [m³/h] pour une hauteur de refoulement H
[m]
Pompe
SPF..
2
1400 *
36
26,1 12,5
Q [m³/h]
1500 *
37,5 28,2 15,8
Q [m³/h]
3000 *
4
46
4500 *
6
8
10
12
40,1 34,4 28,3 22
14
15,6 8,8
53,4 48,4 42,9 37,5 30
16
18
1,8
H [m]
Q [m³/h]
22,5 13,1 Q [m³/h]
* S3/S1 ** S3
H [m]
20
18
16
14
12
10
8
6
4
2
0
SPF 1500
SPF 4500
SPF 3000
0
10
20
30
40
50
60 Q [m3/h]
Fig. [20] 8.3
Couples de serrage des raccords à vis
Pompe à la bride de pompe
7 Nm
Dispositif antireflux (plastique) et vis des sondes
2,5 Nm
Tube plongeur
8.4
5 Nm
Dimensions, volume
Hauteur : Voir les instructions du regard technique LW 1000 (Référence 010-701).
Le diamètre extérieur est d‘env. 1 200 mm
Volume utile d‘env. 160 litres
Volume du bac d‘env. 335 litres
2015/02
117 / 240
Déclaration de conformité
9
Déclaration de conformité
118 / 240
2015/02
Déclaration de conformité
2015/02
119 / 240
Leader en solution d’assainissement
6 4
Construction de logements
privés sans raccordement au
réseau d’assainissement public
1 2 3 4
5
1 2 3 4
Construction de logements
privés sans raccordement au
réseau d’assainissement public
5
Construction publique, par
exemple aménagement de loisirs
1 2 3 4
5
Local à usage
commercial, par
exemple hôtel
4 5
Construction
industrielle
2 3 5
Construction industrielle,
par exemple station
d´essence
1 2 3 4
Construction privée
maison individuel
1 Protection anti-retour
2 Système de relevage
3 Postes de relevage
4 Siphons de sol
5 Séparateurs
6 Micro-stations d’épuration
ISTRUZIONI PER L‘INSTALLAZIONE, IL FUNZIONAMENTO
E LA MANUTENZIONE
KESSEL Stazione di pompaggio Aqualift F XL
- Installazione a secco
Vantaggi del prodotto
Installazione Messa in funzione Istruzioni
dell’impianto sono state fornite dal vostro rivenditore
specializzato:
Nome / Firma
Edizione 2015/02
Data
Luogo
Timbro del rivenditore specializzato
Codice articolo 010-695
Modifiche tecniche riservate
Per le acque di scarico
contenenti sostanze fecali
e non contenenti sostanze
fecali
Installazione a secco =
spazio di lavoro pulito
Resistente a 3 m di acqua
freatica
Centralina con funzione di
auto-diagnostica

Indice
1Introduzione
124
1.1
Descrizione del prodotto, in generale................................................................................ 124
1.2
Indicazioni generali sulle presenti istruzioni per l’uso e la manutenzione.......................... 125
1.3
Principio di funzionamento................................................................................................. 126
1.4
Targhetta............................................................................................................................ 127
1.5
Fornitura............................................................................................................................ 128
1.6
Visualizzazioni, tasti di comando e loro funzioni................................................................ 128
1.7
Gruppi costruttivi e caratteristiche funzionali..................................................................... 129
130
2Sicurezza
2.1
Uso conforme alla destinazione......................................................................................... 130
2.2
Scelta e qualifica del personale......................................................................................... 130
2.3
Misure di sicurezza organizzative...................................................................................... 130
2.4
Pericoli derivanti dal prodotto............................................................................................ 131
2.4.1 Pericoli causati da particolari condizioni locali / ambientali............................................... 131
2.4.2 Pericolo di scossa elettrica in presenza di un connettore svitato...................................... 131
2.4.3 Percoli causati dalle atmosfere nocive.............................................................................. 131
2.4.4 Pericoli per la salute.......................................................................................................... 131
2.4.5 Pericoli causati dal rumore................................................................................................ 131
2.4.6 Pericolo di esplosione........................................................................................................ 131
2.4.7 Pericoli causati dal calore.................................................................................................. 132
2.4.8 Pericoli causati dall‘avvio inatteso di una pompa.............................................................. 132
2.4.9 Pericolo di annegamento nel pozzetto dell‘impianto.......................................................... 132
3
Montaggio
3.1
Informazioni generali sul montaggio.................................................................................. 133
3.2
Montaggio dell‘entrata....................................................................................................... 133
3.3
Previsione del collegamento per la pompa a membrana manuale.................................... 133
133
122 / 240
2015/02

3.4
Montaggio della/e pompa/e delle acque di scarico............................................................ 134
3.5
Montaggio del piccolo compressore per il gorgogliamento dell‘aria.................................. 135
3.6
Montaggio della centralina................................................................................................. 135
3.7
Montaggio del modem di telecontrollo KESSEL................................................................ 135
3.8
Realizzazione dei collegamenti elettrici e dei collegamenti dei sensori di livello............... 136
3.9
Prima messa in funzione................................................................................................... 138
3.9.1 Inizializzazione della centralina......................................................................................... 138
3.9.2 Configurazione del modem di telecontrollo KESSEL per i messaggi di errore.................. 139
3.9.3 Adeguamento dei punti di commutazione per il gorgogliamento dell‘aria.......................... 139
3.9.4 Controllo di funzionamento................................................................................................ 139
4
Funzionamento
140
4.1
Funzioni degli interruttori................................................................................................... 140
4.2Accensione........................................................................................................................ 140
4.3
Display, visualizzazioni / informazioni................................................................................ 140
4.4
Funzioni di tutti i tasti / Visualizzazioni............................................................................... 141
4.5
Conferma dell‘allarme........................................................................................................ 141
4.6
Spegnimento...................................................................................................................... 141
5
Impostazioni del menù di comando
5.1
Menu operativo................................................................................................................ 143
142
6Manutenzione
149
6.1
Avvertenze generali per la manutenzione.......................................................................... 149
6.2
Intervalli di manutenzione.................................................................................................. 149
6.3
Preparazione della manutenzione..................................................................................... 150
6.3.1 Scheda di manutenzione................................................................................................... 151
7
Ricerca di errori
154
8
Dati tecnici
156
8.1
Pompe............................................................................................................................... 156
8.2Portata............................................................................................................................... 157
2015/02
8.3
Momenti di serraggio dei collegamenti a vite..................................................................... 157
8.4
Misure, volumi.................................................................................................................... 157
9
Dichiarazione di conformità
158
123 / 240
Introduzione
1
Introduzione
Gentile
cliente,
siamo lieti che abbia optato per l‘acquisto di uno dei nostri prodotti. Siamo sicuri che soddisferà in pieno le sue
esigenze. Le auguriamo un‘installazione impeccabile e vincente.
Nello sforzo di mantenere i nostri standard di qualità al massimo livello possibile, siamo ovviamente pronti a
fornirle il nostro aiuto. Le preghiamo di comunicarci le possibilità di miglioramento dei nostri prodotti.
Ha delle domande? Saremo felici di ricevere le sue richieste.
1.1
Descrizione del prodotto, in generale
La stazione di pompaggio KESSEL Aqualift F XL(denominata di seguito stazione di pompaggio) è pensata per il
pompaggio di svuotamento delle acque di scarico contenenti e non contenenti sostanze fecali. Il contenitore delle
acque di scarico accoglie la pompa (o le pompe) ed il sensore di livello (o i sensori di livello). I gruppi costruttivi
sono adeguati alla centralina KESSEL in dotazione. La stazione di pompaggio è fornita con diverse pompe per le
acque di scarico.
I segnali di commutazione dei sensori per il livello delle acque di scarico vengono elaborati elettronicamente nella
centralina. Quale sensore di livello viene impiegato un sensore di pressione. Al raggiungimento del volume di
riempimento impostato verrà attivato il pompaggio di svuotamento. Il pompaggio di svuotamento viene terminato
dopo l‘abbassamento adeguato del livello dell‘acqua.
Qualora siano collegate due pompe per le acque di scarico, queste verranno accese singolarmente o unitamente
a seconda del volume di riempimento e del posizionamento dei sensori di livello.
Sul contenitore delle acque di scarico possono essere montati diversi elementi del sistema di pozzetto (010701). Il contenitore delle acque di scarico, unitamente agli elementi funzionali fissati su di esso, rappresenterà
quindi l‘elemento di base del pozzetto. In caso di montaggio adeguato dal punto di vista temporale e tecnico, al
momento del montaggio della stazione di pompaggio il pozzetto sarà completamente montato.
124 / 240
2015/02
Introduzione
1.2
Indicazioni generali sulle presenti istruzioni per l’uso e la manutenzione
Le presenti istruzioni per l‘uso e la manutenzione sono complete solo unitamente alle istruzioni per l‘uso e il
montaggio della centralina Aqualift F Comfort 400V (codice articolo 010-532) o Aqualift F Comfort 230 V
(codice articolo 010-910)
Simboli utilizzati e legenda
<1>
[2]
•
3°
–
Corsivo
Riferimento nel testo a un numero di legenda in un‘immagine
Riferimento a una figura
Passo di lavoro
Passo di lavoro in una sequenza numerata
Numerazione
Scritta in corsivo: riferimento a una sezione / un punto nel menù di comando
PRUDENZA: avverte circa un pericolo per le persone e il materiale. La mancata osservanza
delle indicazioni contrassegnate con questo simbolo può causare lesioni gravi e danni
materiali.
Avvertenza: avvertenza tecnica che richiede particolare attenzione.
Al fine di non ostacolare inutilmente la leggibilità delle descrizioni per il comando delle centraline si è rinunciato a
descrivere i dettagli ritenuti comuni e ovvi nell‘utilizzazione di un comando a menù.
Qualora, ad esempio, debba essere selezionata una rubrica come Manutenzione al posto di
azionare il tasto-freccia in basso => selezionare la voce Manutenzione => premere il tasto OK
si leggerà l‘invito „SelezionareManutenzione „.
2015/02
125 / 240
Introduzione
1.3
Principio di funzionamento
altezza di installazione normale
Ill. [1] altezza di installazione minima
Ill. [2] 126 / 240
2015/02
Introduzione
1.4
Targhetta
Informazioni sulla targhetta
1
Denominazione della impianto
3
Tensione di collegamento e frequenza di collegamento
2
5
6
7
8
9
10
2015/02
Dati idraulici
2
3
Dati generali
4
Data di produzione
6
Numero di serie
5
Stato di revisione
10
Aqualift
XY
xxxxx
U = xxxV xxHz I = x,xA P1 = x,xkW
Q = xxm³/h
H = xxm
S3 xx% ED IP xx (3mWS /48h)
Ser.Nr. xxxxxxx
Auftr.Nr.: xxxxxxx
RevStd.: X.X TT.MM.JJ JJ DIN-EN 12050-1
8
7
Denominazione della norma
Numero d‘ordine
Ill. [3] 127 / 240
9
www.kessel.com
4
1
Codice del materiale della impianto
Introduzione
1.5
Fornitura
14
Centralina con le proprie istruzioni di montaggio
16
Istruzioni per l‘uso e la manutenzione
17
Schema di collegamento nel coperchio dell‘alloggiamento
della centralina
18
19
20
21
23
Materiale di fissaggio per la centralina
23
Mascherina per la realizzazione dei fori per la centralina
Contenitore dell‘impianto (elemento di base del sistema di
pozzetto)
20
Sistema di pozzetto composto da diversi elementi con le
proprie istruzioni di montaggio (non illustrato)
Pompa/e
16
2 curve da 45° DN 150 con guarnizione per il passante tubi
(non illustrate)
Ill. [4] 19
18
17
1.6
Visualizzazioni, tasti di comando e loro funzioni
Vedere 4.4 a pagina 141
14
Ill. [5] 128 / 240
2015/02
Introduzione
1.7
Gruppi costruttivi e caratteristiche funzionali
14
23
14
23
24
24
25
25
20
20
27
27
22
22
26
26
28
28
Ill. [6] Ill. [7] altezza di installazione normale
altezza di installazione bassa
14
20
22
23
24
25
26
27
28
2015/02
Centralina
Contenitore dell‘impianto (elemento di base del sistema di
pozzetto)
Targhetta
Pompe per le acque di scarico
Condotto di mandata
Dispositivo anti-riflusso con valvola a saracinesca
Entrata
Sensore di livello (sensore di pressione)
Collegamento del condotto di sfiato
129 / 240
Sicurezza
2
Sicurezza
2.1
Uso conforme alla destinazione
La stazione di pompaggio funge da impianto di drenaggio per le acque di scarico contenenti e non contenenti
sostanze fecali, domestiche e commerciali, montato in un sistema di pozzetto KESSEL calpestabile, di altezza e
struttura variabile.
2.2
Scelta e qualifica del personale
Le persone che montano la stazione di pompaggio devono
–– Avere almeno 18 anni di età.
–– Essere sufficientemente formate e qualificate per la mansione in oggetto.
–– Conoscere e rispettare le regole tecniche e le norme di sicurezza pertinenti.
Il personale qualificato è rappresentato da persone che – alla luce della loro formazione ed esperienza e della
loro conoscenza delle regole pertinenti, delle norme vigenti e delle norme antinfortunistiche – sono in grado di
svolgere le mansioni in questione e di identificare ed eliminare i possibili rischi a esse connessi.
I lavori ai componenti elettrici possono essere eseguiti solo da personale specializzato e appositamente formato
e nel rispetto di tutte le regole vigenti delle norme antinfortunistiche.
2.3
Misure di sicurezza organizzative
Le istruzioni per l‘uso e la manutenzione devono sempre essere disponibili.
130 / 240
2015/02
Sicurezza
2.4
Pericoli derivanti dal prodotto
2.4.1 Pericoli causati da particolari condizioni locali / ambientali
Pericolo a causa di vapori, gas o sostanze velenose o nocive (ad esempio batteri o virus). Qualora la stazione
di pompaggio si trovi in un pozzetto, i lavori necessari all‘interno di quest‘ultimo dovranno essere eseguiti
esclusivamente da personale specializzato (vedere 2.2).
2.4.2 Pericolo di scossa elettrica in presenza di un connettore svitato
Sulla centralina (solo in esecuzione a 230 V) sussiste il pericolo di una scossa elettrica qualora uno dei
connettori per l‘alimentazione di corrente delle pompe sia stato smontato. Il dado per raccordo del connettore
elettrico deve essere montato in modo talmente saldo da non poter essere allentato senza utensili (ad
esempio a opera dei bambini) (vedere 3.8).
2.4.3 Percoli causati dalle atmosfere nocive
In caso di lavori nel pozzetto sussiste il pericolo che l‘atmosfera all‘interno del sistema di pozzetto sia nociva.
Garantire una ventilazione sufficiente e impiegare eventualmente dei dispositivi di sicurezza, come ad esempio
un rilevatore di gas universale.
2.4.4 Pericoli per la salute
La stazione di pompaggio trasporta acque di scarico contenenti sostanze fecali che possono contenere
sostanze nocive per la salute. Accertarsi che non avvenga alcun contatto tra le acque di scarico o le parti
dell‘impianto da esse toccate e gli occhi, la bocca o la pelle. In caso di contatto diretto, lavare immediatamente
con cura la parte del corpo interessata ed eventualmente disinfettare. Indossare i Dispositivi di Protezione
Individuale.
2.4.5 Pericoli causati dal rumore
Il funzionamento della stazione di pompaggio può produrre un livello di rumore elevato. In caso di necessità,
indossare i dispositivi di protezione appropriati e mettere in pratica delle misure di protezione contro il rumore.
2.4.6 Pericolo di esplosione
L‘interno del contenitore delle acque di scarico può essere considerato un locale a rischio di esplosione
(EN 12050). Tramite i processi di decomposizione biologici possono formarsi dei gas combustibili (idrogeno
solforato, gas metano). Prima dell‘apertura del contenitore delle acque di scarico (ad esempio per lo
smontaggio della pompa), assicurare un ricambio d‘aria sufficiente nel pozzetto.
Se il contenitore delle acque di scarico è aperto, assicurare che nelle immediate vicinanze non sia presente
alcuna fonte di ignizione (ad esempio causata dal funzionamento di apparecchi elettrici senza motore
incapsulato, dalla lavorazione di metalli, dal fumo, ecc.).
2015/02
131 / 240
Sicurezza
2.4.7 Pericoli causati dal calore
Pericolo di ustioni in caso di contatto con le superfici calde. Le pompe delle acque di scarico sviluppano una
temperatura elevata sulla superficie dell‘alloggiamento in caso di funzionamento prolungato. Indossare dei
dispositivi di protezione (guanti) o lasciare raffreddare adeguatamente le pompe.
2.4.8 Pericoli causati dall‘avvio inatteso di una pompa
Qualora la stazione di pompaggio non sia separata dalla rete elettrica ogni pompa può avviarsi senza
preavviso. Smontare le pompe esclusivamente tramite l‘intervento di personale specializzato e con l‘impianto
scollegato dalla rete e assicurato contro la riaccensione accidentale.
2.4.9 Pericolo di annegamento nel pozzetto dell‘impianto
Un pozzetto dell‘impianto può riempirsi rapidamente d‘acqua in breve tempo, ad esempio in caso di
inondazioni. In presenza di rischi di penetrazione dell‘acqua non sarà possibile accedere al pozzetto fino a che
non sarà garantita un permanenza priva di rischi al suo interno.
Non è ammessa l‘apertura della pompa;
la pompa IP68 è stagna. Nessuna penetrazione di umidità in caso di montaggio regolare. Prevedere un
interruttore differenziale.
132 / 240
2015/02
Montaggio
3
Montaggio
Pericolo a causa di vapori, gas o sostanze velenose o nocive (ad esempio batteri o virus). Fare eseguire tutti i
lavori necessari alla stazione di pompaggio esclusivamente a personale specializzato (vedere 2.2).
3.1
Informazioni generali sul montaggio
La stazione di pompaggio viene montata e messa in funzione in diversi momenti in base alle comuni fasi di
costruzione di un cantiere.
1. Installazione del contenitore dell‘impianto (elemento di base del sistema di pozzetto) nel pozzetto.
Collegamento di entrata e scarico delle acque di scarico e del condotto di mandata tramite il quale vengono
pompate via le acque di scarico.
Montaggio del sistema di pozzetto sulla base del contenitore dell‘impianto. Lavori non descritti nelle presenti
istruzioni.
2. Montaggio dei gruppi costruttivi forniti singolarmente a partire dal capitolo 3.4.
3. Montaggio della centralina e collegamento dei componenti elettrici (capitolo 3.8).
4. Prima messa in funzione (capitolo 3.9).
Accertare che i lavori indicati al punto 1. siano completamente conclusi.
3.2
Montaggio dell‘entrata
• Montare professionalmente le due curve da 45° <1> assieme alla
guarnizione per il passante tubi.
3.3
Previsione del collegamento per la pompa a membrana
manuale
Come illustrato nella figura [18] a pagina 150, prevedere un
collegamento <2> (pezzo di revisione) al di sopra del livello di ristagno
per una pompa a membrana manuale nel condotto di sfiato.
2015/02
133 / 240
Ill. [8] Montaggio
3.4
Montaggio della/e pompa/e delle acque di scarico
• Fissare la/e pompa/e delle acque di scarico con le viti <1> (momento di serraggio 7 N·m).
1
1
Ill. [9] Ill. [10] altezza di installazione normale
altezza di installazione bassa
134 / 240
2015/02
Montaggio
3.5
Montaggio del piccolo compressore per il gorgogliamento dell‘aria
(Opzionale)
Collegare il tubo flessibile dell‘aria in base alle istruzioni di montaggio fornite.
3.6
Montaggio della centralina
Montare la centralina ai sensi delle istruzioni allegate alla centralina stessa.
3.7
Montaggio del modem di telecontrollo KESSEL
(Opzionale)
2015/02
135 / 240
Montaggio
3.8
Realizzazione dei collegamenti elettrici e dei collegamenti dei sensori di livello
Accertare che la centralina sia separata dall‘alimentazione di tensione durante i lavori di montaggio.
Pericolo di scossa elettrica in caso di contatto involontario con i connettori svitati (ad esempio da parte
dei bambini). Accertare che tutti i collegamenti elettrici – se presenti – siano fissati come illustrato
(momento di serraggio).
Ill. [11]
136 / 240
2015/02
Montaggio
• Collegare la/e pompa/e ai connettori <b> e <c>.
b
c
e
d
Ill. [12] • Realizzare i collegamenti dei sensori di livello come segue.
Sensore d‘allarme
Sensore di pressione
Collegamento (figura [12])
Codifica cromatica del cavo
e
-
d
Rossa
• Posare in modo sicuro tutti i cavi dei componenti elettrici e la linea del sensore di pressione.
Raccomandazione: fissaggio al collare che può essere montato alla parete del pozzetto.
Posare il tubo flessibile di mandata (collegamento <e>) del pescante (sensore di pressione) in modo
che proceda con pendenza sempre crescente. In questo modo viene impedita l‘eventuale formazione di
condensa, che potrebbe causare dei disturbi.
2015/02
137 / 240
Montaggio
3.9
Prima messa in funzione
Un funzionamento a secco delle pompe delle acque di scarico deve essere assolutamente evitato, in quanto
potrebbero danneggiarsi. Non accendere mai le pompe per le acque di scarico se il contenitore delle acque di
scarico non è pieno almeno fino al livello dell‘acqua minimo.
3.9.1 Inizializzazione della centralina
• Alimentare la centralina con la tensione di rete per dare il via all‘inizializzazione. Mentre i LED si illuminano
per circa 4 secondi, i componenti elettrici vengono controllati, la batteria per il messaggio di guasto alla
rete elettrica viene attivata e il menù 3.10, „Lingua“ viene visualizzato. Al termine è possibile eseguire
l‘inizializzazione.
Al momento dell‘inizializzazione vengono richieste le seguenti immissioni:
Lingua
–– Data / Ora
–– Tipo di prodotto
–– Variante d‘impianto
–– Dimensioni delle prestazioni
–– Intervallo di manutenzione
Lingua
• Premere OK
• Selezionare la lingua nazionale con i tasti-freccia e confermare con OK; verrà visualizzato il menù „Data /
Ora“.
Data / Ora
• Impostare la cifra lampeggiante per la data e l‘ora e confermare con OK. Dopo l‘ultima immissione il menù
Tipo di prodotto verrà visualizzato.
Tipo di prodotto
• Scegliere la stazione di pompaggio Aqualift Mono o Duo e confermare con OK; il menù Variante d‘impianto
verrà visualizzato.
Variante d‘impianto
• Scegliere la variante d‘impianto appropriata e confermare con OK; il menù Dimensioni delle prestazioni verrà
visualizzato.
Dimensioni delle prestazioni
• Scegliere le dimensioni delle prestazioni appropriate e confermare con OK; il menù Scadenza di
manutenzione verrà visualizzato.
Intervallo di manutenzione
• Scegliere la scadenza di manutenzione desiderata o immetterla secondo necessità e confermare con OK; il
menù Informazioni di sistema verrà visualizzato; l‘inizializzazione è conclusa.
138 / 240
2015/02
Montaggio
3.9.2 Configurazione del modem di telecontrollo KESSEL per i messaggi di errore
(Opzionale)
3.9.3 Adeguamento dei punti di commutazione per il gorgogliamento dell‘aria
(Opzionale)
•
•
•
•
•
•
Accertare che il contenitore dell‘impianto sia pieno.
Spegnere il piccolo compressore.
Accenderestazione di pompaggio per il ristagno.
Annotare il valore misurato (mm) visualizzato nel menù di comando 1.5.4.
Accendere il piccolo compressore.
Determinare il valore di offset; a tale fine sottrarre il valore misurato visualizzato nel menù di comando 1.5.4
dal valore misurato precedentemente annotato.
• Immettere il valore di offset nel menù di comando 3.1.14, „Offset del gorgogliamento dell‘aria“; i punti di
commutazione sono adeguati.
3.9.4 Controllo di funzionamento
Eseguire il controllo di funzionamento ai sensi delle attività elencate nella scheda di manutenzione (vedere 6.3.1).
2015/02
139 / 240
Funzionamento
4
Funzionamento
Tutti i dispositivi anti-riflusso con valvole a saracinesca devono essere aperti e bloccati durante il
funzionamento della stazione di pompaggio (estratti verso l‘alto, vedere <25> a pagina <?>).
4.1
Funzioni degli interruttori
4.2
Accensione
28
29
30
32
• Ruotare l‘interruttore principale <28> in posizione I (ON); dopo
l‘esito positivo del test del sistema, nel display <29> compariranno
le informazioni sull‘impianto e il LED verde <30> si accenderà; la
centralina è pronta al funzionamento.
31
Ill. [13] 4.3
Display, visualizzazioni / informazioni
Sul display vengono visualizzati diversi stati di funzionamento con dei messaggi di testo. Tramite il menù 1
(vedere le istruzioni per l’uso della centralina) è possibile richiamare tutti i parametri di sistema.
Il livello del liquido nel contenitore delle acque di scarico viene visualizzato sul display (livello di riempimento) in
mm.
(0 indica che il livello è inferiore all‘altezza misurabile)
140 / 240
2015/02
Funzionamento
4.4
Funzioni di tutti i tasti / Visualizzazioni
19
LED
Pompa 1
21
LED
Allarme
20*
22
LED
LED
Pompa 2
Condizione di prontezza per il
funzionamento
66
Freccia in alto Sfogliare il menù
68
ESC
67
Freccia in
basso
Sfogliare il menù
69
Allarme
Conferma dell‘allarme acustico
72
OK
71
73*
Pompa / Test
Pompa / Test
Cancellazione di un‘immissione,
indietro
Pompa 1 ON / OFF
Conferma di un‘immissione, livello
successivo
Ill. [14] Pompa 2 ON / OFF
* Stazione di pompaggio in esecuzione DUO (2 pompe)
4.5
Conferma dell‘allarme
Al presentarsi di uno stato che genera un allarme (ad esempio il guasto a una pompa o il raggiungimento del
livello d‘allarme delle acque di scarico) si illuminerà il LED d‘allarme <21>. Il display genererà eventualmente
un messaggio di errore con testo in chiaro. Dopo l‘eliminazione della causa dell‘allarme, l‘allarme potrà essere
confermato con la pressione del tasto <69>.
–– Spegnimento del segnale acustico d‘allarme: premere il tasto <69> 1 volta.
–– Conferma dell‘allarme: premere il tasto <69> 1 volta e tenerlo premuto >5 secondi.
4.6
Spegnimento
• Ruotare l‘interruttore principale in posizione O (OFF); verrà emesso un segnale d‘allarme acustico e il LED
d‘allarme <21> lampeggerà.
• Spegnere il segnale d‘allarme; a tale fine tenere premuto il tasto <69> fino a che nel display il simbolo
d‘allarme verrà rappresentato barrato.
• Spegnere la centralina; a tale fine tenere premuto il tasto <69> fino a che il display e il LED d‘allarme verranno
spenti.
La stazione di pompaggio per il ristagno è spenta.
2015/02
141 / 240
Impostazioni del menù di comando
5
Impostazioni del menù di comando
In generale
Il comando a menù della centralina dispone di una modalità di
comando e di una di stand-by.
Nella modalità di comando è possibile visualizzare e impostare le
impostazioni di sistema per mezzo del display.
Qualora, in un arco di tempo di circa 60 secondi, non si verifichi alcun
azionamento di un tasto, verrà attivata automaticamente la modalità di
stand-by e la retroilluminazione del display verrà quindi spenta.
66
67
68
72
Freccia in
alto
Tasti di navigazione per il menù
Sfogliare il menù
Freccia in
basso
Sfogliare il menù
OK
Conferma di un‘immissione, livello successivo
ESC
66
68
72
67
Ill. [15] Cancellazione di un‘immissione, indietro
Attivazione della modalità di comando
• Azionare il tasto OK <72> sul quadro di comando, la
retroilluminazione del display si accende e viene visualizzata la
schermata iniziale („Informazioni di sistema“).
- bzw. Schwimmeranzeige
Apertura del menù
• Azionare OK <72>; il livello 1 del menù (vedere 7.1, „Struttura del
menù“) viene attivato.
72
Ill. [16] 142 / 240
2015/02
Impostazioni del menù di comando
Navigazione nel menù
Azione
Comando
Attivazione del punto del menù per
l‘elaborazione
OK; l‘eventuale sotto-punto del menù presente verrà rappresentato
invertito
Scelta del punto del menù
Freccia in alto / Freccia in basso, il punto del menù scelto viene
rappresentato invertito
Visualizzazione / Elaborazione di un OK; il valore viene visualizzato ovvero rappresentato invertito per
valore impostato
l‘impostazione
Abbandono del menù
ESC; abbandono del livello attuale, passaggio a un livello superiore
Struttura del menù
33
Il numero <33> del rispettivo livello del menù viene illustrato sotto
forma di cifra nella riga superiore del display.
Datum:
Uhrzeit:
Rückstau:
Klappe:
xx.xx.xx
xx:xx:xx
nein
offen
Fehler/Ereignisse (Statuszeile)
Qualora la centralina si trovi in modalità di funzionamento
manuale (menù 2.1.1), non avverrà ad esempio alcun
pompaggio di svuotamento comandato in base al livello.
Ill. [17] 5.1
Menu operativo
Numero
Menù
Unità
Gamma di valori
0
Informazioni di sistema
1
Informazioni
1.1
Ore di funzionamento
1.1.1
Tempo di funzionamento complessivo
h
0...999.999
1.1.2
Tempo di funzionamento pompa 1
h
0...999.999
1.1.3
Tempo di funzionamento pompa 2
h
0...999.999
1.1.4
Avvii della pompa 1
-
0…18.000.000
1.1.5
Avvii della pompa 2
-
0…18.000.000
1.1.6
Guasto alla rete elettrica
h
0...999.999
1.1.7
Consumo energetico
kW·h
0...999.999
1.2
Diario d‘esercizio
Ultimo evento / errore presentatosi
Evento / Errore presentatosi
precedentemente
2015/02
143 / 240
fino a 256 eventi /
errori
Impostazioni del menù di comando
Numero
Menù
Unità
Gamma di valori
Evento / Errore presentatosi
precedentemente
1.3
Tipo di comando
1.4
Scadenza di manutenzione
1.4.1
Ultima manutenzione
GG.MM.AAAA
1.4.2
Prossima manutenzione
GG.MM.AAAA
1.5
Valori misurati attuali
1.5.1
Tensione di rete elettrica
V
1.5.2
Corrente di rete elettrica
A
1.5.3
Tensione della batteria
V
1.5.4
Livello di riempimento
mm
0…999
1.6
Parametri
1.6.1
Altezza tubo di ristagno
cm
0...999
1.6.2
Blocco accensione
s
0...999
1.6.3
Campo di misura
cm
0...999
1.6.4
Livello ON1
mm
0…999
1.6.5
Livello ON2
mm
0...999
1.6.6
Livello OFF1
mm
0...999
1.6.7
Livello d‘allarme
mm
0...999
1.6.8
Ritardo accensione
s
0…999
1.6.9
Durata di funzionamento dopo lo
spegnimento
s
0...999
1.6.11
Modalità pompa
Selezione: carico di base-carico di picco o
alternanza di carico
1.6.10
Tempo max di funzionamento
minuti
0...999
1.6.11
Numero max di accensioni
-
0...999.999
1.6.12
Corrente min
A
0...10,0
1.6.13
Corrente max
1.6.14
Offset LEP
1.6.15
SDS automatico
1.6.16
Funzionamento S1 / S3
2
Manutenzione
2.1
Funzionamento automatico
2.1.1
Funzionamento automatico
2.2
SDS
2.3
Scadenza di manutenzione
2.3.1
Prossima manutenzione
mm:hh - gg.mm.aa
2.3.2
Ultima manutenzione
mm:hh - gg.mm.aa
2.4
Manutenzione eseguita
2.5
Intervallo di manutenzione
2.5.1
3 mesi
2.5.2
6 mesi
2.5.3
12 mesi
2.5.4
Manutenzione manuale
Giorni
144 / 240
Funzionamento S1 /
Funzionamento S3
ON / OFF
2015/02
Impostazioni del menù di comando
Numero
Menù
Unità
Gamma di valori
2.5.5
Nessun intervallo di manutenzione
2.6
Calibrazione
3
Impostazioni
3.1
Parametri
3.1.1
3.1.2
Altezza tubo di ristagno
cm
0...999
Blocco accensione
s
0...999
3.1.3
Campo di misura
cm
0...999
3.1.4
Livello ON1
mm
0…999
3.1.5
Livello ON2
mm
0...999
3.1.6
Livello OFF1
mm
0...999
3.1.7
Livello d‘allarme
mm
0...999
3.1.8
Ritardo accensione
s
0…999
3.1.9
Durata di funzionamento dopo lo
spegnimento
s
0...999
3.1.10
Tempo max di funzionamento
minuti
0...999
3.1.11
Numero max di accensioni
-
0...999.999
3.1.12
Corrente min
A
0...10,0
3.1.13
Corrente max
3.1.14
Offset LEP
mm
0...99
3.1.15
SDS automatico
Giorni
3.1.16
Funzionamento S1 / S3
3.2
Memoria-profili
3.2.1
Nome inseribile
3.2.2
Nome inseribile
3.2.3
Nome inseribile
3.3
Data / Ora
3.4
Configurazione impianto
3.5
Tipo di prodotto
3.5.1
Impianto di sollevamento Aqualift Mono
3.5.2
Impianto di sollevamento Aqualift Duo
3.5.3
Stazione di pompaggio Aqualift Mono
3.5.4
Stazione di pompaggio Aqualift Duo
3.6
Variante d‘impianto
3.6.1
F
3.6.2
F XL 200 l
3.6.3
F XL 300 l
3.6.4
F XL 450 l
3.6.5
Impianto di sollevamento speciale
3.6.6
F Duo
3.6.7
F XL 200 l Duo
3.6.8
F XL 300 l Duo
3.6.9
F XL 450 l Duo
3.6.10
Impianto di sollevamento speciale
3.6.11
F ATEX Mono
2015/02
Funzionamento S1 / S3
GG.MM.AAAA / hh:mm:ss
145 / 240
Impostazioni del menù di comando
Numero
Menù
Unità
3.6.12
F Mono
3.6.13
F AP 501 Mono LW 800
3.6.14
F AP 501 Mono LW 1000
3.6.15
Stazione di pompaggio speciale senza
ATEX
3.6.16
Stazione di pompaggio speciale ATEX
3.6.17
F ATEX Duo
3.6.18
F Duo
3.6.19
F AP 501 Duo LW 800
3.6.20
F AP 501 Duo LW 1000
3.6.21
Stazione di pompaggio speciale senza
ATEX
3.6.22
Stazione di pompaggio speciale ATEX
3.7
Dimensioni delle prestazioni
3.7.1
SPF 1500
3.7.2
SPF 3000
3.7.3
SPF 4500
3.7.4
SPF 5500
3.7.5
TPF 1,9 kW
3.7.6
TPF 1,3 kW
3.7.7
Ama Porter
3.7.8
Pompa speciale
3.7.9
400 V / 2,5 - 4 A
3.7.10
400 V / 4 - 6,3 A
3.7.11
400 V / 6,3 - 10 A
3.7.12
400 V / 9 - 12 A
3.8
Configurazione sensore
3.8.1
Sensore di pressione
3.8.2
Sensore di pressione+Allarme
3.8.3
Sensore di pressione+Compressore
3.8.4
Pressione+Compressore+Allarme
3.8.5
Galleggiante
3.8.6
Sonda di livello
3.8.7
Sonda di livello+Allarme
3.8.8
Interruttore a membrana
3.9
Comunicazione
3.9.1
Nome stazione
3.9.2
N° proprio
3.9.3
Tipo di modem
3.9.4
PIN
3.9.5
Centrale SMS
3.9.6
Destinazione SMS 1
3.9.7
Destinazione SMS 2
3.9.8
Destinazione SMS 3
3.9.9
Stato
146 / 240
Gamma di valori
2015/02
Impostazioni del menù di comando
Numero
Menù
Unità
Gamma di valori
3.10
Lingua
3.10.10
Deutsch
3.10.11
English
3.10.12
Français
3.10.13
Italiano
3.10.14
Polski
3.10.15
Nederlands
3.11
Azzeramento
3.12
Modalità „Esperti“
3.12.1
Ritardo di accensione rete elettrica
s
0 - 99
3.12.2
Monitoraggio batteria
Acceso / Spento
3.12.3
Soglia batteria
V
3.12.4
Funzionamento alternato
ON / OFF
3.12.5
Corrente Cicli di commutazione
n°
0 - 18,0
1.000 - 999.999
Successivamente al reset o in occasione della prima inizializzazione, dopo l‘accensione vengono richieste le seguenti
impostazioni:
3.10
Lingua
3.10.1
Deutsch
3.10.2
English
3.10.3
Français
3.10.4
Italiano
3.10.5
Polski
3.10.6
Nederlands
3.3
Data / Ora
3.5
Tipo di prodotto
3.5.1
Impianto di sollevamento Aqualift Mono
3.5.2
Impianto di sollevamento Aqualift Duo
3.5.3
Stazione di pompaggio Aqualift Mono
3.5.4
Stazione di pompaggio Aqualift Duo
3.6
Variante d‘impianto
3.6.1
F
3.6.2
F XL 200 l
3.6.3
F XL 300 l
3.6.4
F XL 450 l
3.6.5
Impianto di sollevamento speciale
3.6.6
F Duo
3.6.7
F XL 200 l Duo
3.6.8
F XL 300 l Duo
3.6.9
F XL 450 l Duo
3.6.10
Impianto di sollevamento speciale
3.6.11
F ATEX Mono
3.6.12
F Mono
3.6.13
F AP 501 Mono LW 800
3.6.14
F AP 501 Mono LW 1000
2015/02
147 / 240
Impostazioni del menù di comando
Numero
Menù
Unità
3.6.15
Stazione di pompaggio speciale senza
ATEX
3.6.16
Stazione di pompaggio speciale ATEX
3.6.17
F ATEX Duo
3.6.18
F Duo
3.6.19
F AP 501 Duo LW 800
3.6.20
F AP 501 Duo LW 1000
3.6.21
Stazione di pompaggio speciale senza
ATEX
3.6.22
Stazione di pompaggio speciale ATEX
3.7
Dimensioni delle prestazioni
3.7.1
SPF 1500
3.7.2
SPF 3000
3.7.3
SPF 4500
3.7.4
SPF 5500
3.7.5
TPF 1,9 kW
3.7.6
TPF 1,3 kW
3.7.7
Ama Porter
3.7.8
Pompa speciale
3.7.9
400 V / 2,5 - 4 A
3.7.10
400 V / 4 - 6,3 A
3.7.11
400 V / 6,3 - 10 A
3.7.12
400 V / 9 - 12 A
3.1.16
Funzionamento S1 / S3
2.5
Intervallo di manutenzione
3.1.16
Funzionamento S1 / S3
2.5.1
3 mesi
2.5.2
6 mesi
2.5.3
12 mesi
2.5.4
Manutenzione manuale
2.5.5
Nessun intervallo di manutenzione
148 / 240
Gamma di valori
Funzionamento S1 / Funzionamento S3
2015/02
Manutenzione
6
Manutenzione
Prima dell‘apertura delle coperture dell‘alloggiamento, dei connettori e dei cavi (anche sui contatti a potenziale
zero), questi devono essere privati della tensione. I lavori agli elementi elettrici devono essere eseguiti solo da
personale specializzato (vedere 2.2).
6.1
Avvertenze generali per la manutenzione
Durante i lavori di manutenzione non è ammesso salire né sui componenti elettrici, né sui
collegamenti delle linee, né sui cavi.
Pericolo a causa di vapori, gas o sostanze velenose o nocive (ad esempio batteri o virus). Qualora la stazione
di pompaggio si trovi in un pozzetto, i lavori necessari all‘interno di quest‘ultimo dovranno essere eseguiti
esclusivamente da personale specializzato (vedere 2.2).
Pericolo di annegamento nel pozzetto dell‘impianto. Un pozzetto dell‘impianto può riempirsi rapidamente
d‘acqua in breve tempo, ad esempio in caso di inondazioni. In presenza di rischi di penetrazione dell‘acqua
non sarà possibile accedere al pozzetto fino a che non sarà garantita un permanenza priva di rischi al suo
interno.
Eseguire una verifica del funzionamento dopo ogni lavoro di manutenzione alla stazione di pompaggio (vedere
6.3.1).
6.2
Intervalli di manutenzione
La scadenza di manutenzione può essere impostata nel menù 2° Manutenzione / 2.4 Scadenza di manutenzione
(vedere le istruzioni della centralina). Il raggiungimento della scadenza di manutenzione verrà indicato con un
messaggio di testo in chiaro sul display.
Manutenzione degli impianti di sollevamento
La stazione di pompaggio deve essere sottoposta a manutenzione regolarmente a cura di uno specialista. Gli
intervalli temporali non devono essere superiori a:
- 1/4 anno per gli impianti negli esercizi commerciali
- 1/2 anno per gli impianti negli Casa multifamiliare
- 1 anno per gli impianti in ambito privato
Ad ogni manutenzione deve essere stilato un protocollo di manutenzione con l‘indicazione di tutti i lavori eseguiti
e i dati importanti.
Qualora vengano rilevate delle lacune che non possono essere rimosse, queste dovranno essere segnalate
immediatamente all‘esercente dell‘impianto da parte dello specialista incaricato della manutenzione in forma
scritta e confermate con una ricevuta.
2015/02
149 / 240
Manutenzione
6.3
Preparazione della manutenzione
Qualora sia necessario lo svuotamento del
contenitore dell‘impianto, questo potrà avvenire
tramite un pezzo di revisione (2) installato nel
condotto di sfiato. Impiegare a tale fine una pompa
adatta con un tubo flessibile (1).
Ill. [18] 150 / 240
2015/02
Manutenzione
6.3.1 Scheda di manutenzione
Ispezione / Manutenzione della stazione di pompaggio Aqualift F
Denominazione immobile
Immobile
Via
CAP, luogo
Contatti
Variante d‘impianto
Numero di serie
Mono
Tipo di pompa
1
Duo
2
Avvertenze di sicurezza per la manutenzione
Prima dell‘apertura del contenitore delle acque di scarico, garantire un‘aerazione sufficiente del locale. Tenere
lontane le fonti di ignizione e non fumare. Accertare che le pompe abbiano raggiunto la temperatura ambiente.
I condotti di alimentazione e di scarico devono essere svuotati e privati della pressione prima dell‘inizio dei
lavori. Il livello dell‘acqua nel contenitore delle acque di scarico deve trovarsi al di sotto del livello di fissaggio
(flangia della pompa) delle pompe delle acque di scarico. I detergenti aggressivi possono danneggiare le
guarnizioni. Eseguire i lavori di pulizia con acqua calda e spazzole.
Prestazioni di manutenzione a norma EN 12056-4 e DIN 1986, parte 3
Verifica
N°
assivo
Nota d‘esecuzione
sì
Controllo visivo
1
2
3
2015/02
L‘installazione dell‘impianto rispetta la norma suddetta e le indicazioni del costruttore
(nella misura visibile)
Messaggio di errore disponibile?
Funzionamento dato
151 / 240
no
Manutenzione
Verifica
N°
assivo
sì
4
Sbloccare l‘impianto (estrarre la spina di rete elettrica)!!
5.1
Prelevare e lavare il pescante, estrarre la pompa e lavare il contenitore
5
5.2
5.3
5.4
Controllo ottico del pressostato
Posa con pendenza crescente del cavo di comando (con pendenza sempre
crescente)
Pescante
Prelevare e lavare il pescante
5.7
Controllare la sede corretta dell‘anello di fissaggio e della chiusura a vite
Controllare il collegamento del tubo flessibile dell‘aria
6
Misurare la batteria o la batteria ricaricabile: valore EFFETTIVO ________
7.1
Misurare la resistenza di isolamento: valore EFFETTIVO ________
9
Assorbimento di corrente della pompa
7
8
10
11
no
Pressostato
5.5
5.6
Nota d‘esecuzione
Pompa
Collegare nuovamente la corrente
Condizione di prontezza per il funzionamento
Leggere il diario d‘esercizio
Mansioni di manutenzione
12
13
14
Controlli visuali: Controllare tutti i componenti dell‘impianto rispetto a completezza,
stabilità della sede, condizioni intatte e tenuta stagna.
Controllo della valvola a saracinesca
Le valvole a saracinesca devono essere perfette e comandabili agevolmente.
Preparazione dell‘impianto per la manutenzione, svuotamento
• Chiudere l‘entrata ovvero accertare che non possano affluire acque di scarico.
• Svuotare con la pompa l‘impianto; a tale fine immettere acqua fino all‘avvio della
pompa 1. Interrompere l‘alimentazione d‘acqua
e lasciare funzionare la pompa fino al raggiungimento del livello dell‘acqua „Minimo“
o
• Comandare la pompa tramite la centralina (comando manuale) fino a svuotare il
contenitore delle acque di scarico.
Attenzione: pericolo di danni materiali! La pompa non deve funzionare a secco.
15
16
17
Spegnere l‘alimentazione di corrente dell‘impianto e assicurare contro la riaccensione
accidentale.
Se presente, chiudere la valvola a saracinesca nel condotto di mandata.
Svuotare il condotto di mandata; a tale fine, portare il dispositivo di sfiato (come
descritto di seguito, tutti i dispositivi anti-riflusso disponibili) in posizione APERTO
e fare scorrere l‘acqua fuori dal condotto di mandata nel contenitore delle acque di
scarico.
152 / 240
2015/02
Manutenzione
Verifica
N°
assivo
Nota d‘esecuzione
sì
18
Riportare il dispositivo di sfiato in posizione CHIUSO.
20
Smontare il pescante.
19
21
22
no
Svitare il coperchio di revisione.
Accertare che il livello dell‘acqua nel contenitore delle acque di scarico si trovi al di
sotto della flangia della pompa. Eventualmente svuotare con la pompa il contenitore
delle acque di scarico.
Controllo del dispositivo anti-riflusso
Relazione sui risultati
Ricambi impiegati
Destinazione dei ricambi sostituiti
Presso il committente
Presso il destinatario della prestazione
Impianto consegnato al cliente in condizione di prontezza per il
funzionamento
Timbro del servizio clienti interno / dello specialista
Luogo, data
Firma Kessel AG / servizio clienti interno
Nome in stampatello / Firma del committente
2015/02
153 / 240
Ricerca di errori
7
Ricerca di errori
Testo visualizzato, guasto
della rete elettrica
Possibile causa
Rimedio
Errore speciale
Cavo centralina-sonda di allarme
interrotto (optionale)
Errore di pressione
Tubo flessibile di collegamento
centralina-sensore di pressione non a
tenuta
Controllare il cavo ed eventualmente
sostituire, controllare la sonda ed
eventualmente sostituire
Errore della batteria
La batteria manca, è guasta o la
tensione è inferiore a 13,5 V
Controllare il tubo flessibile di
collegamento e sostituire se necessario
Controllare il collegamento della
batteria, eventualmente sostituire la
batteria
Scadenza di manutenzione
(lampeggiante)
La scadenza di manutenzione è stata
raggiunta
Errore della pompa 1 ovvero
2 – sottocorrente
Assorbimento di corrente minimo della Controllare il cavo ed eventualmente
pompa non raggiunto
sostituire, controllare la pompa ed
eventualmente sostituire
Cavo centralina-pompa interrotto
Errore della pompa 1 ovvero
2 – sovracorrente
Errore del relais 1 ovvero 2
Guasto alla rete elettrica
Nessuna scadenza di manutenzione
immessa
Pompa guasta
Pulire la pompa e controllare la mobilità
della girante, eventualmente sostituire
Alimentazione energetica guasta
Nessuno, guasto della rete elettrica
generale
La protezione di potenza non si
spegne più
Interruttore principale guasto
Cavo di alimentazione di rete elettrica
interrotto
Errore di fase
Errore del campo rotante
Immettere la scadenza di
manutenzione (vedere il punto 2.3 nel
menù di comando)
Assorbimento di corrente massimo
della pompa superato, eventuale
bloccaggio della girante
Fusibile dell’apparecchio guasto
Temperatura superata
Eseguire la manutenzione
Separare la centralina dalla rete
elettrica, sostituire la protezione
Controllare il fusibile
Controllare l’interruttore principale
Controllare il cavo di alimentazione di
rete elettrica
In caso di spegnimento volontario,
arrestare la centralina (vedere 4.6 a
pagina 21)
L’interruttore termico dell’avvolgimento A ripristino automatico in caso
è scattato
di raffreddamento del motore; il
messaggio di errore si conferma
automaticamente in caso di tentativo
di riaccensione riuscito; in caso di
permanenza dell’errore di temperatura,
sostituire la pompa
Fase L1, L2 o L3 non disponibile
Campo rotante errato del
collegamento alla rete elettrica
154 / 240
Controllare il collegamento del cavo di
rete elettrica e dei fusibili
Invertire 2 fasi del cavo di
alimentazione
2015/02
Ricerca di errori
Salvamotore 1 ovvero 2
Il salvamotore è scattato
in modo errato
Impostare il valore di corrente
adeguatamente alla pompa
Corrente della pompa eccessiva a
causa della pompa guasta o bloccata
Rimuovere il blocco
Corrente eccessiva a causa di guasto
delle fasi
Controllare il guasto delle fasi della
rete elettrica
Salvamotore impostato
Caduta di pressione
Cicli di commutazione del
relais 1 ovvero 2
2015/02
Tubo flessibile non a tenuta sulla
chiusura a vite verso il pescante (o
la campana ad immersione) ovvero
verso la centralina
Cicli di commutazione massimi
superati
Tempo massimo di
funzionamento 1 ovvero 2
La pompa funziona troppo a lungo per
ogni pompaggio
Numero max di accensioni 1
ovvero 2
La pompa funziona troppo spesso in
breve tempo
155 / 240
Sostituire la pompa in caso di guasto
Verificare la tenuta stagna del sistema
del sensore di pressione
Può essere confermato Informare
il servizio clienti L‘errore comparirà
nuovamente dopo 1.000 cicli di
commutazione ulteriori
Controllare il dimensionamento
dell‘impianto ed eventualmente
informare il servizio clienti
Controllare il dimensionamento
dell‘impianto ed eventualmente
informare il servizio clienti
Dati tecnici
8
Dati tecnici
8.1
Pompe
Pompa
Peso [kg]*
Potenza P1 [kW]
Potenza P2 [kW]
Numero di giri [giri/minuto]
Tensione di funzionamento [V] 50
Hz
Corrente nominale [A]
Portata max [m³/h]
Prevalenza max [m]
Temperatura materiale trasportato
max [°C]
1400
1500
1,6
1,4
24
1,1
3,2
4,5
25
1,1
2,7
26
3,7
2.845
2.845
7,3
2,7
5,4
7,7
7
8
12
17
230
38
400
400
40
45
40
400
53
IP68
I
Salvamotore
esterna
Tipo di connettore
Tipo di funzionamento
4500
1.415
Classe di protezione
Protezione necessaria
24
3000
1.370
Tipo di protezione
Cavo di collegamento
SPF
Connessione diretta
10 m, 7 x 1,5 mm²
Vedere le istruzioni per l’uso della centralina
S3/S1
* Esecuzione per il funzionamento S1. Peso superiore di 2 kg per il funzionamento S3.
156 / 240
2015/02
Dati tecnici
8.2
Portata
Portata Q [m³/h] con prevalenza H [m]
Pompa
SPF..
2
4
1400 *
36
26,1 12,5
Q [m³/h]
1500 *
37,5 28,2 15,8
Q [m³/h]
3000 *
46
4500 *
6
8
10
40,1 34,4 28,3 22
12
14
15,6 8,8
53,4 48,4 42,9 37,5 30
16
1,8
18
H [m]
Q [m³/h]
22,5 13,1 Q [m³/h]
* S3/S1 ** S3
H [m]
20
18
16
14
12
10
8
6
4
2
0
SPF 1500
SPF 4500
SPF 3000
0
10
20
30
40
50
60 Q [m3/h]
Ill. [19] 8.3
Momenti di serraggio dei collegamenti a vite
Pompa sulla flangia della pompa
7Nm
Dispositivo anti-riflusso (plastica) e viti sulle sonde
2,5 N m
Pescante
8.4
5Nm
Misure, volumi
Altezza: vedere le istruzioni del pozzetto tecnico LW 1000 (codice articolo 010-701).
Il diametro esterno è pari a circa 1.200 mm
Volume utile di circa 160 litri
Volume del contenitore di circa 335 litri
2015/02
157 / 240
Dichiarazione di conformità
9
Dichiarazione di conformità
158 / 240
2015/02
Dichiarazione di conformità
2015/02
159 / 240
Leader del drenaggio
6 4
Edilizia residenziale privata
senza collegamento alla fogna
1 2 3 4
5
1 2 3 4
Edilizia pubblica
per es. Ospedale
5
Edilizia pubblica
per es. Impianti ricreativi
1 2 3 4
5
Edilizia commerciale
per es. Albergo
4 5
Edilizia commerciale
per es. Capannoni
2 3 5
Edilizia commerciale
per es. Stazioni di servizio
1 2 3 4
Edilizia residenziale privata
Case mono e plurifamiliari
1 Valvole antiriflusso
2 Sollevamenti antiriflusso
3 Impianti di sollevamento
4 Scarichi / canalette
5 Separatori
6 Piccoli depuratori
HANDLEIDING VOOR INBOUW, BEDRIJF EN ONDERHOUD
KESSEL Pompstation Aqualift F XL
- Droge opstelling
Productvoordelen
Installatie Inbedrijfstelling Instructie
van de installatie werd uitgevoerd door uw gespecialiseerd
bedrijf:
Naam/handtekeningDatumPlaats
Stand 2015/02
Stempel gespecialiseerd bedrijf
Zaaknr. 010-695
Technische wijzigingen voorbehouden
Voor fecaliënvrij en
fecaliënhoudend
afvalwater
Droge opstelling = schone
werkruimte
Bestendig tegen 3 m
grondwater
Schakelapparaat met
zelfdiagnosefunctie

Inhoudsopgave
1Introductie
164
1.1
Productomschrijving, algemeen......................................................................................... 164
1.2
Algemene instructies bij deze gebruiks- en onderhoudshandleiding................................. 165
1.3Functieprincipe.................................................................................................................. 166
1.4Typeplaatje........................................................................................................................ 167
1.5Leveringsprogramma......................................................................................................... 168
1.6
Indicaties, besturingstoetsen en hun functies.................................................................... 168
1.7
Modules en functiekenmerken........................................................................................... 169
170
2Veiligheid
2.1
Voorgeschreven gebruik.................................................................................................... 170
2.2
Personeelskeuze en -kwalificatie....................................................................................... 170
2.3
Organisatorische veiligheidsmaatregelen.......................................................................... 170
2.4
Gevaren die uitgaan van het product................................................................................. 171
2.4.1 Gevaar door speciale plaats / omgevingsfactoren............................................................. 171
2.4.2 Gevaar door stroomstoot bij afgeschroefde stekker.......................................................... 171
2.4.3 Gevaar door voor de gezondheid gevaarlijke atmosfeer................................................... 171
2.4.4 Gevaar voor de gezondheid.............................................................................................. 171
2.4.5 Gevaar door lawaai............................................................................................................ 171
2.4.6Explosiegevaar.................................................................................................................. 171
2.4.7 Gevaar door hitte............................................................................................................... 172
2.4.8 Gevaar door onverwacht opstarten van een pomp............................................................ 172
2.4.9 Gevaar voor verdrinking in de schacht van de installatie.................................................. 172
3Montage
173
3.1
Algemene zaken m.b.t. de montage.................................................................................. 173
3.2
Toevoer monteren.............................................................................................................. 173
3.3
Aansluiting voor handmembraanpomp voorzien............................................................... 173
162 / 240
2015/02

3.4
Afvalwaterpomp(en) monteren.......................................................................................... 174
3.5
Kleine compressor monteren voor inbrenging van luchtbellen.......................................... 175
3.6
Schakelapparaat monteren................................................................................................ 175
3.7
KESSEL tele-control-modem monteren............................................................................. 175
3.8
Elektrische aansluitingen en aansluitingen niveausensoren maken.................................. 176
3.9
Eerste inbedrijfstelling........................................................................................................ 178
3.9.1 Schakelapparaat initialiseren............................................................................................. 178
3.9.2 KESSEL tele-control-modem voor storingsmeldingen instellen......................................... 179
3.9.3 Aanpassing van de schakelpunten voor inbrenging van luchtbellen................................. 179
3.9.4Functiecontrole.................................................................................................................. 179
180
4Bedrijf
4.1
Functies van de schakelaars............................................................................................. 180
4.2Inschakelen........................................................................................................................ 180
4.3
Display, indicaties / informatie............................................................................................ 180
4.4
Functies van alle toetsen / indicaties................................................................................. 181
4.5
Alarm resetten................................................................................................................... 181
4.6Uitschakelen...................................................................................................................... 181
5
Instellingen bedieningsmenu
182
5.1Bedieningsmenu.............................................................................................................. 183
6Onderhoud
6.1
189
Algemene instructies voor het onderhoud......................................................................... 189
6.2Onderhoudsinterval........................................................................................................... 189
6.3Onderhoudsvoorbereiding................................................................................................. 190
6.3.1Onderhoudskaart............................................................................................................... 191
7
Opsporen van storingen
194
8
Technische gegevens
196
8.1Pompen............................................................................................................................. 196
8.2Transportstroom................................................................................................................. 197
8.3
Aanhaalmomenten schroefverbindingen........................................................................... 197
8.4
Afmetingen, volume........................................................................................................... 197
198
9Conformiteitsverklaring
2015/02
163 / 240
Introductie
1
Introductie
Geachte klant
Geachte klant,
Wij zijn blij dat u gekozen hebt voor één van onze producten. Dit zal zeker in volle omvang voldoen aan uw eisen.
Wij wensen u een vlotte en succesvolle inbouw toe.
Wij zijn natuurlijk ook aangewezen op uw medewerking om te streven onze kwaliteitsnorm op een zo hoog
mogelijk niveau te houden. Deel ons a.u.b. mogelijkheden ter verbetering van onze producten mee.
Hebt u vragen? Wij zien ernaar uit dat u contact opneemt.
1.1
Productomschrijving, algemeen
De KESSEL pompinstallatie Aqualift F XL (hieronder pompinstallatie genoemd) is beoogd voor het wegpompen
van fecaliënvrij en fecaliënhoudend afvalwater. De afvalwatertank neemt de pomp(en) en de niveausensor(s) op.
De modules zijn afgestemd op het meegeleverde KESSEL-schakelapparaat. De pompinstallatie wordt geleverd
met verschillende afvalwaterpompen.
De schakelsignalen van de sensoren voor het afvalwaterpeil worden in het schakelapparaat elektronisch
verwerkt. Als niveausensor wordt een druksensor gebruikt. Als het vulvolume bereikt is, wordt het afpompen
geactiveerd. Als het peil weer voldoende is gedaald, wordt het afpompen beëindigd.
Als er twee afvalwaterpompen zijn aangesloten, worden deze afhankelijk van het vulvolume en de positionering
van de niveausensoren ofwel afzonderlijk of samen ingeschakeld.
Er kunnen op de afvalwatertank verschillende elementen van het schachtsysteem (010-701) worden gemonteerd.
De afvalwatertank vormt dan samen met het daarop bevestigde functie-element het vloerelement van de
schachtinstallatie. Bij tijdige en vakkundige montage is op het tijdstip van de montage van de pompinstallatie de
schacht volledig gemonteerd.
164 / 240
2015/02
Introductie
1.2
Algemene instructies bij deze gebruiks- en onderhoudshandleiding
Deze gebruiks- en onderhoudshandleiding is uitsluitend in combinatie met de gebruiks- en montagehandleiding
van het schakelapparaat Comfort PLUS - Control Unit (zaaknr. 010-700) compleet.
Gebruikte symbolen en legenda
<1>
[2]
•
3.
–
Cursief
Verwijzing in de tekst naar een legendanummer op een afbeelding
Referentie naar een afbeelding
Functie
Werkstap in genummerde volgorde
Opsomming
Cursieve letterweergave: Referentie naar een paragraaf / punt in het besturingsmenu
LET OP: Waarschuwt tegen gevaar voor personen en materiaal. Het niet-opvolgen van de
met dit symbool aangeduide instructies kan ernstig letsel en materiaalschade tot gevolg
hebben.
Aanwijzing: Technische instructies die met name in acht moeten worden genomen.
Om de leesbaarheid van de omschrijvingen ter bediening van de schakelapparaten niet onnodig te schaden
is ervan afgezien om details te omschrijven die in de omgang met een menubesturing als gangbaar en
vanzelfsprekend kunnen worden beschouwd.
Als bv. een rubriek zoals Onderhoud gekozen moet worden, is in plaats van
Pijltoets beneden gebruiken => Invoer Onderhoud selecteren =>Toets OK gebruiken
het verzoek „Onderhoud selecteren“ te lezen.
2015/02
165 / 240
Introductie
1.3
Functieprincipe
normale inbouwhoogte
Afb. [1] laagste inbouwhoogte
Afb. [2] 166 / 240
2015/02
Introductie
1.4
Typeplaatje
Informatie op het typeplaatje
1
Benaming van het plant
3
Aansluitspanning en aansluitfrequentie
2
5
6
7
8
9
10
2015/02
2
Hydraulische gegevens
3
Algemene gegevens
4
Serienummer
5
Datum van fabricage
6
Revisiestand
10
Aqualift
XY
xxxxx
U = xxxV xxHz I = x,xA P1 = x,xkW
Q = xxm³/h
H = xxm
S3 xx% ED IP xx (3mWS /48h)
Ser.Nr. xxxxxxx
Auftr.Nr.: xxxxxxx
RevStd.: X.X TT.MM.JJ JJ DIN-EN 12050-1
8
7
Normaanduiding
Ordernummer
Afb. [3] 167 / 240
9
www.kessel.com
4
1
Materiaalnummer van het plant
Introductie
1.5
Leveringsprogramma
14
Schakelapparaat met eigen montagehandleiding
16
Bedrijfs- en onderhoudshandleiding
17
Aansluitschema, in het deksel van de omkasting van het
schakelapparaat
18
19
20
21
23
Bevestigingsmateriaal voor schakelapparaat
23
Boorsjabloon voor schakelapparaat
Systeemtank (vloerelement van het schachtsysteem)
Schachtsysteem, bestaande uit verschillende elementen met
eigen montagehandleiding (zonder afbeelding)
20
Pomp(en)
2 stuks bochten van 45° DN 150 met doorvoerrubber
(zonder afb.)
16
Afb. [4] 19
18
17
1.6
Indicaties, besturingstoetsen en hun functies
Zie 4.4 op pagina 21
14
Afb. [5] 168 / 240
2015/02
Introductie
1.7
Modules en functiekenmerken
14
23
14
23
24
24
25
25
20
20
27
27
22
22
26
26
28
28
Afb. [6] Afb. [7] normale inbouwhoogte
lage inbouwhoogte
14
Schakelapparaat
22
Typeplaatje
20
23
24
25
26
27
28
2015/02
Systeemtank (vloerelement van het schachtsysteem)
Afvalwaterpompen
Persleiding
Terugslagklep met afsluiter
Toevoer
Niveausensor (druksensor)
Aansluiting ontluchtingsleiding
169 / 240
Veiligheid
2
Veiligheid
2.1
Voorgeschreven gebruik
De pompinstallatie dient als afwateringsinstallatie voor fecaliënhoudend en fecaliënvrij, huishoudelijk en
bedrijfsmatig afvalwater, gemonteerd in een beloopbaar KESSEL-schachtsysteem, met verschillende hoogte en
vormgeving.
2.2
Personeelskeuze en -kwalificatie
Personen die de pompinstallatie monteren, moeten
–– minstens 18 jaar oud zijn.
–– voldoende geschoold en gekwalificeerd zijn voor de betreffende activiteiten.
–– de desbetreffende technische regels en veiligheidsvoorschriften kennen en opvolgen.
Gekwalificeerd personeel bestaat uit personen die door hun opleiding en ervaring en hun kennis van
desbetreffende bepalingen, geldige normen en ongevalpreventievoorschriften de telkens vereiste activiteiten
uitvoeren en daarbij mogelijke gevaren kunnen herkennen en voorkomen.
Werkzaamheden aan elektrische componenten mogen uitsluitend door daarvoor opgeleid geschoold personeel
en met inachtneming van alle geldende regelingen van de ongevalpreventievoorschriften (OPV-en) worden
verricht.
2.3
Organisatorische veiligheidsmaatregelen
De gebruiks- en onderhoudshandleiding moet altijd beschikbaar worden gehouden.
170 / 240
2015/02
Veiligheid
2.4
Gevaren die uitgaan van het product
2.4.1 Gevaar door speciale plaats / omgevingsfactoren
Gevaar door giftige en voor de gezondheid gevaarlijke dampen, gassen en stoffen (b v. bacteriën, virussen).
Als de pompinstallatie zich in een schacht bevindt, moeten vereiste werkzaamheden daarin uitsluitend door
geschoold personeel (zie 2.2) worden uitgevoerd.
2.4.2 Gevaar door stroomstoot bij afgeschroefde stekker
Bij het schakelapparaat (uitsluitend 230V uitvoering) bestaat het gevaar van een elektrische stroomstoot,
als één van de stekkers voor de stroomvoorziening van de pompen gedemonteerd is. De dopmoer van de
elektrische stekker moet zo vast gemonteerd zijn dat zij niet zonder gereedschap (bv. door kinderen) kan
worden losgedraaid (zie 3.8).
2.4.3 Gevaar door voor de gezondheid gevaarlijke atmosfeer
Bij werkzaamheden in de schacht bestaat het gevaar dat de atmosfeer in het schachtsysteem gevaarlijk is voor
de gezondheid. Op voldoende ventilatie letten en evtl. veiligheidsvoorzieningen zoals bv. gebruik maken van
multigas-waarschuwingsapparaat.
2.4.4 Gevaar voor de gezondheid
De pompinstallatie transporteert fecaliënhoudend afvalwater, dat voor de gezondheid gevaarlijke stoffen
kan bevatten. Waarborgen dat er geen direct contact tussen het afvalwater of daardoor vervuilde
installatieonderdelen en de ogen, mond of huid optreedt. Bij direct contact het betrokken lichaamspunt
onmiddellijk grondig reinigen en zo nodig desinfecteren. Persoonlijke veiligheidsvoorziening dragen.
2.4.5 Gevaar door lawaai
Het gebruik van de pompinstallatie kan een hoog geluidsniveau veroorzaken. Draag indien nodig passende
veiligheidsvoorzieningen en zorg voor geluiddempende maatregelen.
2.4.6 Explosiegevaar
De binnenkant van de afvalwatertank kan gelden als ruimte met explosiegevaar (EN 12050). Door biologische
rottingsprocessen kunnen brandbare gassen (zwavelwaterstof, methaangas) ontstaan. Vóór het openen van de
afvalwatertank (bv. demontage pomp) voor voldoende luchtverversing in de schacht zorgen.
Als de afvalwatertank open is, waarborgen dat er geen ontstekingsbronnen in de directe omgeving zijn (bv.
gebruik van elektrische apparaten zonder ingekapselde motor, metaalbewerking, roken enz.).
2015/02
171 / 240
Veiligheid
2.4.7 Gevaar door hitte
Gevaar voor verbranding bij het aanraken van hete oppervlakken. Als afvalwaterpompen vrij lang lopen,
ontwikkelen zij een hoge temperatuur aan het oppervlak van de behuizing. Draag beschermende uitrusting
(handschoenen) of laat de pompen navenant afkoelen.
2.4.8 Gevaar door onverwacht opstarten van een pomp
Als de pompinstallatie niet losgekoppeld is van het net, kan iedere pomp plotseling opstarten. Pompen
uitsluitend door geschoold personeel demonteren en wanneer de installatie vrijgeschakeld en tegen onbedoeld
herstarten beveiligd is.
2.4.9 Gevaar voor verdrinking in de schacht van de installatie
Een installatieschacht kan bv. bij overstromingen binnen korte tijd vol water lopen. Als het risico bestaat dat
water binnendringt, mag de schacht niet worden binnengegaan voordat men er zonder gevaar kan verblijven.
Openen van de pomp niet toegestaan;
pomp is IP68 dicht. Geen toelating van vocht bij vakkundige montage. FI voorzien
172 / 240
2015/02
Montage
3
Montage
Gevaar door giftige en voor de gezondheid gevaarlijke dampen, gassen en stoffen (b v. bacteriën, virussen).
Alle aan de pompinstallatie vereiste werkzaamheden uitsluitend door geschoold personeel (zie 2.2) laten
uitvoeren.
3.1
Algemene zaken m.b.t. de montage
De pompinstallatie wordt conform de op een bouwplaats gebruikelijke bouwfasen op verschillende tijdstippen
gemonteerd en in bedrijf genomen.
1. Inbouw van de systeemtank (vloerelement van het schachtsysteem) in de schacht.
Aansluiting van watertoe- en -afvoer en van de persleiding waarlangs het afvalwater wordt weggepompt.
Montage van het schachtsysteem, gebaseerd op de systeemtank. Niet omschreven in deze handleiding.
2. Montage van de los geleverde modules, te beginnen met hoofdstuk 3.4.
3. Montage schakelapparaat en aansluiting van de elektrische componenten (hoofdstuk 3.8).
4. Eerste inbedrijfstelling (hoofdstuk 3.9).
Waarborgen dat de bij 1. genoemde werkzaamheden volledig afgesloten zijn.
3.2
Toevoer monteren
• Beide bochten van 45° <1> samen met het doorvoerrubber
vakkundig monteren
3.3
Aansluiting voor handmembraanpomp voorzien
Zoals op afb. [18] op pagina 190 weergegeven boven het
terugstuwniveau een aansluiting <2> (revisiestuk) voor een
handmembraanpomp in de ontluchtingsleiding voorzien.
2015/02
173 / 240
Afb. [8] Montage
3.4
Afvalwaterpomp(en) monteren
• Afvalwaterpomp(en) met de schroeven <1> bevestigen (aanhaalmoment 7Nm).
1
1
Afb. [9] Afb. [10] normale inbouwhoogte
lage inbouwhoogte
174 / 240
2015/02
Montage
3.5
Kleine compressor monteren voor inbrenging van luchtbellen
(Optie)
Luchtslang aansluiten conform de meegeleverde montagehandleiding.
3.6
Schakelapparaat monteren
Schakelapparaat conform de bij het schakelapparaat bijgevoegde handleiding monteren.
3.7
KESSEL tele-control-modem monteren
(Optie) Kessel tele-control-modem conform de bij het schakelapparaat bijgevoegde handleiding monteren.
2015/02
175 / 240
Montage
3.8
Elektrische aansluitingen en aansluitingen niveausensoren maken
Waarborgen dat het schakelapparaat tijdens de montagewerkzaamheden losgekoppeld is van de
spanningsvoeding.
Gevaar van stroomstoot bij onbedoelde aanraking van losgeschroefde steekverbindingen (bv. door
kinderen). Waarborgen dat alle elektrische aansluitverbindingen - voorzover aanwezig - worden
bevestigd zoals op de afbeelding (aanhaalmoment).
Afb. [11]
176 / 240
2015/02
Montage
• Pomp(en) op de steekverbindingen <b en c> aansluiten.
b
c
e
d
Afb. [12] • Aansluitingen van de niveausensoren als volgt maken.
Alarmsensor
Druksensor
Aansluiting (afb. [12])
Kleurcodering kabel
e
-
d
rood
• Alle kabels van de elektrische componenten en de kabel van de druksensor veilig aanleggen. Advies:
Bevestiging aan de op de wand van de schacht monteerbare kabelbuisklemmen.
De persslang (aansluiting e) van de dompelbuis (druksensor) zodanig aanleggen dat hij continu omhoog
loopt. Hierdoor wordt eventuele vorming van condenswater voorkomen, wat tot storingen zou kunnen leiden.
2015/02
177 / 240
Montage
3.9
Eerste inbedrijfstelling
Er moet absoluut worden voorkomen dat de afvalwaterpomp(en) drooglopen; zij kunnen dan beschadigd
raken. Nooit afvalwaterpompen inschakelen, als de afvalwatertank niet minimaal tot en met niveaustand
minimum gevuld is.
3.9.1 Schakelapparaat initialiseren
• Schakelapparaat voorzien van netspanning, de initialisatie begint. Terwijl ca. 4 seconden de LED‘s branden,
worden de elektrische componenten gecontroleerd, de batterij voor het melden van netuitval geactiveerd en
menu 3.10. taal aangegeven. Vervolgens kan de initialisatie worden uitgevoerd.
Bij de initialisatie wordt de volgende invoer verwacht:
Taal
–– Datum / tijd
–– Producttype
–– Installatievariant
–– Vermogensgrootte
–– Onderhoudsinterval
Taal
• OK gebruiken
• Landstaal met de pijltoetsen selecteren en met OK bevestigen, het menu Datum/tijd wordt aangegeven
Datum / tijd
• Het telkens knipperende cijfer in datum en tijd instellen en met OK bevestigen. Na de laatste invoer wordt het
menu Producttype aangegeven.
Producttype
• Pompinstallatie Aqualift Mono of Duo selecteren en bevestigen met OK, het menu Installatievariant wordt
aangegeven.
Installatievariant
• Passende installatievariant selecteren en bevestigen met OK, het menu Vermogensgrootte wordt
aangegeven.
Vermogensgrootte
• Passende vermogensgrootte selecteren en bevestigen met OK, het menu Onderhoudsdatum wordt
aangegeven.
Onderhoudsinterval
• Gewenste onderhoudstermijn selecteren of navenant invoeren en met OK bevestigen, het menu Systeeminfo
wordt aangegeven, de initialisatie is afgesloten.
178 / 240
2015/02
Montage
3.9.2 KESSEL tele-control-modem voor storingsmeldingen instellen
(Optie) In menuonderdeel 3.9 kan worden ingesteld welke gebeurtenissen van de terugstuwpompinstallatie naar
welke SMS-ontvanger worden gestuurd.
3.9.3 Aanpassing van de schakelpunten voor inbrenging van luchtbellen
(Optie) Voor zover een kleine compressor voor de inbrenging van luchtbellen is geïnstalleerd, is de volgende
aanpassing verricht:
•
•
•
•
•
•
Waarborgen dat de systeemtank gevuld is.
Kleine compressor uitschakelen.
Terugstuwpompinstallatie inschakelen.
In het bedieningsmenu 1.5.4 de aangegeven meetwaarde (mm) noteren.
Kleine compressor inschakelen.
Offsetwaarde vaststellen, daartoe de in bedieningsmenu 1.5.4 aangegeven meetwaarde aftrekken van de van
te voren genoteerde meetwaarde.
• Offsetwaarde in bedieningsmenu 3.1.14 Inbrenging van luchtbellen offset invoeren, de schakelpunten zijn
aangepast.
3.9.4 Functiecontrole
De functiecontrole volgens de op de onderhoudskaart (zie 6.3.1) vermelde activiteiten uitvoeren.
2015/02
179 / 240
Bedrijf
4
Bedrijf
Alle terugslagkleppen met afsluiter moeten tijdens het gebruik van de pompinstallatie geopend en vergrendeld
zijn (naar boven uitgetrokken, zie <25> op pagina 169).
4.1
Functies van de schakelaars
4.2
Inschakelen
28
29
30
32
• Hoofdschakelaar <28> naar positie I (ON) draaien, na succesvolle
systeemtest verschijnt op het display <29> de installatieinformatie en brandt de groene LED <30>, het schakelapparaat is
bedrijfsklaar.
31
Afb. [13] 4.3
Display, indicaties / informatie
Op het display worden verschillende bedrijfstoestanden met tekstindicaties weergegeven. Via menu 1 (zie
bedieningshandleiding van het schakelapparaat) kunnen alle systeemparameters worden opgeroepen.
Het vloeistofpeil in de afvalwatertank wordt op het display (vulpeil) in mm aangegeven.
(0 betekent dat het beneden de meetbare hoogte is)
180 / 240
2015/02
Bedrijf
4.4
Functies van alle toetsen / indicaties
19
LED
Pomp 1
21
LED
Alarm
20*
22
66
67
68
69
71
72
73*
LED
LED
Pijl boven
Pijl beneden
Pomp 2
Bedrijfsklaar
Bladeren in het menu
Bladeren in het menu
ESC
Wissen van een invoer, terug
Pomp / test
Pomp 1 AAN / UIT
Alarm
OK
Pomp / test
Bevestiging van het akoestische alarm
Bevestigen van een invoer, volgende
niveau
Pomp 2 AAN / UIT
Afb. [14] * Pompinstallatie uitvoering DUO (2 pompen)
4.5
Alarm resetten
Als een toestand is ontstaan die een alarm activeerde (bv. storing bij een pomp, niveaustand van het afvalwater
bereikte alarmniveau) brandt de alarm-LED <21>. Op het display wordt evtl. een storingsmelding in duidelijke
bewoordingen afgegeven. Na het opheffen van de oorzaak voor het alarm kan het alarm worden gereset door het
indrukken van toets <69>.
–– Alarmtoon uitschakelen: Toets <69> 1x indrukken.
–– Alarm resetten: Toets <69> 1x indrukken en >5 seconden ingedrukt houden.
4.6
Uitschakelen
• Hoofdschakelaar naar positie O (OFF) draaien, er klinkt een alarmsignaal en de alarm-LED <21> knippert.
• Alarmsignaal uitschakelen, daartoe toets <69> net zolang indrukken totdat op het display het alarmsymbool
doorgestreept wordt weergegeven.
• Schakelapparaat uitschakelen, daartoe toets <69> net zolang ingedrukt houden totdat het display en de
alarm-LED uitgeschakeld worden.
De pompinstallatie is uitgeschakeld.
2015/02
181 / 240
Instellingen bedieningsmenu
5
Instellingen bedieningsmenu
Algemeen
De menubesturing van het schakelapparaat beschikt over een
bedienings- en een stand-bymodus.
In de bedieningsmodus kunnen de systeeminstellingen via het display
worden aangegeven en ingesteld.
Als gedurende een periode van ca. 60 seconden geen toetsen worden
gebruikt, wordt automatisch de stand-bymodus geactiveerd; de
achtergrondverlichting van het display is dan uitgeschakeld
66
Pijl boven
68
ESC
67
72
Navigatietoetsen voor het menu
Pijl beneden
OK
Bladeren in het menu
66
68
72
67
Bladeren in het menu
Wissen van een invoer, terug
Bevestigen van een invoer, volgende niveau
Afb. [15] Bedieningsmodus activeren
• Toets OK <72> op het besturingspaneel gebruiken,
achtergrondverlichting van het display brandt en het
startbeeldscherm (systeeminfo) wordt aangegeven.
- bzw. Schwimmeranzeige
Menu openen
• OK <72> gebruiken, niveau 1 van het menu
(zie 7.1, Menustructuur) wordt geactiveerd.
72
Afb. [16] 182 / 240
2015/02
Instellingen bedieningsmenu
Navigeren in het menu
Actie
Bediening
Menuonderdeel voor bewerking
activeren
OK, als een subonderdeel van het menu aanwezig is, wordt dit
geïnverteerd weergegeven.
Menuonderdeel selecteren
Instelwaarde aangeven, bewerken
Menu verlaten
Pijl boven / pijl beneden, geselecteerde menuonderdeel wordt
geïnverteerd weergegeven
OK, waarde wordt aangegeven c.q. voor instelling geïnverteerd
weergegeven
ESC, actueel niveau verlaten, schakelt een niveau hoger
Menustructuur
33
Het nummer <33> van het desbetreffende menuniveau wordt in
cijfervorm op de bovenste displayregel weergegeven.
Datum:
Uhrzeit:
Rückstau:
Klappe:
Als het schakelapparaat zich in de modus handbediening
bevindt (menu 2.1.1), wordt bv. ook niet afgepompt volgens
niveauregeling.
xx.xx.xx
xx:xx:xx
nein
offen
Fehler/Ereignisse (Statuszeile)
Afb. [17] 5.1
Bedieningsmenu
Nummer
Menu
0
Systeeminfo
1
Informatie
1.1
Bedrijfsuren
1.1.1
Totale looptijd
Eenheid
Waardebereik
h
0...999999
1.1.2
Looptijd pomp 1
h
0...999999
1.1.3
Looptijd pomp 2
h
0...999999
1.1.4
Starts pomp 1
-
0…18000000
1.1.5
Starts pomp 2
-
0…18000000
1.1.6
Netuitval
h
0...999999
1.1.7
Energieverbruik
kWh
0...999999
1.2
Logboek
2015/02
183 / 240
Instellingen bedieningsmenu
Nummer
Menu
Eenheid
Laatst opgetreden E&F
tot en met 256 E&Fs
Waardebereik
Daarvoor opgetreden E&F
Daarvoor opgetreden E&F
1.3
Besturingstype
1.4
Onderhoudsdatum
1.4.1
Laatste onderhoud
DD.MM.JJJJ
1.4.2
Volgende onderhoud
DD.MM.JJJJ
1.5
act. meetwaarden
1.5.1
Net-spanning
T
1.5.2
Net-stroom
A
1.5.3
Batterij-spanning
T
1.5.4
Vulpeil
mm
0…999
1.6
Parameters
1.6.1
Sensorhoogte
cm
0...999
1.6.2
Inschakelblokkering
s
0...999
1.6.3
Meetbereik
cm
0...999
1.6.4
AAN1-niveau
mm
0…999
1.6.5
AAN2-niveau
mm
0...999
1.6.6
UIT1-niveau
mm
0...999
1.6.7
Alarm-niveau
mm
0...999
1.6.8
Aan-vertraging
s
0…999
1.6.9
Nalooptijd
s
0...999
1.6.11
Pompmodus
Keuze: Continue belasting-piekbelasting of
wisseling van belasting
1.6.10
Grenslooptijd
min
0...999
1.6.11
Limiet looptermijn
-
0...999999
1.6.12
min. stroom
A
0...10,0
1.6.13
max. stroom
1.6.14
LEP-offset
1.6.15
auto SDS
1.6.16
S1/S3 Bedrijf
2
Onderhoud
2.1
Automatische modus
2.1.1
Automatische modus
2.2
SDS
2.3
Onderhoudsdatum
2.3.1
Volgende onderhoud
mm:hh - dd.mm.yy
2.3.2
Laatste onderhoud
mm:hh - dd.mm.yy
2.4
Onderhoud uitgevoerd
2.5
Onderhoudsinterval
2.5.1
3 maanden
2.5.2
6 maanden
2.5.3
12 maanden
Dagen
S1 Bedrijf / S3 Bedrijf
Aan Uit
184 / 240
2015/02
Instellingen bedieningsmenu
Nummer
Menu
2.5.4
Handmatig onderhoud
2.5.5
Geen onderhoudsinterval
2.6
Kalibratie
3
Instellingen
3.1
Parameters
Eenheid
Waardebereik
3.1.1
Sensorhoogte
cm
0...999
3.1.2
Inschakelblokkering
s
0...999
3.1.3
Meetbereik
cm
0...999
3.1.4
AAN1-niveau
mm
0…999
3.1.5
AAN2-niveau
mm
0...999
3.1.6
UIT1-niveau
mm
0...999
3.1.7
Alarm-niveau
mm
0...999
3.1.8
Aan-vertraging
s
0…999
3.1.9
Nalooptijd
s
0...999
3.1.10
Grenslooptijd
min
0...999
3.1.11
Limiet looptermijn
-
0...999999
A
0...10,0
0...99
3.1.12
min. stroom
3.1.13
max. stroom
3.1.14
LEP-offset
mm
3.1.15
auto SDS
Dagen
3.1.16
S1/S3 Bedrijf
3.2
Profielgeheugen
3.2.1
In te voeren naam
3.2.2
In te voeren naam
3.2.3
In te voeren naam
3.3
Datum/tijd
3.4
Installatie-config
3.5
Producttype
3.5.1
Opvoerinstallatie Aqualift Mono
3.5.2
Opvoerinstallatie Aqualift Duo
3.5.3
Pompinstallatie Aqualift Mono
3.5.4
Pompinstallatie Aqualift Duo
3.6
Installatievariant
3.6.1
F
3.6.2
F XL 200 l
3.6.3
F XL 300 l
3.6.4
F XL 450 l
3.6.5
Speciale opvoerinstallatie
3.6.6
F Duo
3.6.7
F XL 200 l Duo
3.6.8
F XL 300 l Duo
3.6.9
F XL 450 l Duo
3.6.10
Speciale opvoerinstallatie
2015/02
S1 Bedrijf / S3 Bedrijf
DD.MM.JJJJ / hh:mm:ss
185 / 240
Instellingen bedieningsmenu
Nummer
Menu
Eenheid
3.6.11
F ATEX Mono
3.6.12
F Mono
3.6.13
F AP 501 Mono LW 800
3.6.14
F AP 501 Mono LW 1000
3.6.15
Speciale pompinstallatie zonder
ATEX
3.6.16
Speciale pompinstallatie ATEX
3.6.17
F ATEX Duo
3.6.18
F Duo
3.6.19
F AP 501 Duo LW 800
3.6.20
F AP 501 Duo LW 1000
3.6.21
Speciale pompinstallatie zonder
ATEX
3.6.22
Speciale pompinstallatie ATEX
3.7
Vermogensgrootte
3.7.1
SPF 1500
3.7.2
SPF 3000
3.7.3
SPF 4500
3.7.4
SPF 5500
3.7.5
TPF 1,9 kW
3.7.6
TPF 1,3 kW
3.7.7
Ama Porter
3.7.8
Speciale pomp
3.7.9
400 V / 2,5 - 4 A
3.7.10
400 V / 4 - 6,3 A
3.7.11
400 V / 6,3 - 10 A
3.7.12
400 V / 9 - 12 A
3.8
Sensor-config.
3.8.1
Druksensor
3.8.2
Druksensor+alarm
3.8.3
Druksensor+comp
3.8.4
Druk+ comp+alarm
3.8.5
Vlotter
3.8.6
Niveausonde
3.8.7
Niveausonde + alarm
3.8.8
Membraanschakelaar
3.9
Communicatie
3.9.1
Stationsnaam
3.9.2
Eigen nr.
3.9.3
Modemtype
3.9.4
PIN
3.9.5
SMS-centrale
3.9.6
SMS-doel 1
3.9.7
SMS-doel 2
186 / 240
Waardebereik
2015/02
Instellingen bedieningsmenu
Nummer
Menu
3.9.8
SMS-doel 3
3.9.9
Status
3.10
Taal
3.10.10
Deutsch
3.10.11
English
Eenheid
Waardebereik
s
0 - 99
Francais
3.10.13
Italiano
3.10.14
Polski
3.10.15
Nederlands
3.11
Resetten
3.12
Expertmodus
3.12.1
Inschakelvertraging net
3.12.2
Batterijcontrole
aan/uit
3.12.3
Drempel batterij
T
3.12.4
Alternerend bedrijf
aan/uit
3.12.5
Max. schakelcycli
#
0 - 18,0
1000 - 999.999
Na reset of bij eerste initialisatie worden na het inschakelen de volgende instellingen opgevraagd:
3.10
Taal
3.10.1
Deutsch
3.10.2
English
3.10.3
Francais
3.10.4
Italiano
3.10.5
Polski
3.10.6
Nederlands
3.3
Datum/tijd
3.5
Producttype
3.5.1
Opvoerinstallatie Aqualift Mono
3.5.2
Opvoerinstallatie Aqualift Duo
3.5.3
Pompinstallatie Aqualift Mono
3.5.4
Pompinstallatie Aqualift Duo
3.6
Installatievariant
3.6.1
F
3.6.2
F XL 200 l
3.6.3
F XL 300 l
3.6.4
F XL 450 l
3.6.5
Speciale opvoerinstallatie
3.6.6
F Duo
3.6.7
F XL 200 l Duo
3.6.8
F XL 300 l Duo
3.6.9
F XL 450 l Duo
3.6.10
Speciale opvoerinstallatie
3.6.11
F ATEX Mono
3.6.12
F Mono
2015/02
187 / 240
Instellingen bedieningsmenu
Nummer
Menu
Eenheid
3.6.13
F AP 501 Mono LW 800
3.6.14
F AP 501 Mono LW 1000
3.6.15
Speciale pompinstallatie zonder
ATEX
3.6.16
Speciale pompinstallatie ATEX
3.6.17
F ATEX Duo
3.6.18
F Duo
3.6.19
F AP 501 Duo LW 800
3.6.20
F AP 501 Duo LW 1000
3.6.21
Speciale pompinstallatie zonder
ATEX
3.6.22
Speciale pompinstallatie ATEX
3.7
Vermogensgrootte
3.7.1
SPF 1500
3.7.2
SPF 3000
3.7.3
SPF 4500
3.7.4
SPF 5500
3.7.5
TPF 1,9 kW
3.7.6
TPF 1,3 kW
3.7.7
Ama Porter
3.7.8
Speciale pomp
3.7.9
400 V / 2,5 - 4 A
3.7.10
400 V / 4 - 6,3 A
3.7.11
400 V / 6,3 - 10 A
3.7.12
400 V / 9 - 12 A
3.1.16
S1/S3 Bedrijf
2.5
Onderhoudsinterval
3.1.16
S1/S3 Bedrijf
2.5.1
3 maanden
2.5.2
6 maanden
2.5.3
12 maanden
2.5.4
Handmatig onderhoud
2.5.5
Geen onderhoudsinterval
Waardebereik
S1 Bedrijf / S3 Bedrijf
188 / 240
2015/02
Onderhoud
6
Onderhoud
Voordat afdekkingen van behuizingen, stekkers en kabels worden geopend (ook bij de potentiaalvrije
contacten), moeten deze vrij van spanning worden gemaakt. Werkzaamheden aan elektrische componenten
mogen uitsluitend door geschoold personeel (zie 2.2) worden uitgevoerd.
6.1
Algemene instructies voor het onderhoud
Bij onderhoudswerkzaamheden mag noch op elektrische componenten, noch op kabelverbindingen
of kabels worden geklommen.
Gevaar door giftige en voor de gezondheid gevaarlijke dampen, gassen en stoffen (b v. bacteriën, virussen).
Als de pompinstallatie zich in een schacht bevindt, moeten vereiste werkzaamheden daarin uitsluitend door
geschoold personeel (zie 2.2) worden uitgevoerd.
Gevaar voor verdrinking in de schacht van de installatie. Een installatieschacht kan bv. bij overstromingen
binnen korte tijd vol water lopen. Als het risico bestaat dat water binnendringt, mag de schacht niet worden
binnengegaan voordat men er zonder gevaar kan verblijven.
Na alle onderhoudswerkzaamheden aan de pompinstallatie functiecontrole uitvoeren (zie 6.3.1).
6.2
Onderhoudsinterval
De onderhoudsdatum kan in het menu 2. Onderhoud / 2.4 Onderhoudsdatum worden ingesteld (zie handleiding
schakelapparaat). Als de onderhoudsdatum bereikt is, wordt dat op het display met een melding in duidelijke
bewoordingen aangegeven.
Onderhoud van opvoeren
De pompinstallatie moet regelmatig worden onderhouden door een hiervoor deskundige persoon. De
tijdsafstanden mogen niet groter zijn dan:
- 1/4 jaar bij installaties in industriële bedrijven
- 1/2 jaar bij j installaties in appartementsgebouwen
- 1 jaar bij installaties in eengezinswoningen
Er dient per onderhoud een onderhoudsprotocol te worden opgesteld met opgave van alle uitgevoerde
werkzaamheden en de wezenlijke gegevens.
Voor zover defecten worden vastgesteld die niet verholpen kunnen worden, moeten deze onmiddellijk door de
deskundige die het onderhoud verricht, schriftelijk met bevestiging aan de exploitant van de installatie worden
gemeld.
2015/02
189 / 240
Onderhoud
6.3
Onderhoudsvoorbereiding
Als de systeemtank geleegd moet
worden, kan dat gebeuren via een in de
ontluchtingsleiding geïnstalleerd revisiestuk (2).
Hiervoor een geschikte pomp met slang (1)
gebruiken.
Afb. [18] 190 / 240
2015/02
Onderhoud
6.3.1 Onderhoudskaart
Inspectie / onderhoud pompinstallatie Aqualift F XL
Objectbenaming
Object
Straat
Postcode/plaats
Contact
Installatievariant
Serienummer
Mono
Type pomp
1
Duo
2
Veiligheidsinstructies voor het onderhoud
Vóór opening van de afvalwatertank voor voldoende ontluchting van de ruimte zorgen. Ontstekingsbronnen uit
de buurt houden en niet roken. Waarborgen dat de pomp(en) de temperatuur van de omgeving heeft (hebben)
aangenomen.
Toe- en afvoerleidingen moeten geleegd en drukloos zijn vóór aanvang van het werk. De niveaustand in de
afvalwatertank moet zich beneden het bevestigingsniveau (pompflens) van de afvalwaterpompen bevinden.
Agressieve reinigingsmiddelen kunnen afdichtingen beschadigen. Reinigingswerkzaamheden met warm water
en borstel uitvoeren.
Onderhoudsprestaties conform EN 12056-4 en DIN 1986 deel 3
L-nr.
Controle
Uitvoeringsnotitie
ja
Visuele controle
1
2
3
2015/02
Inbouw van installatie komt overeen met bovengenoemde norm en fabrieksopgaven
(voor zover zichtbaar)
Storingsmelding aanwezig?
Functie gegeven
191 / 240
nee
Onderhoud
L-nr.
Controle
Uitvoeringsnotitie
ja
4
Installatie vrijschakelen (netstekker uittrekken)!!
5.1
Dompelpijp wegnemen en reinigen, pomp wegnemen en tank reinigen
5
5.2
5.3
5.4
5.5
5.6
5.7
Drukschakelaar
Optische controle drukschakelaar
Oplopend aanleggen van de besturingskabel (continu oplopend)
Dompelbuis
Dompelpijp wegnemen en reinigen
Aansluiting luchtslang controleren
Controleren of klemring en schroefkoppeling correct zitten
6
Batterij of accu meten waarde WERKELIJK________
7.1
Isolatieweerstand meten waarde WERKELIJK________
7
Pomp
8
Stroom weer inschakelen
10
Bedrijfsklaar zijn
9
11
nee
Stroomopname pomp
Logboek uitlezen
Onderhoudsactiviteiten
12
13
14
Visuele controle: Controleren of alle installatiecomponenten volledig zijn, vastzitten,
onbeschadigd en dicht zijn.
Afsluiters controleren
De afsluiter(s) moeten perfect en soepel kunnen worden bediend.
Installatie voor onderhoud voorbereiden, legen
• Toevoer sluiten c.q. waarborgen dat er geen afvalwater kan toestromen.
• Installatie leegpompen, daarvoor ofwel met ewater vullen, tot pomp 1 opstart.
Watertoevoer
afzetten, de pomp loopt, tot niveaustand „Minimum“ bereikt is of
• Pomp via het schakelapparaat (handmatige regeling) aansturen, tot de
afvalwatertank geleegd is.
Attentie: gevaar voor materiaalschade! Pomp mag niet drooglopen.
15
16
17
18
19
Stroomvoorziening van de installatie afzetten en borgen tegen onbedoelde
hernieuwde inschakeling.
Wanneer aanwezig afsluiter in de persleiding sluiten.
Persleiding legen, daartoe ontluchtingsvoorziening (zoals hieronder omschreven,
alle aanwezige terugslagkleppen) naar positie OPEN brengen, het water loopt uit de
persleiding naar de afvalwatertank.
Ontluchtingsvoorziening weer naar positie DICHT brengen.
Revisiedeksel eraf schroeven.
192 / 240
2015/02
Onderhoud
L-nr.
Controle
Uitvoeringsnotitie
ja
20
21
22
nee
Dompelpijp eraf monteren.
Waarborgen dat de niveaustand in de afvalwatertank zich beneden de pompflens
bevindt. Evtl. afvalwatertank leegpompen.
Terugslagklep controleren
Resultaatrapport
Gebruikte onderdelen
Verblijfplaats van de vervangen onderdelen
Bij de opdrachtgever
Bij de ontvanger van de prestatie
Installatie bedrijfsklaar overgedragen aan klant
Fabrieksklantenservice/vakman stempel
Plaats, datum
Handtekening KESSEL AG/fabrieksklantenservice
Naam in druletters/handtekening opdrachtgever
2015/02
193 / 240
Opsporen van storingen
7
Opsporen van storingen
Displaytekst netuitval
Speciaal de-fect
Drukstoring
Batterijstoringen
Onderhoudsdatum (knippert)
Pompstoring 1 c.q. 2
stroomminimum
Pompstoring 1 c.q. 2
overstroom
Relaisstoring 1 c.q. 2
Netuitval
Mogelijke oorzaak
Remedie
Verbindingsslang schakelapparaatdruksensor lekt
Verbindingsslang controleren en evtl.
vervangen
Kabel schakelapparaat-alarmsonde
(facultatief) onderbroken
Batterij ontbreekt, is defect of
spanning lager dan 13,5 V
Onderhoudsdatum is bereikt
Geen onderhoudsdatum ingevoerd
Kabel controleren evtl. vervangen,
sonde controleren en evtl. vervangen.
Batterijaansluiting controleren, evtl.
Batterij vervangen.
Onderhoud uitvoeren
Onderhoudsdatum invoeren (zie 2.3 in
het bedieningsmenu)
Minimale stroomopname van de pomp Kabel controleren evtl. vervangen,
niet gehaald
pomp controleren evtl. vervangen.
Kabel schakelapparaat-pomp
onderbroken
Pomp defect“
Maximale stroomopname van de
pomp overschreden, evtl. blokkade
van het schoepenwiel
Pomp schoonmaken en controleren
of schoepenwiel licht loopt, evtl.
vervangen.
Energievoorziening uitgevallen
Geen, algemene netuitval
Vermogensrelais schakelt niet uit
Apparaatbeveiliging uitschakelen.
Hoofdschakelaar defect
Voedingsleiding onderbroken
Schakelapparaat loskoppelen van het
net, relais verbreken.
Zekering controleren
Hoofdschakelaar controleren
Voedingsleiding cntroleren
Bij bewuste uitschakeling
schakelapparaat uitschakelen (zie 4.6
op pagina 181)
Temperatuur overschreden
Temperatuurschakelaar van wikkeling
is geactiveerd
Fasestoring
Fase L1 of L2 of L3 niet aanwezig
Draaiveldstoring
Foutief draaiveld van de netaansluiting 2 fasen van de toevoerleiding
verwisselen
Motorveiligheid 1 c.q. 2
Zelfresettend bij motorafkoeling
storingsmelding wordt vanzelf gereset
na succesvolle poging tot hernieuwde
inschakeling. Pomp vervangen bij
aanhoudende temperatuurstoring
Aansluiting netsnoer en zekeringen
controleren
Motorbeveiligingsschakelaar is
geactiveerd
ingesteld
Stroomwaarde comform pomp instellen
Pompstroom op grond van defecte of
geblokkeerde pomp te hoog
Blokkade verwijderen
Te hoge stroom op grond van
fase-uitval
Net controleren op uitvallen van fase
Motorveiligheidsschakelaar foutief
194 / 240
Pomp vervangen indien defect
2015/02
Opsporen van storingen
Drukdaling
Slang bij de schroefkoppeling naar
de dompelpijp (of dompelstolp) c.q.
Schakelapparaat lekt
Dichtheid van het druksensorsysteem
controleren
Limiet looptijd 1 c.q. 2
Pomp loopt te lang per pompproces
Limiet loopfrequentie 1 c.q. 2
Pomp loopt te vaak in korte tijd
Ontwerp installatie controleren, evtl.
klantenservice informeren
Relaisschakelcycli 1 c.q. 2
2015/02
Maximale schakelcycli overschreden
195 / 240
Kan gereset worden. Klantenservice
informeren Storing verschijnt na nog
eens 1000 schakelcycli.
Ontwerp installatie controleren, evtl.
klantenservice informeren
Technische gegevens
8
Technische gegevens
8.1
Pompen
Pomp
Gewicht [kg]*
Vermogen P1 [kW]
Vermogen P2 [kW]
Toerental [t/min]
Bedrijfsspanning [V] 50 Hz
Nominale stroom [A]
Afvoercapaciteit max. [m³/h]
Opvoerhoogte max. [m]
Temperatuur transportmateriaal
max. [°C]
1400
1500
1,6
1,4
24
1,1
3,2
4,5
25
1,1
2,7
26
3,7
2845
2845
7,3
2,7
5,4
7,7
230
38
7
400
400
40
8
45
40
12
400
53
17
IP68
I
Motorveiligheid
extern
Stekkertype
Modus
4500
1415
Beveiligingsklasse
Vereiste zekering
24
3000
1370
Beschermingsklasse
Netsnoer
SPF
Directe aansluiting
10 m, 7 x 1,5 mm²
Zie bedieningshandleiding schakelapparaat
S3/S1
*Uitvoering voor S1 bedrijf. Bij S3-bedrijf 2 kg zwaarder.
196 / 240
2015/02
Technische gegevens
8.2
Transportstroom
Opvoerstroom Q [m³/h] bij opvoerhoogte H [m]
Pomp
SPF..
2
4
1400 *
36
26,1 12,5
Q [m³/h]
1500 *
37,5 28,2 15,8
Q [m³/h]
3000 *
46
4500 *
6
8
10
40,1 34,4 28,3 22
12
14
15,6 8,8
53,4 48,4 42,9 37,5 30
16
18
1,8
H [m]
Q [m³/h]
22,5 13,1 Q [m³/h]
* S3/S1 ** S3
H [m]
20
18
16
14
12
10
8
6
4
2
0
SPF 1500
SPF 4500
SPF 3000
0
10
20
30
40
50
60 Q [m3/h]
Afb. [19] 8.3
Aanhaalmomenten schroefverbindingen
Pomp bij pompflens
7 Nm
Terugslagklep (kunststof) en schroeven bij de sonden
2,5 Nm
Dompelbuis
8.4
Afmetingen, volume
Hoogte: Zie handleiding Techniekschacht LW 1000 (zaaknr. 010-701).
De buitendiameter bedraagt ca. 1.200 mm
Netto inhoud ca. 160 liter
Tankvolume ca. 335 liter
2015/02
197 / 240
5 Nm
Conformiteitsverklaring
9
Conformiteitsverklaring
198 / 240
2015/02
Conformiteitsverklaring
2015/02
199 / 240
Toonaangevend in waterafvoertechniek
6 4
Particuliere woningbouw
zonder aansluiting op riool
1 2 3 4
5
1 2 3 4
Utiliteitsbouw
bv. ziekenhuis
5
Utiliteitsbouw
bv. vrijetijdsvoorzieningen
1 2 3 4
5
Bedrijfsmatige bouw
bv. hotel
4 5
Bedrijfsmatige bouw
bv. industriële bouw
2 3 5
Bedrijfsmatige bouw
bv. tankstations
1 2 3 4
Particuliere woningbouw
1 Terugstroombeveiligingen
2 Opstuwing hefsystemen
3 Opvoerinstallaties
4 Afvoeren
5 Afscheiders
6 Zuiveringsinstallaties
INSTRUKCJA MONTAŻU, EKSPLOATACJI I KONSERWACJI
KESSEL Stacja pomp Aqualift F XL
- Ustawienie suche
Zalety produktu
Instalacja Uruchomienie Instruktaż
zostały przeprowadzone przez Państwa zakład
specjalistyczny:
Nazwisko/podpis
Stan: 2015/02
Data
Miejscowość
Pieczątka zakładu specjalistycznego
Nr 010-695
Zmiany techniczne zastrzeżone
Do ścieków zawierających
fekalia i bez fekaliów
Ustawienie suche =
czyste pomieszczenie
robocze
Odporność na wodę
gruntową do 3 m
Urządzenie sterujące z
funkcją samodiagnozy

Spis treści
1
Wstęp
204
1.1
Ogólny opis produktu......................................................................................................... 204
1.2
Ogólne informacje dotyczące niniejszej instrukcji eksploatacji i konserwacji.................... 205
1.3
Zasada działania................................................................................................................ 206
1.4
Tabliczka znamionowa....................................................................................................... 207
1.5
Zakres dostawy.................................................................................................................. 208
1.6
Wskaźniki, przyciski obsługi i ich funkcje........................................................................... 208
1.7
Podzespoły i funkcje.......................................................................................................... 209
2
Bezpieczeństwo
2.1
Zastosowanie zgodnie z przeznaczeniem......................................................................... 210
2.2
Wybór i kwalifikacje personelu........................................................................................... 210
2.3
Organizacyjne środki bezpieczeństwa............................................................................... 210
2.4
Zagrożenia ze strony produktu.......................................................................................... 211
210
2.4.1 Zagrożenie wskutek lokalizacji / warunków otoczenia....................................................... 211
2.4.2 Niebezpieczeństwo porażenia prądem elektrycznym przy odkręconej wtyczce................ 211
2.4.3 Zagrożenie wskutek szkodliwej atmosfery......................................................................... 211
2.4.4 Zagrożenie dla zdrowia...................................................................................................... 211
2.4.5 Zagrożenie wskutek hałasu............................................................................................... 211
2.4.6 Zagrożenie wybuchem....................................................................................................... 211
2.4.7 Zagrożenie wskutek wysokiej temperatury........................................................................ 212
2.4.8 Niebezpieczeństwo podczas przypadkowego uruchomienia pompy................................. 212
2.4.9 Niebezpieczeństwo utonięcia w studzience urządzenia.................................................... 212
3
Montaż
3.1
Ogólne informacje dotyczące montażu.............................................................................. 213
3.2
Montaż dopływu................................................................................................................. 213
3.3
Uwzględnienie przyłącza ręcznej pompy membranowej................................................... 213
213
202 / 240
2015/02

3.4
Montaż pompy ściekowej / pomp ściekowych................................................................... 214
3.5
Montaż małego kompresora do wprowadzania pęcherzyków powietrza........................... 215
3.6
Montaż urządzenia sterującego......................................................................................... 215
3.7
Montaż modemu TeleControl KESSEL.............................................................................. 215
3.8
Tworzenie przyłączy elektrycznych i podłączenie czujników poziomu.............................. 216
3.9
Pierwsze uruchomienie...................................................................................................... 218
3.9.1 Inicjalizacja urządzenia sterującego.................................................................................. 218
3.9.2 Ustawianie modemu TeleControl KESSEL do komunikatów o błędach............................. 219
3.9.3 Dopasowanie punktów przełączania do tworzenia pęcherzyków powietrza...................... 219
3.9.4 Kontrola działania.............................................................................................................. 219
4
Eksploatacja
220
4.1
Funkcje przełączników....................................................................................................... 220
4.2
Włączenie.......................................................................................................................... 220
4.3
Wyświetlacz, wskazania / informacje................................................................................. 220
4.4
Funkcje wszystkich przycisków / wskazania...................................................................... 221
4.5
Kasowanie alarmu............................................................................................................. 221
4.6
Wyłączenie........................................................................................................................ 221
5
Ustawienia menu obsługi
5.1
menu robocze.................................................................................................................. 223
6
Konserwacja
6.1
Ogólne informacje dotyczące konserwacji......................................................................... 229
6.2
Częstotliwość konserwacji................................................................................................. 229
6.3
Przygotowanie do konserwacji.......................................................................................... 230
222
229
6.3.1 Karta konserwacyjna......................................................................................................... 231
2015/02
7
Wyszukiwanie błędów
234
8
Dane techniczne
236
8.1
Pompy................................................................................................................................ 236
8.2
Wydajność pompy............................................................................................................. 237
8.3
Momenty dokręcenia złączy śrubowych............................................................................ 237
8.4
Wymiary, pojemność.......................................................................................................... 237
9
Deklaracja zgodności
238
203 / 240
Wstęp
1
Wstęp
Szanowna Klientko,
szanowny Kliencie!
Dziękujemy za zakup produktu naszej firmy. Mamy nadzieję, że spełni on wszystkie Twoje oczekiwania. Życzymy
udanego montażu urządzenia!
W staraniach o utrzymanie naszych standardów jakościowych na możliwie najwyższym poziomie jesteśmy
zależni od Państwa pomocy. Prosimy o zgłaszanie ewentualnych uwag odnośnie możliwości poprawy naszych
produktów.
Pytania? Chętnie udzielimy Państwu odpowiedzi.
1.1
Ogólny opis produktu
Die KESSEL Pumpstation Aqualift F XL(im folgenden Pumpstation benannt) ist für das Abpumpen von
fäkalienfreiem und fäkalienhaltigem Abwasser vorgesehen. Zbiornik ściekowy wyposażony jest w pompę /
pompy oraz czujnik / czujniki poziomu. Wszystkie komponenty są dopasowane do dostarczonego urządzenia
sterującego firmy KESSEL. Stacja pomp dostarczana jest z różnymi pompami ściekowymi.
Sygnały przełączające czujników poziomu ścieków są przetwarzane elektronicznie w urządzeniu sterującym.
Jako czujnik poziomu używany jest czujnik ciśnienia. Gdy osiągnięta zostanie objętość napełnienia, aktywowane
jest odpompowywanie. Gdy poziom ścieków odpowiednio spadnie, odpompowywanie zostaje zakończone.
Gdy podłączone są dwie pompy ściekowe, to zależnie od objętości napełnienia i położenia czujników poziomu
zostaje włączona jedna lub obydwie pompy ściekowe.
Na zbiorniku ścieków można zamontować różne elementy systemu studzienek (010-701). Zbiornik ścieków
stanowi razem z przymocowanym do niego elementem funkcyjnym element dna studzienki. W przypadku
prawidłowo przeprowadzonego montażu w chwili montowania stacji pomp studzienka jest już w pełni
zamontowana.
204 / 240
2015/02
Wstęp
1.2
Ogólne informacje dotyczące niniejszej instrukcji eksploatacji i konserwacji
Niniejsza instrukcja eksploatacji i konserwacji jest kompletna tylko w połączeniu z instrukcją eksploatacji i
montażu urządzenia sterującego Aqualift F Comfort 400V (nr 010-532) lub Aqualift F Comfort 230V (nr 010-910)
Stosowane symbole i legendy
<1>
[2]
•
3.
–
Kursywa
Wskazówka w treści odnosząca się do numeru legendy na rysunku
Odniesienie do rysunku
Krok roboczy
Krok roboczy w ponumerowanej kolejności
Wyliczenie
Tekst pisany kursywą: Odniesienie do fragmentu / punktu w menu sterowania
OSTROŻNIE: Ostrzeżenie przed zagrożeniem dla osób lub rzeczy. Nieprzestrzeganie
wskazówek opatrzonych powyższym symbolem może doprowadzić do poważnych obrażeń
ciała lub szkód materialnych.
Wskazówka: Wskazówki techniczne, które należy szczególnie przestrzegać.
Aby zachować przejrzystość opisów obsługi urządzeń sterujących, zrezygnowano z opisywania szczegółów,
które podczas sterowania menu uznawane są za zwyczajowe i oczywiste.
Np. podczas wyboru rubryki Konserwacja zamiast opisu
Nacisnąć klawisz ze strzałką => Wybrać Konserwacja => Nacisnąć przycisk OK
zawarta jest jedynie informacja „Wybrać wpisKonserwacja “.
2015/02
205 / 240
Wstęp
1.3
Zasada działania
normalna wysokość zabudowy
Rys. [1] najniższa wysokość zabudowy
Rys. [2] 206 / 240
2015/02
Wstęp
1.4
Tabliczka znamionowa
Informacje na tabliczce znamionowej
1
Nazwa urządzenia
3
Napięcie przyłączeniowe i częstotliwość
2
5
6
7
8
9
10
2015/02
2
Dane hydrauliczne
3
Dane ogólne
4
Data produkcji
6
Numer seryjny
5
Stan rewizji
10
Aqualift
XY
xxxxx
U = xxxV xxHz I = x,xA P1 = x,xkW
Q = xxm³/h
H = xxm
S3 xx% ED IP xx (3mWS /48h)
Ser.Nr. xxxxxxx
Auftr.Nr.: xxxxxxx
RevStd.: X.X TT.MM.JJ JJ DIN-EN 12050-1
8
7
Nazwa normy
Numer zlecenia
Rys. [3] 207 / 240
9
www.kessel.com
4
1
Numer materiału urządzenia
Wstęp
1.5
Zakres dostawy
14
Urządzenie sterujące z własną instrukcją montażu
16
Instrukcja obsługi i konserwacji
17
Schemat połączeń, w pokrywie obudowy urządzenia
sterującego
18
19
20
21
23
Materiał montażowy do urządzenia sterującego
23
Szablon do wiercenia do urządzenia sterującego
Zbiornik urządzenia (element dna systemu studzienek)
System studzienek, składający się z różnych elementów z
własną instrukcją montażu (nie przedstawiony na rysunku)
20
Pompa(y)
2 kolanka 45° DN 150 z uszczelką w przepuście rury (nie
przedstawione na rysunku)
16
Rys. [4] 19
18
17
1.6
Wskaźniki, przyciski obsługi i ich funkcje
patrz 4.4 na stronie 221
14
Rys. [5] 208 / 240
2015/02
Wstęp
1.7
Podzespoły i funkcje
14
23
14
23
24
24
25
25
20
20
27
27
22
22
26
26
28
28
Rys. [7] niska wysokość zabudowy
14
Urządzenie sterujące
20
Zbiornik urządzenia (element dna systemu studzienek)
23
Pompy ściekowe
22
24
25
26
27
28
2015/02
Rys. [6] normalna wysokość zabudowy
Tabliczka znamionowa
Przewód tłoczny
Zabezpieczenie przed odpływem wstecznym z zasuwą
odcinającą
Dopływ
Czujnik poziomu (czujnik ciśnienia)
Przyłącze przewodu odpowietrzającego
209 / 240
Bezpieczeństwo
2
Bezpieczeństwo
2.1
Zastosowanie zgodnie z przeznaczeniem
Stacja pomp służy jako instalacja kanalizacyjna do ścieków zawierających fekalia i bez fekaliów z gospodarstw
domowych i zakładów przemysłowych i montowana jest w dostępnym systemie studzienek firmy KESSEL na
różnej wysokości i w różny sposób.
2.2
Wybór i kwalifikacje personelu
Osoby dokonujące montażu stacji pomp muszą:
–– mieć ukończone przynajmniej 18 lat,
–– być odpowiednio przeszkolone i wykwalifikowane do wykonywania danych czynności,
–– znać i przestrzegać odnośnych zasad technicznych oraz przepisów bezpieczeństwa.
Wykwalifikowany personel to osoby, które dzięki swojemu wykształceniu i doświadczeniu, jak również znajomości
odnośnych regulacji, obowiązujących norm oraz przepisów bhp, mogą wykonywać konieczne czynności oraz
rozpoznawać i zapobiegać potencjalnym zagrożeniom.
Prace przy urządzeniach elektrycznych powinny być wykonywane przez odpowiednio przeszkolony personel
specjalistyczny oraz pod warunkiem przestrzegania wszystkich obowiązujących przepisów bezpieczeństwa
pracy.
2.3
Organizacyjne środki bezpieczeństwa
Instrukcję eksploatacji i konserwacji należy przechowywać zawsze w pobliżu.
210 / 240
2015/02
Bezpieczeństwo
2.4
Zagrożenia ze strony produktu
2.4.1 Zagrożenie wskutek lokalizacji / warunków otoczenia
Niebezpieczeństwo wskutek trujących i szkodliwych oparów, gazów i pyłów (np. bakterie, wirusy). Jeżeli stacja
pomp znajduje się w studzience, konieczne do wykonania w niej prace może wykonywać wyłącznie personel
specjalistyczny (patrz 2.2).
2.4.2 Niebezpieczeństwo porażenia prądem elektrycznym przy odkręconej wtyczce
Na urządzeniu sterującym (tylko w wersji 230 V) istnieje ryzyko porażenia prądem elektrycznym, jeżeli
zdemontowana jest jedna z wtyczek elektrycznych pomp. Nakrętka kołpakowa wtyczki elektrycznej musi być
tak mocno zamontowana, aby nie mogła zostać odkręcona bez użycia narzędzia (np. przez dzieci) (patrz 3.8).
2.4.3 Zagrożenie wskutek szkodliwej atmosfery
Podczas prac w studzience istnieje ryzyko wystąpienia w systemie studzienek atmosfery szkodliwej dla
zdrowia. Zadbać o wystarczającą wentylację i ew. urządzenia zabezpieczające, np. wykrywacz gazu.
2.4.4 Zagrożenie dla zdrowia
Stacja pomp tłoczy ścieki zawierające fekalia, które mogą zawierać substancje szkodliwe dla zdrowia.
Należy upewnić się, że niemożliwy jest bezpośredni kontakt ścieków lub zabrudzonych nimi elementami
urządzenia z oczami, ustami lub skórą. Jeżeli dojdzie do bezpośredniego kontaktu ze ściekami lub zabrudzoną
powierzchnią, należy natychmiast oczyścić i ewentualnie zdezynfekować zabrudzoną część ciała. Nosić środki
ochrony osobistej.
2.4.5 Zagrożenie wskutek hałasu
Praca stacji pomp może powodować wysoki poziom hałasu. W razie konieczności należy nosić odpowiednie
wyposażenie ochronne oraz przedsięwziąć kroki w celu wykonania izolacji dźwiękochłonnej.
2.4.6 Zagrożenie wybuchem
Wnętrze zbiornika ściekowego może być uważane za miejsce zagrożenia wybuchem (EN 12050). Podczas
procesu rozkładu mogą wydzielać się gazy palne (siarkowodór, metan). Przed otwarciem zbiornika ściekowego
(np. w celu demontażu pompy) należy zadbać o odpowiednią wentylację w studzience.
Gdy zbiornik ściekowy jest otwarty, należy upewnić się, że w pobliżu nie znajdują się źródła zapłonu (np.
pracujące urządzenia elektryczne bez osłoniętego silnika, obróbka metalu, papierosy itd.).
2015/02
211 / 240
Bezpieczeństwo
2.4.7 Zagrożenie wskutek wysokiej temperatury
Niebezpieczeństwo poparzenia podczas dotknięcia gorących powierzchni. Obudowa pomp ściekowych
podczas dłuższej pracy nagrzewa się do wysokiej temperatury. Nosić wyposażenie ochronne (rękawice) lub
odczekać do ochłodzenia się pomp.
2.4.8 Niebezpieczeństwo podczas przypadkowego uruchomienia pompy
Jeżeli stacja pomp nie jest odłączona od sieci, pompa może w każdej chwili włączyć się. Demontażu pomp
może dokonywać wyłącznie personel specjalistyczny przy odłączonej od sieci i zabezpieczonej przed
przypadkowym włączeniem przepompowni.
2.4.9 Niebezpieczeństwo utonięcia w studzience urządzenia
Studzienka może podczas powodzi w krótkim czasie napełnić się wodą. Jeżeli istnieje ryzyko zalania
studzienki, nie wolno do niej wchodzić aż do chwili, gdy przebywanie w niej będzie znów bezpieczne.
Nie wolno otwierać pompy;
pompa ma stopień szczelności IP68. Przy prawidłowym montażu jest ona zabezpieczona przed wilgocią.
Zamontować wyłącznik różnicowo-prądowy.
212 / 240
2015/02
Montaż
3
Montaż
Niebezpieczeństwo wskutek trujących i szkodliwych oparów, gazów i pyłów (np. bakterie, wirusy). Wszelkie
prace przy stacji pomp może wykonywać wyłącznie personel specjalistyczny (patrz 2.2).
3.1
Ogólne informacje dotyczące montażu
Stacja pomp montowana i uruchamiana jest na odpowiednich odcinkach budowy w różnym czasie.
1. Zabudowa zbiornika urządzenia (element dna systemu studzienek) w studzience.
Podłączenie dopływu i odpływu ścieków oraz przewodu tłocznego, przez który ścieki są odpompowywane.
Montaż systemu studzienek, bazującego na zbiorniku urządzenia. Nie są opisane w tej instrukcji.
2. Montaż luźno dostarczonych podzespołów, począwszy od rozdz. 3.4.
3. Montaż urządzenia sterującego i podłączenie komponentów elektrycznych (rozdz. 3.8).
4. Pierwsze uruchomienie (rozdz. 3.9).
Upewnić się, że prace wymienione w punkcie 1 zostały w pełni zakończone.
3.2
Montaż dopływu
• Zamontować obydwa kolanka 45° <1> w fachowy sposób razem z
uszczelką przejścia rurowego.
3.3
Uwzględnienie przyłącza ręcznej pompy membranowej
Jak na rys. [18] na stronie 230 należy nad poziomem podpiętrzenia
przewidzieć w przewodzie odpowietrzającym przyłącze <2> (element
rewizyjny) na ręczną pompę membranową.
2015/02
213 / 240
Rys. [8] Montaż
3.4
Montaż pompy ściekowej / pomp ściekowych
• Przykręcić pompę ściekową / pompy ściekowe za pomocą śrub <1> (moment dokręcający 7 Nm).
1
1
Rys. [9] Rys. [10] normalna wysokość zabudowy
niska wysokość zabudowy
214 / 240
2015/02
Montaż
3.5
Montaż małego kompresora do wprowadzania pęcherzyków powietrza
(opcja)
Podłączyć węża powietrza zgodnie z dostarczoną instrukcją montażu.
3.6
Montaż urządzenia sterującego
Zamontować urządzenie sterujące zgodnie z instrukcją załączoną do urządzenia sterującego.
3.7
Montaż modemu TeleControl KESSEL
(opcja) Zamontować modem TeleControl KESSEL zgodnie z instrukcją załączoną do urządzenia sterującego.
2015/02
215 / 240
Montaż
3.8
Tworzenie przyłączy elektrycznych i podłączenie czujników poziomu
Upewnić się, że urządzenie sterujące jest podczas prac montażowych odłączone od napięcia.
Niebezpieczeństwo porażenia prądem elektrycznym wskutek przypadkowego dotknięcia odkręconych
wtyczek (np. przez dzieci). Upewnić się, że wszystkie połączenia elektryczne, o ile obecne, są
przymocowane jak w sposób przedstawiony na rysunku (moment dokręcający).
Rys. [11]
216 / 240
2015/02
Montaż
• Podłączyć pompę / pompy do złączy wtykowych <b i c>.
b
c
e
d
Rys. [12] • Podłączyć czujniki poziomu w następujący sposób:
Czujnik alarmu
Czujnik ciśnienia
Przyłącze (rys. [12])
Kod barwny kabla
e
-
d
czerwony
• Poprowadzić bezpiecznie wszystkie kable komponentów elektrycznych i czujnika ciśnienia. Zalecenie: Montaż
na zaciskach rurek izolacyjnych na ścianie studzienki.
Poprowadzić przewód giętki ciśnieniowy (przyłącze e) rury zanurzeniowej (czujnik ciśnienia) w taki sposób,
aby był on wszędzie ułożony w sposób wznoszący się. W ten sposób zapobiega się ewentualnemu tworzeniu
się skroplin, które mogłyby prowadzić do zakłóceń.
2015/02
217 / 240
Montaż
3.9
Pierwsze uruchomienie
Należy koniecznie unikać pracy pomp ściekowych na sucho, ponieważ grozi to ich uszkodzeniem. Nigdy
nie włączać pomp ściekowych, jeżeli zbiornik nie jest napełniony przynajmniej w stopniu odpowiadającym
minimalnemu poziomowi.
3.9.1 Inicjalizacja urządzenia sterującego
• Podłączyć urządzenie sterujące do napięcia sieciowego, inicjalizacja zostaje rozpoczęta. Przez ok. 4 sekund
świecą się diody LED, sprawdzane są podzespoły elektryczne, aktywowana jest bateria do komunikatu o
zaniku sieci i wyświetla się menu 3.10. Wersja językowa. Teraz można przeprowadzić inicjalizację.
Podczas inicjalizacji powinny się pojawić następujące informacje:
Wersja językowa
–– Data / godzina
–– Typ produktu
–– Wariant urządzenia
–– Wydajność
–– Częstotliwość konserwacji
Wersja językowa
• Potwierdzić przyciskiem OK.
• Wybrać język za pomocą przycisków ze strzałkami, potwierdzić przyciskiem OK, pojawia się menu Data /
godzina.
Data / godzina
• Ustawić każdorazowo migające cyfry w dacie i godzinie, po czym potwierdzić przyciskiem OK. Po
zakończeniu wprowadzania pojawia się menu Typ produktu .
Typ produktu
• Wybrać stację pomp Aqualift Mono lub Duo, potwierdzić przyciskiem OK, pojawia się menu Wariant
urządzenia .
Wariant urządzenia
• Wybrać odpowiedni wariant urządzenia, potwierdzić przyciskiem OK, pojawia się menu Wydajność .
Wydajność
• Wybrać odpowiednią wydajność, potwierdzić przyciskiem OK, pojawia się menu Termin konserwacji .
Częstotliwość konserwacji
• Wybrać lub wprowadzić żądany termin konserwacji, potwierdzić przyciskiem OK, pojawia się menu Informacja
systemowa , inicjalizacja jest zakończona.
218 / 240
2015/02
Montaż
3.9.2 Ustawianie modemu TeleControl KESSEL do komunikatów o błędach
(opcja) W punkcie menu 3.9 można dokonać ustawienia, jakie wydarzenia w przepompowni wysyłane są do
określonych odbiorców wiadomości tekstowych SMS.
3.9.3 Dopasowanie punktów przełączania do tworzenia pęcherzyków powietrza
(opcja) Jeżeli zamontowany jest mały kompresor do tworzenia pęcherzyków powietrza, należy dokonać
następującego ustawienia:
•
•
•
•
•
•
Upewnić się, że zbiornik urządzenia jest napełniony.
Wyłączyć mały kompresor.
Włączyć przepompownię.
Zanotować wartość zmierzoną (mm) wyświetloną w menu użytkownika 1.5.4.
Włączyć mały kompresor.
Obliczyć wartość offset, w tym celu odjąć wartość zmierzoną wyświetloną w menu 1.5.4 od wcześniej
zanotowanej wartości zmierzonej.
• Podać wartość offset w menu użytkownika 3.1.14 Tworzenie pęcherzyków powietrza, punkty przełączające są
dopasowane.
3.9.4 Kontrola działania
Dokonać kontroli działania zgodnie z wykazem czynności na karcie konserwacji (patrz 6.3.1).
2015/02
219 / 240
Eksploatacja
4
Eksploatacja
Wszystkie zabezpieczenia przed odpływem wstecznym z zasuwami odcinającymi muszą być podczas pracy
stacji pomp otwarte i zablokowane (wyciągnięte do góry, patrz <25> na str. <?>).
4.1
Funkcje przełączników
4.2
Włączenie
28
29
30
32
• Ustawić główny włącznik <28> w pozycji I (ON), po pomyślnym
teście systemu na wyświetlaczu <29> pojawia się informacja
o urządzeniu i zapala się zielona dioda LED <30>, urządzenie
sterujące jest gotowe do pracy.
31
Rys. [13] 4.3
Wyświetlacz, wskazania / informacje
Na wyświetlaczu przedstawione są różne stany eksploatacyjne wraz ze wskazaniami w formie tekstowej. W
menu 1 (patrz instrukcja eksploatacji urządzenia sterującego) można wywołać wszystkie parametry systemowe.
Poziom cieczy w zbiorniku ściekowym wyświetla się na wyświetlaczu (stan napełniania) w mm.
(0 oznacza, że poziom cieczy jest poniżej możliwej do zmierzenia wysokości).
220 / 240
2015/02
Eksploatacja
4.4
Funkcje wszystkich przycisków / wskazania
19
LED
Pompa 1
21
LED
Alarm
20*
22
66
67
68
69
71
72
73*
LED
LED
Strzałka do
góry
Pompa 2
Gotowość do pracy
Przewijanie w menu
Strzałka na
dół
Przewijanie w menu
Alarm
Kasowanie alarmu akustycznego
ESC
Kasowanie wprowadzenia, powrót
Pompa / test
Pompa 1 WŁ. / WYŁ.
OK
Pompa / test
Potwierdzenie wprowadzenia,
następny poziom
Rys. [14] Pompa 2 WŁ. / WYŁ.
* Stacja pomp w wersji DUO (2 pompy)
4.5
Kasowanie alarmu
Jeżeli wystąpi stan prowadzący do wygenerowania alarmu (np. błąd pompy, poziom ścieków osiągnął poziom
alarmowy), zapala się dioda LED alarmu <21>. Na wyświetlaczu wyświetla się ewentualnie komunikat o błędzie
w formie tekstowej. Po usunięciu przyczyny alarmu można go skasować przez naciśnięcie przycisku <69>.
–– Wyłączenie dźwięku alarmu: Nacisnąć jeden raz przycisk <69>.
–– Kasowanie alarmu: Nacisnąć jeden raz przycisk <69> i przytrzymać wciśnięty przez > 5 sekund.
4.6
Wyłączenie
• Ustawić główny wyłącznik w pozycji O (OFF), rozbrzmiewa sygnał alarmowy i miga dioda LED alarmu <21>.
• Wyłączyć dźwięk alarmu, naciskając w tym celu przycisk <69> tak długo, aż symbol alarmu na wyświetlaczu
będzie przekreślony.
• Wyłączyć urządzenie sterujące, naciskając w tym celu przycisk <69> tak długo, aż wyświetlacz i dioda LED
alarmu wyłączą się.
Stacja pomp jest wyłączona.
2015/02
221 / 240
Ustawienia menu obsługi
5
Ustawienia menu obsługi
Uwagi ogólne
Sterowanie menu urządzenia sterującego posiada tryb obsługi i tryb
czuwania (standby).
W trybie obsługi można wyświetlić i zmienić ustawienia systemowe za
pomocą wyświetlacza.
Jeżeli w ciągu ok. 60 sekund nie naciśnięty zostanie żaden przycisk,
automatycznie aktywowany jest tryb czuwania, a podświetlenie tła
wyświetlacza zostaje wyłączone.
66
67
68
72
Strzałka do
góry
Przyciski nawigacji po menu
Przewijanie w menu
Strzałka na
dół
Przewijanie w menu
OK
Potwierdzenie wprowadzenia, następny
poziom
ESC
66
68
72
67
Rys. [15] Kasowanie wprowadzenia, powrót
Aktywacja trybu obsługi
• Nacisnąć przycisk OK <72> w polu obsługowym, wyświetlacz
zostaje podświetlony i pojawia się ekran startowy (informacje
systemowe).
- bzw. Schwimmeranzeige
Otwarcie menu
• Nacisnąć przycisk OK <72>, aktywowany jest poziom 1 menu
(patrz 7.1 Struktura menu).
72
Rys. [16] 222 / 240
2015/02
Ustawienia menu obsługi
Nawigacja w menu
Akcja
Obsługa
Aktywacja punktu menu do edycji
OK, jeżeli obecny jest podpunkt menu, jest on przedstawiony w
odwróconym kolorze.
Wybór punktu menu
Wyświetlenie i edycja wartości
nastawczej
Opuszczenie menu
Strzałka do góry / strzałka na dół, wybrany punkt menu przedstawiony
jest w odwróconym kolorze.
OK, wartość jest wyświetlana lub przedstawiona do edycji w odwróconym
kolorze.
ESC, opuszczenie aktualnego poziomu, przejście do wyższego poziomu.
Struktura menu
33
Numer <33> danego poziomu menu przedstawiony jest w formie
cyfrowej w górnym wierszu wyświetlacza.
Datum:
Uhrzeit:
Rückstau:
Klappe:
Gdy urządzenie sterujące znajduje się w trybie ręcznym (menu
2.1.1), nie odbywa się np. odpompowywanie zależnie od
poziomu.
xx.xx.xx
xx:xx:xx
nein
offen
Fehler/Ereignisse (Statuszeile)
Rys. [17] 5.1
menu robocze
Numer
Menu
0
Informacja systemowa
1
Informacje
1.1
Godziny robocze
1.1.1
Łączny czas pracy
Jednostka
Zakres wartości
h
0...999999
1.1.2
Czas pracy pompy 1
h
0...999999
1.1.3
Czas pracy pompy 2
h
0...999999
1.1.4
Rozruchy pompy 1
-
0…18000000
1.1.5
Rozruchy pompy 2
-
0…18000000
1.1.6
Przerwa w zasilaniu
h
0...999999
1.1.7
Zużycie energii
kWh
0...999999
1.2
Dziennik urządzenia
2015/02
223 / 240
Ustawienia menu obsługi
Numer
Menu
Jednostka
Ostatnie wydarzenie&błąd
do 256
wydarzeń&błędów
Zakres wartości
Poprzednie wydarzenie&błąd
Poprzednie wydarzenie&błąd
1.3
Typ sterowania
1.4
Termin konserwacji
1.4.1
Ostatnia konserwacja
DD.MM.RRRR
1.4.2
Następna konserwacja
DD.MM.RRRR
1.5
Akt. wartości mierzone
1.5.1
Napięcie w sieci
V
1.5.2
Prąd w sieci
A
1.5.3
Napięcie baterii
V
1.5.4
Poziom napełnienia
mm
0…999
1.6
Parametry
1.6.1
Wysokość elementu spiętrzającego
cm
0...999
1.6.2
Blokada włączenia
s
0...999
1.6.3
Zakres pomiarowy
cm
0...999
1.6.4
Poziom WŁ.1
mm
0…999
1.6.5
Poziom WŁ.2
mm
0...999
1.6.6
Poziom WYŁ.1
mm
0...999
1.6.7
Poziom alarmu
mm
0...999
1.6.8
Opóźnienie włączenia
s
0…999
1.6.9
Czas dobiegu
s
0...999
1.6.11
Tryb pompy
Wybór: Obciążenie podstawowe-obciążenie
szczytowe lub zmiana obciążenia
1.6.10
Graniczny czas pracy
min
0...999
1.6.11
Graniczna prędkość obrotowa
-
0...999999
1.6.12
min. prąd
A
0...10,0
1.6.13
maks. prąd
1.6.14
Offset LEP
1.6.15
auto SDS
1.6.16
Tryb S1/S3
2
Konserwacja
2.1
Tryb automatyczny
2.1.1
Tryb automatyczny
2.2
SDS
2.3
Termin konserwacji
2.3.1
Następna konserwacja
mm:hh - dd.mm.rr
2.3.2
Ostatnia konserwacja
mm:hh - dd.mm.rr
2.4
Konserwacja wykonana
2.5
Częstotliwość konserwacji
2.5.1
co 3 miesiące
2.5.2
co 6 miesięcy
Dni
Tryb S1 / tryb S3
WŁ. WYŁ.
224 / 240
2015/02
Ustawienia menu obsługi
Numer
Menu
Jednostka
Zakres wartości
2.5.3
co 12 miesięcy
2.5.4
Konserwacja ręczna
2.5.5
Brak terminu konserwacji
2.6
Kalibracja
3
Ustawienia
3.1
Parametry
3.1.1
Wysokość elementu spiętrzającego
cm
0...999
3.1.2
Blokada włączenia
s
0...999
3.1.3
Zakres pomiarowy
cm
0...999
3.1.4
Poziom WŁ.1
mm
0…999
3.1.5
Poziom WŁ.2
mm
0...999
3.1.6
Poziom WYŁ.1
mm
0...999
3.1.7
Poziom alarmu
mm
0...999
3.1.8
Opóźnienie włączenia
s
0…999
3.1.9
Czas dobiegu
s
0...999
3.1.10
Graniczny czas pracy
min
0...999
3.1.11
Graniczna prędkość obrotowa
-
0...999999
3.1.12
min prąd
A
0...10,0
3.1.13
maks. prąd
3.1.14
Offset LEP
mm
0...99
Dni
3.1.15
auto SDS
3.1.16
Tryb S1/S3
3.2
Pamięć profili
3.2.1
Nazwa możliwa do wprowadzenia
3.2.2
Nazwa możliwa do wprowadzenia
3.2.3
Nazwa możliwa do wprowadzenia
3.3
Data / godzina
3.4
Konfiguracja urządzenia
3.5
Typ produktu
3.5.1
Przepompownia Aqualift Mono
3.5.2
Przepompownia Aqualift Duo
3.5.3
Stacja pomp Aqualift Mono
3.5.4
Stacja pomp Aqualift Duo
3.6
Wariant urządzenia
3.6.1
F
3.6.2
F XL 200 l
3.6.3
F XL 300 l
3.6.4
F XL 450 l
3.6.5
Przepompownia specjalna
3.6.6
F Duo
3.6.7
F XL 200 l Duo
3.6.8
F XL 300 l Duo
3.6.9
F XL 450 l Duo
2015/02
Tryb S1 / tryb S3
DD.MM.RRRR / hh:mm:ss
225 / 240
Ustawienia menu obsługi
Numer
Menu
Jednostka
3.6.10
Przepompownia specjalna
3.6.11
F ATEX Mono
3.6.12
F Mono
3.6.13
F AP 501 Mono LW 800
3.6.14
F AP 501 Mono LW 1000
3.6.15
Specjalna stacja pomp bez ATEX
3.6.16
Specjalna stacja pomp ATEX
3.6.17
F ATEX Duo
3.6.18
F Duo
3.6.19
F AP 501 Duo LW 800
3.6.20
F AP 501 Duo LW 1000
3.6.21
Specjalna stacja pomp bez ATEX
3.6.22
Specjalna stacja pomp ATEX
3.7
Wydajność
3.7.1
SPF 1500
3.7.2
SPF 3000
3.7.3
SPF 4500
3.7.4
SPF 5500
3.7.5
TPF 1,9 kW
3.7.6
TPF 1,3 kW
3.7.7
Ama Porter
3.7.8
Pompa specjalna
3.7.9
400 V / 2,5 - 4 A
3.7.10
400 V / 4 - 6,3 A
3.7.11
400 V / 6,3 - 10 A
3.7.12
400 V / 9 - 12 A
3.8
Konfiguracja czujników
3.8.1
Czujnik ciśnienia
3.8.2
Czujnik ciśnienia+alarm
3.8.3
Czujnik ciśnienia+komp
3.8.4
Ciśnienie+komp+alarm
3.8.5
Pływak
3.8.6
Sonda poziomu
3.8.7
Sonda poziomu+alarm
3.8.8
Przełącznik membranowy
3.9
Komunikacja
3.9.1
Nazwa stacji
3.9.2
Nr własny
3.9.3
Typ modemu
3.9.4
PIN
3.9.5
Centrala SMS
3.9.6
Cel SMS 1
3.9.7
Cel SMS 2
3.9.8
Cel SMS 3
226 / 240
Zakres wartości
2015/02
Ustawienia menu obsługi
Numer
Menu
Jednostka
Zakres wartości
3.9.9
Stan
3.10
Wersja językowa
3.10.10
Deutsch
3.10.11
English
3.10.12
Francais
3.10.13
Italiano
3.10.14
Polski
3.10.15
Nederlands
3.11
Reset
3.12
Tryb eksperta
3.12.1
Opóźnienie włączenia sieci
s
0 - 99
3.12.2
Nadzór baterii
WŁ./WYŁ.
3.12.3
Próg baterii
V
3.12.4
Tryb naprzemienny
WŁ./WYŁ.
3.12.5
Maks. cykle łączeniowe
#
0 - 18,0
1000 - 999 999
Po zresetowaniu lub podczas pierwszej inicjalizacji urządzenia po włączeniu sprawdzane są następujące ustawienia:
3.10
Wersja językowa
3.10.1
Deutsch
3.10.2
English
3.10.3
Francais
3.10.4
Italiano
3.10.5
Polski
3.10.6
Nederlands
3.3
Data / godzina
3.5
Typ produktu
3.5.1
Przepompownia Aqualift Mono
3.5.2
Przepompownia Aqualift Duo
3.5.3
Stacja pomp Aqualift Mono
3.5.4
Stacja pomp Aqualift Duo
3.6
Wariant urządzenia
3.6.1
F
3.6.2
F XL 200 l
3.6.3
F XL 300 l
3.6.4
F XL 450 l
3.6.5
Przepompownia specjalna
3.6.6
F Duo
3.6.7
F XL 200 l Duo
3.6.8
F XL 300 l Duo
3.6.9
F XL 450 l Duo
3.6.10
Przepompownia specjalna
3.6.11
F ATEX Mono
3.6.12
F Mono
3.6.13
F AP 501 Mono LW 800
2015/02
227 / 240
Ustawienia menu obsługi
Numer
Menu
Jednostka
3.6.14
F AP 501 Mono LW 1000
3.6.15
Specjalna stacja pomp bez ATEX
3.6.16
Specjalna stacja pomp ATEX
3.6.17
F ATEX Duo
3.6.18
F Duo
3.6.19
F AP 501 Duo LW 800
3.6.20
F AP 501 Duo LW 1000
3.6.21
Specjalna stacja pomp bez ATEX
3.6.22
Specjalna stacja pomp ATEX
3.7
Wydajność
3.7.1
SPF 1500
3.7.2
SPF 3000
3.7.3
SPF 4500
3.7.4
SPF 5500
3.7.5
TPF 1,9kW
3.7.6
TPF 1,3 kW
3.7.7
Ama Porter
3.7.8
Pompa specjalna
3.7.9
400 V / 2,5 - 4 A
3.7.10
400 V / 4 - 6,3 A
3.7.11
400 V / 6,3 - 10 A
3.7.12
400 V / 9 - 12 A
3.1.16
Tryb S1/S3
2.5
Częstotliwość konserwacji
3.1.16
Tryb S1/S3
2.5.1
co 3 miesiące
2.5.2
co 6 miesięcy
2.5.3
co 12 miesięcy
2.5.4
Konserwacja ręczna
2.5.5
Brak terminu konserwacji
Zakres wartości
Tryb S1 / tryb S3
228 / 240
2015/02
Konserwacja
6
Konserwacja
Przed otwarciem pokryw, wtyczek i kabli (również na stykach bezpotencjałowych) należy odłączyć zasilanie.
Prace wykonywane przy podzespołach elektrycznych może wykonywać tylko personel specjalistyczny (patrz
2.2).
6.1
Ogólne informacje dotyczące konserwacji
Podczas prac konserwacyjnych nie wolno wspinać się na komponenty elektryczne, połączenia
przewodów lub kable.
Niebezpieczeństwo wskutek trujących i szkodliwych oparów, gazów i pyłów (np. bakterie, wirusy). Jeżeli stacja
pomp znajduje się w studzience, konieczne do wykonania w niej prace może wykonywać wyłącznie personel
specjalistyczny (patrz 2.2).
Niebezpieczeństwo utonięcia w studzience. Studzienka może podczas powodzi w krótkim czasie napełnić się
wodą. Jeżeli istnieje ryzyko zalania studzienki, nie wolno do niej wchodzić aż do chwili, gdy przebywanie w niej
będzie znów bezpieczne.
Po każdej pracy konserwacyjnej przy stacji pomp należy dokonać sprawdzenia działania (patrz 6.3.1).
6.2
Częstotliwość konserwacji
Termin konserwacji można ustawić w menu 2. Konserwacja / 2.4 Termin konserwacji (patrz instrukcja urządzenia
sterującego). Gdy osiągnięty zostanie termin konserwacji, na wyświetlaczu pojawia się odpowiednia informacja w
formie tekstowej.
Konserwacja przepompowni
Stacja pomp musi być regularnie serwisowana przez specjalistę. Odstępy czasowe pomiędzy przeglądami nie
mogą być dłuższe niż:
- 1/4 roku w przypadku urządzeń przeznaczonych do użytku przemysłowego
- 1/2 roku w przypadku urządzeń przeznaczonych do użytku romy wielorodzinne
- 1 rok w przypadku urządzeń przeznaczonych do użytku prywatnego
Podczas każdej konserwacji należy sporządzić protokół konserwacji z wyszczególnieniem wszystkich
przeprowadzonych prac oraz ważnych danych.
W przypadku stwierdzenia usterek, których nie da się naprawić, wykwalifikowany pracownik serwisu
przeprowadzający przegląd powinien niezwłocznie poinformować użytkownika urządzenia w formie pisemnej (za
pokwitowaniem) o zaistniałej sytuacji.
2015/02
229 / 240
Konserwacja
6.3
Przygotowanie do konserwacji
Jeżeli zbiornik urządzenia musi zostać opróżniony,
może to nastąpić poprzez element rewizyjny (2)
zainstalowany w przewodzie odpowietrzającym.
Użyć do tego celu odpowiedniej pompy z wężem (1).
Rys. [18] 230 / 240
2015/02
Konserwacja
6.3.1 Karta konserwacyjna
Inspekcja/konserwacja stacji pomp Aqualift F
Nazwa obiektu
Obiekt
Ulica
Kod pocztowy,
miejscowość
Kontakt
Wariant urządzenia
Numer seryjny
Mono
Typ pompy
1
Duo
2
Wskazówki bezpieczeństwa podczas konserwacji
Przed otwarciem zbiornika ściekowego zadbać o odpowiednią wentylację pomieszczenia. Trzymać z dala od
źródeł ognia, nie palić. Upewnić się, że temperatura pomp(y) jest równa temperaturze otoczenia.
Przed rozpoczęciem pracy przewody dopływowe i odpływowe muszą być puste i nie mogą znajdować się
pod ciśnieniem. Poziom ścieków w zbiorniku musi znajdować się poniżej poziomu mocowań (kołnierz pompy)
pomp ściekowych. Agresywne środki czyszczące mogą prowadzić do uszkodzenia uszczelek. Czyścić ciepłą
wodą i szczotką.
Konserwacja wg EN 12056-4 i DIN 1986 część 3
Nr
bież.
Kontrola
Uwaga odnośnie
załatwienia
tak
Kontrola wzrokowa
1
Zabudowa urządzenia odpowiada ww. normie i danym producenta (o ile widoczne)
2
Czy obecny jest komunikat o błędzie?
2015/02
231 / 240
nie
Konserwacja
Nr
bież.
Kontrola
tak
3
Obecna funkcja
5
Wyłącznik ciśnieniowy
4
5.1
5.2
5.3
5.4
Wyjąć rurę zanurzeniową i wyczyścić, wyjąć pompę i wyczyścić zbiornik
Optyczna kontrola wyłącznika ciśnieniowego
Ułożenie przewodu sterowniczego (ukośnie do góry)
Rura zanurzeniowa
Wyjąć rurę zanurzeniową i wyczyścić.
5.7
Sprawdzić prawidłowe osadzenie pierścienia zaciskowego i złącza śrubowego.
Sprawdzić przyłączenie przewodu powietrza.
6
Zmierzyć baterię lub akumulator. Wartość RZECZYWISTA________
7.1
Zmierzyć rezystancję izolacji. Wartość RZECZYWISTA________
9
Pobór prądu przez pompę
7
8
10
11
nie
Odłączyć urządzenie od napięcia (wyciągnąć wtyczkę)!!
5.5
5.6
Uwaga odnośnie
załatwienia
Pompa
Ponownie włączyć prąd.
Gotowość do pracy
Odczytać dziennik urządzenia.
Czynności konserwacyjne
12
13
14
Kontrola wzrokowa: Sprawdzić wszystkie elementy urządzenia pod względem
kompletności, pewnego osadzenia, ewentualnych uszkodzeń oraz szczelności.
Kontrola zaworu odcinającego
Zawór odcinający / zawory odcinające powinny być bezproblemowe i łatwe w
obsłudze.
Przygotować urządzenie do konserwacji, opróżnić.
• Zamknąć dopływ lub upewnić się że ścieki nie dostają się do zbiornika.
• Opróżnić urządzenie, napełnić wodą aż do rozruchu pompy 1. Odciąć dopływ wody,
pompa pracuje do momentu osiągnięcia minimalnego poziomu, lub
• Kierować pracą pompy przy pomocy urządzenia sterującego (ręcznie) do momentu
opróżnienia zbiornika ścieków.
Uwaga: Niebezpieczeństwo uszkodzenia materiału! Pompa nie może pracować na
sucho.
15
Odciąć zasilanie urządzenia oraz zabezpieczyć je przed niezamierzonym włączeniem.
17
Opróżnić przewód tłoczny przez otwarcie urządzenia napowietrzającego (zgodnie z
poniższym opisem, wszystkie zabezpieczenia odpływu wstecznego), woda przepływa
z przewodu tłocznego do zbiornika ściekowego.
16
Jeżeli urządzenie wyposażone jest w zawór odcinający przewód tłoczny, należy go
zamknąć.
232 / 240
2015/02
Konserwacja
Nr
bież.
Kontrola
tak
18
Zamknąć urządzenie napowietrzające.
20
Zdemontować rurę zanurzeniową.
19
21
22
Uwaga odnośnie
załatwienia
Odkręcić pokrywę włazu rewizyjnego.
Upewnić się, że poziom cieczy w zbiorniku ściekowym znajduje się poniżej kołnierza
pompy. W razie potrzeby opróżnić zbiornik ściekowy.
Sprawdzić zabezpieczenie przed odpływem wstecznym.
Raport wyników
Użyte części zamienne
Wymienione części zamienne pozostają u
Zleceniodawca
Klient
Urządzenie przekazane klientowi w stanie gotowym do użytku
Pieczątka zakład serwisowy/specjalista
Miejscowość, data
Podpis KESSEL AG/zakład serwisowy
Imię i nazwisko drukowanymi literami / Podpis
zleceniodawcy
2015/02
233 / 240
nie
Wyszukiwanie błędów
7
Wyszukiwanie błędów
Tekst wskazania Awaria
zasilania
Możliwa przyczyna
Błąd ciśnienia
Przewód łączący urządzenie sterujące Sprawdzić przewód łączący i ew.
z czujnikiem ciśnienia nieszczelny
wymienić.
Błądspecjalny
Błąd baterii
Termin konserwacji (miga)
Błąd pompy 1 lub 2
niedomiar prądu
Błąd pompy 1 lub 2
przetężenie
Błąd przekaźnika 1 lub 2
Przerwa w zasilaniu
Rozwiązanie
Kabel między urządzeniem sterującym Sprawdzić i ew. wymienić kabel,
a sondą alarmową (opcjonalnie)
sprawdzić i ew. wymienić sondę.
przerwany
Brak baterii, uszkodzona bateria lub
napięcie poniżej 13,5V
Sprawdzić podłączenie baterii, ew.
wymienić baterię.
Nie podany termin konserwacji
Podać termin konserwacji (patrz 2.3 w
menu obsługi).
Nadszedł termin konserwacji.
Pobór prądu przez pompę poniżej
minimalnej wartości
Kabel między urządzeniem sterującym
a pompą przerwany.
Pompa uszkodzona“
Przeprowadzić konserwację.
Sprawdzić i ew. wymienić kabel,
sprawdzić i ew. wymienić pompę.
Przekroczony został maksymalny
pobór prądu, ew. zablokowany jest
wirnik.
Wyczyścić pompę i sprawdzić
lekkobieżność wirnika, ew. wymienić
na nowy.
Zanik zasilania energią.
Ogólna awaria sieci
Stycznik mocy nie przełącza.
Awaria zabezpieczenia urządzenia
Uszkodzony główny włącznik
Przerwany kabel sieciowy
Temperatura przekroczona
Zadziałał wyłącznik temperatury
cewki.
Błąd fazy
Faza L1, L2 lub L3 nieobecna
Błąd pola wirującego
Nieprawidłowe pole wirujące przy
przyłączu sieciowym
234 / 240
Odłączyć urządzenie od sieci,
wymienić stycznik.
Sprawdzić bezpiecznik.
Sprawdzić główny włącznik.
Sprawdzić kabel sieciowy.
Wyłączyć urządzenie, wyłączyć
urządzenie sterujące (patrz 4.6 na
stronie 221)
Wyłącza się samoczynnie po
ochłodzeniu się silnika, komunikat
o błędzie kasuje się samoczynnie
po pomyślnej próbie ponownego
włączenia. Gdy błąd temperatury nadal
się utrzymuje, wymienić pompę.
Sprawdzić przyłącze kabla sieciowego
i bezpieczników.
Wymienić 2 fazy przewodu
zasilającego.
2015/02
Wyszukiwanie błędów
Ochrona silnika 1 lub 2
Zadziałał wyłącznik ochronny
silnikowy.
ustawiona
Ustawić wartość prądu odpowiednio do
pompy.
Prąd w pompie za wysoki wskutek
uszkodzonej lub zablokowanej pompy
Usunąć przyczynę blokady.
Podwyższony prąd wskutek zaniku
fazy“
Sprawdzić sieć pod kątem zaniku fazy.
Nieprawidłowy wyłącznik ochronny
silnikowy
Spadek ciśnienia
Cykle łączeniowe
przekaźnika 1 lub 2
Graniczna prędkość
obrotowa 1 lub 2
Graniczna prędkość
obrotowa 1 lub 2
2015/02
Wymienić pompę, jeżeli jest
uszkodzona.
Wąż w złączu śrubowym na
rurze zanurzeniowej (lub dzwonie
zanurzeniowym) lub urządzeniu
sterującym nieszczelny.
Sprawdzić szczelność systemu
czujnika ciśnienia.
Pompa pracuje za długo podczas
każdego cyklu pompowania
Sprawdzić wersję urządzenia i ew.
poinformować serwis klienta.
Przekroczona maksymalna liczba cykli Komunikat może zostać skasowany.
łączeniowych
Poinformować serwis klienta. Błąd
pojawia się ponownie po kolejnych
1000 cyklach łączeniowych.
Pompa pracuje za często w krótkim
czasie.
235 / 240
Sprawdzić wersję urządzenia i ew.
poinformować serwis klienta.
Dane techniczne
8
Dane techniczne
8.1
Pompy
Pompa
Ciężar [kg]*
Moc P1 [kW]
Moc P2 [kW]
Moment obrotowy [obr./min]
Napięcie robocze [V] 50 Hz
Prąd znamionowy [A]
Maks. moc tłoczenia [m³/h]
Maks. wysokość tłoczenia [m]
Maks. temperatura nosiwa [°C]
1400
1500
1,6
1,4
24
1,1
SPF
24
1,1
4,5
26
3,7
1370
1415
2845
2845
7,3
2,7
5,4
7,7
230
38
7
400
400
40
8
45
40
Ochrona silnika
zewnętrzna
Klasa ochrony
12
400
53
17
I
Rodzaj wtyczki
Tryb pracy
3,2
2,7
IP68
Wymagane zabezpieczenie
4500
25
Stopień ochrony
Kabel przyłączeniowy
3000
Przyłącze bezpośrednie
10 m, 7 x 1,5 mm²
Patrz instrukcja obsługi urządzenia sterującego
S3/S1
*Wersja dla trybu S1. Dla trybu S3 2 kg cięższy.
236 / 240
2015/02
Dane techniczne
8.2
Wydajność pompy
Wydajność pompy Q [m³/h] przy wysokości H [m]
Pompa
SPF..
2
4
1400 *
36
26,1 12,5
Q [m³/h]
1500 *
37,5 28,2 15,8
Q [m³/h]
3000 *
46
4500 *
6
8
10
40,1 34,4 28,3 22
12
14
15,6 8,8
53,4 48,4 42,9 37,5 30
16
18
1,8
H [m]
Q [m³/h]
22,5 13,1 Q [m³/h]
* S3/S1 ** S3
H [m]
20
18
16
14
12
10
8
6
4
2
0
SPF 1500
SPF 4500
SPF 3000
0
10
20
30
40
50
60 Q [m3/h]
Rys. [19] 8.3
Momenty dokręcenia złączy śrubowych
Pompa zamontowana na kołnierzu
7 Nm
Zabezpieczenie przed odpływem wstecznym (tworzywo sztuczne) i
śruby na sondach
2,5 Nm
Rura zanurzeniowa
8.4
5 Nm
Wymiary, pojemność
Wysokość: Patrz instrukcja studzienki technicznej LW 1000 (nr 010-701).
Średnica zewnętrzna wynosi ok. 1200 mm
Pojemność użytkowa ok. 160 l
Pojemność zbiornika ok. 335 l
2015/02
237 / 240
Deklaracja zgodności
9
Deklaracja zgodności
238 / 240
2015/02
Deklaracja zgodności
2015/02
239 / 240
Rückseite_PL_Layout 1 25.06.13 16:13 Seite 1
Wiodący producent systemów odwadniania
6 4
Budownictwo mieszkaniowe
bez podłączenia do kanalizacji
1 2 3 4
5
1 2 3 4
Budynki użyteczności
publicznej, np. szpitale
5
Budowle ogólnodostępne
np. obiekty rekreacyjne
1
2
3
4
5
Działalność gospodarcza
np. hotele
4 5
Budownictwo
przemysłowe
2 3 5
Budownictwo
handlowo-usługowe
np. stacje benzynowe
1 2 3 4
Budownictwo mieszkaniowe
domy jedno- i wielorodzinne
1 Urządzenia
przeciwzalewowe
2 Ecolift
3 Przepompownie
4 Wpusty / odpływy
5 Separatory
6 Oczyszczalnie
ścieków