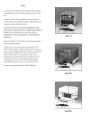
1
HEMOSTATIX
®
Hemostatix Thermal Scalpel Handle
Model 5050
For use with the Hemostatix Thermal Scalpel System Model
150, 3000 and 600 series controllers
The Hemostatix Thermal Scalpel Handle is a surgical cutting instrument designed to
retain the precise, clean cutting characteristics of a traditional steel scalpel and to minimize
blood loss by simultaneously sealing blood vessels as they are cut. The Hemostatix
Thermal Scalpel System provides hemostasis with minimum tissue damage and virtually
no muscle stimulation, using heat thermally conducted to the tissue from an elevatedtemperature blade.
The Hemostatix Thermal Scalpel System consists of three components:
1. Controller. An electronic power supply which energizes the blade and provides various
automatic calibration, sensing, and control functions. It has user controls with visual and
audible indications of instrument status.
2. Handle. A resposable scalpel handle, connected to the Controller by a lightweight
flexible electrical cable, for use with the disposable scalpel blades.
3. Blades. Different sizes of sterile disposable scalpel blades are available (similar in size,
shape, and sharpness to conventional blades), incorporating heating and microcircuitry.
HOW SUPPLIED
The Hemostatix Thermal Scalpel Handle is supplied sterile if the pouch is unopened and
undamaged. Prior to any subsequent reuse, the handle must be resterilized. (Refer to
HANDLE CLEANING AND RESTERILIZATION section.)
BLADES
The model 5050 handle is designed for use with HEMOSTATIX Scalpel Blades. 57XX
Series Blades are used with the Model 600 and 3000 Controllers. 56XX Series Blades are
used with the Model 150 Controller.
Hemostatix Medical Technologies • 8400 Wolf Lake Dr. #109 • Bartlett, TN 38133 U.S.A.
901.261.0012 • Fax 901.261.0017
For information: 1.800.SCALPEL
www.hemostatix.com
1-800-SCALPEL
©Hemostatix Medical Technologies, 2009
ECR00096 01/09 4434407
Controller Front Panel
Attention. See Instructions For Use
Attention : Voir le mode d’emploi
Atención: Ver instrucciones de uso
Achtung! Gebrauchsinformation beachten!
Attenzione. Consultare le istruzioni per l’uso
Use By
A utiliser avant
Utilícese antes de:
Verwendbar bis
Da usarsi entro il
Lot Number (a.k.a. batch code)
Numéro de lot (code lot A.k.a.)
Nº de lote (código de lote)
Kontrollnummer (Chargenbezeichnung)
Numero di lotto
Do Not Use If Package Is Damaged
Ne pas utiliser si l’emballage est abîmé
No utilizar si el paquete está dañado
Nicht verwenden, wenn Verpackung beschädigt ist
Non usare se la confezione é danneggiata
REF
Reference
Référence
Referecia
Referenz
Riferimento
EU Rep: QFI Ltd., 11 Burford Road
Stratford, London E152ST
United Kingdom
0473
(60)
1.
Change Instrument Indicator (Model 600 only)
Lights (red) if the blade is not properly seated, or if blade is outside of the calibration
limit, or if there is no blade in the handle.
1.
Change Blade Indicator (Model 150 and 3000 Controller only)
Lights or flashes (red) if the blade is not properly seated, or if blade is outside of the
calibration limit. On the Model 150 Controller, the Change Blade Indicator also
flashes if there is no blade in the handle.
2.
Calibrating Indicator
Lights or flashes (yellow) while the system is calibrating to a blade. Turns off when
calibration is complete.
3.
Ready Indicator (Model 3000 Controller Only)
Lights (green) after calibration is completed and remains on as long as blade and
handle are acceptable for use or until the blade or handle is unplugged or the
Controller is turned off.
3.
Ready to Heat Indicator (Model 150 Controller Only)
Lights (yellow) after calibration is completed. Remains on until blade is activated by
the handle On/Off switch.
4.
Energized Indicator (Model 600 Only)
Lights (amber) when blade is activated by the handle On/Off switch. Remains on as
long as blade is activated.
4.
Blade at Temp Indicator (Model 150 Controller Only)
Lights (yellow) when blade is activated by the handle On/Off switch. Remains on as
long as blade is activated.
5.
Power Switch
Turns on AC power.
6.
Scalpel Connector
Receptacle for connecting handle to Controller.
7.
Volume Control
Controls the audible tone volume continuously between the minimum and
maximum levels.
8.
Temperature Control
Increases or decreases blade temperature.
9.
Temperature Setting Display
Displays blade temperature setting.
(1)
Handle Controls, Blade and Connector
HEMOSTATIX
Hemostatix Medical Technologies • 8400 Wolf Lake Drive, Ste. 109 • Bartlett, TN 38133
10. On/Off Switch
Sliding the switch rearward mechanically latches the switch On and activates the
blade. Red dot is visible when the switch is in the "ON" position. Sliding the switch
forward, "OFF," deactivates the blade.
11. Thermal Coag Bar
When the On/Off switch is in the "ON" position, depressing the portion of the bar
activates the Thermal Coag mode as long as the bar is depressed. Releasing the bar
causes the temperature to revert the original temperature setting.
12. Temperature Control Switch
With the On/Off switch in the "OFF" position, depressing one of the Temperature
Switches increases or decreases the temperature setting.
The Up Arrow increases the temperature setting and the Down Arrow decreases the
temperature setting. The temperature setting continues to increase or decrease as
long as the Temperature Control switch is depressed until the preset limit is reached.
The temperature setting remains at the last setting when the switch is released.
(Note: When using the Hemostatix Scalpel with the Model 150 Controller, only the
Up Arrow is active. Once the highest setting is reached, holding the switch depressed
resets the temperature to the lowest setting and resumes the upward change
sequence. Depressing the Down Arrow results in no change to the temperature
setting.)
13. Blade
Insert connector end of blade into handle until it snaps into place and is firmly seated.
14. Handle Connector
Connector for attaching handle to Controller.
GARANZIA
La Hemostatix Medical Technologies dichiara in questa sede di aver adottato ragionevole cura
nella fabbricazione del manipolo per bisturi Hemostatix, che garantisce contro eventuali difetti
di materiali e manodopera per un periodo di sessanta (60) giorni, quando correttamente
utilizzato, a decorrere dalla data di spedizione del dispositivo dalla Hemostatix Medical
Technologies all’acquirente originale. L’unico ricorso esclusivo in relazione a un manipolo per
bisturi Hemostatix giudicato, durante il periodo di validità della sua garanzia, non conforme
agli standard descritti consiste, dopo la restituzione del dispositivo e il suo esame da parte della
Hemostatix Medical Technologies, nella riparazione o nella sostituzione gratuita, a discrezione
della Hemostatix Medical Technologies, della parte del manipolo per bisturi Hemostatix
giudicata difettosa. La presente garanzia è nulla (a) se la parte in questione del manipolo per
bisturi Hemostatix è stata riparata da tecnici non qualificati e non approvati dalla Hemostatix
Medical Technologies o se è stata alterata in un modo tale che, a giudizio della Hemostatix
Medical Technologies, ne comprometta l’utilizzabilità o l’affidabilità; oppure (b) se il numero
di serie o di lotto è stato alterato, reso illeggibile o rimosso; oppure (c) se il guasto è stato
causato da condizioni d’uso anomale o da uso improprio (contatto elettrico con un elettrodo
elettrochirurgico Bovie attivo). In tali casi, la Hemostatix Medical Technologies notificherà
l’acquirente di tale determinazione e le eventuali riparazioni, se richieste, verranno fatturate alle
normali tariffe della Hemostatix Medical Technologies. Su richiesta, verrà inviato un
preventivo prima dell’inizio di qualsiasi intervento di riparazione.
Per la restituzione dei dispositivi, è necessario ottenere un numero RGA
presso la Hemostatix Medical Technologies. Prima della restituzione alla
Hemostatix Medical Technologies, i manipoli difettosi vanno puliti,
sterilizzati e confezionati in una busta sterile a comprova della loro sterilità.
Tutti i manipoli non opportunamente puliti, sterilizzati e confezionati come
descritto nella presente garanzia verranno gettati e l’acquirente non avrà
alcun ricorso.
LA SUDDETTA GARANZIA ESPLICITA, CON LE RELATIVE CONDIZIONI E
LIMITAZIONI, SOSTITUISCE ED ESCLUDE QUALSIASI ALTRA GARANZIA
NON FORNITA IN QUESTA SEDE, ESPLICITA O IMPLICITA, AI SENSI DI
LEGGE O ALTRIMENTI, INCLUSE, MA NON AD ESSE LIMITATE, TUTTE LE
GARANZIE IMPLICITE DI COMMERCIABILITÀ O IDONEITÀ A UNO SCOPO
PARTICOLARE. LA HEMOSTATIX MEDICAL TECHNOLOGIES NON VERRÀ
RITENUTA RESPONSABILE DI PERDITE, DANNI O COSTI INCIDENTALI O
CONSEGUENTI, O DI DANNI DERIVATI DIRETTAMENTE O
INDIRETTAMENTE DALL'USO DI QUESTO PRODOTTO. LA HEMOSTATIX
MEDICAL TECHNOLOGIES NON SI ASSUME, NÉ AUTORIZZA ALTRI AD
ASSUMERSI PER SUO CONTO, ALCUN ALTRO ONERE O ULTERIORE
RESPONSABILITÀ CONNESSI ALL'USO DI QUESTO PRODOTTO.
1-800-SCALPEL
(2)
(59)
SYSTEM OPERATING INSTRUCTIONS-MODEL 3000
1.
Attach the handle to the Controller by centering the arrow on the handle connector
at the top of the front panel receptacle and plugging it into the receptacle.
2. Turn on the Controller by activating the POWER switch. If a blade is not in the
handle, no lights will be present except for the setting indicator on the Model 3000
Controller. When a functional blade is inserted, the CALIBRATING light will turn
on while the Controller is calibrating to the blade. The CHANGE BLADE light will
activate whenever the continuous calibration function determines that the blade has
become unacceptable for use. When the Controller has finished calibrating and
determined the blade to be acceptable for use, the READY light will go on.
3. To insert new blade: insert the connector end of the blade into handle (sharp edge on
side opposite On/Off switch) until it snaps into place and is firmly seated.
4. Adjust the SCAPEL SET POINT control to the initial setting desired by the surgeon.
Initial skin incision should be made with blade cold (handle in off position). For
other tissues, typical settings are between 180°C and 300°C, depending upon the
surgeon's preference and the type of tissue and/or surgical procedure involved. The
TEMPERATURE SETTING may also be changed by depressing either the UP or
DOWN indicators on the Temperature Control Switch on the side of the handle
when the handle On/Off switch is in the "OFF" position.
5. To heat the blade, slide On/Off switch rearward to the "ON" position to expose the
red dot on the handle. An audible intermittent tone will sound while the blade is
heating, followed by a steady tone once the blade is at the selected temperature.
6. To activate the Thermal Coag mode, depress the Thermal Coag bar down. The
SCAPEL SET POINT will then change to 300°C. As long as the Thermal coag bar
is depressed, the Controller will sound an intermittent tone. When the Thermal Coag
switch is released, the Controller will return to the original set point and a steady
tone.
7. To change the blade temperature, operate the SCAPEL SET POINT switch located
on the face of the Controller. The blade temperature may also be changed by pressing
the Temperature Control Up/Down switches on the handle when the handle On/Off
switch is in the "OFF" position.
8. An adjustable-volume signal provides a steady tone when the blade is at the selected
temperature. The audible tone is intermittent if the blade is not the selected
temperature, as during warm-up, Thermal Coag, or undergoing excessive power
dissipation.
9. If at any time the blade fails to have acceptable electrical characteristics as determined
by the controller, the CHANGE BLADE light will go on, and a warning will sound.
10. To remove a blade from the handle, pull straight out.
CAUTION: If the blade is hot, use a sponge or a clamp to grasp the blade on the
black portion of the blade.
11. If the blade becomes dislodged, cool the blade to room temperature before
reinsertion.
(4)
PRECAUZIONI
Le precauzioni relative all’uso dell’unità di controllo sono elencate sull’unità stessa.
Tenere comunque presente quanto segue.
• NON IMMERGERE IL MANIPOLO IN SOSTANZE LIQUIDE.
• NON USARE QUESTO DISPOSITIVO IN PRESENZA DI GAS O LIQUIDI
INFIAMMABILI.
• PRIMA DI ESSERE RIUTILIZZATO, IL MANIPOLO VA RISTERILIZZATO.
Vedere la sezione Pulizia e risterilizzazione del manipolo.
• Teli chirurgici in plastica
Se viene usato un telo chirurgico in plastica, l’incisione iniziale della pelle va
eseguita con la lama fredda (manipolo in posizione "OFF").
• Unità elettrochirurgiche
PER EVITARE DI DANNEGGIARE GRAVEMENTE L’UNITÀ DI
CONTROLLO DEL BISTURI HEMOSTATIX, NON PORRE LA LAMA
HEMOSTATIX A CONTATTO CON ELETTRODI ELETTROCHIRURGICI
(Bovie). Tenere la lama Hemostatix e l’elettrodo elettrochirurgico ad almeno 1 cm
di distanza.
• Evitare di ustionare accidentalmente il paziente
NON APPOGGIARE IL BISTURI HEMOSTATIX SUI TELI CHIRURGICI O
SUL PAZIENTE MENTRE LA LAMA È ATTIVA. Mentre è attiva, la lama è
sufficientemente calda da poter provocare ustioni al paziente in caso di contatto.
Nei periodi della procedura durante i quali il bisturi Hemostatix non viene
utilizzato, si consiglia di portare l’interruttore On/Off del manipolo in posizione
"OFF."
• Asciugatura del manipolo dopo il trattamento in autoclave
L’uso immediatamente dopo il trattamento in autoclave può provocare il
temporaneo malfunzionamento a causa della ritenzione di umidità all’interno del
manipolo. Tale problema può essere evitato adottando un ciclo di asciugatura in
autoclave o altri metodi di asciugatura del manipolo prima dell’uso.
PERICOLO: POSSIBILE PERICOLO DI ESPLOSIONE SE USATO IN
PRESENZA DI ANESTETICI INFIAMMABILI.
(57)
tuttavia, l’esposizione ripetuta a temperature di 132 ºC (270 ºF) dei dispositivi non avvolti
o in condizioni "flash" può provocare lo scoloramento e/o la deformazione dei
componenti del manipolo, del cavo o del connettore, riducendo così la vita utile del
prodotto. Al fine di ridurre/prevenire l’eventuale corrosione subordinata alla sterilizzazione
a vapore, è consigliabile sottoporre il dispositivo ad un completo ciclo di asciugatura. Nel
caso della sterilizzazione a vapore in autoclave, è necessario avvolgere debitamente il
manipolo. I parametri consigliati sono i seguenti.
Sterilizzazione a vapore sotto pressione
Temperatura:
Tempo di esposizione:
Tempo di asciugatura:
132 ºC (270 ºF)
15 minuti
30 minuti
Temperatura:
Tempo di esposizione:
Tempo di asciugatura:
121 ºC (250 ºF)
30 minuti
30 minuti
Sterilizzazione a vapore sotto vuoto
Temperatura:
Tempo di esposizione:
Tempo di asciugatura:
132 ºC (270 ºF)
4 minuti
30 minuti
Le indicazioni e i parametri sopra riportati sono stati debitamente testati e costituiscono i
migliori metodi per la pulizia e la risterilizzazione del dispositivo. In caso di quesiti,
telefonare al numero 1-800-SCALPEL.
(56)
SYSTEM OPERATING INSTRUCTIONS-MODEL 150 CONTROLLER
1.
Attach the handle to the Controller by aligning the arrow on the handle connector
with the arrow on the front panel receptacle and plugging it into the receptacle.
2. Turn on the Controller by activating the POWER switch. If a blade is not in the
handle, the CHANGE BLADE light will flash. When a functional blade is inserted,
the CALIBRATING light will flash while the Controller is calibrating to the blade.
The CHANGE BLADE light will reactivate whenever the continuous calibration
function determines that the blade has become unacceptable for use. When the
Controller has finished calibrating and determined the blade to be acceptable for use,
the READY TO HEAT light will go on.
3. To insert new blade: insert the connector end of the blade into handle (sharp edge on
side opposite On/Off switch) until it snaps into place and is firmly seated.
4. Adjust the TEMPERATURE SETTING control to the original setting desired by the
surgeon. Initial skin incision should be made with blade cold (handle in Off
position). For other tissues, typical settings are between 180°C and 260°C, depending
upon the surgeon's preference and the type of tissue and/or surgical procedure
involved. The TEMPERATURE SETTING may also be changed by depressing the
UP indicator on the Temperature Control Switch on the side of the handle when the
handle "OFF" switch is in the Off position. (Note: the temperature setting of the
Model 150 Controller is upwardly adjustable only. Depressing the "Down" indicator
on the handle will not affect the temperature setting.)
5. To heat the blade, slide the On/Off switch rearward to the "ON" position to expose
the red dot on the handle. The READY TO HEAT light will go out and an audible
intermittent tone will sound while the blade is heating; the tone will change to a
steady tone and the BLADE AT TEMP light will go on when the blade reached the
selected temperature.
6. To activate the Thermal Coag mode, depress the Thermal Coag bar down. The
TEMPERATURE SETTING DISPLAY will then change to 270°C. As long as the
Thermal Coag bar is depressed, the Controller will sound an intermittent tone. When
the Thermal Coag switch is released, the Controller will return to the original set
point and a steady tone.
7. To change the blade temperature, operate the TEMPERATURE SETTING switch
on the face of the Controller. The blade temperature may also be changed by pressing
the Up Temperature Control switch on the handle when the handle On/Off switch
is in the "OFF" position.
8. An adjustable-volume signal provides a steady tone when the blade is at the selected
temperature. The audible tone is intermittent if the blade is not at the selected
temperature, as during warm-up, Thermal Coag, or when undergoing excessive
power dissipation.
9. If at any time the blade fails to have acceptable electrical characteristics as determined
by the controller, the CHANGE BLADE light will go on, and the READY TO
HEAT light or the BLADE AT TEMP light will go off.
10. To remove a blade from the handle, pull straight out.
CAUTION: if the blade is hot, use a sponge or a clamp to grasp the blade on the
black portion of the blade.
11. If the blade becomes dislodged, cool the blade to room temperature before
reinsertion.
(5)
SYSTEMOPERATINGINSTRUCTIONS-MODEL600CONTROLLER
Pulizia e risterilizzazione del manipolo
See the Hemostatix Thermal Scalpel Operating Manual for detailed instructions on use
of the Controller and System.
Pulizia
1.
Attach the handle to the Controller by aligning the arrow on the handle connector
with the arrow on the front panel receptacle and plugging it into the front panel
receptacle.
2. Apply power to the instrument by placing the POWER switch in the up position.
After completion of the power on self test, the CHANGE INSTRUMENT light will
illuminate if a blade is not in the handle. When a functional blade is inserted, the
CHANGE INSTRUMENT light will extinguish, and the CALIBRATING light
will illuminate. The CHANGE INSTRUMENT light will reactivate and an audible
alarm is heard whenever the automatic and continuous error checking function
determines that the blade has become unacceptable for further use.
3. Insert new blade. Insert connector end of blade into handle (sharp edge on side
opposite On/Off switch) until the blade is firmly seated.
4. After successful calibration is complete the CALIBRATING light will go out. An
audible success tone also indicates completion of the calibration.
5. Adjust the TEMPERATURE SETTING to the initial setting desired by the surgeon.
Initial skin incision should be made with blade cold (handle in off position). For
other tissues, typical settings are between 180°C and 300°C depending upon the
surgeon's preference and the type of tissue and/or surgical procedure involved.
6. To heat the blade, slide On/Off switch to the "ON" position to expose the red dot.
The ENERGIZED light will turn on and the audible tone is heard.
7. To activate the Thermal Coag mode, depress the Thermal Coag bar down. The
TEMPERATURE SETTING DISPLAY will then change to 300°C. As long as the
Thermal Coag bar is depressed, the Controller will sound an intermittent tone.
When the Thermal Coag switch is released, the Controller will return to the original
set point and a steady tone.
8. To change to blade temperature operate the TEMP switches UP or DOWN. The
blade temperature may also be changed by pressing the Temperature Control
switches on the handle when the Handle On/Off switch is in the "OFF" position.
9. An adjustable-volume signal provides a steady tone when the blade is at the selected
temperature. The audible signal is intermittent if the blade edge is not at the selected
temperature (as during warm-up or cool down), Thermal Coag, or excessive
dissipation.
10. If at any time the blade fails to have acceptable electrical characteristics as determined
by the instrument, the CHANGE INSTRUMENT light will illuminate, the
ENERGIZED light will extinguish, and an audible warning tone will be generated.
11. To remove a blade from the handle, pull straight out.
CAUTION: If the blade is hot, use a sponge or a clamp to grasp the blade on the
back portion of the blade.
12. If the blade becomes dislodged, cool the blade to room temperature before
reinsertion.
(6)
NON IMMERGERE IL MANIPOLO IN ALCUNA SOSTANZA LIQUIDA. Non
consentire l’infiltrazione di sostanze liquide all’interno del manipolo. Non sottoporre il
manipolo a pulizia ad ultrasuoni.
Per la pulizia del manipolo modello 5050 e del cavo, si consiglia la pulizia manuale. Poiché
non è possibile immergere il dispositivo, attenersi alle seguenti indicazioni.
La pulizia va eseguita non appena possibile dopo l’uso. Preparare una soluzione enzimatica
(ad esempio, Klenzyme ™) e una soluzione detergente (ad esempio, Manu-Klenz™) in
base alle istruzioni fornite dai rispettivi produttori. La soluzione enzimatica non ha azione
pulente. Essa è infatti prevista per la scomposizione del sangue e degli altri fluidi corporei
(ad esempio, le proteine) per agevolare la pulizia. I detergenti contengono agenti umettanti
ed emulsificanti in grado di sospendere la sporcizia e di evitare la formazione di composti
insolubili o strati di impurità sul dispositivo o sulla superficie della soluzione detergente.
Passare delicatamente la superficie del dispositivo con una spugna o una salvietta imbevuta
di soluzione enzimatica. Risciacquare bene l’alloggiamento della lama del dispositivo con
la soluzione enzimatica e usare uno spazzolino a setole morbide per asportare i residui
visibili, prestando particolare attenzione alle fessure e ad altre aree difficili da pulire. Evitare
l’uso di scovolini o di bastoncini con punta ovattata: essi tendono a sfilacciarsi e a lasciare
particelle residue all’interno dell’alloggiamento della lama. Esaminare attentamente il
dispositivo per rilevare l’eventuale presenza di sporcizia ostinata (come sangue o proteine).
La soluzione enzimatica è anch’essa composta da sostanze proteiche e va quindi
completamente rimossa con un detergente. Ripetere i passaggi descritti per la pulizia della
superficie del dispositivo e dell’alloggiamento della lama con uno spazzolino a setole
morbide e la soluzione detergente. Per rimuovere tutte le tracce delle sostanze detergenti e
i residui solidi, è necessario un risciacquo in acqua di rubinetto tiepida.
Dopo la pulizia, scuotere il dispositivo per eliminare l’acqua in eccesso e passare il
manipolo e il cavo con un panno morbido e asciutto.
Sterilizzazione
Prima della risterilizzazione, accertarsi che il cavo non presenti rotture e che non vi siano
tracce di materiali estranei nell’alloggiamento della lama o sul connettore. Verificare che
l’interruttore On/Off del manipolo sia in posizione "ON" o "OFF" (che non si trovi, cioè,
tra le due posizioni). Avvolgere il cavo con spire di 15-20 cm e confezionarlo nel materiale
appropriato.
I processi di sterilizzazione principalmente usati nelle strutture sanitarie sono la
sterilizzazione a vapore e quella mediante ossido di etilene (EO). Per l’efficace
sterilizzazione del manipolo modello 5050 e del cavo, è possibile usare uno qualsiasi di
questi due metodi. La sterilizzazione mediante EO è il processo da preferire poiché assicura
la lunga durata della vita utile del dispositivo. La sterilizzazione a vapore, tuttavia, è
economica e non comporta considerazioni quali l’esposizione del personale o dei pazienti
ai residui tossici della sostanza sterilizzante. È possibile usare la sterilizzazione a vapore;
(55)
ISTRUZIONI PER L’USO DEL SISTEMA – MODELLO 600
Handle Cleaning and Resterilization
Per le istruzioni particolareggiate per l’uso dell’unità di controllo e del sistema, consultare il manuale
d’uso del bisturi termico Hemostatix.
Cleaning
1.
DO NOT IMMERSE THE HANDLE IN LIQUID OF ANY KIND. Do not allow any
solution to penetrate to the interior of the handle. Do not use ultrasonic cleaning.
Collegare il manipolo all’unità di controllo allineando la freccia del connettore del manipolo
con la freccia dell’apposita presa situata sul pannello anteriore dell’unità e inserendo il
connettore nella presa.
2. Accendere lo strumento spostando verso l’alto l’interruttore di alimentazione (POWER). Alla
conclusione dell’autoverifica iniziale all’accensione, se non è stata inserita alcuna lama nel
manipolo, l’indicatore luminoso Sostituire strumento (CHANGE INSTRUMENT) si accende.
Quando viene inserita una lama funzionante, l’indicatore luminoso Sostituire strumento
(CHANGE INSTRUMENT) si spegne e l’indicatore luminoso Calibrazione (CALIBRATING)
si accende. L’indicatore luminoso Sostituire strumento (CHANGE INSTRUMENT) si
riaccende e viene emesso un segnale acustico di allarme quando la funzione automatica e
continua di controllo degli errori determina che la lama non è più idonea all’uso.
3. Per inserire una nuova lama: inserire l’estremità della lama munita di connettore nel manipolo
(la parte affilata deve trovarsi sul lato opposto rispetto all’interruttore On/Off) fino a farla
scattare saldamente in posizione.
4. Dopo la calibrazione, l’indicatore luminoso Calibrazione (CALIBRATING) si spegne. La
conclusione della calibrazione viene anche segnalata dall’emissione di un segnale acustico.
5. Regolare il comando per la regolazione della temperatura (TEMPERATURE SETTING)
sull’impostazione iniziale desiderata dal chirurgo. L’incisione iniziale della pelle va eseguita con
la lama fredda (manipolo in posizione "OFF"). Per gli altri tessuti, le impostazioni tipiche sono
comprese tra i 180 °C e i 300 °C, a seconda delle preferenze del chirurgo e del tipo di tessuto
e/o della procedura chirurgica del caso.
6. Per riscaldare la lama, portare l’interruttore On/Off in posizione "ON" rendendo visibile il
puntino rosso sul manipolo. L’indicatore luminoso Lama attiva (ENERGIZED) si accende e
viene emesso un segnale acustico.
7. Per attivare la modalità Termocoagulazione, premere la barra Termocoagulazione (Thermal
Coag). Il display dell'impostazione della temperatura (TEMPERATURE SETTING) si
imposta quindi su 300°C. Mentre la barra Termocoagulazione (Thermal Coag) viene tenuta
premuta, l’unità di controllo emette un segnale acustico intermittente. Quando la barra
Termocoagulazione (Thermal Coag) viene rilasciata, l’unità di controllo torna al setpoint
originale ed emette un segnale acustico continuo.
8. Per variare la temperatura della lama, usare i tasti con le frecce rivolte verso l’alto e verso il basso
del comando per la regolazione della temperatura (TEMP). La temperatura della lama può
anche venire variata premendo le frecce del comando per la regolazione della temperatura
(Temperature Control) situato sul manipolo, quando l’interruttore On/Off del manipolo si
trova in posizione "OFF".
9. Quando la lama raggiunge la temperatura selezionata, il sistema emette un segnale acustico
continuo a volume regolabile. Il segnale acustico è intermittente se la lama non è alla
temperatura selezionata, come durante il riscaldamento, il raffreddamento, la
termocoagulazione o nelle situazioni in cui vi sia un’eccessiva dispersione di corrente.
10. Se, in un momento qualsiasi, l’unità di controllo determina l’inaccettabilità delle
caratteristiche elettriche della lama, l’indicatore luminoso Sostituire strumento (CHANGE
INSTRUMENT) si accende, l’indicatore luminoso Lama attiva (ENERGIZED) si spegne, e
viene emesso un segnale acustico di avviso.
11. Per estrarre la lama dal manipolo, tirarla semplicemente fuori dal manipolo.
ATTENZIONE: se la lama è calda, usare una spugna o una pinza per afferrarla in
corrispondenza della sezione posteriore.
12. Se la lama si stacca, portarla a temperatura ambiente prima di reinserirla.
(54)
Manual cleaning is the recommended method of cleaning for the Model 5050 handle and
cable. Since the device cannot be immersed, it is important to adhere to the following
guidelines.
Cleaning should begin as soon after use as possible. Prepare an enzyme solution (e.g.
Klenzyme ™) and a detergent solution (e.g., Manu-Klenz™), as recommended by the
manufacturers. An enzyme is not a cleaner. An enzyme is intended to break down blood
and bodily fluids (i.e., protein) and thus facilitate cleaning. Detergents contain wetting
and emulsifying agents that suspend soil and prevent the formation of insoluble
compounds or scum on the device or on the surface of the cleaning solution.
Gently wipe the surface of the device with a sponge or towel that has been moistened with
the enzyme solution. Rinse the blade receptacle of the device thoroughly with the enzyme
solution and use a soft bristle brush to remove any gross soil, paying particular attention
to crevices and other hard-to-clean areas. The use of pipe cleaners or cotton swabs should
be avoided since they tend to fray, leaving particles inside the blade receptacle. Carefully
examine the device for any adherent visible soil (e.g., blood, protein). Enzymes are
themselves protein substances and must be thoroughly removed with a detergent. Repeat
the steps of wiping the surface of the device and cleaning the blade receptacle with a soft
bristle brush and the detergent solution. Rinsing with lukewarm tap water is necessary to
remove all traces of detergents and extraneous debris.
Following cleaning, shake the device to remove excess water and wipe the handle and cable
with a soft, dry cloth.
Sterilization
Before resterilization, inspect to ensure there are no breaks in the cable and no foreign
material in the blade receptacle or the connector. Ensure that the handle On/Off switch
is in the "ON" or "OFF" position (not in between). Loop the cord assembly into
approximately seven inch diameter circles and place in appropriate packaging material.
The sterilization processes predominantly used in health care facilities are steam
sterilization and ethylene oxide (EO) sterilization. Both methods are effective in sterilizing
the Model 5050 handle and cable. EO sterilization is the preferred sterilization process
for it will provide the longest useful life of the device. However, steam sterilization is costeffective and poses no concerns about exposure of personnel or patients to toxic sterilant
residuals. Steam sterilization may be used, although repeated exposures at temperatures of
132ºC (270ºF) in an "unwrapped" or "flash" condition may result in discoloration and/or
deformation of the handle parts, cord, or connector, thus reducing the life of the product.
A complete drying cycle should be performed to reduce/prevent eventual corrosion from
the steam sterilization process. If steam autoclaving is to be used, the handles are to be
"wrapped" and the recommended parameters are:
(7)
Gravity displacement steam sterilization
ISTRUZIONI PER L’USO DEL SISTEMA – MODELLO 150
Temperature:
Exposure time:
Drying time:
132ºC (270ºF)
15 minutes
30 minutes
Temperature:
Exposure time:
Drying time:
121ºC (250ºF)
30 minutes
30 minutes
Prevacuum steam sterilization
Temperature:
Exposure time:
Drying time:
132ºC (270ºF)
4 minutes
30 minutes
The above guidelines and parameters have been properly tested to provide the best
methods for cleaning and resterilization of your device. Should you have further
questions, please contact us at 1-800-SCALPEL.
(8)
1.
Collegare il manipolo all’unità di controllo allineando la freccia del connettore del manipolo con la freccia
dell’apposita presa situata sul pannello anteriore dell’unità e inserendo il connettore nella presa.
2. Accendere l’unità di controllo premendo l’interruttore di alimentazione (POWER). Se non è stata inserita
alcuna lama nel manipolo, l’indicatore luminoso Sostituire lama (CHANGE BLADE) comincia a
lampeggiare. Quando viene inserita una lama funzionante, l’indicatore luminoso Calibrazione
(CALIBRATING) lampeggia durante la calibrazione dell’unità di controllo in funzione della lama
inserita. L’indicatore luminoso Sostituire lama (CHANGE BLADE) si riaccende quando la funzione di
calibrazione continua determina che la lama non è più idonea all’uso. Una volta terminata la calibrazione
e determinata l’accettabilità della lama all’uso, l’indicatore luminoso Pronto per riscaldamento (READY
TO HEAT) dell’unità di controllo si accende.
3. Per inserire una nuova lama: inserire l’estremità della lama munita di connettore nel manipolo (la parte
affilata deve trovarsi sul lato opposto rispetto all’interruttore On/Off) fino a farla scattare saldamente in
posizione.
4. Regolare il comando per la regolazione della temperatura (TEMPERATURE SETTING)
sull’impostazione originale desiderata dal chirurgo. L’incisione iniziale della pelle va eseguita con la lama
fredda (manipolo in posizione "OFF"). Per gli altri tessuti, le impostazioni tipiche sono comprese tra i 180
°C e i 260 °C, a seconda delle preferenze del chirurgo e del tipo di tessuto e/o della procedura chirurgica
del caso. È possibile variare l’impostazione della temperatura anche premendo la freccia rivolta verso l’alto
del comando per la regolazione della temperatura (TEMPERATURE SETTING) situato sul lato del
manipolo, quando l’interruttore On/Off del manipolo si trova in posizione "OFF". (Nota: l’impostazione
della temperatura sull’unità di controllo modello 150 è regolabile solo progressivamente verso l’alto. La
pressione della freccia rivolta verso il basso sul manipolo non apporta alcuna variazione al valore impostato
per la temperatura.)
5. Per riscaldare la lama, fare scorrere l’interruttore On/Off all’indietro portandolo in posizione "ON" e
rendendo visibile il puntino rosso sul manipolo. L’indicatore luminoso Pronto per riscaldamento (READY
TO HEAT) si spegne e, durante il riscaldamento della lama, viene emesso un segnale acustico
intermittente. Quando la lama raggiunge la temperatura selezionata, il sistema emette un segnale acustico
continuo e l’indicatore luminoso Lama a temperatura (BLADE AT TEMP) si accende.
6. Per attivare la modalità Termocoagulazione, premere la barra Termocoagulazione (Thermal Coag). Il
display dell'impostazione della temperatura (TEMPERATURE SETTING) si imposta quindi su 270
°C. Mentre la barraTermocoagulazione (Thermal Coag) viene tenuta premuta, l’unità di controllo emette
un segnale acustico intermittente. Quando la barra Termocoagulazione (Thermal Coag) viene rilasciata,
l’unità di controllo torna al setpoint originale ed emette un segnale acustico continuo.
7. Per variare la temperatura della lama, usare il comando per la regolazione della temperatura
(TEMPERATURE SETTING) situato sul pannello anteriore dell’unità di controllo. La temperatura
della lama può anche venire variata premendo la freccia rivolta verso l’alto del comando per la regolazione
della temperatura (Temperature) situato sul manipolo, quando l’interruttore On/Off del manipolo si trova
in posizione "OFF".
8. Quando la lama raggiunge la temperatura selezionata, il sistema emette un segnale acustico continuo a
volume regolabile. Il segnale acustico è intermittente se la lama non è alla temperatura selezionata, come
durante il riscaldamento, la termocoagulazione o nelle situazioni in cui vi sia un’eccessiva dispersione di
corrente.
9. Se, in un momento qualsiasi, l’unità di controllo determina l’inaccettabilità delle caratteristiche elettriche
della lama, l’indicatore luminoso Sostituire lama (CHANGE BLADE) si accende e gli indicatori luminosi
Pronto per riscaldamento (READY TO HEAT) o Lama a temperatura (BLADE AT TEMP) si
spengono.
10. Per estrarre la lama dal manipolo, tirarla semplicemente fuori dal manipolo.
ATTENZIONE: se la lama è calda, usare una spugna o una pinza per afferrarla in corrispondenza della
sezione posteriore.
11. Se la lama si stacca, portarla a temperatura ambiente prima di reinserirla.
(53)
ISTRUZIONI PER L’USO DEL SISTEMA – MODELLO 3000
1.
Collegare il manipolo all’unità di controllo allineando la freccia del connettore del manipolo
con la sommità dell’apposita presa situata sul pannello anteriore dell’unità e inserendo il
connettore in tale presa.
2. Accendere l’unità di controllo premendo l’interruttore di alimentazione (POWER). Se non è
stata inserita alcuna lama nel manipolo, nessuno degli indicatori luminosi dell’unità di
controllo modello 3000 si accende, ad eccezione dell’indicatore di impostazione. Quando viene
inserita una lama funzionante, l’indicatore luminoso Calibrazione (CALIBRATING) si
accende e resta acceso durante la calibrazione dell’unità di controllo in funzione della lama
inserita. L’indicatore luminoso Sostituire lama (CHANGE BLADE) si accende quando la
funzione di calibrazione continua determina che la lama non è più idonea all’uso. Una volta
terminata la calibrazione e determinata l’accettabilità della lama all’uso, l’indicatore luminoso
Pronto (READY) dell’unità di controllo si accende.
3. Per inserire una nuova lama: inserire l’estremità della lama munita di connettore nel manipolo
(la parte affilata deve trovarsi sul lato opposto rispetto all’interruttore On/Off) fino a farla
scattare saldamente in posizione.
4. Regolare il comando Setpoint bisturi (SCAPEL SET POINT) sull’impostazione iniziale
desiderata dal chirurgo. L’incisione iniziale della pelle va eseguita con la lama fredda (manipolo
in posizione “OFF“). Per gli altri tessuti, le impostazioni tipiche sono comprese tra i 180 °C e
i 300 °C, a seconda delle preferenze del chirurgo e del tipo di tessuto e/o della procedura
chirurgica del caso. È possibile variare l’impostazione della temperatura (TEMPERATURE
SETTING) anche premendo le frecce rivolte verso l’alto o verso il basso del comando per la
regolazione della temperatura (Temperature) situato sul lato del manipolo, quando
l’interruttore On/Off del manipolo si trova in posizione “OFF“.
5. Per riscaldare la lama, fare scorrere l’interruttore On/Off all’indietro portandolo in posizione
“ON“ e rendendo visibile il puntino rosso sul manipolo. Durante il riscaldamento della lama
viene emesso un segnale acustico intermittente, seguito da un segnale acustico continuo
quando la lama raggiunge la temperatura desiderata.
6. Per attivare la modalità Termocoagulazione, premere la barra Termocoagulazione (Thermal
Coag). Il Setpoint bisturi (SCAPEL SET POINT) si imposta quindi su 300 °C. Mentre la
barra Termocoagulazione (Thermal Coag) viene tenuta premuta, l’unità di controllo emette un
segnale acustico intermittente. Quando la barra Termocoagulazione (Thermal Coag) viene
rilasciata, l’unità di controllo torna al setpoint originale ed emette un segnale acustico continuo.
7. Per variare la temperatura della lama, usare il comando Setpoint bisturi (SCAPEL SET
POINT) situato sul pannello anteriore dell’unità di controllo. La temperatura della lama può
anche venire variata premendo le frecce rivolte verso l’alto o verso il basso del comando per la
regolazione della temperatura (Temperature Control) situato sul manipolo, quando
l’interruttore On/Off del manipolo si trova in posizione “OFF“.
8. Quando la lama raggiunge la temperatura selezionata, il sistema emette un segnale acustico
continuo a volume regolabile. Il segnale acustico è intermittente se la lama non è alla
temperatura selezionata, come durante il riscaldamento, la termocoagulazione o nelle situazioni
in cui vi è un’eccessiva dispersione di corrente.
9. Se, in un momento qualsiasi, l’unità di controllo determina l’inaccettabilità delle caratteristiche
elettriche della lama, l’indicatore luminoso Sostituire lama (CHANGE BLADE) si accende e
viene emesso un segnale acustico di avviso.
10. Per estrarre la lama dal manipolo, tirarla semplicemente fuori dal manipolo.
ATTENZIONE: se la lama è calda, usare una spugna o una pinza per afferrarla in
corrispondenza della sezione posteriore.
11. Se la lama si stacca, portarla a temperatura ambiente prima di reinserirla.
(52)
PRECAUTIONS
Precautions for use of the Controller are listed on the unit. The following should
be emphasized.
• DO NOT IMMERSE HANDLE IN LIQUIDS.
• DO NOT USE THIS PRODUCT IN THE PRESENCE OF FLAMMABLE
GASES OR LIQUIDS.
• HANDLE MUST BE RESTERILIZED PRIOR TO REUSE. See section on
Handle Cleaning and Resterilization.
• Plastic Skin Drapes
If a plastic skin drape is used, initial skin incision should be made cold (handle in
the “OFF” position).
• Electrosurgical Units
DO NOT TOUCH HEMOSTATIX BLADE TO ELECTROSURGICAL
(Bovie) TIP SINCE SIGNIFICANT DAMAGE TO THE HEMOSTATIX
SCALPEL CONTROLLER WILL RESULT. Keep at least 1 cm between the
Hemostatix blade and the electrosurgical tip.
• Avoiding Inadvertent Patient Burns
DO NOT REST THE HEMOSTATIX SCALPEL ON THE DRAPES OR ON
THE PATIENT WHEN BLADE IS ENERGIZED. When energized, the blade is
sufficiently hot that patient burns can result from contact.
For portions of procedures where the Hemostatix scalpel is not being used, it is
recommended that the handle On/Off switch can be positioned "OFF."
• Handle Drying Following Autoclaving
Immediate use after autoclaving may result in a temporary malfunction due to
moisture retained within the handle. Use of a drying cycle in the autoclave or other
means of drying the handle prior to use can preclude such problems.
DANGER: POSSIBLE EXPLOSION HAZARD IF USED IN THE PRESENCE
OF FLAMMABLE ANESTHETICS.
(9)
Comandi del manipolo, lama e connettore
10. Interruttore On/Off
Facendo scorrere l’interruttore all’indietro lo si blocca meccanicamente in posizione
“ON“ e si attiva la lama. Quando l’interruttore è in posizione “ON“, è visibile un
puntino rosso. Facendo scorrere l’interruttore in avanti e portandolo in posizione
“OFF“ si disattiva la lama.
11. Barra Termocoagulazione [Thermal Coag]
Quando l’interruttore On/Off si trova in posizione “ON“, premendo la sezione della
barra si attiva la modalità termocoagulazione (Thermal Coag), che resta attiva per il
periodo in cui la barra viene tenuta premuta. Rilasciando la barra, la temperatura
torna all’impostazione di temperatura originale.
12. Comando per la regolazione della temperatura [Temperature]
Con l’interruttore On/Off in posizione “OFF“, premere uno dei tasti del comando
per la regolazione della temperatura per aumentare o ridurre il valore impostato.
La freccia rivolta verso l’alto aumenta il valore impostato per la temperatura, mentre
la freccia rivolta verso il basso lo riduce. Tenendo premuto uno di questi tasti, il valore
impostato per la temperatura continua ad aumentare o a diminuire fino a raggiungere
il limite preimpostato. L’impostazione della temperatura rimane all’ultimo valore
riportato al rilascio dell’interruttore.
(Nota: durante l’uso del bisturi Hemostatix con l’unità di controllo modello 150, è
attiva solo la freccia rivolta verso l’alto. Una volta raggiunta l’impostazione più elevata,
tenendo premuto il tasto si riporta la temperatura all’impostazione più bassa e
l’aumento sequenziale del valore di temperatura riprende. La pressione della freccia
rivolta verso il basso non apporta alcuna variazione al valore impostato per la
temperatura.)
13. Lama
Inserire l’estremità della lama munita di connettore nel manipolo fino a farla scattare
saldamente in posizione.
14. Connettore del manipolo
Connettore per il collegamento del manipolo all’unità di controllo.
HEMOSTATIX
Hemostatix Medical Technologies • 8400 Wolf Lake Drive, Ste. 109 • Bartlett, TN 38133
WARRANTY
Hemostatix Medical Technologies hereby warrants to the original purchaser that
reasonable care has been used in the manufacture of the Hemostatix Scalpel Handle and
that, when properly used, it will be free from defects in the material or workmanship for
a period of sixty (60) days after the date of shipment from Hemostatix Medical
Technologies. The sole and exclusive remedy with respect to any Hemostatix Scalpel
Handle found within its warranty period not to meet these standards is that, after return
to and examination by Hemostatix Medical Technologies, Hemostatix Medical
Technologies will without charge at its option either repair or replace that portion of the
Hemostatix Scalpel Handle found to be defective. This warranty shall not apply (a) if that
portion of the Hemostatix Scalpel Handle has been repaired by anyone other than
qualified service personnel approved by Hemostatix Medical Technologies or altered in
any way which, in Hemostatix Medical Technologies’s judgment, affects its usability or
reliability; or (b) if the serial or lot number has been altered, effaced, or removed; or (c) if
the fault has been caused by abnormal conditions of operation or misuse by permitting
electrical contact with an active electrosurgical (Bovie) electrode. In such cases,
Hemostatix Medical Technologies will notify the purchaser of Hemostatix Medical
Technologies’s determination, and repairs if requested will be billed at Hemostatix Medical
Technologies’s normal rates. Estimates will be submitted before any repair work is started,
if requested.
Equipment being returned must obtain an RGA# from Hemostatix
Medical Technologies before it is sent. Handles being returned must
be cleaned, sterilized, and packaged in sterile packaging which
verifies the sterility of the handle prior to return to Hemostatix
Medical Technologies. Any handle not properly cleaned, sterilized,
and packaged as described in this warranty will be disposed of and
no warranty will be in effect.
THE FOREGOING EXPRESS WARRANTY, AS CONDITIONED AND LIMITED,
IS IN LIEU OF AND EXCLUDES ALL OTHER WARRANTIES NOT EXPRESSLY
SET FORTH HEREIN, WHETHER EXPRESSED OR IMPLIED, BY OPERATION
OF LAW OR OTHERWISE INCLUDING, BUT NOT LIMITED TO, ANY
IMPLIED WARRANTIES OR MERCHANTABILITY OR FITNESS FOR
PARTICULAR PURPOSE. HEMOSTATIX MEDICAL TECHNOLOGIES SHALL
NOT BE LIABLE FOR ANY INCIDENTAL OR CONSEQUENTIAL LOSS,
DAMAGE, EXPENSE, OR LIABILITY DIRECT OR INDIRECT WITH RESPECT
TO THIS PRODUCT. HEMOSTATIX MEDICAL TECHNOLOGIES NEITHER
ASSUMES NOT AUTHORIZES ANY OTHER PERSON TO ASSUME FOR IT
ANY OTHER OR ADDITIONAL LIABILITY OR RESPONSIBILITY IN
CONNECTION WITH THIS PRODUCT.
1-800-SCALPEL
(50)
(11)
HEMOSTATIX
®
Pannello anteriore dell’unità di controllo
1.
Indicatore Sostituire strumento [Change Instrument] (solo modello 600)
Questo indicatore luminoso rosso si accende se la lama non è stata inserita
correttamente, se la lama non rientra nei limiti di calibrazione o se non è stata inserita
alcuna lama nel manipolo.
1.
Indicatore Sostituire lama [Change Blade] (solo modelli 150 e 3000)
Questo indicatore luminoso rosso si accende o lampeggia se la lama non è stata inserita
correttamente o se non rientra nei limiti di calibrazione. Sull’unità di controllo modello 150,
l’indicatore Sostituire lama lampeggia anche se non è stata inserita alcuna lama nel manipolo.
2.
Indicatore Calibrazione [Calibrating]
Questo indicatore luminoso giallo si accende o lampeggia durante la calibrazione del
sistema in base alla lama inserita. Si spegne a calibrazione completata.
3.
Indicatore Pronto [Ready] (solo modello 3000)
Questo indicatore luminoso verde si accende al completamento della calibrazione e
rimane acceso per tutto il periodo in cui la lama e il manipolo sono in condizioni
accettabili per l’uso, fino allo scollegamento della lama o del manipolo, o allo
spegnimento dell’unità di controllo.
3.
Indicatore Pronto per riscaldamento [Ready to Heat] (solo modello 150)
Questo indicatore giallo si accende a calibrazione completata. Rimane acceso fino
all’attivazione della lama mediante l’interruttore On/Off del manipolo.
4.
Indicatore Lama attiva [Energized] (solo modello 600)
Questo indicatore luminoso ambra si accende quando la lama viene attivata mediante
l’interruttore On/Off del manipolo. Rimane acceso durante tutto il periodo in cui alla
lama viene fornita corrente.
4.
Indicatore Lama a temperatura [Blade at Temp] (solo modello 150)
Questo indicatore luminoso giallo si accende quando la lama viene attivata mediante
l’interruttore On/Off del manipolo. Rimane acceso durante tutto il periodo in cui alla
lama viene fornita corrente.
5.
Interruttore di alimentazione [Power]
Accende e spegne lo strumento.
6.
Connettore per manipolo [Scalpel]
Presa per il collegamento del manipolo all’unità di controllo.
7.
Comando per la regolazione del volume [Volume]
Regola il volume del segnale acustico in modo continuo tra i livelli minimo e massimo.
8.
Comando per la regolazione della temperatura [Temperature]
Aumenta o riduce la temperatura della lama.
9.
Display dell’impostazione della temperatura [Temperature Setting]
Visualizza il valore dell’impostazione della temperatura della lama.
Manche de scalpel thermique Hemostatix
Modèle 5050
À utiliser avec les unités de commande série 150, 3000 et 600
du système de scalpel thermique Hemostatix.
Le manche de scalpel thermique Hemostatix est un instrument de coupe chirurgical conçu
pour maintenir les caractéristiques de coupe nette et précise d’un scalpel en acier
traditionnel et minimiser la perte de sang en coagulant simultanément les vaisseaux
sanguins à mesure qu’ils sont sectionnés. Le système de scalpel thermique Hemostatix
assure l’hémostase en un minimum de lésions tissulaires et quasiment aucune stimulation
musculaire, en conduisant la chaleur aux tissus via une lame chauffée.
Le système de scalpel thermique Hemostatix se compose des trois éléments suivants :
1. Unité de commande. Source d’alimentation électronique qui active la lame et assure
diverses fonctions automatiques d’étalonnage, de détection et de commande. Elle possède
des commandes utilisateur et des indicateurs visuels et sonores indiquant l’état de
l’instrument.
2. Manche. Manche de scalpel amovible, connecté au contrôleur par un câble électrique
flexible et léger, qui s’utilise avec les lames de scalpel jetables.
3. Lames. Différentes tailles de lames de scalpel jetables stériles sont disponibles (de taille,
forme et affûtage similaires aux lames conventionnelles) ; chauffage et microcircuit
intégrés.
PRÉSENTATION
Le manche de scalpel thermique Hemostatix est fourni stérile, sauf ouverture ou
endommagement du sachet. Avant toute réutilisation, restérilisez le manche. (Reportezvous à la section NETTOYAGE ET RESTÉRILISATION DU MANCHE.)
LAMES
Le manche modèle 5050 s’utilise avec les lames de scalpel HEMOSTATIX. Les lames série
57XX s’utilisent avec les unités de commande modèles 600 et 3000. Les lames série 56XX
s’utilisent avec l’unité de commande modèle 150.
(12)
(49)
HEMOSTATIX
®
Panneau avant de l’unité de commande
1.
Voyant Changement d’instrument [Change Instrument] (unité de commande 600
uniquement)
S’allume (en rouge) si la lame est mal installée ou si elle se trouve hors de la limite
d’étalonnage, ou si aucune lame n’a été insérée dans le manche.
1.
Voyant Changement de lame [Change Blade] (unités de commande 150 et 3000
uniquement)
S’allume ou clignote (en rouge) si la lame est mal installée ou si elle se trouve hors de
la limite d’étalonnage. Sur l’unité de commande modèle 150, ce voyant clignote
également en l’absence d’une lame dans le manche.
2.
Voyant Étalonnage [Calibrating]
S’allume ou clignote (en jaune) durant l’étalonnage du système en fonction de la
lame. S’éteint une fois l’étalonnage terminé.
3.
Voyant Prêt [Ready] (unité de commande modèle 3000 uniquement)
S’allume (en vert) une fois l’étalonnage terminé et reste allumé tant que la lame et le
manche sont utilisables ou jusqu’au débranchement de la lame ou du manche, ou
jusqu’à la mise hors tension de l’unité de commande.
3.
2. Il manipolo. Un’impugnatura riutilizzabile per bisturi, collegata all’unità di controllo
mediante un sottile cavo elettrico flessibile e usata con le lame monouso per bisturi.
Voyant Prêt à chauffer [Ready to Heat] (unité de commande modèle 150
uniquement)
S’allume (en jaune) une fois l’étalonnage terminé. Reste allumé tant que la lame est
activée par l’interrupteur de marche/arrêt (On/Off).
4.
3. Lame. Sono disponibili diverse misure di lame per bisturi monouso sterili (simili, per
dimensioni, forma e affilatura, alle lame tradizionali), dotate di microcircuiti di
riscaldamento.
Voyant Sous tension [Energized] (unité de commande modèle 600 uniquement)
S’allume (orange) tant que la lame est activée par l’interrupteur de marche/arrêt
(On/Off). Reste allumé tant que la lame est activée.
4.
Il manipolo per bisturi termico Hemostatix è fornito in condizioni sterili. L’integrità della
busta che lo contiene ne garantisce la sterilità. Per gli usi successivi a quello iniziale, il
manipolo va risterilizzato (a questo proposito, consultare la sezione PULIZIA E
RISTERILIZZAZIONE DEL MANIPOLO).
Voyant Lame à température [Blade at Temp] (unité de commande modèle 150
uniquement)
S’allume (en jaune) tant que la lame est activée par l’interrupteur de marche/arrêt.
Reste allumé tant que la lame est activée.
5.
Interrupteur d’alimentation [Power]
Met l’appareil sous tension secteur.
LAME
6.
Il manipolo modello 5050 è progettato per l’uso con le lame per bisturi HEMOSTATIX.
Le lame serie 57XX sono previste per l’uso con le unità di controllo modello 600 e 3000,
mentre le lame serie 56XX sono previste per l’uso con l’unità di controllo modello 150.
Connecteur de scalpel [Scalpel]
Prise de branchement du manche sur l’unité de commande.
7.
Réglage du volume [Volume]
Règle le volume de la tonalité en continu entre les niveaux minimum et maximum.
Sélecteur de température [Temperature]
Permet d’augmenter ou de diminuer la température de la lame.
Manipolo per bisturi termico Hemostatix
Modello 5050
Per l’uso con le unità di controllo dei sistemi a bisturi termico
Hemostatix modello 150, 3000 e 600
Il manipolo per bisturi termico Hemostatix è uno strumento chirurgico che fornisce
prestazioni di taglio precise e nette come quelle di un bisturi tradizionale in acciaio e che
riduce al minimo le perdite ematiche coagulando i vasi sanguigni simultaneamente al
taglio. Il sistema a bisturi termico Hemostatix consente di ottenere l’emostasi con minimi
danni tissutali e praticamente senza stimolazione muscolare, applicando calore ai tessuti
con una lama termoconduttrice ad alta temperatura.
Il sistema a bisturi termico Hemostatix è composto da tre elementi.
1. L’unità di controllo. Un alimentatore elettronico che fornisce corrente alla lama.
Questa unità è dotata di varie funzioni automatiche di calibrazione, rilevazione e controllo.
Consta inoltre di comandi azionabili dall’utente e di indicatori visivi e acustici relativi allo
stato dello strumento.
CONDIZIONI DI FORNITURA DEL DISPOSITIVO
8.
9.
(48)
Affichage du réglage de température [Temperature setting]
Affiche le réglage de température de la lame.
(13)
Commandes du manche, lame et connecteur
HEMOSTATIX
Hemostatix Medical Technologies • 8400 Wolf Lake Drive, Ste. 109 • Bartlett, TN 38133
10. Interrupteur de marche/arrêt [On/Off]
Glissez l’interrupteur vers l’arrière pour le bloquer en position Marche (On) et activer
la lame. Un point rouge est visible lorsque l’interrupteur se trouve sur position
Marche (On). Glissez l’interrupteur vers l’avant (Off) pour désactiver la lame.
11. Barre de thermocoagulation [Thermal Coag]
Lorsque l’interrupteur de marche/arrêt (On/Off) se trouve sur position Marche (On),
appuyez en un point de la barre pour activer le mode de thermocoagulation (Thermal
Coag) tant que la barre est enfoncée. Dès que vous relâchez la barre, la température
s’aligne à nouveau sur le réglage de température défini à l’origine.
12. Sélecteur de température [Temperature]
Lorsque l’interrupteur de marche/arrêt (On/Off) se trouve sur position Arrêt (Off),
appuyez sur l’un des sélecteurs de température pour augmenter ou diminuer le réglage
de température.
La flèche vers le haut augmente la température et la flèche vers le bas la diminue. Le
réglage de température continue à augmenter ou diminuer tant que vous appuyez sur
le sélecteur de température, jusqu’à ce que la limite prédéfinie soit atteinte. La
température adopte le dernier réglage défini au relâchement du sélecteur.
(Remarque : Lorsque vous utilisez le scalpel Hemostatix avec l’unité de commande
modèle 150, seule la flèche vers le haut est active. Une fois le réglage maximal atteint,
maintenez le sélecteur enfoncé pour ramener la température à la limite inférieure et
reprendre la séquence inverse. Appuyez sur la flèche vers le bas pour ne pas modifier
le réglage de température.)
13. Lame
Insérez le connecteur de la lame dans le manche, jusqu’à ce qu’il s’enclenche et soit
solidement fixé.
14. Connecteur du manche
Connecteur de branchement du manche sur l’unité de commande.
GARANTIE
Hiermit gewährleistet Hemostatix Medical Technologies dem Erstkäufer, dass der Hemostatix
Skalpellgriff mit angemessener Sorgfalt gefertigt wurde und bei vorschriftsmäßiger Handhabung für
einen Zeitraum von sechzig (60) Tagen nach dem Lieferdatum von Hemostatix Medical Technologies
frei von Material- und Verarbeitungsfehlern ist. Der einzige und ausschließliche Regressanspruch
bezüglich eines Hemostatix Skalpellgriffs, der sich innerhalb des Garantiezeitraums als mangelhaft
erweist, besteht darin, dass Hemostatix Medical Technologies nach Erhalt und Untersuchung des
betreffenden Hemostatix Skalpellgriffs den defekten Teil des Produkts nach eigenem Ermessen
entweder repariert oder ersetzt. Diese Garantie gilt nicht, wenn (a) das betreffende Teil des Hemostatix
Skalpellgriffs von jemand anderem als einem qualifizierten, von Hemostatix Medical Technologies
zugelassenen Servicetechniker repariert oder auf eine Weise geändert wurde, die nach Auffassung von
Hemostatix Medical Technologies die Gebrauchsfähigkeit oder Zuverlässigkeit des Produkts
beeinträchtigt; oder (b) die Serien- oder Chargennummer geändert, unleserlich gemacht oder entfernt
wurde; oder (c) die Störung durch abnormale Betriebsbedingungen oder unsachgemäße Verwendung
verursacht wurde, bei der es zu einem elektrischen Kontakt mit einer elektrochirurgischen Elektrode
(Bovie) gekommen ist. In diesen Fällen informiert Hemostatix Medical Technologies den Käufer von
den entsprechenden Untersuchungsergebnissen. Sollte der Käufer um Reparatur des Produkts bitten,
werden für diese die Standardgebühren von Hemostatix Medical Technologies berechnet. Falls
gewünscht, werden vor Beginn jeglicher Reparaturarbeiten Kostenvoranschläge unterbreitet.
Für Geräte, die an Hemostatix Medical Technologies zurückgesandt werden
sollen, muss zunächst eine Rücksendevollmacht (RGA-Nummer) beantragt
werden. Vor der Rücksendung an Hemostatix Medical Technologies müssen
die betreffenden Griffe gereinigt, sterilisiert und steril verpackt werden (d.h.
die Sterilität der Griffe muss auf der Verpackung bescheinigt werden). Griffe,
die nicht entsprechend den Anweisungen in dieser Garantie gereinigt,
sterilisiert und verpackt wurden, werden entsorgt und jegliche Garantie
verfällt.
DIE VORSTEHENDE AUSDRÜCKLICHE GARANTIE TRITT MIT ALL IHREN
BEDINGUNGEN UND BESCHRÄNKUNGEN AN DIE STELLE ALLER ANDEREN,
NICHT AUSDRÜCKLICH HIERIN ERTEILTEN STILLSCHWEIGENDEN ODER
AUSDRÜCKLICHEN GEWÄHRLEISTUNGEN, KRAFT GESETZES EINSCHLIESSLICH
(ABER NICHT DARAUF BESCHRÄNKT) ALLER STILLSCHWEIGENDEN
GEWÄHRLEISTUNGEN DER HANDELSÜBLICHKEIT ODER EIGNUNG FÜR EINEN
BESTIMMTEN ZWECK. HEMOSTATIX MEDICAL TECHNOLOGIES ÜBERNIMMT
KEINERLEI HAFTUNG FÜR MIT DIESEM PRODUKT VERBUNDENE NEBEN-,
FOLGE- ODER SONSTIGE SCHÄDEN, UNKOSTEN ODER DIREKT BZW. INDIREKT
MIT DIESEM PRODUKT VERBUNDENE VERPFLICHTUNGEN. HEMOSTATIX
MEDICAL TECHNOLOGIES ÜBERNIMMT KEINE WEITERE ODER ZUSÄTZLICHE
HAFTUNG ODER VERANTWORTUNG IN BEZUG AUF DIESES PRODUKT UND
ERMÄCHTIGT AUCH KEINE ANDEREN PERSONEN, EINE SOLCHE HAFTUNG
ODER VERANTWORTUNG FÜR HEMOSTATIX MEDICAL TECHNOLOGIES ZU
ÜBERNEHMEN.
1-800-SCALPEL
(14)
(47)
MODE D’EMPLOI DU SYSTÈME - UNITÉ DE COMMANDE
MODÈLE 3000
1.
Attachez le manche à l’unité de co’mmande en centrant la flèche du connecteur du manche sur
la partie supérieure de la prise du panneau avant et enfichez-le dans cette prise.
2. Mettez l’unité de commande sous tension en activant l’interrupteur d’alimentation (POWER).
Si aucune lame ne se trouve dans le manche, aucun voyant ne s’allume, sauf l’affichage de
réglage sur l’unité de commande modèle 3000. Dès qu’une lame fonctionnelle est insérée, le
voyant Étalonnage (CALIBRATING) s’allume pendant que l’unité de commande s’étalonne
par rapport à la lame. Le voyant Changement de lame (CHANGE BLADE) s’allume chaque
fois que la fonction d’étalonnage continu détermine que la lame est devenue impropre à
l’utilisation. Une fois que l’unité de commande a fini l’étalonnage et a déterminé que la lame
est acceptable, le voyant Prêt (READY) s’allume.
3. Pour insérer une lame neuve : insérez le connecteur de la lame dans le manche (bord coupant
à l’opposé de l’interrupteur de marche/arrêt (On/Off )), jusqu’à ce qu’il s’enclenche en position
et soit solidement fixé.
4. Placez la commande de réglage du scalpel (SCAPEL SET POINT) au réglage initial désiré par
le chirurgien. Pratiquez l’incision initiale de la peau avec la lame froide (manche sur position
Arrêt (Off )). Pour les autres tissus, les réglages typiques sont compris entre 180 et 300 ºC, selon
la préférence du chirugien et le type de tissus impliqués et/ou l’acte chirurgical prévu. Le réglage
de température (TEMPERATURE SETTING) est également modifiable en appuyant sur les
flèches vers le haut et vers le bas du sélecteur de température (Temperature) situé sur le côté du
manche lorsque l’interrupteur de marche/arrêt (On/Off) de ce dernier se trouve sur position
Arrêt (Off ).
5. Pour chauffer la lame, glissez l’interrupteur de marche/arrêt (On/Off) vers l’arrière sur position
Marche (On) pour exposer le point rouge du manche. Une tonalité intermittente retentit
pendant le préchauffage de la lame, suivie d’une tonalité continue dès que la lame a atteint la
température sélectionnée.
6. Pour activer le mode de thermocoagulation, appuyez sur la barre de thermocoagulation
(Thermal Coag). Le point de réglage du scalpel (SCAPEL SET POINT) passe alors à 300 C.
Tant que vous appuyez sur la barre de thermocoagulation (Thermal coag), l’unité de
commande émet une tonalité intermittente. Dès le relâchement de la barre de
thermocoagulation (Thermal Coag), l’unité de commande repasse à la température définie à
l’origine et une tonalité continue retentit.
7. Pour changer la température de la lame, actionnez le sélecteur de réglage du scalpel (SCAPEL
SET POINT), situé à l’avant de l’unité de commande. La température de la lame peut
également être modifiée en appuyant sur les flèches du manche, lorsque l’interrupteur de
marche/arrêt (On/Off ) du manche se trouve sur position Arrêt (Off).
8. Un signal sonore continu, au volume réglable, retentit dès que la lame a atteint la température
sélectionnée. La tonalité sonore est intermittente si la lame ne se trouve pas à la température
sélectionnée, comme durant le préchauffage ou la thermocoagulation, ou qu’elle est soumise à
une dissipation excessive.
9. Si, à tout moment, la lame ne présente pas des caractéristiques électriques acceptables comme
indiqué par l’unité de commande, le voyant Changement de lame (CHANGE BLADE)
s’allume et un avertisseur retentit.
10. Pour retirer la lame du manche, tirez droit.
ATTENTION : Si la lame est chaude, utilisez une éponge ou une pince pour la saisir au
niveau de sa partie noire.
11. Si la lame se déloge, laissez-la refroidir à température ambiante avant de la réinsérer.
(16)
VORSICHTSHINWEISE
Vorsichtshinweise für den Gebrauch der Steuereinheit befinden sich am Gerät.
Folgendes ist besonders hervorzuheben:
• DER GRIFF DARF NICHT IN FLÜSSIGKEITEN GETAUCHT WERDEN.
• DIESES PRODUKT DARF NICHT IN DER NÄHE ENTFLAMMBARER
GASE ODER FLÜSSIGKEITEN VERWENDET WERDEN.
• DER GRIFF MUSS VOR ERNEUTEM GEBRAUCH RESTERILISIERT
WERDEN. Siehe Abschnitt „Reinigung und Resterilisation des Griffs“.
• Hautabdecktücher aus Kunststoff
Wird ein Hautabdecktuch aus Kunststoff verwendet, muss die erste Hautinzision
kalt vorgenommen werden. Der Griff befindet sich in der Position „AUS“ (OFF).
• Elektrochirurgische Geräte
DIE HEMOSTATIX KLINGE DARF NICHT MIT DER SPITZE
ELEKTROCHIRURGISCHER INSTRUMENTE (Bovie) IN BERÜHRUNG
KOMMEN. BEI NICHTBEACHTUNG DIESES SICHERHEITSHINWEISES
KANN ES ZU EINER ERHEBLICHEN BESCHÄDIGUNG DER
HEMOSTATIX SKALPELL-STEUEREINHEIT KOMMEN. Zwischen der
Hemostatix Klinge und der Spitze elektrochirurgischer Instrumente ist ein
Abstand von mindestens 1 cm aufrechtzuerhalten.
• Versehentliche Verbrennungen des Patienten vermeiden
DAS HEMOSTATIX SKALPELL NICHT BEI AKTIVIERTER KLINGE AUF
DEN ABDECKTÜCHERN ODER DEM PATIENTEN ABSETZEN. Eine
aktivierte Klinge ist so heiß, dass Patienten Verbrennungen erleiden können, wenn
sie mit der Klinge in Kontakt kommen.
Wird das Hemostatix Skalpell während des Eingriffs eine Zeit lang nicht benötigt,
empfiehlt es sich, den Ein-/Aus-Schalter des Griffs auf „AUS“ (OFF) zu stellen.
• Trocknen des Griffs nach dem Autoklavieren
Sofortiger Gebrauch nach dem Autoklavieren kann aufgrund der noch im Griff
vorhandenen Feuchtigkeit zu vorübergehender Fehlfunktion führen. Dieses
Problem kann mit Hilfe eines Trockenzyklus im Autoklaven oder durch andere
Trockenverfahren vor dem Gebrauch vermieden werden.
ACHTUNG: WENN DAS GERÄT IN DER NÄHE ENTFLAMMBARER
ANÄSTHETIKA EINGESETZT WIRD, BESTEHT EXPLOSIONSGEFAHR!
(45)
Griffteile, das Kabel oder der Steckverbinder verfärben und/oder verformen, wenn sie
uneingewickelt oder unter „Blitzbedingungen“ wiederholt Temperaturen von 132 ºC (270
ºF) ausgesetzt werden. Dies kann die Lebensdauer des Geräts verkürzen. Bei Anwendung
des Dampfsterilisationsverfahrens muss ein kompletter Trockenzyklus erfolgen, um das
mit dieser Methode verbundene Korrosionsrisiko zu verringern bzw. zu eliminieren. Bei
Anwendung der Autoklav-Dampfsterilisation müssen die Griffe „eingewickelt“ und
folgende Protokollvorschriften eingehalten werden:
MODE D’EMPLOI DU SYSTÈME - UNITÉ DE COMMANDE MODÈLE 150
Die obigen Richtlinien und Parameter wurden ordnungsgemäß geprüft und stellen die
optimalen Reinigungs- und Resterilisationsmethoden für das Gerät dar. Bei Fragen ist
mit der zuständigen Hemostatix Medical Technologies-Vertretung Kontakt
aufzunehmen 1-800-SCALPEL.
Attachez le manche à l’unité de commande en centrant la flèche du connecteur du manche sur
la flèche de la prise du panneau avant et enfichez-le dans cette prise.
2. Mettez l’unité de commande sous tension en activant l’interrupteur d’alimentation (POWER).
Si aucune lame ne se trouve dans le manche, le voyant Changement de lame (CHANGE
BLADE) clignote. Dès qu’une lame fonctionnelle est insérée, le voyant Étalonnage
(CALIBRATING) clignote pendant que l’unité de commande s’étalonne par rapport à la lame.
Le voyant Changement de lame (CHANGE BLADE) se rallume chaque fois que la fonction
d’étalonnage continu détermine que la lame est devenue impropre à l’utilisation. Une fois que
l’unité de commande a fini l’étalonnage et a déterminé que la lame est acceptable, le voyant
Prêt à chauffer (READY TO HEAT) s’allume.
3. Pour insérer une lame neuve : insérez le connecteur de la lame dans le manche (bord coupant
à l’opposé de l’interrupteur de marche/arrêt (On/Off)), jusqu’à ce qu’il s’enclenche en position
et soit solidement fixé.
4. Placez la commande de réglage de temperature (TEMPERATURE SETTING) au réglage initial
désiré par le chirurgien. Pratiquez l’incision initiale de la peau avec la lame froide (manche sur
position Arrêt (Off)). Pour les autres tissus, les réglages typiques sont compris entre 180 et 260°C,
selon la préférence du chirugien et le type de tissus impliqués et/ou l’acte chirurgical prévu. Le
réglage de température (TEMPERATURE SETTING) est également modifiable en appuyant
sur la flèche vers le haut du sélecteur de température (Temperature) situé sur le côté du manche
lorsque l’interrupteur de marche/arrêt (On/Off) de ce dernier se trouve sur position Arrêt (Off).
(Remarque : Sur l’unité de commande modèle 150, la température se règle seulement vers le haut.
Une pression sur la flèche vers le bas est sans effet sur le réglage de température.)
5. Pour chauffer la lame, glissez l’interrupteur de marche/arrêt (On/Off) vers l’arrière sur position
Marche (On) pour exposer le point rouge du manche. Le voyant Prêt à chauffer (READY TO
HEAT) s’éteint et une tonalité intermittente retentit pendant que la lame chauffe ; cette
tonalité devient continue et le voyant Lame à température (BLADE AT TEMP) s’éteint dès que
la lame a atteint la température sélectionnée.
6. Pour activer le mode de thermocoagulation, appuyez sur la barre de thermocoagulation
(Thermal Coag). L’affichage du réglage de température (TEMPERATURE SETTING)
indique alors 270 ºC. Tant que vous appuyez sur la barre de thermocoagulation (Thermal
coag), l’unité de commande émet une tonalité intermittente. Dès le relâchement de la barre de
thermocoagulation (Thermal Coag), l’unité de commande repasse à la température définie à
l’origine et une tonalité continue retentit.
7. Pour changer la température de la lame, actionnez le sélecteur de réglage de température
(TEMPERATURE SETTING), situé à l’avant de l’unité de commande. La température de la
lame (Temperature) peut également être modifiée en appuyant sur la flèche vers le haut du manche,
lorsque l’interrupteur de marche/arrêt (On/Off) du manche se trouve sur position Arrêt (Off).
8. Un signal sonore continu, au volume réglable, retentit dès que la lame a atteint la température
sélectionnée. La tonalité sonore est intermittente si la lame ne se trouve pas à la température
sélectionnée, comme durant le préchauffage ou la thermocoagulation, ou lorsqu’elle est
soumise à une dissipation excessive.
9. Si, à tout moment, la lame ne présente pas des caractéristiques électriques acceptables,
déterminées par l’unité de commande, le voyant Changement de lame (CHANGE BLADE)
s’allume et le voyant Prêt à chauffer (READY TO HEAT) ou Lame à température (BLADE AT
TEMP) s’éteint.
10. Pour retirer la lame du manche, tirez droit.
ATTENTION : Si la lame est chaude, utilisez une éponge ou une pince pour la saisir au
niveau de sa partie noire.
11. Si la lame se déloge, laissez-la refroidir à température ambiante avant de la réinsérer.
(44)
(17)
Dampfsterilisation mit Gravitationsverdrängung
Temperatur:
Einwirkzeit:
Trockenzeit:
132 ºC (270 ºF)
15 Minuten
30 Minuten
Temperatur:
Einwirkzeit:
Trockenzeit:
121 ºC (250 ºF)
30 Minuten
30 Minuten
Dampfsterilisation mit Vorvakuum
Temperatur:
Einwirkzeit:
Trockenzeit:
132 ºC (270 ºF)
4 Minuten
30 Minuten
1.
MODE D’EMPLOI DU SYSTÈME - UNITÉ DE COMMANDE MODÈLE 600
Reinigung und Resterilisation des Griffs
Pour le mode d’emploi détaillé de l’unité de commande et du système, reportez-vous au Manuel
d’utilisation du scalpel thermique Hemostatix.
Reinigung
1.
Attachez le manche à l’unité de commande en centrant la flèche du connecteur du manche sur
celle de la prise du panneau avant et enfichez-le dans cette prise.
2. Alimentez l’instrument en relevant l’interrupteur d’alimentation (POWER). A la fin de l’auto-test,
le voyant Changement d’instrument (CHANGE INSTRUMENT) s’allume si aucune lame ne se
trouve dans le manche. Lorsqu’une lame fonctionnelle est insérée, le voyant Changement
d’instrument (CHANGE INSTRUMENT) s’éteint et le voyant Étalonnage (CALIBRATING)
s’allume. Le voyant Changement d’instrument (CHANGE INSTRUMENT) se rallume et une
alarme sonore retentit chaque fois que la fonction de contrôle d’erreur automatique et continue
détermine que la lame est devenue impropre à l’utilisation.
3. Insérez une lame neuve. Insérez le connecteur de la lame dans le manche (bord coupant à
l’opposé de l’interrupteur de marche/arrêt (On/Off)), jusqu’à ce qu’il soit solidement fixé.
4. Une fois l’étalonnage terminé, le voyant Étalonnage (CALIBRATING) s’éteint. Une tonalité
sonore indique également la réussite de l’étalonnage.
5. Placez la commande de réglage de température (TEMPERATURE SETTING) au réglage initial
désiré par le chirurgien. Pratiquez l’incision initiale de la peau avec la lame froide (manche sur
position Arrêt (Off)). Pour les autres tissus, les réglages typiques sont compris entre 180 et 300 °C,
selon la préférence du chirurgien et le type de tissus impliqués et/ou l’acte chirurgical prévu.
6. Pour chauffer la lame, glissez l’interrupteur de marche/arrêt (On/Off) vers l’arrière sur position
Marche (On) pour exposer le point rouge. Le voyant Sous tension (ENERGIZED) s’allume et
la tonalité retentit.
7. Pour activer le mode de thermocoagulation, appuyez sur la barre de thermocoagulation
(Thermal Coag). L’affichage du réglage de température (TEMPERATURE SETTING)
indique alors 300 °C.Tant que vous appuyez sur la barre de thermocoagulation (Thermal coag),
l’unité de commande émet une tonalité intermittente. Dès le relâchement de la barre de
thermocoagulation (Thermal Coag), l’unité de commande repasse à la température définie à
l’origine et une tonalité continue retentit.
8. Pour modifier la température de la lame, utilisez les flèches vers le haut et le bas du sélecteur de
température (TEMP). La température de la lame peut également être modifiée en appuyant sur
les flèches du manche, lorsque l’interrupteur de marche/arrêt (On/Off) du manche se trouve sur
position Arrêt (Off).
9. Un signal sonore continu, au volume réglable, retentit dès que la lame a atteint la température
sélectionnée. La tonalité sonore est intermittente si la lame ne se trouve pas à la température
sélectionnée (comme durant le préchauffage ou le refroidissement), durant la
thermocoagulation, ou qu’elle est soumise à une dissipation excessive.
10. Si à tout moment la lame ne présente pas des caractéristiques électriques acceptables, déterminées
par l’instrument, le voyant Changement d’instrument (CHANGE INSTRUMENT) s’allume,
le voyant Sous tension (ENERGIZED) s’éteint et un avertisseur sonore retentit.
11. Pour retirer la lame du manche, tirez droit.
ATTENTION : Si la lame est chaude, utilisez une éponge ou une pince pour la saisir au
niveau de sa partie noire.
12. Si la lame se déloge, laissez-la refroidir à température ambiante avant de la réinsérer.
(18)
DEN GRIFF NIEMALS IN FLÜSSIGKEITEN TAUCHEN. In das Griffinnere darf
keinerlei Art von Lösung eintreten. Nicht mit Ultraschall reinigen.
Für das Griffmodell 5050 und dessen Kabel wird die Handreinigung empfohlen. Da das
Gerät nicht in Flüssigkeiten eingetaucht werden darf, müssen die folgenden Richtlinien
unbedingt befolgt werden.
Das Gerät ist so bald wie möglich nach dem Gebrauch zu reinigen. Dazu eine
Enzymlösung (z.B. Klenzyme ™) und eine Detergenslösung (z.B. Manu-Klenz™)
gemäß Herstellerprotokoll anfertigen. Ein Enzym ist kein Reinigungsmittel. Es soll Blut
und Körperflüssigkeiten (Protein) auflösen und damit die Reinigung erleichtern.
Detergenzien enthalten Netz- und Emulgiermittel, die Schmutzpartikel suspendieren und
die Ablagerung unlöslicher Partikel oder Schaumrückstände am Gerät oder auf der
Oberfläche der Reinigungslösung verhindern.
Die Geräteoberfläche leicht mit einem mit der Enzymlösung angefeuchteten Schwamm
oder Tuch abwischen. Die Klingenanschlussöffnung des Griffs gründlich mit der
Enzymlösung reinigen und grobe Schmutzpartikel mit einer weichen Bürste entfernen.
Dabei ist besonders auf Rückstände in Vertiefungen und anderen schwer zu reinigenden
Bereichen zu achten. Pfeifenreiniger oder Wattestäbchen sind nicht zu empfehlen, da sie
leicht ausfransen und im Innern der Klingenanschlussöffnung Rückstände hinterlassen
können. Das Gerät sorgfältig auf sichtbare Schmutzrückstände untersuchen (z.B. Blut,
Protein). Enzyme selbst sind ebenfalls Proteinsubstanzen und müssen gründlich mit
einem Detergens entfernt werden. Die gerade beschriebenen Schritte (Abwischen der
Oberfläche, Reinigung der Klingenanschlussöffnung mit einer weichen Bürste und der
Detergenslösung) noch einmal wiederholen. Ein Nachspülen mit lauwarmem
Leitungswasser ist erforderlich, um alle Detergens- und Schmutzrückstände zu entfernen.
Das Gerät nach der Reinigung schütteln, um alle Wasserreste zu entfernen, und den Griff
und das Kabel mit einem weichen, trockenen Tuch abwischen.
Sterilisation
Vor der Resterilisation sicherstellen, dass das Kabel keine Bruchstellen oder Risse aufweist
und dass sich in der Klingenanschlussöffnung oder im Steckverbinder kein Fremdmaterial
befindet. Es ist sicherzustellen, dass sich der Ein-/Aus-Schalter entweder in der Position
„EIN“ (ON) oder „AUS“ (OFF) befindet (nicht dazwischen). Das Kabel aufwickeln
(Schlaufen mit ungefähr 18 cm Durchmesser) und vorschriftsmäßig einpacken.
Die im medizinischen Bereich gängigsten Sterilisationsverfahren sind die
Dampfsterilisation und die Ethylenoxid-Sterilisation (EO). Beide Methoden sind für die
Sterilisation des Griffmodells 5050 und seines Kabels geeignet. Die EO-Sterilisation wird
empfohlen, weil sie für das Gerät das schonendere Verfahren mit der geringsten
Verschleißwirkung ist. Die Dampfsterilisation hat jedoch den Vorteil, dass sie
kostengünstig ist und für Personal und Patienten kein toxikologisches Risiko darstellt. Die
Dampfsterilisation ist zwar als Sterilisationsverfahren geeignet, jedoch können sich die
(43)
BETRIEBSANLEITUNG FÜR STEUEREINHEITMODELL 600
Nettoyage et restérilisation du manche
Ausführliche Anleitungen zum Gebrauch der Steuereinheit und des Systems sind im
Betriebshandbuch für das Hemostatix Thermoskalpell enthalten.
Nettoyage
1.
Der Griff wird folgendermaßen an die Steuereinheit angeschlossen: Den Steckverbinder des Griffkabels
so halten, dass sein Pfeil auf den Pfeil der Anschlussbuchse an der Vorderseite des Geräts ausgerichtet ist.
Den Steckverbinder dann in dieser Ausrichtung in die Buchse einstecken.
2. Zum Einschalten des Instruments den „Netzschalter“ (POWER) in die obere Position bringen. Nach
Abschluss des Einschaltselbsttests leuchtet der Indikator „Instrument wechseln“ (CHANGE
INSTRUMENT), wenn sich keine Klinge im Griff befindet. Sobald eine funktionsfähige Klinge
eingesetzt wird, erlischt der Indikator „Instrument wechseln“ (CHANGE INSTRUMENT) und der
Indikator „Kalibrierung läuft“ (CALIBRATING) wird aktiviert. Wenn die automatische und
kontinuierliche Fehlerprüffunktion ermittelt, dass die Klinge nicht mehr gebrauchsfähig ist, wird der
Indikator „Instrument wechseln“ (CHANGE INSTRUMENT) wieder aktiviert.
3. So wird eine neue Klinge eingesetzt: Das Anschlussende der Klinge in den Griff einführen
(scharfe Kante auf der dem Ein-/Aus-Schalter gegenüberliegenden Seite), bis sie eingerastet ist
und fest im Griff sitzt.
4. Nach erfolgreich abgeschlossener Kalibrierung erlischt der Indikator „Kalibrierung läuft“
(CALIBRATING). Darüber hinaus wird durch ein akustisches Signal auf den erfolgreichen
Abschluss der Kalibrierung hingewiesen.
5. Die „Temperatureinstellung“ (TEMPERATURE SETTING) auf den vom Chirurgen
gewünschten Ausgangswert einstellen. Die erste Hautinzision ist mit kalter Klinge
vorzunehmen (der Griff ist in der „AUS“-Position). Für andere Gewebe liegen die typischen
Einstellungen je nach Präferenz des Chirurgen und der Art des Gewebes bzw. des
chirurgischen Eingriffs zwischen 180 °C und 300 °C.
6. Zum Erhitzen der Klinge den Ein-/Aus-Schalter nach hinten in die Position „EIN“ (ON)
schieben. Dabei wird der rote Punkt am Griff sichtbar. Der Indikator „Aktiviert“
(ENERGIZED) leuchtet und das akustische Signal ertönt.
7. Zur Aktivierung des Thermokoagulationsmodus den Thermokoagulationsschalter drücken.
Auf der Anzeige der Temperatureinstellung erscheint jetzt der Wert 300 °C. Solange der
Thermokoagulationsschalter gedrückt gehalten wird, gibt die Steuereinheit ein akustisches
Impulssignal aus. Wird der Schalter losgelassen, aktiviert die Steuereinheit wieder ihren
ursprünglichen Sollwert und das Dauertonsignal.
8. Zur Änderung der Klingentemperatur sind die Temp-Schalter „AUF“ (UP) oder „AB“
(DOWN) zu betätigen. Eine andere Möglichkeit, die Klingentemperatur zu ändern, besteht
darin, die Temperaturschalter am Griff zu drücken, wenn sich der Ein-/Aus-Schalter des Griffs
in der Position „AUS“ (OFF) befindet.
9. Wenn die Klinge die ausgewählte Temperatur erreicht hat, wird ein Dauertonsignal mit
regelbarer Lautstärke ausgegeben. Solange die Klinge nicht die ausgewählte Temperatur
aufweist, z.B. während des Aufheizens oder Abkühlens, bei der Thermokoagulation oder bei
übermäßigem Leistungsverlust, wird ein Impulstonsignal ausgegeben.
10. Wenn die Steuereinheit zu irgendeinem Zeitpunkt feststellt, dass die Klinge die
vorgeschriebenen elektrischen Merkmale nicht aufweist, leuchtet der Indikator „Instrument
wechseln“ (CHANGE INSTRUMENT), der Indikator „Aktiviert“ (ENERGIZED) erlischt
und ein akustischer Warnton wird ausgegeben.
11. Eine Klinge wird durch gerades Herausziehen aus dem Griff entfernt.
VORSICHT: Ist die Klinge noch heiß, den schwarzen Teil der Klinge mit einem Schwamm
oder einer Zange festhalten.
12. Löst sich die Klinge, darf sie erst wieder eingesetzt werden, wenn sie sich auf
Zimmertemperatur abgekühlt hat.
(42)
NE PLONGEZ PAS LE MANCHE DANS UN LIQUIDE. Ne laissez pas pénétrer de
solution à l’intérieur du manche. Ne procédez pas à un nettoyage aux ultrasons.
Un nettoyage manuel est la méthode de nettoyage recommandée pour le manche et le
câble modèle 5050. Étant donné que le dispositif ne peut pas être immergé, il est
important de se plier aux consignes suivantes.
Le nettoyage doit débuter le plus tôt possible après l’utilisation. Préparez une solution
enzymatique (ex : Klenzyme ™) et une solution détergente (ex : Manu-Klenz™), en
suivant les recommandations des fabricants. Un enzyme n’est pas un nettoyant. Un
enzyme vise à décomposer le sang et les fluides corporels (ex : protéines) et à faciliter ce
faisant le nettoyage. Les détergents contiennent des agents mouillants et émulsifiants qui
suspendent les saletés et empêchent la formation de composés insolubles ou de dépôts sur
le dispositif ou à la surface de la solution nettoyante.
Passez délicatement une éponge ou un linge humecté de solution enzymatique sur la
surface du dispositif. Rincez bien le connecteur de lame du dispositif avec la solution
enzymatique et utilisez une brosse à soies douces pour retirer le gros des salissures, en
insistant tout particulièrement au niveau des rainures et d’autres endroits difficiles à
nettoyer. L’emploi d’écouvillons ou de cotons-tiges est à proscrire dans la mesure où ils ont
tendance à s’effilocher et à laisser des particules à l’intérieur du connecteur de lame.
Examinez minutieusement le dispositif pour vous assurer que toutes les saletés visibles ont
été décollées (sang, protéines). Les enzymes sont eux-mêmes des substances protéiques et
doivent être bien rincés avec un détergent. Répétez le nettoyage de la surface du dispositif
(avec l’éponge) et du connecteur de lame avec une brosse à soies douces et la solution
détergente. Un rinçage à l’eau du robinet tiède est nécessaire pour éliminer toute trace de
détergent et de particules étrangères.
Après le nettoyage, secouez le dispositif pour retirer l’excédent d’eau et essuyez le manche
et le câble avec un chiffon doux et sec.
Stérilisation
Avant une restérilisation, inspectez le dispositif pour vous assurer que le câble n’est pas
coupé et qu’aucune particule étrangère ne se trouve dans la prise de lame ou le connecteur.
Assurez-vous que l’interrupteur de marche/arrêt (On/Off) du manche est sur position
Marche (On) ou Arrêt (Off) (pas sur une position intermédiaire). Enroulez le cordon
(boucles d’environ 17,5 cm de diamètre) et placez-le dans un emballage approprié.
Les méthodes de stérilisation essentiellement utilisées dans les établissements de soins sont
la stérilisation à la vapeur et la stérilisation à l’oxyde d’éthylène. Ces deux méthodes sont
efficaces pour stériliser la poignée et le câble du modèle 5050. La stérilisation à l’oxyde
d’éthylène est la méthode de stérilisation préférable, dans la mesure où elle prolonge la vie
utile du dispositif. Toutefois, la stérilisation à la vapeur est économique et n’est pas associée
au risque d’exposition du personnel ou des patients aux résidus de stérilisation toxiques.
La stérilisation à la vapeur est une option, même si des expositions répétées à des
(19)
températures de 132 ºC à l’état « non enveloppé » ou en mode « stérilisation rapide »
risquent de provoquer la décoloration et/ou la déformation des pièces du manche, du
cordon ou du connecteur, ce qui réduira la durée utile du produit. Un cycle de séchage
complet doit être effectué pour réduire ou empêcher une éventuelle corrosion suite à la
stérilisation à la vapeur. Pour une stérilisation à l’autoclave à la vapeur, enveloppez les
manches et utilisez les paramètres recommandés suivants :
Stérilisation à la vapeur avec déplacement par gravité
Température :
Durée d’exposition :
Durée de séchage :
132 ºC
15 minutes
30 minutes
Température :
Durée d’exposition :
Durée de séchage :
121 ºC
30 minutes
30 minutes
Stérilisation à la vapeur avec vide préalable
Température :
Durée d’exposition :
Durée de séchage :
132 ºC
4 minutes
30 minutes
Les consignes et les paramètres ci-dessus ont été scrupuleusement vérifiés pour fournir les
meilleures méthodes de nettoyage et de restérilisation de votre dispositif. Pour tout autre
renseignement, contactez-nous au 1-800-SCALPEL.
(20)
BETRIEBSANLEITUNG FÜR STEUEREINHEITMODELL 150
1.
Der Griff wird folgendermaßen an die Steuereinheit angeschlossen: Den Steckverbinder des
Griffkabels so halten, dass sein Pfeil auf den Pfeil der Anschlussbuchse an der Vorderseite des
Geräts ausgerichtet ist. Den Steckverbinder dann in dieser Ausrichtung in die Buchse einstecken.
2. Die Steuereinheit mit dem „Netzschalter“ (POWER) einschalten. Befindet sich keine Klinge im
Griff, blinkt der Indikator „Klinge wechseln“ (CHANGE BLADE). Wird eine funktionsfähige
Klinge eingeführt, blinkt der Indikator „Kalibrierung läuft“ (CALIBRATING), während sich die
Steuereinheit im Rahmen des Kalibriervorgangs auf die Klinge einstellt. Der Indikator „Klinge
wechseln“ (CHANGE BLADE) leuchtet immer dann wieder auf, wenn die
Dauerkalibrierfunktion ermittelt, dass die Klinge nicht mehr gebrauchsfähig ist. Wenn die
Steuereinheit die Kalibrierung abgeschlossen und die Klinge als gebrauchsfähig beurteilt hat,
leuchtet der Indikator „Aufheizbereit“ (READY TO HEAT).
3. So wird eine neue Klinge eingesetzt: Das Anschlussende der Klinge in den Griff einführen
(scharfe Kante auf der dem Ein-/Aus-Schalter gegenüberliegenden Seite), bis sie eingerastet ist
und fest im Griff sitzt.
4. Den Regler „Temperatureinstellung“ (TEMPERATURE SETTING) auf den vom Chirurgen
gewünschten Ausgangswert einstellen. Die erste Hautinzision ist mit kalter Klinge vorzunehmen
(der Griff ist in der „AUS“-Position). Für andere Gewebe liegen die typischen Einstellungen je
nach Präferenz des Chirurgen und der Art des Gewebes bzw. des chirurgischen Eingriffs zwischen
180 °C und 260 °C. Die „Temperatureinstellung“ (TEMPERATURE SETTING) kann auch
durch Betätigung der „AUF“-Taste (UP) auf dem Temperaturregler an der Seite des Griffs
geändert werden, wenn sich der Ein-/Aus-Schalter in der Position „AUS“ (OFF) befindet.
(Hinweis: Bei Steuereinheiten des Modells 150 ist die Temperatur nur nach oben regelbar. Die
Betätigung der „AB“-Taste (DOWN) am Griff hat keine Auswirkung auf die
Temperatureinstellung.)
5. Zum Erhitzen der Klinge den Ein-/Aus-Schalter nach hinten in die Position „EIN“ (ON)
schieben. Dabei wird der rote Punkt am Griff sichtbar. Der Indikator „Aufheizbereit“ (READY
TO HEAT) erlischt und ein akustisches Impulssignal ertönt, während die Klinge aufgeheizt wird.
Sobald die Klinge die ausgewählte Temperatur erreicht hat, wird das akustische Signal zu einem
Dauerton und der Indikator „Klinge hat Temp. erreicht“ (BLADE AT TEMP) leuchtet auf.
6. Zur Aktivierung des Thermokoagulationsmodus den Thermokoagulationsschalter drücken. Auf
der Anzeige der Temperatureinstellung erscheint jetzt der Wert 270 °C. Solange der
Thermokoagulationsschalter gedrückt gehalten wird, gibt die Steuereinheit ein akustisches
Impulssignal aus. Wird der Schalter losgelassen, aktiviert die Steuereinheit wieder ihren
ursprünglichen Sollwert und das Dauertonsignal.
7. Die Klingentemperatur kann mit dem Schalter „Temperatureinstellung“ (TEMPERATURE
SETTING) an der Vorderseite der Steuereinheit geändert werden. Eine andere Möglichkeit, die
Klingentemperatur zu ändern, besteht darin, den „AUF“-Temperaturregler am Griff zu drücken,
wenn sich der Ein-/Aus-Schalter des Griffs in der Position „AUS“ (OFF) befindet.
8. Wenn die Klinge die ausgewählte Temperatur erreicht hat, wird ein Dauertonsignal mit
regelbarer Lautstärke ausgegeben. Solange die Klinge nicht die ausgewählte Temperatur aufweist,
z.B. während des Aufheizens, bei der Thermokoagulation oder bei übermäßigem
Leistungsverlust, wird ein Impulstonsignal ausgegeben.
9. Wenn die Steuereinheit zu irgendeinem Zeitpunkt feststellt, dass die Klinge die vorgeschriebenen
elektrischen Merkmale nicht aufweist, leuchtet der Indikator „Klinge wechseln“ (CHANGE
BLADE) und der Indikator „Aufheizbereit“ (READY TO HEAT) bzw. „Klinge hat Temp.
erreicht“ (BLADE AT TEMP) erlischt.
10. Eine Klinge wird durch gerades Herausziehen aus dem Griff entfernt.
VORSICHT: Ist die Klinge noch heiß, den schwarzen Teil der Klinge mit einem Schwamm
oder einer Zange festhalten.
11. Löst sich die Klinge, darf sie erst wieder eingesetzt werden, wenn sie sich auf Zimmertemperatur
abgekühlt hat.
(41)
BETRIEBSANLEITUNG FÜR STEUEREINHEITMODELL 3000
1.
Der Griff wird folgendermaßen an die Steuereinheit angeschlossen: Den Steckverbinder des
Griffkabels so halten, dass sein Pfeil mittig auf die Oberseite der Anschlussbuchse an der
Gerätevorderseite ausgerichtet ist. Den Steckverbinder dann in dieser Ausrichtung in die
Buchse einstecken.
2. Die Steuereinheit mit dem „Netzschalter“ (POWER) einschalten. Befindet sich keine Klinge
im Griff, sind mit Ausnahme des Einstellungsindikators am Modell 3000 alle Indikatoren
deaktiviert. Nach Einsetzen einer funktionsfähigen Klinge leuchtet der Indikator „Kalibrierung
läuft“ (CALIBRATING), bis sich die Steuereinheit im Rahmen des Kalibriervorgangs auf die
Klinge eingestellt hat. Der Indikator „Klinge wechseln“ (CHANGE BLADE) leuchtet immer
dann, wenn die Dauerkalibrierfunktion ermittelt, dass die Klinge nicht mehr gebrauchsfähig
ist. Sobald die Steuereinheit die Kalibrierung abgeschlossen und die Funktionsfähigkeit der
Klinge bestätigt hat, wird der Indikator „Bereit“ (READY) aktiviert.
3. So wird eine neue Klinge eingesetzt: Das Anschlussende der Klinge in den Griff einführen
(scharfe Kante auf der dem Ein-/Aus-Schalter gegenüberliegenden Seite), bis sie eingerastet ist
und fest im Griff sitzt.
4. Den Regler „Skalpell-Sollwert“ (SCAPEL SET POINT) auf den vom Chirurgen gewünschten
Ausgangswert einstellen. Die erste Hautinzision ist mit kalter Klinge vorzunehmen (der Griff
ist in der „AUS“-Position). Für andere Gewebe liegen die typischen Einstellungen je nach
Präferenz des Chirurgen und der Art des Gewebes bzw. des chirurgischen Eingriffs zwischen
180 °C und 300 °C. Die „Temperatureinstellung“ (TEMPERATURE SETTING) kann auch
durch Betätigung der AUF- (UP) bzw. AB- (DOWN) Tasten auf dem Temperaturregler an der
Seite des Griffs geändert werden, wenn sich der Ein-/Aus-Schalter in der Position „AUS“
(OFF) befindet.
5. Zum Erhitzen der Klinge den Ein-/Aus-Schalter nach hinten in die Position „EIN“ (ON)
schieben. Dabei wird der rote Punkt am Griff sichtbar. Während die Klinge aufgeheizt wird,
gibt das Gerät ein Impulstonsignal aus. Wenn die ausgewählte Temperatur erreicht ist, wird das
Signal zu einem Dauerton.
6. Zur Aktivierung des Thermokoagulationsmodus den Thermokoagulationsschalter drücken.
Der „Skalpell-Sollwert“ (SCAPEL SET POINT) wird dann auf 300 °C eingestellt. Die
Steuereinheit gibt ein Impulstonsignal aus, solange der Thermokoagulationsschalter gedrückt
wird. Wird der Schalter losgelassen, aktiviert die Steuereinheit wieder ihren ursprünglichen
Sollwert und das Dauertonsignal.
7. Die Klingentemperatur wird mit dem Schalter „Skalpell-Sollwert“ (SCAPEL SET POINT),
der sich auf der Vorderseite der Steuereinheit befindet, geändert. Die Klingentemperatur kann
auch durch Drücken der Auf-/Ab-Schalter für die Temperaturregelung am Griff geändert
werden, wenn sich der Ein-/Aus-Schalter in der Position „AUS“ (OFF) befindet.
8. Wenn die Klinge die ausgewählte Temperatur erreicht hat, wird ein Dauertonsignal mit
regelbarer Lautstärke ausgegeben. Solange die Klinge nicht die ausgewählte Temperatur
aufweist, z.B. während des Aufheizens, bei der Thermokoagulation oder bei übermäßigem
Leistungsverlust, wird ein Impulstonsignal ausgegeben.
9. Wenn die Steuereinheit zu irgendeinem Zeitpunkt feststellt, dass die Klinge die
vorgeschriebenen elektrischen Merkmale nicht aufweist, wird der Indikator „Klinge wechseln“
(CHANGE BLADE) aktiviert und ein Warnsignal ertönt.
10. Eine Klinge wird durch gerades Herausziehen aus dem Griff entfernt.
VORSICHT: Ist die Klinge noch heiß, den schwarzen Teil der Klinge mit einem Schwamm
oder einer Zange festhalten.
11. Löst sich die Klinge, darf sie erst wieder eingesetzt werden, wenn sie sich auf
Zimmertemperatur abgekühlt hat.
(40)
PRÉCAUTIONS
Les précautions d’emploi de l’unité de commande sont indiquées sur l’appareil. Il faut
toutefois souligner les précautions suivantes.
• NE PLONGEZ PAS LE MANCHE DANS UN LIQUIDE.
• N’UTILISEZ PAS CE PRODUIT EN PRÉSENCE DE GAZ OU DE
LIQUIDES INFLAMMABLES.
• RESTÉRILISEZ LE MANCHE AVANT DE LE RÉUTILISER. Reportez-vous à
la section Nettoyage et restérilisation du manche.
• Champs stériles en plastique
Si vous utilisez un champ stérile en plastique, l’incision initiale doit être pratiquée
à froid (manche sur position Arrêt (Off)).
• Bistouris électriques
NE LAISSEZ PAS LA LAME HEMOSTATIX ENTRER EN CONTACT AVEC
L’EXTRÉMITÉ DU BISTOURI ÉLECTRIQUE (Bovie) SOUS PEINE
D’ENDOMMAGER SENSIBLEMENT L’UNITÉ DE COMMANDE DU
SCALPEL HEMOSTATIX. Maintenez un espace de 1 cm minimum entre la lame
Hemostatix et l’extrémité du bistouri électrique.
• Évitez de brûler accidentellement le patient
NE POSEZ PAS LE SCALPEL HEMOSTATIX SUR LES CHAMPS STÉRILES
OU SUR LE PATIENT LORSQUE LA LAME EST SOUS TENSION.
Lorsqu’elle est sous tension, la lame est assez chaude pour pouvoir brûler le patient
à son contact.
Pour les parties de l’intervention où le scalpel Hemostatix n’est pas utilisé, il est
recommandé de placer l’interrupteur de marche/arrêt (On/Off) sur Arrêt (Off).
• Séchage du manche après la stérilisation à l’autoclave
Une utilisation juste après le passage à l’autoclave risque de produire un
disfonctionnement temporaire en raison de l’humidité encore présente dans le
manche. Le recours à un cycle de séchage dans l’autoclave ou le séchage du manche
par un autre moyen avant l’utilisation peut empêcher de tels problèmes.
DANGER : RISQUE D’EXPLOSION LORS D’UNE UTILISATION EN
PRÉSENCE D’ANESTHÉSIQUES INFLAMMABLES.
(21)
Bedienelemente am Griff, Klinge und Steckverbinder
10. Ein-/Aus-Schalter [On/Off]
Wenn dieser Schalter nach hinten geschoben wird, rastet er in der „EIN“-Position
(ON) ein und aktiviert damit die Klinge. Wenn sich der Schalter in der Position
„EIN“ befindet, ist ein roter Punkt sichtbar. Wird der Schalter nach vorne in die
Position „AUS“ (OFF) geschoben, bewirkt dies die Deaktivierung der Klinge.
11. Thermokoagulationsschalter [Thermal Coag]
Befindet sich der Ein-/Aus-Schalter in der Position „EIN“ (ON), ist der
Thermokoagulationsmodus aktiviert, solange dieser Schalter gedrückt bleibt. Nach
Loslassen des Thermokoagulationsschalters kehrt die Temperatur wieder zu ihrem
ursprünglich eingestellten Wert zurück.
12. Temperaturregler [Temperature]
Befindet sich der Ein-/Aus-Schalter in der Position „AUS“ (OFF), kann die
Temperatur durch Betätigung des jeweiligen Temperaturreglers erhöht bzw. gesenkt
werden.
Der Regler mit dem Aufwärtspfeil dient zur Temperaturerhöhung, der Regler mit
dem Abwärtspfeil zur Temperatursenkung. Die Temperatureinstellung wird solange
erhöht bzw. gesenkt, wie der entsprechende Temperaturregler gedrückt gehalten wird
und bis der voreingestellte Grenzwert erreicht ist. Die Temperatureinstellung bleibt
auf dem Wert, bei dem der Schalter losgelassen wird.
(Hinweis: Bei Verwendung des Hemostatix Skalpells mit dem Steuereinheitmodell
150 ist nur der Regler mit dem Aufwärtspfeil aktiv. Wenn der Höchstwert erreicht
ist, bewirkt ein fortgesetztes Drücken des Reglers, dass das Gerät wieder auf den
niedrigsten Wert zurückgesetzt und die stufenweise Erhöhung des Temperaturwertes
wiederholt wird. Der Regler mit dem Abwärtspfeil ist inaktiv, hat also keinen Einfluss
auf den Temperaturwert.)
13. Klinge
Das Anschlussende der Klinge wird in den Griff eingeführt, bis die Klinge einrastet
und fest im Griff sitzt.
14. Steckverbinder des Griffs
Steckverbinder, mit dem der Griff an die Steuereinheit angeschlossen wird.
HEMOSTATIX
Hemostatix Medical Technologies • 8400 Wolf Lake Drive, Ste. 109 • Bartlett, TN 38133
GARANTIE
Hemostatix Medical Technologies garantit par la présente à l’acheteur d’origine qu’un soin
raisonnable a été pris pour la fabrication du manche du scalpel Hemostatix et que, lorsqu’il
est correctement utilisé, il sera dépourvu de défauts de matériau et de fabrication pendant
une période de soixante (60) jours après la date d’expédition depuis l’usine Hemostatix
Medical Technologies. Le seul recours exclusif relatif au manche du scalpel Hemostatix
qui, au cours de sa période de garantie, s’avère non conforme à ces normes est la réparation
ou le remplacement sans frais par Hemostatix Medical Technologies et selon son choix,
après renvoi et examen, de la partie du manche de scalpel Hemostatix avérée défectueuse.
Cette garantie ne s’appliquera pas (a) si cette partie du manche de scalpel Hemostatix a été
réparée par quelqu’un d’autre qu’un personnel de maintenance qualifié et agréé par
Hemostatix Medical Technologies ou altérée d’une manière qui, selon Hemostatix Medical
Technologies, compromet son utilisation ou sa fiabilité ; ou (b) si le numéro de série ou
de lot a été modifié, effacé ou retiré ; ou (c) si la panne a été causée par des conditions
anormales de fonctionnement ou une utilisation impropre ayant permis le contact
électrique avec une électrode électrochirurgicale (Bovie) sous tension. Dans de telles
circonstances, Hemostatix Medical Technologies avisera l’acheteur de son verdict et toute
réparation demandée sera facturée aux taux normaux pratiqués par Hemostatix Medical
Technologies. Des devis seront soumis sur demande avant tout travail de réparation.
Avant de renvoyer le matériel, l’utilisateur doit obtenir un numéro
d’autorisation de renvoi auprès de Hemostatix Medical
Technologies. Les manches renvoyés doivent être nettoyés, stérilisés
et emballés dans un conditionnement stérile qui vérifie la stérilité du
manche avant son renvoi à Hemostatix Medical Technologies. Tout
manche mal nettoyé, stérilisé ou emballé, comme le décrit cette
garantie, sera mis au rebut et sa garantie se verra annulée.
LA GARANTIE EXPRESSE CI-AVANT, TELLE QUE CONDITIONNÉE ET
LIMITÉE, REMPLACE ET EXCLUT TOUTE AUTRE GARANTIE NON
EXPLICITEMENT ÉNONCÉE ICI, QU’ELLE SOIT EXPRESSE OU TACITE, PAR
EXERCICE DE LA LOI OU AUTRE MANIÈRE INCLUANT, MAIS SANS S’Y
LIMITER, TOUTE GARANTIE TACITE DE QUALITÉ COMMERCIALE OU
D’ADAPTATION À UN BUT PARTICULIER. HEMOSTATIX MEDICAL
TECHNOLOGIES NE POURRA ÊTRE TENUE RESPONSABLE DE PERTES
FORTUITES OU CONSÉCUTIVES, DE DOMMAGES, DÉPENSES OU
DOMMAGES DIRECTS OU INDIRECTS LIÉS À CE PRODUIT. HEMOSTATIX
MEDICAL TECHNOLOGIES N’ENDOSSE ET N’AUTORISE PERSONNE À
ENDOSSER EN SON NOM TOUTE AUTRE RESPONSABILITÉ RELATIVE À CE
PRODUIT.
1-800-SCALPEL
(38)
(23)
HEMOSTATIX
®
Vorderseite der Steuereinheit
1.
Indikator „Instrument wechseln“ [Change Instrument] (nur bei Modell 600)
Leuchtet (rot), wenn die Klinge nicht ordnungsgemäß eingesetzt wurde, wenn sie von
den vorgeschriebenen Kalibrierwerten abweicht oder wenn sich keine Klinge im Griff
befindet.
1.
Indikator „Klinge wechseln“[Change Blade] (nur bei Modell 150 und 3000)
Leuchtet oder blinkt (rot), wenn die Klinge nicht ordnungsgemäß eingesetzt wurde
oder von den vorgeschriebenen Kalibrierwerten abweicht. Am Steuereinheitmodell
150 blinkt der Indikator „Klinge wechseln“ (Change Blade) auch, wenn sich keine
Klinge im Griff befindet.
2.
Indikator „Kalibrierung läuft“ [Calibrating]
Leuchtet oder blinkt (gelb), während sich das System im Rahmen des
Kalibriervorgangs auf eine Klinge einstellt. Erlischt, wenn der Kalibriervorgang
abgeschlossen ist.
3.
Indikator „Bereit“ [Ready] (nur bei Modell 3000)
Leuchtet (grün), wenn die Kalibrierung abgeschlossen ist und solange die Klinge und
der Griff einsatzbereit sind bzw. bis die Klinge oder der Griff abgenommen werden
oder die Steuereinheit ausgeschaltet wird.
3.
Indikator „Aufheizbereit “ [Ready to Heat] (nur bei Modell 150)
Leuchtet (gelb), wenn die Kalibrierung abgeschlossen ist. Leuchtet, bis die Klinge mit
dem Ein-/Aus-Schalter am Griff aktiviert wird.
4.
Indikator „Aktiviert“ [Energized] (nur bei Modell 600)
Leuchtet (orange), wenn die Klinge mit dem Ein-/Aus-Schalter des Griffs aktiviert
wird. Leuchtet, bis die Klinge deaktiviert wird.
4.
Indikator „Klinge hat Temp. erreicht“ [Blade at Temp] (nur bei Modell 150)
Leuchtet (gelb), wenn die Klinge mit dem Ein-/Aus-Schalter des Griffs aktiviert wird.
Leuchtet, bis die Klinge deaktiviert wird.
5.
Netzschalter [Power]
Dient zum Ein- und Ausschalten der Netzstromversorgung.
6.
Skalpell-Anschlussbuchse [Scalpel]
Buchse für den Anschluss des Griffs an der Steuereinheit.
7.
Lautstärkeregler [Volume]
Dient zur stufenlosen Regelung der akustischen Signallautstärke.
8.
Temperaturregler [Temperature]
Erhöht oder senkt die Klingentemperatur.
9.
Anzeige der Temperatureinstellung [Temperature setting]
Zeigt die für die Klinge eingestellte Temperatur an.
Mango de escalpelo térmico Hemostatix
Modelo 5050
Para uso con los controladores Modelo 150, 3000 y 600 del
sistema de escalpelo térmico Hemostatix
El mango de escalpelo térmico Hemostatix es un instrumento para incisión quirúrgica
cuyo diseño retiene el corte preciso y definido característico de un escalpelo tradicional de
acero, y a la vez permite reducir a un mínimo la pérdida de sangre efectuando el cierre de
los vasos a medida que son escindidos. El sistema de escalpelo térmico Hemostatix facilita
la hemostasia con un mínimo de lesiones tisulares y prácticamente sin causar estimulación
muscular, valiéndose del calor conducido al tejido desde una hoja a temperatura elevada.
El sistema de escalpelo térmico Hemostatix consta de tres componentes:
1. Un controlador. Fuente de alimentación electrónica que activa la hoja y ofrece diversas
funciones automáticas de calibración, detección y control. Incorpora controles para el
usuario con indicaciones visuales y sonoras de la condición del instrumento.
2. Un mango. Asa reutilizable del escalpelo para uso con hojas desechables. Se conecta al
controlador mediante un cable eléctrico ligero y flexible.
3. Hojas. Se dispone de varios tipos de hojas de escalpelo desechables (de tamaño, forma
y filo similares a los de las hojas convencionales). Incorporan circuitos de calentamiento y
microcircuitos.
PRESENTACIÓN
El mango de escalpelo térmico Hemostatix se suministra estéril y conservará la esterilidad
mientras la bolsa se mantenga sellada e intacta. Antes de cualquier uso subsiguiente, el
mango debe volver a esterilizarse.
(Consulte la sección LIMPIEZA Y
ESTERILIZACIÓN DEL MANGO.)
HOJAS
El mango Modelo 5050 está diseñado para emplearse con las hojas de escalpelo
HEMOSTATIX. Los controladores Modelo 600 y 3000 requieren hojas Serie 57XX; el
controlador Modelo 150 utiliza hojas Serie 56XX.
(24)
(37)
Panel frontal del controlador
HEMOSTATIX
®
1.
Indicador de cambio de instrumento [Change Instrument] (sólo en el controlador
Modelo 600)
Se ilumina en rojo si la hoja no está bien asentada, si excede el límite de calibración
o si no se ha instalado en el mango.
1.
Indicador de cambio de hoja [Change Blade] (sólo en los controladores Modelo 150 y 3000)
Se ilumina o destella en rojo si la hoja no está bien asentada o si excede el límite de
calibración. En el controlador Modelo 150, el indicador para cambiar de hoja
(Change Blade) destella también si la hoja no se ha instalado en el mango.
2.
Indicador de calibración [Calibrating]
Se ilumina o destella en amarillo mientras el sistema efectúa la calibración de una
hoja. Se apaga una vez concluida la calibración.
3.
Indicador de preparado [Ready] (sólo en el controlador Modelo 3000)
Se ilumina en verde una vez concluida la calibración. Se mantiene encendido hasta
que la hoja y el mango dejen de ser admisibles para uso, se desenchufe la hoja o el
mango, o se apague el controlador.
1. Steuereinheit Eine elektronische Stromversorgungseinheit, die die Klinge aktiviert und
verschiedene automatische Kalibrier-, Sensor- und Steuerfunktionen erfüllt. Das Gerät
wird über Bedienelemente gesteuert und informiert anhand visueller und akustischer
Anzeigen über den jeweiligen Instrumentenstatus.
3.
Indicador de preparado para calentar [Ready to Heat] (sólo en el controlador
Modelo 150)
Se ilumina en amarillo una vez concluida la calibración. Se mantiene encendido hasta
que se active la hoja mediante el interruptor de corriente del mango.
2. Griff Ein wiederverwendbarer Skalpellgriff, der über ein leichtes, flexibles Elektrokabel
an die Steuereinheit angeschlossen und mit Einmal-Skalpellklingen bestückt wird.
4.
Indicador de hoja activa [Energized] (sólo en el controlador Modelo 600)
Se ilumina de color ámbar cuando se activa la hoja mediante el interruptor de
corriente del mango. Se mantiene encendido mientras permanezca activada la hoja.
4.
Indicador de hoja a la temperatura deseada [Blade at Temp] (sólo en el controlador
Modelo 150)
Se ilumina en amarillo cuando se activa la hoja mediante el interruptor de corriente
del mango. Se mantiene encendido mientras permanezca activada la hoja.
5.
Interruptor de corriente [Power]
Activa el suministro de corriente alterna.
6.
Conector del escalpelo [Scalpel]
Receptáculo para conectar el mango al controlador.
7.
Control de volumen [Volume]
Permite regular de forma continua el volumen del tono audible, entre los niveles
mínimo y máximo.
8.
Control de temperatura [Temperature]
Permite aumentar y disminuir la temperatura de la hoja.
9.
Pantalla de ajuste de temperatura [Temperature Setting]
Indica el ajuste de temperatura de la hoja.
Hemostatix Thermoskalpellgriff
Modell 5050
Für den Gebrauch mit den Steuereinheitmodellen 150, 3000
und 600 des Hemostatix Thermoskalpellsystems
Der Hemostatix Thermoskalpellgriff ist ein chirurgisches Schneideinstrument, das die
präzisen und sauberen Schnitteigenschaften herkömmlicher Stahlskalpelle aufweist.
Darüber hinaus werden Blutgefäße noch während des Schneidevorgangs verschlossen, was
den Blutverlust auf ein Minimum beschränkt. Anhand einer aufheizbaren Klinge, mit der
die thermische Gewebebehandlung vorgenommen wird, gewährleistet das Hemostatix
Thermoskalpellsystem gewebeschonende Hämostase bei minimaler Muskelstimulation.
Das Hemostatix Thermoskalpellsystem setzt sich aus drei Bestandteilen zusammen:
3. Klingen Für das System sind sterile Einmal-Skalpellklingen in verschiedenen Größen
erhältlich, die in Größe, Form und Schärfe herkömmlichen Klingen ähneln, darüber
hinaus jedoch spezielle Heiz- und Mikroschaltungselemente enthalten.
LIEFERFORM
Der Hemostatix Thermoskalpellgriff wird steril geliefert. Sterilität ist gewährleistet,
solange die Verpackung ungeöffnet und unbeschädigt bleibt. Der Griff muss vor jedem
erneuten Gebrauch resterilisiert werden. (Siehe Abschnitt „REINIGUNG UND
RESTERILISATION DES GRIFFS“.)
KLINGEN
Das Griffmodell 5050 ist für den Gebrauch mit HEMOSTATIX Skalpellklingen
vorgesehen. Bei Steuereinheiten der Modelle 600 und 3000 werden Klingen der Serie
57XX verwendet, während bei Steuereinheiten des Modells 150 Klingen der Serie 56XX
zum Einsatz kommen.
(36)
(25)
Controles, hoja y enchufe del mango
10. Interruptor de corriente [On/Off]
Si se empuja hacia atrás, el interruptor se traba mecánicamente en la posición de
encendido y activa la hoja. Cuando el interruptor se encuentra en la posición de
encendido se hace visible un punto rojo. Si el interruptor se empuja hacia adelante
(posición de apagado), la hoja se desactiva.
11. Barra de termocoagulación [Thermal Coag]
Si se oprime esta barra cuando el interruptor de corriente se encuentra en la
posición de encendido, se activa el modo de termocoagulación (Thermal Coag).
Este modo permanece activo hasta que se suelte la barra, y en este momento la
temperatura volverá a su ajuste original.
12. Interruptor de control de temperatura [Temperature]
Si el interruptor de corriente se encuentra en la posición de apagado, el ajuste de
temperatura puede aumentarse o disminuirse oprimiendo uno de los interruptores
de temperatura.
Las flechas ascendente y descendente permiten, respectivamente, aumentar y
disminuir el ajuste de temperatura. El aumento o la disminución del ajuste
continúan mientras se mantenga oprimido el respectivo interruptor de control de
temperatura, hasta alcanzar el límite prestablecido. El ajuste de temperatura adopta
el valor vigente en el momento en que se soltó el interruptor.
(Nota: Cuando el escalpelo Hemostatix se emplea con el controlador Modelo 150,
sólo está activo el interruptor de flecha ascendente. Si el interruptor se mantiene
oprimido continuamente, una vez alcanzado el ajuste máximo, la temperatura
vuelve al ajuste mínimo y se reanuda la secuencia ascendente. La pulsación del
control de flecha descendente no tiene efecto alguno sobre el ajuste de
temperatura.)
13. Hoja
Inserte el conector de la hoja en el mango hasta que ésta encaje en su posición y
quede firmemente asentada.
14. Conector del mango
Conector para acoplar el mango al controlador.
HEMOSTATIX
Hemostatix Medical Technologies • 8400 Wolf Lake Drive, Ste. 109 • Bartlett, TN 38133
GARANTÍA
Por este medio, Hemostatix Medical Technologies garantiza al comprador original que ha
tomado todas las precauciones razonables en la fabricación del mango de escalpelo
Hemostatix y que, si se lo utiliza correctamente, estará exento de defectos de material o
fabricación durante un plazo de sesenta (60) días a partir de la fecha de envío desde
Hemostatix Medical Technologies. El único y exclusivo recurso respecto a cualquier
mango de escalpelo Hemostatix que no cumpla con estos estándares durante el plazo de
vigencia de la garantía será que, tras recibir el dispositivo para su evaluación, Hemostatix
Medical Technologies reparará o sustituirá gratuitamente, a su criterio, la parte defectuosa
del mango de escalpelo Hemostatix. Esta garantía no tendrá validez si (a) esa parte del
mango de escalpelo Hemostatix ha sido reparada por cualquier persona ajena a los técnicos
de servicio autorizados por Hemostatix Medical Technologies o alterado de alguna forma
que, a juicio de Hemostatix Medical Technologies, afecte su utilidad o fiabilidad; o (b) el
número de serie o de lote ha sido alterado, destruido o eliminado; o (c) la avería es el
resultado de condiciones de uso anormales o maltrato, por haberse permitido el contacto
eléctrico del mango con un electrodo electroquirúrgico (Bovie) activo. En tales casos,
Hemostatix Medical Technologies avisará al comprador de su decisión y, si se solicitara
alguna reparación, cobrará por sus servicios a sus tarifas normales. A petición, se enviarán
estimaciones de costo antes de comenzar el trabajo de reparación.
Antes de su envío, el equipo devuelto debe recibir un número de
autorización (RGA) de Hemostatix Medical Technologies. Antes de
enviarse a Hemostatix Medical Technologies, los mangos deben limpiarse,
esterilizarse y embalarse en un envase estéril que dé constancia de su
esterilidad. Cualquier mango que no esté debidamente limpio, esterilizado
y embalado tal como se describe en esta garantía será desechado y su
garantía vigente quedará anulada.
LA ANTEDICHA GARANTÍA EXPRESA, CON SUS CONDICIONES Y
LIMIACIONES, SUSTITUYE Y EXCLUYE A TODAS LAS DEMÁS GARANTÍAS
QUE NO SE ENUNCIAN ESPECÍFICAMENTE EN EL PRESENTE, YA SEAN
EXPRESAS O IMPLÍCITAS, POR APLICACIÓN DE LA LEY O POR CUALQUIER
OTRO MEDIO, INCLUIDAS, A TÍTULO ENUNCIATIVO PERO NO
LIMITATIVO,
CUALQUIER
GARANTÍA
IMPLÍCITA,
DE
COMERCIALIZACIÓN O DE IDONEIDAD PARA UN FIN DETERMINADO.
HEMOSTATIX MEDICAL TECHNOLOGIES NO SE RESPONSABILIZARÁ DE
NINGUNA PÉRDIDA, DAÑO, GASTO O RESPONSABILIDAD DIRECTA, SEA
INCIDENTE O CONSECUENTE, QUE SURJA EN RELACIÓN CON ESTE
PRODUCTO. HEMOSTATIX MEDICAL TECHNOLOGIES NO ASUME, NI
AUTORIZA A NINGUNA OTRA PERSONA A ASUMIR DE PARTE SUYA,
NINGUNA OTRA OBLIGACIÓN O RESPONSABILIDAD ADICIONAL CON
RESPECTO A ESTE PRODUCTO.
1-800-SCALPEL
(26)
(35)
INSTRUCCIONES DE USO DEL SISTEMA: MODELO 3000
1.
Acople el mango al controlador. Para hacerlo, centre la flecha del conector del mango
respecto al receptáculo de la parte superior del panel frontal y enchufe el conector en el
receptáculo.
2. Encienda el controlador activando el interruptor de encendido (POWER). Si aún no se ha
instalado una hoja en el mango, no se encenderá ninguna luz salvo la pantalla de ajuste del
controlador Modelo 3000. Cuando se inserte una hoja funcional, se encenderá el indicador
de calibración (CALIBRATING) mientras el controlador se calibra para la hoja. Siempre que
la función de calibración continua determine que la hoja ya no es admisible para uso, se
iluminará el indicador de cambio de hoja (CHANGE BLADE). Una vez que el controlador
haya terminado de calibrarse y determinado que la hoja es admisible para uso, se iluminará
el indicador de preparado (READY).
3. Para insertar una hoja nueva: introduzca el conector de la hoja en el mango (situando el
borde afilado del lado opuesto al interruptor de corriente (On/Off )), hasta que la hoja encaje
en su posición y quede firmemente asentada.
4. Coloque el control de punto de referencia del escalpelo (SCALPEL SET POINT) en la
posición inicial deseada por el cirujano. La incisión cutánea inicial debe efectuarse antes de
calentar la hoja (con el mango apagado (Off )). En el caso de los demás tejidos, los ajustes
típicos oscilan entre 180 y 300 °C, dependiendo de las preferencias del cirujano, el tipo de
tejido y el procedimiento quirúrgico a realizar. Si el interruptor de corriente del mango se
halla en la posición de apagado, también es posible modificar el ajuste de temperatura
(TEMPERATURE SETTING) oprimiendo el indicador ascendente o descendente del
interruptor de control de temperatura (Temperature) situado en el costado del mango.
5. Para calentar la hoja, deslice el interruptor de corriente (On/Off ) hacia atrás a la posición de
encendido (On), a fin de poner al descubierto el punto rojo del mango. Mientras se calienta
la hoja se escuchará un tono intermitente, el cual será reemplazado por un tono continuo
una vez que la hoja alcance la temperatura seleccionada.
6. Para activar el modo de termocoagulación, oprima la barra de termocoagulación (Thermal
Coag); el punto de referencia del escalpelo (SCALPEL SET POINT) cambiará a 300 °C.
Mientras se mantenga oprimida la barra de termocoagulación (Thermal Coag), el
controlador emitirá un tono intermitente; cuando se suelte la barra, el controlador volverá al
punto de referencia original y se escuchará un tono continuo.
7. Para cambiar la temperatura de la hoja, utilice el interruptor de punto de referencia del
escalpelo (SCALPEL SET POINT) situado en el panel frontal del controlador; como
alternativa, oprima las flechas ascendente o descendente del interruptor de control de
temperatura (Temperature) del mango mientras éste se encuentre apagado (Off ).
8. Cuando la hoja alcance la temperatura seleccionada, se escuchará un tono continuo cuyo
volumen puede ajustarse. El tono audible es intermitente si la hoja no está a la temperatura
seleccionada, como por ejemplo durante el calentamiento, en modo de termocoagulación o
en condiciones de disipación térmica excesiva.
9. Si en algún momento el controlador determina que la hoja no cumple los criterios de
admisibilidad eléctrica, se iluminará el indicador de cambio de hoja (CHANGE BLADE) y
se escuchará una señal de advertencia.
10. Para quitar la hoja del mango, hálela directamente hacia afuera.
CUIDADO: Si la hoja está caliente, sujétela por la parte negra utilizando una esponja o
una pinza.
11. Si la hoja se desprende, deje que se enfríe a temperatura ambiente antes de volver a insertarla.
(28)
PRECAUCIONES
En la unidad se indican las precauciones de uso del controlador; las que siguen
revisten importancia especial.
• NO SUMERJA EL MANGO EN NINGÚN LÍQUIDO.
• NO UTILICE ESTE PRODUCTO EN PRESENCIA DE GASES O
LÍQUIDOS INFLAMABLES.
• EL MANGO DEBE ESTERILIZARSE ANTES DE CADA USO. Consulte la
sección "Limpieza y esterilización del mango".
• Cubiertas cutáneas de plástico
Si se utiliza una cubierta cutánea de plástico, la incisión inicial debe efectuarse
antes de calentar la hoja (con el mango apagado).
• Unidades electroquirúrgicas
NO DEJE QUE LA HOJA HEMOSTATIX HAGA CONTACTO CON LA
PUNTA ELECTROQUIRÚRGICA (Bovie), YA QUE ESTO PROVOCARÍA
AVERÍAS CONSIDERABLES AL CONTROLADOR DEL ESCALPELO
HEMOSTATIX. Deje un espacio de al menos 1 cm entre la hoja Hemostatix y la
punta electroquirúrgica.
• Prevención de quemaduras accidentales del paciente
NO DEPOSITE EL ESCALPELO HEMOSTATIX SOBRE LAS CUBIERTAS
O EL PACIENTE MIENTRAS ESTÉ ACTIVADA LA HOJA. En este estado, la
hoja está lo suficientemente caliente como para provocar quemaduras al paciente
si entra en contacto con él.
Se recomienda dejar el interruptor de corriente del mango en la posición de
apagado durante las etapas de los procedimientos quirúrgicos que no requieran el
escalpelo Hemostatix.
• Secado del mango después de la esterilización por autoclave
El uso inmediato después de la esterilización por autoclave podría provocar
averías pasajeras debido a la humedad atrapada en el interior del mango. Para
evitar estos problemas, someta el mango a un ciclo de secado en autoclave o
cualquier otro método de secado antes de utilizarlo.
PELIGRO: POSIBLE PELIGRO DE EXPLOSIÓN SI SE UTILIZA EN
PRESENCIA DE ANESTÉSICOS INFLAMABLES.
(33)
vapor, las exposiciones reiteradas a temperaturas de 132 ºC (270 ºF) en condiciones "sin
envoltura" o "ultrarrápidas" pueden alterar el color del mango o deformar sus
componentes, el cable o el conector, acortando con ello la duración del producto. Debe
efectuarse un ciclo de secado completo para reducir o prevenir la posible corrosión
consiguiente al proceso de esterilización a vapor. Si se va a emplear el método de autoclave
de vapor, es preciso envolver los mangos y esterilizarlos utilizando los siguientes parámetros
recomendados:
Esterilización a vapor con desplazamiento por gravedad
Temperatura:
Tiempo de exposición:
Tiempo de secado:
132 ºC (270 ºF)
15 minutos
30 minutos
Temperatura:
Tiempo de exposición:
Tiempo de secado:
121 ºC (250 ºF)
30 minutos
30 minutos
Esterilización a vapor con prevacío
Temperatura:
Tiempo de exposición:
Tiempo de secado:
132 ºC (270 ºF)
4 minutos
30 minutos
Las pautas y parámetros antecitados han sido verificados debidamente, demostrando
producir los mejores resultados de limpieza y esterilización del dispositivo. Si tiene
preguntas adicionales, sírvase llamar al 1-800-SCALPEL.
(32)
INSTRUCCIONES DE USO DEL SISTEMA: CONTROLADOR MODELO 150
1.
Acople el mango al controlador. Para hacerlo, alinee la flecha del conector del mango con la
flecha del receptáculo del panel frontal y enchufe el conector en el receptáculo.
2. Encienda el controlador activando el interruptor de encendido (POWER). Si aún no se ha
instalado una hoja en el mango, destellará el indicador de cambio de hoja (CHANGE
BLADE). Cuando se inserte una hoja funcional, destellará el indicador de calibración
(CALIBRATING) mientras el controlador se calibra para la hoja. Siempre que la función de
calibración continua determine que la hoja ya no es admisible para uso, se iluminará el
indicador de cambio de hoja (CHANGE BLADE). Una vez que el controlador haya
terminado de calibrarse y determinado que la hoja es admisible para uso, se iluminará el
indicador de preparado para calentar (READY TO HEAT).
3. Para insertar una hoja nueva: introduzca el conector de la hoja en el mango (situando el
borde afilado del lado opuesto al interruptor de corriente (On/Off)), hasta que la hoja encaje
en su posición y quede firmemente asentada.
4. Coloque el control de ajuste de temperatura (TEMPERATURE SETTING) en el valor
original deseado por el cirujano. La incisión cutánea inicial debe efectuarse antes de calentar
la hoja (con el mango apagado (Off)). En el caso de los demás tejidos, los ajustes típicos
oscilan entre 180 y 260 °C, dependiendo de las preferencias del cirujano, el tipo de tejido y
el procedimiento quirúrgico a realizar. Si el interruptor de corriente (On/Off) del mango se
halla en la posición de apagado (Off), también es posible modificar el ajuste de temperatura
(TEMPERATURE SETTING) oprimiendo el indicador ascendente del interruptor de
control de temperatura (Temperature) situado en el costado del mango. (Nota: El ajuste de
temperatura del controlador Modelo 150 sólo se puede ajustar en sentido ascendente. La
pulsación del indicador descendente en el mango no tendrá efecto alguno sobre el ajuste de
temperatura.)
5. Para calentar la hoja, deslice el interruptor de corriente hacia atrás a la posición de encendido,
a fin de poner al descubierto el punto rojo del mango. Mientras se calienta la hoja, se apagará
el indicador de preparado para calentar (READY TO HEAT) y se escuchará un tono
intermitente; una vez que la hoja alcance la temperatura seleccionada, se emitirá un tono
continuo y se encenderá el indicador de hoja a la temperatura deseada (BLADE AT TEMP).
6. Para activar el modo de termocoagulación, oprima la barra de termocoagulación (Thermal
Coag); la pantalla de ajuste de temperatura (TEMPERATURE SETTING) cambiará a 270
°C. Mientras se mantenga oprimida la barra de termocoagulación (Thermal Coag), el
controlador emitirá un tono intermitente; cuando se suelte la barra, el controlador volverá al
punto de referencia original y se escuchará un tono continuo.
7. Para cambiar la temperatura de la hoja, utilice el interruptor de ajuste de temperatura
(TEMPERATURE SETTING) situado en el panel frontal del controlador; como alternativa,
oprima la flecha ascendente del control de temperatura (Temperature) del mango mientras
éste se encuentre apagado.
8. Cuando la hoja alcance la temperatura seleccionada, se escuchará un tono continuo cuyo
volumen puede ajustarse. El tono audible es intermitente si la hoja no está a la temperatura
seleccionada, como por ejemplo durante el calentamiento, en modo de termocoagulación o
en condiciones de disipación térmica excesiva.
9. Si en algún momento el controlador determina que la hoja no cumple los criterios de
admisibilidad eléctrica, se iluminará el indicador de cambio de hoja (CHANGE BLADE) y
se apagará el indicador de preparado para calentar (READY TO HEAT) o de hoja a la
temperatura deseada (BLADE AT TEMP).
10. Para quitar la hoja del mango, hálela directamente hacia afuera.
CUIDADO: Si la hoja está caliente, sujétela por la parte negra utilizando una esponja o
una pinza.
11. Si la hoja se desprende, deje que se enfríe a temperatura ambiente antes de volver a insertarla.
(29)
INSTRUCCIONES DE USO DEL SISTEMA: CONTROLADOR MODELO 600
Limpieza y esterilización del mango
En el manual de funcionamiento del escalpelo térmico Hemostatix encontrará instrucciones
detalladas sobre el uso del controlador y del sistema.
Limpieza
1.
NO SUMERJA EL MANGO EN NINGÚN TIPO DE LÍQUIDO. No deje que
penetre ninguna solución en el interior del mango. No utilice métodos ultrasónicos de
limpieza.
Acople el mango al controlador. Para hacerlo, alinee la flecha del conector del mango con la
flecha del receptáculo del panel frontal y enchufe el conector en el receptáculo.
2. Coloque el interruptor de corriente (POWER) en la posición superior para suministrar
energía al instrumento. Si no se ha instalado una hoja en el mango para el momento en que
termine la autoverificación al encendido, se encenderá el indicador de cambio de
instrumento (CHANGE INSTRUMENT). Cuando se inserte una hoja funcional, se
apagará el indicador de cambio de instrumento (CHANGE INSTRUMENT) y se
encenderá el indicador de calibración (CALIBRATING). Siempre que la función
automática y continua de detección de errores determine que la hoja ya no es admisible para
usos ulteriores, el indicador de cambio de instrumento (CHANGE INSTRUMENT)
volverá a activarse y se emitirá una alarma sonora.
3. Inserte una hoja nueva. Introduzca el conector de la hoja en el mango (situando el borde
afilado del lado opuesto al interruptor de corriente (On/Off )) hasta que la hoja quede
firmemente asentada.
4. Una vez que el instrumento se calibre satisfactoriamente, se apagará el indicador de
calibración (CALIBRATING). El éxito de la calibración se indica también mediante una
señal sonora.
5. Coloque el control de ajuste de temperatura (TEMPERATURE SETTING) en el valor
original deseado por el cirujano. La incisión cutánea inicial debe efectuarse antes de calentar
la hoja (con el mango apagado (Off )). En el caso de los demás tejidos, los ajustes típicos
oscilan entre 180 y 300 °C, dependiendo de las preferencias del cirujano, el tipo de tejido y
el procedimiento quirúrgico a realizar.
6. Para calentar la hoja, coloque el interruptor de corriente (On/Off ) en la posición de
encendido (On)a fin de poner al descubierto el punto rojo del mango. Se encenderá el
indicador de hoja activada (ENERGIZED) y se escuchará un tono.
7. Para activar el modo de termocoagulación, oprima la barra de termocoagulación (Thermal
Coag); la pantalla de ajuste de temperatura (TEMPERATURE SETTING) cambiará a 300
°C. Mientras se mantenga oprimida la barra de termocoagulación (Thermal Coag), el
controlador emitirá un tono intermitente; cuando se suelte la barra, el controlador volverá
al punto de referencia original y se escuchará un tono continuo.
8. Para cambiar la temperatura de la hoja, utilice los interruptores TEMP ascendente o
descendente; como alternativa, oprima los interruptores de control de temperatura
(Temperature) del mango mientras éste se encuentre apagado (Off ).
9. Cuando la hoja alcance la temperatura seleccionada, se escuchará un tono continuo cuyo
volumen puede ajustarse. El tono audible es intermitente si el borde de la hoja no está a la
temperatura seleccionada (como por ejemplo, durante el período de calentamiento o
enfriamiento), en modo de termocoagulación o en condiciones de disipación térmica
excesiva.
10. Si en algún momento el controlador determina que la hoja no cumple los criterios de
admisibilidad eléctrica, se iluminará el indicador de cambio de instrumento (CHANGE
INSTRUMENT), se apagará el indicador de hoja activada (ENERGIZED) y se emitirá una
señal sonora de advertencia.
11. Para quitar la hoja del mango, hálela directamente hacia afuera.
CUIDADO: Si la hoja está caliente, sujétela por la parte posterior utilizando una esponja
o una pinza.
12. Si la hoja se desprende, deje que se enfríe a temperatura ambiente antes de volver a
insertarla.
(30)
Se recomienda efectuar la limpieza manual del mango Modelo 5050 y su cable. Ya que el
dispositivo no puede limpiarse por inmersión, es importante respetar las pautas siguientes.
La limpieza debe efectuarse lo antes posible después del uso. Prepare una solución
enzimática (por ejemplo, Klenzyme™) y una de detergente (por ejemplo, ManuKlenz™) siguiendo las recomendaciones de los fabricantes. La enzima no es un limpiador,
sino que se utiliza para descomponer la sangre y demás líquidos corporales (por ejemplo,
las proteínas) y así facilitar la limpieza. Los detergentes contienen agentes tensoactivos y
emulsionantes que suspenden los residuos e impiden la formación de compuestos
insolubles o capas de impurezas en el dispositivo y en la superficie de la solución de
limpieza.
Frote suavemente la superficie del dispositivo con una esponja o paño previamente
humedecido con la solución enzimática. Enjuague con abundante solución enzimática el
receptáculo de la hoja en el dispositivo y elimine los residuos grandes con un cepillo de
cerdas suaves, prestando atención especial a las hendiduras y otras áreas difíciles de limpiar.
Debe evitarse el uso de limpiapipas o hisopos de algodón, ya que tienden a deshilacharse
dejando partículas en el interior del receptáculo de la hoja. Con cuidado, examine el
dispositivo en busca de adherencias visibles (por ejemplo, sangre o proteínas). Las enzimas
también son sustancias proteicas que deben eliminarse escrupulosamente con un
detergente. Repita los pasos de frotado de la superficie del dispositivo y limpieza del
receptáculo de la hoja con un cepillo de cerdas suaves humedecido en solución de
detergente. A continuación enjuague con agua corriente tibia, para eliminar todos los
vestigios de detergente y residuos ajenos.
Después de la limpieza, sacuda el dispositivo para eliminar el exceso de agua y frote el
mango y el cable con un paño suave y seco.
Esterilización
Antes de proceder con la esterilización, inspeccione el mango para descartar la presencia
de roturas en el cable y material ajeno en el receptáculo de la hoja o el conector. Verifique
que el interruptor de corriente del mango se encuentre ya sea en la posición de encendido
o de apagado (y no en una posición intermedia). Enrolle el conjunto del cable en círculos
de 18 cm de diámetro y colóquelo en un material de envoltura adecuado.
En los centros de atención médica, los procesos de esterilización de uso más difundido
utilizan vapor u óxido de etileno (OE). Ambos métodos son eficaces para esterilizar el
mango Modelo 5050 y su cable, aunque se recomienda esterilizarlo con OE porque este
método prolonga al máximo la vida útil del dispositivo. Sin embargo, la esterilización a
vapor es más económica y no presenta ningún riesgo de exposición a residuos tóxicos de
esterilizante para el personal o los pacientes. Aunque puede utilizarse la esterilización a
(31)