Download BEDIENUNGSANLEITUNG OPERATING MANUAL
Transcript
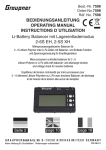
Best.-Nr. 6454 Order-No.6454 Rèf. No. 6454 BEDIENUNGSANLEITUNG OPERATING MANUAL INSTRUCTIONS D´UTILISATION LiPo BALANCER CHARGER 2-3S 12V DC mit Netzteil 100-240V AC Mikroprozessorgesteuertes Ladegerät für 2 oder 3 Lithium-Polymer Zellen von 1,1 A und mit LiPo Balancer-Funktion Micro-processor controlled charger for two or three Lithium-Polymer cells, maximum charge current 1.1 A and with LiPo Balancer-Function Chargeur piloté par micro-processeur pour la charge de 2 ou 3 éléments au Lithium-Polymer avec un courant de charge maximum de 1,1 A et avec Balancer intégré pour accus LiPo Seite 2 page 6 page 10 G R A U P N E R/SJ GmbH D - 7 3 2 3 0 K I R C H H E I M / T E C K G E R M A N Y Keine Haftung für Druckfehler! Änderungen vorbehalten! PN.PF-01 Allgemeine Sicherheitshinweise Allgemeine Hinweise zur Sicherheit Einleitung Bitte machen Sie sich mit dieser Anleitung vertraut, indem Sie sie vollständig und aufmerksam lesen. bevor Sie sich an den ersten Einsatz dieses Geräts machen. Dann haben Sie eine Garantie dafür, dass Sie alle Möglichkeiten Ihres neuen Akku-Ladegeräts ausschöpfen können. Die Warnungen und Sicherheitshinweise sind besonders wichtig. Bewahren Sie diese Anleitung an einem sicheren Ort auf; sollten Sie sich jemals von Ihrem Ladegerät trennen, geben Sie diese Anleitung bitte an den neuen Besitzer weiter. Mit dem Kauf des LiPo BALANCER CHARGER 2-3 S haben Sie ein ausgereiftes Produkt mit ausgezeichneter Leistung erworben. Es enthält die neuesten Halbleiter-Technologien, und gesteuert von einem Hochleistungs-RISC-Prozessor bietet es überlegene Ladeeigenschaften kombiniert mit einfacher Bedienung und größtmöglicher Verlässlichkeit. Diese Eigenschaften kann man normalerweise nur bei viel teureren Geräten erwarten. Der LiPo BALANCER CHARGER 2-3 S steht für eine verlässliche Methode, zwei oder drei Lithium-Polymer-Zellen zu laden. Das Verbindungskabel zwischen Akku und Balancer muss in die richtige Ausgangsbuchse für S2 oder S3 gesteckt werden. Hinweis Es ist wichtig, dass Sie stets die Anweisungen zum Laden beachten, die von den Akkuherstellern vorgelegt werden, und dass Sie sich an die empfohlenen Ladeströme und Ladezeiten halten. Führen Sie keine Schnellladungen durch, wenn der Hersteller nicht ausdrücklich erklärt, dass die Akkus geeignet sind für die hohen Ströme, die bei diesen Vorgängen fließen. Wieder aufladbare Batterien – und besonders Lithium-Polymer-Zellen – sind empfindlich und können leicht Schaden nehmen. Deshalb ist es wichtig, dass der Ladevorgang ganz überwacht wird. WARN- UND SICHERHEITSHINWEISE • Dieses Erzeugnis ist nicht für Kinder unter 14 Jahren geeignet, es ist kein Spielzeug! Es soll auch nicht von Personen mit eingeschränkten körperlichen, sensorischen oder geistigen Fähigkeiten oder ungenügender Erfahrung und Kenntnisstand benutzt werden, Kinder eingeschlossen, wenn sie nicht unter Aufsicht s tehen oder wenn sie keine Einführung in den G e brauch des Geräts durch eine für ihre Sicherheit verantwortliche Person erhalten haben. 2 Sicherheitshinweise • Kinder müssen beaufsichtigt werden, um sicherzustellen, dass sie nicht mit dem Gerät spielen. • Schützen Sie das Netzteil vor Staub, Feuchtig keit, Regen, Hitze (z.B. direkter Sonneneinstrahlung) und vor Erschütterungen. Es darf nur in trockenen Innenräumen benützt werden. • Sie selbst dürfen den Lader oder das Netzteil nicht öffnen! • Die Schlitze im Gehäuse dienen zur Kühlung des Laders. Sie dürfen nicht abgedeckt oder verschlossen werden. Stellen Sie das Gerät frei auf, so dass Kühlluft ungehindert zirkulieren kann. • Das Ladegerät ist zum Anschluss an eine 12VAutobatterie (11-16V DC) oder an eine 220~240V AC Steckdose vorgesehen. Wählen Sie die richtige Stromquelle aus. Wenn Sie 100~240V DC als Eingang (Steckernetzgerät) wählen, muss die Steckdose in der Nähe des Ladegeräts liegen und leicht zugänglich sein. Falls die Eingangsspannung für den Lader über 18V DC liegt, wird der Lader beschädigt und es kann Feuer entstehen. Gefahr! • Auf keinen fall dürfen Sie den Lader an beide Stromquellen gleichzeitig anschließen, Sie dürfen auch niemals Wechselstrom an die Gleichstrom-Eingangsbuchsen anlegen. Das Ladegerät darf in keiner Weise verändert werden. • Das Ladegerät und der zu ladende Akku müssen vor Gebrauch auf eine Wärme hemmende, nicht brennbare und nicht leitende Unterlage gestellt werden. Stellen Sie das Netzteil niemals auf einen Autositz, einen Teppich o. ä. Halten Sie brennbare oder flüchtige Substanzen fern vom Ladebereich. Sorgen Sie für gute Durchlüftung. • Schließen Sie den Lader mit Hilfe der mitgelieferten Original-Kabel und –Stecker direkt an die Autobatterie an. Der Motor des Autos muss über die ganze Zeit, in der der LiPo BALANCER CHARGER 2-3 S an die Autobatterie angeschlossen ist, abgestellt sein. Laden Sie die Autobatterie nie auf, solange der LiPo BALANCER CHARGER 2-3 S daran angeschlossen ist! • Die Lade-Ausgangsbuchsen und die Ladekabel dürfen nicht verändert oder in irgendeiner Form zusammengeschlossen werden. Zwischen den Ladebuchsen und –kabeln und der Karosserie eines Wagens besteht Kurzschlussgefahr, wenn der Lader an die Autobatterie angeschlossen wird. Lade- und Verbindungskabel dürfen im Betrieb nicht aufgerollt sein. Vermeiden Sie Kurzschlüsse zwischen den Ladekabeln und dem Akku Ihres Modells und der Karosserie. Aus diesem Grund darf der Lader nie auf die Karosserie des Autos gestellt werden. Allgemeine Betriebshinweise • Lassen Sie den Lader nie unbeaufsichtigt, wenn er läuft oder an die Autobatterie angeschlossen ist. • Es darf immer nur ein Akku an einen Ladeausgang angeschlossen werden. • Die einzigen Akkutypen, die sicher an den Lader angeschlossen werden dürfen, sind LithiumPolymer-Packs aus zwei oder drei Zellen. • Laden Sie niemals 2-Zellen-Packs und 3-Zellen-Packs gleichzeitig! • Zur Vermeidung von Kurzschlüssen zwischen den Krokodilklemmen an den Ladekabeln sollten Sie immer erst die Ladekabel an den Lader anschließen und erst dann an den zu ladenden Akku. Beim Abklemmen die Reihenfolge umkehren. • Bitte vor dem Laden prüfen: Überprüfen Sie die folgenden Punkte vor Ladebeginn: Sind alle Verbindungskabel fest angeschlossen oder gibt es irgendwo einen Wackelkontakt? Vergessen Sie bitte nicht, dass das Schnellladen von Akkus gefährlich sein kann. So führt zum Beispiel eine kurze Ladeunterbrechung aufgrund eines Wackelkontakts mit Sicherheit zu einem Fehler wie etwa einem Neustart des Ladevorgangs oder zu falschem Erkennen der Zellenzahl, was zu einer massiven Überladung des Packs führen würde. Laden von Akkus Zum Laden eines LiPo-Akkus wird elektrischer Strom in einer Höhe von max. 1,1A in den Akku eingespeist. Der Lader regelt den Ladestrom automatisch und verringert ihn, wenn die LadeEndspannung erreicht ist. • Akkus müssen beim Laden immer überwacht werden. • Akkus MÜSSEN beim Laden auf eine feuerfeste Unterlage gestellt werden. • Versuchen Sie nie, fehlerhafte oder bauchige Lithium-Zellen zu laden. • Schließen Sie den zu ladenden Akku mit Hilfe von Original GRAUPNER EH Balancer- Verbindungskabeln für Lithium Polymer Zellen an. • Sorgen Sie dafür, dass alle Kabel, Stecker und Klemmen guten und festen Kontakt haben. Wenn es z.B. zu einer kurzen Unterbrechung durch einen Wackelkontakt kommt, erfolgt unvermeidlich eine Fehlfunktion wie etwa ein Neustart des Ladeprozesses, mit dem Ergebnis, dass das Pack massiv überladen wird. Lithium-Polymer-Zellen Dieses Ladeprogramm eignet sich nur zum Laden von Lithium-Polymer-Akkus mit einer Zellen-Nennspannung von 3,7V.Die herausragende Besonderheit von Lithium-Akkus ist ihre im Vergleich zu anderen Akkutypen weit höhere Kapazität. Dies ist ein wichtiger Vorteil, der aber durch die Notwendigkeit relativiert wird, diese Akkus vor allem beim Laden und Entladen anders zu behandeln, wenn die Gefahren beim Umgang mit ihnen klein gehalten werden sollen. Der Umgang mit diesen Zellen unterliegt einigen wichtigen Grundregeln, und diese müssen ständig beachtet werden. Bitte befassen Sie sich mit den Datenblättern der Hersteller, wenn Sie zusätzliche Informationen und Sicherheitshinweise finden wollen. Die Grundregel heißt: Lithium-Akkus dürfen NUR mit speziellen Ladegeräten geladen werden, die auf den vorliegenden Akkutyp zugeschnitten sind (Lade-Endspannung, Kapazität). Die Lademethode für diese Akkus unterscheidet sich von Art, wie man NiCd- oder NiMH-Akkus lädt; sie gründet sich auf das sogenannte Konstantstrom / Konstantspannungs-Verfahren. Der erforderliche Ladestrom hängt von der Kapazität des Akkus ab und wird automatisch vom Lader festgelegt. Lithium-Akkus werden im allgemeinen mit 1-2 C geladen (1 C Ladestrom = Kapazität als Ladestrom. Beispiel: Bei einem Akku der Kapazität 1500 mAh beträgt der 1 C–Ladestrom 1500 mA oder 1,5 A). Sobald der Akku die Lade-Endspannung erreicht, die zu genau diesem Akkutyp passt, reduziert der Lader automatisch den Ladestrom, um zu verhindern, dass die LadeEndspannung zu hoch wird. Der Lader gleicht zudem die die Spannungen der einzelnen Zellen aus („balanciert“), wenn diese unterschiedlich sind, was die Sicherheit erhöht. Haftungsausschluss Die Einhaltung der Betriebsanleitung sowie die Bedingungen und Methoden bei Installation, Betrieb, Verwendung und Wartung des Ladegerätes können von der Fa. Graupner/SJ nicht überwacht werden. Daher übernimmt die Fa. Graupner/SJ keinerlei Haftung für Verluste, Schäden oder Kosten, die sich aus fehlerhafter Verwendung und Betrieb ergeben oder in irgendeiner Weise damit zusammenhängen. Komponenten und Zubehör Die Firma Graupner/SJ GmbH als Hersteller empfiehlt, Komponenten und Zubehörprodukte zu verwenden, die von Graupner/SJ auf Tauglichkeit, Funktion und Sicherheit geprüft, freigegeben sind.Graupner/SJ übernimmt für Sie die Produktverantwortung.Die Fa. Graupner/ SJ übernimmt für nicht freigegebene Teile oder Zubehörprodukte von anderen Herstellern keine Haftung und kann nicht jedes einzelne Fremdprodukt beurteilen, ob es ohne Sicherheitsrisiko eingesetzt werden kann. Betriebshinweise 3 Inbetriebnahme Eingang 100~240V AC LED grün FERTIG LED rot LADEN FÜR LADEGERÄT EINGANG 10-18V DC EINGANG 10-18V DC AUSGANG 2 LiPo-Zellen oder 3 LiPo-Zellen Inbetriebnahme Erstmalige Verwendung des Ladegeräts Falls Sie den 100~240V AC-Eingang verwenden wollen und eine Steckdose zur Verfügung steht, schließen Sie das Netzteil an eine leicht zugängliche Steckdose in der Nähe des Ladegeräts an. Schließen Sie das Ladegerät an eine Stromquelle mit 11-16V DC mit mindestens 1,2A oder an den Netzteilausgang 15V / 18W an. Die grüne und die rote LED am Lader leuchten auf und erlöschen nach einer Sekunde. Jetzt können Sie das 2S- oder das 3S–Balancer-Kabel GRAUPNER-EH (für 2 oder für 3 Zellen) an den Lader anschließen. Sie dürfen nicht ein 2-Zellen-Pack und ein 3-Zellen-Pack gleichzeitig laden! Vergewissern Sie sich, dass die Polung des Balancerkabels GRAUPNER-EH stimmt. Von rechts nach links gilt: PIN 1 (GND): Erde (ground) = Akku-Minuspol PIN 2 (1): + Zelle 1 PIN 3 (2): + Zelle 2 PIN 4 (3): + Zelle 3 Schließen Sie 2 oder 3 Zellen richtig an den Laderausgang an und prüfen Sie nach: Plus ist links und Minus ist rechts. Rote LED an, grüne LED aus bedeutet Ladung. Wenn der Akku voll geladen ist, ist die grüne LED an und die rote aus. 4 Inbetriebnahme EINGANG 10-18V DC Hinweise • Schließen Sie zuerst das AC-Netzteil an, dann erst den Lader. • Stellen Sie den Lader nach erfolgtem Laden weg, lassen Sie keinen Kontakt zwischen Lader und Akku mehr zu. • Klemmen Sie den Lader nach dem Ladevorgang vom Netzteil ab. • Stellen Sie während des Ladens nichts auf den Lader. • Der Temperaturbereich geht von 0 bis 40°C, die beste Ladeleistung ergibt sich bei 10-30°C. • Wenn zwischen den einzelnen Zellen von 2S oder 3S größere Spannungsdifferenzen bestehen, wird die Ladezeit möglicherweise länger. • Die DC-Spannung des Netzteils sollte 15V bei 1,2A betragen, oder es muss sich um das originale Netzteil handeln. • Wenn die DC-Spannung unter 10V sinkt, kann der Lader nicht arbeiten. • Vor Gebrauch müssen die Kunden dieses Handbuch lesen. Bei Unfällen, die auf unrichtige Lademethoden – d.h. andere als die hier aufgeführten – zurückzuführen sind, sind Hersteller, Zwischen- und Endverkäufer nicht verantwortlich. Inbetriebnahme, Technische Daten Lademodus Die Akkus werden nach der CC/CV-Lademethode geladen und die Zellen werden zudem balanciert (Spannungs-ausgeglichen). Fehlercodes Rote LED leuchtet nicht, wenn Akku angeschlossen: - Akkuspannung ist kleiner als 2,75V pro Zelle. Akkuspannung überprüfen. Keine der beiden LEDs leuchtet: - Akku ist mit falscher Polung angeschlossen oder kurzgeschlossen. Anschluss auf falsche Polarität oder Kurzschluss prüfen. - Eingangskabel in schlechtem Zustand. Zustand des Eingangskabels prüfen. - Eingangs-Stromquelle nicht brauchbar. Prüfen, ob die Eingangs-Stromquelle 15V DC / 1,2 A liefert oder ob die Gleichspannung zwischen 10-18V liegt. Technische Daten Eingangsspannung des Netzteils: 100-240V AC Ausgangsspannung des Netzteils: 15V DC Eingangsspannung am Lader: 10-18V DC Akkutyp: Lithium-Polymer (nur 3,7V-Typen) Zellenzahl: 2-3 LiPo Ladestrom: 1,1A (<15W) Leuchtanzeigen: rote und grüne LED Sicherheitsfunktionen: Schutz vor falscher Polung (Eingang/Ausgang) Ausgang: GRAUPNER-EH Balancer-Verbindungskabel Spannungsunterschied am Balancer: ca. 30mV Abmessungen (L/B/H): Netzteil Lader Gewicht Netzteil: Gewicht Lader: ca. 69 x 47 x 32 mm ca. 81 x 52 x 24 mm ca. 105g ca. 50g Inbetriebnahme 5 General Safety Notes Introduction Please study these instructions, reading them completely and attentively, before you use the unit for the first time. This will guarantee that you will be able to exploit all the facilities of your new battery charger. The warnings and safety notes are particularly important. Please store these instructions in a safe place, and be sure to pass them on to the new owner if you ever dispose of the charger. In purchasing the LiPo BALANCER CHARGER 2 - 3S you have acquired a mature product with an excellent performance. It incorporates the latest semi-conductor technology, controlled by a highperformance RISC micro-processor, to provide superior charging characteristics combined with simple operation and optimum reliability. These features can normally be expected only from much more expensive units. The LiPo BALANCER CHARGER 2 - 3S represents a reliable method of charging two or three Lithium-Polymer cells. The battery balancer connector must be plugged in the right Output for 2S or 3S. Note It is important always to observe the charging instructions supplied by the battery manufacturer, and to keep to the recommended charge currents and times. Do not fast-charge batteries unless the manufacturer states expressly that they are suitable for the high currents which flow during these processes. Rechargeable batteries generally - and LithiumPolymer cells in particular - are sensitive and easily damaged. It is therefore essential to supervise the whole of the charge process. Warnings and safety notes • This product isn‘t designed for use by children under the age of 14, it isn‘t a toy! This appliance is not intended for use by persons (including children) with reduced physical, sensory or mental capabilities, or lack of experience and knowledge, unless they have been given supervision or instruction concerning use of the appliance by a person responsible for their safety. Children should be supervised to ensure that they do not play with the appliance. • Protect the charger from dust, damp, rain, heat (e.g. direct sunshine) and vibration. It should only be operated in dry indoor conditions. • Do not open the charger or the power supply by yourselve! 6 Safety Notes • The case slots serve to cool the charger, and must not be covered or enclosed; set up the charger with space round it, so that cooling air can circulate unhindered. • The charger is designed to be powered by a 12 V car battery (11 - 16 V DC) or with the power supply to a mains socket (100 ~ 240 V AC). Select the appropriate power input. If the 100~240V AC input is selected, for pluggable equipement like power supply, the socket-outlet shall be installed near the charger and shall be easily accessible. If the input voltage of the charger is over 18V DC, this will damage the charger and can cause even fire. Danger! • Never connect the charger to both power sources simultaneously, and never connect an AC voltage to the DC voltage input. Do not modify the charger in any way. • The charger and the battery to be charged should be set up on a heat-resistant, non-inflammable and non-conductive surface before use. Never place the charger directly on a car seat, carpet or similar. Keep all inflammable and volatile materials well away from the charging area. Provide good ventilation. • Connect the charger directly to the car battery using the original cables and connectors supplied. The car’s engine must be stopped all the time the LiPo BALANCER CHARGER 2 - 3S is connected to the car’s battery. Do not recharge the car battery at any time when the LiPo BALANCER CHARGER 2 - 3S is connected to it. • The charge output sockets and connecting leads must not be modified, and must not be inter-connected in any way. There is a danger of short-circuit between the charge outputs and the vehicle’s bodywork when the charger is connected to the car battery. The charge leads and connecting leads must not be coiled up when the charger is in use. Avoid short-circuiting the charge output or the model battery with the car bodywork. For this reason the charger must never be placed directly on the vehicle’s bodywork. • Never leave the charger running or connected to the car battery unsupervised. • Only one battery may be connected to the charger for charging at any one time. • The only types of battery which may safely be connected to the charger are: Lithium-Polymer packs consisting of two to three cells. • Never charge 2cells and 3 cells at the same time! General Operating Information • To avoid short-circuits between the crocodile plugs fitted to the charger lead, please always connect the charger lead to the charger first, and only then to the battery to be charged. Reverse the sequence when disconnecting. Check before using the charger Before charging please check the following points: are all connections firm and secure, i.e. no intermittent contacts? Please bear in mind that it can be dangerous to fast-charge batteries. For example, if there is a brief interruption due to an intermittent contact, the result is inevitably a malfunction such as a restart of the charge process, or an incorrect cellcount detection, which could result in the pack being massively overcharged. Charging batteries When a battery is charged, electrical current is fed into it at the rate of max. 1.1 A. The charger automatically adjusts the charge current, and reduces it when the final charge voltage is reached. • Batteries must always be supervised when on charge. • Batteries MUST be placed on a fire-proof surface for charging. • Never attempt to recharge defective or inflated Lithium cells! • Connect the battery to be charged using genuine GRAUPNER-EH balancer connectors for LithiumPolymer cells. • Ensure that all connectors and terminal clamps make good, sound contact. For example, if there is a brief interruption due to an intermittent contact, the result is inevitably a malfunction such as a restart of the charge process, which would result in the pack being massively overcharged. Lithium-Polymer cells This charge program is only suitable for charging Lithium-Polymer batteries with a nominal cell voltage of 3.7 V. The main outstanding feature of Lithium batteries is their much higher capacity compared to other battery types. This is an important advantage, but it is balanced by the requirement to handle the batteries differently, especially with respect to charging and discharging, if the danger of using them is to be minimised. There are important basic rules governing the handling of these cells, and they must be observed at all times. For additional information and safety notes please study the battery manufacturer’s published specifications. The fundamental rule is that Lithium-based batteries may ONLY be charged using special chargers which are designed and set for the actual battery type (final charge voltage, capacity). The method of charging these batteries is different to the one employed with Ni-Cd or Ni-MH batteries, and is based on what is known as a constant current / constant voltage process. The charge current required varies according to the battery capacity, and is set automatically by the charger. Lithium batteries are generally charged at 1 - 2 C (1 C charge current = capacity charge current. Example: with a battery capacity of, say, 1500 mAh the corresponding 1 C charge rate is 1500 mA, or 1.5 A). On this charger the charge current is set to max. 1.1 A. Once the battery reaches the final charge voltage appropriate to the specific battery type, the charger automatically reduces the charge current in order to prevent the final charge voltage being exceeded. The charger does also balance the voltage of the single cells, if it‘s different, so this increases safety and the life time of the battery. Liability Exclusion As manufacturers, we at Graupner/SJ are not in a position to ensure that you observe the correct methods of operation when installing, using and maintaining this product. For this reason we are obliged to deny all liability for loss, damage or costs which are incurred due to the incompetent or incorrect use and operation of our products, or which are connected with such operation in any way. Components and accessories As manufacturer of this product, the company of Graupner/SJ GmbH recommends the use of associated components and accessory products which have been checked and approved by Graupner/SJ for their suitability, proper function and safety. In such cases Graupner/SJ accepts responsibility for these products on your behalf. We are unable to accept liability for parts or accessories made by other manufacturers, which are not expressly approved by Graupner/ SJ, as we are not in a position to assess every individual non-Graupner/SJ item to decide whether it represents a safety risk or not. Operating Information 7 Using the charger for the first time INPUT 100~240V AC LED grün ready LED red charge INPUT 10-18V DC OUTPUT 2 LiPo-cells or 3 LiPo-cells FOR INPUT 10-18V DC INPUT 10-18V DC Using the charger for the first time Connect the power supply a easily accessible mains socket near to the charger, when using the 100 - 240 V AC power input, if a main socket is available. Connect the charger to 11 - 16 V DC with minimum 1.2A or to the power supply output 15V / 800mA. The green and red LED of the charger are lighting, 1 second later they will be off. Now you can connect the battery 2S or 3S (2 or 3 cells) balancer connector Graupner-EH to the charger. You must not charge 2 cells and 3 cells at the same time! Notes • Contact AC power first, before contact to the charger. Make sure for the right polarity of your battery balancer connector Graupner-EH. From right handed to left side: Pin 1 (GND): Ground = battery -, Pin 2 (1): + cell 1 Pin 3 (2): + cell 2 Pin 4 (3): + cell 3 • If the single cell voltage difference of 2S or 3S is bigger, the charge time may be longer. Contact 2 or 3 cells to the charger output correctly, make sure, positive is on the left side and negative on the right side. Red LED on, green LED off means charging. If the battery is charged full, the green LED is on and the red LED is off. 8 Using the charger for the first time • Move charger away after charging, do not contact charger with battery after charged full. • Finished charging, take off the charger from AC power. • Do not put something on it during charging. • Working Temperature is from 0 to 40°C, the better charge performance is at 10 to 30°C. • AC power supply should be only the original one or 15V 1.2A • If the DC power is less then 10V, the charger can not work. • Before using, customers must read this manual. Any accident lead by incorrect using method (other then specified), manufacturer, distributor, retailers will not be responsible. Using the charger for the first time Charge mode The batteries will be charge with CC/CV charge method and the cells will be balanced, too. Error mode Red LED no light, when connect battery: - Battery voltage is lower as 2.75V per cell. Check battery voltage. Both LEDs no light: - Connect battery with wrong polarity or short circuit. Check contact if there is a short circuit or wrong polarity. - Input connector is not good. Check the input connector is good or not. - Input power supply is not suitable. Check the input power supply or DC is between 10-18V. Specification Input voltage Power supply: 100 - 240V AC Output voltage Power supply: 15V Input voltage Charger: 10 - 18V DC Battery type: Lithium-Polymer (3.7 V type only), Cell count: 2-3 LiPo Charge current: 1.1 A (<15W) Indicators: red, green LEDs Safety functions: Reversed polarity protection (input, output) Output:Graupner-EH Balancer connector Balance voltage difference: about 30mV Dimensions (L / W / H): Power supply: app. 69 x 47 x 32 mm Charger: app. 81 x 52 x 24 mm Weight power supply: approx. 105 g Weight charger: approx. 50 g Using the charger for the first time 9 Généralités Avertissements et conseils de sécurité Introduction Veuillez vous familiariser avec ces instructions en les lisant entièrement et avec attention avant la première utilisation de cet appareil. Vous aurez ainsi une garantie pour connaître toues les possibilités de votre nouveau chargeur d’accu. Les avertissements et les conseils de sécurité sont particulièrement importants. Conservez ces instructions dans un endroit sûr et si vous devez vous séparer de votre chargeur, veuillez les remettre au nouvel utilisateur. Avec l’achat du CHARGEUR BALANCER LiPo 2-3S, vous avez fait l’acquisition d’un produit avec de remarquables performances. Il contient les nouvelles technologies en semi conducteurs, il est piloté par un processeur RISC à haute puissance offrant des caractéristiques de charge supérieures combinées avec une simplicité d’utilisation et a plus grande sécurité possible. Ces caractéristiques ne peuvent normalement être obtenues qu’avec des appareils beaucoup plus chers. Le CHARGEUR BALANCER LiPo 2-3S permet de charger deux ou trois éléments au Lithium Polymer selon une méthode sûre. Le cordon de charge de raccordement entre l’accu et le Balancer devra être connecté sur la sortie de charge correcte pour S2 ou S3. Notes Il est important d’observes les directives pour la charge données par le fabricant des accus et de respecter le courant de charge et le temps de charge conseillés. N’effectuez aucune charge rapide tant que le fabricant n’a pas expressément indiqué que l’accu est adapté pour les forts courants qui sont délivrés avec ces processus. Les batteries rechargeables et particulièrement les éléments au Lithium Polymer sont sensibles et peuvent facilement être détériorés. C’est pourquoi il est important de surveiller totalement le processus de charge. AVERTISSEMENTS ET CONSEILS DE SECURITE • Ce produit ne convient pas aux enfants en dessous de 14 ans, ce n’est pas un jouet ! Il ne devra pas non plus être utilisé par des personnes aux facultés physiques, sensorielles ou intellectuelles limitées, ou bien ayant une expérience et des connaissances insuffisantes, ni par des enfants lorsqu’ils ne sont pas sous la surveillance d’un adulte ou qu’ils n’ont aucune assistance pour l’utilisation de l’appareil en toute sécurité. Les enfants devront être surveillés pour s’assurer qu’ils ne jouent pas avec l’appareil. 10 Généralités • Protégez le transformateur de la poussière, le l’humidité, de la pluie, de la chaleur (par ex. du rayonnement solaire direct) et des chocs. Il devra être utilisé uniquement dans un local fermé et sec. • N’ouvrez pas vous-même le chargeur, ni le transformateur ! • Les fentes sur le boîtier servent au refroidissement du chargeur ; elles ne devront pas être recouvertes ou obturées. Placez l’appareil à un endroit libre de façon à ce que de l’air de refroidissement puisse circuler autour. • Le chargeur est prévu pour un raccordement sur une batterie de voiture de 12 V (11-16 V continu) ou sur une prise de courant secteur 220-240 alternatif ; sélectionnez la source de courant correcte. Si vous sélectionnez 100-240 V comme entrée, la prise doit se trouver à proximité de l’appareil et être facilement accessible. si la tension d’entrée pour le chargeur est supérieure à 18 V continu, il sera détérioré et un danger d’incendie peut se produire ! • Le chargeur ne devra en aucun cas être relié simultanément aux deux sources de courant, vous ne devrez jamais non plus appliquer du courant alternatif sur les fiches d’entrée en courant continu. Le chargeur ne devra pas être modifié d’une façon quelconque. • Le transformateur et l’accu à charger devront être placés avant l’utilisation sur une base insensible à la chaleur, non inflammable et non conductrice. Ne placez jamais le transformateur sur le siège d’une voiture, sur un tapis ou similaire. Eloignez les substances inflammables ou volatiles de l’installation de charge. Assurez toujours une bonne circulation d’air. • Reliez le chargeur avec le cordon original fourni et connectez le directement sur la batterie de voiture. Le moteur de la voiture devra être arrêté durant tout le temps où le CHARGEUR BALANCER LiPo 2-3S sera connecté sur la batterie. Ne rechargez jamais non plus la batterie de la voiture tant que le CHARGEUR BALANCER LiPo 2-3S est relié à celle-ci ! • Les fiches de sortie de charge et le cordon de charge ne devront pas être modifiée ou reliés dans une forme quelconque. Il existe un danger de court circuit entre les fiches de sortie, le cordon de charge et la carrosserie d’une voiture lorsque le chargeur sera relié à la batterie de celle-ci. Le cordon de charge ne devra pas être enroulé durant l’utilisation. Evitez les courts circuits entre le cordon de charge, l’accu de votre modèle et la carrosserie. Pour cette raison, le chargeur ne devra jamais être posé sur la carrosserie de la voiture. Généralités • Ne laissez jamais le chargeur sans surveillance lorsqu’il fonctionne ou qu’il est relié à la batterie de la voiture. • Il doit toujours y avoir seulement un seul accu relié sur la sortie de charge. • Les seuls accus qui pourront être reliés au chargeur en toute sécurité sont les packs au Lithium Polymer composés de deux ou de trois éléments. • Ne chargez jamais simultanément des packs de 2 éléments et des packs de 3 éléments. • Pour éviter des courts circuits entre les pinces crocodile du cordon de charge, connectez toujours d’abord le cordon sur le chargeur et ensuite sur l’accu à charger. • Veuillez vérifier avant la charge : Vérifiez les points suivant avant de commencer la charge : Si tous les cordons sont fermement reliés, ou s’il n’y a pas de contact intermittent. Veuillez ne pas oublier que la charge rapide d’un accu peut être dangereuse. Lorsqu’il se produit par ex. une courte interruption de charge en raison d’un contact intermittent, il s’ensuit une erreur comme un nouveau départ du processus de charge ou une détection erronée du nombre d’éléments qui conduiront à une surcharge massive du pack d’accus. Charge des accus Pour la charge d’un accu LiPo, un courant électrique d’une intensité de 1,1 A max. est envoyé dans l’accu. Le chargeur règle automatiquement le courant de charge et le diminue lorsque la tension de fin de charge est atteinte. • L’accu devra toujours être surveillé durant la charge. • L’accu DEVRA être placé sur une base non inflammable durant la charge. • Ne tentez jamais de charger des éléments au Lithium défectueux ou déformés. • Reliez l’accu à charger à l’aide du cordon de charge original GRAUPNER EH Balancer pour éléments au Lithium Polymer. • Assurez vous que tous les cordons, les connecteurs et les pinces assurent un bon contact. Lorsque par ex. il se produit une courte interruption de charge due à un contact intermittent, il s’ensuit inévitablement un disfonctionnement avec comme résultat un nouveau départ du processus de charge et une surcharge massive du pack d’accus. Eléments au Lithium Polymer Ce programme est uniquement adapté pour la charge des accus au Lithium Polymer avec une tension nominale de 3,7 V par élément. La particularité la plus remarquable des accus au Lithium est leur très forte capacité par comparaison aux autres types d’accus. Ceci est un avantage important, mais ces accus devront être traités autrement, surtout avant et après la charge L’utilisation de ces accus exige le respect de quelques règles de base importantes et celles-ci devront être observées en permanence. Veuillez vous référer aux fiches de caractéristiques du fabricant lorsque vous voulez trouver des informations et des conseils de sécurité supplémentaires. La règle de base est que les accus au Lithium doivent être chargés UNIQUEMENT avec des chargeurs spéciaux adaptés pour ces types d’accus (Tensions de charge/décharge, capacité). La méthode de charge pour ces accus diffère de celle pour les accus NiCd ou NiMH par le processus appelé courant constant/tension constante. Le courant de charge dépend de la capacité de l’accu et il sera automatiquement réglé par le chargeur. Les accus au Lithium seront généralement chargés avec 1-2 C (Courant de charge 1 C = capacité comme courant de charge ; Exemple : avec un accu d’une capacité de 1500 mAh, le courante de charge 1 C est de 1500 mA, ou 1,5 A). Dès que l’accu atteint la tension de fin de charge exactement adaptée à ce type d’accu, le chargeur réduit automatiquement le courant de charge pour empêcher que la tension de fin de charge soit trop haute. Le chargeur égalise en outre la tension des différents éléments (‘’Equilibrage’’) lorsque celle-ci est différente, ce qui augmente la sécurité. Exclusion de responsabilité Le respect des instructions d’utilisation ainsi que les conditions et les méthodes d’installation, d’utilisation et d’entretien du chargeur ne peuvent pas être surveillés par la Firme Graupner/ SJ. En conséquence, la Firme Graupner décline toute responsabilité pour les pertes, les détériorations et les coûts survenus à la suite d’une mauvaise utilisation, ainsi que sa participation d’une façon quelconque aux dédommagements. Composants et accessoires En tant que fabricant, la Firme Graupner/SJ GmbH conseille les composants et les accessoires à utiliser dont la compatibilité, la fonction et la sécurité ont été éprouvés par ses soins et assure la responsabilité de ses produits. La Firme Graupner/SJ n’assure aucune responsabilité pour tout autre composant ou accessoires produits par d’autres fabricants, car elle ne peut pas juger si chaque produit étranger pourra être utilisé sans risque pour la sécurité. Généralités 11 Mise en service LiPo LED verte fini ENTRÉE 100~240V AC LED rouge charge ENTRÉE 10-18V DC Continu POUR ENTRÉE 10-18V DC Continu ENTRÉE 10-18V DC Continu SORTIE 2 éléments de LiPo, ou 3 éléments de LiPo Mise en service Notes Première utilisation du chargeur Si vous voulez utiliser l’entrée en 100-240 V alternatif, reliez le transformateur à une prise de courant secteur facilement accessible et à sa proximité. Reliez le chargeur à une source de courant 1116 V continu avec au moins 1,2 A ou à la sortie 15 V / 18 W. Les LED vert et rouge s’allument sur le chargeur et s’éteignent après une seconde. Vous pouvez maintenant relier le cordon Balancer 2S ou 3S GRAUPNER-EH (poue 2 ou pour 3 éléments) au chargeur. Vous ne devrez pas charger simultanément un pack à 2 éléments et un pack à 3 éléments ! • Reliez d’abord le transformateur et ensuite le chargeur. Assurez-vous que les polarités du cordon Balancer GRAUPNER-EH correspondent, soit de la droite vers la gauche : BROCHE 1 (GND) : (Terre) = Pôle Moins de l’accu. BROCHE 2 (1) : + Elément 1 BROCHE 3 (2) : + Elément 2 BROCHE 4 (3) : + Elément 3 • Lorsqu’il existe une grande différence de tension entre les éléments 2S ou 3S, le temps de charge sera peut être plus long. Reliez correctement 2 ou 3 éléments à la sortie du chargeur et vérifiez ensuite que le Plus soit à gauche et que le Moins soit droite. Le LED rouge allume et le LED vert éteint signifient la charge. Lorsque l’accu est totalement chargé, les LED vert et rouge sont éteints. 12 Mise en service • Eloignez le chargeur après la charge, ne laissez plus aucun contact entre le chargeur et l’accu. • Déconnectez le chargeur du transformateur après le processus de charge. • Ne le posez pas sur le chargeur durant la charge. • La plage de températures va de 0 à 40° C, la meilleure puissance de charge est obtenue avec 10-30° C. • La tension du courant continu du transformateur doit être de 16 V avec 1,2 A. • Lorsque cette tension est située en dessous de 10 V, le chargeur ne peut pas travailler. • Les clients doivent lire ce manuel avant d’utiliser le chargeur. En cas d’accident dû à une méthode de charge incorrecte, (c’est-à-dire autre que celle indiquée ici), le fabricant et le revendeur ne sont pas responsables. Mise en service Mode de charge Les accus seront chargés selon la méthode CC/ CV et les éléments seront en outre équilibrés (équilibrage des tensions). Codes d’erreur Le LED rouge ne s’allume pas lorsque l’accu est relié : - La tension de l’accu est plus faible que 2,75 V par élément. Vérifier la tension de l’accu. Aucun des deux LED ne s’allume : - L’accu est relié avec des fausses polarités ou en court circuit. Vérifiez les polarités sur le raccordement ou s’il n’y a pas un court circuit. -Le cordon d’entrée est en mauvais état. Vérifiez l’état du cordon d’entrée. -La source du courant d’entrée n’est pas utilisable. Vérifiez si elle délivre 15 V continu / 1,2 A ou si la tension en continu est située entre 10-18 V. Caractéristiques techniques Tension d’entrée du transformateur: 100-240 V AC Tension de sortie du transformateur: 15 V DC Tension d’entrée au chargeur: 10-18 V DC Types d’accus : Lithium-Polymer (Type 3,7 V seul.) Nombre d’éléments : 2-3 LiPo Courant de charge: 1,1 A (< 15W) Témoins lumineux: LED rouge et vert Fonctions de sécurité : Protection contre les inversions de polarités (Entrée/Sortie). Sortie : Cordon de liaison Balancer GRAUPNER-EH, Différence de tension sur le Balancer env . 30mV. Dimensions (L/l/h) : Transformateur Chargeur Poids du transformateur Poids du chargeur, env. env. 60x47x32mm env. 81x52x24mm env. 1095 g. env. 50 g. Mise en service 13 Hinweise zum Umweltschutz / Environmental Protection Notes / Protection de I‘ environnement Hinweise zum Umweltschutz Das Symbol auf dem Produkt, der Gebrauchsanleitung oder der Verpackung weist darauf hin, dass dieses Produkt bzw. elektronische Teile davon am Ende seiner Lebensdauer nicht über den normalen Haushaltsabfall entsorgt werden dürfen. Es muss an einem Sammelpunkt für das Recycling von elektrischen und elektronischen Geräten abgegeben werden. In the case of RC models, the electronic components - such as servos, receivers and speed controllers - must be removed from the model, and taken to an appropriate collection centre for electrical waste. Die Werkstoffe sind gemäß ihrer Kennzeichnung wiederverwertbar. Mit der Wiederverwendung, der stofflichen Verwertung oder anderen Formen der Verwertung von Altgeräten leisten Sie einen wichtigen Beitrag zum Umweltschutz. Batterien und Akkus müssen aus dem Gerät entfernt werden und bei einer entsprechenden Sammelstelle getrennt entsorgt werden. Bei RC-Modellen müssen Elektronikteile, wie z.B. Servos, Empfänger oder Fahrtenregler aus dem Produkt ausgebaut und getrennt bei einer entsprechenden Sammelstelle als ElektroSchrott entsorgt werden. Protection de l’environnement Le symbole figurant sur l’appareil, dans les instructions d’utilisation ou sur l’emballage indique que ce produit ne devra pas être jeté dans une poubelle domestique normale à la fin de sa durée de vie. Il devra être déposé dans un container spécial pour le recyclage des appareils électriques et électroniques. Bitte erkundigen Sie sich bei der Gemeindeverwaltung nach der zuständigen Entsorgungsstelle. Environmental Protection Notes Whenever you see this symbol on a product, in the user instructions or the packaging, it means that you must not dispose of that item, or the electronic components in it, in the ordinary domestic waste when it comes to the end of its useful life. The correct method of disposal is to take it to your local collection point for recycling electrical and electronic equipment. Individual markings indicate which materials can be recycled and re-used. You can make an important contribution to the protection of our shared environment by re-using the product, recycling the basic materials or recycling redundant equipment in other ways. Dry cells and rechargeable batteries must be removed from the device and taken separately to a suitable battery disposal centre. 14 Environmental Protection Notes If you don’t know the location of your nearest disposal centre, please enquire at your local council office. La matière est re-valorisable conformément à sa désignation. Avec la réutilisation, l’exploitation des matières ou pour d’autres formes d’utilisation des vieux appareils, vous apportez une importante contribution à la protection de l’environnement. Les batteries et les accus devront être retirées des appareils et jetés dans un container séparé correspondant. Pour le débarras des modèles R/C, les éléments électroniques comme par ex. les servos, le récepteur ou le régulateur de vitesse devront être démontés du modèle et déposés séparément dans un container correspondant. Renseignez-vous sur la présence de ces containers à l’administration de votre commune. Konformitätserklärung / Conformity Declaration / Déclaration de conformitè EG KONFORMITÄTSERKLÄRUNG Für das folgend bezeichnete Erzeugnis: LiPo BALANCER CHARGER 2-3S 12V DC mit Netzteil 100-240V AC; Best.-Nr. 6454 wird hiermit bestätigt, dass es den wesentlichen Schutzanforderungen entspricht, die in der Richtlinie des Rates zur Angleichung der Rechtsvorschriften der Mitgliedstaaten über die elektromagnetische Verträglichkeit (2004/108/EG) bzw. die elektrische Sicherheit LVD (2006/95/EG) festgelegt sind. Zur Beurteilung des Erzeugnisses hinsichtlich elektromagnetischer Verträglichkeit wurden folgende Normen herangezogen: EMV: EN 61000-3-2 / EN 61000-3-3 EN 55022 / EN 55024 LVD: EN 60950-1 Diese Erklärung wird verantwortlich für den Hersteller/Importeur Graupner/SJ GmbH, Henriettenstr. 96, 73230 Kirchheim/Teck abgegeben durch 73230 Kirchheim/Teck, den 13.09.2013 Ralf Helbing Geschäftsführer EU Conformity Declaration We hereby declare that the following product:LiPo BALANCER CHARGER 2-3S 12V DC mit Netzteil 100-240V AC; Best.-Nr. 6454 conforms with the essential protective requirements as laid down in the directive for harmonising the statutory directives of the member states concerning electro-magnetic interference (2004/108/EG) and LVD (2006/95/EG). This product has been tested for electro-magnetic interference in accordance with the following norms: EMV: EN 61000-3-2 / EN 61000-3-3 EN 55022 / EN 55024 LVD: EN 60950-1 This declaration was produced by: Graupner/SJ GmbH Henriettenstr. 96 73230 Kirchheim/Teck and is valid for the manufacturer / importer of the product 73230 Kirchheim/Teck, Germany, on 13.09.2013 Ralf Helbing Managing Director Déclaration de conformité EG : Pour le produits suivant LiPo BALANCER CHARGER 2-3S 12V DC mit Netzteil 100-240V AC; Best.-Nr. 6454 Nous confirmons que la compatibilité électronique correspond aux directives (2004/108/EG) et LVD LVD (2006/95/EG). Normes appliquées : EMV: EN 61000-3-2 / EN 61000-3-3 EN 55022 / EN 55024 LVD: EN 60950-1 Cette déclaration est sous la responsabilité du Fabricant/Importateur Graupner/SJ GmbH Henriettenstr. 96 73230 Kirchheim/Teck Fait à 73230 Kirchheim/Teck, le 13.09.2013 Ralf Helbing Le Directeur d’Entreprise Conformity Declaration 15 Wir gewähren auf dieses Erzeugnis eine / This product is / Sur ce produit nous accordons une Garantie von warrantied for garantie de 24 Monaten month mois Die Fa. Graupner/SJ GmbH, Henriettenstraße 96. 73230 Kirchheim/Teck gewährt ab dem Kaufdatum auf dieses Produkt eine Garantie von 24 Monaten. Die Garantie gilt nur für die bereits beim Kauf des Produktes vorhandenen Material- oder Funktionsmängel. Schäden die auf Abnützung, Überlastung, falsches Zubehör oder unsachgemäße Behandlung zurückzuführen sind, sind von der Garantie ausgeschlossen. Die gesetzlichen Rechte und Gewährleistungsansprüche des Verbrauchers werden durch diese Garantie nicht berührt. Bitte überprüfen Sie vor einer Reklamation oder Rücksendung das Produkt genau auf Mängel, da wir Ihnen bei Mängelfreiheit die entstandenen Servicestellen / Service / Service après-vente Graupner/SJ GmbH, Henriettenstraße 96, 73230 Kirchheim/Teck, Germany guarantees this product for a period of 24 months from date of purchase. The guarantee applies only to such material or operational defects witch are present at the time of purchase of the product. Damage due to wear, overloading, incompetent handling or the use of incorrect accessories is not covered by the guarantee. The user´s legal rights and claims under garantee are not affected by this guarantee. Please check the product carefully for defects before you are make a claim or send the item to us, since we are obliged to make a charge for our Pour adresses des points de service situés en dehors de l‘Allemagne s‘il vous plaît se référer à www. graupner.de/fr/. La société Graupner/SJ GmbH, Henriettenstraße 96, 73230 Kirchheim/Teck, Allemagne, accorde sur ce produit une garantie de 24 mois à partir de la date d´achat. La garantie prend effet uniquement sur les vices de fonctionnement et de matériel du produit acheté. Les dommages dûs à de l´usure, à de la surcharge, à de mauvais accessoires ou à d´une application inadaptée, sont exclus de la garantie. Cette garantie ne remet pas en cause les droits et prétentions légaux du consommateur. Avant toute réclamation et tout retour du prouit, veuillez s.v.p. cotrôler et noter exactement les défauts ou vices du produit, car tout autre frais Graupner-Zentralservice Graupner/SJ GmbH Henriettenstr.96 D-73220 Kirchheim Servicehotline (+49) (0)7021/ 722-130 Montag -Donnerstag 7:30 - 9:00 9:15 - 16:00 Uhr Freitag 9:00 - 13:00 uhr Die Adressen der Servicestellen außerhalb Deutschlands entnehmen Sie bitte unserer Webseite www. graupner.de. For adresses of service points outside of germany please refer to www.graupner.de/en/. Garantie-Urkunde Warranty certificate / Certificat de garantie LiPo BALANCER CHARGER 2 - 3S 12V/230V Best.-Nr. 6454 Übergabedatum, Date of purchase/delivery, Date de remise Name des Käufers, Owner´s name, Nom de l´acheteur Strasse, Wohnort, Complete adress, Domicie et rue Firmenstempel und Unterschrift des Einzelhändlers, Stamp and signature of dealer, Cachet de la firme et signature du detailant


