1
Bedienungsanleitung
Operating instructions
Notice d’utilisation
Manuale d’istruzione
Manual de Uso
Návod k obsluze
Power Peak® C8 EQ-BID
No. 8553
Bedienungsanleitung
Bestell Nr.
Power Peak® C8 EQ-BID
8553
Sehr geehrter Kunde,
wir freuen uns, dass Sie sich für das leistungsfähige Computer-Ladegerät Power Peak®
C8 EQ-BID aus dem robbe Sortiment entschieden haben. Damit besitzen Sie ein kompaktes Ladegerät mit Akkumanagement und Equalizer für den Anschluss an 230V AC
oder 12V DC.
Trotz der einfachen Handhabung dieses Laders verlangt die Bedienung eines so hochwertigen automatischen Ladegerätes wie dem Power Peak® C8 EQ-BID vom Anwender
einige Kenntnisse. Durch diese Anleitung wird es Ihnen schnell gelingen, sich mit dem
Gerät vertraut zu machen.
Wir wünschen Ihnen viel Erfolg und Freude mit Ihrem neuen Ladegerät!
Sicherheitshinweise
Am Ende der Bedienungsanleitung sind ausführliche Sicherheitshinweise zum
Umgang mit Ladegeräten und den unterschiedlichen Akkutypen aufgeführt.
Darüber hinaus sind noch weitere, wissenswerte generelle Hinweise zu den einzelnen Akkutypen im Kapitel “KLEINE AKKUKUNDE” zusammengestellt.
Lesen Sie UNBEDINGT VOR Inbetriebnahme des Gerätes diese Sicherheitshinweise
und Anweisungen durch.
Falscher Umgang mit Akkus und Ladegeräten kann zur Explosion und Feuer der
Akkus führen.
Die Menüsprache des Laders, wird wie auf Seite 13 Kapitel 9 beschrieben eingestellt.
2
Bedienungsanleitung
Bestell Nr.
Power Peak® C8 EQ-BID
8553
Inhaltsverzeichnis
Kapitel
Seite
Sicherheitshinweise
2
1. Lieferumfang
4
2. Allgemeine Beschreibung
5
3. Bedienelemente
6
3.1 Funktion der Bedienelemente
6
4. Technische Daten
7
5. Inbetriebnahme des Ladegerätes
8
5.1 Anschluss der Akkus
8
6. Arbeits Display
9
7. Parameter im Hauptmenü ohne BID
10
7.1 Parameter im Hauptmenü mit BID
11
8. Daten editieren ohne BID
11
8.1 Daten editieren mit BID
13
9. Einstellungen
13
10. Lade- / Entladevorgänge ohne BID-Chip/KEY 14
11. Lade- / Entladevorgänge mit BID-Chip/KEY
14
12. Ende eines Lade-/Entladevorganges
15
13. Fehlermeldungen
16
14. Menüstruktur
17
15. Sicherheitshinweise
18
16. Kleine Akkukunde
19
16.1 Nickel-Cadmium-Akkus (NC)
19
16.2 Nickel-Metall-Hydrid-Akkus (NiMH)
19
16.3 Blei-Akkus (Pb)
19
16.4 Lithium-Akkus (LiPo, LiIo, LiFe)
20
17. Gewährleistung
21
18. Haftungsausschluss
21
19. Empfohlenes Zubehör
22
20. Service Adressen
23
21. Akku u. Geräteentsorgung
23
22. Konformitätserklärung
24
3
1.
Bedienungsanleitung
Bestell Nr.
Power Peak® C8 EQ-BID
8553
LIEFERUMFANG
POWER PEAK® C8 EQ-BID No. 8553
Der Lieferumfang enthält:
1 Power Peak® C8 EQ-BID 230V/12V Lader
1 BID-Key
1 Equalizer Adapter JST XH (No. 8214) zum Anschluss von 2-6 S LiPo-Akkus mit JST-H
Voltage-Sensorkabeln (Lama, G47, Align) am Equalizer.
4
2.
Bedienungsanleitung
Bestell Nr.
Power Peak® C8 EQ-BID
8553
ALLGEMEINE BESCHREIBUNG
Leistungsfähige und formschöne Computer-Lade-Entladestation mit Akkumanagement
für alle gängigen Akkutypen. Mit integriertem Equalizer für 8-zellige Lithium-Ionen (LiIo),
Lithium Polymer (LiPo) und Lithium-Ferrum (LiFe)-Akkus. Mit bis zu 6,5 A Ladestrom,
wahlweise aus einer 12 Volt Autobatterie oder dem integrierten Schaltnetzteil aus dem
230 Volt Netz.
Mit dem Power Peak® C8 EQ-BID können NC/ NiMH Akkus von 1 bis 24 Zellen oder Pb
(Blei) Akkus von 1 bis 12 Zellen (2...24V) geladen bzw. entladen werden. Die Abschaltung
erfolgt bei vollgeladenem Akku nach der Delta-Peak-Methode. Lithium und Blei (PB)
Akkus werden nach der CC-CV Methode geladen.
5 interne Speicherplätze des Gerätes erlauben im manuellen Modus das Abspeichern
akkuspezifischer Daten für den Lade- u. Entladevorgang von fünf verschiedenen Akkus.
Ein Haupt-Feature des Power Peak® C8 EQ-BID ist das zukunftsweisende Batterie-Identifikations System (BID). Die Vielfalt der verschiedenen Akkutypen wird immer größer, wobei jeder Akkutyp sein “eigenes” Ladeverfahren benötigt. Schnell kann es passieren, dass man am
Ladegerät eine falsche Einstellung vornimmt und schon hat der wertvolle
Akku Schaden genommen.
Das revolutionäre BID-System von robbe bietet eine geniale
Lösung für dieses Problem. Jedem Akku wird ein kleiner,
leichter BID-Key zugeordnet. Er speichert alle relevanten Daten zum optimalen Laden und Entladen des Akkus.
Zum Laden bzw.Entladen wird der BID-Key mit dem Power
Peak C8 EQ-BID verbunden, er gibt dem Lader die entsprechenden Akkuparameter vor.
Es muss nur noch die “MODE”-Taste betätigt werden
und der Lade- bzw. Entladevorgang beginnt. Kein
lästiges Suchen der Einstell-Parameter im Menü, maximaler Schutz vor Fehlbedienung und Speicherung der
relevanten Akkudaten im BID-Key sind die besonderen
Vorteile des BID-Systems.
Durch die Speicherung der wichtigsten Daten im BID-Key
können diese am Ladegerät leicht angezeigt werden.
Diese Funktion ersetzt weitgehend die Notwendigkeit
einer PC-Software sowie Computertechnik, um sich
einen aktuellen Überblick über den Akkuzustand zu verschaffen.
Alternativ zum BID-Key sind BID-Chips als Zubehör verfügbar (siehe S.22), welche die gleiche Funktion aufweisen sich allerdings durch die Abmessungen unterscheiden.
Ein integrierter USB-Anschluss mit Bootloaderfunktion für ein nachträgliches Update der
Software, hält das Gerät auf aktuellem Stand.
5
3.
Bedienungsanleitung
Bestell Nr.
Power Peak® C8 EQ-BID
8553
BEDIENELEMENTE
Stromversorgung
Display
EDIT-Taste
“+”/ Taste
VIEW-Taste
Select Wheel
MODE-Taste
“-”/ Taste
Akkuanschluss
Anschluss für
Voltage Sensor
BID-Anschluss
USB Anschluss
für Update
ENTER-Taste
3.1
FUNKTION DER BEDIENELEMENTE
MODE TASTE
• Durch 1x betätigen wird ein Ladeprozess,
2x betätigen ein Entladeprozess und
3x betätigen ein Entlade/ Ladeprozess (Zyklusladen) gestartet.
Der ausgewählte Prozess kann durch erneutes Drücken der Taste gestoppt werden.
VIEW-TASTE
• Anzeige der verschiedenen Parameter des Laders z.B. Eingangsspannung. Ausserdem
kann man mit dieser Taste alle Einzelzellenspannungen eines angeschlossenen LiPoAkkus anzeigen.
EDIT-TASTE
• Über die “EDIT”-Taste gelangt man in das Akku Parameter und Einstellungs Menü.
“+” / TASTE
• Mit dieser Taste wird bei Einstellung eines Parameters (Akkutyp, Zellenzahl, etc.) der
Wert um einen Schritt erhöht und bei der Menüauswahl das jeweils nächste Menü
ausgewählt. Die Taste besitzt eine Autorepeat-Funktion, die bei halten der Taste ein
wiederholendes Tasten bewirkt.
“-” / TASTE
• Mit dieser Taste wird bei Einstellung eines Parameters (Akkutyp, Zellenzahl, etc.) der
Wert um einen Schritt verringert und bei der Menüauswahl das jeweils vorherige Menü
ausgewählt. Die Taste besitzt eine Autorepeat-Funktion, die bei halten der Taste ein
wiederholendes Tasten bewirkt.
SELECT WHEEL
Mit dem Select Wheel werden die Funktionen der “+”/ ”-” Taste durch “drehen” realisiert.
ENTER-TASTE
• Mit der ‘ENTER’-Taste erfolgt die Bestätigung einer Auswahl, z.B. die Aktivierung eines
ausgewählten Untermenüs, oder die Übernahme eines zuvor eingestellten Wertes.
6
4.
Bedienungsanleitung
Bestell Nr.
Power Peak® C8 EQ-BID
8553
TECHNISCHE DATEN
Betriebsspannung:
Zellenzahl:
Ladestrom:
Entladestrom:
Equalizingstrom:
Entladeleistung:
Erhaltungsladung:
Entladeschlussspg.:
Abschaltung:
NC / NiMH:
Blei- und Lithium:
Abmessungen:
Funktionen:
Schutzfunktionen:
Eingang:
Ausgang:
12V DC (Autobatterie) / 230V AC
(keine Ladegeräte für Autobatterien verwenden!)
1 ... 24 Zellen NC / NiMH,
1 ... 8 Zellen LiIo (3,6V), LiPo (3,7V), LiFe (3,3V)
1 ... 12 Zellen (2...24V) Bleiakku
0,1 ... 6,5A bei max. 135W (12V DC)
0,1 ... 6,5A bei max. 110W (230V AC)
0,1 ... 5A bei max. 25W
ca. 250mA
25W, Strom wird entsprechend geregelt
Erhaltungsladung C/20
(nur bei NC und NiMH)
0,8V pro Zelle bei NC und NiMH,
3,0V pro Zelle bei LiPo, LiIo
2,5V pro Zelle bei LiFe
1,7V pro Zelle bei Bleiakkus
automatisch, digitales-Delta-Peak-System
automatisch, spannungsabhängig, CC-CV Verfahren
180 x 145 x 70 mm
Laden, Entladen, Zyklusbetrieb, Balancieren
Verpolgeschützt
Verpolgeschützt, Kurzschlussgeschützt
Anmerkung:
Fällt die Eingangsspannung im DC-Betrieb unter 11 V, wird der Ausgangsstrom um je 1A
reduziert.
Hintergrund: Hat eine Autobatterie weniger als 11 V (am Eingang des Gerätes, nicht an
den Polen der Batterie), ist davon auszugehen, daß die Batterie „schwach“ ist. Durch die
automatisch Rücknahme des Ladestroms wird die Batterie entlastet. Ohne diese Funktion
würde die Batteriespannung weiter sinken und das Ladegerät durch Unterspannung
abschalten. So kann möglichst lange auch an schwachen Batterien geladen werden.
Maximale Ladeströme im AC oder DC Betrieb:
AC-Betrieb:
DC-Betrieb:
Bis 16,5 V Akkuspannung:
6,5 A
Bis 20,5 V Akkuspannung:
6,5 A
Bei höheren Akkuspannungen reduziert sich der Strom.
Hinweis zum Laden von Lithium Akkus ohne Sensorkabel:
Das Laden von Lithium Akkus ist bei Verwendung des BID Systems auch ohne Voltage
Sensorkabel möglich. Allerdings wird der Akku dann nicht balanciert und es besteht keine
Überwachung der Zellenzahl!
7
5.
Bedienungsanleitung
Bestell Nr.
Power Peak® C8 EQ-BID
8553
INBETRIEBNAHME DES LADEGERÄTES
Das Ladegerät an eine 12 V Bleibatterie oder mit dem Kaltgerätestecker an das Netz
anschließen. Unbedingt auf richtige Polung achten (rot = plus / schwarz = minus).
Im Display erscheint kurz “Power Peak C8 EQ-BID V1.0” und danach “KEIN AKKU”, wenn
kein Akku angeschlossen ist.
5.1
ANSCHLUSS DES AKKUS
Wichtig!!! Vor dem Anschluss eines Akkus unbedingt die eingestellten Parameter genau
überprüfen. Bei falscher Einstellung kann der Akku Schaden nehmen, explodieren oder
zu brennen beginnen. Um einen Kurzschluss mit den Bananensteckern zu vermeiden, die
Ladekabel immer zuerst am Ladegerät anschließen, dann am Akku. Beim Abklemmen in
umgekehrter Reihenfolge vorgehen. Auf Polung achten!
Voltage Sensor Anschluss (Li-Akku):
Das Voltage Sensorkabel des Akkus, muss mit dem schwarzen Kabel an die Pfeilkennzeichnung am Ladegerät angeschlossen werden. Die Pfeilkennzeichnung gibt den
Massepol (Minus) an. Auf Polung achten! Bei selbstkonfektionierten Akkuverbindungen
oder Voltage Sensorkabeln auf Polung achten! Beim Laden von Lithium Zellen sollte das
Voltage Sensorkabel immer gesteckt werden, ausser es handelt sich um eine Einzellzelle!
Es ist bei der Konfiguration des BID-Chip/ Key unbedingt auf die richtige Einstellung der Akkuparameter zu achten (Zerstörungsgefahr des Akkus)! Falls der Akku
mit einem Voltage Sensorkabel ausgestattet ist, sollte dies auch immer aus Sicherheitsgründen gesteckt werden.
“+” = rot
“-” = schwarz
8
Bedienungsanleitung
Bestell Nr.
Power Peak® C8 EQ-BID
8553
Das Beispiel auf Seite 8 dient nur zur Anschauung und soll den Anschluss des Voltage
Sensor Kabels an den Equalizer verdeutlichen.
EQ-Adapter
robbe-PQ No.8213
EQ-Adapter
robbe-JST/XH No.8214
EQ-Adapter
robbe-TP/FP No.8215
6. ARBEITS-DISPLAY
Akkuspeicher
Status
anzeige
aktuelle
verstricheAkkuspannung
ne Zeit
Während eines Lade- bzw. Entladevorganges werden dem Anwender
über diese Anzeige alle notwendigen
Informationen zur Verfügung gestellt.
In der oberen Zeile wird der Interne
Akkuspeicher (z.B. 1-5) oder bei
Akkutyp
angeschlossenem, BID “B” gezeigt.
Über die “EDIT” Taste gelangt man
zur Einstellung “DATEN EDITIEREN” (S.11 Kap.8). bzw. “EINSTELLUNGEN” (S.13 Kap.9). Der interne Speicher kann
direkt aus dem Arbeitsdisplay eingestellt werden. Dazu “ENTER” Taste betätigen und über
die Pfeiltasten Speicher auswählen. Danach wieder mit der “ENTER” Taste die Speicher
Auswahl bestätigen.
Lade- bzw. Kapazitätsanzeige
Entladestrom
In der oberen Zeile Spalte 2 wird der Status des Laders angezeigt (‘C’ für Laden, ‘D’ für
Entladen, ‘D-C’ für Entladen-Laden, “R” für Ready, “N” für No Battery, ‘F‘ für Finish (Ende).
Der Akkutyp kann in der unteren Zeile durch die Abkürzungen bestimmt werden: PB= Blei,
NC= NiCd, NH= NiMH, LP= LiPo, LI= LiIo, LF= LiFe und LS= Lithium Storage (Lithium
Lagerprogramm).
Auch während eines Lade-Entladeprozesses kann man den Strom ändern. Um dies möglich zu machen, muss die “ENTER” Taste gedrückt werden, danach lässt sich der Strom
entsprechend mit den Pfeiltasten einstellen. Anschliessend wird mit der Taste “ENTER” die
Neueingabe quittiert.
9
7.
Bedienungsanleitung
Bestell Nr.
Power Peak® C8 EQ-BID
8553
PARAMETER IM HAUPTMENÜ OHNE BID
Über die “VIEW” Taste Menü auswählen. Mit den “+”, “-” Tasten oder dem Select Wheel
kann man nachfolgende Parameter anzeigen.
EINGANGSSPANNUNG
Anzeige der Eingangsspannung.
A
ANZEIGE DER LETZTEN AKKULADUNGEN (M1 ...M5)
Mit dieser Funktion lassen sich die letzten fünf AkkuM
lladungen rekonstruieren, dabei wird nur die geladene
Kapazität angezeigt. Durch Drücken der “ENTER”
Taste wird der Parameter ausgewählt. Mit den “+”/ ”-”
T
Tasten oder dem “Select WHEEL” kann man nun den gewünschten Speicher ansehen.
Durch erneutes Drücken der “ENTER” Taste wird die Auswahl aufgehoben.
ANZEIGE DER LETZTEN AKKUENTLADUNGEN (M1 ... M5)
Mit dieser Funktion lassen sich die letzten fünf Akkuentladungen rekonstruieren, dabei wird nur die ente
ladene Kapazität angezeigt. Durch Drücken der
““ENTER” Taste wird der Parameter ausgewählt. Mit
den “+”/ ”-” Tasten oder dem “Select WHEEL” kann man nun den gewünschten Speicher
ansehen. Durch erneutes Drücken der “ENTER” Taste wird die Auswahl aufgehoben.
ANZEIGE MAX. AKKUSPANNUNG
Maximale Akkuspannung während eines
M
Lade-/Entladevorgangs.
ANZEIGE DURCHSCHNITTLICHE AKKUSPANNUNG
Anzeige der durchschnittlichen Akkuspannung wähA
rrend eines Lade-/Entladevorgangs.
ANZEIGE GELADENE / ENTLADENE ENERGIE
Anzeige der geladenen bzw. entladenen Energie.
A
Die Anzeige wird in Wh (Wattstunde) angezeigt.
D
EQUALIZER-DATEN
Falls mehr als 6 Lithium Zellen angeschlossen sind, werden zwei Displays im Wechsel
angezeigt.
Hinweis: Nur bei angeschlossenem Voltage Sensorkabel werden die Einzelzellenspannungen angezeigt!
10
Bedienungsanleitung
Bestell Nr.
Power Peak® C8 EQ-BID
8553
Zelle 1
Zelle 6
Zelle 8
7.1
ZUSÄTZLICHE PARAMETER IM HAUPTMENÜ MIT BID
Nach dem Anschließen eines BID Chip/Keys können folgende Daten des Akkus ausgelesen werden.
ANZEIGE DER MAXIMAL GELADENEN KAPAZITÄT
A
Anzeige der bisher maximal eingeladenen Akkukapazität.
W
Wird bei einem Ladevorgang der bisherige Wert überttroffen, stellt sich automatisch der neue Wert ein.
ANZEIGE DER MAXIMAL ENTLADENEN KAPAZITÄT
Anzeige der bisher maximal entladenen Akkukapazität.
A
Wird bei einem Entladevorgang der bisherige Wert
W
übertroffen, stellt sich automatisch der neue Wert ein.
ü
ANZEIGE DER LADEZYKLEN
Anzeige der bisherigen Ladezyklen des Akkus. Nach
A
Ende eines Ladevorgangs wird der Zähler um 1 erhöht.
ANZEIGE EINES DEFINIERBAREN DATUMS
Anzeige des auf dem BID Chip/Key definierten Datums
A
((z.B. Anschaffungsdatum des Akkus).
ANZEIGE MAX. AKKUSPANNUNG
Maximale Akkuspannung während eines
M
Lade-/Entladevorgangs.
8.
DATEN EDITIEREN OHNE BID
Über die “EDIT” Taste das Menü “DATEN EDITIEREN” anwählen und über die “ENTER”
Taste auswählen. Mit den “+”, “-” Tasten oder dem Select Wheel kann man nachfolgende
Parameter anzeigen.
11
Bedienungsanleitung
Bestell Nr.
Power Peak® C8 EQ-BID
8553
INTERNER SPEICHER
Über dieses Menü lassen sich bis zu fünf verschiedene Akkutypen mit ihren jeweiligen Parameter einsteln
llen, die auch nach Ausschalten des Gerätes erhalten
bleiben. Die Ziffer blinkt und kann über die Pfeiltasten
b
oder das “Select Wheel” geändert werden. Bei der Auswahl eines neuen Speichers
werden die vorher gespeicherten Daten wie Ladestrom, Kapazität, Zellenzahl usw. angezeigt. Der Speicheplatz kann auch über das Arbeitsdisplay eingestellt werden. Dazu die
“ENTER” Taste drücken und Speicher Nummer auswählen.
EINSTELLEN DES AKKUTYPS
Durch Drücken der “ENTER” Taste wird der ParameD
tter Akkutyp ausgewählt. Mit den “+”,”-” Tasten oder
dem “SELECT WHEEL” kann nun der gewünschte
d
Typ eingestellt werden. Um einen LiIon oder LiPo
T
Akku lagerfähig zu machen, kann hier die Funktion “L3,9V” eingestellt werden. Durch diese
Funktion wird der Akku auf eine Lagerspannung von 3,9V/Zelle gebracht. Damit ist der
Akku für längere Lagerung geeignet. Durch erneutes Drücken der “ENTER” Taste wird die
Auswahl übernommen.
EINSTELLEN DER ZELLENZAHL
Danach muß der Parameter “AKKUZELLEN” ausD
gewählt werden. Wie vorher beschrieben kann man
g
nun auch hier die gewünschte Zellenzahl einstellen.
n
Danach muss die “ENTER” Taste gedrückt werden,
D
damit die Auswahl übernommen wird.
EINSTELLEN DER AKKUKAPAZITÄT
Nach dem Drücken der “ENTER” Taste blinkt der einN
sstellbare Parameter. Nun kann die Akkukapazität
gewählt werden. Nach Auswahl erneut ‘ENTER’g
Taste drücken.
T
EINSTELLEN DES LADESTROMS
In diesem Parameter kann der Ladestrom eingestellt
werden. Der max. Ladestrom ist von der Zellenzahl
w
bzw. der Akkuspannung abhängig. Der Prozessor des
b
Ladegerätes begrenzt den max. Ladestrom ent
sprechend der Ladeleistung.
EINSTELLEN
DES
S
S ENTLADESTROMS
S O
In diesem Parameter kann der Entladestrom eingestellt
werden. Der max. Entladestrom ist dabei aber von der
w
Zellenzahl bzw. der Akkuspannung abhängig. Der ProZ
den max. Entladestrom.
zessor des Ladegerätes begrenzt d
12
8.1
Bedienungsanleitung
Bestell Nr.
Power Peak® C8 EQ-BID
8553
DATEN EDITIEREN MIT BID
Hinweis: Nur bei angeschlossenem BID Chip/Key wird dieser zusätzliche Parameter und
die darauf gespeicherten Daten angezeigt. Ausserdem werden die anderen einstellbaren
Parameter bereits auf S. 12 verdeutlicht. Es werden also nur die Unterschiede erklärt.
ANZEIGE EINES DEFINIERBAREN DATUMS
Anzeige
des auf dem BID Chip/Key definierten Datums
A
(z.B.
Anschaffungsdatum des Akkus).
(
9.
EINSTELLUNGEN
Über die “EDIT” Taste, Menü “EINSTELLUNGEN” auswählen und danach mit “ENTER”
bestätigen. Mit den “+”, “-” Tasten oder dem Select Wheel kann man nachfolgende Parameter anzeigen.
EINSTELLEN DER ABSCHALTTOLERANZ BEI LITHIUM AKKUS
Im Menü “Li-LADEN” kann die Abschaltung für Lithium
Akkus
eingestellt werden. In der Abschaltungs EinstelA
lung
“NORMAL” wird die Ladung bei C/20 und in der
l
Abschaltungs
Einstellung “SCHNELL” bei C/10 abgeA
schaltet. In der Abschalltungs Einstellung “SCHNELL” wird der Akku zwar schneller geladen, verfügt danach aber nur über ca. 95% seiner Kapazität.
EINSTELLEN DER LAUTSTÄRKE
Über diese Funktion wird die Lautstärke der Signaltöne
reguliert.
Es stehen drei Modi zur Verfügung: AUS,
r
LEISE und LAUT.
EINSTELLEN DER MELODIE
In diesem Menü lassen sich drei unterschiedliche
Abschaltmelodien
einstellen.
A
EINSTELLEN DER MENÜSPRACHE
Um die gewünschte Sprache (Deutsch, Englisch, Französisch,
Italienisch, Spanisch oder Tschechisch) ausz
zuwählen,
wie vorher beschrieben mit dem “SELECT
z
WHEEL”
oder den Pfeiltasten auf den Menüpunkt
W
“SPRACHE” navigieren. Mit “ENTER” auswählen und über die Pfeiltasten die gewünschte
Sprache einstellen. Nach Einstellung der Sprache, die “ENTER” Taste zum Bestätigen drücken. Um die Änderung zu aktivieren, auf “ENDE” navigieren und mit “ENTER” bestätigen.
13
10.
Bedienungsanleitung
Bestell Nr.
Power Peak® C8 EQ-BID
8553
LADE-ENTLADEVORGANG OHNE BID CHIP/KEY
Bevor ein Lade- bzw. Entladevorgang gestartet werden kann, müssen folgende
Einstellungen durchgeführt werden, damit das Ladegerät den Vorgang optimal abarbeiten
kann:
•
Akku anschliessen, auf richtige Polung achten (siehe Anschlussbild ,Seite 8.)
•
Akkutyp einstellen
•
Zellenzahl einstellen
•
Kapazität einstellen
•
Lade- Entladestrom einstellen
Nach dem die Parameter, wie vorher beschrieben, eingestellt wurden kann nun der Prozess gestartet werden. Um den angeschlossenen Akku zu laden (LADEN), “MODE” Taste
einmal drücken. Nochmaliges Drücken der Taste innerhalb 1 Sekunde, stellt die Entladefunktion (ENTLADEN) ein. Bei dreimaligem Drücken der “MODE” Taste wird die Zyklusfunktion eingestellt (DC-CH ZYKLUS). Mit den “+”,”-” Tasten oder dem “SELECT WHEEL”
kann eine Zykluswiederholung von 1 bis 99 eingestellt werden. Wird nach Auswahl eines
Modus keine weitere Eingabe mehr gemacht (ca.2 Sek.) beginnt der Lader mit dem ausgewählten Prozess. Um den Vorgang abzubrechen, wird die “MODE” Taste gedrückt.
11.
LADE- / ENTLADEVORGÄNGE MIT BID-CHIP/KEY
Die Bilder unten veranschaulichen die Verwendung eines BID-Chips und eines BID-Key`s.
Verbinden Sie zuerst den BID Chip über das Adapterkabel bzw. den BID Key direkt mit
dem Ladegerät (siehe Bild unten). Um die BID Daten vor dem Lade/ Entladevorgang
zu prüfen, betätigen Sie die “ENTER” Taste. Wenn die Ladeparameter auf dem Chip in
Ordnung sind, kann mit der “MODE” Taste der entsprechende Modus ausgewählt und
gestartet werden. Während eines Lade- bzw. Entladevorganges werden die wichtigsten
Daten dieses Vorganges auf dem BID Chip/Key gespeichert.
Vertiefung
nach oben
14
Bedienungsanleitung
Bestell Nr.
Power Peak® C8 EQ-BID
8553
1. Akku anschließen, (bei Lithium Akkus auch Voltage Sensorkabel anschließen)
auf richtige Polung achten (siehe Seite 8).
2. BID Chip/Key anschliessen.
3. Die “MODE” Taste einmal drücken. Nach etwa 2 Sek. beginnt der Ladevorgang.
Alternativ wird bei 2x betätigen ein Entladeprozess und 3x betätigen ein Entlade/
Ladeprozess (Zyklusladen) gestartet.
Der ausgewählte Prozess kann durch erneutes Drücken der Taste gestoppt werden.
Hinweis:
Bei Verwendung des BID-Systems können Li-Akkus auch ohne Anschluss des Voltage
Sensorkabels ge- bzw. entladen werden! Dies ist allerdings nicht empfehlenswert.
12.
ENDE EINES LADE- / ENTLADEVORGANGES
Das Ladegerät beendet automatisch einen Lade- bzw. Entladevorgang. Der Prozessor
berücksichtigt dabei die Lade- Entladeparameter. Für jeden Akkutyp wird das jeweils
optimale Verfahren angewandt. Am Ende des Prozesses ertönt, je nach Einstellung, eine
Piepsequenz.
15
Bedienungsanleitung
Bestell Nr.
Power Peak® C8 EQ-BID
8553
13.
FEHLERMELDUNGEN
Um einen sicheren Ablauf eines Lade- bzw. Entladevorganges zu gewährleisten, ist der
Power Peak® C8 EQ-BID mit Sicherheitsvorrichtungen ausgestattet. Sobald ein Fehler
auftritt, erscheint eine entsprechende Meldung im Display und der Piezo-Summer gibt
einen schrillen Warnton ab. Die folgenden Fehlermeldungen können mit einer beliebigen
Taste nach Beseitigung der Ursache quittiert werden.
Eingangsspanung unter 10,5V
Falsche Zellenzahl eingestellt
Die Daten auf BID Chip/Key, können vom Power
Peak® C8 EQ-BID nicht bearbeitet werden z.B. Lithium
Zellenzahl
> 8 Zellen.
Z
Fehlerhafte Daten auf dem BID Chip/Key. BID muß
anschliessend
neu editiert werden. Nach Quittierung
a
mit einer beliebigen Taste wird automatisch das Menü
“DATEN EDITIEREN” geöffnet. Die Akkudaten müssen
nun neu eingegeben werden.
Lader ist Überhitzt!
Ursache kann evtl. ein defekter Lüfter oder ein abgedecktes
Lüftungsgitter sein. Um dies zu testen, Akku
d
abziehen
Ladegerät wieder einschalten, Akku anschliessen und
b i h und
d Lader
L d ausschalten.
h lt
kurz einen Entladeprozeß starten. Wenn der Lüfter nicht anlaufen sollte, muß der Akku
abgezogen und das Ladegerät sofort ausgeschaltet werden. Den defekten Lader bitte zum
reparieren in den robbe-Service einsenden (bitte beachten Sie die Gewährleistungsanforderungen, S21. Kap.17).
16
14.
Bedienungsanleitung
Bestell Nr.
Power Peak® C8 EQ-BID
8553
MENÜSTRUKTUR
VIEW
EDIT
ENT
ENT
ENT
VIEW
ENT
17
15.
Bedienungsanleitung
Bestell Nr.
Power Peak® C8 EQ-BID
8553
SICHERHEITSHINWEISE
• Der Power Peak® C8 EQ-BID ist nur zum Laden, Entladen und Equalizen von wiederaufladbaren NC- / NiMH- Blei und Lithium-Akkus geeignet. Keine Trockenbatterien
laden, dabei besteht Explosionsgefahr.
• Das Ladegerät ist für den Betrieb an 12 V DC und 230V AC ausgelegt, betreiben Sie es
nie mit einer anderen Spannung.
• Schützen Sie das Ladegerät unbedingt vor Staub, Schmutz und Feuchtigkeit.
• Setzen Sie das Gerät keiner übermäßigen Kälte oder Hitze und keiner direkten Sonneneinstrahlung aus.
• Vermeiden Sie Stoß- und Druckbelastungen und setzen Sie das Ladegerät keinen starken Vibrationen aus.
• Ladegerät und angeschlossene Akkus niemals auf brennbare Unterlagen legen. Nie in
der Nähe von brennbarem Material oder Gasen betreiben.
• Gerät nicht unter Spannung öffnen!
• Lassen Sie das Gerät und die Akkus während des Betriebs nicht unbeaufsichtigt. Das
Gerät kann sich während des normalen Betriebs stark erwärmen.
• Beim Aufstellen auf freie Kühlöffnungen zur Luftzirkulation achten.
• Bei längerem Nichtgebrauch das Gerät von der Stromquelle trennen und eventuell
angeschlossene Akkus abnehmen.
• Keine Akkus kurz hintereinander ein zweites Mal laden.
• Keine Akkus laden, die stark erwärmt sind. Akkus auf Umgebungstemperatur abkühlen
lassen.
• Es dürfen nur Zellen gleicher Kapazität und gleichen Fabrikats im Verbund geladen
werden.
• Nicht zwei Akkus an einem Ausgang beim Laden parallel laden, nur einen Akkupack
anschließen.
• Achten Sie unbedingt auf richtige Polung der Akkus und vermeiden Sie Kurzschlüsse.
• Beachten Sie genau die Angaben der Akkuhersteller.
• Überprüfen Sie die Einstellungen am Power Peak® C8 EQ-BID stets genau. Akkus
können durch falsche Einstellungen zerstört werden.
• Achten Sie auch auf Beschädigungen am Gehäuse und an den Kabeln.
• Vorsicht im Umgang mit Akkupacks mit hohen Zellenzahlen. Unbedingt auf gute Isolierung achten, sonst besteht die Gefahr eines Stromschlags.
• Für selbstkonfektionierte Akkuverbindungen oder Voltage Sensorkabel übernehmen
wir keine Haftung.
18
16.
Bedienungsanleitung
Bestell Nr.
Power Peak® C8 EQ-BID
8553
KLEINE AKKUKUNDE
Beim Umgang mit Akkus müssen einige Vorsichtsmaßnahmen unbedingt beachtet
werden, um Personen- und Sachschäden zu vermeiden. Beim Einsatz dieser Akkus
übernehmen Sie die Verantwortung dafür.
16.1
NICKEL- CADMIUM- AKKUS (NC)
Wir empfehlen folgende Laderaten für NC-Akkus:
Hochenergieakkus, 1-2 C, beachten Sie bitte auch die Angaben des Akkuherstellers.
Hochstromakkus, 2-3 C, extrem bis zu 5 C. Beachten sie eventuelle maximale
Ladestromangaben des Akkuherstellers. Prüfen sie auch, ob die Steckverbindung bzw.
die Ladekabel für den gewählten Ladestrom geeignet sind.
16.2
NICKEL-METALL-HYDRID-AKKUS (NIMH)
Wir empfehlen folgende Laderaten für NiMH-Akkus:
Hochenergieakkus 0,5...1 C, beachten Sie bitte auch die Angaben des Akkuherstellers.
Hochstromakkus, üblicherweise 1C, manche Akkutypen können mit 1,5...2C geladen werden. Beachten sie die maximale Ladestromangabe des Akkuherstellers.
16.3
BLEI-AKKUS (PB)
• Die im Modellbau weit verbreiteten Gel-Bleiakkus sind meist gasdicht ausgeführt und
deshalb weniger gefährlich.
• Autobatterien mit flüssiger Schwefelsäure als Elektrolyt hingegen sind sehr gefährlich,
wegen der ätzenden Schwefelsäure und der schnellen Gasbildung bei Überladung.
• Bleiakkus dürfen niemals mit offenem Feuer in Berührung kommen, es besteht Explosionsgefahr.
• Bleiakkus niemals gewaltsam öffnen, es besteht Verätzungsgefahr.
• Bleiakkus niemals kurzschließen, es besteht Verbrennungs- und Explosionsgefahr.
• Ausgetretenes Elektrolyt niemals mit der Haut oder den Augen in Berührung bringen.
Falls versehentlich doch geschehen, sofort mit reichlich Wasser spülen und einen Arzt
aufsuchen. Zellen oder Akkus nicht in den Mund nehmen, es besteht Vergiftungsgefahr.
• Ein geladener Bleiakku ist kein Kinderspielzeug. Akkus sollten Kindern unzugänglich
aufbewahrt werden.
• Berücksichtigen Sie beim Laden und Entladen unbedingt die Hinweise des jeweiligen
Akkuherstellers.
• Bei Bleiakkus kann es während des Ladevorgangs zum Gasen des Akkus kommen.
Sorgen sie deshalb für eine ausreichende Belüftung. Bei Überladung entsteht
„Knallgas“ ein Gemisch aus Wasserstoff und Sauerstoff.
Es besteht Explosionsgefahr.
19
16.4
Bedienungsanleitung
Bestell Nr.
Power Peak® C8 EQ-BID
8553
LITHIUM-AKKUS (LiPo, LiIo, LiFe)
ALLGEMEINES
Es gibt verschiedene Lithium Akkutypen:
1. Lithium-Ionen Akkus mit flüssigem Elektrolyt und 3,6 Volt Nennspannung, die erste
Generation der Lithium Akkus, im Modellbau kaum verbreitet.
2. Lithium-Ionen Akkus (LiIo) mit flüssigem Elektrolyt und 3,6 Volt Nennspannung, die
zweite Generation von Lithium Akkus, mit Metallbecher.
3. Lithium-Ionen-Polymer Akkus (LiPo) mit gelförmigem Elektrolyt und 3,7 Volt Nennspannung, die derzeit aktuelle Generation von Lithium Akkus, auch LiPo genannt. Durch den
gelartigen Elektrolyt entsteht beim Laden bzw. Entladen weniger Druck in
der Zelle, weshalb eine Folienummantelung ausreicht. Wegen des geringen Gewichtes
und der hohen Energiedichte hat sie sich schnell im Modellbau verbreitet.
4. Lithium-Ferrum Akkus (LiFe) mit 3,3 Volt Nennspannung, die derzeit neuste Generation von Lithium Akkus, auch A123 genannt. Wegen der hohen Entladerate und der
hohen Energiedichte wird sich dieser Akku schnell im Modellbau verbreiten.
UNTERSCHIEDLICHE KAPAZITÄT
Werden mehrere Zellen zu einem Akkupack verarbeitet und mit höherem Strom entladen,
so erwärmen sich die Zellen unterschiedlich, da die innere Zelle die Wärme schlecht abgeben kann.
Dadurch ändert sich der Innenwiderstand und die Abgabekapazität ist geringer. Diese
Zelle ist dann früher entladen und es besteht die Gefahr, dass diese Zelle unter die Entladeschlussspannung entladen wird.
Besonders bei sehr niedrigen Außentemperaturen entstehen starke Kapazitätsunterschiede. Werden LiPo Akkus beispielsweise in einem Elektroheli geflogen, so wird die vordere Zelle vom Fahrtwind stark gekühlt, die innen liegenden Zellen sind deutlich wärmer.
Die kalte Zelle hat dadurch eine geringere Kapazität und es besteht die Gefahr, dass die
kältere Zelle unter die Entadeschlussspannung entladen wird.
Es wird deshalb empfohlen die LiPo Zellen nur bis ca. 3 Volt Entladeschlussspannung zu
entladen um eine dauerhafte Schädigung der Zellen zu vermeiden. Hierführ empfehlen wir
den MC-Balancer No.8636 (bis zu 7 Zellen) oder MC Balancer 14S No.8643 (bis zu 14
Zellen) der die Einzelzellenspannung von LiPo-Zellen überwacht. Außerdem muss bei der
nächsten Ladung unbedingt dafür Sorge getragen werden, dass die Zellen auf gleiches
Niveau geladen werden.
Das Laden von parallel geschalteten Einzelzellen ist unproblematisch, hier verteilt sich der
Gesamtstrom je nach Spannungslage auf die einzelnen Zellen.
Für Schäden durch unsachgemäße Handhabung der Zellen können wir keinerlei
Haftung übernehmen. Beachten Sie auch die Sicherheitshinweise
20
Bedienungsanleitung
Bestell Nr.
Power Peak® C8 EQ-BID
8553
Durch normale Fertigungstoleranzen, aber vor allem auch durch Temperaturunterschiede
bei der Entladung - die äußeren Zellen werden immer besser gekühlt als die inneren driften in Serie geschalteten Lithium-Polymer Zellen auseinander. Nach mehreren Zyklen
haben die Zellen unweigerlich unterschiedliche Spannungslagen.
17.
GEWÄHRLEISTUNG
Unsere Artikel sind selbstverständlich mit den gesetzlich vorgeschriebenen 24 Monaten
Gewährleistung ausgestattet. Sollten Sie einen berechtigten Gewährleistungsanspruch
geltend machen wollen, so wenden Sie sich immer an Ihren Händler, der Gewährleistungsgeber und für die Abwicklung zuständig ist.
Während dieser Zeit werden evtl. auftretende Funktionsmängel sowie Fabrikations- oder
Materialfehler kostenlos von uns behoben. Weitergehende Ansprüche z. B. bei Folgeschäden, sind ausgeschlossen.
Der Transport zu uns muss frei erfolgen, der Rücktransport zu Ihnen erfolgt ebenfalls frei.
Unfreie Sendungen können nicht angenommen werden.
Für Transportschäden und Verlust Ihrer Sendung können wir keine Haftung übernehmen.
Wir empfehlen eine entsprechende Versicherung. Senden Sie Ihre Geräte an die für das
jeweilige Land zuständige Servicestelle.
Zur Bearbeitung Ihrer Gewährleistungsansprüche müssen folgende Voraussetzungen
erfüllt werden:
• Legen Sie Ihrer Sendung den Kaufbeleg (Kassenzettel) bei.
• Die Geräte wurden gemäß der Bedienungsanleitung betrieben.
• Es wurden ausschließlich empfohlene Stromquellen und original robbe Zubehör verwendet.
• Feuchtigkeitsschäden, Fremdeingriffe, Verpolung, Überlastungen und mechanische
Beschädigungen liegen nicht vor.
• Fügen Sie sachdienliche Hinweise zur Auffindung des Fehlers oder des Defektes bei.
18.
HAFTUNGSAUSSCHLUSS
Dieses Ladegerät ist ausschließlich für das Laden von den in der Anleitung genannten
Akkus konzipiert und zugelassen. robbe Modellsport übernimmt keinerlei Haftung bei
anderweitiger Verwendung. Sowohl die Einhaltung der Betriebsanleitung als auch die
Bedingungen und Methoden beim Betrieb, Verwendung und Wartung des Ladegeräts
können von robbe-Modellsport nicht überwacht werden. Daher übernehmen wir keinerlei
Haftung für Verluste, Schäden oder Kosten, die sich aus fehlerhafter Verwendung und
Betrieb ergeben oder in irgendeiner Weise damit zusammenhängen. Soweit gesetzlich
zulässig ist die Verpflichtung zur Schadenersatzleistung, gleich aus welchen
Rechtsgründen, auf den Rechnungswert der an dem schadensstiftenden Ereignis unmittelbar beteiligten robbe-Produkte begrenzt. Dies gilt nicht, soweit nach zwingenden
gesetzlichen Vorschriften wegen Vorsatzes oder grober Fahrlässigkeit unbeschränkt
gehaftet werden muss.
21
Bedienungsanleitung
Bestell Nr.
Power Peak® C8 EQ-BID
8553
19. EMPFOHLENES ZUBEHÖR
Senderakkuladekabel
No. F1415
Empfängerakkuladekabel
No. F1416
BID-Chip ohne Kabel, zur
Ausstattung weiterer
Akkus.
No. 8472
BID-Chip mit Kabel 300
mm, zur Ausstattung weiterer Akkus
No. 8473
BID-Kabel, 300 mm
No. 8474
BID-KEY
No.8888
BID-Kabel, 500 mm
No. 8475
Adapterkabel 3S-XH
No.4029
Adapterkabel 2X3S EHR
No.4023
Adapterkabel 2X3S
XH-EHR
No.4023XH
Adapterkabel 3
X 2S XH-EHR
No.4031XH
22
Adapterkabel 3X 2S EHR
No.4031
20.
Bedienungsanleitung
Bestell Nr.
Power Peak® C8 EQ-BID
8553
SERVICEADRESSEN
Land
Firma
Strasse
Stadt
Telefon
Fax
Andorra
SORTENY
Santa Anna, 13
AND-00130 LES
ESCALDES
0037-6-82 0827
0037-6-82 5476
Dänemark
Nordic Hobby A/S Bogensevej 13
8900 RANDERS
0045-86-43 6100
0045-86-43 7744
D-36355 Grebenhain
0049-6644-87-777 0049-6644-7412
Deutschland robbe-Service
Metzloser Str. 38
England
robbe-Schlüter UK LE10-1UB
Leicestershire
0044-1455-63
7151
0044-1455-63
5151
Frankreich
S.A.V Messe
BP 12
F-57730 Folschviller
0033-387-94 6258 0033-387-94 6258
TAG Models
Griechenland
Hellas
18,Vriullon Str.
143 41 Nea Philadelfia
0030-1-25 84 380 0030-1-25 33 533
Italien
MC-Electronic
Via del Progresso I-36010 Cavazeale 00390-0444-94
25
(Vi)
5992
Niederlande/
Belg.
Jan van Mouwerik
Slot de Houvelaan
NL-3155 Maasland 0031-1059-13 594 0031-1059-13 594
30
Norwegen
Norwegian ModelBox 2140
lers
3101 TØNSBERG 0047-333-78-000
Österreich
Robbe Service
Puchgasse 1
A-1220 Wien
Schweden
Minicars Hobby
A.B.
Bergsbrunnagatan
75323 Uppsala
18
Schweiz
robbe Futaba
CH-4203
Baslerstrasse 67 a
Grellingen
Service
00390-0444-94
5991
0047-333-78-001
0043-01259-65
5214
0043-01259-1179
0046-18-71 2015
0046-18-10 8545
0041-61-741 23 22 0041-61 741 23 34
Slowakische
Ivo Marhoun
Rep.
Horova 9
CZ-35201 AS
00420 351 120
162
Spanien
Metzloser Str. 38
D-36355
Grebenhain
0049-6644-87-777 0049-6644-87-779
Horova 9
CZ-35201 AS
00420 351 120
162
35060 PinarbasiIzmir
0090-232-47 912
58
robbe-Service
Tschechische
Ivo Marhoun
Rep.
Türkey
Formula Modelsports
21.
0900-232-47 917
14
AKKU U. GERÄTEENTSORGUNG
Werfen Sie Akkus auf keinen Fall in den Hausmüll. Um die Umwelt zu
schützen, geben Sie defekte oder verbrauchte Akkus nur entladen zu
den entsprechenden Sammelstellen. Dies sind alle Verkaufstellen für
Batterien und Akkus, oder kommunale Sondermüllsammelstellen. Um
Kurzschlüsse zu vermeiden, kleben sie bitte eventuell blanke Kontakte
mit Klebestreifen ab. Die Kosten für die Rückführung des Akkus und
dessen Entsorgung sind schon mit dem Kaufpreis abgedeckt. Alle Stellen sind verpflichtet
Akkus anzunehmen, gleich ob Sie sie dort gekauft haben oder nicht.Die Akkus werden
wieder aufgearbeitet. Dadurch gelangt das Material wieder in den Produktionskreislauf.
Helfen Sie mit, die Umwelt zu schützen und zu bewahren!
23
Elektronische Geräte dürfen nicht einfach in eine übliche Mülltonne
geworfen werden. Der Power Peak® C8 EQ-BID ist daher mit dem
nebenstehenden Symbol gekennzeichnet. Dieses Symbol bedeutet, dass
elektrische und elektronische Geräte am Ende ihrer Nutzungsdauer,
vom Hausmüll getrennt, entsorgt werden müssen. Entsorgen Sie das
Ladegerät bei Ihrer örtlichen kommunalen Sammelstelle oder RecyclingZentrum. Dies gilt für alle Länder der Europäischen Union sowie anderen Europäischen
Ländern mit separatem Sammelsystem.
22.
KONFORMITÄTSERKLÄRUNG
Hiermit erklärt die robbe Modellsport GmbH & Co. KG, dass sich dieses Gerät
in Übereinstimmung mit den grundlegenden Anforderungen und anderen relevanten Vorschriften der entsprechenden CE Richtlinien befindet. Die OriginalKonformitätserklärung finden Sie im Internet unter www.robbe.com, bei der jeweiligen
Gerätebeschreibung durch Aufruf des Logo-Buttons „Conform“.
robbe Modellsport GmbH & Co.KG
Metzloser Straße 38
D-36355 Grebenhain OT Metzlos/Gehaag
Telefon +49 (0) 6644 / 87-0
robbe Form ACBA
Irrtum und technische Änderungen vorbehalten.
Copyright robbe-Modellsport 2010
Kopie und Nachdruck, auch auszugsweise, nur mit schriftlicher
Genehmigung der robbe-Modellsport GmbH & Co.KG
24
Bedienungsanleitung
Operating instructions
Notice d’utilisation
Manuale d’istruzione
Manual de Uso
Návod k obsluze
Power Peak® C8 EQ-BID
No. 8553
Operating Instructions
No.
Power Peak® C8 EQ-BID
8553
Dear customer,
Congratulations on your choice of the Power Peak® C8 EQ-BID high-performance battery
charger from the robbe range. This is a compact charger with battery management and
equalizer for use with 230 V AC or 12 V DC.
The Power Peak® C8 EQ-BID is simple to use, but the operation of a high-quality automatic charger of this type does require some knowledge on the part of the user. Reading
these instructions will ensure that you are quickly able to exploit the facilities of the device
to the full.
We wish you many hours of success and pleasure using your new battery charger.
Safety notes
At the end of the operating instructions you will find comprehensive safety notes
concerning the correct handling of battery chargers and the various battery types.
We have also assembled useful supplementary general notes regarding the individual battery types in the chapter entitled “A brief guide to battery types”.
It is ABSOLUTELY ESSENTIAL that you read through these instructions and the
safety notes before you use the charger for the first time.
Mishandling rechargeable batteries and battery chargers can cause batteries to
catch fire and even explode.
The charger’s menu language is set as described in chapter 9 on page 13.
2
Operating Instructions
No.
Power Peak® C8 EQ-BID
8553
Contents
Chapter
Safety notes
1.
Set contents
2.
General description
3.
Charger controls
3.1 Control functions
4.
Specification
5.
Using the charger for the first time
5.1 Connecting the battery
6.
Working display
7.
Parameters in the main menu without BID
7.1 Additional parameters in the main menu with BID
8.
Editing data without BID
8.1 Editing data with BID
9.
Settings
10.
Charge / discharge process without BID chip / KEY
11.
Charge / discharge process with BID chip / KEY
12.
Terminating a charge / discharge process
13.
Error messages
14.
Menu structure
15.
Safety notes
16.
Brief guide to battery types
16.1 Nickel-Cadmium (NC) batteries
16.2 Nickel-Metal-Hydride (NiMH) batteries
16.3 Lead-Acid (Pb) batteries
16.4 Lithium (LiPo, LiIo, LiFe) batteries
17.
Guarantee
18.
Liability exclusion
19.
Recommended accessories
20.
Service Centre addresses
21.
Disposal of batteries and apparatus
22.
Conformity declaration
3
Page
2
4
5
6
6
7
8
8
9
10
11
11
13
13
14
14
15
16
17
18
19
19
19
19
20
21
21
22
23
23
24
Operating Instructions
No.
Power Peak® C8 EQ-BID
8553
1. SET CONTENTS
POWER PEAK® C8 EQ-BID No. 8553
The set consists of:
1 Power Peak® C8 EQ-BID 230 V / 12 V battery charger
1 BID key
1 JST XH equalizer adapter (No. 8214) for connecting 2S - 6S LiPo batteries with JST-H
voltage sensor leads (Lama, G47, Align) to the equalizer.
4
2.
Operating Instructions
No.
Power Peak® C8 EQ-BID
8553
GENERAL DESCRIPTION
This is a high-performance, good-looking computer charge / discharge station with battery management suitable for use with all current battery types. With integral equalizer for
eight-cell Lithium-Ion (LiIo), Lithium-Polymer (LiPo) and Lithium-Ferrum (LiFe) batteries.
Maximum 6.5 A charge current; can be powered by a 12 Volt car battery or from the 230
Volt mains via the integral switch-mode mains PSU.
The Power Peak® C8 EQ-BID is capable of charging and discharging NC / NiMH batteries
consisting of 1 to 24 cells and Pb (lead-acid) batteries with 1 to 12 cells (2 ... 24 V). When
a Nickel battery is fully charged, the unit terminates the process using the Delta-Peak
method. Lithium and lead (Pb) batteries are charged using the CC-CV method.
The charger features five internal memories, which can be used in manual
mode to store battery-specific data relating to the charge and discharge process of five different batteries.
An important feature of the Power Peak® C8 EQ-BID is the pioneering Battery Identification System (BID). A vast array of different battery types is now
available to the modeller, and the range is constantly expanding; the problem
is that each battery type requires its “own” charge process. It can happen so quickly: you
switch the system on with the wrong settings - and in a moment your valuable battery is
damaged.
The revolutionary BID system from robbe provides an ingenious solution to this problem. A small, lightweight BID key
is assigned to each battery. The key stores all the relevant
data required for charging and discharging that pack perfectly.
When the battery is to be charged or discharged, the BID key
is connected to the Power Peak® C8 EQ-BID, and the BID
system transfers the required parameters to the charger.
All you have to do now is press the “MODE” button, and
the desired charge or discharge process commences.
No tiresome searching through menus for set-up parameters, maximum protection from mishandling, and the
relevant battery data stored on the BID key - these are
the unique advantages of the BID system.
Since the essential information is saved on the BID key,
all the data can easily be displayed on the charger’s
integral screen This means that you can obtain an upto-date picture of the battery’s condition without the need for PC software or computer
technology.
BID chips are available as accessories (see page 22) , and form an alternative to the BID
key. The chips have the same function, but differ in size.
An integral USB socket with bootloader function allows the charger’s software to be updated at any time, so that it can be kept abreast of the latest developments.
5
3.
Operating Instructions
No.
Power Peak® C8 EQ-BID
8553
CHARGER CONTROLS
Screen
Power supply
EDIT button
“+” /
VIEW button
button
Select wheel
MODE button
Battery sockets
“-” /
button
Voltage sensor
socket
BID socket
USB socket
for updating
ENTER button
3.1
CONTROL FUNCTIONS
MODE BUTTON
• Press 1 x to start a charge process;
Press 2 x to start a discharge process;
Press 3 x to start a discharge / charge process (cycle charge).
VIEW BUTTON
• Displays the charger’s various parameters, e.g. input voltage. It is also possible to display all the individual cell voltages of a connected LiPo battery using this button.
EDIT BUTTON
• Pressing the “EDIT” button takes you to the battery parameter and set-up menu.
“+” / BUTTON
• When adjusting a parameter (battery type, cell count, etc.) this button is used to increase the value by one increment; at the menu select stage it selects the next menu. The
button features an auto-repeat function: holding it pressed in has the same effect as
repeatedly pressing the button.
“-” / BUTTON
• When adjusting a parameter (battery type, cell count, etc.) this button is used to decrease the value by one increment; at the menu select stage it selects the previous menu.
The button features an auto-repeat function: holding it pressed in has the same effect
as repeatedly pressing the button.
SELECT WHEEL
• When rotated, the Select Wheel duplicates the “+” / “-” buttons.
ENTER BUTTON
• Pressing the ‘ENTER’ button confirms a selection – e.g. activating a selected sub-menu
– or adopts a previously set value.
6
4.
Operating Instructions
No.
Power Peak® C8 EQ-BID
8553
SPECIFICATION
Operating voltage:
Cell counts:
Charge current:
Discharge current:
Equalizer current:
Discharge power:
Trickle charge current:
Final discharge voltage:
Charge termination:
NC / NiMH:
Lead / Lithium
Dimensions:
Functions:
Protective functions:
Input:
Output:
12 V DC (car battery) / 230 V AC
(do not use a car battery charger!)
1 - 24 NC / NiMH cells
1 - 8 LiIo (3.6 V), LiPo (3.7 V), LiFe (3.3 V) cells
1 - 12 (2 ... 24 V) lead-acid cells
0.1 ... 6.5 A, max. 135 Watt, (12 V DC)
0.1 ... 6.5 A, max. 110 W (230 V AC)
0.1 ... 5 A (max. 25 Watt)
approx. 250 mA
25 W, current adjusted accordingly
C/20 maintenance charge
(NC and NiMH only)
0.8 V per cell, NC / NiMH
3.0 V per cell, LiPo, LiIo
2.5 V, LiFe
1.7 V per cell, Lead-Acid
automatic, digital Delta-Peak system
automatic, voltage-dependent, CC-CV method
180 x 145 x 70 mm
Charge, discharge, cycle, balance
Reverse polarity guard
Reverse polarity guard, short-circuit protection
Note:
If the input voltage falls below 11 V in DC mode, the output current is automatically reduced
by 1 A.
Reason: if the voltage of a car battery is less than 11 V (at the charger input, not at the
battery terminals), it can safely be assumed that the battery is too “weak” for the task in
hand, and reducing the charge current lessens the load on the battery. Without this function
the battery voltage would continue to fall, and the charger would eventually switch itself off
due to inadequate voltage. Reducing the charge current in this way allows you to continue
charging for as long as possible even when the battery is weak.
Maximum charge currents in AC or DC mode:
AC mode:
DC mode:
Up to 16.5 V battery voltage: 6.5 A
Up to 20.5 V battery voltage: 6.5 A
At higher battery voltages the current is reduced.
Note re. charging Lithium batteries without a sensor lead:
If you are using the BID system, it is possible to charge Lithium batteries even without a
voltage sensor lead. However, the battery is not balanced if you do this, and the charger is
unable to check the cell count.
7
Operating Instructions
No.
Power Peak® C8 EQ-BID
8553
5.
USING THE CHARGER FOR THE FIRST TIME
Connect the charger to a 12 V lead-acid battery, or use the “kettle” lead supplied to connect
the unit to a mains socket. It is essential to maintain correct polarity.
Assuming that no battery is connected, the screen now displays “Power Peak® C8 EQ-BID
V1.0”, followed by “NO BATTERY”.
5.1 CONNECTING THE BATTERY
Important !!! Before you connect a battery to the charger it is essential to check the
set parameters. Incorrect settings can result in damage to the battery, which could even
explode or ignite. To avoid short-circuits between the banana plugs, always connect the
charge lead to the charger first, and only then to the battery. Reverse the procedure when
disconnecting the battery. Always maintain correct polarity!
Voltage sensor socket (Lithium battery):
The voltage sensor lead attached to the lithium battery must be connected to the appropriate socket on the charger, with the black wire at the end marked with an arrow; the arrow
indicates the Earth (negative) terminal. Always maintain correct polarity! If you wish to
make up your own battery connections or voltage sensor leads, you must take great care
to assemble them with correct polarity! When charging Lithium cells the voltage sensor lead
should always be plugged in - unless you are charging a single cell.
When configuring the BID chip or key it is important to check that the battery parameters are set correctly (risk of ruining the battery). If the battery is fitted with a
voltage sensor lead, for safety reasons this should always be plugged in.
“+”==redrot
“+”
“-” “-”
= schwarz
= black
8
Operating Instructions
No.
Power Peak® C8 EQ-BID
8553
The example on page 8 is only for illustration purposes; it is just intended to show how a
typical voltage sensor lead is connected to the equalizer.
EQ adapter
robbe-PQ No. 8213
6.
EQ adapter
robbe-PQ No. 8214
EQ adapter
robbe-PQ No. 8215
WORKING DISPLAY
Battery memory
Status
display
Battery
type
Momentary
battery
voltage
Charge /
discharge
current
Elapsed
time
Capacity display
During a charge or discharge process this screen display provides all the necessary information to keep the user informed of progress.
The top line shows the internal battery memory (e.g. 1 to 5), or “B”, if a BID key is connected. Pressing the “EDIT” button takes you to the “EDIT DATA” menu (see Chapter 8 on
page 11) or “SETTINGS” (Chapter 9 on page 13). The internal memory can be selected
directly from the working display: press the “ENTER” button and use the arrow buttons to
select the memory you wish to use, then press the “ENTER” button again to confirm your
choice.
Column 2 of the top line shows the charger’s status (‘C’ for Charge, ‘D’ for Discharge, ‘D-C’
for Discharge - Charge, ‘R’ for Ready, ‘N’ for No Battery, and ‘F’ for Finish). The battery
type can be determined by the abbreviations in the bottom line: PB = lead-acid, NC = NiCd,
NH = NiMH, LP = LiPo, LI = LiIo, LF = LiFe and LS = Lithium Storage (program for storing
Lithium batteries).
It is also possible to alter the current while a charge or discharge process is under way.
This is accomplished by pressing the “ENTER” button, then adjusting the current using the
arrow buttons. Finally press the “ENTER” button again to confirm the new value.
9
7.
Operating Instructions
No.
Power Peak® C8 EQ-BID
8553
PARAMETERS IN THE MAIN MENU WITHOUT BID
Select the menu by pressing the “VIEW” button, then use the “+” or “-” buttons or the Select
Wheel to display the following parameters.
INPUT VOLTAGE
Display of input voltage.
DISPLAY OF THE LAST BATTERY CHARGE PROCESSES (M1 ... M5)
This function enables you to reconstruct the last five
battery charge processes; only the charged-in capacity is displayed. Press the “ENTER” button to select
the parameter, then use the “+” or “-” buttons or the
Select Wheel to view the desired memory. Pressing the “ENTER” button again cancels the
selection.
DISPLAY OF THE LAST BATTERY DISCHARGE PROCESSES (M1 ... M5)
This function enables you to reconstruct the last five
battery discharge processes; only the discharged
capacity is displayed. Press the “ENTER” button to
select the parameter, then use the “+” or “-” buttons or
the Select Wheel to view the desired memory. Pressing the “ENTER” button again cancels
the selection.
DISPLAY OF MAXIMUM BATTERY VOLTAGE
Maximum battery voltage during a charge or discharge
process.
DISPLAY OF AVERAGE BATTERY VOLTAGE
Display of average battery voltage during a charge or
discharge process.
DISPLAY OF CHARGED-IN OR DISCHARGED ENERGY
Display of the charged-in or discharged energy; the
value is shown in Wh (Watt/hour).
EQUALIZER DATA
If more than six Lithium cells are connected to the charger, the screen shows two alternating displays.
Note: the individual cell voltages are only displayed if a voltage sensor lead is connected.
10
Operating Instructions
No.
Power Peak® C8 EQ-BID
8553
Cell 1
Cell 6
Cell 8
7.1 ADDITIONAL PARAMETERS IN THE MAIN MENU WITH BID
When a BID chip or key is connected, the following battery data can be read out:
DISPLAY OF MAXIMUM CHARGED-IN CAPACITY
Display of the maximum charged-in battery capacity
to date. If the previous value is exceeded during a
charge process, the old value is automatically superseded.
DISPLAY OF MAXIMUM DISCHARGED CAPACITY
Display of the maximum discharged battery capacity
to date. If the previous value is exceeded during a
discharge process, the old value is automatically
superseded.
DISPLAY OF CHARGE CYCLES
Display of the battery’s previous charge cycles. At the
end of a charge process the counter is incremented
by 1.
DISPLAY OF A USER-DEFINABLE DATE
Display of the user-defined date on the BID chip or
key (e.g. date of purchase of the battery).
DISPLAY OF MAXIMUM BATTERY VOLTAGE
Maximum battery voltage during a charge or discharge
process.
8.
EDITING DATA WITHOUT BID
Use the “EDIT” button to select the “EDIT DATA” menu, then press the “ENTER” button
to select the menu. Use the “+” or “-” buttons or the Select Wheel to display the following
parameters:
11
Operating Instructions
No.
Power Peak® C8 EQ-BID
8553
INTERNAL MEMORY
This menu can be used to set up a maximum of five
different battery types with their corresponding parameters; the data you enter is retained when the charger is switched off. The number flashes, and can be
changed using the arrow buttons or the “Select Wheel”. When you select a new memory,
the screen displays the previously saved data, such as charge current, capacity, cell count
etc. The memory can also be selected from the working display: this is accomplished by
pressing the “ENTER” button and selecting the memory number.
SETTING THE BATTERY TYPE
Pressing the “ENTER” button selects the Battery
Type parameter. Now use the “+” or “-” buttons or the
“SELECT WHEEL” to set the desired type. If you wish
to prepare a LiIo or LiPo battery ready for storage, it is
possible to select the function “L3.9V”: this function adjusts the battery voltage to the correct storage value of 3.9 V / cell; this is ideal for storing the battery for a protracted period.
A further press on the “ENTER” button adopts the selected battery type.
SETTING THE CELL COUNT
The next essential step is to select the parameter “BATTERY CELLS”. The appropriate cell count
can also be set at this point, as described previously. When the count is correct, you must press the
“ENTER” button in order to adopt the selected value.
SETTING THE BATTERY CAPACITY
When you press the “ENTER” button, the set parameter flashes; at this stage you can select the battery
capacity. Press the “ENTER” button once more after
making your selection.
SETTING THE CHARGE CURRENT
This parameter is used to set the charge current.
Please note that the maximum charge current varies
according to the cell count and the battery voltage.
The charger’s integral processor limits the maximum
charge current in accordance with the specified charge power.
SETTING THE DISCHARGE CURRENT
This parameter is used to set the discharge current.
Please note that the maximum discharge current
varies according to the cell count and the battery voltage. The charger’s integral processor limits the maximum discharge current.
12
8.1
Operating Instructions
No.
Power Peak® C8 EQ-BID
8553
EDITING DATA WITH BID
Note: this supplementary parameter and the data stored on it are only displayed if a BID
chip or key is connected to the charger. The other user-variable parameters have already
been explained on page 12, so this section only mentions the differences.
DISPLAYING A USER-DEFINABLE DATE
Display of the date defined on the BID chip or key
(e.g. date of purchase of the battery).
9.
SETTINGS
Use the “EDIT” button to select the “SETTINGS” menu, and then confirm your choice by
pressing “ENTER”. The “+” or “-” buttons or the “SELECT WHEEL” can now be used to
display the following parameters.
SETTING THE CUT-OFF TOLERANCE FOR LITHIUM BATTERIES
The menu “CHARGE Li” enables you to set the
charge cut-off level for Lithium batteries. At the “NORMAL” cut-off setting, the charge process is terminated
when
h th
the charge
h
currentt ffalls
ll tto C/2
C/20; at the “FAST” cut-off setting the threshold is C/10.
If you select the “FAST” cut-off setting, the battery is charged more quickly, but it will only
have about 95% of its full capacity.
SETTING THE VOLUME
This function enables you to adjust the volume of the
audible tones emitted by the charger. Three modes
are available: OFF, QUIET and LOUD.
SETTING THE MELODY
In this menu you can select any of three different cutoff melodies.
SETTING THE MENU LANGUAGE
The charger’s software can be set to any of the following languages: German, English, French, Italian,
Spanish or Czech; to select your preferred language
use the “SELECT WHEEL” or the arrow buttons to
move to the “LANGUAGE” menu point. Select it by pressing “ENTER”, then set your preferred language using the arrow buttons. When you have set the language, press the
“ENTER” button to confirm your choice. To activate the change, move to “END” and confirm
your choice with “ENTER”.
13
10.
Operating Instructions
No.
Power Peak® C8 EQ-BID
8553
CHARGE / DISCHARGE PROCESS WITHOUT BID CHIP OR KEY
The following settings must be entered before you can start a charge or discharge process,
to ensure that the charger is set up correctly for the selected process:
• Connect the battery, check for correct polarity (see wiring diagram on page 8).
• Set the battery type
• Set the cell count
• Set the capacity
• Set the charge / discharge current
Once you have set the parameters - as described in previous chapters - the process can
be started. If you wish to charge the connected battery (CHARGE), press the “MODE” button once. Pressing the same button a second time within one second sets the discharge
function (DISCHARGE). Pressing the “MODE” button three times sets cycle mode (DC-CH
CYCLE). Use the “+” or “-” buttons or the “SELECT WHEEL” to set the number of cycles
within the range 1 to 99. If no further input is made within about two seconds of selecting
a mode, the charger initiates the selected process. To interrupt any process, press the
“MODE” button.
11.
CHARGE / DISCHARGE PROCESS WITH BID CHIP OR KEY
The pictures below illustrate how a BID chip and a BID key are used: first connect the BID
chip to the charger using the adapter lead, or connect the BID key directly (see picture
below). If you wish to check the BID data before starting a charge / discharge process,
press the “ENTER” button. If the charge parameters on the chip are in order, you can select
and start the appropriate mode using the “MODE” button. During a charge or discharge
process the essential data of for the procedure is saved to the BID chip or key.
Depression
on top
14
Operating Instructions
No.
Power Peak® C8 EQ-BID
8553
1. Connect the battery (in the case of a Lithium battery: connect the voltage sensor lead at
the same time), and check for correct polarity (see page 8).
2. Connect the BID chip or key.
3. Press the “MODE” button once: the charge process starts with a delay of about two
seconds. Alternatively a discharge process is initiated if you press the button twice,
while a discharge / charge process (cycle charge) is started if you press the button
three times.
The selected process can be stopped by pressing the same button again.
Note:
If you are using the BID system it is also possible to charge or recharge Lithium batteries
without connecting the voltage sensor lead, although this is not recommended.
12. TERMINATING A CHARGE / DISCHARGE PROCESS
The charger terminates the charge or discharge process automatically; the internal processor governs this action, taking into account the charge / discharge parameters. For
each battery type the charger employs the most suitable cut-off method. At the end of the
process the charger emits a sequence of beeps in accordance with the setting.
15
Operating Instructions
No.
Power Peak® C8 EQ-BID
8553
13. ERROR MESSAGES
The Power Peak® C8 EQ-BID is fitted with safety circuits designed to ensure that the
charge or discharge process is completed reliably and safely. If an error should occur, a
corresponding message appears on the screen, and the piezo buzzer emits a shrill warning
sound. The following error messages may be displayed: once the fault has been corrected,
pressing any button turns the error message off again.
Input voltage below 10.5 V
Incorrect cell count
The data on the BID chip or key cannot be processed
by the Power Peak® C8 EQ-BID, e.g. Lithium cell
count > 8 cells.
Corrupt data on the BID chip or key. If this should
happen, you must re-edit the BID data. When you
press any button to cancel the error message, the
“EDIT DATA” menu is opened automatically; the battery data must now be re-entered.
Charger overheating!
The reason may be a faulty cooling fan or a blocked
vent grille. To test this, disconnect the battery and
switch the charger off, then switch the unit on again, re-connect the battery, and briefly start
a discharge process: if the fan does not immediately start running, disconnect the battery
and switch the charger off without delay. Send the defective charger to a robbe Service
Centre for repair (please note the guarantee requirements: chapter 17 on page 21).
16
14.
Operating Instructions
No.
Power Peak® C8 EQ-BID
8553
MENU STRUCTURE
VIEW
EDIT
ENT
ENT
ENT
VIEW
ENT
17
15.
Operating Instructions
No.
Power Peak® C8 EQ-BID
8553
SAFETY NOTES
• The Power Peak® C8 EQ-BID is intended exclusively for charging, discharging and
equalizing rechargeable NC / NiMH, Lead-Acid and Lithium batteries. Do not attempt to
recharge dry cells - explosion hazard!
• The charger is designed exclusively for use with a 12 V DC or 230 V AC power source.
Never connect it to any other voltage.
• It is essential to protect the charger from dust, dirt and damp.
• Do not subject the charger to excessive heat or cold, nor to direct sunlight.
• Avoid shock and pressure loads, and do not subject the Power Peak® C8 EQ-BID to
severe vibration.
• Do not open the charger when it is connected to a power supply.
• Never place the charger and the batteries connected to it on any form of inflammable
surface. Never operate the charger in the vicinity of inflammable materials or gases.
• Do not leave the charger operating unsupervised. It is normal for the charger to
become quite hot when operating.
• Ensure that there is an unrestricted airflow to and from the charger’s cooling slots.
• If you will not be using the charger for a protracted period, disconnect it from the power
source and any batteries connected to it.
• Never charge any battery a second time immediately after its initial charge.
• Do not charge a battery which is already warm or hot to the touch. Allow packs to cool
down to ambient temperature before continuing.
• Batteries to be charged as a unit must consist of cells of the same make, the same type
and the same capacity.
• Do not charge two batteries connected in parallel to one output; connect only one battery
at a time.
• Take great care to maintain correct battery polarity, and avoid short-circuits.
• Read the battery manufacturer’s instructions and adhere to them strictly.
• Always take great care to check the settings of the Power Peak® C8 EQ-BID. Batteries
may be completely ruined if you select inappropriate settings.
• Check the charger case and cables for damage at regular intervals.
• Please take particular care when handling battery packs containing a large number of
cells. The voltage of these packs is high enough to give you a serious electric shock, so
it is important that all terminals should be properly insulated.
• We accept no liability for home-made battery connections or voltage sensor leads.
18
Operating Instructions
No.
Power Peak® C8 EQ-BID
8553
16. A BRIEF GUIDE TO BATTERY TYPES
When handling rechargeable batteries a number of safety measures must always be observed in order to avoid the possibility of personal injury and property damage. When you use
a rechargeable battery, you accept liability for the consequences.
16.1 NICKEL-CADMIUM (NC) BATTERIES
We recommend the following charge rates for NC batteries:
High-energy batteries: 1 - 2C; please observe the battery manufacturer’s stated figures.
High-current batteries: 2 - 3C, max. 5C; please check the maximum charge current figures
stated by the battery manufacturer. Check also that the connectors and charge lead are
suitable for such high currents.
16.2 NICKEL-METAL-HYDRIDE (NIMH) BATTERIES
We recommend the following charge rates for NiMH batteries:
High-energy batteries: 0.5 - 1C; please observe the battery manufacturer’s stated figures.
High-current batteries: usually 1C, but many cell types can be charged at 1.5 … 2C; please
check the maximum charge current figures stated by the battery manufacturer.
16.3 LEAD-ACID (PB) BATTERIES
• The lead-gel batteries which are in widespread use in the modelling world are usually
gastight, and therefore less hazardous than conventional lead-acid types.
• In contrast, car batteries with fluid sulphuric acid electrolyte are extremely hazardous,
because the acid is corrosive, and the cells generate gas when overcharged.
• Lead-acid batteries must never come into contact with open fire, as they may explode.
• Never forcibly open lead-acid cells; they contain corrosive materials.
• Never short-circuit lead-acid cells - fire hazard, possible explosion hazard.
• If electrolyte should escape from the cell, do not allow it to touch your skin or eyes. If this
should happen despite taking normal precautions, immediately wash it off using plenty
of clean water, and seek medical attention immediately. Never place lead-acid cells or
batteries in your mouth, as they are poisonous.
• A charged lead-acid battery is not a child’s plaything. Store these batteries well out of
the reach of children.
• It is essential to take into account the notes provided by the battery manufacturer regarding charging and discharging.
• Lead-acid batteries may generate hydrogen gas (“gassing”) during the charge process.
For this reason good ventilation is essential. If overcharged, these batteries generate an explosive mixture of hydrogen and oxygen.
Explosion hazard.
19
Operating Instructions
No.
Power Peak® C8 EQ-BID
8553
16.4 LITHIUM (LiPo, LiIo, LiFe) BATTERIES
GENERAL INFORMATION
There are various basic types of Lithium battery:
1. Lithium-Ion batteries containing fluid electrolyte, with a nominal voltage of 3.6 Volts.
This is the first generation of Lithium cell, and is not often used for modelling applications.
2. Lithium-Ion batteries containing fluid electrolyte, with a nominal voltage of 3.7 Volts.
This is the second generation of Lithium cell, and is housed in a metal can.
3. Lithium-Ion-Polymer batteries (LiPo) containing gel electrolyte, with a nominal voltage
of 3.7 Volts. This is the current generation of Lithium cell, and they have also become
known as Li-Po or Li-Poly batteries. The gel electrolyte results in a reduced pressure
build-up in the cell during charging and discharging, for which reason a foil housing is
adequate. This cell has rapidly become very popular for model purposes due to its low
weight and high energy density.
4. Lithium-Ferrum batteries (LiFe) with a nominal voltage of 3.3 Volts. These are the
latest generation of Lithium batteries, and are also known as A123 cells. Due to their
high maximum discharge rate and good energy density this type of battery will quickly
become popular for modelling applications
CAPACITY DIFFERENCES
If several cells are assembled to form a battery which is then discharged at a fairly high
current, the cells will heat up to different extents as the cell or cells on the inside are unable
to dissipate heat effectively.
This results in changes to the cells’ internal resistance, which in turn reduces their discharge
capacity. The cell concerned will then be discharged more quickly, with the danger that it
will eventually be discharged below the permissible final discharge voltage.
Considerable differences in capacity can occur when external temperatures are very low.
For example, if a Li-Po pack is flown in an electric helicopter, the front cell will be cooled
very effectively by the normal airflow, while the inner cells become significantly warmer.
The colder cell will lose effective capacity, with the danger that it will be discharged below
the permissible final discharge voltage.
To avoid the danger of permanent cell damage we recommend that Li-Po cells should only
be discharged down to a final discharge voltage of about 3 Volts. We recommend the MC
Balancer, No. 8636 (max. seven cells) or the MC Balancer 14S, No. 8643 (max. fourteen
cells) for this task, both of which monitor the individual cell voltages of a LiPo pack. It is
also essential that the cells are brought up to the same level when the pack is recharged.
Charging individual cells wired in parallel presents no problems, as the total current is distributed amongst the individual cells according to their voltage level.
We are unable to accept liability of any kind for damage caused by improper or
incompetent use of Lithium cells. Please observe the safety notes at all times.
20
Operating Instructions
No.
Power Peak® C8 EQ-BID
8553
Temperature differences always occur during the discharge process, as the outer cells are
invariably cooled more effectively than the inner ones. The effect of this, combined with
normal manufacturing tolerances, is that the state of charge of series-connected LithiumPolymer cells always tends to drift. After several discharge / charge cycles individual cells
inevitably exhibit differences in voltage.
17. GUARANTEE
Naturally we guarantee this battery charger for the statutory period of 24 months. If you
believe you have a valid claim under guarantee, please contact your dealer in the first
instance, as he is responsible for processing guarantee claims.
During the guarantee period we will correct any operating deficiencies, production defects
and material faults which arise, at no charge to you. We will not entertain any claims beyond these terms, e.g. consequent damage.
The unit must be returned to us carriage-paid; it will also be returned to you carriage-paid.
We will not accept goods sent to us without pre-paid carriage.
We accept no liability for transit damage and the loss of your shipment; we therefore
recommend that you take out suitable insurance to cover these risks.
Send the unit to the Service Centre responsible for the country in which you live.
The following conditions must be fulfilled if we are to process your guarantee claim:
•
Send proof of purchase (till receipt) with your shipment.
• The unit must have been operated in accordance with the operating instructions.
• The unit must have been operated with the recommended power sources and genuine
robbe accessories.
• The unit must not exhibit damage due to damp, unauthorised intervention, reverse polarity, overload conditions or mechanical damage.
• Please include a concise description of the fault or defect, as this will help us identify the
problem.
18. LIABILITY EXCLUSION
This charger is designed and approved exclusively for charging the types of battery stated
in these operating instructions. robbe Modellsport accepts no liability of any kind if the
charger is used for any purpose other than that stated. We at robbe Modellsport are unable to ensure that you observe the instructions supplied with the charger, and we have no
control over the methods you employ for using, operating and maintaining the device and
the batteries. For this reason we are obliged to deny all liability for loss, damage or costs
which are incurred due to the incompetent or incorrect use and operation of our products,
or which are connected with such operation in any way. Unless otherwise prescribed by
law, our obligation to pay compensation, regardless of the legal argument employed, is
limited to the invoice value of those robbe products which were immediately and directly
involved in the event in which the damage occurred. This does not apply if the company is
found to be subject to unlimited liability according to binding legal regulation on account of
deliberate or gross negligence.
21
19.
Operating Instructions
No.
Power Peak® C8 EQ-BID
8553
RECOMMENDED ACCESSORIES
Transmitter battery
charge lead
No. F1415
Receiver battery
charge lead
No. F1416
BID chip, excl. lead,
for fitting to additional
batteries
No. 8472
BID chip with 300 mm lead,
for fitting to additional
batteries
No. 8473
BID lead, 300 mm
No. 8474
BID key
No. 8888
Adapter lead
3S-XH
No. 4029
Adapter lead
2 x 3S EHR
No. 4023
Cordon-adaptateur
2X3S XH-EHR
réf. 4023XH
BID lead, 500 mm
No. 8475
Adapter lead
3 x 2S XH-EHR
No. 4031XH
22
Adapter lead
3 x 2S EHR
No. 4031
20.
Operating Instructions
No.
Power Peak® C8 EQ-BID
8553
SERVICE CENTRE ADDRESSES
Country
Company
Street
Town
Telephone
Fax
0037-6-82 0827
0037-6-82 5476
0045-86-43 7744
Andorra
SORTENY
Santa Anna, 13
AND-00130 LES
ESCALDES
Dänemark
Nordic Hobby A/S
Bogensevej 13
8900 RANDERS
0045-86-43 6100
Deutschland
robbe-Service
Metzloser Str. 38
D-36355 Grebenhain
0049-6644-87-777 0049-6644-7412
England
robbe-Schlüter UK LE10-1UB
Leicestershire
0044-1455-63 7151 0044-1455-63 5151
Frankreich
S.A.V Messe
F-57730 Folschviller 0033-387-94 6258
Griechenland
TAG Models Hellas 18,Vriullon Str.
Italien
MC-Electronic
Niederlande/
Belg.
Jan van Mouwerik
Norwegen
Norwegian Modellers
Österreich
Schweden
Schweiz
BP 12
Via del Progresso
25
Slot de Houvelaan
30
Box 2140
143 41 Nea Philadelfia
I-36010 Cavazeale
(Vi)
0033-387-94 6258
0030-1-25 84 380
0030-1-25 33 533
00390-0444-94
5992
00390-0444-94
5991
NL-3155 Maasland
0031-1059-13 594
0031-1059-13 594
3101 TØNSBERG
0047-333-78-000
0047-333-78-001
A-1220 Wien
0043-01259-65
5214
0043-01259-1179
0046-18-71 2015
0046-18-10 8545
Robbe Service
Puchgasse 1
Minicars Hobby
A.B.
robbe Futaba
Service
Bergsbrunnagatan
75323 Uppsala
18
Baslerstrasse 67 a CH-4203 Grellingen 0041-61-741 23 22 0041-61 741 23 34
Slowakische
Rep.
Ivo Marhoun
Horova 9
CZ-35201 AS
00420 351 120 162
Spanien
robbe-Service
Metzloser Str. 38
D-36355 Grebenhain
0049-6644-87-777 0049-6644-87-779
Tschechische
Rep.
Ivo Marhoun
Horova 9
CZ-35201 AS
00420 351 120 162
Türkey
Formula Modelsports
35060 PinarbasiIzmir
0090-232-47 912
58
21.
0900-232-47 917
14
DISPOSAL OF BATTERIES AND APPARATUS
On no account dispose of exhausted batteries in the domestic waste. To
protect the environment, take defective and exhausted packs to your local
battery collection centre after ensuring that they are completely discharged. Collection points include all retail outlets where dry and rechargeable
batteries are sold, and also local authority toxic waste collection sites. To
avoid short-circuits, any exposed contacts should be carefully insulated.
The cost of returning and recycling old batteries is included in their original purchase price.
All the above-named collection points are legally obliged to accept batteries, whether you
purchased them there or not. Exhausted batteries can be recycled, and the materials reintroduced into the production chain. Please help to protect the environment!
23
It is illegal to dispose of electronic equipment in the ordinary household
waste: that is the meaning of the symbol printed alongside, which is
attached to the Power Peak® C8 EQ-BID. It simply means that you must
dispose of electrical and electronic equipment separately from the general household waste when it reaches the end of its useful life. Take your
unwanted battery charger to your local specialist waste collection point or
recycling centre. This applies to all countries of the European Union, and to
other European countries with a separate waste collection system.
22. CONFORMITY DECLARATION
robbe Modellsport GmbH & Co. KG hereby declares that this product satisfies the fundamental requirements and other relevant regulations contained in the appropriate CE
Directives. The original Conformity Declaration can be viewed on the Internet under www.
robbe.com: click on the logo button marked “Conform” which is included in each device
description.
robbe Modellsport GmbH & Co. KG
Metzloser Strasse 38
D-36355 Grebenhain OT Metzlos/Gehaag
Germany
Telephone: [0049] 6644-870
Robbe form ACBA
We accept no liability for errors and technical modifications.
Copyright robbe-Modellsport 2010
This information may not be copied or reproduced in whole or in part without
the prior written approval of robbe Modellsport GmbH & Co. KG
Bedienungsanleitung
Operating instructions
Notice d’utilisation
Manuale d’istruzione
Manual de Uso
Návod k obsluze
Power Peak® C8 EQ-BID
No. 8553
Instructions d‘utilisation
Réf.
Power Peak® C8 EQ-BID
8553
Madame, Monsieur, cher Client,
nous sommes heureux que vous ayez opté pour le chargeur informatique très performant
Power Peak® C8 EQ-BID de la gamme des produits robbe. Vous disposez ainsi d’un
chargeur compact avec gestion des accus et égaliseur avec une alimentation de 230V CA
ou de 12V CC.
Bien que le chargeur de qualité et automatique soit relativement aisé à mettre en œuvre,
l‘exploitation de ce chargeur Power Peak® C8 EQ-BID exige quelques connaissances
préalables de la part de l‘utilisateur. La présente notice vous permettra de vous familiariser
rapidement avec l‘appareil.
Nous vous souhaitons beaucoup de réussite et de plaisir avec votre nouveau chargeur !
Consignes de sécurité
À la fin de cette notice sont répertoriées des consignes de sécurité détaillées concernant la mise en œuvre et la manipulation des chargeurs et l‘exploitation des
divers types d‘accus. Par ailleurs, le chapitre « ACCUS, MODE D‘EMPLOI », rassemble un certain nombre de consignes générales essentielles pour l‘exploitation des
divers types d‘accus.
Avant de mettre l‘appareil en service LIRE ABSOLUMENT les informations le concernant et les consignes de sécurité.
Une manipulation non conforme des accus et des appareils de charge est susceptible de provoquer l‘explosion des accus et un incendie.
La langue du menu du chargeur peut être sélectionnée comme indiqué page 13 au
chapitre 9.
2
Instructions d‘utilisation
Réf.
Power Peak® C8 EQ-BID
8553
Sommaire
Chapitre
Consignes de sécurité
1.
2.
3.
3.1
4.
5.
5.1
6.
7.
7.1
8.
8.1
9.
10.
11.
12.
13.
14.
15.
16.
16.1
16.2
16.3
16.4
17.
18.
19.
20.
21.
22.
Page
2
Contenu de la livraison 4
Description générale
Éléments de commande
Fonction des organes de commande
Caractéristiques techniques
Mise en service du chargeur
Branchement des accus
Écran de travail
Paramètres dans le menu principal sans BID
Paramètres dans le menu principal avec BID
Éditer des données sans BID
Éditer des données avec BID
Mises au point
Procédures de charge/décharge sans une puce/clé BID
Procédures de charge/décharge avec une carte/clé BID
Fin d’une procédure de charge / de décharge
Messages de dérangement
Structure du menu
Consignes de sécurité
Accus mode d‘emploi
Accus Cadmium-Nickel (NC)
Accus hybrides Nickel métal (NiMH)
Accus au plomb (Pb)
Accus au Lithium (LiPo, LiIo, LiFe)
Garantie
Exclusion de la responsabilité
Accessoires recommandés
Adresse des ateliers de service après-vente
Mise au rebut des accus et des appareils
Déclaration de conformité
3
5
6
6
7
8
8
9
10
11
11
13
13
14
14
15
16
17
18
19
19
19
19
20
21
21
22
23
23
24
1.
Instructions d‘utilisation
Réf.
Power Peak® C8 EQ-BID
8553
CONTENU DE LA LIVRAISON
POWER PEAK® C8 EQ-BID No. 8553
Le kit comprend :
1 Chargeur Power Peak® C8 EQ-BID 230 volts /12 volts
1 Clé BID
1 Égaliseur JST XH (réf. 8214) pour le raccordement d’accus LiPo 2-6 S avec cordoncapteur de tension (Lama, G47, Align) JST-H à l’égaliseur robbe.
4
2.
Instructions d‘utilisation
Réf.
Power Peak® C8 EQ-BID
8553
DESCRIPTION GÉNÉRALE
Station informatisée de charge et de décharge très puissante avec gestion des accus
pour tous les types d’accus communs. Avec égaliseur intégré pour des accus de 8 éléments Lithium-ions (LiLo), Lithium polymère (LiPo) et Lithium-fer (LiFe). Avec un courant
de charge pouvant aller jusqu’à 6,5 A, alternativement à partir d’une batterie d’auto 12 volts
ou à partir du secteur 230 volts grâce au bloc d’alimentation secteur intégré.
Le chargeur Power Peak® C8 EQ-BID permet de charger ou de décharger de 1 à 24 éléments Cd-Ni ou NiMH ou des accus au plomb de 1 à 12 éléments (2 à 24 volts). Lorsque
l’accu est intégralement chargé intervient la commutation en fin de charge selon la procédure
Delta-Peak. Les accus au Lithium et au plomb (PB) sont chargés selon la procédure CC-CV.
Les 5 emplacements de mémoire interne de l’appareil permettent, en mode
manuel, la sauvegarde des caractéristiques spécifiques de charge et de
décharge de dix accus différents.
La propriété essentielle du chargeur Power Peak® C8 EQ-BID est le nouveau système orienté vers le futur, le système BID : système d’identification
des accus. La multiplicité des différents types d’accus ne cesse de croître,
chaque type d’accu exigeant sa “propre” procédure de charge. Il peut arriver très rapidement d’établir des réglages incorrects sur le chargeur et détériorer ainsi un accu de valeur.
Le système révolutionnaire BID de robbe propose une solution
géniale à ce problème. À chaque accu est affectée une petite
clé BID légère. Elle sauvegarde toutes les caractéristiques
essentielles concernant la charge et la décharge de l’accu.
Pour charger ou décharger l’accu, la puce BID est raccordée
au chargeur Power Peak C8 EQ-BID auquel elle fournit les
paramètres nécessaires de l‘accu.
Il suffit alors d’actionner la touche ‘MODE’ et la procédure de charge ou de décharge commence. Plus de
recherche laborieuse des paramètres de mise au point
dans le menu, protection maximale contre les manipulations erronées et sauvegarde des caractéristiques
essentielles des accus dans la clé BID, voilà les principaux avantage du système BID.
Grâce à la mémorisation des caractéristiques essentielles sur la clé BID, il est très facile de les matérialiser sur
l‘écran de l‘appareil de charge. Cette fonction remplace largement la nécessité d’exploiter
un logiciel de micro-ordinateur et l’informatique pour obtenir un récapitulatif de l’état de
l’accu.
Alternativement à la clé BID existe également en accessoire une puce BID-Chips (Cf. page
22), elle dispose des mêmes fonctions mais ne se distingue que par ses cotes.
Un raccord USB intégré avec fonction d‘initialisation pour les mises à jour ultérieures du
logiciel permet de maintenir l‘appareil au standard technologique actuel.
5
3.
Instructions d‘utilisation
Réf.
Power Peak® C8 EQ-BID
8553
ÉLÉMENTS DE COMMANDE
Écran Alimentation
en courant
Touche EDIT
touche “+”/
Touche de
VISUALISATION
Roue de sélection
Raccordement
de l’accu
Touche MODE
touche “-”/
Connexion du
capteur de tension
Raccord BID
Raccord USB
de mise à jour
Touche ENTER
3.1
FONCTION DES ÉLÉMENTS DE COMMANDE
TOUCHE MODE
• Le fait d‘actionner 1x la touche permet de lancer une procédure de charge,
2x de lancer une procédure de décharge et
3x de lancer une procédure de décharge / charge (charge cyclique).
La procédure sélectionnée peut être arrêtée par une nouvelle pression sur la touche.
Touche de visualisation
• Affichage des divers paramètres du chargeur, par exemple de sa tension d’entrée. Par
ailleurs, cette touche permet de faire apparaître toutes les tensions individuelles d’un accu
LiPo raccordé.
Touche ‘EDIT’
• La touche “EDIT” permet d‘accéder aux paramètres de l‘accu et au menu de mise au point.
Touche “+”
• Cette touche permet d‘accroître d‘un incrément (d‘une unité) le réglage établi pour un
paramètre (type d‘accu, nombre d‘éléments, etc.) et, dans la sélection du menu, de passer
au menu suivant. La touche comporte une fonction autorépétitive (Autorepeat) qui provoque une reprise de la pression lorsqu‘on tient la touche.
TOUCHE “-”
• Cette touche permet de réduire d‘un incrément (d‘une unité) le réglage établi pour un
paramètre (type d‘accu, nombre d‘éléments, etc.) et, dans la sélection du menu, de passer
au menu précédent. La touche comporte une fonction autorépétitive (Autorepeat) qui provoque une reprise de la pression lorsqu‘on tient la touche.
POTENTIOMÈTRE DE SÉLECTION
Le potentiomètre de sélection (Select Wheel) permet de réaliser les fonctions de la touche
“+”/ ”-” en “tournant”.
TOUCHE ENTER
• La touche ‘ENTER’ permet de confirmer la sélection, par exemple l’activation d‘un sousmenu sélectionné, ou la reprise d‘une valeur sélectionnée antérieurement.
6
4.
Instructions d‘utilisation
Réf.
Power Peak® C8 EQ-BID
8553
CARACTÉRISTIQUES TECHNIQUES
Tension de service :
nombre d‘éléments :
Courant de charge :
courant de décharge :
courant d’homogénéisation :
Capacité de décharge
charge de maintien :
Tension de fin de décharge :
12V CC (batterie d’auto) / 230V CA
(ne pas utiliser de chargeur pour batterie d‘auto !)
1 ... 24 éléments Cd-Ni/NiMH
1 ... 8 éléments LiIo (3,6V), LiPo (3,7V), LiFe (3,3V)
1 ... 12 éléments 2..0,24V) accu au plomb
0,1 ... 6,5A avec max. 135W (12V CC)
0,1 ... 6,5A avec max. 110 W (230 volts CA)
0,1 ... 5A avec au max. 25W
approx. 250mA
25W, courant régulé en conséquence
charge de maintien C/20
(uniquement Cd-Ni et NiMH)
0,8 V par élément Cd-Ni et NiMH,
3,0V par élément LiPo, LiIo
2,5V par élément LiFe
1,7V par élément d’accu au plomb
Commutation en fin de charge :
Cd-Ni / NiMH :
automatique, système numérique Delta-Peak
Plomb et Lithium :
automatique, en fonction de la tension, selon la procédure
CC-CV
encombrement :
180 x 145 x 70 mm
Fonctions :
charger, décharger, mode cyclique, équilibrer
Fonctions de protection :
entrée :
protection contre les inversions de polarité
sortie :
protection contre les inversions de polarité, protection contre
les courts-circuits
Remarque :
lorsque la tension d‘entrée choit en mode CC sous 11 volts, le courant de sortie est réduit
systématiquement de 1 ampère.
Motif : lorsqu‘une batterie de voiture délivre moins de 11 volts, (à l‘entrée du chargeur et non
sur les pôles de la batterie) on peut en déduite que la charge de la batterie est „faible“. La
batterie subit une moindre charge du fait du retrait automatique du courant de charge. Sans
cette fonction, la tension de la batterie continuerait de choir et le chargeur s‘arrêterait en présence d‘une tension insuffisante. Il est ainsi possible également de charger longtemps des
batteries faibles.
Courants de charge maximaux en mode CA ou en mode CC :
Mode CA :
jusqu‘à 16,5 volts tension de l‘accu : 6,5 A
Mode CC :
jusqu‘à 20,5 volts tension de l‘accu : 6,5 A
Le courant diminue avec des tensions d‘accu plus élevées.
Recommandations concernant la charge des accus au Lithium sans cordon-capteur :
La charge d‘accus au Lithium est possible également sans cordon-capteur de tension en
présence du système BID. Toutefois en l‘occurrence l‘accu n‘est pas équilibré et le nombre
des éléments n‘est pas surveillé !
7
5.
Instructions d‘utilisation
Réf.
Power Peak® C8 EQ-BID
8553
MISE EN SERVICE DU CHARGEUR
Raccorder le chargeur à une batterie au plomb 12 volts de voiture ou avec le câble
d‘alimentation (type 60320 C13) au secteur. Respectez impérativement les polarités (rouge =
plus /noir = moins). Sur l’écran apparaît brièvement la mention “Power Peak C8 EQ-BID V1.0”
puis “PAS D‘ACCU”, en l’absence d’accu raccordé.
5.1
BRANCHEMENT DE L‘ACCU
Important !!! Avant de raccorder un accu au chargeur vérifiez exactement les paramètres
établis. Si le réglage initial est incorrect, l‘accu risque d‘être endommagé, d‘exploser ou de
prendre feu. Pour éviter tout court-circuit avec les fiches banane, raccorder toujours d‘abord
les cordons de charge au chargeur avant de les raccorder aux accus. Pour débrancher l‘accu
du chargeur, procéder dans l‘ordre inverse. Observer les polarités !
Branchement du capteur de tension (accu Li) :
1.Le cordon capteur d’alimentation en provenance de l’accu doit être raccordé avec le brin noir
du chargeur au niveau du repère fléché. Le repère fléché indique le pôle de masse (moins).
Observer les polarités ! Avec des connecteurs d‘accu de réalisation personnelle ou avec le
cordon capteur de tension, observez les polarités ! Pour la charge d‘éléments au Lithium il
faut que le cordon capteur de tension soit toujours en place, sauf si un élément est chargé
individuellement !
Pour la configuration de la puce/clé BID il faut absolument veiller à la mise au point correcte des paramètres de l‘accu (risque de destruction) ! Lorsqu‘un accu est équipé d‘un
cordon capteur de tension, il faut, pour des motifs de sécurité, que celui-ci demeure
systématiquement en place.
“+”==rouge
rot
“+”
“-” =“-”schwarz
= noir
8
Instructions d‘utilisation
Réf.
Power Peak® C8 EQ-BID
8553
Cet exemple de la page 8 n’est mentionné qu’à titre de documentation et est censé représenter le raccordement du cordon capteur d’alimentation à l’égaliseur.
Adaptateur EQ
robbe-PQ réf. 8213
6.
Adaptateur EQ
robbe-JST/XH réf. 8214
Adaptateur EQ
robbe-TP/FP réf. 8215
ÉCRAN DE TRAVAIL
Mémoire d‘accu
Affichage
d‘état
Type d‘accu
tension
actuelle
de l‘accu
Courant de
charge ou de
décharge
temps écoulé
Affichage de la capacité
Pendant une procédure de charge ou de décharge, l‘utilisateur est informé par cet écran
sur toutes les caractéristiques dont il a besoin.
Dans la ligne du haut apparaît la mémoire interne de l‘accu (par exemple 1 à 5) ou lorsqu‘il
est raccordé, BID “B”. La touche “EDIT” permet d‘accéder à la mise au point “ÉDITER
DONNÉES” (Seite 11, chap. 8) ou “MISES AU POINT” (Seite 13, chap. 9). La mémoire
interne peut être directement mise au point sur l‘écran de travail. Pour ce faire, actionnez
la touche “ENTER” et sélectionnez la mémoire à l‘aide des touches à flèches. Ensuite,
confirmez la sélection de la mémoire avec la touche “ENTER”.
Dans la ligne du haut, 2e colonne, apparaît l‘état du chargeur (‘C’ pour charger, ‘D’ pour
décharger, ‘D-C’ pour décharger-charger, “R” pour en ordre de marche (Ready), “N” pour
pas d‘accu (No Battery), ‘F‘ pour fin (Finish). Le type de l‘accu peut être déterminé dans la
ligne du bas par les abréviations suivantes : PB= plomb, NC= Cd-Ni, NH= NiMH, LP= LiPo,
LI= LiIo et LF= LiFe et LS= Lithium Storage (programme de stockage Lithium).
Il est également possible de modifier le courant au cours d‘une procédure de chargedécharge. Pour rendre cela possible, il faut actionner la touche ENTER” puis régler ensuite
le courant en conséquence avec les touches à flèche. Validez ensuite la nouvelle saisie à
l‘aide de la touche “ENTER”.
9
7.
Instructions d‘utilisation
Réf.
Power Peak® C8 EQ-BID
8553
PARAMETRES DANS LE MENU PRINCIPAL SANS BID
Sélectionnez le menu à l‘aide de la touche “VIEW”. Avec les touches “+” et “-” ou le potentiomètre de sélection (Select Wheel) il est possible de faire apparaître les paramètres
suivants.
TENSION D‘ENTRÉE
Affichage de la tension d‘entrée
AFFICHAGE DES DERNIÈRES CHARGES D‘ACCU (M1 ...M5)
Cette fonction permet de reconstituer les cinq dernières charges en ce qui concerne simplement la capacité chargée. Le fait d‘actionner la touche “ENTER”
permet de sélectionner le paramètre. Les touches
“+”/ ”-” ou le potentiomètre de sélection “Select WHEEL” permet maintenant d‘afficher la
mémoire souhaitée Le fait d‘actionner de nouveau la touche “ENTER” permet d‘annuler
la sélection.
AFFICHAGE DES DERNIÈRES DÉCHARGES D‘ACCU (M1 ...M5)
Cette fonction permet de reconstituer les cinq dernières décharges en ce qui concerne simplement
la capacité déchargée. Le fait d‘actionner la touche
“ENTER” permet de sélectionner le paramètre. Les touches “+”/ ”-” ou le potentiomètre
de sélection “Select WHEEL” permet maintenant d‘afficher la mémoire souhaitée Le fait
d‘actionner de nouveau la touche “ENTER” permet d‘annuler la sélection.
AFFICHAGE DE LA TENSION MAX. DE L‘ACCU
Tension maximale de l‘accu au cours de la procédure
de charge/décharge.
AFFICHAGE DE LA TENSION MOYENNE DE L‘ACCU
Affichage de la tension moyenne de l‘accu au cours
de la procédure de charge/décharge.
AFFICHAGE DE L‘ÉNERGIE CHARGÉE / DÉCHARGÉE
Affichage de l‘énergie chargée ou déchargée.
L‘affichage est présenté en Wh (watt par heure).
CARACTÉRISTIQUES ÉGALISEUR
Si plus de 6 éléments lithium sont raccordés, apparaissent alternativement deux écrans.
À noter : La tension de chacun des éléments n‘apparaît que lorsque le cordon capteur de
tension est raccordé.
10
Instructions d‘utilisation
Réf.
Power Peak® C8 EQ-BID
8553
Élément 1
Élément 6
Élément 8
7.1 PARAMÈTRES SUPPLÉMENTAIRES DANS LE MENU PRINCIPAL AVEC BID
Après avoir raccordé la puce/clé BID il est possible d‘extraire les caractéristiques suivantes
de l‘accu.
AFFICHAGE DE LA CAPACITÉ MAXIMALE CHARGÉE
Affichage de la capacité maximale de l‘accu chargée
jusqu‘à présent. Lorsque, au cours d‘une procédure de
charge la valeur sauvegardée jusqu‘alors est dépassée, la nouvelle valeur la remplace automatiquement.
AFFICHAGE DE LA CAPACITÉ MAXIMALE DÉCHARGÉE
Affichage de la capacité maximale de l‘accu déchargée jusqu‘à présent. Lorsque, au cours d‘une procédure de décharge la valeur sauvegardée jusqu‘alors
est dépassée, la nouvelle valeur la remplace automatiquement.
AFFICHAGE DES CYCLES DE CHARGE
Affichage des cycles de charge de l‘accu exécutés
jusqu‘à présent. Après l’achèvement de la procédure
de charge, compteur augmente d’une unité.
AFFICHAGE D‘UNE DATE DÉTERMINÉE
Affichage d‘une date déterminée sur la puce/clé BID
(par exemple, date de l‘achat de l‘accu).
AFFICHAGE DE LA TENSION MAX. DE L‘ACCU
Tension maximale de l‘accu au cours de la procédure
de charge/décharge.
8.
ÉDITER DES CARACTÉRISTIQUES SANS BID
À l‘aide de la touche “EDIT”, sélectionner le menu “ÉDITER CARACTÉRISTIQUES” et y
accéder à l‘aide de la touche “ENTER”. Avec les touches “+” et “-” ou le potentiomètre de
sélection (Select Wheel) il est possible de faire apparaître les paramètres suivants.
11
Instructions d‘utilisation
Réf.
Power Peak® C8 EQ-BID
8553
MÉMOIRE INTERNE
Ce menu permet de mettre au point jusqu‘à cinq
divers types d‘accus avec les paramètres appropriés qui sont sauvegardés et préservés une fois que
l‘appareil est arrêté. Le chiffre clignote et peut être modifié à l‘aide des touches à flèche
ou de la “roue de sélection”. Si vous sélectionnez une nouvelle mémoire, apparaissent les
caractéristiques sauvegardées précédemment telles que le courant de charge, la capacité,
le nombre d‘éléments, etc. Il est également possible de mettre l‘emplacement de mémoire
au point à l‘aide de l‘écran de travail. Pour ce faire, actionnez la touche “ENTER” et sélectionnez le numéro de mémoire.
MISE AU POINT DU TYPE D‘ACCU
Le fait d‘actionner la touche “ENTER” permet de
sélectionner le paramètre type d‘accu. La touche “+”,
”-” ou le potentiomètre de sélection “Select WHEEL”
permettent maintenant d‘établir le type d‘accu souhaité. Pour préparer un accu LiIon ou un
accu LiPo pour le stockage, il est possible d‘établir la fonction “L3,9V”. Avec cette fonction,
l‘accu est porté à une tension de stockage de 3,9 volts/élément. Ainsi l‘accu est-il prêt
pour un stockage prolongé. Le fait d‘actionner de nouveau la touche “ENTER” permet de
sauvegarder la sélection.
MISE AU POINT DU NOMBRE D‘ÉLÉMENTS
Il faut ensuite sélectionner le paramètre “ÉLÉMENTS
D‘ACCU”. Comme décrit précédemment, il est possible ici également d‘établir le nombre d‘éléments
souhaités. Actionner ensuite la touche “ENTER” pour sauvegarder la sélection.
ÉTABLISSEMENT DE LA CAPACITÉ DE L‘ACCU
Après avoir actionné la touche “ENTER”, le paramètre
qu‘il est possible de régler clignote. Il est possible
maintenant de sélectionner la capacité de l‘accu.
Après sélection, rappuyer sur la touche ‘ENTER’.
ÉTABLISSEMENT DU COURANT DE CHARGE
Ce paramètre permet d‘établir le courant de charge.
Le courant de charge maximal dépend toujours du
nombre d’éléments et de la tension de l’accu. Le processeur du chargeur limite le courant de charge maximal en fonction de la puissance de
charge.
ÉTABLISSEMENT DU COURANT DE DÉCHARGE
Ce paramètre permet d‘établir le courant de décharge.
Le courant de décharge maximal dépend toujours du
nombre d’éléments ou de la tension de l’accu. Le processeur du chargeur limite le courant de décharge maximal.
12
8.1
Instructions d‘utilisation
Réf.
Power Peak® C8 EQ-BID
8553
ÉDITER DES CARACTÉRISTIQUES AVEC BID
À noter : Ce n‘est que lorsque la puce/clé BID est raccordée que ce paramètre supplémentaire et les caractéristiques qu‘il contient apparaissent. Par ailleurs, les autres paramètres
réglables sont déjà récapitulés sur la page 12. Seules les différences sont donc explicitées.
AFFICHAGE D‘UNE DATE DÉTERMINÉE
Affichage d‘une date déterminée sur la puce/clé BID
(par exemple, date de l‘achat de l‘accu).
9.
RÉGLAGES
Avec la touche “EDIT”, sélectionnez le menu “MISES AU POINT” puis actionnez ensuite
la touche “ENTER”. Avec les touches “+” et “-” ou le potentiomètre de sélection (Select
Wheel) il est possible de faire apparaître les paramètres suivants.
MISE AU POINT DE LA TOLÉRANCE DE COMMUTATION AVEC LES ACCUS AU
LITHIUM
Dans le meu “CHARGER Li” il est possible d‘établir la
commutation en fin de charge des accus au Lithium.
Avec la position de commutation en fin de charge
“NORMAL” la charge est interrompue avec C/20 et avec la position de commutation en
fin de charge “RAPIDE” avec C/10. Avec la position de commutation “RAPIDE” en fin de
charge, l‘accu est chargé rapidement mais ne dispose ensuite que de 95% de sa capacité
environ.
MISE AU POINT DU VOLUME
Cette fonction permet de réguler le volume des signaux sonores. Les trois positions suivantes sont disponibles : COUPÉ, RÉDUIT et FORT.
MISE AU POINT DE LA MÉLODIE
Dans ce menu il est possible de choisir entre trois
types de mélodies pour la commutation en fin de
charge.
MISE AU POINT DE LA LANGUE DU MENU
Pour sélectionner la langue souhaitée (allemand, anglais, français, italien, espagnol ou tchèque) comme
décrit précédemment, avec la “ROUE DE SÉLECTION” ou les touches à flèche, naviguez sur le point de menu “LANGUE”. Sélectionnez
avec “ENTER” et établissez la langue souhaitée avec les touches à flèche. Une fois la
langue sélectionnée, actionnez les touches “ENTER” pour confirmer.
Pour activer le changement, naviguez sur “FIN” et confirmez avec “ENTER”.
13
Instructions d‘utilisation
Réf.
Power Peak® C8 EQ-BID
8553
10. PROCÉDURE DE CHARGE / DE DÉCHARGE AVEC PUCE/CLÉ BID
Avant de pouvoir lancer une procédure de charge ou de décharge, il faut que les réglages
suivants soient établis afin que l’appareil soit en mesure de traiter correctement la procédure :
• raccorder l‘accu en veillant à ce que les polarités soient respectées (Cf. schéma de
connexion, page 8.)
• établir le type d‘accu
• établir le nombre d‘éléments
• mise au point de la capacité
• régler le courant de charge/décharge
Lorsque les paramètres ont été établis comme décrit précédemment, il est possible de
lancer la procédure. Pour charger l‘accu raccordé (CHARGER), actionner une fois la touche “MODE”. Une nouvelle pression sur la touche en l‘espace d‘une seconde engage la
fonction de décharge (DÉCHARGE). Lorsqu‘on actionne trois fois la touche “MODE”, on
établit la fonction cyclique de décharge/charge (Cycle DC-CH). Les touches “+”, ”-” ou le
potentiomètre de sélection “Select WHEEL” permettent maintenant d‘établir une reprise du
cycle de 1 à 99 fois. Lorsqu’après une sélection de Mode aucune autre saisie n‘intervient
(pendant approx. 2 s) le chargeur engage la procédure sélectionnée. Pour interrompre la
procédure en cours, actionner la touche “MODE”.
11. PROCÉDURES DE CHARGE / DE DÉCHARGE AVEC UNE PUCE/CLÉ BID
Les illustrations ci-dessous explicitent l‘emploi d‘une puce BID et d‘une clé BID. Raccordez
d‘abord la puce BID via le cordon-adaptateur ou la clé BID directement au chargeur (Cf.
l‘illustration ci-dessous). Pour contrôler les caractéristiques BID avant la charge/décharge,
actionnez la touche “ENTER”. Lorsque les paramètres de charge sont corrects sur la puce,
il est possible de sélectionner le Mode approprié à l‘aide de la touche “MODE”. Pendant la
procédure de charge ou de décharge, les informations essentielles concernant la procédure sont sauvegardées sur la puce/clé BID.
Concavité
vers le haut
14
Instructions d‘utilisation
Réf.
Power Peak® C8 EQ-BID
8553
1. Raccorder l‘accu (avec des accus un Lithium raccorder également le cordon capteur de
tension) en observant les polarités, Cf. page 8.
2. Raccorder la puce/clé BID.
3. Appuyer une fois sur la touche “MODE”. La procédure de charge démarre après approximativement 2 secondes. Alternativement il est également possible d‘actionner 2x pour
démarrer une procédure de décharge et 3x pour lancer une procédure de décharge/
charge (chargement cyclique). La procédure sélectionnée peut être arrêtée par une
nouvelle pression sur la touche.
À noter :
Avec le système BID il est également possible de charger ou de décharger des accus Li
sans raccorder le cordon capteur de tension !
La procédure n‘est toutefois pas recommandée.
12. FIN D’UNE PROCÉDURE DE CHARGE / DE DÉCHARGE
Le chargeur arrête automatiquement la procédure de charge ou de décharge. Le processeur tient alors compte des paramètres de charge ou de décharge. Appliquer systématiquement la procédure optimale appropriée à chaque type d’accu. À la fin de la procédure
retentit un séquence de bips en fonction de la mise au point établie.
15
Instructions d‘utilisation
Réf.
Power Peak® C8 EQ-BID
8553
13. MESSAGES DE DÉRANGEMENT
Pour garantir un déroulement sûr de la procédure de charge ou de décharge, le chargeur
Power Peak® C8 EQ-BID est équipé de dispositifs de sécurité. Dès qu‘un dysfonctionnement apparaît, un message approprié s‘affiche sur l‘écran et un signal sonore retentit. Il
est possible de valider les messages de dérangement suivants après en avoir supprimé la
cause, en actionnant une touche quelconque.
Tension d‘admission en dessous de 10,5 volts
Nombre d‘éléments sélectionné incorrect
Les caractéristiques sauvegardées sur la puce/clé BID
ne peuvent pas être traitées par le chargeur Power
Peak® C8 EQ-BID, par exemple Lithium nombre
d‘éléments
d‘élé
t > 8 élé
éléments.
t
Caractéristiques incorrectes sur la puce/clé BID. La
puce/clé BID doit être réindexée. Après validation à
l‘aide d‘une touche quelconque, c‘est automatiquement le menu “ÉDITER CARACTÉRISTIQUES” qui s‘ouvre. Il faut dès lors ressaisir les
caractéristiques de l‘accu.
Le chargeur est surchauffé !
Origine possible, un ventilateur défectueux ou une
grille d‘aération de ventilateur bouchée. Pour le tester, retirez l‘accu et coupez le chargeur. Remettez le
chargeur en marche, raccordez l‘accu et lancez brièvement une procédure de décharge. Si
le ventilateur ne démarre pas, retirez l‘accu et coupez immédiatement le chargeur. Envoyez le chargeur en réparation dans nos ateliers du service après-vente (tenez compte des
exigences concernant la garantie, page 21, chap. 17).
16
14.
Instructions d‘utilisation
Réf.
Power Peak® C8 EQ-BID
8553
STRUCTURE DU MENU
VIEW
EDIT
(VISUALISATION)
ENT
ENT
ENT
VIEW
(VISUALISATION)
ENT
17
15.
Instructions d‘utilisation
Réf.
Power Peak® C8 EQ-BID
8553
CONSIGNES DE SÉCURITÉ
• Le chargeur Power Peak® C8 EQ-BID est conçu pour la charge, la décharge et
l’équilibrage d‘accus rechargeables Cd-Ni, NiMH, au plomb et au lithium. Pas de piles
sèches la charge de piles sèches risque de provoquer une explosion.
• Le chargeur est conçu pour une alimentation de 12 V CC et 230 volts CA, ne jamais le
mettre en œuvre avec une autre tension.
• Protéger impérativement l‘appareil de la poussière, de la saleté et de l‘humidité.
• Ne pas exposer l‘appareil à des températures élevées ou trop basses, ne jamais
l‘exposer au rayonnement solaire.
• Éviter les chocs et les charges de pression et ne pas soumettre le chargeur à de fortes
vibrations.
• Ne jamais disposer le chargeur ni les accus en charge sur des surfaces inflammables.
Ne jamais mettre l‘appareil en service dans le voisinage de matériaux ou de gaz inflammables.
• Ne pas ouvrir l’appareil lorsqu’il est sous tension !
• Ne jamais laisser l‘appareil en fonction ni les accus en charge sans surveillance.
L‘appareil peut chauffer sensiblement pendant son fonctionnement normal.
• Lors de la mise en place du chargeur, veiller à ce que l’air puisse circuler au niveau des
ouvertures de refroidissement.
• Si l‘appareil n‘est pas utilisé pendant un certain temps, le désolidariser du secteur et en
retirer les accus éventuellement en place.
• Ne jamais recharger des accus qui viennent d‘être chargés.
• Ne pas charger d‘accus chauds. Laisser refroidir les accus à température ambiante.
• Ne charger que des accus constitués d‘éléments de même capacité et de même
marque.
• Ne jamais raccorder deux accus en parallèle sur une sortie pour les charger, ne raccorder qu‘un pack d‘éléments.
• Observer impérativement les polarités de l‘accu et éviter les courts-circuits.
• Observer impérativement les consignes fournies par le fabricant.
• Vérifiez toujours systématiquement les mises au point du chargeur Power Peak® C8
EQ-BID. Des réglages inappropriés sont susceptibles d‘abîmer le chargeur.
• Veiller à ne pas endommager le boîtier ni les cordons.
• La manipulation d‘accus composés de nombreux éléments demande une certaine prudence. Veiller absolument à ce que l‘isolation soit parfaite, risque d‘électrocution.
• Nous ne sommes pas responsables des groupements d‘accu ou des cordons capteurs
de confection personnelle.
18
Instructions d‘utilisation
Réf.
Power Peak® C8 EQ-BID
8553
16. MANUEL DE TRAITEMENT DES ACCUS
La manipulation des accus est soumise à un certain nombre de consignes de sécurité qu‘il
faut impérativement observer pour éviter les dommages matériels et personnels. La mise
en œuvre d‘accus engage votre responsabilité.
16.1 ACCUS CADMIUM-NICKEL (Cd-Ni)
Pour les accus Cd-Ni nous recommandons les taux de charge suivants :
accus à haute énergie, 1-2 C, tenir compte des consignes du fabricant.
accus à courant élevé, 2 -3 C, cas extrême jusqu‘à 5 C. Tenir compte des indications de
courant maximales fournies par le fabricant. Vérifier si les connecteurs et les cordons de
charge sont adaptés aux courants de charge sélectionnés.
16.2 ACCUS HYBRIDES NICKEL-MÉTAL (NIMH)
Pour les accus NiMH nous recommandons les taux de charge suivants :
accus à haute énergie, 0,5 à 1 C, tenir compte des consignes du fabricant.
Accus à courant élevé, généralement 1C, certains types d‘accus peuvent être chargés
avec un taux de 1,5...2C. Observer les indications de courant de charge fournies par le
fabricant de l‘accu.
16.3 ACCUS AU PLOMB (PB)
• Les accus au plomb à gel utilisés généralement par les modélistes sont étanches et
donc peu dangereux.
• Les batteries d‘auto avec un électrolyte à base d‘acide sulfurique sont par contre très
dangereuses à cause des produits et de la production de gaz en présence d‘une charge
excessive.
• Les accus au plomb ne doivent jamais entrer en contact avec une flamme, danger
d‘explosion.
• Ne jamais ouvrir de force des accus au plomb, danger de brûlures par acide.
• Ne jamais mettre d‘accu au plomb en court-circuit, danger de brûlure et d‘explosion.
• Ne jamais mettre la peau ou les yeux en contact avec l‘électrolyte. Si cela se produisait
par inadvertance, rincer immédiatement et abondamment à l‘eau claire et consulter un
médecin. Ne pas mettre d‘élément ou d‘accu dans la bouche, risque d‘empoisonnement.
• Un accu au plomb chargé n‘est pas un jouet. Conserver les accus hors de portée des
enfants.
• Pour la charge et la décharge, tenir impérativement compte des consignes fournies par
le fabricant.
• Un accu au plomb est susceptible de dégager un gaz pendant la charge. Veillez à
assurer une bonne ventilation. Une surcharge provoque l‘apparition de „gaz explosif“
constitué d‘un mélange d‘hydrogène et d‘oxygène. Risque d’explosion.
19
Instructions d‘utilisation
Réf.
Power Peak® C8 EQ-BID
8553
16.4 ACCUS AU LITHIUM (LiPo, LiIo, LiFe).
GÉNÉRALITÉS
Il existe différents types d‘accus au lithium :
1. les accus au lithium ions avec électrolyte liquide et 3,6 volts de tension nominale, la
première génération des accus au lithium, peu utilisés dans le modélisme.
2. les accus au lithium ions (Lilo) avec électrolyte liquide et 3,6 volts de tension nominale,
la seconde génération des accus au lithium, avec enveloppe en métal.
3. Les accus lithium ions polymères (LiPo) à gel électrolytique et 3,7 volts de tension nominale, la génération actuelle des accus au lithium, également appelés LiPo. La présence
du gel électrolytique réduit la pression dans l‘élément à la charge et à la décharge voilà
pourquoi un film suffit pour l‘enveloppe. Grâce à leur faible poids et à leur forte densité
énergétique ces accus se sont rapidement répandus dans les diverses disciplines du
modélisme.
4. Les accus au fer Lithium (LiFe) disposant d’une tension nominale de 3,3 volts, à l’heure
actuelle la génération la plus récente des accus au Lithium également appelés A123. À
cause des taux de décharge élevés et de la compacité de l’énergie, ce type d’accu va
se répandre très rapidement dans le monde du modélisme.
CAPACITÉ DIFFÉRENTE
Lorsque plusieurs éléments sont réunis en un groupe et déchargés avec un courant élevé,
les éléments s‘échauffent différemment étant donné que les éléments placés à l‘intérieur
dispersent moins leur chaleur.
La résistance interne change et la capacité énergétique est donc réduite. Cet élément est
donc déchargé plus tôt et le danger existe qu‘il soit déchargé en deçà de la tension de
coupure en fin de décharge.
Particulièrement avec des températures externes très basses, apparaissent d‘énormes
différences de capacité. Lorsque des accus LiPo sont par exemple utilisés sur les hélicoptères électriques, l‘élément se trouvant à l‘avant est particulièrement bien refroidi par la circulation de l‘air alors que les éléments se trouvant à l‘intérieur s‘échauffent sensiblement.
L‘élément froid dispose donc d‘une capacité moindre et le danger existe que l‘élément le
plus froid passe en dessous de la tension de coupure en fin de décharge.
C‘est pourquoi il est recommandé de ne décharger les éléments LiPo que jusqu‘à approx.
3 volts afin d‘éviter une détérioration définitive des éléments. Nous recommandons en
l‘occurrence l‘équilibreur MC-Balancer réf. 8636 (jusqu‘à 7 éléments) ou MC Balancer
14S réf. 8643 (jusqu‘à 14 éléments) qui surveille la tension individuelle des éléments LiPo.
Par ailleurs, pour la charge suivante il faut absolument veiller à ce que les éléments soient
chargés au même niveau.
La charge d‘éléments autonomes raccordés en parallèle ne pose de pas de problème étant
donné que dans ce cas le courant global se reporte sur chacun des éléments en fonction
du niveau de tension.
Nous ne portons aucune responsabilité pour les dommages causés par une manipulation non conforme des éléments. Tenir compte aussi des consignes de sécurité
20
Instructions d‘utilisation
Réf.
Power Peak® C8 EQ-BID
8553
À cause des conditions de fabrication normales et surtout à cause des nuances de température à la décharge des éléments situés à l’intérieur par rapport aux éléments situés
à l’extérieur qui sont toujours mieux refroidis que les éléments intérieurs, les éléments
polymères au Lithium présentent toujours des nuances au niveau de leurs caractéristiques
mutuelles. Après plusieurs cycles, les éléments disposent systématiquement et forcément
de niveaux de tension différents.
17. GARANTIE
Nos articles sont naturellement couverts par la garantie légale de 24 mois. Si vous souhaitez faire valoir une requête justifiée avec recours à la garantie, adressez-vous toujours
d’abord à votre vendeur qui vous assure la garantie et qui est responsable du suivi de
votre requête.
Les carences de fonctionnement, les défauts de fabrication ou les défauts matériels apparaissant pendant la garantie sont remplacés par nous gratuitement. Toute autre réclamation, par exemple de dommages secondaires, est exclue.
Le transport intervient franco de port de même que pour le renvoi. Les envois non affranchis ne seront pas pris en considération.
Nous ne sommes pas responsables des dommages dus au transport ou de la perte de
votre envoi. Nous recommandons une police d‘assurance appropriée. Expédier l‘appareil
au service après-vente du pays concerné.
Pour que les réclamations couvertes par la garantie puissent être traitées, il faut que
les conditions suivantes soient satisfaites :
• joindre le bon d‘achat à l‘envoi
• les appareils ont été exploités conformément aux prescriptions de la notice de mise en
œuvre
• les sources d‘alimentation employées sont celles qui ont été recommandées par robbe,
seules des pièces de rechange originales ont été utilisées
• absence de dommages dus à l‘humidité, à des interventions extérieures, à des inversions de polarité, à des surtensions, à des surcharges ou des dégradations mécaniques.
• joindre une description du dérangement ou du défaut afin d‘en faciliter la réparation.
18. EXCLUSION DE LA RESPONSABILITÉ
Cet appareil de charge est exclusivement conçu et habilité pour la charge des accus mentionnés dans cette notice. La Sté robbe Modellsport ne peut en aucun cas être tenue pour
responsable d‘une exploitation non conforme.. La société robbe Modellsport n‘est pas en
mesure de contrôler le respect des indications et des méthodes fournies par la notice de
maintenance et d‘exploitation, de mise en œuvre, d‘utilisation et de maintenance. Nous
ne pouvons donc être tenus pour responsables d‘aucune perte, d‘aucun dommage ni coût
dus à une utilisation ou une mise en œuvre inadéquates ou de quelque conséquence que
ce soit. Dans les limites du Droit et quels qu‘en soient les motifs les produits robbe directement à l‘origine de dommages ne peuvent être mis en cause ni donner droit au versement de dommages et intérêts. Ceci ne vaut pas dans le cas de directives contraignantes
lorsque les intentions sont malveillantes ou en présence de négligences grossières.
21
19.
Instructions d‘utilisation
Réf.
Power Peak® C8 EQ-BID
8553
ACCESSOIRES RECOMMANDÉS
cordon de charge de l‘accu
de l‘émetteur
Réf. F1415
cordon de charge de l‘accu
du récepteur
Réf. F1416
Puce BID sans cordon, pour
équiper d’autres groupements d’éléments
réf. 8472
Puce BID avec cordon
de 300 mm, pour équiper
d’autres groupements
d’éléments réf. 8473
Cordon BID de 300 mm
Réf. 8474
CLÉ BID
réf. 8888
Cordon-adaptateur 3S-XH
réf.4029
Cordon-adaptateur
2X3S EHR
réf.4023
Cordon-adaptateur
2X3S XH-EHR
réf. 4023XH
Cordon BID de 500 mm
Réf. 8475
Cordon-adaptateur
3 X 2S XH-EHR
réf.4031XH
22
Cordon-adaptateur
3x 2S EHR
réf.4031
20.
Instructions d‘utilisation
Réf.
Power Peak® C8 EQ-BID
8553
ADRESSE DES SERVICES TECHNIQUES APRÈS-VENTE
Land
Firma
Straße
Stadt
Telefon
Fax
0037-6-82 0827
0037-6-82 5476
0045-86-43 7744
Andorra
SORTENY
Santa Anna, 13
AND-00130 LES
ESCALDES
Dänemark
Nordic Hobby A/S
Bogensevej 13
8900 RANDERS
0045-86-43 6100
Deutschland
robbe-Service
Metzloser Str. 38
D-36355 Grebenhain
0049-6644-87-777 0049-6644-7412
England
robbe-Schlüter UK LE10-1UB
Leicestershire
0044-1455-63 7151 0044-1455-63 5151
Frankreich
S.A.V Messe
F-57730 Folschviller 0033-387-94 6258
Griechenland
TAG Models Hellas 18,Vriullon Str.
Italien
MC-Electronic
Niederlande/
Belg.
Jan van Mouwerik
Norwegen
Norwegian Modellers
Österreich
Schweden
Schweiz
BP 12
Via del Progresso
25
Slot de Houvelaan
30
Box 2140
143 41 Nea Philadelfia
I-36010 Cavazeale
(Vi)
0033-387-94 6258
0030-1-25 84 380
0030-1-25 33 533
00390-0444-94
5992
00390-0444-94
5991
NL-3155 Maasland
0031-1059-13 594
0031-1059-13 594
3101 TØNSBERG
0047-333-78-000
0047-333-78-001
A-1220 Wien
0043-01259-65
5214
0043-01259-1179
0046-18-71 2015
0046-18-10 8545
Robbe Service
Puchgasse 1
Minicars Hobby
A.B.
robbe Futaba
Service
Bergsbrunnagatan
75323 Uppsala
18
Baslerstrasse 67 a CH-4203 Grellingen 0041-61-741 23 22 0041-61 741 23 34
Slowakische
Rep.
Ivo Marhoun
Horova 9
CZ-35201 AS
00420 351 120 162
Spanien
robbe-Service
Metzloser Str. 38
D-36355 Grebenhain
0049-6644-87-777 0049-6644-87-779
Tschechische
Rep.
Ivo Marhoun
Horova 9
CZ-35201 AS
00420 351 120 162
Türkey
Formula Modelsports
35060 PinarbasiIzmir
0090-232-47 912
58
21.
0900-232-47 917
14
MISE AU REBUT DES ACCUS ET DES APPAREILS
Ne jeter les accus en aucun cas dans les ordures ménagères. Pour protéger l‘environnement, mettre les accus défectueux ou usés au rebut aux
endroits prévus à cet effet. Il s‘agit des endroits où l‘on peut acheter ces
piles et ces accus ou des déchetteries communales. Pour éviter les courtscircuits protéger les contacts nus avec des morceaux de ruban adhésif. Le
coût de recyclage des accus et de leur mise au rebut est contenu dans
leur prix d‘achat. Tous les magasins qui les vendent doivent reprendre les accus usés que
vous les ayez achetés à cet endroit ou non. Les accus sont recyclés. Ainsi les matériaux
qui les composent sont réintroduits dans les circuits de production. Respectez et protégez
l‘environnement.
23
Les appareils électroniques ne peuvent pas simplement être mis au rebut
avec les ordures ménagères. Le chargeur Power Peak® C8 EQ-BID est
ainsi muni du symbole ci-contre. Ce symbole signifie que les appareils
électriques et électroniques irréparables ou en fin de cycle d’exploitation
doivent être mis au rebut non pas avec les ordures ménagères mais dans
les déchetteries spécialisées. Portez le chargeur dans les collecteurs communaux appropriés ou un centre de recyclage spécialisé. Cette remarque
s’applique aux pays de la Communauté européenne et aux autres pays
européens pourvus d’un système de collecte spécifique.
22. DÉCLARATION DE CONFORMITÉ
Par la présente la Sté robbe Modellsport GmbH & Co. KG, déclare que cet appareil
répond aux exigences fondamentales et à d’autres prescriptions significatives de la directive appropriée de la Communauté européenne. L’original de la déclaration de conformité
se trouve dans l’Internet sur le site associée à la description de l’appareil concerné et
apparaît lorsqu’on clique le bouton portant le logo „Conform“.
robbe Modellsport GmbH & Co.KG
Metzloser Straße 38
D-36355 Grebenhain OT Metzlos/Gehaag
Telefon +49 (0) 6644 / 87-0
robbe Form ACBA
Sous réserve d‘erreur d‘impression et de modification technique.
Copyright robbe-Modellsport 2010
La copie et la reproduction, même partielles, sont soumises à l‘autorisation
écrite de la Sté robbe-Modellsport GmbH & Co.KG
Bedienungsanleitung
Operating instructions
Notice d’utilisation
Manuale d’istruzione
Manual de Uso
Návod k obsluze
Power Peak® C8 EQ-BID
No. 8553
Manuale d’istruzione
No.
Power Peak® C8 EQ-BID
8553
Stimato cliente,
ci rallegriamo che abbiate scelto il potente caricatore computerizzato Power Peak C8 EQBID dalla gamma robbe. Possedete un caricatore compatto con programmi di carica e
equalizzatore (bilancaitore) per la connessione alla rete 230V AC oppure a 12V DC.
Nonostante al facile utilizzo sono necessarie alcune conoscenze di base per l‘impiego di un
caricatore automatico versatile come il Power Peak C8 EQ-BID. Grazie a questo manuale
acquisirete rapidamente familiarità con l‘apparecchio.
Vi auguriamo tanto successo e divertimento con il vostro nuovo caricatore!
Precauzioni di sicurezza
Al termine di questo manuale troverete una lista di precauzioni esaustiva per
l‘utilizzo di caricatori e i diversi tipi di accumulatori.
Oltre a questo nel capitolo “Introduzione ai diversi tipi di accumulatore” sono racconti diversi consigli utili e interessanti.
Leggete completamente le avvertenze di sicurezza PRIMA del primo impiego
dell‘apparecchio.
Una manipolazione errata di caricatore o accumulatori può avere come conseguenza
l‘esplosione o l‘incendio di quest‘ultimi.
La lingua dei menù del caricatore può venir impostata come descritto a pagina 13
capitolo 9.
2
Manuale d’istruzione
No.
Power Peak® C8 EQ-BID
8553
Indice
Capitolo
Precauzioni di sicurezza
1.
Contenuto
2.
Descrizione generale
3.
Elementi di controllo
3.1 Funzioni elementi di controllo
4.
Dati tecnici
5.
Primo utilizzo caricatore
5.1 Connessione batterie
6.
Display
7.
Parametri nel menù principale senza BID
7.1 Parametri nel menù principale con BID
8.
Modifica dati senza BID
8.1 Modifica dati con BID
9.
Impostazioni
10.
Procedura di scarica/carica senza chip/chiavetta BID
11.
Procedura di scarica/carica con chip/chiavetta BID
12.
Fine di un ciclo di carica/scarica
13.
Messaggi d‘errore
14.
Struttura dei menù
15.
Precauzioni di sicurezza
16.
Introduzione ai vari tipi di accumulatori
16.1 Batterie nickel cadmio (NC)
16.2 Batterie nickel metallo idruro (NiMH)
16.3 Batterie al piombo (Pb)
16.4 Batterie al litio (LiPo, LiIo, LiFe)
17.
Garanzia
18.
Declinazione responsabilità
19.
Accessori consigliati
20.
Centri di assistenza
21.
Smaltimento batterie e apparecchiature
22.
Certificazione di conformità
3
Pagina
2
4
5
6
6
7
8
8
9
10
11
11
13
13
14
14
15
16
17
18
19
19
19
19
20
21
21
22
23
23
24
1.
Manuale d’istruzione
No.
Power Peak® C8 EQ-BID
8553
Contenuto
POWER PEAK® C8 EQ-BID No. 8553
Contenuto:
1 Caricatore Power Peak C8 EQ-BID 230V/12V
1 Chiavetta BID
1 Adattore bilanciatore (equalizer) JST XH (No. 8214) per la connessione di batterie LiPo
2-6S con presine JST-H (Lama, G47, Align).
4
2.
Manuale d’istruzione
No.
Power Peak® C8 EQ-BID
8553
Descrizione generale
Potente e esteticamente piacevole stazione di carica computerizzata con programmi di
carica per tutti i tipi più comuni di batterie. Con bilanciatore (equalizer) integrato per batterie
litio ioni (LiIo), Litio polimeri (LiPo) e litio ferro (LiFe). Corrente massima di carica 6,5A a
scelta da una batteria 12 Volt oppure dall‘alimentatore interno collegato alla rete 230 Volt.
Con il Power Peak C8 EQ-BID possono venir caricate batterie NC/NiMH da 1 fino a 24
celle oppure batterie Pb (piombo) da 1 fino a 12 celle (2...24V). Al termine della carica la
corrente viene interrotta quando la batteria è piena con il metodo Delta-Peak. Batterie al
litio e al piombo (Pb) vengono caricate secondo il metodo CC-CV.
5 memorie interne dell‘apparecchio permettono di salvare dati per le procedure di carica e scarica di cinque batterie.
Una caratteristica principale del Power Peak C8 EQ-BID è l‘innovativo sistema di identificazione batteria (BID). I tipi diversi di batteria sono in costante
aumento e ogni tipo di batteria ha bisogno la propria procedura di carica. Un
attimo di disattenzione può quindi avere conseguenze gravi per una preziosa
batteria.
Il rivoluzionario sistema BID della robbe offre una soluzione
geniale al problema. A ogni batteria viene assegnato una chiavetta BID piccola e leggera. Questa salva tutti i dati rilevanti
per la carica e la scarica della batteria. Per caricare rispettivamente caricare la batteria la chiavetta BID viene inserita nel
Power Peak C8 EQ-BID e vengono messi a disposizione tutti
i parametri necessari.
Deve venir premuto soltanto il tasto “MODE” e la procedura di carica rispettivamente di scarica ha inizio. Nessuna fastidiosa ricerca dei parametri corretti nel menù,
protezione massima da errori di programmazione e salvataggio dei dati rilevanti della batteria nella chiavetta
BID sono i vantaggi di questo sistema.
Grazie al salvataggio dei più importanti dati nella chiavetta BID questi possono venir facilmente visualizzati
sul display del caricatore. Questa funzione permette di
evitare l‘utilizzo di un PC e del relativo software per riuscire ad avere un‘idea dello stato
della batteria.
Oltre alle chiavette BID sono disponibili come accessorio anche dei chip BID (vedi pagina
22). Le funzioni sono le medesime, le dimensioni però sono più ristrette.
Una presa USB con funzione bootloader permette di aggiornare il software dell‘apparecchio
e mantenerlo sempre aggiornato.
5
3.
Manuale d’istruzione
No.
Power Peak® C8 EQ-BID
8553
Elementi di controllo
display
alimentazione
tasto EDIT
tasto “+” / “
tasto VIEW
Select Wheel”
tasto MODE
connettore batteria
tasto “-” /
connettore per
monitor di tensione
presa USB
per aggiornamenti
connettore
BID
tasto ENTER
3.1
Funzioni degli elementi di controllo
Tasto MODE Premendo
• 1x viene avviata un processo di carica
• 2x viene avviato un processo di scarica
• 3x viene avviato un ciclo di carica/scarica Il processo selezionato può venir interrotto
premendo nuovamente il tasto.
Tasto VIEW
• Visualizzazione dei diversi parametri del caricatore, ad esempio tensione in entrata.
Inoltre è possibile visualizzare la tensione di tutte le celle di una batteria LiPo premendo
questo tasto.
Tasto EDIT
• Attraverso il tasto “EDIT” si giunge nel menù parametri accumulatore e nel menù
d‘impostazione.
Tasto “+”/
• con questo tasto il valore di un parametro (tipo di batteria, numero di celle, ecc.) viene
incrementato di una unità e durante la navigazione nei menù viene selezionata la prossima voce. Il tasto possiede una funzione auto ripetente: mantenere premuto il tasto ha
lo stesso effetto che premerlo più volte.
Tasto “-”/
• con questo tasto il valore di un parametro (tipo di batteria, numero di celle, ecc.) viene
decrementato di una unità e durante la navigazione nei menù viene selezionata la precedente voce. Il tasto possiede una funzione auto ripetente: mantenere premuto il tasto
ha lo stesso effetto che premerlo più volte.
„Select Wheel“
• con il „Select Wheel“ si ottiene lo stesso effetto dei tasti “+”/”-” con un movimento rotatorio.
Tasto ENTER
• con il tasto ENTER avviene la conferma di un parametro selezionato, ad esempio
l‘attivazione di un sotto menù oppure il salvataggio di un valore impostato.
6
4.
Manuale d’istruzione
No.
Power Peak® C8 EQ-BID
8553
Dati tecnici
Tensione di alimentazione:
Numero di celle:
Corrente di carica:
Corrente di scarica:
Corrente bilanciatore:
Potenza di scarica:
Carica di mantenimento:
Tensione di fine scarica:
Termine carica:
NC / NiMH:
Piombo e litio:
Funzioni di protezione:
Entrata:
Uscita:
12V DC (batteria d‘automobile) / 230V AC
(non utilizzare caricatori per batterie d‘automobile!)
1 ... 24 celle NC / NiMH
1 ... 8 celle LiIo (3,6V), LiPo (3,7V), LiFe (3,3V)
1 ... 12 celle (2...24V) piombo
0,1 ... 6,5A e max. 135W (12V DC)
0,1 ... 6,5A e max. 110W (230V AC)
0,1 ... 5A e max. 25W
ca 250mA
25W, la corrente viene regolata di conseguenza
Corrente di mantenimento C/20
(solo per NC e NiMH)
0,8V a cella per NC e NiMH
3,0V a cella per LiPo, LiIo
2,5V a cella per LiFe
1,7V a cella per batterie al piombo
automatica, sistema digitale Delta Peak
automatica, dipendente dalla tensione, programma CC-CV
protezione inversione polarità
protezione inversione di polarità e corto circuito
Nota:
Se la tensione di entrata durante l‘utilizzo DC cade sotto i 11V, la corrente di entrambe le
uscite viene ridotta di 1A.
Motivo: Se una batteria di un‘automobile ha una tensione inferiore ai 11V (all‘entrata
dell‘apparecchio, non ai poli della batteria) è da presumere che sia “debole”. Diminuendo
automaticamente la corrente di carica viene diminuito il carico sulla batteria. Senza questa
funzione la tensione calerebbe ulteriormente e il caricatore si spegnerebbe per via della
tensione di alimentazione insufficiente. In questa maniera si può utilizzare il caricatore più
a lungo possibile anche con batterie deboli.
Correnti di carica massime durante utilizzo AC o DC:
Utilizzo AC:
Utilizzo DC:
Tensione batteria fino a 16,5V: 6,5A
Tensione di entrata fino a 20,5V: 6,5A
Per tensioni più alte si riduce la corrente.
Nota sulla carica di batterie al litio senza cavo bilanciatore:
La carica di batterie al litio è possibile anche senza cavo del bilanciatore a condizione che
venga utilizzato il sistema BID. La batteria però non viene bilanciata e non è possibile un
controllo del numero di celle.
7
Manuale d’istruzione
No.
Power Peak® C8 EQ-BID
8553
5.
Primo utilizzo caricatore
Connettete il caricatore a una batteria al piombo 12V oppure alla rete domestica con
l‘apposito cavo.
Prestate la massima attenzione alla giusta polarità. (rosso = più / nero = meno).
Sul display appare brevemente “Power Peak C8 EQ-BID V1.0” e poi “NESSUNA BATTERIA” quando non è connessa nessuna batteria.
5.1 Connessione batterie
Importante!!! Prima di connettere una batteria controllare con cura che i parametri impostati
siano giusti. Con delle impostazioni sbagliate la batteria può venir danneggiata, esplodere
oppure prendere fuoco. Per evitare un corto circuito con le presine a banana, connettete
i cavi di carica prima al caricatore e solo in un secondo momento alla batteria. Per scollegare la batteria seguite il procedimento inverso. Prestate attenzione alla polarità.
Cavo bilanciatore (batterie Li):
Il cavo bilanciatore della batteria deve venir connesso con il cavo nero corrispondente alla
freccia sul caricatore. La freccia indica la posizione del polo negativo. Prestate attenzione
alla polarità! Per batterie oppure cavi dell‘equalizzatore assemblati da voi stessi prestate
attenzione alla polarità! Durante la carica di celle al litio il cavo dell‘equalizzatore dovrebbe
sempre venir connesso, a meno che si tratti di una singola cella!
Prestate la massima attenzione che i parametri impostati sulla chiavetta, rispettivamente sul chip, BID siano corrette (pericolo di distruzione della batteria)! Se la
batteria è dotata di cavo dell‘equalizzatore questo, per motivi di sicurezza, è sempre
da collegare.
“+”==rosso
rot
“+”
“-” =
“-” schwarz
= nero
sensore di voltaggio
8
Manuale d’istruzione
No.
Power Peak® C8 EQ-BID
8553
L‘esempio di pagina 8 è solo per facilitare la visualizzazione del concetto e dovrebbe rendere chiara la modalità di connessione del cavo dell‘equalizzatore.
Adattatore EQ
robbe-PQ No.8213
6.
Adattatore EQ
robbe-JST/HX No.8214
Adattatore EQ
robbe-TP/FP No.8215
Display
Memoria batteria
Indicazione
stato
Tipo
batteria
Tensione
batteria
attuale
Corrente
di carica
risp. scarica
Tempo
trascorso
Indicazione capacità
Durante il processo di carica rispettivamente scarica vengono comunicate all‘utente, tramite questo display, tutte le informazioni necessarie.
Nella riga superiore viene mostrata la memoria batteria attiva al momento (ad esempio 1-5)
oppure “B” nel caso sia connesso un dispositivo BID. Premendo il tasto “EDIT” si giunge
al menù “IMPOSTAZIONE DATI” (pagina 11 capitolo 8) rispettivamente “IMPOSTAZIONI”
(pagina 13 capitolo 9). La memoria interna può venir impostata direttamente dal display.
Per fare ciò premere “ENTER” e con i tasti freccia scegliere la memoria desiderata. Premere di nuovo il tasto “ENTER” per confermare la selezione.
Nella seconda colonna della riga superiore viene mostrato lo stato del caricatore (“C” per
carica, “D” per scarica, “D-C” per scarica-carica, “R” per ready, “N” per no batteria, “F”
per finish). Il tipo di batteria può venir determinato nella riga inferiore tramite le seguenti
abbreviazioni: PB = piombo, NC = NiCd, MH = NiMH, LP = LiPo, LI = LiIo, LF = LiFe e LS
= Lithium Storage (programma di carica prima di periodi di inutilizzo per batterie al litio).
Anche durante il processo di carica-scarica può venir modificata la corrente. Per fare ciò
premere il tasto “ENTER”, a questo punto impostare la corrente con i tasti freccia. Quando
è stato raggiunto il valore desiderato confermarlo premendo nuovamente “ENTER”.
9
7.
Manuale d’istruzione
No.
Power Peak® C8 EQ-BID
8553
Parametri nel menù principale senza BID
Selezionare il menù tramite il tasto “VIEW”. Con i tasti “+”, “-” oppure „Select Wheel“ è
possibile visualizzare i seguenti parametri
Visualizzazione tensione di entrata
Visualizzazione degli ultimi processi di scarica (M1 ... M5)
Con questa funzione è possibile ricostruire gli ultimi
cinque processi di scarica, viene visualizzata però
solo la capacità prelevata. Premendo il tasto “ENTER”
viene selezionato il parametro. Con i tasti “+”, “-”
oppure „Select Wheel“ è possibile visualizzare la memoria desiderata. Premendo nuovamente il tasto “ENTER” avviene al deselezione del valore.
Visualizzazione tensione batteria massima
Tensione massima durante il processo di carica/scarica.
Visualizzazione tensione media batteria
Visualizzazione tensione media batteria durante il processo di carica/scarica.
Visualizzazione energia caricata / scaricata
Visualizzazione energia caricata rispettivamente scaricata. L‘unità di misura sono i watt ora (Wh).
Dati equalizzatore
Nel caso fossero connesso più di 6 celle litio vengono
visualizzati, in maniera alternata, due display.
Nota: La tensione delle singole celle viene visualizzata solo se il cavo dell‘equalizzatore è connesso!
10
Manuale d’istruzione
No.
Power Peak® C8 EQ-BID
8553
Cella 1
Celal 6
Cella 8
7.1 Parametri addizionali nel menù principale con BID
Dopo la connessione di una chiavetta / chip BID possono venir visualizzati i seguenti dati
della batteria.
Visualizzazione della capacità caricata massima
Visualizzazione della capacità caricata massima caricata. Se durante un futuro processo di carica questo
valore viene superato, il nuovo valore prenderà il
posto di quello vecchio.
Visualizzazione della capacità scaricata massima
Visualizzazione della capacità scaricata massima
caricata. Se durante un futuro processo di scarica
questo valore viene superato, il nuovo valore prenderà il posto di quello vecchio.
Visualizzazione cicli di carica
Visualizzazione dei cicli di carica subiti dalla batteria
finora. Alla fine di ogni ciclo il valore viene incrementato di 1.
Visualizzazione di una data impostabile
Visualizzazione di una data impostabile sulla chiavetta
/ chip BID (ad esempio data di acquisto della batteria).
Visualizzazione della tensione massima della batteria
Tensione massima della batteria durante un processo
di carica/scarica.
8.
Modifica dati senza BID
Selezionare il menù “IMPOSTAZIONE DATI” utilizzando il tasto “EDIT”, confermare con
il tasto “ENTER”. Con i tasti “+”,”-” oppure il „Select Wheel“ possono venir visualizzati i
seguenti parametri.
11
Manuale d’istruzione
No.
Power Peak® C8 EQ-BID
8553
Memoria interna
Attraverso questo menù è possibile impostare parametri per fino a cinque batterie distinte. I dati salvati
non vengono persi se l‘apparecchio viene spento. La
cifra lampeggia e può venir modificata con i tasti freccia oppure il „Select Wheel“. Selezionando una nuova memoria vengono visualizzati i dati
impostati in precedenza come corrente di carica, capacità, numero di celle, ecc. Il numero
della memoria può anche venir impostato dal display principale. Per fare ciò premere il
tasto “ENTER” e selezionare la memoria desiderata.
Impostazione tipo di batteria.
Premendo il tasto “ENTER” viene selezionato il parametro tipo batteria. Con i tasti “+”,”-” oppure il „Select
Wheel“ viene selezionato il tipo di batteria. Prima di
un periodo di inutilizzo prolungato per batterie LiIon e
LiPo è possibile impostare la funzione “L3,9V”. In questa maniera la batteria è preparata
in maniera ottimale per questo periodo. Premendo nuovamente il tasto “ENTER” il valore
viene salvato.
Impostazione numero celle
In seguito deve venir selezionate il parametro “CELLE
BATTERIA”. Come descritto in precedenza può venir
impostato il numero di celle. Infine premere il tasto
“ENTER” per salvare il valore.
Impostazione capacità batteria
Dopo aver premuto il tasto “ENTER” lampeggia il
parametro impostabile. È ora possibile impostare la
capacità della batteria. Dopo l‘impostazione premere
nuovamente il tasto “ENTER”.
Impostazione corrente di carica
Con questo parametro è possibile impostare la
corrente di carica. La corrente di carica massima
dipende dal numero di celle rispettivamente dalla tensione della batteria. Il processore del caricatore limita
la corrente di carica massima in funzione della potenza di carica.
Impostazione corrente di scarica
Con questo parametro è possibile impostare la corrente di scarica. La corrente di scarica massima
dipende dal numero di celle rispettivamente dalla
tensione della batteria. Il processore del caricatore
limita la corrente di scarica massima in funzione della
potenza di carica.
12
8.1
Manuale d’istruzione
No.
Power Peak® C8 EQ-BID
8553
Modifica dati con BID
Nota: questo parametro addizionale, e i relativi dati, vengono visualizzati solo nel caso sia
connessa una chiavetta o un chip BID. Inoltre i parametri impostabili sono già stati illustrati
a pagina 12. Vengono dunque messe in evidenza soltanto le differenze.
Visualizzazione di una data definibile
Visualizzazione di una data salvata sulla chiavetta /
chip BID (ad esempio la data di acquisto della batteria).
9.
Impostazioni
Selezionare il menù “IMPOSTAZIONI” con il tasto “EDIT” e in seguito confermare con
“ENTER”. Con i tasti “+”, “-” oppure il “Select Wheel” possono venir visualizzati i seguenti
parametri.
Impostazione tolleranza di fine carica per batterie al litio
Nel menù “CARICA-Li” può venir impostata la sensibilità per il termine della carica. Con l‘impostazione
“NORMALE” la carica viene interrotta a C/20 con
l‘impostazione “VELOCE” a C/10. Con l‘impostazione
“VELOCE” la batteria verrà caricata in minore tempo, dispone però solo del circa 95% della
capacità.
Impostazione volume
Con questa funzione viene regolato il volume dei segnali acustici. Sono a disposizione tre modalità: OFF,
BASSO, ON.
Impostazione melodia
In questo menù è possibile scegliere tra tre segnali
acustici diversi per segnalare il termine della carica.
Impostazione lingua menù
Per scegliere la lingua desiderata (Tedesco, Inglese, Francese, Italiano, Spagnolo oppure Ceco),
come descritto in precedenza, evidenziate la voce
“LINGUA” utilizzando i tasti freccia oppure il “Select
Wheel”. Selezionatela con “ENTER” e scegliete la lingua desiderata con i tasti freccia.
Dopo la scelta della lingua premete il tasto “ENTER” per confermare. Per attivare la modifica spostate il cursore su “FINE” e in seguito premete nuovamente “ENTER”.
13
10.
Manuale d’istruzione
No.
Power Peak® C8 EQ-BID
8553
Procedura di scarica/carica senza chip/chiavetta BID
Prima di poter iniziare con un processo di carica, rispettivamente scarica, devono venir
impostati i seguenti parametro. Questo per adattare in maniera ottimale il caricatore alla
batteria connessa.
Connettete la batteria, prestate attenzione alla giusta polarità (vedi schematica di connessione a pagina 8)
• Impostare tipo di batteria
• Impostare numero di celle
• Impostare la capacità
• Impostare correnti di carica e scarica
Dopo aver impostato, come descritto in precedenza, questi parametri, il processo può venir
avviato. Per caricare la batteria connessa (CARICA), premere una volta il tasto “MODE”.
Premendo il tasto nuovamente entro un secondo avvia la funzione di scarica (SCARICA).
Premendo tre volte di seguito il tasto “MODE” viene attivata la funzione ciclo (CICLO
DC-CH). Con i tasti “+”,”-” oppure con il “Select Wheel” è possibile scegliere il numero
di cicli da 1 fino a 99. Se dopo aver scelto la modalità non vengono premuti altri tasti, il
processo selezionato inizierà dopo circa 2 secondi. Per interrompere il processo premere
il tasto “MODE”
11.
Procedura di scarica/carica con chip/chiavetta BID
Le immagini illustrano l‘impiego di un chip BID e di una chiavetta BID. Collegate innanzitutto il chip BID attraverso il suo adattatore, rispettivamente la chiavetta BID direttamente
con il caricatore (vedi immagine sottostante). Per controllare i dati BID prima della carica /
scarica, premere il tasto “ENTER”. Se i paramenti sono corretti, premendo il tasto “MODE”,
può venir selezionata e avviata la modalità desiderata. Durante il processo di carica, rispettivamente di scarica, vengono salvati i dati più importanti del processo sulla chiavetta/
chip BID.
Depression
on top
14
Manuale d’istruzione
No.
Power Peak® C8 EQ-BID
8553
1. Collegare la batteria, (per batterie al litio collegare il cavo del bilanciatore) prestate
attenzione alla corretta polarità (vedi pagina 8).
2. Collegate la chiavetta / chip BID
3. Premete una volta il tasto “MODE”. Dopo circa 2 secondi ha inizio il processo di carica.
Alternativamente premete due volte il tasto per un processo di scarica e tre volte per un
ciclo di carica (scarica/carica).
Il processo selezionato viene interrotto se si preme nuovamente il tasto.
Nota:
Utilizzando il sistema BID possono venir caricate, rispettivamente scaricate, batterie al litio
senza connettere il cavo del bilanciatore. Questo però non è consigliato.
12. Fine di un ciclo di carica/scarica
Il caricatore termina automaticamente un ciclo di carica, rispettivamente carica. Il processore tiene conto dei parametri di carica e scarica. Per ogni tipo di batteria viene scelto un
programma ottimale. Alla fine del processo viene emesso, a dipendenza dalle impostazioni, una sequenza di “beep”.
15
Manuale d’istruzione
No.
Power Peak® C8 EQ-BID
8553
13. Messaggi d‘errore
Per garantire uno svolgimento sicuro di un ciclo di carica, rispettivamente di scarica, il
Power Peak C8 EQ-BID è dotato di dispositivi di sicurezza. Nel momento che si verifica
un errore, appare il messaggio corrispondente e vengono emessi dei “beep”. I seguenti
messaggi d‘errore possono venir chiusi con un tasto qualsiasi dopo che la causa è stata
eliminata.
Tensione in entrata inferiore ai 10,5V
Numero di celle impostato errato
I dati sulla chiavetta / chip BID non possono venir
elaborati dal Power Peak C8 EQ-BID. Ad esempio se
il numero di celle litio è superiore a 8.
Dati difettosi sulla chiavetta / chip BID. Il dispositivo
BID deve venir riprogrammato. Dopo aver chiuso
questo messaggio, appare automaticamente il menù
“IMPOSTAZIONE DATI”. I dati della batteria devono
venir immessi nuovamente.
Il caricatore si è surriscaldato!
La causa potrebbe essere una ventola difettosa
oppure una presa d‘aria ostruita. Per testare se
questo è il problema, scollegare la batteria e spegnere il caricatore. Riaccendete il caricatore, collegate la batteria e avviate brevemente un processo di scarica. Se la ventola
non dovesse accendersi, scollegare la batteria e spegnere il caricatore immediatamente.
Inviate il caricatore difettoso al servizio robbe (per favore tenere conto delle condizioni di
garanzia, pagina 21 capitolo 17).
16
14.
Manuale d’istruzione
No.
Power Peak® C8 EQ-BID
8553
Struttura dei menù
VIEW
EDIT
ENT
ENT
ENT
VIEW
ENT
17
15.
Manuale d’istruzione
No.
Power Peak® C8 EQ-BID
8553
Precauzioni di sicurezza
• Il Power Peak C8 EQ-BID è concepito solo per la carica, scarica e il bilanciamento di
batterie ricaricabili NC / NiMH, al piombo e al litio. Non ricaricare pile a secco. Pericolo
di esplosione
• Il caricatore è previsto per essere utilizzato con tensioni di 12V DC e 230V AC, non
utilizzarlo mai con altre tensioni.
• Proteggere il caricatore da polvere, sporcizia e umidità.
• Non esporre il caricatore a calore eccessivo o temperature eccessivamente basse e
proteggere dall‘irradiazione solare diretta.
• Evitare di esporre il caricatore a pressioni o urti, evitare anche forti vibrazioni.
• Non disporre mai le batterie collegate su una superficie combustibile. Non utilizzare mai
in vicinanza di materia o gas combustibili.
• Non aprire l‘apparecchio sotto tensione.
• Non lasciare mai il caricatore senza supervisione durante l‘utilizzo. L‘apparecchio può
riscaldarsi fortemente durante l‘utilizzo.
• Cercare di disporre il caricatore in maniera da avere la migliore circolazione d‘aria possibile.
• Scollegare dall‘alimentazione il caricatore, e eventuali batterie connesse, prima di lunghi
periodi di inutilizzo.
• Non ricaricare in maniera consecutiva diretta due volte la stessa batteria.
• Non ricaricare batterie fortemente riscaldate. Attendere che la batteria abbia raggiunto
temperatura ambiente.
• Possono venir collegate solo celle dello stesso tipo, stessa capacità e stesso produttore.
• Non collegare due batterie in parallelo a un uscita del caricatore, ricaricare una sola
batteria per volta.
• Prestare la massima attenzione alla polarità delle batterie e evitare i corto circuiti.
• Seguire in maniera esatta le indicazioni del produttore della batteria.
• Verificare con la massima attenzione le impostazioni del Power Peak C8 EQ-BID.
Impostazioni errate possono distruggere la batteria.
• Prestare attenzione a danni alla casse e ai cavi.
• Maneggiare batterie con grandi numeri di celle con cautela. Curare l‘isolazione per
evitare scosse elettriche.
• Per connettori e cavi del bilanciatore saldati o modificati dall‘utente non assumiamo
nessuna responsabilità.
18
Manuale d’istruzione
No.
Power Peak® C8 EQ-BID
8553
16. Introduzione ai vari tipi di accumulatori
Durante l‘utilizzo di batterie è necessario tenere conto di alcuno precauzioni di sicurezza
per evitare danni a persone o cose. Non assumiamo nessuna responsabilità.
16.1 Batterie nickel cadmio (NC)
Consigliamo le seguenti correnti di carica per batterie NC:
Batteria ad alta densità d‘energia, 1-2C, tenere conto delle indicazioni del produttore.
Batteria per alte correnti di scarica, 2-3C, estremo fino a 5C. Tenere conto di eventuali
correnti di carica massime date dal produttore. Verificare se presine e cavi possono sostenere una tale corrente.
16.2 Batterie nickel metallo idruro (NiMH)
Consigliamo le seguenti correnti di carica per batterie NC:
Batteria ad alta densità d‘energia, 0.5-1C, tenere conto delle indicazioni del produttore.
Batteria per alte correnti di scarica, solitamente 1C. Alcuni tipi di batteria anche 1,5---2C.
Tenere conto delle correnti di carica massime specificate dal produttore.
16.3 Batterie al piombo (PB)
• Le batterie al piombo al gel molto diffuse nel modellismo sono solitamente impermeabili
ai gas e quindi meno pericolose.
• Batterie d‘auto invece utilizzano acido solforico come elettrolita e sono molto pericolose,
per via dell‘acido solforico e la rapida formazione di gas nel caso di sovraccarica.
• Non portare mai a contatto batterie al piombo con una fiamma aperta, pericolo di esplosione.
• Non aprire mai batteria al piombo, pericolo di ferimento.
• Non mettere mai in corto circuito batterie al piombo, pericolo di combustione e di esplosione.
• Non portare mai elettrolita fuoriuscito a contatto con la pelle gli occhi. Nel caso dovesse
succedere sciacquare con tanta acqua immediatamente e consultare un medico. Non
mettere in bocca celle o batterie, pericolo di avvelenamento.
• Una batteria al piombo carica non è un giocattolo per bambini. Mantenere le batterie
fuori dalla portata dei bambini.
• Tenere conto delle raccomandazioni del relativo produttore per la carica e la scarica.
• Durante la carica possono fuoriuscire gas da una batteria al piombo, assicurate che ci
sia sufficiente circolazione d‘aria. Nel caso di una sovraccarica si forma un gas composto da idrogeno e ossigeno.
Pericolo di esplosione!
19
Manuale d’istruzione
No.
Power Peak® C8 EQ-BID
8553
16.4 Batterie al litio (LIPO, LiIo, LiFe)
Note generali
Esistono diversi tipi di batterie al litio:
1. Batterie ioni litio con elettrolita liquido e una tensione nominale di 3,6 Volt, la prima
generazione di batterie al litio, poco utilizzate in ambito modellistico.
2. Batterie ioni litio (LiIo) con elettrolita liquido e una tensione nominale di 3,6 Volt, la
seconda generazione di batterie al lito, con cassa in metallo.
3. Batterie litio polimeri (LiPo) con elettrolita sotto forma di gel e una tensione nominale
di 3,7 Volt. La generazione attuale di batterie al litio, chiamate anche LiPo. Per via
dell‘elettrolita sotto forma di gel si raggiungono pressioni più basse durante la carica e la
scarica. Grazie al basso e l‘elevata densità d‘energia, questo tipo di batteria si è diffuso
rapidamente in ambito modellistico.
4. Batterie litio ferro (LiFe) con tensione nominale di 3,3 Volt, al momento l‘ultima generazione di batterie al litio, chiamate anche A123. Per via delle elevati correnti di scarica
e densità d‘energia si diffonderà in fretta in ambito modellistico.
Differenze di capacità
Quando più celle vengono unite per formare un pacco batteria e scaricate con alte correnti,
le celle si riscaldano in maniera diversa, dato che le celle interne non riescono a dissipare
rapidamente il calore.
La differenza di temperatura ha come conseguenza una differenza di resistenza interna,
che a sua volta diminuisce la capacità della cella. Questa cella sarà vuota prima e vi è il
pericolo di scaricarla oltre la tensione di scarica minima.
Soprattutto con temperature esterne molto basse si formano notevoli differenze di capacità. Se batterie LiPo vengono utilizzate in un elicottero elettrico ad esempio, la cella anteriore viene raffreddata dal flusso di aria freddo, le celle più interne diventeranno nettamente
più calde. La cella fredda ha una capacità minore e vi è il pericolo che cella più fredda
raggiunga una tensione inferiore a quella minima.
È consigliato scaricare batterie LiPo fino a una tensione minima di circa 3 Volt per evitare
danni permanenti alla cella. Consigliamo l‘MC-Balancer No. 8636 (fino a 7 celle) oppure
l‘MC Balancer 14S No. 8643 (fino a 14 celle) per sorvegliare la tensione di ogni cella LiPo
individualmente. Inoltre bisogna rassicurarsi che durante la prossima carica questa cella
venga caricate allo stesso livello delle altre.
La carica in parallelo di singole celle non è problematica. La corrente di carica si divide in
funzione della tensione delle due celle.
Per danni causati da manipolazioni errate delle celle non possiamo assumere nessuna responsabilità. Tenete conto delle precauzioni di sicurezza.
20
Manuale d’istruzione
No.
Power Peak® C8 EQ-BID
8553
Per via delle tolleranze durante la produzione, ma soprattutto differenze di temperatura
durante la scarica, le celle esterne sono raffreddate meglio di quelle interne, le celle di un
pacco di batterie litio polimeri avranno tensioni differenti dopo alcuni cicli. Dopo un grande
numero di cicli questa differenza non è più trascurabile.
17. Garanzia
I nostri articoli sono naturalmente provvisti dalla garanzia di 24 mesi prevista dalla legge.
Se volete fare uso di questa garanzia rivolgetevi sempre al vostro venditore che è responsabile per lo svolgimento e l’applicazione di tale garanzia.
Durante questo lasso di tempo eventuali errori di funzionamento come difetti di fabbricazione e difetti materiali verranno corretti a nostre spese. Non forniremo però nessuna
assistenza per i danni causati dalle conseguenze del malfunzionamento.
Il trasporto fino a noi deve essere pagato dal mittente, dovete anche provvedere a coprire
le spese di spedizione per il ritorno.
Non possiamo assumere nessuna responsabilità per danni di trasporto o la perdita del
vostro articolo durante il trasporto. Consigliamo un assicurazione adatta.
Inviate il vostro prodotto al centro di assistenza del vostro paese.
Per poter rispondere a una richiesta di garanzia devono esser soddisfatte le seguenti condizioni:
• Allegate una copia della prova di acquisto (scontrino di cassa o fattura).
• Gli articoli sono stati utilizzati rispettando il manuale
• Sono state utilizzate solo batterie consigliate e accessori robbe originali.
• Danni causati da umidità, modifiche, inversione di polarità, sovra carico e danni meccanici non sono presenti.
• Allegate una spiegazione dettagliata del problema o difetto presente.
18. Declinazione di responsabilità
Questo caricatore è concepito e omologato esclusivamente per la carica dei tipi di accumulatori menzionati in questo manuale d‘istruzione. Robbe Modellsport non si assume
nessuna responsabilità nel caso il caricatore venga utilizzato per altri scopi. Sia il rispetto
delle istruzioni per l‘utilizzo che le condizioni e i metodi durante l‘installazione, utilizzo e
manutenzione del caricatore non possono esser sorvegliati dalla robbe-Modellsport. Per
via di questo non assumiamo nessuna responsabilità per perdite, danni o costi causati
dall‘utilizzo improprio o operazione erronea o che ne consegue in qualsiasi maniera. Per
quanto previsto dalla legge l‘obbligo di risarcire i danni, fondato su qualsiasi base giudiziaria, è limitato al valore fatturato del prodotto robbe direttamente collegato all‘evento che
ha causato il danno. Questo non vale se per via di dolo o negligenza grave è necessaria
una risposta illimitata.
21
19.
Manuale d’istruzione
No.
Power Peak® C8 EQ-BID
8553
Accessori consigliati
Cavo di carica batteria
trasmittente
No. F1415
Cavo di carica batteria
ricevente
No. F1416
Chiavetta BID, senza cavo,
per l‘equipaggiamento
di ulteriori batterie
No. 8472
Chip BID, con cavo
di 300mm, per
l‘equipaggiamento di
ulteriori batterie
No. 8473
Cavo BID, 300mm
No. 8474
Chiavetta BID
No. 8888
Cavo adattatore
3S-XH
No. 4029
Cavo adattatore
2X3S EHR
No. 4023
Cavo adattatore
2X3S XH-EHR
No. 4023XH
Cavo BID, 500mm
No. 8475
Cavo adattatore
3X2S XH-EHR
No.4031XH
22
Cavo adattatore
3X2S EHR
No. 4031
20.
Manuale d’istruzione
No.
Power Peak® C8 EQ-BID
8553
Centri di assistenza
Land
Firma
Straße
Stadt
Telefon
Fax
Andorra
SORTENY
Santa Anna, 13
AND-00130 LES
ESCALDES
0037-6-82 0827
0037-6-82 5476
Dänemark
Nordic Hobby A/S Bogensevej 13
8900 RANDERS
0045-86-43 6100
0045-86-43 7744
Metzloser Str. 38
D-36355 Grebenhain
0049-6644-87-777
0049-6644-7412
0044-1455-63 7151
0044-1455-63 5151
Deutschland robbe-Service
England
robbe-Schlüter
UK
LE10-1UB
Leicestershire
Frankreich
S.A.V Messe
BP 12
F-57730 Folschviller 0033-387-94 6258
Griechenland
TAG Models
Hellas
18,Vriullon Str.
Österreich
Robbe Service
Puchgasse 1
Minicars Hobby
A.B.
robbe Futaba
Service
Bergsbrunnagatan 18
Baslerstrasse
67 a
0033-387-94 6258
143 41 Nea Phil0030-1-25 84 380
0030-1-25 33 533
adelfia
Via del Progresso I-36010 Cavazeale
Italien
MC-Electronic
00390-0444-94 5992 00390-0444-94 5991
25
(Vi)
Niederlande/
Slot de HouveJan van Mouwerik
NL-3155 Maasland 0031-1059-13 594
0031-1059-13 594
Belg.
laan 30
Norwegian ModelNorwegen
Box 2140
3101 TØNSBERG 0047-333-78-000
0047-333-78-001
lers
Schweden
Schweiz
A-1220 Wien
0043-01259-65 5214 0043-01259-1179
75323 Uppsala
0046-18-71 2015
CH-4203 Grellingen 0041-61-741 23 22
Slowakische
Ivo Marhoun
Rep.
Horova 9
CZ-35201 AS
00420 351 120 162
Spanien
Metzloser Str. 38
D-36355 Grebenhain
0049-6644-87-777
Horova 9
CZ-35201 AS
00420 351 120 162
35060 PinarbasiIzmir
0090-232-47 912 58
robbe-Service
Tschechische
Ivo Marhoun
Rep.
Formula ModelTürkey
sports
21.
0046-18-10 8545
0041-61 741 23 34
0049-6644-87-779
0900-232-47 917 14
Smaltimento batterie e apparecchiature
Non buttare batterie nei comuni rifiuti casalinghi in nessun caso. Per proteggere l‘ambiente portate batterie difettose o consumate ai rispettivi centri
di raccolta assicurandovi che siano scariche.
Per evitare corto circuiti coprite eventuali contatti scoperti con nastro
adesivo. I costi per il riciclaggio delle batterie sono già inclusi nel prezzo
d‘acquisto. Tutti i punti di vendita sono obbligati a riprendere le batterie,
indifferentemente se sono state acquistate in quel luogo o meno. Le batterie vengono
riciclate. In questa maniera le materie prime ritornano in circolazione. Aiutate anche voi a
salvaguardare l‘ambiente!
23
Il dispositivo è contrassegnato con il simbolo raffigurato a lato, per ricordare
che le apparecchiature elettroniche non devono essere smaltite nei comuni
cestini per l’immondizia.
Questo simbolo significa che le apparecchiature elettriche ed elettroniche
devono essere smaltite separatamente dai rifiuti domestici al termine del
loro utilizzo. Consegnate il dispositivo agli appositi punti di raccolta comunali oppure ai centri di riciclo. Tale disposizione è in vigore per tutti i paesi
dell’Unione Europea e per gli altri paesi europei con centri di raccolta separati.
22.
Certificazione di conformità
La robbe Modellsport GmbH & Co. KG dichiara che questo dispositivo è conforme alle
direttive fondamentali vigenti ed alle altre essenziali prescrizioni contenute nelle normative
corrispondenti. La dichiarazione originale di conformità è scaricabile all’indirizzo
www.robbe.com cliccando sul bottone “Conform” vicino alla descrizione del prodotto.
robbe Modellsport GmbH & Co.KG
Metzloser Straße 38
D-36355 Grebenhain OT Metzlos-Gehaag
Telefono +49 (0) 6644 / 87-0
robbe Form ACBA
Con riserva di errori e modifiche tecniche.
Copyright robbe-Modellsport 2010
La copia e la ristampa, anche parziali sono
consentiti soltanto previa autorizzazione
scritta della robbe-Modellsport GmbH & Co.KG.
Návod k obsluze
Operating instructions
Notice d’utilisation
Manuale d’istruzione
Manual de Uso
Návod k obsluze
Power Peak® C8 EQ-BID
č. 8553
Návod k obsluze
Obj. č.
Power Peak® C8 EQ-BID
8553
Vážený zákazníku,
děkujeme Vám, že jste se rozhodl pro náš výkonný počítačový nabíječ Power Peak®
C8 EQ-BID z naší produkce. Stali jste se tak majiteli kompaktního nabíječe s akumanagamentem a balancerem s připojením na 230V AC nebo 12V DC.
Přestože se jedná o nabíječ s jednoduchou obsluhou, vyžaduje ovládání tak vysoce
výkonného automatického nabíječe jako je Power Peak® C8 EQ-BID od uživatele
určité znalosti. Díky tomuto návodu byste se měli s Vaším novým nabíječem
poměrně rychle seznámit.
Přejeme Vám hodně úspěchů a radosti s Vaším novým nabíječem!
Bezpečnostní pokyny
Na konci návodu k obsluze jsou podrobně uvedeny bezpečnostní pokyny k zacházení s nabíječi a různými typy akumulátorů.
Kromě toho jsou zde uvedeny ještě další praktické obecné pokyny k jednotlivým
typům akumulátorů v kapitole „MALÁ NAUKA O AKUMULÁTORECH“.
Přečtěte si bezpodmínečně návod k obsluze a zvláštní pozornost pak věnujte i
bezpečnostním pokynům, než nabíječ poprvé uvedete do provozu
Chybné zacházení s akumulátory a nabíječem může vést k explozi nebo hoření
baterií.
Menu jazyka nabíječe se nastavuje jak je popsáno na str. 13 v kapitole 9.
2
Návod k obsluze
Obj. č.
Power Peak® C8 EQ-BID
8553
Obsah
Kapitola
Strana
Bezpečnostní pokyny
2
1. Obsah balení
4
2. Všeobecný popis
5
3. Ovládací prvky
6
3.1 Funkce ovládacích prvků
6
4. Technická data
7
5. Uvedení nabíječe do provozu
8
5.1 Připojení akumulátorů
8
6. Pracovní displej
9
7. Parametry v hlavním menu bez BID
10
7.1 Parametry v hlavním menu s BID
11
8. Editace dat bez BID
11
8.1 Editace dat s BID
13
9. Nastavení
13
10. Procesy nabíjení/vybíjení s BID čipem/klíčem 14
11. Procesy nabíjení/vybíjení bez BID čipu/klíče 14
12. Ukončení procesu nabíjení/vybíjení
15
13. Chybová hlášení
16
14. Struktura menu
17
15. Bezpečnostní pokyny
18
16. Malá nauka o akumulátorech
19
16.1 Nikl-kadmiové aku (NC)
19
16.2 Nikl-metal hydridové aku (NiMH)
19
16.3 Olověné aku (Pb)
19
16.4 Lithiové aku (LiPo, LiIo, LiFe)
20
17. Záruční podmínky
21
18. Vyloučení záruky
21
19. Doporučené příslušenství
22
20. Servisní adresy
23
21. Likvidace akumulátorů a nabíječe
23
22. Prohlášení o shodě
24
3
1.
Návod k obsluze
Obj. č.
Power Peak® C8 EQ-BID
8553
OBSAH BALENÍ
POWER PEAK® C8 EQ-BID Č. 8553
Balení obsahuje:
1 nabíječ Power Peak® C8 EQ-BID 230V/12V
1 BID klíč
1 adaptér balanceru JST XH (No. 8214) k připojení 2-6 S Li-Poly aku s JST-H servisními
kabely (Lama, G47, Align) na balanceru.
4
2.
Návod k obsluze
Obj. č.
Power Peak® C8 EQ-BID
8553
VŠEOBECNÝ POPIS
Vysoce výkonná počítačová nabíjecí a vybíjecí stanice s akumanagamentem pro všechny
běžné typy akumulátorů. S integrovaným balancerem pro 8-čl. lithium-Ionen (LiIo),
Lithium Polymer (LiPo) a Lithium-Ferrum (LiFe) akumulátory. S nabíjením proudem až
6,5 A, volitelně z 12V autobaterie nebo integrovaného spínaného zdroje ze sítě (230V).
Nabíječem Power Peak® C8 EQ-BID lze nabíjet popř. vybíjet 1-24 NC/ NiMH nebo 1-12
olověných článků (2...24V). Odpojování probíhá automaticky při plně nabitých akumulátorech přes Delta Peak. Lithiové a olověné akumulátory lze nabíjet postupem CC-CV.
5 interních pamětí nabíječe umožňuje v manuálním módu ukládání specifických dat
nabíjení a vybíjení pro 5 různých akumulátorů.
Důležitou vlastností nabíječe Power Peak® C8 EQ-BID je identifikační
systém baterií (BID). Na trhu je stále více různých typů baterií, přičemž
každý typ vyžaduje svůj vlastní nabíjecí proces. Tak se může lehce stát, že
na nabíječi provedete chybné nastavení a články tím poškodíte.
Revoluční BID systém robbe nabízí geniální řešení tohoto
problému. Každé sadě článků se přiřadí jednoduchý BID klíč.
Tento klíč uloží všechna relevantní data pro optimální nabíjení
a vybíjení akumulátorů. K nabíjení nebo vybíjení se propojí BID
klíč, který je připevněn na akusadách, s nabíječem Power Peak
C8 EQ-BID a předá nabíječi potřebné parametry pro nabíjení/
vybíjení.
Stačí stisknout tlačítko „MODE“ a proces nabíjení nebo
vybíjení se spustí. Nemusíte nijak složitě vyhledávat
parametry v menu. Hlavními výhodami BID klíče je
maximální ochrana proti chybné obsluze a uložení
všech relevantních dat na BID klíči. Díky uložení
nejdůležitějších dat na BID klíč mají články vlastně svá
data neustále u sebe a lze je kdykoli použít. Tato funkce
nahrazuje použití PC softwaru, když si chcete udělat
přehled o aktuálním stavu akumulátorů.
Jako alternativu k BID klíči jsou k dostání jako příslušenství i BID čipy (viz. str. 22), které
mají stejnou funkci, liší se pouze svými rozměry.
Integrovaná USB-přípojka s funkcí Bootloader pro dodatečný update softwaru udržuje Váš
nabíječ na aktuální softwarové úrovni.
5
3.
Návod k obsluze
Obj. č.
Power Peak® C8 EQ-BID
8553
OVLÁDACÍ PRVKY
displej
tlačítko EDIT
tlačítkoVIEW
tlačítkoMODE
zdroj
proudu
“+”/ tlač.
Select Wheel
“-”/ tlač.
připojení aku
připojení servisního kabelu
USB přípojka
pro update
připojení BID
tlač. ENTER
3.1
FUNKCE OVLÁDACÍCH PRVKŮ
TLAČÍTKO MODE
•
1x stisknout – spustí se proces nabíjení
2x stisknout – spustí se proces vybíjení
3x stisknout – spustí se proces nabíjení / vybíjení (nabíjecí cyklus)
Zvolený proces lze zastavit opětovným stisknutím tlačítka.
TLAČÍTKO VIEW
• Zobrazování různých parametrů nabíječe, např. vstupního napětí. Kromě toho si lze
pomocí tohoto tlačítka udělat přehled o všech napětích jednotlivých připojených Li-Poly
článků.
TLAČÍTKO EDIT
• Tlačítkem “EDIT” se dostanete do parametrů akumulátorů a menu nastavování.
TLAČÍTKO “+”
• Tímto tlačítkem se během nastavování parametru (typ akumulátoru, počet článků apod.)
zvyšuje hodnota parametru o jeden krok a při volbě menu se volí následující menu.
Toto tlačítko je vybaveno automatickou opakovací funkcí Autorepeat, která má při stisknutém tlačítku stejný účinek jako další zmáčknutí tlačítka.
TLAČÍTKO “-” /
• Tímto tlačítkem se během nastavování parametru (typ akumulátoru, počet článků apod.)
snižuje hodnota parametru o jeden krok a při volbě menu se volí předchozí menu. Toto
tlačítko je vybaveno automatickou opakovací funkcí Autorepeat, která má při stisknutém tlačítku stejný účinek jako další zmáčknutí tlačítka.
SELECT WHEEL
Otáčením ovladače Select Wheel se realizují funkce tlačítek “+”/ ”-”.
TLAČÍTKO ENTER
• Tlačítkem ‘ENTER’ se provádí potvrzení nějaké volby, např. aktivace zvoleného podmenu nebo převzetí předtím nastavené hodnoty.
• Mit der ‘ENTER’-Taste erfolgt die Bestätigung einer Auswahl, z.B. die Aktivierung eines
ausgewählten Untermenüs, oder die Übernahme eines zuvor eingestellten Wertes.
6
4.
Návod k obsluze
Obj. č.
Power Peak® C8 EQ-BID
8553
TECHNICKÁ DATA
Provozní napětí:
Počet článků:
Nabíjecí proud:
Vybíjecí proud:
Proud balanceru:
Výkon vybíjení:
Udržovací nabíjení:
Koncové vybíjecí napětí:
Odpojování:
NC / NiMH:
Olověné a lithiové aku:
Rozměry:
Funkce:
Ochranné funkce:
Vstup:
Výstup:
12V DC (autobaterie) / 230V AC
(nikdy nepoužívejte nabíječe určené pro autobaterie!)
1 ... 24 články NC / NiMH,
1 ... 8 článků LiIo (3,6V), Li-Poly (3,7V), LiFe (3,3V)
1 ... 12 olověných článků (2...24V)
0,1 ... 6,5A při max. 135W (12V DC)
0,1 ... 6,5A při max. 110W (230V AC)
0,1 ... 5A při max. 25W
ca. 250mA
25W, proud je adekvátně upravován
udržovací nabíjení C/20 (pouze u NC a NiMH)
0,8V na článek u NC a NiMH,
3,0V na článek u LiPo, LiIo
2,5V na článek u LiFe
1,7V na článek u olověných aku
automaticky, digitální Delta Peak systém
automaticky, v závislosti na napětí, postup CC-CV
180 x 145 x 70 mm
nabíjení, vybíjení cyklování, vyrovnávání proudu
chráněn proti přepólování
chráněn proti přepólování a zkratu
Poznámka:
Pokud klesne vstupní napětí v DC provozu pod hodnotu 11 V, dojde automaticky ke
snížení výstupního proudu o 1A.
Pokud má autobaterie méně než 11 V (na vstupu nabíječe, ne na pólech baterie), musíte
vycházet z toho, že je baterie slabá. Automatickým snížením proudu se zátěž baterie
sníží. Bez této funkce by provozní napětí dále klesalo a nabíječ by se v důsledku nízkého
napětí vypnul. Tak lze docela dlouho nabíjet i se slabou baterií.
Maximální nabíjecí proudy v AC nebo DC provozu:
DC-Betrieb:
AC-provoz:
Bis 20,5 V Akkuspannung:
Do napětí akumulátoru:
16,5 V
6,5 A
Při vyšších napětích akumulátorů se proud sníží.
Upozornění k nabíjení lithiových aku bez servisního kabelu:
Lithiové akumulátory lze s použitím BID systému nabíjet i bez servisního kabelu. Avšak
bez servisního kabelu se nevyrovnává napětí akumulátorů (nejsou balancovány) a není
kontrolován počet článků!
7
5.
Návod k obsluze
Obj. č.
Power Peak® C8 EQ-BID
8553
UVEDENÍ NABÍJEČE DO PROVOZU
Připojte nabíječ ke 12 V olověné baterii nebo k síti. Dbejte na správnou polaritu (červená
= plus / černá = minus).
Na displeji se krátce zobrazí nápis “Power Peak C8 EQ-BID V1.0” a poté “KEIN AKKU”
(žádný aku), pokud není k nabíječi připojen žádný akumulátor.
5.1
PŘIPOJENÍ AKUMULÁTORU
Důležité!!! Před připojením akumulátorů bezpodmínečně překontrolujte nastavené parametry. Při chybném nastavení může dojít k poškození článků, které mohou explodovat nebo se vznítit. Abyste předešli zkratu s banánky, připojte k nabíječi vždy nejdříve
nabíjecí kabel a teprve poté k akumulátoru. Při odpojování postupujte v opačném pořadí.
Dávejte pozor na polaritu!
Připojení servisního kabelu (Li-aku):
Servisní kabel akumulátorů se musí k nabíječi připojit černým kabelem na místo označené
šipkou. Šipka označuje minusový pól.
Dávejte pozor na polaritu!
Pokud jste si sami letovali akumulátory a vyráběli servisní kabel, dávejte pozor na polaritu! Během nabíjení lithiových článků by měl být servisní kabel stále připojený, pokud se
nejedná o samostatný článek!
Při konfiguraci BID čipu/ klíče musíte dávat bezpodmínečně pozor na správné nastavení
parametrů akumulátoru (nebezpečí zničení aku)! Pokud je akumulátor vybaven servisním
kabelem, měl by být kabel z bezpečnostních důvodu neustále připojený.
“+” = červená
“-” = černá
8
Návod k obsluze
Obj. č.
Power Peak® C8 EQ-BID
8553
Příklad na straně 8 slouží pouze pro představu a má znázornit připojení servisního kabelu
k balanceru.
EQ-Adapter
robbe-PQ č.8213
EQ-Adapter
robbe-JST/XH č.8214
EQ-Adapter
robbe-TP/FP č.8215
6. PRACOVNÍ DISPLEJ
paměť
aku
ukazatel
stavu
aktuální
napětí aku
uplynulá
doba
Během procesu nabíjení/vybíjení
jsou přes displej uživateli sdělovány
veškeré potřebné informace.
V horním řádku displeje se zobrazuje
interní paměť aku (např. 1-5) nebo
při zapojeném BID „B“. Tlačítkem
nabíjecí/
zobrazení kapacityp aku
„EDIT“ se dostanete k nastavení
vybíjecí
ty kapacity
“DATEN EDITIEREN” (editovat data)
proud
(viz. Kap. 8). popř. “EINSTELLUNGEN” (nastavování) (str.13 Kap. 9). Interní paměť lze nastavit přímo z pracovního displeje.
K tomu stiskněte tlačítko „ENTER“ a pomocí tlačítek s šipkami zvolte paměť. Poté potvrďte
zvolenou paměť opětovným stisknutím tlačítka „ENTER“.
V horním řádku sloupce 2 se zobrazuje stav nabíječe (‘C’ pro nabíjení, ‘D’ pro vybíjení
‘D-C’ pro nabíjení-vybíjení, “R” pro Ready (připraven), “N” pro No Battery, ‘F‘ pro Finish
(konec).
Ve spodním řádku lze pomocí zkratek určit typ akumulátoru: PB= olověný,
NC= NiCd, NH= NiMH, LP= Li-Poly, LI= LiIo, LF= LiFe a LS= Lithium Storage.
Během procesu nabíjení nebo vybíjení lze měnit proud. Aby to bylo možné, musíte stisknout tlačítko „ENTER“, poté lze proud nastavit tlačítky s šipkami. Nakonec potvrdíte
tlačítkem „ENTER“ nové zadání.
9
7.
Návod k obsluze
Obj. č.
Power Peak® C8 EQ-BID
8553
PARAMETRY V HLAVNÍM MENU BEZ BID
Tlačítkem “VIEW” zvolíte menu. Tlačítky “+”, “-” nebo ovladačem Select Wheel lze zobrazovat následující parametry.
VSTUPNÍ NAPĚTÍ
Zobrazení vstupního napětí.
Z
Eingang = vstup
LAD = laden (nabíjení)
ZOBRAZENÍ POSLEDNÍCH NABÍJENÍ AKUMULÁTORŮ (M1 ...M5)
Touto funkcí lze provést rekonstrukci 5 posledních
T
nabíjení, přičemž se zobrazuje pouze nabitá kapan
ccita. Stisknutím tlačítka „ENTER“ zvolíte parametr.
Tlačítky “+”/ ”-” nebo ovladačem “Select WHEEL”
T
si můžete prohlédnout požadovanou paměť. Opětovným stisknutím tlačítka „ENTER“ je
volba zrušena.
ENTL.=vybíjení
POSLEDNÍCH
VYBÍJENÍ
ZOBRAZENÍ
AKUMULÁTORŮ (M1 ... M5)
A
Touto funkcí lze provést rekonstrukci 5 posledních
T
vvybíjení, přičemž se zobrazuje pouze vybitá kapacita.
Stisknutím tlačítka „ENTER“ zvolíte parametr. Tlačítky “+”/ ”-” nebo ovladačem “Select
WHEEL” si můžete prohlédnout požadovanou paměť. Opětovným stisknutím tlačítka
„ENTER“ je volba zrušena.
ZOBRAZENÍ MAXIMÁLNÍHO NAPĚTÍ AKU
Z
Maximální napětí akumulátorů během procesu
M
nabíjení/vybíjení.
n
MITTELWERT=střední hodnota
ZOBRAZENÍ PRŮMĚRNÉHO NAPĚTÍ AKU
Z
Zobrazení průměrného napětí akumulátorů během
Z
procesu nabíjení/vybíjení.
p
ZOBRAZENÍ NABITÉ/VYBITÉ KAPACITY
Z
Zobrazení nabité popř. vybité kapacity.
Z
Údaj se zobrazuje ve Wh (watt hodina).
Ú
DATA BALANCERU
Pokud je připojeno více než 6 lithiových článků, zobrazují se střídavě dva displeje.
Upozornění: Napětí jednotlivých článků se zobrazuje pouze tehdy, je-li připojen servisní
kabel.
10
Návod k obsluze
Obj. č.
Power Peak® C8 EQ-BID
8553
čl. 1
čl. 6
čl. 8
7.1
DOPLŇKOVÉ PARAMETRY V HLAVNÍM MENU S BID
Po připojení BID čipu/klíče si lze přečíst následující data akumulátorů:
ZOBRAZENÍ MAXIMÁLNÍ NABITÉ KAPACITY
Z
Zobrazení dosavadní maximální nabité kapacity
a
akumulátorů.
Pokud je během nabíjení překročena dosavadní maximální hodnota, je nová hodnota automaticky nastavena.
m
ZOBRAZENÍ MAXIMÁLNÍ VYBITÉ KAPACITY
Z
Zobrazení dosavadní maximální vybité kapacity
Z
akumulátorů.
a
Pokud je během vybíjení překročena dosavadní maximální hodnota, je nová hodnota automaticky nastavena.
ZOBRAZENÍ CYKLŮ NABÍJENÍ
Z
Zobrazení dosavadních cyklů nabíjení akumulátorů. Po
Z
ukončení nabíjení se čítač zvýší o 1.
ZOBRAZENÍ DEFINOVATELNÉHO DATA
Z
Zobrazení definovatelného data na BID čipu/klíči (např.
Z
datum zakoupení akumulátoru).
d
ZOBRAZENÍ MAXIMÁLNÍHO NAPĚTÍ AKU
Z
Maximální napětí akumulátorů během procesu nabíjení/
M
vvybíjení.
8.
EDITOVÁNÍ DAT BEZ BID
Navolte si tlačítkem “EDIT” menu “DATEN EDITIEREN” (editace dat) a zvolte tlačítkem
„ENTER“. Tlačítky “+”, “-” nebo ovladačem Select Wheel můžete zobrazovat následující
parametry.
11
Návod k obsluze
Obj. č.
Power Peak® C8 EQ-BID
8553
INTERNÍ PAMĚŤ
V tomto menu lze nastavit až 5 různých typů
akumulátorů s jejich příslušnými parametry, které
a
zzůstanou zachovány i po vypnutí nabíječe. Číslo
bliká a lze ji změnit pomocí tlačítek s šipkami nebo
b
ovladačem Select Wheel. Při volbě nové paměti se zobrazí dříve uložená data jako
nabíjecí proud, kapacita, počet článků apod.
Paměťovou pozici lze nastavit i přes pracovní displej. K tomu stiskněte tlačítko „ENTER“
a zvolte číslo paměti.
NASTAVENÍ TYPU AKUMULÁTORU
Stisknutím tlačítka “ENTER” zvolíte typ akuS
mulátoru. Tlačítky “+”,”-” nebo ovladačem “SELECT
m
WHEEL” lze nastavit požadovaný typ akumulátoru.
W
Pokud chcete připravit LiIon nebo Li-Poly články
P
k uskladnění, můžete zde nastavit funkci “L3,9V”. Pomocí této funkce je napětí akumulátoru uvedeno na optimální skladovací hodnotu 3,9V/čl. Díky tomu je akumulátor
vhodně připraven k delšímu uskladnění. Opětovným stisknutím tlačítka “ENTER” je volba
převzata.
NASTAVENÍ POČTU ČLÁNKŮ
Poté musíte zvolit parametr “AKKUZELLEN” (počet
P
ččlánků). Jak již bylo dříve uvedeno, je zde možné
nastavit i požadovaný počet článků. Poté musíte stin
ssknout tlačítko „ENTER“, aby byla volba převzata.
NASTAVENÍ KAPACITY AKUMULÁTORU
Po stisknutí tlačítka „ENTER“ bliká parametr, který
má být nastaven. Nyní můžete zvolit kapacitu aku. Po
m
vvolbě opět stiskněte tlačítko „ENTER“.
NASTAVENÍ NABÍJECÍHO PROUDU
V tomto parametru lze nastavit nabíjecí proud.
Maximální nabíjecí proud je závislý na počtu článků,
M
příp. na napětí akumulátorů. Procesor nabíječe omezup
jje maximální nabíjecí proud odpovídajícím způsobem
vzhledem k výkonu při nabíjení.
NASTAVENÍ VYBÍJECÍHO PROUDU
V tomto parametru lze nastavit vybíjecí proud.
Maximální vybíjecí proud je závislý na počtu článků,
M
příp. na napětí akumulátorů. Procesor nabíječe omep
zzuje maximální vybíjecí proud.
12
Návod k obsluze
Obj. č.
Power Peak® C8 EQ-BID
8553
8.1
EDITACE DAT S BID
Upozornění: Jen tehdy, pokud je připojený BID čip/klíč se zobrazí doplňkové parametry, jakož i data, která jsou na něm uložena. Kromě toho jsou na straně 12 znázorněny
ostatní nastavitelné parametry. Proto jsou vysvětleny pouze rozdíly.
ZOBRAZENÍ DEFINOVATELNÉHO DATA
Zobrazení
definovatelného data na BID čipu/klíči
Z
(např.
datum zakoupení akumulátoru).
(
9.
NASTAVENÍ
Tlačítkem “EDIT” zvolíte menu “EINSTELLUNGEN” (nastavování) a poté potvrdíte tlačítkem
“ENTER”. Tlačítky“+”, “-” nebo ovladačem Select Wheel lze zobrazit následující parametry.
NASTAVENÍ VYPÍNACÍ TOLERANCE U LITHIOVÝCH AKU
V menu “Li-LADEN” (nabíjení Li) lze nastavit odpojování
pro
p lithiové akumulátory. V nastavení odpojení “NORMAL” se nabíjení vypne při C/20, v nastavení odpojení
“SCHNELL”
(rychle) při C/10.
“
V nastavení odpojení “SCHNELL” (rychle) se akumulátor sice rychle nabije, avšak má pak
k dispozici pouze 95% své kapacity.
NASTAVENÍ HLASITOSTI
Touto
funkcí lze upravovat hlasitost akustických signálů.
T
K dispozici jsou 3 módy: AUS (vypnuto), LEISE (potichu)
a LAUT (hlasitě).
c
NASTAVENÍ MELODIE
V tomto menu lze nastavit tři různé vypínací melodie.
NASTAVENÍ JAZYKA MENU
Pokud chcete zvolit požadovaný jazyk menu (němčina,
angličtina,
francouzština, italština, španělština nebo
a
čeština),
přesuňte se, jak již bylo dříve popsáno,
č
ovladačem
“SELECT
o
WHEEL” nebo tlačítky s šipkami do bodu menu “SPRACHE” (jazyk). Zvolte tlačítkem
“ENTER” a šipkami nastavte požadovaný jazyk. Po nastavení jazyka stiskněte pro potvrzení tlačítko “ENTER”. Aby byla změna aktivována, přesuňte se na nápis “ENDE” (konec) a
potvrďte tlačítkem “ENTER”.
13
Návod k obsluze
Obj. č.
Power Peak® C8 EQ-BID
8553
10.
PROCESY NABÍJENÍ/VYBÍJENÍ BEZ BID ČIPU/KLÍČE
Dříve než spustíte nějaký proces nabíjení/vybíjení musíte provést následující nastavení,
aby mohl nabíječ optimálně pracovat:
•
•
•
•
•
připojte akumulátory, dbejte na správnou polaritu (viz. obrázek zapojení, str. 8.)
nastavte typ akumulátoru
nastavte počet článků
nastavte kapacitu
nastavte nabíjecí/vybíjecí proud
Poté co byly nastaveny parametry, jak již bylo výše popsáno, lze proces spustit. Abyste
začali nabíjet připojené akumulátory (LADEN = nabíjení), musíte jednou stisknout tlačítko
“MODE”. Dalším stisknutím tlačítka během jedné sekundy se nastavuje funkce vybíjení
(ENTLADEN). Pokud stisknete tlačítko “MODE” 3x, nastavíte funkci cyklování (DC-CH
ZYKLUS = cyklus vybíjení-nabíjení)). Tlačítky “+”,”-” nebo ovladačem “SELECT WHEEL”
lze nastavit opakování cyklu od 1 do 99. Pokud po volbě módu není provedeno žádné
další zadání (ca 2s), začne nabíječ se zvoleným procesem. Pokud byste chtěli průběh
procesu přerušit, musíte znovu stisknout tlačítko “MODE”.
11.
PROCESY NABÍJENÍ/VYBÍJENÍ S BID ČIPEM/KLÍČEM
Obrázky dole znázorňují použití BID čipu a BID klíče.
Nejdříve propojte BID čip popř. BID klíč přímo přes adapter kabel s nabíječem (viz obr.
dole). Ke kontrole dat před nabíjením/vybíjením stiskněte tlačítko “ENTER”. Pokud jsou
parametry nabíjení na BID čipu v pořádku, můžete tlačítkem “MODE” zvolit odpovídající
mód a proces spustit. Během procesu nabíjení/vybíjení se na BID čipu/klíči ukládají
nejdůležitější data tohoto procesu.
prohloubením nahoru
14
Návod k obsluze
Obj. č.
Power Peak® C8 EQ-BID
8553
1. Připojte akumulátory, (u lithiových aku připojte servisní kabel), dávejte pozor na
správnou polaritu (viz str. 8).
2. Připojte BID čip/klíč.
3. Stiskněte jednou tlačítko “MODE”. Asi po 2s se spustí proces nabíjení.
Alternativně lze dvojitým stiskem spustit vybíjení a trojitým cyklování.
Zvolený proces lze zastavit opětovným stisknutím tlačítka.
Upozornění:
Při použití BID systému lze lithiové akumulátory nabíjet i vybíjet bez servisního
kabelu, což ale nedoporučujeme!
12. UKONČENÍ PROCESU NABÍJENÍ/VYBÍJENÍ
Nabíječ automatický ukončí nabíjecí i vybíjecí proces. Procesor přitom zohledňuje
nabíjecí a vybíjecí parametry. Pro každý typ akumulátoru je použit optimální postup.
Na konci procesu zazní podle nastavení akustický signál.
15
Návod k obsluze
Obj. č.
Power Peak® C8 EQ-BID
8553
13.
CHYBOVÁ HLÁŠENÍ
Pro zajištění bezchybných procesů nabíjení a vybíjení je nabíječ Power Peak® C8 EQ-BID
vybaven různými bezpečnostními zařízeními. Jakmile se vyskytne nějaká chyba, objeví se
na displeji odpovídající hlášení a bzučák vydá varovný signál. Následující chybová hlášení
mohou být po odstranění potvrzena libovolným tlačítkem.
Vstupní napětí je pod hodnotou 10,5V
V
Chybně nastavený počet článků
Nabíječ Power Peak® C8 EQ-BID nemůže zpracovat
data na BID čipu/klíči, např. počet lithiových článků >
d
8 článků.
Chybná data na BID čipu/klíči. BID musí být následně
zznovu editován. Po potvrzení libovolným tlačítkem se
automaticky otevře menu “DATEN EDITIEREN” (editovat data). Nyní se musí znovu zadat
data akumulátorů.
Nabíječ je přehřátý!
Důvodem může být např. vadný ventilátor nebo zakrytá
vvětrací mřížka. Pokud chcete tuto možnost přezkoušet,
odpojte akumulátory a vypněte nabíječ. Poté nabíječ
o
opět zapněte, připojte akumulátory a krátce spusťte proo
ces vybíjení. Pokud ventilátor nenaběhne, musíte akumulátory odpojit a nabíječ okamžitě
vypnout. Vadný nabíječ zašlete, prosím, na opravu do autorizovaného robbe servisu
(prosím, dodržujte požadavky týkající se záručních podmínek (str. 21. kap. 17).
16
14.
Návod k obsluze
Obj. č.
Power Peak® C8 EQ-BID
8553
MENÜSTRUKTUR
VIEW
EDIT
ENT
ENT
ENT
VIEW
ENT
17
15.
Návod k obsluze
Obj. č.
Power Peak® C8 EQ-BID
8553
BEZPEČNOSTNÍ POKYNY
• Nabíječ Power Peak® C8 EQ-BID je určen pouze k nabíjení, vybíjení a balancování
nabíjecích NC- / NiMH, olověných a lithiových akumulátorů. Nikdy se nepokoušejte
nabíjet suché články, hrozí nebezpečí exploze.
• Nabíječ je určen k provozu na 12V a 230V, nikdy jej nezkoušejte provozovat na jiném
napětí.
• Chraňte nabíječ před prachem, vlhkem a nečistotami.
• Nevystavujte nabíječ přímému slunci, extrémnímu teplu nebo chladu.
• Chraňte nabíječ před nárazy, nepokládejte na něj těžké předměty a nevystavujte jej
silným vibracím.
• Při provozu umístěte nabíječ i baterii tak, aby při přehřátí nedošlo k nějakým škodám
(nabíječ umísťujte na nehořlavé podložky jako kachličky nebo skleněné desky. Nikdy
na koberec nebo jiné látkové materiály.
• Nepokoušejte se otevírat nabíječ, když je pod napětím!
• Pokud je nabíječ v provozu, nenechávejte jej nikdy bez dozoru. Během provozu může
dojít k silnému zahřátí.
• Dbejte na to, aby byly vždy volné otvory pro chlazení a cirkulaci vzduchu.
• Pokud nabíječ delší dobu nepoužíváte, odpojte jej od zdroje proudu, eventuelně odpojte
i články.
• Nikdy nenabíjejte jedny baterie krátce po sobě.
• Nenabíjejte zahřáté baterie. Baterie vždy nechejte ochladit na okolní teplotu..
• Současně lze nabíjet jen akumulátory stejné kapacity a parametrů (např. stejný obal).
• Nenabíjejte paralelně na jednom výstupu dvoje akumulátory, připojujte jen 1 akupack.
• Dbejte na správnou polaritu, abyste zabránili zkratu.
• Dbejte vždy doporučení výrobců akumulátorů.
• Vždy zkontrolujte nastavení na nabíječi Power Peak® C8 EQ-BID. Při chybném nastavení může dojít ke zničení či poškození akumulátorů.
• Dávejte pozor na poškození na obalu nabíječe nebo kabeláži.
• Dbejte zvýšené opatrnosti při zacházení s akupacky s vyššími počty článků. Vždy
dbejte na dobrou izolaci!!
• Za akupacky a servisní kabely, které si sami zhotovíte, nemůže robbe Modellsport
přebírat žádné záruky.
18
16.
Návod k obsluze
Obj. č.
Power Peak® C8 EQ-BID
8553
MALÁ NAUKA O AKUMULÁTORECH
Při zacházení s těmito akumulátory musí být bezpodmínečně dodržovány určité
zásady, aby nedošlo ke škodám nebo újmě na zdraví. Za následky při používání
nesete plnou zodpovědnost.
16.1 NIKL- KADMIOVÉ AKU (NC)
Pro NiCd články doporučujeme následující hodnoty nabíjení (RATE): Vysoce energetické
baterie –1-2 C, dbejte však vždy i doporučení výrobce baterií. Vysokoproudové články
– 2-3 C, extrém až 5C. Dbejte vždy i maximálních hodnot nabíjení, které udává výrobce
baterií. Dávejte pozor také na to, abyste pro zvolené nabíjecí proudy používali odpovídající kabely a konektory.
16.2 NIKL-METAL-HYDRIDOVÉ-AKU (NIMH)
Pro NiMH aku doporučujeme následující hodnoty nabíjení: Vysoce energetické baterie
– 0,5..1C, dbejte však vždy i doporučení výrobců akumulátorů. Vysoko proudové baterie - většinou 1C, některé typy článků i 1,5…2C. Dbejte však vždy i maximálních hodnot
nabíjení, které udává výrobce baterií.
16.3 OLOVĚNÉ AKU (PB)
• Většina Pb článků používaná v modelářství je plynotěsně uzavřena a tím i méně
nebezpečná.
• Autobaterie s kapalnou kyselinou sírovou představují nebezpečí poleptání a rychlejšího
vzniku
plynu při přebití.
• Pb články nikdy nesmí přijít do kontaktu s otevřeným ohněm, jinak hrozí exploze.
• Pb články nikdy neotevírejte násilím, hrozí nebezpečí poleptání.
• Pb články nikdy nezkratujte, hrozí nebezpečí exploze nebo ohně.
• Vytékající elektrolyty nesmí přijít do kontaktu s pokožkou nebo očima. Pokud se tak
stane,
okamžitě postižené místo omyjte vodou a vyhledejte lékaře. Nikdy nevkládejte články
do úst,
hrozí nebezpečí otravy.
• Baterie by měly být vždy uloženy mimo dosah dětí.
• Při nabíjení a vybíjení vždy dbejte doporučení výrobců akumulátorů.
• Při nabíjení Pb článků může někdy dojít k úniku plynu, proto dbejte na dobré větrání. Při
přebití dochází ke vzniku výbušného plynu a hrozí tak nebezpečí exploze.
19
16.4
Návod k obsluze
Obj. č.
Power Peak® C8 EQ-BID
8553
LITHIOVÉ-AKU (Li-Poly, LiIo, LiFe)
VŠEOBECNĚ
Na trhu existuje několik různých typů lithiových akumulátorů:
1. Lithium-ionové články s kapalnými elektrolyty a jmenovitým napětím 3,6 V.
Jsou to lithiové články první generace, které se ovšem v modelařině příliš nerozšířily.
2. Lithium-ionové články (Lilo) s kapalnými elektrolyty a jmenovitým napětím 3,6 V.
Jsou to lithiové články druhé generace, v kovovém obalu.
3. Lithium-ion-polymerové články (LiPo) s gelovými elektrolyty a jmenovitým napětím 3,7V,
tzv. lipolky. Díky gelové formě elektrolytů dochází při nabíjení a obzvláště pak při vybíjení
k menšímu tlaku v článku, a proto je dostačující pouze foliové pouzdro. Díky minimální
váze a
vysokých proudům se v modelařině rychle rozšířily.
4. Lithium-Ferrum aku (LiFe) s jmenovitým napětím 3,3 V, označovány také jako A123,
jsou t.č.
nejnovějšími akumulátory generace lithiových článků. Díky vysokým impulzům při
vybíjení a
vysoké kapacitě se v modelařině tento typ článků rychle rozšiřuje.
ROZDÍLNÁ KAPACITA
Pokud se do jednoho akupacku sletuje více článků a tento akupack je pak vybíjen, dochází
k různému zahřívání jednotlivých článků, neboť vnitřní články mohou svou teplotu hůře
odevzdat. Tím dochází ke změně vnitřního odporu a odevzdaná kapacita je nižší. Takový
článek je pak dříve vybitý a vzniká nebezpečí, že bude vybit pod přípustnou hranici.
Obzvláště při nižších venkovních teplotách hrozí velké rozdíly v kapacitě. Když použijete
lipolky např. v elektrovrtulníku, bude přední článek proudem vzduchu silně ochlazován
a vnitřní články budou více zahřáté. Studený článek má nižší kapacitu a vzniká tak
nebezpečí, že bude vybit pod přípustnou hranici koncového vybíjecího napětí.
Proto doporučujeme vybíjet lipolky jen po ca. 3V koncového vybíjecího napětí, abyste tak
zabránili trvalému poškození článků. Zde doporučujeme použití MC-balanceru č. 8636 (až
7 článků) nebo MC-balanceru 14S č. 8643 (až 14 článků), které hlídají napětí jednotlivých
článků.
Kromě toho však musíte při dalším následném nabíjení dbát na to, aby byly články nabity
na stejnou úroveň.
Nabíjení paralelně zapojených článků není problematické, protože se zde celkový proud
rozděluje podle stavu napětí na jednotlivé články.
20
Návod k obsluze
Obj. č.
Power Peak® C8 EQ-BID
8553
Za škody vzniklé neopatrným či neodborných zacházením nemůžeme při event.
poškozeních převzít zodpovědnost a na tato poškození se pak nevztahuje ani záruka.
Dbejte také bezpečnostních pokynů.
Při běžných výrobních tolerancích, ale především teplotními rozdíly během vybíjení, jsou
vnější články vždy lépe ochlazovány než vnitřní (pokud se jedná o sériové zapojení 3
článků). Po více cyklech mají články nesporně rozdílné hodnoty napětí.
17.
ZÁRUČNÍ PODMÍNKY
Na výrobek se poskytuje záruka 24 měsíců od data prodeje. Jako doklad pro začátek
a průběh záruční lhůty slouží paragon nebo pokladní lístek prodejce, který je při prodeji
vystaven. Eventuelní opravy neprodlužují dobu záruční lhůty.
Během záruky jsou všechny opravy způsobené výrobní nebo materiálovou vadou
prováděny zdarma v rámci servisu. Další nároky, jako např. následné škody, nelze
uplatňovat.
Zaslání k nám hradí zákazník (prodejce), zaslání zpět od nás je zdarma. Zásilky zatížené
poplatky nemůžeme přijmout.
Za škody vzniklé při dopravě nebo ztrátu nemůže firma Robbe převzít zodpovědnost.
Proto doporučuje využít příslušných pojištění. Své nabíječe zasílejte vždy servisu ve Vaší
zemi, který je k tomu určen.
Pro zpracování Vaší záruční opravy je nutno:
- přiložit doklad o koupi nabíječe
- nabíječ musí být obsluhován v souladu s návodem k použití
- byly použity jen doporučené zdroje napětí a příslušenství Robbe
- nabíječ nebyl vystaven vlhku, nebyly zde zjištěny žádné cizí zásahy, přetěžování nebo
mechanická
poškození
- pokuste se uvést možné důvody závady
18. VYLOUČENÍ ZÁRUKY
Tento nabíječ je určen výhradně pro nabíjení baterií uvedených v návodu k obsluze. Robbe
Modellsport nepřebírá v žádném případě zodpovědnost při jiném použití. Dodržení pokynů
v návodu k obsluze jako i podmínek a metod během provozu, používání a údržbě nabíječe
nemůže být firmou robbe kontrolována. Potud tedy firma Robbe nepřebírá v žádném
případě odpovědnost za ztráty, škody a náklady, které souvisí jakýmkoli způsobem s chybnou obsluhou a provozem. Pokud to zákon připouští, omezuje se závazek firmy robbe
Modellsport k plnění náhrady škody, stejně tak ze zákona, na hodnotu faktury za množství
zboží firmy robbe Modellsport, které se bezprostředně podílelo na poškozující události.
Toto neplatí, pokud firma robbe Modellsport podle závazných zákonných předpisů ručí
neomezeně, z důvodu záměru nebo hrubé nedbalosti.
21
Návod k obsluze
Obj. č.
Power Peak® C8 EQ-BID
8553
19. DOPORUČENÉ PŘÍSLUŠENSTVÍ
Nabíjecí kabel vysílač. aku
č. F1415
Nabíjecí kabel
přijímačových (č. F1416)
BID čip s kabelem 300
mm k vybavení dalších
akumulátorů
č. 8473
BID kabel, 300 mm
č. 8474
BID-Kabel, 500 mm
č. 8475
Adapterkabel 3S-XH
č. 4029
Adapterkabel 2X3S EHR
č. 4023
Adapterkabel 2X3S
XH-EHR
č. 4023XH
Adapterkabel 3 X 2S
XH-EHR
č. 4031XH
22
BID čip bez kabelu k vybavení dalších akumulátorů
č. 8472
BID-klíč
č. 8888
Adapterkabel 3X 2S EHR
č. 4031
20.
Návod k obsluze
Obj. č.
Power Peak® C8 EQ-BID
8553
SERVISNÍ ADRESY
Země
Firma
Ulice
Město
Telefon
Fax
Andorra
SORTENY
Santa Anna, 13
AND-00130 LES
ESCALDES
0037-6-82 0827
0037-6-82 5476
Dänemark
Nordic Hobby A/S Bogensevej 13
8900 RANDERS
0045-86-43 6100
0045-86-43 7744
D-36355 Grebenhain
0049-6644-87-777 0049-6644-7412
Deutschland robbe-Service
Metzloser Str. 38
England
robbe-Schlüter UK LE10-1UB
Leicestershire
0044-1455-63
7151
0044-1455-63
5151
Frankreich
S.A.V Messe
BP 12
F-57730 Folschviller
0033-387-94 6258 0033-387-94 6258
TAG Models
Griechenland
Hellas
18,Vriullon Str.
143 41 Nea Philadelfia
0030-1-25 84 380 0030-1-25 33 533
Italien
MC-Electronic
Via del Progresso I-36010 Cavazeale 00390-0444-94
25
(Vi)
5992
Niederlande/
Belg.
Jan van Mouwerik
Slot de Houvelaan
NL-3155 Maasland 0031-1059-13 594 0031-1059-13 594
30
Norwegen
Norwegian ModelBox 2140
lers
3101 TØNSBERG 0047-333-78-000
Österreich
Robbe Service
Puchgasse 1
A-1220 Wien
Schweden
Minicars Hobby
A.B.
Bergsbrunnagatan
75323 Uppsala
18
Schweiz
robbe Futaba
CH-4203
Baslerstrasse 67 a
Grellingen
Service
00390-0444-94
5991
0047-333-78-001
0043-01259-65
5214
0043-01259-1179
0046-18-71 2015
0046-18-10 8545
0041-61-741 23 22 0041-61 741 23 34
Slowakische
Ivo Marhoun
Rep.
Horova 9
CZ-35201 AS
00420 351 120
162
Spanien
Metzloser Str. 38
D-36355
Grebenhain
0049-6644-87-777 0049-6644-87-779
Horova 9
CZ-35201 AS
00420 351 120
162
35060 PinarbasiIzmir
0090-232-47 912
58
robbe-Service
Tschechische
Ivo Marhoun
Rep.
Türkey
21.
Formula Modelsports
0900-232-47 917
14
LIKVIDACE AKUMULÁTORŮ A NABÍJEČE
Nikdy nevyhazujte akumulátory do běžného odpadu. Poškozené nebo
použité aku vždy likvidujte na místech k tomu určených. To jsou všechna
místa, kde se prodávají akumulátory nebo za tímto účelem určená
sběrná místa. Abyste zabránili zkratům, přelepte obnažené kontakty
izolepou.
Poplatek za likvidaci akumulátorů je již součástí kupní ceny. Prodejci jsou povinni vzít
použité nebo poškozené články zpět. Všechna tato místa jsou povinna vzít zpět staré
články, ať už jste je tam zakoupili nebo ne. Akumulátory jsou určeny k dalšímu zpracování.
Tím se materiál znovu dostane do výrobního oběhu. Pomozte, prosím, chránit životní
prostředí.
23
Elektrické a elektronické přístroje na konci jejich životnosti nelze vyhazovat do běžného komunálního odpadu. Nabíječ Power Peak® C8 EQ-BID
je proto označen uvedeným symbolem. Tento symbol znamená, že elektrické a elektronické přístroje na konci jejich životnosti nelze vyhazovat
do běžného komunálního odpadu. Zlikvidujte nabíječ v místním Ekodvoru
nebo recyklačním centru. Toto platí pro země, které jsou členy EU i pro
ostatní evropské země s odlišnými sběrnými systémy.
22.
PROHLÁŠENÍ O SHODĚ
Tímto firma robbe Modellsport prohlašuje, že je tento nabíječ v souladu se základními
nařízeními a ostatními relevantními předpisy dle CE směrnic.
Originál prohlášení o shodě najdete na internetu na www.robbe.com u příslušného popisu
výrobku přes vyvolání pomocí „Conform“.
robbe Modellsport GmbH & Co.KG
Metzloser Straße 38
D-36355 Grebenhain OT Metzlos/Gehaag
Telefon +49 (0) 6644 / 87-0
robbe Form ACBA
Chyby a technické změny jsou vyhrazeny.
Copyright robbe-Modellsport 2010
Kopírování a tisk, jakož i výňatky z tohoto návodu, jsou povoleny pouze s
písemným svolením firmy robbe Modellsport -GmbH & Co.KG.
24
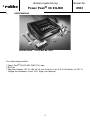
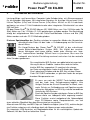
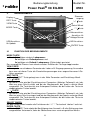
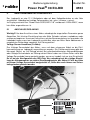
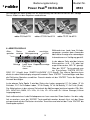
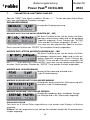
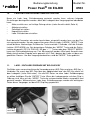
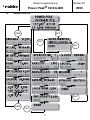


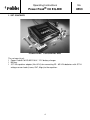
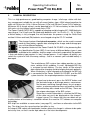
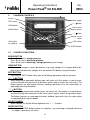
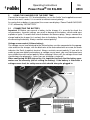

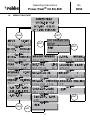


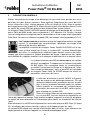
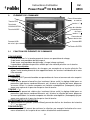

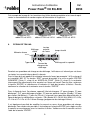

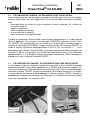
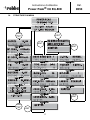

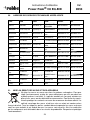
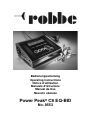
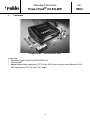
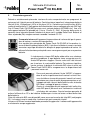
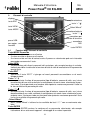
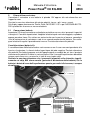
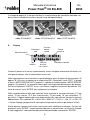
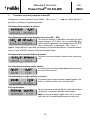
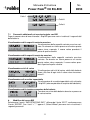
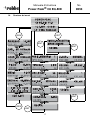


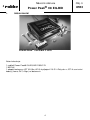
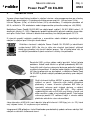
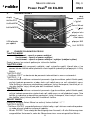
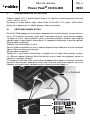
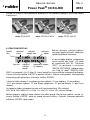
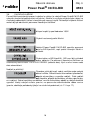
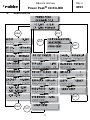
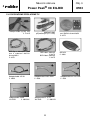
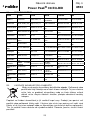

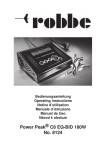


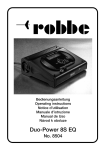
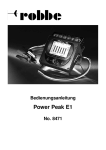
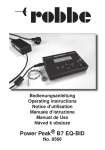
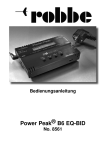

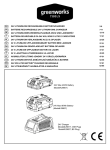
![取扱説明書 [保証書付]](http://vs1.manualzilla.com/store/data/006545752_4-45b30c28e4a2e6ff8ec7986df64c7ecf-150x150.png)