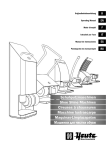
1
Betriebsanleitung Hubantriebe MC100/24 • MC100/230 • MC103/24 • MC103/230 März 2011 / 112454 / DE Allgemeine Informationen Allgemeine Informationen Änderungsnachweis Version Datum Änderungen 1.0 Januar 2006 Ersterstellung 2.0 März 2008 Vollständige Überarbeitung und Ergänzung 2.1 März 2011 Überarbeitung Urheberrecht Das Urheberrecht an dieser Betriebsanleitung sowie alle Rechte für den Fall einer Patenterteilung oder Gebrauchsmustereintragung verbleiben beim Hersteller! Änderungsvorbehalt In dieser Betriebsanleitung aufgeführte Vorschriften, Richtlinien, Normen usw. entsprechen dem Informationsstand während der Ausarbeitung und unterliegen keinem Änderungsdienst. Sie sind vom Betreiber in Eigenverantwortung jeweils in ihrer neuesten, gültigen Fassung anzuwenden. Gegenüber allen Daten, Angaben und Abbildungen in dieser Anleitung bleibt das Recht technischer Änderungen und Verbesserungen jederzeit vorbehalten. Ein Anspruch auf Änderung oder Nachbesserung von bereits ausgelieferten Hubantrieben ist ausgeschlossen. Hersteller HORA Holter Regelarmaturen GmbH & Co. phone: +49 (0) 5207/8903-0 www.hora.de Hubantriebe MC100 • MC103 2 Version 2.1 - März 2011 Betriebsanleitung Inhalt Inhalt 1 Sicherheit ................................................................... 4 1.1 Bestimmungsgemäße Verwendung......................... 4 1.2 Für den Betreiber..................................................... 4 1.3 Personal................................................................... 5 1.4 Vor den Arbeiten...................................................... 5 1.5 Im Betrieb ................................................................ 5 1.6 Arbeitsumgebung..................................................... 5 2 Produktbeschreibung ............................................... 6 2.1 Bauteile.................................................................... 6 2.2 Zubehör ................................................................... 7 2.3 Betriebsarten ........................................................... 7 2.3.1 Stetigbetrieb ................................................. 7 2.3.2 Dreipunktbetrieb ........................................... 8 2.4 Funktionen ............................................................... 8 2.4.1 Binärsignal / Frostschutzfunktion.................. 8 2.4.2 Blockiererkennung........................................ 8 2.4.3 Drahtbrucherkennung................................... 8 2.4.4 Stellzeit ......................................................... 9 2.4.5 Hysterese ..................................................... 9 2.4.6 Handbetrieb und Rückmeldesignal............... 9 2.4.7 Autotest ........................................................ 9 2.4.8 Autopause .................................................... 9 2.4.9 Potentialfreier Wegschalter (Zubehör).......... 9 2.5 Technische Daten.................................................. 10 2.6 Typenschild............................................................ 11 3 4 Montage....................................................................12 4.1 Lieferumfang prüfen ...............................................12 4.2 Montage vorbereiten ..............................................12 4.3 Hubantrieb auf Ventil montieren.............................13 4.4 Deckel demontieren/montieren ..............................14 4.5 Elektrik anschließen ...............................................15 4.5.1 Reglerunabhängige Schaltung ...................17 4.5.2 Platinenabdeckung entfernen .....................18 4.6 Zubehör einbauen ..................................................19 4.6.1 Wegschalterplatine einbauen .....................19 4.6.2 Platine für mA-Ausgangssignal einbauen...20 5 Inbetriebnahme........................................................22 5.1 Betriebsparameter und Kodierschalterstellungen ..23 5.2 Eingangssignal einstellen.......................................23 5.3 Stellzeit einstellen ..................................................23 5.4 Hysterese einstellen...............................................24 5.5 Stellrichtung einstellen ...........................................24 5.6 Autotest und Autopause einstellen.........................24 5.7 Endposition einstellen ............................................25 5.8 Potentialfreien Wegschalter einstellen ...................25 5.9 Wegmesssystem initialisieren ................................27 5.10 In Betrieb nehmen..................................................28 6 Bedienung ................................................................29 6.1 Zwischen Hand- und Automatikbetrieb wechseln ..29 6.2 LED-Anzeige ..........................................................30 Transport und Lagerung ........................................ 11 7 Wartung, Pflege und Instandsetzung ....................30 8 Ersatzteile.................................................................30 9 Außerbetriebnahme und Entsorgung....................30 10 Störungsbehebung..................................................31 10.1 Störungen beheben................................................31 10.2 Checkliste bei Betriebsstörungen...........................32 Hubantriebe MC100 • MC103 Betriebsanleitung Version 2.1 - März 2011 3 1 Sicherheit 1 Sicherheit Lesen Sie diese Betriebsanleitung insbesondere die folgenden Sicherheitshinweise vor Montage und Betrieb sorgfältig. GEFAHR WARNUNG VORSICHT ACHTUNG Tipp: 1.1 GEFAHR Unmittelbar drohende Gefahr, die zu Tod oder schweren Körperverletzungen führt. WARNUNG Möglicherweise gefährliche Situation, die zu Tod oder schweren Körperverletzungen führen kann. VORSICHT Möglicherweise gefährliche Situation, die zu leichten Körperverletzungen führen könnte. Weist auch auf eine Gefahr hin, die zu Sachschäden führen kann. ACHTUNG Möglicherweise schädliche Situation, bei der das Produkt oder eine Sache in seiner Umgebung beschädigt werden kann. Anwendungshinweise und andere nützliche Informationen. Bestimmungsgemäße Verwendung Hubantriebe MC100/24, MC100/230, MC103/24, MC103/230 werden angesteuert durch Dreipunktregler oder stetige Regelung. Hubantriebe der hier beschriebenen Baureihen dienen zur Hubverstellung von Ventilen. Um die bestimmungsgemäße Verwendung zu gewährleisten, müssen Sie vor Beginn aller Maßnahmen auf die Übereinstimmung der obigen Typenbezeichnung mit dem Typenschild der Hubantriebe achten. Für die technischen Daten der Hubantriebe und die Anforderungen an das Versorgungsnetz sind die Angaben auf dem Typenschild maßgebend. Jede Benutzung für andere, von der oben genannten bestimmungsgemäßen Verwendung, abweichende Aufgaben sowie ein Betrieb bei anderen als den zulässigen Netzverhältnissen gilt als nicht bestimmungsgemäßer Gebrauch. Das Risiko für Mensch und Gerät sowie anderer Sachwerte bei nicht bestimmungsgemäßem Gebrauch trägt allein der Betreiber! Zur bestimmungsgemäßen Verwendung gehört auch die Einhaltung der Unfallverhütungs-, DIN VDE-Vorschriften sowie eine sicherheitsgerechte Arbeitsweise bei allen in dieser Betriebsanleitung beschriebenen Maßnahmen, unter Berücksichtigung üblicher technischer Regeln. 1.2 Für den Betreiber Bewahren Sie die Betriebsanleitung ständig am Einsatzort der Hubantriebe griffbereit auf! Achten Sie bei Aufstellung, Betrieb und Wartung die jeweils gültigen Arbeitsschutz-, Unfallverhütungs- und DIN VDE-Vorschriften. Hubantriebe MC100 • MC103 4 Version 2.1 - März 2011 Betriebsanleitung 1 Sicherheit Berücksichtigen Sie eventuell zusätzliche regionale, örtliche oder innerbetriebliche Sicherheitsvorschriften. Stellen Sie sicher, dass jede Person, die Sie mit einer der in dieser Betriebsanleitung beschriebenen Maßnahmen betrauen, diese Anleitung gelesen und verstanden hat. 1.3 Personal Nur qualifiziertes Personal darf an diesen Hubantrieben oder in dessen Nähe arbeiten. Qualifiziert sind Personen, wenn Sie mit Aufstellung, Montage, Inbetriebnahme und dem Betrieb bzw. der Wartung der Hubantriebe vertraut sind und über die ihrer Tätigkeit entsprechende Qualifikationen verfügen. Zu notwendigen oder vorgeschriebenen Qualifikationen gehören u.a.: • Ausbildung / Unterweisung bzw. die Berechtigung, Stromkreise und Geräte / Systeme gemäß EN 60204 (DIN VDE 0100 / 0113) und den Standards der Sicherheitstechnik ein- und auszuschalten. • Ausbildung oder Unterweisung gemäß den Standards der Sicherheitstechnik in Pflege und Gebrauch angemessener Sicherheits- und Arbeitsschutzausrüstung. • Schulung in Erster Hilfe. Arbeiten Sie sicher und unterlassen Sie jede Arbeitsweise, die die Sicherheit von Personen gefährdet oder den Hubantrieb bzw. andere Sachwerte in irgendeiner Weise schädigt. 1.4 Vor den Arbeiten Prüfen Sie vor allen Arbeiten, ob die hier angegeben Typen mit den Angaben auf dem Typenschild am Hubantrieb übereinstimmen: Hubantriebe MC100/24, MC100/230, MC103/24, MC103/230. 1.5 Im Betrieb Ein sicherer Betrieb ist nur möglich, wenn Sie den Transport, die Lagerung, die Montage, die Bedienung und die Instandhaltung sicherheitsgerecht sowie sachund fachgerecht durchführen. Transport, Installation und Montage Instandhaltung und Wartung 1.6 Beachten Sie die allgemeinen Einrichtungs- und Sicherheitsvorschriften für den Heizungs- Lüftungs-, Klima- und Rohrleitungsbau. Setzen Sie Werkzeug fachgerecht ein. Tragen Sie die geforderte persönliche sowie sonstige Schutzausrüstungen. Achten Sie darauf, dass qualifiziertes Personal den Hubantrieb vor Wartungsoder Instandsetzungsarbeiten gemäß DIN VDE freischaltet. Arbeitsumgebung Beachten Sie die Angaben zur Arbeitsumgebung in den Technischen Daten. Hubantriebe MC100 • MC103 Betriebsanleitung Version 2.1 - März 2011 5 2 Produktbeschreibung 2 Produktbeschreibung Der Hubantrieb steuert mithilfe eines Microcontrollers einen Schrittmotor. Die Drehbewegung des Schrittmotors wird über ein Planetengetriebe und eine Gewindespindel mit Spindelmutter in eine Linearbewegung umgesetzt. 2.1 Bauteile MC100/24, MC103/24 201 201 7 mm 24 V 33, 33, 481 481 110 110 230 230 231 231 101 101 107 107 11 480 480 13 13 12 36 36 6 6 88 28 28 33 11 11 22 308 308 448 448 201 201 MC100/230, MC103/230 230 V 107 107 27 27 1 2 3 6 8 11 13 27 28 33 36 Antriebsgehäuse Traverse Kupplungsstück* Kupplung Stellungsanzeige* Distanzsäule Brücke Abstandhalter für 230 V* Bügel Abdeckung* Handrad Bild 1 101 107 110 201 230 231 308 448 480 481 Motor Klemmplatine für 24 V oder 230 V Hauptplatine Deckel für 24 V oder 230 V* Kabeleinführung M20 × 1,5* Kabeleinführung M16 × 1,5* Sicherungsscheibe* Sechskantmutter M8* Typenschild Schaltplan auf der Abdeckung Bauteilbezeichnungen * Dieses Bauteil ist als Ersatzteil lieferbar! Hubantriebe MC100 • MC103 6 Version 2.1 - März 2011 Betriebsanleitung 2 Produktbeschreibung Zubehör 111 111 230 V230 AC V X 0..20 mA 4..20 mA 0..20 mA 4..20 mA N2 N2 X 0..20 mA 4..20 mA N2 X 24 V AC / 24 V24DCV X 2.2 111 Platine für Ausgangssignal X = 0/4 ... 20 mA Bild 2 106 106 LED1 Platine für mA-Ausgangssignal im Deckel 230 230 V AC V 24 V AC / 24 24 V DCV LED1 LED1 LED1 LED1 LED1 LED2 LED2 LED2 LED2 LED2 LED2 106 Wegschalterplatine Bild 3 Tipp: 2.3 Wegschalterplatine im Deckel Wahlweise Betrieb mit mA-Ausgangssignal oder Wegschalter möglich. Betriebsarten Der Hubantrieb kann im Handbetrieb oder Automatikbetrieb betrieben werden. • Im Handbetrieb wird der Hub über das Handrad verstellt. • Im Automatikbetrieb wird der Hub elektrisch gesteuert. 2.3.1 Stetigbetrieb Im Stetigbetrieb wird die Stellung des Hubantriebs von der Anlagensteuerung vorgegeben. Im Hubantrieb wird dazu ständig das Eingangssignal (Y) der Anlagensteuerung mit dem Ausgangssignal (X) des Hubantriebs verglichen. Das Ausgangssignal ist dabei abhängig von der Position des Hubantriebs (Verfahrweg). Der Hubantrieb verfährt so lange, bis das Eingangssignal und das Ausgangssignal sich entsprechen. Hubantriebe MC100 • MC103 Betriebsanleitung Version 2.1 - März 2011 7 2 Produktbeschreibung Eingangssignal (Y) Das Eingangssignal (Y) der Anlagensteuerung gibt dem Hubantrieb die SollStellung vor. Es liegt als analoges Signal an Klemme Y an. Folgende Eingangssignale sind möglich: • 0 … 10 V DC / 2 … 10 V DC • 0 … 20 mA / 4 … 20 mA Ausgangssignal (X) Das Ausgangssignal (X) gibt die Ist-Stellung des Hubantriebs an. Es liegt als analoges Signal an Klemme X an. 0% bis 100% Ventilhub werden ausgegeben als: • 0 … 10 V DC • 0 … 20 mA oder 4 … 20 mA (Zubehör Platine für Ausgangssignal (111)) 2.3.2 Dreipunktbetrieb Die Bewegungsrichtung wird über eine Steuerspannung an Klemme 2 und Klemme 3 auf der Hauptplatine vorgegeben: • Wenn die Steuerspannung an Klemme 2 anliegt, dann fährt die Spindelmutter aus. • Wenn die Steuerspannung an Klemme 3 anliegt, dann fährt die Spindelmutter ein. 2.4 2.4.1 Funktionen Binärsignal / Frostschutzfunktion Die Klemmen B1 und B2 auf der Hauptplatine sind im Normalbetrieb gebrückt. Wenn der Stromkreis zwischen B1 und B2 unterbrochen wird, dann speichert der Hubantrieb die aktuelle Position und fährt anschließend automatisch an seine Endposition. Während dieses Vorgangs werden alle anderen Steuersignale ignoriert. Der Hubantrieb verbleibt in der Endposition, bis der Stromkreis zwischen B1 und B2 wieder geschlossen wird. • Im Dreipunktbetrieb fährt der Hubantrieb anschließend automatisch an die gespeicherte Position zurück. • Im Stetigbetrieb wird wieder der Sollwert des Einganssignals angefahren. 2.4.2 Blockiererkennung Wenn der Hubantrieb mechanisch blockiert wird, dann fährt der Hubantrieb kurz zurück und versucht erneut die geforderte Position zu erreichen. Gelingt dies auch nach insgesamt 7 Versuchen nicht, wird der Hubantrieb abgeschaltet, um Schäden an Hubantrieb und Stellglied zu vermeiden. Die Blockiererkennung wird über die LED angezeigt. 6.2 LED-Anzeige auf Seite 30 2.4.3 Drahtbrucherkennung Die Drahtbrucherkennung ist nur im Stetigbetrieb mit einem Eingangssignal 2 … 10 V DC und 4 … 20 mA verfügbar. Wenn im Stetigbetrieb das Eingangssignal unter 1 V bzw. 2 mA fällt, fährt der Hubantrieb in die mit dem Kodierschalter S6 eingestellte Endposition. Die Drahtbrucherkennung wird über die LED angezeigt. 6.2 LED-Anzeige auf Seite 30 Hubantriebe MC100 • MC103 8 Version 2.1 - März 2011 Betriebsanleitung 2 Produktbeschreibung 2.4.4 Stellzeit Die Zeit, in der die Spindelmutter einen definierten Weg zurücklegt, wird als Stellzeit bezeichnet. Die Stellzeit wird in s/mm angegeben. Mit dem Kodierschalter S4 wird die Stellzeit eingestellt. 5.3 Stellzeit einstellen auf Seite 23 2.4.5 Hysterese Als Hysterese wird die Differenz des Eingangssignals (Y) bezeichnet, die nach einer Umkehr der Signalrichtung erforderlich ist, damit die Spindelmutter verfahren wird. Sie dient dazu, bei geringen Eingangssignaländerungen ein permanentes Pendeln des Antriebsmotors um eine bestimmte Hubposition zu vermeiden. 5.4 Hysterese einstellen auf Seite 24 2.4.6 Handbetrieb und Rückmeldesignal Im Handbetrieb können Sie den Hub ohne Versorgungsspannung manuell verändern. • Im Handbetrieb werden Motor- und Steuerelektronik abgeschaltet, so dass Hubbewegungen durch die Steuerung nicht möglich sind. • Sobald Sie den Hubantrieb in den Handbetrieb umstellen, schaltet die Steuerung ein Signal auf die Klemme R, sofern Versorgungsspannung anliegt. 6.1 Zwischen Hand- und Automatikbetrieb wechseln auf Seite 29 2.4.7 Autotest Wenn ein Ventil lange Zeit nicht betätigt wird, dann kann sich der Ventilkegel festsetzen. Die Autotestfunktion beugt dem vor. Wenn Sie die Autotest-Funktion des Hubantriebs einschalten, dann verfährt der Hubantrieb nach ca. 10 Tagen ohne Betätigung automatisch im Eilgang in die mit dem Kodierschalter S6 eingestellte Endposition und wieder in die Ausgangsposition. 5.6 Autotest und Autopause einstellen auf Seite 24 2.4.8 Autopause Mit dieser Funktion zählt der Antrieb die Fahrbefehle, die einen Richtungswechsel bedeuten. Bei mehr als 20 richtungsverschiedenen Fahrbefehlen pro Minute wird eine Zwangspause von 3 s eingelegt. 5.6 Autotest und Autopause einstellen auf Seite 24 2.4.9 Potentialfreier Wegschalter (Zubehör) Mit Hilfe der optionalen Wegschalterplatine (106) können Sie zwei Hubstellungen einstellen, bei denen ein potentialfreier elektrischer Kontakt geöffnet bzw. geschlossen wird. 5.8 Potentialfreien Wegschalter einstellen auf Seite 25 Hubantriebe MC100 • MC103 Betriebsanleitung Version 2.1 - März 2011 9 2 Produktbeschreibung 2.5 Technische Daten Typ MC100/24, MC103/24 MC100/230, MC103/230 Versorgungsspannung 24 V AC ± 10% 115 V AC ± 10% 24 V DC ± 10% 230 V AC + 6% -10% Leistungsaufnahme 6 VA 12 VA Gewicht 2,5 kg 2,5 kg Maße siehe Technische Datenblätter Hub max. 20 mm max. 20 mm Frequenz 50/60 Hz ± 5% 50/60 Hz ± 5% Umgebungstemperatur 0 bis +60°C 0 bis +60°C Schutzart IP 54 IP 54 Betriebsart S3-50% ED S3-50% ED Stellzeit 12, 9, 4, 1,9 s/mm 12, 9, 4, 1,9 s/mm Stellkraft 1,0 kN 1,0 kN Die angegebene Stellkraft wird bei Betrieb mit 24 V DC nur mit gleichgerichteter Wechselspannung erreicht. Tabelle 1 Technische Daten 0 … 10 V DC / 77 k 2 … 10 V DC / 77 k 0 … 20 mA / 510 4 … 20 mA / 510 Eingangssignal Y/ Eingangswiderstand (Bürde) • • • • Ausgangssignal X/ Belastbarkeit • 0 … 10 V DC / Bürde 1200 , Imax. 8 mA • 0 … 20 mA / Bürde 500 mit Zubehör Platine für Ausgangssignal (111) • 4 … 20 mA / Bürde 500 mit Zubehör Platine für Ausgangssignal (111) Rückmeldesignal R/ Belastbarkeit • 24 V DC / Mindestwiderstand 480 Imax. 35 mA Leitungswiderstand zwischen B1 und B2 • max. 10 Tabelle 2 Technische Daten Signale Hubantriebe MC100 • MC103 10 Version 2.1 - März 2011 Betriebsanleitung 3 Transport und Lagerung 2.6 Typenschild Das Typenschild befindet sich am Gehäuse des Hubantriebs. Darauf finden Sie die Typ-Bezeichnung und die Fabrikationsnummer (F.-Nr.) mit dem Fertigungsdatum (letzte vier Stellen). 2.1 Bauteile auf Seite 6 MC100/24 F.-Nr.: 07204142/01/0607 AC 50 Hz 24 V 6 VA 1,0 kN Y=0…10 V DC IP 54 4 s/mm X=0…10 V DC S3-50% ED Hub 20 mm Bild 4 Beispiel eines Typenschilds 3 Transport und Lagerung VORSICHT Verletzungsgefahr durch Nichtbeachten von Sicherheitsvorschriften! • Tragen Sie die geforderten persönlichen sowie sonstigen Schutzausstattungen. • Vermeiden Sie Stöße, Schläge, Vibrationen und Ähnliches am Hubantrieb. • Lagern Sie den Hubantrieb (und gegebenenfalls das komplette Stellgerät) trocken. • Beachten Sie die Transport- und Lagerungstemperatur von -20 bis +65°C. Hubantriebe MC100 • MC103 Betriebsanleitung Version 2.1 - März 2011 11 4 Montage 4 Montage Bevor Sie den Hubantrieb montieren: 4.1 Lieferumfang prüfen auf Seite 12 4.2 Montage vorbereiten auf Seite 12 Die folgenden Arbeiten gehören zur Montage des Hubantriebs: 4.3 Hubantrieb auf Ventil montieren auf Seite 13 4.4 Deckel demontieren/montieren auf Seite 14 4.5 Elektrik anschließen auf Seite 15 4.1 Lieferumfang prüfen 1 Prüfen Sie die Verpackung auf Beschädigung. 2 Entsorgen Sie die Verpackung umweltgerecht. 3 Kontrollieren Sie anhand des Lieferscheins, ob die Lieferung vollständig ist. 4 Melden Sie dem Hersteller fehlende oder beschädigte Produkte. 4.2 Montage vorbereiten Beschädigung durch nicht angebautes Ventil! Wenn Sie den Hubantrieb ohne Ventil betreiben, dann kann auf Grund des fehlenden Anschlags die Spindelmutter herausfallen. ACHTUNG • Betreiben Sie den Hubantrieb deshalb nur mit einem Ventil. 1 Achten Sie darauf, dass am Einbauort über dem Deckel ca. 140 mm Platz ist. 2 Prüfen Sie die Arbeitsumgebung, bevor Sie den Hubantrieb montieren und in Betrieb nehmen: 3 Stellen Sie sicher, dass das Ventil korrekt eingebaut ist. Informationen dazu finden Sie in der Einbauanleitung des Ventils. 4 Bestimmen Sie die Einbaulage des Hubantriebs. Hubantriebe dürfen nicht hängend angeordnet werden. M M M M M M AA A-B A-B BB Bild 5 Einbaulagen von Hubantrieb und Ventil Hubantriebe MC100 • MC103 12 Version 2.1 - März 2011 Betriebsanleitung 4 Montage 4.3 Hubantrieb auf Ventil montieren Wenn der Hubantrieb und das Ventil getrennt geliefert werden, müssen Sie den Hubantrieb auf das Ventil montieren. Montage von MC100/24, MC100/230 Montage von MC103/24, MC103/230 36 36 6 6 28 28 3 428 23 451 18 18 308 459 2 2 19 51 19 2 3 6 18 19 23 28 Traverse Adapter Kupplung Ventilspindel Ventilhals Montagehilfe Bügel Bild 6 36 51 308 428 451 459 Handrad Distanzring Sicherungsscheiben Schrauben Sechskantmutter M10 Sechskantmutter Hubantrieb auf Ventil montieren So montieren Sie den Hubantrieb Typ MC100: 1 Setzen Sie den Antrieb mit Traverse (2) auf den Ventilhals (19). Bild 6 auf Seite 13 2 Schieben Sie den Bügel (28) ein und ziehen Sie die Ventilspindel (18) mit der Montagehilfe (23) nach oben, bis die Ventilspindel (18) in die Kupplung (6) einrastet. 3 Befestigen Sie die Traverse (2) des Antriebes mit Schrauben (428) Schlüsselweite 13 und Sicherungsscheiben (308) auf dem Ventilhals (19). Hubantriebe MC100 • MC103 Betriebsanleitung Version 2.1 - März 2011 13 4 Montage So montieren Sie den Hubantrieb Typ MC103: 1 Schieben Sie den Bügel (28) ein. Bild 6 auf Seite 13 2 Ziehen Sie den Adapter (3) aus der Kupplung (6). 3 Drehen Sie die flache Sechskantmutter M10 (451) Schlüsselweite 17 auf die Ventilspindel (18). 4 Drehen Sie den Adapter (3) auf die Ventilspindel (18). 5 Kontern Sie die Ventilspindel (18) mit der flachen Sechskantmutter (451), um diese gegen Verdrehen zu sichern. 6 Stecken Sie den Distanzring (51) auf den Ventilhals (19). 7 Setzen Sie den Antrieb mit Traverse (2) und Sechskantmutter (459) auf den Ventilhals (19). 8 Schieben Sie den Bügel (28) ein und ziehen Sie die Ventilspindel (18) nach oben, bis die Ventilspindel (18) in die Kupplung (6) einrastet. 9 Befestigen Sie die Traverse (2) mit einer Sechskantmutter (459) Schlüsselweite 50. So demontieren Sie den Hubantrieb 1 Führen Sie die Schritte in umgekehrter Montagereihenfolge aus. 4.4 Deckel demontieren/montieren Im Deckel befinden sich die Klemmen für den elektrischen Anschluss. WARNUNG Stromschlag durch spannungsführende Teile! Wenn die Stromversorgung eingeschaltet ist, besteht Stromschlaggefahr durch spannungsführende Teile. • Stellen Sie vor den Arbeiten sicher, dass der Antrieb sicher vom Stromnetz getrennt ist. • Sichern Sie gegen unbefugtes Wiedereinschalten. • Nehmen Sie den Deckel nur vorübergehend ab. So nehmen Sie den Deckel ab 1 Stecken Sie einen Schraubendreher in die Aussparung des Deckels und hebeln Sie den Deckel (201) auf. 201 201 7 mm 7 mm 201 Deckel Bild 7 Deckel abnehmen Hubantriebe MC100 • MC103 14 Version 2.1 - März 2011 Betriebsanleitung 4 Montage Geräteschaden durch beschädigte Verkabelung! Beim Abnehmen des Deckels können Sie die Verkabelung im Deckel abreißen oder beschädigen. ACHTUNG • Nehmen Sie den Deckel vorsichtig ab. 2 Nehmen Sie den Deckel (201) vorsichtig ab. 3 Trennen Sie die Steckverbindung zwischen Hautplatine (110) und Deckel (201). So setzen Sie den Deckel auf 1 Stecken Sie die zuvor abgezogenen Kabel wieder in die Stecker der Hauptplatine (110). Achten Sie dabei auf die Aussparungen an Stecker und Buchse. Tipp: Sie können den Deckel (201) in vier verschiedenen, jeweils um 90° versetzten Positionen montieren. Das ermöglicht eine günstige Verlegung der Anschlussleitung bei verschiedenen Installationen des Hubantriebs. 2 Setzen Sie den Deckel (201) auf und drücken Sie ihn mit mäßigem Kraftaufwand in seinen Sitz. 3 Prüfen Sie den einwandfreien Sitz des Deckels, damit die Dichtheit des Antriebsgehäuses gewährleistet ist. 4.5 WARNUNG Elektrik anschließen Lebensgefahr durch unqualifiziertes Personal! Das Anschließen der Elektrik durch unqualifiziertes Personal kann Tod, schwere Körperverletzung oder erheblichen Sachschaden zur Folge haben. • Achten Sie darauf, dass diese Arbeiten nur von qualifiziertem Personal ausgeführt werden dürfen. 1.3 Personal auf Seite 5 WARNUNG Stromschlag durch spannungsführende Teile! Wenn die Versorgungsspannung eingeschaltet ist, besteht Stromschlaggefahr durch spannungsführende Teile. • Stellen Sie vor den Arbeiten sicher, dass der Antrieb sicher vom Stromnetz getrennt ist. • Sichern Sie gegen unbefugtes Wiedereinschalten. So bereiten Sie den elektrischen Anschluss vor 1 Stellen Sie sicher, dass die Versorgungsspannung mit den Angaben auf dem Typenschild des Hubantriebs übereinstimmt. 2 Legen Sie den Leitungsquerschnitt entsprechend der Antriebsleistung und erforderlichen Leitungslänge aus, um Betriebsstörungen zu vermeiden. 3 Verlegen Sie die Netzleitungen bei einer Versorgungsspannung > 48 V getrennt von Signal- und Steuerleitungen. Wenn Sie die Leitungen in einem gemeinsamen Leitungskanal verlegen, müssen Sie abgeschirmte Steuerleitungen verwenden. 4 Prüfen Sie die Versorgungsspannung. Falls die geforderte Toleranz der Versorgungsspannung mit einem Netztransformator nicht eingehalten werden kann, müssen Sie einen Wechselspannungskonstanthalter einsetzen. 2.5 Technische Daten auf Seite 10 Hubantriebe MC100 • MC103 Betriebsanleitung Version 2.1 - März 2011 15 4 Montage So schließen Sie die Elektrik an 1 Nehmen Sie den Deckel (201) ab. So nehmen Sie den Deckel ab auf Seite 14 2 3 Führen Sie die Leitung durch die Verschraubung im Deckel zur Klemmleiste. Schließen Sie die Elektrik gemäß Schaltplan an. Bild 8 auf Seite 16 Tipp: Der Schaltplan (481) befindet sich auch auf der Platinenabdeckung (33). Fehlfunktion durch falsches Nullpotential! Wenn der Hubantrieb von Signalgebern mit unterschiedlichen Nullpotentialen elektrisch versorgt wird, kann dies zu falschem Regelverhalten führen. ACHTUNG • Stellen Sie sicher, dass die Nullpotentiale korrekt verwendet werden. Tabelle 3 auf Seite 17 4 Ziehen Sie die Verschraubungen fest. U UB N1 2 230 V AC; 230 VAC; 24 24VAC; V AC; V DC 2424 VDC (GND) NN (GND) Bild 8 3 R B1 B2 N2 Y T X WE1 WE1 WE2 WE2 20 21 22 23 24 25 GND GND Schaltplan Hubantriebe MC100 • MC103 16 Version 2.1 - März 2011 Betriebsanleitung 4 Montage Klemme Beschreibung UB, N1 Versorgungsspannung 2 Steuerspannung für Abwärtsbewegung bei Dreipunktbetrieb 3 Steuerspannung für Aufwärtsbewegung bei Dreipunktbetrieb R Rückmeldesignal in Betriebsart „Handbetrieb“ • R= 24 V DC max. 35 mA B1, B2 Binäreingang / Frostschutzfunktion N2 Nullpotential der Signale X, Y und R • Wenn die Nullpotentiale der Signale X, Y und R mit dem Nullpotential der Versorgungsspannung identisch sind, können Sie die Klemmen N1 und N2 brücken. • Wenn Sie den Antrieb im Stetigbetrieb mit 230 V betreiben, dann müssen Sie N2 anschließen. • Wenn Sie den Antrieb im Dreipunktbetrieb mit 230 V betreiben, dann müssen Sie N2 anschließen, wenn Sie zusätzlich X oder R verwenden wollen. Y Eingangssignal Stetigbetrieb X Ausganssignal Stetigbetrieb 20, 21, 22 Klemmen Wegschaltereinheit WE1 23, 24, 25 Klemmen Wegschaltereinheit WE2 Tabelle 3 4.5.1 Legende zum Schaltplan Reglerunabhängige Schaltung Wenn Sie mit 24 V Versorgungsspannung und 0 … 10 V DC / 2 … 10 V DC Eingangssignal arbeiten, dann können Sie den Antrieb mit einem dreistufigen Umschalter im Steuerschrank reglerunabhängig schalten. So schalten Sie den Antrieb reglerunabhängig 1 Legen Sie die Versorgungsspannung 24 V AC über eine Diode und einen dreistufigen Umschalter an Klemme Y an. z z.B: 1N4001; 1N4148 10 V Pos. 0 V Pos. Regelbetr. Bild 9 2 Reglerunabhängige Schaltung Mit dem Umschalter können Sie den Hubantrieb in folgende Positionen verfahren: • Regelbetrieb durch Eingangssignal Y (Normalbetrieb) • 10 V-Position • 0 V-Position, bei 2 … 10 V DC kann der Hubantrieb in die durch Kodierschalter S6 gewählte Position gefahren werden. 5.1 Betriebsparameter und Kodierschalterstellungen auf Seite 23 5.7 Endposition einstellen auf Seite 25 Hubantriebe MC100 • MC103 Betriebsanleitung Version 2.1 - März 2011 17 4 Montage 4.5.2 Platinenabdeckung entfernen Um den Hubantrieb über die Kodierschalter einzustellen, müssen Sie zunächst die Platinenabdeckung (33) entfernen. WARNUNG Stromschlag durch spannungsführende Teile! Wenn die Stromversorgung eingeschaltet ist, besteht Stromschlaggefahr durch spannungsführende Teile. • Stellen Sie vor den Arbeiten sicher, dass der Antrieb sicher vom Stromnetz getrennt ist. • Sichern Sie gegen unbefugtes Wiedereinschalten. 1 Stecken Sie einen Schraubendreher in eine Aussparung des Deckels (201) und heben Sie den Deckel (201) heraus. 2 Stecken Sie einen kleinen Schraubendreher in die dafür vorgesehene Aussparung in der Platinenabdeckung (33) und heben Sie diese vorsichtig heraus. 33 33 x 2...10 V (4...20 mA) 0...10 V (0...20 mA) y Hysterese 0,5 V Endpos. Hysterese 0,15 V 7 8 INIT Pause Autotest t aus S 23 24 25 20 21 22 1,9 s/mm X 6 x y Endpos. 12s mm T 30 VAC; 4 VAC; 4 VDC (GND) UB N1 2 3 Pause Autotest 9s mm R ein 4s mm GND ON B1 B2 N2 Y 5 WE1 4 3 U 2 1 WE2 JP1 33 Abdeckung Bild 10 3 Platinenabdeckung im Antriebsgehäuse abnehmen Nach dem Abheben der Platinenabdeckung (33) im Antriebsgehäuse (1) werden die Kodierschalter S1 bis S8 sowie Jumper JP1 und JP2 zugänglich. Hubantriebe MC100 • MC103 18 Version 2.1 - März 2011 Betriebsanleitung 4 Montage 4.6 Zubehör einbauen Zubehör gehört nur bei ausdrücklicher Bestellung zum Lieferumfang des Hubantriebs! Die Hubantriebe sind vorbereitet für eine Nachrüstung mit: • Wegschalterplatine (106) • Platine für Ausgangssignal X=0/4 … 20 mA (111) Tipp: Wahlweise Betrieb mit mA-Ausgangssignal oder Wegschalter möglich. * Dieses Bauteil ist als Ersatzteil lieferbar! auf Seite 6 4.6.1 WARNUNG Wegschalterplatine einbauen Stromschlag durch spannungsführende Teile! Wenn die Stromversorgung eingeschaltet ist, besteht Stromschlaggefahr durch spannungsführende Teile. • Stellen Sie vor den Arbeiten sicher, dass der Antrieb sicher vom Stromnetz getrennt ist. • Sichern Sie gegen unbefugtes Wiedereinschalten. 1 Öffnen Sie den Deckel (201) des Hubantriebs. 4.4 Deckel demontieren/montieren auf Seite 14 2 24 V: Wegschalterplatine (106) in die Rasthaken des Deckels (201)einklipsen Bild 11 auf Seite 19. 3 230 V: Wegschalterplatine (106) auf die drei Abstandshalter (27) der Klemmplatine (107) drücken. 24 V 230 V 230 V 201 201 24 V 106 201 201 106 27 27 115 107 107 106 115 110 115 106 115 110 110 110 27 Abstandshalter 106 Wegschalterplatine 107 Klemmplatine für 24 V oder 230 V Bild 11 4 115 Steckerbuchse 110 Hauptplatine 201 Deckel für 24 V oder 230 V Einbau der Wegschalterplatine im Deckel Stecken Sie die Steckerbuchse (115) der Wegschalterplatine (106) auf die Stiftleiste (123) der Hauptplatine (110) auf. Achten Sie dabei auf die Aussparungen an Stiftleiste und Steckerbuchse. Hubantriebe MC100 • MC103 Betriebsanleitung Version 2.1 - März 2011 19 4 Montage y x 2...10 V (4...20 mA) Hysterese 0,5 V Endpos. 7 8 INIT Pause Autotest t aus S 23 24 25 1,9 s/mm 6 x R 12s mm 3 y Endpos. 9s mm JP2 230 VAC; 24 VAC; 24 VDC N (GND) T 0...10 V (0...20 mA) ein 4s mm UB N1 2 Hysterese 0,15 V GND ON Pause Autotest WE1 20 21 22 5 X 4 B1 B2 N2 Y 3 U 2 1 WE2 JP1 mA V R= return signal 123 123 123 Stiftleiste Bild 12 5 Stiftleiste für Wegschalterplatine auf der Hauptplatine Stellen Sie die Wegschalter ein. 5.8 Potentialfreien Wegschalter einstellen auf Seite 25 4.6.2 WARNUNG Platine für mA-Ausgangssignal einbauen Stromschlag durch spannungsführende Teile! Wenn die Stromversorgung eingeschaltet ist, besteht Stromschlaggefahr durch spannungsführende Teile. • Stellen Sie vor den Arbeiten sicher, dass der Antrieb sicher vom Stromnetz getrennt ist. • Sichern Sie gegen unbefugtes Wiedereinschalten. 1 Öffnen Sie den Deckel (201) des Hubantriebs. 4.4 Deckel demontieren/montieren auf Seite 14 2 24 V: Platine für mA-Ausgangssignal in die Rasthaken des Deckels (201) einklipsen. 230 V: Platine für mA-Ausgangssignal auf die drei Abstandshalter (27) der Klemmplatine (107) drücken. Bild 13 auf Seite 21 Hubantriebe MC100 • MC103 20 Version 2.1 - März 2011 Betriebsanleitung 4 Montage 24 V 230 V 230 V 201 201 24 V 111 201 201 111 27 27 115 107 111 115 110 115 107 111 115 110 110 110 27 Abstandshalter 111 Platine für mA-Ausgangssignal 107 Klemmplatine für 24 V oder 230 V Bild 13 115 Steckerbuchse 110 Hauptplatine 201 Deckel für 24 V oder 230 V* Einbau der Platine für mA-Ausgangssignal 3 Stecken Sie die Steckerbuchse (115) der Platine für mA-Ausgangssignal auf die Stiftleiste (123) der Hauptplatine (110) auf. Achten Sie dabei auf die Aussparungen an Stiftleiste und Steckerbuchse. 4 Legen Sie die einzelne Leitung von der Platine (111) für mA-Ausgangssignal an die Klemme X der Klemmplatine (107) an. 5 Wählen Sie den Signalbereich des Ausgangssignals mit dem Jumper : • Jumper rechts: 4 … 20 mA • Jumper links: 0 … 20 mA 4 ...mA 20 mA 4 ... 20 0..20 mA Einstellen der Platine für mA-Ausgangssignal 24 V 107 230 V 111 0..20 mA 4..20 mA N2 0..20 mA 4..20 mA 107 N2 X X X 111 Bild 15 4..20 mA 0..20 mA 4..20 mA X X Bild 14 4..20 mA 0..20 mA N2 X 0 ... mA 0 ... 2020mA Anschluss der Platine für mA-Ausgangssignal an Klemmplatine Hubantriebe MC100 • MC103 Betriebsanleitung Version 2.1 - März 2011 21 5 Inbetriebnahme 5 Inbetriebnahme WARNUNG Stromschlag durch spannungsführende Teile! Wenn die Stromversorgung eingeschaltet ist, besteht Stromschlaggefahr durch spannungsführende Teile. • Stellen Sie vor den Arbeiten sicher, dass der Antrieb sicher vom Stromnetz getrennt ist. • Sichern Sie gegen unbefugtes Wiedereinschalten. An den Kodierschaltern (116) und den Jumpern werden die Betriebsparameter eingestellt. Die Kodierschalter und Jumper befinden sich unter der Platinenabdeckung (33) im Antriebsgehäuse (1). 4.4 Deckel demontieren/montieren auf Seite 14 4.5.2 Platinenabdeckung entfernen auf Seite 18 U WE1 R B1 B2 N2 Y X 20 21 22 23 24 25 GND INIT 116 116 2...10 V (4...20 mA) y x aus on 7 6 5 4 ON x 3 0...10 V (0...20 mA) y Hysterese 0,5 V JP1 JP2 Endpos. Pause Autotest 2 ein Hysterese 0,15 V 1 V mA Endpos. Pause Autotest 1,9 s/mm 12s mm 9s mm 4s mm 8 S t 33 33 33 Platinenabdeckung Bild 16 JP2 LED R= return signal 3 T 1 2 3 4 5 6 7 8 UB N1 2 230 VAC; 24 VAC; 24 VDC N (GND) WE2 JP1 116 Kodierschalter JP1 Jumper JP2 Jumper Platinenabdeckung, Kodierschalter und Jumper Hubantriebe MC100 • MC103 22 Version 2.1 - März 2011 Betriebsanleitung 5 Inbetriebnahme 5.1 Betriebsparameter und Kodierschalterstellungen Bevor Sie den Hubantrieb in Betrieb nehmen können, müssen Sie mit den Kodierschaltern und Jumpern die Betriebsparameter einstellen. Schalter/ Jumper on S1 X-Kennlinie off X-Kennlinie Hub Hub X S2 Y-Kennlinie X Y-Kennlinie Hub Hub Y S3 Eingangssignal (Y) 0 … 10 V DC bzw. 0 … 20 mA Eingangssignal (Y) 2 … 10 V DC bzw. 4 … 20 mA S4 Hysterese 0,15 V Hysterese 0,5 V S5 Autotest und Autopause ein Autotest und Autopause aus S6 Endposition Antriebsspindel ausgefahren Endposition Antriebsspindel eingefahren S7, S8 Mit S7 und S8 wird die Stellzeit (1,9…12 s/mm) eingestellt JP1 Kennlinie linear Kennlinie exponential (1/50) JP2 Eingangssignal (Y) in mA Eingangssignal (Y) in V Tabelle 4 5.2 Y Kodierschalter- und Jumperstellungen Eingangssignal einstellen 0 ... 10 V 0 ... 20 mA V JP2 mA 2 ... 10 V 4 ... 20 mA Bild 17 Eingangssignal einstellen Weitere Informationen: Eingangssignal (Y) auf Seite 8 5.3 Stellzeit einstellen 1,9 s/mm Bild 18 4 s/mm 9 s/mm 12 s/mm Stellzeit einstellen Weitere Informationen 2.4.4 Stellzeit auf Seite 9 Hubantriebe MC100 • MC103 Betriebsanleitung Version 2.1 - März 2011 23 5 Inbetriebnahme 5.4 Hysterese einstellen 0,15 V 0,5 V Bild 19 Hysterese einstellen Weitere Informationen: 2.4.5 Hysterese auf Seite 9 5.5 Stellrichtung einstellen Die Stellrichtung des Hubantriebs können Sie an dem Kodierschalter umkehren (invertierter Betrieb). Antriebsstellung normaler Betrieb invertierter Betrieb (X und Y invertiert) JP2 Y = 10 V DC JP2 Y = 20 mA 66 18 JP2 Y = 0 V DC JP2 Y = 2 V DC JP2 Y = 0 mA Y = 4 mA JP2 Y = 0 V DC JP2 Y = 2 V DC 6 JP2 Y = 10 V DC JP2 Y = 20 mA JP2 Y = 0 mA JP2 18 Y = 4 mA Kodierschalter S1: X (Ausgangssignal), Kodierschalter S2: Y (Eingangssignal) Tabelle 5 Stellrichtung einstellen 5.6 Autotest und Autopause einstellen Wenn der Kodierschalter S5 auf ON steht, dann sind Autotest und Autopause aktiv. Beim Autotest wird ca. alle 10 Tage ein Anfahren der Endposition im Eilgang angestoßen. Dabei erfolgt automatisch ein neuer Nullabgleich. Bei der Autopause erfolgt nach mehr als 20 richtungsverschiedenen Fahrbefehlen pro Minute eine Pause von 3 Sekunden (Messzyklus 2 min). Eine getrennte Auswahl dieser beiden Funktionen ist nicht möglich. Hubantriebe MC100 • MC103 24 Version 2.1 - März 2011 Betriebsanleitung 5 Inbetriebnahme 5.7 Endposition einstellen Mit dem Kodierschalter S6 wählen Sie die Endposition des Hubantriebs: • S6 ON: Endposition bei ausgefahrener Spindelmutter • S6 OFF: Endposition bei eingefahrener Spindelmutter Die Endposition wird in folgenden Situationen angefahren: • bei Drahtbrucherkennung des Y-Signales (nur bei 2 … 10 V DC bzw. 4 … 20 mA), • bei einem Binärsignal (Stromkreis zwischen Klemme B1 und B2 ist unterbrochen), • beim Autotest, • nach Unterbrechung der Versorgungsspannung (Handverstellung). 5.8 Potentialfreien Wegschalter einstellen Die beiden Wegschalter stellen Sie über die Trimmpotentiometer P1/P2 unabhängig voneinander ein. Führen Sie die angegebenen Arbeitsschritte für jeden Wegschalter einmal durch. So stellen Sie einen Wegschalter ein 1 Stellen Sie sicher, dass der Hubantrieb in Betrieb genommen und initialisiert wurde. 5.10 In Betrieb nehmen auf Seite 28 5.9 Wegmesssystem initialisieren auf Seite 27 Fehlfunktion durch ungenau eingestellten Wegschalter! Wenn Sie den Antrieb auf Handbetrieb (ohne Versorgungsspannung) gestellt haben, können Sie den Wegschalter nur ungenau einstellen (Mittelstellung des Schleifers entspricht hier Schaltpunkt bei ca. 50% Hub). ACHTUNG • Stellen Sie den Antrieb auf Automatikbetrieb, um den Wegschalter genau einzustellen. 2 Verfahren Sie den Antrieb in die Position, in der ein Schaltereignis ausgelöst werden soll. Die folgenden Arbeitsschritte müssen Sie bei eingeschalteter Versorgungsspannung durchführen. WARNUNG Stromschlag durch spannungsführende Teile! Wenn die Versorgungsspannung eingeschaltet ist, besteht Stromschlaggefahr durch spannungsführende Teile. • Achten Sie darauf, dass Sie keine spannungsführenden Teile berühren. • Achten Sie darauf, dass Sie mit dem Werkzeug keinen Kurzschluss auf einer Platine herbeiführen. 3 Öffnen Sie den Deckel (201). 4.4 Deckel demontieren/montieren auf Seite 14 Im Deckel befindet sich die Wegschaltplatine (111). 4 Verdrehen Sie mit einem Schraubendreher das Trimmpotentiometer bis der Wegschalter schaltet. Die zugehörige LED geht dabei an oder aus. Mit dem Potentiometer P1 (105 P1) stellen Sie den Wegschalter 1 ein. Die LED 1 zeigt den Schaltzustand an. Hubantriebe MC100 • MC103 Betriebsanleitung Version 2.1 - März 2011 25 5 Inbetriebnahme Mit dem Potentiometer P2 (105 P2) stellen Sie den Wegschalter 2 ein. Die LED 2 zeigt den Schaltzustand an. 24 V 105 105 P1 P1 LED1 LED1 105 105 P2 P2 LED2 LED2 230 V JP2 105 105 P1 P1 LED1 LED1 105 105 P2 P2 LED2 LED2 105 P1Trimmpotentiometer Bild 20 5 105 P2Trimmpotentiometer Wegschalterplatine im Deckel Beachten Sie die zulässige Kontaktbelastung des Wegschalters: Nennlast 8 A, 250 V AC 8 A, 30 V DC Schalterspannung max. 400 V AC max. 125 V DC Tabelle 6 Kontaktbelastung des Wegschalters 6 Schalten Sie den Antrieb spannungsfrei und schließen Sie die Wegschalterkontakte an. 7 Schließen Sie den Deckel (201) des Hubantriebs So setzen Sie den Deckel auf auf Seite 15 Hubantriebe MC100 • MC103 26 Version 2.1 - März 2011 Betriebsanleitung 5 Inbetriebnahme 5.9 Wegmesssystem initialisieren Hubantrieb fährt automatisch an! Direkt nach dem Anlegen der Versorgungsspannung fährt der Hubantrieb automatisch in einen Referenzpunkt des Wegmesssystems. ACHTUNG • Warten Sie, bis der Referenzpunkt angefahren wurde und der Hubantrieb steht. Nach folgenden Arbeiten müssen Sie das inkrementale Wegmesssystem initialisieren: • bei der Erstinbetriebnahme • nach Reparaturen am Ventil oder am Antrieb • nach dem Austausch von Ventil oder Antrieb Sie können das Initialisieren auf zwei Arten auslösen. WARNUNG So initialisieren Sie über den Initialisierungstaster Stromschlag durch spannungsführende Teile! Wenn die Versorgungsspannung eingeschaltet ist, besteht Stromschlaggefahr durch spannungsführende Teile. • Achten Sie darauf, dass Sie keine spannungsführenden Teile berühren. • Achten Sie darauf, dass Sie mit dem Werkzeug keinen Kurzschluss auf einer Platine herbeiführen. 1 Öffnen Sie den Deckel (201). 4.4 Deckel demontieren/montieren auf Seite 14 2 Stellen Sie sicher, dass Versorgungsspannung anliegt. 3 Drücken Sie den Initialisierungstaster (118) und halten Sie ihn mindestens 1 Sekunde lang gedrückt. 110 110 on 118 1 2 3 4 5 6 7 8 110 Hauptplatine Bild 21 118 118 Initialisierungstaster Wegmesssystem initialisieren So initialisieren Sie über die Anschlussklemmen 1 Legen Sie die Versorgungsspannung gleichzeitig auf die Klemme 2 und 3. Achten Sie darauf, dass die Versorgungsspannung für mindestens 1 Sekunde anliegt. Bild 8 auf Seite 16 Hubantriebe MC100 • MC103 Betriebsanleitung Version 2.1 - März 2011 27 5 Inbetriebnahme 5.10 1 In Betrieb nehmen Prüfen Sie, ob alle Einbau- und Montagearbeiten fachgerecht abgeschlossen sind. 4 Montage auf Seite 12 2 Stellen Sie sicher, dass die elektrische Betätigung des Hubantriebs ohne Gefährdung von Personen oder Geräten bzw. der Anlage sichergestellt ist. 3 Stellen Sie sicher, dass der Hubantrieb korrekt befestigt und der Deckel des Hubantriebs geschlossen ist. 4.4 Deckel demontieren/montieren auf Seite 14 4 Stellen Sie sicher, dass der Hubantrieb in den Automatikbetrieb geschaltet ist. 6.1 Zwischen Hand- und Automatikbetrieb wechseln auf Seite 29 5 Stellen Sie sicher, dass die Betriebsparameter korrekt eingestellt sind. 5.1 Betriebsparameter und Kodierschalterstellungen auf Seite 23 6 Stellen Sie sicher, dass das Wegmesssystem initialisiert ist. 5.9 Wegmesssystem initialisieren auf Seite 27 7 Legen Sie die Versorgungsspannung an. Danach fährt der Hubantrieb den Referenzpunkt an. Der Hubantrieb ist betriebsbereit. Hubantriebe MC100 • MC103 28 Version 2.1 - März 2011 Betriebsanleitung 6 Bedienung 6 Bedienung Bevor Sie den Hubantrieb in Betrieb nehmen können, müssen Sie ihn initialisieren und die Betriebsart wählen. 5 Inbetriebnahme auf Seite 22 5.9 Wegmesssystem initialisieren auf Seite 27 6.1 Zwischen Hand- und Automatikbetrieb wechseln Sie können den Hubantrieb im Automatikbetrieb oder im Handbetrieb (Handverstellung) betreiben. • Im Automatikbetrieb fährt die Spindelmutter in die Stellung, die der Regler vorgibt. • Im Handbetrieb können Sie die Spindel von Hand einstellen, z.B. zu Kontrollzwecken. Das Ausgangssignal (X) ist im Handbetrieb nicht verfügbar. 36 36 Automatikbetrieb 36 Handrad Bild 22 Handbetrieb Automatikbetrieb wählen So schalten Sie in den Handbetrieb um 1 Schieben Sie das Handrad (36) in Stellung Handbetrieb und drehen Sie es dabei, bis das Handrad spürbar einrastet. Beschädigungsgefahr von Ventil und Antrieb im Handbetrieb! Das Ventil kann beschädigt werden, wenn es beim Schließen im Handbetrieb zu fest in seinen Sitz gepresst wird. ACHTUNG • Drehen Sie nicht weiter am Handrad, wenn der Kraftaufwand spürbar steigt! • Wenden Sie niemals Gewalt an! 2 Drehen Sie die Spindelmutter mit dem Handrad in die gewünschte Position. Drehen Sie das Handrad, bis der Drehwiderstand steigt. Wenden Sie keine Gewalt an! So schalten Sie im Automatikbetrieb um 1 Schieben Sie das Handrad (36) in Stellung Automatikbetrieb. 2 Der Hubantrieb fährt zunächst in die mit Kodierschalter S6 vorgegebene Position und danach in die vom Regler vorgegebene Position. Hubantriebe MC100 • MC103 Betriebsanleitung Version 2.1 - März 2011 29 7 Wartung, Pflege und Instandsetzung 6.2 LED-Anzeige Die LED auf der Hauptplatine im Antrieb zeigt Betriebszustände oder Störungen an. 10.2 Checkliste bei Betriebsstörungen auf Seite 32 LED Betriebszustand / Störung Normalbetrieb, Bereitschaft Die LED leuchtet dauernd, Antrieb erwartet Fahrbefehl. dauer Normalbetrieb Antrieb führt Fahrbefehl aus. Drahtbrucherkennung kurz - lang Rhythmus Bei den Betriebsarten 2 … 10 V DC oder 4 … 20 mA ist das Eingangssignal unter 1 V bzw. unter 2 mA gefallen. 2.4.3 Drahtbrucherkennung auf Seite 8 Blockiererkennung (nur Stetigbetrieb) Der Hubantrieb wird mechanisch blockiert. lang - lang Rhythmus 2.4.2 Blockiererkennung auf Seite 8 Dauersignal auf Klemme 2 und 3 lang - kurz Rhythmus Tabelle 7 Bei gleichzeitigem Steuersignal auf Klemme 2 und 3 erfolgt ein Initialisierungslauf (max. 4 Versuche). Nach 4 Fehlversuchen schaltet der Hubantrieb automatisch ab. Anzeige LED 7 Wartung, Pflege und Instandsetzung Der Hubantrieb ist wartungsarm. Sie brauchen keine laufende oder periodische Wartung durchführen. 8 Ersatzteile Achten Sie bei der Zubehör- oder Ersatzteilbestellung auf die Angaben auf dem Typenschild Ihres Hubantriebs. Für die technischen Daten der Hubantriebe und die Anforderungen an das Versorgungsnetz sind die Angaben auf dem Typenschild maßgebend. ACHTUNG Geräteschaden durch fehlerhafte Ersatzteile! Ersatzteile müssen den vom Hersteller festgelegten technischen Anforderungen entsprechen. • Setzen Sie nur Originalersatzteile ein. 2.1 Bauteile auf Seite 6 * Dieses Bauteil ist als Ersatzteil lieferbar! auf Seite 6 Hubantriebe MC100 • MC103 30 Version 2.1 - März 2011 Betriebsanleitung 9 Außerbetriebnahme und Entsorgung 9 Außerbetriebnahme und Entsorgung Entsorgen Sie den Hubantrieb entsprechend der landesspezifischen Vorgaben und Gesetze. 10 Störungsbehebung Nach der Störungsbehebung, müssen Sie das Wegmesssystem neu initialisieren. 5.9 Wegmesssystem initialisieren auf Seite 27 10.1 Störungen beheben Falls der Hubantrieb nicht einwandfrei arbeitet, gehen Sie wie folgt vor, um die Störung zu beheben: 1 Prüfen Sie, ob der Hubantrieb korrekt montiert wurde. 2 Prüfen Sie die Einstellungen des Hubantriebs und die Angaben des Typenschildes. 3 Beheben Sie die Störungen anhand der Checkliste. 10.2 Checkliste bei Betriebsstörungen auf Seite 32 4 Falls sich auch danach die Störung nicht beheben lässt, fragen Sie beim Hersteller nach. 5 Geben Sie bei allen Rückfragen an den Hersteller bzw. beim Einsenden Folgendes an: • F.-Nr. (Fabrik-Nummer = Auftragsnummer) • Typenbezeichnung • Versorgungsspannung und Frequenz • Zusatzausrüstung • Störungsbericht 6 Falls sich die Störung auch nicht durch die Nachfrage beheben lässt, können Sie das Gerät an den Hersteller schicken. Hubantriebe MC100 • MC103 Betriebsanleitung Version 2.1 - März 2011 31 10 Störungsbehebung 10.2 Checkliste bei Betriebsstörungen Störung Ursache Behebung 1. Hubantrieb funktioniert nicht. Handrad (36) ist in Stellung Handbetrieb Handrad in Stellung Automatikbetrieb schalten. Netzausfall Ursache feststellen und beseitigen. Sicherung defekt. (im Schaltschrank) Ursache feststellen und beseitigen, Sicherung austauschen. Hubantrieb falsch angeschlossen Anschluss nach Schaltplan (auf der Abdeckung) richtig stellen. Kurzschluss durch Feuchtigkeit Ursache feststellen, Hubantrieb trocknen, ggf. Haubendichtung und Verschraubungen auswechseln und/ oder Schutzhaube anbringen. Kurzschluss durch falschen Anschluss Anschluss richtig stellen Motor hat Wicklungsschaden (durchgebrannt) Ursache ermitteln, Stromdaten messen, mit Typenschild und Tabelle vergleichen, Hubantrieb ausbauen und zur Reparatur einsenden. • z.B. durch zu hohe Spannung • Elektronik defekt 2. Hubantrieb läuft instabil, d.h. pendelt zwischen Rechts- und Linkslauf. Spannungsabfall durch zu lange Stromdaten am Hubantrieb messen, ggf. Anschlussleitungen und / oder zu geringen Anschlussleitungen neu berechnen und Querschnitt austauschen! Netzschwankungen größer, als die zulässige Toleranz Netzverhältnisse verbessern 2.5 Technische Daten auf Seite 10 3. Hubantrieb setzt zeitweise aus. bzw. initialisiert oft Zuleitung hat Wackelkontakt 4. Hubantrieb fährt nicht in die Ventil klemmt Endpositionen. Ventil Zu hoher Anlagendruck schließt/öffnet nicht. Anschlüsse (Klemmleisten) kontrollieren und festziehen Für ein leichtgängiges Ventil sorgen Anlagendruck richtig stellen Eingangssignal Y am Hubantrieb prüfen, Störungsursache beseitigen 5. Hubantrieb fährt nicht oder nicht korrekt auf die vom Eingangssignal Y vorgegebene Position Eingangssignal Y mangelhaft: Hauptplatine defekt Hauptplatine auswechseln, ggf. Hubantrieb ausbauen und zur Reparatur einsenden 6. LED blinkt im lang / lang Rhythmus Blockiererkennung hat angesprochen INIT drücken und Antrieb bei der Initialisierung beobachten. • Störsignale • Signalschwankungen Ventil auf Leichtgängigkeit im gesamten Hubbereich prüfen 7. LED blinkt im kurz / lang Rhythmus Drahtbruch erkannt Sollwert Spannung bzw. Strom am Hubantrieb messen 8. LED blinkt im lang / kurz Rhythmus Relaiskontaktkleben Regler prüfen Tabelle 8 Checkliste Betriebsstörungen Operating Manual Linear actuators MC100/24 • MC100/230 • MC103/24 • MC103/230 March 2011 / 112454 / EN General information General information Amendment Copyright Subject to alteration Version Date Modifications 1.0 Januar 2006 Initial preparation 2.0 March 2008 Complete revision and amendment 2.1 March 2011 Revision The copyright for this operating manual as well as all rights in case of patent awarding or registration of registered design remains with the manufacturer! The regulations, directives, standards etc. are compliant with the current state of information at the time of development and are not subject to modification service. They must be applied by the operator at his own responsibility in their latest valid version. Concerning all data, information, and illustrations in this manual we reserve the right of technical modifications and improvements. No claims can be considered for alteration or rework of already delivered lift drives. Manufacturer HORA Holter Regelarmaturen GmbH & Co. phone: +49 (0) 5207/8903-0 www.hora.de Table of contents Table of contents 1 Safety ......................................................................... 4 1.1 Proper use ............................................................... 4 1.2 Information for the operator ..................................... 4 1.3 Personnel................................................................. 5 1.4 Prior to starting work................................................ 5 1.5 During operation ...................................................... 5 1.6 Working environment............................................... 5 2 Product Specification ............................................... 6 2.1 Component parts ..................................................... 6 2.2 Accessories ............................................................. 7 2.3 Operating modes ..................................................... 7 2.3.1 Continuous mode ......................................... 7 2.3.2 Three-point mode ......................................... 8 2.4 Functions ................................................................. 8 2.4.1 Binary signal / frost protection function......... 8 2.4.2 Blockage detection ....................................... 8 2.4.3 Wire break detection..................................... 8 2.4.4 Actuating time............................................... 9 2.4.5 Hysteresis..................................................... 9 2.4.6 Manual mode and response signal............... 9 2.4.7 Auto test ....................................................... 9 2.4.8 Auto pause ................................................... 9 2.4.9 Potential-free limit switch (accessory) .......... 9 2.5 Technical data ....................................................... 10 2.6 Type plate .............................................................. 11 3 5 Commissioning........................................................22 5.1 Operating parameters and encoding switch settings...................................................................23 5.2 Setting the input signal...........................................23 5.3 Setting the actuating time.......................................23 5.4 Setting the hysteresis.............................................24 5.5 Setting the actuating direction................................24 5.6 Setting auto test and auto pause ...........................24 5.7 Setting the limit position .........................................25 5.8 Setting a potential-free path switch ........................25 5.9 Initialising the path measuring system ...................27 5.10 Commissioning.......................................................28 6 Operation..................................................................29 6.1 Changing between manual and automatic mode...29 6.2 LED display ............................................................30 7 Maintenance, care and repairs ...............................30 8 Spare parts...............................................................30 9 Decommissioning and disposal.............................31 10 Removal of faults.....................................................31 10.1 How to remedy faults .............................................31 10.2 Check list for breakdown........................................32 Transportation & Storage ....................................... 11 4 Assembly ................................................................. 12 4.1 Checking the scope of delivery.............................. 12 4.2 Preparing assembly ............................................... 12 4.3 Mounting the linear actuator on the valve.............. 13 4.4 Assembling/disassembling the cover..................... 14 4.5 Electrical connection.............................................. 15 4.5.1 Controller independent circuit..................... 17 4.5.2 Removing the PCB cover ........................... 18 4.6 Fitting accessories ................................................. 19 4.6.1 Fitting a PCB for a path switch ................... 19 4.6.2 Fitting the PCB for the mA output signal .... 20 3 1 Safety 1 Safety Read these Operating Instructions carefully particularly the following safety instructions prior to installation and operation. DANGER Directly threatening hazard leading to death or serious physical injuries. DANGER WARNING CAUTION ATTENTION Hint: 1.1 WARNING Potentially hazardous situation which may lead to death or serious physical injuries. CAUTION Potentially hazardous situation which could lead to minor physical injuries. Indicates a hazard which may cause material damage. ATTENTION Potentially hazardous situation where the product or an object in its environment may get damaged. Utilisation instructions and other useful information. Proper use Linear actuators MC100/24, MC100/230, MC103/24, MC103/230 are controlled by three-point control or constant control. Linear actuators in the series described in these Operating Instructions are used for valve stroke adjustment. Concurrence of the above type designation with the linear actuator rating plate must be checked prior to starting any operations in order to guarantee utilisation in accordance with specification. The data on the rating plate is decisive for linear actuator technical data and mains power supply requirements. Any utilisation for tasks other than the aforementioned usage in accordance with specification and operating with mains power supply ratios other than those permitted is not deemed to be utilisation in accordance with specification. The operator bears sole liability for the risk to persons and machine and other assets in the event of utilisation not in accordance with specification. The intended use also includes the compliance with accident preventions, DIN VDE regulations and safe working practices for all measures described in these operating instructions in due consideration of prevailing rules. 1.2 Information for the operator Always keep the Operating Instructions available at the linear actuator deployment site. Observe the current health and safety, accident prevention and DIN VDE standards for installation, operation and maintenance. Take into consideration any additional regional, local or in-house safety regulations. Linear actuators MC100 • MC103 4 Operating Manual 1 Safety Ensure that every person entrusted with one of the tasks specified in these Operating Instructions has read and understood these instructions. 1.3 Personnel Only qualified personnel may work on these linear actuators or in their vicinity. Qualified persons are those persons entrusted with installation, assembly, commissioning and operation or maintenance of the linear actuators and possessing the appropriate qualifications for their activity. The necessary and prescribed qualifications include: • Training / instruction or authorization to turn on /off circuits and appliances / systems according to EN 60204 (DIN VDE 0100 / 0113) and the standards of safety technology. • Training or instruction according to the standards of the safety technology concerning care and use of adequate safety and work protection equipment. • First Aid training. Work in a safe manner and refrain from any working practice which endangers the safety of persons or damages the linear actuator or other assets in any way whatsoever. 1.4 Prior to starting work Prior to starting any work, check that the type designations specified here concur with the data on the linear actuator rating plate. Linear actuators MC100/24, MC100/230, MC103/24, MC103/230. 1.5 During operation Safe operation is only possible if transportation, storage, installation, operation and maintenance are carried out safely and materially and professionally correctly. Transportation, installation and assembly Repairs and maintenance 1.6 Observe the general set-up and safety regulations for heating, ventilation, airconditioning and pipework design. Use tools correctly. Wear the necessary personal and other safety equipment. Ensure that qualified personnel switch off the linear actuator prior to maintenance or repair work in accordance with DIN VDE. Working environment Read the data concerning the working environment in the Technical Data. Linear actuators MC100 • MC103 Operating Manual Version 2.1 - March 2011 5 2 Product Specification 2 Product Specification The linear actuators control a stepper motor by means of a micro controller. The stepper motor’s rotational movement is converted into a linear movement via planetary gears and a threaded spindle with spindle nut. 2.1 Component parts MC100/24, MC103/24 201 201 7 mm 24 V 33, 33, 481 481 110 110 230 230 231 231 101 101 107 107 11 480 480 13 13 12 36 36 6 6 88 28 28 33 11 11 22 308 308 448 448 201 201 MC100/230, MC103/230 230 V 107 107 27 27 1 2 3 6 8 11 13 27 28 33 36 Actuator housing Cross head Coupling piece* Clutch Position display* Distance sleeve Bridge Spacer for 230 V* C-frame Sheeting* Hand wheel diagram 1 101 107 110 201 230 231 308 448 480 481 Engine/ motor Push-fit PCB for 24 V or 230 V Main board Cover for 24 V or 230 V* Cable lead-in M20 × 1,5* Cable lead-in M16 × 1,5* Safety disk* Hexagon nut M8* Type plate Wiring diagram on cover Component part denominations * This component parts is available as a spare part! Linear actuators MC100 • MC103 6 Version 2.1 - March 2011 Operating Manual 2 Product Specification Accessories 111 111 230 V230 AC V X 0..20 mA 4..20 mA 0..20 mA 4..20 mA N2 N2 X 0..20 mA 4..20 mA N2 X 24 V AC / 24 V24DCV X 2.2 111 PCB for output signal X = 0/4 ... 20 mA diagram 2 106 106 LED1 PCB for mA output signal in cover 230 230 V AC V 24 V AC / 24 24 V DCV LED1 LED1 LED1 LED1 LED1 LED2 LED2 LED2 LED2 LED2 LED2 106 PCB for path switch diagram 3 Hint: 2.3 Position switch PCB in cover Optional operation with mA output signal or path switch possible Operating modes The linear actuator can be operated manually or automatically. • In manual mode stroke is adjusted via the hand wheel. • In automatic mode stroke is controlled electrically. 2.3.1 Continuous mode In continuous mode the system control presets the position of the linear actuator whilst inside the linear actuator the input signal (Y) of the system control is continuously compared with the output signal (X) of the linear actuator. In doing so the output signal depends on the position of the linear actuator (travel). The linear actuator keeps moving until the input signal and the output signal match. Linear actuators MC100 • MC103 Operating Manual Version 2.1 - March 2011 7 2 Product Specification Input signal (Y) The input signal (Y) of the system control specifies the desired position for the linear actuator. It is applied in the form of an analogue signal to terminal Y. Possible input signals: • 0 … 10 V DC / 2 … 10 V DC • 0 … 20 mA / 4 … 20 mA Output signal (X) The output signal (X) determines the actual position of the linear actuator. It is applied to terminal X in the form of an analogue signal. 0% to 100% valve lift is put out as: • 0 … 10 V DC • 0 … 20 mA or 4 … 20 mA (accessory PCB for output signal (111)) 2.3.2 Three-point mode The direction of rotation is set via the control voltage at terminal 2 and terminal 3 on the main PCB: • When the control voltage is applied to terminal 2, the spindle nut will be extended. • When the control voltage is applied to terminal 3, the spindle nut will be retracted. 2.4 2.4.1 Functions Binary signal / frost protection function The terminals B1 and B2 on the main PCB are bridged during normal operation. If the electric circuit between B1 and B2 is interrupted, the linear actuator will store the current position and afterwards move automatically to its limit position. All other control signals will be ignored during this process. The linear actuator will remain in limit position until the electric circuit between B1 and B2 has closed. • In three-point mode the linear actuator will automatically return to the stored position. • In continuous mode the desired value of the input signal will be restarted. 2.4.2 Blockage detection If the linear actuator is blocked manually, the linear actuator will briefly move back and then retry to reach the required position. If this is still unsuccessful after a total of 7 attempts the linear actuator will be turned off in order to prevent damage to the linear actuator and the control element. Blockage detection is indicated by LED 6.2 LED display on page 30 2.4.3 Wire break detection Wire break detection is only available for continuous mode with an input signal 2 … 10 V DC and 4 … 20 mA. When the input signal drops below 1 V or 2 mA in continuous mode the linear actuator will move to the limit position set by encoding switch S6. Wire break detection is indicated by the LED. 6.2 LED display on page 30 Linear actuators MC100 • MC103 8 Version 2.1 - March 2011 Operating Manual 2 Product Specification 2.4.4 Actuating time The time required for the spindle nut to travel a defined distance is called actuating time. Actuating time is specified in s/mm. Encoding switch S4 is used to set the actuating time. 5.3 Setting the actuating time on page 23 2.4.5 Hysteresis Hysteresis equals the difference of the input signal (Y) that is required after a reversal of signal direction in order to move the spindle nut. It serves to prevent permanent oscillation of the actuator motor around a certain hoisting position during minor input signal alterations. 5.4 Setting the hysteresis on page 24 2.4.6 Manual mode and response signal In manual mode it is possible to change the lift without supply voltage. • Motor and control electronics are turned off in manual mode to make hoisting movements of the control impossible. • The moment you set the linear actuator to manual mode the control switches a signal to terminal R, provided supply voltage is applied. 6.1 Changing between manual and automatic mode on page 29 2.4.7 Auto test If a valve is not actuated for a long time the valve cone may get stuck. The auto test function acts as a preventative measure. When you turn on the auto test function for the linear actuator, the linear actuator will automatically move after c. 10 days without actuation to the limit position set by encoding switch S6 and return to initial position . 5.6 Setting auto test and auto pause on page 24 2.4.8 Auto pause This function is used by the actuator to count the traverse commands per minute that involve a change of direction. If there are more than 20 direction varying traverse commands per minute this will result in a compulsory pause of 3 s. 5.6 Setting auto test and auto pause on page 24 2.4.9 Potential-free limit switch (accessory) The optional path switch PCB allows you (106) to set two actuating positions within which a potential-free contact is opened or closed. 5.8 Setting a potential-free path switch on page 25 Linear actuators MC100 • MC103 Operating Manual Version 2.1 - March 2011 9 2 Product Specification 2.5 Technical data Type MC100/24, MC103/24 MC100/230, MC103/230 Supply voltage: 24 V AC ± 10% 115 V AC ± 10% 24 V DC ± 10% 230 V AC + 6% -10% Power consumption 6 VA 12 VA Weight 2.5 kg 2.5 kg Dimensions See technical data sheets Stroke max. 20 mm max. 20 mm Frequency 50/60 Hz ± 5% 50/60 Hz ± 5% Ambient temperature 0 to +60°C 0 to +60°C Enclosure protection IP 54 IP 54 Operating mode S3-50% ED S3-50% ED Actuating time 12, 9, 4, 1.9 s/mm 12, 9, 4, 1.9 s/mm Actuating force 1.0 kN 1.0 kN During 24 V DC the specified actuating force can only be reached with the help of an aligned AC voltage. table 1 Technical data 0 … 10 V DC / 77 k 2 … 10 V DC / 77 k 0 … 20 mA / 510 4 … 20 mA / 510 Input signal Y/ Resistance of load • • • • Output signal X/ Load rating • 0 … 10 V DC / resistance of load 1200 , Imax. 8 mA • 0 … 20 mA / resistance of load 500 with accessory PCB for output signal (111) • 4 … 20 mA / resistance of load 500 with accessory PCB for output signal (111) Response signal R/ load rating • 24 V DC / minimum impedance 480 Imax. 35 mA Cable impedance between • max. 10 B1 and B2 table 2 Technical data signals Linear actuators MC100 • MC103 10 Version 2.1 - March 2011 Operating Manual 3 Transportation & Storage 2.6 Type plate The type plate is attached to the housing of the linear actuator. It bears the type denomination, serial number (s/no) and date of manufacture (last four digits). 2.1 Component parts on page 6 MC100/24 F.-Nr.: 07204142/01/0607 AC 50 Hz 24 V 6 VA 1,0 kN Y=0…10 V DC IP 54 4 s/mm X=0…10 V DC S3-50% ED Stroke 20 mm diagram 4 Example of type plate 3 Transportation & Storage Non-compliance with safety regulations may result in injury! • Wear the required personal and other safety equipment. CAUTION • Avoid impacts, blows, vibrations etc. to the linear actuator. • Store the linear actuator (and, where appropriate, the entire controlling device) in a dry place. • Keep to the specified transport and storage temperatures between -20 to +65°C. Linear actuators MC100 • MC103 Operating Manual Version 2.1 - March 2011 11 4 Assembly 4 Assembly Prior to assembling the linear actuator: 4.1 Checking the scope of delivery on page 12 4.2 Preparing assembly on page 12 The following sequence of operations is part of the linear actuator assembly: 4.3 Mounting the linear actuator on the valve on page 13 4.4 Assembling/disassembling the cover on page 14 4.5 Electrical connection on page 15 4.1 Checking the scope of delivery 1 Check the packaging for damage. 2 Dispose of packaging in an environmentally friendly manner. 3 Check the delivered items against the delivery note in order to see whether the delivery is complete. 4 Report any missing or damaged products to the manufacturer. 4.2 ATTENTION Preparing assembly A non-attached valve causes damage! If you operate the linear actuator without valve, the spindle nut may fall off due to the missing stop. • Always operate the linear actuator with a valve attached. 1 Allow for about 140 mm space above the cover at the site of installation. 2 Check the working environment before assembling and commissioning the linear actuator: 3 Ensure that the valve is correctly fitted. For details please see assembly instructions for valve. 4 Determine the assembly position of the linear actuator. Do not arrange linear actuators in a hanging position. M M M M M M AA A-B A-B BB diagram 5 Assembly positions for linear actuator and valve Linear actuators MC100 • MC103 12 Version 2.1 - March 2011 Operating Manual 4 Assembly 4.3 Mounting the linear actuator on the valve If the linear actuator and the valve are supplied separately you will have to mount the linear actuator on the valve. Assembling MC100/24, MC100/230 Assembling MC103/24, MC103/230 36 36 6 6 28 28 3 428 23 451 18 18 308 459 2 2 19 51 19 2 3 6 18 19 23 28 Cross head Adapter Clutch Valve stem Valve neck Assembly aid C-frame diagram 6 36 51 308 428 451 459 Hand wheel Spacer ring Lock washers Screws Hexagon nut M10 Hexagonal nut Mounting the linear actuator on the valve How to assemble linear actuator type MC100: 1 Place actuator with crossbeam (2) on valve neck (19). diagram 6 on page 13 2 Insert the C-frame (28) and, using a mounting aid, pull the valve stem upwards (18) (23) until the valve stem (18) locks inside the clutch (6). 3 Fix the crossbeam (2) of the actuator with the help of screws(428) spanner width 13 and lock washers (308) on the valve neck (19). Linear actuators MC100 • MC103 Operating Manual Version 2.1 - March 2011 13 4 Assembly How to assemble linear actuator type MC103: 1 Insert the C-frame (28). diagram 6 on page 13 2 Pull the adapter (3) off the clutch (6). 3 Screw the hexagon locknut M10 (451) spanner width 17 onto the valve stem (18). 4 Screw the adapter (3) onto the valve stem (18). 5 Fix the valve stem (18) by the hexagon locknut (451), in order to prevent skewing. 6 Fit the spacer (51) on the valve neck (19). 7 Fit the actuator and crossbeam (2) and hexagon nut (459) on the valve neck (19). 8 Insert the C-frame (28) and pull the valve stem upwards (18) until the valve stem locks (18) into the clutch (6). 9 Fix the crossbeam (2) using a hexagon nut (459) spanner width 50. How to disassemble the linear actuator 1 Follow the sequence of operation in reverse order. 4.4 Assembling/disassembling the cover The cover contains the terminals for electric connection. Risk of injury from electric shock by live parts! When the power supply is on there is a danger of electric shock due to live parts. • Prior to commencing any work, ensure that the actuator is safely disconnected from the power supply system. WARNING • Secure against unauthorised restarting. • Remove the cover only momentarily. How to remove the cover 1 Insert a screwdriver in the notch of the cover and lift the cover (201). 201 201 7 mm 7 mm 201 Cover diagram 7 Removing the cover Linear actuators MC100 • MC103 14 Version 2.1 - March 2011 Operating Manual 4 Assembly Damaged cables result in damage to devices! When lifting the cover you may tear off or damage the cabling inside the cover. ATTENTION • Carefully remove the cover. 2 Remove the cover (201) carefully. 3 Disconnect the plug-in connection between the main PCB and the (110) cover (201). How to attach the cover 1 Plug the previously pulled off cables back into the main PCB (110). Pay attention to the notches on plug and socket. Hint: You can mount the cover (201) in four, different, positions each of which is transposed by 90°. This allows the best possible laying of the connecting cable for different installations of the linear actuator. 2 Place the cover (201) on top and push it down to make it fit by applying moderate force. 3 Check the cover for correct fit to ensure air-tightness for the actuator housing. 4.5 Electrical connection Danger of life caused by incompetent staff! Electrical connections carried out by unqualified staff may result in death, severe bodily injury or considerable material damage. WARNING • Make sure that such all work is carried out by qualified staff. 1.3 Personnel on page 5 Risk of injury from electric shock by live parts! When the supply voltage is turned on there is a risk of electric shock from live parts. WARNING • Prior to commencing any work, ensure that the actuator is safely disconnected from the power supply system. • Secure against unauthorised restarting. How to prepare the electric connection 1 Ensure that the supply voltage matches the specifications on the type place of the linear actuator. 2 To avoid breakdown, construct the line diameter according to actuating performance and required line length. 3 Lay the mains for a supply voltage of > 48 V separate from the signal and control wires. When laying cables in a joint cable duct, use shielded control wires. 4 Check the supply voltage. If the required tolerance is not achieved by a power transformer you will have to use an AC voltage stabilizer. 2.5 Technical data on page 10 Linear actuators MC100 • MC103 Operating Manual Version 2.1 - March 2011 15 4 Assembly How to establish electrical connection 1 Remove the cover (201). How to remove the cover on page 14 2 3 Run the cable through the screw joint in the cover to the terminal. Connect the power supply according to the wiring diagram. diagram 8 on page 16 Hint: ATTENTION 4 The wiring diagram (481) is on the PCB cover(33). Malfunctions caused by incorrect zero potential! If the electric power supply for the linear actuator is fed by transducing sensors with varying zero potentials this may result in incorrect automatic controller action. • Ensure that the zero potential is properly applied. table 3 on page 17 Tighten the screw joints. U UB N1 2 230 V AC; 230 VAC; 24 24VAC; V AC; V/DC 2424 VDC (GND) NN (GND) diagram 8 3 R B1 B2 N2 Y T X WE1 WE1 WE2 WE2 20 21 22 23 24 25 GND GND Circuit diagram Linear actuators MC100 • MC103 16 Version 2.1 - March 2011 Operating Manual 4 Assembly Terminal Description UB, N1 Supply voltage: 2 Control voltage for downward movement during three-point mode 3 Control voltage for upward movement during three-point mode R Response signal during “manual” mode • R= 24 V DC max. 35 mA B1, B2 Binary input / frost protection function N2 Zero potential of signals X, Y and R • When the zero potentials of signals X, Y and R are identical to the zero potential of the supply voltage it is possible to bridge terminals N1 and N2. • If you run the actuator in continuous mode at 230 V you will have to connect N2. • If you run the actuator in three-point mode at 230 V you will have to connect N2 if you wish to use X or R at the same time. Y Input signal continuous mode X Output signal continuous mode 20, 21, 22 Terminals path switch unit PS1 23, 24, 25 Terminals path switch unit PS2 table 3 4.5.1 Key to wiring diagram Controller independent circuit When working with 24 V supply voltage and 0 … 10 V DC / 2 … 10 V DC input signal you can switch the actuator controller-independently via a three-step toggle switch in the control cabinet. How to switch the actuator controller-independently 1 Run the supply voltage 24 V AC via a diode and a three-step toggle switch to terminal Y. z Example: 1N4001; 1N4148 10 V Pos. 0 V Pos. Closed-loop control diagram 9 2 Controller independent circuit Using the toggle you can move the linear actuator to the following positions: • Closed-loop control by input signal Y (normal operation) • 10 V-position • 0 V-Position, the linear actuator can be moved to the position selected by encoding switch S6 at 2 … 10 V DC. 5.1 Operating parameters and encoding switch settings on page 23 5.7 Setting the limit position on page 25 Linear actuators MC100 • MC103 Operating Manual Version 2.1 - March 2011 17 4 Assembly 4.5.2 Removing the PCB cover To set the linear actuator by using the encoding switch you will first have to remove the PCB cover. (33) Risk of injury from electric shock by live parts! When the power supply is on there is a danger of electric shock due to live parts. • Prior to commencing any work, ensure that the actuator is safely disconnected from the power supply system. WARNING • Secure against unauthorised restarting. 1 Insert the screwdriver in one of the notches on the cover (201) and lift off the cover (201). 2 Insert a small screwdriver in the designated notch on the printed circuit cover (33) and lift if off. 33 33 y x 0...10 V (0...20 mA) 2...10 V (4...20 mA) Hysterese 0,5 V Endpos. Hysterese 0,15 V 8 INIT 7 X Pause Autotest t aus S 23 24 25 20 21 22 1,9 s/mm x y Endpos. T 30 VAC; 4 VAC; 4 VDC (GND) UB N1 2 3 Pause Autotest 9s mm 12s mm R ein 4s mm GND ON B1 B2 N2 Y 6 WE1 5 4 3 U 2 1 WE2 JP1 33 Sheeting diagram 10 3 Remove the PCB cover in the actuator housing Access to encoding switches S1 to S8 as well as jumpers JP1 and JP2 is achieved by removing the PCB cover (33) in the actuator casing (1). Linear actuators MC100 • MC103 18 Version 2.1 - March 2011 Operating Manual 4 Assembly 4.6 Fitting accessories Accessories are not part of the scope of delivery for the linear actuator unless expressly ordered! The linear actuators are prepared for retro-fitting with: • PCB for path switch (106) • PCB for output signal X=0/4 … 20 mA (111) Hint: Optional operation with mA output signal or path switch possible * This component parts is available as a spare part! on page 6 4.6.1 Fitting a PCB for a path switch Risk of injury from electric shock by live parts! When the power supply is on there is a danger of electric shock due to live parts. • Prior to commencing any work, ensure that the actuator is safely disconnected from the power supply system. WARNING • Secure against unauthorised restarting. 1 Open the cover (201) of the linear actuator. 4.4 Assembling/disassembling the cover on page 14 2 24 V: Clipping the path switch PCB (106) to the safety catches on the cover (201) diagram 11 on page 19. 3 230 V: Push the path switch PCB (106) onto the three spacers of (27) the pushfit PCB (107). 24 V 230 V 230 V 201 201 24 V 106 201 201 106 27 27 115 107 107 106 115 110 115 106 115 110 110 110 27 Spacers 106 PCB for path switch 107 Push-fit PCB for 24 V or 230 V diagram 11 4 115 Female plug 110 Main board 201 Cover for 24 V or 230 V Assembling the path switch PCB inside the cover Plug the female plug into the (115) path switch PCB (106) on the socket board (123) of the main PCB (110). In the process pay attention to the notches on the socket board and female plug. Linear actuators MC100 • MC103 Operating Manual Version 2.1 - March 2011 19 4 Assembly x 2...10 V (4...20 mA) Hysterese 0,5 V Endpos. y 8 INIT Pause Autotest t aus S 23 24 25 20 21 22 7 x 12s mm R y Endpos. 9s mm 3 0...10 V (0...20 mA) ein 4s mm JP2 230 VAC; 24 VAC; 24 VDC N (GND) T Hysterese 0,15 V GND ON Pause Autotest WE1 1,9 s/mm 6 X 5 B1 B2 N2 Y 4 UB N1 2 3 U 2 1 WE2 JP1 mA V R= return signal 123 123 123 Socket board diagram 12 5 Socket board for position switch PCB on main PCB Set the position switches. 5.8 Setting a potential-free path switch on page 25 4.6.2 Fitting the PCB for the mA output signal Risk of injury from electric shock by live parts! When the power supply is on there is a danger of electric shock due to live parts. • Prior to commencing any work, ensure that the actuator is safely disconnected from the power supply system. WARNING • Secure against unauthorised restarting. 1 Open the cover (201) of the linear actuator. 4.4 Assembling/disassembling the cover on page 14 2 24 V: Clip the PCB for the mA output signal to the safety catches inside the cover (201). 230 V: Push the PCB for the mA output signal onto the three spacers of the (27) push-fit PCB (107). diagram 13 on page 21 Linear actuators MC100 • MC103 20 Version 2.1 - March 2011 Operating Manual 4 Assembly 24 V 230 V 230 V 201 201 24 V 111 201 201 111 27 27 115 107 111 115 110 115 107 111 115 110 110 110 115 Female plug 110 Main board 201 Cover for 24 V or 230 V* 27 Spacers 111 PCB for mA output signal 107 Push-fit PCB for 24 V or 230 V diagram 13 Fitting a PCB for the mA output signal 3 Push the female plug of the (115) PCB for the mA output signal onto the pin strip (123) of the main PCB (110) . In the process pay attention to the notches on the socket board and female plug. 4 Attach the single cable from the PCB (111) for the mA output signal to terminal X of the push-fit PCB (107). 5 Use the jumper to select the signal range for the output signal: • Jumper right: 4 … 20 mA • Jumper left: 0 … 20 mA 4 ...mA 20 mA 4 ... 20 24 V 107 0..20 mA 230 V 111 0..20 mA 4..20 mA N2 0..20 mA 4..20 mA 107 N2 X X X 111 diagram 15 4..20 mA 0..20 mA 4..20 mA Setting the PCB for the mA output signal X diagram 14 4..20 mA 0..20 mA N2 X 0 ... mA 0 ... 2020mA Connecting the PCB for the mA output signal to the push-fit PCB Linear actuators MC100 • MC103 Operating Manual Version 2.1 - March 2011 21 5 Commissioning 5 Commissioning Risk of injury from electric shock by live parts! When the power supply is on there is a danger of electric shock due to live parts. WARNING • Prior to commencing any work, ensure that the actuator is safely disconnected from the power supply system. • Secure against unauthorised restarting. Operating parameters are set at the encoding switches (116) and jumpers. The encoding switches and jumpers are situated underneath the PCB cover (33) in the actuator housing (1). 4.4 Assembling/disassembling the cover on page 14 4.5.2 Removing the PCB cover on page 18 U WE1 R B1 B2 N2 Y X 20 21 22 23 24 25 GND INIT 116 116 y x aus on 7 6 4 x ON y 2...10 V (4...20 mA) JP1 JP2 Hysterese 0,5 V 3 Hysterese 0,15 V 0...10 V (0...20 mA) Endpos. Pause Autotest 2 5 ein 1 V mA Endpos. Pause Autotest 1,9 s/mm 12s mm 9s mm 4s mm 8 S t 33 33 33 PCB cover diagram 16 JP2 LED 3 T 1 2 3 4 5 6 7 8 UB N1 2 230 VAC; 24 VAC; 24 VDC N (GND) R= return signal WE2 JP1 116 Coding switch JP1 Jumper JP2 Jumper PCB cover, encoding switch and jumper Linear actuators MC100 • MC103 22 Version 2.1 - March 2011 Operating Manual 5 Commissioning 5.1 Operating parameters and encoding switch settings Before starting to operate the linear actuator you will have to set the operating parameters with the help of the encoding switches and jumpers. Switch / jumper on S1 Xcharacteristic line off X-characteristic Stroke line Stroke X S2 Y-characteristic Stroke line X Y-characteristic Stroke line Y S3 Input signal (Y) 0 … 10 V DC or 0 … 20 mA Input signal (Y) 2 … 10 V DC or 4 … 20 mA S4 Hysteresis 0.15 V Hysteresis 0.5 V S5 Auto test and auto pause on Auto test and auto pause off S6 Limit position actuator spindle extended Limit position actuator spindle retracted S7, S8 S7 and S8 are used to set the actuating time (1.9…12 s/mm) JP1 Characteristic line linear Characteristic line is exponential (1/ 50) JP2 Input signal (Y) in mA Input signal (Y) in V table 4 5.2 Y Encoding switch and jumper settings Setting the input signal 0 ... 10 V 0 ... 20 mA V JP2 mA 2 ... 10 V 4 ... 20 mA diagram 17 Setting the input signal Additional information: Input signal (Y) on page 8 5.3 Setting the actuating time 1.9 s/mm diagram 18 4 s/mm 9 s/mm 12 s/mm Set actuating time For further information see 2.4.4 Actuating time on page 9 Linear actuators MC100 • MC103 Operating Manual Version 2.1 - March 2011 23 5 Commissioning 5.4 Setting the hysteresis 0.15 V 0.5 V diagram 19 Set hysteresis Additional information: 2.4.5 Hysteresis on page 9 5.5 Setting the actuating direction You can use the encoding switch (reverse operation) to reverse the actuating direction of the linear actuator. Actuator setting Normal operation Reverse operation (X and Y reversed) JP2 JP2 Y = 10 V DC Y = 0 V DC JP2 JP2 Y = 20 mA 66 Y = 2 V DC 18 JP2 Y = 0 mA Y = 4 mA JP2 JP2 Y = 0 V DC Y = 10 V DC JP2 JP2 Y = 2 V DC 6 Y = 20 mA JP2 Y = 0 mA JP2 18 Y = 4 mA Encoding switch S1: X (output signal), encoding switch S2: Y (input signal) table 5 Setting the actuating direction 5.6 Setting auto test and auto pause Auto test and auto pause are enabled when encoding switch S5 is set to ON. Approximately every 10 days the auto test triggers a start-up towards the limit position in rapid traverse mode. Rebalancing takes place at the same time. During auto pause a break of 3 seconds (measuring cycle 2 min) takes place after more than 20 direction varying traverse commands per minute. These two functions cannot be selected individually. Linear actuators MC100 • MC103 24 Version 2.1 - March 2011 Operating Manual 5 Commissioning 5.7 Setting the limit position Use encoding switch S6 to select the limit position for the linear actuator: • S6 ON: Limit position with extended spindle nut • S6 OFF: Limit position with retracted spindle nut The limit position is approached in the following situations: • Due to wire break detection by the Y signal (2 … 10 V DC or 4 … 20 mA only), • Due to a binary signal (When electric circuit between terminal B1 and B2 is interrupted), • During auto test • After a cut in supply voltage (manual adjustment) 5.8 Setting a potential-free path switch Trim-pots P1/P2 is used to set the path switches independently. Try out the sequence of operations for each position switch once. How to set a path switch 1 Ensure that the linear actuator has been commissioned and initialised. 5.10 Commissioning on page 28 5.9 Initialising the path measuring system on page 27 ATTENTION Malfunction caused by imprecisely set path switches! If you have set the actuator to manual mode (without supply voltage) it is only possible to set the path switch approximately (central setting is the equivalent of a switch point of c. 50% lift). • To set the path switch accurately, set the actuator to automatic mode. 2 Move the actuator to the position where the switch event is to be triggered. Follow the sequence of operations below with the supply voltage turned on. Risk of injury from electric shock by live parts! When the supply voltage is turned on there is a risk of electric shock from live parts. WARNING • Take care not to touch any live parts. • Take care to apply the tool in a way that does not cause short-circuit. 3 Open the cover (201). 4.4 Assembling/disassembling the cover on page 14 Inside the cover is the path switch PCB (111). 4 Use a screwdriver to adjust the trim-pot until the path switch switches. The related LED will either light up or switch off. Potentiometer P1 (105 P1) is used to set path switch 1. LED 1 shows the switching status. Potentiometer P2 (105 P2) is used to set path switch 2. LED 2 shows the switching status. Linear actuators MC100 • MC103 Operating Manual Version 2.1 - March 2011 25 5 Commissioning 24 V 105 105 P1 P1 LED1 LED1 105 105 P2 P2 LED2 LED2 230 V 105 105 P1 P1 LED1 LED1 JP2 105 105 P2 P2 LED2 LED2 105 P1Trim-pot diagram 20 5 7 Position switch PCB in cover Comply with the allowable contact load for the path switch: Nominal load 8 A, 250 V AC 8 A, 30 V DC Switch voltage max. 400 V AC max. 125 V DC table 6 6 105 P2Trim-pot Contact load of path switch Disconnect the actuator from the supply and connect the path switch contacts. Close the cover (201) of the linear actuator How to attach the cover on page 15 Linear actuators MC100 • MC103 26 Version 2.1 - March 2011 Operating Manual 5 Commissioning 5.9 ATTENTION Initialising the path measuring system Linear actuator starts automatically! The linear actuator starts immediately after being connected to the supply voltage and automatically moves to a reference point of the path measuring system. • Wait until this reference point has been reached and the linear actuator has stopped. The path measuring system has to be initialised after the following: • At initial commissioning • After repairs to the valve or actuator • After a replacement of valve or actuator Initialisation may be triggered in two different ways. How to initialise via the initialising button Risk of injury from electric shock by live parts! When the supply voltage is turned on there is a risk of electric shock from live parts. WARNING • Take care not to touch any live parts. • Take care to apply the tool in a way that does not cause short-circuit. 1 Open the cover (201). 4.4 Assembling/disassembling the cover on page 14 2 Ensure that supply voltage is applied. 3 Press the initialising button (118) and keep it pressed for at least 1 second. 110 110 on 118 1 2 3 4 5 6 7 8 110 Main board diagram 21 118 118 Initialising button Initialising the path measuring system How to initialise via the connecting terminals 1 Apply supply voltage simultaneously to terminals 2 and 3, making sure that supply voltage is applied for at least 1 second. diagram 8 on page 16 Linear actuators MC100 • MC103 Operating Manual Version 2.1 - March 2011 27 5 Commissioning 5.10 1 Commissioning Check whether all fitting and assembly work has been competently finished. 4 Assembly on page 12 2 Ensure that the electrical actuation of the linear actuator can take place safely without putting people or devices at risk. 3 Ensure that the linear actuator is attached correctly and that the cover of the linear actuator is closed. 4.4 Assembling/disassembling the cover on page 14 4 Ensure that the linear actuator is set to automatic mode. 6.1 Changing between manual and automatic mode on page 29 5 Ensure that the operating parameters are set correctly. 5.1 Operating parameters and encoding switch settings on page 23 6 Ensure that the path measuring system is initialised. 5.9 Initialising the path measuring system on page 27 7 Apply supply voltage. The linear actuator will now move to the reference point. The linear actuator is ready for operation. Linear actuators MC100 • MC103 28 Version 2.1 - March 2011 Operating Manual 6 Operation 6 Operation Prior to commissioning the linear actuator you will have to initialise it and select the operating mode. 5 Commissioning on page 22 5.9 Initialising the path measuring system on page 27 6.1 Changing between manual and automatic mode It is possible to run the linear actuator in automatic mode or manual mode (manual adjustment). • In automatic mode the spindle nut moves to the position set by the controller. • In manual mode it is possible to set the spindle manually, e. g.for control purposes. Output signal (X) is not available in manual mode. 36 36 Automatic operation 36 Hand wheel diagram 22 Manual operation Selecting automatic mode How to change-over in manual mode 1 Move the hand wheel (36) to manual mode position by turning until the hand wheel locks noticeably. ATTENTION Risk of damage to valve and actuator during manual mode! The valve may get damaged if it is pushed too hard into its receptacle during manual mode. • Do not try and keep turning the hand wheel when you realise that the required effort increases noticeably! • Never use force ! 2 Use the hand wheel to turn the spindle nut to the desired position. Turn the hand wheel until the preset potentiometer increases. Do not use force! How to change-over in automatic mode 1 Push the hand wheel (36) to automatic mode position. 2 The linear actuator first moves to the position specified by encoding switch S6 and then to the position preset by the controller. Linear actuators MC100 • MC103 Operating Manual Version 2.1 - March 2011 29 7 Maintenance, care and repairs 6.2 LED display The LED on the main PCB in the actuator indicates the operating status or errors. 10.2 Check list for breakdown on page 32 LED Operating status / error Normal operation, ready for operation The LED is permanently lit, actuator waiting for traverse command. Duration Standard Operation Actuator carries out traverse command. Wire break detection Short – long rhythm Input signal has dropped below 1 V or below 2 mA in operating modes 2 … 10 V DC or 4 … 20 . 2.4.3 Wire break detection on page 8 Blockage detection (continuous mode only) The linear actuator is mechanically blocked. Long – long rhythm 2.4.2 Blockage detection on page 8 Continuous signal on terminal 2 and 3 Long – long rhythm table 7 A simultaneous control signal at terminal 2 and 3 will result in an initialising cycle (max. 4 attempts). The linear actuator will automatically switch off after 4 unsuccessful attempts. Display LED 7 Maintenance, care and repairs The linear actuator requires little maintenance. You do not have to carry our continuous or periodical maintenance. 8 Spare parts When ordering accessories and spare parts please quote the specifications engraved on the type plate of your linear actuator. The specifications on the type plate are standard for the technical date of linear actuators as well as the requirements for the public power supply. Damage to device caused by faulty spare parts! Spare parts must match the technical data specified by the manufacturer. ATTENTION • Use genuine spare parts at all times. 2.1 Component parts on page 6 * This component parts is available as a spare part! on page 6 Linear actuators MC100 • MC103 30 Version 2.1 - March 2011 Operating Manual 9 Decommissioning and disposal 9 Decommissioning and disposal Dispose of the linear actuator according to national regulations and laws. 10 Removal of faults After remedying faults you will have to re-initialise the path measuring system. 5.9 Initialising the path measuring system on page 27 10.1 How to remedy faults If the linear actuator does not work properly follow the sequence of operations described below in order to remedy the fault: 1 Check whether the linear actuator was correctly assembled. 2 Check the settings for the linear actuator against the specifications on the type plate. 3 Remedy the fault by following the check list. 10.2 Check list for breakdown on page 32 4 If you are unable to remedy the fault contact the manufacturer. 5 For all queries at the manufacturer’s and when sending back the device please quote the following : • SN (serial number = order number) • Type denomination • Supply voltage and frequency • Accessory equipment • Error report 6 If you are unable to remedy the fault despite inquiry you can send the device to the manufacturer. Linear actuators MC100 • MC103 Operating Manual Version 2.1 - March 2011 31 10 Removal of faults 10.2 Check list for breakdown Fault Cause/reason Remedy 1. Linear actuator is not working. Hand wheel (36) is in position manual mode Switch hand wheel to position automatic mode. Power cut Determine cause and remedy. Fuse defective (in control cabinet) Determine cause and remedy, replace fuse. Linear actuator incorrectly connected Set connection correctly according to wiring diagram (on cover). Short circuit due to humidity Determine cause, dry the linear actuator; replace cover seal or screw joints and/or attach protective cover, as required. Short circuit due to incorrect connection Correct setting for connection Motor has winding damage (burnt-out) Determine cause, measure current data, Compare to type plate and table, Disassemble linear actuator and send it in for repairs. • e.g. voltage too high • Electronic system defective 2. Linear actuator running Drop of voltage due to excessively long unsteadily, i. e.veering connecting cables and / or insufficient between clockwise and anti- diameter. clockwise rotation. Public power supply fluctuations greater than admissible tolerance Measure the current data; if required, recalculate and replace connecting cables! Improve public power supply conditions 2.5 Technical data on page 10 3. Linear actuator pauses intermittently or initialises frequently Slack contact in feeder line Valve is stuck 4. Linear actuator does not move to limit position. Valve Excessive system pressure does not open/close. Check and tighten connections (terminal strips) Provide smooth-running valve Adjust system pressure 5. Linear actuator does not move at all or not correctly to the position preset by input signal Y Input signal Y is faulty: Main PCB defective Replace main PCB or disassemble linear actuator and send it in for repair 6. LED flashes in long / long rhythm Blockage detection was triggered Press INIT and observe actuator during initialisation. • Interfering signals • Signal variations Check input signal Y on linear actuator, remove cause of fault Check valve for smooth-running along entire traverse range 7. LED flashes in short / long rhythm Wire break was detected Measure desired value voltage and current on linear actuator 8. LED flashes in long / short rhythm Relay contact adhesive Check controller table 8 Check list breakdown