1
Integrated Feeding
Systems
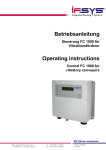
Betriebsanleitung
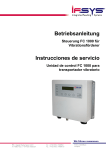
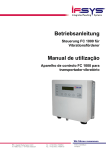
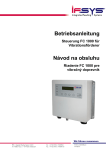
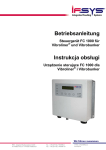
Steuergerät FC 1000 für
Vibroliner® und Vibrobunker
Operating instructions
Controller FC 1000 for
Vibroliner® and Vibrobunker
Wir führen zusammen
IFSYS - Integrated Feeding Systems GmbH
Am Weißen Kreuz 5 D-97633 Großbardorf
Tel.: +49 (0) 9766 / 940098-0
Fax.: +49 (0) 9766 / 940098-10
e-Mail: [email protected]
www.ifsys.eu
Betriebsanleitung
Feeder Controller FC 1000
Operating instructions
Inhaltsverzeichnis / Table of Contents
1
HINWEISE FÜR DEN BENUTZER / USER INFORMATION.................................................. 3
1.1
1.2
1.3
1.4
1.5
SICHERHEITSHINWEISE / SAFETY INFORMATION.................................................................... 3
GEFAHRENSYMBOLE / HAZARD SYMBOLS ............................................................................. 3
GEFAHRENHINWEISE / HAZARD INFORMATION ....................................................................... 4
KONFORMITÄTSERKLÄRUNG / DECLARATION OF CONFORMITY ................................................ 5
BESTIMMUNGSGEMÄßE VERWENDUNG / PROPER USE ........................................................... 5
2
TECHNISCHE DATEN / TECHNICAL DATA......................................................................... 6
3
INSTALLATION / INSTALLATION ........................................................................................ 7
3.1
MONTAGE / ASSEMBLY ....................................................................................................... 7
3.2
ELEKTRISCHER ANSCHLUSS / ELECTRICAL CONNECTION ....................................................... 7
3.2.1
Lage der Anschlüsse / Position of Connections........................................................ 8
3.2.2
Beschreibung der Anschlüsse / Description of the connections ............................... 8
3.2.3
Anschlussbeispiel / Connection example................................................................ 10
4
INBETRIEBNAHME / PUTTING INTO INITIAL OPERATION ............................................. 11
4.1
5
LAGEPLAN BEDIENELEMENTE / LAYOUT OF OPERATING CONTROLS ....................................... 11
BEDIENUNG / OPERATION ................................................................................................ 12
5.1
MENÜSTRUKTUR / MENU STRUCTURE................................................................................. 12
5.2
BEDIENPHILOSOPHIE / OPERATING PHILOSOPHY ................................................................. 13
5.3
DIE FUNKTIONSTASTEN / THE FUNCTION KEYS .................................................................... 13
5.3.1
F1 – Systeminfo / System information .................................................................... 13
5.3.2
F2 – Setup Optionen / Setup Options..................................................................... 14
5.3.3
F3 – Messwerte / Measured values........................................................................ 15
5.3.4
F4 – RUN /STOP / RUN/STOP .............................................................................. 16
5.4
TASTENSPERRE / KEYLOCK ............................................................................................... 16
5.5
EINSTELLUNGEN / SETTINGS ............................................................................................. 17
5.5.1
Leistung - P / Power - P.......................................................................................... 17
5.5.2
Frequenz – F / Frequency – F ................................................................................ 17
5.5.3
Sanftanlauf - Frequenz / Soft start - frequency....................................................... 18
5.5.4
Sanftanlauf - Leistung / Soft start - Power .............................................................. 19
5.6
PARAMETERSATZSPEICHER: / PARAMETER MEMORY: .......................................................... 20
6
FEHLER / ERRORS ............................................................................................................. 20
6.1
6.2
V1.04
FEHLERLISTE / LIST OF ERRORS ........................................................................................ 21
SICHERUNG WECHSELN / CHANGING THE FUSE ................................................................... 22
Seite / Page 2 / 22
Betriebsanleitung
Feeder Controller FC 1000
Operating instructions
1 Hinweise für den Benutzer / User information
1.1 Sicherheitshinweise / Safety information
Diese Beschreibung enthält die erforderlichen
Informationen für den bestimmungsgemäßen
Gebrauch der darin beschriebenen Produkte.
Sie wendet sich an technisch qualifiziertes
Personal.
This description document contains the
information required for the proper use of the
products described within it. It is intended to
be read by technically qualified personnel.
Qualifiziertes Personal sind Personen, die
aufgrund ihrer Ausbildung, Erfahrung und
Unterweisung sowie ihrer Kenntnisse über
einschlägige Normen, Bestimmungen,
Unfallverhütungsvorschriften und Betriebsverhältnisse von dem für die Sicherheit der
Anlage Verantwortlichen berechtigt worden
sind, die jeweils erforderlichen Tätigkeiten
auszuführen und dabei mögliche Gefahren
erkennen und vermeiden können (Definition
für Fachkräfte laut IEC 364).
Qualified personnel are persons who, on the
basis of their education, experience and
training, and of their knowledge of the relevant
standards, regulations, accident safety
regulations and operating conditions, are
authorised and responsible for the safety of
the equipment, who carry out the necessary
job activities, and in doing so are able to
detect and avoid any possible dangers
(definition of technical personnel as stated in
IEC 364).
1.2 Gefahrensymbole / Hazard symbols
ACHTUNG!
Dieses Warndreieck kennzeichnet
Sicherheitshinweise. Nichtbeachtung
dieser Warnung kann schwerste
Verletzungen oder Tod zur Folge
haben!
GEFÄHRLICHE SPANNUNG!
Dieses Warndreieck kennzeichnet
Sicherheitshinweise. Nichtbeachtung
dieser Warnung kann schwerste
Verletzungen oder Tod zur Folge
haben!
FREISCHALTEN!
Dieses Symbol kennzeichnet
Wartungs-, Reparatur-, oder
Installationsarbeiten, bei denen die
Spannung abzuschalten und gegen
wiedereinschalten zu sichern ist.
V1.04
ATTENTION!
This warning triangle indicates safety
information. Failure to heed this warning
can result in severe or fatal injury.
DANGER- HIGH VOLTAGE
This warning triangle indicates safety
information. Failure to heed this warning
can result in severe or fatal injury.
DISCONNECT!
This symbol identifies maintenance, repair
or installation work for which the power
supply must be disconnected and secured
against the possibility of being switched
back on.
Seite / Page 3 / 22
Betriebsanleitung
Feeder Controller FC 1000
Operating instructions
1.3 Gefahrenhinweise / Hazard information
Die folgenden Hinweise dienen sowohl der
persönlichen Sicherheit des Bedienungspersonals als auch der Sicherheit der
beschriebenen Produkte sowie daran
angeschlossener Geräte.
The information below is intended to ensure the
personal safety of the operating staff, and to
ensure the safety of the products described, as
well as that of any connected appliances.
Der FC 1000 steuert schwingende mechanische
Teile, die gegebenenfalls gefährlich sind.
The FC 1000 controls vibrating mechanical parts
that are potentially dangerous.
Beachten Sie die im speziellen Einsatzfall
geltenden Unfallverhütungs- und Sicherheitsvorschriften.
Bei Lagerung des FC 1000 auf trockenen,
sauberen Lagerort achten. Die Temperatur muss
zwischen +5°C und +70°C betragen.
Achten sie darauf damit die bestimmungsgemäße
Verwendung sichergestellt ist.
Please refer to the relevant accident prevention
and work safety regulations for your particular
application.
Always store the FC 1000 in a dry and clean
storage place. The storage temperature should be
between +5 °C and +70°C.
This should be observed in order to ensure proper
use.
Prüfen Sie das Gerät sofort auf Verpackungs- oder
Transportschäden. Beschädigte Geräte dürfen
nicht in Betrieb genommen werden.
Beschädigungen bitte umgehend beim Lieferanten
beanstanden.
Check the equipment immediately for any
damaged packaging or transport damage.
Damaged equipment must not be put into
operation. Please inform the supplier immediately
of any damage.
Beachten Sie die im speziellen Einsatzfall
geltenden Unfallverhütungs- und Sicherheitsvorschriften.
Please refer to the relevant accident prevention
and work safety regulations for your particular area
of application.
Das Gerät darf nur an der auf dem Typenschild
angegebenen Netzspannung/Frequenz betrieben
werden.
The equipment must be operated only at the
mains voltage stated on the type plate.
Vor Inbetriebnahme ist sicherzustellen, dass der
Schutzleiter (PE) an der Anschlussstelle
installiert ist.
Before putting the equipment into operation,
ensure that the protective conductor (PE) is
installed at the connection point.
Bei Schweißarbeiten an der Anlage muss der
FC1000 allpolig vom Netz und dem
angeschlossenen Magneten getrennt werden.
During welding works on the machinery, the FC
1000 has to be disconnected with all poles from
power supplies and the connected magnet.
V1.04
Seite / Page 4 / 22
Betriebsanleitung
Feeder Controller FC 1000
Operating instructions
1.4 Konformitätserklärung / Declaration of conformity
Das Steuergerät FC 1000 ist nach
folgenden Bestimmungen,
harmonisierten Normen und technischen
Spezifikationen entwickelt und gefertigt:
The FC 1000 control unit has been
developed and manufactured in
accordance with the following
regulations, harmonised standards and
technical specifications.
2004/108/EG
EG-EMV Richtlinie
2004/108/EG
EC EMC Directive
2006/95/EG
EG-Niederspannungsrichtlinie
2006/95/EC
EC Low voltage Directive
EN 61010-1
Sicherheitsbestimmungen für elektrische
Mess-, Steuer-, Regel- und Laborgeräte
Allgemeine Anforderungen
EN 61010-1
Safety requirements for electrical
equipment for measurement, control
and laboratory use.
EN 61326-1
Elektrische Mess-, Steuer-, Regel- und
Laborgeräte –
EMV-Anforderungen
EN 61326-1
Electrical equipment for measurement,
control and laboratory use –
EMC requirements
1.5 Bestimmungsgemäße Verwendung / Proper use
An dem kompakt aufgebauten Steuergerät
®
FC 1000 können alle VIBROLINER und
VIBROBUNKER der Firma IFSYS betrieben
werden. Das Gerät ist für die Einzelaufstellung in der Nähe des Schwingantriebs
vorgesehen und ist vollkommen steckbar
ausgeführt
Der FC 1000 kann mit Optionsmodulen
erweitert werden.
Definition:
®
All IFSYS VIBROLINER and
VIBROBUNKER equipment can be operated
from the compact structure FC 1000 control
unit. The unit is intended for single installation
close to the vibrating drive, and is fully
designed as a plug-in module.
The FC 1000 can be extended by adding
optional modules.
Definition:
®
®
VIBROLINER und VIBROBUNKER sind
VIBROLINER and VIBROBUNKER are
elektromagnetische Schwingantriebe der Firma electro-magnetic vibration feed systems
IFSYS.
manufactured by IFSYS.
V1.04
Seite / Page 5 / 22
Betriebsanleitung
Feeder Controller FC 1000
Operating instructions
2 Technische Daten / Technical Data
Netzanschluss:
100V…250Veff 50/60Hz
Mains connection:
100V…250V eff. 50/60Hz
Leistungsaufnahme:
max. 500VA
Interne Sicherung 2x4AT
Vorsicherung nur mit Träger
Charakteristik verwenden !
Power input :
max. 500VA
Internal 2x4AT fuse
Only pre-fuse with carrier
characteristic should be
used!
Absicherung:
(Einschaltstrom bis 25A)
Safety fuse:
(Power-on current up to 25A)
Magnet Ausgang:
Rechteck PWM 0...210Veff
Magnet output:
Right-angle PWM 0...210Veff
Steuereingänge:
Verpolungssicher
Control inputs:
Reverse polarity protection
„Magnet ein“ (X4 Pin 2)
+5...+24VDC / bei 24V 7mA
“Magnet on” (X4 Pin 2)
+5...+24VDC / at 24V 7mA
„Reset“ (X4 Pin 4)
+5...+24VDC /
“Reset“ (X4 Pin 4)
+5...+24VDC /
Meldeausgang:
Relaisausgang potentialfrei
Max. 30V DC / 0,5A
Signal output:
No-voltage relay output
Max. 30V DC / 0,5A
Umgebungstemperatur:
Ambient temperature:
Betrieb
5…40°C
Operation
5…40°C
Lagerung
5...70°C
Storage
0...85°C
Luftfeuchtigkeit:
5...95%, nicht kondensierend
Air humidity:
5...95%, non-condensating
Schutzklasse:
I
Protection class
I
Schutzart:
IP65
bei verschraubten
Anschlussbuchsen
Insulation type:
IP65
For screw-connection
sockets
Maße:
217 x 188 x 67 mm
B x H x T
Dimensions:
217 x 188 x 67 mm
W x H x D
V1.04
Seite / Page 6 / 22
Betriebsanleitung
Feeder Controller FC 1000
Operating instructions
3 Installation / Installation
3.1 Montage / Assembly
Wird der FC 1000 lose geliefert, muss das Gerät
vor der Inbetriebnahme durch die vorgesehenen
Befestigungslöcher montiert werden. Die
Entfernung zwischen dem
FC 1000 und dem Schwingantrieb sollte
10 Meter nicht überschreiten.
Befestigung mit 4x Senkkopfschraube M4.
If the FC 1000 is supplied separately, prior to
being put into operation, the device must be
mounted through the mounting holes provided.
The distance between the FC 1000 and the
vibration feed drive must not be more than 10
metres.
It is fastened by 4 x M4 countersunk screws.
Befestigungsloch
Mounting hole
Befestigungsloch
Mounting hole
3.2 Elektrischer Anschluss / Electrical connection
V1.04
Das Gerät muss geerdet werden.
The device must be earthed
Vor dem Beginn der Arbeiten das
Gerät von Spannung freischalten.
Disconnect the power supply from
the device before starting work.
Seite / Page 7 / 22
Betriebsanleitung
Feeder Controller FC 1000
Operating instructions
3.2.1 Lage der Anschlüsse / Position of Connections
3.2.2 Beschreibung der Anschlüsse / Description of the connections
Flanschstecker X1:
Netzspannungseingang 100V... 250V AC
X1 flange plug:
Mains voltage input 100V… 250V a.c.
Pin 1: L1
Pin 2: N
Pin 3: nc
Pin 4 (PE): PE
Pin 1: L1
Pin 2: N
Pin 3: nc
Pin 4 (PE): PE
max. 2.5mm² !
max. 2.5mm²!
M12-Einbaustecker X4:
Steuereingänge für Automatik (Magnet ein /
aus) und Reset (Fehler quittieren)
X4 M12- Panel-mounted (male) plug:
Control inputs for automatic (magnet on/off) and
Reset (acknowledge error)
Pin 1: Hilfsspannung +15VDC (falls enabled)
oder +24VDC (falls Option: Zusatznetzteil)
Pin 2: Automatik Magnet ein (ME)
+5VDC...+24DC = Magnet ein, <4VDC =
Magnet aus
Pin 3: GND zu den Pins 1,2,4
Pin 4: Reseteingang +5VDC...+24DC = Reset
aktiv, <4VDC = Reset nicht aktiv
Pin 1: Auxiliary voltage + 15 VDC (if enabled) or
+24 VDC (if option: auxiliary power supply
pack)
Pin 2: Automatic Magnet on (ME)
+5VDC...+24DC = Magnet on, <4VDC =
Magnet off
Pin 3: GND to pins 1, 2, 4
Pin 4: Reset input +5VDC...+24DC = Reset
active, <4VDC = Reset not active
Falls die Hilfsspannung mit +15VDC enabled
ist, kann diese mit max. 100mA belastet
werden. Eine Überlastung oder ein Kurzschluss hat eine Strombegrenzung zur Folge.
In diesem Fall wird nach ca. 1s der Ausgang
abgeschaltet, um eine Überlastung der Strombegrenzung zu vermeiden. Durch Abschalten
im SetAUF (über die Taste "F2" zu erreichen)
von X4-Power = OFF und erneutem
Einschalten von X4-Power = ON wird der
Ausgang wieder eingeschaltet.
If auxiliary voltage is enabled with + 15VDC it
can accept a load of maximum 100 mA. An
overload or a short circuit will result in limited
current. In this event the output is switched off
after approximately 1 second in order to prevent
the current limiter from overloading.
The output is switched back on by
disconnecting in SetON (obtained via the “F2”
button) from X4-Power = OFF and switching
X4=POWER = ON back on
V1.04
Seite / Page 8 / 22
Betriebsanleitung
Feeder Controller FC 1000
Operating instructions
M12-Einbaustecker X5:
Relaisausgang für Fehlerstatus
X5 M12- Panel-mounted (male) plug:
Relay output for error status
Pin 1: Relaiskontakt 11
Pin 2: Relaiskontakt 12
Pin 3: nc
Pin 4: Relaiskontakt 14
Pin 1: Relay contact 11
Pin 2: Relay contact 12
Pin 3: nc
Pin 4: Relay contact 14
Im Fehlerfall wie auch im stromlosen Fall sind
die Relaiskontakte 11 und 12 leitend, im
fehlerfreien Betrieb sind die Relaiskontakte 11
und 14 miteinander verbunden.
In the event of a fault as well in the event of a
power failure, relay contacts 11 and 12 are live;
when operating correctly relay contacts 11 and
14 are interconnected.
M8-Einbaubuchse X7:
RS232-Schnittstelle, Pegel TTL (5V)
X7 M8 panel-mounted socket (female)
RS232 interface, TTL Level (5V)
Pin 1: +5Vdc
Pin 2: TX-Data vom Mikroprozessor (TTLPegel 5V)
Pin 3: GND zu den Pins 1,2,4
Pin 4: RX-Data zum Mikroprozessor (TTLPegel 5V)
Pin 1: +5Vdc
Pin 2: TX data from microprocessor (TTL level
5V)
Pin 3: GND to pins 1, 2, 4
Pin 4: RX data from microprocessor (TTL level
5V)
Die +5Vdc-Versorgung ist mit F=200mAT intern
abgesichert. Sie dient nur zur Versorgung von
einfachen Schnittstellenbausteinen (z.B.
MAX232 Pegelwandler TTL 5V <-> +/-10V
RS232-Normpegel) und sollte nicht für andere
Zwecke verwendet werden, da mit dieser
Spannung auch der interne Mikroprozessor
versorgt wird.
The +5VDC supply is protected internally by a
F=200mAT. It is used only to supply simple
interface components (such as MAX232 level
converter TTL 5V <-> +/- 10V RS232 standard
converter) and should not be used for any other
purpose, because the internal microprocessor
is also supplied with this voltage.
Flanschbuchse X10:
Magnetanschluss (nicht galvanisch vom
Leitungsnetz getrennt ! )
Pin 1: Magnet M+
Pin 2: nc
Pin 3: Magnet MPin 4 (PE): PE
X10 Flange socket:
Magnet connection (not DC isolated from the
mains!)
Pin 1: Magnet M+
Pin 2: nc
Pin 3: Magnet MPin 4 (PE): PE
max. 2.5mm²!
max. 2.5mm² !
Stellen Sie alle notwendigen
Anschlüsse nach obiger
Beschreibung und dem folgenden
Anschlussbeispiel her !
V1.04
Make all the necessary connections
as per the above description and
the connection example shown
below!
Seite / Page 9 / 22
Betriebsanleitung
Feeder Controller FC 1000
Operating instructions
3.2.3 Anschlussbeispiel / Connection example
On X4 Pin 1 (+UB) the following
options are parametrizable:
n.c.
+15V cc (100mA)
+24V cc (0,6A) with extra power
supply
V1.04
Seite / Page 10 / 22
Betriebsanleitung
Feeder Controller FC 1000
Operating instructions
4 Inbetriebnahme / Putting into initial operation
Vor Beginn der Inbetriebnahme die
Scheitshinweise im Kapitel 1
beachten.
Before putting into operation, refer
to the safety information in Section
1.
Vor Beginn der Inbetriebnahme die
Sicherheitshinweise im Kapitel 1
beachten.
Before putting into operation, refer
to the safety information in Section
1.
Vor Inbetriebnahme alle elektrischen
Anschlüsse wie im Kapitel 3.2 beschrieben
herstellen und auf Richtigkeit prüfen.
Schalten Sie die
Versorgungsspannung ein.
Nach dem Einschalten des FC
1000 erscheint für ca. 5s die
Firmenbezeichnung.
Dann erscheint die
nebenstehende
Hauptanzeige.
Die Power-LED zeigt das
Vorhandensein der
Betriebsspannung an.
Before putting into operation make all the
electrical connections as described in section
3.2 and check that they are correct.
Switch on the power supply.
Once the FC 1000 has been
switched on, the company
name appears for
approximately 5 seconds.
After that the main display,
illustrated alongside, appears.
The Power LED indicates that
operating voltage is present.
4.1 Lageplan Bedienelemente / Layout of operating controls
Funktionstasten
F1-F4
Functionkey
F1-F4
LED POWER (GN)
Versorgungsspannung
LED POWER (GN)
Supply voltage
LED MAGNET (GN)
Ausgang aktiv
LED MAGNET (GN)
Output active
LED ERROR (RD)
Gerätefehler
LED ERROR
(RD) fault on device
Taste AUF
UP button
Taste AB
DOWN button
Taste LINKS
LEFT button
Taste RECHTS
RIGHT button
V1.04
Seite / Page 11 / 22
Betriebsanleitung
Feeder Controller FC 1000
Operating instructions
5 Bedienung / Operation
5.1 Menüstruktur / Menu structure
V1.04
Seite / Page 12 / 22
Betriebsanleitung
Feeder Controller FC 1000
Operating instructions
5.2 Bedienphilosophie / Operating philosophy
Die Bedienung erfolgt über die vier
Cursortasten
“AUF“ „LINKS“ „RECHTS“ und „AB“.
The unit is operated by means of the four
cursor buttons - “UP” “LEFT” “RIGHT” AND
“DOWN”.
Wird die Taste "AUF" gedrückt, beginnt der
erste Buchstabe eines veränderbaren
Parameters an zu blinken.
If you press the “UP” button the first letter of a
modifiable parameter starts to flash.
Durch weiteres Betätigen der Taste „AUF“ wird
der nächste Parameter aktiv. Ist das Menü am
Ende, springt der blinkende Cursor zurück zum
ersten Menübild oder Parameter.
If you press the “UP” button again, the next
parameter activates. Once you reach the end
of the menu, the flashing cursor goes back to
the first menu or parameter.
Die Werte der einzelnen Parameter können mit
den Tasten „LINKS“ und „RECHTS“ verändert
werden.
Die Daten müssen durch Betätigen der Taste
„AB“ in den Speicher übernommen werden.
You can change the values in each of the
parameters by pressing the “LEFT” and
“RIGHT” buttons.
The data must be stored in the memory by
pressing the “DOWN” button.
Einige Parameter lassen sich nur im STOP
Zustand verändern.
Some parameters can be altered only in
STOP status.
5.3 Die Funktionstasten / The function keys
5.3.1 F1 – Systeminfo / System information
Mit dem Betätigen der
Funktionstaste F1 wird Ihnen
der Gerätetyp (FCxxxx), die
Seriennummer (SNR:xxxxx)
sowie die Version (Vx.xx)
angezeigt.
Hier kann auch der Kontrast
des Displays der Umgebung
angepasst werden.
Diese Anzeige ist nur im STOP
Zustand anwählbar.
Pressing function key F1
displays the device type
(FCxxxx), the serial number
(SNR:xxxxx) and the version
no. (Vx.xx).
This is where it is also possible
to adjust the contrast of the
display to suit the ambient
light.
This display can be selected
only in STOP status.
5.3.1.1 Veränderbare Parameter / Modifiable parameters
Bezeichnung:
Description
Symbol:
Symbol:
LCD-Display Kontrast
LCD-Display contrast
CONTR.
V1.04
Einheit:
Unit:
min. Wert
min. value
max. Wert:
max. value:
Auflösung:
Resolution:
25
99
1
Seite / Page 13 / 22
Betriebsanleitung
Feeder Controller FC 1000
Operating instructions
5.3.2 F2 – Setup Optionen / Setup Options
Mit dem Betätigen der
Funktionstaste F2 wird ihnen
das Menü „Setup Optionen“
angezeigt.
Durch weiteres Betätigen der
Taste F2 gelangen Sie zurück.
Pressing the F2 function key
displays the “Set-up options”
menu.
Press F2 again to go back.
Diese beiden Einstellungen wirken nur auf die
Bedienung "RUN" oder "STOP" durch das
Ansteuern oder Ausschalten des Automatikeingangs (X4 Pin2).
These two settings work only on “RUN” or
“STOP” operation by actuating or switching off
the automatic input (X4 pin 2).
Die mit der Taste "F4" in diesen Delay-Zeiten
erzwungenen "RUN" oder "STOP" -Befehle
haben Vorrang.
The “RUN” or “STOP” commands forced by
the “F4” key during these delay times have
priority.
Durch Anwahl einer Delay-Zeit mit 0 wird diese
deaktiviert und entsprechend mit "off"
It is deactivated by selecting a delay time of 0
angezeigt.
and is then accordingly displayed as “off”.
Mit dem Parameter STARTDEL lässt sich der Automatikeingang (X4 Pin2) einschaltverzögern.
Wenn wie hier im Bild gezeigt
das Start-Delay auf 0,3s steht,
bedeutet dies, dass nach dem
Setzen des Automatikeingangs
0,3s vergehen, bis der
eigentliche Start ("RUN")
aktiviert wird, unabhängig
davon, ob und wie der
Sanftanlauf eingestellt ist.
The START-DEL parameter
creates a switch-on delay on
the automatic input (X4 Pin 2).
If, as shown here in the
illustration, the Start delay is
set to 0.3s, it means that after
the automatic input is set, 0.3
seconds go by before the
actual start ("RUN") is
activated, regardless of
whether and how soft start is
set.
Mit dem Parameter STOP-DEL
lässt sich der Automatikeingang (X4 Pin2) ausschaltverzögern.
Das hier gezeigte Stop-Delay
von 0,4s ergibt noch einen
Nachlauf von 0,4s ("RUN),
obwohl der Automatikeingang
schon wieder ausgeschaltet
wurde.
The STOP-DEL parameter
creates a switch-off delay on
the automatic input (X4 Pin 2).
The Stop Delay of 0.4s
illustrated here will cause a
run-on lasting 0.4s (“RUN”)
even though the automatic
input has already been
switched off again.
V1.04
Seite / Page 14 / 22
Betriebsanleitung
Feeder Controller FC 1000
Operating instructions
The X4 POWER function provides
the opportunity to switch off at
socket X4 (automatic and reset
inputs) at pin 1 15VDC.
Die Funktion X4-POWER stellt
die Möglichkeit dar, an die
Buchse X4 (Automatik- und
Reset-Eingänge) an den Pin 1
15V DC aufzuschalten.
Ist der Parameter aktiviert, können die beiden
Steuereingänge für Automatik z.B. über
potentialfreie Kontakte angeschlossen werden.
Zum anderen können so Füllstandssensoren,
wie z.B. eine Lichtschranke oder ein induktiver
Geber, ohne weitere Spannungsversorgung
angeschlossen werden.
If the parameter is activated the two control
inputs for automatic can be connected via novoltage contacts for example.
On the other hand, in this way, level sensors
such as a light barrier or an inductive
transducer can be connected without further
voltage supply.
Die X4-POWER -Spannungsversorgung ist
mit max. 100mA belastbar. Eine höhere
Belastung hat eine Strombegrenzung mit
nachfolgender Abschaltung (nach ca. 1s)
zur Folge. Diese Abschaltung kann wieder
rückgängig gemacht werden, wenn X4POWER: ON auf "OFF" und wieder auf
"ON" gestellt wird.
The X4 POWER power supply can accept a
maximum load of 100 mA. Any higher load
will cause a current limitation followed by a
power-down (after approx. 1 second). This
power-down can be reverted if X4-POWER:
ON is switched to “OFF” and then back to
“ON”.
Sollte das optionale Zusatznetzteil 24V DC
15W installiert sein, dann steht bei dieser Wahl
(X4-POWER: OFF) eine mit 0,6A belastbare
Spannungsversorgung mit 24V DC am Pin 1
der Buchse X4 zur Verfügung.
If the optional auxiliary 24VDC 15 W power
supply pack is installed, then when this is
selected (X4 – POWER: OFF) a 24VDC power
supply with a load capacity of 0.6A is present
at pin 1 on socket X4.
5.3.2.1 Veränderbare Parameter / Modifiable Parameters
Bezeichnung:
Description
Symbol:
Symbol:
Startverzögerung
Automatikeingang
Stopverzögerung
Automatikeingang
Hilfsspannung 15V DC
Start delay
Automatic input
Stop delay
Automatic input
Auxiliary voltage 15V DC
min. Wert
min. value
max. Wert:
max. value:
Auflösung:
Resolution:
START-DEL S
0
25.5
0.1
STOP-DEL
0
25.5
0.1
OFF
ON
X4-POWER:
Einheit:
Unit:
S
5.3.3 F3 – Messwerte / Measured values
Über die Taste "F3" kann die
Anzeige des Magnetstromes
aufgerufen werden.
V1.04
The “F3” key can be used to
display the magnet current.
Seite / Page 15 / 22
Betriebsanleitung
Feeder Controller FC 1000
Operating instructions
Der Wert I=xx.xxA ist ein über 250 Messungen Value I=xx.xxA is a value for the magnet
(alle 1ms) gemittelter Wert des
current, ascertained from 250 measurements
Magnetstromes.
(every 1ms).
Der Wert Ip=xx.xxA ist der Spitzenstromwert
(Ipeak) während der Mittelung der 250
Messungen.
Value Ip=xx.xxA is the peak current while the
250 measurements are being averaged.
5.3.4 F4 – RUN /STOP / RUN/STOP
Mit der Taste F4 kann der
Magnetausgang aktiviert
werden. Die Anzeige wechselt
von „STOP“ auf „RUN“
Wenn sich der FC 1000 im "RUN" befindet
blinkt die LED "MAGNET", um optisch auf die
Magnetansteuerung hinzuweisen. Die
Blinkfrequenz ist fix und hat nichts mit der
Ausgangsfrequenz des Magnetes zu tun.
Sollte der Automatikeingang angesteuert
werden, startet der FC 1000 ebenfalls nur
dann, wenn es sich nicht in der Anzeige "F1Systeminfo" oder "F2-Setup" befindet.
Wenn der Automatikeingang
angesteuert wird erscheint in
der Anzeige hinter P=xxx%
"AUTO".
Das Gerät kann aber jederzeit über die Taste
"F4" wieder auf "STOP" oder auch auf "RUN"
gestellt werden. Auch kann ein mit der Taste
"F4" auf "RUN" eingestelltes Gerät über einen
gesetzten und wieder ausgeschalteten
Automatikeingang auf "STOP" geschaltet
werden.
The magnet output can be
activated from the F4 key. The
display alters from “STOP” to
“RUN”
When the FC 1000 is in “RUN” the “MAGNET”
LED flashes to provide a visual indication of
the magnet actuation. The frequency of the
flashing is fixed and has nothing to do with the
output frequency of the magnet.
If the automatic input has to be actuated, the
FC 1000 will likewise only start provided it is
not in “F1 system info” or “F2 Setup”.
If the automatic input has to be
actuated, the word “AUTO”
appears behind P=xxx%.
However the unit can be set back to “STOP”
or also to “RUN” at any time by pressing the
“F4” key. A unit set to “RUN” using the “F4”
key can be switched to “STOP” by setting an
automatic input and then switching it back on.
5.4 Tastensperre / Keylock
Die Tasten des FC 1000
können gegen
unbeabsichtigtes Betätigen
durch eine Tastensperre
geschützt werden.
V1.04
The Keys of the FC 1000 can
be protected against
inadvertent pressing through a
keylock.
Seite / Page 16 / 22
Betriebsanleitung
Feeder Controller FC 1000
Operating instructions
Die Tastensperre kann in der Hauptanzeige im
„STOP“ oder „RUN“ Mode aktiviert bzw.
deaktiviert werden. Die Tastensperre wird
durch Betätigen und Halten (10Sek.) der Taste
„AB“ ein- und ausgeschaltet .
The keylock can be activated and deactivated
in the main display in the „STOP“ or „RUN“ mode. The keylock is set on and out by
pressing and holding (10sec.) the button
“DOWN”
Ist die Tastensperre aktiviert, erscheint in der
Anzeige neben der Frequenz der Buchstabe
„L“ für Locked.
When the keylock is activated , the letter „L“
appears in the display next to the frequency.
5.5 Einstellungen / Settings
5.5.1 Leistung - P / Power - P
Die Vibrationsstärke kann
durch den Parameter „P“
verändert werden
Durch Betätigen der Taste „AUF“ den Cursor
zum Parameter „P“ bewegen. Mit der Taste
„AB“ wird der Wert übernommen. Falls sich der
FC 1000 nicht in "STOP" sondern in "RUN"
befindet, kann der Programmspeicher nicht
ausgewählt werden. Die Bedienung über die
Taste "AUF" fängt dann mit der Einstellung der
Leistung P an.
The intensity of vibration can
be changed via the “P”
parameter.
Move the cursor to parameter “P” by pressing
the button “UP”. Store the value by pressing
the “DOWN” button. If the FC 1000 is not in
“STOP” but in “RUN” it is not possible to select
the program memory. Operation via the “UP”
button then starts with the setting of Power P.
5.5.1.1 Veränderbare Parameter / Modifiable parameters
Bezeichnung:
Description
Symbol:
Symbol:
Einheit:
Unit:
min. Wert
min. value
max. Wert:
max. value:
Auflösung:
Resolution:
Ausgangsleistung
Output power
P
%
10
130
1
5.5.2 Frequenz – F / Frequency – F
Die Ausgangsfrequenz des FC
1000 kann durch den
Parameter „F“ verändert
werden.
Durch Betätigen der Taste „AUF“ den Cursor
zum Parameter „F“ bewegen. Mit der Taste
„AB“ wird der veränderte Wert übernommen.
V1.04
The “F” parameter can be used
to change the output frequency
of the FC 1000.
Move the cursor to the “F” parameter by
pressing the “UP” button. Store the altered
value by pressing the “DOWN” button.
Seite / Page 17 / 22
Betriebsanleitung
Feeder Controller FC 1000
Operating instructions
5.5.2.1 Veränderbare Parameter / Modifiable parameters
Bezeichnung:
Description
Symbol:
Symbol:
Einheit:
Unit:
min. Wert
min. value
max. Wert:
max. value:
Auflösung:
resolution:
Ausgangsfrequenz
(mechanisch)
Output frequency
(mechanical)
F
Hz
5.00
99.99
0.01
5.5.3 Sanftanlauf - Frequenz / Soft start - frequency
Der Sanftanlauf ist ein
zeitgeführtes Abfahren der
Frequenz auf die eingestellte
Frequenz des Parameters „F“
nach dem Einschalten.
Soft start is a time-controlled
decrementation of the
frequency to the set frequency
of parameter “F” following
switch on.
Beispiel:
Parameter F=13.85Hz
Parameter SoftFrq=0.20Hz
Parameter dec.all=200ms
Example:
Parameter F=13.85Hz
Parameter SoftFrq=0.20Hz
Parameter dec.all=200ms
Beim Einschalten des Magnetausgangs (F4
oder Steuereingang) am FC 1000 erhöht sich
die eingestellte Frequenz 13.85Hz um 0.2Hz
auf 14.05Hz. Die Ausgangsfrequenz wird für
die eingestellte Zeit um 0.01Hz erniedrigt.
Der Zeitfaktor für diesen Vorgang wird mit dem
Parameter „dec.all“ eingestellt.
Die Zeit für den Sanftanlauf errechnet sich
dann wie folgt:
When the magnet output is switched on (by
means of F4 or control input) on the FC 1000,
at switch-on the set frequency of 13.85 Hz
increases by 0.2Hz to 14.05 Hz. The output
frequency is reduced by 0.01Hz for the set
time.
The time factor for this procedure is set on the
“dec.all” parameter.
The time for the soft start is therefore
calculated as follows:
(Anfahrfrequenz - Nennfrequenz) x Zeitfaktor
(Start-up frequency – nominal frequency) x
time factor
(1405 - 1385) x 0,200s = 4 Sekunden
(1405 – 1385) x 0.200 s = 4 seconds
Wird der Parameter „dec.all“ auf „off“ (0)
gestellt ist die Funktion deaktiviert.
If the “dec.all” parameter is set to “off” (0), the
function is deactivated.
5.5.3.1 Veränderbare Parameter / Modifiable parameters
Bezeichnung:
Description
Symbol:
Symbol:
Einheit:
Unit
min. Wert
min. value
max. Wert:
max. value:
Auflösung:
Resolution
Sanftanlauf
Ausgangsfrequenzerhöhung
Sanftanlauf Frequenz
(Dekrementzeit)
Soft start
Output frequency increment
Soft start frequency
(decrement time)
F(SoftFrq)
Hz
0.01
2.50
0.01
T(dec.all)
ms
0 (=off)
2000
10
V1.04
Seite / Page 18 / 22
Betriebsanleitung
Feeder Controller FC 1000
Operating instructions
5.5.4 Sanftanlauf - Leistung / Soft start - Power
Der Sanftanlauf ist ein
zeitgeführtes Hochfahren der
Leistung auf die eingestellte
Leistung des Parameters „P“
nach dem Einschalten.
Soft start is a time-controlled
power-up to the set power of
parameter “P” following switch
on.
Beispiel:
Parameter Leistung P=80%
Parameter SoftPow P=10%
Parameter inc.all T=50ms
Example:
Parameter Power P=80%
Parameter SoftPow P=10%
Parameter inc.all T=50ms
Beim Einschalten des Magnetausgangs (F4
oder Steuereingang) am FC 1000 wird die am
Parameter „SoftPow“ eingestellte Leistung
(10%) alle 50ms um 1% bis auf 80% erhöht.
Die Zeit für den Sanftanlauf errechnet sich
dann wie folgt:
When the magnet output is switched on (via
F4 or control input) on the FC 1000 the power
set on the "SoftPow" parameter (10%)
increases by 1% every 50ms until it reaches
80%.
The time for the soft start is therefore
calculated as follows:
(Automatikleistung- Startleistung) x Zeitfaktor
(Automatic power – start power) x time factor
(80 - 10) x 0,05s = 3,5 Sekunden
(80 – 10) x 0.05 s = 3.5 seconds
Wird der Parameter „inc.all“ auf „off“ (0) gestellt If the “inc.all” parameter is set to “off” (0), the
ist die Funktion deaktiviert.
function is deactivated.
Die beiden Sanftanläufe für Leistung und
Frequenz können beliebig eingestellt und
verwendet werden.
The two soft starts, for power and for
frequency, can be set and used as
required.
5.5.4.1 Veränderbare Parameter / Modifiable parameters
Bezeichnung:
Description
Symbol:
Symbol:
Sanftanlauf Leistung
(Startleistung)
Sanftanlauf Leistung
(Inkrementzeit)
Soft start power
(start power)
Soft start power
(increment time)
V1.04
Einheit:
Unit:
min. Wert
min. value
max. Wert:
max. value
Auflösung:
resolution:
P(SoftPow) &
10
130
1
T(inc.all)
0 (=off)
100
1
ms
Seite / Page 19 / 22
Betriebsanleitung
Feeder Controller FC 1000
Operating instructions
5.6 Parametersatzspeicher: / Parameter memory:
Das FC 1000 ist mit 20 Programmspeichern
(PS01...PS20) ausgestattet, die das
Abspeichern von kompletten Parametersätzen
ermöglichen. Ein Parametersatz enthält
folgende Werte:
The FC 1000 comes with 20 program
memories (PS01 .. PS20) which can store
complete sets of parameters. One parameter
set contains the following values:
Bezeichnung:
Description
Symbol:
Symbol:
Einheit:
Unit:
min. Wert
min. value
max. Wert:
max. value:
Auflösung:
resolution:
Ausgangsleistung
Ausgangsfrequenz
(mechanisch)
Sanftanlauf Leistung
(Startleistung)
Sanftanlauf Leistung
(Inkrementzeit)
Sanftanlauf
Ausgangsfrequenzerhöhung
Sanftanlauf Frequenz
(Dekrementzeit)
Output power
Output frequency
(mechanical)
Soft start Power
(start power)
Soft start power
(increment time)
Soft start
out put frequency increment
Soft start frequency
(decrement time)
P
F
%
Hz
10
5.00
130
99.99
1
0.01
P(SoftPow) &
10
130
1
T(inc.all)
ms
0 (=off)
100
1
F(SoftFrq)
Hz
0.01
2.50
0.01
T(dec.all)
ms
0 (=off)
2000
10
Um einen anderen
Parametersatz auszuwählen,
muss sich der FC 1000 im
"STOP" befinden.
Mit den Tasten „LINKS“ oder
„RECHTS den Parametersatz
auswählen und mit der Taster
„AB“ übernehmen. Jetzt sind
alle Einstellungen, die im
Speicher für diesen Satz
abgelegt sind, aktiv.
To select another parameter
set, the FC 1000 must be at
“STOP”.
Use the “LEFT” or "RIGHT"
button to select the parameter
and confirm by pressing the
“DOWN” button. All the
settings stored for this
parameter set are now active.
6 Fehler / Errors
V1.04
Störungsbehebung nur durch
qualifiziertes Fachpersonal !
Only qualified technicians may
correct this fault!
Störungsbehebung nur durch
qualifiziertes Fachpersonal !
Only qualified technicians may
correct this fault!
Vor dem Beginn der Arbeiten das
Gerät von Spannung freischalten.
Disconnect the power supply from
the device before starting work.
Seite / Page 20 / 22
Betriebsanleitung
Feeder Controller FC 1000
Operating instructions
Sollte ein Fehler am Gerät auftreten, wird im
Display der Fehlercode angezeigt und die rote
LED „ERROR“ leuchtet. Parallel dazu wird der
Magnetausgang abgeschaltet und das Relais
mit dem potentialfreien Kontakt am Stecker X5
fällt ab.
In case a fault occurs on the device, the error
code will be displayed and the red LED
“ERROR” lights. Parallel to this, the magnetic
exit is switched off and the relay with the
voltage-free contact on plug X5 secedes.
Ein Fehler kann durch Betätigen der Taste
„AB“ oder über den externen Steuereingang
(X4 Pin4) quittiert werden.
An error can be acknowledged by pressing the
button “AB” or via the external control input
(X4Pin4).
6.1 Fehlerliste / List of errors
Bezeichnung
Störungsursache
Hardware-detec,
Überstrom
Endstufe
Falsche Parametereinstellungen
Anzeige / Display
Description
Cause of fault
Hardware-detec,
Over-current
end stage
Incorrect parameter
settings
oder
or
Falscher Magnet
Incorrect magnet
Start-Spannung
Sanftanlauf > als
Spannung (P)
Achten Sie darauf, dass
der Startwert des
„Sanftanlaufs Leistung“
nicht größer ist als der
eingestellte
Leistungswert P.
Start voltage
soft start > that
voltage (P)
Make sure that the
starting value of the
“soft start power” is
not greater than the
configured power P.
RS232Overrunerror
Überprüfen Sie die PCEinstellungen der
RS232-Schnittstelle,
z.B. zu hohe Baudrate
RS232-Overrun
error
Check the PC settings
on the RS232
interface, for example,
baud rate too high
RS232Frameerror
Überprüfen Sie die PCEinstellungen der
RS232-Schnittstelle,
z.B. falsche Bit-Anzahl
RS232-Frame
error
Check the PC settings
on the RS232
interface, for example,
wrong bit quantity
V1.04
Seite / Page 21 / 22
Betriebsanleitung
Feeder Controller FC 1000
Operating instructions
6.2 Sicherung wechseln / Changing the fuse
Störungsbehebung nur durch
qualifiziertes Fachpersonal !
Gerät nicht öffnen bevor die
Kondensatoren entladen sind !
Only qualified technicians may
correct this fault.
Do not open the device before the
capacitors have discharged!
Störungsbehebung nur durch
qualifiziertes Fachpersonal !
Only qualified technicians may
correct this fault.
Vor dem Beginn der Arbeiten das
Gerät von Spannung freischalten.
Disconnect the power supply from
the device before starting work.
Schalten Sie das Gerät
spannungsfrei. Demontieren
Sie den FC 1000 durch das
Lösen der vier
Befestigungsschrauben (siehe
Kapitel 3.1 ).
Disconnect the equipment from
the power supply. Dismantle
the FC 1000 by loosening the
four fastening screws (see
section 3.1).
Legen Sie das demontierte
Gerät auf die Frontseite und
lösen die acht Kreuzschlitzschrauben auf der Rückseite
des Gerätes.
Place the dismantled
equipment on its front and
loosen the eight cross-head
screws on the rear of the
equipment.
Legen Sie das Gerät (noch
ungeöffnet) zurück auf die
Rückseite und heben danach
den Gehäusedeckel ab. Nun
können Sie die defekte
Sicherungen gegen neue
ersetzen.
(Feinsicherung 4x20mm 4AT)
Lay the equipment (still
unopened) back onto its back,
and then lift off the housing
cover. You can now replace
the faulty fuses with new ones.
(4 x 20mm 4AT microfuse).
Schließen Sie das Gehäuse in
umgekehrter Reihenfolge.
Achten Sie darauf keine
Leitungen zwischen Rückplatte
und Gehäusedeckel
einzuklemmen.
Reassemble the housing in
reverse order. Make sure that
no cables or leads are jammed
between the rear plate and the
top of the housing.
V1.04
Seite / Page 22 / 22