1
GRX-WCI Function Switches
Installation Instructions
GRX-WCI
PELV/Class 2
Please Read Before Installing
Overview
Input Wiring
Harness
FUNCTIONS
FUNCTION SWITCH SETTINGS
5 6 7 8 9 10
Installation
Warning: Always turn Off the circuit breaker/MCB or remove the main
fuse from the power line before doing any work. Failure to do so can
result in serious personal injury.
8. Restore power.
■
5 6 7 8 9 10
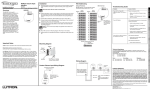
Mounting Diagram
Low-voltage Class 2/PELV Wiring:
■ Use low-voltage Class 2/PELV wiring to daisy-chain the GRX-WCI to GRX3000/4000 Control Units and other components.
■ Make connections inside the wallbox, switchbox, or junction box with a maximum wire length of 2.5m (8 feet) from the link to the GRX-WCI.
Wallbox
Communication
Link Wiring
Scenes 1 to 4
Off
Raise
Lower
Scenes 5 to 8
Off
Raise
Lower
Scenes 9 to 12
Off
Raise
Lower
Scenes 13 to 16
Off
Raise
Lower
Input 6
Input 7
Selects scene 1.
Turns lights off.
2-button Scene Selection*
Selects scene 9.
Selects scene 10.
Selects scene 13.
Selects scene 14.
2-button Panic Wallstation*
Selects Scene 16 (light full ON). Locks all other system controls from
this Control Unit (scene lock).
Restores previous scene. Removes lockout control.
2-button Fine Tuning*
Temporarily brightens selected zone(s).
Temporarily dims selected zone(s).
2-button Zone Lockout*
Allows only temporary adjustments to zones.
Adjustments won’t affect preset scene settings.
Disables zone lockout.
2-button Sequencing*
Starts a sequence, loops continuously through scenes 5 to 16 using
fade times entered at Control Units.
Turns sequencing off.
1-button Entrance Control
Interface* for Momentary Switch
Inputs
Alternately selects between scene 1 and OFF.
Nothing
Selects scene 1 when contacts close.
Nothing
1-button Occupany
Sensor/Entrance Control
Interface* for Maintained Inputs
(causes event upon closure and
opening)
No response when contacts close.
Nothing
Selects Off when contacts open.
Nothing
Low-Voltage Contact Closure
Switch Provided by Others
* Inputs 1 through 5 are inactive.
When used with GRX-3000 Control Units:
■ Use two 1.0mm2 (#18 AWG) conductors for common (terminal 1) and 12VDC
(terminal 2). Make sure you wire the the terminal 2 connection correctly.
Refer to GRX-3000 Installation Guide.
■ Use one shielded, twisted pair 1.0mm2 (#18 AWG) for data link (terminals 3
and 4).
GRX-WCI
Português
GRX-WCI Addressing
ADDRESS
5
1
1
2
3
4
1
2
3
4
1
2
3
4
1
2
3
4
2
3
4
1
2
3
4
1
2
3
4
1
2
3
4
6
2
2
3
4
1
2
3
4
1
2
3
4
1
2
3
4
1
2
3
4
1
2
3
4
1
2
3
4
1
2
3
4
14
15
11
8
4
1
10
7
3
13
9
1
Nederlands
When used with GRX-4000 Control Units:
■ Use two 2.5mm2 (#12 AWG) conductors for common (terminal 1) and 24VFW
(terminal 2). These won’t fit in terminals. Connect as shown on next page.
■ Use one shielded, twisted pair #1.0mm2 (#18 AWG) for data link (terminals 3
and 4).
■ Connect Drain/Shield as shown on next page.
— Do not connect to Ground (Earth) to GRX-WCI.
— Connect the bare drain wires and cut off the outside shield.
Input 7
2-button Entrance Wallstation
Interface*
Codes: Install in accordance with all local and national electrical codes.
Environment: Ambient operating temperature:
0-40°C (32-104°F), 0-90% humidity, non-condensing. Indoor use only.
Input 6
Français
Important Notes
Program
Button
Input 5
Deutsch
Operating voltage: PELV/Class 2, LowPower
voltage type inputs, 12VDC when
Addressing and Function
LED
used on a GRX-3000 system and
Switches
24VFW when used on a GRX-4000
system.
■ Input switch must have a solid-state output with an on-state saturation voltage less than 1VDC at 1mA and an off-state leakage current of less than 1
mA. Outputs must be capable of switching operating voltage for desired life of
system.
■ The recommended wallbox depth is 61mm. The wallbox depth requirements
vary with the depth of the switch being used.
■ The GRX-WCI uses one address on the Communication Link.
■ If there is any question as to whether a switch is compatible with these specifications, contact the manufacturer of the switch.
Note: The GRX-WCI is not designed to work with line/mains voltage switches.
1. Turn power Off.
2. Mount Lutron wallbox (P/N 241-758) or German and UK backboxes (60.30
mm measured center to center of mounting holes).
3. Set Address. Assign a unique address to each GRX-WCI using the Address
switches on the front of the control. See GRX-WCI Addressing for Address
switch settings. Be sure to record the address for future programming purposes.
4. Select Function. Set Function Switches 5—10 on the GRX-WCI to select its
function. Function Switch settings and their corresponding function are
shown in the chart on the next page.
5. Connect the GRX-WCI to the Communication Link. Strip insulation from wires
so that 10 mm (3/8 in.) of bare wire is exposed for 1.0 mm2 (#18 AWG) wire.
Each terminal will accept one or two 1.0mm2 (#18 AWG) wires. See
Communication Link Wiring Diagram.
6. Connect Contact Closure Inputs. Connect the wiring to the contact
closure/input connector harness using PELV/Class 2 or better cable. See
Contact Closure Input Wiring Diagram. Cap or cut off unused input wires.
7. Mount the GRX-WCI as shown in Mounting Diagram. The GRX-WCI is unsupported in the wallbox.
4-Scene with Master
Raise/Lower
Inputs 1-4
Español
The GRX-WCI is for use with GRAFIK Eye
3000 and 4000 Series systems. The
GRX-WCI mounts behind the user-supplied switch to select or adjust scenes
in up to eight Control Units. The interface provides from two to seven contact
closure inputs.
English
Wallbox Closure Input Interface
16*
12
Italiano
Communication Link Wiring
■
■
PELV/Class 2, Low-voltage wiring connects the GRX-WCI to GRX-3000/4000
Control Units and other components.
You can link up to 8 Control Units and up to 16 total GRX-WCIs, Wallstations
and/or Control Interfaces for a total of 24 control points.
System Communications
Troubleshooting
If used as part of an unaddressed system (Control Units not addressed), the
GRX-WCI will affect all Control Units on the system.
■ For an addressed system (Control Units addressed), follow the steps below.
1. Enter Program Mode (only one GRX-WCI can be in program mode at a time).
Press and hold the Program Button for about 3 seconds, until the LED starts
flashing.
Symptom
Power LED is off
Possible Cause
A different Wallstation is in Program Mode.
Power is not present at WCI. Make sure the lighting system is powered up and
check for miswires.
Power LED flashes.
WCI is in Program Mode.
Power LED is on, but the system response isn't correct.
WCI improperly programmed. Verify correct function switch settings and check
system programming.
■
Drain Wire
Program Button
4 3 2 1
Drain Wire
1.0 mm2 (#18 AWG)
2. Identify the Control Unit(s) that you want to “listen” to this GRX-WCI. (Control
Units must be addressed!) Press and hold the top Scene button on the Control
Unit for about 3 seconds, until the LEDs flash in unison. Repeat for each
Control Unit that you want to “listen” to the GRX-WCI.
Control Unit
2 1.0 mm2 (#18 AWG)
twisted, shielded pair
from terminals 3 to 3,
and 4 to 4
Press here for “listen”
2 2.5 mm2 (#12 AWG)
LUTRON
Note:
Use appropriate wire connecting devices as specified by local codes.
LEDs flash in unison
Note: (To make a “listening” Control Unit not listen to a GRX-WCI: Put the
GRX-WCI in program mode, then press the “listening” Control Unit’s
OFF button until the LEDs stop flashing.).
3. Exit Program Mode. Press and hold the Program Button for about 3 seconds,
until the LED stops flashing.
Contact Closure Wiring
Switch* (provided by others)
Input 1
■
Connect the desired input(s) and common wires to the switch provided by
others.
Cap off unused input wires.
Common
■
* Must have a solid-state
output with an on-state
saturation voltage less
than 1VDC at 1mA and an
off-state leakage current
of less than 1 mA.
LIMITED WARRANTY
Lutron will, at its option, repair or replace any unit that is defective in materials or manufacture within one year after purchase. For warranty service, return unit to place of purchase or mail to
Lutron at 7200 Suter Rd., Coopersburg, PA 18036-1299, postage pre-paid.
This warranty is in lieu of all other express warranties, and the implied warranty of merchantability is limited to one year from purchase. This warranty does not cover the cost of
installation, removal or reinstallation, or damage resulting from misuse, abuse, or improper or incorrect repair, or damage from improper wiring or installation. This warranty does not
cover incidental or consequential damages. Lutron’s liability on any claim for damages arising out of or in connection with the manufacture, sale, installation, delivery, or use of the
unit shall never exceed the purchase price of the unit.
This warranty gives you specific legal rights, and you may also have other rights which vary from state to state. Some states do not allow limitations on how long an implied warranty lasts, so the
above limitation may not apply to you. Some states do not allow the exclusion or limitation of incidental or consequential damages, so the above limitation or exclusion may not apply to you.
Lutron and GRAFIK Eye are registered trademarks of Lutron Electronics Co., Inc.
© 2003 Lutron Electronics Co., Inc.
Internet: www.lutron.com
E-mail: [email protected]
Lutron Electronics Co., Inc.
Made and printed in U.S.A.
P/N 030-826 Rev.A 6/03
World Headquarters
Lutron Electronics Co. Inc.,
TOLL FREE: (800) 523-9466
(U.S.A., Canada, Caribbean)
Tel: (610) 282-3800;
International 1-610-282-3800
Fax: (610) 282-3090;
International 1-610-282-3090
Lutron Electronics Co., Inc.
7200 Suter Road
Coopersburg, PA 18036-1299
European Headquarters
Lutron EA Ltd.,
FREEPHONE: 0800 282107 (U.K.)
Tel: (207) 702-0657;
International 44-207-702-0657
Fax: (207) 480-6899;
International 44-207-480-6899
Asian Headquarters
Lutron Asuka Co., Ltd. (Japan)
Tel: (03) 5575-8411;
International ++81-3-5575-8411
Fax: (03) 5575-8420;
International ++81-3-5575-8420
Interfaz para caja de empotrar universal
Instrucciones de montaje
GRX-WCI
PELV/Class 2
Leer antes de instalar
Perspectiva general
Cables de
entradas digitales
FUNCIONES
CONFIGURACIÓN DEL INTERRUPTOR DE FUNCIÓN
5 6 7 8 9 10
Instalación
Atención! Desconectar siempre el disyuntor /MCB o quitar el fusible
general del circuito de alimentación antes de realizar cualquier
trabajo. De lo contrario podría sufrir graves lesiones.
8. Conectar la alimentación.
■
Normativas: Instalar de acuerdo con las normas eléctricas locales y nacionales.
Especificaciones ambientales: Temperatura ambiente de operación:
de 0 a 40 °C (de 32 a 104 °F), humedad ambiente de 0 a 90%, sin
condensación. Uso en interiores solamente.
Diagrama de montaje
Caja de empotrar
CABLEADO DE BAJO VOLTAJE
■ Utilice cableado de comunicaciones Clase 2 (PELV) para conectar en cadena
el GRX-WCI a Unidades de Control GRX-3000/4000 y otros componentes.
■ Realizar las conexiones en la misma caja de empotrar universal o en una caja
de conexión o de distribución con una longitud de cable máxima de 2,5 m
desde la conexión al GRX-WCI.
GRX-WCI
GRX-WCI Dirección
DIRECCIÓN
1
5
1
2
3
4
2
9
1
2
3
4
6
1
2
3
4
1
2
3
4
1
2
3
4
3
13
1
2
3
4
10
1
2
3
4
1
2
3
4
1
2
3
4
7
4
Entrada 7
Escenas 1 a 4
Apagado
Subir
Bajar
Escenas 5 a 8
Apagado
Subir
Bajar
Escenas 9 a 12
Apagado
Subir
Bajar
Escenas 13 a 16
Apagado
Subir
Bajar
Entrada 6
Entrada 7
Interfaz como unidad de control
de entrada con 2 botones*
Selecciona la escena 1.
Apaga las luces.
Selección de escenas de
2 botones*
Selecciona la escena 9.
Selecciona la escena 10.
Selecciona la escena 13.
Selecciona la escena 14.
Control de antipánico de
2 botones*
Selecciona la escena 16 (luces 100% ON) Bloquea todos los demás controles
de la Unidad de Control (bloqueo de escena)
Restablece la escena previa. Anula el control de
bloqueo
Ajuste fino de 2 botones*
Aumenta temporalmente la intensidad de las zona(s) seleccionada(s).
Disminuye temporalmente los niveles de las zonas
seleccionadas.
Bloqueo de zona de 2 botones*
Sólo permite el ajuste temporal de niveles de las zonas.
Los ajustes no afectan a las configuraciones de escenas preestablecidas.
Anula el bloqueo de la zona.
Activación de secuencias con
2 botones*
Inicia una secuencia, realiza un bucle continuo de las escenas 5 a 16
utilizando los tiempos de transición introducidos en las unidades de control.
Para la secuencia.
Interfaz* de Control de Entrada
tipo pulsador para Entradas de
Contactos Momentáneas
Selecciona alternativamente la escena 1 y APAGADO.
Nada
Selecciona la escena 1 cuando los contactos se cierran.
Nada
Interfaz* de Sensor de
Presencia/Control de Entrada de
1 pulsador para Entradas
Sostenidas
(provoca un acontecimiento con el
cierre y la apertura)
No hay respuesta cuando los contactos se cierran.
Nada
Selecciona Apagado cuando los contactos se abren.
Nada
5 6 7 8 9 10
* Las entradas 1 a 5 están inactivas.
Portugués
Cuando se utiliza con unidades de control GRX-3000
■ Utilice dos hilos de 1,0 mm2 (#18 AWG) para común (terminal 1) y 12Vcc
(terminal 2). Compruebe que la conexión del terminal 2 se ha realizado
correctamente. Véase la Guía de Instalación del GRX-3000.
■ Utilice un par apantallado y trenzado #1,0 mm2 (#18 AWG) para bus de datos
(terminales 3 y 4).
Cuando se utiliza con unidades de control GRX-4000
■ Utilice dos hilos de 2,5 mm2 (#12 AWG) para común (terminal 1) y 24Vcc
(terminal 2). Estos no encajarán en los terminales. Conectar como se indica
en la página siguiente.
■ Utilice un par apantallado y trenzado #1,0 mm2 (#18 AWG) para bus de datos
(terminales 3 y 4).
■ Conectar la malla como se indica en la página siguiente.
— No conectar masa (tierra) al GRX-WCI.
— Conectar los cables de malla y cortar el apantallamiento exterior.
Interruptor con contacto de
bajo voltaje suministrado por
otros fabricantes
Cableado del Bus
de Comunicación
Entrada 6
Français
Notas Importantes
Pulsador de
Programa
Entrada 5
Deutsch
LED de
Voltaje de servicio: Entrada tipo
Interruptores de
PELV/Clase 2, tipo bajo voltaje, 12Vcc alimentadireccionamiento y función
ción
si se utiliza en un sistema GRX-3000
y 24Vca si se utiliza en un sistema
GRX-4000.
■ El interruptor convencional debe tener una salida de estado sólido, con un
voltaje de saturación inferior a 1Vcc a 1mA y una corriente de fuga inferior
a 1 mA. Las salidas deben ser capaces de conmutar el voltaje de servicio
requerido en el sistema.
■ La profundidad recomendada para la caja de empotrar es de 61 mm. Los
requisitos de profundidad de la caja de montaje pueden variar en función
de la profundidad del interruptor que se esté utilizando.
■ El GRX-WCI utiliza una dirección en el bus de comunicaciones.
■ Consulte al fabricante del interruptor en caso de dudas sobre su
compatibilidad con estas especificaciones.
NOTA: El GRX-WCI No es adecuado para interruptores generales de
red/alimentación.
1. Desconectar la alimentación.
2. Instalar la caja de empotrar Lutron (P/N 241-758) o cajas universales
(60.30 mm medidas de centro a centro de las perforaciones de montaje).
3. Configurar dirección. Asignar una única dirección a cada GRX-WCI utilizando
los interruptores de dirección en la parte frontal del control. Véase Dirección
de GRX-WCI para las configuraciones de los interruptores de dirección.
Asegúrese de apuntar la dirección para futuras programaciones.
4. Seleccionar Función. Configurar los Interruptores de Función 5—10
del GRX-WCI para seleccionar su función. Las configuraciones de los
interruptores de función y sus correspondientes funciones se muestran
en el cuadro en la página siguiente.
5. Conecte el GRX-WCI al Bus de Comunicación. Quite el aislante de los cables
de tal manera que queden expuestos 10 mm (3/8 pulg.) de cable desnudo
para un cable de 1.0 mm2 (#18 AWG). Cada terminal aceptará uno o dos
cables de 1.0mm2 (#18 AWG). Véase el Diagrama de Cableado del Bus de
Comunicación.
6. Conectar las Entradas . Conecte el cable al conector de cierre de
contacto/entradas digitales utilizando un cable PELV/Clase 2. Véase
Diagrama de Cableado de Entrada de Cierre de Contacto. Tape o corte
los cables de entrada no utilizados.
7. Instale el GRX-WCI como se muestra en el Diagrama de Montaje. El GRX-WCI
no está soportado en la caja de empotrar.
4 escenas, apagado y subir
/ bajar
Entradas 1-4
Español
El GRX-WCI es para su uso con
sistemas GRAFIK Eye de las Series 3000
and 4000 . El GRX-WCI se instala detrás
del interruptor suministrado para que el
usuario seleccione o ajuste escenas en
hasta ocho Unidades de Control. La
interfaz proporciona de dos a siete
entradas de cierre de contacto.
GRX-WCI Interruptores de Función
1
2
3
4
1
2
3
4
1
2
3
4
11
8
1
2
3
4
1
2
3
4
1
2
3
4
1
2
3
4
14
15
12
16*
Cableado del Bus de Comunicación
■
■
Comunicaciones del sistema
El cableado PELV/Clase 2 de bajo voltaje conecta el GRX-WCI con las
unidades de control GRX-3000/4000 y otros componentes.
Se pueden conectar un total de 8 unidades de control y hasta un total de
16 GRX-WCIs, Unidades de pared y/o interfaces de control para un máximo
de 24 puntos de control.
Solución de Problemas
Si se utiliza como parte de un sistema sin dirección (las Unidades de Control
no tienen asignada dirección), el GRX-WCI afectará a todas las Unidades de
Control del sistema.
■ Para un sistema con dirección (Unidades de Control con asignación de
dirección), siga los pasos siguientes.
1. Entre en el Modo de Programa (sólo puede estar en modo de programa
un GRX-WCI cada vez). Pulse y mantenga el Pulsador de Programa durante
aproximadamente 3 segundos, hasta que el LED empiece a parpadear.
■
Malla
4 3 2 1
Malla
Síntoma
El LED de Alimentación está apagado
Posible causa
Otra estación de pared está en Modo de Programa.
No hay alimentación en el WCI. Asegúrese de que el sistema de alumbrado
está alimentado y compruebe si hay cableados mal hechos.
El LED de Alimentación parpadea.
El WCI está en Modo de Programa.
El LED de Alimentación está encendido pero el sistema no responde
correctamente.
WCI no está programado correctamente. Compruebe si son correctas las
configuraciones de los interruptores de función y compruebe la programación
del sistema.
Pulsador de Programa
1,0 mm2 (#18 AWG)
2. Identifique la(s) Unidad(es) de Control a las que quiere “escuchar” este
GRX-WCI. (Las Unidades de Control deben tener asignada dirección!) Pulse
y mantenga el pulsador tuperior de Escena de la Unidad de Control durante
aproximadamente 3 segundos, hasta que los LED parapadean a la vez. Repita
para cada Unidad de Control que quiera “escuchar” al GRX-WCI.
2 pares trenzados y
apantallados de 1,0 mm2
(#18 AWG) del terminal 3
al 3 y del 4 al 4
Nota:
Unidad de control
2 2,5 mm2 (#12 AWG)
Pulse aquí para
“escuchar”
Utilice dispositivos de conexión de cables adecuados, según se
especifica en las normas locales.
Los LEDs parpadean al unísono
Cableado del Cierre de Contacto
Interruptor* (suministrado por otros)
Entrada 1
■
Conectar las entradas y los cables comunes deseados al interruptor
suministrado por otros fabricantes.
Cortar los cables de entrada no utilizados.
Común
■
* debe tener una salida de
estado sólido, con un
voltaje de saturación
inferior a 1Vcc a 1mA y
una corriente de fuga
inferior a 1 mA.
Nota: (Para hacer que una Unidad de Control que “está escuchando” no
escuche a un GRX-WCI: Coloque el GRX-WCI en modo de programa y
después presione el botón de APAGADO de la Unidades de Control que
“estén escuchando” hasta que los LED dejen de parpadear).
3. Salir del Modo de Programa. Presione y mantenga el Pulsador de Programa
durante aproximadamente 3 segundos hasta que el LED deje de parpadear.
GARANTÍA LIMITADA
A su juicio, Lutron procederá a la reparación o a la sustitución de cualquier unidad que presente defectos de material o de fabricación durante un año a partir de la fecha de compra. Para
reclamaciones en garantía deberá devolver la unidad al distribuidor donde la haya adquirido o enviarla por correo a portes pagados a Lutron, 7200 Suter Rd., Coopersburg, PA 18036-1299.
Esta garantía sustituye cualquier otra garantía expresa; la garantía de comercialización que implica está limitada a un año a partir de la fecha de compra. Esta garantía no cubre los
gastos de instalación, desmontaje o reinstalación, los daños que se deriven del mal uso, abuso o de reparaciones inadecuadas o incorrectas ni los daños ocasionados por el cableado
o la instalación no apropiados. Esta garantía no cubre daños fortuitos o secundarios. En caso de reclamaciones causadas por o en relación con la fabricación, la venta, la instalación,
la entrega o el uso de la unidad, la responsabilidad de Lutron nunca excederá el precio de adquisición de la unidad.
Esta garantía le otorga derechos legales específicos. Sin embargo, puede tener otros derechos que pueden variar de un país a otro. Algunos países no permiten limitaciones en la duración de la
garantía implícita, por lo que la limitación arriba descrita puede no ser aplicable en su caso. Algunos países no permiten la exclusión o las limitaciones de daños fortuitos o secundarios, por lo que
la limitación o exclusión arriba descrita puede no ser aplicable en su caso.
Lutron y Grafik Eye son marcas registradas de Lutron Electronics Co., Inc.
© 2003 Lutron Electronics Co., Inc.
Internet: www.lutron.com
E-mail: [email protected]
Lutron Electronics Co., Inc.
Redactado e impreso en EE.UU.
P/N 030-826 Rev.A 6/03
Central internacional
Lutron Electronics Co. Inc.,
GRATUITA: (800) 523-9466
(EE.UU. Canadá, Caribe)
Tel: (610) 282-3800;
Internacional +1-610-282-3800
Fax: (610) 282-3090;
Internacional +1-610-282-3090
Lutron Electronics Co., Inc.
7200 Suter Road
Coopersburg, PA 18036-1299
Central para Europa
Lutron EA Ltd.,
GRATUITA: 0800 282107 (R.U.)
Tel: (207) 702-0657;
Internacional +44-207-702-0657
Fax: (207) 480-6899;
Internacional +44-207-480-6899
Central para Asia
Lutron Asuka Co., Ltd. (Japón)
Tel: (03) 5575-8411;
Internacional +81-3-5575-8411
Fax: (03) 5575-8420;
Internacional: +81-3-5575-8420
GRX-WCI Funktionsschalter
Busschnittstelle für UP Montage
Installationsanweisungen
GRX-WCI
PELV/Klasse 2
Bitte lesen Sie diese Anweisungen vor der Installation
Übersicht
Das GRX-WCI kann in GRAFIK Eye
Systemen der 3000-er und 4000-er
Serie eingesetzt werden. Das GRX-WCI
wird hinter einem konventionellen
Schalter (für Niedervolt) montiert, und
dient zum Auswählen oder Steuern von
Lichtszenen in bis zu acht Steuerstellen.
Das Interface stellt dem Lutron
Lichtsteuersystem zwei bis sieben
Netz-LED
Steuereingänge zur Verfügung.
Kabelsatz
Eingangsklemmen
FUNKTIONEN
EINSTELLUNG DER FUNKTIONSSCHALTER
5 6 7 8 9 10
Installation
Warnung: Schalten Sie den Strom immer am Sicherungsautomaten
oder an der Hauptsicherung AUS, bevor Sie mit den Arbeiten
beginnen, da es sonst zu schweren Verletzungen kommen kann.
8. Schalten Sie den Strom wieder ein.
Vorschriften: Die Anlage muß entsprechend allen lokalen und nationalen
Vorschriften über elektrische Anlagen installiert werden.
Montagezeichnung
Adressen- und
Funktionsschalter
Verkabelung der
Kommunikationslinks
Niederspannungsschalter
Niederspannungs-PELV-Verkabelung
■ Das GRX-WCI durch PELV-Verkabelung (Daisy-Chain) mit den GRX-3000/4000
Steuerstellen und anderen Komponenten verbinden.
■ Das GRX-WCI muss innerhalb der UP-Dose der oder in einer Verteilerdose an
die Busleitung angeschlossen werden. Bei einer Verdrahtung mit T-Abzweig
darf der Abstand von der Busleitung zum GRX-WCI höchstens 2,5 m betragen.
Wenn GRX-3000 Steuerstellen benutzt werden:
Zwei 1,0mm2 (#18 AWG) Leitungen für die Masse (Klemme 1) und 12VDC
(Klemme 2) verwenden. Vergewissern Sie sich, dass dir Anschluss an Klemme
2 richtig verdrahtet wurde. Siehe die GRX-3000 Installationsanleitung.
■ Ein 1,0 mm2 (#18 AWG) abgeschirmtes, verdrilltes Leitungspaar zur
Datenübertragung (Klemmen 3 und 4) verwenden.
GRX-WCI
■
Wenn GRX-4000 Steuerstellen benutzt werden:
■ Zwei 2,5 mm2 (#12 AWG) Leiter für die Masse (Klemme 1) und 24 V FW
(Klemme 2) verwenden. Sie passen nicht in die Anschlussklemmen. Wie auf
der nächsten Seite abgebildet anschließen.
■ Ein 1,0 mm2 (#18 AWG) abgeschirmtes, verdrilltes Leitungspaar als
Datenverbindung (Klemmen 3 und 4) verwenden.
■ Abschirmung wie auf der nächsten Seite abgebildet anschließen.
— Die Schirmleitung nie mit der Masse (Erde) oder dem GRX-WCI verbinden.
— Die abisolierten Drähte der Abschirmung anschließen und die äußere
Abschirmung abschneiden.
Zuweisung der Adresse dem GRX-WCI
ADRESSE
1
5
1
2
3
4
1
2
3
4
1
2
3
4
1
2
3
4
2
9
1
2
3
4
1
2
3
4
1
2
3
4
1
2
3
4
6
3
2
3
4
1
2
3
4
1
2
3
4
1
2
3
4
10
7
4
13
1
2
3
4
1
2
3
4
1
2
3
4
1
2
3
4
14
11
8
1
15
12
16*
Eingang 7
Szenen 1 - 4
AUS
HELLER
DUNKLER
Szenen 5 - 8
AUS
HELLER
DUNKLER
Szenen 9 - 12
AUS
HELLER
DUNKLER
Szenen 13 - 16
AUS
HELLER
DUNKLER
Eingang 6
Eingang 7
2-Tasten EingangsbedienstellenInterface*
Wählt Szene 1.
Schaltet Beleuchtung aus.
2-Tasten Szenenauswahl*
Wählt Szene 9.
Wählt Szene 10.
Wählt Szene 13.
Wählt Szene 14.
2-Tasten Panik-Bedienstelle*
Wählt Szene 16 (Licht voll EIN). Verriegelt alle andere Bedienstellen im
System von dieser Steuerstelle (Szenensperre).
Schaltet die Verriegelung aus und kehrt in die vorige
Szene zurück.
2-Tasten Feinabstimmung*
Stellt die ausgewählte(n) Zonen vorübergehend heller ein.
Stellt die ausgewählte(n) Zonen zeitweilig dunkler ein.
2-Tasten Zonensperre*
Ermöglicht nur eine vorübergehende Einstellung der Zonen.
Die Einstellungen haben keinen Einfluss auf die Szenen-Voreinstellungen.
Schaltet die Zonenverriegelung aus.
2-Tasten Sequenzsteuerung*
Startet eine Sequenz, durchläuft kontinuierlich eine Schleife der Szenen 5 16, verwendet dabei die an den Steuerstellen eingestellten Überblendzeiten.
Schaltet die Sequenzsteuerung aus.
1-Tasten An/Aus Funktion für
einen Taster-Eingang
Schaltet zwischen Szene 1 und AUS.
Nichts
Wählt beim Schließen der Kontakte Szene 1 aus.
Nichts
Keine Reaktion beim Schließen der Kontakte.
Nichts
5 6 7 8 9 10
1-Tasten An/Aus Funktion für
Anwesenheitssensoren und
Schalter mit Dauerkontakt
(reagiert auf Schließen und auf
Öffnen)
UP-Dose
Umgebung: Zulässige Umgebungstemperatur:
0-40°C, zulässige Feuchtigkeitsgehalt der Luft: 0-90% Feuchtigkeit,
nicht kondensierende passive Kühlung. Nur für Innenräume.
Eingang 6
*{Tab}Eingänge 1 bis 5 sind nicht aktiv.
Wählt AUS beim Öffnen der Kontakte
Nichts
Français
Wichtige Hinweise
■
Programmiertaste
Eingang 5
Deutsch
Betriebsspannung: PELV/Klasse 2,
Niedervolteingänge, 12VDC in einem
GRX-3000 System und 24VFW in einem GRX-4000 System.
■ Der Schalter muss über einen Ausgang mit einer Sättigungsspannung
unterhalb von 1 VDC im Durchlasszustand bei 1 mA und einem Kriechstrom
unterhalb von 1 mA im Sperrzustand verfügen. Die Ausgänge müssen die
Betriebsspannung während der gesamten Lebensdauer des Systems schalten
können.
■ Empfohlene Unterputzdosentiefe 61 mm. Die Unterputzdosentiefe kann
je nach der Tiefe des verwendeten Schalters unterschiedlich sein.
■ Das GRX-WCI verwendet eine Adresse auf dem Kommunikationslink.
■ Falls Sie sich nicht sicher sind, dass ein Schalter mit diesen Daten kompatibel
ist, setzen Sie sich bitte mit dem Gerätehersteller des Schalters in
Verbindung.
Hinweis: Das GRX-WCI nicht mit Netzspannungsschaltern verwenden.
1. Schalten Sie den Strom aus
2. Montieren Sie das GRX-WCI in eine Lutron-Unterputzdose
(Bestellnummer 241-758) oder in eine standard deutsche bzw. englische
Unterputzdose (Abstand der Montageöffnungen 60,30 mm).
3. Adresse einstellen. Weisen Sie jedem GRX-WCI eine eindeutige Adresse
mit Hilfe der Adressen-DIP-schalter auf der Frontseite des Geräts zu.
Die Einstellungen der Adressenschalter siehe Einstellen der Adressen fürs
GRX-WCI. Notieren Sie sich die Adressen für die spätere Programmierung.
4. Legen Sie die Funktion fest. Stellen Sie die Funktionsschalter 5—10 am
GRX-WCI ein, um seine Funktion auszuwählen. Die Stellung der Funktionsschalter und die entsprechenden Funktionen sind in der Tabelle auf der
nächsten Seite dargestellt.
5. Schließen Sie das GRX-WCI an den Kommunikationslink an. Von den
1,0 mm2 (#18 AWG) Drähten 10 mm (3/8 Zoll) der Isolierung abmanteln.
Jede Klemme kann eine oder zwei 1,0 mm2 (# 18 AWG) Leitungen
aufnehmen. Siehe Verkabelungsschema des Kommunikationslinks.
6. Schließen Sie die Eingänge mit potentialfreien Kontakten an. Schließen Sie
ein PELV-Kabel an die potentialfreien Kontakte an. Siehe
Verkabelungsschema für die potentialfreien Eingangskontakte. Nicht benutzte
Eingangsleitungen mit einer Klemme versehen oder abkappen.
7. Montieren Sie das GRX-WCI entsprechend der Montagezeichnung. Das GRXWCI sitzt frei in der Unterputzdose.
4-Szenen Bedienstelle mit
Master Dunkler/Heller
Funktion
Eingänge 1-4
Verkabelung der Kommunikationslinks
■
■
Systemkommunikation
Die GRX-WCI sind durch PELV-Verkabelung mit den GRX-3000/4000
Steuerstellen und anderen Komponenten verbunden.
Es können bis zu 8 Steuerstellen und bis zu insgesamt 16 GRX-WCIs,
Bedienstellen und/oder Schnittstellen, also insgesamt 24 Busteilnehmer
eingesetzt werden.
Abschirmleitung
Fehlersuche
Falls das GRX-WCI in einem nicht adressierten System verwendet wird
(die Steuerstellen haben keine Adressen), so beeinflußt das GRX-WCI alle
Steuerstellen im System.
■ In einem System mit Adressen (die Steuerstellen verfügen über eine Adresse)
befolgen Sie folgende Schritte.
1. Aktivieren Sie den Programmiermodus (gleichzeitig kann sich nur
ein einziges GRX-WCI im Programmiermodus befinden). Halten Sie die
Programmiertaste für über 3 Sekunden gedrückt, bis die LED zu blinken
beginnt.
■
Anzeichen
Netz-LED ist aus
Mögliche Ursache
Eine andere Bedienstelle befindet sich im Programmiermodus.
Die Stromversorgung des WCI ist nicht angeschlossen. Stellen Sie sicher, dass
die Stromversorgung des Lichtsteuersystems eingeschaltet wird und überprüfen
Sie eine eventuelle fehlerhafte Verdrahtung.
Netz-LED blinkt.
Das WCI befindet sich im Programmiermodus.
Die Netz-LED leuchtet, aber das System reagiert falsch.
Das WCI ist nicht richtig programmiert. Überprüfen Sie die Einstellungen der
Funktionsschalter und das Programmieren des Systems.
4 3 2 1
Abschirmleitung
Programmiertaste
1,0 mm2 (#18 AWG)
2. Legen Sie die Steuerstelle(n) fest, die Daten von diesem GRX-WCI
"empfangen" soll(en). (Die Steuerstellen müssen bereits über eigene
Adressen verfügen!). Halten Sie die oberste Szenentaste der gewählten
Steuerstelle etwa 3 s gedrückt, bis alle LEDs gleichzeitig blinken. Wiederholen
Sie diesen Vorgang für alle anderen Steuerstellen, die Daten von diesem GRXWCI empfangen sollen.
2x 1,0 mm2 (# 18 AWG)
verdrillte geschirmte
Doppelleitung von
Klemmen 3 an 3 und 4
an 4
Steuerstelle
2 2,5 mm2 (#12 AWG)
Hinweis: Nur den örtlichen Vorschriften entsprechende, geeignete
Kabelverbinder verwenden.
Drücken Sie diese Taste
um zu "empfangen"
Die LEDs blinken gleichzeitig
Verkabelung der potentialfreien Kontakte
Schalter* (von Drittherstellern)
Eingang 1
■
Den (Die) gewünschten Eingang (Eingänge) an den Schalter (Produkt eines
anderen Herstellers) anschließen.
Nicht benutzte Leiter mit einer Klemme versehen oder abschneiden.
Korrespondierend
■
* Der Schalter muss über
einen Ausgang mit einer
Sättigungsspannung
unterhalb von 1 VDC im
Durchlasszustand bei 1 mA
und einem Kriechstrom
unterhalb von 1 mA im
Sperrzustand verfügen.
Hinweis: (Wenn Sie verhindern wollen, daß eine "empfangende"
Steuerstelle von einem GRX-WCI Daten empfängt: Aktivieren Sie
den Programmiermodus des GRX-WCI und halten Sie die AUSTaste der "empfangenden" Steuerstelle solange gedrückt, bis alle
LED's der Steuerstelle aufhören zu blinken.).
3. Deaktivieren Sie den Programmiermodus. Halten Sie die Programmiertaste
für über 3 Sekunden gedrückt, bis die LED aufhört zu blinken.
BESCHRÄNKTE GEWÄHRLEISTUNG
Lutron verpflichtet sich, während des ersten Jahres ab Verkauf unentgeltlich etwaige Mängel, die auf Material- oder Fabrikationsfehler zurückzuführen sind, zu beseitigen oder nach eigener Wahl
mangelhafte Teile zu ersetzen oder nachzubessern. Schicken Sie die Einheit im Garantiefall an Ihren Händler oder an Lutron, 7200 Suter Rd., Coopersburg, PA 18036-1299, portofrei zurück.
Diese Garantie ersetzt jede andere ausdrückliche oder eine Schlussfolgerung zulassende Garantie. Die die Schlussfolgerung zulassende Garantie der Wiederverkäuflichkeit ist auf
ein Jahr ab Kaufdatum begrenzt. Installations-, Demontage- und Reinstallationskosten sowie Beschädigungen infolge missbräuchlicher oder falscher Verdrahtung und fehlerhafter
Isolation sind von der Garantie ausgeschlossen. Unmittelbare oder Folgeschäden sind von der Garantie ausgeschlossen. Lutrons Haftung für Schäden in Zusammenhang mit der
Herstellung, dem Verkauf, der Installation, der Lieferung oder der Anwendung der Einheit ist auf den Kaufpreis der Einheit beschränkt.
Durch diese Garantie werden Sie mit gewissen Rechten ausgestattet. Außerdem können Sie in diesem Zusammenhang auch andere Rechte haben, die von Staat zu Staat unterschiedlich sind. In
einigen Staaten darf die Zeitdauer einer indirekten Garantie nicht begrenzt werden. In einigen Staaten ist es unzulässig, unmittelbare oder Folgeschäden auszuschließen oder zu begrenzen. Daher
ist es möglich, dass obige Ausnahmen und Begrenzungen für Sie nicht gültig sind.
Lutron und GRAFIK Eye sind eingetragene Warenzeichen von Lutron Electronics Co., Inc.
© 2003 Lutron Electronics Co., Inc.
Internet: www.lutron.com
E-mail: [email protected]
Lutron Electronics Co., Inc.
Zusammengestellt und gedruckt in den U.S.A.
P/N 030-82602 Rev.A 6/03
Weltweite Zentrale
Lutron Electronics Co. Inc.,
GEBÜHRENFREI: (800) 523-9466
(U.S.A., Kanada & Karibik)
Tel: (610) 282-3800;
International 1-610-282-3800
Fax: (610) 282-3090;
International 1-610-282-3090
Lutron Electronics Co., Inc.
7200 Suter Road
Coopersburg, PA 18036-1299
Europazentrale
Lutron EA Ltd.,
GEBÜHRENFREI: 0800 282107 (U.K.)
Tel: (207) 702-0657;
International 44-207-702-0657
Fax: (207) 480-6899;
International 44-207-480-6899
Asien-Zentrale
Lutron Asuka Co., Ltd. (Japan)
Tel: (03) 5575-8411;
International ++81-3-5575-8411
Fax: (03) 5575-8420;
International ++81-3-5575-8420
GRX-WCI Interrupteurs de fonction
Interface d’entrée à contacts secs encastrable
Instructions d'installation
GRX-WCI
PELV/Classe 2
À lire avant de procéder à l'installation
Aperçu
Le système GRX-WCI doit être utilisé
avec les systèmes de la série GRAFIK
Eye 3000 et 4000 . Le GRX-WCI doit être
installé derrière l’interrupteur de
l’utilisateur pour permettre de sélectionner ou de régler les scènes de huit
unités de commande au maximum.
L’interface assure entre deux et sept
entrées à contacts secs.
Brochage des
câbles d’entrée
FONCTIONNEMENT
PARAMÈTRAGES DES SWITCHES DE FONCTION
5 6 7 8 9 10
Installation
Attention : Couper toujours l'alimentation principale ou enlever le
fusible principal du circuit avant toute intervention. Le non-respect
de cette précaution peut entraîner des dommages corporels graves.
Remarques importantes
Codes : Installer conformément à tous les codes électriques locaux et nationaux
en vigueur.
8. Rétablir l’alimentation.
Schéma de montage
Environnement : Température de fonctionnement ambiante :
0-40°C, humidité de fonctionnement ambiante : de 0 à 90%, sans condensation.
Exclusivement destiné à un usage intérieur.
Boîtier d’encastrement
Utilisation avec des unités de commande GRX-3000 :
■ Utiliser deux conducteurs de 1,0 mm2 (#18 AWG) pour le commun (borne 1)
et 12 VCC (borne 2). Veiller à câbler correctement la borne 2. Se reporter aux
caractéristiques techniques du guide d’installation du GRX-3000.
■ Utiliser une paire torsadée blindée de 1,0mm2 (#18 AWG) pour la liaison de
données (bornes 3 et 4).
Utilisation avec des unités de commande GRX-4000 :
■ Utiliser deux conducteurs de 2,5 mm2 (#12 AWG) pour le commun (borne 1)
et 24 VFW (borne 2). Ceux-ci ne s’ajustent pas aux bornes. Raccorder comme
indiqué page suivante.
■ Utiliser une paire torsadée blindée de 1,0 mm2 (#18 AWG) pour la liaison de
données (bornes 3 et 4).
■ Se conformer au schéma de la page suivante pour raccorder le drain/
blindage.
— Ne pas raccorder à la masse (terre) ou au GRX-WCI.
— Raccorder les fils de drain nus et découper le blindage extérieur.
Interrupteur basse tension
à contacts secs d’une autre
marque
Câblage du bus de
communication
Câbles basse tension Classe 2/PELV :
■ Utiliser des câbles basse tension de classe 2/PELV pour raccorder en série
le système GRX-WCI aux unités de commande GRX-3000/4000 et aux autres
composants.
■ Réaliser les raccordements à l’intérieur du boîtier d’encastrement ou dans
une boite de jonction ou de dérivation avec une longueur maximum de câble
de 2,5 m entre le bus de communication et le système GRX-WCI.
5 6 7 8 9 10
GRX-WCI Adressage
ADRESSE
1
5
1
2
3
4
1
2
3
4
1
2
3
4
2
9
1
2
3
4
1
2
3
4
1
2
3
4
6
3
2
3
4
3
4
1
2
3
4
1
2
3
4
2
3
4
2
3
4
1
2
3
4
1
2
3
4
1
2
3
4
15
12
1
1
14
11
8
1
2
10
7
4
13
1
16*
1
2
3
4
Entrée 6
Entrée 7
Scènes 1 à 4
Éteindre
Augmenter
Diminuer
Scènes 5 à 8
Éteindre
Augmenter
Diminuer
Scènes 9 à 12
Éteindre
Augmenter
Diminuer
Scènes 13 à 16
Éteindre
Augmenter
Diminuer
Entrée 6
Entrée 7
Interface commande murale
d’entrée à 2 boutons*
Sélection de la scène 1.
Extinction des lumières.
Sélection de scène à 2 boutons*
Sélection de la scène 9.
Sélection de la scène 10.
Sélection de la scène 13.
Sélection de la scène 14.
Commande d’urgence
à 2 boutons*
Sélection de la scène 16 (pleine intensité). Verrouille les
autres commandes du système depuis cette unité de
commande (verrouillage de scène)
Rétablissement de la scène précédente.
Désactivation du verrouillage.
Commande de variation
(augmenter/diminuer) à
2 boutons*
Augmente provisoirement l’éclairage de la ou des zone(s)
sélectionnée(s).
Diminution provisoire des lumières de la ou des zone(s)
sélectionnée(s).
Verrouillage de zone à 2 boutons*
Permet seulement des réglages temporaires de zones.
Ces réglages n’affectent pas les paramètres de scène pré-réglés.
Désactivation du verrouillage de la zone.
Séquençage à 2 boutons*
Démarrage d’une séquence et passage en continu des scènes 5 à 16
grâce aux temps d’allumage progressif des scènes programmées dans
les unités de commande.
Interruption du séquençage.
Interface de commande
d’entrée à 1 bouton* pour
les entrées d’interrupteur
à contact momentané
Sélection alternative de la scène 1 et de OFF.
Rien
Sélection de la scène 1 lors de la fermeture des contacts.
Rien
Interface pour détecteur de
présence/ commande d’entrée
à 1 bouton pour entrées
maintenues (provoque un
événement lors de la fermeture
et de l’ouverture)
Pas de réponse lors de la fermeture des contacts.
Rien
Sélection de Off lors de l’ouverture des contacts.
Rien
* Les entrées 1 à 5 sont inactives.
GRX-WCI
Entrée 5
Français
1. Couper l'alimentation.
2. Monter dans un gradateur mural par Lutron (P/N 241-758) ou dans des
boîtiers arrières allemands et britanniques (60,30 mm entre les centres
Bouton de
des trous de montage).
programmation
3. Configurer l’adresse. Attribuer une adresse unique à chaque système
LED témoin
GRX-WCI à l’aide des interrupteurs d’adressage depuis la face avant de la
de tension Switches d’adresse
commande. Voir les paramètres des interrupteurs d’adressage au chapitre
■ Tension de fonctionnement :
et de fonction
Adressage GRX-WCI. Veiller à consigner l’adresse à des fins de programmaPELV/Classe 2, entrées de type
tion ultérieure.
basse tension, 12 VCC pour un
système GRX-3000 et 24 VFW pour un système GRX-4000.
4. Sélectionner la fonction. Configurer les interrupteurs de fonction 5—10 sur
■ L’interrupteur utilisé doit comporter une sortie statique et présenter une
le GRX-WCI pour sélectionner sa fonction. Le tableau de la page suivante
tension de saturation à l’état passant inférieure à 1 VCC à 1 mA et un
indique la configuration des interrupteurs de fonction et leurs fonctions
courant de fuite dans l’état bloqué inférieur à 1 mA. Les sorties doivent
correspondantes.
pouvoir commuter la tension de fonctionnement pendant toute la durée
5. Brancher le GRX-WCI au bus de communication. Dénuder les fils sur 10 mm
de vie souhaitée du système.
(3/8 in.) pour le câble 1,0 mm2 (#18 AWG). Chaque borne peut recevoir un ou
■ La profondeur recommandée pour le boîtier d’encastrement est 61 mm.
deux fils de 1,0 mm2 (#18 AWG) de section. Voir le schéma de câblage du
Ces exigences varient en fonction de la profondeur de l’interrupteur utilisé.
bus de communication.
■ Le système GRX-WCI utilise une adresse du port de communication.
6. Brancher les entrées à contacts secs. Brancher le câble au faisceau de
■ Pour toute question concernant la compatibilité d’un interrupteur au regard
connecteur d’entrées/à contacts secs à l’aide d’un câble de type PELV/Classe
de ces caractéristiques techniques, consulter le fabricant.
2 ou mieux. Voir le schéma de câblage des entrées à contacts secs. Couvrir
Note: Le système GRX-WCI est incompatible avec des interrupteurs pour
ou couper les fils d’entrée non utilisés.
tension secteur (230V).
7. Monter le système GRX-WCI comme indiqué dans le schéma de montage.
Le GRX-WCI n’est pas pris en charge dans le boîtier.
4 scènes avec bouton
général augmenter/diminuer
Entrées 1-4
Câblage du bus de communication
■
■
Système de communications
Le câblage PELV/Classe 2, basse tension permet de raccorder le
système GRX-WCI aux unités de commande GRX-3000/4000 et
aux autres composants.
Il permet de raccorder jusqu’à 8 unités de commande et 16 GRX-WCI,
commandes murales et/ou interfaces de commande soit au total
24 points de commande pour tout le système.
Fil de drain
S’il est utilisé en tant que pièce d’un système muni d’aucune adresse
(unités de commande auxquelles aucune adresse n’a été attribuée), le
GRX-WCI agira sur toutes les unités de commande du système.
■ Suivre les étapes ci-après pour tout système muni d’une adresse (unités
de commande auxquelles une adresse a été attribuée).
1. Entrer le mode programmation (un seul GRX-WCI à la fois peut être en
mode programmation).
Appuyer sur le bouton de programmation pendant 3 secondes environ
jusqu’à ce que la DEL se mette à clignoter.
■
Symptôme
La DEL d’alimentation est éteinte
Cause possible
Une station murale différente est en mode programmation.
Le WCI n’est pas alimenté. S’assurer que le système d’éclairage
est alimenté et contrôler la présence éventuelle de mauvais câblages.
La DEL d’alimentation clignote.
Le WCI est en mode programmation.
La DEL d’alimentation s'allume, mais le système ne réagit pas correctement.
Le WCI est mal programmé. Vérifier si les paramètres des interrupteurs
de fonction sont corrects et contrôler la programmation du système.
4 3 2 1
Fil de drain
Bouton de programmation
1 mm2 (#18 AWG)
2. Identifier les unités de commande qui doivent "écouter" ce GRX-WCI (les
unités de commande doivent comporter une adresse !). Appuyer sur le bouton
de scène supérieur de l'unité de commande pendant 3 secondes jusqu'à ce
que les DEL clignotent simultanément. Répéter l'opération pour chaque unité
de commande devant "écouter" ce GRX-WCI.
2 paires torsadées
blindées de 1 mm2 (#18
AWG) à partir des bornes
3 à 3 et 4 à 4
Note :
Dépannage
Unité de commande GRAFIK Integrale
2 fois 2,5 mm2 (#12 AWG)
Utiliser des dispositifs de raccordement de câble tels que spécifiés par
la réglementation locale.
Appuyer ici pour "écouter"
Les DEL clignotent simultanément
Câbles à contacts secs
Interrupteur* (d’une autre marque)
Entrée 1
■
Raccorder la ou les entrées souhaitées et les fils communs à un interrupteur
d’une autre marque.
Découvrir les câbles d’entrée non utilisés.
Commun
■
* Doit comporter une sortie
statique et présenter une
tension de saturation à
l’état passant inférieure à
1 VCC à 1 mA et un
courant de fuite dans l’état
bloqué inférieur à 1 mA.
Remarque : (Pour qu’une commande cesse « d’écouter » un GRX-WCI :
mettre le GRX-WCI en mode programmation, puis appuyer sur
le bouton ÉTEINT de l'unité de commande "écoutante" jusqu'à
ce que les DEL cessent de clignoter).
3. Quitter le mode programmation. Appuyer sur le bouton de programmation
pendant 3 secondes environ jusqu’à ce que la DEL cesse de clignoter.
LIMITATION DE GARANTIE
Lutron choisira de réparer ou de remplacer les unités présentant des défauts de pièces ou de fabrication pendant une période d’un an à compter de la date d’achat. Pour le service de garantie,
renvoyer l’unité au magasin où elle a été achetée ou à Lutron à l’adresse suivante : 7200 Suter Rd., Coopersburg, PA 18036-1299, port pré-payé.
Cette garantie remplace toute autre garantie expresse. La garantie implicite de qualité loyale et marchande est limitée à un an à compter de la date d’achat. Cette garantie ne couvre
pas les frais d’installation, de démontage ou de réinstallation, les dommages résultant d’une utilisation incorrecte, d’abus, de réparation impropre ou incorrecte ni les dommages
résultant d’une installation ou d’un câblage incorrects. Cette garantie ne couvre pas non plus les dommages accidentels ou consécutifs. La responsabilité de Lutron quant à toute
réclamation concernant des dommages résultant ou en relation avec la fabrication, la vente, l’installation, la livraison ou l’utilisation de l’unité ne doit jamais excéder le prix d’achat
de l’unité.
Cette garantie vous accorde des droits spécifiques et éventuellement certains autres selon les états. Certains états n’autorisent pas la restriction de la durée d’une garantie implicite, par conséquent
la limitation ci-dessus ne s’applique pas. Certains états n’autorisent pas l’exclusion ni la limitation des dommages accidentels ou consécutifs, par conséquent la limitation ou l’exclusion ci-dessus
ne s’appliquent pas.
Lutron et GRAFIK Eye, sont des marques de commerce déposées de Lutron Electronics Co., Inc.
© 2003 Lutron Electronics Co., Inc.
Internet : www.lutron.com
E-mail: [email protected]
Lutron Electronics Co., Inc.
Réalisé et imprimé aux États-Unis.
P/N 030-82603 Rev.A 6/03
Siège mondial
Lutron Electronics Co. Inc.,
NUMERO D'APPEL GRATUIT : (800) 523-9466
(États-Unis, Canada, Caraïbes)
Tél : (610) 282-3800;
International 1-610-282-3800
Fax : (610) 282-3090;
International 1- 610-282-3090
Lutron Electronics Co., Inc.
7200 Suter Road
Coopersburg, PA 18036-1299
Siège pour l’Europe
Lutron EA Ltd.,
NUMERO D'APPEL GRATUIT : 0800 282107 (R.-U.)
Tél : (207) 702-0657 ;
International 44-207-702-0657
Fax : (207) 480-6899 ;
International 44-207-480-6899
Siège pour l'Asie
Lutron Asuka Co., Ltd. (Japon)
Tél. : (03) 5575-8411;
International ++81-3-5575-8411
Fax : (03) 5575-8420;
International ++81-3-5575-8420
ñ
■
—
■
■
■
■
ç
■
■
■
■
■
■
■
—
—
1
5
1
2
3
4
1
2
3
4
1
2
3
4
1
2
3
4
2
9
1
2
3
4
1
2
3
4
1
2
3
4
1
2
3
4
6
3
2
3
4
1
2
3
4
1
2
3
4
1
2
3
4
10
7
4
13
1
2
3
4
1
2
3
4
1
2
3
4
1
2
3
4
14
11
8
1
15
12
16*
■
■
■
■
4 3 2 1
■
■
©
Interface de entrada sem tensão do teclado de parede
Instruções de instalação
GRX-WCI
PELV/Classe 2
Ler atentamente antes de instalar.
Aspectos gerais
O GRX-WCI deve ser utilizado com
sistemas GRAFIK Eye série 3000 e 4000 .
O GRX-WCI é montado por trás do
interruptor fornecido pelo utilizador para
seleccionar ou regular ambientes com o
máximo de oito unidades de controlo.
O interface fornece entre dois a sete
entradas de contactos sem tensão.
Cablagem de
ligação de
entrada
Botão do
programa
LED
Tensão de funcionamento: entradas de
indicador Endereçamento e
baixa tensão PELV/Classe 2, de 12 VCC
de energia comutadores de função
quando utilizadas num sistema GRX3000 e de 24 VFW quando utilizadas
num sistema GRX-4000.
■ O interruptor de entrada deve possuir uma saída de estado sólido com uma tensão
de saturação, quando ligada, inferior a 1 VCC a 1 mA e uma corrente de fuga,
quando desligada, inferior a 1 mA. As saídas devem ser capazes de comutar a
tensão de funcionamento de acordo com a duração de actividade pretendida do
sistema.
■ A profundidade recomendada para o teclado de parede é de 61 mm. A
profundidade dos teclados de parede varia em função da profundidade do
interruptor utilizado.
■ O GRX-WCI utiliza um endereço na ligação para comunicação.
■ Caso existam dúvidas acerca da compatibilidade de algum interruptor com estas
especificações, contacte o fabricante do interruptor.
Nota: O GRX-WCI não foi concebido para trabalhar com interruptores de rede de
alimentação/tensão de linha.
■
Notas importantes
Normas: A instalação eléctrica deve ser feita em conformidade com todas as normas
locais e nacionais aplicáveis.
DEFINIÇÕES DO COMUTADOR DE FUNÇÃO
5 6 7 8 9 10
Aviso: Desligue sempre o disjuntor/MCB ou retire o fusível principal da
linha de alimentação antes de realizar qualquer operação; caso contrário,
poderão ocorrer ferimentos graves.
1. Desligue a corrente.
2. Monte o teclado de parede Lutron (Ref. 241-758) ou caixas de aparelhagem
alemãs e inglesas (60,30 mm de distância entre os centros dos orifícios de
montagem).
3. Defina o endereço. Atribua um endereço exclusivo a cada GRX-WCI utilizando
os comutadores de endereçamento, na parte frontal do controlador. Consulte o
Endereçamento do GRX-WCI para obter mais informações sobre as definições dos
comutadores de endereçamento. Certifique-se de que regista o endereço para fins
de programação futura.
4. Seleccione a função. Defina os comutadores de função 5—10 no GRX-WCI para
seleccionar as respectivas funções. As definições dos comutadores de função e
respectivas funções são indicadas na tabela da página seguinte.
5. Ligue o GRX-WCI à ligação para comunicação. Descarne o isolador dos fios, por
forma a que fiquem expostos 10 mm de fio descarnado nos fios de 1,0 mm2
(#18 AWG). Podem ser ligados um ou dois fios de 1,0 mm2 (#18 AWG) a cada
terminal. Consulte o esquema de cablagem da ligação para comunicação.
6. Ligue as entradas de contactos sem tensão. Ligue os cabos ao contacto sem
tensão/cablagem do conector de entrada utilizando cabos PELV/Classe 2 ou de
qualidade superior. Consulte o esquema de ligação das entradas de contactos sem
tensão. Isole ou corte os fios das entradas não utilizados.
7. Monte o GRX-WCI conforme indicado no esquema de montagem. O GRX-WCI não
é apoiado no teclado de parede.
4 ambientes com botão
principal aumentar/diminuir
5 6 7 8 9 10
Entradas 1 a 4
Entrada 5
Entrada 6
Entrada 7
Ambientes 1 a 4
Desligar
Aumentar
Diminuir
Ambientes 5 a 8
Desligar
Aumentar
Diminuir
Ambientes 9 a 12
Desligar
Aumentar
Diminuir
Ambientes 13 a 16
Desligar
Aumentar
Diminuir
Entrada 6
Entrada 7
Interface com teclado de entrada*
com 2 botões
Selecciona o ambiente 1.
Desliga as luzes.
Teclado de selecção de ambientes*
com 2 botões
Selecciona o ambiente 9.
Selecciona o ambiente 10.
Selecciona o ambiente 13.
Selecciona o ambiente 14.
Teclado de emergência* com
2 botões
Selecciona o ambiente 16 (luz totalmente ligada). Bloqueia os restantes
controlos do sistema desta unidade de controlo (bloqueio de ambientes).
Repõe o ambiente anterior. Retira o controlador de bloqueio.
Ajuste de precisão com 2 botões*
Aumenta temporariamente a intensidade de iluminação da(s) zona(s)
seleccionada(s).
Regula temporariamente a intensidade da(s) zona(s)
seleccionada(s).
Bloqueio de zona, com 2 botões*
Permite apenas ajustes temporários nas zonas.
Os ajustes realizados não afectam as predefinições dos ambientes.
Desactiva o bloqueio de zona.
Criação de sequências, com
2 botões*
Inicia uma sequência, percorre continuamente os ambientes 5 a 16 utilizando
os tempos de diminuição gradual inseridos nas unidades de controlo.
Desactiva as sequências.
Interface de teclado de entrada*
com 1 botão para entradas de
interruptor momentâneo
Permite seleccionar alternadamente entre o ambiente 1 e desligar.
Nada
Selecciona o ambiente 1 quando os contactos se fecham.
Nada
Interface de teclado de
entrada*/Sensor de ocupação com 1
botão para entradas utilizadas
(provoca efeito no fecho e na
abertura)
Não há resposta quando os contactos se fecham.
Nada
Selecciona a opção Desligar quando os contactos se abrem.
Nada
8. Volte a ligar a corrente.
Esquema de montagem
Teclado de parede
Cablagem da
ligação para
comunicação
Comutador para contacto de
baixa tensão fornecido por
terceiros
GRX-WCI
Endereçamento GRX-WCI
ENDEREÇO
1
■
5
1
2
3
4
1
2
3
4
1
2
3
4
1
2
3
4
2
9
1
2
3
4
1
2
3
4
1
2
3
4
1
2
3
4
6
3
13
1
2
3
4
1
2
3
4
1
2
3
4
1
2
3
4
10
7
4
* As entradas de 1 a 5 encontram-se desactivadas.
Português
Cablagem Classe 2/PELV de baixa tensão:
■ Utilize cablagem Classe 2/PELV de baixa tensão para ligar em daisy-chain o
GRX-WCI às unidades de controlo GRX-3000/4000 e a outros componentes.
■ Faça todas as ligações dentro do teclado de parede, caixa de distribuição ou de
derivação, com um comprimento máximo de fio de 2,5 m desde a ligação até ao
GRX-WCI.
Quando utilizado com unidades de controlo GRX-4000:
Utilize dois condutores de 2,5 mm2 (#12 AWG) para comum (terminal 1) e 24 VFW
(terminal 2). Estes não encaixam nos terminais. Ligue conforme indicado na página
seguinte.
■ Utilize um cabo blindado, de par torcido de #1,0mm2 (#18 AWG) para ligação de
dados (terminais 3 e 4).
■ Ligue a drenagem/blindagem tal como indicado na página seguinte.
— Não ligue à massa (terra) para o GRX-WCI.
— Ligue os fios de drenagem descarnados e corte a blindagem exterior.
FUNÇÕES
Instalação
Condições de ambiente: Temperatura ambiente de funcionamento:
0-40 °C, 0-90% de humidade, sem condensação. Apenas para utilização em
interiores.
Quando utilizado com unidades de controlo GRX-3000:
■ Utilize dois condutores de 1,0mm2 (#18 AWG) para comum (terminal 1) e 12 VCC
(terminal 2). Certifique-se de que faz correctamente a ligação do terminal 2.
Consulte o manual de instalação do GRX-3000.
■ Utilize um cabo blindado, de par torcido de 1,0 mm2 (#18 AWG) para ligação de
dados (terminais 3 e 4).
Comutadores de função GRX-WCI
2
3
4
1
2
3
4
1
2
3
4
1
2
3
4
14
11
8
1
15
12
16*
Cablagem da ligação para comunicação
■
■
Comunicações do sistema
A cablagem Classe 2/PELV de baixa tensão liga o GRX-WCI às unidades de
controlo GRX-3000/4000 e a outros componentes.
Pode ligar até um máximo de 8 unidades de controlo e de 16 GRX-WCI,
teclados de parede e/ou interfaces de controlo para um total de 24 pontos de
controlo.
Resolução de problemas
Se for utilizado como parte de um sistema sem endereçamentos
(com unidades de controlo não endereçadas), o GRX-WCI afectará
todas as unidades de controlo no sistema.
■ Para um sistema com endereçamentos (com unidades de controlo
endereçadas), siga os passos abaixo indicados.
1. Aceda ao modo de programação (apenas pode estar em modo de
programação um GRX-WCI de cada vez). Mantenha premido o botão
Programa durante cerca de 3 segundos, até que o LED comece a piscar.
■
Fio de drenagem
4 3 2 1
Fio de drenagem
Problema
O LED indicador de energia está desligado.
Causa possível
Há outro teclado de parede em modo de programação.
O WCI não tem energia. Certifique-se de que o sistema de iluminação está
ligado e verifique se existem más ligações.
O LED indicador de energia pisca.
O WCI encontra-se em modo de programação.
O LED indicador de energia está ligado, mas a resposta do sistema não é
correcta.
O WCI não está devidamente programado. Certifique-se de que as definições do
comutador de função estão correctas e verifique a programação do sistema.
Botão do programa
1,0 mm2 (#18 AWG)
2. Identifique a(s) unidade(s) de controlo que devem “ouvir” este GRX-WCI.
(É necessário atribuir um endereço às unidades de controlo!) Mantenha
premido o botão de ambiente superior da unidade de controlo durante cerca
de 3 segundos, até os LED começarem a piscar ao mesmo tempo. Repita
este processo para cada unidade de controlo que deva “ouvir” o GRX-WCI.
2 1,0 mm2 (#18 AWG) de
par torcido, blindado dos
terminais 3 a 3 e 4 a 4
Unidade de controlo
2 2,5 mm2 (#12 AWG)
Nota:
Utilize dispositivos apropriados para ligação de fios, tal como
especificado pelos regulamentos locais.
Premir aqui para “ouvir”
Os LED piscam ao mesmo tempo
Cablagem para contactos sem tensão
Interruptor* (fornecido por terceiros)
Entrada 1
■
Ligue a(s) entrada(s) pretendida(s) e os fios comuns ao comutador fornecido
por terceiros.
Isole os fios de entrada não utilizados.
Comum
■
* Deve possuir uma saída de
estado sólido com uma
tensão de saturação,
quando ligada, inferior a 1
VCC a 1 mA e uma
corrente de fuga, quando
desligada, inferior a 1 mA.
Nota: (Para fazer com que uma unidade de controlo deixe de “ouvir” o
GRX-WCI: coloque o GRX-WCI no modo de programação e, em seguida,
prima o botão DESLIGAR da unidade de controlo que está a “ouvir” até
os LED pararem de piscar.).
3. Saia do modo de programação. Mantenha premido o botão Programa
durante cerca de 3 segundos, que os LED pararem de piscar.
GARANTIA LIMITADA
A Lutron tem a opção de reparar ou substituir qualquer unidade que apresente defeitos de materiais ou fabrico no prazo de um ano a contar da data de aquisição. Para assistência técnica coberta
pela garantia, entregue a unidade no ponto de venda onde a adquiriu ou envie-a para a Lutron, na seguinte morada: 7200 Suter Rd., Coopersburg, PA 18036-1299, portes pré-pagos.
Esta garantia substitui todas as demais garantias expressas e a garantia implícita de comerciabilidade está limitada ao prazo de um ano a contar da data de aquisição. Esta garantia
não cobre o custo de instalação, remoção ou reinstalação, nem danos resultantes de utilização indevida, abuso ou reparação incorrecta ou inadequada, nem danos resultantes de
ligações eléctricas ou instalação incorrectas. Esta garantia não cobre danos acessórios ou não previstos. A responsabilidade da Lutron relativamente a quaisquer danos reclamados
resultantes de ou relacionados com o fabrico, venda, instalação, entrega ou utilização nunca poderá ultrapassar o preço de aquisição da unidade.
Esta garantia concede-lhe direitos legais específicos e poderá ter ainda outros direitos, que variam consoante a jurisdição. Alguns estados não permitem a limitação da duração de uma garantia
implícita, pelo que a limitação acima indicada poderá não se aplicar ao seu caso. Alguns estados não permitem a exclusão de ou limitação de danos acessórios ou não previstos, pelo que a
limitação ou exclusão acima indicada poderá não se aplicar ao seu caso.
Lutron e GRAFIK Eye são marcas comerciais registadas da Lutron Electronics Co., Inc.
© 2003 Lutron Electronics Co., Inc.
Internet: www.lutron.com
E-mail: [email protected]
Lutron Electronics Co., Inc.
Feito e impresso nos E.U.A.
P/N 030-826 Rev.A 6/03
Sede Mundial
Lutron Electronics Co. Inc.,
LINHA AZUL: (800) 523-9466
(E.U.A., Canadá, Caraíbas)
Tel.: (610) 282-3800;
Internacional 1- 610-282-3800
Fax: (610) 282-3090;
Internacional 1-610-282-3090
Lutron Electronics Co., Inc.
7200 Suter Road
Coopersburg, PA 18036-1299
Sede Europeia
Lutron EA Ltd.,
LINHA VERDE: 0800 282107 (R.U.)
Tel.: (207) 702-0657;
Internacional 44-207-702-0657
Fax: (207) 480-6899;
Internacional 44-207-480-6899
Sede na Ásia
Lutron Asuka Co., Ltd. (Japão)
Tel: (03) 5575-8411;
Internacional ++81-3-5575-8411
Fax: (03) 5575-8420;
Internacional ++81-3-5575-8420
Wanddoos contactsluitingang-interface
Installatievoorschriften
GRX-WCI
PELV/Klasse 2
Eerst lezen a.u.b. alvorens tot installatie over te gaan.
Overzicht
Invoerkabelset
De GRX-WCI is geschikt voor gebruik
met systemen uit de GRAFIK Eye 3000en 4000-serie. De GRX-WCI wordt
gemonteerd achter de schakelaar van
de gebruiker voor het selecteren of
instellen van scènes in maximaal acht
regeleenheden. De interface biedt twee
tot zeven contactsluitingangen.
Programmeerknop
VoedingsBedrijfsspanning: PELV/Klasse 2,
Adresserings- en
LED
laagspanningsingangen, 12VDC bij
functieschakelaars
gebruik op een GRX-3000 systeem en
24VFW bij gebruik op een GRX-4000
systeem.
■ Ingangsschakelaar moet een uitgang met halfgeleider hebben met een
doorlaat-verzadigingsspanning van minder dan 1VDC bij 1mA en een
sperlekkage van minder dan 1 mA. Uitgangen moeten bedrijfsspanning
kunnen schakelen gedurende de gewenste levensduur van het systeem.
■ De aanbevolen wanddoosdiepte is 61mm. De benodigde wanddoosdiepte
kan verschillen, afhankelijk van de diepte van de gebruikte schakelaar.
■ De GRX-WCI gebruikt één adres op de communicatieverbinding.
■ Mocht u niet zeker weten of een schakelaar compatibel is met deze
specificaties, neemt u dan contact op met de fabrikant van de schakelaar.
Opm.: De GRX-WCI is niet bestemd voor gebruik in combinatie met
lijnspannings-/netvoedingsschakelaars.
■
FUNCTIE-SCHAKELAARINSTELLINGEN
5 6 7 8 9 10
Waarschuwing: Zet de uitschakelaar/MCB altijd in de uitgeschakelde
stand of onderbreek de netleiding door de hoofdzekering te verwijderen
alvorens wat voor werkzaamheden dan ook te gaan uitvoeren. Doet u
dit niet, dan kan dit ernstig persoonlijk letsel tot gevolg hebben.
1. Schakel de stroom uit.
2. Monteer de Lutron wanddoos (P/N 241-758) of Duitse en Britse inbouwdozen
(60.30 mm gemeten h.o.h. van montagegaten).
3. Adres instellen. Ken een uniek adres toe aan elke GRX-WCI m.b.v. de
adresschakelaars aan de voorzijde van de regelaar.
Zie GRX-WCI Adressering voor instellingen van de adresschakelaars.
Noteer het adres voor toekomstige programmeerdoeleinden.
4. Selecteer een functie. Stel functieschakelaars 5—10 op de GRX-WCI in om
de functie ervan te selecteren. Instellingen voor functieschakelaars en de
bijbehorende functies zijn weergegeven in de tabel op de volgende pagina.
5. Sluit de GRX-WCI aan op de communicatieverbinding. Strip zoveel isolatie
van de draden dat 10 mm draad blank komt te liggen voor 1,0 mm2
(#18 AWG) draad. In elke klem passen een of twee 1,0mm2 (#18 AWG)
draden. Zie het bedradingschema van de communicatieverbinding.
6. Sluit contactsluitingangen aan. Sluit de bedrading aan op de contactsluit/ingangsconnector-kabelset d.m.v. PELV/Klasse 2 of een betere kwaliteit
kabel. Zie bedradingschema van de contactsluitingangen. Scherm of knip
ongebruikte invoerdraden af.
7. Monteer de GRX-WCI zoals getoond in het montageschema. De GRX-WCI
hangt vrij in de wanddoos.
Belangrijke opmerkingen
Voorschriften: Aanleggen in overeenstemming met alle plaatselijk en
landelijk geldende elektrotechnische voorschriften.
Montageschema
Omgeving: Omgevingstemperatuur bij bedrijf:
0-40°C, 0-90% vochtigheid, zonder condensatie, alleen voor binnen.
Wanddoos
Bedrading
communicatieverbinding
Klasse 2/PELV-draden voor laagspanning
■ Lus de GRX-WCI door naar GRX-3000/4000-regeleenheden en andere
componenten met Klasse 2/PELV-draden voor laagspanning.
■ Breng verbindingen tot stand binnenin de wanddoos, schakeldoos
of verdeeldoos met een draadlengte van ten hoogste 2,5 m vanaf
de verbinding naar de GRX-WCI.
Laagspanningscontactsluitschakelaar
door derden te leveren
4 scènes met master voor
verhogen/verlagen
5 6 7 8 9 10
Ingang 1-4
Ingang 5
Ingang 6
Ingang 7
Scène 1 t/m 4
Uit
Verhogen
Verlagen
Scène 5 t/m 8
Uit
Verhogen
Verlagen
Scène 9 t/m 12
Uit
Verhogen
Verlagen
Scène 13 t/m 16
Uit
Verhogen
Verlagen
Ingang 6
Ingang 7
2-knops wandstation-interface*
voor ingang
Selecteert scène 1.
Schakelt verlichting uit.
2-knops scènekeuze*
Selecteert scène 9.
Selecteert scène 10.
Selecteert scène 13.
Selecteert scène 14.
2-knops wandbediening
met paniekregeling*
Selecteert scène 16 (licht voluit AAN). Blokkeert deze regeleenheid
tegen alle andere systeembesturingen (scenariovergrendeling).
Stelt vorige scène weer in. Ontgrendelt de regelaar.
2-knops fijnregeling*
Laat geselecteerde zone(s) tijdelijk feller branden.
Dimt geselecteerde zone(s) tijdelijk.
2-knops zonevergrendeling*
Voor alleen tijdelijke zone-instellingen.
Instellingen zijn niet van invloed op vooringestelde scène-instellingen.
Deactiveert de zonevergrendeling.
2-knops sequentiëring*
Start een opeenvolging, doorloopt continu scène 5 t/m 16 met
gebruikmaking van overvloeitijden die zijn ingesteld op de regeleenheden.
Schakelt sequentiëring uit.
1-knops toegangscontroleinterface* voor momentele
schakelaaringangen
Schakelt beurtelings heen en weer tussen scène 1 en UIT.
Niets
Selecteert scène 1 wanneer de contacten worden gesloten.
Niets
1-knops
aanwezigheidssensor/toegangsco
ntrole-interface* voor
aangehouden ingangen
(schakelt bij sluiten en openen)
Reageert niet wanneer de contacten worden gesloten.
Niets
Selecteert Uit wanneer de contacten worden geopend.
Niets
* Ingang 1 t/m 5 zijn niet actief.
GRX-WCI
GRX-WCI Adressering
ADRES
1
5
1
2
3
4
1
2
3
4
1
2
3
4
1
2
3
4
2
9
1
2
3
4
1
2
3
4
1
2
3
4
1
2
3
4
6
3
2
3
4
1
2
3
4
1
2
3
4
1
2
3
4
10
7
4
13
1
2
3
4
1
2
3
4
1
2
3
4
1
2
3
4
14
11
8
1
15
12
16*
Nederlands
Bij gebruik samen met GRX-4000-regeleenheden:
■ Gebruik twee 2,5mm2 (#12 AWG) geleiders voor gemeenschappelijk
(common) (klem 1) en 24VFW (klem 2). Deze passen niet in klemmen.
Aansluiten volgens afbeelding op de volgende pagina.
■ Gebruik één afgeschermd, getwist aderpaar 1,0 mm2 (#18 AWG) voor
gegevensverbinding (klem 3 en 4).
■ Sluit drain/afscherming aan zoals afgebeeld op de volgende pagina.
— Niet verbinden met aarde met GRX-WCI.
— Sluit de blanke afvoerdraden aan en strip de buitenafscherming eraf.
FUNCTIES
Installatie
8. Schakel de stroom in.
Bij gebruik samen met GRX-3000-regeleenheden
■ Gebruik twee 1,0 mm2 (#18 AWG) geleiders voor gemeenschappelijk
(common) (klem 1) en 12VDC (klem 2). Let erop dat u de bedrading naar
klem 2 juist aansluit. Raadpleeg de installatiehandleiding voor de GRX-3000.
■ Gebruik één afgeschermd, getwist aderpaar 1,0 mm2 (#18 AWG) voor
gegevensverbinding (klem 3 en 4).
GRX-WCI Functieschakelaars
Bedrading communicatieverbinding
■
■
Systeemcommunicatie
PELV/Klasse 2, laagspanningsbedrading verbindt de GRX-WCI met GRX3000/4000 regeleenheden en andere componenten.
U kunt max. 8 regeleenheden met elkaar verbinden en max. 16 GRX-WCI’s,
wandstations en/of besturingsinterfaces voor in totaal 24 besturingspunten.
Afvoerdraad
Storingzoeken
Bij gebruik als deel van een ongeadresseerd systeem (regeleenheden niet
geadresseerd), beïnvloedt de GRX-WCI alle regeleenheden die zijn verbonden
met het systeem.
■ Volg voor een geadresseerd systeem (geadresseerde regeleenheden)
onderstaande stappen.
1. Ga naar programmamodus (er kan zich slechts één GRX-WCI op een
bepaald moment in programmamodus bevinden).
Druk de programmaknop in en houd die circa 3 seconden ingedrukt, tot
de LED begint te knipperen.
■
Symptoom
Voedings-LED is uit
Mogelijke oorzaak
Een ander wandstation staat in de programmamodus.
Geen stroom op WCI. Controleer of er stroom staat op het
verlichtingssysteem en of alle bedrading juist is aangesloten.
Voedings-LED knippert.
WCI staat in programmamodus.
Voedings-LED is aan, maar het systeem reageert niet juist.
WCI onjuist geprogrammeerd. Controleer de instellingen
van de functieschakelaars en de systeemprogrammering.
4 3 2 1
Afvoerdraad
Programmeerknop
1,0 mm2 (#18 AWG)
2. Stel vast welke regeleenheden moeten “luisteren” naar deze GRX-WCI.
(Regeleenheden moeten geadresseerd zijn!) Druk de bovenste scèneknop
op de regeleenheid in en houd deze circa 3 seconden ingedrukt, tot de LED’s
tegelijk gaan knipperen. Herhaal dit voor elke besturingseenheid die moet
“luisteren” naar de GRX-WCI.
2 1,0 mm2 (#18 AWG)
getwist, afgeschermd
aderpaar van klem 3 naar
3 en 4 naar 4.
Note:
Regeleenheid
2 2,5 mm2 (#12 AWG)
Gebruik toepasselijke draadverbindingsinrichtingen zoals
gespecificeerd in de ter plaatse geldende voorschriften.
Druk hierop om
te “luisteren”
LED’s knipperen tegelijk
Contactsluitbedrading
Schakelaar* (geleverd door derden)
Ingang 1
■
Verbind de gewenste invoer- en gemeenschappelijke
draden met de door derden geleverde schakelaar.
Scherm ongebruikte invoerdraden af.
Gemeenschappelijk
■
* Moet een halfgeleider-
uitgang hebben met een
doorlaatverzadigingsspanning van
minder dan 1VDC bij 1mA
en een sperlekkage van
minder dan 1 mA.
Opm.: (Om een “luisterende” regeleenheid te laten ophouden met luisteren
naar een GRX-WCI: Stel de GRX-WCI in op programmamodus, en druk
vervolgens op de UIT-knop van de “luisterende” regeleenheid tot de
LED’s ophouden met knipperen.)
3. Verlaten van programmamodus. Druk op de programmaknop en houd
deze circa 3 seconden ingedrukt, tot de LED ophoudt met knipperen.
BEPERKTE GARANTIE
Lutron zal een eenheid met een materiaal- of fabrieksfout binnen één jaar na aankoop, naar eigen goeddunken, repareren dan wel vervangen. Breng, om recht te kunnen doen gelden op service
op grond van de garantie, de eenheid terug naar het bedrijf waar die gekocht werd of stuur de eenheid op naar Lutron, 7200 Suter Rd., Coopersburg, PA 18036-1299, met vooruitbetaling van de
verzendkosten.
Deze garantie komt in de plaats van alle andere uitdrukkelijke garanties, en de stilzwijgende garantie van verhandelbaarheid blijft beperkt tot één jaar, gerekend vanaf de
aankoopdatum. Onder deze garantie vallen niet de kosten gemoeid met het installeren, verwijderen of opnieuw installeren, of schade als gevolg van verkeerd gebruik, oneigenlijk
gebruik, of ondeugdelijke of onjuiste reparaties, of schade veroorzaakt door ondeugdelijke bedrading of installatie. Bijkomende schade of gevolgschade is uitgesloten van deze
garantie. De aansprakelijkheid van Lutron m.b.t. enige vordering tot schadevergoeding voortvloeiend uit of in verband met de fabricage, verkoop, installatie, levering of gebruik
van de eenheid blijft te allen tijde beperkt tot ten hoogste het aankoopbedrag van de eenheid.
Op grond van deze garantie hebt u specifieke wettelijke rechten en het kan zijn dat u ook andere rechten heeft, die per staat kunnen verschillen. Sommige staten staan geen beperking toe wat
betreft de duur van een stilzwijgende garantie, derhalve kan het zijn dat bovenbedoelde garantie niet voor u geldt. Sommige staten staan geen uitsluiting of beperking van bijkomende schade of
gevolgschade toe, derhalve kan het zijn dat bovenbedoelde uitsluiting of beperking niet voor u geldt.
Lutron en GRAFIK Eye zijn gedeponeerde handelsmerken van Lutron Electronics Co., Inc.
© 2003 Lutron Electronics Co., Inc.
Internet: www.lutron.com
E-mail: [email protected]
Lutron Electronics Co., Inc.
Geproduceerd en gedrukt in de V.S.
P/N 030-82607 Rev.A 6/03
Hoofdkantoor wereldwijd
Lutron Electronics Co. Inc.,
BEL GRATIS: (800) 523-9466
(V.S., Canada, Caribisch gebied)
Tel.: (610) 282-3800;
Internationaal 1- 610-282-3800
Fax: (610) 282-3090;
Internationaal 1-610-282-3090
Lutron Electronics Co., Inc.
7200 Suter Road
Coopersburg, PA 18036-1299
Hoofdkantoor voor Europa
Lutron EA Ltd.,
BEL GRATIS: 0800-282107 (binnen G.B.)
Tel: (207) 702-0657;
Internationaal 44-207-702-0657
Fax: (207) 480-6899;
Internationaal 44-207-480-6899
Hoofdkantoor voor Azië
Lutron Asuka Co., Ltd. (Japan)
Tel.: (03) 5575-8411;
Internationaal ++81-3-5575-8411
Fax: (03) 5575-8420;
Internationaal ++81-3-5575-8420
Interfaccia ingressi a relè per installazione in scatola a muro
Istruzioni d’Installazione
GRX-WCI
PELV/Classe 2
Leggere attentamente prima di procedere all’installazione
Informazioni generali
L'interfaccia GRX-WCI è adatta all'uso
con i sistemi GRAFIK Eye Serie 3000 e
4000 . L'interfaccia viene installata
dietro l'interruttore fornito dall'utente
per permettere la selezione o la
regolazione delle scene in un massimo
di otto centraline. L'interfaccia fornisce
da due a sette ingressi a contatti puliti.
Cavi di
collegamento
degli ingressi
Pulsante
programma
zione
FUNZIONI
CONFIGURAZIONI DEI DIP SWITCH "FUNCTION"
5 6 7 8 9 10
Installazione
Importante! Spegnere sempre l'interruttore automatico o togliere
il fusibile principale dalla linea di alimentazione prima di effettuare
qualsiasi intervento. La mancata osservanza di tale prescrizione può
provocare gravi lesioni personali.
1. Interrompere l'alimentazione.
2. Installare in scatole a muro Lutron (codice 241-758) o in scatole da incasso
di tipo tedesco o inglese (interasse tra i fori di montaggio 60,30 mm).
3. Impostare gli indirizzi. Assegnare un indirizzo univoco a ciascuna interfaccia
GRX-WCI utilizzando i DIP switch sul lato anteriore del dispositivo. Vedere il
paragrafo GRX-WCI - Indirizzamento per la configurazione dei DIP switch
"Address". Annotare l’indirizzo assegnato per eventuali modifiche future.
4. Selezionare la funzione. Impostare i DIP switch "Function" 5—10
sull'interfaccia GRX-WCI in base alla funzione del dispositivo. Le
configurazioni dei DIP switch e la relativa funzione sono illustrate nella
tabella alla pagina seguente.
5. Collegare l'interfaccia GRX-WCI al circuito di comunicazione. Togliere 10 mm
(3/8") di rivestimento isolante dai cavi con sezione 1,0 mm2 (nr. 18 AWG).
Ciascun morsetto è adatto per uno o due conduttori con sezione 1,0mm2 (nr.
18 AWG). Fare riferimento allo schema elettrico per il circuito di
comunicazione.
6. Collegare gli ingressi a relè. Collegare i cavi (PELV/Classe 2, o migliori) al
connettore degli ingressi a relè. Fare riferimento allo schema elettrico per gli
ingressi a relè. Terminare o tagliare i cavi inutilizzati.
7. Installare l'interfaccia GRX-WCI come mostrato nello schema d'installazione.
L'interfaccia non dispone di un supporto fisso nella scatola a muro.
8. Ridare corrente.
Schema di montaggio
Cablaggio circuito
di comunicazione
Ingresso 7
Scene da 1 a 4
Spento
Alza
Abbassa
Scene da 5 a 8
Spento
Alza
Abbassa
Scene da 9 a 12
Spento
Alza
Abbassa
Scene da 13 a 16
Spento
Alza
Abbassa
Ingresso 7
Interfaccia per tastierino entrata,
2 pulsanti*
Seleziona la scena 1.
Spegne le luci.
Selezione scene, 2 pulsanti*
Selezione la scena 9.
Seleziona la scena 10.
Seleziona la scena 13.
Seleziona la scena 14.
Tastierino antipanico, 2 pulsanti*
Seleziona la scena 16 (lampade accese alla massima intensità). Blocca tutti gli
altri dispositivi di sistema collegati alla centralina (blocco della scena).
Ripristina la scena precedente. Rimuove il
blocco.
Regolazione fine, 2 pulsanti*
Aumenta temporaneamente l'intensità nelle zone selezionate.
Abbassa temporaneamente l'intensità luminosa
nelle zone selezionate.
Blocco zona, 2 pulsanti*
Permette solo regolazioni temporanee delle zone.
Le regolazioni non modificheranno le precedenti impostazioni.
Disabilita il blocco di zona.
Sequenziazione, 2 pulsanti*
Avvia una sequenza, ripetendo continuamente le scene dalla 5 alla 16 e
utilizzando i tempi di passaggio da una scena all'altra impostati sulla centralina.
Spegne la sequenziazione.
Interfaccia dispositivo per entrate,
1 pulsante*, (segnale a impulsi)
Seleziona alternativamente la scena 1 e OFF.
Niente
Seleziona la scena 1 alla chiusura dei contatti.
Niente
Nessuna risposta alla chiusura dei contatti.
Niente
Seleziona Off all'apertura dei contatti.
Niente
Interruttore a chiusura di
contatti fornito dal cliente
* Gli ingressi dal nr. 1 al nr. 5 sono inattivi.
Português
Cablaggio a bassa tensione Classe 2 (PELV)
■ Il cablaggio in serie (daisy-chain) tra l'interfaccia GRX-WCI, le centraline GRX3000/4000 e gli altri componenti dovrà essere di tipo a bassa tensione Classe
2 (PELV).
■ I collegamenti all'interno di scatole a muro, armadi o scatole di giunzione
devono avere una lunghezza massima di 2,5 m (8 piedi) dal punto di
collegamento all'interfaccia GRX-WCI
GRX-WCI
GRX-WCI Indirizzamento
INDIRIZZO
1
5
1
2
3
4
1
2
3
4
1
2
3
4
1
2
3
4
2
9
1
2
3
4
1
2
3
4
1
2
3
4
1
2
3
4
6
3
2
3
4
1
2
3
4
1
2
3
4
1
2
3
4
10
7
4
13
1
2
3
4
1
2
3
4
1
2
3
4
1
2
3
4
14
11
8
1
Nederlands
15
12
16*
Italiano
Se usato con le centraline GRX-4000:
■ Due conduttori da 2,5mm2 (nr. 12 AWG) per il comune (morsetto 1) e la
24VFW (morsetto 2). I cavi non entreranno nei morsetti. Collegare come
mostrato.
■ Un doppino schermato intrecciato da 1,0mm2 (nr. 18 AWG) per la trasmissione
dati (morsetti 3 e 4).
■ Collegare la massa/schermatura come mostrato nella pagina seguente.
— Non collegare alla terra o all'interfaccia GRX-WCI.
— Collegare i fili nudi della massa e tagliare via la schermatura esterna.
Ingresso 6
Scatola
Condizioni ambientali: temperatura operativa:
0-40°C (32-104°F), umidità 0-90% senza condensa. Solo per uso in ambienti
interni.
Se usato con centraline GRX-3000:
■ Due conduttori da 1,0mm2 (nr. 18 AWG) per il comune (morsetto 1) e 12Vcc
(morsetto 2). Assicurarsi di aver collegato correttamente il morsetto 2. Fare
riferimento alla guida d'installazione della centralina GRX-3000.
■ Un doppino schermato intrecciato da 1,0mm2 (nr. 18 AWG) per la trasmissione
dati (morsetti 3 e 4).
Ingresso 5
Ingresso 6
5 6 7 8 9 10
Interfaccia sensore
occupazione/entrata, 1 pulsante*
(segnale continuo)
(l'evento provoca la chiusura o
l'apertura del contatto)
Importante
Normative di riferimento: Installare secondo le normative elettriche nazionali e
locali.
4 scene con Master
alza/abbassa
Ingressi 1-4
Français
LED
Tensione d'esercizio: cablaggio
DIP switch per
presenza
PELV/Classe 2, ingressi a bassa
assegnazione indirizzi
tensione
tensione, 12Vcc se utilizzata in un
e altre funzioni
sistema GRX-3000 e 24VFW se usata
in un sistema GRX-4000.
■ L'interruttore che fornisce il segnale in ingresso deve avere uscite a stato
solido con una tensione di saturazione allo stato di conduzione inferiore a
1 Vcc, a 1 mA, e una corrente di dispersione allo stato di interdizione inferiore
a 1 mA. Le uscite devono essere in grado di pilotare la tensione d'esercizio
per tutta la durata del sistema.
■ La profondità consigliata della scatola a muro è 61mm. La profondità varia in
base all'interruttore utilizzato.
■ All'interfaccia GRX-WCI deve essere assegnato un indirizzo sul canale di
comunicazione.
■ In caso di dubbi sulla compatibilità di un interruttore con le presenti
specifiche, contattare il costruttore.
Nota: L'interfaccia GRX-WCI non è adatta all'uso in applicazioni a tensione di
linea/rete.
■
GRX-WCI - DIP switch "Function"
Cablaggio circuito di comunicazione
■
■
Comunicazioni di sistema
Il cablaggio a bassa tensione PELV/Classe 2, collega l'interfaccia GRX-WCI
alle centraline GRX-3000/4000 e agli altri componenti.
Il sistema permette di collegare assieme fino a un totale di 8 centraline e fino
a 16 interfacce GRX-WCI, tastierini e/o e interfacce di controllo, per un totale
di 24 punti di controllo.
Filo di massa
Individuazione ed eliminazione guasti
Se usata all'interno di un sistema senza indirizzo (nessun indirizzo assegnato
alle centraline), l'interfaccia GRX-WCI modificherà il comportamento delle
altre centraline del sistema.
■ Per la creazione di un sistema con indirizzi (assegnazione degli indirizzi alle
centraline), attenersi alle seguenti istruzioni.
1. Entrare in modalità programmazione (è possibile portare in modalità
programmazione solo un'interfaccia GRX-WCI alla volta). Tenere premuto il
pulsante Program per circa 3 secondi, fino a quando il LED inizia a
lampeggiare.
■
Problema
Il LED presenza tensione è off
Possibile causa
Un altro tastierino è in modalità programmazione.
L'interfaccia WCI non è alimentata. Assicurarsi che il sistema di illuminazione
sia alimentato e verificare la presenza di eventuali collegamenti elettrici errati.
Il LED presenza tensione lampeggia.
L'interfaccia WCI è in modalità programmazione.
Il LED presenza tensione è acceso, ma la risposta del sistema non è corretta.
L'interfaccia WCI non è programmata correttamente. Verificare la corretta
configurazione dei DIP switch "Function" e la programmazione di sistema.
4 3 2 1
Filo di massa
Pulsante programmazione
1,0 mm2
(nr. 18 AWG)
2. Identificare le centraline che desiderate impostare come "in ascolto"
dell'interfaccia GRX-WCI (è necessario indirizzare le centraline!).Tenere
premuto il primo pulsante delle scene (a partire dall'alto) per circa 3 secondi,
fino a che i LED iniziano a lampeggiare all'unisono. Ripetere la procedura
per tutte le centraline che desiderate mettere "in ascolto" della interfaccia
GRX-WCI.
2 doppini intrecciati
schermati con sezione
1,0 mm2 (nr. 18 AWG) dai
morsetti 3 a 3, e da 4 a 4
Nota:
2 conduttori 2,5 mm2 (nr. 12 AWG)
Centralina
Utilizzare sistemi di cablaggio adeguati, secondo quanto previsto dalla
normativa locale.
Premere qui per
“ascoltare”
I LED lampeggiano all'unisono
Cablaggio ingressi a relè
Collegare gli ingressi e i fili del comune all'interruttore fornito dall'utente.
Terminare i cavi non utilizzati.
Interruttore* (fornito dall'utente)
Ingresso 1
■
Comune
■
* Deve avere uscite a stato
solido con una tensione di
saturazione allo stato di
conduzione inferiore a
1Vcc, a 1mA e una
corrente di dispersione
allo stato di interdizione
inferiore a 1 mA.
Nota: (Per impostare una centralina “in ascolto” in modo che non ascolti
GRX-WCI: entrare nella modalità programmazione dell'interfaccia
GRX-WCI, quindi premere il pulsante OFF della centralina “in ascolto”
fino a che i LED non smettono di lampeggiare).
3. Uscire dalla modalità programmazione. Tenere premuto il pulsante
Program per circa 3 secondi, fino a quando il LED non smette di lampeggiare.
LIMITAZIONI DI GARANZIA
Lutron potrà, a propria discrezione, riparare o sostituire le unità con difetti di materiale o produzione entro un anno dall’acquisto. Per attivare la garanzia è necessario far pervenire l’unità al punto di
acquisto o spedirla via posta in porto franco alla Lutron, 7200 Suter Rd., Coopersburg, PA 18036-1299.
La presente garanzia sostituisce tutte le altre garanzie espresse; le garanzie implicite di commerciabilità sono limitate a un anno dall’acquisto. La presente garanzia non copre i costi
di installazione, rimozione, reinstallazione, o eventuali danni risultanti da utilizzo inadeguato, cattivo uso, riparazione impropria o sbagliata, danni derivanti da cablaggio o installazione
inadeguati. La presente garanzia non copre i danni diretti o indiretti. La responsabilità della Lutron in caso di reclami per danni relativi o collegati alla produzione, vendita,
installazione, consegna o utilizzo dell’unità sarà limitata al valore di acquisto dell’unità stessa.
La presente garanzia fornisce all’acquirente specifici diritti legali. L’acquirente può inoltre godere di eventuali altri diritti concessi dalla normativa applicabile nel proprio paese. Alcuni stati non
prevedono limitazioni sulla durata della garanzia, pertanto la limitazione di cui sopra potrebbe non essere applicabili a voi. Alcuni stati non prevedono l’esclusione o la limitazione dei danni diretti o
indiretti, pertanto la limitazione di cui sopra potrebbe non essere applicabili a voi.
Lutron e GRAFIK Eye sono marchi registrati di Lutron Electronics Co., Inc.
© 2003 Lutron Electronics Co., Inc.
Sito Internet: www.lutron.com
E-mail: [email protected]
Lutron Electronics Co., Inc.
Realizzato e stampato negli Stati Uniti
P/N 030-82608 Rev.A 6/03
Sede principale
Lutron Electronics Co. Inc.,
NUMERO VERDE: +800-523-9466
(U.S.A., Canada, zona caraibica)
Tel: (610) 282-3800;
Internazionale +1-610-282-3800
Fax +1-610-282-3090;
Internazionale +1-610-282-3090
Lutron Electronics Co., Inc.
7200 Suter Road
Coopersburg, PA 18036-1299
Sede in Europa
Lutron EA Ltd.,
NUMERO VERDE: (0800) 282107 (U.K.)
Tel: (207) 702-0657;
Internazionale +44-207-702-0657
Fax: (207) 480-6899;
Internazionale +44-207-480-6899
Sede in Asia
Lutron Asuka Co., Ltd. (Giappone)
Tel: (03) 5575-8411;
Internazionale ++81-3-5575-8411
Fax: (03) 5575-8420;
Internazionale ++81-3-5575-8420