1
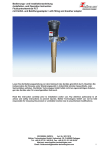
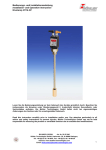
Bedienungs- und Installationsanleitung Installation- and Operation Instruction Nivotemp NT64 / Nivovent NV74 Lesen Sie die Bedienungsanleitung vor dem Gebrauch des Gerätes gründlich durch. Beachten Sie insbesondere die Hinweise unter Gliederungspunkt 2. Andernfalls könnten Gesundheits- oder Sachschäden auftreten. Die Bühler Technologies GmbH haftet nicht bei eigenmächtigen Änderungen des Gerätes oder für unsachgemäßen Gebrauch. Read this instruction carefully prior to installation and/or use. Pay attention particularly to all advice and safety instructions to prevent injuries. Bühler Technologies GmbH can not be held responsible for misusing the product or unreliable function due to unauthorised modifications. BX100020 05/2014 Art. Nr. 9032037 Bühler Technologies GmbH, Harkortstr. 29, D-40880 Ratingen, Tel. +49 (0) 21 02 / 49 89-0, Fax. +49 (0) 21 02 / 49 89-20 Internet: www.buehler-technologies.com Email: [email protected] 1 Bedienungs- und Installationsanleitung Installation- and Operation Instruction Nivotemp NT64 / Nivovent NV74 Inhaltsverzeichnis 1 1.1 1.1.1 1.1.2 1.2 Seite Einleitung ........................................................................................................................... 3 Funktionsweise ..................................................................................................................................4 Füllstandsüberwachung ................................................................................................................4 Temperaturüberwachung (Option) ................................................................................................4 Einsatzbereich ...................................................................................................................................4 2 Wichtige Hinweise ............................................................................................................. 5 3 Aufbauen und Anschließen .............................................................................................. 7 3.1 3.2 4 4.1 4.2 5 5.1 Verstellen der Niveaukontakte ..........................................................................................................9 Nachträgliche Montage eines Temperaturfühlers .......................................................................... 11 Wartung ............................................................................................................................ 11 Filterelement wechseln ................................................................................................................... 11 Nachfüllen kleiner Ölmengen ......................................................................................................... 11 Service und Reparatur .................................................................................................... 12 Entsorgung ..................................................................................................................................... 12 6 Beigefügte Dokumente .................................................................................................... 12 7 Anhang ............................................................................................................................. 23 7.1 7.2 7.3 7.4 7.5 Definitionen..................................................................................................................................... 23 Standard Anschlussbelegung für NT64 und NV74 ........................................................................ 24 Technische Daten .......................................................................................................................... 25 Technische Daten Kontakte ........................................................................................................... 26 Abmessungen................................................................................................................................. 27 Contents 1 1.1 1.1.1 1.2 1.3 Page Introduction...................................................................................................................... 13 Functional Description .................................................................................................................... 14 Level Control .............................................................................................................................. 14 Temperature Control (Option) ........................................................................................................ 14 Intended Use .................................................................................................................................. 14 2 Important advice .............................................................................................................. 15 3 Installation and Connection ............................................................................................ 17 3.1 3.2 4 4.1 4.1.1 4.2 5 5.1 Adjusting the Contacts ................................................................................................................... 19 Retrofit of a Temperature Sensor ................................................................................................... 20 Maintenance ..................................................................................................................... 21 Inspection and Service ................................................................................................................... 21 Replacing the Filter Element ...................................................................................................... 21 Refilling small Amounts of Oil ......................................................................................................... 21 Service and Repair .......................................................................................................... 22 Disposal .......................................................................................................................................... 22 6 Attached Documents ....................................................................................................... 22 7 Appendix .......................................................................................................................... 23 7.1 7.2 7.3 7.4 7.5 2 Definitions ....................................................................................................................................... 23 Standard Pin Assignment for NT64 and NV74 ............................................................................... 24 Technical Data................................................................................................................................ 25 Technical Data of Contacts ............................................................................................................ 26 Dimensions ..................................................................................................................................... 27 BX100020 05/2014 Art. Nr. 9032037 Bedienungs- und Installationsanleitung Installation- and Operation Instruction Nivotemp NT64 / Nivovent NV74 1 Einleitung Der Nivotemp NT64 und Nivovent NV74 dienen zur Überwachung des Füllstandes und der Temperatur in Fluidsystemen. Je nach Ausstattung stehen folgende Konfigurationen zur Verfügung: bis zu vier Schaltausgänge für die Füllstandsüberwachung oder bis zu drei Schaltausgänge für die Füllstandsüberwachung plus ein Schaltausgang für die Temperaturüberwachung oder bis zu drei Schaltausgänge für die Füllstandsüberwachung plus ein Ausgang Pt100 bis zu drei Schaltausgänge für die Füllstandsüberwachung plus ein Analogausgang für die Temperaturüberwachung Folgende Optionen stehen zur Verfügung: SSR Schwallschutzrohr mit Zentrierscheibe: Das Schwallschutzrohr ist in dem gleichen Material ausgeführt wie das Tauchrohr (MS/VA). Bei der Baureihe Nivovent enthält diese Option zusätzlichen einen Befülladapter (Option BFA). Die Niveauschalter der Serie Nivovent sind zusätzlich mit einem Belüftungsfilter ausgestattet. Für diese Typen stehen die folgenden Optionen zur Verfügung: VS optische Verschmutzungsanzeige für den Belüftungsfilter: Analoge Unterdruckanzeige, Anzeigebereich 0,35 bar. BFA Befülladapter inkl. Rippenflansch mit Siebeinsatz: Mittels dieser Option können kleinere Mengen Öl über das Belüftungsfiltergehäuse nachgefüllt werden. Hierzu wird in der gewählten Variante das entsprechende Gehäuse eingebaut. Welchen Typ Sie vor sich haben, ersehen Sie aus dem Typenschild. Die Typenschlüssel lauten folgendermaßen: NT 64Baureihe Nivotemp NT 64 Ausführung MS Messing VA Schwimmer und Tauchrohr VA Zubehör SSR = Schwallschutzrohr Temperatur Steckverbindung M3 S6 M12 2M12 Länge 280 370 500 Anzahl Niveaukontakte 1-4 Niveaukontakt K = Öffner / Schließer W = Wechsler BX100020 05/2014 Art. Nr. 9032037 Pt 100 KT = Temperatursensor = Temperaturtransmitter TK T50NO T60NO T70NO T80NO = Temperaturkontakt = 50 °C Schließer = 60 °C Schließer = 70 °C Schließer = 80 °C Schließer T50NC T60NC T70NC T80NC = 50 °C Öffner = 60 °C Öffner = 70 °C Öffner = 80 °C Öffner 3 Bedienungs- und Installationsanleitung Installation- and Operation Instruction Nivotemp NT64 / Nivovent NV74 NV 74-HYZubehör VS = Verschmutzungsanzeige Baureihe Nivotemp NV 74-HY Optionen BFA** = Befülladapter SSR** = Schwallschutzrohr mit Befülladapter MT = für Multiterminal MTS = für Multiterminal inkl. Schwallschutztrohr FCT = Fluidcontrolterminal Temperatur Pt 100 = Temperatursensor KT = Temperaturtransmitter Ausführung MS Messing VA* Schwimmer und Schaltrohr VA Steckverbindung M3 S6 M12 2M12 Länge (mm) 280 370 500 Anzahl Niveaukontakte 1-4 Niveaukontakt K = Öffner / Schließer W = Wechsler TK T50NO T60NO T70NO T80NO = Temperaturkontakt = 50°C Schließer = 60°C Schließer = 70°C Schließer = 80°C Schließer T50NC T60NC T70NC T80NC = 50°C Öffner = 60°C Öffner = 70°C Öffner = 80°C Öffner * nicht in Verbindung mit Option FCT lieferbar ** nicht in Verbindung mit Option FCT, MT und MTS lieferbar 1.1 Funktionsweise 1.1.1 Füllstandsüberwachung Durch das easyjust System ermöglicht der Nivotemp NT64 und Nivovent NV74 die Verwendung standardisierter Tauchrohrlängen für Ölbehälter unterschiedlicher Größe und Form. Die Schaltpunkte lassen sich jederzeit auf die Bedürfnisse der Anlage einstellen. Die Niveaukontakte befinden sich geschlossenen Gehäusen. Sie werden einfach auf einer Kontaktleiste mit vergoldeten Kontakten im gewünschten Abstand positioniert. Der Mindestabstand zwischen zwei Kontakten beträgt 40 mm, das Raster 10 mm. Die farbliche Kenzeichnung der Kontakte stellt die Übereinstimmung mit der Klemmenbelegung des Anschlusses sicher. Die Schaltfunktion als fallend Öffner (NO) oder als fallend Schließer (NC) wird durch die Einbaulage der Kontakte bestimmt. Zudem ist die Funktion als Wechsler verfügbar. Die Signalisierung erfolgt nur elektronisch über die Schaltausgänge. 1.1.2 Temperaturüberwachung (Option) Die Temperaturüberwachung erfolgt über ein Thermoelement, das am Ende der Trägerplatine aufgesteckt ist. Hier stehen Temperaturkontakte mit fester Abstufung, ein Pt 100 oder ein Temperaturtransmitter mit 420 mA Ausgangs zur Verfügung. 1.2 Einsatzbereich ! WARNUNG Alle Gerätetypen sind ausschließlich für industrielle Anwendungen vorgesehen. Es handelt sich nicht um Sicherheitsbauteile. Die Geräte dürfen nicht eingesetzt werden, wenn bei ihrem Ausfall oder bei Fehlfunktion die Sicherheit und Gesundheit von Personen beeinträchtigt wird. Der Einsatz in explosionsgefährdeten Bereichen ist nicht gestattet. 4 BX100020 05/2014 Art. Nr. 9032037 Bedienungs- und Installationsanleitung Installation- and Operation Instruction Nivotemp NT64 / Nivovent NV74 2 Wichtige Hinweise Bitte überprüfen Sie vor Einbau des Gerätes, ob die genannten technischen Daten den Anwendungsparametern entsprechen. Überprüfen Sie ebenfalls, ob alle zum Lieferumfang gehörenden Teile vollständig vorhanden sind. Der Einsatz der Geräte ist nur zulässig, wenn: - das Produkt unter den in der Bedienungs- und Installationsanleitung beschriebenen Bedingungen, dem Einsatz gemäß Typenschild und für Anwendungen, für die es vorgesehen ist, verwendet wird. Bei eigenmächtigen Änderungen des Gerätes ist die Haftung durch die Bühler Technologies GmbH ausgeschlossen. - die im Datenblatt und der Anleitung angegebenen Grenzwerte eingehalten werden. - Überwachungsvorrichtungen / Schutzvorrichtung korrekt angeschlossen sind. - die Service- und Reparaturarbeiten, die nicht in dieser Anleitung beschrieben sind, von Bühler Technologies GmbH durchgeführt werden. - Originalersatzteile verwendet werden. Diese Bedienungsanleitung ist Teil des Betriebsmittels. Der Hersteller behält sich das Recht vor, die Leistungs-, die Spezifikations- oder die Auslegungsdaten ohne Vorankündigung zu ändern. Bewahren Sie die Anleitung für den späteren Gebrauch auf. In dieser Anleitung werden folgende Warnzeichen und Signalwörter benutzt: Warnung vor einer allgemeinen Gefahr Netzstecker ziehen Warnung vor dem Einatmen giftiger Gase Atemschutz tragen Warnung vor ätzenden Flüssigkeiten Gesichtsschutz tragen Warnung vor explosionsgefährdeten Bereichen Handschuhe tragen Signalwörter für Warnhinweise: HINWEIS Signalwort für wichtige Information zum Produkt, auf die im besonderen Maße aufmerksam gemacht werden soll. VORSICHT Signalwort zur Kennzeichnung einer Gefährdung mit geringem Risiko, die zu einem Sachschaden oder leichten bis mittelschweren Körperverletzungen führen kann, wenn sie nicht vermieden wird. WARNUNG Signalwort zur Kennzeichnung einer Gefährdung mit mittlerem Risiko, die möglicherweise Tod oder schwere Körperverletzungen zur Folge hat, wenn sie nicht vermieden wird. GEFAHR Signalwort zur Kennzeichnung einer Gefährdung mit hohem Risiko, die unmittelbar Tod oder schwere Körperverletzung zur Folge hat, wenn sie nicht vermieden wird. BX100020 05/2014 Art. Nr. 9032037 5 Bedienungs- und Installationsanleitung Installation- and Operation Instruction Nivotemp NT64 / Nivovent NV74 Das Gerät darf nur von Fachpersonal installiert werden, das mit den Sicherheitsanforderungen und den Risiken vertraut ist. Beachten Sie unbedingt die für den Einbauort relevanten Sicherheitsvorschriften und allgemein gültigen Regeln der Technik. Beugen Sie Störungen vor und vermeiden Sie dadurch Personen- und Sachschäden. Der für die Anlage Verantwortliche muss sicherstellen, dass: - Sicherheitshinweise und Betriebsanleitungen verfügbar sind und eingehalten werden, - Unfallverhütungsvorschriften der Berufsgenossenschaften beachtet werden; in Deutschland: BGV A1: Grundsätze der Prävention und BGV A3: Elektrische Anlagen und Betriebsmittel, - die zulässigen Daten und Einsatzbedingungen eingehalten werden, - Schutzeinrichtungen verwendet werden und vorgeschriebene Wartungsarbeiten durchgeführt werden, - bei der Entsorgung die gesetzlichen Regelungen beachtet werden. Wartung, Reparatur: Reparaturen an den Betriebsmitteln dürfen nur von Bühler autorisiertem Personal ausgeführt werden. Nur Umbau-, Wartungs- oder Montagearbeiten ausführen, die in dieser Bedienungs- und Installationsanleitung beschrieben sind. Nur Original-Ersatzteile verwenden. Bei Durchführung von Wartungsarbeiten jeglicher Art müssen die relevanten Sicherheits- und Betriebsbestimmungen beachtet werden. 6 BX100020 05/2014 Art. Nr. 9032037 Bedienungs- und Installationsanleitung Installation- and Operation Instruction Nivotemp NT64 / Nivovent NV74 3 Aufbauen und Anschließen Die Montage und der Anschluss dürfen nur von entsprechend ausgebildeten Fachleuten ausgeführt werden. Die jeweils geltenden Sicherheitsvorschriften des Einsatzortes sind einzuhalten! ! T GEFAHR Giftige, ätzende Gase / Flüssigkeiten Schützen Sie sich bei allen Arbeiten vor giftigen, ätzenden Gasen / Flüssigkeiten. Tragen Sie die entsprechende Schutzausrüstung. Zum direkten Tankaufbau wird das Schaltrohr in die dafür vorgesehene Bohrung (nach DIN 24557, Teil2) mit der GI-Korkdichtung eingesetzt. Die Befestigung erfolgt mit den beiliegenden Schrauben und Dichtungen am DIN-Flansch. Der Schwimmer muss sich frei bewegen und genügend Abstand zur Behälterwand und anderen Einbauten einhalten. Nach einer Demontage des Schwimmers muss der Magnet im Schwimmer beim erneuten Einbau oberhalb des Flüssigkeitsspiegels liegen. Kontrollieren Sie die Lage des Magneten mit einem Eisenstück. Die Nennspannung beträgt 24 V DC. Der Anschluss erfolgt über einen Steckverbinder. Die Anschlussbelegung finden Sie im Anhang. Die Niveaukontakte sind gemäß Bestellung als Schließer, Öffner oder Wechsler ausgeführt und in der angegebenen Lage montiert. Sowohl die Lage als auch die Schaltfunktion können geändert werden. Gehen Sie dazu wie in 3.1 beschrieben vor. Die Kontaktlogik geht davon aus, dass der Niveauschalter bei leerem Tank installiert wird, d. h. er ist erst nach dem Befüllen in der Betriebsposition. Hinweise zum korrekten Betrieb von Reedkontakten in Bühler Niveauschaltern: Reedkontakte sind konstruktionsbedingt sehr langlebige und zuverlässige Bauteile. Trotzdem sollte beim Einsatz folgendes beachtet werden: Lebensdauer von Reedschaltern 9 Die Lebensdauer von Reedschaltern kann bis zu 10 Schaltspiele betragen. Sie wird vermindert durch hohe Belastung und / oder falsche oder nicht vorhandene Schutzbeschaltung beim Schalten von induktiven, kapazitiven oder Lampenlasten. Deswegen ist sicherzustellen, dass NIEMALS, auch nicht kurzzeitig, einer oder mehrere der maximal zulässigen Grenzwerte überschritten werden und dass bei nicht rein ohmschen Lasten eine Kontaktschutzbeschaltung angebracht wird. Auch die Anwendung von Prüflampen bei der Installation der Geräte ist nicht zulässig, da durch diese kurzfristig ein zu hoher Strom fließen kann, welcher die Reedkontakte beschädigen kann. Hier sollte man auf jeden Fall leistungslose Prüfmittel verwenden. BX100020 05/2014 Art. Nr. 9032037 7 Bedienungs- und Installationsanleitung Installation- and Operation Instruction Nivotemp NT64 / Nivovent NV74 Kontaktschutzbeschaltungen für Reedschalter Bei Gleichspannung sollte eine Freilaufdiode nach Bild A parallel zum Kontakt angeschlossen werden. Bei Wechselspannung sollte ein RC Glied nach Bild B und Tabelle 1 parallel zum Kontakt angeschlossen werden. A B + Kontakt Kontakt ~ ~ Last _ R C RC-Glied Schutzdiode VA Spannung am Kontakt V 24 48 110 230 10 R/Ohm 22 120 470 470 25 C/µF 0,022 0,0047 0,001 0,001 Last R/Ohm 1 22 120 470 50 C/µF 0,1 0,022 0,0047 0,001 R/Ohm 1 1 22 120 75 C/µF 0,47 0,1 0,022 0,0047 R/Ohm 1 1 22 120 100 C/µF 1,0 0,47 0,047 0,022 R/Ohm 1 1 22 120 C/µF 1,0 0,47 0,1 0,022 Spannungen und Ströme Alle Bühler Niveaukontakte mit Reedschaltern können minimale Schaltspannungen von 10 µV und minimale Schaltströme von 1 µA schalten. Es gelten die bei den jeweiligen Kontakttypen angegebenen Maximalwerte. Darum können Niveaukontakte mit Reedschaltern bedenkenlos sowohl für SPS Anwendungen als auch für hohe Belastungen (im Rahmen der Maximalgrenzwerte) eingesetzt werden. Kontaktmaterial Bei allen Reedschaltern in Bühler Niveaukontakten wird Rhodium als Kontaktmaterial im Bereich der eigentlichen Kontaktflächen verwendet. Rhodium hat im Vergleich zu Gold eine erheblich höhere Verschleißfestigkeit gegenüber Kontaktfunken und neigt auch weniger zum Verbrennen und Kleben der Kontaktzungen. Gold wird ausschließlich als Trägermaterial für die nachfolgende Rhodiumschicht benutzt. Der Übergangswiderstand der Kontaktflächen mit Rhodiumbeschichtung im Vergleich zu Goldbeschichtung ändert sich nicht. Wegen der unbestreitbaren Vorteile der Rhodiumbeschichtung im Bereich der Kontaktflächen, gibt es bereits seit Jahren bei keinem Reedschalterhersteller mehr Kontakte mit Goldbeschichtung. 8 BX100020 05/2014 Art. Nr. 9032037 Bedienungs- und Installationsanleitung Installation- and Operation Instruction Nivotemp NT64 / Nivovent NV74 3.1 Verstellen der Niveaukontakte Die vom Schwimmer betätigten Kontakte sind auf einer galvanisch vergoldeten Kontaktleiste mit cm-Skala mit Kunststoffschrauben angebracht. Die Kontaktgehäuse sind verschiedenfarbig ausgeführt und dürfen nur in folgender Reihenfolge auf die Kontaktleiste montiert werden. Von oben nach unten: Öffner / Schließer Wechsler grün weiß gelb schwarz Kontaktleiste cm-Skala auf der Rückseite Kabellose bistabile Niveaukontakte Funktion: fallend Schließer (NC) oder fallend Öffner (NO) rot Abstandsraster 10 mm blau Bei einer anderen Zuordnung können Fehlfunktionen auftreten. Thermoelement TK / PT / KT HINWEIS Die Kunststoffschrauben nur mit maximal 5 cNm festziehen! KONTAKT K10x ÖFFNER/NC SCHLIESSER/NO MAX:24V DC/AC 0;5A 10VA BÜHLER GMBH RATINGEN Funktion NO: Schließer bei steigendem Niveau = Öffner bei fallendem Niveau KONTAKT K10x ÖFFNER/NC SCHLIESSER/NO MAX:24V DC/AC 0;5A 10VA BÜHLER GMBH RATINGEN ! Ändern der Kontaktfunktion NO/NC durch Drehen der Kontakte um 180° F000593x Die Niveaukontakte sind ab Werk nach den Bestelldaten positioniert, können aber nachträglich in einem Raster von 10 mm verstellt werden. Auch die Kontaktfunktion fallend Öffner (NO) oder fallend Schließer (NC) kann durch drehen der Kontaktgehäuse um 180° geändert werden. Auf dem Gehäuse sind zwei Pfeile dargestellt. Der Pfeil, der nach oben zeigt, weist auf die gültige Kontaktfunktion hin. Funktion NC: Öffner bei steigendem Niveau = Schließer bei fallendem Niveau F000275X Die Kontaktlogik geht davon aus, dass der Niveauschalter in einen leeren Tank installiert wird d. h. er ist erst nach dem Befüllen in der Betriebsposition. Der Referenzpunkt für den Niveauschaltpunkt befindet sich in der Mitte des EASYJUST Niveaukontaktes. BX100020 05/2014 Art. Nr. 9032037 9 Bedienungs- und Installationsanleitung Installation- and Operation Instruction Nivotemp NT64 / Nivovent NV74 NT64: Spannungszuführung unterbrechen. Steckverbindungen lösen. Steckersockel abschrauben und zusammen mit dem Adapterstecker und der Kontaktleiste vorsichtig nach oben herausziehen. Die Kunststoffschrauben an den Kontakten lösen und neu positionieren (cm-Skala auf der Rückseite der Kontaktleiste). Mindestabstand: 40 mm. Ggf. Kontaktfunktion durch Drehen um 180° ändern. Die Kunststoffschrauben zur Kontaktbefestigung handfest anziehen. Kontaktleiste wieder in das Schutzrohr schieben und Steckersockel aufschrauben. optional: Temperaturkontakt (TK), Pt100 oder 4 - 20 mA Ausgang Beispiel: Steckverbindung M3 mit Steckersockel Adapterstecker F000259X Niveaukontakte Schaltrohr Kunststoffschrauben Schwimmer Flansch Kontaktleiste NV74: Spannungszuführung unterbrechen. Filterdeckel abschrauben und Filterelement herausnehmen. Die Befestigungsschrauben lösen und Filterbehälter entfernen. Die Schrauben des Flanschdeckels lösen und Deckel mit Deckeldichtung abnehmen. Den Adapterstecker von der Kontaktleiste abziehen und Kontaktleiste vorsichtig nach oben herausnehmen. Die Kunststoffschrauben an den Kontakten lösen und neu positionieren (cm-Skala auf der Rückseite der Kontaktleiste). Mindestabstand: 40 mm. Ggf. Kontaktfunktion durch Drehen um 180° ändern. Die Kunststoffschrauben zur Kontaktbefestigung handfest anziehen. Kontaktleiste wieder in das Schutzrohr schieben. Adapterstecker wieder richtig herum auf die Kontaktleiste aufstecken. Die Markierungen am Adapterflansch und an der Kontaktleiste müssen übereinander liegen. Flanschdeckel inkl. Dichtung befestigen. Filterbehälter befestigen, Filtereinsatz einsetzen und Filterdeckel anschrauben. Beispiel: Filterdeckel mit -behälter und Dichtung optional TemperaturFlanschdeckel und kontakt (TK) oder Pt100 -dichtung Niveaukontakte Beispiel: Steckverbindung M3 mit Steckersockel Adapterstecker F000261D Filterelement 10 Kunststoffschrauben BX100020 05/2014 Schaltrohr Kontaktleiste Art. Nr. 9032037 Flansch Schwimmer Bedienungs- und Installationsanleitung Installation- and Operation Instruction Nivotemp NT64 / Nivovent NV74 3.2 Nachträgliche Montage eines Temperaturfühlers Bei Bedarf kann der Temperaturfühler nachgerüstet werden. Wenden Sie sich in diesem Fall an unseren Service oder Ihre lokale Vertretung. Halten Sie dazu bitte die Daten des Typenschildes bereit. 4 Wartung Das Gerät arbeitet wartungsfrei. Nur NV74: Das Filterelement muss bei Bedarf, mindestens 1x jährlich gewechselt werden. In Ausnahmefällen kann über den Filter eine kleine Menge Öl nachgefüllt werden. 4.1 Filterelement wechseln Zum Wechsel des Filterelements gehen Sie folgendermaßen vor: Öffnen Sie den Filterdeckel durch Drehen gegen den Uhrzeigersinn. Entnehmen Sie das Filterelement und entsorgen Sie es gemäß den gesetzlichen Vorschriften. Setzen Sie das neue Filterelement ein. Achten Sie dabei unbedingt auf die richtige Filterfeinheit! Schrauben Sie den Filterdeckel wieder auf. Bei Filtern mit optischer Verschmutzungsanzeige: Stellen Sie die Anzeige durch Drücken der gelben Reset-Taste auf Null. 4.2 Nachfüllen kleiner Ölmengen Nur mit Option BFA oder SSR Öffnen Sie den Filterdeckel durch Drehen gegen den Uhrzeigersinn. Füllen Sie über die Nierenlöcher langsam Öl nach. Setzen Sie das Filterelement wieder ein und schließen Sie den Deckel. BX100020 05/2014 Art. Nr. 9032037 11 Bedienungs- und Installationsanleitung Installation- and Operation Instruction Nivotemp NT64 / Nivovent NV74 5 Service und Reparatur ! VORSICHT Risiko durch fehlerhaftes Gerät Schalten Sie das Gerät aus und trennen Sie es vom Netz. Beheben Sie Störungen am Gerät umgehend. Das Gerät darf bis zur Beseitigung der Störung nicht mehr in Betrieb genommen werden. Sollte ein Fehler beim Betrieb auftreten, wenden Sie sich bitte an unseren Service: Tel.: +49-(0)2102-498955 oder Ihre zuständige Vertretung. Halten Sie dazu bitte die Daten des Typenschildes bereit. Ist nach Beseitigung eventueller Störungen und nach Einschalten der Netzspannung die korrekte Funktion nicht gegeben, muss das Gerät durch den Hersteller überprüft werden. Bitte senden Sie das Gerät zu diesem Zweck in geeigneter Verpackung an: Bühler Technologies GmbH - Reparatur/Service Harkortstraße 29 40880 Ratingen Deutschland Bringen Sie zusätzlich die Dekontaminierungserklärung ausgefüllt und unterschrieben an der Verpackung an. Ansonsten ist eine Bearbeitung Ihres Reparaturauftrages nicht möglich! Das Formular kann per E-Mail angefordert werden: [email protected]. 5.1 Entsorgung Bei der Entsorgung sind die gesetzlichen Vorschriften des Anwenderlandes zu beachten, insbesondere die Vorschriften für die Entsorgung von elektronischen Bauteilen. 6 Beigefügte Dokumente - Konformitätserklärung KX100020 - Dekontaminierungserklärung 12 BX100020 05/2014 Art. Nr. 9032037 Bedienungs- und Installationsanleitung Installation- and Operation Instruction Nivotemp NT64 / Nivovent NV74 1 Introduction The level switches Nivotemp NT64 and Nivovent NV74 are designed for level- and temperature control in fluid systems. Depending on the model, the following configurations are available: Up to four switching outputs for level control or Up to three switching outputs for level control plus one switching output for temperature control or Up to three switching outputs plus Pt100 (RTD) or Up to three switching outputs for level control plus one analogue output for temperature control The following options are available: SSR stilling tube with support ring: The stilling tube is made of the same material as the immersion tube (MS/VA). With series Nivovent this option includes an additional filling adapter (option BFA). The Nivovent series is equipped with an air breather filter with the following options: VS visual clogging indicator for the air breather filter: analogue underpressure indicator, display range 0.35 bar. BFA filling adapter incl. ribbed flange with sieve insert: this option allows that small oil quantities can be filled via the breather housing. Therefore the corresponding housing is equipped in that version. NT 64Series Nivotemp NT 64 Design MS brass VA float and immersion tube stainless steel Accessories SSR = stilling tube Connector M3 S6 M12 2M12 Temperature Length 280 370 500 TK T50NO T60NO T70NO T80NO = Temperature contact = 50 °C NO = 60 °C NO = 70 °C NO = 80 °C NO T50NC T60NC T70NC T80NC = 50 °C NO = 60 °C NO = 70 °C NO = 80 °C NO Pt 100 = Temperature sensor (RTD) KT = Temperature transmitter No. of level contacts 1-4 Level contact K = NO/NC W = change over BX100020 05/2014 Art. Nr. 9032037 13 Bedienungs- und Installationsanleitung Installation- and Operation Instruction Nivotemp NT64 / Nivovent NV74 NV 74-HYAccessories VS = clogging indicator Series Nivotemp NV 74-HY Optionen BFA** = filling adapter SSR** = stilling tube with filling adapter MT = for Multiterminal MTS = for Multiterminal incl. stilling tube FCT = Fluidcontrolterminal Temperatur Pt 100 = Temperature sensor (RTD) KT = Temperature transmitter Design MS brass VA* float and immersion tube VA Connector M3 S6 M12 2M12 Length (mm) 280 370 500 TK = Temperature contact T50NO = 50°C closer T60NO = 60°C closer T70NO = 70°C closer T80NO = 80°C closer Quantity of level contacts 1-4 T50NC T60NC T70NC T80NC Level contact K = opener / closer W = change over = 50°C opener = 60°C opener = 70°C opener = 80°C opener * not available in combination with option FCT ** not available in combination with the option FCT, MT and MTS 1.1 Functional Description 1.1.1 Level Control Using adjustable level contacts allows the application of standardised immersion tubes in oil tanks of different sizes and geometrical shapes. The switching points are changeable to the requirement of the individual application at any time. The level contacts are placed in closed housings. They are positioned on a gold plated printed circuit board in defined positions on a 10 mm grid. The minimum distance between two contacts is 40 mm. The contacts are designed of closed and colour coded housings. They are positioned on a printed circuit board with gold plated contacts. The colours are used for the coding of the different contacts and assure the allocation of the connector’s assignments. The colour coded housings allows easy assignment to the respective connector pins. The contacts’ function (falling opener fO or falling closer fC) is determined by 180° rotation on the printed circuit board. 1.2 Temperature Control (Option) An adjusted temperature switch (bi-metal, NO or NC), a Pt 100 (RTD) or a 4-20 mA transmitter is fixed at the lower end of the printed circuit board 1.3 Intended Use ! WARNING All types of devices are designed for industrial applications only. They are not designed as safety devices. They must not be used if in case of failure or malfunction safety or health of persons is affected. The device is not suitable for use in hazardous areas with potentially explosive atmosphere. 14 BX100020 05/2014 Art. Nr. 9032037 Bedienungs- und Installationsanleitung Installation- and Operation Instruction Nivotemp NT64 / Nivovent NV74 2 Important advice Please check prior to installation of the device that the technical data matches the application parameters. Check that the delivery is complete as well. Operation of the device is only valid if - the product is used under the conditions described in the installation- and operation instruction, the intended application according to the type plate and the intended use. In case of unauthorized modifications done by the user Bühler Technologies GmbH can not be held responsible for any damage. - the performance limits given in the datasheets and in the installation- and operation instruction are obeyed, - monitoring devices and safety devices are installed properly, - service and repair is carried out by Bühler Technologies GmbH, unless described in this manual, - only original spare parts are used. This manual is part of the equipment. The manufacturer keeps the right to modify specifications without advanced notice. Keep this manual for later use. The following warning signs and signal words are used in this manual: Warning against hazardous situation Warning against possible explosive atmospheres disconnect from mains Warning against electrical voltage Warning against hot surface wear respirator Warning against respiration of toxic gases wear face protection Warning against acid and corrosive substances wear gloves Signal words for warnings: NOTE Signal word for important information to the product CAUTION Signal word for a hazardous situation with low risk, resulting in damage to the device or the property or minor or medium injuries if not avoided. WARNNG Signal word for a hazardous situation with medium risk, possibly resulting in severe injuries or death if not avoided. DANGER Signal word for an imminent danger with high risk, resulting in severe injuries or death if not avoided BX100020 05/2014 Art. Nr. 9032037 15 Bedienungs- und Installationsanleitung Installation- and Operation Instruction Nivotemp NT64 / Nivovent NV74 Installation of the device shall be performed by trained staff only, familiar with the safety requirements and risks. Adhere to all relevant safety regulations and technical indications for the specific installation place. Prevent failures and protect persons against injuries and the device against damage. The person responsible for the system must secure that: - safety and operation instructions are accessible and followed, - local accident prevention regulations and standards are obeyed, - performance data and installation specifications are regarded, - safety devices are installed and recommended maintenance is performed, - national regulations for disposal of electrical equipment are obeyed. Maintenance and repair - Repairs on the device must be carried out by Bühler authorized persons only. - Only perform modifications, maintenance or mounting described in this manual. - Only use original spare parts. During maintenance regard all safety regulations and internal operation instructions. 16 BX100020 05/2014 Art. Nr. 9032037 Bedienungs- und Installationsanleitung Installation- and Operation Instruction Nivotemp NT64 / Nivovent NV74 3 Installation and Connection Installation of the device shall be performed by trained staff only, familiar with the safety requirements and risks. Adhere to all relevant safety regulations and technical indications for the specific installation place. ! DANGER Toxic and corrosive gases Protect yourself during maintenance against toxic / corrosive gases. Use gloves, respirator and face protector under certain circumstances. For direct tank top installation, insert gasket and immersion tube into the flange (dimensioned according to DIN 24557, Part 2). Fix the device with the screws (included in delivery). The float must move freely and must keep enough distance to the walls and to other equipment installed. If the float had been demounted, make sure that the magnet inside the float is placed above the surface. Check its position using a piece of iron. The nominal supply voltage is 24 V DC. The device is connected via a connector on top. Please find the pin assignment in the appendix. The level contacts are designed as NO, NC or change over contacts and are mounted in customized positions. The position as well as the contact function can be changed as described in chapter 3.1. The switching logic assumes that the level switch is installed in an empty vessel, implicating that the operating position is reached after filling the vessel. Information on the correct operation of reed contacts in Bühler level switches Based on their construction, reed contacts are very long lasting and reliable components. Yet the following should be considered when using them: Life of reed switches 9 The life of reed switches reed switches can be up to 10 cycles. This is reduces by high stress and / or incorrect or the absence of protective circuits when switching inductive, capacitive or lamp loads. It’s therefore important to ensure NEVER to exceed one or several of the maximum approved limits, even temporarily, and to install a contact protective circuit for loads which are not purely ohmic. Using test lamps when installing the devices is also prohibited, as these can temporarily allow too much current to flow, which can damage the reed contacts. In this case non-volatile testing equipment should always be used. BX100020 05/2014 Art. Nr. 9032037 17 Bedienungs- und Installationsanleitung Installation- and Operation Instruction Nivotemp NT64 / Nivovent NV74 Contact protective circuits for reed switches Under direct current voltage a recovery diode per figure A should be connected parallel to the contact. Under alternating current voltage an RC circuit per Figure B and Table 1 should be connected parallel to the contact. A + B contact contact ~ ~ load _ R C RC-network Diode VA Voltage at contact V 24 48 110 230 10 R/Ohm 22 120 470 470 load 25 C/µF 0,022 0,0047 0,001 0,001 R/Ohm 1 22 120 470 50 C/µF 0,1 0,022 0,0047 0,001 R/Ohm 1 1 22 120 75 C/µF 0,47 0,1 0,022 0,0047 R/Ohm 1 1 22 120 100 C/µF 1,0 0,47 0,047 0,022 R/Ohm 1 1 22 120 C/µF 1,0 0,47 0,1 0,022 Voltages and currents All Bühler level contacts with reed switch can switch minimal Switching voltages of 10 µV and minimal switching currents of 1 µA. The maximum values specified for the respective contact types apply. Level contact with reed switches can therefore be used for SPS applications as well as for high loads (within the maximum limits) without hesitation. Contact material All reed switches in Bühler level contacts use rhodium as the contact material for the actual contact areas. Compared to gold, rhodium is significantly more wear resistant to contact sparks and the contact blades are also less likely to burn and adhere. Gold is only used as a support material for the ensuing rhodium layer. The contact resistance of rhodium coated contact areas is no different than gold coated. Based on the undeniable advantages of rhodium coating for contact areas, reed switch manufacturers phased out gold plated contacts years ago. 18 BX100020 05/2014 Art. Nr. 9032037 Bedienungs- und Installationsanleitung Installation- and Operation Instruction Nivotemp NT64 / Nivovent NV74 3.1 Adjusting the Contacts The level contacts are mounted on a contact strip with cm-scale inside the stem. The contact housings are colour coded and must be installed according to the following order: From top to bottom: NO / NC change over green white yellow black contact strip cm-scale on the rear side wireless bistable level contacts function: NO or NC red distance: grid 10 mm blue Changing the colour order may result in malfunctions. thermal element TK / PT / KT NOTE The torque for the plastic screws must not exceed 5 cNm! KONTAKT K10x ÖFFNER/NC SCHLIESSER/NO MAX:24V DC/AC 0;5A 10VA BÜHLER GMBH RATINGEN NO contact: closed with rising level = opens with falling level KONTAKT K10x ÖFFNER/NC SCHLIESSER/NO MAX:24V DC/AC 0;5A 10VA BÜHLER GMBH RATINGEN ! changing of contact function NO/NC due to turning the contacts at 180° F000593x The level contacts are positioned as ordered but can be re-adjusted in steps of 10 mm, if required. The contact switching function NO or NC can be inverted as well by turning the contacts through 180°. The housing is marked with two arrows. The one pointing up when mounted indicates the current switching function. NC contact: opens with rising level = closes with falling level F000275X The switching logic assumes that the level switch is installed in an empty vessel, implicating that the operating position is reached after filling the vessel. The reference for the switching point is set to the middle of the EASYJUST level contact. BX100020 05/2014 Art. Nr. 9032037 19 Bedienungs- und Installationsanleitung Installation- and Operation Instruction Nivotemp NT64 / Nivovent NV74 NT64: Disconnect the device from the mains supply. Pull the connector off. Unscrew the connector base and carefully pull out the punched strip with adapter connector. Remove the plastic screws from the contact housing and reposition the housing. (Use the cm-scale on the back of the strip). Regard the minimum distance: 40 mm. If necessary, change the contact function. Tighten the plastic screws hand tight. Insert the contact strip into the tube and remount the connector base. option: temperature contact (TK), Pt100 or 4-20 mA output example: connector M3 with connector socket F000259X level contacts adapter-connector immersion tube plasticscrews float flange contact board NV74: Disconnect the device from the mains supply. Remove filter cover and filter element. Unscrew the fixing screws and remove the filter housing. Remove the flange cover and gasket. Pull the adapter connector off and carefully pull out the punched strip. Remove the plastic screws from the contact housing and reposition the housing. (Use the cm-scale on the back of the strip). Regard the minimum distance: 40 mm. If necessary, change the contact function. Tighten the plastic screws hand tight. Insert the contact strip into the tube. Remount the adapter connector. The markings on the adapter and on the contact strip must fit. Remount the flange cover and gasket. Remount the filter housing, insert the filter element and tighten the filter cover. example: filter cover with housing and gasket flange cover and -gasket optional temperaturecontact (TK) or Pt100 level contacts example: connector M3 with connector socket adapter-connector F000261D filter element plasticscrews contact board switch tube flange float 3.2 Retrofit of a Temperature Sensor If required, it is possible to retrofit a temperature sensor. Please contact our service department or you local agent. Please hold the data of the type plate ready. 20 BX100020 05/2014 Art. Nr. 9032037 Bedienungs- und Installationsanleitung Installation- and Operation Instruction Nivotemp NT64 / Nivovent NV74 4 Maintenance 4.1 Inspection and Service The device works maintenance free. NV74 only: Replace the filter element when clogged, at least once a year. In special cases, a small amount of oil may be refilled via the Nivovent filter. 4.1.1 Replacing the Filter Element To replace the filter element, proceed as follows: Unscrew the filter cover counter clockwise. Remove the filter element and dispose it according the National rules and standards. Insert the new filter element. Make sure that the filter element has got the correct pore size. Close the filter cover. For filters with visual clogging indicator: Reset the display to zero with the reset button 4.2 Refilling small Amounts of Oil With option BFA or SSR only: Unscrew the filter cover counter clockwise. Refill the oil slowly. Insert the filter element and close the cover. BX100020 05/2014 Art. Nr. 9032037 21 Bedienungs- und Installationsanleitung Installation- and Operation Instruction Nivotemp NT64 / Nivovent NV74 5 Service and Repair ! CAUTION Risk due to defective device In case of failure switch off the device immediately and repair the fault. The device should not be turned on again before elimination of the failure. If the device shows irregularities please contact our service department. call +49(0)2102-498955 or your local agent. Please hold the data of the type plate ready. If the device doesn’t work correctly after elimination of failures and turning power on, the device must be checked by the manufacturer. Please ship the device with suitable packing to Bühler Technologies GmbH - Service Harkortstraße 29 40880 Ratingen Germany In Addition, attach the filled in and signed Declaration of Decontamination status to the packing. Otherwise, your repair order cannot be processed! The form can be requested by e-mail to [email protected]. 5.1 Disposal Regard the local regulations for disposal of electric and electronic equipment. 6 Attached Documents - Declaration of Conformity KX100020 - Declaration of Contamination status 22 BX100020 05/2014 Art. Nr. 9032037 Bedienungs- und Installationsanleitung Installation- and Operation Instruction Nivotemp NT64 / Nivovent NV74 7 Anhang 7 Appendix 7.1 Definitionen 7.1 Definitions Die Kontaktlage ist wie folgt definiert: The contact positions are defined as follows: L1 K1 (grün / green) / W1 (weiß / white) L2 L3 K2 (gelb / yellow) / W2 (schwarz / black) L4 K3 (rot / red) K4 (blau / blue) NO = Schließer NC = Öffner NO = normally open NC = normally closed TK = Thermokontakt KT = Temperaturtransmitter PT = Temperatursensor Pt100 TK = Thermal contact KT = Temperature transmitter PT = Temperature sensor Pt100 SSR = Schwallschutzrohr (Option) SSR = stilling tube (option) Hinweis zum Analogausgang (Temperatur): Note for analog output (temperature): Der Analogausgang kann mit maximal +30 V DC beaufschlagt werden. The analog output is supplied with +30 V DC at maximum. BX100020 05/2014 Art. Nr. 9032037 23 Bedienungs- und Installationsanleitung Installation- and Operation Instruction Nivotemp NT64 / Nivovent NV74 7.2 Standard Anschluss7.2 Standard Pin Assignment belegung für NT64 und NV74 for NT64 and NV74 Andere Belegung auf Anfrage Steckverbinder other assignment on request M3 S6/C6 M12 2 x M12 (Sockel / base) (Sockel / base) 2 2 3 Nur Niveaukontakt(e) Typ K L1 1 2 3 PE L2 L1 1 L2 L3 L4 2 1 3 3 4 L1 1 Connector L2 1 4 level contacts only, type K 4 2 3 4 5 6 PE Nur Niveaukontakt(e) Typ W 1 L1 2 1 L1 3 PE L2 2 1 L1 level contacts only, type W 4 3 2 4 3 5 6 PE Niveaukontakt(e) Typ K und Temperatur L1 L1 1 2 1 3 TK / KT L2 L3 PE 5 2 3 4 1 L1 4 TK / KT A L2 B PE 1 L1 L1 1 A 3 3 6 TK / KT / PT 4 1 PE B 2 TK / KT / PT 24 BX100020 05/2014 3 4 2 4 5 Art. Nr. 9032037 level contacts type K and temperature 2 TK / KT / PT Niveaukontakt(e) Typ W und Temperatur 2 4 1 2 4 3 3 6 TK / KT / PT L1 1 2 3 level contacts type W and temperature Bedienungs- und Installationsanleitung Installation- and Operation Instruction Nivotemp NT64 / Nivovent NV74 7.3 Technische Daten 7.3 Technical Data NT64 NV74 Basiseinheit Basic unit max. Betriebsdruck 1 bar / 14.5 psi 1 bar / 14.5 psi max. operating press. Betriebstemperatur -20 °C ... 80 °C ; -4 °F ... 176 °F -20 °C ... 80 °C ; -4 °F ... 176 °F operating temperature mit Kontakt K10HT --- --- Dichte Fluid Density fluid Schwimmer SK 601 0.80 kg/dm³ ; 0.029 lb/in³ 0.80 kg/dm³ ; 0.029 lb/in³ Schwimmer SK 221 0.85 kg/dm³ ; 0.031 lb/in³ 0.85 kg/dm³ ; 0.031 lb/in³ Belüftungsfilter --- HY / Hydac BF7 Filterfeinheit --- 3 µm Ausführung MS pore size PU Messing / brass Messing / brass Flansch PA PA flange Filtergehäuse --- PA filter housing SSR (Option) Messing / brass Messing / brass SSR (Option) Ausführung VA float SK 601 immersion tube Type VA Schwimmer SK 221 1.4571 1.4571 float SK 221 Tauchrohr 1.4571 1.4571 immersion tube PA PA flange Flansch Filtergehäuse --- PA filter housing SSR (Option) 1.4571 1.4571 SSR (Option) Niveaumessung 1) Kontakt-Typ P level measurement / max. Anzahl P Wechsler / max. Anzahl K (NO/NC) / 4 K (NO/NC) / 4 W/2 W/2 Temperaturmessung max. Anzahl Kontakte 1) Temp. Kontakt P P 1) Temp. Transmitter P 1) Temp. Sensor P P float SK221 Air breather filter PU Tauchrohr P float SK 601 Type MS Schwimmer SK 601 1) with contact HT P P type of contact1) / max. no. P P change over contact / max. no. Temperature measurement 1 1 TK TK KT KT Pt100 Pt100 max. number of contacts temperature contact1) P P 1) temp. transmitter P P temperature sensor1) P P Technische Daten der Kontakte siehe 7.4 / for technical data of contacts see chapter 7.4 BX100020 05/2014 Art. Nr. 9032037 25 Bedienungs- und Installationsanleitung Installation- and Operation Instruction Nivotemp NT64 / Nivovent NV74 7.4 Technische Daten Kontakte 7.4 Technical Data of Contacts Niveaukontakt Schaltfunktion max. Spannung max. Schaltstrom max. Kontaktbelastung min. Kontaktabstand K NO / NC 30 V 0.5 A 10 VA 40 mm / 1.57 in Level contact switching function max. voltage max. switching current max. contact load min. contact distance Niveaukontakt Schaltfunktion max. Spannung max. Schaltstrom max. Kontaktbelastung min. Kontaktabstand W Wechsler / change over 30 V 0.5 A 20 VA 40 mm / 1.57 in Level contact switching function max. voltage max. switching current max. contact load min. contact distance Temperaturkontakt Schaltfunktion max. Spannung max. Schaltstrom max. Kontaktbelastung Schaltpunkt in °C Schaltpunkt in °F Schaltpunkttoleranz TK NO / NC 30 V 2.5 A 75 VA 50 / 60 / 70 / 80 122 / 140 / 158 / 176 Temperature contact switching function max. voltage max. switching current max. contact load switching point in °C switching point in °F switching tolerance 3K max. Hysterese 10 K 3 K Temperatursensor Klasse Toleranz Pt100 B, DIN EN 60 751 0,8 K Temperaturtransmitter Fühlerelement / Messwiderstand Messbereich Betriebsspannung UB Ausgang Bürde B 26 B KT Pt100, DIN EN 60751, Klasse B / Class B 0 °C ... 100 °C ; 32 °F ... 212 °F 10 – 30 V DC 4 – 20 mA = (UB – 7,5 V) / 0.02 A B B BX100020 05/2014 Art. Nr. 9032037 max. hysteresis Temperature sensor class tolerance Temperature transmitter sensor element / resistor measuring range operating voltage UB output load B B Bedienungs- und Installationsanleitung Installation- and Operation Instruction Nivotemp NT64 / Nivovent NV74 7.5 Abmessungen 7.5 Dimensions NT64 NV74 65 4 35 90 SK601 L1=min.50 L = 280 / 370 / 500 mm erster Kontakt first contact ø50 (MS) ø60.3 (VA) letzter Kontakt last contact 23 GI-Korkdichtung GI-cork gasket L2=min.90 4 8 bei VA mit SSR for VA with stilling tube BFA Befülladapter filling adapter Schwallschutzrohr (Option) stilling tube (option) F000 59 3x L2= min 70 44 SSR Schwallschutzrohr mit Zentrierscheibe und Befülladapter stilling tube with support ring and filling adapter 3,5 3.5 letzter Kontakt last contact ø44 6x 6 BX100020 05/2014 90 73 Flange according to DIN 24557 / Part 2 61 Flanschbild nach DIN 24557 / Teil 2 5 L1= min 40 erster Kontak t first contact GI-Korkdichtung GI-cork gasket min. 60 L=280 / 370 / 500 65 VS Verschmutzungsanzeige clogging indicator Art. Nr. 9032037 27 Dekontaminierungserklärung Declaration of Contamination status Gültig ab / valid since: 2011/05/01 Revision 0 ersetzt Rev. / replaces Rev --- Die gesetzlichen Vorschriften schreiben vor, dass Sie uns die Dekontaminierungserklärung ausgefüllt und unterschrieben zurück zu senden haben. Die Angaben dienen zum Schutz unserer Mitarbeiter. Bringen Sie die Bescheinigung an der Verpackung an. Ansonsten ist eine Bearbeitung Ihres Reparaturauftrages nicht möglich! Legal regulations prescribe that you have to fill in and sign the Declaration of Contamination status and send it back. This information is used to protect our employees. Please attach the declaration to the packing. Otherwise, your repair order cannot be processed. Gerät / Device: Serien-Nr. / Serial no. : Rücksendegrund / Reason for return: [ ] Ich bestätige hiermit, dass das oben spezifizierte Gerät ordnungsgemäß gereinigt und dekontaminiert wurde und keinerlei Gefahren im Umgang mit dem Produkt bestehen. I herewith declare that the device as specified above has been properly cleaned and decontaminated and that there are no risks present when dealing with the device. Ansonsten ist die mögliche Gefährdung genauer zu beschreiben / In other cases, please describe the hazards in detail: Aggregatzustand (bitte ankreuzen) / Condition of aggregation (please check): Flüssig / Liquid Fest / Solid Pulvrig / Powdery Gasförmig / Gaseous Folgende Warnhinweise sind zu beachten (bitte ankreuzen) / The following safety advices must be obeyed (please check): Explosiv Explosives Giftig / Tödlich Acute toxicity Entzündliche Stoffe Flammable Brandfördernd Oxidizing Komprimierte Gase Gas under pressure Gesundheitsgefährdend Irritant toxicity Gesundheitsschädlich Health hazard Umweltgefährdend Environmental hazard Bitte legen Sie ein aktuelles Datenblatt des Gefahrenstoffes bei / Please include the current material safety data sheet of the hazardous material! Angaben zum Absender / Information about the dispatcher: Firma / Company: Anschrift / Address: Ansprechpartner / Contact person: Abteilung / Division: E-Mail: Tel. / Phone: Fax: Ort, Datum / Location, date: Unterschrift / Stempel Signature / Stamp: Bühler Technologies GmbH D - 40880 Ratingen, Harkortstr. 29 Tel.: + 49 (0) 2102 / 4989-0 Fax: + 49 (0) 2102 / 4989-20 e-mail: [email protected] Internet: www.buehler-technologies.com