1
Allgemeine Hinweise
Folgende Symbole werden Sie durch die Anleitung begleiten:
Hinweis, Tipp !
Allgemeiner Hinweis, Unbedingt beachten !
Voraussetzung für eine erfolgreiche Inbetriebnahme sind eine korrekte Geräteauswahl, Projektierung und Montage. Sollten
Sie in diesem Zusammenhang weitere Fragen haben, so wenden Sie sich bitte an den Lieferanten des Gerätes.
Kondensatorentladung !
Vor Arbeiten am Gerät ist nach dem Freischalten vom Netz die Kondensatorentladezeit von mindestens 15 Minuten abzuwarten, um sicherzustellen, dass das Gerät völlig spannungsfrei ist.
Automatischer Wiederanlauf !
Bei bestimmten Parametereinstellungen kann es vorkommen, dass der Frequenzumrichter nach einem Ausfall und
anschließender Netzzuschaltung automatisch wieder anläuft. Stellen Sie sicher, dass dadurch weder Personen noch
Einrichtungen gefährdet sind.
Inbetriebnahme und Service !
Arbeiten am Gerät dürfen nur von dafür qualifizierten Personen unter Beachtung der gültigen Bedienungsanleitung und
Vorschriften erfolgen. Im Fehlerfall können auch betriebsmäßig potentialfreie Kontakte und/oder Baugruppen gefährliche
Spannungen führen. Um eine Gefährdung auszuschließen, sind die Vorschriften "Arbeiten unter Spannung" zu beachten.
Lieferbedingungen
Unseren Lieferungen und Leistungen liegen die "Allgemeinen Lieferbedingungen der Elektro- und Elektronikindustrie
Österreichs" neuester Ausgabe zugrunde.
Angaben in diesem Dokument
Es ist unser Bestreben, unsere Erzeugnisse ständig zu verbessern und jeweils dem neuesten Stand der technischen
Entwicklung anzupassen. Änderungen der Angaben in diesem Dokument, insbesondere von Massen und Abmessungen,
bleiben daher jederzeit vorbehalten. Die Projektierungshinweise und Anschlussbeispiele sind unverbindliche Vorschläge, für
die wir insbesondere deshalb keine Gewähr übernehmen können, da die anzuwendenden Bestimmungen von Art und Ort
der Installation und Verwendung der Geräte abhängen.
Alle fremdsprachigen Übersetzungen entstehen auf Basis der deutschen oder englischen Version. Bei Unklarheiten ist
daher auf diese zurückzugreifen.
Vertragsgrundlage
Die Angaben in Texten und Grafiken dieses Dokumentes stellen ohne ausdrückliche Bestätigung durch unser Unternehmen
keinen Vertragsgegenstand im rechtlichen Sinne dar.
Vorschriften
Der Anwender hat sicherzustellen, dass das Gerät sowie zugehörige Komponenten nach den jeweils gültigen Vorschriften
verwendet werden. Der Einsatz dieser Geräte in Wohngebieten ist ohne besondere Maßnahmen zur Funkfrequenzentstörung nicht zulässig.
Schutzrechte
Wir bitten zu beachten, dass keine Gewähr dafür übernommen wird, dass die hier beschriebenen Schaltungen, Geräte und
Verfahren frei von Schutzrechten sind.
Copyright
Layout, Ausstattung, Logos, Texte, Graphiken und Bilder dieses Dokumentes sind urheberrechtlich geschützt. Alle Rechte
bleiben vorbehalten.
Vor der Inbetriebnahme
DEUTSCH ...............................................................1
Vor der Inbetriebnahme.................................................. 2
Sicherheit ................................................................................2
Vorgangsweise ........................................................................3
Einleitende Empfehlungen .......................................................4
Installation des Umrichters ......................................................6
Empfehlungen zur Verdrahtung.............................................10
Inbetriebnahme ............................................................ 23
Vorgangsweise ......................................................................23
Werkseinstellung ...................................................................25
Getrennte Versorgung des Steuerteils ..................................25
Leistungssteuerung über Netzschütz ....................................26
Anlauf ....................................................................................26
Test mit einem Motor mit geringer Leistung oder
ohne Motor, Parallelbetrieb von Motoren ..............................26
Grafikterminal ........................................................................27
Fehlerursachen & -behebung ................................................34
ENGLISCH ............................................................43
FRANZÖSISCH ......................................................85
1
Vor der Inbetriebnahme
Vor der Inbetriebnahme
Sicherheit
Lesen Sie diese Anweisungen sorgfältig durch, bevor Sie den Frequenzumrichter einsetzen und
beachten Sie unbedingt nachfolgende Sicherheitshinweise !
GEFAHR
BERÜHRUNGSSPANNUNGEN
• Lesen Sie diese Anleitung vollständig und sorgfältig durch, bevor Sie den Frequenzumrichter
installieren und in Betrieb setzen. Installation, Einstellung und Reparaturen müssen durch
qualifiziertes Personal erfolgen.
• Es unterliegt der Verantwortung des Betreibers, dass die Schutzerdung aller Geräte den geltenden
internationalen und nationalen Normen bezüglich elektrischer Geräte entspricht.
• Zahlreiche Komponenten des Frequenzumrichters, einschließlich der gedruckten Schaltungen,
werden mit Netzspannung versorgt. Berühren Sie diese Komponenten nicht.
Verwenden Sie nur elektrisch isolierte Werkzeuge.
• Berühren Sie keine ungeschirmten Komponenten oder Klemmenschrauben, wenn das Gerät unter
Spannung steht.
• Schließen Sie die Klemmen PA/+ und PC/- oder die Kondensatoren des DC-Zwischenkreises nicht
kurz.
• Montieren Sie alle Abdeckungen und schließen Sie diese, bevor Sie den Umrichter unter Spannung
setzen.
• Führen Sie vor jeglicher Wartung oder Reparatur am Frequenzumrichter folgende Arbeiten aus:
− Unterbrechen Sie die Spannungsversorgung.
− Bringen Sie am Leistungs- oder Trennschalter des Frequenzumrichters ein Schild mit dem
Vermerk "NICHT EINSCHALTEN" an.
− Verriegeln Sie den Leistungs- oder Trennschalter in der geöffneten Stellung.
• Trennen Sie den Frequenzumrichter vor jeglichen Arbeiten vom Netz und gegebenenfalls auch die
externe Versorgung des Steuerteils. Warten Sie, bis die Ladungsanzeige des Umrichters vollständig
erloschen ist. Messen Sie die Spannung des DC-Zwischenkreises, um zu überprüfen, ob die
Gleichspannung unter 45 V liegt. Die LED des Frequenzumrichters zur Anzeige vorhandener
Spannung am DC-Zwischenkreis ist nicht präzise genug.
Eine Nichtbeachtung dieser Vorkehrungen wird zum Tod oder schwerwiegenden Verletzungen führen.
VORSICHT
UNSACHGEMÄSSER BETRIEB DES UMRICHTERS
• Voraussetzung für eine erfolgreiche Inbetriebnahme sind eine korrekte Geräteauswahl, Projektierung
und Montage.
• Wenn der Umrichter längere Zeit nicht eingeschaltet war, ist die Leistung seiner Elektrolytkondensatoren herabgesetzt.
• Schalten Sie im Fall eines längeren Betriebsstillstands den Umrichter mindestens alle zwei Jahre und
dann jeweils mindestens fünf Stunden lang ein, um die Leistung der Kondensatoren wiederherzustellen und den Betrieb des Umrichters zu überprüfen. Es ist empfehlenswert, den Umrichter nicht
direkt an die Netzspannung anzuschließen, sondern die Spannung stufenweise mit Hilfe eines
Spartransformators zu erhöhen.
Eine Nichtbeachtung dieser Vorkehrungen kann Materialschäden zur Folge haben.
2
Vor der Inbetriebnahme
Vorgangsweise
1. Empfang des Frequenzumrichters
■ Überprüfen Sie, ob die Angaben auf dem Typenschild mit denen auf dem Bestellschein übereinstimmen.
■ Öffnen Sie die Verpackung und stellen Sie sicher, dass der Altivar Frequenzumrichter während des
Transports nicht beschädigt wurde.
2. Prüfung der Netzspannung
■ Stellen Sie sicher, dass die Netzspannung mit dem zulässigen Spannungsbereich des Umrichters
kompatibel ist.
3. Montage des Frequenzumrichters (Seite 6)
■ Stellen Sie den Schaltschrank unter Beachtung der in diesem Dokument angegebenen Empfehlungen auf.
4. Verkabelung des Frequenzumrichters (Seite 10)
■ Schließen Sie den Motor an und achten Sie darauf, dass die Motorschaltung der Netzspannung
entspricht.
■ Schließen Sie das Versorgungsnetz an, nachdem Sie sichergestellt haben, dass es nicht unter
Spannung steht.
■ Schließen Sie die Steuerleitungen an.
5. Inbetriebnahme
■ Nehmen Sie den Frequenzumrichter anhand der auf Seite 23 angeführten Vorgangsweise in
Betrieb.
3
Vor der Inbetriebnahme
Einleitende Empfehlungen
Verantwortlichkeit
Es liegt in der Verantwortlichkeit des Anwenders, die Frequenzumrichter in das Schutz- und
Sicherheitskonzept der Anlage oder Maschine einzubinden.
Alle angeführten Schaltungsempfehlungen und Projektierungshinweise sind daher lediglich als Vorschläge
zu verstehen, die an die örtlichen Gegebenheiten und Bestimmungen hinsichtlich Installation und
Verwendung angepasst werden müssen.
Dies trifft im Besonderen auf die Sicherheitsvorschriften für Maschinen, die EMV-Vorschriften und die
allgemeinen Personenschutzbestimmungen zu.
CE-Kennzeichnung
Alle Geräte und Anlagen der elektrischen Antriebstechnik können elektromagnetische Störungen
verursachen und durch solche gestört werden. Sie fallen daher seit 1.1.1996 in den Geltungsbereich der
EMV-Richtlinie 2004/108/EG.
Die Frequenzumrichter haben eine Betriebsnennspannung, welche eindeutig im Bereich von
50...1000 V AC bzw. 75...1500 V DC liegt. Sie fallen daher seit 1.1.1997 auch in den Geltungsbereich der
Niederspannungsrichtlinie 2006/95/EG.
Durch die in den Frequenzumrichtern eingebauten Funkentstörfilter ist die Konformität mit EN 61800-3
und EN 61800-5-1 gewährleistet.
Frequenzumrichter sind jedoch nicht als Maschinen mit mindestens einem mechanisch beweglichen Teil
zu sehen. Sie fallen daher nicht in den Geltungsbereich der Maschinenrichtlinie 2006/42/EG.
Frequenzumrichter sind ein Produkt der eingeschränkten Vertriebsklasse nach IEC 61800-3. In
einer Wohnumwelt kann dieses Produkt hochfrequente Störungen verursachen, woraufhin der
Anwender aufgefordert werden kann, geeignete Maßnahmen zu ergreifen.
Die Frequenzumrichter tragen eine CE-Kennzeichnung am Leistungsschild. Um die entsprechenden
Grenzwerte zu erreichen, ist es jedoch notwendig, die Installationsvorschriften einzuhalten.
Handhabung und Lagerung
Um den Schutz des Frequenzumrichters vor der Montage sicherzustellen, sollte das Gerät im verpackten
Zustand bewegt und gelagert werden. Stellen Sie sicher, dass die Umgebungsbedingungen zulässig sind.
Lagertemperatur -25°C bis 70°C
Wenn der Umrichter längere Zeit nicht eingeschaltet war, ist die Leistung seiner Elektrolytkondensatoren
herabgesetzt. Aufgrund des "Active Balancing Systems" ist jedoch keine spezielle Behandlung des
Frequenzumrichters notwendig, wenn die maximale Lagerzeit nicht überschritten wurde:
• 12 Monate bei einer maximalen Lagertemperatur von +50°C
• 24 Monate bei einer maximalen Lagertemperatur von +45°C
• 36 Monate bei einer maximalen Lagertemperatur von +40°C
Nach Überschreiten der maximalen Lagerzeit ist es notwendig, den Umrichter vor der
Inbetriebnahme etwa eine Stunde an Netzspannung zu legen (Formieren der ELKOs), bevor eine
Impulsfreigabe erfolgt. Wir empfehlen, diesen Vorgang bereits nach 6 Monaten Stillstandszeit
durchzuführen.
4
Vor der Inbetriebnahme
WARNUNG
BESCHÄDIGTE VERPACKUNG
Wenn ein Verdacht auf Beschädigung vorliegt, kann sich das Öffnen bzw. der Transport des verpackten
Geräts als gefährlich erweisen. Führen Sie Vorgänge dieser Art nur nach Ergreifung aller erforderlichen
Sicherheitsvorkehrungen durch, um jegliches Risiko zu vermeiden.
Eine Nichtbeachtung dieser Vorkehrung kann zum Tod oder schwerwiegenden Verletzungen führen
und/oder Materialschäden zur Folge haben.
GEFAHR
BESCHÄDIGTES GERÄT
Installieren Sie den Umrichter nicht und nehmen Sie ihn nicht in Betrieb, wenn er beschädigt ist.
Eine Nichtbeachtung dieser Vorkehrung wird zum Tod oder schwerwiegenden Verletzungen führen
und/oder Materialschäden zur Folge haben.
Der Hersteller trägt keine Verantwortung für Schäden, die während des Transportes oder beim
Auspacken entstanden sind. Bitte informieren Sie in diesem Fall die Versicherungsgesellschaft.
Transport / Aufstellung
Der Frequenzumrichter wird in Karton verpackt stehend auf einer Palette geliefert.
Entfernen Sie die Spannbänder und lösen Sie die Befestigungsschrauben des
Umrichters auf der Palette erst nach Erreichen der endgültigen Position.
Nachdem der Schaltschrank aufgestellt wurde, muss dieser mit dem Boden verschraubt werden!
Für eine optimale Handhabung mit Hebezeug sind die Umrichter mit Transportösen ausgestattet.
VORSICHT
ERHÖHTE KIPPGEFAHR
Der Schaltschrank darf nicht ohne Spannbänder und fester Verschraubung mit
der Palette mit einem Gabelstapler transportiert werden. Es besteht erhöhte
Kippgefahr!
Eine Nichtbeachtung dieser Vorkehrung kann zu Verletzungen führen
und/oder Materialschäden zur Folge haben.
5
Vor der Inbetriebnahme
Installation des Umrichters
Der Frequenzumrichter wird anschlussfertig in einem Schaltschrank geliefert.
Vorsichtsmaßnahmen
VORSICHT
NETZSPANNUNG NICHT KOMPATIBEL
Bevor Sie den Umrichter einschalten und konfigurieren, stellen Sie sicher, dass die Netzspannung mit
der Versorgungsspannung des Umrichters kompatibel ist. Bei nicht kompatibler Netzspannung kann der
Umrichter beschädigt werden.
Eine Nichtbeachtung dieser Vorkehrung kann zu Verletzungen führen und/oder Materialschäden zur
Folge haben.
WARNUNG
UNERWARTETER BETRIEB DES GERÄTS
• Bevor Sie den Frequenzumrichter einschalten und konfigurieren, stellen Sie sicher, dass der Eingang
PWR (POWER REMOVAL) deaktiviert ist (Zustand 0), um einen unvorhergesehenen Neustart zu
vermeiden.
• Stellen Sie vor dem Einschalten oder beim Verlassen des Konfigurationsmenüs sicher, dass die den
Fahrbefehlen zugeordneten Eingänge deaktiviert sind (Zustand 0), da diese sofort das Anlaufen des
Motors bewirken könnten.
Eine Nichtbeachtung dieser Vorkehrungen kann zum Tod oder schwerwiegenden Verletzungen führen.
Wenn für die Sicherheit des Bedienpersonals ein unkontrolliertes Wiederanlaufen ausgeschlossen
werden muss, wird die elektronische Verriegelung durch die Funktion "Power Removal" des
Frequenzumrichters sichergestellt. Diese Funktion bedingt die Verwendung eines Verdrahtungsschemas, das den Anforderungen der Kategorie 3 gemäß Norm EN 954-1 und dem Sicherheitsniveau 2 gemäß IEC/EN 61508 entspricht (weitere Informationen finden Sie im Katalog oder auf
der mit dem Umrichter gelieferten CD-ROM).
Die Power-Removal-Funktion (PWR) hat vor jedem Fahrbefehl Priorität.
Funkstörungen
Die Frequenzumrichter haben standardmäßig ein integriertes Funkentstörfilter. Dieses Filter erfüllt die
Anforderungen der Kategorie "C3 – Industriebereich" entsprechend EN/IEC 61800-3 (früher: EN 55011
Klasse A Gruppe 2).
Frequenzumrichter sind ein Produkt der eingeschränkten Vertriebsklasse nach IEC 61800-3. In einer
Wohnumwelt kann dieses Produkt hochfrequente Störungen verursachen, woraufhin der Anwender
aufgefordert werden kann, geeignete Maßnahmen zu ergreifen.
Blindstromkompensationsanlagen
Frequenzumrichter rufen im speisenden Netz Stromoberschwingungen hervor. Ist eine Blindstromkompensationsanlage im Einsatz, werden deren Kondensatoren durch die Oberschwingungen zusätzlich
belastet.
Zum Schutz vor Überlastung wird daher die Verdrosselung dieser Anlagenteile empfohlen.
6
Vor der Inbetriebnahme
Entladung der Kondensatoren
Schalten Sie den Frequenzumrichter vor der Durchführung von Arbeiten aus und warten Sie, bis die
Kondensatoren entladen sind. Messen Sie dann die Spannung des Zwischenkreises.
Messung der Spannung am Zwischenkreis
Die Spannung des Zwischenkreises kann 800 V DC (bei 690 V: 1000 V DC) überschreiten.
Messen Sie die Spannung des Zwischenkreises wie nachfolgend beschrieben mit einem geeigneten
Messgerät:
1. Unterbrechen Sie die Spannungsversorgung.
2. Warten Sie 15 Minuten, damit sich die Kondensatoren des Zwischenkreises entladen können.
3. Messen Sie die Spannung des DC-Zwischenkreises zwischen den Klemmen PA/+ und PC/-, um zu
überprüfen, ob die Spannung unter 45 V DC liegt.
Wenn sich die Kondensatoren des Zwischenkreises nicht vollständig entladen, wenden Sie sich
an Ihre lokale Vertretung (den Umrichter weder reparieren noch in Betrieb setzen).
GEFAHR
BERÜHRUNGSSPANNUNGEN
Lesen Sie die auf Seite 2 beschriebenen Vorsichtsmaßnahmen sorgfältig durch, bevor Sie dieses
Verfahren durchführen.
Eine Nichtbeachtung dieser Vorkehrungen wird zum Tod oder schwerwiegenden Verletzungen führen.
Isolationsmessungen
Alle Frequenzumrichter sind bezüglich Spannungsfestigkeit und Isolationswiderstand laut EN 61800-5-1
geprüft. Bei Isolationswiderstandsmessungen für diese Geräte (z.B. im Rahmen einer Inspektion) müssen
folgende Punkte beachtet werden:
1. Es müssen alle Leistungsklemmen des Umrichters (L1, L2, L3, U, V, W, PO, PA/+, PB, PC/-)
kurzgeschlossen werden.
2. Das interne EMV-Filter muss deaktiviert sein!
3. Isolationswiderstandsmessungen dürfen nur zwischen den kurzgeschlossenen Leistungsklemmen
und Erde durchgeführt werden.
4. Prüfspannung: ATV71EX●●●●●N4:
max. 2,8 kV DC
ATV71EX●●●●●N, Y: max. 3,11 kV DC
5. Vor einer Isolationswiderstandmessung des Motors muss der Motor vom Umrichter durch
Abklemmen oder durch Öffnen des Motorschützes sicher getrennt werden. Bei Nichtbeachtung
wird der Umrichter beschädigt !
Verwenden Sie ein Prüfgerät, welches für Prüfungen mit hohen Kapazitäten und Ableitströmen bis
10 mA geeignet ist.
Nehmen Sie keine Isolationswiderstandsmessungen an den Steuerklemmen vor !!!
7
Vor der Inbetriebnahme
Verlustleistung
Diese Leistungen gelten für einen Betrieb mit Nennlast sowie für eine Taktfrequenz von 2,5 kHz.
Die Umrichterschaltschränke verfügen je nach Ausführung und Schutzart über Lüfter, welche die Kühlung
der Komponenten gewährleisten. Hier wird die Kühlluft in der Schranktür angesaugt und durch das Dach
des Schaltschrankes wieder abgegeben.
ATV71EX●●
D90N4
C11N4
C13N4
C16N4
C20N4
C25N4
C28N4
C31N4
C40N4
C50N4
ATV71EXA●
C50N4
C63N4
C71N4
C90N4
M11N4
M13N4
8
Verlustleistung
[W]
2590
2950
3450
4130
5330
6380
7350
8060
10080
12330
Verlustleistung
[W]
11400
14300
16200
19800
24000
29000
ATV71EX●●
D90N
C11N
C13N
C16N
C20N
C25N
C31N
C40N
C50N
ATV71EXA●
C50N
C63N
C80N
C90N
M11N
M13N
M15N
Verlustleistung
[W]
2700
3210
3820
4560
5820
7180
8730
11030
13700
Verlustleistung
[W]
10700
13200
16100
20100
24700
29200
32000
ATV71EX●●
C11Y
C13Y
C16Y
C20Y
C25Y
C31Y
C40Y
C50Y
C63Y
ATV71EXA●
C63Y
C80Y
M10Y
M12Y
M15Y
M18Y
M20Y
Verlustleistung
[W]
2740
3250
3880
4640
5950
7310
8900
11230
13960
Verlustleistung
[W]
12700
15800
19200
23800
29500
35000
382000
Vor der Inbetriebnahme
Luftstrom
Der Leistungsverlust des Umrichters muss aus dem Schaltschrank ins Freie abgeleitet werden. Um eine
ausreichende Luftzirkulation zu gewährleisten ist sicherzustellen, dass der Luftstrom für jeden Umrichter
mindestens dem angegebenen Wert in der folgenden Tabelle entspricht.
Die Geräte ATV71EXA● sind zum einfachen Anschluss an eine Luftabsaugung vorbereitet.
ATV71EXC●
D90N4
C11N4
C13N4
C16N4
C20N4
C25N4
C28N4
C31N4
C40N4
C50N4
ATV71EXS5
D90N4
C11N4
C13N4
C16N4
C20N4
C25N4
C28N4
C31N4
C40N4
C50N4
ATV71EXA●
C50N4
C63N4
C71N4
C90N4
M11N4
M13N4
Luftstrom
[m³/h]
400
600
600
800
1200
1200
1200
1800
1800
2400
Luftstrom
[m³/h]
500
700
750
950
1400
1400
1400
2200
2200
3000
Luftstrom
[m³/h]
5500
5500
11000
11000
11000
11000
ATV71EXC●
D90N
C11N
C13N
C16N
C20N
C25N
C31N
C40N
C50N
ATV71EXS5
D90N
C11N
C13N
C16N
C20N
C25N
C31N
C40N
C50N
ATV71EXA●
C50N
C63N
C80N
C90N
M11N
M13N
M15N
Luftstrom
[m³/h]
600
600
600
1200
1200
1200
2400
2400
2400
Luftstrom
[m³/h]
600
600
600
1200
1200
1200
2400
2400
2400
Luftstrom
[m³/h]
5500
5500
5500
11000
11000
11000
11000
ATV71EXC●
C11Y
C13Y
C16Y
C20Y
C25Y
C31Y
C40Y
C50Y
C63Y
ATV71EXS5
C11Y
C13Y
C16Y
C20Y
C25Y
C31Y
C40Y
C50Y
C63Y
ATV71EXA●
C63Y
C80Y
M10Y
M12Y
M15Y
M18Y
M20Y
Luftstrom
[m³/h]
600
600
600
1200
1200
1200
2400
2400
2400
Luftstrom
[m³/h]
600
600
600
1200
1200
1200
2400
2400
2400
Luftstrom
[m³/h]
5500
5500
5500
11000
11000
11000
11000
9
Vor der Inbetriebnahme
Empfehlungen zur Verdrahtung
Schutzerdung
Der Umrichter muss unbedingt an die Schutzerde angeschlossen werden. Um den geltenden Vorschriften
zu genügen, verwenden Sie einen Schutzleiter mit mindestens dem halben Querschnitt der Leiter für die
Versorgung der Leistungsklemmen.
Zum Anschluss des Schutzleiters steht eine gekennzeichnete Klemme (Schiene) im Schaltschrank zur
Verfügung. Weiters ist eine gekennzeichnete Klemme (Schiene) für den Anschluss der Motorschutzerde
vorhanden.
WARNUNG
INDIREKTE BERÜHRUNG
Nur mit korrekt angeschlossenem Schutzerdungsleiter erfüllt das Gerät die Anforderungen zum Schutz
gegen indirekte Berührung.
Eine Nichtbeachtung dieser Vorkehrungen kann zum Tod oder schwerwiegenden Verletzungen führen.
■ Prüfen Sie, ob der Widerstand der Schutzerde 1 Ω oder
weniger beträgt.
■ Wenn mehrere Umrichter an die Schutzerde angeschlossen werden müssen, muss jeder wie nebenstehend
gezeigt direkt mit dieser Schutzerde verbunden werden.
VORSICHT
UNSACHGEMÄSSE VERDRAHTUNGSANSCHLÜSSE
• Der Frequenzumrichter wird beschädigt, wenn die Netzspannung an die Ausgangsklemmen (U/T1,
V/T2, W/T3) angelegt wird.
• Prüfen Sie die elektrischen Anschlüsse, bevor Sie den Frequenzumrichter unter Spannung setzen.
• Wenn Sie einen anderen Frequenzumrichter ersetzen, prüfen Sie, ob die elektrischen Anschlüsse am
ATV71 Plus den in dieser Anleitung angegebenen Verdrahtungsanweisungen entsprechen.
Eine Nichtbeachtung dieser Vorkehrungen kann zu Verletzungen führen und/oder Materialschäden
zur Folge haben.
EMV-Erdung
Da die Messung der Netzstörungen wie auch die tatsächliche Beeinflussung anderer Verbraucher auf das
Erdpotential bezogen ist, ist die Induktivität der "Erdung" äußerst entscheidend. D. h. großflächige
Erdanschlüsse, die durchaus parallel zur gelb-grünen Schutzerdung PE ausgeführt sein können, sind
besonders wichtig.
10
Vor der Inbetriebnahme
FI-Schutzschalter
Frequenzumrichter, besonders solche mit zusätzlichen Funkentstörfiltern und geschirmten Motorkabeln,
führen einen erhöhten Ableitstrom gegen Erde.
Er ist abhängig von:
• der Länge des Motorkabels
• der Art der Verlegung und ob das Motorkabel geschirmt oder ungeschirmt ausgeführt ist
• der eingestellten Taktfrequenz
• der Verwendung eines zusätzlichen Funkentstörfilters
• der Erdung des Motors am Standort (geerdet oder nicht geerdet)
Im Einschaltaugenblick kann es insbesondere durch die Kondensatoren des Filters zur
ungewollten Auslösung eines FI-Schutzschalters kommen. Ebenso können die Erdkapazitäten im
Betrieb zu einer Fehlauslösung führen.
Andererseits besteht durch die Netzgleichrichtung am Eingang des Umrichters die Möglichkeit der
Blockierung der Auslösefunktion durch Gleichstromanteile.
Es sollte daher folgendes beachtet werden:
• Nur kurzzeitverzögerte und pulsstromsensitive FI-Schutzschalter mit wesentlich höherem Auslösenennstrom verwenden.
• Andere Verbraucher durch einen eigenen FI-Schutzschalter absichern.
• FI-Schutzschalter vor einem Umrichter stellen keinen absolut zuverlässigen Schutz bei direktem
Berühren dar !! Sie sollten daher immer in Verbindung mit anderen Schutzmaßnahmen eingesetzt
werden.
• Die Frequenzumrichter haben keine strombegrenzende Wirkung (bei Fehlerströmen) und verletzen
damit nicht die Nullungsbedingungen.
Bei Anlagen mit großen Kabellängen kann der Ableitstrom, abhängig von den Gegebenheiten, durchaus
größer 100 mA sein !!
Die eingebaute Erdschlussüberwachung hat keine strombegrenzende Wirkung. Sie ist ein
Geräteschutz und kein Personenschutz.
WARNUNG
ÜBERSTROMSCHUTZ
■ Die Schutzeinrichtungen gegen Überströme müssen ordnungsgemäß zugeordnet werden.
■ Verwenden Sie die in der Dokumentation des Umrichters empfohlenen Vorsicherungen, um den
Kurzschlussnennstrom zu erzielen.
■ Schließen Sie den Umrichter nicht an ein Versorgungsnetz an, dessen Kurzschlusskapazität den
angenommenen maximalen Kurzschlussstrom überschreitet.
Eine Nichtbeachtung dieser Vorkehrungen kann zum Tod oder schwerwiegenden Verletzungen führen.
11
Vor der Inbetriebnahme
Zugang zu den Leistungsklemmen
Die genaue Position der Klemmen ist abhängig von der Ausführungsvariante.
Kenndaten und Funktion der Leistungsklemmen
Klemmen
Funktion
ATV71EXA●
PE
Klemmen für den Anschluss an die Schutzerde
alle Modelle
R/L1
S/L2
T/L3
Leistungsversorgung
Die Anzahl der Anschlüsse variiert abhängig von
der gewählten Gleichrichtung (6-puls, optional 12puls oder 24-puls).
alle Modelle
PA/+
+ Polarität des DC-Busses und Anschluss der DCDrossel
ATV71EXC● und
ATV71EXS5
PC/-
- Polarität des DC-Busses
ATV71EXC● und
ATV71EXS5
U/T1, V/T2, W/T3
Ausgang zum Motor
alle Modelle
Schirm
Anschlussschiene für den Schirm des Motorkabels
alle Modelle
Die gesamte Leistungsverdrahtung ist unter Beachtung der mitgelieferten Schaltpläne durchzuführen.
Alle Leistungsanschlüsse sind für senkrechten Anschluss von unten vorgesehen.
Alternativ ist die Option "Kabeleinführung von oben" verfügbar.
12
Vor der Inbetriebnahme
Sicherungen und Kabelquerschnitte
Die Altivar Schrankausführung hat standardmäßig Eingangssicherungen eingebaut. Diese Sicherungen sind
für den Fall vorgesehen, dass die elektronischen Schutzmechanismen des Umrichters versagen. Sie stellen
daher einen Sekundärschutz des Umrichters dar, um die Leistungskabel vor Überlast und den
Eingangsgleichrichter im Falle eines internen Kurzschlusses zu schützen.
Die angeführten Kabelquerschnitte für dreiadrige Kabel sind Richtwerte für eine Kabelverlegung in Luft bei
max. 40°C Umgebungstemperatur, basierend auf den Vorschriften ÖVN EN 1 und VDE 0100.
Die Leitungen im Schrank sind entsprechend der Spezifikation für Einzelleiter XLPE/EPR Kupfer 90°C
ausgelegt.
Die Motorkabel sind auf den max. Dauerstrom ausgelegt. Sie gelten für 0...100 Hz (bis 300 Hz erhöhen sich
die Kabelverluste um ca. 25 % aufgrund des Skin-Effekts).
Für andere Umgebungsbedingungen und abweichende Vorschriften müssen die Kabelquerschnitte
entsprechend angepasst werden.
Falls die Netzsicherungen ausfallen, ist im Umrichter bereits ein Primärschaden aufgetreten. Ein
Tausch der Sicherungen und eine Wiedereinschaltung ist daher absolut nicht sinnvoll. Folglich ist
auch die Verwendung von Leistungsschaltern nicht vorteilhaft und bringt darüber hinaus den
Nachteil der weniger raschen Abschaltung.
Bei den Motorkabeln stellt die Verwendung von NYCY bzw. NYCWY Kabeln (Energiekabel mit
konzentrisch angeordnetem Schutzleiter) eine preiswerte Alternative zu geschirmten Kabeln dar.
Die Dimensionierung der Netzeinspeise-Vorsicherungen, Netzkabelquerschnitte und Netzkabellängen muss unter Beachtung des zu Verfügung stehenden Netzkurzschlussstromes zur
Sicherstellung einer raschen Abschaltung im Fehlerfall erfolgen!
Gegebenenfalls ist die Leistung des Transformators zu erhöhen um den notwendigen
Kurzschlussstrom erreichen zu können.
13
Vor der Inbetriebnahme
Kabelquerschnitte bei Standardausführung
Netzeinspeisung
Vorempfohlenes
sicher Kabel [mm2]
ung
max. Kabel
[mm2]
(je Phase)
Interne
Sicherung
250A
315A
400A
400A
1x (3x 120)
1x (3x 185)
2x (3x 120)
2x (3x 120)
2x 185 (M12)
2x 185 (M12)
2x 150 (M10)
2x 150 (M10)
250 A sf
315 A sf
400 A sf
500 A sf
C20N4
C25N4
C28N4
C31N4
C40N4
500 A
630A
700A
800A
1000A
2x (3x 150)
2x (3x 185)
3x (3x 185)
3x (3x 185)
4x (3x 185)
2x 150 (M10)
2x 300 (M10) 2)
3x 185 (M12)
4x 300 (M12)
4x 300 (M12)
C50N4
1250A 4x (3x 240)
6x 300 (M12) 2)
630 A sf
800 A sf
800 A sf
900 A sf
2x
630 A sf
2x
800 A sf
2x
800 A sf
ATV71EX●● D90N4
C11N4
C13N4
C16N4
C71N4
1250A 2x [4x (3x 150)] 8x 240 (M12)
oder
2x [3x (3x 240)]
1600A 2x [4x (3x 150)] 8x 240 (M12)
oder
2x [3x (3x 240)]
2000A 4x [2x (3x 185)] 16x 240 (M12)
C90N4
2500A 4x [2x (3x 185)] 16x 240 (M12)
ATV71EXA● C50N4
C63N4
M11N4 3200A 4x [3x (3x 185)] 16x 240 (M12)
M13N4 3200A 4x [4x (3x 150)] 16x 240 (M12)
oder
4x [3x (3x 240)]
1)…
2) ...
14
empfohlenes
Kabel [mm2]
4x 240 (M12)
4x 240 (M12)
4x 240 (M12)
4x 240 (M12)
4x 240 (M12)
max. Kabel
(mit
Motordrossel)
[mm2]
(je Phase)
2x 150 (M10)
2x 150 (M10)
2x 240 (M12)
2x 240 (M12)
bzw.
4x 240 (M12) 1)
4x 240 (M12)
4x 240 (M12)
4x 240 (M12)
4x 240 (M12)
4x 240 (M12)
6x 240 (M12)
6x 240 (M12)
4x (3x 185)
6x 240 (M12)
6x 240 (M12)
5x (3x 185) oder
4x (3x 240)
2x
6x 240 (M12)
900 A sf
6x 240 (M12)
6x (3x 185) oder
5x (3x 240)
4x
500 A sf
4x
630 A sf
4x
800 A sf
4x
900 A sf
bei IP54 mit getrennter Luftführung (ATV71EXS5●●●N4)
Anschluss nur mit Spezialkabelschuhen für Schaltgeräte möglich
Abweichende Kabelquerschnitte auf Anfrage.
Motorabgang
max. Kabel
(ohne
Motordr.)
[mm2]
(je Phase)
2x 150 (M10)
2x 150 (M10)
2x 240 (M12)
2x 240 (M12)
12x 240 (M12) 12x 240 (M12)
12x 240 (M12) 12x 240 (M12)
12x 240 (M12) 12x 240 (M12)
12x 240 (M12) 12x 240 (M12)
1x (3x 70)
1x (3x 95)
1x (3x 120)
1x (3x 150)
2x (3x 95)
2x (3x 120)
2x (3x 150)
3x (3x 150)
3x (3x 185)
7x (3x 185) oder
6x (3x 240)
9x (3x 185) oder
7x (3x 240)
10x (3x 185) oder
8x (3x 240)
11x (3x 185) oder
9x (3x 240)
Vor der Inbetriebnahme
Kabelquerschnitte bei Kabeleinführung oben
Netzeinspeisung
Vorempfohlenes
sicher Kabel [mm2]
ung
max. Kabel
[mm2]
(je Phase)
Interne
Sicherung
ATV71EX●● D90N4
C11N4
C13N4
C16N4
250A
315A
400A
400A
1x (3x 120)
1x (3x 185)
2x (3x 120)
2x (3x 120)
2x 150 (M10)
2x 240 (M12)
2x 240 (M12)
2x 240 (M12)
250 A sf
315 A sf
400 A sf
500 A sf
Motorabgang
max. Kabel
(ohne
Motordr.)
[mm2]
(je Phase)
2x 150 (M10)
2x 150 (M10)
2x 240 (M12)
2x 240 (M12)
C20N4
C25N4
C28N4
C31N4
500 A
630A
700A
800A
2x (3x 150)
2x (3x 185)
3x (3x 185)
3x (3x 185)
630 A sf
800 A sf
800 A sf
900 A sf
4x 240 (M12)
4x 240 (M12)
4x 240 (M12)
4x 240 (M12)
C40N4 1000A
C50N4 1250A
ATV71EXA● C50N4 1250A
C63N4 1600A
C71N4 2000A
1)…
2) ...
4x 240 (M12)
4x 240 (M12)
4x 240 (M12)
4x 240 (M12)
bzw.
4x 300 (M12) 2)
4x (3x 185)
4x 240 (M12)
bzw.
4x 300 (M12) 2)
4x (3x 240)
6x 240 (M12)
bzw.
6x 300 (M12) 1) 2)
2x [4x (3x 150)] 8x 240 (M12)
oder
2x [3x (3x 240)]
2x [4x (3x 150)] 8x 240 (M12)
oder
2x [3x (3x 240)]
4x [2x (3x 185)] 16x 240 (M12)
max. Kabel
(mit
Motordrossel)
[mm2]
(je Phase)
2x 150 (M10)
2x 150 (M10)
2x 240 (M12)
2x 240 (M12)
bzw.
4x 240 (M12) 1)
4x 240 (M12)
4x 240 (M12)
4x 240 (M12)
4x 240 (M12)
empfohlenes Kabel
[mm2]
2x
4x 240 (M12)
630 A sf
4x 240 (M12)
3x (3x 185)
6x 240 (M12)
2x
800 A sf
6x 240 (M12)
4x (3x 185)
2x
6x 240 (M12)
800 A sf
6x 240 (M12)
2x
6x 240 (M12)
900 A sf
6x 240 (M12)
5x (3x 185)
oder
4x (3x 240)
6x (3x 185)
oder
5x (3x 240)
7x (3x 185)
oder
6x (3x 240)
9x (3x 185)
oder
7x (3x 240)
10x (3x 185)
oder
8x (3x 240)
11x (3x 185)
oder
9x (3x 240)
4x
12x 240 (M12) 12x 240 (M12)
500 A sf
C90N4 2500A 4x [2x (3x 185)] 16x 240 (M12)
4x
12x 240 (M12) 12x 240 (M12)
630 A sf
M11N4 3200A 4x [3x (3x 185)] 16x 240 (M12)
4x
12x 240 (M12) 12x 240 (M12)
800 A sf
M13N4 3200A 4x [4x (3x 150)] 16x 240 (M12)
oder
4x [3x (3x 240)]
12x 240 (M12) 12x 240 (M12)
4x
900 A sf
1x (3x 70)
1x (3x 95)
1x (3x 120)
1x (3x 150)
2x (3x 95)
2x (3x 120)
2x (3x 150)
3x (3x 150)
bei IP54 mit getrennter Luftführung (ATV71EXS5●●●N4)
Anschluss nur mit Spezialkabelschuhen für Schaltgeräte möglich
Abweichende Kabelquerschnitte auf Anfrage.
15
Vor der Inbetriebnahme
Kabelquerschnitte bei Standardausführung
Netzeinspeisung
Vorempfohlenes
sicher Kabel [mm2]
ung
max. Kabel
[mm2]
(je Phase)
ATV71EX●● D90N
200A
1x (3x 95)
2x 120 (M8)
Motorabgang
max. Kabel
(ohne
Motordr.)
[mm2]
(je Phase)
200 A sf 2x 150 (M10)
C11N
250A
1x (3x 120)
2x 120 (M8)
250 A sf 2x 150 (M10)
C13N
315A
1x (3x 185)
2x 185 (M12)
315 A sf 2x 150 (M10)
C16N
C20N
C25N
C31N
400A
500A
630A
800A
2x (3x 120)
2x (3x 150)
2x (3x 185)
3x (3x 185)
2x 150 (M10)
2x 150 (M12)
3x 185 (M12)
4x 300 (M12)
C40N
1000A 4x (3x 185)
4x 300 (M12)
C50N
1250A 4x (3x 240)
4x 300 (M12)
ATV71EXA● C50N
1000A 2x [2x (3x 185)]
8x 240 (M12)
C63N
8x 240 (M12)
C90N
1250A 2x [4x (3x 150)]
oder
2x [3x (3x 240)]
1600A 2x [4x (3x 150)]
oder
2x [3x (3x 240)]
2000A 4x [2x (3x 185)]
400 A sf
500 A sf
630 A sf
2x
400 A sf
2x
500 A sf
2x
630 A sf
2x
630 A sf
2x
800 A sf
M11N
2500A 4x [2x (3x 185)]
M13N
2500A 4x [3x (3x 150)]
oder
4x [2x (3x 240)]
3200A 4x [3x (3x 185)]
C80N
M15N
1) …
8x 240 (M12)
empfohlenes
Kabel [mm2]
4x 240 (M12)
4x 240 (M12)
4x 240 (M12)
4x 240 (M12)
max. Kabel
(mit
Motordrossel)
[mm2]
(je Phase)
2x 150 (M10)
bzw.
4x 240 (M12) 1)
2x 150 (M10)
bzw.
4x 240 (M12) 1)
2x 150 (M10)
bzw.
4x 240 (M12) 1)
4x 240 (M12)
4x 240 (M12)
4x 240 (M12)
4x 240 (M12)
4x 240 (M12)
4x 240 (M12)
3x (3x 185)
4x 240 (M12)
4x 240 (M12)
4x (3x 185)
6x 240 (M12)
6x 240 (M12)
6x 240 (M12)
6x 240 (M12)
4x (3x 185) oder
3x (3x 240)
5x (3x 185) oder
4x (3x 240)
2x
6x 240 (M12)
900 A sf
6x 240 (M12)
16x 240 (M12) 4x
12x 240 (M12) 12x 240 (M12)
500 A sf
16x 240 (M12) 4x
12x 240 (M12) 12x 240 (M12)
630 A sf
16x 240 (M12) 4x
12x 240 (M12) 12x 240 (M12)
800 A sf
16x 240 (M12) 4x
12x 240 (M12) 12x 240 (M12)
900 A sf
bei IP54 mit getrennter Luftführung (ATV71EXS5●●●N)
Abweichende Kabelquerschnitte auf Anfrage.
16
Interne
Sicherung
1x (3x 70)
1x (3x 95)
1x (3x 120)
1x (3x 185)
2x (3x 120)
2x (3x 150)
3x (3x 150)
6x (3x 185) oder
5x (3x 240)
7x (3x 185) oder
6x (3x 240)
9x (3x 185) oder
7x (3x 240)
10x (3x 185)
oder
8x (3x 240)
11x (3x 185)
oder
9x (3x 240)
Vor der Inbetriebnahme
Kabelquerschnitte bei Kabeleinführung oben
Netzeinspeisung
Vorempfohlenes
sicher Kabel [mm2]
ung
max. Kabel
[mm2]
(je Phase)
Interne
Sicherung
D90N
C11N
C13N
C16N
C20N
C25N
C31N
200A
250A
315A
400A
500A
630A
800A
1x (3x 95)
1x (3x 120)
1x (3x 185)
2x (3x 120)
2x (3x 150)
2x (3x 185)
3x (3x 185)
2x 150(M10)
2x 150 (M10)
2x 240 (M12)
4x 240 (M12)
4x 240 (M12)
4x 240 (M12)
4x 240 (M12)
C40N
1000A 4x (3x 185)
4x 240 (M12)
C50N
1250A 4x (3x 240)
4x 240 (M12)
ATV71EXA● C50N
1000A 2x [2x (3x 185)]
8x 240 (M12)
C63N
8x 240 (M12)
C90N
1250A 2x [4x (3x 150)]
oder
2x [3x (3x 240)]
1600A 2x [4x (3x 150)]
oder
2x [3x (3x 240)]
2000A 4x [2x (3x 185)]
200 A sf
250 A sf
315 A sf
400 A sf
500 A sf
630 A sf
2x
400 A sf
2x
500 A sf
2x
630 A sf
2x
630 A sf
2x
800 A sf
M11N
2500A 4x [2x (3x 185)]
M13N
2500A 4x [3x (3x 150)]
oder
4x [2x (3x 240)]
3200A 4x [3x (3x 185)]
ATV71EX●●
C80N
M15N
8x 240 (M12)
Motorabgang
max. Kabel
(ohne
Motordr.)
[mm2]
(je Phase)
2x 150 (M10)
2x 150 (M10)
2x 150 (M10)
4x 240 (M12)
4x 240 (M12)
4x 240 (M12)
4x 240 (M12)
max. Kabel
empfohlenes
(mit
Kabel [mm2]
Motordrossel
) [mm2]
(je Phase)
2x 150 (M10)
1x (3x 70)
2x 150 (M10)
1x (3x 95)
2x 150 (M10)
1x (3x 120)
4x 240 (M12)
1x (3x 185)
4x 240 (M12)
2x (3x 120)
4x 240 (M12)
2x (3x 150)
4x 240 (M12)
3x (3x 150)
4x 240 (M12)
4x 240 (M12)
3x (3x 185)
4x 240 (M12)
4x 240 (M12)
4x (3x 185)
6x 240 (M12)
6x 240 (M12)
6x 240 (M12)
6x 240 (M12)
4x (3x 185) oder
3x (3x 240)
5x (3x 185) oder
4x (3x 240)
2x
6x 240 (M12)
900 A sf
6x 240 (M12)
6x (3x 185) oder
5x (3x 240)
16x 240 (M12) 4x
12x 240 (M12) 12x 240 (M12) 7x (3x 185) oder
500 A sf
6x (3x 240)
16x 240 (M12) 4x
12x 240 (M12) 12x 240 (M12) 9x (3x 185) oder
7x (3x 240)
630 A sf
16x 240 (M12) 4x
12x 240 (M12) 12x 240 (M12) 10x (3x 185)
800 A sf
oder
8x (3x 240)
16x 240 (M12) 4x
12x 240 (M12) 12x 240 (M12) 11x (3x 185)
900 A sf
oder
9x (3x 240)
Abweichende Kabelquerschnitte auf Anfrage.
17
Vor der Inbetriebnahme
Kabelquerschnitte bei Standardausführung
Netzeinspeisung
Vorempfohlenes
sicher Kabel [mm2]
ung
max. Kabel
[mm2]
(je Phase)
ATV71EX●● C11Y
200A
1x (3x 95)
2x 120 (M8)
Motorabgang
max. Kabel
(ohne
Motordr.)
[mm2]
(je Phase)
200 A sf 2x 150 (M10)
C13Y
250A
1x (3x 120)
2x 120 (M8)
250 A sf 2x 150 (M10)
C16Y
315A
1x (3x 185)
2x 185 (M12)
315 A sf 2x 150 (M10)
C20Y
C25Y
C31Y
C40Y
400A
500A
630A
800A
2x (3x 120)
2x (3x 150)
2x (3x 185)
3x (3x 185)
3x 185 (M12)
3x 185 (M12)
3x 185 (M12)
4x 300 (M12)
C50Y
1000A 4x (3x 185)
4x 300 (M12)
C63Y
1250A 4x (3x 240)
4x 300 (M12)
400 A sf
500 A sf
630 A sf
2x
400 A sf
2x
500 A sf
2x
630 A sf
2x
630 A sf
2x
800 A sf
ATV71EXA● C63Y
1000A 2x [2x (3x 185)] 8x 240 (M12)
Interne
Sicherung
1250A 2x [4x (3x 150)] 8x 240 (M12)
oder
2x [3x (3x 240)]
2x
M10Y 1600A 2x [4x (3x 150)] 8x 240 (M12)
oder
900 A sf
2x [3x (3x 240)]
M12Y 2000A 4x [2x (3x 185)] 16x 240 (M12) 4x
500 A sf
M15Y 2500A 4x [2x (3x 185)] 16x 240 (M12) 4x
630 A sf
M18Y 2500A 4x [3x (3x 150)] 16x 240 (M12) 4x
800 A sf
oder
4x [2x (3x 240)]
M21Y 3200A 4x [3x (3x 185)] 16x 240 (M12) 4x
900 A sf
C80Y
1) …
bei IP54 mit getrennter Luftführung (ATV71EXS5●●●Y)
Abweichende Kabelquerschnitte auf Anfrage.
18
empfohlenes
Kabel [mm2]
4x 240 (M12)
4x 240 (M12)
4x 240 (M12)
4x 240 (M12)
max. Kabel
(mit
Motordrossel)
[mm2]
(je Phase)
2x 150 (M10)
bzw.
4x 240 (M12) 1)
2x 150 (M10)
bzw.
4x 240 (M12) 1)
2x 150 (M10)
bzw.
4x 240 (M12) 1)
4x 240 (M12)
4x 240 (M12)
4x 240 (M12)
4x 240 (M12)
4x 240 (M12)
4x 240 (M12)
3x (3x 185)
4x 240 (M12)
4x 240 (M12)
4x (3x 185)
6x 240 (M12)
6x 240 (M12)
6x 240 (M12)
6x 240 (M12)
4x (3x 185) oder
3x (3x 240)
5x (3x 185) oder
4x (3x 240)
6x 240 (M12)
6x 240 (M12)
12x 240 (M12) 12x 240 (M12)
12x 240 (M12) 12x 240 (M12)
12x 240 (M12) 12x 240 (M12)
12x 240 (M12) 12x 240 (M12)
1x (3x 70)
1x (3x 95)
1x (3x 120)
1x (3x 185)
2x (3x 120)
2x (3x 150)
3x (3x 150)
6x (3x 185) oder
5x (3x 240)
7x (3x 185) oder
6x (3x 240)
9x (3x 185) oder
7x (3x 240)
10x (3x 185) oder
8x (3x 240)
11x (3x 185) oder
9x (3x 240)
Vor der Inbetriebnahme
Kabelquerschnitte bei Kabeleinführung oben
Netzeinspeisung
Vorempfohlenes
sicher Kabel [mm2]
ung
max. Kabel
[mm2]
(je Phase)
Interne
Sicherung
200A
250A
315A
400A
500A
630A
800A
1x (3x 95)
1x (3x 120)
1x (3x 185)
2x (3x 120)
2x (3x 150)
2x (3x 185)
3x (3x 185)
2x 150(M10)
2x 150 (M10)
2x 240 (M12)
4x 240 (M12)
4x 240 (M12)
4x 240 (M12)
4x 240 (M12)
C50Y
1000A 4x (3x 185)
4x 240 (M12)
C63Y
1250A 4x (3x 240)
4x 240 (M12)
1000A 2x [2x (3x 185)]
8x 240 (M12)
1250A 2x [4x (3x 150)]
oder
2x [3x (3x 240)]
M10Y 1600A 2x [4x (3x 150)]
oder
2x [3x (3x 240)]
M12Y 2000A 4x [2x (3x 185)]
8x 240 (M12)
200 A sf
250 A sf
315 A sf
400 A sf
500 A sf
630 A sf
2x
400 A sf
2x
500 A sf
2x
630 A sf
2x
630 A sf
2x
800 A sf
ATV71EX●● C11Y
C13Y
C16Y
C20Y
C25Y
C31Y
C40Y
ATV71EXA● C63Y
C80Y
M15Y 2500A 4x [2x (3x 185)]
M18Y 2500A 4x [3x (3x 150)]
oder
4x [2x (3x 240)]
M21Y 3200A 4x [3x (3x 185)]
8x 240 (M12)
Motorabgang
max. Kabel
(ohne
Motordr.)
[mm2]
(je Phase)
2x 150 (M10)
2x 150 (M10)
2x 150 (M10)
4x 240 (M12)
4x 240 (M12)
4x 240 (M12)
4x 240 (M12)
max. Kabel
empfohlenes
(mit
Kabel [mm2]
Motordrossel
) [mm2]
(je Phase)
2x 150 (M10)
1x (3x 70)
2x 150 (M10)
1x (3x 95)
2x 150 (M10)
1x (3x 120)
4x 240 (M12)
1x (3x 185)
4x 240 (M12)
2x (3x 120)
4x 240 (M12)
2x (3x 150)
4x 240 (M12)
3x (3x 150)
4x 240 (M12)
4x 240 (M12)
3x (3x 185)
4x 240 (M12)
4x 240 (M12)
4x (3x 185)
6x 240 (M12)
6x 240 (M12)
6x 240 (M12)
6x 240 (M12)
4x (3x 185) oder
3x (3x 240)
5x (3x 185) oder
4x (3x 240)
2x
6x 240 (M12)
900 A sf
6x 240 (M12)
6x (3x 185) oder
5x (3x 240)
16x 240 (M12) 4x
12x 240 (M12) 12x 240 (M12) 7x (3x 185) oder
500 A sf
6x (3x 240)
16x 240 (M12) 4x
12x 240 (M12) 12x 240 (M12) 9x (3x 185) oder
630 A sf
7x (3x 240)
16x 240 (M12) 4x
12x 240 (M12) 12x 240 (M12) 10x (3x 185) oder
800 A sf
8x (3x 240)
16x 240 (M12) 4x
12x 240 (M12) 12x 240 (M12) 11x (3x 185) oder
900 A sf
9x (3x 240)
Abweichende Kabelquerschnitte auf Anfrage.
19
Vor der Inbetriebnahme
Zugang zu den Steuerklemmenleisten
Öffnen Sie, wie in der Abbildung gezeigt, die Frontabdeckung, um Zugang
zu den Steuerklemmen zu erhalten. Um die Verdrahtung am Steuerteil des
Umrichters zu vereinfachen, kann die Karte der Steuerklemmenleisten
herausgezogen werden.
1. Drehen Sie die Schraube bis zur Dehnung der Feder heraus.
2. Ziehen Sie die Karte heraus, indem Sie sie nach unten schieben.
Maximale Anschlusskapazität:2,5 mm² - AWG 14
Maximales Anzugsmoment: 0,6 Nm - 5,3 lb.in
VORSICHT
ELEKTRONIKMASSE
Die Elektronikmasse (0 V) darf bis 35 V gegen PE floaten. Die zur Begrenzung der Spannung notwendige
Verbindung 0 V – Erde kann daher z.B. auch entfernt in der SPS erfolgen (eventuell durch den auf 0 V
bezogenen Analogausgang).
Eine Nichtbeachtung dieser Vorkehrung kann zu Verletzungen führen und/oder Materialschäden zur
Folge haben.
VORSICHT
UNSACHGEMÄSSE BEFESTIGUNG DER KLEMMENLEISTENKARTE
Wenn Sie die Karte der Steuerklemmenleisten wieder einbauen, müssen Sie die unverlierbare Schraube
festdrehen.
Eine Nichtbeachtung dieser Vorkehrung kann zu Verletzungen führen und/oder Materialschäden zur
Folge haben.
Kenndaten und Funktion der Steuerklemmleisten
Klemmen
Funktion
Elektrische Kenndaten
R1A
R1B
R1C
Programmierbares Relais R1:
NC-Kontakt zieht bei Einschalten
an, fällt bei Störung ab.
• Minimales Schaltvermögen: 3 mA bei 24 V c
R2A
R2C
Schließer (NO) des
programmierbaren Relais R2
• Maximales Schaltvermögen bei induktiver Last
(cos φ = 0,4 und L/R = 7 ms): 2 A bei 250 V a
oder 30 V c
+10
Spannungsversorgung +10 V c für
Sollwertpotentiometer 1...10 kΩ
• +10 V c (10,5 V ± 5 V)
• Max. 10 mA
AI1 +
AI1-
Differential-Analogeingang AI1
• -10 bis +10 V c (zulässige Höchstspannung 24 V)
COM
Bezugspotential für analoge Einund Ausgänge
0V
AI2
Gemäß Softwarekonfiguration:
Analogeingang, Spannung oder
Strom
• Analogeingang 0 bis +10 V c (zulässige Höchstspannung 24 V), Impedanz 30 kΩ
20
• Maximales Schaltvermögen bei ohmscher Last:
5 A bei 250 V a oder 30 V c
• oder Analogeingang X - Y mA; X und Y sind
programmierbar von 0 bis 20 mA, Impedanz 250 Ω
Vor der Inbetriebnahme
Klemmen
Funktion
Elektrische Kenndaten
AO1
Gemäß Softwarekonfiguration:
Analogausgang, Spannung oder
Strom oder Logikausgang
• Analogausgang 0 bis +10 V c, min. Lastimpedanz
50 kΩ
• oder Analogausgang X – Y mA; X und Y sind
programmierbar von 0...20 mA, max. Lastimpedanz 500 Ω
• oder Logikausgang 0...10V oder 0...20 mA
P24
Eingang für die externe Versorgung
+24 V c des Steuerteils
• +24 V c (min. 19 V, max. 30 V)
• Leistung 30 Watt
0V
Bezugspotential der Logikeingänge
und 0 V der Spannungsversorgung
P24
0V
LI1...LI5
Logikeingänge programmierbar
• +24 V c (max. 30 V)
• Impedanz 3,5 kΩ
LI6
Gemäß Stellung des Wahlschalters
SW2: LI oder PTC
SW2 = LI:
• Gleiche Daten wie bei den Logikeingängen LI1...LI5
SW2 = PTC:
• Schwellwert für die Auslösung 3 kΩ, Schwellwert
für die erneute Auslösung 1,8 kΩ
• Schwellwert für die Kurzschlusserkennung < 50 Ω
+24
Versorgung
Wahlschalter SW1 auf Position "Source" oder
"Sink Int":
• Interne Spannungsversorgung +24 V c
• Max. 200 mA
Wahlschalter SW1 auf Position "Sink Ext":
• Eingang für externe Spannungsversorgung +24 V
c der Logikeingänge
PWR
Eingang der Sicherheitsfunktion
"Power Removal"
• 24 V c (max. 30 V)
• Impedanz 1,5 kΩ
Klemmenleisten der Optionskarte Basis E/A-Erweiterung (VW3 A3E 201)
Kenndaten und Funktion der Klemmen
Maximale Anschlusskapazität:
Maximales Anzugsmoment:
1,5 mm² - AWG 16
0,25 Nm - 2,21 lb.in
Klemmen
TH1+
TH1-
Funktion
Eingang PTC-Fühler
LO1
LO2
Programmierbare Logikausgänge
mit Open Collector
CLO
Bezugspotential der Logikausgänge
0V
0V
Elektrische Kenndaten
• Schwellwert für die Auslösung 3 kΩ, Schwellwert
für die erneute Auslösung 1,8 kΩ
• Schwellwert für die Kurzschlusserkennung < 50 Ω
• +24 V c (max. 30 V)
• Max. Strom: 200 mA bei interner Versorgung und
200 mA bei externer Versorgung
0V
21
Vor der Inbetriebnahme
Klemmenleisten der Optionskarte Erweiterte E/A-Erweiterung (VW3 A3E 202)
Kenndaten und Funktion der Klemmen
Maximale Anschlusskapazität:
Maximales Anzugsmoment:
1,5 mm² - AWG 16
0,25 Nm - 2,21 lb.in
R4A bis LI14: Gleiche Kenndaten wie bei der Steuerkarte.
Klemmen
TH2 +
TH2 -
Funktion
Eingang PTC-Fühler
Elektrische Kenndaten
• Schwellwert für die Auslösung 3 kΩ, Schwellwert
für die erneute Auslösung 1,8 kΩ
• Schwellwert für die Kurzschlusserkennung < 50 Ω
RP
Frequenzeingang
• Frequenzbereich 0...30 kHz, max. 30 V, max. 15 mA
• Einen Widerstand hinzufügen, wenn die Eingangsspannung den Wert von 5 V überschreitet (510 Ω
bei 12 V, 910 Ω bei 15 V, 1,3 kΩ bei 24 V)
LO3
LO4
Programmierbare Logikausgänge
mit Open Collector
• +24 V c (max. 30 V)
• Max. Strom: 20 mA bei interner Versorgung und
200 mA bei externer Versorgung
CLO
Bezugspotential der Logikausgänge
0V
0V
0V
Klemmenleisten der Encoder-Interface-Karte
Weitere Informationen finden Sie auf der mit dem Umrichter gelieferten CD-ROM.
Betrieb in IT-Netzen und "corner-grounded" Netzen
Der Einsatz der Altivar Frequenzumrichter ist grundsätzlich in allen Netzvarianten zulässig.
Folgende Geräte dürfen jedoch nicht im "Corner Grounded Networks" betrieben werden:
■ ATV71EX●●●●●N
■ ATV71EX●●●●●Y
Alle Altivar Frequenzumrichter enthalten integrierte EMV-Filter. Im Falle des Betriebs in IT-Netzen wählen
Sie die Option "Ausführung IT-Netz" (VW3 AE 2701). Bei dieser Option wird der Umrichter für den
Anschluss an IT-Netze vorbereitet.
Das eingesetzte Isolationsüberwachungsgerät muss für nicht-lineare Lasten geeignet sein.
Bei ungeerdeten Netzen hat ein einpoliger Erdschluss im speisenden Netz keinen Einfluss auf die
Funktion des Umrichters. Tritt der Erdschluss im Motor oder Motorkabel auf, schaltet sich der Umrichter
ab. Die Erkennung ist jedoch stark von der Erdkapazität des Netzes abhängig.
22
Inbetriebnahme
Inbetriebnahme
Vorgangsweise
1. Kontrolle der Leistungsverdrahtung
■ Die Netzzuleitungen müssen an den vorgesehenen Klemmen für die Netzspannung angeschlossen
sein.
■ Ist der Schaltschrank im Sinne des Personenschutzes korrekt geerdet?
■ Größe der Vorsicherungen laut Tabelle in Kapitel "Sicherungen und Kabelquerschnitte", Seite 13
prüfen.
■ Entspricht die Länge des Motorkabels den zulässigen Grenzwerten (siehe Tabelle im ATV71 Plus
Selection guide) und ist gegebenenfalls eine Motordrossel eingebunden?
2. Kontrolle der EMV-Maßnahmen
■ Ist das integrierte EMV-Filter entsprechend der Netzsituation (TT, TN oder IT, Corner Grounded)
richtig geschaltet? Siehe auch Kapitel "Betrieb in IT-Netzen und "corner-grounded" Netzen",
Seite 22.
■ Der Motorkabelschirm muss motor- und umrichterseitig eine gute HF-Verbindung haben.
■ Alle Kleinsignal-Steuerleitungen (auch die Logikeingänge) müssen geschirmt ausgeführt und
getrennt von den Motorleitungen verlegt sein.
■ Der Schaltschrank benötigt zur Einhaltung der Störgrenzwerte eine großflächige Erdverbindung
(Mindestbreite der Erdungslasche 40 mm).
3. Einschalten des Gerätes ohne Fahrbefehl
■ Falls vorgesehen, externe Steuerspannungen prüfen und einschalten.
■ Spannungsebene des Steuerspannungstransformators entsprechend der vorhandenen
Netzspannung überprüfen und gegebenenfalls korrigieren.
■ Netzspannung prüfen und einschalten.
■ Kontrollmessung durchführen:
■ Sind die drei Phasenspannungen vorhanden und symmetrisch?
■ Liegt an den Netzklemmen ein Rechtsdrehfeld an?
(Vorschrift "Arbeiten unter Spannung" beachten)
■ Steuerung entsprechend der mitgelieferten Schaltpläne kontrollieren und in Betrieb nehmen.
4. Wahl der Sprache und Zugriffsebene (Seite 28)
■ Beim ersten Einschalten ist die Navigation in den Menüs bis [1 UMRICHTER MENÜ] zur Benutzerführung vorgegeben. Hier müssen Sie zuerst die Sprache und danach die Zugriffsebene festlegen.
5. Konfiguration des Menüs [SCHNELLSTART MENÜ] (Seite 29)
■ Die Parameter dieses Untermenüs müssen konfiguriert und die Motormessung muss unbedingt vor
dem Anlauf des Motors durchgeführt werden.
6. Einstellung der Netzspannung
■ Den Parameter für die Netzspannung kontrollieren und gegebenenfalls gemäß der verwendeten
Netzspannung korrigieren.
23
Inbetriebnahme
7. Start des Antriebes im Lokal-Betrieb
■ Vor der Inbetriebnahme Freigabe einholen!
■ Umschalten des Bedienfeldes auf Lokalsteuerung.
■ Die Motordrehrichtung kontrollieren.
■ Verschiedene Drehzahlen anfahren und die Auslastung des Antriebes überprüfen.
8. Remote-Betrieb
■ Vor der Rückschaltung auf Remote-Betrieb die anstehenden Sollwerte und Steuerbefehle
überprüfen.
■ Auf Remote-Betrieb umschalten und neuerlich die Leistungsparameter sowie die Reaktion auf die
Steuerbefehle prüfen.
9. Datensicherung und Protokollierung
■ Unerlaubte Betriebsarten durch entsprechende Parametereinstellung verhindern.
■ Sicherung aller Applikationsparameter.
■ Auslesen aller Parameter mit dem PC-Programm "Power Suite" und gegebenenfalls Ausdruck der
gesamten Liste.
24
Inbetriebnahme
Werkseinstellung
Voreinstellung des Umrichters
Der ATV71 Plus ist werkseitig für die gängigsten Anwendungen voreingestellt:
■ Makrokonfiguration: Pumpen / Lüfter
■ Motorfrequenz: 50 Hz
■ Anwendungen mit variablem Drehmoment, mit Energieeinsparung
■ Normaler Anhaltemodus über Auslauframpe
■ Anhaltemodus bei Störung: Freier Auslauf
■ Lineare Rampen, Hochlaufzeit, Auslaufzeit: 3 Sekunden
■ Kleine Frequenz: 0 Hz
■ Große Frequenz: 50 Hz
■ Thermischer Motorstrom = Nennstrom des Umrichters
■ Bremsstrom bei DC-Aufschaltung im Stillstand = 0,7 x Nennstrom des Umrichters während
0,5 Sekunden
■ Kein automatischer Wiederanlauf nach einer Störung
■ Taktfrequenz 2,5...12 kHz, je nach Umrichtertyp
■ Logikeingänge:
LI1: Rechtslauf (eine Drehrichtung), 2-Draht-Steuerung flankenbewertet
LI2: inaktiv (nicht belegt)
LI3: Umschaltung 2. Drehzahlsollwert
LI4: Fehlerreset
LI5, LI6: inaktiv (nicht zugeordnet)
■ Analogeingänge:
AI1: 1. Drehzahlsollwert 0...+10 V
AI2: 2. Drehzahlsollwert 0...20 mA
■ Relais R1: bei einer Störung (oder Umrichter ohne Spannung) fällt der Kontakt ab
■ Relais R2: der Kontakt schließt, wenn der Umrichter in Betrieb ist
■ Analogausgang AO1: 0...20 mA inaktiv (nicht belegt)
Wenn die oben genannten Werte mit Ihrer Anwendung vereinbar sind, kann der Umrichter ohne Änderung
der Einstellungen eingesetzt werden.
Voreinstellung der Optionskarten
Die Ein-/Ausgänge der Optionskarten werden bei der Werkseinstellung nicht zugeordnet.
Getrennte Versorgung des Steuerteils
Wenn das Steuerteil des Umrichters unabhängig vom Leistungsteil versorgt wird (Klemmen P24 und 0V),
so muss das Leistungsteil nach dem Hinzufügen einer Optionskarte und nach jedem Austausch einer
Karte nur beim ersten Einschalten versorgt werden. Bleibt dies aus, wird die neue Karte nicht erkannt. Es
besteht keine Möglichkeit, diese zu konfigurieren und der Umrichter schaltet demzufolge mit einer
Störung ab.
25
Inbetriebnahme
Leistungssteuerung über Netzschütz
WARNUNG
GEFAHR DER BESCHÄDIGUNG DES UMRICHTERS
■ Vermeiden Sie häufiges Betätigen des Steuerschützes (vorzeitiges Altern des Filterkondensators).
■ Bei Zykluszeiten < 60 s besteht die Gefahr einer Zerstörung des Lastwiderstands.
Eine Nichtbeachtung dieser Vorkehrungen kann zum Tod oder schwerwiegenden Verletzungen führen
und/oder Materialschäden zur Folge haben.
Anlauf
In der Werkseinstellung sind die logischen Eingänge flankenbewertet.
Nach dem
■ Einschalten
■ manuellem Rücksetzen
■ Haltebefehl
läuft der Umrichter daher nicht selbständig wieder an. Im Display des Umrichters wird "nSt" angezeigt.
Für einen neuerlichen Start muss der Startbefehl neu gesetzt werden.
Test mit einem Motor mit geringer Leistung oder ohne
Motor, Parallelbetrieb von Motoren
Weitere Informationen finden Sie auf der mit dem Umrichter gelieferten CD-ROM.
26
Inbetriebnahme
Grafikterminal
Das Grafikterminal ist eine Option für kleine Umrichtermodelle, bei den größeren Modellen jedoch
systematisch vorhanden (siehe Katalog). Das Terminal kann abgenommen und an einer anderen Stelle
angebracht werden, beispielsweise an einer Schranktür. Verwenden Sie hierzu die als Option erhältlichen
Kabel und Zubehörteile (siehe Katalog).
Beschreibung des Terminals
Anmerkung: Bei aktivierter Steuerung über das Grafikterminal kann der Umrichter direkt mit den Tasten 3,
4, 5 und 6 gesteuert werden.
Zustandscodes des Umrichters
ACC: Beschleunigung
CLI: Strombegrenzung
CTL: Geführter Auslauf (kontr. Stop) bei Verlust einer Netzphase
DCB: Gleichstrombremsung (DC-Aufsch.) aktiv
DEC: Verzögerung
FLU: Magnetisierung Motor aktiv
FRF: Unterer Grenzwert bei Drehmomentensteuerung
FST: Schnellhalt
NLP: Leistungsteil nicht mit Spannung versorgt (keine Netzspannung an L1, L2, L3)
NST: Freier Auslauf
OBR: Auslaufzeit automatisch angepasst
PRA: Funktion "Power Removal" aktiv (Umrichter gesperrt)
RDY: Umrichter bereit
RUN: Umrichter in Betrieb
SOC: Motorschütz aktiv
TUN: Motormessung aktiv
USA: Alarm Unterspannung
27
Inbetriebnahme
Abgezogenes Terminal
Ist das Terminal herausgezogen, sind an seiner Stelle zwei Kontrollleuchten sichtbar:
Grüne Kontrollleuchte z: DC-Bus unter Spannung
Rote Kontrollleuchte erleuchtet r: Störung
Navigation
Beim ersten Einschalten ist die Navigation in den Menüs bis [1 UMRICHTER MENÜ] zur Benutzerführung
vorgegeben. Hier müssen Sie zuerst die Sprache und danach die Zugriffsebene festlegen.
Die Parameter des Untermenüs [1.1 SCHNELLSTART MENÜ] müssen konfiguriert und die Motormessung
muss unbedingt vor dem Anlauf des Motors durchgeführt werden.
In diesem Dokument wird nur das Menü [1.1 SCHNELLSTART MENÜ] beschrieben. Alle anderen
Menübeschreibungen finden Sie auf der mit dem Umrichter gelieferten CD-ROM.
Anzeige während
Einschalten.
↓
drei
Sekunden
nach
dem
3 Sekunden
Automatischer Wechsel zum Menü [5 SPRACHE]
Wählen Sie die Sprache und drücken Sie ENT.
↓
ENT
Wechsel zum Menü [2 ZUGRIFFSEBENE] (Weitere
Informationen finden Sie auf der mit dem Umrichter
gelieferten CD-ROM). Wählen Sie das Zugriffsmenü und drücken Sie ENT.
↓
ENT
Wechsel zu [1 UMRICHTER MENÜ] (Weitere Informationen finden Sie auf der mit dem Umrichter
gelieferten CD-ROM).
↓
ESC
Rückkehr zum [HAUPTMENÜ] über ESC.
28
Inbetriebnahme
Menü [1.1 SCHNELLSTART MENÜ] (SIM-)
Über das Menü [1.1 SCHNELLSTART MENÜ] (SIM-) ist eine schnelle Inbetriebnahme möglich, die für die
meisten Anwendungen ausreicht.
Anmerkung: Die Parameter des Menüs [1.1 SCHNELLSTART MENÜ] (SIM-) sind in der Reihenfolge zu
definieren, wie sie erscheinen, da die ersten Parameter die Voraussetzung für alle weiteren Parameter
bilden.
Zum Beispiel ist der Parameter [2/3-Drahtst.] (tCC) vor jedem anderen Parameter zu konfigurieren.
Makrokonfiguration
Die Makrokonfiguration ermöglicht eine schnelle Konfiguration von Funktionen für ein bestimmtes
Anwendungsgebiet.
Die Wahl einer Makrokonfiguration bewirkt die Zuordnung der Ein-/Ausgänge dieser Makrokonfiguration.
Eingang/
Ausgang
[Start/
Stopp]
[Mater.Handl]
[allgemein]
[Hubwerk]
[PID-Reg.]
[Buskom.]
AI1
[Kanal
Sollw1]
[KanalSollw
1]
[Kanal
Sollw1]
[Kanal
Sollw1]
[Kanal Sollw1]
(PID-Sollwert)
[Kanal
Sollw1]
AI2
[Nein]
[Istwert PID]
[Nein]
[Kein
Fehler]
[Sollw.
Summ. E2]
[Nein]
[keinFehler]
[Nein]
AO1
R1
[Sollw.
Summ. E2]
[Nein]
[kein Fehler]
[Kanal Sollw2]
([Kanal Sollw1]
über Bus)
[Nein]
[Nein]
[kein Fehler]
[Nein]
[kein Fehler]
[Nein]
[kein Fehler]
[Nein]
[kein Fehler]
R2
LI1
(2-Draht)
LI2
(2-Draht)
LI3
(2-Draht)
LI4
(2-Draht)
LI5
(2-Draht)
LI6
(2-Draht)
LI1
(3-Draht)
LI2
(3-Draht)
LI3
(3-Draht)
LI4
(3-Draht)
LI5
(3-Draht)
LI6
(3-Draht)
[Nein]
[Rechtsl
auf]
[Links
lauf]
[Nein]
[Nein]
[Rechtslauf]
[Nein]
[Rechtslauf]
[Bremsanst]
[Rechtslauf]
[Nein]
[Rechtslauf]
[Nein]
[Rechtslauf]
[Nein]
[Rechtslauf]
[Linkslauf]
[Linkslauf]
[Linkslauf]
[Linkslauf]
[Linkslauf]
[Linkslauf]
[2 Vorwahlfreq.]
[4 Vorwahlfreq.]
[8 Vorwahlfreq.]
[Fehlerreset]
[Jog]
[Fehlerreset]
[Fehlerreset]
[Ext. Fehler]
[Umsch.
SollwKanal]
[Fehlerreset]
[Begr
Drehm]
[Nein]
[Nein]
[Nein]
[UmschMo
ment / v]
[Fehlerreset]
[Nein]
[Nein]
[Reset PID
I-Anteil]
[Zuord 2 PIDSollw]
[Zuord 4 PIDSollw]
[Nein]
[Nein]
[Nein]
Startfreig.
[Rechtsl
auf]
[Nein]
Startfreig.
Startfreig.
Startfreig.
Startfreig.
Startfreig.
Startfreig.
[Rechtslauf]
[Rechtslauf]
[Rechtslauf]
[Rechtslauf]
[Rechtslauf]
[Rechtslauf]
[Linkslauf]
[Linkslauf]
[Linkslauf]
[Linkslauf]
[Linkslauf]
[Linkslauf]
[Nein]
[2 Vorwahlfreq.]
[4 Vorwahlfreq.]
[8 Vorwahlfreq.]
[Jog]
[Fehlerreset]
[Fehlerreset]
[Ext. Fehler]
[Umsch.
SollwKanal]
[Fehlerreset]
[Begr
Drehm]
[Nein]
[Reset PID I
Anteil]
[Zuord 2 PIDSollw]
[Zuord 4 PIDSollw]
[Umsch
Moment /v]
[Fehlerreset]
[Nein]
[Nein]
[Nein]
[Nein]
[Nein]
[Nein]
[Nein]
[Mast./
Slave]
[Ref.Drehm.]
Bei der 3-Draht-Steuerung ist die Belegung der Eingänge LI1...LI6 versetzt.
Alle Werte können geändert, eingestellt und neu zugeordnet werden. Weitere Informationen finden
Sie auf der mit dem Umrichter gelieferten CD-ROM.
29
Inbetriebnahme
Code
Name/Beschreibung
tCC
M [2/3-Drahtst.]
2C
3C
Einstellbereich
Werkseinstellung
[2Draht-Stg] (2C)
v [2Draht-Stg] (2C)
v [3Draht-Stg] (3C)
2-Draht-Steuerung:
Das Ein- oder Ausschalten
wird über den Zustand (0 oder
1) oder die Flanke (0 bis 1 oder
1 bis 0) des Eingangs
gesteuert.
3-Draht-Steuerung:
(Steuerung über Impulse):
Ein Impuls "Rechtslauf" oder
"Linkslauf" reicht aus, um das
Anlaufen des Motors zu
steuern; ein Impuls "Stop"
reicht aus, um das Anhalten
des Motors zu steuern.
Beispiel für eine Verdrahtung als
"Source":
LI1: Rechtslauf
LIx: Linkslauf
Beispiel für eine Verdrahtung als
"Source":
LI1: Stop
LI2: Rechtslauf
LIx: Linkslauf
WARNUNG
UNERWARTETER BETRIEB DES GERÄTS
Zur Änderung der Belegung von [2/3-Drahtst.] (tCC) muss die Taste "ENT" gedrückt werden
(2 s).
Sie bewirkt die Rückkehr zur Werkseinstellung der Funktion [Typ 2-Drahtst.] (tCt) (weitere
Informationen finden Sie auf der mit dem Umrichter gelieferten CD-ROM.) sowie aller
Funktionen, die sich auf Logikeingänge beziehen. Gleichzeitig wird auch die Rückkehr zur
gewählten Makrokonfiguration bewirkt, wenn diese benutzerspezifisch angepasst wurde
(Verlust der Anpassungen). Stellen Sie sicher, dass diese Änderung mit dem verwendeten
Verdrahtungsschema kompatibel ist.
Eine Nichtbeachtung dieser Vorkehrungen kann zum Tod oder schwerwiegenden
Verletzungen führen und/oder Materialschäden zur Folge haben.
CFG
StS
HdG
HSt
GEn
PId
nEt
MSL
M [Makro Konfig.]
v
v
v
v
v
v
v
[Pump. Lüft.] (PnF)
[Start/Stopp] (StS): Betrieb / Stillstand
[Mater.Handl] (HdG): Fördertechnik
[Hubwerk] (HSt): Hubwerke
[allgemein] (GEn): Allgemeine Anwendungen
[PID-Reg.] (PId): PID-Regelung
[Buskom.] (nEt): Kommunikationsbus
[Mast./Slave] (MSL): Master / Slave
WARNUNG
UNERWARTETER BETRIEB DES GERÄTS
Zur Änderung der Belegung von [Makro Konfig.] (CFG) muss die Taste ENT gedrückt
werden (2 s). Stellen Sie sicher, dass die gewählte Makrokonfiguration mit dem verwendeten
Verdrahtungsschema kompatibel ist.
Eine Nichtbeachtung dieser Vorkehrungen kann zum Tod oder schwerwiegenden
Verletzungen führen und/oder Materialschäden zur Folge haben.
30
Inbetriebnahme
Code
Name/Beschreibung
CCFG
M [Kundensp. Makro]
YES
bFr
Werkseinstellung
Parameter, der nur gelesen werden kann und sichtbar ist, wenn mindestens ein
Parameter der Makrokonfiguration geändert wurde.
v [Ja] (YES)
M [Standard Motorfreq.]
50
60
nPr
Einstellbereich
[50 Hz IEC] (50)
v [50 Hz IEC] (50): IEC
v [60 Hz NEMA] (60): NEMA
Dieser Parameter ändert die Voreinstellung folgender Parameter:[Nennspannung Mot.]
(UnS), [Große Frequenz] (HSP), [Nennfreq. Motor] (FrS) und [Max. Ausgangsfreq.] (tFr).
M [Motornennleistung]
Gemäß
Gemäß
Umrichterleistung Umrichterleistung
Motornennleistung gemäß Typenschild;
in kW, wenn [Standard Motorfreq.] (bFr) = [50 Hz IEC] (50);
in HP, wenn [Standard Motorfreq.] (bFr) = [60 Hz NEMA] (60).
UnS
M [Nennspannung Mot.]
Gemäß
Gemäß
Umrichterleistung Umrichterleistung
und
[Motorfrequenz]
(bFr)
Nennspannung des Motors gemäß Typenschild.
ATV61EX●●●●●N4: 200 bis 480 V - ATV61EX●●●●●N, Y: 400 bis 690 V
nCr
M [Nennstrom Motor]
0,25...1,5 In, je
nach Baugröße
(1)
Gemäß
Umrichterleistung
10...500 oder
1000 Hz, je nach
Baugröße
50 Hz
Nennstrom des Motors gemäß Typenschild.
FrS
M [Nennfreq. Motor]
Nennfrequenz des Motors gemäß Typenschild. Die Werkseinstellung beträgt 50 Hz und wird
durch eine Voreinstellung von 60 Hz ersetzt, wenn [Motorfrequenz] (bFr) auf 60 Hz gesetzt
wird.
nSP
M [Motornenndrehzahl]
0...60000 U/min
Gemäß
Umrichterleistung
Nenndrehzahl des Motors gemäß Typenschild.
0...9999 U/min, danach 10,00...60,00 kU/min auf der integrierten Anzeige. Gibt das Typenschild nicht die Nenndrehzahl, sondern die Synchrondrehzahl und den Schlupf in Hertz oder
Prozent an, dann errechnet sich die Nenndrehzahl wie folgt:
•Nenndrehzahl = Synchrondrehzahl x
•Nenndrehzahl = Synchrondrehzahl x
•Nenndrehzahl = Synchrondrehzahl x
100 − Schlupf _ in _ %
100
50 − Schlupf _ in _ %
50
60 − Schlupf _ in _ %
60
oder
(50 Hz-Motoren) oder
(60 Hz-Motoren)
(1) In entpricht dem in der Installationsanleitung und auf dem Typenschild angegebenen Nennstrom des
Umrichters.
31
Inbetriebnahme
Code
Name/Beschreibung
Einstellbereich
Werkseinstellung
tFr
M [Max. Ausgangsfreq.]
10...500 oder
1000 Hz, je nach
Baugröße
60 Hz
Die Werkseinstellung beträgt 60 Hz und wird durch eine Voreinstellung von 72 Hz ersetzt,
wenn der Parameter [Standard Motorfreq.] (bFr) auf 60 Hz eingestellt wird. Der maximale Wert
wird durch folgende Bedingungen eingeschränkt:
• Er kann den Wert der [Nennfreq. Motor] (FrS) nur um das 10fache überschreiten.
tUn
nO
YES
dOnE
M [Motormess.]
[Nein] (nO)
v [Nein] (nO): Motormessung nicht erfolgt.
v [Ja] (YES): Die Motormessung erfolgt sobald wie möglich. Der Parameter wechselt dann
automatisch auf [Ausgeführt] (dOnE).
v [ausgeführt] (dOnE): Verwendung der Werte, die sich durch die vorherige Motormessung
ergeben.
Achtung:
• Alle Motorparameter ([Nennspannung Mot] (UnS), [Motornennfrequenz.] (FrS),
[Nennstrom Motor] (nCr), [Motornenndrehzahl] (nSP), [Motornennleistung] (nPr))
müssen unbedingt vor der Motormessung ordnungsgemäß konfiguriert werden. Wenn
einer dieser Parameter geändert wird, nachdem die Motormessung durchgeführt
wurde, wechselt [Motormessung] (tUn) auf [Nein] (nO) und die Motormessung muss
erneut durchgeführt werden.
• Die Motormessung wird nur dann durchgeführt, wenn kein Haltebefehl erteilt wurde.
Wenn die Funktion "Freier Auslauf" oder "Schnellhalt" einem Logikeingang zugeordnet
wurde, muss dieser Eingang auf 1 gesetzt werden (Eingang auf 0 aktiv).
• Die Motormessung hat Vorrang vor eventuellen Fahr- oder Vormagnetisierungsbefehlen, die nach der Motormessungssequenz berücksichtigt werden.
• Wenn die Motormessung misslingt, zeigt der Umrichter [Nein] (nO) an und kann je
nach Konfiguration von [Mgt Fehler Mot. Mes] (tnL) (siehe mit dem Umrichter gelieferte
CD-ROM) in den Fehlermodus [Motormess.] (tnF) wechseln.
• Die Motormessung kann 1 bis 2 Sekunden dauern. Unterbrechen Sie nicht und warten
Sie ab, bis die Anzeige auf "[ausgeführt] (dOnE)" oder "[Nein] nO" wechselt.
Während der Motormessung fließt Nennstrom durch den Motor.
tUS
tAb
PEnd
PrOG
FAIL
dOnE
PHr
AbC
ACb
32
M [Zust. Mot.-messung]
[Nicht ausg.] (tAb)
(Nur zur Information, nicht einstellbar)
v [Nicht ausg.] (tAb): Der Standardwert des Statorwiderstands wird verwendet, um den
Motor zu steuern.
v [Warten] (PEnd): Die Motormessung wurde angefordert, aber noch nicht ausgeführt.
v [Aktiv] (PrOG): Die Motormessung wird ausgeführt.
v [Fehlerhaft] (FAIL): Die Motormessung ist fehlgeschlagen.
v [ausgeführt] (dOnE): Der von der Motormessfunktion gemessene Statorwiderstand wird
verwendet, um den Motor zu steuern.
M [Phasendrehung]
[ABC] (AbC)
v [ABC] (AbC): Normale Drehrichtung.
v [ACB] (ACb): Umgekehrte Drehrichtung.
Mit diesem Parameter kann die Drehrichtung des Motors ohne Invertierung der
Verkabelung geändert werden.
Inbetriebnahme
Bei Betrieb und bei Stillstand änderbare Parameter
Code
Name/Beschreibung
Einstellbereich
Werkseinstellung
ItH
M [Therm. Nennstr.]
0,2 bis 1,5 In (1)
Gemäß
Umrichterleistung
Strom für den thermischen Schutz des Motors, der entsprechend dem auf dem
Typenschild angegebenen Bemessungsbetriebsstrom einzustellen ist.
ACC
M [Hochlaufzeit]
0,1...999,9 s
3,0 s
Zeit für den Hochlauf von 0 bis zur [Nennfreq. Motor] (FrS). Stellen Sie sicher, dass dieser
Wert mit dem Trägheitsmoment des Antriebs kompatibel ist.
dEC
M [Auslaufzeit]
0,1...999,9 s
3,0 s
Zeit für den Auslauf von der [Nennfreq. Motor.] (FrS), bis auf 0. Stellen Sie sicher, dass
dieser Wert mit dem Trägheitsmoment des Antriebs kompatibel ist.
LSP
M [Kleine Frequenz]
0
Motorfrequenz mit minimalem Sollwert, Einstellung von 0 bis [Große Frequenz] (HSP)
HSP
M [Große Frequenz]
50 Hz
Motorfrequenz mit maximalem Sollwert, Einstellung von [Kleine Frequenz] (LSP) bis [Max.
Ausgangsfreq.] (tFr). Die Werkseinstellung wechselt auf 60 Hz, wenn [Motorfrequenz]
(bFr) = [60 Hz] (60) ist.
(1) In entpricht dem in der Installationsanleitung und auf dem Typenschild angegebenen Nennstrom des
Umrichters.
33
Inbetriebnahme
Fehlerursachen & -behebung
Kein Anlaufen ohne Fehleranzeige
• Erscheint keine Anzeige, überprüfen Sie, ob die Versorgung des Umrichters korrekt ist.
• Die Zuordnung der Funktionen "Schnellhalt" oder "Freier Auslauf" bewirkt ein Nichtanlaufen, wenn die
entsprechenden Logikeingänge nicht unter Spannung stehen. Der ATV71 Plus zeigt dann bei freiem
Auslauf [NST] (nSt) an und bei Schnellhalt [FST] (FSt). Letzteres ist normal, da diese Funktionen bei
Null aktiv sind, um den Stillstand im Falle der eines Drahtbruchs sicherzustellen.
• Es muss sichergestellt sein, dass der oder die Eingänge für Fahrbefehle gemäß dem gewählten
Steuermodus geschaltet werden (Parameter [2/3-Drahtst] (tCC) und [Typ 2-Drahtstg] (tCt)).
Fehler, welche keinen automatischer Wiederanlauf zulassen
Vor einem Wiederanlauf muss die Fehlerursache durch Aus- und anschließendes Wiedereinschalten
beseitigt werden.
Die Fehler AI2F, EnF, SOF, SPF und tnF können auch dezentral über einen Logikeingang oder ein
Befehlsbit zurückgesetzt werden (siehe mit dem Umrichter gelieferte CD-ROM). Die Fehler EnF, InFA,
InFb, SOF, SPF und tnF können auch dezentral über einen Logikeingang oder ein Befehlsbit gesperrt und
gelöscht werden (siehe mit dem Umrichter gelieferte CD-ROM).
Code
Name
Wahrscheinliche Ursache
AI2F
[Eingang AI2]
• Signal an Analogeingang • Verkabelung am Analogeingang AI2
AI2 nicht konform.
und Wert des Signals überprüfen.
AnF
[Drehzahlabweich.]
• Die Drehzahlrückführung
über den Encoder ist
nicht mit dem Sollwert
kohärent.
• Die Parameter von Motor, Verstärkung
und Stabilität überprüfen.
• Einen Bremswiderstand hinzufügen.
• Dimensionierung von
Motor/Umrichter/Last prüfen.
• Die mechanische Ankopplung des
Encoders und seine Verdrahtung
überprüfen.
brF
[Rückm. Bremse]
• Der Rückmeldekontakt
der Bremse stimmt nicht
mit der Bremslogik
überein.
• Den Rückmeldestrompfad und den
Steuerkreis der Bremse überprüfen.
• Den mechanischen Zustand der
Bremse überprüfen.
CrF1
[Fehler Ladung DC
Bus]
• Störung der Steuerung
des Lastrelais oder
Ladevorwiderstand
beschädigt.
• Interne Anschlüsse überprüfen.
• Den Umrichter kontrollieren/reparieren.
ECF
[Mech. Verb. Encoder] • Drahtbruch der
• Die mechanische Kopplung des
mechanischen Kopplung
Encoders überprüfen.
des Encoders.
EEF1_ [EEp St.-teil/
EEF2 Leistungsteil.]
34
• Störung des internen
Speichers.
Maßnahmen zur Behebung
• Umgebung prüfen (elektromagnetische
Verträglichkeit).
• Abschalten, wieder einschalten, zur
Werkseinstellung zurückkehren.
• Den Umrichter kontrollieren/reparieren.
Inbetriebnahme
Code
Name
Wahrscheinliche Ursache
Maßnahmen zur Behebung
EnF
[Fehler Encoder]
• Fehler EncoderRückführung.
• [Anzahl Impulse] (PGI) und [Encoder
Signal] (EnS) überprüfen (siehe mit
dem Umrichter gelieferte CD-ROM).
• Den ordnungsgemäßen mechanischen
und elektrischen Betrieb des Encoders
sowie die Versorgung und den
Anschluss überprüfen.
• Die Drehrichtung des Motors
(Parameter [Phasendrehung] (PHr)
oder die Encodersignale überprüfen
und gegebenenfalls umkehren.
FCF1
[Motorsch. geschl.]
• Das Motorschütz ist
• Das Schütz und seine Verdrahtung
geschlossen, obwohl alle
überprüfen.
Bedingungen zum
• Den Rückmeldestrompfad überprüfen.
Öffnen des Schützes
erfüllt sind.
ILF
[Fehler int Komm.]
• Fehler bei der
Kommunikation
zwischen Optionskarte
und Umrichter.
• Umgebung prüfen (elektromagnetische
Verträglichkeit).
• Verbindungen überprüfen.
• Die Optionskarte ersetzen.
• Den Umrichter kontrollieren/reparieren.
InF1
[Falsche FU Größe]
• Die Leistungskarte
weicht von der
gespeicherten
Leistungskarte ab.
• Den Referenztyp der Leistungskarte
überprüfen.
InF2
[Inkomp. Leist. Karte]
• Die Leistungskarte ist
• Den Typ der Leistungskarte und die
nicht mit der Steuerkarte
Kompatibilität überprüfen.
kompatibel.
InF3
[Fehler int. ser.
Komm.]
• Kommunikationsfehler
bei internen Karten
InF4
[Fehler int. Fabr.]
• Inkonsistenz der internen • Den Umrichter neu kalibrieren (durch
Daten.
den Kundendienst von Schneider
Electric).
InF6
[Int. Option]
• Die im Umrichter
installierte Option ist
nicht bekannt.
• Den Typ der Option und die
Kompatibilität überprüfen.
InF7
[Int. Init Hardw.]
• Die Initialisierung des
Umrichters ist
unvollständig.
• Ausschalten und wieder einschalten.
InF8
[int.Spg. Leistung]
• Die
Spannungsversorgung
des Steuerteils ist nicht
korrekt.
• Die Spannungsversorgung des
Steuerteils überprüfen.
InF9
[int.Strom Messung]
• Die Strommessungen
sind nicht korrekt.
• Die Stromgeber oder die
Leistungskarte ersetzen.
• Den Umrichter kontrollieren/reparieren.
InFA
[int. Spg.Versorgung]
• Die Eingangsstufe
funktioniert nicht
ordnungsgemäß.
• Den Umrichter kontrollieren/reparieren.
InFb
[Interner PTC Fühler]
• Der Temperaturfühler
des Umrichters
funktioniert nicht
ordnungsgemäß.
• Den Temperaturfühler ersetzen.
• Den Umrichter kontrollieren/reparieren.
• Interne Anschlüsse überprüfen.
• Den Umrichter kontrollieren/reparieren.
35
Inbetriebnahme
Code
Name
Wahrscheinliche Ursache
Maßnahmen zur Behebung
InFC
[Inter Zeitmessung]
• Fehler des
elektronischen
Zeitmessers.
• Den Umrichter kontrollieren/reparieren.
InFE
[Fehler CPU]
• Fehler des internen
Mikroprozessors.
• Ausschalten und wieder einschalten.
• Den Umrichter kontrollieren/reparieren.
OCF
[Überstrom]
• Parameter der Menüs
• Parameter überprüfen (siehe mit dem
[EINSTELLUNGEN] (SEt-)
Umrichter gelieferte CD-ROM).
und
Dimensionierung von
[1.4ANTRIEBSDATEN]
Motor/Umrichter/Last prüfen.
(drC-) nicht korrekt.
• Zustand der Mechanik überprüfen.
Massenträgheit oder
Last zu hoch.
• Mechanische
Blockierung.
PrF
[Power Removal]
• Fehler der UmrichterSicherheitsfunktion
„Power Removal“.
• Den Umrichter kontrollieren/reparieren.
SCF1
[Kurzschluß Motor]
SCF2
[Imp. Kurzschluß]
SCF3
[Erdschluß]
• Kurzschluss oder
Erdschluss am
Umrichterausgang.
• Starker Kriechstrom
gegen Erde am
Umrichterausgang bei
Parallelanschluss
mehrerer Motoren.
• Anschlusskabel vom Umrichter zum
Motor und die Isolierung des Motors
überprüfen.
• Taktfrequenz herabsetzen.
• Drosseln in Reihenschaltung zum
Motor hinzufügen.
SOF
[Überdrehzahl]
• Instabilität oder zu stark
antreibende Last.
• Die Parameter von Motor, Verstärkung
und Stabilität überprüfen.
• Einen Bremswiderstand hinzufügen.
• Dimensionierung von
Motor/Umrichter/Last prüfen.
SPF
[Verl.Encod]
• Fehlendes EncoderRückführungssignal.
• Verdrahtung zwischen Encoder und
Umrichter überprüfen.
• Encoder überprüfen.
tnF
[Motormess.]
• Motor ist nicht an den
• Überprüfen, ob der Motor bei der
Umrichter
Motormessung erkannt wird.
angeschlossen.
• Bei Verwendung eines Motorschützes
• Sonder- oder
dieses während der Vermessung
Leistungsmotor nicht auf
schließen.
den Umrichter
• Die Umrichter/Motor-Eignung
abgestimmt.
überprüfen.
36
Inbetriebnahme
Fehler, welche einen automatischen Wiederanlauf nach Beseitigung der
Störungsursache zulassen
Diese Fehler können auch durch Aus- und anschließendes Wiedereinschalten oder über einen Logikeingang oder ein Befehlsbit zurückgesetzt werden (siehe mit dem Umrichter gelieferte CD-ROM).
Code
Name
Wahrscheinliche Ursache
Maßnahmen zur Behebung
APF
[Applikationsfehler]
• Fehler der Karte
"Controller Inside"
• Siehe kartenspezifische
Dokumentation.
bLF
[Bremsanst.]
• Strom des Bremshubs
nicht erreicht. Parameter
der Bremslogik
nichteingestellt, obwohl
die Bremslogik
zugeordnet ist.
• Den Umrichter/Motor-Anschluss
überprüfen.
• Die Motorwicklungen überprüfen.
• Die empfohlenen Einstellungen
vornehmen (siehe mit dem
Umrichter gelieferte CD-ROM).
CnF
[Fehler Netw. Komm.]
• Kommunikationsfehler
auf der
Kommunikationskarte.
• Umgebung
prüfen(elektromagnetische
Verträglichkeit).
• Die Verdrahtung überprüfen.
• Time-out überprüfen.
• Die Optionskarte ersetzen.
• Den Umrichter
kontrollieren/reparieren.
COF
[Fehler CANopen]
• Kommunikationsunterbrechung auf dem
CANopen-Bus.
• Den Kommunikationsbus
überprüfen.
• Time-out überprüfen.
• Siehe spezifische Dokumentation.
EPF1
[Ext. Fehler LI/ Bit]
• Störung durch ein
externes Gerät
ausgelöst, entsprechend
Benutzer.
• Das Gerät prüfen, das die Störung
verursacht hat und wieder
einschalten.
EPF2 [Ext. Fehler Komm.]
• Störung durch ein
externes Gerät
ausgelöst, entsprechend
Benutzer.
• Das Gerät prüfen, das die Störung
verursacht hat und wieder
einschalten.
FCF2 [Motorsch. offen]
• Das Motorschütz ist
geöffnet, obwohl alle
Bedingungen zum
Schließen des Schützes
erfüllt sind.
• Das Schütz und seine
Verdrahtung überprüfen.
• Den Rückmeldestrompfad
überprüfen.
LCF
• Der Umrichter ist nicht
eingeschaltet, obwohl
das Schütz gesteuert
wird.
• Das Schütz und seine
Verdrahtung überprüfen.
• Time-out überprüfen (siehe mit
dem Umrichter gelieferte CDROM).
• Die Verbindung
Netz/Schütz/Umrichter
überprüfen.
[Fehler Netzschütz]
LFF2 [Verlust 4 -20 mA]
LFF3 [Verlust 4 -20 mA AI3]
LFF4 [Verlust 4 -20 mA AI4]
• Verlust des Sollwerts 4 - • Die Anschlüsse an den
20 mA an Analogeingang
Analogeingängen überprüfen.
AI2, AI3 oder AI4
37
Inbetriebnahme
Code
Name
Wahrscheinliche Ursache
ObF
[Überbremsung]
• Zu starke Bremsung oder • Die Auslaufzeit erhöhen.
antreibende Last.
• Bei Bedarf einen
Bremswiderstand einbauen.
• Die Funktion [Anp.
Auslauframpe](brA) aktivieren
(siehe mit dem Umrichter
gelieferte CD-ROM), wenn sie mit
der Anwendung vereinbar ist.
OHF
[Übertemp. Umrichter]
• Überhitzung des
Umrichters.
• Motorlast, Belüftung des
Umrichters und
Umgebungstemperatur
überprüfen. Das Abkühlen
abwarten, um wieder einschalten
zu können.
OLF
[Überlast Motor]
• Auslösung durch zu
hohen Motorstrom.
• Die Einstellung des
Thermoschutzes des Motors und
die Motorlast überprüfen. Das
Abkühlen abwarten,um wieder
einschalten zu können.
OPF1
[Verlust 1 Motorph.]
• Verlust einer Phase am
Umrichterausgang.
• Anschlüsse zwischen Umrichter
und Motor überprüfen.
OPF2 [Verlust 3 Motorph.]
• Motor nicht
angeschlossen oder zu
geringe Leistung.
Motorschütz geöffnet.
Plötzlich auftretende
Motorstromverstimmung
en.
• Anschlüsse zwischen Umrichter
und Motor überprüfen.
• Informationen zur Verwendung
eines Motorschützes: Siehe die
mit dem Umrichter gelieferte CDROM.
• Test mit einem Motor mit geringer
Leistung oder ohne Motor: Bei der
Werkseinstellung ist die Funktion
zur Erkennung von
Motorphasenausfällen aktiviert:
[Verlust Motorphase] (OPL) = [Ja]
(YES). Wenn der Umrichter
getestet werden soll oder
Wartungsarbeiten durchzuführen
sind, ohne dass auf einen dem
Umrichtermodell entsprechenden
Motor zurückgegriffen werden soll
(dies gilt vor allem für
Hochleistungsumrichter), ist die
Funktion zur Erkennung der
Motorphase zu deaktivieren:
[Verlust Motorphase] (OPL) =
[Nein] (nO) - siehe mit dem
Umrichter gelieferte CD-ROM.
• Die Parameter [Nennspannung
Mot.](UnS) und [Nennstrom Motor]
(nCr) überprüfen und optimieren.
Dann eine[Motormess.] (tUn)
durchführen.
OSF
• Netzspannung zu hoch
Störung im Netz.
• Netzspannung überprüfen.
38
[Überspannungsfehler]
Maßnahmen zur Behebung
Inbetriebnahme
Code
Name
Wahrscheinliche Ursache
Maßnahmen zur Behebung
OtF1
[Übertemp. PTC 1]
• Erkennung einer
Überhitzung der PTCFühler 1.
• Die Last und die Bemessung des
Motors kontrollieren.
• Die Belüftung des Motors
kontrollieren.
• Vor dem Wiedereinschalten den
Motor abkühlen lassen.
• Typ und Zustand der PTCFühlerkontrollieren.
OtF2 [Übertemp. PTC2 OPT.]
• Erkennung einer
Überhitzung der PTCFühler 2.
OtFL
[Übertemp. LI6=PTC]
• Erkennung einer
Überhitzung PTCFühler/LI6.
PtF1
[Fehler PTC 1]
• Öffnung oder
Kurzschluss der PTCFühler 1.
PtF2 [Fehler PTC2 OPT.]
• Öffnung oder
Kurzschluss der PTCFühler 2.
PtFL
• Öffnung oder
Kurzschluss PTCFühler/LI6.
[Fehler LI6=PTC]
• PTC-Fühler und deren Motor/Umrichter-Verdrahtung
überprüfen.
SCF4 [Kurzschluss IGBT]
• Fehler des Leistungsteils. • Den Umrichter kontrollieren /
reparieren.
SCF5 [Kurzschl. Ladung ZK]
• Kurzschluss am
Umrichterausgang.
• Anschlusskabel vom Umrichter
zum Motor und die Isolierung des
Motors überprüfen.
• Den Umrichter
kontrollieren/reparieren.
SLF1
• Kommunikationsunterbrechung auf
Modbus-Bus.
• Den Kommunikationsbus
überprüfen.
• Time-out überprüfen.
• Siehe spezifische Dokumentation.
SLF2 [Komm.Powersuite]
• Kommunikationsfehler
mit PowerSuite
• Das PowerSuite-Anschlusskabel
überprüfen.
• Time-out überprüfen.
SLF3 [Fehler Modbus Komm.
HMI]
• Kommunikationsfehler
mit dem Grafikterminal
• Den Anschluss des
Bedienterminals überprüfen.
• Time-out überprüfen.
SrF
[Fehl. Drehm. Time out]
• Time-out der Funktion
„Drehmomentensteuerung“ erreicht.
• Die Einstellung der Funktion
überprüfen.
• Zustand der Mechanik überprüfen.
SSF
[Limit Strom Drehm.]
• Wechsel zur
Drehmomentenbegrenzung
• Auf eventuelles Vorhandensein
eines mechanischen Problems
überprüfen.
• Begrenzungsparameter
überprüfen (siehe mit dem
Umrichter gelieferte CD-ROM).
tJF
[Übertemperatur IGBT]
• Übertemperatur
Umrichter
• Bemessung von
Last/Motor/Umrichter überprüfen.
• Taktfrequenz herabsetzen.
• Vor dem Wiedereinschalten den
Motor abkühlen lassen.
[Komm. Modbus]
39
Inbetriebnahme
Fehler, wo automatisch ein Wiederanlauf erfolgt
Code
Name
Wahrscheinliche Ursache
Maßnahmen zur Behebung
CFF
[inkorrekte Konfig] • Wechsel oder Beseitigung • Prüfen, ob kein Kartenfehler vorliegt.
der Optionskarte.
• Im Falle eines Austausches oder bei
absichtlichem Entfernen der Options• Die aktuelle Konfiguration
karte, die Empfehlungen der mit dem
ist inkonsistent.
Umrichter gelieferten CD-ROM
befolgen.
• Zur Werkseinstellung zurückkehren oder
die gesicherte Konfiguration aufrufen,
falls diese verwendbar ist (siehe mit
dem Umrichter gelieferte CD-ROM).
CFI
[Konfig ungültig]
PHF
• Den Leistungsanschluss und die
[Netzphasenfehler] • Umrichter fehlerhaft
Sicherungen überprüfen.
versorgt oder Sicherung
geschmolzen
• Ein dreiphasiges Netz verwenden.
• Ausfall einer Phase
• Den Fehler durch [Netzphasenausfall]
(IPL) = [Nein] (nO) sperren
• Verwendung eines
dreiphasigen Umrichters
in einem einphasigen Netz
• Last mit Unwucht
Diese Schutzfunktion wirkt
nur unter Last.
USF
[Unterspannung]
• Ungültige Konfiguration.
• Die zuvor eingelesene Konfiguration
Die über den Bus oder
überprüfen.
das Netz in den Umrichter • Eine konsistente Konfiguration laden.
geladene Konfiguration ist
inkonsistent.
• Netzspannung zu niedrig
• Vorübergehender
Spannungsabfall
• Lastwiderstand
beschädigt
• Spannung und Spannungsparameter
überprüfen (siehe mit dem Umrichter
gelieferte CD-ROM).
• Lastwiderstand austauschen.
• Den Umrichter kontrollieren/reparieren.
Austauschen oder Entfernen von Optionskarten
Weitere Informationen finden Sie auf der mit dem Umrichter gelieferten CD-ROM.
40
41
General remarks
The following symbols should assist you in handling the instructions:
Advice, tip !
General information, note exactly !
The requirements for successful commissioning are correct selection of the device, proper planning and installation. If you
have any further questions, please contact the supplier of the device.
Capacitor discharge !
Before performing any work on or in the device, disconnect it from the mains and wait at least 15 minutes until the
capacitors have been fully discharged to ensure that there is no voltage on the device.
Automatic restart !
With certain parameter settings it may happen that the frequency inverter restarts automatically when the mains supply
returns after a power failure. Make sure that in this case neither persons nor equipment is in danger.
Commissioning and service !
Work on or in the device must be done only by duly qualified staff and in full compliance with the appropriate instructions
and pertinent regulations. In case of a fault contacts which are normally potential-free and/or PCBs may carry dangerous
voltages. To avoid any risk to humans, obey the regulations concerning "Work on Live Equipment" explicitly.
Terms of delivery
The latest edition "General Terms of Delivery of the Austrian Electrical and Electronics Industry Association" form the basis
of our deliveries and services.
Specifications in this document
We are always anxious to improve our products and adapt them to the latest state of the art. Therefore, we reserve the
right to modify the specifications given in this document at any time, particular those referring to weights and dimensions.
All planning recommendations and connection examples are non-binding suggestions for which we cannot assume liability,
particularly because the regulations to be complied depend on the type and place of installation and on the use of the
devices.
All foreign-language translations result from the German or English version. Please consider those in case of unclarity.
Basis of contract
The specifications in text and drawings of this document are no subject of contract in the legal sense without explicit
confirmation.
Regulations
The user is responsible to ensure that the device and its components are used in compliance with the applicable
regulations. It is not permitted to use these devices in residential environments without special measures to suppress radio
frequency interferences.
Trademark rights
Please note that we do not guarantee that the connections, devices and processes described herein are free from patent or
trademark rights of third parties.
Copyright
Layout, equipment, logos, texts, diagrams and pictures of this document are copyrighted. All rights are reserved.
42
GERMAN ................................................................1
ENGLISH ..............................................................43
Before start-up ............................................................. 44
Safety ....................................................................................44
Proceeding ............................................................................45
Basic recommendations........................................................46
Installation of the inverter ......................................................48
Wiring recommendations ......................................................52
Commissioning ............................................................ 65
Proceeding ............................................................................65
Factory setting.......................................................................67
Separate power supply for control part.................................67
Power switching via line contactor ........................................68
Starting ..................................................................................68
Test on low-power motor or without motor,
use of motors in parallel ........................................................68
Graphic display terminal........................................................69
Detected faults & troubleshooting .........................................76
FRENCH ...............................................................85
43
Before start-up
Before start-up
Safety
Read these instructions carefully before installing or using the frequency inverter and pay attention to
the following safety notes !
DANGER
HAZARDOUS VOLTAGE
• Read and understand these instructions carefully before installing or operating the frequency inverter.
Installation, adjustment and repair must be performed by qualified personnel.
• The user is responsible for compliance with all international and national electrical standards
concerning protective grounding of the whole equipment.
• Many parts of the frequency inverter, including the printed circuit boards, are supplied with line
voltage. Do not touch these parts.
Only use electrically insulated tools.
• Do not touch unshielded components or terminal screws when the device is energised.
• Do not short-circuit terminals PA/+ and PC/- or the capacitors of the DC bus.
• Install and close all the covers before applying power on the drive.
• Execute the following precautions before maintenance or repair of the frequency inverter:
− Disconnect the power supply.
− Place a label with the notation "DO NOT TURN ON" on the circuit breaker or disconnecting switch
of the frequency inverter.
− Lock the circuit breaker or disconnecting switch in the opened position.
• Before any work, disconnect the frequency inverter from the mains as well as from the external supply
of the control part, if existing. Wait until the charging LED is completely lapsed. Measure the voltage of
the DC bus in order to check whether the DC voltage is below 45 V. The LED of the frequency inverter
which indicates the present DC bus voltage is not sufficient.
Failure to follow these instructions will result in death or serious injury.
CAUTION
IMPROPER OPERATION OF THE INVERTER
• The requirements for successful commissioning are correct selection of the device, proper planning
and installation.
• If the inverter is disconnected over a longer period, the performance of its electrolytic capacitors is
reduced.
• In case of standstill over a longer period, turn the drive on at least every two years for at least five
hours to restore the performance of the capacitors and to check the operational function of the
inverter. It is recommended not to connect the inverter directly to the line voltage but to increase the
voltage gradually by means of an autotransformer.
Failure to follow these instructions can result in equipment damage.
44
Before start-up
Proceeding
1. Receiving the device
■ Check whether the specification on the name plate complies with those of the order.
■ Open the packaging and check whether the Altivar frequency inverter was not damaged during
transport.
2. Checking the line voltage
■ Check whether the line voltage complies with the voltage range of the drive.
3. Installation of the inverter (page 48)
■ Install the enclosure considering the recommendations given in this document.
4. Wiring of the frequency inverter (page 52)
■ Connect the motor, ensuring that its connection corresponds to the line voltage.
■ Connect the line supply, after making sure that it is turned off.
■ Connect the control lines.
5. Start-up
■ Follow the instructions on page 65 to put the frequency inverter into operation.
45
Before start-up
Basic recommendations
Responsibility
The users are responsible to integrate the frequency inverters into the protection and safety
concept of the plant or machine.
All stated connection recommendations and planning remarks are to be taken merely as suggestions
which must be adapted to the local conditions and regulations concerning installation and usage.
This applies especially to the safety regulations for machines, the EMC regulations and the general
regulations for human protection.
CE marking
All devices and drives of the electric drive engineering may cause electromagnetic interferences and
otherwise they may be influenced by such interferences. Therefore, they are subject to the EMC directive
2004/108/EC since 1.1.1996.
The frequency inverters have an operating voltage which is clearly in the range of 50...1000 V AC or
75...1500 V DC. Therefore, they are also subject to the Low-voltage directive 2006/95/EC since 1.1.1997.
Because of the EMC filters which are built into the frequency inverters they are in conformity with
EN 61800-3 and EN 61800-5-1.
Frequency inverters are not considered as machines with at least one mechanically moving part.
Therefore, they are not subject to the Machine directive 2006/42/EC.
Frequency inverters are a product of the restricted sales according to IEC 61800-3. In a
residential environment this product can cause radio frequency interferences whereupon the
user can be called on to take suitable measures.
The frequency inverters have a CE marking on the rating plate. However, it is necessary to observe the
installation regulations to achieve the corresponding limits.
Handling and storage
Before installation the inverter should be packaged during movement and storage to protect the device.
Ensure that the ambient conditions are permitted.
Storage temperature -25°C to 70°C
When the inverter was disconnected over a longer period, the performance of its electrolytic capacitors is
reduced. But due to the "active balancing system" no special treatment of the frequency inverter is
necessary when the maximum storage time has not been exceeded:
• 12 months at a maximum storage temperature of +50°C
• 24 months at a maximum storage temperature of +45°C
• 36 months at a maximum storage temperature of +40°C
When the maximum storage temperature has been exceeded, the inverter has to be applied with
mains voltage for about one hour (forming the electrolytic capacitors) before pulse enable takes
place. We recommend to execute this process already after a shutdown period of 6 months.
46
Before start-up
WARNING
DAMAGED PACKAGING
If the packaging appears damaged, it can be dangerous to open or to handle the packaged device.
Take precautions against all risks when opening or handling the packaging.
Failure to follow this instruction can result in death or serious injury and/or equipment damage.
DANGER
DAMAGED EQUIPMENT
Do not install or operate any drive that appears damaged.
Failure to follow this instruction will result in death or serious injury and/or equipment damage.
The manufacturer does not bear responsibility for damages which result from transport or
unpacking. In this case please inform the insurance company.
Handling / installation
The frequency inverter is delivered standing on a pallet and packaged in carton.
When the device is in its final position, remove the tightening straps and unscrew
the screws of the inverter on the pallet.
When the enclosure is positioned it has to be fixed to the floor with screws!
The inverters are equipped with handling lugs for optimum handling with a hoist.
CAUTION
INCREASED RISK OF TOPPLING
The enclosure must not be handled with a pallet transporter without tightening
straps and tight screw connection with the pallet. There is increased risk of
toppling!
Failure to follow this instruction can result in injury and/or equipment damage.
47
Before start-up
Installation of the inverter
The frequency inverter is delivered in an enclosure ready to connect.
Precautions
CAUTION
INCOMPATIBLE LINE VOLTAGE
Please ensure that the line voltage corresponds with the supply voltage of the frequency inverter before
you switch the inverter on to configure it. An incompatible line voltage may cause damage of the
inverter.
Failure to follow this instruction can result in injury and/or equipment damage.
WARNING
UNEXPECTED OPERATION OF THE DEVICE
• To avoid an unintentional restart please ensure that the input PWR (POWER REMOVAL) is
deactivated (state 0) before you switch the frequency inverter on to configure it.
• Before switching on the device or when exiting the configuration menu, please ensure that the inputs
which are used as run commands are deactivated (state 0) because they promptly could cause a
start of the motor.
Failure to follow this instruction can result in death or serious injury.
If an unintentional restart must be prevented to ensure safety of the operating personnel, the
electronic locking can be performed by the function "Power Removal" of the frequency inverter.
This function requires the use of a wiring diagram which complies with the requirements of
category 3 according to the EN 954-1 standard and safety level 2 according to IEC/EN 61508
(further information are given in the catalogue or on the CD-ROM which is attached to each
inverter).
The Power Removal function (PWR) has higher priority than each run command.
Radio interferences
The frequency inverters include an EMC filter built-in as standard. This filter complies with the
requirements for category "C3 – Industrial environments" according EN/IEC 61800-3 (in the past:
EN 55011 class A group 2).
Frequency inverters are a product of the restricted sales according to IEC 61800-3. In a residential
environment this product can cause radio frequency interferences whereupon the user can be
called on to take suitable measures.
Power factor correction systems
Frequency inverters cause current harmonics in the supplying mains. When a power factor correction
system is used, their capacitors are additionally stressed by means of the harmonics.
To protect against overload, we recommend the installation of chokes for those parts.
48
Before start-up
Capacitor discharge
Disconnect the frequency inverter before performing any work on or in the device and wait until the
capacitors are discharged. Then measure the voltage of the DC bus.
Measuring the voltage at the DC bus
The voltage of the DC bus can exceed 800 V DC (at 690 V: 1000 V DC).
Measure the voltage of the DC bus with a suitable measuring instrument as described below:
1. Disconnect the power supply.
2. Wait 15 minutes until the DC link capacitors are discharged.
3. Measure the voltage of the DC bus between the terminals PA/+ and PC/- in order to check whether
the voltage is below 45 V DC.
Please contact our local distributor if the DC link capacitors do not completely discharge (do not
repair or activate the inverter).
DANGER
HAZARDOUS VOLTAGE
Read the precautions given on page 44 carefully before performing this procedure.
Failure to follow these instructions will result in death or serious injury.
Insulation measurements
All frequency inverters are tested regarding voltage resistance and insulation resistance according to
EN 61800-5-1. When measuring the insulation resistance for this devices (e.g. in case of inspection)
unconditionally pay attention to following points:
1. Short-circuit all power terminals of the inverter (L1, L2, L3, U, V, W, PO, PA/+, PB, PC/-).
2. The internal EMC filter must be deactivated!
3. Carry out the measurements of the insulation resistance only between the short-circuited power
terminals and ground.
4. Test voltage:
ATV71EX●●●●●N4:
max. 2.8 kV DC
ATV71EX●●●●●N, Y:
max. 3.11 kV DC
5. Before measuring the insulation resistance of the motor, the motor has to be safely separated from
the inverter either by disconnection or by opening the motor contactor. Non-observance leads to
damage of the inverter !
Use a checking device which is qualified for tests with high capacities and leakage currents up to
10 mA.
Do not carry out insulation resistance measurements at the control terminals !!!
49
Before start-up
Losses
These losses re valid for operation with nominal load and for a switching frequency of 2.5 kHz.
Depending on design and protection degree, the inverter enclosures are equipped with fans to ensure
cooling of the components. Here the cooling air is sucked in through the enclosure door and the air outlet
takes place through the enclosure roof.
ATV71EX●●
D90N4
C11N4
C13N4
C16N4
C20N4
C25N4
C28N4
C31N4
C40N4
C50N4
ATV71EXA●
C50N4
C63N4
C71N4
C90N4
M11N4
M13N4
50
Losses
[W]
2590
2950
3450
4130
5330
6380
7350
8060
10080
12330
Losses
[W]
11400
14300
16200
19800
24000
29000
ATV71EX●●
D90N
C11N
C13N
C16N
C20N
C25N
C31N
C40N
C50N
ATV71EXA●
C50N
C63N
C80N
C90N
M11N
M13N
M15N
Losses
[W]
2700
3210
3820
4560
5820
7180
8730
11030
13700
Losses
[W]
10700
13200
16100
20100
24700
29200
32000
ATV71EX●●
C11Y
C13Y
C16Y
C20Y
C25Y
C31Y
C40Y
C50Y
C63Y
ATV71EXA●
C63Y
C80Y
M10Y
M12Y
M15Y
M18Y
M20Y
Losses
[W]
2740
3250
3880
4640
5950
7310
8900
11230
13960
Losses
[W]
12700
15800
19200
23800
29500
35000
382000
Before start-up
Air flow
The power losses of the inverter must be dissipated out of the enclosure. In order to guarantee sufficient
circulation of air, ensure that the air flow for each inverter at least corresponds with the given values.
The devices ATV71EXA● are prepared for easy connection to an air extraction.
ATV71EXC●
D90N4
C11N4
C13N4
C16N4
C20N4
C25N4
C28N4
C31N4
C40N4
C50N4
ATV71EXS5
D90N4
C11N4
C13N4
C16N4
C20N4
C25N4
C28N4
C31N4
C40N4
C50N4
ATV71EXA●
C50N4
C63N4
C71N4
C90N4
M11N4
M13N4
Air flow
[m³/h]
400
600
600
800
1200
1200
1200
1800
1800
2400
Air flow
[m³/h]
500
700
750
950
1400
1400
1400
2200
2200
3000
Air flow
[m³/h]
5500
5500
11000
11000
11000
11000
ATV71EXC●
D90N
C11N
C13N
C16N
C20N
C25N
C31N
C40N
C50N
ATV71EXS5
D90N
C11N
C13N
C16N
C20N
C25N
C31N
C40N
C50N
ATV71EXA●
C50N
C63N
C80N
C90N
M11N
M13N
M15N
Air flow
[m³/h]
600
600
600
1200
1200
1200
2400
2400
2400
Air flow
[m³/h]
600
600
600
1200
1200
1200
2400
2400
2400
Air flow
[m³/h]
5500
5500
5500
11000
11000
11000
11000
ATV71EXC●
C11Y
C13Y
C16Y
C20Y
C25Y
C31Y
C40Y
C50Y
C63Y
ATV71EXS5
C11Y
C13Y
C16Y
C20Y
C25Y
C31Y
C40Y
C50Y
C63Y
ATV71EXA●
C63Y
C80Y
M10Y
M12Y
M15Y
M18Y
M20Y
Air flow
[m³/h]
600
600
600
1200
1200
1200
2400
2400
2400
Air flow
[m³/h]
600
600
600
1200
1200
1200
2400
2400
2400
Air flow
[m³/h]
5500
5500
5500
11000
11000
11000
11000
51
Before start-up
Wiring recommendations
Protective grounding
The inverter must be connected to the protective grounding. To comply with the current regulations, use
a protective conductor with at least half of the cross-section of the power supply conductors.
There is a marked terminal (bar) inside the enclosure to connect the protective conductor. Furthermore
there is a marked terminal (bar) to connect the protective grounding of the motor.
WARNING
INDIRECT CONTACT
Only when the protective earthing conductor is proper connected, the device fulfils the requirements for
protection against indirect contact.
Failure to follow this instruction can result in death or serious injury.
■ Check whether the resistance of the protective grounding
is 1 Ω or less.
■ When several inverters need to be connected the the
protective ground, each one must be connected directly
to this protective ground as illustrated opposite.
CAUTION
IMPROPER WIRING PRACTICES
• The frequency inverter will be damaged if the line voltage is applied to the output terminals (U/T1,
V/T2, W/T3).
• Check the electrical connections before energising the frequency inverter.
• If you replace a frequency inverter, please check whether the electrical connection of the ATV71 Plus
corresponds to the wiring comments given in these instructions.
Failure to follow these instructions can result in injury and/or equipment damage.
EMC grounding
The inductance of "grounding" is extremely significant because the measurement of power failures as
well as the existing influences on other loads are related to earth potential. That means that ground
connections with large surface, which are arranged parallel to the yellow-green protective grounding PE,
are particular important.
52
Before start-up
Earth leakage circuit breaker
Frequency inverters, especially those with additional radio frequency interference filters and screened
motor cables, lead an increased leakage current against earth.
The leakage current depends on:
• the length of the motor cable
• the type of laying and whether the motor cable is screened or not
• the set pulse frequency
• the use of an additional radio frequency interference filter
• the grounding of the motor at his installation place (grounded or nongrounded)
Particularly because of the capacitors of the filter, an unintentional triggering of an earth leakage
circuit breaker may occur at the moment of switching on. As well, the earth capacitances may
cause an incorrect triggering during operation.
On the other hand, it is possible that the triggering is blocked by means of DC components which
are caused by the mains rectification at the input of the inverter.
Therefrom, you should observe following:
• Only use short-time delayed and pulse current sensitive earth leakage circuit breakers with
considerably higher tripping current.
• Protect the other loads by means of a separate earth leakage circuit breaker.
• Earth leakage circuit breakers in front of an inverter do not provide absolutely reliable protection in
case of direct contact !! So they should be always used in combination with other protective
measures.
• The frequency inverters have no current-limiting effect (in case of earth leakage currents) and
therefore they do not violate the protective multiple earthing.
Depending on the conditions, the leakage current of plants with high cable lengths can be absolutely
higher than 100 mA !!
The built-in earth leakage detection has no current-limiting effect. It only protects the drive and is
no human protection.
WARNING
OVERCURRENT PROTECTION
■ Overcurrent protective devices must be properly assigned.
■ Use the pre-fuses recommended in the documentation to achieve the nominal short-circuit current.
■ Do not connect the inverter to a supplying mains whose short-circuit capacity exceeds the supposed
maximum short-circuit current.
Failure to follow this instruction can result in death or serious injury.
53
Before start-up
Access to the power terminals
The exact position of the terminals depends on the design variant.
Characteristics and function of the power terminals
Terminals
Function
ATV71EXA●
PE
Terminals for protective ground connection
All ratings
R/L1
S/L2
T/L3
Power supply
The number of terminals varies depending on the
chosen rectification (6-pulse, optional 12-pulse or
24-pulse).
All ratings
PA/+
DC bus + polarity and DC choke connection
ATV71EXC● and
ATV71EXS5
PC/-
DC bus - polarity
ATV71EXC● and
ATV71EXS5
U/T1, V/T2, W/T3
Output to the motor
All ratings
Screen
Connecting bar for the motor cable screen
All ratings
Carry out the whole power wiring observing the provided circuit diagrams.
All power terminals are designed for a vertical connection from bottom.
Alternatively the option "Cable entry via the top" is available.
54
Before start-up
Fuses and cable cross sections
The Altivar enclosure designs have input fuses built-in as
standard. These fuses are for the case that the electronic
protective mechanism of the inverter fails. So they are a
secondary protection of the inverter to protect the power cables
against overload and to protect the input rectifier against an
internal short-circuit.
The below-mentioned diameters for 3-wire cables are
recommended values for laying the cable in air at max. 40°C
ambient temperature, based on the regulations ÖVN EN 1 and
VDE 0100.
The lines in the enclosure are dimensioned according to the
specification for single conductors XLPE/EPR copper 90°C.
The motor cables are dimensioned for the maximum continuous
current. They apply to 0...100 Hz (up to 300 Hz the cable losses
increase about 25 % because of the Skin-effect).
In case of other ambient conditions and different
regulations the cable diameters must be adjusted.
If the mains fuses blow the inverter already has a primary defect. Therefore, exchanging the blown
fuses and switching the inverter on again is not effective. Consequently, the use of circuit
breakers is not advantageous and has additionally the disadvantage of a slower switch-off.
A low cost alternative to screened motor cables is the use of NYCY or NYCWY cables (power
cables with concentric protective conductor).
The dimensioning of the pre-fuses, mains cable cross sections and mains cable length has to be
done taking into account the available mains short circuit current to ensure a safe switch-off in
case of a fault!
If required increase the power of the transformer to reach the necessary short circuit capability.
55
Before start-up
Cable cross sections at standard design
Mains supply
Prerecommended max. cable
fuse
cable [mm2]
[mm2]
(per phase)
ATV71EX●●
max. cable
(with motor
choke) [mm2]
(per phase)
recommended
cable [mm2]
1x (3x 70)
1x (3x 95)
1x (3x 120)
1x (3x 150)
4x 240 (M12)
4x 240 (M12)
4x 240 (M12)
4x 240 (M12)
4x 240 (M12)
2x 150 (M10)
2x 150 (M10)
2x 240 (M12)
2x 240 (M12)
or
4x 240 (M12) 1)
4x 240 (M12)
4x 240 (M12)
4x 240 (M12)
4x 240 (M12)
4x 240 (M12)
6x 240 (M12)
6x 240 (M12)
4x (3x 185)
6x 240 (M12)
6x 240 (M12)
5x (3x 185) or
4x (3x 240)
8x 240 (M12)
2x
6x 240 (M12)
900 A sf
6x 240 (M12)
6x (3x 185) or
5x (3x 240)
16x 240 (M12)
4x
500 A sf
4x
630 A sf
4x
800 A sf
4x
900 A sf
D90N4
C11N4
C13N4
C16N4
250A
315A
400A
400A
1x (3x 120)
1x (3x 185)
2x (3x 120)
2x (3x 120)
2x 185 (M12)
2x 185 (M12)
2x 150 (M10)
2x 150 (M10)
C20N4
C25N4
C28N4
C31N4
C40N4
500 A
630A
700A
800A
1000A
2x (3x 150)
2x (3x 185)
3x (3x 185)
3x (3x 185)
4x (3x 185)
2x 150 (M10)
2x 300 (M10) 2)
3x 185 (M12)
4x 300 (M12)
4x 300 (M12)
C50N4
1250A 4x (3x 240)
6x 300 (M12) 2)
8x 240 (M12)
C71N4
1250A 2x [4x (3x 150)]
or
2x [3x (3x 240)]
1600A 2x [4x (3x 150)]
or
2x [3x (3x 240)]
2000A 4x [2x (3x 185)]
C90N4
2500A 4x [2x (3x 185)]
16x 240 (M12)
M11N4
3200A 4x [3x (3x 185)]
16x 240 (M12)
M13N4
3200A 4x [4x (3x 150)]
or
4x [3x (3x 240)]
16x 240 (M12)
ATV71EXA● C50N4
C63N4
Motor output
Internal max. cable
fuse
(without
motor choke)
[mm2]
(per phase)
250 A sf 2x 150 (M10)
315 A sf 2x 150 (M10)
400 A sf 2x 240 (M12)
500 A sf 2x 240 (M12)
630 A sf
800 A sf
800 A sf
900 A sf
2x
630 A sf
2x
800 A sf
2x
800 A sf
12x 240 (M12) 12x 240 (M12)
12x 240 (M12) 12x 240 (M12)
12x 240 (M12) 12x 240 (M12)
12x 240 (M12) 12x 240 (M12)
1) …
At IP54 with separated air flow (ATV71EXS5●●●N4)
2) ...
Connection only with special cable lugs for switching devices possible
Differing terminal cross sections on request.
56
2x (3x 95)
2x (3x 120)
2x (3x 150)
3x (3x 150)
3x (3x 185)
7x (3x 185) or
6x (3x 240)
9x (3x 185) or
7x (3x 240)
10x (3x 185) or
8x (3x 240)
11x (3x 185) or
9x (3x 240)
Before start-up
Cable cross sections at cable entry above
Mains supply
Prerecommended max. cable
fuse
cable [mm2]
[mm2]
(per phase)
ATV71EX●● D90N4
C11N4
C13N4
C16N4
250A
315A
400A
400A
1x (3x 120)
1x (3x 185)
2x (3x 120)
2x (3x 120)
2x 150 (M10)
2x 240 (M12)
2x 240 (M12)
2x 240 (M12)
C20N4
C25N4
C28N4
C31N4
500 A
630A
700A
800A
2x (3x 150)
2x (3x 185)
3x (3x 185)
3x (3x 185)
C40N4
1000A
C50N4
1250A
ATV71EXA● C50N4
1250A
C63N4
1600A
C71N4
2000A
C90N4
2500A 4x [2x (3x 185)] 16x 240 (M12)
4x 240 (M12)
4x 240 (M12)
4x 240 (M12)
4x 240 (M12)
or
4x 300 (M12) 2)
4x (3x 185)
4x 240 (M12)
or
4x 300 (M12) 2)
4x (3x 240)
6x 240 (M12)
or
1) 2)
6x 300 (M12)
2x [4x (3x 150)] 8x 240 (M12)
or
2x [3x (3x 240)]
2x [4x (3x 150)] 8x 240 (M12)
or
2x [3x (3x 240)]
4x [2x (3x 185)] 16x 240 (M12)
M11N4 3200A 4x [3x (3x 185)] 16x 240 (M12)
M13N4 3200A 4x [4x (3x 150)] 16x 240 (M12)
or
4x [3x (3x 240)]
Motor output
Internal max. cable
fuse
(without
motor choke)
[mm2]
(per phase)
250 A sf 2x 150 (M10)
315 A sf 2x 150 (M10)
400 A sf 2x 240 (M12)
500 A sf 2x 240 (M12)
max. cable
(with motor
choke) [mm2]
(per phase)
recommended
cable [mm2]
2x 150 (M10)
2x 150 (M10)
2x 240 (M12)
2x 240 (M12)
or
4x 240 (M12) 1)
4x 240 (M12)
4x 240 (M12)
4x 240 (M12)
4x 240 (M12)
1x (3x 70)
1x (3x 95)
1x (3x 120)
1x (3x 150)
2x
4x 240 (M12)
630 A sf
4x 240 (M12)
3x (3x 185)
2x
6x 240 (M12)
800 A sf
6x 240 (M12)
4x (3x 185)
2x
6x 240 (M12)
800 A sf
6x 240 (M12)
5x (3x 185) or
4x (3x 240)
2x
6x 240 (M12)
900 A sf
6x 240 (M12)
6x (3x 185) or
5x (3x 240)
630 A sf
800 A sf
800 A sf
900 A sf
4x 240 (M12)
4x 240 (M12)
4x 240 (M12)
4x 240 (M12)
4x
12x 240 (M12) 12x 240 (M12)
500 A sf
4x
12x 240 (M12) 12x 240 (M12)
630 A sf
4x
12x 240 (M12) 12x 240 (M12)
800 A sf
4x
12x 240 (M12) 12x 240 (M12)
900 A sf
1) …
At IP54 with separated air flow (ATV71EXS5●●●N4)
2) ...
Connection only with special cable lugs for switching devices possible
2x (3x 95)
2x (3x 120)
2x (3x 150)
3x (3x 150)
7x (3x 185) or
6x (3x 240)
9x (3x 185) or
7x (3x 240)
10x (3x 185)
or
8x (3x 240)
11x (3x 185)
or
9x (3x 240)
Differing terminal cross sections on request.
57
Before start-up
Cable cross sections at standard design
Mains supply
Prerecommended max. cable
fuse
cable [mm2]
[mm2]
(per phase)
ATV71EX●● D90N
200A
1x (3x 95)
2x 120 (M8)
Motor output
max. cable
(without
motor choke)
[mm2]
(per phase)
200 A sf 2x 150 (M10)
C11N
250A
1x (3x 120)
2x 120 (M8)
250 A sf 2x 150 (M10)
C13N
315A
1x (3x 185)
2x 185 (M12)
315 A sf 2x 150 (M10)
C16N
C20N
C25N
C31N
400A
500A
630A
800A
2x (3x 120)
2x (3x 150)
2x (3x 185)
3x (3x 185)
2x 150 (M10)
2x 150 (M12)
3x 185 (M12)
4x 300 (M12)
C40N
1000A 4x (3x 185)
4x 300 (M12)
C50N
1250A 4x (3x 240)
4x 300 (M12)
400 A sf
500 A sf
630 A sf
2x
400 A sf
2x
500 A sf
2x
630 A sf
2x
630 A sf
2x
800 A sf
ATV71EXA● C50N
1000A 2x [2x (3x 185)] 8x 240 (M12)
Internal
fuse
1250A 2x [4x (3x 150)] 8x 240 (M12)
or
2x [3x (3x 240)]
2x
C80N 1600A 2x [4x (3x 150)] 8x 240 (M12)
or
900 A sf
2x [3x (3x 240)]
C90N 2000A 4x [2x (3x 185)] 16x 240 (M12) 4x
500 A sf
M11N 2500A 4x [2x (3x 185)] 16x 240 (M12) 4x
630 A sf
M13N 2500A 4x [3x (3x 150)] 16x 240 (M12) 4x
800 A sf
or
4x [2x (3x 240)]
M15N 3200A 4x [3x (3x 185)] 16x 240 (M12) 4x
900 A sf
C63N
1) …
At IP54 with separated air flow (ATV71EXS5●●●N)
Differing terminal cross sections on request.
58
max. cable
(with motor
choke) [mm2]
(per phase)
recommended
cable [mm2]
1x (3x 70)
4x 240 (M12)
4x 240 (M12)
4x 240 (M12)
4x 240 (M12)
2x 150 (M10)
or
4x 240 (M12) 1)
2x 150 (M10)
or
4x 240 (M12) 1)
2x 150 (M10)
or
4x 240 (M12) 1)
4x 240 (M12)
4x 240 (M12)
4x 240 (M12)
4x 240 (M12)
4x 240 (M12)
4x 240 (M12)
3x (3x 185)
4x 240 (M12)
4x 240 (M12)
4x (3x 185)
6x 240 (M12)
6x 240 (M12)
6x 240 (M12)
6x 240 (M12)
4x (3x 185) or
3x (3x 240)
5x (3x 185) or
4x (3x 240)
6x 240 (M12)
6x 240 (M12)
12x 240 (M12) 12x 240 (M12)
12x 240 (M12) 12x 240 (M12)
12x 240 (M12) 12x 240 (M12)
12x 240 (M12) 12x 240 (M12)
1x (3x 95)
1x (3x 120)
1x (3x 185)
2x (3x 120)
2x (3x 150)
3x (3x 150)
6x (3x 185) or
5x (3x 240)
7x (3x 185) or
6x (3x 240)
9x (3x 185) or
7x (3x 240)
10x (3x 185) or
8x (3x 240)
11x (3x 185) or
9x (3x 240)
Before start-up
Cable cross sections at cable entry above
Mains supply
Prerecommended max. cable
fuse
cable [mm2]
[mm2]
(per phase)
ATV71EX●●
D90N
C11N
C13N
C16N
C20N
C25N
C31N
200A
250A
315A
400A
500A
630A
800A
1x (3x 95)
1x (3x 120)
1x (3x 185)
2x (3x 120)
2x (3x 150)
2x (3x 185)
3x (3x 185)
2x 150(M10)
2x 150 (M10)
2x 240 (M12)
4x 240 (M12)
4x 240 (M12)
4x 240 (M12)
4x 240 (M12)
C40N
1000A 4x (3x 185)
4x 240 (M12)
C50N
1250A 4x (3x 240)
4x 240 (M12)
ATV71EXA● C50N
C63N
C80N
C90N
M11N
M13N
M15N
1000A 2x [2x (3x 185)] 8x 240 (M12)
Internal
fuse
200 A sf
250 A sf
315 A sf
400 A sf
500 A sf
630 A sf
2x
400 A sf
2x
500 A sf
2x
630 A sf
2x
630 A sf
2x
800 A sf
1250A 2x [4x (3x 150)] 8x 240 (M12)
or
2x [3x (3x 240)]
1600A 2x [4x (3x 150)] 8x 240 (M12) 2x
900 A sf
or
2x [3x (3x 240)]
2000A 4x [2x (3x 185)] 16x 240 (M12) 4x
500 A sf
2500A 4x [2x (3x 185)] 16x 240 (M12) 4x
630 A sf
2500A 4x [3x (3x 150)] 16x 240 (M12) 4x
800 A sf
or
4x [2x (3x 240)]
3200A 4x [3x (3x 185)] 16x 240 (M12) 4x
900 A sf
Motor output
max. cable
(without
motor choke)
[mm2]
(per phase)
2x 150 (M10)
2x 150 (M10)
2x 150 (M10)
4x 240 (M12)
4x 240 (M12)
4x 240 (M12)
4x 240 (M12)
max. cable
(with motor
choke) [mm2]
(per phase)
recommended
cable [mm2]
2x 150 (M10)
2x 150 (M10)
2x 150 (M10)
4x 240 (M12)
4x 240 (M12)
4x 240 (M12)
4x 240 (M12)
1x (3x 70)
1x (3x 95)
1x (3x 120)
1x (3x 185)
2x (3x 120)
2x (3x 150)
3x (3x 150)
4x 240 (M12)
4x 240 (M12)
3x (3x 185)
4x 240 (M12)
4x 240 (M12)
4x (3x 185)
6x 240 (M12)
6x 240 (M12)
6x 240 (M12)
6x 240 (M12)
4x (3x 185) or
3x (3x 240)
5x (3x 185) or
4x (3x 240)
6x 240 (M12)
6x 240 (M12)
12x 240 (M12) 12x 240 (M12)
12x 240 (M12) 12x 240 (M12)
12x 240 (M12) 12x 240 (M12)
12x 240 (M12) 12x 240 (M12)
6x (3x 185) or
5x (3x 240)
7x (3x 185) or
6x (3x 240)
9x (3x 185) or
7x (3x 240)
10x (3x 185) or
8x (3x 240)
11x (3x 185) or
9x (3x 240)
Differing terminal cross sections on request.
59
Before start-up
Cable cross sections at standard design
Mains supply
Prerecommended
fuse
cable [mm2]
ATV71EX●●
ATV71EXA●
C11Y
200A
1x (3x 95)
2x 120 (M8)
Motor output
Internal max. cable
fuse
(without
motor choke)
[mm2]
(per phase)
200 A sf 2x 150 (M10)
C13Y
250A
1x (3x 120)
2x 120 (M8)
250 A sf 2x 150 (M10)
C16Y
315A
1x (3x 185)
2x 185 (M12)
315 A sf 2x 150 (M10)
C20Y
C25Y
C31Y
C40Y
400A
500A
630A
800A
2x (3x 120)
2x (3x 150)
2x (3x 185)
3x (3x 185)
3x 185 (M12)
3x 185 (M12)
3x 185 (M12)
4x 300 (M12)
C50Y
1000A 4x (3x 185)
4x 300 (M12)
C63Y
1250A 4x (3x 240)
4x 300 (M12)
C63Y
1000A 2x [2x (3x 185)]
8x 240 (M12)
1250A 2x [4x (3x 150)]
or
2x [3x (3x 240)]
M10Y 1600A 2x [4x (3x 150)]
or
2x [3x (3x 240)]
M12Y 2000A 4x [2x (3x 185)]
8x 240 (M12)
400 A sf
500 A sf
630 A sf
2x
400 A sf
2x
500 A sf
2x
630 A sf
2x
630 A sf
2x
800 A sf
M15Y 2500A 4x [2x (3x 185)]
16x 240 (M12)
M18Y 2500A 4x [3x (3x 150)]
or
4x [2x (3x 240)]
M21Y 3200A 4x [3x (3x 185)]
16x 240 (M12)
C80Y
1) …
max. cable
[mm2]
(per phase)
max. cable
(with motor
choke) [mm2]
(per phase)
recommended
cable [mm2]
1x (3x 70)
4x 240 (M12)
4x 240 (M12)
4x 240 (M12)
4x 240 (M12)
2x 150 (M10)
or
4x 240 (M12) 1)
2x 150 (M10)
or
4x 240 (M12) 1)
2x 150 (M10)
or
4x 240 (M12) 1)
4x 240 (M12)
4x 240 (M12)
4x 240 (M12)
4x 240 (M12)
4x 240 (M12)
4x 240 (M12)
3x (3x 185)
4x 240 (M12)
4x 240 (M12)
4x (3x 185)
6x 240 (M12)
6x 240 (M12)
6x 240 (M12)
6x 240 (M12)
4x (3x 185) or
3x (3x 240)
5x (3x 185) or
4x (3x 240)
8x 240 (M12)
2x
6x 240 (M12)
900 A sf
6x 240 (M12)
6x (3x 185) or
5x (3x 240)
16x 240 (M12)
4x
12x 240 (M12)
500 A sf
4x
12x 240 (M12)
630 A sf
4x
12x 240 (M12)
800 A sf
12x 240 (M12)
7x (3x 185) or
6x (3x 240)
9x (3x 185) or
7x (3x 240)
10x (3x 185) or
8x (3x 240)
4x
12x 240 (M12)
900 A sf
12x 240 (M12)
16x 240 (M12)
At IP54 with separated air flow (ATV71EXS5●●●Y)
Differing terminal cross sections on request.
60
12x 240 (M12)
12x 240 (M12)
1x (3x 95)
1x (3x 120)
1x (3x 185)
2x (3x 120)
2x (3x 150)
3x (3x 150)
11x (3x 185) or
9x (3x 240)
Before start-up
Cable cross sections at cable entry above
Mains supply
Prerecommended max. cable
fuse
cable [mm2]
[mm2]
(per phase)
ATV71EX●●
C11Y
C13Y
C16Y
C20Y
C25Y
C31Y
C40Y
200A
250A
315A
400A
500A
630A
800A
1x (3x 95)
1x (3x 120)
1x (3x 185)
2x (3x 120)
2x (3x 150)
2x (3x 185)
3x (3x 185)
2x 150(M10)
2x 150 (M10)
2x 240 (M12)
4x 240 (M12)
4x 240 (M12)
4x 240 (M12)
4x 240 (M12)
C50Y
1000A 4x (3x 185)
4x 240 (M12)
C63Y
1250A 4x (3x 240)
4x 240 (M12)
ATV71EXA● C63Y
1000A 2x [2x (3x 185)]
8x 240 (M12)
C80Y
8x 240 (M12)
M12Y
1250A 2x [4x (3x 150)]
or
2x [3x (3x 240)]
1600A 2x [4x (3x 150)]
or
2x [3x (3x 240)]
2000A 4x [2x (3x 185)]
M15Y
2500A 4x [2x (3x 185)]
M18Y
2500A 4x [3x (3x 150)]
or
4x [2x (3x 240)]
3200A 4x [3x (3x 185)]
M10Y
M21Y
8x 240 (M12)
Internal
fuse
200 A sf
250 A sf
315 A sf
400 A sf
500 A sf
630 A sf
2x
400 A sf
2x
500 A sf
2x
630 A sf
2x
630 A sf
2x
800 A sf
2x
900 A sf
Motor output
max. cable
(without
motor choke)
[mm2]
(per phase)
2x 150 (M10)
2x 150 (M10)
2x 150 (M10)
4x 240 (M12)
4x 240 (M12)
4x 240 (M12)
4x 240 (M12)
max. cable
recommended
(with motor
cable [mm2]
choke) [mm2]
(per phase)
2x 150 (M10)
2x 150 (M10)
2x 150 (M10)
4x 240 (M12)
4x 240 (M12)
4x 240 (M12)
4x 240 (M12)
1x (3x 70)
1x (3x 95)
1x (3x 120)
1x (3x 185)
2x (3x 120)
2x (3x 150)
3x (3x 150)
4x 240 (M12)
4x 240 (M12)
3x (3x 185)
4x 240 (M12)
4x 240 (M12)
4x (3x 185)
6x 240 (M12)
6x 240 (M12)
6x 240 (M12)
6x 240 (M12)
4x (3x 185) or
3x (3x 240)
5x (3x 185) or
4x (3x 240)
6x 240 (M12)
6x 240 (M12)
6x (3x 185) or
5x (3x 240)
16x 240 (M12) 4x
500 A sf
16x 240 (M12) 4x
630 A sf
16x 240 (M12) 4x
800 A sf
12x 240 (M12) 12x 240 (M12) 7x (3x 185) or
6x (3x 240)
12x 240 (M12) 12x 240 (M12) 9x (3x 185) or
7x (3x 240)
12x 240 (M12) 12x 240 (M12) 10x (3x 185) or
8x (3x 240)
16x 240 (M12) 4x
900 A sf
12x 240 (M12) 12x 240 (M12) 11x (3x 185) or
9x (3x 240)
Differing terminal cross sections on request.
61
Before start-up
Access to the control terminals
Open the cover on the control front panel as illustrated to access the
control terminals. In order to simplify the wiring at the control part of the
inverter it is possible to pull out the control terminals.
1. Unscrew the screw until the spring is expanded.
2. Pull out the option card by pushing it downwards.
Maximum wire size:
2.5 mm² - AWG 14
Maximum tightening torque: 0.6 Nm - 5.3 lb.in
CAUTION
GROUND
The ground (0 V) can float up to 35 V compared to PE. The connection 0 V - ground necessary to limit
the voltage can therefore e.g. also occur far away in the PLC (if necessary by the analog output related
to 0 V).
Failure to follow this instruction can result in injury and/or equipment damage.
CAUTION
IMPROPERLY FIXED TERMINAL CARD
After reassembling the control terminal card it is essential to tighten the captive screw.
Failure to follow this instruction can result in injury and/or equipment damage.
Characteristics and function of the control terminals
Terminals Function
Electrical characteristics
• Minimum switching capacity: 3 mA for 24 V c
R1A
R1B
R1C
Programmable relay R1:
NC contact makes contact when
switching on, opens at trip
R2A
R2C
N.O. contact of programmable relay • Maximum switching capacity on inductive load
R2
(cos φ = 0.4 and L/R = 7 ms): 2 A for 250 V a or
30 V c
+10
Power supply +10 V c for reference • +10 V c (10.5 V ± 5 V)
potentiometer 1...10 kΩ
• Max. 10 mA
AI1 +
AI1-
Differential analog input AI1
• -10 to +10 V c (maximum peak voltage 24 V)
COM
Reference potential for analog in/outputs
0V
AI2
Depending on software
configuration: analog input, voltage
or current
• Analog input 0 to +10 V c (maximum peak voltage
24 V), impedance 30 kΩ
62
• Maximum switching capacity on resistive load: 5 A
for 250 V a or 30 V c
• Or analog input X - Y mA; X and Y can be
programmed from 0 to 20 mA, impedance 250 Ω
Before start-up
Terminals Function
Electrical characteristics
AO1
• Analog output 0 to +10 V c, min. load impedance
50 kΩ
Depending on software
configuration: analog output,
voltage or current or logic output
• Or analog output X – Y mA; X and Y can be
programmed from 0...20 mA, max. load impedance
500 Ω
• Or logic output 0...10V or 0...20 mA
P24
Input for external +24 V c supply
for control part
• +24 V c (min. 19 V, max. 30 V)
• Power 30 Watt
0V
Reference potential of the logic
0V
inputs and 0 V of the voltage supply
P24
LI1...LI5
Programmable logic inputs
• +24 V c (max. 30 V)
• Impedance 3.5 kΩ
LI6
Depending on the position of switch SW2 = LI:
SW2: LI or PTC
• Same characteristics as logic inputs LI1...LI5
SW2 = PTC:
• Trip threshold 3 kΩ , reset threshold 1.8 kΩ
• Short-circuit detection threshold < 50 Ω
+24
Power supply
Switch SW1 in position "Source" or "Sink Int":
• Internal +24 V c power supply
• Max. 200 mA
Switch SW1 in position "Sink Ext":
• Input for external +24 V c voltage supply for the
logic inputs
PWR
Input of the safety function "Power
Removal"
• 24 V c (max. 30 V)
• Impedance 1.5 kΩ
Terminals of the basic I/O extension option card (VW3 A3E 201)
Characteristics and function of the terminals
Maximum wire size:
Maximum tightening torque:
1.5 mm² - AWG 16
0.25 Nm - 2.21 lb.in
Terminals Function
TH1+
Input PTC probe
TH1LO1
LO2
Programmable logic outputs with
open collector
CLO
Reference potential of logic outputs
0V
0V
Electrical characteristics
• Trip threshold 3 kΩ, reset threshold 1.8 kΩ
• Short-circuit detection threshold < 50 Ω
• +24 VV c (max. 30 V)
• Max. current: 200 mA for internal power supply and
200 mA for external power supply
0V
63
Before start-up
Terminals of the extended I/O option card (VW3 A3E 202)
Characteristics and function of the terminals
Maximum wire size:
Maximum tightening torque:
1.5 mm² - AWG 16
0.25 Nm - 2.21 lb.in
R4A to LI14: same characteristics as for the control card.
Terminals Function
TH2 +
Input PTC probe
TH2 -
Electrical characteristics
• Trip threshold 3 kΩ, reset threshold 1.8 kΩ
• Short-circuit detection threshold < 50 Ω
RP
Frequency input
• Frequency range 0...30 kHz, max. 30 V, max. 15 mA
• Add a resistor for input voltages higher than 5 V
(510 Ω for 12 V, 910 Ω for 15 V, 1.3 kΩ for 24 V)
LO3
LO4
Programmable logic outputs with
open collector
• +24 V c (max. 30 V)
• Max. current: 20 mA for internal power supply and
200 mA for external power supply
CLO
Reference potential of logic outputs
0V
0V
0V
Terminals of encoder interface card
Further information are given on the CD-ROM which is attached to each inverter.
Operation on IT systems and corner grounded systems
The use of the Altivar frequency inverters is basically in all network variants permitted.
The following devices must not be operated in "Corner Grounded Networks":
■ ATV71EX●●●●●N
■ ATV71EX●●●●●Y
All Altivar frequency inverters have a EMC filter built-in. Use the option "Design for IT networks" (VW3 AE
2701) in case of operation on IT systems. When choosing this option the inverter is prepared for
connection to IT systems.
The used isolation monitoring device must be capable for non-linear loads.
In case of nongrounded networks a single earth fault in the supplying mains has no effect to the function
of the inverter. If the earth fault occurs in the motor or the motor cables, the inverter is switched off. But
the recognition heavily depends on the earth capacitance of the mains.
64
Commissioning
Commissioning
Proceeding
1. Check of the power wiring
■ The power supply has to be connected to the terminals provided for the line voltage.
■ Is the enclosure proper grounded for the purpose of human protection?
■ Check the size of the pre-fuses according to the table in chapter "Fuses and cable cross sections",
page 55.
■ Does the length of the motor cable correspond with the allowed limits (see table in the ATV71 Plus
Selection guide) and is a motor choke integrated, if required?
2. Check the EMC measures
■ Does the setting of the integrated EMC filter correspond to the mains situation (TT,TN or IT, Corner
Grounded)? See also chapter "Operation on IT systems and corner grounded systems", page 64.
■ The screen of the motor cable must have a well HF connection on the motor and inverter side.
■ All low-level control wires (also the logic inputs) have to be screened and taken separately from the
motor cables.
■ The enclosure requires a ground connection with large surface (minimum width of the grounding
lug 40 mm) in order to keep the interference limits.
3. Power up the device without run command
■ If existing, check the external power supply and turn it on.
■ Check whether the voltage level of the control transformer corresponds with the existing line
voltage and adjust it, if required.
■ Check the line voltage and turn it on.
■ Perform a check measurement:
■ Are the three phase voltages available and are they symmetrically?
■ Is there a right hand phase rotation at the line terminals?
(observe the regulation "Work on Live Equipment")
■ Check the control according to the delivered circuit diagrams and put it into operation.
4. Select the language and the access level (page 70)
■ When the drive is powered up the first time, the user will automatically be guided through the
menus as far as [1 DRIVE MENU]. You have to choose the language and the access level.
5. Configuration of the menu [SIMPLY START] (page 71)
■ The parameters of this submenu have to be configured and the motor measurement must be
executed before running the motor.
6. Setting of the line voltage
■ Check the parameter for the line voltage and adapt it according to the used line voltage, if required.
65
Commissioning
7. Start of the drive in panel operation
■ Ask for release before start-up!
■ Switch the keypad to panel control.
■ Check the direction of the motor rotation.
■ Try different speeds and check the charge of the drive.
8. Remote operation
■ Before switching back to Remote-operation check the active reference values and control
commands.
■ Switch back to Remote-operation and check the power parameters and the reactions to the control
commands again.
9. Data storage and protocols
■ Lock unintended operating modes by adequate parameter adjustment.
■ Save all application parameters.
■ Read-out all parameters with the PC program "Power Suite" and print out the whole list if
necessary.
66
Commissioning
Factory setting
Factory setting of the inverter
The ATV71 Plus is factory-set for the most common operating conditions:
■ Macro configuration: Pumps / fans
■ Motor frequency: 50 Hz
■ Energy-saving variable torque applications
■ Normal stop mode on deceleration ramp
■ Stop mode in the event of a fault: freewheel
■ Linear, acceleration and deceleration ramps: 3 seconds
■ Low speed: 0 Hz
■ High speed: 50 Hz
■ Motor thermal current = rated drive current
■ Standstill injection braking current = 0.7 x rated drive current, for 0.5 seconds
■ No automatic starts after a fault
■ Switching frequency 2.5...12 kHz, depending on drive rating
■ Logic inputs:
LI1: forward (one operating direction), 2-wire control on transition
LI2: inactive (not assigned)
LI3: switching of 2nd speed reference
LI4: fault reset
LI5, LI6: inactive (not assigned)
■ Analog inputs:
AI1: 1st speed reference 0...+10 V
AI2: 2nd speed reference 0...20 mA
■ Relay R1: the contact opens in the event of a fault (or drive off)
■ Relay R2: the contact closes when the drive is in operation
■ Analog output AO1: 0...20 mA inactive (not assigned)
If the above values are compatible with the application, the drive can be used without changing the
settings.
Factory setting of option cards
The inputs/outputs of the option cards are not factory-set.
Separate power supply for control part
When the control part of the inverter is powered independently of the power part (P24 and 0V terminals),
only the power part must be supplied with power next time the drive is powered up whenever an option
card is added or replaced. Otherwise the new card would not be recognised. There would be no
possibility to configure it, thereby causing the drive to lock in fault mode.
67
Commissioning
Power switching via line contactor
WARNING
RISK OF DAMAGE TO THE INVERTER
■ Avoid operating the contactor frequently (premature ageing of the filter capacitors).
■ Cycle times < 60 s can result in damage to the pre-charge resistor.
Failure to follow this instruction can result in death or serious injury and/or equipment damage.
Starting
In factory setting the logic inputs are on transition.
The inverter will not restart automatically after
■ Switching on
■ Manual reset
■ Stop command.
The drive will display "nSt". For renewed start the run command must be set again.
Test on low-power motor or without motor, use of motors
in parallel
Further information are given on the CD-ROM which is attached to each inverter.
68
Commissioning
Graphic display terminal
Although the graphic display terminal is optional for low-power drives, it is a standard component on
high-power drives (see catalog). The graphic display terminal is removable and can be located remotely
(on the door of an enclosure, for example) using the cables and accessories available as options (see
catalog).
Description of the terminal
Note: Buttons 3, 4, 5 and 6 can be used to control the drive directly, if control via the graphic display
terminal is activated.
State codes of the inverter
ACC: Acceleration
CLI: Current limitation
CTL: Controlled stop on input phase loss
DCB: DC injection braking in progress
DEC: Deceleration
FLU: Motor fluxing in progress
FRF: Lower limit for torque control
FST: Fast stop
NLP: No line power (no line voltage on L1, L2, L3)
NST: Freewheel stop
OBR: Auto-adapted deceleration
PRA: Power Removal function active (drive locked)
RDY: Inverter ready
RUN: Inverter running
SOC: Controlled output cut in progress
TUN: Auto-tuning in progress
USA: Undervoltage alarm
69
Commissioning
Disconnected terminal
When the terminal is disconnected, two LEDs become visible:
Green LED z: DC bus ON
Red LED r: Fault
Navigation
When the drive is powered up the first time, the user will automatically be guided through the menus as
far as [1 DRIVE MENU]. You have to choose the language and the access level.
The parameter of the submenu [1.1 SIMPLY START] have to be configured and the motor measurement
must be executed before running the motor.
Only the menu [1.1 SIMPLY START] is described in this document. The description of the other
menus is given on the CD-ROM which is attached to each inverter.
Display for three seconds after power-up.
↓
3 seconds
Switches to menu [5 LANGUAGE] automatically.
Select the language and press ENT.
↓
ENT
Switches to menu [2 ACCESS LEVEL] (Further
information are given on the CD-ROM which is
attached to each inverter). Select the access level
and press ENT.
↓
ENT
Switches to menu [1 DRIVE MENU] (Further
information are given on the CD-ROM which is
attached to each inverter).
↓
ESC
Press ESC to return to [MAIN MENU].
70
Commissioning
Menu [1.1 SIMPLY START] (SIM-)
The menu [1.1 SIMPLY START] (SIM-) can be used for fast startup, which is sufficient for the majority of
applications.
Note: The parameters of the menu [1.1 SIMPLY START] (SIM-) must be entered in the order in which they
appear, as the later ones are dependent on the first ones.
For example parameter [2/3 wire control] (tCC) must be configured before any other parameter.
Macro configuration
Macro configuration provides a means of speeding up the configuration of functions for a specific field of
application.
Selecting a macro configuration assigns the inputs/outputs according to this macro configuration.
Input/
Output
[Start/
Stop]
[M. handling]
[Gen. Use]
[Hoisting]
[PID regul.]
[Network C.]
AI1
[Ref. 1
channel]
[Ref. 1
channel]
[Ref. 1
channel]
[Ref. 1
channel]
[Ref. 1 channel]
(PID reference)
AI2
[No]
[PID feedback]
[No]
[No drive
flt]
[Summing
ref. 2]
[No]
[No drive flt]
[No]
AO1
R1
[Summing
ref. 2]
[No]
[No drive flt]
[Ref. 2 channel]
([Ref. 1
channel]
via the bus)
[No]
[No]
[No drive flt]
[No]
[No drive flt]
[No]
[No drive flt]
[Torque
reference]
[No]
[No drive flt]
R2
LI1
(2-wire)
LI2
(2-wire)
LI3
(2-wire)
LI4
(2-wire)
LI5
(2-wire)
LI6
(2-wire)
LI1
(3-wire)
LI2
(3-wire)
LI3
(3-wire)
LI4
(3-wire)
LI5
(3-wire)
LI6
(3-wire)
[No]
[Forward]
[No]
[Forward]
[No]
[Forward]
[Brk control]
[Forward]
[No]
[Forward]
[No]
[Forward]
[No]
[Forward]
[Reverse]
[Reverse]
[Reverse]
[Reverse]
[Reverse]
[Reverse]
[Reverse]
[No]
[Jog]
[Fault reset]
[Fault reset]
[External fault]
[Trq/spd
switching]
[Fault reset]
[Torque
limitation]
[No]
[No]
[No]
[No]
[No]
[PID integral
reset]
[2 preset PID
ref.]
[4 preset PID
ref.]
[No]
[Ref. 2
switching]
[Fault reset]
[No]
[2 preset
speeds]
[4 preset
speeds]
[8 preset
speeds]
[Fault reset]
[No]
[No]
Stop
Stop
Stop
Stop
Stop
Stop
Stop
[Forward]
[Forward]
[Forward]
[Forward]
[Forward]
[Forward]
[Forward]
[No]
[Reverse]
[Reverse]
[Reverse]
[Reverse]
[Reverse]
[Reverse]
[No]
[2 preset
speeds]
[4 preset
speeds]
[8 preset
speeds]
[Jog]
[Fault reset]
[Fault reset]
[External fault]
[Ref. 2
switching]
[Fault reset]
[Trq/spd
switching]
[Fault reset]
[Torque
limitation]
[No]
[PID integral
reset]
[2 preset PID
ref.]
[4 preset PID
ref.]
[No]
[No]
[No]
[No]
[No]
[No]
[Mast./
slave]
[Ref. 1
channel]
In 3-wire control, the assignment of inputs LI1...LI6 shifts.
All these values can be modified, adjusted and reassigned. Further information are given on the
CD-ROM which is attached to each inverter.
71
Commissioning
Code
Name/Description
tCC
M [2/3 wire control]
2C
3C
Adjustment
range
Factory setting
[2 wire] (2C)
v [2 wire] (2C)
v [3 wire] (3C)
2-wire control:
Running or stopping is
controlled by the input state (0
or 1) or the edge (0 to 1 or 1 to
0).
3-wire control:
(pulse control):
A “forward” or “reverse” pulse
is sufficient to control the
startup of the motor, a “stop”
pulse is sufficient to control
stopping of the motor.
Example of "source" wiring:
LI1: forward
LIx: reverse
Example of "source" wiring:
LI1: stop
LI2: forward
LIx: reverse
WARNING
UNEXPECTED OPERATION OF THE DEVICE
To change the assignment of [2/3 wire control] (tCC) press the “ENT” key for 2 s.
The [2 wire type] (tCt) function will be returned to its factory setting (further information are
given on the CD-ROM which is attached to each inverter.) as will the functions assigning the
logic inputs. The macro configuration selected will also be reset if it has been customised
(loss of custom settings). Check that this change is compatible with the wiring diagram
used.
Failure to follow these instructions can result in death or serious injury and/or equipment
damage.
CFG
StS
HdG
HSt
GEn
PId
nEt
MSL
M [Macro configuration]
v
v
v
v
v
v
v
[Pumps.Fans]
(PnF)
[Start/Stop] (StS): Start / stop
[M. handling] (HdG): Handling
[Hoisting] (HSt): Hoisting
[Gen. Use] (GEn): General use
[PID regul.] (PId): PID regulation
[Network C.] (nEt): Communication bus
[Mast./slave] (MSL): Master / slave
WARNING
UNEXPECTED OPERATION OF THE DEVICE
To change the assignment of [Macro configuration] (CFG) press the “ENT” key for 2 s.
Check that the selected macro configuration is compatible with the wiring diagram used.
Failure to follow these instructions can result in death or serious injury and/or equipment
damage.
CCFG
M [Customised macro]
Read-only parameter, only visible if at least one macro configuration parameter has been
modified.
YES
v
[Yes] (YES)
72
Commissioning
Code
Name/Description
bFr
M [Standard mot. freq.]
50
60
nPr
Adjustment
range
Factory setting
[50 Hz IEC] (50)
v [50 Hz IEC] (50): IEC
v [60 Hz NEMA] (60): NEMA
This parameter modifies the presets of the following parameters: [Rated motor volt.]
(UnS), [High speed] (HSP), [Rated motor freq.] (FrS) and [Max. frequency] (tFr).
M [Rated motor power]
According to
drive rating
According to
drive rating
According to
drive rating
According to
drive rating and
[Standard mot.
freq] (bFr)
Rated motor power given on the nameplate,
in kW, if [Standard mot. freq] (bFr) = [50 Hz IEC] (50),
in HP, if [Standard mot. freq] (bFr) = [60 Hz NEMA] (60).
UnS
M [Rated motor volt.]
Rated motor voltage given on the nameplate.
ATV61EX●●●●●N4: 200 to 480 V - ATV61EX●●●●●N, Y: 400 to 690 V
nCr
M [Rated mot. current]
0.25...1.5 In,
according to
rating (1)
According to
drive rating
10...500 or
1000 Hz,
according to
rating
50 Hz
Rated motor current given on the nameplate.
FrS
M [Rated motor freq.]
Rated motor frequency given on the nameplate. The factory setting is 50 Hz, and it is
replaced by a preset of 60 Hz if [Standard mot. freq] (bFr) is set to 60 Hz.
nSP
M [Rated motor speed]
0...60000 rpm
According to
drive rating
Rated motor speed given on the nameplate. 0...9999 rpm, then 10.00...60.00 krpm on the
integrated display terminal. If the nameplate does not indicate the rated speed but the
synchronous speed and the slip in Hz or as a %, you can calculate the rated speed as
follows:
100 − slip as a %
or
•Rated speed = Synchronous speed x
100
50 − slip as a %
(50 Hz motors) or
•Rated speed = Synchronous speed x
50
•Rated speed = Synchronous speed x
60 − slip as a %
60
(60 Hz-motors)
(1) In corresponds to the rated drive current indicated in the Installation Manual and on the drive
nameplate.
73
Commissioning
Code
Name/Description
tFr
M [Max. frequency]
Adjustment
range
10...500 or
1000 Hz,
according to
rating
Factory setting
60 Hz
The factory setting is 60 Hz, and it is replaced by a preset of 72 Hz if [Standard mot. freq]
(bFr) is set to 60 Hz. The maximum value is limited by the following conditions:
• It must not exceed 10 times the value of [Rated motor freq.] (FrS).
tUn
nO
YES
dOnE
M [Auto tuning]
[No] (nO)
v
v [No] (nO): Auto-tuning not performed. [Yes] (YES): Auto-tuning is performed as soon as
possible. Then the parameter automatically changes to [Done] (dOnE).
v [Done] (dOnE): Use of the values given the last time auto-tuning was performed.
Caution:
• It is essential that all motor parameters ([Rated motor volt.] (UnS), [Rated motor freq.]
(FrS), [Rated mot. current.] (nCr), [Rated motor speed] (nSP), [Rated motor power]
(nPr)) are configured correctly before starting auto-tuning. If at least one of these
parameters is modified after auto-tuning has been performed, [Auto tuning] (tUn) will
return to [No] (nO) and must be repeated.
• Auto-tuning is only performed if no stop command has been activated. If a “freewheel
stop” or “fast stop” function has been assigned to a logic input, this input must be set
to 1 (active at 0).
• Auto-tuning takes priority over any run or prefluxing commands, which will be taken
into account after the auto-tuning sequence.
• If auto-tuning fails, the drive displays [No] (nO) and, depending on the configuration of
[Autotune fault mgt] (tnL) (see the CD-ROM attached to each inverter), may switch to
[Auto-tuning] (tnF) fault mode.
• Auto-tuning may last for 1 to 2 seconds. Do not interrupt; wait for the display to
change to “[Done] (dOnE)” or “[No] (nO)”.
During auto-tuning the motor operates at rated current.
tUS
tAb
PEnd
PrOG
FAIL
dOnE
PHr
AbC
ACb
74
M [Auto tuning state]
[Not done] (tAb)
(for information only, cannot be modified)
v [Not done] (tAb): The default stator resistance value is used to control the motor.
[Pending] (PEnd): Auto-tuning has been requested but not yet performed.
v [In progress] (PrOG): Auto-tuning in progress.
v [Failed] (FAIL): Auto-tuning has failed.
v [Done] (dOnE): The stator resistance measured by the auto-tuning function is used to
v control the motor.
M [Output Ph rotation]
[ABC] (AbC)
v [ABC] (AbC): Forward
v [ACB] (ACb): Reverse.
This parameter can be used to reverse the direction of rotation of the motor without
reversing the wiring.
Commissioning
Parameters changeable during operation or when stopped
Code
Name/Description
Adjustment
range
Factory setting
ItH
M [Mot. therm. current]
0.2 to 1.5 In (1)
According to
drive rating
Motor thermal protection current, to be set to the rated current indicated on the
nameplate.
ACC
M [Acceleration]
0.1...999.9 s
3.0 s
Time to accelerate from 0 to the [Rated motor freq.] (FrS). Make sure that this value is
compatible with the inertia being driven.
dEC
M [Deceleration]
0.1...999.9 s
3.0 s
Time to decelerate from the [Rated motor freq.] (FrS) to 0. Make sure that this value is
compatible with the inertia being driven.
LSP
M [Low speed]
0
Motor frequency at minimum reference, can be set between 0 and [High speed] (HSP)
HSP
M [High speed]
50 Hz
Motor frequency at maximum reference, can be set between [Low speed] (LSP) and [Max
frequency] (tFr). The factory setting changes to 60 Hz if [ Standard mot. freq] (bFr) = [60
Hz] (60).
(1) In corresponds to the rated drive current indicated in the Installation Manual and on the drive
nameplate.
75
Commissioning
Detected faults & troubleshooting
Drive does not start, no fault displayed
• If the display does not light up, check the power supply to the drive.
• The assignment of the “Fast stop” or “Freewheel stop” functions will prevent the drive from starting if
the corresponding logic inputs are not powered up. The ATV71 Plus then displays [Freewheel] (nSt) in
freewheel stop and [Fast stop] (FSt) in fast stop. This is normal since these functions are active at zero
so that the drive will be stopped safely if there is a wire break.
• Make sure that the run command input or inputs are activated in accordance with the selected control
mode (parameters [2/3 wire control] (tCC) and [2 wire type] (tCt)).
Faults which cannot be reset automatically
The cause of the fault must be removed before resetting by turning off and then back on.
AI2F, EnF, SOF, SPF and tnF faults can also be reset remotely by means of a logic input or control bit
(see the CD-ROM which is attached to each inverter). EnF, InFA, InFb, SOF, SPF and tnF faults can be
inhibited and cleared remotely by means of a logic input or control bit (see the CD-ROM which is attached to each inverter).
Code
Name
Probable cause
Remedy
AI2F
[AI2 input]
• Non-conforming signal
on analog input AI2
• Check the wiring of analog input AI2
and the value of the signal.
AnF
[Load slipping]
• The encoder speed
feedback does not
match the reference.
• Check the motor, gain and stability
parameters.
• Add a braking resistor.
• Check the size of the motor/inverter/load.
• Check the encoder's mechanical coupling and its wiring.
brF
[Mechanical brake flt]
• The brake feedback does • Check the feedback circuit and the
not match the brake
brake logic control circuit.
logic control.
• Check the mechanical state of the
brake.
CrF1
[Precharge fault]
• Charging relay control
fault or charging resistor
damaged.
• Check the internal connections.
• Inspect/repair the inverter.
ECF
[Encoder coupling]
• Break in encoder's mechanical coupling.
• Check the encoder's mechanical coupling.
EEF1_
EEF2
[EEp control / powerpart]
• Internal memory fault.
• Check the environment (electromagnetic compatibility).
• Turn off, reset, return to factory settings.
• Inspect/repair the inverter.
EnF
[Encoder fault]
• Encoder feedback fault.
• Check [number of pulses] (PGI) and
[Encoder signal] (EnS) (consult the CDROM supplied with the drive).
• Check that the encoder's mechanical
and electrical operation, its power
supply and connections are correct.
• Check the direction of motor rotation
(parameter [Phase rotation]) (PHr) or
the encoder signals and if necessary
reverse them.
76
Commissioning
Code
Name
Probable cause
Remedy
FCF1
[Out. contact. closed]
• The output contactor
remains closed although
the opening conditions
have been met.
• Check the contactor and its wiring.
• Check the feedback circuit.
ILF
[Internal link fault]
• Communication fault
• Check the environment (electromagbetween option card and
netic compatibility).
inverter
• Check the connections.
• Replace the option card.
• Inspect/repair the inverter.
InF1
[Rating error]
• The power card is different to the card stored.
InF2
[Incompatible PB]
• The power card is in• Check the number and compatibility of
compatible with the conthe power card.
trol card.
InF3
[Int. serial link flt.]
• Communication fault
between the internal
cards
• Check the internal connections.
• Inspect/repair the inverter.
InF4
[Internal flt-mfg area]
• Internal data inconsistent.
• Recalibrate the drive (performed by
Schneider Electric product support).
InF6
[Internal flt-option]
• The option installed in
the inverter is not recognised.
• Check the reference and compatibility
of the option.
InF7
[Intern. flt-hard. init.]
• Initialisation of the inverter is incomplete.
• Turn off and reset.
InF8
[Int. flt-control sup.]
• The power supply of the
control part is incorrect.
• Check the power supply of the control
part.
InF9
[Internal- flt-I measure] • Incorrect current measurements.
• Replace the current sensors or the
power card.
• Inspect/repair the inverter.
InFA
[Internal-mains circuit] • Input stage does not
operate correctly.
• Inspect/repair the inverter.
InFb
[Internal- th. sensor]
• The temperature sensor
of the inverter is not operating correctly.
• Replace the temperature sensor.
• Inspect/repair the inverter.
InFC
[Int. time meas]
• Fault on the electronic
time measurement component
• Inspect/repair the inverter.
InFE
[Fault CPU]
• Internal microprocessor
fault.
• Turn off and reset.
• Inspect/repair the inverter.
OCF
[Overcurrent]
• Parameters in the [SET- • Check the parameters (see the CDTINGS] (SEt-) and [1.4
ROM which is attached to each inMOTOR CONTROL]
verter). Check the size of the mo(drC-) menus are not cortor/inverter/load.
rect. Inertia or load too
• Check the state of the mechanism.
high.
• Mechanical locking
PrF
[Power removal]
• Fault with the “Power
removal” safety function
of the inverter
• Check the reference number of the
power card.
• Inspect/repair the inverter.
77
Commissioning
Code
Name
Probable cause
Remedy
SCF1
[Motor short circuit]
SCF2
[Impedant sh. circuit]
SCF3
[Ground sh. circuit]
• Short-circuit or grounding at the inverter output
• Significant earth leakage
current at the inverter
output if several motors
are connected in parallel
• Check the cables connecting the drive
to the motor and the motor insulation.
• Reduce the switching frequency.
• Connect chokes in series with the motor.
SOF
[Overspeed]
• Instability or driving load
too high
• Check the motor, gain and stability
parameters.
• Add a braking resistor.
• Check the size of the motor/inverter/load.
SPF
[Speed feedback loss] • Encoder feedback signal
missing.
• Check the connection between encoder and inverter.
• Check encoder.
tnF
[Auto-tuning]
• Check that the motor is present during
auto-tuning.
• If an output contactor is being used,
close it during auto-tuning.
• Check that the motor/inverter are
compatible.
78
• Motor not connected to
the drive
• Special motor or motor
whose power is not suitable for the inverter
Commissioning
Faults that can be reset automatically after troubleshooting
These faults can also be reset by turning the drive off then on again or by means of a logic input or control bit (see the CD-ROM which is attached to each inverter).
Code
Name
Probable cause
Remedy
APF
[Application fault]
• Controller Inside card
fault
• Please refer to the card documentation.
bLF
[Brake control fault] .
• Brake release current
not reached. Brake
control parameters not
set when brake logic
control is assigned.
• Check the drive/motor connection.
• Check the motor windings.
• Apply the recommended settings
(see the CD-ROM which is attached to each inverter).
CnF
[Network fault]
• Communication fault on • Check the environment (electrocommunication card
magnetic compatibility).
• Check the wiring.
• Check the time-out.
• Replace the option card.
• Inspect/repair the inverter.
COF
[CANopen fault]
• Interruption in communication on the
CANopen bus.
• Check the communication bus.
• Check the time-out.
• Please refer to the specific documentation.
EPF1
[External flt-LI/Bit]
• Fault triggered by an
external device, depending on user.
• Check the device which caused
the fault, and reset.
EPF2 [Ext. fault net]
• Fault triggered by an
external device, depending on user.
• Check the device which caused
the fault, and reset.
FCF2 [Output cont. opened]
• The output contactor
remains open although
the closing conditions
have been met.
• Check the contactor and its wiring.
• Check the feedback circuit.
LCF
[Line contact. fault]
• The drive is not powering up although the
contactor is controlled.
• Check the contactor and its wiring.
• Check the time-out (see the CDROM which is attached to each inverter).
• Check the line/contactor/inverter
connection.
LFF2
LFF3
LFF4
[AI2 4 -20 mA loss]
[AI3 4 -20 mA loss]
[AI4 4 -20 mA loss]
• Loss of the 4...-20 mA
reference on analog input AI2, AI3 or AI4
• Check the connection on the analog inputs.
ObF
[Overbraking]
• Braking too sudden or
driving load.
• Increase the deceleration time.
• Add a braking resistor if necessary.
• Activate the [Dec ramp adapt.]
(brA) function (see the CD-ROM
which is attached to each inverter),
if it is compatible with the application.
79
Commissioning
Code
Name
Probable cause
Remedy
OHF
[Drive overheat]
• Drive temperature too
high
• Check the motor load, the drive
ventilation and the ambient temperature. Wait for the inverter to
cool down before restarting.
OLF
[Motor overload]
• Triggered by excessive
motor current
• Check the setting of the motor
thermal protection and check the
motor load. Wait for the drive to
cool down before restarting.
OPF1
[1 motor phase loss]
• Loss of one phase at
the inverter output
• Check the connections from the
inverter to the motor.
OPF2 [3 motor phase loss]
• Motor not connected or • Check the connections from the
motor power too low.
inverter to the motor.
Output contactor open. • If an output contactor is being
Instantaneous instability
used, see the CD-ROM which is
in the motor current.
attached to each inverter.
• Test on a low power motor or
without a motor: In factory settings
mode, motor output phase loss
detection is active [Output Phase
Loss] (OPL) = [Yes] (YES). To
check the drive in a test or maintenance environment without having to switch to a motor with the
same rating as the drive (particularly useful in the case of highpower drives), deactivate motor
phase loss detection [Output
phase loss] (OPL) = [No] (nO) - see
the CD-ROM which is attached to
each inverter.
• Check and optimise the parameters [Rated motor volt.] (UnS) and
[Rated mot. current.] (nCr). Then
perform an [Auto tuning] (tUn).
OSF
[Mains overvoltage]
• Line voltage too high
• Check the line voltage.
Disturbed mains supply
OtF1
[PTC 1 overheat]
• Overheating of the
PTC1 probes detected
OtF2
[PTC2 overheat]
• Overheating of the
PTC2 probes detected
OtFL
[PTC=LI6 overheat]
• Overheating of the PTC
probes detected on input LI6.
PtF1
[PTC1 failure]
• PTC1 probes open or
short-circuited.
PtF2
[PTC2 failure]
• PTC2 probes open or
short-circuited.
PtFL
[LI6=PTC failure]
• PTC probes on input
LI6 open or shortcircuited.
SCF4
[IGBT short circuit]
• Power component fault. • Inspect/repair the inverter.
80
• Check the motor load and motor
size.
• Check the motor ventilation.
• Wait for the motor to cool before
restarting.
• Check the type and state of the
PTC probes.
• Check the PTC probes and the
wiring between them and the motor/drive.
Commissioning
Code
Name
Probable cause
Remedy
SCF5 [Load short circuit]
• Short-circuit at the inverter output.
• Check the cables connecting the
drive to the motor and the motor
insulation.
• Inspect/repair the inverter.
SLF1
[Modbus com.]
• Interruption in communication on the Modbus-bus.
• Check the communication bus.
• Check the time-out.
• Please refer to the specific documentation.
SLF2
[PowerSuite com.]
• Fault communicating
with PowerSuite
• Check the PowerSuite connecting
cable.
• Check the time-out.
SLF3
[HMI com.]
• Fault communicating
• Check the connection of the
with the graphic display
graphic display terminal.
terminal
• Check the time-out.
SrF
[Torque time out flt.]
• The time-out of the
torque control is attained.
• Check the function's settings..
• Check the state of the mechanism.
SSF
[Torque/ I limit flt]
• Switch to torque limitation
• Check if there are any mechanical
problems.
• Check the limitation parameters
(see the CD-ROM which is attached to each inverter).
tJF
[IGBT overheat]
• Inverter overheated
• Check the size of the
load/motor/inverter.
• Reduce the switching frequency.
• Wait for the motor to cool before
restarting.
81
Commissioning
Faults which can be reset automatically
Code
Name
Probable cause
Remedy
CFF
[incorrect config.] • Option card changed or
removed.
• The current configuration
is inconsistent.
CFI
[Invalid config.]
PHF
[Input phase loss] • Drive incorrectly supplied • Check the power connection and the
fuses.
or fuse blown
• Use a three-phase line supply.
• Failure of one phase
• Three-phase inverter used • Disable the fault by setting [Input phase
loss] (IPL) = [No] (nO)
on a single-phase line
supply
• Unbalanced load
This protection only operates
with the drive on load.
USF
[Undervoltage]
• Check that there are no card errors.
• In the event of the option card being
changed/removed deliberately, see the
CD-ROM which is attached to each inverter.
• Return to factory settings or retrieve the
backup configuration, if it is valid (see
the CD-ROM which is attached to each
inverter).
• Invalid configuration. The
• Check the configuration loaded previconfiguration loaded in the
ously.
inverter via the bus or
• Load a compatible configuration.
network is inconsistent.
• Line voltage too low
• Transient voltage dip
• Damaged pre-charge resistor
• Check the voltage and the voltage parameter (see the CD-ROM which is attached to each inverter).
• Replace the pre-charge resistor.
• Inspect/repair the inverter.
Replacing or removing option cards
Further information are given on the CD-ROM which is attached to each inverter.
82
83
Remarques générales
Les symboles suivants vous accompagneront tout au long de ce manuel :
Remarque, astuce !
Remarque d'ordre général, à observer impérativement !
Un choix des appareils, un paramétrage et un montage adéquats sont les conditions préalables à une mise en service
réussie. Si vous avez d'autres questions à ce propos, veuillez vous adresser au fournisseur de l'appareil.
Charge du condensateur !
Avant de commencer des travaux sur l'appareil, patientez pendant au moins les 15 minutes du temps de charge du
condensateur après l'avoir séparé du réseau, afin de garantir que l'appareil exempt de tension.
Redémarrage automatique !
Certains paramétrages peuvent avoir pour conséquence que le variateur de fréquence redémarre automatiquement après
une défaillance suivi d'une reconnection au réseau. Assurez-vous qu'aucune personne ni aucune installation ne soit
menacée.
Mise en service et maintenance !
Les travaux sur l'appareils ne doivent être effectués que par un personnel possédant la qualification adéquate et dans le
respect du mode d'emploi et des directives applicables. En cas de défaut, des contacts et / ou des groupes sans potentiel
en fonctionnement normal peuvent conduire une tension dangereuse. Afin d'écarter le danger, les directives relatives aux «
Travaux sous tension » doivent être observés.
Conditions de livraison
Nos livraisons et services sont soumis aux conditions générales de l'industrie électrique et électronique autrichiennes («
Allgemeinen Lieferbedingungen der Elektro- und Elektronikindustrie Österreichs »), dernière édition.
Informations communiquées dans ce document
Nous attachons beaucoup d'importance à l'amélioration constante de nos produits et à leur adaptation aux derniers
développements de la technique. C'est pourquoi nous nous réservons à tout moment le droit d'apporter des modifications
par rapport aux données de ce document, en particulier en ce qui concerne les masses et dimensions. Les remarques
relatives au paramétrage et les exemples de raccordement sont des suggestions sans engagement de notre part pour
lesquelles nous ne pouvons pas nous porter garant en particulier parce que les dispositions à prendre dépendent du type
et du lieu de l'installation et de l'application des appareils.
Toutes les traductions on été effectuées sur la base des versions allemande ou anglaise. Reportez-vous à ces versions en
cas d'incertitude.
Base contractuelle
Les données des textes et graphiques dans ce document ne peuvent en aucun cas représenter une base de contrat au
sens juridique sans confirmation expresse de notre entreprise.
Directives
L'utilisateur doit assurer que l'appareil et ses composants sont utilisés selon les directives applicables. La mise en oeuvre
de ces appareils dans des zones résidentielles sans prendre de mesure particulière en ce qui concerne le déparasitage est
illicite.
Droits de propriété
Veuillez observer que nous ne portons pas garant que les circuits, appareils et processus décrits ici ne font pas l'objet de
titres de propriété.
Copyright
La mise en page, la présentation, logos, textes, graphiques et images contenus dans ce document sont protégés de droits
à la propriété intellectuelle. Tous droits réservés.
84
ALLEMAND ............................................................1
ANGLAIS .............................................................43
FRANÇAIS ...........................................................85
Avant de commencer ................................................... 86
Sécurité .................................................................................86
Procédure..............................................................................87
Recommandations préliminaires ...........................................88
Installation du variateur .........................................................90
Précautions de câblage.........................................................94
Mise en service .......................................................... 107
Procédure............................................................................ 107
Réglage usine...................................................................... 109
Alimentation séparée du contrôle........................................ 109
Commande de puissance par contacteur de ligne.............. 110
Démarrage........................................................................... 110
Essai sur moteur de faible puissance ou sans moteur,
utilisation de moteurs en parallèle ....................................... 110
Terminal graphique.............................................................. 111
Cause et correction des défauts ......................................... 118
85
Avant de commencer
Avant de commencer
Sécurité
Lisez attentivement ces instructions avant de commencer toute procédure avec ce variateur et
observez impérativement les consignes de sécurité suivantes !
DANGER
TENSION DANGEREUSE
• Lisez soigneusement ce guide dans son intégralité avant d’installer et de faire fonctionner le variateur
de vitesse. L’installation, le réglage et les réparations doivent être effectués par du personnel qualifié.
• L’utilisateur est responsable de la conformité avec toutes les normes électriques internationales et
nationales en vigueur concernant la mise à la terre de protection de tous les appareils.
• De nombreuses pièces de ce variateur de vitesse, y compris les cartes de circuit imprimé
fonctionnent à la tension du réseau. Ne les touchez pas.
N’utilisez que des outils dotés d’une isolation électrique.
• Ne touchez pas les composants non blindés ou les vis des borniers si l’appareil est sous tension.
• Ne court-circuitez pas les bornes PA/+ et PC/- ou les condensateurs du bus DC.
• Installez et fermez tous les couvercles avant de mettre le variateur sous tension.
• Avant tout entretien ou réparation sur le variateur de vitesse :
− Coupez l'alimentation.
− Placez une étiquette « NE METTEZ PAS SOUS TENSION » sur le disjoncteur ou le sectionneur du
variateur de vitesse.
− Verrouillez le disjoncteur ou le sectionneur en position ouverte.
• Avant d’intervenir dans le variateur de vitesse, coupez son alimentation y compris l’alimentation de
contrôle externe si elle est utilisée. Attendez l’extinction du voyant de charge du variateur. Mesurez la
tension du bus DC pour vérifier si la tension continue est inférieure à 45 V. Le voyant du variateur de
vitesse n’est pas un indicateur précis de l’absence de tension du bus DC.
Le non-respect de ces précautions entraînera la mort ou des blessures graves.
ATTENTION
FONCTIONNEMENT INAPPROPRIÉ DU VARIATEUR
• La réussite de la mise en service est conditionnée par la sélection, la planification et l’installation
correctes du variateur.
• Si le variateur n’est pas mis sous tension pendant une longue période, la performance de ses
condensateurs électrolytiques diminue.
• En cas d’arrêt prolongé, mettez le variateur sous tension au moins tous les deux ans et pendant au
moins cinq heures afin de rétablir la performance des condensateurs puis de vérifier son
fonctionnement. Il est conseillé de ne pas raccorder directement le variateur à la tension du réseau,
mais d’augmenter la tension graduellement à l’aide d’un alternostat.
Le non-respect de ces précautions peut entraîner des dommages matériels.
86
Avant de commencer
Procédure
1. Réception du variateur
■ Assurez-vous que la référence inscrite sur l’étiquette est conforme au bon de commande.
■ Ouvrez l’emballage et vérifiez que le variateur Altivar n’a pas été endommagé pendant le transport.
2. Vérification de la tension réseau
■ Vérifiez que la tension du réseau est compatible avec la plage de tension d’alimentation du
variateur.
3. Montage du variateur (Page 90)
■ Fixez l’armoire en respectant les préconisations de ce document.
4. Câblage du variateur (Page 94)
■ Raccordez le moteur en vous assurant que son couplage correspond à la tension.
■ Raccordez le réseau d’alimentation, après vous être assuré qu’il est hors tension.
■ Raccordez les lignes de commande.
5. Mise en service
■ Mettez le variateur en service en suivant la procédure indiquée à la page 107.
87
Avant de commencer
Recommandations préliminaires
Responsabilité
L’intégration du variateur dans le concept de protection et de sécurité de l’installation ou de
la machine relève de la responsabilité de l’utilisateur.
Tous les schémas de raccordement et conseils de planification mentionnés doivent être uniquement
considérés comme des propositions qui doivent être adaptées aux données et dispositions locales
concernant l’installation et l’utilisation.
Cela s’applique particulièrement aux consignes de sécurité pour machines, les directives CEM et les
dispositions générales de protection des personnes.
Marquage CE
Tous les appareils et installations de la technique d’entraînement électrique peuvent provoquer des
perturbations électromagnétiques et être perturbés par celles-ci. Ils tombent par conséquent dans le
champ d’application de la directive CEM 2004/108/CE.
Les variateurs ont une tension nominale de fonctionnement comprise sans équivoque entre 50 et
1 000 V AC ou entre 75 et 1 500 V DC. Par conséquent, ils tombent aussi dans le champ d’application de
la directive basse tension 2006/95/CE depuis le 1er janvier 1997.
La conformité avec les normes EN 61800-3 et EN 61800-5-1 est garantie par l’intégration dans les
variateurs d’un filtre CEM.
Toutefois, les variateurs ne doivent pas être considérés comme des machines présentant au moins une
pièce mécanique mobile. Par conséquent, ils ne tombent pas dans le champ d’application de la directive
machines 2006/42/CE.
Conformément à la norme CEI 61800-3, les variateurs sont des produits appartenant à la classe
de distribution restreinte. Dans les environnements domestiques, ces produits peuvent provoquer
des perturbations hautes fréquences, de sorte que l’utilisateur peut être amené à prendre des
mesures appropriées.
Les variateurs portent un marquage CE sur la plaque signalétique. Pour atteindre les valeurs limites
correspondantes, il est toutefois nécessaire d'observer les normes d'installation.
Manutention et stockage
Afin d'assurer la protection du variateur de fréquence avant la pose, ne déplacer et stocker l'appareil que
dans son emballage. Assurez-vous que les conditions ambiantes sont admissibles.
Température de stockage - 25°C à 70°C
Si le variateur n’est pas mis sous tension pendant une longue période, la performance de ses
condensateurs électrolytiques diminue. En raison du système d’équilibrage « Active Balancing System »,
le variateur ne nécessite aucun traitement spécial lorsque la durée maximale de stockage n’a pas été
dépassée :
• 12 mois à une température de stockage maximale de + 50°C
• 24 mois à une température de stockage maximale de + 45°C
• 36 mois à une température de stockage maximale de + 40°C
Après dépassement de la durée maximale de stockage, il est nécessaire de relier le variateur à la
tension du réseau (activation des condensateurs électrolytiques) pendant environ une heure avant
la mise en service, avant qu’un déverrouillage ne se produise. Nous recommandons d'effectuer
déjà cette procédure après 6 mois de non-utilisation.
88
Avant de commencer
AVERTISSEMENT
EMBALLAGE ENDOMMAGÉ
Si l’emballage semble être endommagé, il peut être dangereux de l’ouvrir ou de le manipuler. Effectuez
cette opération en vous prémunissant contre tout risque.
Le non-respect de cette précaution peut entraîner la mort, des blessures graves et/ou des dommages
matériels.
DANGER
APPAREIL ENDOMMAGÉ
N’installez pas et ne faites pas fonctionner le variateur s’il semble être endommagé.
Le non-respect de cette précaution entraînerera la mort, des blessures graves et/ou des dommages
matériels.
Le fabricant n’assume aucune responsabilité pour les dégâts se produisant durant le transport ou
lors du déballage. Dans ce cas, veuillez en informer la compagnie d’assurances.
Transport / mise en place
Le variateur est livré emballé dans un carton, en position verticale sur une palette.
Retirez les bandes de serrage et desserrez les vis de fixation du variateur à la
palette qu'une fois celui-ci arrivé à son emplacement définitif.
Après le montage de l’armoire, celle-ci doit être vissée au sol !
Les variateurs sont équipés d’œillets de transport afin d’assurer un maniement
optimal à l’aide d’engins de levage.
ATTENTION
RISQUE ACCRU DE BASCULEMENT
L'armoire ne doit pas être transportée à l'aide d’un élévateur à fourche sans
bandes de serrage et sans être solidement vissée à la palette. Il y a risque accru
de basculement !
Le non-respect de cette précaution peut entraîner des lésions corporelles
et/ou des dommages matériels.
89
Avant de commencer
Installation du variateur
Le variateur est livré dans une armoire, prêt à être raccordé.
Précautions
ATTENTION
TENSION DU RESEAU INCOMPATIBLE
Avant de mettre sous tension et de configurer le variateur, assurez-vous que la tension du réseau est
compatible avec la tension d’alimentation du variateur. Le variateur peut se trouver endommagé si la
tension du réseau n’est pas compatible.
Le non-respect de cette précaution peut entraîner des lésions corporelles et/ou des dommages
matériels.
AVERTISSEMENT
FONCTIONNEMENT INATTENDU DE L’APPAREIL
• Avant de mettre sous tension et de configurer le variateur, assurez-vous que l’entrée PWR (POWER
REMOVAL) est désactivée (à l’état 0) afin d’éviter tout redémarrage inattendu.
• Avant de mettre sous tension ou à la sortie du menu de configuration, assurez-vous que les entrées
affectées à la commande de marche sont désactivées (à l’état 0) car elles peuvent entraîner
immédiatement le démarrage du moteur.
Le non-respect de ces précautions peut entraîner la mort ou des blessures graves.
Si la sécurité du personnel exige l’interdiction de tout redémarrage intempestif ou inattendu, le
verrouillage électronique est assuré par la fonction « Power Removal » du variateur. Cette fonction
exige l’utilisation des schémas de raccordement conformes aux exigences de la catégorie 3 selon
la norme EN 954-1 et d’un niveau d’intégrité de sécurité 2 selon CEI/EN 61508 (vous trouverez de
plus amples informations dans le catalogue ou le CD-ROM fourni avec le variateur).
La fonction Power Removal est prioritaire sur toute commande de marche.
Parasitage
Les variateurs possèdent en standard un filtre CEM intégré. Ce filtre satisfait aux exigences de la
catégorie « C3 – Domaine industriel » conformément à la norme CEI EN 61800-3 (anciennement :
EN 55011 classe A groupe 2).
Conformément à la norme CEI 61800-3, les variateurs sont des produits appartenant à la classe
de distribution restreinte. Dans les environnements domestiques, ces produits peuvent provoquer
des perturbations hautes fréquences, de sorte que l’utilisateur peut être amené à prendre des
mesures appropriées.
Installations de compensation de courant réactif
Les variateurs produisent des harmoniques de courant dans le réseau d’alimentation. En cas d’utilisation
d’une installation de compensation de courant réactif, les condensateurs sont chargés de façon
supplémentaire par ces harmoniques.
L’étranglement de ces composants est donc recommandé pour les protéger des surcharges.
90
Avant de commencer
Décharge des condensateurs
Avant toute intervention sur le variateur, mettez-le hors tension et attendez que les condensateurs soient
déchargés. Mesurez ensuite la tension du bus DC.
Mesure de la tension du bus DC
La tension du bus DC peut dépasser 800 V DC (en cas de 690 V : 1000 V DC).
Mesurez la tension du bus DC à l’aide d’un appareil de mesure approprié, suivant la procédure décrite
ci-dessous :
1. Coupez l'alimentation.
2. Attendez 15 minutes pour permettre aux condensateurs du bus DC de se décharger.
3. Mesurez la tension du bus DC entre les bornes PA/+ et PC/- pour vérifier si la tension est inférieure à
45 V DC.
Si les condensateurs du bus DC ne sont pas complètement déchargés, contactez votre
représentant local (ne réparez pas ni ne faites fonctionner le variateur).
DANGER
TENSION DANGEREUSE
Lisez soigneusement les précautions décrites à la page 86 avant d’exécuter cette procédure.
Le non-respect de ces précautions entraînera la mort ou des blessures graves.
Mesures de l’isolation
Tous les variateurs sont testés selon la norme EN 61800-5-1 en ce qui concerne la rigidité diélectrique et
la résistance d’isolement. Les points suivants doivent être respectés lors des mesures de la résistance
d’isolement des ces appareils (p. ex. dans le cadre d’une inspection) :
1. Toutes les bornes puissance du variateur (L1, L2, L3, U, V, W, PO, PA/+, PB, PC/-) doivent être
court-circuitées.
2. Le filtre CEM interne doit être désactivé !
3. Les mesures de la résistance d’isolement doivent uniquement être effectuées entre les bornes
puissance court-circuitées et la mise à la terre.
4. Tension d’essai :
ATV71EX●●●●●N4 :
max. 2,8 kV DC
ATV71EX●●●●●N, Y :
max. 3,11 kV DC
5. Avant d’effectuer une mesure de la résistance d’isolement du moteur, celui-ci doit être coupé du
variateur de manière sûre en débranchant ou en ouvrant le contacteur de moteur. En cas de nonrespect, le variateur sera endommagé !
Utilisez un appareil d'essai approprié pour effectuer des essais avec des capacités élevées et des
courants de fuite pouvant atteindre 10 mA.
N'effectuez jamais de mesures de la résistance d’isolement aux bornes puissance !!!
91
Avant de commencer
Puissance dissipée
Ces puissances sont données pour un fonctionnement à la charge nominale et pour une fréquence de
découpage de 2,5 kHz.
Selon le modèle et le degré de protection, les armoires de variateurs disposent de ventilateurs qui
assurent le refroidissement des composants. L’air de refroidissement est alors aspiré dans la porte de
l’armoire et il est évacué par le toit de celle-ci.
ATV71EX●●
D90N4
C11N4
C13N4
C16N4
C20N4
C25N4
C28N4
C31N4
C40N4
C50N4
ATV71EXA●
C50N4
C63N4
C71N4
C90N4
M11N4
M13N4
92
Puissance
dissipée
[W]
2590
2950
3450
4130
5330
6380
7350
8060
10080
12330
Puissance
dissipée
[W]
11400
14300
16200
19800
24000
29000
ATV71EX●●
D90N
C11N
C13N
C16N
C20N
C25N
C31N
C40N
C50N
ATV71EXA●
C50N
C63N
C80N
C90N
M11N
M13N
M15N
Puissance
dissipée
[W]
2700
3210
3820
4560
5820
7180
8730
11030
13700
Puissance
dissipée
[W]
10700
13200
16100
20100
24700
29200
32000
ATV71EX●●
C11Y
C13Y
C16Y
C20Y
C25Y
C31Y
C40Y
C50Y
C63Y
ATV71EXA●
C63Y
C80Y
M10Y
M12Y
M15Y
M18Y
M20Y
Puissance
dissipée
[W]
2740
3250
3880
4640
5950
7310
8900
11230
13960
Puissance
dissipée
[W]
12700
15800
19200
23800
29500
35000
382000
Avant de commencer
Flux d’air
La puissance dissipée par le variateur doit être évacuée à l'extérieur de l'armoire. Afin de garantir une
circulation d’air suffisante, il faut veiller à ce que le débit d'air destiné à chaque variateur corresponde au
moins à la valeur indiquée dans le tableau suivant.
Les appareils ATV71EXA● sont préparés en vue d’un raccordement facile à une aspiration d’air.
ATV71EXC●
D90N4
C11N4
C13N4
C16N4
C20N4
C25N4
C28N4
C31N4
C40N4
C50N4
ATV71EXS5
D90N4
C11N4
C13N4
C16N4
C20N4
C25N4
C28N4
C31N4
C40N4
C50N4
ATV71EXA●
C50N4
C63N4
C71N4
C90N4
M11N4
M13N4
Débit d'air
[m³/h]
400
600
600
800
1200
1200
1200
1800
1800
2400
Débit d'air
[m³/h]
500
700
750
950
1400
1400
1400
2200
2200
3000
Débit d'air
[m³/h]
5500
5500
11000
11000
11000
11000
ATV71EXC●
D90N
C11N
C13N
C16N
C20N
C25N
C31N
C40N
C50N
ATV71EXS5
D90N
C11N
C13N
C16N
C20N
C25N
C31N
C40N
C50N
ATV71EXA●
C50N
C63N
C80N
C90N
M11N
M13N
M15N
Débit d'air
[m³/h]
600
600
600
1200
1200
1200
2400
2400
2400
Débit d'air
[m³/h]
600
600
600
1200
1200
1200
2400
2400
2400
Débit d'air
[m³/h]
5500
5500
5500
11000
11000
11000
11000
ATV71EXC●
C11Y
C13Y
C16Y
C20Y
C25Y
C31Y
C40Y
C50Y
C63Y
ATV71EXS5
C11Y
C13Y
C16Y
C20Y
C25Y
C31Y
C40Y
C50Y
C63Y
ATV71EXA●
C63Y
C80Y
M10Y
M12Y
M15Y
M18Y
M20Y
Débit d'air
[m³/h]
600
600
600
1200
1200
1200
2400
2400
2400
Débit d'air
[m³/h]
600
600
600
1200
1200
1200
2400
2400
2400
Débit d'air
[m³/h]
5500
5500
5500
11000
11000
11000
11000
93
Avant de commencer
Précautions de câblage
Mise à la terre
Le variateur doit être impérativement raccordé à la terre de protection. Afin de satisfaire aux
réglementations en vigueur, utilisez un conducteur de protection d’une section au moins égale à la moitié
de celle des conducteurs d’alimentation puissance.
Une borne marquée (barre) est disponible dans l’armoire pour le raccordement du conducteur de
protection. Il existe en outre une borne marquée (barre) pour le raccordement de la terre de protection du
moteur.
AVERTISSEMENT
CONTACT INDIRECT
L’appareil ne satisfait aux exigences de protection contre le contact indirect que si le conducteur de
mise à la terre est correctement raccordé.
Le non-respect de ces précautions peut entraîner la mort ou des blessures graves.
■ Vérifiez si la résistance à la terre de protection est d’1 Ω
ou moins.
■ Si plusieurs variateurs doivent être connectés à la terre de
protection, chacun doit être connecté directement à cette
terre comme indiqué ci-contre.
ATTENTION
CONNEXIONS DE CABLAGE INAPPROPRIEES
• Le variateur sera endommagé si la tension du réseau est appliquée aux bornes de sortie (U/T1, V/T2,
W/T3).
• Vérifiez les raccordements électriques avant de mettre le variateur sous tension.
• Si vous remplacez un autre variateur de vitesse, vérifiez que tous les raccordements électriques à
l'ATV71 Plus correspondent aux instructions de câblage indiquées dans ce guide.
Le non-respect de ces précautions peut entraîner des lésions corporelles et/ou des dommages
matériels.
Mise à la terre CEM
Etant donné que la mesure des perturbations de réseau, ainsi que l’influence réelle des autres utilisateurs,
est estimée par rapport au potentiel de terre, l’inductance de la « mise à la terre » est extrêmement
déterminante. Cela signifie que des raccords de mise à la terre de surface importante, pouvant être
réalisés de manière tout à fait parallèle aux conducteurs de mise à la terre en PE vert-jaune, sont
particulièrement importants.
94
Avant de commencer
Disjoncteur différentiel
Les variateurs de fréquence, en particuliers ceux qui sont équipés des filtres anti-parasitage
supplémentaires et de câbles de moteur blindés créent un surplus de courant de fuite à la terre.
Celui-ci dépend de :
• la longueur du câble du moteur
• du type de la pose et de si le câble du moteur est blindé ou non
• de la fréquence d'horloge réglée
• de l'utilisation du filtre anti-parasitage supplémentaire
• de la mise à la terre du moteur sur le site (mise à la terre ou non)
Au moment de l'activation, les condensateurs du filtre en particulier pourraient provoquer le
déclenchement d'un disjoncteur différentiel. Les capacités à la terre pendant le service pourraient
également entraîner un déclenchement intempestif.
D'autre part, il est possible que les composantes CC bloquent la fonction de déclenchement dû à
rectification du réseau à l'entrée du variateur.
C'est pourquoi il faut observer ce qui suit :
• N'utiliser que des disjoncteurs différentiels à courte temporisation et sensibles au courant pulsé
avec un courant nominal de déclenchement nettement plus élevé.
• Protéger les autres consommateurs avec un disjoncteur différentiel propre.
• Des disjoncteurs différentiels en amont d'un variateur ne garantissent pas une protection
absolument fiable en cas d'un contact physique direct !! Ils doivent donc toujours être mis en
oeuvre en combinaison avec d'autres mesures de protection.
• Les variateurs de fréquence n'ont pas d'effet de limitation de courant (en cas de courants
différentiels) et ne violent ainsi pas les conditions de la mise au neutre.
Pour les installations dotées de longueurs de câbles importantes, le courant de fuite peut être, en
fonction des données, facilement supérieur à 100 mA !!
Le système de protection contre les défauts d'isolement à la terre intégré n'a pas d'effet de
limitation de courant. Il ne constitue pas de protection d'appareils ni de protection des personnes.
AVERTISSEMENT
PROTECTION CONTRE LES SURINTENSITES
■ Les dispositifs de protection contre les surintensités doivent être correctement coordonnés.
■ Utilisez les fusibles recommandés dans la documentation du variateur pour obtenir le courant
nominal de court-circuit.
■ Ne raccordez pas le variateur à un réseau d’alimentation dont la capacité de court circuit dépasse le
courant de court-circuit maximal admis.
Le non-respect de ces précautions peut entraîner la mort ou des blessures graves.
95
Avant de commencer
Accès aux bornes puissance
La position exacte des bornes dépend de la variante d’exécution.
Caractéristiques et fonction des bornes puissance
Bornes
Fonction
ATV71EXA●
PE
Bornes de raccordement à la terre de protection
Tous les modèles
R/L1
S/L2
T/L3
Alimentation puissance
Le nombre de connecteurs varie en fonction du
redressement choisi (6 impulsions, 12 impulsions ou
24 impulsions en option).
Tous les modèles
PA/+
Polarité + du bus DC et raccordement de l’inductance
DC
ATV71EXC● et
ATV71EXS5
PC/-
Polarité - du bus DC
ATV71EXC● et
ATV71EXS5
U/T1, V/T2, W/T3
Sortie vers le moteur
Tous les modèles
Blindage
Barre de raccordement pour le blindage du câble
moteur
Tous les modèles
L’ensemble du câblage puissance doit être effectué en respectant les schémas fournis.
Tous les connexions de puissance sont prévus pour une connexion verticale d'en bas.
Autrement l'option "Sortie de câble d'en haut" est disponible.
96
Avant de commencer
Fusibles et sections de câble
L’exécution Altivar en armoire possède des fusibles d’entrée en standard. Ces fusibles sont prévus en cas
de défaillance des mécanismes électroniques de protection du variateur. Ils constituent par conséquent
une protection secondaire du variateur destinée à protéger les câbles de puissance avant une surcharge
et le redresseur d’entrée en cas de court-circuit interne.
Les sections de câbles indiquées pour le câble à trois brins sont des valeurs indicatives pour une pose de
câbles dans l’air à une température ambiante max. de 40°C, basées sur les réglementations ÖVN EN 1 et
VDE 0100.
Les conducteurs de l’armoire sont dimensionnés conformément à la spécification pour câbles monobrins
cuivre 90°C XLPE/EPR.
Les câbles moteur sont dimensionnés pour le courant permanent maximum. Ils conviennent pour 0 à
100 Hz (à partir de 300 Hz, les déperditions du câble augmentent d’environ 25 % en raison de l’effet
pelliculaire).
Pour d’autres conditions ambiantes et des réglementations différentes, les sections de câbles
doivent être adaptées en conséquence.
En cas de défaillance des fusibles du réseau, des dommages primaires se seront déjà produits
dans le variateur. Aussi n'est-il absolument pas judicieux de procéder au remplacement des
fusibles et à la remise en circuit. Par conséquent, l'utilisation de disjoncteurs n'est également pas
intéressante et présente en outre le désavantage d’une déconnexion moins rapide.
Pour les câbles moteurs, l’utilisation de câbles NYCY ou NYCWY (câbles de puissance à
conducteur de terre concentrique) constitue une option économique par rapport aux câbles
blindés.
Le dimensionnement des fusibles auxillaires, des sections de cordon éléctrique et des longeurs
de cable d’alimentation doivent être fait en tenant compte du courant de court-circuit pour
garantir une coupure rapide en cas d’erreur.
Si nécessaire augmenter la puissance du transformateur pour atteindre le courant de court-circuit
essential.
97
Avant de commencer
Sections des câbles en cas d'exécution standard
Alimentation réseau
Fusi- Câble recomble
mandé [mm2]
ATV71EX●● D90N4
C11N4
C13N4
C16N4
Fusible
interne
Câble recommandé [mm2]
4x 240 (M12)
4x 240 (M12)
4x 240 (M12)
4x 240 (M12)
4x 240 (M12)
6x 240 (M12)
6x 240 (M12)
4x (3x 185)
6x 240 (M12)
6x 240 (M12)
5x (3x 185) ou
4x (3x 240)
8x 240 (M12)
6x 240 (M12)
2x
900 A sf
6x 240 (M12)
6x (3x 185) ou
5x (3x 240)
16x 240 (M12)
4x
500 A sf
4x
630 A sf
4x
800 A sf
4x
900 A sf
1x (3x 120)
1x (3x 185)
2x (3x 120)
2x (3x 120)
2x 185 (M12)
2x 185 (M12)
2x 150 (M10)
2x 150 (M10)
250 A sf
315 A sf
400 A sf
500 A sf
500 A
630A
700A
800A
1000A
2x (3x 150)
2x (3x 185)
3x (3x 185)
3x (3x 185)
4x (3x 185)
2x 150 (M10)
2x 300 (M10) 2)
3x 185 (M12)
4x 300 (M12)
4x 300 (M12)
C50N4 1250A 4x (3x 240)
6x 300 (M12) 2)
630 A sf
800 A sf
800 A sf
900 A sf
2x
630 A sf
2x
800 A sf
2x
800 A sf
ATV71EXA● C50N4 1250A 2x [4x (3x 150)]
ou
2x [3x (3x 240)]
C63N4 1600A 2x [4x (3x 150)]
ou
2x [3x (3x 240)]
C71N4 2000A 4x [2x (3x 185)]
8x 240 (M12)
C90N4 2500A 4x [2x (3x 185)]
16x 240 (M12)
M11N4 3200A 4x [3x (3x 185)]
16x 240 (M12)
M13N4 3200A 4x [4x (3x 150)]
ou
4x [3x (3x 240)]
16x 240 (M12)
12x 240 (M12) 12x 240 (M12)
12x 240 (M12) 12x 240 (M12)
12x 240 (M12) 12x 240 (M12)
12x 240 (M12) 12x 240 (M12)
En cas de protection IP54 avec conduit de ventilation séparé (ATV71EXS5●●●N4)
Raccordement possible uniquement avec des cosses spéciales pour appareils de distribution
Sections de câble différées sur demande.
98
Sortie moteur
Câble max.
(sans
inductance
mot.) [mm2]
(par phase)
2x 150 (M10)
2x 150 (M10)
2x 240 (M12)
2x 240 (M12)
Câble max.
(avec
inductance
moteur) [mm2]
(par phase)
2x 150 (M10)
2x 150 (M10)
2x 240 (M12)
2x 240 (M12)
ou
1)
4x 240 (M12)
4x 240 (M12)
4x 240 (M12)
4x 240 (M12)
4x 240 (M12)
4x 240 (M12)
250A
315A
400A
400A
C20N4
C25N4
C28N4
C31N4
C40N4
1) …
2) ...
Câble max.
[mm2]
(par phase)
1x (3x 70)
1x (3x 95)
1x (3x 120)
1x (3x 150)
2x (3x 95)
2x (3x 120)
2x (3x 150)
3x (3x 150)
3x (3x 185)
7x (3x 185) ou
6x (3x 240)
9x (3x 185) ou
7x (3x 240)
10x (3x 185) ou
8x (3x 240)
11x (3x 185) ou
9x (3x 240)
Avant de commencer
Sections des câbles en cas de presse-étoupe dans le haut
Alimentation réseau
Fusi- Câble recomble
mandé [mm2]
Sortie moteur
Câble max.
(sans
inductance
mot.) [mm2]
(par phase)
Câble max.
[mm2]
(par phase)
Fusible
interne
Câble max.
(avec
inductance
moteur)
[mm2]
(par phase)
2x 150 (M10)
2x 150 (M10)
2x 240 (M12)
2x 240 (M12)
ou
1)
4x 240 (M12)
4x 240 (M12)
4x 240 (M12)
4x 240 (M12)
4x 240 (M12)
2x 150 (M10)
2x 240 (M12)
2x 240 (M12)
2x 240 (M12)
250 A sf
315 A sf
400 A sf
500 A sf
2x 150 (M10)
2x 150 (M10)
2x 240 (M12)
2x 240 (M12)
1x (3x 70)
1x (3x 95)
1x (3x 120)
1x (3x 150)
630 A sf
800 A sf
800 A sf
900 A sf
4x 240 (M12)
4x 240 (M12)
4x 240 (M12)
4x 240 (M12)
4x 240 (M12)
2x
630 A sf
4x 240 (M12)
3x (3x 185)
6x 240 (M12)
2x
800 A sf
6x 240 (M12)
4x (3x 185)
6x 240 (M12)
2x
800 A sf
6x 240 (M12)
6x 240 (M12)
2x
900 A sf
6x 240 (M12)
12x 240 (M12)
4x
500 A sf
12x 240 (M12)
5x (3x 185)
ou
4x (3x 240)
6x (3x 185)
ou
5x (3x 240)
7x (3x 185)
ou
6x (3x 240)
9x (3x 185)
ou
7x (3x 240)
10x (3x 185)
ou
8x (3x 240)
11x (3x 185)
ou
9x (3x 240)
ATV71EX●● D90N4
C11N4
C13N4
C16N4
250A
315A
400A
400A
1x (3x 120)
1x (3x 185)
2x (3x 120)
2x (3x 120)
C20N4
C25N4
C28N4
C31N4
500 A
630A
700A
800A
2x (3x 150)
2x (3x 185)
3x (3x 185)
3x (3x 185)
C40N4
1000A
C50N4
1250A
ATV71EXA● C50N4
1250A
C63N4
1600A
C71N4
2000A
C90N4
2500A 4x [2x (3x 185)] 16x 240 (M12)
12x 240 (M12)
4x
630 A sf
12x 240 (M12)
M11N4 3200A 4x [3x (3x 185)] 16x 240 (M12)
12x 240 (M12)
4x
800 A sf
12x 240 (M12)
M13N4 3200A 4x [4x (3x 150)] 16x 240 (M12)
ou
4x [3x (3x 240)]
12x 240 (M12)
4x
900 A sf
12x 240 (M12)
1) …
2) ...
4x 240 (M12)
4x 240 (M12)
4x 240 (M12)
4x 240 (M12)
ou
2)
4x 300 (M12)
4x (3x 185)
4x 240 (M12)
ou
2)
4x 300 (M12)
4x (3x 240)
6x 240 (M12)
ou
1) 2)
6x 300 (M12)
2x [4x (3x 150)] 8x 240 (M12)
ou
2x [3x (3x 240)]
2x [4x (3x 150)] 8x 240 (M12)
ou
2x [3x (3x 240)]
4x [2x (3x 185)] 16x 240 (M12)
Câble
recommandé
[mm2]
2x (3x 95)
2x (3x 120)
2x (3x 150)
3x (3x 150)
En cas de protection IP54 avec conduit de ventilation séparé (ATV71EXS5●●●N4)
Raccordement possible uniquement avec des cosses spéciales pour appareils de distribution
Sections de câble différées sur demande.
99
Avant de commencer
Sections des câbles en cas d'exécution standard
Alimentation réseau
Fusi- Câble recomble
mandé [mm2]
ATV71EX●● D90N
200A
1x (3x 95)
2x 120 (M8)
Sortie moteur
Câble max.
(sans
inductance
mot.) [mm2]
(par phase)
200 A sf 2x 150 (M10)
C11N
250A
1x (3x 120)
2x 120 (M8)
250 A sf 2x 150 (M10)
C13N
315A
1x (3x 185)
2x 185 (M12)
315 A sf 2x 150 (M10)
C16N
C20N
C25N
C31N
400A
500A
630A
800A
2x (3x 120)
2x (3x 150)
2x (3x 185)
3x (3x 185)
2x 150 (M10)
2x 150 (M12)
3x 185 (M12)
4x 300 (M12)
C40N
1000A 4x (3x 185)
4x 300 (M12)
C50N
1250A 4x (3x 240)
4x 300 (M12)
400 A sf
500 A sf
630 A sf
2x
400 A sf
2x
500 A sf
2x
630 A sf
2x
630 A sf
2x
800 A sf
ATV71EXA● C50N
C63N
C80N
C90N
M11N
M13N
M15N
1) …
Câble max.
[mm2]
(par phase)
1000A 2x [2x (3x 185)] 8x 240 (M12)
1250A 2x [4x (3x 150)] 8x 240 (M12)
ou
2x [3x (3x 240)]
1600A 2x [4x (3x 150)] 8x 240 (M12) 2x
ou
900 A sf
2x [3x (3x 240)]
2000A 4x [2x (3x 185)] 16x 240 (M12) 4x
500 A sf
2500A 4x [2x (3x 185)] 16x 240 (M12) 4x
630 A sf
2500A 4x [3x (3x 150)] 16x 240 (M12) 4x
ou
800 A sf
4x [2x (3x 240)]
3200A 4x [3x (3x 185)] 16x 240 (M12) 4x
900 A sf
4x 240 (M12)
4x 240 (M12)
4x 240 (M12)
4x 240 (M12)
Câble max.
(avec
inductance
moteur) [mm2]
(par phase)
2x 150 (M10)
ou
1)
4x 240 (M12)
2x 150 (M10)
ou
1)
4x 240 (M12)
2x 150 (M10)
ou
1)
4x 240 (M12)
4x 240 (M12)
4x 240 (M12)
4x 240 (M12)
4x 240 (M12)
1x (3x 185)
2x (3x 120)
2x (3x 150)
3x (3x 150)
4x 240 (M12)
4x 240 (M12)
3x (3x 185)
4x 240 (M12)
4x 240 (M12)
4x (3x 185)
6x 240 (M12)
6x 240 (M12)
6x 240 (M12)
6x 240 (M12)
4x (3x 185) ou
3x (3x 240)
5x (3x 185) ou
4x (3x 240)
6x 240 (M12)
6x 240 (M12)
6x (3x 185) ou
5x (3x 240)
12x 240 (M12)
12x 240 (M12)
12x 240 (M12)
12x 240 (M12)
12x 240 (M12)
12x 240 (M12)
7x (3x 185) ou
6x (3x 240)
9x (3x 185) ou
7x (3x 240)
10x (3x 185) ou
8x (3x 240)
12x 240 (M12)
12x 240 (M12)
En cas de protection IP54 avec conduit de ventilation séparé (ATV71EXS5●●●N)
Sections de câble différées sur demande.
100
Fusible
interne
Câble recommandé [mm2]
1x (3x 70)
1x (3x 95)
1x (3x 120)
11x (3x 185) ou
9x (3x 240)
Avant de commencer
Sections des câbles en cas de presse-étoupe dans le haut
Alimentation réseau
Fusi- Câble recomble
mandé [mm2]
Câble max.
[mm2]
(par phase)
Fusible
interne
1x (3x 95)
1x (3x 120)
1x (3x 185)
2x (3x 120)
2x (3x 150)
2x (3x 185)
3x (3x 185)
2x 150(M10)
2x 150 (M10)
2x 240 (M12)
4x 240 (M12)
4x 240 (M12)
4x 240 (M12)
4x 240 (M12)
C40N
1000A 4x (3x 185)
4x 240 (M12)
C50N
1250A 4x (3x 240)
4x 240 (M12)
200 A sf
250 A sf
315 A sf
400 A sf
500 A sf
630 A sf
2x
400 A sf
2x
500 A sf
2x
630 A sf
2x
630 A sf
2x
800 A sf
ATV71EX●● D90N
C11N
C13N
C16N
C20N
C25N
C31N
ATV71EXA● C50N
C63N
C80N
C90N
M11N
M13N
M15N
200A
250A
315A
400A
500A
630A
800A
1000A 2x [2x (3x 185)] 8x 240 (M12)
1250A 2x [4x (3x 150)] 8x 240 (M12)
ou
2x [3x (3x 240)]
1600A 2x [4x (3x 150)] 8x 240 (M12) 2x
ou
900 A sf
2x [3x (3x 240)]
2000A 4x [2x (3x 185)] 16x 240 (M12) 4x
500 A sf
2500A 4x [2x (3x 185)] 16x 240 (M12) 4x
630 A sf
2500A 4x [3x (3x 150)] 16x 240 (M12) 4x
ou
800 A sf
4x [2x (3x 240)]
3200A 4x [3x (3x 185)] 16x 240 (M12) 4x
900 A sf
Sortie moteur
Câble max.
(sans
inductance
mot.) [mm2]
(par phase)
2x 150 (M10)
2x 150 (M10)
2x 150 (M10)
4x 240 (M12)
4x 240 (M12)
4x 240 (M12)
4x 240 (M12)
Câble max.
(avec
inductance
moteur) [mm2]
(par phase)
2x 150 (M10)
2x 150 (M10)
2x 150 (M10)
4x 240 (M12)
4x 240 (M12)
4x 240 (M12)
4x 240 (M12)
1x (3x 70)
1x (3x 95)
1x (3x 120)
1x (3x 185)
2x (3x 120)
2x (3x 150)
3x (3x 150)
4x 240 (M12)
4x 240 (M12)
3x (3x 185)
4x 240 (M12)
4x 240 (M12)
4x (3x 185)
6x 240 (M12)
6x 240 (M12)
6x 240 (M12)
6x 240 (M12)
4x (3x 185) ou
3x (3x 240)
5x (3x 185) ou
4x (3x 240)
6x 240 (M12)
6x 240 (M12)
12x 240 (M12) 12x 240 (M12)
12x 240 (M12) 12x 240 (M12)
12x 240 (M12) 12x 240 (M12)
12x 240 (M12) 12x 240 (M12)
Câble recommandé [mm2]
6x (3x 185) ou
5x (3x 240)
7x (3x 185) ou
6x (3x 240)
9x (3x 185) ou
7x (3x 240)
10x (3x 185) ou
8x (3x 240)
11x (3x 185) ou
9x (3x 240)
Sections de câble différées sur demande.
101
Avant de commencer
Sections des câbles en cas d'exécution standard
Alimentation réseau
Fusi- Câble recomble
mandé [mm2]
Câble max.
[mm2]
(par phase)
Fusible
interne
1x (3x 95)
2x 120 (M8)
200 A sf
Sortie moteur
Câble max.
(sans
inductance
mot.) [mm2]
(par phase)
2x 150 (M10)
C13Y 250A
1x (3x 120)
2x 120 (M8)
250 A sf
2x 150 (M10)
C16Y 315A
1x (3x 185)
2x 185 (M12)
315 A sf
2x 150 (M10)
C20Y
C25Y
C31Y
C40Y
2x (3x 120)
2x (3x 150)
2x (3x 185)
3x (3x 185)
3x 185 (M12)
3x 185 (M12)
3x 185 (M12)
4x 300 (M12)
C50Y 1000A 4x (3x 185)
4x 300 (M12)
C63Y 1250A 4x (3x 240)
4x 300 (M12)
400 A sf
500 A sf
630 A sf
2x
400 A sf
2x
500 A sf
2x
630 A sf
2x
630 A sf
2x
800 A sf
ATV71EX●● C11Y 200A
400A
500A
630A
800A
ATV71EXA● C63Y 1000A 2x [2x (3x 185)] 8x 240 (M12)
C80Y 1250A 2x [4x (3x 150)] 8x 240 (M12)
ou
2x [3x (3x 240)]
M10Y 1600A 2x [4x (3x 150)] 8x 240 (M12) 2x
ou
900 A sf
2x [3x (3x 240)]
M12Y 2000A 4x [2x (3x 185)] 16x 240 (M12) 4x
500 A sf
M15Y 2500A 4x [2x (3x 185)] 16x 240 (M12) 4x
630 A sf
M18Y 2500A 4x [3x (3x 150)] 16x 240 (M12) 4x
ou
800 A sf
4x [2x (3x 240)]
M21Y 3200A 4x [3x (3x 185)] 16x 240 (M12) 4x
900 A sf
1) …
1x (3x 185)
2x (3x 120)
2x (3x 150)
3x (3x 150)
4x 240 (M12)
4x 240 (M12)
3x (3x 185)
4x 240 (M12)
4x 240 (M12)
4x (3x 185)
6x 240 (M12)
6x 240 (M12)
6x 240 (M12)
6x 240 (M12)
4x (3x 185) ou
3x (3x 240)
5x (3x 185) ou
4x (3x 240)
6x 240 (M12)
6x 240 (M12)
12x 240 (M12) 12x 240 (M12)
12x 240 (M12) 12x 240 (M12)
12x 240 (M12) 12x 240 (M12)
12x 240 (M12) 12x 240 (M12)
En cas de protection IP54 avec conduit de ventilation séparé (ATV71EXS5●●●Y)
Sections de câble différées sur demande.
102
4x 240 (M12)
4x 240 (M12)
4x 240 (M12)
4x 240 (M12)
Câble max.
(avec
inductance
moteur) [mm2]
(par phase)
2x 150 (M10)
ou
1)
4x 240 (M12)
2x 150 (M10)
ou
1)
4x 240 (M12)
2x 150 (M10)
ou
1)
4x 240 (M12)
4x 240 (M12)
4x 240 (M12)
4x 240 (M12)
4x 240 (M12)
Câble recommandé [mm2]
1x (3x 70)
1x (3x 95)
1x (3x 120)
6x (3x 185) ou
5x (3x 240)
7x (3x 185) ou
6x (3x 240)
9x (3x 185) ou
7x (3x 240)
10x (3x 185) ou
8x (3x 240)
11x (3x 185) ou
9x (3x 240)
Avant de commencer
Sections des câbles en cas de presse-étoupe dans le haut
Alimentation réseau
Fusi- Câble recomble
mandé [mm2]
Câble max.
[mm2]
(par phase)
Fusible
interne
1x (3x 95)
1x (3x 120)
1x (3x 185)
2x (3x 120)
2x (3x 150)
2x (3x 185)
3x (3x 185)
2x 150(M10)
2x 150 (M10)
2x 240 (M12)
4x 240 (M12)
4x 240 (M12)
4x 240 (M12)
4x 240 (M12)
C50Y 1000A 4x (3x 185)
4x 240 (M12)
C63Y 1250A 4x (3x 240)
4x 240 (M12)
200 A sf
250 A sf
315 A sf
400 A sf
500 A sf
630 A sf
2x
400 A sf
2x
500 A sf
2x
630 A sf
2x
630 A sf
2x
800 A sf
8x 240 (M12)
16x 240 (M12)
ATV71EX●● C11Y
C13Y
C16Y
C20Y
C25Y
C31Y
C40Y
200A
250A
315A
400A
500A
630A
800A
ATV71EXA● C63Y 1000A 2x [2x (3x 185)]
8x 240 (M12)
C80Y 1250A 2x [4x (3x 150)]
ou
2x [3x (3x 240)]
M10Y 1600A 2x [4x (3x 150)]
ou
2x [3x (3x 240)]
M12Y 2000A 4x [2x (3x 185)]
8x 240 (M12)
M15Y 2500A 4x [2x (3x 185)]
16x 240 (M12)
M18Y 2500A 4x [3x (3x 150)]
ou
4x [2x (3x 240)]
M21Y 3200A 4x [3x (3x 185)]
16x 240 (M12)
16x 240 (M12)
Sortie moteur
Câble max.
(sans
inductance
mot.) [mm2]
(par phase)
2x 150 (M10)
2x 150 (M10)
2x 150 (M10)
4x 240 (M12)
4x 240 (M12)
4x 240 (M12)
4x 240 (M12)
Câble max.
(avec
inductance
moteur)
[mm2]
(par phase)
2x 150 (M10)
2x 150 (M10)
2x 150 (M10)
4x 240 (M12)
4x 240 (M12)
4x 240 (M12)
4x 240 (M12)
Câble recommandé [mm2]
1x (3x 70)
1x (3x 95)
1x (3x 120)
1x (3x 185)
2x (3x 120)
2x (3x 150)
3x (3x 150)
4x 240 (M12)
4x 240 (M12)
3x (3x 185)
4x 240 (M12)
4x 240 (M12)
4x (3x 185)
6x 240 (M12)
6x 240 (M12)
6x 240 (M12)
6x 240 (M12)
4x (3x 185) ou
3x (3x 240)
5x (3x 185) ou
4x (3x 240)
2x
900 A sf
6x 240 (M12)
6x 240 (M12)
6x (3x 185) ou
5x (3x 240)
4x
500 A sf
4x
630 A sf
4x
800 A sf
12x 240 (M12)
12x 240 (M12)
12x 240 (M12)
12x 240 (M12)
12x 240 (M12)
12x 240 (M12)
7x (3x 185) ou
6x (3x 240)
9x (3x 185) ou
7x (3x 240)
10x (3x 185) ou
8x (3x 240)
4x
900 A sf
12x 240 (M12)
12x 240 (M12)
11x (3x 185) ou
9x (3x 240)
Sections de câble différées sur demande.
103
Avant de commencer
Accès aux borniers contrôle
Pour accéder aux bornes contrôle, ouvrez le capot de la face avant
comme indiqué sur la figure. Pour faciliter le câblage de la partie
contrôle du variateur, la carte borniers contrôle peut être débrochée.
1. Dévissez la vis jusqu’à extension du ressort.
2. Débrochez la carte en la faisant coulisser vers le bas.
Capacité maximale de raccordement :
Couple de serrage maximum :
2,5 mm² - AWG 14
0,6 Nm - 5,3 lb.in
ATTENTION
MASSE ELECTRONIQUE
La masse électronique (0 V) doit flotter contre le conducteur PE jusqu’à 35 V. Par conséquent, la
connexion 0 V – terre nécessaire pour limiter la tension peut aussi s’effectuer séparément p. ex. dans
l’automate programmable (éventuellement par la sortie analogique se rapportant à 0 V).
Le non-respect de cette précaution peut entraîner des lésions corporelles et/ou des dommages
matériels.
ATTENTION
FIXATION INAPPROPRIEE DE LA CARTE BORNIERS
Lors du remontage de la carte borniers contrôle, serrez obligatoirement la vis imperdable.
Le non-respect de cette précaution peut entraîner des lésions corporelles et/ou des dommages
matériels.
Caractéristiques et fonctions des bornes contrôle
Bornes
Fonction
Caractéristiques électriques
R1A
R1B
R1C
Relais programmable R1 :
le contact NC s’excite lors de la
mise sous tension, s’ouvre en cas
de défaut.
• Pouvoir de commutation mini : 3 mA pour 24 V c
R2A
R2C
Contact à fermeture du relais
programmable R2
+10
Alimentation +10 V c pour
potentiomètre de consigne 1 à
10 kΩ
• Pouvoir de commutation maximal sur charge
résistive : 5 A pour 250 V a ou 30 V c
• Pouvoir de commutation maximal sur charge
inductive (cos = 0,4 et L/R = 7 ms) : 2 A pour
250 V a ou 30 V c
• + 10 V c (10,5 V ± 5 V)
• 10 mA maxi
AI1 +
AI1-
Entrée analogique différentielle AI1
• -10 à +10 V c (tension maxi de non-destruction
24 V)
COM
Commun des entrées/sorties
analogiques
0V
AI2
Selon configuration logicielle :
entrée analogique en tension ou en
courant
• Entrée analogique 0 à +10 V c (tension maxi de
non-destruction 24 V), impédance 30 kΩ
104
• ou entrée analogique X - Y mA, X et Y étant
programmables de 0 à 20 mA, impédance 250 Ω
Avant de commencer
Bornes
Fonction
Caractéristiques électriques
AO1
Selon configuration logicielle :
entrée analogique en tension ou en
courant, ou sortie logique
• Sortie analogique 0 à +10 V c, impédance de
charge mini 50 kΩ
• ou sortie analogique X – Y mA, X et Y étant
programmables de 0 à 20 mA, impédance de
charge maxi. 500 Ω
• ou sortie logique 0 à 10 V ou 0 à 20 mA
P24
Entrée pour alimentation contrôle
+24 V c externe
• +24 V c (mini 19 V, maxi 30 V)
• Puissance 30 Watts
0V
Commun des entrées logiques et 0
V de l’alimentation P24
0V
LI1 à LI5
Entrées logiques programmables
• +24 V c (maxi 30 V)
• Impédance 3,5 kΩ
LI6
Selon position du commutateur
SW2 : LI ou PTC
SW2 = LI :
• Mêmes caractéristiques que les entrées logiques
LI1 à LI5
SW2 = PTC :
• Seuil de déclenchement 3 kΩ, seuil de
réenclenchement 1,8 kΩ
• Seuil de détection de court-circuit < 50 Ω
+24
Alimentation
Commutateur SW1 en position Source ou Sink Int :
• Alimentation interne +24 V c
• 200 mA maxi
Commutateur SW1 en position Sink ext :
• Entrée pour alimentation +24 V c externe des
entrées logiques
PWR
• 24 V c (maxi 30 V)
Entrée de la fonction de sécurité
« Power Removal »
• Impédance 1,5 kΩ
Borniers carte option entrées/sorties logiques (VW3 A3E 201)
Caractéristiques et fonction des bornes
Capacité maximale de raccordement :
Couple de serrage maximum :
Bornes
TH1+
TH1-
1,5 mm² - AWG 16
0,25 Nm - 1,00 kg.in
Fonction
Entrée sonde PTC
Caractéristiques électriques
• Seuil de déclenchement 3 kΩ, seuil de
réenclenchement 1,8 kΩ
• Seuil de détection de court-circuit < 50 Ω
LO1
LO2
Sorties logiques programmables à
collecteur ouvert
CLO
Commun des sorties logiques
0V
0V
• +24 V c (maxi 30 V)
• Courant maxi : 200 mA en alimentation interne et
200 mA en alimentation externe
0V
105
Avant de commencer
Borniers carte option entrées/sorties étendues (VW3 A3E 202)
Caractéristiques et fonction des bornes
Capacité maximale de raccordement :
Couple de serrage maximum :
1,5 mm² - AWG 16
0,25 Nm - 1,00 kg.in
R4A à LI14 : mêmes caractéristiques que pour la carte contrôle.
Bornes
TH2 +
TH2 -
Fonction
Entrée sonde PTC
Caractéristiques électriques
• Seuil de déclenchement 3 kΩ, seuil de
réenclenchement 1,8 kΩ
• Seuil de détection de court-circuit < 50 Ω
RP
Entrée fréquence
• Gamme de fréquence 0 à 30 kHz, 30 V maxi, 15 mA
maxi
• Ajouter une résistance lorsque la tension d’entrée
est supérieure à 5 V (510 Ω pour 12 V, 910 Ω pour
15 V, 1,3 kΩ pour 24 V)
LO3
LO4
Sorties logiques programmables à
collecteur ouvert
• +24 V c (maxi 30 V)
• Courant maxi : 20 mA en alimentation interne et
200 mA en alimentation externe
CLO
Commun des sorties logiques
0V
0V
0V
Borniers cartes interface codeur
Consultez le cédérom fourni avec le variateur.
Utilisation sur réseaux IT et « corner grounded »
L’utilisation du variateur Altivar est en principe autorisée dans tous les types de réseaux.
Toutefois, les appareils suivants ne doivent pas être utilisés dans les réseaux « corner grounded » :
■ ATV71EX●●●●●N
■ ATV71EX●●●●●Y
Tous les variateurs Altivar comportent des filtres RFI intégrés. En cas d’utilisation sur réseaux IT,
choisissez l'option « Exécution pour réseau IT » (VW3 AE 2701). Dans cette option, le variateur est
préparé en vue du raccordement aux réseaux IT.
Le contrôleur d’isolement utilisé doit être compatible avec les charges non linéaires.
En cas de réseaux non reliés à la terre, une mise à la terre unipolaire dans le réseau d’alimentation est
sans influence sur le fonctionnement du variateur. Si la mise à la terre s’effectue dans le moteur ou le
câble moteur, le variateur se coupe. Toutefois, la détection dépend fortement de la capacité par rapport à
la terre du réseau.
106
Mise en service
Mise en service
Procédure
1. Contrôle du câblage puissance
■ Les câbles d’alimentation doivent être raccordés aux bornes prévues pour la tension réseau.
■ L’armoire est-elle correctement reliée à la terre en matière de sécurité des personnes ?
■ La dimension des fusibles doit être vérifiée selon le tableau figurant au chapitre « Fusibles et
sections de câble », page 97.
■ La longueur du câble moteur correspond-elle aux valeurs limites admissibles (voir le tableau
figurant dans le guide de sélection ATV71 Plus) et une inductance moteur est-elle éventuellement
installée ?
2. Contrôle des mesure CEM
■ Le filtre CEM intégré est-il relié correctement par rapport à la situation du réseau (TT, TN ou IT,
Corner Grounded) ? Voir également le chapitre « Utilisation sur réseaux IT et « corner grounded » »,
page 106.
■ Le blindage du câble moteur doit présenter une bonne connexion HF côté moteur et côté variateur.
■ Toutes les lignes de commande à signaux faibles (ainsi que les entrées logiques) doivent être
blindées et séparées des câbles moteur.
■ L’armoire nécessite un système de terre à grande surface (barre de liaison à la terre d’au moins
40 mm de large) pour respecter les limites de perturbation.
3. Mise sous tension de l’appareil sans ordre de marche
■ Vérifiez et connectez les tensions de commande externes si elles sont prévues.
■ Vérifiez et éventuellement corrigez le niveau de tension du transformateur de tension de commande
par rapport à la tension réseau présente.
■ Vérifiez la tension réseau et mettez sous tension.
■ Effectuez une mesure de contrôle :
■ Les trois tensions de phases sont elles présentes et symétriques ?
■ Un champ magnétique rotatif à droite est-il adjacent aux bornes de puissance ?
(Respectez les consignes « Travaux sous tension »)
■ Contrôlez la commande et mettez-la en service conformément aux schémas fournis.
4. Sélectionnez la langue et le niveau d’accès (page 112)
■ A la première mise sous tension, la navigation dans les menus est imposée jusqu’au [1. MENU
VARIATEUR] afin de guider l’utilisateur. Vous devez d’abord spécifier la langue, puis le niveau
d’accès.
5. Configuration du menu [SIMPLY START] (page 113)
■ Les paramètres de ce sous-menu doivent être configurés et l’auto-réglage effectué impérativement
avant de démarrer le moteur.
6. Réglage de la tension réseau
■ Contrôlez les paramètres de la tension réseau et corrigez-les le cas échéant en fonction de la
tension réseau utilisée.
107
Mise en service
7. Démarrage de l'entraînement en mode local
■ Demandez l’autorisation avant la mise en service !
■ Commutez le clavier du terminal graphique en mode local.
■ Contrôlez le sens de rotation du moteur.
■ Démarrez différentes vitesses de rotation et vérifiez la charge de l’entraînement.
8. Mode distance
■ Vérifiez les valeurs de consigne et entrées de commande en suspens avant de repasser en mode
distance.
■ Commutez en mode distance et vérifiez à nouveau les paramètres de tension ainsi que la réaction
sur les entrées de commande.
9. Sauvegarde et enregistrement des données
■ Empêchez les modes d’exploitation interdits par un réglage adéquat des paramètres.
■ Sauvegarde de tous les paramètres d’application.
■ Extraction de tous les paramètres avec le programme PC « Power Suite » et impression éventuelle
de la liste complète.
108
Mise en service
Réglage usine
Préréglages variateur
Nous avons préréglé l’ATV71 Plus en usine pour les applications les plus courantes :
■ Macro configuration : pompage / ventilation
■ Fréquence moteur : 50 Hz
■ Applications à couple variable avec économie d’énergie
■ Mode d’arrêt normal sur rampe de décélération
■ Mode d’arrêt sur défaut : arrêt en roue libre
■ Rampes linéaires, accélération et décélération : 3 secondes
■ Petite vitesse : 0 Hz
■ Grande vitesse : 50 Hz
■ Courant thermique moteur = courant nominal variateur
■ Courant de freinage par injection à l'arrêt = 0,7 x courant nominal variateur, pendant 0,5 seconde
■ Pas de redémarrage automatique après un défaut.
■ Fréquence de découpage de 2,5 à 12 kHz, selon le calibre du variateur
■ Entrées logiques :
LI1 : marche avant (1 sens de rotation), commande 2 fils sur transition
LI2 : inactive (non affectée)
LI3 : commutation 2e consigne vitesse
LI4 : Reset défauts
LI5, LI6 : inactives (non affectées)
■ Entrées analogiques :
AI1 :1. consigne vitesse 0 à +10 V
AI2 :2. consigne vitesse 0 à 20 mA
■ Relais R1 : le contact s'ouvre en cas de défaut (ou variateur hors tension)
■ Relais R2 : le contact se ferme lorsque le variateur est en marche
■ Sortie analogique AO1 : 0 à 20 mA, inactive (non affectée)
Si les valeurs ci-dessus sont compatibles avec votre application, utilisez le variateur sans modification
des réglages.
Préréglages cartes options
Les entrées / sorties des cartes options sont non affectées en réglage usine.
Alimentation séparée du contrôle
Lorsque le contrôle du variateur est alimenté indépendamment de la puissance (bornes P24 et 0V), après
toute adjonction de carte option et après tout remplacement éventuel de carte, il est nécessaire
d’alimenter la puissance à la première mise sous tension seulement. A défaut, la nouvelle carte ne sera
pas reconnue. Il n’est pas possible de la configurer et le variateur coupe dès lors le circuit avec un défaut.
109
Mise en service
Commande de puissance par contacteur de ligne
AVERTISSEMENT
RISQUE DE DÉTÉRIORATION DU VARIATEUR
■ Evitez de manœuvrer fréquemment le contacteur (vieillissement prématuré du condensateur de
filtrage).
■ En cas de temps de cycles < 60 s, il y a risque de destruction de la résistance de charge.
Le non-respect de ces précautions peut entraîner la mort, des blessures graves et/ou des dommages
matériels.
Démarrage
Dans le réglage usine, les entrées logiques sont configurées par niveau.
Par conséquent, après
■ une mise sous tension
■ une remise à zéro manuelle
■ un ordre d’arrêt
le variateur ne redémarre pas de manière autonome. L’écran du variateur affiche « nSt ». L’ordre de
marche doit être de nouveau placé pour un nouveau démarrage.
Essai sur moteur de faible puissance ou sans moteur,
utilisation de moteurs en parallèle
Consultez le cédérom fourni avec le variateur.
110
Mise en service
Terminal graphique
Le terminal graphique est optionnel pour les petits calibres de variateurs et systématiquement présent sur
les calibres supérieurs (voir catalogue). Le terminal peut être déconnecté et monté à un autre endroit, par
exemple sur une porte d’armoire. À cette fin, utilisez les câbles et accessoires disponibles en option (voir
catalogue).
Description du terminal
Remarque : les touches 3, 4, 5 et 6 permettent de commander directement le variateur, si la commande
par le terminal graphique est activée.
Codes d’état du variateur
ACC : accélération
CLI : limitation de courant
CTL : arrêt contrôlé sur perte phase réseau
DCB : freinage par injection de courant continu en cours
DEC : délais
FLU : fluxage moteur en cours
FRF : limite inférieure en cas de contrôle de couple
FST : arrêt rapide
NLP : puissance non alimentée (pas de tension réseau sur L1, L2, L3)
NST : arrêt en roue libre
OBR :décélération automatiquement adaptée
PRA : fonction « Power removal » active (variateur verrouillé)
RDY : variateur prêt
RUN :variateur en marche
SOC :coupure aval contrôlée en cours
TUN : auto-réglage en cours
USA : alarme sous tension
111
Mise en service
Terminal débroché
Lorsque le terminal est débroché, on peut voir à sa place 2 voyants de signalisation :
Voyant vert z : bus DC sous tension
Voyant rouge r : défaut
Navigation
A la première mise sous tension, la navigation dans les menus est imposée jusqu’au [1. MENU
VARIATEUR] afin de guider l’utilisateur. Vous devez d’abord spécifier la langue, puis le niveau d’accès.
Les paramètres du sous-menu [1.1 SIMPLY START] doivent être configurés et l’auto-réglage effectué
impérativement avant de démarrer le moteur.
Seul le menu [1.1 SIMPLY START] est décrit dans ce document. Pour connaître le contenu des
autres menus, consultez le cédérom fourni avec le variateur.
Affichage pendant 3 secondes après la mise sous
tension
↓
3 secondes
Passage automatique au menu [5 LANGUAGE]
Choisissez la langue et appuyez sur ENT.
↓
ENT
Passage au menu [2 NIVEAU D’ACCÈS] (consultez
le cédérom fourni avec le variateur). Choisissez le
niveau d’accès et appuyez sur ENT.
↓
ENT
Passage au [1 MENU VARIATEUR] (consultez le
cédérom fourni avec le variateur).
↓
ESC
Retour au [MENU GENERAL] par ESC
112
Mise en service
Menu [1.1 SIMPLY START] (SIM-)
Le menu [1.1 SIMPLY START] (SIM-) permet d’effectuer une mise en service rapide, suffisante dans la
plupart des applications.
Remarque : les paramètres du menu [1.1 SIMPLY START] (SIM-) sont à renseigner dans l’ordre où ils se
présentent car les premiers conditionnent les suivants.
Par exemple, le paramètre [Cde 2 fils / 3 fils] (tCC) est à configurer avant tout autre.
Macro configuration
La macro configuration permet la configuration rapide des fonctions pour un domaine d’application
spécifique.
Le choix d’une macro configuration entraîne l’affectation des entrées / sorties de cette macro
configuration.
Entrée
/sortie
[Start/
stop]
[Manut.]
[Usage gén.]
[Levage]
[PID régul.]
[Network C.]
[Maître/escl.]
AI1
[Canal
réf. 1]
[Canal réf. 1]
[Canal réf. 1]
[Canal réf. 1]
[Canal réf. 1]
(Consigne PID)
[Canal réf. 2]
([Canal réf. 1]
par le bus)
[Canal réf. 1]
AI2
[Non]
[Retour PID]
[Non]
[Non]
[Réf. sommatrice 2]
[Non]
[Non]
AO1
[Réf. sommatrice 2]
[Non]
[Non]
[Non]
[Non]
[Référence
couple]
[Non]
R1
[Non
défaut]
[Non défaut]
[Non défaut]
[Non défaut]
[Non défaut]
[Non défaut]
[Non défaut]
[Non]
[Non]
[Cmde frein]
[Non]
[Non]
[Non]
[Sens avant]
[Sens avant]
[Sens avant]
[Sens avant]
[Sens avant]
[Sens avant]
[Sens arrière]
[Sens arrière]
[Sens arrière]
[Sens arrière]
[Sens arrière]
[Reset
défauts]
[Défaut
externe]
[RAZ intégral
PID]
[2 Réf. PID
présél.]
[4 Réf. PID
présél.]
[Commutation
réf.2]
[Comm.
couple/vit]
[Reset
défauts]
[Non]
[Non]
R2
LI1 (2 fils)
LI2 (2 fils)
[Non]
[Sens
avant]
[Sens
arrière]
LI3 (2 fils)
[Non]
LI4 (2 fils)
[Non]
LI5 (2 fils)
[Non]
LI6 (2 fils)
[Non]
LI1 (3 fils)
Stop
LI2 (3 fils)
[Sens
avant]
LI3 (3 fils)
[Non]
LI4 (3 fils)
[Non]
LI5 (3 fils)
[Non]
LI6 (3 fils)
[Non]
[Sens
arrière]
[2 vitesses
présél.]
[4 vitesses
présél.]
[8 vitesses
présél.]
[Reset
défauts]
[Jog]
[Reset
défauts]
[Limitation
couple]
[Non]
[Reset défauts]
[Non]
[Non]
[Non]
[Non]
[Non]
Stop
Stop
Stop
Stop
Stop
Stop
[Sens avant]
[Sens avant]
[Sens avant]
[Sens avant]
[Sens avant]
[Sens avant]
[Sens arrière]
[Sens arrière]
[Sens arrière]
[Sens arrière]
[Sens arrière]
[Reset
défauts]
[Défaut
externe]
[RAZ intégral
PID]
[2 Réf. PID
présél.]
[4 Réf. PID
présél.]
[Commutation
réf.2]
[Comm.
couple/vit]
[Reset
défauts]
[Sens
arrière]
[2 vitesses
présél.]
[4 vitesses
présél.]
[8 vitesses
présél.]
[Jog]
[Reset
défauts]
[Limitation
couple]
[Non]
[Reset défauts]
[Non]
[Non]
En commande 3 fils, l’affectation des entrées LI1 à LI6 est décalée.
Toutes les valeurs sont modifiables, réglables et réaffectables. Consultez le cédérom fourni avec
le variateur.
113
Mise en service
Code
Nom / Description
tCC
M [Cde 2 fils / 3 fils]
2C
3C
Plage de réglage Réglage usine
[Cde 2 fils] (2C)
v [Cde 2 fils] (2C)
v [Cde 3 fils] (3C)
Commande 2 fils :
C’est l’état (0 ou 1) ou le front
(0 à 1 ou 1 à 0) de l’entrée qui
commande la marche ou
l’arrêt.
Commande 3 fils :
(Commande par impulsions) :
une impulsion « avant » ou
« arrière » suffit pour
commander le démarrage du
moteur, une impulsion "stop"
suffit pour en commander
l’arrêt.
Exemple de câblage en « source » :
LI1 : marche avant
LIx : marche arrière
Exemple de câblage en « source » :
LI1 : Stop
LI2 : marche avant
LIx : marche arrière
AVERTISSEMENT
FONCTIONNEMENT INATTENDU DE L’APPAREIL
Le changement d’affectation de [Cde 2 fils/3 fils] nécessite un appui prolongé (2 s) sur la
touche « ENT ».
Il entraîne un retour au réglage usine de la fonction [Type cde 2 fils] (tCt) (consultez le
cédérom fourni avec le variateur) et de toutes les fonctions affectant des entrées logiques. Il
entraîne également un retour à la macro configuration sélectionnée si celle-ci a été
personnalisée (perte des personnalisations). Assurez-vous que ce changement est
compatible avec le schéma de câblage utilisé.
Le non-respect de ces précautions peut entraîner la mort, des blessures graves et/ou
des dommages matériels.
CFG
StS
HdG
HSt
GEn
PId
nEt
MSL
M [Macro configuration]
v
v
v
v
v
v
v
[Pomp./vent.]
(PnF)
[Start/stop] (StS) : Marche / arrêt
[Manut.] (HdG) : Manutention
[Levage] (HSt) : Levage
[Usage gén.] (GEn) : Usage général
[PID régul.] (PId) : Régulation PID
[Network C.] (nEt) : Bus de communication
[Maître/escl.] (MSL) : Maître / esclave
AVERTISSEMENT
FONCTIONNEMENT INATTENDU DE L’APPAREIL
Le changement de la [Macro configuration] (CFG) nécessite un appui prolongé (2 s) sur la
touche « ENT ». Assurez-vous que la macro configuration choisie est compatible avec le
schéma de câblage utilisé.
Le non-respect de ces précautions peut entraîner la mort, des blessures graves et/ou
des dommages matériels.
114
Mise en service
Code
Nom / Description
CCFG
M [Macro perso.]
YES
bFr
Paramètre en lecture seulement, visible si au moins un paramètre de la macro
configuration a été modifié.
v [Oui] (YES)
M [Standard fréq mot]
50
60
nPr
Plage de réglage Réglage usine
[50 Hz IEC] (50)
v [50 Hz IEC] (50) : IEC
v [60 Hz NEMA] (60) : NEMA
Ce paramètre modifie les préréglages des paramètres :[Tension nom. mot.] (UnS) ci
dessous, [Grande vitesse] (HSP), [Fréq. nom. mot.] (FrS) et [Fréquence maxi.] (tFr) ci
dessous.
M [Puissance nom. mot.]
Selon calibre
variateur
Selon calibre
variateur
Puissance nominale moteur inscrite sur sa plaque signalétique, en kW,
si [Standard Mot.Fréq] (bFr) = [50 Hz IEC] (50), en HP
si [Standard Mot.Fréq] (bFr) = [60 Hz NEMA] (60).
UnS
M [Tension nom. mot.]
Selon calibre
variateur
Selon calibre
variateur et
[Standard
Mot.Fréq] (bFr)
Tension nominale moteur inscrite sur sa plaque signalétique.
ATV61EX●●●●●N4 : 200 à 480 V - ATV61EX●●●●●N, Y : 400 à 690 V
nCr
M [Tension nom. mot.]
0,25...1,5 In,
selon calibre (1)
Selon calibre
variateur
Courant nominal moteur inscrit sur sa plaque signalétique.
FrS
M [Fréq. nom. mot.]
10 à 500 ou
1 000 Hz selon
calibre
50 Hz
Fréquence nominale moteur inscrite sur sa plaque signalétique. Le réglage usine est 50 Hz,
remplacé par un préréglage à 60 Hz si [Fréquence moteur] (bFr) est mis à 60 Hz.
nSP
M [Vitesse nom. mot.]
0 à 60 000 RPM
Selon calibre
variateur
Vitesse nominale moteur inscrite sur sa plaque signalétique.
0 à 9 999 RPM, puis 10,00 à 60,00 kRPM sur l’afficheur intégré. Si la plaque signalétique
n’indique pas la vitesse nominale mais la vitesse de synchronisme et le glissement en Hz ou
en %, calculeZ la vitesse nominale comme suit :
100 − glissement en %
100
50 − glissement en %
•vitesse nominale = vitesse de synchronisme x
50
60 − glissement en %
•vitesse nominale = vitesse de synchronisme x
60
•vitesse nominale = vitesse de synchronisme x
ou
(moteurs 50 Hz) ou
(moteurs 60 Hz)
(1) In correspond au Courant nominal variateur indiqué dans le guide d’installation et sur l’étiquette
signalétique du variateur.
115
Mise en service
Code
Nom / Description
Plage de réglage Réglage usine
tFr
M [Fréquence maxi.]
10 à 500 ou 1 000 60 Hz
Hz selon calibre
Le réglage usine est 60 Hz, remplacé par un préréglage à 72 Hz si le paramètre [Standard
Mot. Fréq.] (bFr) est mis sur 60 Hz. La valeur maxi est limitée par les conditions suivantes :
• Elle ne peut dépasser que 10 fois la valeur de [Fréq. nom. mot.] (FrS).
tUn
nO
YES
dOnE
M [autoréglage]
[Non] (nO)
v [Non] (nO) : Auto-réglage non fait.
v [Oui] (YES) : L'autoréglage est fait dès que possible. Le paramètre passe ensuite
automatiquement à [Fait] (dOnE).
v [Fait] (dOnE) : Utilisation des valeurs données par le précédent auto-réglage.
Attention :
• Il est impératif que tous les paramètres moteurs ([Tension nom. mot.] (UnS), [Fréq.
nom. mot.] (FrS), [Courant nom. mot.] (nCr), [Vitesse nom. mot] (nSP), [Puissance nom.
mot] (nPr)) soient correctement configurés avant d’effectuer l’auto-réglage. Si au
moins un de ces paramètres est modifié après que l’auto-réglage a été effectué,
[Auto-réglage] (tUn) repasse à [Non] (nO) et doit être refait.
• L'auto-réglage s'effectue seulement si aucune commande d’arrêt n'est actionnée. Si
une fonction « arrêt roue libre » ou « arrêt rapide » est affectée à une entrée logique, il
faut mettre cette entrée à 1 (active à 0).
• L’auto-réglage est prioritaire sur les ordres de marche ou de préfluxage éventuels qui
seront pris en compte après la séquence d’auto-réglage.
• Si l’auto-réglage échoue, le variateur affiche [Non] (nO) et, suivant la configuration de
[Gestion défaut tnf] (tnL) (consultez le cédérom fourni avec le variateur), peut passer
en défaut [autoréglage] (tnF).
• L’autoréglage peut durer 1 à 2 secondes. Ne l’interrompez pas et attendez que
l’affichage passe à « [Fait] (dOnE) » ou à « [Non] (nO) ».
Pendant l’auto-réglage, le moteur est parcouru par son courant nominal.
tUS
tAb
PEnd
PrOG
FAIL
dOnE
PHr
AbC
ACb
116
M [Etat auto-réglage]
[Non fait] (tAb)
(information, non paramétrable)
v [Non fait] (tAb) : La valeur par défaut de résistance du stator est utilisée pour commander
le moteur.
v [En attente] (PEnd) : l’autoréglage a été demandé mais n'est pas encore effectué.
v En cours] (PrOG) : auto-réglage en cours.
v [Echec] (FAIL) : l'autoréglage a échoué.
v [Fait] (dOnE) : la résistance stator mesurée par la fonction autoréglage est utilisée pour
commander le moteur.
M [Rotation phase]
[ABC] (AbC)
v [ABC] (AbC) : sens normal.
v [ACB] (ACb) : sens inverse.
Ce paramètre permet d’inverser le sens de rotation du moteur sans inverser le câblage.
Mise en service
Paramètres modifiables en marche et à l’arrêt
Code
Nom / Description
Plage de réglage Réglage usine
ItH
M [Courant therm. mot.]
0,2 á 1,5 In (1)
Selon calibre
variateur
Courant de protection thermique du moteur, à régler à l’intensité nominale lue sur sa
plaque signalétique.
ACC
M [Accélération]
0,1 à 999,9 s
3,0 s
Temps pour accélérer de 0 à la [Fréq. nom. mot.] (FrS). Assurez-vous que cette valeur
est compatible avec l’inertie entraînée.
dEC
M [Décélération]
0,1 à 999,9 s
3,0 s
Temps pour décélérer de la [Fréq. nom. mot.] (FrS) à 0. Assurez-vous que cette valeur
est compatible avec l’inertie entraînée.
LSP
M [Petite vitesse]
0
Fréquence moteur à consigne mini, réglage de 0 à [Grande vitesse] (HSP).
HSP
M [Grande vitesse]
50 Hz
Fréquence moteur à consigne maxi, réglage de [Petite vitesse] (LSP) à [Fréquence maxi]
(tFr). Le réglage usine devient 60 Hz si [Standard fréq mot.] (bFr) = [60 Hz] (60).
(1) In correspond au Courant nominal variateur indiqué dans le guide d’installation et sur l’étiquette
signalétique du variateur.
117
Mise en service
Cause et correction des défauts
Non-démarrage sans affichage de défaut
• S'il n'y a aucun affichage, vérifiez que le variateur est bien alimenté.
• L’affectation des fonctions « Arrêt rapide » ou « Arrêt roue libre » entraîne un non démarrage si les
entrées logiques correspondantes ne sont pas sous tension. L’ATV71 Plus affiche alors [NST] (nSt) en
arrêt roue libre et [FST] (FSt) en arrêt rapide. Cela est normal car ces fonctions sont actives à zéro afin
de garantir l'arrêt en cas de coupure de fil.
• Assurez-vous que la ou les entrées de commande de marche sont actionnées conformément au mode
de contrôle choisi (paramètres [Cde 2 fils/3fils] (tCC) et [Type cde 2 fils] (tCt)).
Défauts non réarmables automatiquement
La cause du défaut doit être supprimée avant réarmement par mise hors puis sous tension.
Les défauts AnF, brF, ECF, EnF, SOF, SPF et tnF sont réarmables aussi à distance par entrée logique ou
bit de commande (consultez le cédérom fourni avec le variateur).
Code
Nom
Cause probable
Mesures correctives
AI2F
[Entrée AI2]
• Signal non conforme sur
l’entrée analogique AI2.
• Vérifiez le câblage de l’entrée
analogique AI2 et la valeur du signal.
AnF
[Dévirage]
• le retour vitesse par
codeur n’est pas
cohérent avec la
consigne
• Vérifier les paramètres moteur, gain
etstabilité.
• Ajouter une résistance de freinage.
• Vérifier le dimensionnement moteur /
variateur / charge.
• Vérifier l’accouplement mécanique du
codeur et son câblage.
brF
[Frein mecanique]
• le contact de retour du
frein n’est pas en
concordance avec la
commande de frein.
• Vérifier le circuit de retour et le circuit
de commande de frein.
• Vérifier l’état mécanique du frein.
CrF1
[Defaut Precharge]
• défaut de commande du
relais de charge ou
résistance de charge
détériorée
• Vérifier les connexions internes.
• Contrôler / réparer le variateur.
ECF
[Liaison Meca codeur] • rupture de
l’accouplement
mécanique du codeur.
• Vérifier l’accouplement mécanique du
codeur.
EEF1_ [EEPROM Controle]
EEF2
• défaut mémoire interne
• Vérifier l'environnement (compatibilité
électromagnétique).
• Mettre hors tension, réarmer, faire un
retour en réglage usine.
• Contrôler / réparer le variateur.
EnF
• défaut retour codeur
• Vérifier [Nombre impulsions] (PGI) et
[Signaux codeur] (EnS) (consulter le
cédérom fourni avec le variateur).
• Vérifier le bon fonctionnement
mécanique et électrique du codeur,
son alimentation et son raccordement.
• Vérifier et si nécessaire inverser le
sens de rotation du moteur (paramètre
[Rotation phase] (PHr) page 32) ou les
signaux du codeur.
118
[Defaut Codeur]
Mise en service
Code
Nom
Cause probable
Mesures correctives
FCF1
[Contact Aval Colle]
• Le contacteur aval reste
fermé alors que les
conditions d'ouverture
sont remplies.
• Vérifier le contacteur et son câblage.
• Vérifier le circuit de retour.
ILF
[Liaisoninterne]
• défaut de
communication entre
carte option et variateur
• Vérifier l’environnement (compatibilité
électromagnétique).
• Vérifier les connexions.
• Remplacer la carte option.
• Contrôler / réparer le variateur.
InF1
[Erreur calibre]
• La carte puissance est
• Vérifier la référence de la carte
différente de celle qui est
puissance.
mémorisée.
InF2
[Puiss incompatible]
• La carte puissance est
incompatible avec la
carte contrôle.
• Vérifier la référence de la carte
puissance et sa compatibilité.
• Défaut de
communication entre les
cartes internes.
• Vérifier les connexions internes.
• Contrôler / réparer le variateur.
InF3
[Liaison Serieinterne]
InF4
[Interne – Zone Fab]
• Incohérence de données • Recalibrer le variateur (par les services
internes.
Schneider Electric)
InF6
[Option Interne]
• L'option installée dans le • Vérifier la référence et la compatibilité
variateur est inconnue.
de l’option.
InF7
[Interne - Init Hard]
• L'initialisation du
variateur est incomplète.
• Mettre hors tension et réarmer.
InF8
[Intern. Alim.Controle]
• L'alimentation contrôle
n'est pas correcte.
• Vérifier l’alimentation du contrôle.
InF9
[Interne - Mesure I]
• Les mesures courant
sont incorrectes.
• Remplacer les capteurs de courant ou
la carte puissance.
• Contrôler / réparer le variateur.
InFA
[Intern. Circuit
Reseau]
• L'étage d'entrée ne
fonctionne pas
correctement
• Contrôler / réparer le variateur.
InFb
[Interne Capteur
Temp.]
• Le capteur de
température du variateur
ne fonctionne pas
correctement.
• Remplacer le capteur de température.
• Contrôler / réparer le variateur.
InFC
[Interne Mesure
Temps]
• Défaut du composant
électronique de mesure
du temps.
• Contrôler / réparer le variateur.
InFE
[Defaut Micro]
• Mettre hors tension et réarmer.
• Défaut du
microprocesseur interne. • Contrôler / réparer le variateur.
OCF
[Surintensite]
• paramètres des menus
• Vérifier les paramètres (consulter le
[REGLAGES] (SEt-) et[1.4
cédérom fourni avec le variateur).
CONTRÔLE MOTEUR]
• Vérifier le dimensionnement
(drC-) non corrects.
moteur/variateur/charge.
• inertie ou charge trop
• Vérifier l'état de la mécanique.
forte.
• blocage mécanique.
PrF
[Powerremoval]
• défaut de la fonction de
sécurité du variateur
"Power removal"
• Contrôler / réparer le variateur.
119
Mise en service
Code
Nom
Cause probable
SCF1
[Court-Circuit Mot.]
SCF2
[C.-Circuit Impedant]
SCF3
[Court-Circuit Terre]
• court-circuit ou mise à la • Vérifier les câbles de liaison du
terre en sortie du
variateur au moteur, et l’isolement du
variateur
moteur.
• courant de fuite
• Réduire la fréquence de découpage.
important à la terre en
• Ajouter des inductances en série avec
sortie du variateur dans
le moteur.
le cas de plusieurs
moteurs en parallèle.
SOF
[Survitesse]
• instabilité ou charge
entraînante trop forte
• Vérifier les paramètres moteur, gain
etstabilité.
• Ajouter une résistance de freinage.
• Vérifier le dimensionnement moteur
/variateur / charge.
SPF
[Coupure Retour Vit.]
• absence de signal retour
codeur
• Vérifier le câblage entre codeur et
variateur.
• Vérifier le codeur.
tnF
[Auto Reglage]
• moteur non raccordé au • Vérifier la présence du moteur lors de
variateur
l’autoréglage.
• moteur spécial ou
• Dans le cas de l’utilisation d’un
moteur de puissance non
contacteur aval, le fermer pendant
adaptée au variateur.
l’auto-réglage.
• Vérifier l’adéquation moteur / variateur.
120
Mesures correctives
Mise en service
Défauts réarmables avec la fonction redémarrage automatique, après disparition de la
cause
Ces défauts sont également réarmables par mise hors puis sous tension ou par entrée logique ou bit de
commande (consultez le cédérom fourni avec le variateur).
Code
Nom
Cause probable
Mesures correctives
APF
[Déf. Application]
• Défaut carte Controller
Inside
• Voir documentation de la carte.
bLF
[Commande Frein]
• courant de levée de
• Vérifier le raccordement variateur /
frein non atteint
moteur.
• paramètres de
• Vérifier les enroulements du
commande de frein non
moteur.
réglés alors que la
• Effectuer les réglages préconisés
commande de frein est
(consulter le cédérom fourni avec
affectée.
le variateur).
CnF
[Defaut Reseau Com.]
• défaut de
communication sur
carte communication
COF
[Defaut CANopen]
• interruption de
• Vérifier le bus de communication.
communication sur bus • Vérifier le time out.
CANopen
• Consulter la documentation
spécifique.
EPF1
[Externe Par LI]
• Défaut déclenché par
un organe externe,
selon utilisateur
• Vérifier l'organe qui a causé le
défaut et réarmer.
EPF2 [Externe Via Reseau]
• Défaut déclenché par
un organe externe,
selon utilisateur
• Vérifier l'organe qui a causé le
défaut et réarmer.
FCF2 [Contact Aval Ouvert]
• Le contacteur aval reste • Vérifier le contacteur et son
ouvert alors que les
câblage.
conditions de fermeture • Vérifier le circuit de retour.
sont remplies.
LCF
[Contacteur ligne]
• Le variateur n’est pas
sous tension alors que
le contacteur est
commandé.
• Vérifier le contacteur et son
câblage.
• Vérifier le time out (consulter le
cédérom fourni avec le variateur).
• Vérifier le raccordement réseau /
contacteur / variateur.
LFF2
LFF3
LFF4
[Perte 4-20 mA AI2]
[Perte 4-20 mA AI3]
[Perte 4-20 mA AI4]
• perte de la consigne 420 mA sur une entrée
analogique AI2, AI3 ou
AI4
• Vérifier le raccordement sur les
entrées analogiques.
• Vérifier l’environnement
(compatibilité électromagnétique).
• Vérifier le câblage.
• Vérifier le time out.
• Remplacer la carte option.
• Contrôler / réparer le variateur.
121
Mise en service
Code
Nom
Cause probable
Mesures correctives
ObF
[Freinage Excessif]
• freinage trop brutal ou
charge entraînante
• Augmenter le temps de
décélération.
• Adjoindre une résistance de
freinage si nécessaire.
• Activer la fonction [Adapt. rampe
déc] (brA) (consulter le cédérom
fourni avec le variateur), si elle est
compatible avec l'application
OHF
[Surchauffe Var.]
• température variateur
trop élevée
• Contrôler la charge moteur, la
ventilation variateur et la
température ambiante. Attendre le
refroidissement pour redémarrer.
OLF
[Surcharge Moteur]
• déclenchement par
courant moteur trop
élevé
• Vérifier le réglage de la protection
thermique moteur, contrôler la
charge du moteur. Attendre le
refroidissement pour redémarrer.
OPF1
[Coupure 1 Phase Moteur]
• coupure d’une phase
en sortie variateur
• Vérifier les raccordements du
variateur au moteur
OPF2 [Coupure 3 Phases Moteur]
• moteur non câblé ou de • Vérifier les raccordements du
trop faible puissance
variateur au moteur
• contacteur aval ouvert
• Dans le cas de l’utilisation d’un
contacteur aval, consulter le
• instabilités instantanées
cédérom fourni avec le variateur.
du courant moteur
• Essai sur moteur de faible
puissance ou sans moteur : en
réglage usine, la détection perte
phase moteur est active [Perte
phase moteur] (OPL) = [Oui] (YES).
Pour vérifier le variateur dans un
environnement de test ou de
maintenance, et sans avoir recours
à un moteur équivalent au calibre
du variateur (en particulier pour les
variateurs de fortes puissances),
désactiver la détection de phase
moteur [Perte phase moteur] (OPL)
= [Non] (nO) (consulter le cédérom
fourni avec le variateur).
• Vérifier et optimiser les
paramètres, [Tension nom. mot.]
(UnS) et [Courant nom. mot.] (nCr)
et faire un [Auto-réglage] (tUn).
OSF
[Surtension Reseau]
• tension réseau trop
élevée
• réseau perturbé
OtF1
[Surchauffe PTC1]
OtF2
[Surchauffe PTC2]
OtFL
[Surchauffe LI6= PTC]
• détection de surchauffe • Contrôler la charge et le
sondes PTC1
dimensionnement du moteur.
• détection de surchauffe • Contrôler la ventilation du moteur.
sondes PTC2
• Attendre le refroidissement avant
de redémarrer.
• détection de surchauffe
sondes PTC/LI6.
• Contrôler le type et l’état des
sondes PTC.
122
• Vérifier la tension réseau.
Mise en service
Code
Nom
Cause probable
Mesures correctives
PtF1
[Defaut PTC1]
• Ouverture ou courtcircuit des sondes
PTC1.
• Vérifier les sondes PTC et leur
câblage moteur/variateur.
PtF2
[Defaut PTC2]
• Ouverture ou courtcircuit des sondes
PTC2.
PtFL
[Defaut LI6 = PTC]
• Ouverture ou courtcircuit des sondes
PTC/LI6.
SCF4
[Court-Circuit IGBT]
• Défaut composant de
puissance.
• Contrôler / réparer le variateur.
SCF5 [C.-Circuit Charge]
• Court-circuit en sortie
du variateur.
• Vérifier les câbles de liaison du
variateur au moteur et l’isolement
du moteur.
• Contrôler / réparer le variateur.
SLF1
[Com. Modbus]
• interruption de
• Vérifier le bus de communication.
communication sur bus • Vérifier le time out.
Modbus
• Consulter la documentation
spécifique.
SLF2
[Com. PowerSuite]
• défaut de
communication avec
PowerSuite
• Vérifier le câble de raccordement
PowerSuite.
• Vérifier le time out.
SLF3
[Communication HMI]
• défaut de
communication avec le
terminal graphique
• Vérifier le raccordement du
terminal.
• Vérifier le time out.
SrF
[Time Out Couple]
• Time out de la fonction
contrôle de couple
atteint.
• Vérifier les réglages de la fonction.
• Vérifier l’état de la mécanique.
SSF
[Lim. Couple/Courant]
• passage en limitation
de couple
• Vérifier la présence éventuelle d’un
problème mécanique.
• Vérifier les paramètres de
limitation(consulter le cédérom
fourni avec le variateur).
tJF
[Surchauffe IGBT]
• surcharge variateur
• Vérifier le dimensionnement
charge/moteur/variateur.
• Diminuer la fréquence de
découpage.
• Attendre le refroidissement avant
de redémarrer.
123
Mise en service
Défaut résultant automatiquement d’un redémarrage
Code
Nom
Cause probable
Mesures correctives
CFF
[Config.
incorrecte]
• Changement ou
suppression de carte
option.
• La configuration en cours
est incohérente.
• Vérifiez qu’il n’y a pas d’erreur de carte.
• En cas de changement ou de
suppression volontaire de carte option,
consultez le cédérom fourni avec le
variateur.
• Faites un retour en réglage usine ou un
rappel de la configuration en
sauvegarde si elle est valide (consultez
le cédérom fourni avec le variateur).
CFI
[Config. invalide]
• Vérifiez la configuration précédemment
• Configuration non valide.
chargée.
La configuration chargée
dans le variateur par bus
• Chargez une configuration cohérente.
ou réseau est incohérente.
PHF
[Perte Ph.
Réseau]
• Variateur mal alimenté ou
grillage d’un fusible
• Coupure d’une phase
• Utilisation sur réseau
monophasé d'un variateur
triphasé
• Charge avec balourd
Cette protection agit
seulement en charge.
• Vérifiez le raccordement puissance et
les fusibles.
• Utilisez un réseau triphasé.
• Bloquez le défaut par [Perte phase
réseau] (IPL) = [Non] (nO)
USF
[Sous-tension]
• Réseau trop faible
• Baisse de tension
passagère
• Résistance de charge
détériorée
• Vérifiez la tension et le paramètre
tension (consultez le cédérom fourni
avec le variateur).
• Remplacez la résistance de charge.
• Contrôlez / réparez le variateur.
Remplacement ou enlèvement de cartes option
Consultez le cédérom fourni avec le variateur.
124
125
8 P0 2 5 0 6 . 0 0
Schneider Electric Power Drives GmbH
Ruthnergasse 1
A-1210 Vienna
Austria
www.schneider-electric.com
Design: Schneider Electric Power Drives
Photos: Schneider Electric Power Drives
8 P02 506.00/00
Aufgrund der Weiterentwicklung unserer Produkte und Standards sind die
Angaben in Texten und Grafiken dieses Dokuments rechtlich unverbindlich.
Due to evolution of standards and equipment, the characteristics indicated
in texts and images of this document do not constitute a commitment on
our part without confirmation.
En raison de l’évolution des normes et du matériel, les caractéristiques
indiquées par les textes et les images de ce document ne nous engagent
qu’après confi rmation par nos services.
03 / 2009


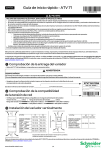


![Menü [APPLIKATIONS-FKT.] (FUn-)](http://vs1.manualzilla.com/store/data/006785857_1-1964dad41919d7751ff292dd87bffafa-150x150.png)