1
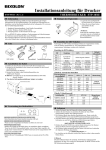
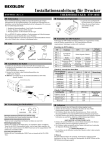
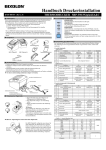
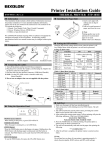
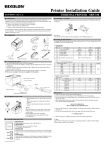
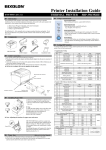
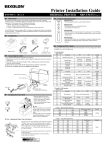
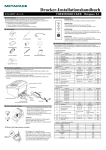
Installationsanleitung für Drucker
THERMODRUCKER STP-103III
KN04-00096C (Rev.1.1)
◈ Information
◈ Einlegen der Papierrolle
Diese Installationsanleitung enthält eine kurze Beschreibung der nötigen
Informationen für die Produktinstallation. Für detailliertere Informationen zur
Installation wird auf das Benutzerhandbuch auf der beiliegenden CD verwiesen.
Die CD enthält folgende Inhalte.
1. Legen Sie eine neuePapierrolle
ein und richten Sie sie richtig aus.
2. Ziehen Sie etwas Papier heraus
und schließen Sie die
Abdeckung.
1. Handbuch: Benutzerhandbuch, Code-Tabelle, Steuerbefehle
2. Treiber: Windows-Treiber, OPOS-Treiber
3. Dienstprogramme: ein Download-Tool für Logos
Wir von BIXOLON arbeiten ständig an Verbesserungen und Aktualisierungen
der Funktionen und der Qualität aller unserer Produkte.
Die Produktspezifikationen und/oder der Inhalt des Benutzerhandbuchs können
sich in der Zukunft ohne vorherige Ankündigung ändern.
◈ Teile
Procuct Installation CD
※ HINWEIS
Wird nicht das empfohlene Papier
verwendet, kann es zu Einbußen in
der Druckqualität kommen (siehe
Benutzerhandbuch).
◈ Einstellen der DIP-Schalter
Änderungen der DIP-Schaltereinstellungen können nur vorgenommen werden,
wenn der Drucker ausgeschaltet ist. Bei eingeschaltetem Drucker
vorgenommene Änderungen werden nicht verarbeitet.
Einstellen des DIP-Schalters
Kabel
STP-103III
Papierrolle
Netzteil
Stromkabel
CD
Installationsanleitung
SW
SW 1-1
SW 1-2
SW 1-3
SW 1-4
SW 1-5
◈ Anschließen der Kabel
SW 1-6
1. Schalten Sie den Drucker und den Host-ECR (Host-Computer) aus.
2. Stecken Sie das Stromkabel in das Netzteil und verbinden Sie das Netzteil
anschließend mit
dem Netzanschluss am Drucker.
3. Stecken Sie das Kabel in den Schnittstellenanschluss ein.
(USB/Seriell/ Parallel)
※ Hinweis: Verwenden Sie nur das Schnittstellenkabel des STP-103III.
(Seriell/ Parallel)
※ Nur den im Lieferumfang enthaltenen Adapter verwenden.
SW 1-7
SW 1-8
Schnittstellenanschluss
Schnittstellenkabel
(Seriell/Parallel)
EIN
Stromkabel
Netzteil
* Siehe folgende Tabelle 1
Dichte
Handschlag
Zeichen pro Zeile
(Schrift A)
Schriftauswahl
Schriftauswahl
Dunkel
Normal
Xon / Xoff
DTR/DSR
24 Zeichen
32 Zeichen
pro Zeile
pro Zeile
Schrift B/Ba
Schrift A
* Siehe folgende Tabelle 2
[Tabelle1] Auswahl der Baud-Rate
Übertragungsge
SW 1-1
SW 1-2
schwindigkeit
SW 1-3
2400 Baud
4800 Baud
EIN
AUS
AUS
EIN
AUS
AUS
9600 Baud
AUS
AUS
EIN
19200 Baud
38400 Baud
57600 Baud
115200 Baud
EIN
EIN
AUS
EIN
AUS
EIN
EIN
EIN
EIN
AUS
EIN
EIN
Default
(Standard)
AUS
AUS
EIN
AUS
AUS
AUS
AUS
AUS
Bemerkung
Default
(Standard)
SW 1-8
Bemerkung
Default
(Standard)
Schrift A (12x24)
AUS
AUS
Schrift B (9x17)
Schrift C (9x24)
Reserviert
EIN
AUS
EIN
AUS
EIN
EIN
◈ Selbsttest
◈ Verwendung des Bedienfeldes
FEED
AUS
Auswahl der
Baud-Rate
[Tabelle 2] Schriftauswahl
Schriftgröße
SW 1-7
USB-Kabel
DK-Port
POWER ERROR
Funktion
ON LINE
• POWER (ANZEIGE FÜR EIN/AUS, GRÜNE LED)
Beim Einschalten des Stroms leuchtet eine grüne LED auf.
• ERROR (FEHLERANZEIGE, ROTE LED)
Wenn nur noch wenig Papier im Drucker ist, blinkt eine rote LED.
• FEED (Papierzufuhr-Taste)
Drücken Sie einmal auf die FEED-Taste, um zusätzliches Papier zuzuführen.
Wenn Sie die FEED-Taste gedrückt halten, wird so lange Papier zugeführt, bis
Sie die Taste wieder loslassen. Die FEED-Taste kann nur bei ausgeschalteter ONLINE-Taste verwendet werden.
• ON LINE (ON-LINE-Taste)
Drücken Sie zur Verwendung der FEED-Taste erst einmal auf die ON-LINETaste.
1. Achten Sie darauf, dass die Papierrolle richtig eingelegt wurde.
2. Schalten Sie den Drucker ein und halten Sie dabei die Taste FEED
(Papierzufuhr) gedrückt. Der Selbsttest beginnt.
3. Der Selbsttest druckt den aktuellen Druckerstatus aus. Darin werden die
Steuerungs-ROM-Version und die DIP-Schaltereinstellungen ausgewiesen.
4. Nach dem Drucken des aktuellen Druckerstatus druckt der Selbsttest folgende
Information aus und hält an. (DieError-LED (Fehleranzeige) blinkt.)
SELBSTTESTDRUCK:
DRÜCKEN SIE AUF DIE FEED-TASTE.
5. Drücken Sie auf die FEED-Taste, um den Druck fortzusetzen. Der Drucker
druckt ein Muster mit dem eingebauten Zeichensatz aus.
6. Der Selbsttest endet automatisch und das Papier wird nach dem Ausdrucken
der folgenden Meldung abgeschnitten.
*** ABGESCHLOSSEN ***
7. Im Anschluss an den Selbsttest wechselt der Drucker wieder in den normalen
Online-Status.
※ Hinweis
Mit dem Selbsttest können Sie ermitteln, ob Ihr Drucker ordnungsgemäß
funktioniert. Bei dem Test werden die Druckqualität, die ROM-Version und die
DIP-Schaltereinstellungen geprüft.
◈ Spezifikationen
Komponente
Details
Druckmethode
Punktdichte
Druckbreite
Zeichen pro Zeile
Druckgeschwindigkeit
*1)
Drucker
Empfangspuffergröße
SMPS
Eingangsspannung
Thermozeilendruck
203 dpi (8 Punkte/mm)
48mm
32 (Schrift A: 12x24)
42 (Schrift B: 9x17 / Schrift C: 9x24)
Ca. 3,15 Zoll/s
80 mm/s
um 25℃/Drucklast 12,5 %
64 Kbytes
100-240 VAC
Temperatur
Umgebungsbedingungen
Luftfeuchtigkeit
MCBF *2)
Papier
Papierbreite
Papierstärke
Rollen-Durchmesser
Papierwalze
5-40℃ (Betrieb)
-10-+50℃
(Lagerung)
30-80 % (Betrieb)
10-90 % (Lagerung)
30.000.000 Zeilen
100 km
Mechanismus
Kopf
57,5±0,5mm
Papierstärke: 0,062-0,075 mm
Ø60 mm
Innen: Ø12mm (0,47")
Außen: Ø18mm (0,71")
※ Hinweis
*1) Die Druckgeschwindigkeit kann langsamer ausfallen, je nach der
Datenübertragungsgeschwindigkeit und der Kombination der Steuerbefehle.
*2) Dieser Wert wird für einen bestimmten Zustand gemessen, zum Beispiel
Standardtemperatur, angegebenes Papier und Standarddruckdichte, und er
kann sich je nach der Temperatur oder dem Druckvolumen ändern.
◈ Windows-Modell mit fester, serieller Schnittstelle
(RS-232C)
1. Führen Sie die Datei Software_STP-103III_Windows_Driver_Vx.x.x.exe
aus.
2. Das Installationsfenster wird geöffnet. Klicken Sie hier auf „Next“ (Weiter).
3. Wählen Sie im Fenster „Port Type“ (Anschlusstyp) die Option „Serial Port“
(Serieller Anschluss) aus und klicken dann auf „Next“ (Weiter).
7. Wählen Sie im Fenster „Properties“ (Eigenschaften) die Registerkarte
„General“ (Allgemein) aus und klicken Sie auf „Print Test Page“ (Testseite
drucken), um den normalen Druckbetrieb zu bestätigen.
◈ Windows-Modell mit fester paralleler Schnittstelle
(IEEE1284)
1. Führen Sie die Datei Software_STP-103III_Windows_Driver_Vx.x.x.exe
aus.
2. Das Installationsfenster wird geöffnet. Klicken Sie hier auf „Next“ (Weiter).
3. Wählen Sie im Fenster „Port Type“ (Anschlusstyp) die Option „Parallel
Port“ (Paralleler Anschluss) aus und klicken Sie dann auf „Next“ (Weiter).
4. Klicken Sie auf „Yes“. Der Computer wird neu gestartet.
5. Öffnen Sie nach Neustart des Computers das Fenster „Printer Properties“
(Druckereigenschaften).
※ XP oder Server 2003: Control Panel (Systemsteuerung) > Printers and
Faxes (Drucker und Faxgeräte)
※ Vista oder aktueller: Control Panel (Systemsteuerung) > Hardware and
Sound (Hardware und Ton) > Devices and Printers (Geräte und Drucker)
6. Wählen Sie im Fenster „Properties“ (Eigenschaften) die Registerkarte
„General“ (Allgemein) aus und klicken Sie auf „Print Test Page“ (Testseite
drucken), um den normalen Druckbetrieb zu bestätigen.
◈ Windows-Modell mit fester USB-Schnittstelle
1. Führen Sie die Datei Software_STP-103III_Windows_Driver_Vx.x.x.exe
aus.
2. Das Installationsfenster wird geöffnet. Klicken Sie hier auf „Next“ (Weiter).
3. Wählen Sie im Fenster „Port Type“ (Anschlusstyp) die Option „USB“ aus
und klicken dann auf „Next“ (Weiter).
4-1. Windows Vista, Server 2008, 7, 8 oder Server 2012: Schalten Sie den
Drucker aus- und wieder an. Der Treiber wird automatisch installiert.
4-2. Windows XP oder Server 2003: Schalten Sie den Drucker aus- und wieder
an. Wenn das Fenster „New Hardware Detected“ (Neue Hardware
gefunden) angezeigt wird, klicken Sie auf „Next“ (Weiter), um den Treiber
zu installieren.
※ Hinweis: Sollte während der Installation eine Warnung angezeigt werden,
klicken Sie entweder auf „Continue Anyway“ (Dennoch fortfahren) oder auf
„Install“ (Installieren)
5. Öffnen Sie nach Neustart des Computers das Fenster „Printer Properties“
(Druckereigenschaften).
※ XP oder Server 2003: Control Panel (Systemsteuerung) > Printers and
Faxes (Drucker und Faxgeräte)
※ Vista oder aktueller: Control Panel (Systemsteuerung) > Hardware and
Sound (Hardware und Ton) > Devices and Printers (Geräte und Drucker)
◈ WEEE (Elektroschrott)
(Abbildung 1)
4. Klicken Sie auf „Yes“. Der Computer wird neu gestartet.
5. Öffnen Sie nach Neustart des Computers das Fenster „Printer Properties“
(Druckereigenschaften).
※ XP oder Server 2003: Control Panel (Systemsteuerung) > Printers and
Faxes (Drucker und Faxgeräte)
※ Vista oder aktueller: Control Panel (Systemsteuerung) > Hardware and
Sound (Hardware und Ton) > Devices and Printers (Geräte und Drucker)
6. Wählen Sie im Fenster „Properties“ (Eigenschaften) die Registerkarte „Port“
(Anschluss) aus und klicken Sie auf „Port Settings“ (Anschlusseinstellungen).
Prüfen Sie, ob die Informationen denen der Ergebnisse des nach der
Installation abgeschlossenen Selbsttests entsprechen und klicken Sie auf
„OK“.
Diese Kennzeichnung auf dem Produkt oder der Produktdokumentation weist darauf
hin, dass das Produkt nicht über den Hausmüll entsorgt werden sollte. Um eventuelle
Umwelt- oder Gesundheitsschäden aufgrund der unsachgemäßen Entsorgung zu
vermeiden, sollten Sie dieses Produkt von anderen Abfällen trennen und recyceln. So
fördern Sie den nachhaltigen Gebrauch der Ressourcen. Wenn Sie das Produkt in
Ihrem Haushalt benutzen, wenden Sie sich bitte an Ihren Fachhändler, bei dem Sie
das Produkt gekauft haben, oder an die Stadtverwaltung. Dort können Sie
Einzelheiten dazu erfragen, wie und wo Sie dieses Produkt abgeben können, damit es
umweltsicher recycelt wird. Wenn Sie das Produkt in der Firma benutzen, sollten Sie
sich an Ihren Zulieferer wenden und die entsprechenden Bedingungen über die
Rücknahme oder Entsorgung im Kaufvertrag nachlesen. Dieses Produkt sollte nicht
zusammen mit anderen gewerblichen Abfällen entsorgt werden.
☎ BIXOLON Co., Ltd.
● Website http://www.bixolon.com
● Hauptbüro in Korea
(Adresse) 7~8F, (Sampyeong-dong), 20, Pangyoyeok-ro241beon-gil,
Bundang-gu, Seongnam-si, Gyeonggi-do, 463-400, Korea (ROK)
(Telefon) +82-31-218-5500
● Büro in den USA
(Adresse) BIXOLON America Inc., 3171 Fujita St, Torrance, CA 90505
(Telefon) +1-858 764 4580
● Zweigstelle für Europa
(Adresse) BIXOLON Europe GmbH, Tiefenbroicher Weg 35 40472 Düsseldorf
(Telefon) +49 (0)211 68 78 54 0
(Abbildung 2)
Guía de instalación de la impresora
IMPRESORA TÉRMICA STP-103III
◈ Información
◈ Cómo instalar el rollo de papel
Esta Guía de instalación incluye un breve resumen de la información
necesaria para la instalación del producto. Para obtener información de
instalación más detallada, consulte el manual del usuario que se encuentra en
el CD adjunto. Los contenidos del CD incluyen lo siguiente.
1. Manual: Manual del usuario, Tabla de códigos, Comandos de control
2. Controladores: Controladores para Windows, controladores OPOS
3. Programas utilitarios: herramienta para descarga de logos
1. Inserte un nuevo rollo de papel,
asegurándose de alinearlo
adecuadamente.
2. Quite una pequeña cantidad de
papel y cierre la tapa.
※ NOTA
La calidad de la impresión puede no
ser óptima si no se utiliza el papel
recomendado.
(Consulte el Manual del usuario.)
En BIXOLON mantenemos esfuerzos continuos para mejorar y actualizar
las funciones y la calidad de todos nuestros productos. En lo sucesivo, las
especificaciones del producto y/o el contenido del manual del usuario
pueden modificarse sin previo aviso.
◈ Cómo configurar los interruptores DIP
◈ Componentes
Procuct Installation CD
Cable
STP-103III
Rollo de papel
Adaptador
AC/DC
Cable de energía
CD
Guía de
instalación
Para cambiar la configuración de los interruptores DIP, la impresora debe
estar apagada. Los cambios que se realicen mientras la impresora esté
encendida no se procesarán.
Cómo configurar el interruptor DIP
SW
Function
SW 1-1
SW 1-2
SW 1-3
SW 1-4
Selección de
velocidad de
transmisión
Densidad
Entrada en
comunicación
Caracteres por
línea (Fuente A)
Selección de
Fuente
SW 1-5
◈ Cómo conectar los cables
1. Apague la impresora y la caja registradora principal (computadora
principal).
2. Conecte el cable de energía al adaptador, y luego, el adaptador al conector
de alimentación de la impresora.
3. Conecte el cable al conector interfaz. (USB/Serie/ Paralelo)
※ Nota: Sólo use el cable interfaz exclusivo de la STP-103III.
(Serie/ Paralelo)
※ No utilice un adaptador que no haya sido provisto junto con la
impresora.
Conector interfaz
Cable interfaz
(Serie/Paralelo)
SW 1-6
SW 1-7
SW 1-8
ENCENDIDO
Normal
Predeter
minado
APAGADO
APAGADO
ENCENDIDO
APAGADO
DTR/DSR
APAGADO
APAGADO
* Consulte la siguiente tabla 1
Oscuro
Xencendido
/Xapagado
24 CPL
32 CPL
APAGADO
* Consulte la siguiente tabla 2
APAGADO
APAGADO
[Tabla 1] Selección de velocidad de transmission
Velocidad de
transmisión
2400 Baudios
4800 Baudios
SW 1-1
SW 1-2
SW 1-3
ENCENDIDO
APAGADO
APAGADO
ENCENDIDO
APAGADO
APAGADO
9600 Baudios
APAGADO
APAGADO
ENCENDIDO
19200 Baudios
38400 Baudios
57600 Baudios
115200 Baudios
ENCENDIDO
ENCENDIDO
APAGADO
ENCENDIDO
APAGADO
ENCENDIDO
ENCENDIDO
ENCENDIDO
ENCENDIDO
APAGADO
ENCENDIDO
ENCENDIDO
Comen
tario
Predet
Ermi
nado
[Tabla 2] Selección de Fuente
Cable USB
Puerto DK
Cable de energía
Adaptador AC
Medida de fuente
Fuente A (12x24)
Fuente B (9x17)
Fuente C (9x24)
Reservado
SW 1-7
APAGADO
ENCENDIDO
APAGADO
ENCENDIDO
SW 1-8
APAGADO
APAGADO
ENCENDIDO
ENCENDIDO
Comentario
PredetErminado
◈ Autoevaluación
◈ Cómo usar el panel de funcionamiento
POWER ERROR
FEED
ON LINE
• POWER (LED, VERDE)
Cuando conecte la energía, se encenderá un LED verde.
• ERROR (LED, ROJO)
Cuando el papel está por terminarse, un LED rojo parpadea.
• FEED (Botón)
Presione una vez el botón de FEED para expulsar más papel. Si
mantiene presionado el botón de FEED, descargará papel continuamente
hasta que lo suelte. El botón de FEED se puede usar cuando está
apagado el botón de ON LINE.
• ON LINE (Botón)
Para usar el botón de FEED, primero presione una vez el botón de ON
LINE.
1. Asegúrese de que el rollo de papel haya sido instalado adecuadamente.
2. Encienda la impresora mientras mantiene presionado el botón de
ALIMENTACIÓN. Comienza la autoevaluación.
3. Esta función imprime el estado actual de la impresora, proporciona la
versión ROM de control y la configuración de los interruptores DIP.
4. Luego, la autoevaluación imprimirá lo siguiente y hará una pausa.
(La luz LED de Error parpadea).
IMPRESIÓN DE AUTOEVALUACIÓN.
PRESIONE EL BOTÓN DE ALIMENTACIÓN
5. Presione el botón de ALIMENTACIÓN para continuar con la impresión.
La impresora imprime un dibujo usando el conjunto de caracteres
incorporado.
6. La autoevaluación termina automáticamente y corta el papel después de
imprimir lo siguiente.
*** FINALIZADO ***
7. Una vez finalizado el proceso, la impresora regresa al estado normal en
línea.
※ Nota
La autoevaluación le permite saber si su impresora funciona correctamente.
Comprueba la calidad de impresión, la versión ROM y la configuración de
los interruptores DIP.
◈ Especificaciones
Elemento
Método de
impresión
Densidad del
punto
Ancho de
impresión
Caracteres por
línea
Impresora
Papel
Velocidad de
impresión *1)
Detalles
Impresión térmica por línea
203 Dpi (8 puntos/mm)
48 mm
32 (Fuente A : 12x24)
42 (Fuente B : 9x17 / Fuente C : 9x24)
Aproximadamente 3,15 pulgadas/seg
80 mm/seg
a 25℃/tarea de impresión 12,5%
Tamaño del búfer
64K bytes
de recepción
SMPS Tensión de
100 ~ 240 VAC
entrada
0 ~ 45℃ (Funcionamiento)
Temperatura
Condiciones
-20 ~ 60℃ (Almacenamiento)
ambientales
10 ~ 80% HR(Funcionamiento)
Humedad
10 ~ 90% HR (Almacenamiento)
Mecanismo 30.000.000 líneas
MCBF *2)
Cabezal
50 km
Ancho del papel 57,5±0,5mm
Espesor del papel Espesor del papel : 0,062 ~ 0,075mm
Diámetro del rollo Ø60 mm
Interior : Ø12 mm (0,47”)
Tubo del papel
Exterior : Ø18 mm (0,71”)
※ Nota
*1) La velocidad de impresión puede ser más lenta según la velocidad
de transmisión de datos y la combinación de los comandos de
control.
*2) Este valor se mide para una determinada condición tal como
temperatura estándar, papel especificado y densidad estándar de
impresión y puede cambiar dependiendo del nivel de la temperatura
o la impresión.
◈ Instalación de los controladores de Windows del
modelo de interfaz serie fijo (RS-232C)
1. Ejecutar el el archivo de Software_STP-103III_de los controlador
de Windows_Vx.x.x.exe.
2. En la ventana que se abra para la instalación, haga clic en Siguiente..
3. En la ventana Tipo de puerto, seleccionar un Puerto serie y hacer
clic en Siguiente.
7. En la ventana Propiedades, seleccionar la pestaña General y hacer
clic en Imprimir página de prueba para confirmar que la impresión
sea normal.
.
◈ Instalación de los controladores de Windows del
Modelo de interfaz paralela fija (IEEE1284)
1. Ejecutar el archivo de Software_STP-103III_de los controlador de
Windows_Vx.x.x.exe.
2. En la ventana que se abra para la instalación, haga clic en Siguiente..
3. En la ventana Tipo de puerto, seleccionar un Puerto paralelo y
hacer clic en Siguiente.
4. Haga clic en Sí y la computadora se reiniciará.
5. Luego que la computadora se haya reiniciado, abra la ventana
Propiedades de impresora.
※ Servidor XP o 2003: Panel de control > Impresoras y faxes
※ Vista o versiones anteriores: Panel de control
> Hardware y sonido > Dispositivos e impresoras
6. En la ventana Propiedades, seleccionar la pestaña General y hacer
clic en Imprimir página de prueba para confirmar que la impresión
sea normal.
◈ Instalación de los controladores de Windows del
modelo de interfaz USB
1. Ejecutar el archivo de Software_STP-103III_de los controlador
de Windows_Vx.x.x.exe.
2. En la ventana que se abra para la instalación, haga clic en Siguiente..
3. En la ventana Tipo de puerto, seleccionar USB y hacer clic en
Siguiente.
4-1. Si utiliza Windows Vista, Servidor 2008, 7, 8, o Servidor 2012:
Apague la impresora y vuelva a encenderla. El controlador se
instala automáticamente.
4-2. Si utiliza Windows XP o Servidor 2003: Apague la impresora y
vuelva a encenderla. Cuando aparezca la ventana Nuevo
hardware encontrado, siga haciendo clic en Siguiente para
instalar el controlador.
※ Nota: Si aparece una casilla de mensaje de advertencia durante la
instalación, haga clic en Continuar de todas maneras o Instalar.
5. Luego que la computadora se haya reiniciado, abra la ventana
Propiedades de impresora.
※ Servidor XP o 2003: Panel de control > Impresoras y faxes
※ Vista o versiones anteriores: Panel de control > Hardware y sonido
> Dispositivos e impresoras
6. En la ventana Propiedades, seleccionar la pestaña General y hacer
clic en Imprimir página de prueba para confirmar que la impresión
sea normal
◈ WEEE (Waste Electrical and Electric Equipment)
(Figura 1)
4. Haga clic en Sí y la computadora se reiniciará.
5. Luego que la computadora se haya reiniciado, abra la ventana
Propiedades de impresora.
※ Servidor XP o 2003: Panel de control > Impresoras y faxes
※ Vista o versiones anteriores: Panel de control
> Hardware y sonido > Dispositivos e impresoras
6. En la ventana Propiedades, seleccionar la pestaña Puerto y hacer
clic en Configuración de puerto. Compruebe que la información sea
idéntica a los resultados de la autoevaluación realizada después de la
instalación y haga clic en OK.
.
Esta marca mostrada sobre el producto, indica que este no debería ser mezclado
junto con otros desechos de uso doméstico al final de su vida laboral. Para
prevenir el posible daño medioambiental o de salud humana en la recogida de
basura incontrolada, por favor separe este producto de otros tipos de desechos y
recíclelo con responsabilidad para promover la reutilización de recursos
materiales. El usuario final del producto debería ponerse en contacto con el
distribuidor donde ha realizado la compra del producto, ó con su oficina de
administración local, para que le informen dónde y cómo ellos pueden hacer el
reciclaje ecológico seguro y adecuado. Los empresarios deberían ponerse en
contacto con su proveedor y comprobar los términos y las condiciones del
contrato de compra. Este producto no debería ser mezclado con otros desechos
comerciales.
☎ BIXOLON Co., Ltd.
● Sitio Web http://www.bixolon.com
● Oficinas centrales en Corea
(Dir.) 7~8F, (Sampyeong-dong), 20, Pangyoyeok-ro241beon-gil,
Bundang-gu, Seongnam-si, Gyeonggi-do, 463-400, Korea (ROK)
(Tel.) +82-31-218-5500
● Oficina en los EE.UU.
(Dir.) BIXOLON America Inc., 3171 Fujita St, Torrance, CA 90505
(Tel.) +1-858 764 4580
● Oficina en Europa
(Dir.) BIXOLON Europe GmbH, Tiefenbroicher Weg 35 40472
Düsseldorf
(Figura 2)
(Tel.) +49 (0)211 68 78 54 0
Guide d’installation de l’imprimante
IMPRIMANTE THERMIQUE STP-103III
◈ Information
◈ Installation du rouleau de papier
Ce guide d’installation comprend de brèves informations nécessaires à
l'installation du produit. Pour des informations plus détaillées concernant
l’installation, veuillez vous reporter au manuel d’utilisation disponible sur le
CD fourni. Le contenu du CD est le suivant :
1. Manuel : Manuel d’utilisation, schéma des codes, commandes de
contrôle
2. Pilotes : Pilotes Windows, pilotes Système d’exploitation
3. Utilitaires : Un outil de téléchargement de logo
Nous, BIXOLON, poursuivons sans cesse nos efforts afin d’améliorer et de
mettre à jour les fonctions et la qualité de tous nos produits. Dans le présent
manuel, les caractéristique et / ou le contenu du manuel d’utilisation peut
être modifié sans avis préalable.
◈ Composants
Procuct Installation CD
STP-103III
Câble
Rouleau de
papier
CD
Adaptateur
CA/CC
Cordon
d’alimentation
Guide
d’installation
◈ Connexion des câbles
1. Eteindre l'imprimante ainsi que la caisse enregistreuse électronique
hôte (ordinateur hôte).
2. Brancher le cordon d'alimentation dans l'adaptateur, puis, brancher
l'adaptateur dans la prise d'alimentation de l'imprimante.
3. Brancher le câble dans le connecteur de l’interface. (USB/Série/ Parallèle)
※ Note Utiliser uniquement le câble d’interface STP-103III.
(Série/ Parallèle)
※ Ne pas utiliser d'adaptateur non fourni avec l'imprimante.
Connecteur d’interface
Câble d’interface
(Série / Parallèle)
Câble USB
Port DK
Cordon
d’alimentation
Adaptateur CA
◈ Utilisation du panneau de fonctions
POWER ERROR
FEED
ON LINE
• POWER (LED, GREEN)
Lorsque l'imprimante est allumée, un voyant vert s'allume.
• ERROR (VOYANT, ROUGE)
Lorsqu’il n’y a presque plus de papier, le voyant rouge clignote.
• FEED (Bouton)
Appuyer une fois sur le bouton FEED pour retirer le surplus de papier.
Appuyer sur le bouton FEED jusqu’à ce que tout le surplus du papier
soit dégagé. Le bouton FEED peut être utilise lorsque le bouton ON
LINE est éteint.
• ON LINE (Bouton)
Appuyer une fois sur le bouton ON LINE pour utiliser le bouton FEED.
1. Insérer un nouveau rouleau de
papier et s’assurer qu’il est
correctement aligné.
2. Sortir une petite quantité de papier
puis refermer le couvercle.
※ Remarque
La qualité d'impression peut ne pas
être optimale si un papier autre que
celui recommandé est utilisé.
(Se reporter au manuel d'utilisateur.)
◈ Paramétrage des commutateurs DIP
La modification des paramètres des commutateurs DIP doit être
effectuée lorsque l’imprimante est éteinte. Toute modification effectuée
lorsque l’imprimante est allumée ne sera pas traitée.
Paramétrage du commutateur DIP
SW
Fonction
ON
OFF
Défaut
SW 1-1
OFF
Sélection du
* Se reporter au tableau 1
SW 1-2
OFF
débit en bauds
suivant
SW 1-3
ON
SW 1-4
Densité
Noire
Normale
OFF
SW 1-5
Prise de contact
Xon / Xoff
DTR/DSR
OFF
Caractère par
SW 1-6
24 CPL
32 CPL
OFF
ligne (Police A)
SW 1-7
OFF
Sélection des
* Se reporter au tableau 2
polices
suivant
SW 1-8
OFF
[Tableau 1] Sélection du débit en bauds
Vitesse de
SW 1-1
SW 1-2
SW 1-3 Remarque
transmission
2400 Bauds
ON
OFF
OFF
4800 Bauds
OFF
ON
OFF
9600 Bauds
OFF
OFF
ON
Défaut
19200 Bauds
ON
OFF
ON
38400 Bauds
ON
ON
OFF
57600 Bauds
OFF
ON
ON
115200 Bauds
ON
ON
ON
[Tableau 2] Sélection des polices
Taille Police
SW 1-7
SW 1-8
Remarque
Police A (12x24)
OFF
OFF
Défaut
Police B (9x17)
ON
OFF
Police C (9x24)
OFF
ON
Réservé
ON
ON
◈ Autotest
1. S’assurer que le rouleau de papier a été correctement installé.
2. Mettre l’imprimante sous tension tout en appuyant sur le bouton FEED.
L’autotest démarre.
3. L’autotest imprime le statut actuel de l’imprimante, tout en indiquant la
version ROM de la commande ainsi que le paramétrage des commutateurs DIP.
4. Après avoir imprimé le statut actuel de l’imprimante, l’autotest imprimera ce
qui suit, puis se mettra en pause.
(Le voyant LED Erreur clignote.)
IMPRESSION AUTO-TEST.
APPUYEZ SUR LE BOUTON ALIMENTATION
5. Appuyer sur le bouton ALIMENTATION afin de continuer l’impression.
L’imprimante imprime un modèle en utilisant l’ensemble des caractères
intégrés.
6. L’autotest se termine automatiquement et coupe le papier après avoir imprimé
ce qui suit.
***TERMINE***
7. Une fois l’autotest terminé, l'imprimante se remet en statut en ligne normal.
※ Note
L’autotest vous indique si votre imprimante fonctionne correctement. Il vérifie la
qualité d’impression, la version ROM ainsi que les paramétrages des
commutateurs DIP.
◈ Caractéristiques
Elément
Méthode
d’impression
Densité du point
Largeur
d’impression
Caractères par
ligne
Vitesse
d’impression *1)
Imprimante
Taille de la
mémoire tampon
de réception
SMPS Tension
d’entrée
Conditions
ambiantes
MCBF *2)
Papier
Largeur du papier
Epaisseur du
papier
Diamètre du
rouleau
Tube du papier
Détails
Impression par lignes thermique
203 ppp (8 dot/mm)
48mm
32 (Police A : 12x24)
42 (Police B : 9x17 / Police C : 9x24)
Environ 3,15 pouces/s
80 mm/s
À 25℃/ 12,5% tâche d’impression
64Ko
100 ~ 240 VCC
Température
Humidité
Mécanisme
Tête
57,5±0,5mm
0 ~ 45 ℃ (en fonction)
-20 ~ 60 ℃ (Stockée)
10 ~ 80% HR (en fonction)
10 ~ 90% HR (stockée)
30 000 000 lignes
50 km
Epaisseur du papier : 0,062 ~ 0,075mm
Ø60 mm
Intérieur : Ø12mm
Extérieur : Ø18mm
※ Note
*1) La vitesse d’impression peut être ralentie en fonction de la vitesse
de transmission des données ainsi que la combinaison des
commandes de contrôle.
*2) Cette valeur est mesurée pour une condition donnée comme la
température standard et la densité d’impression standard. Elle peut
changer selon la température et le degré d’impression.
◈ Installation du pilote Windows du modèle
d'interface fixe en série (RS-232C)
1. Exécutez le fichier Software_STP-103III_Windows_Driver
_Vx.x.x.exe
2. Dans la fenêtre d'installation, cliquez sur Suivant.
3. Dans la fenêtre Type de port, sélectionnez Port en série puis cliquez
sur Suivant.
7. Dans la fenêtre Propriétés, sélectionnez l'onglet Généralités puis
cliquez sur Imprimer page de test pour confirmer que l'impression
est normale.
◈ Installation du pilote Windows du modèle
d'interface fixe parallèle (IEEE1284)
1. Exécutez le fichier Software_STP103III_Windows_Driver_Vx.x.x.exe
2. Dans la fenêtre d'installation, cliquez sur Suivant.
3. Dans la fenêtre Type de port, sélectionnez un Port parallèle puis
cliquez sur Suivant.
4. Cliquez sur Oui, et l'ordinateur redémarrera.
5. Après le redémarrage de l'ordinateur, ouvrez la fenêtre Propriétés de
l'imprimante.
※ XP ou Server 2003 : Panneau de commandes > Imprimantes et fax
※ Versions Vista ou ultérieure : Panneau de commandes > Matériel
et son > Périphériques et imprimantes
6. Dans la fenêtre Propriétés, sélectionnez l'onglet Généralités puis
cliquez sur Imprimer page de test pour confirmer que l'impression
est normale.
◈Installation du pilote Windows du modèle d'interface
fixe USB
1. Exécutez le fichier Software_STP103III_Windows_Driver_Vx.x.x.exe
2. Dans la fenêtre d'installation, cliquez sur Suivant.
3. Dans la fenêtre Type de port, sélectionnez USB puis cliquez sur
Suivant.
4-1 Si vous utilisez Windows Vista, Server 2008, 7, 8, ou Server 2012 :
Eteignez l'imprimante puis rallumez-la. Le pilote s'installe
automatiquement.
4-2 Si vous utilisez Windows XP ou Server 2003 : Eteignez
l'imprimante puis rallumez-la. Quand la fenêtre Nouveau
périphérique détecté s'affiche, cliquez sur Suivant pour installer
le pilote.
※ Note Quand un message d'avertissement apparaît au cours de
l'installation, cliquez sur Continuer quand même ou installer.
5. Après le redémarrage de l'ordinateur, ouvrez la fenêtre Propriétés de
l'imprimante.
※ XP ou Server 2003 : Panneau de commandes > Imprimantes et fax
※ Versions Vista ou ultérieure : Panneau de commandes > Matériel
et son > Périphériques et imprimantes
6. Dans la fenêtre Propriétés, sélectionnez l'onglet Généralités puis
cliquez sur Imprimer page de test pour confirmer que l'impression
est normale.
◈ WEEE (Waste Electrical and Electric Equipment)
(Schéma 1)
4. Cliquez sur Oui, et l'ordinateur redémarrera.
5. Après le redémarrage de l'ordinateur, ouvrez la fenêtre Propriétés de
l'imprimante.
※ XP ou Server 2003 : Panneau de commandes > Imprimantes et fax
※ Versions Vista ou ultérieure : Panneau de commandes > Matériel
et son > Périphériques et imprimantes
6. Dans la fenêtre Propriétés, sélectionnez l'onglet Port puis cliquez sur
Paramétrage du port. Vérifiez que les informations affichées
correspondent aux résultats de l'auto-test, après l'installation, puis
cliquez OK.
L’indication que comportent le produit ou son étiquette, signifie qu’il ne
doit pas être traité avec les autres déchets domestiques, lorsqu’il ne sera
plus utilisable. Son utilisateur devra le séparer d’autres types de déchets
pour son recyclage, afin d’empêcher que son mauvais traitement ne nuise
à l’environnement ou à la santé publique, ce qui contribuera à la
réutilisation durable de ressources. Pour un produit à usage domestique, il
faut contacter le point de vente où vous avez acheté votre produit, ou les
autorités locales, pour vous renseigner sur les décharges où le produit usé
doit être mis, dans le cadre de sa réutilisation assurant la sécurité
environnementale. Pour un produit à usage industriel, il faut appeler son
fournisseur pour vérifier les conditions de vente. Une fois usé, ce produit
ne doit pas être traité avec les autres déchets industriels et commerciaux.
☎ BIXOLON Co., Ltd.
● Site Internet http://www.bixolon.com
● Siège en Corée
(Adr.) 7~8F, (Sampyeong-dong), 20, Pangyoyeok-ro241beon-gil,
Bundang-gu, Seongnam-si, Gyeonggi-do, 463-400, Korea (ROK)
(Tél.) +82-31-218-5500
● Bureau aux Etats-Unis
(Adr.) BIXOLON America Inc., 3171 Fujita St, Torrance, CA 90505
(Tél.) +1-858 764 4580
(Schéma 2)
● Bureau en Europe
(Adr.) BIXOLON Europe GmbH, Tiefenbroicher Weg 35 40472
Düsseldorf
(Tél.) +49 (0)211 68 78 54 0
Printer Installation Guide
THERMAL PRINTER STP-103III
◈ Information
◈ Installing the Paper Roll
This Installation Guide includes a brief outline of information necessary
for product installation. For more detailed installation information,
please refer to the user manual in the enclosed CD. The contents of the
CD include the following.
1. Manual: User Manual, Code Chart, Control Commands
2. Drivers: Windows Drivers, OPOS Drivers
3. Utilities: a logo download tool
1. Insert a new paper roll,
making sure to align it
properly.
2. Pull out a small amount of
paper, and close the cover.
※ Note
Printing quality may not be
optimum if recommended
paper is not used. (Refer to
the User's Manual.)
We at BIXOLON maintain ongoing efforts to enhance and upgrade the
functions and quality of all our products. In following, product
specifications and/or user manual content may be changed without prior
notice.
◈ Setting the DIP switches
◈ Components
Procuct Installation CD
STP-103III
Cable
Paper Roll
CD
AC/DC Adaptor
Power cord
Installation Guide
◈ Connecting the cables
1. Turn off the printer and the host ECR (host computer).
2. Plug the power cord into the Adaptor, and then plug the Adaptor into
the power connector of the printer.
3. Plug the cable into the interface connector. (USB/Serial/ Parallel)
※ Note: Use the STP-103III exclusive interface cable only.
(Serial/ Parallel)
※ Do not use an adapter that was not supplied with the printer.
Interface connector
Interface cable
(Serial/Parallel)
USB Cable
DK Port
Power cord
AC Adaptor
Changing Dip Switch settings must be done when the printer is off.
Any changes done while the printer is on will not be processed.
Setting the DIP switch
SW
Function
ON
OFF
Default
SW 1-1
OFF
Baud Rate
* Refer to the Following
SW 1-2
OFF
Selection
Table 1
SW 1-3
ON
SW 1-4
Density
Dark
Normal
OFF
SW 1-5
Handshaking
Xon / Xoff
DTR/DSR
OFF
Character per
SW 1-6
24 CPL
32 CPL
OFF
Line (Font A)
SW 1-7
OFF
* Refer to the Following
Font Select
Table 2
SW 1-8
OFF
[Table 1] Baud Rate Selection
Transmission Speed
SW 1-1
2400 Baud
ON
4800 Baud
OFF
9600 Baud
OFF
19200 Baud
ON
38400 Baud
ON
57600 Baud
OFF
115200 Baud
ON
[Table 2] Font Select
Font size
SW 1-7
Font A (12x24)
OFF
Font B (9x17)
ON
Font C (9x24)
OFF
Reserved
ON
SW 1-2
OFF
ON
OFF
OFF
ON
ON
ON
SW 1-8
OFF
OFF
ON
ON
SW 1-3
OFF
OFF
ON
ON
OFF
ON
ON
Remark
Default
Remark
Default
◈ Self-Test
◈ Using the Operation Panel
POWER ERROR
FEED
ON LINE
• POWER (LED, GREEN)
When turning on the power, a green LED will be lit.
• ERROR (LED, RED)
When the paper is running low, a red LED blinks.
• FEED (Button)
Press the FEED button once to discharge extra paper. Holding down the
FEED button will discharge paper continuously until the button is
released. The FEED button can be used when the ON-LINE button is
turned off.
• ON LINE (Button)
To use the FEED button, first press the ON-LINE button once.
1. Make sure the paper roll has been installed properly.
2. Turn on the power while holding down the FEED button. The selftest begins.
3. The self-test prints the current printer status, providing the control
ROM version and the DIP switch setting.
4. After printing the current printer status, self-test printing will print the
following, and pause. (The Error LED light blinks.)
SELF-TEST PRINTING.
PLEASE PRESS THE FEED BUTTON
5. Press the FEED button to continue printing. The printer prints a
pattern using the built-in character set.
6. The self-test automatically ends and cuts the paper after printing the
following.
*** COMPLETED ***
7. After the self-test is complete, the printer returns to normal on-line
status.
※ Note
The self-test lets you know if your printer is operating properly. It
checks the print quality, ROM version, and DIP switch settings.
◈ Specifications
Item
Printing Method
Dot Density
Printing Width
Characters per
line
Printing Speed
*1)
Printer
Receive Buffer
Size
SMPS Input
Voltage
Environmental
Conditions
MCBF *2)
Paper
Paper Width
Paper Thickness
Roll Diameter
Paper Tube
Details
Thermal Line Printing
203 Dpi (8 dot/mm)
48mm
32 (Font A : 12x24)
42 (Font B : 9x17 / Font C : 9x24)
Approximately 3.15 inches/sec
80 mm/sec
at 25℃/printing duty 12.5%
64K bytes
100 ~ 240 VAC
Temperature
Humidity
0 ~ 45℃ (Operating)
-20 ~ 60℃ (Storage)
10 ~ 80% RH (Operating)
10 ~ 90% RH (Storage)
30,000,000 line
50km
Mechanism
Head
57.5±0.5mm
Paper thickness : 0.062 ~ 0.075 mm
Ø60 mm
Inner : Ø12mm (0.47”)
Outer : Ø18mm (0.71”)
※ Note
*1) Printing speed may be slower depending on the data transmission
speed and the combination of control commands.
*2) This value is measured for a given condition such as standard
temperature, specified paper, and standard printing density, and it
may change depending on the temperature or printing level.
◈ Serial(RS-232C) Fixed Interface Model
Windows Driver Installation
1. Launch Software_STP-103III_Windows_Driver_Vx.x.x.exe.
2. Click the Next button in the opening installation window.
3. Select a com port in Serial Port box in the Port Type dialog box, and
click the Next button.
7. In the Properties window, after selecting the General tab, click on
Print Test Page to confirm that printing is normal.
◈ Parallel (IEEE1284) Fixed Interface Model
Windows Driver Installation
1. Launch Software_STP-103III_Windows_Driver_Vx.x.x.exe.
2. Select the Next button in the opening installation window.
3. Select Parallel Port from the Port Type window and click the Next
button.
4. Click the Yes button and reboot the computer.
5. After rebooting, open the Printer Properties window provided by
the operating system.
※ XP or Server 2003: Control Panel – Printers and Faxes
※ Vista or later version: Control Panel – Hardware and Sound – Devices and
Printers
6. Select the General tab in the properties window and click the Print
Test Page button to make sure printer is set up correctly.
◈ USB Fixed Interface Model
Windows Driver Installation
1. Launch Software_STP-103III_Windows_Driver_Vx.x.x.exe.
2. Select the Next button in the opening installation window.
3. Select USB in the Port Type window and click the Next button.
4-1. If using Windows Vista, Server 2008, 7, 8, Server 2012: Turn off
the printer and turn it on again then the Windows driver will be
installed automatically.
4-2. If using Windows XP/Server 2003: Turn off the printer and turn it
on again then “Found New Hardware Wizard” will pop up. Click
the Next button to install the Windows driver.
※ Note: If a warning message box pops up while Windows Driver
Installation, click the Continue Anyway or Install button.
5. After rebooting, open the Printer Properties window provided by
the operating system.
※ XP or Server 2003: Control Panel – Printers and Faxes
※ Vista or later version: Control Panel – Hardware and Sound – Devices and
Printers
6. Select the General tab in the properties window and click the Print
Test Page button to make sure printer is set up correctly.
◈ WEEE (Waste Electrical and Electric Equipment)
(Fig 1.)
4. Click the Yes button and reboot the computer.
5. After rebooting, open the Printer Properties window provided by
the operating system.
※ XP or Server 2003: Control Panel – Printers and Faxes
※ Vista or later version: Control Panel – Hardware and Sound – Devices and
Printers
6. Select the Port tab in the Properties window, select Port Settings,
set the same parameters as the ones obtained from the self-test result,
and click the OK button.
This marking shown on the product or its literature, indicates that
is should not be disposed with other household wastes at the end
of its working life, To prevent possible harm to the environment
or human health from uncontrolled waste disposal, please
separate this from other types of wastes and recycle it responsibly
to promote the sustainable reuse of material resources. Household
users should contact either the retailer where they purchased this
product, or their local government office, for details of where and
how they can take this item for environmentally safe recycling.
Business users should contact their supplier and check the terms
and conditions of the purchase contract. This product should not
be mixed with other commercial wastes for disposal.
☎ BIXOLON Co., Ltd.
● Website http://www.bixolon.com
● Korea Headquarters
(Add) 7~8F, (Sampyeong-dong), 20, Pangyoyeok-ro241beon-gil,
Bundang-gu, Seongnam-si, Gyeonggi-do, 463-400, Korea (ROK)
(Tel.) +82-31-218-5500
● U.S. Office
(Add) BIXOLON America Inc., 3171 Fujita St, Torrance, CA 90505
(Tel.) +1-858 764 4580
(Figure 2.)
● Europe Office
(Add) BIXOLON Europe GmbH, Tiefenbroicher Weg 35 40472
Düsseldorf
(Tel.) +49 (0)211 68 78 54 0