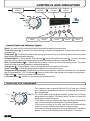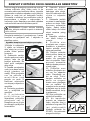
1
INSTRUCTION BOOK
GCH 980NA1T
Heat Pump Tumble Dryer
English
2
Deutsch
16
Slovensko
Italiano
30
62
Français
44
Italiano
58
INDEX
Introduction
Delivery Information
Safety Reminders
Use
Installation
The Laundry
Ventilation
Environmental Issues
Gias Service
Electrical Requirements
Adjusting the Feet
Drain Hose Kit: Fitting Instructions
Preparing the Load
Clothes Preparation
Do Not Tumble Dry
Energy Saving
Sorting the Load
Drying Guide
Controls and Indicators
Selecting the Programme
Door and Filter
Opening the Door
Filter
Filter Care Indicator
To Clean the Condenser Filter
Water Container
To Remove the Container
Operation
Delay Start Function
Cancelling and Resetting the Programme
Cleaning and Routine Maintenance
Cleaning the Dryer
Technical Specifications
Troubleshooting
Customer Service
Spares
Gias Service
EN
2
3
3
3
4
5
5
6
7
7
7
7
8
9
9
9
9
9
9
10
11
12
12
12
12
12
13
13
13
14
14
14
14
14
15
15
15
15
INTRODUCTION
Please read and follow these instructions carefully and operate the machine accordingly. This
booklet provides important guidelines for safe use, installation, maintenance and some useful
advice for best results when using your machine.
Keep all documentation in a safe place for future reference or for any future owners.
Delivery Information
Please check that the following items are
delivered with the appliance:
Check that no damage has occurred to the
machine during transit. If it has, call for service
by GIAS.
● Instruction manual
● Guarantee card
● Energy label
Failure to comply with the above can
compromise the safety of the appliance. You
may be charged for a service call if a problem
with your machine is caused by misuse.
SAFETY REMINDERS
Use
● This appliance can be used by children aged from 8 years and above
and persons with reduced physical, sensory or mental capabilities or lack
of experience and knowledge if they have been given supervision or
instruction concerning use of the appliance in a safe way and understand
the hazards involved.
Children shall not play with the appliance. Cleaning and user
maintenance shall not be made by children without supervision.
● This appliances is intended to be used in household and similar
applications such as:
- Staff kitchen areas in shops, offices and other working environments;
- Farm houses;
- By clients in hotels, motels and other residential type environments;
- Bed and breakfast type environments.
A different use of this appliance from household environment or from
typical housekeeping functions, as commercial use by expert or trained
users, is excluded even in the above applications. If the appliance is used
in a manner inconsistent with this it may reduce the life of the appliance
and may void the manufacturer’s warranty. Any damage to the appliance
or other damage or loss arising through use that is not consistent with
domestic or household use (even if located in a domestic or household
environment) shall not be accepted by the manufacturer to the fullest
extent permitted by law.
● WARNING Misuse of a tumble dryer may create a fire hazard.
● This machine is solely for domestic use, i.e. to dry household textiles
and garments.
EN
3
INTRODUCTION
SAFETY REMINDERS
Use
●This machine should only be used for its intended purpose as described
in this manual. Ensure that the instructions for installation and use are
fully understood before operating the appliance.
● Do not touch the appliance when hands or feet are damp or wet.
● Do not lean on the door when loading the machine or use the door to lift
or move the machine.
●Do not allow children to play with the machine or its controls.
● WARNING Do not use the product if the fluff filter is not in position or is
damaged; fluff could be ignited.
● WARNING Where the hot surface symbol is
located the
temperature rise during operation of the tumble dryer may be in excess of
60 degrees C.
● Remove the plug from the electricity supply. Always remove the plug
before cleaning the appliance.
● Do not continue to use this machine if it appears to be faulty.
● Lint and fluff must not be allowed to collect on the floor around the
outside of the machine.
● The drum inside may be very hot. Always allow the dryer to complete the
cool down period before removing the laundry.
● The final part of a tumble dryer cycle occurs without heat (cool down
cycle) to ensure that the items are left at a temperature that ensures that
the items will not be damaged.
● Maximum load drying weight: refer to energy label 8 kg.
● The tumble dryer is not to be used if industrial chemicals have been
used for cleaning.
● WARNING: Never stop a tumble dryer before the end of the drying cycle
unless all items are quickly removed and spread out so that the heat is
dissipated.
EN
4
INTRODUCTION
SAFETY REMINDERS
Installation
● Check that the product has no
visible signs of damage before
use. If damaged do not use and
please call GIAS Service.
● Do not use adapters, multiple
connectors and/or extensions.
● Never install the dryer against
curtains and be sure to prevent
items from falling or collecting
behind the dryer.
●
The appliance must not be
installed behind a lockable door, a
sliding door or a door with a hinge
on the opposite side to that of the
tumble dryer.
The Laundry
●Do not dry unwashed items in the
tumble dryer.
● WARNING Do not tumble dry
fabrics treated with dry cleaning
fluids.
● WA R N I N G F o a m r u b b e r
materials can, under certain
circumstances, when heated
become ignited by spontaneous
combustion. Items such as foam
rubber (latex foam), shower caps,
waterproof textiles, rubber backed
articles and clothes or pillows fitted
with foam rubber pads MUST NOT
be dried in the tumble dryer.
● Always refer to the laundry care
labels for directions on suitability
for drying.
● Clothes should be spin dried or
thoroughly wrung before they are
put into the tumble dryer. Clothes
that are dripping wet should not be
put into the dryer.
● Lighters and matches must not
be left in pockets and NEVER use
flammable liquids near the
machine.
● Glass fibre curtains should
NEVER be put in this machine.
Skin irritation may occur if other
garments are contaminated with
the glass fibres.
● Items that have been soiled with
substances such as cooking oil,
acetone, alcohol, petrol, kerosene,
spot removers, turpentine, waxes
and wax removers should be
washed in hot water with an extra
amount of detergent before being
dried in the tumble dryer.
● Fabric softeners, or similar
products, should be used as
specified by the fabric softener
instructions.
EN
5
INTRODUCTION
SAFETY REMINDERS
VENTILATION
Adequate ventilation must be
provided in the room where the
tumble dryer is located to prevent
gases from appliances burning
other fuels, including open fires,
being drawn into the room during
operation of the tumble dryer.
● Installing the rear of the appliance
close to a wall or vertical surface.
● There should be a gap of at least
12 mm between the machine and
any obstrubtions. The inlet and
outlet should be kept clear of
obstruction. To ensure adequate
ventilation the space between the
bottomof the machine and the floor
must not be obstructed.
● Exhaust air must not be
discharged into a flue which is used
for exhausting fumes from
appliances burning gas or other
fuels.
● Check regularly that the air
flowing through the dryer is not
restricted.
● Check frequently the fluff filter
after use, and clean, if necessary.
●Check the fluff filter after use, and
clean, if necessary.
● Prevent items from falling or
collecting behind the dryer as these
may obstruct the air inlet and outlet.
● NEVER install the dryer up
against curtains.
EN
6
● In cases where the dryer is
installed on top of a washing
machine, a suitable stacking kit
must be used, according to the
follow configuration.
● Stacking kit Mod 35100019: for
minimum washing machine depth
= 49 cm
● Stacking kit Mod 35900120:for
minimum washing machine depth
= 51 cm
● The stacking kit shall be one of
that above, obtainable from our
spare service. The instructions for
installation and any fixing
attachments, are provided with the
staking kit.
Air Outlets in the Base
Important: During transport ensure that the dryer
is in an upright position, if it's necessary you can
only flip in the side shown;
Caution: If the product is in different side, wait at
least 4 hours before switching on so that the oil can
flow back into the compressor. Failure to do this
could result in damage to the compressor.
INSTALLATION
Environmental Issues
● All packaging materials used are
environmentally-friendly and recyclable.
Please help dispose of the packaging via
environmentally-friendly means. Your local
council will be able to give you details of current
means of disposal.
● To ensure safety when disposing of an old
tumble dryer disconnect the mains plug from
the socket, cut the mains power cable and
destroy this together with the plug. To prevent
children shutting themselves in the machine
break the door hinges or the door lock.
European Directive 2002/96/EC
This appliance is marked according
to the European directive
2002/96/EC on Waste Electrical and
Electronic Equipment (WEEE).
By ensuring this product is disposed of correctly,
you will help prevent potential negative
consequences for the environment and human
health, which could otherwise be caused by
inappropriate waste handling of this product.
The symbol on the product indicates that this
product may not be treated as household waste.
Instead it shall be handed over to the applicable
collection point for the recycling of electrical and
electronic equipment.
For more detailed information about treatment,
recovery and recycling of this product, please
contact your local city office,your household
waste disposal service or the shop where you
purchased the product. Disposal must be
carried out in accordance with local
environmental regulations for waste disposal.
GIAS Service
● To ensure the continued safe and efficient
operation of this appliance we recommend that
any servicing or repairs are only carried out by
an authorised GIAS service engineer.
If the appliance is not running properly or
breaks down, switch it off and disconnect the
plug from the socket. Consult GIAS Service for
possible repair.
Electrical Requirements
Tumble dryers are supplied to operate at a
voltage of 220-240V, 50 Hz single phase. Check
that the supply circuit is rated to at least 6 A.
Electricity can be extremely dangerous.
This appliance must be earthed.
The socket outlet and the plug on the
appliance must be of the same type.
Do not use multiple adapters and/or
extension leads.
The plug should be accessible for
disconnection after the appliance has been
installed.
CE Appliance complies with European Directive
2004/108/EC, 2006/95/EC and subsequent
amendments.
You may be charged for a service call if a
problem with your machine is caused by
incorrect installation.
If the mains cord on this appliance is
damaged, it must be replaced by a special cord
which is ONLY obtainable from the spares
service. It must be installed by a competent
person.
Do not plug the machine in and switch it
on at the mains until the installation is
completed.For your safety, this dryer must be
correctly installed. If there is any doubt about
installation, call GIAS Service for advice.
Adjusting the Feet
Once the machine is in
place the feet should
be adjusted to ensure
that the machine is
level.
EN
7
DRAIN HOSE KIT: FITTING INSTRUCTIONS
To avoid having to empty the water container
after each drying cycle, the water normally
collected during the drying cycle can be
discharged directly to a waste water drain pipe
(the same drainage system as household
sinks).Water Bye-Laws prohibit connection to
a surface water drain. The waste water drain
pipe system should be located adjacent to the
tumble dryer.
xThe kit is composed: 1 hose, 1 straight
hose connector, 1 pipe clip and 1 plastic tie.
WARNING! Switch off and remove the
tumble dryer plug from the electricity supply
before carrying out any work.
Fit the Kit as Follows:
1.Unscrew and
remove the 3 screws,
at the rear of the
machine, retaining the
worktop trim.
2. Remove the rear
worktop trim and the
worktop surface by
carefully sliding it
towards the rear of the
machine.
3. The waste water
container is situated at
the right-hand side of
the machine (viewed
from the rear). A grey
hose connects to the
bridge above the water
container. Using pliers,
remove the pipe
retaining clip from the
bridge.
4. Pull the hose off the
bridge connection.
5. Attach the hose from
the kit, using the
connector and pipe
clips supplied, to the
hose removed from the
bridge connection.
EN
8
6. Take off the water
container cover from
the rear of the machine
by removing the two
screws and unclipping
the cover.
7. Break off the tab on
the side of the cover
and replace the cover
on the machine, refit
the screws. You should
now have revealed a
hole in the back of the
cabinet next to the
Cover.
8. Feed the drain hose
through the hole in the
cabinet.
9. Locate the grey pipe
in the cutout of the tray
and secure the pipe
assembly to the bridge
with the plastic tie.
10. Carefully slide the
worktop back into
position ensuring that
the hose is not trapped
and replace the
worktop rear trim with
the 3 screws.
11. Connect the new
drain hose to the waste
water pipe. Make sure
that the new hose does
not kink when pushing
the tumble dryer into
position. Ensure that
the guidelines, as
shown, are followed
when routing the new
external hose.
12. Connect to the
mains electricity
supply.
13. After emptying the
waste water container
switch the machine ON
(and press the 'START'
button on electronic
models) to commence
with the drying
program.
PREPARING THE LOAD
Before using the tumble dryer for the first time:
● Please read this instruction book thoroughly.
● Remove all items packed inside drum.
● Wipe the inside of the drum and door with a
damp cloth to remove any dust which may have
settled in transit.
Clothes Preparation
Make sure that the laundry you are going to dry is
suitable for drying in a tumble dryer, as shown by
the care symbols on each item.
Check that all fastenings are closed and that
pockets are empty. Turn the articles inside out.
Place clothes loosely in the drum to make sure
that they don't get tangled.
Do Not Tumble Dry:
Woollens, silk, delicate fabrics, nylon stockings,
delicate embroidery, fabrics with metallic
decorations, garments with PVC or leather
trimmings, training shoes, bulky items such as
sleeping bags, etc.
IMPORTANT: Do not dry articles which
have been treated with a dry cleaning fluid or
rubber clothes (danger of fire or explosion).
During the last 15 minutes (roughly) the
load is always tumbled in cool air
Do not overload the drum, large items when
wet can exceed the maximum admissible clothes
load (for example: sleeping bags, duvets).
Energy Saving
Only put into the tumble dryer laundry which has
been thoroughly wrung or spin-dried. The drier
the laundry the shorter the drying time thus
saving electricity.
ALWAYS
● Try to dry the maximum weight of laundry, this
will save time and electricity.
● Check that the filter is clean before every drying
cycle.
NEVER
● Exceed the maximum weight, this will waste
time and electricity.
● Put dripping wet items into the tumble dryer, this
may damage the appliance.
Maximum Drying Weight
● Cottons
● Synthetics
Max. 8 kg
Max. 4 kg
Sort the Load as Follows
● By care symbols
These can be found on the collar or inside seam:
Suitable for tumble drying.
..
Tumble drying at high temperature.
.
Tumble drying at low temperature only.
Do not tumble dry.
If the item does not have a care label it must be
assumed that it is not suitable for tumble drying.
● By amount and thickness
Whenever the load is bigger than the dryer
capacity, separate clothes according to thickness
(e.g. towels from thin underwear).
● By type of fabric
Cottons/linen: Towels, cotton jersey, bed and
table linen.
Synthetics: Blouses, shirts, overalls, etc. made of
polyester or polyamid, as well as for
cotton/synthetic mixes.
● By drying level
Sort into: iron dry, cupboard dry, etc. For delicate
articles press the
button to select low drying
temperature.
Drying Guide
The standard cycle HANG DRY (
) is the most
energy efficient and best suited for drying normal wet
cotton laundry.
The table below shows the approximate time and
energy consumption of the main drying programmes.
CYCLE
Perfect Home
Store Dry
Hand Dry
Hang Dry
Iron Dry
LOAD
FULL
FULL
FULL
HALF
FULL
ENERGY
(kWh)
3,40
2,93
2,66
1,35
2,13
TIME
(Min)
250
210
149
115
159
Power consumption of "left on-mode"
0,75 W
Power consumption of "off-mode"
0,20 W
EN
9
CONTROLS AND INDICATORS
Programme
Selector
Empty Water
Indicator
Time Selection
Button
Delay Start
Button
Filter Care
Indicator
Program
Display
Acrylic Synthetic Anti-Crease
Button
Button
Start/Pause
Button
Control Panel and Indicator Lights
Knob: You can turn it in both directions to choose the required programme.
Time selection
:To modify the drying timing of required programme; it works only with certain
programmes.
Delay start :To delay the start of the drying cycle and to dry your laundry when electricity costs
less (please see dedicated section)
Delicate fabrics : When pulled, this indicator
turns off and this new one
turns on; with this
special function, the drying temperature is lower to better protect your delicate clothes.
Anti- Crease Button
– Select the anti-crease function at the end of drying cycle. The drum
keeps moving at regular phases to refresh the laundry.
Cool down
: This indicator turns on during the final cool phase of the cycle.
Start/Pause : To start the programme required or to pause the cycle.
Automatic programmes: Depending on desired programme, specific indicators turn on (please
see “programme list”); ECO indicator
turns on when you select a low consumption programme.
Filter care
: When on, please clean the filters.
Full water tank
: When on, please empty the water tank.
SELECTING THE PROGRAMME
This machine has a special Sensor Dry to help you choose
your preferred programme simply by selecting the level of
dryness wanted.
For small loads and pre-dried clothes, please use a Timing
programme and select “Delicate fabrics” button to lower the
temperature inside the drum.
If the Sensor does not detect any item, this Dryer will work for
only 10 minutes before starting the Cool down phase.
If the load is too big or too wet, this Dryer will automatically
work for 3 hours and then start the Cool down phase.
At the end of each programme, there is always the Cool Down
phase: it is a cool-air refresh phase of around 15 minutes.
EN 10
SELECTING THE PROGRAMME
PROGRAMME
Perfect Home
Store Dry
Hang Dry
Iron Dry
No Crease
Wool
IDEAL FOR
Clothes you want completely dryed, e.g. towels, bathrobes, table clothes
or sheet. Time: around 3h.
Clothes you want to fold and store without ironing, e.g. shirts in mixed
fabrics, socks, baby clothes. Time: around 2h and 45 min.
Clothes you don’t need to iron, but just hang after the drying cycle. Time:
around 2h and 30 min.
Leave clothes slightly damp to allow easier ironing. Time: around 1h and
50 min.
Clothes you just need to refresh. Good for items of clothing which have been
left prior to ironing or if they have been dried outside or on radiators. This
programme has a specific Anti-Crease function that relaxes fibres and
makes easier ironing. Time: 9 min + 3 min cool down.
To soften your woollen clothes or to simply refresh them after a long time in
the wardrobe. Time: 12 min.
Mix & Dry
To dry mixed cotton and synthetic clothes: save time and no need to
separate the washing and dry them in different cycles. Time: around 2h
(max 4 kg).
Shirts
To dry shirts both cotton and synthetic fabrics. Time: 1h for 2kg of synthetic
shirts (around 10 shirts); 1h and 20 min for 3 kg of cotton shirts (around 10
shirts).
Rapid 40 Min.
For dry, refreshed and ready to dress clothes in onyl 40 minutes. Sensor
system keeps under control the temperature to have always the best result.
Max 2 kg.
Time
If you want to choose drying times, from 30 to 180 minutes. By selecting “20
min” you choose a “cool programme”, ideal to refresh clothes and to remove
eventual smells.
Jeans
To dry up to 4 kg of Jeans (around 5 pairs). The programme works for around
2h, but timing can change according to the load and washing spin speed.
Jeans programme can only be used for 100% cotton items, please do not
mix colours nor dry jeans with embroideries or accessories.
EN 11
DOOR and FILTER
Opening the Door
To Clean the Condenser Filter
Pull on handle to open
the door.
To restart the dryer,
close the door and
press
.
WARNING! When the tumble dryer is in
use the drum and door may be VERY HOT.
Never stop a tumble dryer before the end of the
drying cycle unless all items are quickly
removed and spread out so that the heat is
dissipated.
Filter
IMPORTANT: To maintain the efficiency of the
dryer check that the fluff filter is clean before
each drying cycle.
Do not operate the dryer without the filters.
Clogged filters can increase the drying time
and cause damage which may result in
expensive repair costs.
1.Pull the filter
upwards.
2. Open filter as shown.
3.Gently remove lint
using a soft brush or
your fingertips.
4.Snap the filter
together and push
back into place.
Filter Care Indicator
Lights when the filter
needs cleaning.
Check and clean the
main filter in the door
and the condenser
filters allocated in the
bottom of the dryer,If
the laundry is not
drying check that the
filter is not clogged.
EN 12
1.Remove
kickplate.
the
2. Turn the two locking
levers anti-clockwise
and pull out the front
cover.
3. Gently remove the
filter frame and clean
any dust or fluff with a
cloth from the filter. Do
not use water to clean
the filter.
4. Remove the sponge
gently from its place
and then wash the
sponge by holding it
under a running tap
turning it so to remove
any dust or fluff.
5. Refit the front cover
ensuring it is in the
correct way (as
indicated by the arrow)
and pushed firmly into
place. Lock the two
levers by turning them
clockwise.
6. Refit the kickplate.
DO NOT USE WATER TO CLEAN THE FILTER.
WATER CONTAINER
The water removed from the laundry during
the drying cycle is collected in a container
inside the door of the dryer. When the
container is full the
indicator on the control
panel will light, and the container MUST be
emptied. However, we recommend that the
container is emptied after each drying cycle.
NOTE: Very little water will collect during the
first few cycles of a new machine as an internal
reservoir is filled first.
To Remove the Container
OPERATION
1. Open the door and load the drum with
laundry. Ensure that garments do not hinder
closure of the door.
2. Gently close the door pushing it slowly until
you hear the door 'click' shut.
3. Turn the Programme Selector dial to select
the required drying programme (see
Programme Guide).
1. Gently pull out the
tray until it is
completely removed.
Support the tray with
both hands. When it is
full the water container
will weigh about 4kg.
4. If drying synthetics, acrylics or delicate items,
press the
button to reduce the heat level.
The indicator will light up when the machine is in
low heat setting. To deselect in the first few
minutes of the programme, press the
button
, after this time reset the machine to change the
setting.
2 . Ti l t t h e w a t e r
container to empty the
water out through the
rear hole.
5. Press the
button. The dryer will start
automatically and the indicator above the
button will be continuously lit.
When emptyslide the
water container back
into position.
PUSH FIRMLY INTO
PLACE.
3. Press
the cycle.
to restart
NOTE: If you have the
option of drainage near
the dryer it is possible
to use the discharge kit
to provide a permanent
drain for the water
collected by the dryer.
This will remove the
need to empty the
water tray. All the
information for
assembly of the kit is
contained in the kit
envelope.
6. If the door is opened during the programme to
check the laundry, it is necessary to press
to
recommence drying after the door has been
closed.
7. When the cycle is nearing completion the
machine will enter the cool down phase, the
clothes will be tumbled in cool air allowing the
load to cool down.
8. Following the completion of the cycle the
drum will rotate intermittently to minimize
creasing. This will continue until the machine is
switched OFF or the door is opened.
Do not open the door during the automatic
programs in order to obtain a proper drying.
EN 13
OPERATION
Delay Start Function
The Delay Start Function
allows the user to delay the start of the drying cycle by 1 to 24 hours.
When the function is first selected the display will show a delay of 1 hour, subsequent presses of
the button will increase the delay with 1 hour steps.
To commence the programme press
and the appliance will complete the drying cycle at the
end of this time. The indicator light will flash to indicate that the start delay is in progress.
Cancelling and Resetting the Programme
To cancel a programme press the
button for 3 seconds. In the TIME CONTROL display 0:00
Light will flash to indicate that it has been reset.
CLEANING AND ROUTINE MAINTENANCE
Cleaning the Dryer
● Clean the filter and empty the water
container after every drying cycle.
● Regularly clean the filters.
● After each period of use, wipe the inside of
the drum and leave the door open for a while to
allow circulation of air to dry it.
● Wipe the outside of the machine and the
door with a soft cloth.
● DO NOT use abrasive pads or cleaning
agents.
● To prevent the door sticking or the build up
of fluff clean the inner door and gasket with a
damp cloth after every drying cycle.
WARNING! The Drum, door and load may
be very hot.
Technical Specifications
Drum capacity
Maximum load
Height
Width
Depth
Energy Label Band
115 litres
8 kg
85 cm
60 cm
60 cm
A +
Information for Test Laboratory
EN 61121 Programme
Programme To Use
-DRY COTTON
-IRON DRY COTTON
-EASY-CARE TEXTILE
-HANG DRY
-IRON DRY
-HANG DRY + SYNTHETIC
Note:Install and use the drain hose to discharge
the condensing water.
IMPORTANT Always switch off and
remove the plug from the electricity supply
before cleaning this appliance.
For electrical data refer to the rating label
on the front of the dryer cabinet (with the door
open).
EN 14
TROUBLESHOOTING
What Might be the Cause of...
Defects you can remedy yourself
Before calling GIAS Service for technical
advice please run through the following
checklist. A charge will be made if the machine
is found to be working or has been installed
incorrectly or used incorrectly.
If the problem persists after completing the
recommended checks, please call GIAS
Service, they may be able to assist you over the
telephone.
Time display to end could change during
drying cycle. The time to end is
continuously checked during the drying
cycle and the time is adjusted to give the
best estimation time. The displayed time
may increase or decrease during the cycle
and this is normal.
Drying time is too long/clothes are not dry
enough…
● Have you selected the correct drying
time/programme?
● Were the clothes too wet? Were the clothes
thoroughly wrung or spindried?
● Does the filter need cleaning?
● Is the dryer overloaded?
● Has the
option been selected from a
previous cycle?
The dryer does not operate…
● Is there a working electricity supply to the
dryer? Check using another appliance such as
a table lamp.
● Is the plug properly connected to the mains
supply?
● Is there a power failure?
● Has the fuse blown?
● Is the door fully closed?
● Is the dryer switched on, both at the mains
supply and at the machine?
● Has the drying time or the programme been
selected?
● Has the machine been switched on again after
opening the door?
The dryer is noisy…
● Switch off the dryer and contact GIAS Service
for advice.
The
Indicator is on…
● Does the filter need cleaning?
The
Indicator is on…
● Does the water container need emptying?
CUSTOMER SERVICE
Should there still be a problem with your dryer
after completing all the recommended checks,
please call GIAS Service for advice.
They may be able to assist you over the
telephone or arrange for a suitable appointment
for an engineer to call under the terms of your
guarantee. However, a charge may be made if
any of the following applies to your machine:
● Is found to be in working order.
● Has not been installed in accordance with the
installation instructions.
● Has been used incorrectly.
Spares
Always use genuine spares, available direct
from GIAS Service.
GIAS Service
For service and repairs call your local GIAS
Service engineer.
The manufacturer declines all responsibility
in the event of any printing mistakes in this
booklet. The manufacturer also reserves the
right to make appropriate modifications to
its products without changing the essential
characteristics.
EN 15
INDEX
Einführung
Lieferinformationen
Sicherheitshinweise
Gebrauch
Installation
Die Wäsche
Entlüftung
Umweltschutz
GIAS-Service
Elektro-Anschluss
Einstellen der Füße
Ablaufschlauchbausatz: Installationsanleitung
Vorbereitung der Füllung
Vorbereitung der Textilien
Nicht für den Trockner geeignet
Energiesparen
Sortierung der Füllung
Trocknungswerte
Schalterblende und Anzeigen
Auswählen des Programms
Tür und Sieb
Öffnen der Tür
Sieb
Flusensieb-Anzeige
Kondenswasser-Behälter
Um den Behälter herauszunehmen
Kondensator
Entfernen des Kondensators
Betrieb
Startverzögerung
Abbrechen und Zurücksetzen des Programms
Reinigung und Routinewartungen
Reinigung des Trockners
Technische Daten
Fehlersuche
Kundendienst
Ersatzteile
GIAS-Service
DE 16
17
17
17
18
19
19
20
21
21
21
21
22
23
23
23
23
23
23
24
25
26
26
26
26
27
27
27
27
28
28
28
28
28
28
29
29
29
29
EINFÜHRUNG
Bitte lesen Sie diese Anleitung sorgfältig durch und richten Sie sich bei der Bedienung der
Wäschetrockner an die Anleitung. Dieses Handbuch enthält wichtige Hinweise für die sichere
Installation, Anwendung und Wartung sowie einige nützliche Hinweise für optimale Ergebnisse beim
Gebrauch Ihrer Maschine.
Heben Sie diese Dokumentation an einem sicheren Ort auf, um jederzeit wieder darauf zurückgreifen
zu können bzw. um sie an zukünftige Besitzer weitergeben zu können
Liefer informationen
Zum Lieferumfang Ihrer Waschmaschine
gehören folgende Dokumentation und
Zusatzteile:
● Bedienungsanleitung
● Garantieschein
● Energieeffizienzklasse
Kontrollieren Sie,ob die Maschine durch
den Transport beschädigt wurde.Falls dies der
Fall ist, wenden Sie sich an den GIASService.
Die Sicherheit des Geräts kann beeinträchtigt
werden, wenn Sie sich nicht an diese
Sicherheitshinweis e halten. Falls ein Problem mit
Ihrer Maschine durch Zweckentfremdung
verursacht wird, müssen Sie Reparaturarbeiten
möglicherweise selbst bezahlen.
SICHERHEITSHINWEISE
Gebrauch
● Kinder unter 8 Jahren sowie Personen, die aufgrund ihrer physischen,
sensorischen oder geistigen Fähigkeiten oder ihrer Unerfahrenheit oder
Unkenntnis nicht in der Lage sind, die Wäschetrockner sicher zu bedienen,
dürfen die Wäschetrockner nicht ohne Aufsicht oder Anweisung durch eine
verantwortliche Person benutzen, sich in der Nähe aufhalten oder das
Gerät saubermachen.
Kinder sollten nicht mit dem Gerät spielen. Reinigung und
Benutzerwartung sollten nicht von Kindern ohne Einführung, ausgeführt
werden.
● WARNUNG Zweckentfremdung des Trockners kann zu Brandgefahr
führen.
● Dieses Gerät ist ausschließlich für den Haushaltsgebrauch konzipiert
bzw. für den haushaltsnahen Gebrauch, wie z.B:
- Teeküchen für das Personal von Büros, Geschäften oder ähnlichen
Arbeitsbereichen;
- Ferienhäuser;
- Gäste von Hotels, Motels und anderen Wohneinrichtungen;
- Gäste von Apartments/Ferienwohnungen, Bed and Breakfast
Einrichtungen
Eine andere Nutzung als die normale Haushaltsnutzung, wie z.B.
gewerbliche oder professionelle Nutzung durch Fachpersonal, ist auch im
Falle der oben erwähnten Einrichtungen ausgeschlossen.
Sollte das Gerät entgegen diesen Vorschriften betrieben werden, kann dies
die Lebensdauer des Gerätes beeinträchtigen und den Garantieanspruch
gegenüber dem Hersteller verwirken.
Eventuelle Schäden am Gerät oder andere Schäden oder Verluste, die
DE 17
EINFÜHRUNG
SICHERHEITSHINWEISE
Gebrauch
durch eine nicht haushaltsnahe Nutzung hervorgerufen werden sollten
(selbst wenn sie in einem Haushalt erfolgen), werden, so weit vom Gesetz
ermöglicht, vom Hersteller nicht anerkannt.
● Diese Maschine dient als Haushaltsgerät ausschließ lich zum Trocknen
von Haushaltstextilien und Kleidungsstücken.
● Verwenden Sie dieses Gerät nur für die vorgesehenen Zwecke gemäß der
Anleitung. Lesen Sie die Gebrauchsanleitung sorgfältig durch, bevor Sie das
Gerät in Betrieb nehmen.
● Berühren Sie das Gerät nicht mit feuchten oder nassen Händen oder Füß
en.
● Lehnen Sie sich nicht gegen die Tür, wenn Sie die Maschine beladen, und
fassen Sie die Maschine nicht an der Tür, wenn Sie sie hochheben oder
verschieben.
● Lassen Sie Kinder nicht mit der Maschine oder den Schaltern spielen.
●WARNUNG Verwenden Sie das Produkt nicht, wenn das Flusensieb nicht
richtig eingebaut oder beschädigt ist; Flusen könnten Feuer fangen.
● WARNUNG An der Stelle, an der sich das Symbol für heiß e Flächen
befindet
,kann die Temperatur während des Trocknerbetriebs auf über
60°C steigen.
● Ziehen Sie den Stecker aus der Steckdose! Ziehen Sie vor dem Reinigen
des Geräts immer den Stecker heraus!
● Verwenden Sie die Maschine bei vermuteten Störungen nicht weiter.
● Fusseln und Flusen dürfen sich nicht auf dem Fußboden im Bereich um die
Maschine ansammeln.
● Die Trommel in dem Gerät kann sehr heiß werden. Lassen Sie den
Trockner stets vollständig bis zum Ende der Abkühlphase laufen, bevor Sie
die Wäsche herausnehmen.
● Der letzte Teil eines Trockenzyklus (Abkühlphase) erfolgt mit einem kalten
Luftstrom, um Verbrennungen und Schäden an den Textilien zu vermeiden.
● Max. Füllmenge (Mischwäsche): siehe Energielabel 8kg.
●Der Wäschetrockner darf keinesfalls zur Trocknung von Textilien, die zuvor
chemisch gereinigt wurden, benutzt werden.
● WARNUNG: Programme niemals vor dem Ende des Trockenzyklus
abbrechen, wenn die Beladung nicht zur Abkühlung unmittelbar entnommen
und luftig ausgebreitet wird.
DE 18
EINFÜHRUNG
SICHERHEITSHINWEISE
Installation
● Überprüfen Sie vor dem
Gebrauch, ob das Produkt
sichtbare Schäden aufweist.
Verwenden Sie es nicht, wenn es
beschädigt ist, und wenden Sie
sich an den GIAS-Service.
● Verwenden Sie keine Adapter,
Mehrfachsteck dosen und/oder
Verlängerungskabel.
● Stellen Sie den Trockner nie in
der Nähe von Vorhängen auf.
Achten Sie darauf, dass keine
Gegenstände hinter den Trockner
fallen oder sich dort ansammeln
können.
● Das Gerät darf nicht hinter einer
verschließ baren Tür, einer
Schiebetür oder einer Tür mit
Scharnier an der dem Trockner
entgegen gesetzten Seite
installiert werden.
Die Wäsche
● Trocknen Sie keine
ungewaschenen Gegenstände im
Trockner.
● WARNUNG AUF KEINEN FALL
Stoffe in der Maschine trocknen, die
mit chemischen Reinigungs mitteln
behandelt wurden.
● W A R N U N G W e n n
Schaumgummimaterialien heiß
werden, können sie sich unter
bestimmten Bedingungen plötzlich
entzünden. Gegenstände wie
Schaumgummi (Latexschaumstoff), Duschhauben,
wasserab weisende Textilien, mit
Gummi verstärkte Produkte sowie
Kleidung-sstücke oder Kissen- mit
Schaumstoffpolster sind für den
Wäschet- rockner NICHT
GEEIGNET.
● Sehen Sie immer auf den
Pflegeetiketten nach, ob das
Material für das Trocknen geeig-net
ist.
● Textilien vor dem Einfüllen in den
Trockner erst schleudern oder
gründlich auswringen. Füllen Sie
KEINE tropfnassen Textilien in den
Trockner.
● Feuerzeuge und Streichhölzer
unbedingt aus den Taschen
entfernen und AUF KEINEN FALL
mit feuergefährlichen Flüssigkeiten
in der Nähe der Maschine
hantieren.
● K E I N E Vo r h ä n g e a u s
Glasfasermaterial in die Maschine
füllen. Kommen andere Textilien mit
Glasfasern in Berührung, so kann
dies zu Hautreizungen führen.
● Gegenstände, die mit Substanzen
wie Speiseöl, Azeton, Alkohol,
Benzin, Kerosin, Fleckenentferner,
Te r p e n t i n , W a c h s e n u n d
Wachsentferner getränkt sind,
sollten mit einer zusätzlichen
Menge Waschpulver in heißem
Wasser gewaschen werden, bevor
sie im Trockner getrocknet werden.
● Weichspüler oder ähnliche
Produkte sollten wie in der
Gebrauchanleitung des
Weichspülers angegeben
verwendet werden.
DE 19
EINFÜHRUNG
SICHERHEITSHINWEISE
ENTLÜFTUNG
In dem Raum, in dem sich der
Trockner befindet, muss eine
ausreichende Entlüftung vorhanden
sein, um zu verhindern, dass Gase
aus der Verbrennung anderer
Brennstoffe, zum Beispiel offene
F e u e r, w ä h r e n d d e s T r o c knerbetriebs in den Raum gesogen
werden.
• Hinweis zur Aufstellung des
Gerätes an Wänden oder in Nischen
• Der Mindestabstand zwischen
Gerät und sämtlichen angrenzenden
Oberflächen beträgt 12 mm. Die
Luftzufuhr- und Auslassöffnungen
müssen immer großräumig
freigehalten werden. Den Platz
zwischen Geräteunterseite und
Boden ebenfalls rundum freihalten.
• Die Abluft darf nicht in einen
Kaminschacht geleitet werden, der
für das Ableiten von Rauch aus der
Verbrennung von Gas oder anderen
Brennstoffen verwendet wird.
• Prüfen Sie regelmäß ig die
reibungslose Luftzirkulation im
Trockner.
• Bitte alle Filter regelmäßig prüfen
und ggf. reinigen.
• Bei der Aufstellung als Wasch/Trockensäule muß aus
Sicherheitsgründen ein geeigneter
Zwischenbaurahmen mit den
folgenden Eigenschaften verwendet
werden.
• Originalzwischenbaurahmen
(35100019): für Waschmaschinen
mit einer Tiefe von mindestens 49 cm
•Originalzwischenbaurahmen
(35100120): für Waschmaschinen
mit einer Tiefe von mindestens 51 cm
DE 20
• D i e v o r g e n a n n t e n
Originalzwischenbaurahmen sind
über Ihren Händler bzw. unseren
Kundendienst zu beziehen.
Hinweise zur Anbringung finden Sie
in der dem Verpackunsginhalt
beigefügten Anleitung. Die
Verwendung von generischen
Zwischenbaurahmen ist bei ggf.
eingeschränkter Funktionsweise
ebenfalls möglich.
• Achten Sie darauf, dass keine
Gegenstände zwischen beiden
Seitenteilen und der Rück-seite des
Trockners herunterfallen und sich
dort ansammeln, da hierdurch die
Ansaug- und Abluftanschlüsse
blockiert werden können.
• Der Trockner darf AUF KEINEN
FALL in der unmittelbaren Nähe von
Vorhängen aufgestellt werden.
Air Outlets in the Base
Wichtig: Das Gerät soll möglichst stehend
transportiert werden. Bei Bedarf kann es nur in die
gezeigte Richtung geneigt werden.
Achtung: Wenn das Gerät in eine andere Lage
transportiert wurde, warten Sie mindestens 4
Stunden, bevor Sie es einschalten, damit sich die
Flüssigkeit im Kompressor wieder stabilisieren kann.
Tun Sie es nicht, können Schäden am Kompressor
die Folge sein.
SICHERHEITSHINWEISE
Umweltschutz
● Das gesamte Verpackungsmaterial besteht
aus umwelt-freundlichen, wiederverwertbaren
Materialien. Bitte helfen Sie mit, diese umweltfreundlich zu entsorgen. Ihre Stadtverwaltung
kann Sie über Entsorgungsmöglichkeiten
informieren.
● Ziehen Sie den Stecker aus der Steckdose,
zerschneiden Sie das Netzkabel und werfen Sie
Netzkabel und Netzstecker getrennt in den Müll,
bevor Sie Ihren alten Trockner entsorgen.
Zerstören Sie Scharniere und die Türverriegelung, damit sich Kinder nicht versehentlich in
der Waschmaschine einsperren können.
Europäische Vorschrift 2002/96/EC
Dieses Elektrohaushaltsgerät ist
entsprechend der EU-Richtlinie
2002/96/CE über Elektro- und
Elektronik-Altgeräte (WEEE)
gekennzeichnet.
Bitte sorgen Sie dafür, dass das Gerät
ordnungsgemäß entsorgt wird, damit mögliche
negative Auswirkungen auf Umwelt und
Gesundheit vermieden werden, die bei einer
unsachgemäßen Entsorgung des Altgerätes
entstehen könnten.
Das Symbol auf dem Produkt bedeutet, dass
dieses Gerät nicht in den normalen Hausmüll
gehört, sondern den jeweiligen kommunalen
Rücknahmesystemen für Elektro- und
Elektronik-Altgeräte übergeben werden muss.
Die Entsorgung muss im Einklang mit den
geltenden Umweltrichtlinien für die Abfallentsorgung erfolgen. Für nähere Informationen über
Entsorgung und Recycling dieses Produktes
wenden Sie sich bitte an Ihre kommunalen
Einrichtungen (Umweltamt) oder an die
Abfallentsorgungsgesellschaft Ihrer Stadt bzw.
an Ihren Händler.
GIAS Service
● Um einen sicheren und einwandfreien Betrieb
dieses Geräts zu gewährleisten, empfehlen wir,
alle Wartungs- und Reparatur-arbeiten nur von
einem zugelassenen GIAS Kundendiensttechniker durchführen zu lassen.
Falls das Gerät nicht richtig funktioniert
oder ausfällt, schalten Sie es aus und ziehen
Sie den Stecker aus der Steckdose. Wenden
Sie sich an den GIAS-Service.
Elektro-Anschluss
Dieser Trockner ist für eine Netzspannung von
220-240 V und 50 Hz (Einphasenstrom)
ausgelegt. Stellen Sie sicher, dass der Stromkreis
eine Nennleistung von 6 A hat.
●Strom kann lebensgefährlich sein.
●Dieses Gerät muss an eine geerdete
Steckdose mit Schutzkontakt angeschlossen werden.
●Die Steckdose und der Stecker am Gerät
müssen vom selben Typ sein.
●Verwenden Sie keine Mehrfachstecker
und/oder Verlängerungskabel.
●Der Stecker sollte so angebracht werden,
dass er nach der Installation des Geräts
leicht aus der Steckdose zu ziehen ist.
Das Gerät stimmt mit den Bestimmungen der
Europäischen Vorschrift 2004/108/EC, 2006/95/
EC sowie deren Nachfolgebes-timmungen
überein.
Falls ein Problem mit Ihrer Maschine durch
falsche Installation verursacht wird, müssen Sie
Reparaturarbeiten möglicherweise selbst
bezahlen.
Sollte das Netzanschlusskab el an diesem
Gerät beschädigt sein, muss es durch ein
spezielles Kabel ersetzt werden, das NUR beim
Ersatzteilservice erhältlich ist. Es muss von
einer fachkundigen Person installiert werden.
Schließen Sie die Maschine erst an und drücken
Sie die Einschalttaste erst, wenn die Installation
abgeschlossen ist. Zu Ihrer eigenen Sicherheit
muss der Trockner richtig installiert werden. Sollten
Sie bezüglich der Installation Fragen haben,
wenden Sie sich an den GIAS Service.
Einstellen der Füße
Sobald sich die
M a s c h i n e a m
endgültigen Ort
befindet, sollten die
Füße so eingestellt
werden, dass die
Maschine eben steht.
DE 21
ABLAUFSCHLAUCHBAUSATZ: INSTALLATIONSANLEITUNG
Um zu vermeiden, dass der Wasserbehälter nach
jedem Trocknungsvorgang geleert werden muss,
kann das Wasser, dass sich normalerweise
während des Trocknungsvorgangs ansammelt,
direkt über einen Ablaufschlauch abgelassen
werden (in dasselbe Abwassersystem, über das
Abwasser von Ihrem Becken abgeleitet wird).
Gemeindewasserverordnungen verbieten einen
Anschluss an Oberflächenwasserabläufe. Das
Ablaufschlauchsystem sollte sich neben dem
Trockner befinden.
WARNUNG! Schalten Sie die Maschine aus
und trennen Sie den Stecker des Trockners von
der Stromversorgung, bevor Sie Arbeiten daran
vornehmen.
Das Kit besteht aus: 1 Schlauch, 1 geraden
Schlauchanschluss, 1 Schlauchklemme und
Plastikband.
Bringen Sie den Bausatz wie folgt an:
1.Schrauben Sie die 3
Schrauben an der
Rückseite der Maschine,
die die Arbeitsplattenleiste
halten, ab und entfernen
Sie diese.
2. Nehmen Sie die hintere
Arbeitsplattenleiste und
die Arbeitsplatte ab, indem
Sie sie vorsichtig in
Richtung Rückseite der
Maschine schieben.
3.Der Abwasser-behälter
befindet sich an der
rechten Seite der
Maschine (von hinten
gesehen).
Ein grauer Schlauch ist mit
dem Steg über dem
Wasserbehälter
verbunden. Entfernen Sie
d i e S c h l a u c h halteklemme mithilfe einer
Zange vom Steg.
4. Ziehen Sie den
Schlauch von der
Stegverbindung ab.
5. Befestigen Sie den
Schlauch aus dem
Bausatz mithilfe der
mitgelieferten Anschlussund Schlauchklemmen.
6. Nehmen Sie die
Wasserbehälterabdeckung von der
Rückseite der Maschine
ab, indem Sie die zwei
Schrauben entfernen und
die Abdeckung entriegeln.
DE 22
7. Brechen Sie die
Lasche an der Seite der
Abdeckung ab und
setzen Sie die
Abdeckung wieder auf
die Maschine, bringen
Sie die Schrauben wieder
an. Sie sollten jetzt eine
Öffnung an der Rückseite
neben der Abdeckung
freigelegt haben.
8. Führen Sie den
Ablaufschlauch durch die
Öffnung.
9. Verbinden Sie den
grauen Schlauch im
Ausschnitt des Behälters
und befestigen Sie den
Schlauchbausatz mit
dem Plastikband am
Steg.
10. Schieben Sie die
Arbeitsplatte vorsichtig
wieder in ihre Position
und achten Sie dabei
darauf, dass der
Schlauch nicht eingeklemmt wird.
Befestigen Sie die hintere
Arbeitsplattenleiste
wieder mit den 3
Schrauben.
11. Schließen Sie den
neuen Ablaufschlauch an
den Abwasserschlauch
an. Achten Sie darauf,
dass der neue Schlauch
nicht geknickt wird, wenn
Sie den Trockner in die
richtige Position
schieben. Stellen Sie bei
der Verlegung des neuen
externen Schlauchs
sicher, dass die
beschriebenen Hinweise
befolgt werden.
12. Schließen Sie die
Maschine an die
Stromversorgung an.
13. Schalten Sie die
Maschine nach dem
Entleeren des
Abwasserbehälters EIN
(oder drücken Sie bei
elektronischen Modellen
die ‘START’-Taste), um
das Trocknungsprogramm zu beginnen.
VORBEREITUNG DER FÜLLUNG
Bevor Sie den Trockner das erste Mal benutzen:
● Lesen Sie die Gebrauchsanleitung bitte sorgfältig
durch!
● Entfernen Sie alle in der Trommel befindlichen
Gegenstände!
● Wischen Sie die Innenseiten der Trommel und Tür
mit einem feuchten Tuch aus, um den beim
Transport eventuell dort angesammelten Staub zu
entfernen.
Maximales Fassungsvermögen
● Baumwolle
● Synthetische Stoffe
Sortieren Sie die Füllung folgendermaßen:
● Anhand der Pflegeanleitungssymbole Diese
finden Sie am Kragen oder der Sauminnenseite:
Vorbereitung der Textilien
Vergewissern Sie sich anhand der Pflegeanleitungssymbole in jedem Wäschestück, dass die
Wäsche, die Sie trocknen wollen, für eine Trocknung
im Trockner geeignet ist.
Überprüfen Sie, ob alle Verschlüsse zu und die
Taschen entleert sind. Wenden Sie die Innen-seiten
der Textilien nach außen. Füllen Sie die
Kleidungsstücke locker in die Trommel, so dass
diese sich nicht verheddern.
Nicht Für Den Trockner Geeignet:
Wollsachen, Seide, empfindliche Stoffe,
Nylonstrümpfe,gewirkte Textilien, Stoffe mit MetallD e k o r, K l e i d u n g s s t ü c k e m i t P V C - o d e r
Lederbesatz,Trainingsschuhe, voluminöse
Wäschestücke wie Schlafsäcke usw.
WICHTIG: Kleidungsstücke, die mit einem
chemischen Reinigungsmittel behandelt worden
sind, oder Gummibekleidung dürfen nicht im
Wäschetrockner getrocknet werden (Brand- oder
Explosionsgefahr).
Innerhalb der letzten 15 Minuten (ca.) wird die
Wäsche stets mit kalter Luft getrocknet.
Überladen Sie die Trommel nicht, große Teile
können, wenn sie nass sind, die maximal zulässige
Wäscheladung überschreiten (zum Beispiel
Schlafsäcke, Bettdecken).
Energiesparen
Füllen Sie nur gründlich ausgewrungene oder
geschleudert e Wäsche in den Trockner. Je
trockener die Wäsche, desto kürzer ist die
Trocknungszeit, was sich energiesparend auswirkt.
IMMER
● Es ist wirtschaftlicher, IMMER die maximale
Füllmenge zu trocknen.
● Kontrollieren Sie IMMER vor jedem
Trocknungsvorgang, ob das Sieb sauber ist.
NIE
● Überschreiten Sie NIE die maximale
Füllmenge,denn dies ist zeitaufwendig und
Energieverschwendung.
● Füllen Sie AUF KEINEN FALL tropfnasse
Kleidungs-stücke in den Wäschetrockner; dies kann
zu Schäden am Gerät führen.
max.8 kg
max. 4 kg
Für Trockner geeignet.
..
Im Trockner bei hoher Temperatur.
.
Im Trockner nur bei geringer Temperatur.
Nicht für den Trockner geeignet.
Falls ein Wäschestück keine Pflegeanleitung hat,
muss angenommen werden, dass es nicht für das
Trocknen im Trockner geeignet ist.
● Nach Menge und Volumen
Ist die Füllmenge größer als das Fassungsvermögen des Trockners, sortieren Sie die Wäsche
nach Stoffdicke (trennen Sie z.B. Handtücher von
dünner Unterwäsche).
● Nach Stoffart
Baumwolle/Leinen: Handtücher, Baumwolljersey,
Bett- und Tischwäsche.
Textilien aus Kunstfaser: Blusen, Hemden, Overalls,
usw. aus Polyester oder Polyamid und auch
Baumwoll/ Synthetikgemische.
● Nach Trocknungsgrad
Sortieren Sie nach: Bügelfeucht, Schranktrocken, usw.
Für empfindliche Textilien drücken Sie zur Wahl einer
niedrigeren Trocknungstemperatur die Taste
.
Trocknungswerte
Die Standardardprogramme für die Ermittlung der
Werte auf dem Energielabel BÜGELTROCKEN(
)
bieten die besten Energieverbrauchswerte und
eignen sich zur Trocknung von normalfeuchten
Baumwolltextilien. Die nachfolgende Tabelle gibt die
ungefähren Standardprogrammlaufzeiten und
Ve r b r a u c h s w e r t e i n d e n e i n z e l n e n
Hauptrockenprogrammen an (gmessen unter
Laborbedingungen).
PROGRAMM
Perfect Home
MAX. BELADUNG
VOLL
Schranktrocken VOLL
Bügeltrocken VOLL
Bügeltrocken
HALBVOLL
Mangeltrocken VOLL
ENERGIEVERBRAUCH PROGRAMMDAUER
(kWh)
3,40
2,93
2,66
1,35
2,13
(Min)
250
210
149
115
159
Leistungsaufnahme im unausgeschalteten Zustand 0,75 W
Leistungsaufnahme im Aus-Zustand
0,20 W
DE 23
SCHALTERBLENDE UND ANZEIGEN
Programmwähler
Wasseranzeige
Trockendauer
StartzeitVorwahl
Spia Pulizia
Filtro
Auto- Programm
Anzeige
Schontrocknen
Knitterschutz
Taste
Start/Pause
Taste
Schalterblende: Kontroll- und Leuchtanzeigen
Programmwahlschalter: Der Programmwahlschalter kann in beide Richtungen gedreht werden, um das
gewünschte Programm auszuwählen.
Trockendauer : Ermöglicht die individuelle Einstellung der Programmdauer in einigen Programmen. Diese
Funktion ist nicht in allen Programmen verfügbar.
Startzeitvorwahl : Mit dieser Funktion kann die Startzeit von minimal 1 Stunde bis maximal 23 Stunden
verzögert werden (s. Stratzeitvorwahl).
Schontrocken-Option: Nach Drücken dieser Optionstaste leuchtet die entsprechende
Anzeige auf. Der
Trockenvorgang
wird zur optimalen Gewebeschonung bei geringerer Temperatur durchgeführt.
Knitterschutz-Option
: Wenn die Funktion eingeschaltet ist, verlängert sich die StandardKnitterschutzphase am Ende des Trockengangs. Die Wäsche bleibt mit dieser
Option locker und knitterfrei. Die Wäsche kann während des Knitterschutzprogramms jederzeit entnommen
werden.
Abkühlphase
: Diese Anzeige leuchtet während der Abkühlphase auf.
Start/Pause
: Diese Taste betätigen, um das gewünschte Programm zu starten oder den Trockenvorgang
zu unterbrechen (zum Beispiel, um Wäsche nachzulegen).
Sensorgesteuerte Programme: Je nach ausgewähltem Programm (s. Programmübersicht) leuchtet das
jeweilige Symbol im Display auf. Das Symbol ECO
leuchtet bei Anwahl eines sparsamen Programms auf.
Anzeige Filterreinigung
: Alle Filter müssen nach jedem Trockengang sorgfältig gereinigt werden, um
einen einwandfreien Betrieb des Trockners zu gewährleisten. Das Aufleuchten der Anzeige weist hierauf hin.
Anzeige Behälter leeren
: Der Kondensatbehälter muß nach jedem Trockengang entleert werden. Bei
vollem Kondensatbehälter leutet die Anzeige Behälter leeren auf. Bitte den Behälter dann komplett entleeren.
AUSWÄHLEN DES PROGRAMMS
Dieser Wäschetrockner verfügt über eine sensorgesteuerte
Trocknung (Fuzzy Logic), bei der man lediglich den gewünschten
Trocknungsgrad auswählen muß.
Bei der Trocknung von kleineren Wäscheposten oder bereits
vorgetrockneter Wäsche wird die Auswahl eines zeitgesteuerten
Trockenprogramms und zusätzlich die Anwahl der "SchontrocknenOption" empfohlen.
Wenn die Sensorsteuerung keine eingelegte Wäsche erkennen
kann, wird das gewählte Programm automatisch nach 10 Minuten
abgebrochen und die Abkühlphase eingeleitet.
Wenn die Sensorsteuerung eine Überfüllung bzw. zu feuchte
Wäsche erkennt, wird das gewählte Programm automatisch auf eine
Dauer von 3 Stunden verlängert und anschließend die Abkühlphase
eingeleitet.
Am Ende jedes Trockenprogramms erfolgt eine Abkühlphase, bei
der die Wäsche für ca. 15 Minuten mit kalter Luft abgekühlt wird.
DE 24
AUSWÄHLEN DES PROGRAMMS
Programm
Perfect Home
Schranktrocken
Bügeltrocken
Mangeltrocken
Geeignet Für
Intensives Trocknen von dicken oder mehrlagigen Textilien, wie
Handtüchern etc.; Programmdauer ca. 3 Stunden.
Intensives Trocknen von normal dicken und einlagigen Textilien;
Programmdauer 2:45 Stunden.
Für Textilien, die noch gebügelt werden sollen; Programmdauer ca. 2:30
Stunden.
Für Textilien, die erst später gebügelt werden bzw. gemangelt werden
sollen; Programmdauer ca. 1:50 Stunden.
Knitterschutz
Taste'
Sonderprogramm zum Auffrischen von getragener oder schonenden
Reinigen von Textilien mit handelsüblichen Trocknereinigungsmitteln; ideal
zur Vorbereitung der Wäsche vor dem Bügeln nach langer lagerung oder
wenn diese auf der Leine getrocknet wurden; Programmdauer ca. 9
Minuten + 3 Minuten Abkühlphase
Wolle
Zum Auffrischen von auf der Leine getrockneter Wolletextilien;
Programmdauer ca. 12 Minuten.
Mix & Dry
Sonderprogramm zur gleichzeitigen Trocknung von Baumwoll- und
Kunstfasertextilien; Programmdauer ca. 2 Stunden (ACHTUNG: maximale
Füllmenge 4 kg Wäsche).
Hemden
Sonderprogramm speziell zur Trocknung von Hemden und Blusen aus
Baumwolle und Kunstfaser; Programmdauer ca. 1 Stunde für ca. 2 kg
Kunstfasertextilien (ca. 10 Hemden) oder 1:20 Stunden für ca. 3 kg
Baumwolltextilien (ca. 10 Hemden).
Kurz 40 Min.
Zur schnellen Trocknung von max. 2 kg Wäsche in nur 40 Minuten.
Zeit-programme
Neben den sensorgesteuerten Programmen stehen zeitgesteuerte
Programme zwischen 30 und 180 Minuten zur Auswahl. Im 20 MinutenZyklus wird ausschließlich kalte Luft verwendet, so dass dies optimal zum
Lüften von getragener Kleidung ist.
Jeans
Zur Trockung von bis zu 4 kg Jeans (enstspricht ca. 5 Paar
Baumwollhosen). Die Programmdauer beträgt ca. zwei Stunden, kann
jedoch auf Grund von der Beladungsmenge und Restfeuchte abweichen.
Das Jeans-Programm bitte nur zur Trockung von Wäschestücken aus
100% Baumwolle verwenden. Bitte in diesem Programm nur farbechte
Wäsche und keine Kleidungsstücke mit Bestickung oder aufgebrachten
Applikationen trocknen.
DE 25
TÜR und SIEB
Öffnen der Tür
Reinigung des Kondensatorfilters
Ziehen Sie am Griff,
um die Tür zu öffnen.
Um den Trocknungsvorgang wieder in
Gang zu setzen,
schließen Sie die Tür
und drücken .
WARNUNG! Während des Trocknungsvorgangs können Trommel und Tür SEHR
HEISS werden. Stoppen Sie den Trockner nie
vor Ende des Trocknungsvorgangs, außer alle
Gegenstände werden schnell herausgenommen und ausgebreitet, so dass die
Wärme abgeleitet wird.
Sieb
WICHTIG: Damit der Wäschetrockner immer
optimale Leistung erbringen kann, überprüfen Sie
vor jedem Trocknungsvorgang, ob das Flusensieb
sauber ist.
Benutzen Sie den Trockner nicht ohne Filter. Durch
verstopfte Filter kann sich die Trocknungsdauer
verlängern oder es können Schäden verursacht
werden, die kostenpflichtige Reparaturen mit sich
ziehen.
1. Ziehen Sie das Sieb
nach oben.
2. Öffnen Sie das Sieb wie
auf der Abbildung.
3. Entfernen Sie die
Flusen sanft mit einer
weichen Bürste oder den
Fingerspitzen.
4. Klappen Sie das Sieb
zusammen und setzen
Sie es wieder an seinen
Platz ein.
Flusensieb-Anzeige
leuchtet auf, wenn
das Sieb gesäubert
werden muss.
Wenn die Wäsche
nicht trocknet, kontrollieren Sie, ob das
Sieb verstopft ist.
DE 26
1. Entfernen Sie die
Wartungsklappe
2. Drehen Sie die zwei
Verschlusshebel gegen
den Uhrzeigersinn und
ziehen Sie den
Kondensatordeckel
heraus
3. Nehmen Sie
vorsichtig den
Filterrahmen heraus
und entfernen Sie
etwaigen Staub oder
Flusen vorsichtig mit
einem Tuch. Reinigen
Sie den Filter nicht mit
Wasser.
4. Entfernen Sie den
Schaumgummifilter
und reinigen Sie ihn
unter fließendem
Wasser, wobei Sie es
drehen, um Flusen und
Staub vollständig zu
entfernen.
5. Passen Sie den
Kondensatordeckel
wieder ein (Richtung
wird durch den Pfeil
angegeben) und stellen
Sie sicher, dass er fest
an seinen Platz
gedrückt wird.
Schließen Sie die zwei
Verschlusshebel durch
eine Drehung im
Uhrzeigersinn.
6. Setzen Sie die
Wartungsklappe wieder
ein.
REINIGEN SIE DEN FILTER NICHT MIT WASSER
KONDENSATOR
KONDENSWASSER-BEHÄLTER
Das während des Trocknungsvorgangs aus der
Wäsche entzogene Wasser wird in einem
Behälter unten im Trockner gesammelt.
Wenn der Behälter voll ist, leuchtet die Anzeige
auf der Bedienfläche auf. Dann MUSS der
Behälter geleert werden. Wir empfehlen jedoch,
den Behälter nach jedem Trockengang zu leeren.
HINWEIS: Während der ersten wenigen
Trocknungszyklen eines neuen Trockners
sammelt sich sehr wenig Wasser an, da zunächst
ein in der Maschine befindliches Reservoir gefüllt
wird.
Um Den Behälter Herauszunehmen
1. Ziehen Sie den
Behälter vorsichtig
heraus, bis er vollständig
entfernt ist. Halten Sie
den Behälter mit beiden
Händen, denn im
gefüllten Zustand wiegt
der KondenswasserBehälter rund 4 kg.
2. Kippen Sie den
Wasserbehälter, um das
Wasser aus dem hinteren
Loch zu entleeren. Wenn
der Wasserbehälter leer
ist, schieben Sie ihn
wieder zurück in seine
Position. SCHIEBEN SIE
IN FEST AN SEINEN
PLATZ.
3.Drücken Sie die
Taste
um die
Trocknung wieder zu
starten.
HINWEIS: Wenn Sie
einen Ablauf in der Nähe
des Trockners haben,
können Sie den
A b l a u f b a u s a t z
verwenden, um einen
ständigen Ablauf für das
v o m T r o c k n e r
g e s a m m e l t e Wa s s e r
einzurichten. Sie müssen
dann den Wasserbehälter
nicht mehr ausleeren. Alle
Informationen für das
Zusammenbauen des
Bausatzes sind im
dazugehörigen Umschlag
enthalten.
BETRIEB
1. Öffnen Sie die Tür des Gerätes und füllen die
Trommel mit der zu trocknenden Wäsche.
Vergewissern Sie sich, dass heraushängende
Wäsche nicht das Schließen der Tür verhindern
kann.
2. Schließen Sie langsam die Tür, bis Sie ein
„Klick“ hören.
3. Drehen Sie den Programmwähler auf das
gewünschte Programm (hierzu bitte die
Programmempfehlungen in dieser Anleitung
beachten).
4. Wenn Sie Synthetik, Acryl oder Feinwäsche
trocknen möchten, nutzen Sie die
Schontrocknen-Option
, um die Temperatur
zu reduzieren. Die Anzeige leuchtet auf, sobald
das Gerät im niedrigen Wärmemodus ist. Sie
können innerhalb der ersten Minuten des
gewählten Programms die Schontrocken-Taste
noch nachträglich drücken. Nach dieser Zeit
müssen Sie das Programm allerdings löschen,
wenn Sie die Einstellung ändern wollen.
5. Drücken Sie die taste
. Der Trockner
startet automatisch und die Anzeige über der
Taste leuchtet durchgängig.
6. Sollte einmal die Tür während des
Programms geöffnet werden müssen, drücken
Sie erneut die taste
, um die Trocknung
fortzuführen.
7. Neigt sich die Trocknung dem Ende zu,
beginnt kurz zuvor die Abkühlphase, um die
Luft und damit die Wäsche abzukühlen.
8. Ist das Programm beendet, dreht die
Trommel weiter bis das Gerät ausgeschaltet
wird oder die Tür geöffnet wird. Dies dient dazu,
dass die Wäsche durch Stoppen der Trommel
nicht verknittert.
Bitte öffnen Sie die Tür nicht in
sensorgesteuerten Programmen, um eine
optimale Trocknung zu ermöglichen.
DE 27
BETRIEB
Startzeitvorwahl
Mit der Startzeitvorwahlfunktion
können Sie den Beginn des Trocknungsvorgangs um 1 bis
24 Stunde verzögern.
Wenn diese Funktion erstmalig ausgewählt wird, zeigt das Display eine Verzögerung von 1
Stunden. Durch nachfolgendes mehrmaliges Drücken der Taste, wird die Verzögerung auf 24
Stunden verlängert.
Drücken Sie taste
, um das Programm zu beginnen, und das Gerät wird den
Trocknungsvorgang am Ende dieses Zeitraums durchführen. Die Lichtanzeige für 6 oder 9
Stunden blinkt, um anzuzeigen, dass die Startverzögerung aktiviert wurde.
Abbrechen und Zurücksetzen des Programms
Zum Abbrechen des Programms drücken Sie die Taste Start/Pause 3 Sekunden lang. Die
Maschine zeigt an, dass die zurückgesetzt wurde, wenn im Display 0:00 blinkt.
REINIGUNG UND ROUTINEWARTUNGEN
Reinigung des Trockners
● Reinigen Sie nach jedem Trocknungsvorgang das Flusensieb und leeren Sie den
Kondenswasser- Behälter.
● Reinigen Sie alle Filter in regelmäßigen
Abständen.
● Wischen Sie nach jeder Anwendungs-phase
die Innenseite der Trommel aus und lassen
Sie die Tür einige Zeit offen stehen, damit sie
durch die Luftzirkulation getrocknet wird.
● Reinigen Sie die Auß enseite der Maschine
und der Tür mit einem weichen Tuch.
● AUF KEINEN FALL Scheuerschwämme
oder Scheuermittel benutzen.
● Wir empfehlen, dass Sie die Tür, die
Türdichtung sowie das Geräteäußere nach
jedem Gebrauch kurz mit einem feuchten
Tuch reinigen.
WARNUNG! Trommel, Tür und die
Wäsche selbst können sehr heiß sein.
DE 28
Technische Daten
Trommelinhalt
115 Liter
Maximales Fassungsvermögen 8 kg
Höhe
85 cm
Breite
60 cm
Tiefe
60 cm
Energieeffizienzklasse
A +
Informationen für Test-Labor
EN 61121 Programm
Programm zu verwenden
-Trockene Baumwolle
- Bügeltrocken
-Trockene Baumwolle, Eisen - Mangeltrocken
- Bügeltrocken+Synthetisch
-Empfindliche Textilien
HINWEIS: Sie können das optional erhältliche
Ablaufset zur Ableitung des Kondenswassers
installieren.
WICHTIG Schalten Sie immer das Gerät
aus und ziehen Sie den Stecker aus der
Steckdose, bevor das Gerät gereinigt wird.
Die elektrischen Daten befinden sich auf
dem Betriebstypenschild an der Vorderseite
des Trockners (bei offener Tür).
FEHLERSUCHE
Mögliche Gründe für...
Fehler, die Sie selbst beheben können
Prüfen Sie alle Punkte in der folgenden Checkliste,
bevor Sie sich an den GIAS-Service wenden.
Sollte die Waschmaschine funktionstüchtig sein
oder unsachgemäß installiert oder verwendet
worden sein, wird Ihnen der Besuch des
Kundendien-sttechnikers inRechnung gestellt.
Wenn das Problem weiterhin besteht, nachdem
Sie die Checkliste durchgegangen sind, wenden
Sie sich bitte an den GIAS-Service, der Ihnen evtl.
telefonisch weiterhelfen kann.
Die Restzeitanzeige auf dem Display könnte
sich während des Trocknungsgangs ändern.
Die Restzeit wird kontinuierlich während der
Trocknung überprüft und die Zeit wird
angepasst, um eine bestmögliche Schätzung
der Restdauer zu geben. Es ist daher ganz
normal, dass die angezeigte Restzeit sich
vergrößern oder verkleinern kann
Die Trocknungszeit ist zu lang/die Textilien
sind nicht trocken genug…
● Haben Sie die richtige Trocknungszeit/das
richtige Programm gewählt?
●Waren die Textilien zu nass? Wurden die Textilien
sorgfältig ausgewrungen oder
geschleudert?
● Muss das Sieb gereinigt werden?
● Muss der Kondensator gereinigt werden?
● Ist der Trockner überladen?
●Sind die Luftansaug- und Abluftanschlüsse sowie
die Fläche unter dem Sockel des
Trockners frei?
● Ist die Taste
noch von einem früher gewählten
Programm gedrückt?
Der Trockner funktioniert nicht…
● Ist der elektrische Netzanschluss für den
Trockner in Ordnung? Kontrollieren Sie diesen mit
einem anderen Gerät, wie z.B. einer Tischlampe.
● Befindet sich der Stecker korrekt in der
Steckdose?
● Gibt es einen Stromausfall?
● Ist die Sicherung herausgesprungen?
●Ist die Tür richtig geschlossen?
● Ist der Trockner sowohl am Netzanschluss als
auch an der Maschine angestellt?
● Ist die Trocknungszeit oder das Programm
gewählt worden?
● Ist die Maschine nach dem Türöffnen wieder
angestellt worden?
●Hat der Trockner den Betrieb eingestellt, weil der
Kondenswasser-Behälter voll ist und entleert
werden muss?
Der Trockner ist zu laut…
● Schalten Sie den Trockner aus und wenden Sie
sich an den GIAS-Service.
Die
leuchtet…
● Muss das Sieb gereinigt werden?
● Muss der Kondensator gereinigt werden?
Die
leuchtet…
● Muss der Kondenswasser-Behälter geleert
werden?
KUNDENDIENST
Sollten trotz obengenannter Kontrollen
weiterhin Störungen bei Ihrem Trockner
auftreten, wenden Sie sich bitte an den GIASService, der Sie beraten kann. Der Kundendienst kann Sie möglicherweise telefonisch
beraten oder mit Ihnen einen geeigneten
Termin für einem Techniker im Rahmen der
Garantie vereinbaren.Ihnen wird jedoch
eventuell eine Gebühr berechnet, wenn sich
herausstellt, dass Ihre Maschine:
● funktionsfähig ist.
● nicht gemäß der Installationsanweisung
installiert worden ist.
● unsachgemäß benutzt wurde.
Ersatzteile
Verwenden Sie immer Original-Ersatzteile, die
Sie direkt beim GIAS-Service erhalten.
GIAS - Service
Wenden Sie sich für Wartungs- und Reparaturarbeiten an Ihren GIAS-Servicetechniker.
Der Hersteller übernimmt keine
Verantwortung für etwaige Druckfehler in
dieser Bedienungsanleitung. Der Hersteller
behält sich das Recht vor, seine Produkte
ggf. anzupassen, ohne wesentliche
Eigenschaften zu verändern.
DE 29
INDEKS
Uvod
Podatki O Dobavi
Opombe Za Varnost
Uporaba
Namestitev
Perilo
Pretok Zraka
Varovanje Okolja
Pooblaščeni Servis
Zahteve Za Električno Napeljavo
Nastavitev Nivelirnih Nog
Komplet Z Odtočno Cevjo: Navodila Za Namestitev
Priprava Na Polnjenje Stroja
Priprava Oblačil
Sortiranje Perila
V Sušilnem Stroju Ne Sušiti
Varčevanje Z Energijo
Navodila Za Sušenje
Tipke Za Upravljanje In Signalne Lučke
Izbira Programa
Vrata In Filter
Odpiranje Vrat
Filter
Signalna Lučka Za Stanje Filtra
Posoda Za Vodo
Da Odstranite Posodo
Kondenzator
Da Odstranite Kondenzator
Obratovanje
Preklic In Ponastavitev Programa
Funkcija Zakasnitve Vklopa
Čiščenje In Vzdrževanje
Čiščenje Sušilnega Stroja
Tehnični Podatki
Odpravljanje Napak
Pomoč Strankam
Nadomestni Deli
Pooblaščeni Servis
SL 30
31
31
31
32
33
33
34
35
35
35
35
36
37
37
37
37
37
37
38
39
40
40
40
40
41
41
41
41
42
42
42
42
42
42
43
43
43
43
UVOD
Prosimo vas, da ta navodila pozorno preberete in stroj uporabljate v skladu z njimi. Ta knjižica
vsebuje pomembna navodila za varno uporabo, namestitev in vzdrževanje vašega stroja ter tudi
uporabne napotke za doseganje najboljših rezultatov.
Vso dokumentacijo, ki ste jo dobili s strojem, skrbno shranite, saj jo boste morda še potrebovali ali pa
jo boste Predali drugemu lastniku.
Podatki o Dobavi
Prosimo, preverite, ali ste s strojem dobili tudi
naslednje:
● navodila za uporabo
● garancijski list
● nalepko o energijski varčnosti
Prepričajte se, da med. prevozom stroj ni
bil poškodovan. Če se je poškodoval, pokličite
pooblaščeni servis.
Če ne boste upoštevali zgornjih navodil,
lahko ogrozite varnost naprave. Če bi napaka
na stroju nastala zaradi nepravilne uporabe,
vam lahko zaračunamo klic servisne službe.
OPOMBE ZA VARNOST
Uporaba
● Aparat lahko uporabljajo otroci, starejši od 8 let, in osebe z zmanjšanimi
fizičnimi, zaznavnimi ali umskimi sposobnosti ali s pomanjkljivimi
izkušnjami in predznanjem, vendar le pod nadzorom in če so jim bila
razložena navodila za varno uporabo aparata in če se zavedajo s tem
povezanih tveganj.
Otroci se ne smejo igrati z aparatom, prav tako otroci ne smejo čistiti in
vzdrževati aparata brez nadzora.
● OPOZORILO: Napačna uporaba sušilnega stroja lahko povzroči požar.
●Aparat je namenjen samo uporabi v gospodinjstvih in podobnih okoljih:
- kuhinjah za osebje v pisarnah, delavnicah ali drugih delovnih okoljih;
- na kmetijah;
- za stranke v hotelih, motelih in drugih bivalnih okoljih;
- v penzionih.
Za drugačno uporabo v okoljih, ki se razlikujejo od uporabe v
gospodinjstvih, kot na primer uporaba komercialne namene s strani
strokovnjakov ali izučenih uporabnikov, ta aparat ni namenjen.
Nenamenska uporaba aparata lahko skrajša njegovo življenjsko dobo in
izniči veljavnost garancije. Proizvajalec ne prevzema nikakšrne
odgovornosti, skladno z veljavnimi zakoni, za morebitno škodo na
aparatu ali poškodbe ali izgubo zaradi nenamenske uporabe, tudi če je bil
aparat uporabljan v gospodinjstvu.
● Ta naprava je namenjena izključno uporabi v gospodinjstvih, z njo lahko
sušite le gospodinjski tekstil in oblačila.
SL 31
UVOD
OPOMBE ZA VARNOST
Uporaba
● Stroj se sme uporabljati le za namen, ki je opisan v tem priročniku. Pred
uporabo stroja se prepričajte, ali ste popolnoma razumeli navodila za
namestitev in uporabo.
● Stroja se ne dotikajte, če imate vlažne oziroma mokre roke ali noge.
● Med polnjenjem stroja se ne naslanjajte na njegova vrata in jih nikoli ne
uporabljajte za dviganje ali premikanje stroja.
● Nikoli ne dovolite otrokom, da bi se igrali s strojem ali njegovimi tipkami.
● OPOZORILO: Stroja ne uporabljajte, če filter za puh ni pravilno
nameščen ali če je poškodovan; puh se lahko vžge.
●OPOZORILO: Na mestih, kjer je simbol za vročo površino
,se lahko
temperatura med delovanjem sušilnega stroja dvigne na več kot 60
stopinj Celzija.
● Izvlecite vtič iz električne vtičnice. Pred čiščenjem stroja vtič vedno
izvlecite iz vtičnice.
● Če se vam zdi, da stroj ne deluje pravilno, ga prenehajte uporabljati.
● Na tleh v okolici stroja se ne smejo nabirati nitke ali puh.
● Boben v stroju se lahko zelo segreje. Preden začnete perilo jemati iz
stroja, vedno počakajte, da sušilni stroj konča fazo hlajenja.
● Zadnja faza programa sušenja poteka brez segrevanja (faza ohlajanja).
S tem dosežemo, da je perilo po koncu sušenja take temperature, da ni
nevarnosti za poškodbe tkanine.
● Največja dovoljena količina perila: navedena na energijski nalepki 8 kg.
● V stroju ni dovoljeno sušiti perila, ki je bilo čiščeno z industrijskimi
kemikalijami.
● OPOZORILO: Če je že nujno potrebno prekiniti program sušenja pred
koncem, kar odsvetujemo, takoj poberite perilo iz bobna in ga razgrnite,
da se toplota razgubi.
SL 32
UVOD
OPOMBE ZA VARNOST
Namestitev
● Preden stroj uporabite, se
prepričajte, da ni vidno
poškodovan. Če je poškodovan,
ga ne uporabljajte, temveč
pokličite pooblaščeni servis.
● Ne uporabljajte adapterjev,
razdelilcev in/ali podaljškov.
● Nikoli ga ne postavite ob zavese
in pazite, da predmeti ne bodo
mogli pasti za sušilni stroj ali se za
njim nabirati.
● Naprave ne smete namestiti za
vrati, ki se dajo zakleniti, drsnimi
vrati ali vrati, ki imajo tečaje na
nasprotni strani kot sušilni stroj.
Perilo
● V sušilnem stroju ne sušite
kosov, ki niso bili oprani.
● OPOZORILO: Nikoli ne sušite
tkanin, obdelanih s tekočinami za
kemično čiščenje.
● OPOZORILO: Materiali iz
penaste gume lahko včasih pri
segrevanju (pod posebnimi pogoji)
zagorijo zaradi samovžiga.
Predmetov iz penaste gume
(lateks pena), kap za prhanje, proti
vodi odpornih tkanin, izdelkov in
oblačil z gumijasto podlogo in
blazin z vložki iz penaste gume NE
SMETE sušiti v sušilniku za perilo.
● Da izveste, ali je material
primeren za sušenje, vedno
poglejte etiketo na tekstilu.
● Preden daste oblačila v sušilni
stroj, morajo biti ožeta ročno ali s
centrifugo v pralnemstroju. V
sušilni stroj se NE SME dajati
oblačil, iz katerih še kaplja.
● Pazite, da v žepih ni vžigalnikov
ali vžigalic, in v bližini sušilnega
stroja NIKOLI ne uporabljajte
gorljivih tekočin.
● V stroju NIKOLI ne smete sušiti
zaves iz steklenih vlaken. Če
steklena vlakna pridejo na druga
oblačila, lahko pride do draženja
kože.
● Kose, ki so se umazali s snovmi,
kot so na primer jedilno olje,
aceton, alkohol, bencin, kerozin,
odstranjevalec madežev, terpentin,
vosek ali odstranjevalec voska,
morate najprej oprati v vroči vodi z
nekaj več detergenta, preden jih
začnete sušiti v sušilnem stroju.
● Mehčalce perila in podobne
izdelke uporabite, kot je navedeno
v navodilih za uporabo Mehčalca.
SL 33
UVOD
OPOMBE ZA VARNOST
PRETOK ZRAKA
V prostoru, kjer stoji sušilni stroj, je
treba zagotoviti zadostno zračenje,
zato da stroj med delovanjem v
prostor ne bi potegnil plinov, ki jih
pri izgorevanju izločajo nekatere
naprave, na primer kamini.
● Zrak, ki izhaja iz stroja, ne sme
biti speljan v dimnik, na katerega
so priključene naprave, ki
za zgorevanje uporabljajo plin ali
druga goriva.
● Sušilni stroj postavite s hrbtno
stranjo ob zid ali drugo vertikalno
površino.
● Redno preverjajte, ali ima zrak, ki
teče skozi sušilni stroj, prosto pot.
● Po uporabi preverite, ali se je v
filtru nabral puh, in filter po potrebi
očistite.
● Okoli stroja mora biti vsaj 12 mm
praznega prostora. Odprtine za
vstop in izstop zraka morajo biti
vedno neovirane, prav tako mora
biti omogočeno kroženje zraka
med dnom stroja in tlemi, kar je
nujno za zadostno zračenje.
● Preprečite, da bi predmeti padali
za stroj ali se
nabirali za njim, saj bi lahko ovirali
pretok zraka
(vhode in izhode za zrak).
● NIKOLI ne namestite sušilnega
stroja ob zavesah.
● Redno po vsaki uporabi
preverjajte stanje filtra za delce
tkanine in ga po potrebi očistite.
SL 34
● Če želite postaviti sušilni stroj na
pralni stroj, morate uporabiti
namenski komplet za sestavljanje
obeh strojev ter upoštevati
navodila.
●
Komplet za sestavljanje
sušilnega in pralnega stroja model
35100019: za pralne stroje globine
najmanj 49 cm
● Komplet za sestavljanje
sušilnega in pralnega stroja model
35900120: za pralne stroje globine
najmanj 51 cm
● Komplet za sestavljanje
sušilnega in pralnega stroja izberite
glede na globino vašega pralnega
stroja; na voljo so pri p ooblaščenih
servisih. Kompletu so priložena
tudi navodila za instalacijo in vsi
otrebni deli za pritrditev.
Air Outlets in the Base
Pomembno: Med transportom naj bo sušilni stroj v
pokončnem položaju. Če je nujno, ga nagnite samo
tako, kot je to prikazano na spodnji sliki:
V nasprotnem primeru počakajte vsaj 4 ure in šele
nato vključite sušilni stroj, da bo lahko olje steklo
nazaj v kompresor. V nasprotnem primeru obstaja
nevarnost poškodbe kompresorja!.
OPOMBE ZA VARNOST
Varovanje Okolja
●
Vsi materiali, iz katerih je izdelana
embalaža, so okolju prijazni in jih je mogoče
reciklirati. Prosimo, odvrzite embalažo na
okolju prijazen način. Na vaši občini ali
komunalni službi vam bodo lahko podrobno
povedali več o odstranjevanju odpadkov.
● Ko boste sušilni stroj odvrgli, varnost
zagotovite tako, da stroj izključite iz vtičnice ter
nato prerežete električni kabel in ga skupaj z
vtičem uničite. Da preprečite, da bi se otroci
zaprli v stroj, odlomite tečaje vrat ali
ključavnico na vratih.
European Directive 2002/96/EC
Ta naprava je označena v skladu z
Direktivo 2002/96/ES Evropskega
parlamenta in Sveta o odpadni
električni in elektronski opremi
(OEEO).
S tem, ko poskrbite, da bo ta izdelek pravilno
odvržen, boste pripomogli k preprečevanju
morebitnih negativnih posledic za okolje in
zdravje, ki bi sicer lahko nastale pri nepravilnem
ravnanju z odpadkom.
Simbol na napravi prikazuje, da je ne moremo
obravnavati kot gospodinjski odpadek.
Namesto tega ga je treba odložiti na primernem
odpadu, kjer reciklirajo električno in elektronsko
opremo. Stroj morate odvreči v skladu z lokalno
okoljevarstveno zakonodajo o odpadkih.
Za podrobnejše informacije o obdelavi,
obnovitvi in recikliranju tega izdelka se,
prosimo, obrnite na svojo lokalno občino,
Podjetje za odvoz odpadkov ali na trgovino, kjer
ste stroj kupili.
Pooblaščeni Servis
● Zaradi zagotavljanja stalnega varnega in
učinkovitega delovanja stroja priporočamo, da
Vse servisne storitve in vsa popravila izvaja le
pooblaščeni serviser.
Če naprava ne deluje pravilno ali če se
pokvari, jo izključite, vtič pa iztaknite iz vtičnice.
Za morebitno popravilo pokličite pooblaščeni
servis.
Zahteve za Električno Napeljavo
Sušilni stroji delujejo na enofazni izmenični tok s
50 Hz in napetostjo 220 240 V. Prepričajte se, da
je nazivna zmogljivost priključka vsaj 6 A.
Električni tok je lahko zelo nevaren.
Ta naprava mora biti ozemljena.
Vtičnica električne napeljave in vtič morata
biti iste vrste.
Ne uporabljajte več adapterjev in/ali
podaljškov.
Vtič mora biti po namestitvi stroja na
dostopnem mestu, da ga lahko po porabi
iztaknete.
Naprava CE je v skladu z direktivama Sveta
2004/108/GS, 2006/95GS in njunimi dopolnili.
Če napaka na stroju nastane zaradi
nepravilne namestitve, vam lahko klic servisne
Službe zaračunamo.
Če je električni kabel poškodovan, ga je
treba nadomestiti s posebnim kablom, ki ga
lahko dobite SAMO pri pooblaščenem
prodajalcu nadomestnih delov. Namestiti ga
mora za to usposobljena oseba.
Stroja ne priključujte in ne vklapljajte, dokler
ni popolnoma nameščen. Zaradi vaše varnosti je
treba sušilni stroj namestiti pravilno. Če imate
kakršne koli dvome o nameščanju stroja,
pokličite pooblaščeni servis, kjer vam bodo z
veseljem svetovali.
Nastavitev Nivelirnih Nog
Ko boste stroj postavili
na želeno mesto, je
treba nastaviti še
nivelirne noge, da stroj
stoji vodoravno.
Nastavite vse štiri
nivelirne noge tako, da
stroj stoji trdno in
vodoravno.
SL 35
KOMPLET Z ODTOČNO CEVJO: NAVODILA ZA NAMESTITEV
Da bi se izognili praznjenju posode za vodo po
vsakem sušilnem ciklu, lahko vodo, ki se
normalno zbira med sušilnim ciklom, izpustite
neposredno v odtok za odpadno vodo (odtočni
Sistem je enak kot pri kuhinjskih koritih).
Povezava z odtokom za površinske vode je
prepovedana v skladu z zakonodajo o
varovanju voda. Napeljava za odtok odpadne
vode mora biti zraven sušilnika za perilo.
OPOZORILO! Preden začnete kakršna
koli dela, izklopite sušilnik za perilo in iztaknite
vtič iz vtičnice.
Komplet je sestavljen: 1 gumijasto cev, 1 raven
konektor za gumijasto cev, 1 objemko in
plastično vezico.
Vgradite komplet po naslednjem postopku:
1.Odvijte in odstranite
3 vijake na hrbtnem
delu stroja ter pri tem
pustite hrbtni pokrov
na mestu.
2. Odstranite zadnjo
obrobo pokrova in sam
pokrov, tako da ga
pazljivo potisnete, da
zdrsi proti zadnjemu
delu stroja.
3. Posoda za odpadno
vodo je na desni strani
stroja (gledano od
zadaj). Siva gumijasta
cev se poveže z
mostičkom nad
posodo za vodo. S
kleščami odstranite
cev skupaj z objemko z
mostička.
4. Povlecite gumijasto
cev s priključka na
mostičku.
5. S priloženim
priključkom in
objemkami priključite
gumijasto cev iz
kompleta na cev, ki ste
jo odstranili s priključka
na mostičku.
SL 36
6. Snemite pokrov
posode za vodo z
zadnjega dela stroja,
tako da odstranite dva
vijaka in odpnete
pokrov.
7. Odstranite jeziček
na strani in zamenjajte
pokrov na stroju. Nato
ponovno namestite
vijake. Sedaj lahko
vidite luknjo na hrbtni
strani omarice poleg
pokrova.
8. Napeljite odtočno
cev skozi luknjo v
omarici.
9. Poiščite sivo
gumijasto cev v izrezu
predala in s plastično
vezico pritrdite cevni
sklop na mostiček.
10. Pazljivo potisnite
hrbtni pokrov nazaj na
mesto, pri tem pa
pazite, da gumijaste
cevi ne priprete. Nato
ponovno namestite
zadnjo obrobo pokrova
s tremi vijaki.
11. Priključite novo
odtočno gumijasto cev
na cev za odpadno
vodo. Prepričajte se,
da se med. Potiskanjem sušilnika za
perilo na njegovo
mesto nova gumijasta
cev ne zaplete. Pri
napeljavi nove zunanje
gumijaste cevi je treba
slediti navodilom, kot je
to prikazano.
12. Stroj priključite na
električno omrežje.
13. Ko izpraznite
posodo za odpadno
vodo, vključite stroj s
pritiskom na gumb ON
(pri elektronskih
modelih pritisnite še
START), da poženete
program sušenja.
PRIPRAVA NA POLNJENJE STROJA
Preden prvič uporabite sušilni stroj:
● Skrbno preberite navodila za uporabo;
● Odstranite vse dele, ki so v bobnu;
● Z vlažno krpo obrišite notranjost bobna in vrat, da
odstranite prah, ki se je nabral med prevozom.
Priprava Oblačil
Prepričajte se, ali je perilo, ki ga nameravate dati v
sušilni stroj, primerno za strojno sušenje; to je
prikazano na opozorilnih simbolih na vsakem kosu
perila.
Preverite, ali so vsi gumbi, zadrge in podobno zapeti
in ali so žepi prazni. Obrnite oblačila navzven.
Oblačila položite v boben narahlo (ne natrpajte jih),
da se ne bodo prepletla.
V Sušilnem Stroju ne Sušite:
Svile, občutljivega blaga, najlonskih nogavic,
občutljivih vezenin, blaga s kovinskimi okraski,
oblačil z dodatki iż PVC ali usnja, športnih čevljev in
velikih kosov, kot so spalne vreče ipd.
POMEMBNO: Ne sušite predmetov, ki so
bili obdelani s tekočinami za kemično čiščenje,
ali gumijastih oblačil (nevarnost požara ali
eksplozije).
Zadnjih 15 minut (približno) se perilo vedno
obrača v hladnem zraku.
Bobna ne smete preveč napolniti, saj lahko
z velikimi kosi, ko so mokri, prekoračite najvišjo
dovoljeno težo perila (na primer: spalne vreče,
prešite odeje).
Varčevanje z Energijo
V sušilni stroj polagajte le perilo, ki ste ga strojno ali
ročno oželi. Čim bolj suho je perilo, tem krajši bo čas
sušenja, kar pomeni manjšo porabo električne
energije.
VEDNO
● Sušite čim bolj napolnjen stroj, tako boste prihranili
čas in električno energijo.
● Pred sušenjem preverite, ali je filter očiščen.
NIKOLI
● Ne prekoračite najvišje dovoljene teže; s tem bi
porabili več časa in električne energije.
● Ne napolnite stroja s tako mokrimi oblačili, da z njih
še kaplja; tako bi lahko stroj poškodovali.
Maksimalna Teža za Sušenje
● Bombaž največ
● Sintetika največ
8 kg
4 kg
Perilo Sortirajte po Naslednjem Zaporedju:
● Po etiketah na oblačilih
Najdete jih na ovratniku ali notranjem šivu:
Primerno za sušenje v sušilnem stroju.
..
Sušenje v stroju pri visokih temperaturah.
.
Sušenje v stroju le pri nizkih temperaturah.
Ne sušite v sušilnem stroju.
Če oblačilo nima etikete, ga raje ne sušite Strojno.
● Po količini in gostoti blaga
Kadar koli je količina materiala za sušenje večja od
zmogljivosti sušilnega stroja, razdelite obleke po
debelini materiala (npr. ločite brisače od tankega
spodnjega perila).
● Po vrsti materiala
Bombažne/lanene tkanine: brisače, bombažni jersey,
posteljno in namizno perilo.
Sintetika: bluze, srajce, delovne halje itd., Izdelane iz
poliestra ali poliamida; velja tudi za mešanice iz
bombaža in sintetike.
● Po tem, kako močno jih želite posušiti Razdelite na:
popolnoma suho, primerno za zlaganje itd. Za
občutljivo blago pritisnite tipko , da izberete sušenje
pri nizki temperaturi.
Navodila za Sušenje
Standardni program SUHO BREZ LIKANJA (
) je
energijsko najbolj učinkovit in najbolj primeren za
sušenje običajno mokrega perila iz bombaža. V
spodnji razpredelnici so navedeni orientacijski
podatki o času in porabi energije pri osnovnih
programih sušenja..
PROGRAM
NAJVEČJA DOVOLJENA
KOLIČINA
Perfect Home
POLN STROJ
Za v omaro
POLN STROJ
Suho brez likanja
POLN STROJ
Suho brez likanja
POLOVIČNA KOLIČINA
Za likanje
POLN STROJ
PORABA ENERGIJE
(kWh)
3,40
2,93
2,66
1,35
2,13
TRAJANJE
(Min)
250
210
149
115
159
Poraba električne energije v stanju pripravljenosti
0,75 W
Poraba električne energije v stanju izključenosti
0,20 W
SL 37
TIPKE ZA UPRAVLJANJE IN SIGNALNE LUČKE
Gump za
Programe
Indikator za
vodo
Tipka za nast
časa
Tipka za
Zamik
Indikator za filter
Tipka za
Akril-sint
Prikaz avto
Programa
Tipka proti
mečkanju
Tipka
Start/Pavza
Stikalna Plošča In Kontrolne Lučke
Gumb za izbiranje programov – Izberite ustrezen program
Tipka za nastavljanje časa
- Omogoča spreminjanje trajanja z gumbom izbranega programa.
Na voljo je samo, če so izbrani programi Mix&Dry, Srajce in časovni programi
Tipka za zamik vklopa
- Uporabniku omogoča, da zamakne začetek izvajanja programa
sušenja (gl. podrobnejši opis v navodilih)
Tipka za akril/sintetiko - S pritiskom na to tipko izberete vrsto tkanine, ki jo želite posušiti – akril
ali sintetična vlakna. Če je izbrana ta opcija, se osvetli indikator.
Tipka za preprečevanje mečkanja
- Uporabniku omogoča vklop faze za preprečevanje
mečkanja po zaključenem programu sušenja
Tipka start/pavza
- S pritiskom na to tipko zaženete izbrani program ali pa ga začasno
prekinete.
Indikator za vzdrževanje filtra
- Osvetli se, ko je treba očistiti filter.
Indikator polne posode za vodo
- Osvetli se, ko je posoda za vodo polna.
Prikaz samodejnega programa – Če ste izbrali samodejni program, se osvetli ustrezen indikator
Osvežitev
- Indikator se osvetli, ko začne program izvajati fazo ohlajanja.
SELECTING THE PROGRAMME
SL 38
Sušilni stroj Sensor Dry vam ponuja veliko možnosti sušenja
perila za vse okoliščine.V spodnji razpredelnici so našteti
programi in njihove funkcije.
Opomba: Tipalo morda ne bo zaznalo majhnih količin majhnih
kosov tekstila v stroju. Za majhne količine perila, Ločene kose ali
tkanine, ki so že bile delno posušene, raje uporabite programe s
časovnikom. Program nastavite na čas med 30 in 75 minutami,
odvisno od količine perila in tega, kako močno ga želite posušiti,
izberite še visoko ali nizko temperaturo, primerno za vrsto
tkanine.
Če tipalo perila v stroju ne zazna, bo sušilni stroj deloval le 10
minut, nato se bo začel cikel sušenja s hladnim zrakom.
Če je perila preveč ali če je premokro za strojno sušenje, bo
sušilni stroj po 185 minutah samodejno začel cikel Hladnega
sušenja.
IZBIRA PROGRAMA
PROGRAMME
Perfect Home
Za v omaro
Suho brez likanja
Za likanje
No Crease
Osvežitev volne
IDEALNO ZA
Perilo, ki ga želite posušiti do konca, npr. brisače, kopalne halje, prti, rjuhe.
Program traja pribl. 3 ure.
Perilo, ki ga želite zložiti in shraniti brez likanja, npr. srajce iz mešanice
vlaken, nogavice, otroška oblačila. Program traja pribl. 2 uri 45 minut.
Perilo, ki ga ni potrebno likati, ampak ga po sušenju obesite na obešalnik.
Program traja pribl. 2 uri in 30 minut.
Perilo ostane nekoliko vlažno, kar olajša likanje. Program traja pribl. 1 uro
in 50 minut.
Perilo, ki ga želite samo osvežiti. Primerno za perilo, ki je bilo nekaj časa
shranjeno v košu za likanje, ali ste ga sušili na prostem ali na radiatorju.
Program vsebuje posebno fazo za odpravljanje gub iz perila, ki sprošča
vlakna in olajša likanje. Program traja 9 minut, sledi 3-minutna faza
ohlajanja.
Za mehčanje volnenega perila ali osvežitev po dolgotrajni hrambi v omari.
Program traja 12 minut.
Mix&Dry
Za hkratno sušenje perila iz bombaža in sintetike. Zagotavlja prihranek na
času, saj vam ni potrebno ločevati perila in sušiti vsake vrste posebej.
Program traja pribl. 2 uri (največja dovoljena količina 4 kg).
Srajce
Za sušenje srajc iz bombaža in sintetičnih tkanin. Program traja 1 uro za 2 kg
srajc iz sintetičnih tkanin (pribl. 10 srajc), 1 uro 20 minut za 3 kg srajc iz
bombaža (pribl. 10 srajc).
Hitri 40 Min.
Stroj srajce posuši in osveži, tako da so pripravljene za ponovno uporabo, v
samo 40 minutah. Senzorski sistem ndazira temperaturo in zagotavlja
vsakič najboljše rezultate. Za največ 2 kg perila.
Časovni program
Če želite, lahko sami določite trajanje programa sušenja - od 30 do 180
minut. Če nastavite "20 min", poteka sušenje s hladnim zrakom, kar je
idealno za osvežitev perila in odstranitev morebitnega vonja.
Jeans
Przeznaczony do suszenia ubrań jeans’owych ( 5 sztuk lub max 4kg).
Program trwa około 2 godzin – jego długość jest uzależniona od wielkości
załadunku i stopnia odwirowania ubrań podczas prania. Program JEANS
może być używany
także do suszenia
innych ubrań, ale tylko
bawełnianych (100%bawełny); proszę nie mieszać ubrań o różnych
kolorach ani nie suszyć ubrań z haftami lub innymi ozdobami.
SL 39
VRATA IN FILTER
Odpiranje Vrat
Čiščenje filtra kondenzatorja
Za odpiranje vrat
potegnite ročico.
Za ponovni zagon
sušilnega stroja
zaprite vrata in
pritisnite tipko
OPOZORILO! Med delovanjem sušilnega
stroja se lahko boben in vrata ZELO
SEGREJEJO! Sušilnega stroja nikoli ne
zaustavljajte pred koncem sušilnega cikla,
razen če nameravate hitro odstraniti vse perilo,
tako da se lahko Stroj ohladi.
Filter
POMEMBNO:Zaradi zagotavljanja in
ohranjanja učinkovitosti sušilnega stroja pred
vsakim sušenjem Preverite, ali je filter za puh
čist.
1.Potegnite filter
navzgor.
2. Filter odprite, kot je
prikazano.
3. Z mehko krtačko ali
konicami prstov
narahlo odstranite
nitke.
4. Filter zaprite nazaj in
ga vstavite nazaj na
njegovo Mesto.
1.Snemite podnožje.
2. Obrnite jezička v levo
in izvlecite sprednji
pokrov.
3. Nežno izvlecite okvir
filtra in odstranite prah
in delce tkanine s filtra,
uporabite krpo. Filtra ne
čistite z vodo!
4. Nežno odstranite
gobico in jo nato
izperite pod tekočo
vodo; pri tem jo
obračajte, da z nje
odstranite prah in delce
tkanine.
5. Znova namestite
sprednji pokrov, pri tem
pa pazite, da je pravilno
nameščen (gl.
puščico!). Zaprite
jezička, ki ga
pridržujeta na mestu.
Signalna Lučka za Stanje Filtra
se prižge, ko je
treba filter očistiti.
6.Spet namestite
podnožje..
Če se perilo ne suši
pravilno, preverite, da
ni filter Zamašen.
Nepoužívajte vodu a na čistenie filtra.
SL 40
KONDENZATOR
Pomembno: Pred čiščenjem kondenzatorja vedno
izklopite stroj in izvlecite kabel iz vtičnice.
Da ohranite učinkovitost sušilnega stroja, redno
preverjajte, Ali je kondenzator očiščen.
POSODA ZA VODO
Voda, ki izhlapeva iz perila med sušenjem, se
zbira v zbiralni posodi, ki jo najdete na dnu
sušilnega stroja.
Ko se posoda napolni, se prižge signalna lučka
na nadzorni plošči; to pomeni, da posodo
MORATE izprazniti.
Priporočamo vam, da posodo izpraznite po
vsakem sušenju.
OPOMBA: Med prvimi nekaj cikli sušenja v
novem stroju se bo nabralo zelo malo vode, saj
se najprej napolni notranja posoda.
Praznjenje Posode Za Vodo
1.Predal nežno
potegnite ven, dokler
ga ne izvlečete v celoti.
Posodo podpirajte z
obema rokama. Ko je
posoda polna, tehta
namreč približno 4 kg.
2.Zbiralnik vode
nagnite in tako skozi
zadnjo odprtino izlijte
vodo. Ko je prazen,
zbiralnik potisnite nazaj
na njegovo mesto.
NAZAJ NA MESTO GA
PRITISNITE ČVRSTO.
3.Program ponovno
zaženete s pritiskom na
tipko
.
OPOMBA: Če imate v
bližini sušilnega stroja
možnost priklopa na
odtok, lahko uporabite
komplet za odtok
vodein tako vodo, ki se
zbira med sušenjem,
sproti odvajate v odtok.
Tako vam ne bo več
treba prazniti posode.
Vsa navodila za
sestavljanje kompleta
boste našli v njegovi
vrečki.
UPORABA SUŠILNEGA STROJA
1.Odprite vrata in vložite perilo v boben. Pazite,
da perilo ne ovira zapiranje vrat.
2.Nežno zaprite vrata – potisnite jih proti stroju,
dokler se slišno ne zaprejo.
3.Obrnite gumb za izbiranje programov na
ustrezen program (gl. razpredelnico
programov).
4.Če sušite perilo iz sintetike, akrila ali
občutljivo perilo, pritisnite tudi na tipko
, da
zmanjšate temperaturo. Ko je nastavljena nižja
temperatura sušenja, je osvetljena ustrezna
kontrolna lučka. Če si premislite, lahko prvih
nekaj minut izvajanuja programa temperaturo
ponovno zvišate s ponovnim pritiskom na
tipko
. Če to želite storiti pozneje, morate
stroj najprej resetirati.
5.Pritisnite na tipko
. Sušilni stroj začne
izvajati izbrani program, kontrolna lučka nad
tipko je stalno osvetljena.
6.Če med izvajanjem programa odprete vrata,
da bi preverili suhost perila, po zapiranju vrat
ponovno zaženete program s pritiskom na
tipko.
7.Proti koncu programa opravi stroj fazo
ohlajanja – perilo se med obračanjem bobna
ohlaja s pomočjo hladnega zraka.
8.Ko je program zaključen, se na
prikazovalniku prikaže indikator END (Konec).
9.Po zaključku programa se boben občasno
zavrti, kar prepreči pretirano mečkanje perila.
Ta faza poteka, dokler ne izklopite stroja oz.
dokler ne odprete vrat.
Med izvajanjem samodejnih programov ne
odpirajte vrat stroja, saj bo le v tem primeru
možno pravilno sušenje.
SL 41
Obratovanje
Časovni Zamik Vklopa
Funkcija za časovni zamik vklopa uporabniku omogoča, da zamakne začetek sušenja za od 1 do
24 ur.
Ko izberete to funkcijo, se na prikazovalniku prikaže vrednost 1 ure, z vsakim pritiskom na tipko pa
se časovni zamik poveča v korakih po 1 uro.
Program zaženete s pritiskom na tipko
; ko poteče nastavljeni čas, stroj začne izvajati izbrani
program. Utripanje kontrolne lučke opozarja, da je nastavljen časovni zamik vklopa.
Preklic In Resetiranje Programa
Če želite preklicati izbrani program, 3 sekunde pritiskajte na tipko
CONTROL utripa vrednost 0:00, kar pomeni, da je program resetiran.
. Na prikazovalniku TIME
ČIŠČENJE IN VZDRŽEVANJE
Čiščenje Sušilnega Stroja
● Očistite filter in izpraznite posodo za vodo po
vsakem sušenju.
● Redno čistite kondenzator.
● Po vsaki uporabi obrišite notranjost bobna in
pustite vrata nekaj časa odprta, da zrak kroži
po bobnu in ga posuši.
● Zunanjost stroja in vrata obrišite z mehko
krpo.
● NE UPORABLJAJTE grobih gobic, krpic ali
čistil.
● Da bi preprečili nabiranje delcev tkanin in
oteženo odpiranje/zapiranje vrat po vsakem
zaključenem programu sušenja obrišite
notranjo stran vrat in tesnilo z vlažno krpo.
OPOZORILO! Boben, vrata in perilo so
lahko zelo vroči!
SL 42
Tehnični Podatki
Prostornina bobna
Največja obremenitev
Višina
Širina
Globina
Nalepka o energetski varčnosti
115 litrov
8 kg
85 cm
60 cm
60 cm
A+
Information for Test Laboratory
Program EN 61121
-Bombaž, Suho
-Bombaž, za likanje
-Um. tkanine
Ustrezni program
-Suho brez likanja
-Za likanje
-Suho brez likanja
+Sintetika
POMEMBNO: Preden začnete stroj čistiti,
ga vedno ugasnite in izvlecite električni vtič iz
vtičnice.
Podatke o električnih delih najdete na
nalepki, ki je na sprednji strani ohišja sušilnega
stroja (ko so vrata odprta).
ODPRAVLJANJE NAPAK
Kaj je Lahko Vzrok, da ...
Napake, ki jih lahko odpravite sami
Preden pokličete pooblaščeni servis za nasvet,
vas prosimo, da pregledate ta seznam. Če bi se
izkazalo, da stroj dela ali da je bil nepravilno
uporabljen ali nameščen, vam bomo morali
storitve servisa zaračunati. Če težave ne
morete odpraviti z nasveti po tem seznamu,
prosimo, pokličite pooblaščeni servis, saj vam
bodo morda lahko pomagali po telefonu.
Če sušenje traja predolgo oz. če oblačila
niso dovolj suha:
● Ste izbrali pravi program/čas sušenja?
● So bile obleke preveč mokre? Ste oblačila
temeljito ročno ali strojno oželi?
● Je treba očistiti filter?
● Je treba očistiti kondenzator?
● Je sušilni stroj preobremenjen?
● Ali kaj ovira dno sušilnega stroja ali dovodne
in odvodne odprtine?
● Ste pri prejšnjem ciklu izbrali možnost
?
Sušilni stroj ne deluje ...
● Ali je stroj pod napetostjo? V vtičnico
priključite drugo napravo, da preverite, ali
vtičnica deluje.
● Je vtič pravilno vključen v vtičnico?
● Je prišlo do napake pri oskrbi z električnim
tokom?
● Je pregorela varovalka?
● So vrata pravilno zaprta?
● Ali je sušilni stroj vklopljen in vključen v
vtičnico?
● Ste izbrali čas sušenja ali program sušenja?
● Ste po odprtju vrat stroj vklopili ponovno?
● Je stroj prenehal delovati, ker je posoda za
zbiranje vode polna in jo je treba izprazniti?
POMOČ STRANKAM
Če vaš sušilni stroj še vedno ne dela niti potem,
ko ste preverili vse točke na tem seznamu, vas
prosimo, da za nasvet pokličete pooblaščeni
servis. Morda vam bodo lahko pomagali po
telefonu ali pa se boste dogovorili za primeren
čas serviserjevega klica skladno z določili
garancije. Vendar pa vam lahko v naslednjih
primerih servisne storitve tudi zaračunamo:
● če stroj deluje;
● če stroj ni bil nameščen v skladu z navodili za
Namestitev;
●če ste stroj uporabljali narobe.
Nadomestni Deli
Vedno uporabljajte originalne nadomestne
dele, ki so na voljo pri pooblaščenem servisu.
Pooblaščeni Servis
Če potrebujete servisne storitve ali popravilo
stroja, pokličite najbližji pooblaščeni servis.
Sušilni stroj je zelo glasen ...
● Izključite stroj in za nasvet pokličite
pooblaščeni servis.
Signalna lučka
je prižgana ...
● Je treba očistiti filter?
● Je treba očistiti kondenzator?
Izdelovalec ne odgovarja za morebitne
tiskarske napake v tem priročniku.
Proizvajalec si pridržuje pravico do
primernih sprememb svojih naprav, tako da
ne spreminja njihovih osnovnih značilnosti.
Signalna lučka
je prižgana ...
● Je treba izprazniti posodo za vodo?
SL 43
INDEX
Introduction
Informations Sur La Livraison
Rappels De Sécurité
Utilisation
Installation
Le Linge
Ventilation
Protection De L'environnement
Service Gias
Installation
Besoins Électriques
Ajustement Des Pieds
Kit Tuyau D’évacuation : Instructions de Montage
Préparation De La Charge
Préparation Des Vêtements
Tri De La Charge
Ne Séchez Pas En Machine
Économies D’énergie
Guide De Séchage
Commandes Et Indicateurs
Sélection Du Programme
Porte Et Filtre
Ouverture De La Porte
Filtre
Indicateur Entretien Filtre
Réservoir D’eau
Pour Retirer Le Réservoir
Condenseur
Pour Retirer Le Condenseur
Fonctionnement
Départ Différé
Annulation Et Réinitialisation Du Programme
Nettoyage Et Entretien De Routine
Nettoyage Du Sèche-linge
Spécifications Techniques
Dépistage De Pannes
Service Clientèle
Pièces De Rechange
Service Gias
FR 44
45
45
45
46
47
47
48
49
49
49
49
49
50
51
51
51
51
51
51
52
53
54
54
54
54
55
55
55
55
56
56
56
56
56
56
57
57
67
57
INTRODUCTION
Veuillez lire et suivre ces instructions avec soin et utiliser la machine en conséquence. Ce livret
contient des instructions importantes sur la sécurité d'utilisation, l'installation et l'entretien de la
machine, ainsi que des conseils utiles pour obtenir les meilleurs résultats possibles lors de son
utilisation. Conservez toute la documentation dans un endroit sûr pour pouvoir vous y reporter à une
date ultérieure ou la transmettre aux prochains propriétaires
Informations Sur La Livraison
Vérifiez que les articles suivants ont bien été
livrés avec l’appareil :
● Manuel d'utilisation
● Carte de garantie
● Étiquette d'énergie
Vérifiez que la machine ne s'est pas
détériorée en transit. Si c'est le cas, contactez
GIAS pour une opération de dépannage.
Le non-respect de ces instructions peut
compromettre la sécurité de votre appareil. Un
appel de service peut vous être facturé si la
défaillance de votre appareil est causée par une
mauvaise utilisation.
RAPPELS DE SÉCURITÉ
Utilisation
● Cet appareil peut être utilisé par des enfants âgés de 8 ans et plus, ou
des personnes présentant un handicap physique, moteur ou mental, et
manquant de connaissance sur l’utilisation de l’appareil, si elles sont sous
la surveillance d’une personne, donnant des instructions pour une
utilisation en toute sécurité de l’appareil.
Les enfants ne doivent pas jouer avec l'appareil.
Le nettoyage et l’entretien de l’appareil ne doit pas être fait par des
enfants sans surveillance d’un adulte.
● ATTENTION La mauvaise utilisation d’un sèche-linge risque de causer
un incendie.
● Le produit est conçu pour être utilisé dans un foyer domestique, comme
- Le coin cuisine dans des magasins ou des lieux de travail,
- Employés et clients dans un hôtel, un motel ou résidence de ce type,
- Dans des bed and breakfast,
- Service de stock ou similaire, mais pas pour de la vente au détail.
La durée de vie de l’appareil peut être réduite ou la garantie du fabricant
annulée si l’appareil n’est pas utilisée correctement.
Tout dommage ou perte résultant d'un usage qui n'est pas conforme à un
usage domestique (même s'ils sont situés dans un environnement
domestique ou un ménage) ne sera pas acceptée par le fabricant dans
toute la mesure permise par la loi.
● Cette machine est conçue uniquement pour usage domestique, à savoir
pour sécher le linge domestique et les vêtements.
● Cette machine ne doit être utilisée que pour l’ emploi auquel elle est
destinée et qui est décrit dans ce manuel.
FR 45
INTRODUCTION
RAPPELS DE SÉCURITÉ
Utilisation
Assurez-vous d'avoir bien compris les instructions d'installation et
d'utilisation avant de faire fonctionner la machine.
● Ne touchez pas la machine si vous avez les mains ou les pieds
mouillés ou humides.
● Ne vous appuyez pas sur la porte lorsque vous chargez la machine et
n'utilisez pas la porte pour soulever ou déplacer la machine.
● Ne laissez pas des enfants jouer avec la machine ou avec ses
commandes.
● ATTENTION N’ utilisez pas cette machine si le filtre à peluches n’ est
pas en place ou s’il est endommagé ; les peluches risquent en effet de
s’allumer.
● ATTENTION L’ augmentation de température pendant le
fonctionnement du sèche-linge peut être supérieure à 60°C là où se
trouve le symbole de surface chaude .
● Débranchez du courant de secteur. Retirez toujours la prise avant de
nettoyer la machine.
● Cessez d’utiliser la machine si elle semble défectueuse.
● Veillez à ce que les peluches ne puissent pas s’accumuler sur le sol, à l’
extérieur de la machine.
● Il se peut que l’intérieur du tambour soit très chaud. Veillez à ce que le
sèche-linge termine
son cycle de refroidissement avant d’en sortir le linge.
● La dernière partie du cycle s'effectue à froid (cycle de refroidissement)
pour garantir la préservation des textiles.
● Charge maximum pour le séchage: se référer à l'étiquette énergie 8kg
● Le sèche-linge ne doit pas être utilisé si le lavage a été effectué avec
des produits chimiques.
● AVERTISSEMENT: Ne jamais arrêter le sèche-linge avant la fin du
cycle de séchage à condition que les éléments sont rétirés rapidement
et répartis de telle sorte que la chaleur puisse se dissiper.
Installez l'arrière de l'appareil près d'un mur ou d'une surface verticale.
FR 46
INTRODUCTION
RAPPELS DE SÉCURITÉ
Installation
● Vérifiez que la machine ne
présente aucun signe visible de
détérioration avant de l’utiliser. En
cas de détérioration, assurez-vous
de ne pas l’utiliser et de contacter
le service GIAS.
● N'utilisez pas d'adaptateurs, de
multi-prises et/ou de rallonges.
● Veillez à ne pas installer le
sèche-linge contre des rideaux et
assurez-vous que rien ne pourra
tomber ou s’accumuler derrière le
sèche-linge. ● Cet appareil ne doit
pas être installé derrière une porte
verrouillable, une porte
coulissante ou une porté munie de
gonds placée en face de la porte
du sèche-linge.
Le Linge
● Ne séchez pas des vêtements
non lavés dans le sèche-linge.
● ATTENTION NE séchez PAS
les tissus qui ont été traités avec
des liquides de nettoyage à sec.
● ATTENTION Quand elles sont
chauffées, les mousses
alvéolaires peuvent dans certains
cas brûler par combustion spontanée. Les articles tels que le
caoutchouc mousse (mousse de
latex), les bonnets de douche, le
textile imperméable, les articles
caoutchoutés et les vêtements ou
coussins rembourrés de
caoutchouc mousse NE
DOIVENT.
PAS être séchés dans le sèchelinge.
● Reportez-vous toujours aux
étiquettes d’entretien du linge pour
vérifier le mode de séchage
recommandé.
● Les vêtements doivent être
essorés en machine ou à la main
avant d’être placés dans le sèchelinge. Les vêtements qui
dégoulinent NE DOIVENT PAS
être mis dans le sèche-linge.
● Enlevez les briquets et les
allumettes des poches et veillez à
ne JAMAIS utiliser de liquides
inflammables à proximité de la
machine.
● Les rideaux en fibres de verre ne
doivent JAMAIS être placés dans
cette machine. La contamination
d’autres vêtements par les fibres
de verre peut entraîner des
irritations de la peau.
● Les articles qui ont été souillés
par des substances telles que huile
de cuisson, acétone, alcool,
pétrole, kérosène, produit antitaches, térébenthine, cire et
décapant pour cire doivent être
lavés à l'eau chaude avec une
quantité supplémentaire de détergent avant d'être séchés dans le
sèche-linge.
● Les agents adoucissants, et
autres produits similaires, doivent
être utilisés conformément aux
instructions fournies par le
fabricant du produit.
FR 47
INTRODUCTION
RAPPELS DE SÉCURITÉ
VENTILATION
La pièce où se trouve le sèche-linge
doit avoir une ventilation adéquate de
manière à ce que les gaz des
appareils qui brûlent d’autres
combustibles, y compris les
cheminées, ne soient pas attirés
dans la pièce pendant que le sèchelinge est en marche
● .Installez l'arrière de l'appareil près
d'un mur ou d'une surface verticale.
● Il doit y avoir un espace minimum
de 12 mm entre la machine et
quelconque obstacle. L'entrée et la
sortie d'air doivent être dégagées.
Pour assurer une ventilation
adéquate, l'espace entre le bas de la
machine et le sol ne doit pas être
obstrué.
● L’ air d’ échappement ne doit pas
être évacué par un conduit qui est
également utilisé pour évacuer les
fumées d’échappement d’appareils
qui brûlent du gaz ou d’autres
combustibles.
● Vérifiez régulièrement que l’air peut
circuler librement autour du sèchelinge.
● Contrôlez régulièrement le filtre à
peluches après usage et nettoyez-le
si nécessaire.
● Veillez à ce que rien ne puisse
tomber ou s’accumuler entre les
côtés et l’arrière du sèchelinge, afin
de ne pas obstruer l'entrée et la sortie
d’air.
FR 48
● N’installez JAMAIS le sèche-linge
contre des rideaux.
● Dans le cas ou le sèche-linge est
positionné en colonne au dessus
d'une machine à laver, un kit de
superposition approprié doit être
utilisé, selon la configuration
suivante.
Kit Mod 35100019: pour un lave
linge avec une profondeur min. 49
cm
Kit Mod 35900120: pour un lave
linge avec une profondeur min. 51
cm
Le kit de superposition est
disponible auprès du service pièces
détachées. Les instructions pour
l'installation de l'appareil et de ses
accessoires sont fournis avec le kit.
Important : Pendant le transport, l’appareil doit être
stocké dans sa position normale d’utilisation. Si
nécessaire, l’appareil peut être incliné comme montré
ci-dessous.
Attention : Si le produit est transporté différemment,
attendez au moins 4 heures avant d’allumer
l’appareil, ceci afin que le gaz liquide retourne dans le
compresseur. En cas de non respect de cette
procédure, le compresseur pourrait être endommagé
INSTALLATION
Protection De L'environnement
● Tous les matériaux de conditionnement
utilisés sont écologiques et recyclables.
Veuillez les éliminer de manière écologique.
Votre municipalité pourra vous donner le détail
exact des méthodes d’élimination en vigueur.
● Pour assurer la sécurité lors de l’élimination
d’un vieux sèche-linge, veuillez débrancher la
fiche du courant de secteur, couper le câble
d’alimentation et le détruire avec la fiche. Pour
empêcher que les enfants ne s’enfer-ment
dans la machine, cassez les charnières de la
porte ou son dispositif de verrouillage.
Directive Européenne 2002/96/CE
Cet appareil est commercialisé en
accord avec la directive européenne
2002/96/CE sur les déchets des
équipements électriques et
électroniques (DEEE).
Besoins Électriques
Les sèche-linges sont prévues pour une
tension monophasée de 220-240 V, 50 Hz.
Vérifiez que la tension nominale du circuit
d'alimentation est réglée sur 6 A minimum.
L’électricité peut être extrêmement
dangereuse.
Cet appareil doit être mis à la terre.
La prise de courant et la fiche de la machine
doivent être du même type.
N'utilisez pas de multi-prises et/ou de
rallonges.
La fiche doit être accessible pour
débrancher l’appareil une fois qu’il a été
installé.
La machine est conforme aux directives
européennes 2004/108/EC, 2006/95/EC et à
En vous assurant que ce produit est correc- leurs modifications ultérieures.
tement recyclé, vous participez à la prévention
des conséquences négatives sur
l’environnement et la santé publique qui pourrait
Un appel de service peut vous être facturé
être causé par une mise au rebut inappropriée
si la défaillance de votre appareil est causée
de ce produit. Le symbole sur ce produit indique
par une installation incorrecte.
qu’il ne doit pas être traité comme un déchet
ménager. Il doit être rapporté jusqu’à un point de
Si le cordon électrique de cet appareil
recyclage des déchets électriques et
électroniques. La collecte de ce produit doit se estendommagé, il doit être remplacé par un
faire en accord avec les réglementations cordon spécial qui est UNIQUEMENT disponible
environnementales concernant la mise au rebut auprès du service des pièces de rechange. Il doit
être installé par une personne compétente.
de ce type de déchets. Pour plus d’information
au sujet du traitement, de la collecte et du
Ne branchez pas l'appareil et ne mettez pas
recyclage de ce produit, merci de contacter votre
mairie, votre centre de traitement des déchets ou en marche l'interrupteur de secteur tant que
l'installation n'est pas terminée. Par mesure de
le magasin où vous avez acheté ce produit.
sécurité, veillez à installer ce sèche-linge
correctement. En cas de doute concernant son
installation, veuillez demander conseil à GIAS
● Pour veiller au fonctionnement efficace et Service.
Service GIAS
sans risque de cet appareil, nous vous
recommandons de faire exclusivement appel à
un technicien GIAS agréé pour son entretien
ou sa réparation éventuelle.
Si l’appareil ne fonctionne pas correctement
ou s’il tombe en panne, mettez-le à l’arrêt et
débranchez-le du courant de secteur. Consultez
le service GIAS pour prévoir une éventuelle
réparation.
Ajustement Des Pieds
Lorsque la machine est
en place, les pieds
doivent être ajustés
pour mettre la machine
de niveau.
FR 49
KIT TUYAU D’ÉVACUATION : INSTRUCTIONS DE MONTAGE
Afin d’éviter d’avoir à vider le réservoir d’eau après
chaque cycle de séchage, l’eau qui est
normalement recueillie pendant le cycle de
séchage peut être évacuée directement par un
tuyau d’évacuation d’eaux sales (le même
système de vidange que celui des éviers
domestiques). Les arrêtés municipaux en matière
d’évacuation d’eau interdisent la connexion à un
égout d’eau de surface. Le système de vidange
d’eaux sales doit être placé à proximité du sèchelinge.
ATTENTION ! Éteignez la machine et
retirez la prise du sèche-linge de l’alimentation
électrique secteur avant d’entreprendre tout
travail.
Le kit est composé: 1 tuyau, 1 connecteur de tuyau
droit, 1 étrier de tuyau et une attache en plastique.
Installez le Kit En Suivant les Instructions ci-après :
1.Dévissez et retirez les
trois vis placées à
l’arrière de la machine
en conservant la
garniture du plan de
travail.
2. Retirez la garniture
arrière du plan de travail
et le plan de travail en le
faisant glisser
délicatement vers
l’arrière de la machine.
3. Le réservoir d’eaux
sales se trouve du côté
droit de la machine (vue
de l’arrière). Un tuyau
gris est branché sur le
raccord placé audessus du réservoir. À
l’aide d’une pince,
retirez l’étrier de fixation
du tuyau du raccord.
4. Retirez le tuyau du
raccord..
5. Fixez le tuyau du kit
en utilisant le
connecteur et les étriers
de tuyau fournis au
tuyau démonté du
raccord.
6. Retirez le couvercle
du réservoir de l’arrière
de la machine en
dévissant les deux vis et
en déclipsant le
couvercle.
FR 50
7. Brisez l’onglet placé
sur le côté du couvercle
et replacez le couvercle
sur la machine puis
refixez les vis. Vous
devez maintenant avoir
mis à jour un orifice à
l’arrière de l’armoire à
côté du couvercle.
8. Glissez le tuyau de
vidange par l’orifice de
l’armoire.
9. Repérez le tuyau gris
dans la découpe du
réservoir et fixez le bloc
tuyau au raccord avec
l’attache en plastique.
10. Faites glisser
délicatement le plan de
travail dans sa position
d’origine en vous
assurant que le tuyau
n’est pas coincé puis
remettez en place la
garniture arrière du plan
de travail à l’aide des
trois vis.
11 . B r a n c h e z l e
nouveau tuyau de
vidange au tuyau d’eaux
sales. Assurez-vous
que le nouveau tuyau ne
forme pas un coude
lorsque vous repoussez
le sèche-linge dans sa
position d’origine.
Assurezvous
que les directives
indiquées sont
respectées lors de la
mise en place du
nouveau tuyau externe.
12. Raccordez la
machine à l’alimentation électrique
secteur.
13. Après avoir vidé le
réservoir d’eau sale,
allumez la machine (et
appuyez sur le bouton
“MARCHE” sur les
modèles électroniques)
pour lancer le
programme de
séchage.
PRÉPARATION DE LA CHARGE
Avant d’utiliser le sèche-linge pour la première
fois :
● Veuillez lire ce manuel d’instruction en détail.
● Retirez tous les articles qui se trouvent à
l’intérieur du tambour.
● Essuyez l’intérieur du tambour et de la porte
avec un chiffon humide pour éliminer la
poussière éventuelle qui aurait pu s’y infiltrer en
transit.
Préparation Des Vêtements
Vérifiez sur les étiquettes comportant les
symboles d’entretien que le linge que vous
souhaitez sécher convient au séchage en
machine.
Vérifiez que toutes les fermetures sont fermées
et que les poches sont vides. Mettez les articles
à l’envers. Placez les vêtements en vrac dans le
tambour en veillant à ce qu’ils ne s’emmêlent
pas les uns avec les autres.
Ne séchez pas en machine :
Les lainages, la soie, les tissus délicats, les bas
de nylon, les broderies délicates, les tissus
ayant des décorations métalliques, les
vêtements avec des bordures en PVC ou en
cuir, les chaussures de sport, les articles
volumineux comme les sacs de couchage, etc.
Ne surchargez pas le tambour ; lorsqu’ils sont
mouillés, les grands articles peuvent dépasser le poids de
maximum admissible (ex : sacs de couchage, couettes).
IMPORTANT : Ne séchez pas les articles qui ont été
traités avec un liquide de nettoyage à sec ou les
vêtements en caoutchouc (risque d’incendie ou
d’explosion).
Pendant les 15 dernières minutes (approxi-mativement),
les vêtements sont toujours échés à l'air froid.
Économies D’énergie
Ne mettez que du linge essoré en machine ou à la
main dans le sèche-linge. Plus le linge est sec,
plus le temps de séchage sera court, ce qui
économisera de l’énergie.
TOUJOURS
● Essayez de sécher le poids de linge
maximum,pour économiser du temps et de
l’électricité.
● Vérifiez que le filtre est propre avant chaque
cyclede séchage.
JAMAIS
● Ne dépassez pas le poids maximum pour ne
pas gaspiller du temps ou de l’électricité.
● Ne mettez pas d'articles dégoulinant d’eau
dans le sèche-linge pour ne pas endommager
l’appareil.
Poids De Séchage Maximum
● Coton
● Synthétiques
9 kg maxi
8 kg maxi
Triez La Charge Comme Suit :
● Par symbole de soin d’entretien
Vous les trouverez sur le col ou la couture intérieure :
Convient pour séchage en machine.
..
.
Séchage à haute température.
Séchage à basse température
uniquement.
Ne séchez pas en machine.
Si le vêtement ne comporte aucune étiquette de
conseils de lavage, considérez qu'il ne convient pas
pour le séchage en machine.
● Par quantité et épaisseur
Lorsque la charge est plus importante que la
capacité du sèche-linge, séparez les vêtements
selon leur épaisseur (ex : les serviettes des
sousvêtements fins).
● Par type de tissu
Coton/toile de lin : Serviettes, jersey en coton,
linge de lit ou de table.
Synthétiques : Chemisiers, chemises, blouses etc.
en polyester ou polyamide, ainsi que pour les
mélanges de coton/synthétique.
● Par degré de séchage
Triez selon : sec pour repassage, sec pour
rangement, etc. Pour les articles délicats, appuyez
Sur le bouton Séchage Délicat pour sélectionner
une température de séchage basse.
Guide De Séchage
Le cycle normatif PRÉT À RANGER (
) est le
plus économe et le plus approprié pour le séchage
des textiles cotons. Le tableau ci-dessous vous
indique la durée approximative et la consommation
énergétique des principaux programmes de
séchage..
CYCLE
PERFECT HOME
SEC
PRÉT À RANGER
PRÉT À RANGER
PRÉT À REPASSER
CHARGE ENERGIE
(kWh)
PLEINE
3,40
PLEINE
2,93
PLEINE
2,66
1/2
1,35
2,13
PLEINE
DUREE
(Min)
250
210
149
115
159
Leistungsaufnahme im unausgeschalteten Zustand
0,75 W
Leistungsaufnahme im Aus-Zustand
0,20 W
7
FR 51
COMMANDES et INDICATEURS
Sélecteur de
programmes
Voyant entretien
filtre
Voyant vidage
réservoir d'eau
Bouton
Sélection
temps
Bouton départ
différé
L'option Séchage
Délicat
Display
Bouton
Défroissage
Bouton
Marche/Arrét
Panneau de commande et témoins indicateurs
Sélecteur de programmes: En tournant le sélecteur, il permet de choisir le programme désiré
Sélection Temps
: Permet de modifier la durée du programme choisi; il peut être utilisé pour
certains programmes uniquement .
Départ différé
: Permet de différer le départ du cycle de séchage, par exemple pour utiliser
l'appareil pendant les heures creuses (pour cela, se référer à la section dediée).
Textiles Délicats : En appuyant sur ce bouton,le voyant s'éteint
et l'indicateur délicats s'allume;
le séchage s'effectuera à températures modérées pour un meilleur soin du linge.
Défroissage
: Permet de programmer un cycle anti-plis à la fin du séchage. Le tambour en
mouvement continus évite d'alourdir le linge sec.
Ventilation
: S'allume quand le cycle est dans la phase finale de refroidissement.
Départ/Pause
: permet de lancer le programme selectionné ou de suspendre le cycle.
Programmes Automatiques : En fonction du programme choisi, les voyants s'allument (voir liste
programmes); l'indicateur ECO : indique qu'un programme à faible consommation a été choisi.
Nettoyage filtre
: Quand cet voyant s'allume, il est nécessaire de nettoyer le filtre.
Réservoir d'eau
: Quand cet voyant s'allume, il est nécessaire de vider le réservoir de l'eau de
condensation.
SÉLECTION DU PROGRAMME
Ce sèche-linge est doté d'un capteur de séchage qui
permet de sélectionner le programme préféré en fonction
du résultat de séchage désiré.
Pour les charges réduites ou les tissus pré-séchés, il est
conseillé d'utiliser un programme à durée déterminée, en
appuyant sur le bouton "Textiles Délicats" de manière à
avoir une temperature réduite à l'intérieur du tambour.
Dans le cas où le capteur ne détecte pas la présence de
linge, le séche-linge ne fonctionnera que pendant 10
minutes avant de se mettre en mode refroidissement.
Si la charge est trop importante ou trop humide, le séchelinge fontionne automatiquement pendant 3 heures avant
de se mettre en mode refroidissement.
A la fin de chaque programme, la phase de
refroidissement a toujours lieu à avec de l'air froid et dure
en moyenne 15 minutes.
FR 52
SÉLECTION DU PROGRAMME
PROGRAMME
Perfect Home
Sec
Prêt à Ranger
Prêt à repasser
Anti-Plis
Laine
Idéal Pour
Du linge que l'on veut complètement sec, par exemple les serviettes en
éponge, les peignoirs, les nappes et les draps. Durée: environ 3 heures.
Du linge qui peut être rangé sans être repassé, comme les pulls en tissus
mixtes, les chaussettes, les vêtements pour enfants. Durée: environ 2
heures et 45 minutes.
Du linge qui ne nécessite pas de repassage, mais qu'il faut suspendre à
un cintre après le séchage. Durée : 2 heures et 30 minutes.
Du linge que l'on préfère garder légèrement humide, afin de faciliter le
repassage. Durée: environ 1 heure et 50 minutes.
Du linge à rafraîchir, idéal pour du linge qui à été laissé dans le bac à linge
pendant quelques jours ou après les avoir séchés à l'extérieur ou sur des
radiateurs. Le cycle a une fonction anti-plis qui relaxe les fibres et facilite le
repassage. Durée: 9 minutes + 3 minutes de refroidissement.
Pour rendre les lainages plus doux ou pour les rafraîchir après une longue
période passée dans l'armoire. Durée: 12 minutes.
Mix & Dry
To dry mixed cotton and synthetic clothes: save time and no need to
separate the washing and dry them in different cycles. Time: around 2h (max
4 kg).
Chemises
Sécher les chemises en coton ou en fibres synthétiques. Durée: 1 heure
pour 2 Kg de chemises en fibres synthétiques (environ 10 chemises ); 1
heure et 20 minutes pour 3 Kg de chemises en coton (environ 10 chemises).
Rapide 40'
Permet d'avoir des vêtements secs, rafraîchis et prêts à porter en
seulement 40 minutes. Le capteur contrôle constamment la température
pour un meilleur résultat de séchage. Max 2 Kg de linge.
Temps
Si besoin, ce programme permet de choisir manuellement la durée de
séchage, de 30 à 180 minutes. En sélectionnant "20 minutes" on choisi un
programme à froid, idéal pour éliminer d'éventuelles odeurs.
Jeans
Pour sécher jusqu'à 4 Kg de jeans (environ 5 paires de Jeans). Le
programme dure environ 2 heures, mais la durée peut varier en fonction de
la charge et de la vitesse d'éssorage utilisée lors du cycle de lavage. Il est
conseillé d'utiliser le cycle Jeans pour les articles 100% Coton, en faisant
attention à ne pas mélanger les couleurs et à ne pas sécher les jeans ayant
des broderies et des accessoires.
FR 53
PORTE et FILTRE
Ouverture De La Porte
Tirez sur la poignée
pour ouvrir la porte.
Pour remettre le
sèche-linge en
marche, fermez la
porte et appuyez
.
ATTENTION ! Lorsque le sèche-linge est
en cours d’utilisation, il se peut que le tambour
et la porte soient TRES CHAUDS. N'arrêtez
jamais le sèche-linge avant la fin du cycle de
séchage sauf si tous les articles sont
rapidement retirés et étendus de façon à
dissiper la chaleur.
Filtre
IMPORTANT: Pour garder une efficacité
constante du sèche-linge, vérifier que le filtre
soit propre avant chaque cycle de séchage
Ne pas utiliser le sèche-linge sans le filtre. Un
filtre encrassé peut augmenter la durée de
séchage et causer des dégâts qui peuvent
entraîner des coûts de réparation importants.
1. Tirez le filtre vers le
haut.
2. Ouvrez le filtre,
comme illustré.
3. Retirez doucement
les peluches à l’aide
d’une brosse douce ou
du bout des doigts.
4. Réenclenchez le
filtre et poussez-le en
place.
Indicateur Entretien Filtre
Vérifier et nettoyer
le filtre situé dans la
porte ainsi que le
condenseur situé
derrière la plaque de
protection, en bas du
sèche-linge.
Si le linge n’est pas
sec, vérifier que le filtre
ne soit pas encrassé.
FR 54
Nettoyage du condenseur
1. Enlever la plaque de
protection
2. Tourner les deux
leviers de blocage dans
le sens contraire des
aiguilles d’une montre
et retirer la porte.
3. Retirez doucement la
poussière ou les
peluches avec un
chiffon. Ne pas utiliser
d’eau pour nettoyer le
condenseur.
4. Enlever délicatement
l’éponge de son
emplacement et laver
l’éponge en la passant
sous un filet d’eau afin
d’enlever tout reste de
poussière ou de
peluches.
5 . R e m e t t e z
correctement le
condenseur en place
(en suivant la flèche) en
le poussant fermement.
Bloquez les deux
leviers en position en
les tournant dans le
sens des aiguilles d’une
montre.
6. Remettez la plaque
de protection en place.
CONDENSEUR
RÉSERVOIR D’EAU
L’eau récupérée du linge pendant le cycle de
séchage est recueillie dans un bac situé en bas
du sèche-linge. Quand le réservoir est plein,
l’indicateur
s’allume sur le panneau de
commande et le réservoir DOIT ABSOLUMENT être vidé. Cependant, nous
recommandons de vider le réservoir après
chaque cycle de séchage.
NOTE : Il n'y a que très peu d'eau qui est
récupéré pendant les premiers cycles d'une
nouvelle machine, car le réservoir intérieur est
rempli en premier.
Pour Retirer Le Réservoir
1. Tirez doucement le
réservoir jusqu'à
l'extraire complètement.
Tenez-le fermement à
deux mains.
Lorsque le réservoir est
plein, il pèse environ 4
kg.
2. Inclinez le réservoir
d'eau pour vidanger
l'eau par le trou arrière.
Une fois vidé, remettez
le réservoir d'eau dans
sa position d'origine.
P O U S S E Z - L E
FERMEMENT EN
PLACE.
3.Appuyer sur la touche
de départ pour lancer le
cycle.
NOTE : Si vous
disposez d'une bouche
d'évacuation proche du
sèche-linge, il est
possible d'installer le kit
d'évacuation de façon
permanente pour
vidanger l'eau
accumulée dans le
sèche-linge. Il n'y aura
ainsi plus besoin de
vider le réservoir d'eau.
Toutes les informations
d'assemblage du kit sont
fournies avec celui-ci.
FR 82
FONCTIONNEMENT
1.Ouvrir la porte et charger le linge dans le
tambour.Vérifier qu'aucun vêtement n'entrave
la fermeture de la porte.
2. Fermer doucement la porte en la poussant
jusqu'à ce que vous entendiez un déclic.
3. Tournez le sélecteur de programme et choisir
le programme de séchage souhaité (consultez
le guide de programmation pour de plus amples
détails)
4. Pour sécher des articles délicats,
synthétiques ou acryliques,appuyez sur le
bouton
pour diminuer la température de
séchage. Le voyant s'allume lorsque vous
sélectionnez cette option. Pour désactiver ce
mode, appuyez de nouveau et programmez de
nouveau
l'appareil.
5. Appuez sur le bouton
. Le sèche-linge
démarre automatiquement et le voyant situé au
dessus du bouton s'allume.
6. Si vous ouvrez la porte pendant le cycle de
séchage pour vérifier le linge, il est nécessaire
d'appuyer sur le bouton
, pour recommencer
le séchage une fois la porte refermée.
7. Lorsque le cycle est bientôt terminé, la phase
de ventilation à froid commence. Les
vêtements sont séchés avec de l'air froid afin de
les refroidir.
8. Lorsque le programme est terminé, le voyant
END s'allume sur le display.
9. A la fin du cycle, le tambour continuera à
tourner de manière intermittente afin de
minimiser les plis. Cette opération se poursuit
jusqu'à ce que la porte s'ouvre.
Afin d'assurer un séchage efficace dans les
meilleures conditions, ne pas ouvrir la porte lors
des cycles de séchage automatiques.
FR 55
FONCTIONNEMENT
Départ Différé
La fonction départ différé permet
de différé le départ du cycle de séchage de 1 à 24 heures.
Lorsque cette fonction est selectionnée pour la première fois, l'afficheur indique un délai d'une
heure. Il convient d'appuyer plusieurs fois sur le bouton pour repousser successivement le
démarrage d'heure en heure, et ce jusqu'à 24H maximum.
Pour démarrer le programme, appuyez sur
indiquera le temps restant du cycle.
. Le voyant lumineux clignotera et l'afficheur
Annulation et Réinitialisation du Programme
Pourt annuler le programme, appuyez sur la touche
pendant 3 secondes. La machine
indiquera qu'elle à été réinitialisée par le clignotement de 0:00 sur l'afficheur.
NETTOYAGE ET ENTRETIEN DE ROUTINE
Nettoyage Du Sèchelinge
● Nettoyez le filtre et videz le réservoir d’ eau
après chaque cycle de séchage.
●Nettoyer le filtre à intervalles réguliers
● Après chaque période d’utilisation, essuyez
L’intérieur du tambour et laissez la porte
ouverte pendant un moment pour qu’il puisse
sécher grâce à la circulation d’air.
● Essuyez l’extérieur de la machine et la porte
avec un chiffon doux.
● N’UTILISEZ PAS de tampons ou d’ agents
de nettoyage abrasifs.
●Pour empêcher que la porte n'adhère ou que
les peluches s'accumulent, nettoyez après
chaque fin de cycle la surface intérieure et le
joint de la porte avec un chiffon humide.
ATTENTION! Il est possible que le
tambour, la porte et la charge soient très
chauds.
FR 56
Spécifications Techniques
Capacité du tambour
Charge maximale
Hauteur
Largeur
Profondeur
Étiquette d'énergie
115 litres
8 kg
85 cm
60 cm
60 cm
A+
Information pour Laboratoire d'essai
EN 61121 Programme Programme
Pour utiliser
- Prét à ranger
-Coton Sec
- Prét à repasser
-Coton Sec Au Fer
- Prét à ranger + Délicat
-Les Tissus Délicats
Remarque : Installer et utiliser le kit d'évacuation
pour évacuer l'eau issue de la condensation.
IMPORTANT Coupez toujours le courant et
débranchez la fiche de l’alimentation électrique
avant de nettoyer cet appareil.
Pour les données électriques, veuillez
consulter l’étiquette des valeurs nominales qui
se trouve à l’avant de l’armoire du sèche-linge
(avec la porte ouverte).
DÉPISTAGE DE PANNES
Qu'est-ce qui peut être à l'origine de...
Défauts que vous pouvez rectifier vousmême
Avant d’appeler le service GIAS pour obtenir des
conseils, veuillez suivre la liste des vérifications
ci-dessous. L’intervention sera facturée si la
machine fonctionne correctement ou si elle a été
installée ou utilisée de manière incorrecte. Si le
problème persiste alors que vous avez terminé
les vérifications recommandées, veuillez appeler
le service GIAS qui pourra peut-être vous aider
par téléphone.
Le temps restant affiché peut varié pendant le
cycle de séchage. Le temps est constamment
ajusté au cours du cycle afin de donner la
meilleure estimation possible. Le fait que le
temps restant augmente ou diminue pendant
le cycle est normal.
La période de séchage est trop longue/les
vêtements ne sont pas suffisamment secs…
●Avez-vous sélectionné le temps de séchage/le
programme qui convient ?
● Les vêtements étaient-ils trop mouillés ? Les
vêtements avaient-ils été adéquatement essorés
en machine ou à la main ?
● Le filtre doit-il être nettoyé ?
● Faut-il nettoyer le condenseur ?
● Le sèche-linge est-il surchargé ?
● Les entrées, sorties et la base du sèche-linge
sont-elles libres d'obstructions ?
● Avez-vous sélectionné le bouton
au cours
d’un cycle précédent ?
Le sèche-linge ne fonctionne pas…
● Le sèche-linge est-il branché sur une
alimentation électrique adéquate ? Vérifiez à
l’aide d’un autre appareil, par exemple une lampe
de chevet.
● La fiche est-elle bien branchée sur
l’alimentation de secteur ?
● Y a-t-il une panne de courant ?
● Le fusible a-t-il sauté ?
● La porte est-elle bien fermée ?
● Le sèche-linge est-il en position de marche, au
niveau du courant de secteur et de la machine ?
● La période de séchage ou le programme a-t-il
été sélectionné ?
● La machine a-t-elle été remise en marche après
l’ouverture de la porte ?
● Le sèche-linge s’est-il arrêté parce que le
réservoir d’eau est plein et qu’il faut le vider ?
Le sèche-linge est bruyant…
● Arrêtez le sèche-linge et contactez le service
GIAS pour obtenir des conseils.
L'indicateur
est allumé…
● Le filtre doit-il être nettoyé ?
● Faut-il nettoyer le condenseur ?
L'indicateur
est allumé…
● Le réservoir d’eau doit-il être vidé ?
SERVICE CLIENTÈLE
En cas de problème après avoir effectué toutes
les inspections recommandées, veuillez
contacter le Service. Il pourra vous aider par
téléphone ou organiser la visite d'un technicien,
en vertu des conditions de votre garantie.
Cependant, vous serez facturé dans l’un des
cas suivants :
● Si la machine est en bon état de marche.
● Si la machine n’a pas été installée
conformément aux instructions d’installation.
● Si la machine a été utilisée incorrectement.
Pièces De Rechange
Utilisez toujours des pièces de rechange du
fabricant, disponibles auprès du service GIAS.
Service GIAS
Pour les entretiens et les réparations, contactez
votre technicien local du service GIAS.
Le constructeur décline toute responsabilité
en cas d’erreurs d’impression dans le
présent document. Le constructeur se
réserve le droit d’apporter les modifications
nécessaires à ses produits sans en changer
les caractéristiques de base.
FR 57
INDICE
Introduzione
Informazioni Sulla Consegna
Consigli di Sicurezza
Utilizzo
Installazione
La Biancheria
Tutela Dell’ambiente
Servizio Gias
Installazione
Requisiti Elettrici
Regolazione dei Piedini
Ventilazione
Kit di Montaggio Tubo di Scarico: Istruzioni Per il Montaggio
Preparazione della Biancheria
Preparazione dei Capi
Evitare di Asciugare
Risparmio Energia
Selezione della Biancheria
Guida Ad una Corretta Asciugatura
Comandi e Spie Di Segnalazione
Selezione del Programma
Portellone e Filtro
Apertura del Portellone
Filtro
Spia di Pulizia Filtro
Vaschetta Dell’acqua
Per Togliere La Vaschetta
Condensatore
Per Togliere Il Condensatore
Funzionamento
Partenza Ritardata
Annullamento e Azzeramento del Programma
Pulizia e Manutenzione Ordinaria
Pulizia Dell’asciugatrice
Specifiche Tecniche
Ricerca Guasti
Servizio Assistenza Clienti
Ricambi
Servizio Assistenza Gias
IT
58
59
59
59
60
61
61
62
63
63
63
63
63
64
65
65
65
65
65
65
66
67
68
68
68
68
69
69
69
69
70
70
70
70
70
70
71
71
71
71
INTRODUZIONE
Leggere attentamente le istruzioni per un corretto funzionamento della macchina. Questo
opuscolo fornisce importanti linee guida per una manutenzione,un uso e un'installazione sicuri.
Esso contiene inoltre utili consigli che consentiranno di sfruttare al meglio le potenzialità di questa
macchina.
Conservare la documentazione in un luogo sicuro per eventuali riferimenti o per futuri proprietari.
Informazioni sulla Consegna
Controllare che al momento della consegna
la macchina sia dotata dei seguenti
componenti:
● Libretto di istruzioni
● Certificato di garanzia
● Etichetta efficienza energetica
Verificare che durante il trasporto la
macchina non abbia subito danni. In caso
contrario, rivolgersi al Centro Assistenza GIAS.
La mancata osservanza di tale procedura
potrebbe compromettere la sicurezza
dell’apparecchio. La chiamata può essere
soggetta a pagamento se le cause di
malfunzionamento della macchina sono
attribuibili a un uso improprio.
CONSIGLI DI SICUREZZA
Utilizzo
• Questo apparecchio può essere utilizzato da bambini di 8 anni e oltre e
da persone con capacità fisiche, sensoriali o mentali ridotte o con
mancanza di esperienza e di conoscenza a patto che siano
supervisionate o che siano date loro istruzioni in merito all’utilizzo sicuro
dell’apparecchio e che capiscano i pericoli del suo utilizzo.
Evitare che i bambini giochino con la lavatrice o che si occupino della sua
pulizia e manutenzione senza supervisione.
●ATTENZIONE L’uso improprio dell’asciugatrice può provocare rischio di
incendio.
● Questo apparecchio è destinato ad uso in ambienti domestici e simili
come per esempio:
- aree di ristoro di negozi, uffici o altri ambienti di lavoro;
- negli agriturismo;
- dai clienti di hotel, motel o altre aree residenziali simili;
- nei bed & breakfast.
Un utilizzo diverso da quello tipico dell’ambiente domestico, come l’uso
professionale da parte di esperti o di persone addestrate, è escluso
anche dagli ambienti sopra descritti. Un utilizzo non coerente con quello
riportato, può ridurre la vita del prodotto e può invalidare la garanzia del
costruttore. Qualsiasi danno all’apparecchio o ad altro, derivante da un
utilizzo diverso da quello domestico (anche quando l’apparecchio è
installato in un ambiente domestico) non sarà ammesso dal costruttore in
sede legale.
● Questa macchina è prevista unicamente per uso domestico, ovvero per
l’asciugatura di capi e indumenti per la casa.
IT
59
INTRODUZIONE
CONSIGLI DI SICUREZZA
Utilizzo
●La macchina qui descritta deve essere utilizzata esclusivamente per lo
scopo al quale è destinata secondo quanto illustrato nel presente libretto.
Prima di attivare la macchina, accertarsi di avere letto attentamente e
compreso le istruzioni d’uso e di installazione.
● Non toccare l’asciugatrice con mani o piedi umidi o bagnati.
● Non appoggiarsi al portellone per caricare la macchina; non utilizzare il
portellone per sollevare o spostare la macchina.
● Non consentire ai bambini di giocare con la macchina o con i suoi
comandi.
● ATTENZIONE Non utilizzare il prodotto se il filtro antifilacce non è
correttamente posizionato o risulta danneggiato; il filtro non è ignifugo.
● ATTENZIONE Se è esposto il simbolo indicante il riscaldamento della
superficie
,quando l’asciugatrice è in funzione la temperatura può
essere superiore a 60 gradi C.
● Staccare la spina dalla presa elettrica. Prima di pulire la macchina,
staccare sempre la spina.
● Se si presume che la macchina sia guasta, non continuare ad usarla.
●Evitare che sul pavimento attorno alla macchina si raccolgano filacce e
pelucchi.
● Dopo il ciclo di asciugatura, l’interno del cestello può essere molto caldo.
Prima di estrarre la biancheria è pertanto opportuno lasciar raffreddare
completamente la macchina.
● L'ultima parte del ciclo di asciugatura viene fatta senza calore (ciclo
freddo) per assicurare che i capi siano lasciati ad una temperatura che
non li danneggi.
● Massimo carico di asciugatura: far riferimento all'etichetta energetica 8
kg.
● L'asciugatrice non dev'essere usata se sono stati usati prodotti chimici
per il lavaggio
●ATTENZIONE: mai fermare un' asciugatrice prima della fine del ciclo di
asciugatura senza che tutti i capi siano rimossi velocemente e separati in
modo che il calore si dissolva
IT
60
INTRODUZIONE
CONSIGLI DI SICUREZZA
Installazione
● Prima dell’uso, controllare che il
prodotto non presenti segni visibili
di danni. Non usare in caso di
danni e contattare il Servizio
Assistenza GIAS.
● Non utilizzare adattatori,
connettori multipli e/o prolunghe.
● Non installare l’asciugatrice
vicino ai tendaggi e rimuovere
tempestivamente eventuali oggetti
caduti dietro la macchina.
● L'apparecchio non deve essere
installato dietro una porta che può
essere chiusa a chiave, una porta
scorrevole o una porta i cui cardini
siano sul lato opposto rispetto a
quelli dell'asciugatrice.
La Biancheria
● Non asciugare capi non lavati
nell'asciugatrice.
● AT T E N Z I O N E E v i t a r e d i
asciugare articoli trattati con
prodotti di pulizia a secco.
● ATTENZIONE In determinate
circostanze, i materiali in gomma
possono essere soggetti ad
autocombustione se riscaldati.
Articoli in gommapiuma (lattice),
cuffie da doccia, tessuti
impermeabili, articoli in caucciù e
vestiti o cuscini imbottiti con
gommapiuma NON VANNO
asciugati nell'asciugatrice.
● Leggere attentamente le
etichette con le istruzioni di
lavaggio per conoscere le
caratteristiche dell’asciugatura
idonea.
● Gli indumenti devono essere
introdotti nell’ asciugatrice solo
dopo essere stati opportunamente
centrifugati in lavatrice o strizzati a
mano. EVITARE di caricare nel
cestello indumenti ancora
gocciolanti.
● Controllare accuratamente che
nelle tasche degli indumenti da
asciugare non siano presenti
accendini o fiammiferi ed
EVITARE ASSOLUTAMENTE
l’uso di prodotti infiammabili in
prossimità della macchina.
● Evitare ASSOLUTAMENTE di
asciugare tende in fibra di vetro. La
contaminazione dei capi con le
fibre di vetro può infatti dar luogo a
fenomeni d’irritazione cutanea.
● I capi che sono stati macchiati
con sostanze come olio da cucina,
acetone, alcol, petrolio,
cherosene, smacchiatori,
acquaragia, cere e sostanze per
rimuovere le cere dovrebbero
essere lavati in acqua calda con
una quantità extra di detergente
prima di essere asciugati
nell'asciugatrice.
●Gli ammorbidenti o prodotti simili
dovrebbero essere utilizzati come
s p e c i fi c a to n e l l e r i s p e tti v e
istruzioni.
IT
61
INTRODUZIONE
CONSIGLI DI SICUREZZA
VENTILAZIONE
Il locale in cui viene installata
l’asciugatrice deve essere
adeguatamente ventilato onde
evitare che i gas provenienti da
apparecchiature funzionanti con
altri combustibili, comprese fiamme
libere, siano aspirati nel locale dove
l’asciugatrice è in funzione.
Installare il retro della macchina
vicino al muro o ad una parete
verticale
● Ci dovrebbe essere uno spazio di
almeno 12 mm tra la macchina e
qualsiasi ostruzione. La valvola
interna ed esterna dovrebbe essere
tenuta lontana da ostacoli. Per
assicurare un'adeguata
ventilazione lo spazio tra la parte
inferiore della macchina e il
pavimento non dev'essere ostruito
● Non scaricare l’ aria nella canna
fumaria utilizzata per lo scarico di
fumi provenienti da attrezzature
funzionanti a gas o altri combustibili.
● Controllare periodicamente che
attorno all’asciugatrice vi sia una
buona circolazione d’aria, senza
impedimenti di sorta.
● Dopo l’ uso ispezionare il filtro
antifilacce e, se necessario, pulirlo.
● Rimuovere tempestivamente
eventuali oggetti caduti, dietro/sotto
la macchina in quanto potrebbero
ostruire le prese e gli sfiati dell’aria.
● EVITARE ASSOLUTAMENTE d’
installare la macchina contro
tendaggi.
IT
62
● Nel caso in cui l'asciugatrice fosse
installata sopra una lavatrice,
dev'essere usato un'accessorio su
misura per separarli, considerando
la seguente configurazione.
- Kit Mod 35100019: per una
macchina profonda almeno 49 cm
- Kit Mod 35900120: per una
macchina profonda almeno 51 cm
● Il kit dovrebbe essere uno di quelli
sopra indicati, ottenibile dal nostro
servizio ricambi. Le istruzioni per
l'installazione della macchina e di
tutti gli accessori, sono fornite con il
kit.
SFIATI ARIA NELLA BASE
Importante: durante il trasporto mantenere
in posizione verticale l'asciugabiancheria. Se
necessario ribaltarla esclusivamente nel lato
indicato in figura.
Attenzione: se il prodotto è stato ribaltato
non correttamente prima di avviarlo attendere
almeno 4 ore in modo tale che l'olio possa
scorrere nuovamente nel compressore. In caso
contrario il compressore può subire danni.
INSTALLAZIONE
Tutela dell’ambiente
● Tutti i materiali utilizzati per l’imballaggio sono
ecologici e riciclabili. Smaltite l’imballaggio con
metodi ecologici. Presso il comune di residenza
si potranno reperire ulteriori informazioni sui
metodi di smaltimento.
● Per garantire la sicurezza al momento dello
smaltimento di una asciugatrice, scollegare la
spina dell’alimentazione dalla presa, tagliare il
cavo dell’alimentazione di rete e distruggerlo
insieme alla spina. Per evitare che i bambini
possano rimanere intrappolati all'interno della
lavatrice, rompere i cardini o la chiusura
dell’oblò.
Direttiva Europea 2002/96/CE
Questo elettrodomestico è marcato
conformemente alla Direttiva
Europea 2002/96/CE sui rifiuti da
apparecchiature elettriche ed
elettroniche (WEEE).
Assicurandovi che questo prodotto sia smaltito
correttamente, aiuterete ad evitare possibili
conseguenze negative all’ambiente e alla salute
delle persone, che potrebbero verificarsi a causa
d’un errato trattamento di questo prodotto giunto a
fine vita.Il simbolo sul prodotto indica che questo
apparecchio non può essere trattato come un
normale rifiuto domestico; dovrà invece essere
consegnato al punto più vicino di raccolta per il
riciclo delle apparecchiature elettriche ed
elettroniche. Lo smaltimento deve essere
effettuato in accordo con le regole ambientali
vigenti per lo smaltimento dei rifiuti.
Per informazioni più dettagliate sul trattamento,
recupero e riciclo di questo prodotto, per favore
contattare l’ufficio pubblico di competenza (del
dipartimento ecologia e ambiente), o il vostro
servizio di raccolta rifiuti a domicilio, o il negozio
dove avete acquistato il prodotto.
Servizio GIAS
Ai fini della durata e del buon funzionamento
della macchina, per gli eventuali interventi di
assistenza o riparazione consigliamo di
rivolgersi esclusivamente al servizio assistenza
autorizzato GIAS.
Nel caso in cui la macchina non funzioni
correttamente o sia fuori uso, spegnere e
staccare la spina dalla presa. Per la riparazione,
rivolgersi al Centro Assistenza GIAS.
Requisiti Elettrici
Le asciugatrici sono state progettate per
funzionare ad una tensione di 220-240V, 50 Hz
monofase. Controllare che il circuito
dell’alimentazione sia idoneo per valori di corrente
di almeno 6A.
L’elettricità può essere estremamente
pericolosa
L’apparecchio deve essere opportunamente
collegato a terra.
La presa e la spina dell’apparecchio devono
essere dello stesso tipo.
Non utilizzare adattatori multipli e/o
prolunghe.
Una volta completata l’installazione, la spina
deve risultare accessibile e facilmente
scollegabile.
L’apparecchio con marchio CE è conforme alle
direttive europee 2004/108/CE, 2006/95/CE
E successive modifiche.
La chiamata può essere soggetta a pagamento,
se le cause di malfunzionamento della macchina
sono attribuibili a un’installazione non corretta.
Nel caso risulti danneggiato, il cavo di
alimentazione dell’apparecchio dev’essere
prontamente sostituito con apposito cavo
reperibile ESCLUSIVAMENTE presso il servizio di
ricambi. L’installazione deve essere effettuata da
persone competenti.
Non inserire la spina nella presa e non accendere la macchina finché l’installazione non sarà
stata completata. Ai fini della sicurezza personale è
essenziale che l’asciugatrice venga installata
correttamente. In caso di dubbi sull’installazione,
rivolgersi al Servizio Assistenza GIAS.
Regolazione dei Piedini
Una volta posizionata la
macchina, si dovrebbe
procedere alla
regolazione dei piedini,
per garantire una
perfetta messa in bolla.
IT
63
KIT DI MONTAGGIO TUBO DI SCARICO: ISTRUZIONI PER IL MONTAGGIO
Per non dover svuotare il contenitore dell’acqua
dopo ogni ciclo di asciugatura, si può convogliare
l’acqua normalmente raccolta durante il ciclo di
asciugatura direttamente in un tubo di scarico
delle acque di scolo (lo stesso sistema di scarico
usato nei lavandini di Casa).
Le leggi locali sullo smaltimento delle acque
vietano la connessione ai canali a cielo aperto. Il
sistema di scarico delle acque di scolo va
collocato accanto all’asciugatrice.
Il kit è composto: 1 tubo flessibile, 1 connettore
per tubo flessibile dritto, 1 morsetto per tubo e una
fascetta di plastica.
AVVERTENZA! Prima di eseguire qualsiasi
operazione, spegnere l’asciugatrice e staccare
la spina dalla presa principale.
Montare i Componenti del Kit Come di Seguito Riportato:
1.Svitare e rimuovere le 3
viti sul retro della
macchina, mante-nendo
in posizione il bordino di
finitura del piano di lavoro.
2. Rimuovere il bordino di
finitura del piano di lavoro
posteriore, poi rimuovere
anche il piano di lavoro
superiore, facendolo
scorrere con delicatezza
verso il retro della
macchina.
3. Il contenitore
dell’acqua di scolo è
posto sul lato destro della
macchina (guardando dal
retro).
Sopra il contenitore
dell’acqua è posto un tubo
grigio flessibile, fissato a
un collegamento a ponte.
Utilizzando una pinza,
rimuovere dal ponte il
morsetto di bloccaggio
del tubo.
4. Rimuovere il tubo
flessibile dal ponte.
5. Collegare il tubo
flessibile del kit al tubo
flessibile rimosso dal
ponte, utilizzando il
connettore e I morsetti per
il tubo forniti.
6. Rimuovere il coperchio
del contenitore dell’acqua
Posto sul retro della
macchina, rimuovendo le
due viti e sganciandolo.
IT
64
EN
5
.7. Rompere la linguetta
posta sul lato del
coperchio, riposizio-nare
il coperchio sulla
macchina e fissare
nuovamente le viti. A
questo punto si dovrebbe
vedere un foro sul retro
del mobile, accanto al
coperchio.
8. Far passare il tubo
flessibile di scarico
attraverso il foro di
entrata nel mobile.
9. Collocare il tubo grigio
nello spazio libero della
vaschetta e fissare
l’intero blocco del tubo al
ponte, utilizzando la
fascetta di plastica.
10. Ricollocare il piano di
lavoro facendolo scorrere
di nuovo nella posizione
di partenza, e
accertandosi che il tubo
flessibile non sia
incastrato. Ricollocare
in posizione anche il
bordino di finitura del
piano di lavoro
posteriore, utilizzando le
3 viti.
11. Collegare il nuovo
tubo flessibile di scarico
al tubo dell’acqua di
scolo. Accertarsi che il
nuovo tubo flessibile non
si pieghi quando si spinge
i n p o s i z i o n e
l’asciugatrice. Accertarsi
di rispettare le linee
guida, come mostrato,
quando si fissa la
posizione del nuovo tubo
flessibile esterno.
12. Effettuare il
collegamento alla presa
di rete principale.
13. Dopo avere svuotato
il contenitore dell’acqua
di scarico, per dare inizio
al programma di
asciugatura basterà
accendere la macchina
con il tasto ON (e
premere nel caso dei
modelli elettronici il
pulsante ‘START’).
PREPARAZIONE DELLA BIANCHERIA
Prima di utilizzare l’asciugatrice per la prima volta:
● Leggere attentamente il presente libretto
d’istruzioni.
● Togliere tutti gli articoli presenti all’ interno del
cestello.
● Pulire l’interno del cestello e il portellone con un
panno umido in modo da eliminare l’eventuale
polvere depositata durante il trasporto.
Preparazione dei Capi
Verificare che la biancheria da asciugare sia idonea
per l’asciugatura meccanica, come indicato dai
simboli sull’etichetta di lavaggio dei vari articoli.
Controllare che le chiusure siano chiuse e le tasche
vuote. Girare i capi con il rovescio all’esterno.
Introdurre i capi nel cestello uno ad uno, in modo che
non si aggroviglino.
Evitare Di Asciugare:
Articoli di lana, seta, tessuti delicati, calze di
nylon,ricami delicati, tessuti con decorazioni
metalliche, indumenti con guarnizioni in PVC o in
pelle, scarpe da ginnastica, articoli pesanti come
sacchi a pelo ecc.
IMPORTANTE: Evitare di asciugare
articoli preventivamente trattati con prodotti di
pulizia a secco o capi in gomma (pericolo
d’incendio o esplosione).
Durante gli ultimi 15 minuti (approssimativamente) i capi sono sempre asciugati con aria
fredda.
Non sovraccaricare il cestello, in quanto I
capi ingombranti, a caldo, possono superare il
carico massimo consentito. (per esempio sacchi
a pelo e piumoni)
Risparmio Energia
Introdurre nell’asciugatrice solo biancheria
accuratamente strizzata a mano o centrifugata a
macchina. Quanto più asciutta è la biancheria, tanto
più rapido è il tempo richiesto per l’asciugatura, con
conseguente risparmio di consumo elettrico.
COSA FARE SEMPRE
● Cercare sempre di far lavorare la macchina a pieno
carico di biancheria: si risparmia tempo ed elettricità.
● Prima di ogni ciclo di asciugatura verificare
SEMPRE che il filtro sia pulito.
COSA NON FARE MAI
● Non superare mai il peso massimo: si perde tempo
e si consuma più elettricità.
● Evitare di caricare capi ancora gocciolanti: si
rischia di rovinare la macchina.
Peso Massimo di Asciugatura
● Capi in cotone
● Capi sintetici
Max. 8 kg
Max. 4 kg
Selezionare La Biancheria Nel Modo Seguente:
● In base ai simboli delle etichette di lavaggio
Le etichette di lavaggio sono apposte sul collo o
sulle cuciture interne:
Articolo idoneo per l’asciugatura
meccanica.
..
Asciugatura ad alta temperatura.
.
Solo asciugatura a bassa temperatura.
Articolo non idoneo all’asciugatura
meccanica.
Se il capo è sprovvisto di etichetta di lavaggio, si
deve presumere che non sia idoneo all’asciugatura
meccanica.
● In base al quantitativo ed alla pesantezza
Se il carico è superiore alla capacità della macchina,
separare i capi in base alla pesantezza (p. es.,
separare gli asciugamani dalla biancheria leggera).
● In base al tipo di tessuto
Articoli di cotone/lino: Asciugamani, jersey di
cotone, biancheria da tavola/letto.
Articoli sintetici: Camicette, camicie, tute ecc. in
poliestere o poliammide e misti cotone/sintetici.
● In base al grado di asciugatura
Selezionare tra: capi asciutti da stirare, capi pronti
da riporre ecc. Per i capi delicati premere il pulsante
,impostando una temperatura di asciugatura ridotta.
Guida Ad Una Corretta Asciugatura
Il ciclo standard ASCIUTTO NO-STIRO (
) è quello
a maggior efficienza energetica e il più adatto per
un'asciugatura di un normale bucato bagnato in
cotone. La tabella sotto mostra la durata e il consumo
energetico indicativi dei principali programmi di
asciugatura
CICLO
Perfect Home
Asciutto Armadio
Asciutto No-Stiro
Asciutto No-Stiro
Asciutto Pronto-stiro
CARICO ENERGIA DURATA
(Min)
(kg)
(kWh)
PIENO
3,40
250
2,93
PIENO
210
2,66
PIENO
149
MEZZO
1,35
115
2,13
159
PIENO
Consumo di energia modalità "stand-by»
Consumo di energia modalità "spento"
0,75 W
0,20 W
IT
65
COMANDI E SPIE DI SEGNALAZIONE
Selettore
Programmi
Spia Elimina
Acqua
Pulsante
Selezione
Tempo
Spia Pulizia Filtro
Pulsante Partenza
Ritardata
Pulsante
Acrilici/Sintetici
Display Programmi
Automatici
Pulsante Anti
Piega
Tasto
Avvio/pausa
Pannello di Comando e Spie Luminose
Manopola: Ruotando in entrambe le direzioni, consente di selezionare il programma desiderato.
Selezione Tempo : Permette di modificare la durata del programma scelto; può essere utilizzato
solo per alcuni programmi .
Partenza Ritardata : Dà la possibilità all’utente di ritardare la partenza del ciclo di asciugatura, ad
esempio per sfruttare gli orari in cui l’elettricità costa meno (vedi sezione dedicata).
Tessuti Delicati : Premendo questo pulsante, si spegne la spia
e si accende la spia delicati; ,
l’asciugatura avverrà a temperature ridotte per una maggiore cura dei tessuti.
Anti-Piega
: Consente di programmare un ciclo anti-piega a fine asciugatura, mantenendo il
cesto in movimento e non facendo appesantire i panni asciutti.
Cool down
: Si accende quando il ciclo è nella fase finale di raffreddamento.
Avvio/Pausa
: Serve per dare inizio al programma selezionato o bloccare il ciclo.
Programmi automatici: A seconda del programma scelto, si accenderanno le relative spie (vedere
elenco programmi); la spia ECO
indica che è stato scelto un programma a basso consumo.
Pulizia filtro
: Quando si accende questa spia, è necessario pulire il filtro.
Tanica acqua
: Questa spia si accende per ricordare di svuotare la tanica dell’acqua di condensa
SELEZIONE DEL PROGRAMMA
Questa asciugatrice è dotata di un sensore di asciugatura che
permette di scegliere il programma preferito in base al carico,
fermandosi quando la biancheria all’interno è pronta.
Per carichi ridotti o tessuti già parzialmente asciutti, si
consiglia di selezionare un programma a tempo, premendo il
pulsante “Tessuti Delicati” per avere una temperatura ridotta
all’interno del cesto.
Nel caso il sensore non rilevi la presenza del carico,
l’asciugatrice funzionerà solo per 10 minuti, per poi passare
alla fase di raffreddamento.
Se il carico è troppo abbondante o eccessivamente bagnato,
l’asciugatrice funziona in automatico per 3 ore, passando poi
alla fase di raffreddamento.
In ogni caso, la fase di raffreddamento viene sempre effettuata
a fine ciclo con aria fredda e ha una durata media di 15 minuti.
IT
66
SELEZIONE DEL PROGRAMMA
PROGRAMMA
Perfect Home
Asciutto Armadio
Asciutto No-Stiro
Asciutto Pronto-Stiro
Anti piega
Ravviva lana
Mix & Dry
IDEALE PER
Capi che si vogliono completamente asciutti, come asciugamani,
accappatoi, tovaglie e lenzuola. Durata: circa 3 ore.
Capi che possono essere ripiegati, senza stirarli, come maglie in tessuti
misti, calzini, indumenti per bambini. Durata: circa 2 ore e 45 min.
Capi che si preferisce non stirare, ma appendere direttamente dopo
l’asciugatura. Durata: circa 2 ore e 30 min.
Capi che si preferisce mantenere leggermente più umidi, in modo da
facilitare la stiratura. Durata: circa 1 ora e 50 min.
Capi da ravvivare, dopo averli lasciati nel cesto dei panni asciutti per
qualche giorno o dopo averli asciugati all’aperto o su caloriferi. Il ciclo ha una
funziona anti-piega che rilassa le fibre e rende più facile e rapida la stiratura.
Durata: 9 minuti + 3 minuti di cool down.
Rendere più soffici i capi in lana o per ravvivarli dopo un lungo periodo
nell’armadio. Durata: 12 minuti.
Quando si vuole mischiare capi in cotone e sintetici, senza perdere tempo a
dividerli e ad asciugarli in cicli diversi. Durata: circa 2h (max 4 kg di bucato)
Camicie
Asciugare le camice in cotone o in fibre sintetiche. Durata: 1 ora per 2kg di
camicie in fibre sintetiche (circa 10 capi); 1 ora e 20 min per 3 kg di camicie in
cotone (circa 10 capi).
Rapido 40’
Avere capi asciutti, rinfrescati e pronti da indossare in solo 40 minuti. Il
sensore monitora costantemente la temperatura per il miglior risultato di
asciugatura. Max 2kg di bucato.
Tempo
Chi vuole scegliere manualmente il tempo di asciugatura, da 30 a 180
minuti. Selezionando “20 minuti” si sceglie un programma a freddo, ideale
per capi da ravvivare, per eliminare eventuali odori.
Jeans
Per asciugare fino a 4kg di Jeans (circa 5 paia). Il programma dura circa 2
ore, ma il tempo può modificarsi in base al carico e alla velocità di centrifuga
utilizzata nel lavaggio. Si consiglia di utilizzare il ciclo Jeans per capi in
cotone 100%, avendo cura di non mischiare i colori e di non asciugare jeans
con ricami e accessori.
IT
67
PORTELLONE e FILTRO
Apertura del Portellone
PULIZIA FILTRO
Tirare la maniglia per
aprire lo sportello.
Per avviare la
macchina, richiudere
il portellone e
premere il tasto.
AVVERTENZA! Si ricorda che quando la
macchina è in funzione il cestello e il portellone
possono essere MOLTO CALDI. Non arrestare
mai l'asciugatrice prima della fine del ciclo di
asciugatura a meno che tutti i capi in essa
contenuti non vengano rimossi rapidamente e
stesi in modo da dissipare il calore.
1. Rimuovere
zoccolo
lo
2. Girare in senso
antiorario I ganci e
rimuovere il coperchio
supporto filtri
Filtro
IMPORTANTE: Ai fini della massima efficacia
della macchina, prima di ogni ciclo di
asciugatura è essenziale verificare la pulizia
del filtro antifilacce.
Importante: Non utilizzare l'asciugabiancheria
senza I filtri. I filtri intasati possono allungare il
tempo di asciugatura e causare danni con
conseguenti costosi interventi di pulizia.
3. R i m u o v e r e
delicatamente il telaio
agendo sul gancio
superiore a pulire la
rete filtrante da residui o
depositi. Non usare
acqua.
1. Tirare il filtro verso
l’alto.
2. Aprire il filtro come
illustrato.
3 . R i m u o v e r e
delicatamente le
Filacce con la punta delle
dita o aiutandosi con uno
spazzolino morbido.
4. Richiudere il filtro e
reinserirlo in sede.
4. Rimuovere
delicatamente il filtro a
spugna dalla sede a
lavarlo sotto acqua
corrente per rimuovere
residui o depositi.
Spia Di Pulizia Filtro
Si accende segnalando
la necessità di pulire il
filtro.
Procedere con la verifica
ed eventuale pulizia del
filtro principale e dei filtri
allocati nella parte
inferiore del Dryer.
Se la biancheria non si
asciuga verificare che il
filtro non sia intasato.
NON USARE ACQUA PER PULIRE IL FILTRO
IT
68
5. Rimontare i filtri e
posizionare il coperchio
supporto filtri nella
corretta posizione
indicata dalla freccia
(posizione verso l'alto).
Bloccare il coperchio
con i ganci.
6. R i m o n t a r e
zoccolo.
lo
CONDENSATORE
VASCHETTA DELL’ACQUA
L’acqua eliminata dalla biancheria durante il
ciclo di asciugatura viene raccolta in una
vaschetta posta in fondo alla macchina. Quando
la vaschetta è piena si accende la spia
sul
pannello dei comandi, segnalando che si DEVE
vuotare la vaschetta. Tuttavia, si consiglia di
svuotare la vaschetta dopo ogni ciclo di
asciugatura.
NOTA: Nei primi cicli, quando la macchina è
nuova, si raccoglie poca acqua in quanto si
riempie prima il serbatoio interno.
Per Togliere La Vaschetta
1.Estrarre con
delicatezza la
vaschetta, finché non
viene completamente
rimossa. Sostenere la
vaschetta con
entrambe le mani. Da
piena, la vaschetta
dell’acqua pesa circa 4
kg.
2.Inclinare la vaschetta
facendo defluire
l'acqua dal foro
posteriore. Quando è
vuota, far scivolare di
nuovo la vaschetta
nell'apposita sede.
SPINGERE CON
DECISIONE IN SEDE.
3.Per avviare la
macchina, premere il
tasto.
NOTA: se c’è uno
scarico vicino
all’asciugatrice, si può
usare l’apposito kit per
far scaricare
costantemente l’acqua
raccolta dalla
macchina. Così
facendo si eviterà di
svuotare la vaschetta
dell’acqua. Tutte le
informazioni per il
montaggio sono
all’interno della
confezione del kit di
scarico.
FUNZIONAMENTO
1. Aprire la porta e caricare la biancheria nel
cesto. Assicurarsi che i capi non si incastrino
nella porta.
2. Chiudere gentilmente la porta fino a sentire
un “click”.
3. Ruotare il selettore programmi e scegliere il
programma di asciugatura desiderato (per
dettagli, guardare la Guida Programmi).
4. Se bisogna asciugare tessuti sintetici, acrilici
o delicati, premere il pulsante
per ridurre la
temperatura di asciugatura. La spia si illumina
quando si sceglie questa opzione. Per deselezionarla, nei primi minuti di avvio del
programma, ri-premere il pulsante
e
programmare nuovamente la macchina.
5. Premere il pulsante
. L’asciugabiancheria
inizia automaticamente e la spia luminosa
sopra il tasto resta accesa.
6. Se si apre la porta durante il ciclo per
controllare la biancheria, è necessario
successivamente richiudere la porta e premere
il pulsante
, il ciclo di asciugatura
ricomincerà nuovamente.
7. Quando il ciclo è prossimo alla fine, inizia una
fase di raffreddamento. I capi vengono
asciugati con aria fredda al fine di raffreddarli.
8. Quando il programma è terminato, la spia
END si illumine sul display.
9. A seguito della fine del ciclo, il cesto effettuerà
delle rotazioni ad intermittenza per minimizzare
le pieghe. Continuerà fino a quando la porta
verrà aperta.
Non aprire la porta durante i cicli di
asciugatura automatici per avere un'asciugatura
sempre efficace.
IT
69
FUNZIONAMENTO
Partenza Ritardata
La funzione Partenza Ritardata
asciugatura da 1 a 24 ore.
consente all’utente di ritardare la partenza del ciclo di
Agendo la prima volta sul tasto di questa funzione, comparirà sul display un ritardo di 1 ora, a ogni
successiva pressione del tasto, si aggiungerà un ulteriore ritardo di 1 ora.
Successivamente, premere il tasto
e trascorso il tempo di ritardo selezionato, il ciclo di
asciugatura verrà avviato. La spia luminosa lampeggerà indicando che count down è iniziato.
Annullamento e Azzeramento Del Programma
Per cancellare il programma premere il pulsante
per 3 secondi. Nel display “TIME CONTROL”
lampeggerà 0:00 indicando che è stato azzerato il programma.
PULIZIA E MANUTENZIONE ORDINARIA
Pulizia dell’asciugatrice
● Si consiglia di pulire il filtro e di svuotare la
vaschetta dell’acqua dopo ogni ciclo di
asciugatura.
● Pulire regolarmente il filtro.
● Dopo l’ uso, pulire l’ interno del cestello e
lasciare aperto il portellone per un certo
periodo di tempo in modo che circoli aria e si
asciughi.
● Pulire l’esterno della macchina e il portellone
con un panno morbido.
● NON usare spugnette abrasive né prodotti di
pulizia.
●Pre evitare che si accumuli della lanuggine e
che l'oblò abbia difficoltà ad aprirsi/chiudere, a
fine di ogni ciclo d'asciugatura pulire con un
panno umido la parte interna dell'oblò e la
guarnizione.
Specifiche Tecniche
Capacità del cestello
Carico massimo
Altezza
Larghezza
Profondità
Efficienza Energetica
115 litri
8 kg
85 cm
60 cm
60 cm
A+
Informazıonı per Test dı Laboratorıo
EN 61121 Programmı
Programmı da usare
-Cotone Asciutto
-Cotone Asciutto da Stirare
-Tessuti Delicati
-Asciutto No-Stiro
-Asciutto Pronto-Stiro
-Asciutto No-Stiro+Sintetico
NOTA: Installare e utilizzare il tubo di scarico
per scaricare l’ acqua condensata.
IMPORTANTE Prima di procedere alla
pulizia, disattivare sempre la macchina e
staccare la spina dalla presa a muro.
AVVERTENZA! Il cestello, il portellone e il
carico possono essere molto caldi.
Per i dati elettrici vedere la targhetta dei dati
posta sul davanti del mobile della macchina (con
portellone aperto).
IT
70
RICERCA GUASTI
Quale Può Essere La Causa...
Problemi che può risolvere l’utente
Prima di rivolgersi al Centro Assistenza GIAS,
consultare la seguente checklist. La chiamata
verrà addebitata all'utente nel caso in cui risulti
che la macchina funziona o è stata installata o
utilizzata in maniera errata. Se il problema persiste
anche dopo aver eseguito i controlli consigliati,
rivolgersi al servizio di assistenza GIAS che sarà a
disposizione per suggerire eventuali soluzioni per
telefono.
Il tempo di asciugatura residuo può variare
durante il ciclo. Il tempo infatti
viene
costantemente aggiornato per migliorarne la
stima. E' per tanto normale che durante il ciclo,
il tempo mostrato sul display possa aumentare
o diminuire.
Tempo di asciugatura eccessivamente
lungo/capi non sufficientemente asciutti…
●Il programma/tempo di asciugatura selezionato è
corretto?
● I capi sono stati introdotti eccessivamente
bagnati? Si è provveduto a strizzare o centrifugare
adeguatamente i capi prima d’introdurli nella
macchina?
● Si deve pulire il filtro?
● Si deve pulire il condensatore?
●L’asciugatrice è stata caricata eccessivamente?
● Vi sono ostruzioni a livello delle prese, degli
sfiati e della base dell’asciugatrice?
● Il tasto
è stato selezionato da un ciclo
precedente?
L’asciugatrice non funziona…
● L’alimentazione elettrica cui è collegata la
macchina è attiva? Controllare provando con un
altro apparecchio (ad esempio, lampada da
tavolo).
● La spina di alimentazione è stata collegata
correttamente all’alimentazione elettrica?
● Manca la corrente?
● Fusibile bruciato?
● Il portellone è stato chiuso perfettamente?
● La macchina è stata opportunamente attivata
(sia collegata all’alimentazione sia attivata
localmente)?
● È stato selezionato il tempo o il programma di
asciugatura?
●La macchina è stata riattivata dopo aver aperto il
portellone?
●La macchina ha smesso di funzionare perché la
vaschetta dell’acqua è piena e deve essere
svuotata?
L’asciugatrice fa molto rumore…
● Spegnere l’asciugatrice e rivolgersi al Servizio
Assistenza GIAS.
La spia di segnalazione
è accesa…
● Si deve pulire il filtro?
● Si deve pulire il condensatore?
La spia di segnalazione
è accesa…
● Si deve svuotare la vaschetta dell’acqua?
SERVIZIO ASSISTENZA CLIENTI
Se il problema persiste anche dopo aver
effettuato tutti icontrolli consigliati, rivolgersi al
Servizio Assistenza GIAS.
Sarà a disposizione per suggerire eventuali
soluzioni per telefono o per fissare la visita del
tecnico in base alle condizioni di garanzia. Si
ricorda che l’intervento del tecnico può essere
soggetto a pagamento nel caso la macchina:
● risulti perfettamente funzionante.
● non sia stata installata secondo quanto
indicato nelle istruzioni d’installazione.
● sia stata utilizzata in modo improprio.
Ricambi
Utilizzare sempre ricambi originali, disponibili
direttamente presso il Servizio Assistenza
GIAS.
Servizio GIAS
Per assistenza e riparazioni, rivolgersi al
tecnico del Servizio Assistenza GIAS più vicino.
Il produttore declina ogni responsabilità
in caso di eventuali errori di stampa nel
presente opuscolo. Il produttore si riserva
il diritto di apportare le necessarie
modifiche ai propri prodotti, senza
alterarne le caratteristiche essenziali.
IT
71
40008781