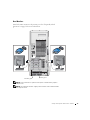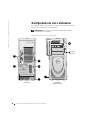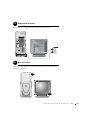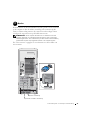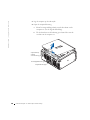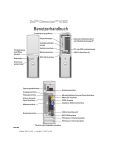
1
Dell Precision™ Workstation 530
Setup and Quick
Reference Guide
w w w. d e l l . c o m | s u p p o r t . d e l l . c o m
Notes, Notices, and Cautions
NOTE: A NOTE indicates important information that helps you make better
use of your computer.
NOTICE: A NOTICE indicates either potential damage to hardware or loss of
data and tells you how to avoid the problem.
CAUTION: A CAUTION indicates a potential for property damage,
personal injury, or death.
____________________
Information in this document is subject to change without notice.
© 2002 Dell Computer Corporation. All rights reserved.
Reproduction in any manner whatsoever without the written permission of Dell Computer
Corporation is strictly forbidden.
Trademarks used in this text: Dell, the DELL logo, and Dell Precision are trademarks of Dell
Computer Corporation; Microsoft and Windows are registered trademarks of Microsoft Corporation.
Other trademarks and trade names may be used in this document to refer to either the entities claiming
the marks and names or their products. Dell Computer Corporation disclaims any proprietary interest
in trademarks and trade names other than its own.
December 2002
P/N 402GU
Rev. A03
Contents
Finding Information and Assistance
. . . . . . . . . . . . . . . .
Using the Dell Precision™ ResourceCD
Setting Up Your Computer
Dual Monitors
. . . . . . . . . . . . . .
5
9
. . . . . . . . . . . . . . . . . . . .
10
. . . . . . . . . . . . . . . . . . . . . . . . .
17
Frequently Asked Questions .
. . . . . . . . . . . . . . . . . . .
Safety First—For You and Your Computer
18
. . . . . . . . . . . .
20
. . . . . . . . . . . . . . . . . . .
21
Opening the Cover
. . . . . . . . . . . . . . . . . . . . . . .
21
Inside Your Computer
. . . . . . . . . . . . . . . . . . . . . . .
23
Opening the Computer Cover
. . . . . . . . . . . . . . . . . .
24
. . . . . . . . . . . . . . . . . . . . . . . .
24
Removing and Installing Parts
Adding Memory
. . . . . .
24
. . . . . . . . . . . . . . . . .
24
. . . . . . . . . . . . . . . . . . .
25
Adding a Hard Drive or Externally Accessible Drive
Adding a PCI Expansion Card
Upgrading the Video Card
. . . . . . . . . . . . . . . . . .
25
. . . . . . . . . . . . . . . . . . . . . . . . .
25
Upgrading Your Processor(s)
Solving Problems
When to Use the Dell Diagnostics
. . . . . . . . . . . . . . .
26
. . . . . . . . . . . . . . . . . .
27
. . . . . . . . . . . . . . . . . . . . . .
30
Starting the Dell Diagnostics
Messages and Codes
Contents
3
4
Contents
Finding Information and Assistance
The following table lists the resources that Dell provides as support tools.
Additional resources may be shipped with your computer.
What Are You Looking For?
Find it Here
•
•
•
•
Drivers and Utilities CD (also known as the
ResourceCD)
A diagnostic program for my computer
Drivers for my computer
My User’s Guide
My device documentation
You can use this CD to access documentation, reinstall drivers, or run
diagnostics tools.
•
•
•
•
•
How to set up my computer
How to care for my computer
Troubleshooting information
How to open my computer cover
How to locate other documentation
Setup and Quick Reference Guide
Setup and Quick Re ference Guide
5
w w w. d e l l . c o m | s u p p o r t . d e l l . c o m
What Are You Looking For?
Find it Here
• Express Service Code and Service Tag
• Microsoft® Windows® License Label
Express Service Code and Product Key
The labels are located on your computer.
• How to reinstall my operating system
Operating System CD and Installation Guide
After you reinstall your operating system, use the Drivers and Utilities
CD to reinstall drivers for the devices that came with your computer.
6
Setup and Quick Re ference Guide
What Are You Looking For?
Find it Here
•
•
•
•
User’s Guide Icon (Microsoft Windows 2000)
How to remove and replace parts
Technical specifications
How to configure system settings
How to troubleshoot and solve problems
Double-click the User’s Guide icon on your desktop.
Windows XP Help and Support Center
1 Click the Start button and click Help and Support.
2 Click User’s Guide.
• Location of connectors on the system board S y s t e m I n f o r m a t i o n L a b e l
or
The label is located on the inside of your computer cover.
• Latest drivers for my computer
D e l l S u p p o r t W e b s i t e — support.dell.com
• Answers to technical service and support
The Dell Support website provides several online tools, including:
questions
• Knowledge Base — Hints, tips, and online courses
• Online discussions with other users and
• Customer Forum — Online discussion with other Dell customers
technical support
• Upgrades — Upgrade information for components, such as memory,
• Documentation for my computer including
the hard drive, and the operating system
the Service Manual
• Customer Care — Contact information, order status, warranty, and
repair information
• Downloads — Drivers, patches, and software updates
• Reference — Computer documentation, product specifications, and
white papers
Setup and Quick Re ference Guide
7
w w w. d e l l . c o m | s u p p o r t . d e l l . c o m
What Are You Looking For?
Find it Here
•
•
•
•
•
•
Dell Premier Support Website —
premiersupport.dell.com
Service call status and support history
Top technical issues for my computer
Frequently asked questions
File downloads
Details on my computer’s configuration
Service contract for my computer
The Dell Premier Support website is customized for corporate,
government, and education customers. This website may not be
available in all regions.
• Warranty information
System Information Guide
• How to use Windows XP
• Documentation for my computer and
devices
Windows XP Help and Support Center
1 Click the Start button, and click Help and Support.
2 Type a word or phrase that describes your problem, and click the
arrow icon.
3 Click the topic that describes your problem.
4 Follow the instructions shown on the screen.
NOTE: For help using Windows 2000, click the Start button and click
Help.
8
Setup and Quick Re ference Guide
Using the Dell Precision™ ResourceCD
To use the Dell Precision ResourceCD from within the
Microsoft® Windows® operating system:
1
Insert the Dell Precision ResourceCD into the CD drive.
If you are using the Dell Precision ResourceCD for the first time on this
computer, the ResourceCD Installation window opens to inform you
that the ResourceCD is about to begin installation.
2
Click OK to continue.
To complete the installation, respond to the prompts offered by the
installation program.
3
Click Next at the Welcome Dell System Owner screen.
4
Select the appropriate System Model, Operating System,
Device Type, and Topic.
To access the Dell Precision ResourceCD Guide, click User’s Guides in the
Topic pull-down menu and click Dell Precision ResourceCD.
NOTE: To access device drivers and user documentation, you must use the
ResourceCD from within Windows. To use the Dell Diagnostics, you must insert
the ResourceCD in the CD drive and restart the computer. For information
about running the Dell Diagnostics, see "When to Use the Dell Diagnostics" on
page 26.
Setup and Quick Re ference Guide
9
w w w. d e l l . c o m | s u p p o r t . d e l l . c o m
Setting Up Your Computer
The numbers in the following figure correspond to the tasks described in
the setup steps.
NOTE: You must complete all steps to properly set up your computer.
C o m p u t e r Fe a t u r e s
6
diagnostic
lights
1
4
2
3
7
5
Back View
10
Setup and Quick Re ference Guide
Front View
(doors open)
1
Keyboard and Mouse
Connect the keyboard and mouse as shown in the following illustration.
NOTE: If you have a Personal System/2 (PS/2) keyboard, connect it into the
PS/2 keyboard connector. If you have a Universal Serial Bus (USB) keyboard,
connect it to a USB connector as shown in the illustration. Do not connect a
USB mouse or keyboard to the USB connectors on the front of the computer.
NOTE: Do not attempt to operate a PS/2 mouse and a USB mouse
simultaneously.
PS/2 or USB
keyboard
PS/2 or USB
mouse
Setup and Quick Re ference Guide
11
w w w. d e l l . c o m | s u p p o r t . d e l l . c o m
2
Network Adapter and Modem
Insert the network cable, not the phone line, into the network connector.
NOTE: Your computer has an integrated network adapter. However, if your
computer has a network expansion card installed, connect the network cable to
the network card, not to the connector on the computer back panel.
If you have an optional modem, connect the phone line to the modem.
NOTICE: Do not connect a modem cable to the network adapter. Voltage
from telephone communications can cause damage to the network adapter.
network cable
12
Setup and Quick Re ference Guide
modem cable
3
Monitor
Align and gently insert the monitor cable to avoid bending connector pins.
Then tighten the thumbscrews on the cable connector.
NOTE: If you are only using one monitor with an optional dual-monitor card,
you must use the primary port. To enable dual-monitor support, both monitors
must be attached when the computer starts.
For setting up dual monitors, see "Dual Monitors" on page 17.
primary port
optional secondary port
Setup and Quick Re ference Guide
13
w w w. d e l l . c o m | s u p p o r t . d e l l . c o m
4
Speakers
Connect the speakers to the computer as shown on the instructions
supplied with the speakers.
NOTE: Your computer has an integrated audio controller. However, if your
computer has an audio expansion card installed, connect external audio
devices to the sound card, not to the connectors on the computer back panel.
14
Setup and Quick Re ference Guide
5
Power Connection
Plug in the computer and the monitor to their electrical outlets.
6
Power On
Press the power button on your computer and monitor to turn them on.
Setup and Quick Re ference Guide
15
w w w. d e l l . c o m | s u p p o r t . d e l l . c o m
7
Setting Up the Operating System
When you start the computer for the first time, a few system start-up
messages may appear, including one that shows your Service Tag and
Express Service Code.
Your computer is preconfigured with the operating system already installed.
Before turning on your computer for the first time, you must complete all
the previous setup steps, connecting all devices for your computer.
The initial setup of the operating system is automatic and may take several
minutes. Additional setup time may be required, depending on your
system’s internal and external devices.
Follow the operating system prompts to complete setup. You may be
prompted to enter the Windows Product Key (also called the Product ID or
COA) to complete the registration. You can find this above the service tag
on your computer.
NOTE: For more information on setting up the operating system, see the
operating system installation guide.
For future reference, write the number below:
Product Key (ID or COA): ________________________________________
For more information, access your computer documentation from the
User’s Guides icon on the desktop or from the Dell Precision ResourceCD.
16
Setup and Quick Re ference Guide
Dual Monitors
Attach the main monitor to the primary port. See "Frequently Asked
Questions" on page 18 for more information.
secondary port
primary port
NOTE: A second monitor is optional and requires a multimonitor graphics
adapter card.
NOTE: To enable dual-monitor support, both monitors must be attached when
the computer starts.
Setup and Quick Re ference Guide
17
w w w. d e l l . c o m | s u p p o r t . d e l l . c o m
Frequently Asked Questions
Problem?
Try...
Or try the Dell Precision
ResourceCD
Or try the Dell Support Site
How do I use my Dell See "Using the Dell
Go to the main menu on the
Precision ResourceCD? Precision™ ResourceCD" on Dell Precision ResourceCD.
page 9 for more information. Click User’s Guides in the
Topic pull-down menu and
click Dell Precision
ResourceCD Guide.
Where can I find a
detailed User’s Guide
for my computer?
Depending on your
operating system, doubleclick the User’s Guides icon
on your desktop or click the
Start button and select Help
and Support.
Go to the main menu on the
Dell Precision ResourceCD.
Click User’s Guides in the
Topic pull-down menu and
click the user’s guide
appropriate for your computer.
Go to support.dell.com. At the
Welcome page, click
Dell Documents. Make selections
appropriate for your computer to
access your User’s Guide.
Go to the main menu on the
Dell Precision ResourceCD.
Click User’s Guides in the
Topic pull-down menu, click
the user’s guide appropriate
for your computer, and then
see "Limited Warranty and
Return Policy."
Go to support.dell.com. At the
Welcome page, click
Dell Documents. Make selections
appropriate for your computer to
access your User’s Guide. See
"Limited Warranty and Return
Policy" in the User’s Guide.
Documentation such as the
User’s Guide is available on
your hard drive.
Where can I find a
Depending on your
warranty statement for operating system, doublemy computer?
click the User’s Guides icon
on your desktop or click the
Start button and select Help
and Support. See the
"Limited Warranty and
Return Policy" section in
your User’s Guide.
Where can I find the
Product Key (also
called the Product ID
or Certificate of
Authenticity [COA])
for the operating
system registration?
See page 16 of this
document.
How do I find
technical
specifications for my
computer?
Depending on your
operating system, doubleclick the User’s Guides icon
on your desktop or click the
Start button and select Help
and Support. See the
"Technical Specifications"
section in your User’s Guide.
18
Setup and Quick Re ference Guide
Go to support.dell.com. At the
Welcome page, click Ask Dudley!
and search using the keywords
Product Key.
Go to the main menu on the
Dell Precision ResourceCD.
Click User’s Guides in the
Topic pull-down menu, click
the user’s guide appropriate
for your computer, and then
see "Technical Specifications."
Go to support.dell.com. At the
Welcome page, click
Dell Documents. Make selections
appropriate for your computer to
access your User’s Guide. See
"Technical Specifications" in the
User’s Guide.
Problem?
Try...
Or try the Dell Precision
ResourceCD
Or try the Dell Support Site
I have a computer with
a dual-monitorcapable graphics card.
How do I set up my
second monitor?
Depending on your
operating system, doubleclick the User’s Guides icon
on your desktop or click the
Start button, and then select
Help and Support and
search for dual monitor. A
step-by-step procedure for
setting up dual monitors is
located in the video
controller User’s Guide.
Go to the main menu on the
Dell Precision ResourceCD.
Click User’s Guides in the
Topic pull-down menu and
click the user’s guide
appropriate for your computer.
Go to http://support.dell.com.
At the Welcome page, click
Dell Knowledge Base and search
using the keywords dual
monitor.
If I need a driver for
my graphics card,
network adapter,
sound card, small
computer system
interface (SCSI)
software, or some
other device, where do
I locate it?
See "Using the Dell
See the Dell Precision
Precision™ ResourceCD" on WorkStations ResourceCD
page 9 for more information. Guide for more information.
How do I open the
computer?
See "Opening the Computer Go to the main menu on the
Cover" on page 21.
Dell Precision ResourceCD.
Click User’s Guides in the
Topic pull-down menu, click
the user’s guide appropriate
for your computer, and then
see "Removing and Installing
Parts."
Go to support.dell.com for help
with general usage, installation,
and troubleshooting instructions.
The monitor is blank
and the power light is
blinking green. How
do I resume operations
with my computer?
The computer is in a
reduced power, or "sleep,"
state. Use one of the
appropriate methods to
"wake up" the computer.
Go to support.dell.com. At the
Welcome page, click
Dell Documents. Make selections
appropriate for your computer to
access your User’s Guide. See
"Power Management" in the
User’s Guide.
You may also have a CD
specifically for the device. If
so, search the contents of the
CD for documentation and
appropriate driver(s).
Depending on your
operating system, doubleclick the User’s Guides icon
on your desktop or click the
Start button and select Help
and Support. See "Power
Management" in your
User’s Guide.
Go to the main menu on the
Dell Precision ResourceCD.
Click User’s Guides in the
Topic pull-down menu, click
the user’s guide appropriate
for your computer, and then
see "Power Management."
Setup and Quick Re ference Guide
19
w w w. d e l l . c o m | s u p p o r t . d e l l . c o m
Problem?
Try...
Or try the Dell Precision
ResourceCD
Or try the Dell Support Site
How do I install
See the interior service label
additional hardware on described in "Inside Your
my computer?
Computer" on page 23. Also,
see "Removing and Installing
Parts" on page 24.
Go to the main menu on the
Dell Precision ResourceCD.
Click User’s Guides in the
Topic pull-down menu, click
the user’s guide appropriate
for your computer, and then
see "Removing and Installing
Parts."
Go to support.dell.com. At the
Welcome page, click
Dell Documents. Make selections
appropriate for your computer to
access your User’s Guide. See
"Removing and Installing Parts" in
the User’s Guide.
I installed 4 GB of
system memory. Why
does some of my
memory appear to be
missing?
Depending on your
operating system, doubleclick the User’s Guides icon
on your desktop or click the
Start button and select Help
and Support. See "System
Memory" under the
"Removing and Installing
Parts" section in your
User’s Guide.
Go to the main menu on the
Dell Precision ResourceCD.
Click User’s Guides in the
Topic pull-down menu, click
the user’s guide appropriate
for your computer, and then
see "System Memory."
Go to support.dell.com. At the
Welcome page, click
Dell Documents. Make selections
appropriate for your computer to
access your User’s Guide. See
"System Memory" in the User’s
Guide.
How do I reinstall my
operating system?
See the operating system
installation guide for
information on reinstalling
your operating system.
Safety First—For You and Your
Computer
While working inside your computer, do not attempt to service the
computer except as explained in this guide and elsewhere in
Dell documentation. Always follow the instructions closely.
Working inside your computer is safe—if you observe the following
precautions.
CAUTION: FOR YOUR PERSONAL SAFETY AND PROTECTION OF
THE EQUIPMENT
20
Setup and Quick Re ference Guide
Before you start to work on the computer, perform the following steps in the
sequence indicated:
1
Turn off the computer and all devices.
2
Touch an unpainted metal surface on the computer, such as the metal
around the card-slot openings at the back of your computer, before
touching anything inside your computer.
3
Disconnect the computer and devices from their electrical outlets.
Doing so reduces the potential for personal injury or shock. Also
disconnect any telephone or telecommunication lines from the
computer.
NOTE: Before disconnecting a device from the computer or removing a
component from the system board, verify that the standby power light on the
system board has turned off. See the interior service label located on the inside
of the cover to locate the standby power light.
While you work, periodically touch an unpainted metal surface on the
computer to dissipate any static electricity that might harm internal
components.
In addition, Dell recommends that you periodically review the safety
instructions in the documentation that came with your computer.
Opening the Computer Cover
You may need to open the computer cover if you are going to remove or
install a part, reset a forgotten password, or diagnose a computer problem.
CAUTION: Before you perform this procedure, see "Safety First—
For You and Your Computer" on page 20.
Opening the Cover
1
Turn off the computer and devices, disconnect them from their
electrical outlets, and wait 10 to 20 seconds.
2
If you have installed a padlock through the padlock ring on the back
panel, remove the padlock (see the following figure).
3
Lay the computer on its right side.
Setup and Quick Re ference Guide
21
w w w. d e l l . c o m | s u p p o r t . d e l l . c o m
4
Open the computer cover:
a
Slide the cover release latch toward the top of the computer
(see the following figure).
b
Raise the back of the cover, and pivot it toward the front of the
computer.
cover
release latch
security cable slot
padlock ring
22
Setup and Quick Re ference Guide
Inside Your Computer
The following figure shows the computer with the cover open.
NOTE: A service label affixed to the inside of your computer cover provides
information about working inside your computer.
interior service label
diskette-drive bracket
hard-drive bracket
externally accessible-drive bracket
chassis intrusion switch
AGP card
brace
front panel
cable retainer
memory riser board
retention bracket
(if needed)
speaker
expansion-card
cooling fan
microprocessor
airflow shroud
I/O panel connectors
expansion-card slots
power supply
system board
AC power receptacle
power supply airflow vents
Setup and Quick Re ference Guide
23
w w w. d e l l . c o m | s u p p o r t . d e l l . c o m
Removing and Installing Parts
Instructions for removing and installing various parts are located in the
User’s Guide on your hard drive. To access this document:
1
Double-click the User’s Guides icon on your desktop.
NOTE: The User’s Guide is also available as a portable document format
(PDF) file at support.dell.com.
2
Click System Information.
3
Click System Documentation.
4
Click Dell Precision WorkStation 530 System User’s Guide.
5
Click Removing and Installing Parts.
6
Select Print from the File menu to print the procedure before you
begin working.
NOTE: To print the entire User’s Guide with the Internet Explorer browser,
select Print all linked documents in the Print window.
Adding Memory
Perform the preceding steps to access the User’s Guide, and then see
"System Memory."
Adding a Hard Drive or Externally Accessible Drive
Your computer has one or more enhanced integrated drive electronics
(EIDE) drives or SCSI drives. To determine which kind of drives you have,
see the order form that came with your computer.
Perform the preceding steps to access the User’s Guide, and then see
"Disk Drives and Media."
Adding a PCI Expansion Card
To add a Peripheral Component Interconnect (PCI) expansion card, such as
a modem, to your computer, perform the preceding steps to access the
User’s Guide, and then see "Expansion Cards."
24
Setup and Quick Re ference Guide
Upgrading the Video Card
To upgrade your accelerated graphics port (AGP) card, see the
documentation for the video card and any other special instructions. The
documentation for your video card is included with your video card upgrade
kit. You can also find online documentation about your video card at
support.dell.com. Go to the page for your computer and click
Dell Documents, then click Video Adapter. Pick your video card from the
list displayed.
For instructions on installing the card in your computer, perform the
preceding steps to access your User’s Guide, and see "Expansion Cards."
Upgrading Your Processor(s)
Perform the preceding steps to access the User’s Guide, and then see
"Microprocessor."
Solving Problems
NOTE: If computer problems occur that require help from Dell support, write
down your Express Service Code and Service Tag below, and then contact Dell
from the same location as your computer.
Express Service Code: ___________________________
Service Tag:
___________________________
Setup and Quick Re ference Guide
25
w w w. d e l l . c o m | s u p p o r t . d e l l . c o m
Dell provides tools to help you solve problems. The tools listed in this
section can help you solve a problem when no other online tools are
available. Your computer includes the following tools:
D E L L D I A G N O S T I C S — The Dell Precision ResourceCD contains Dell
Diagnostics that tests various components on your computer and helps identify
the cause of computer problems. For more information, see "When to Use the
Dell Diagnostics" on page 26.
S Y S T E M L I G H T S — Located on the front of the computer, these lights can
indicate a computer problem. For more information, see "System Lights" on
page 30.
D I A G N O S T I C L I G H T S — Located on the front of the computer, these lights can
indicate a computer problem. For more information, see "Diagnostic Lights" on
page 32.
S Y S T E M M E S S A G E S — The computer reports these messages to warn you of
current or possible failure. For more information, see "System Messages" on
page 37.
B E E P C O D E S — A series of audible beep codes emitted by your computer can
help identify a problem. For more information, see "Beep Codes" on page 37.
When to Use the Dell Diagnostics
If you experience a problem with your computer, perform the checks in
"Finding Solutions" in your User’s Guide and run the Dell Diagnostics
before you contact Dell for technical assistance. Running the Dell
Diagnostics may help you resolve the problem without contacting Dell. If
you do contact Dell, the test results can provide important information for
Dell's service and support personnel.
The Dell Diagnostics allows you to:
26
•
Perform express, extended, or custom tests on one or all devices
•
Select tests based on a symptom of the problem you are having
•
Choose how many times a test is run
•
Display test results
Setup and Quick Re ference Guide
•
Suspend testing if an error is detected
•
Access online help information that describes the tests and devices
•
Receive status messages that tell you whether tests completed
successfully
•
Receive error messages if problems are detected
Starting the Dell Diagnostics
It is recommended that you print these procedures before you begin.
NOTICE: Only use the Dell Diagnostics to test your Dell™ computer. Using
this program with other computers can result in error messages.
Enter system setup, review your computer’s configuration information, and
ensure that the device you want to test displays in system setup and is
active.
Start the Dell Diagnostics from either your hard drive or from the Drivers
and Utilities CD (also known as the ResourceCD).
Starting the Dell Diagnostics From Your Hard Drive
1
Shut down and restart the computer.
2
When the DELL logo appears, press <F12> immediately.
If you wait too long and the Windows logo appears, continue to wait
until you see the Windows desktop. Then shut down your computer
through the Start menu and try again.
3
When the boot device list appears, highlight Boot to Utility Partition
and press <Enter>.
4
When the Dell Diagnostics Main Menu appears, select the test you
want to run.
NOTE: If you receive a
message stating that no
Diagnostics utility
partition has been found,
follow the instructions to
run the Dell Diagnostics
from your Drivers and
Utilities CD.
Starting the Dell Diagnostics From the Drivers and Utilities CD
1
Insert the Drivers and Utilities CD into the CD drive.
2
Shut down and restart the computer.
When the DELL logo appears, press <F12> immediately.
Setup and Quick Re ference Guide
27
w w w. d e l l . c o m | s u p p o r t . d e l l . c o m
If you wait too long and the Windows logo appears, continue to wait
until you see the Windows desktop. Then shut down your computer
through the Start menu and try again.
NOTE: This feature
changes the boot sequence
for one time only. On the
next start-up, the
computer boots according
to the devices specified in
system setup.
3
When the boot device list appears, highlight IDE CD-ROM Device
and press <Enter>.
4
Select the IDE CD-ROM Device option from the CD boot menu.
5
Select the Boot from CD-ROM option from the menu that appears.
6
Type 1 to start the ResourceCD menu.
7
Type 2 to start the Dell Diagnostics.
8
Select Run the 32 Bit Dell Diagnostics from the numbered list. If
multiple versions are listed, select the version appropriate for your
platform.
9
When the Dell Diagnostics Main Menu appears, select the test you
want to run.
Dell Diagnostics Main Menu
1
NOTE: The Service Tag
for your computer is
located at the top of each
test screen.
28
After the Dell Diagnostics loads and the Main Menu screen appears,
click the button for the option you want.
Option
Function
Express
Test
Performs a quick test of devices. This test typically takes 10
to 20 minutes and requires no interaction on your part.
Run Express Test first to increase the possibility of tracing
the problem quickly.
Extended
Test
Performs a thorough check of devices. This test typically
takes an hour or more and requires you to answer questions
periodically.
Custom
Test
Tests a specific device. You can customize the tests you
want to run.
Symptom
Tree
Lists the most common symptoms encountered and allows
you to select a test based on the symptom of the problem
you are having.
Setup and Quick Re ference Guide
2
If a problem is encountered during a test, a message displaying the
error code and a description of the problem appear. Write down the
error code and problem description and follow the instructions on the
screen.
If you cannot resolve the error condition, contact Dell.
3
If you run a test from the Custom Test or Symptom Tree option, click
the applicable tab described in the following table for more
information.
Tab
Function
Results
Displays the results of the test and any error conditions
encountered.
Errors
Displays error conditions encountered, error codes, and
problem description.
Help
Describes the test and may indicate requirements for
running the test.
Configuration
Displays your hardware configuration for the selected
device.
The Dell Diagnostics obtains your configuration
information for all devices from system setup, memory,
and various internal tests and displays it in the device
list in the left pane of the screen. The device list may
not display the names of all the components installed on
your computer or all devices attached to your computer.
Parameters
Allows you to customize the test by changing the test
settings.
4
When the tests are completed, if you are running the Dell Diagnostics
from the Drivers and Utilities CD, remove the CD.
5
Close the test screen to return to the Main Menu screen. To exit the
Dell Diagnostics and restart the computer, close the Main Menu
screen.
Setup and Quick Re ference Guide
29
w w w. d e l l . c o m | s u p p o r t . d e l l . c o m
Changing the Boot Sequence
NOTE: For more information, see your User’s Guide.
1
Turn on your computer (if your computer is already on, restart it).
2
When F2 = Setup appears in the upper-right corner of the screen,
press <F2>.
The System Setup menu appears.
NOTE: If you wait too long and your operating system begins to load into
memory, let the computer complete the load operation, then restart the
computer and try again.
3
Use the arrow keys to highlight the Boot Sequence menu option and
press <Enter> to access the pop-up menu.
NOTE: Write down your current boot sequence in case you want to
restore it after running the Dell Diagnostics.
4
Use the arrow keys to highlight CD Device in the Boot First Device:
menu option and press <+> to move it to the top of the list.
5
Press <Alt><b> to restart your computer.
Messages and Codes
Your application programs, operating system, and computer can identify
problems and alert you to them. When a problem occurs, a message may
appear on your monitor screen, a beep code may sound, or a light code may
be generated. The following subsections present information about
messages, beep codes, and light codes.
System Lights
Your computer has a number of lights that can help you analyze and solve
problems. To locate these lights, see "Computer Features" on page 10.
The following table lists the codes for the system lights, gives probable
causes, and suggests corrective actions.
NOTE: For many system light codes, it is helpful to check the diagnostic lights
to see if the specific problem is identified. See "Diagnostic Lights" on page 32.
30
Setup and Quick Re ference Guide
System Light Codes
Power Light
Hard Drive Light Cause
Corrective Action
Solid green
N/A
Power is on, and the computer is
operating normally.
No corrective action is required.
Blinking green
Blank
The computer is in the suspended
state (Windows 2000 and
Windows XP).
Use one of the appropriate methods
to "wake up" the computer. See
"Power Management" in the
User’s Guide.
Blinks green several N/A
times and then
turns off
A configuration error exists.
Check the diagnostic lights to see if
the specific problem is identified.
Solid yellow
The Dell Diagnostics is running a
If the Dell Diagnostics is running,
test, or a device on the system board allow the testing to complete.
may be faulty or incorrectly installed. Check the diagnostic lights to see if
the specific problem is identified.
Also, see "System Board Problems" in
the User’s Guide.
N/A
If the computer does not boot,
contact Dell for technical assistance.
Blinking yellow
Blank
A power supply or system board
failure exists.
Check the diagnostic lights to see if
the specific problem is identified.
Also, see "Power Problems" and
"System Board Problems" in the
User’s Guide.
Blinking yellow
Solid green
A system board failure exists.
Check the diagnostic lights to see if
the specific problem is identified.
Also, see "System Board Problems" in
the User’s Guide.
Solid green and a
beep code during
POST
N/A
A problem was detected while the
BIOS was executing.
See "Beep Codes" on page 37 for
instructions on diagnosing the beep
code. Also, check the diagnostic lights
to see if the specific problem is
identified.
Solid green power
light and no beep
code and no video
during POST
N/A
The monitor or the graphics card may Check the diagnostic lights to see if
be faulty or incorrectly installed.
the specific problem is identified.
Also, see "Video Problems" in the
User’s Guide.
Solid green power
light and no beep
code but the
computer locks up
during POST
N/A
An integrated system board device
may be faulty.
Check the diagnostic lights to see if
the specific problem is identified. If
the problem is not identified, contact
Dell for technical assistance.
Setup and Quick Re ference Guide
31
w w w. d e l l . c o m | s u p p o r t . d e l l . c o m
Diagnostic Lights
When you turn on your computer, it performs a series of self-diagnostic
tests. A successful power-on self test (POST) ends with a single beep that
signifies the start of normal operation. If the computer fails to complete the
POST, a series of lights located on the computer can help you understand
which test failed or why the computer stopped responding. These lights
communicate problems encountered before and during POST only, not
during normal operation. To locate the diagnostic lights, see "Computer
Features" on page 10.
The following table lists the codes for the diagnostic lights, gives probable
causes, and suggests corrective actions. The lights are labeled to help you
match the pattern on your computer with one shown in the tables.
32
Setup and Quick Re ference Guide
Diagnostic Light Codes Before POST
The following table lists the codes for the diagnostic lights that occur before
the computer begins the POST.
Diagnostic Light Codes Before POST
Light Pattern
A B C D
Cause
Action
No electrical power is supplied to the Connect the computer to its electrical outlet. Ensure that
computer.
the front-panel power light is on. If the power light is off,
ensure that the computer is connected to a working
electrical outlet, and then press the power button.
If the problem is still not resolved, contact Dell for
technical assistance.
Normal off condition. Computer is
connected to its electrical outlet.
A B C D
Ensure that the front-panel power light is on. If the power
light is off, ensure that the computer is connected to a
working electrical outlet, and then press the power button.
When the computer is operating normally, it can be
automatically or remotely started as long as it remains
connected to an electrical outlet. For more information, see
"Power Management" in the User’s Guide.
If the problem is still not resolved, contact Dell for
technical assistance.
Computer is in a reduced power or
"sleep" state.
Use one of the appropriate methods to "wake up" the
computer. See "Power Management" in the User’s Guide.
If the problem is still not resolved, contact Dell for
technical assistance.
A B C D
BIOS is not executing.
See "Reset Corrupted BIOS Settings" in the User’s Guide.
Possible power supply or power cord
failure.
See "Power Problems" in the User’s Guide.
Possible system board failure.
Contact Dell for technical assistance.
A B C D
A B C D
A B C D
= yellow
= green
= off
Setup and Quick Re ference Guide
33
w w w. d e l l . c o m | s u p p o r t . d e l l . c o m
D i a g n o s t i c L i g h t C o d e s B e f o r e P O S T (continued)
Light Pattern
Cause
Action
Microprocessor and/or voltage
regulator module (VRM) mismatch.
See "Microprocessor Problems" in the User’s Guide.
Possible VRM 0 failure.
See "Microprocessor Problems" in the User’s Guide.
Possible VRM 1 failure.
See "Microprocessor Problems" in the User’s Guide.
Possible VRM 0 and VRM 1 failure.
See "Microprocessor Problems" in the User’s Guide.
A B C D
A B C D
A B C D
A B C D
Possible memory riser board A failure. See "System Memory Problems" in the User’s Guide.
A B C D
Possible memory riser board B failure. See "System Memory Problems" in the User’s Guide.
A B C D
Possible memory riser board A and
riser board B failure.
A B C D
= yellow
= green
= off
34
Setup and Quick Re ference Guide
See "System Memory Problems" in the User’s Guide.
Diagnostic Light Codes During POST
The following table lists the codes for the diagnostic lights that occur while
the computer is performing the POST.
NOTE: If the computer is turned on and all four diagnostic lights are not on,
see "Diagnostic Light Codes Before POST" on page 33.
Diagnostic Light Codes During POST
Light Pattern
Cause
Action
Possible BIOS failure, and the computer is in
the recovery mode.
Run the BIOS Recovery utility, and restart the
computer to retest. See "BIOS Recovery Utility"
in the User’s Guide.
A B C D
If the problem is still not resolved, see "Reset
Corrupted BIOS Settings" in the User’s Guide.
Possible microprocessor failure.
See "Microprocessor Problems" in the
User’s Guide.
Possible memory failure.
See "System Memory Problems" in the
User’s Guide.
Possible expansion card failure or conflict.
See "Expansion-Card Problems" and "Hardware
Conflicts" in the User’s Guide.
Possible video card failure.
Reseat the video card, and restart the computer
to retest. For instructions on removing and
installing an expansion card, see "Removing an
Expansion Card" in the User’s Guide.
A B C D
A B C D
A B C D
A B C D
If the problem is not resolved, see "ExpansionCard Problems" in the User’s Guide.
If the problem is still not resolved, contact Dell
for technical assistance.
Possible diskette drive or hard-drive failure.
See "Diskette Drive Problems" and "Hard Drive
Problems" in the User’s Guide.
A B C D
= yellow
= green
= off
Setup and Quick Re ference Guide
35
w w w. d e l l . c o m | s u p p o r t . d e l l . c o m
D i a g n o s t i c L i g h t C o d e s D u r i n g P O S T (continued)
Light Pattern
Cause
Action
Possible USB failure.
Disconnect all USB devices and cables, and
restart the computer to retest. Then reconnect
all USB devices and cables, and restart the
computer to retest.
A B C D
If the problem is still not resolved, contact Dell
for technical assistance.
Possible system board resource and/or hardware See "System Board Problems" and "Hardware
failure.
Conflicts" in the User’s Guide.
A B C D
Possible system board resource and/or hardware See "System Board Problems" and "Hardware
failure.
Conflicts" in the User’s Guide.
A B C D
Possible expansion card failure or conflict.
See "System Board Problems" and "Hardware
Conflicts" in the User’s Guide.
A B C D
Possible system board resource and/or hardware See "System Board Problems" and "Hardware
failure.
Conflicts" in the User’s Guide.
A B C D
Normal operating condition after POST.
A B C D
= yellow
= green
= off
36
Setup and Quick Re ference Guide
No action is necessary.
System Messages
If an error occurs during start-up, a message may be reported on the
monitor identifying the problem. If a system message is displayed, look it up
under "System Messages" in the User’s Guide for suggestions on resolving
any problems. The system messages are listed alphabetically.
NOTE: If the system message you received is not listed in the User’s Guide,
check the documentation for the application program that you were running at
the time the message appeared and/or the operating system documentation for
an explanation of the message and a recommended action.
Beep Codes
If an error occurs during start-up that cannot be reported on the monitor,
your computer may emit a beep code that identifies the problem. The beep
code is a pattern of sounds: for example, one beep, followed by a second
beep, and then a burst of three beeps (code 1-1-3) means that the computer
was unable to read the data in nonvolatile random-access memory
(NVRAM).
If a beep code is emitted, write it down and look it up under
"System Beep Codes" in the User’s Guide.
Setup and Quick Re ference Guide
37
38
Setup and Quick Re ference Guide
w w w. d e l l . c o m | s u p p o r t . d e l l . c o m
Station de travail Dell Precision™ 530
Guide de configuration et
de référence rapide
w w w. d e l l . c o m | s u p p o r t . e u r o . d e l l . c o m
Remarques, avis et précautions
REMARQUE : Une REMARQUE indique des informations importantes qui
vous aident à mieux utiliser votre ordinateur.
AVIS : Un AVIS vous avertit d'un risque de dommage matériel ou de perte de
données et vous indique comment éviter le problème.
PRÉCAUTION : Une PRÉCAUTION indique un risque potentiel
d'endommagement du matériel, de blessure corporelle ou de mort.
____________________
Les informations de ce document sont sujettes à modifications sans préavis.
© 2002 Dell Computer Corporation. Tous droits réservés.
Toute reproduction sous quelque forme que ce soit sans l'autorisation écrite de Dell Computer
Corporation est strictement interdite.
Marques utilisées dans ce document : Dell, le logo DELL et Dell Precision sont des marques de
Dell Computer Corporation ; Microsoft et Windows sont des marques déposées de Microsoft
Corporation.
D'autres marques et noms commerciaux peuvent être utilisés dans ce document pour faire référence
à des entités se réclamant de ces marques et de ces noms ou à leurs produits. Dell Computer
Corporation dénie tout intérêt propriétaire aux marques et aux noms commerciaux autres que les
siens.
Décembre 2002
Réf. 402GU
Rév. A03
Sommaire
Recherche d'informations et d'assistance
. . . . . . . . . . . . .
47
. . . . . . . . . . . . . . . .
48
. . . . . . . . . . . . . . . . .
55
. . . . . . . . . . . . . . . . . .
56
Configuration de votre ordinateur
Utilisation de deux moniteurs
Questions fréquemment posées
Sécurité optimale — Pour vous et votre ordinateur
. . . . . . .
60
. . . . . . . . . . . . . . . .
61
. . . . . . . . . . . . . . . . . . . . . .
61
. . . . . . . . . . . . . . . . . . . . . .
63
Ouverture du capot de l'ordinateur
Ouverture du capot .
Intérieur de l'ordinateur
. . . . . . . . . . . . . . . . . .
64
. . . . . . . . . . . . . . . . . . . . . . .
64
Retrait et installation de pièces
Ajout de mémoire
Ajout d'un disque dur ou d'une unité accessible
de l'extérieur . . . . . . . . . . . . . . . . .
. . . . . . . . .
64
. . . . . . . . . . . . . . .
65
. . . . . . . . . . . . . . . .
65
Ajout d'une carte d'extension PCI .
Mise à niveau de la carte vidéo .
. . . . . . . . . . . . . . .
65
. . . . . . . . . . . . . . . . . . . . .
65
Mise à niveau de votre processeur
Résolution des problèmes
. . . . . . . . . . . . . . .
66
. . . . . . . . . . . . . . . .
67
. . . . . . . . . . . . . . . . . . . . . . .
71
Quand utiliser les Diagnostics Dell
Démarrage des Diagnostics Dell
Messages et codes
43
. . . . . . . . .
Utilisation du CD Dell Precision™ ResourceCD
Sommaire
41
42
Sommaire
Recherche d'informations et
d'assistance
Le tableau suivant dresse la liste des ressources fournies par Dell en tant
qu'outils de support. D'autres ressources peuvent être livrées avec votre
ordinateur.
Que recherchez-vous ?
Retrouvez les éléments ici
• Un programme de diagnostics pour mon
ordinateur
• Des pilotes pour mon ordinateur
• Mon Guide d'utilisation
• La documentation de mon périphérique
CD Pilotes et utilitaires (appelé aussi
ResourceCD)
Vous pouvez utiliser ce CD pour accéder à la documentation, réinstaller
des pilotes ou exécuter les outils de diagnostic.
•
•
•
•
•
Guide de configuration et de référence rapide
Comment configurer mon ordinateur
Comment prendre soin de mon ordinateur
Informations de dépannage
Comment ouvrir le capot de mon ordinateur
Comment localiser de la documentation
supplémentaire
G u i d e d e c o n f i g u r a t i o n e t de r éf é r e nc e r apide
43
w w w. d e l l . c o m | s u p p o r t . e u r o . d e l l . c o m
Que recherchez-vous ?
Retrouvez les éléments ici
• Code de service express et numéro de
Code de service express et clé du produit
service
• Étiquette de licence Microsoft® Windows®
Les étiquettes sont apposées sur votre ordinateur.
• Comment réinstaller mon système
d'exploitation
CD du système d'exploitation et Guide
d'installation
Après avoir réinstallé le système d'exploitation, utilisez le CD Pilotes et
utilitaires pour réinstaller les pilotes des périphériques fournis avec
votre ordinateur.
44
Guide de configuration et d e r é f é r e n c e r a p i d e
Que recherchez-vous ?
Retrouvez les éléments ici
• Comment démonter et remplacer des pièces I c ô n e d u G u i d e d ' u t i l i s a t i o n
(Microsoft Windows 2000)
• Caractéristiques techniques
• Comment configurer les paramètres
système
• Comment dépanner et résoudre les
problèmes
Double-cliquez sur l'icône Guide d'utilisation située sur votre bureau.
Centre d'aide et de support Windows XP
1 Cliquez sur le bouton Start (Démarrer), puis sur Help and Support
(Aide et support).
2 Cliquez sur Guide d'utilisation.
• Position des connecteurs sur la carte
système
Étiquette d'informations système
ou
L'étiquette est apposée sur la face interne du capot de votre ordinateur.
G u i d e d e c o n f i g u r a t i o n e t de r éf é r e nc e r apide
45
w w w. d e l l . c o m | s u p p o r t . e u r o . d e l l . c o m
Que recherchez-vous ?
Retrouvez les éléments ici
• Pilotes récents pour mon ordinateur
• Réponses aux questions sur le service et le
support technique
• Discussions en ligne avec d'autres
utilisateurs et le support technique
• Documentation pour mon ordinateur, y
compris le Guide technique
Site Web de support technique de Dell —
support.dell.com
• État des appels de demande d'assistance et
historique de support technique
• Principaux problèmes techniques de mon
ordinateur
• Questions fréquemment posées
• Téléchargements de fichiers
• Détails sur la configuration de mon
ordinateur
• Contrat de service pour mon ordinateur
Site Web de support technique de Dell Premier —
premiersupport.dell.com
• Informations sur la garantie
Guide d'information sur le système
46
Le site Web de support technique propose plusieurs outils en ligne,
notamment :
• Base de connaissance — Astuces, conseils et cours en ligne
• Forum clients — Discussion en ligne avec d'autres clients Dell
• Mises à niveau — Informations de mise à niveau pour les
composants tels que la mémoire, le disque dur et le système
d'exploitation
• Service clientèle — Informations sur les contacts, état des
commandes, garantie et informations sur les réparations
• Téléchargements — Pilotes, correctifs et mises à jour logicielles
• Référence — Documentation de l'ordinateur, caractéristiques de
produits et livres blancs
Le site Web Dell Premier Support est personnalisé pour les entreprises,
l'administration publique et les établissements d'enseignement. Il se
peut que ce site ne soit pas disponible dans tous les pays.
Guide de configuration et d e r é f é r e n c e r a p i d e
Que recherchez-vous ?
Retrouvez les éléments ici
Centre d'aide et de support Windows XP
• Comment utiliser Windows XP
• Documentation de mon ordinateur et de ses 1 Cliquez sur le bouton Start (Démarrer), puis sur Help and Support
(Aide et support).
périphériques
2 Entrez un mot ou une expression décrivant votre problème, puis
cliquez sur l'icône en forme de flèche.
3 Cliquez sur la rubrique qui décrit votre problème.
4 Suivez les instructions qui s'affichent à l'écran.
REMARQUE : Pour obtenir de l'aide sur l'utilisation de
Windows 2000, cliquez sur le bouton Start (Démarrer) puis sur
Help (Aide).
Utilisation du CD Dell Precision™ ResourceCD
Pour utiliser le CD Dell Precision ResourceCD à partir de votre système
d'exploitation Microsoft® Windows® :
1
Introduisez le CD Dell Precision ResourceCD dans le lecteur de
CD-ROM.
Si vous utilisez le CD Dell Precision ResourceCD pour la première fois
sur cet ordinateur, la fenêtre d'installation ResourceCD Installation
(Installation de ResourceCD) s'ouvre pour vous indiquer que le CD
va commencer l'installation.
2
Cliquez sur OK pour continuer.
Pour terminer l'installation, suivez les invites du programme
d'installation.
3
Cliquez sur Suivant dans l'écran Welcome Dell System Owner
(Bienvenue au propriétaire du système Dell).
4
Sélectionnez la liste appropriée System Model (Modèle de système),
Operating System (Système d'exploitation), Device Type (Type de
périphérique) ou Topic (Rubrique).
Pour accéder au Guide Dell Precision ResourceCD, cliquez sur User's Guides
(Guides d'utilisation) dans le menu déroulant Topic (Rubrique), puis
cliquez sur Dell Precision ResourceCD.
REMARQUE : Pour accéder aux pilotes de périphériques et à la
documentation utilisateur, vous devez utiliser le CD ResourceCD à partir de
Windows. Pour utiliser les Diagnostics Dell, vous devez insérer le CD
ResourceCD dans le lecteur de CD-ROM et redémarrer votre ordinateur. Pour
plus d'informations sur l'exécution des Diagnostics Dell, consultez la section
« Quand utiliser les Diagnostics Dell » à la page 66.
G u i d e d e c o n f i g u r a t i o n e t de r éf é r e nc e r apide
47
w w w. d e l l . c o m | s u p p o r t . e u r o . d e l l . c o m
Configuration de votre ordinateur
Les numéros indiqués dans la figure suivante correspondent aux tâches
décrites dans la procédure de configuration.
REMARQUE : Vous devez réaliser toutes les étapes pour configurer
correctement votre ordinateur.
Caractéristiques de l'ordinateur
6
Voyants de
diagnostic
1
4
2
3
7
5
Vue arrière
48
Guide de configuration et d e r é f é r e n c e r a p i d e
Vue avant
(portes ouvertes)
1
Clavier et souris
Connectez le clavier et la souris tel qu'indiqué sur l'illustration suivante.
REMARQUE : Si vous utilisez un clavier de style PS/2 (Personal System/2),
reliez-le au connecteur de clavier PS/2. Si vous utilisez un clavier de type USB
(Universal Serial Bus), reliez-le à un connecteur USB tel qu'indiqué sur
l'illustration. Les souris et claviers USB ne doivent pas être reliés aux
connecteurs USB situés à l'avant de l'ordinateur.
REMARQUE : Vous ne devez pas utiliser une souris PS/2 et USB
simultanément.
Clavier
PS/2 ou USB
Souris
PS/2 ou USB
G u i d e d e c o n f i g u r a t i o n e t de r éf é r e nc e r apide
49
w w w. d e l l . c o m | s u p p o r t . e u r o . d e l l . c o m
2
Carte réseau et modem
Insérez le câble réseau (et non la ligne téléphonique) dans le connecteur
réseau.
REMARQUE : Votre ordinateur est doté d'une carte réseau intégrée.
Toutefois, si une carte d'extension réseau est installée sur celui-ci, vous devez
connecter le câble réseau à la carte réseau, et non au connecteur situé sur le
panneau arrière de l'ordinateur.
Si vous disposez d'un modem en option, branchez la ligne téléphonique à ce
dernier.
AVIS : Ne raccordez pas le câble de modem au connecteur réseau. La tension
de la ligne de communication téléphonique risquerait d'endommager
l'adaptateur réseau.
Câble de réseau
50
Guide de configuration et d e r é f é r e n c e r a p i d e
Câble de modem
3
Moniteur
Alignez puis insérez avec précaution le câble du moniteur, de manière à ne
pas tordre les broches du connecteur. Resserrez les vis à ailettes du
connecteur de câble.
REMARQUE : Si vous utilisez un seul moniteur avec une carte prenant en
charge l'utilisation de deux moniteurs, vous devez utiliser le port principal.
Pour activer la prise en charge de deux moniteurs, les deux moniteurs doivent
être connectés à l'ordinateur au moment du démarrage.
Pour plus d'informations sur la configuration de deux moniteurs, consultez
la section « Utilisation de deux moniteurs » à la page 55.
Port principal
Port secondaire facultatif
G u i d e d e c o n f i g u r a t i o n e t de r éf é r e nc e r apide
51
w w w. d e l l . c o m | s u p p o r t . e u r o . d e l l . c o m
4
Haut-parleurs
Connectez les haut-parleurs à l'ordinateur, tel qu'indiqué dans les
instructions qui les accompagnent.
REMARQUE : Votre ordinateur est doté d'un contrôleur audio intégré.
Toutefois, si une carte d'extension audio est installée sur celui-ci, vous devez
connecter les périphériques audio externes à la carte son, et non aux
connecteurs situés sur le panneau arrière de l'ordinateur.
52
Guide de configuration et d e r é f é r e n c e r a p i d e
5
Alimentation électrique
Branchez les prises électriques de l'ordinateur et du moniteur.
6
Mise sous tension
Appuyez sur le bouton d'alimentation de l'ordinateur et du moniteur pour
les mettre sous tension.
G u i d e d e c o n f i g u r a t i o n e t de r éf é r e nc e r apide
53
w w w. d e l l . c o m | s u p p o r t . e u r o . d e l l . c o m
7
Configuration du système d'exploitation
Lorsque vous démarrez l'ordinateur pour la première fois, quelques
messages de démarrage peuvent s'afficher. Ils vous indiquent notamment
votre code de maintenance et votre numéro de service.
Votre ordinateur est préconfiguré et le système d'exploitation a déjà été
installé sur celui-ci. Avant de démarrer l'ordinateur pour la première fois,
vous devez réaliser toutes les étapes de configuration décrites
précédemment, de manière à connecter tous les périphériques à
l'ordinateur.
La première configuration du système d'exploitation se fait
automatiquement et elle peut nécessiter plusieurs minutes. Il peut être
nécessaire de continuer la configuration selon les périphériques internes et
externes installés sur l'ordinateur.
Suivez les invites du système d'exploitation pour achever la configuration.
Il sera peut-être nécessaire d'entrer la clé de produit Windows (également
appelée ID de produit ou Certificat d'authenticité) pour terminer
l'installation. Ce numéro figure sur votre ordinateur, au-dessus du numéro
de service.
REMARQUE : Pour plus d'informations sur la configuration du système
d'exploitation, consultez le guide d'installation du système d'exploitation.
Notez le numéro de clé ci-après, pour une référence future :
Clé de produit (ID ou Certificat d'authenticité) : _____________________
54
Guide de configuration et d e r é f é r e n c e r a p i d e
Pour plus d'informations, accédez à la documentation de votre ordinateur à
partir de l'icône User's Guides (Guides d'utilisation) située sur votre bureau
ou du CD Dell Precision ResourceCD.
Utilisation de deux moniteurs
Connectez le moniteur principal au port principal. Pour plus
d'informations, consultez « Questions fréquemment posées » à la page 56.
Port secondaire
Port principal
REMARQUE : Un deuxième moniteur peut être utilisé. Dans ce cas, une
carte graphique multimoniteurs est requise.
REMARQUE : Pour activer la prise en charge de deux moniteurs, les deux
moniteurs doivent être connectés à l'ordinateur au moment du démarrage.
G u i d e d e c o n f i g u r a t i o n e t de r éf é r e nc e r apide
55
w w w. d e l l . c o m | s u p p o r t . e u r o . d e l l . c o m
Questions fréquemment posées
Problème
Résolution
Ou consultez le CD Dell
Precision ResourceCD
Ou consultez le site de
support technique Dell
Comment utiliser mon Pour plus d'informations,
CD Dell Precision
consultez « Utilisation du
ResourceCD ?
CD Dell Precision™
ResourceCD » à la page 47.
Ouvrez le menu principal du
CD Dell Precision
ResourceCD. Cliquez sur
User's Guides (Guides
d'utilisation) dans le menu
déroulant Topic (Rubrique),
puis sur Dell Precision
ResourceCD Guide (Guide
du CD Dell Precision
ResourceCD).
Où puis-je trouver un
Guide d'utilisation
détaillé pour mon
ordinateur ?
Ouvrez le menu principal du
CD Dell Precision
ResourceCD. Cliquez sur
User's Guides (Guides
d'utilisation) dans le menu
déroulant Topic (Rubrique),
puis sélectionnez le guide
d'utilisation approprié pour
votre ordinateur.
Visitez le site support.dell.com.
Dans la fenêtre d'accueil, cliquez
sur Dell Documents (Documents
Dell). Sélectionnez les options
appropriées pour votre ordinateur
de manière à accéder au Guide
d'utilisation correspondant.
Ouvrez le menu principal du
CD Dell Precision
ResourceCD. Cliquez sur
User's Guides (Guides
d'utilisation) dans le menu
déroulant Topic (Rubrique),
cliquez sur le guide
d'utilisation approprié pour
votre ordinateur, puis
consultez la section « Limited
Warranty and Return Policy
(Garantie limitée et règle de
retour) ».
Visitez le site support.dell.com.
Dans la fenêtre d'accueil, cliquez
sur Dell Documents (Documents
Dell). Sélectionnez les options
appropriées pour votre ordinateur
de manière à accéder au Guide
d'utilisation correspondant.
Consultez la section « Limited
Warranty and Return Policy
(Garantie limitée et règle de
retour) » du Guide d'utilisation.
En fonction du système
d'exploitation installé sur
votre ordinateur,
double-cliquez sur l'icône
User's Guides (Guides
d'utilisation), située sur le
bureau, ou cliquez sur le
bouton Start (Démarrer)
puis sélectionnez Help and
Support (Aide et support).
Une documentation, telle
que le Guide d'utilisation, est
disponible sur votre unité de
disque dur.
Où puis-je trouver la En fonction du système
déclaration de garantie d'exploitation installé sur
de mon ordinateur ?
votre ordinateur,
double-cliquez sur l'icône
User's Guides (Guides
d'utilisation), située sur le
bureau, ou cliquez sur le
bouton Start (Démarrer)
puis sélectionnez Help and
Support (Aide et support).
Consultez la section
« Limited Warranty and
Return Policy (Garantie
limitée et règle de retour) »
du Guide d'utilisation.
56
Guide de configuration et d e r é f é r e n c e r a p i d e
Problème
Résolution
Ou consultez le CD Dell
Precision ResourceCD
Où puis-je trouver la Reportez-vous à la page 54
clé de produit
de ce document.
(également appelée ID
de produit ou
Certificat
d'authenticité [COA])
requise pour
l'inscription du
système
d'exploitation ?
Ou consultez le site de
support technique Dell
Visitez le site support.dell.com.
Dans la fenêtred'accueil, cliquez
sur Ask Dudley! et faites une
recherche à l'aide des mots clés
Clé de produit.
Comment trouver les
caractéristiques
techniques de mon
ordinateur ?
En fonction du système
d'exploitation installé sur
votre ordinateur,
double-cliquez sur l'icône
User's Guides (Guides
d'utilisation), située sur le
bureau, ou cliquez sur le
bouton Start (Démarrer)
puis sélectionnez Help and
Support (Aide et support).
Consultez la section
« Technical Specifications
(Spécifications
techniques) » du Guide
d'utilisation.
Ouvrez le menu principal du
CD Dell Precision
ResourceCD. Cliquez sur
User's Guides (Guides
d'utilisation) dans le menu
déroulant Topic (Rubrique),
sélectionnez le guide
d'utilisation approprié pour
votre ordinateur, puis
consultez la section
« Technical specifications
(Spécifications techniques) ».
Visitez le site support.dell.com.
Dans la fenêtre d'accueil, cliquez
sur Dell Documents (Documents
Dell). Sélectionnez les options
appropriées pour votre ordinateur
de manière à accéder au Guide
d'utilisation correspondant.
Consultez la section « Technical
Specifications (Spécifications
techniques) » du Guide
d'utilisation.
Mon ordinateur est
doté d'une carte
graphique double
moniteur. Comment
dois-je configurer mon
second moniteur ?
En fonction du système
d'exploitation installé sur
votre ordinateur,
double-cliquez sur l'icône
User's Guides (Guides
d'utilisation), située sur le
bureau, ou cliquez sur le
bouton Start (Démarrer),
puis sélectionnez Help and
Support (Aide et support).
et recherchez dual monitor
(double moniteur). Le
Guide d'utilisation du
contrôleur vidéo détaille la
procédure à suivre pour
configurer deux moniteurs.
Ouvrez le menu principal du
CD Dell Precision
ResourceCD. Cliquez sur
User's Guides (Guides
d'utilisation) dans le menu
déroulant Topic (Rubrique),
puis sélectionnez le guide
d'utilisation approprié pour
votre ordinateur.
Visitez le site
http://support.dell.com. Dans
la fenêtred'accueil, cliquez sur
Dell Knowledge Base (Base de
connaissances Dell) et faites une
recherche à l'aide des mots clés
dual monitor (double
moniteur).
G u i d e d e c o n f i g u r a t i o n e t de r éf é r e nc e r apide
57
w w w. d e l l . c o m | s u p p o r t . e u r o . d e l l . c o m
Problème
Résolution
Ou consultez le CD Dell
Precision ResourceCD
Où puis-je me
procurer un pilote
pour ma carte
graphique, mon
adaptateur réseau, ma
carte son, mon logiciel
SCSI ou tout autre
périphérique ?
Pour plus d'informations,
consultez « Utilisation du
CD Dell Precision™
ResourceCD » à la page 47.
Pour plus d'informations,
consultez le Dell Precision
WorkStations ResourceCD
Guide (Guide du CD
ResourceCD pour stations de
travail Dell Precision).
Un CD spécifique peut
également être disponible
pour le périphérique. Dans
ce cas, consultez la
documentation et
recherchez les pilotes
appropriés sur celui-ci.
Ou consultez le site de
support technique Dell
Comment ouvrir mon Consultez la section
ordinateur ?
« Ouverture du capot de
l'ordinateur » à la page 61.
Ouvrez le menu principal du
CD Dell Precision
ResourceCD. Cliquez sur
User's Guides (Guides
d'utilisation) dans le menu
déroulant Topic (Rubrique),
sélectionnez le guide
d'utilisation approprié pour
votre ordinateur, puis
consultez la section
« Removing and Installing
parts (Retrait et installation
de pièces) ».
Visitez le site support.dell.com
pour obtenir une aide sur les
instructions d'utilisation générale,
d'installation et de dépannage.
L'écran est noir et le
voyant d'alimentation
vert clignote.
Comment poursuivre
les opérations sur mon
ordinateur ?
Ouvrez le menu principal du
CD Dell Precision
ResourceCD. Cliquez sur
User's Guides (Guides
d'utilisation) dans le menu
déroulant Topic (Rubrique),
sélectionnez le guide
d'utilisation approprié pour
votre ordinateur, puis
consultez la section « Power
Management (Gestion de
l'énergie) ».
Visitez le site support.dell.com.
Dans la fenêtre d'accueil, cliquez
sur Dell Documents (Documents
Dell). Sélectionnez les options
appropriées pour votre ordinateur
de manière à accéder au Guide
d'utilisation correspondant.
Consultez la section « Power
Management (Gestion de
l'énergie) » du Guide d'utilisation.
58
L'ordinateur est en mode
d'alimentation minimale, ou
« mode veille ». Utilisez l'une
des méthodes appropriées
pour le réactiver.
En fonction du système
d'exploitation installé sur
votre ordinateur,
double-cliquez sur l'icône
User's Guides (Guides
d'utilisation), située sur le
bureau, ou cliquez sur le
bouton Start (Démarrer)
puis sélectionnez Help and
Support (Aide et support).
Consultez la section « Power
Management (Gestion de
l'énergie) » du Guide
d'utilisation.
Guide de configuration et d e r é f é r e n c e r a p i d e
Problème
Résolution
Ou consultez le CD Dell
Precision ResourceCD
Ou consultez le site de
support technique Dell
Comment installer du
matériel
supplémentaire sur
mon ordinateur ?
Reportez-vous à l'étiquette
de service interne décrite
dans la section « Intérieur de
l'ordinateur » à la page 63.
Consultez également la
section « Retrait et
installation de pièces » à la
page 64.
Ouvrez le menu principal du
CD Dell Precision
ResourceCD. Cliquez sur
User's Guides (Guides
d'utilisation) dans le menu
déroulant Topic (Rubrique),
sélectionnez le guide
d'utilisation approprié pour
votre ordinateur, puis
consultez la section
« Removing and Installing
parts (Retrait et installation
de pièces) ».
Visitez le site support.dell.com.
Dans la fenêtre d'accueil, cliquez
sur Dell Documents (Documents
Dell). Sélectionnez les options
appropriées pour votre ordinateur
de manière à accéder au Guide
d'utilisation correspondant.
Consultez la section « Removing
and Installing Parts (Retrait et
installation de pièces) » du Guide
d'utilisation.
J'ai installé 4 Go de
mémoire système.
Pourquoi une partie de
la mémoire semble telle être manquante ?
En fonction du système
d'exploitation installé sur
votre ordinateur,
double-cliquez sur l'icône
User's Guides (Guides
d'utilisation), située sur le
bureau, ou cliquez sur le
bouton Start (Démarrer)
puis sélectionnez Help and
Support (Aide et support).
Consultez la rubrique
« System memory (Mémoire
système) » de la section
« Removing and Installing
Parts (Retrait et installation
de pièces) » du
Guide d'utilisation.
Ouvrez le menu principal du
CD Dell Precision
ResourceCD. Cliquez sur
User's Guides (Guides
d'utilisation) dans le menu
déroulant Topic (Rubrique),
sélectionnez le guide
d'utilisation approprié pour
votre ordinateur, puis
consultez la section « System
Memory (Mémoire
système) ».
Visitez le site support.dell.com.
Dans la fenêtre d'accueil, cliquez
sur Dell Documents (Documents
Dell). Sélectionnez les options
appropriées pour votre ordinateur
de manière à accéder au Guide
d'utilisation correspondant.
Consultez la section « System
Memory (Mémoire système) » du
Guide d'utilisation.
Comment réinstaller
mon système
d'exploitation ?
Consultez le guide
d'installation du système
d'exploitation pour obtenir
des informations sur la
réinstallation de votre
système d'exploitation.
G u i d e d e c o n f i g u r a t i o n e t de r éf é r e nc e r apide
59
w w w. d e l l . c o m | s u p p o r t . e u r o . d e l l . c o m
Sécurité optimale — Pour vous et votre
ordinateur
Lors d'une intervention à l'intérieur de votre ordinateur, n'essayez pas
d'intervenir vous-même sur l'ordinateur, excepté en suivant les instructions
de ce guide ou d'une autre documentation Dell. Suivez toujours
scrupuleusement les instructions.
Vous pouvez intervenir à l'intérieur de votre ordinateur en toute sécurité, si
vous prenez les précautions suivantes.
PRÉCAUTION : POUR VOTRE SÉCURITÉ PERSONNELLE ET LA
PROTECTION DU MATÉRIEL
Avant de commencer à travailler sur l'ordinateur, effectuez les étapes
suivantes dans l'ordre indiqué :
1
Éteignez votre ordinateur ainsi que tous ses périphériques.
2
Touchez une surface métallique non peinte de l'ordinateur, telle que les
ouvertures d'emplacement de carte à l'arrière de l'ordinateur, avant de
toucher tout élément à l'intérieur de votre ordinateur.
3
Débranchez l'ordinateur et ses périphériques de leurs prises électriques.
Vous réduirez ainsi le risque de blessure ou de décharge électrique.
Déconnectez également de l'ordinateur les lignes téléphoniques ou de
télécommunication.
REMARQUE : Avant de déconnecter un périphérique de l'ordinateur ou de
retirer un composant de la carte système, assurez-vous que le voyant
d'alimentation du mode veille est éteint sur la carte système. Reportez-vous à
l'étiquette de service apposée sur la face interne du capot pour localiser le
voyant d'alimentation du mode veille.
Pendant votre travail à l'intérieur de l'ordinateur, touchez
régulièrement une surface métallique non peinte sur l’ordinateur pour
dissiper toute électricité statique qui pourrait endommager les
composants internes.
En outre, Dell vous recommande de consulter régulièrement les
instructions de sécurité figurant dans la documentation qui accompagne
votre ordinateur.
60
Guide de configuration et d e r é f é r e n c e r a p i d e
Ouverture du capot de l'ordinateur
Il vous sera parfois nécessaire d'ouvrir le capot de l'ordinateur pour retirer ou
installer une pièce, redéfinir un mot de passe oublié ou identifier un
problème lié à l'ordinateur.
PRÉCAUTION : Avant d'effectuer cette procédure, consultez la
section « Sécurité optimale — Pour vous et votre ordinateur » à la
page 60.
Ouverture du capot
1
Mettez l'ordinateur et ses périphériques hors tension, déconnectez-les
de leurs prises électriques et attendez 20 à 30 secondes.
2
Si vous avez installé un cadenas dans l'anneau situé sur le panneau
arrière, retirez le cadenas (reportez-vous à l'illustration suivante).
3
Couchez l'ordinateur sur le côté droit.
G u i d e d e c o n f i g u r a t i o n e t de r éf é r e nc e r apide
61
w w w. d e l l . c o m | s u p p o r t . e u r o . d e l l . c o m
4
Ouvrez le capot de l'ordinateur :
a
Faites glisser le loquet de verrouillage du capot vers le haut de
l'ordinateur (voir figure suivante).
b
Soulevez le bas du capot, puis faites-le pivoter vers l'avant de
l'ordinateur.
Loquet de
verrouillage
du capot
Fente pour câble
de sécurité
Anneau de cadenas
62
Guide de configuration et d e r é f é r e n c e r a p i d e
Intérieur de l'ordinateur
L'illustration suivante montre l'ordinateur avec le capot ouvert.
REMARQUE : Une étiquette de sécurité apposée sur la face interne du capot
de votre ordinateur donne des informations relatives aux opérations effectuées
à l'intérieur de l'ordinateur.
Étiquette de service interne
Support de lecteur de disquette
Support de disque dur
Support de disque dur accessible de l'extérieur
Commutateur d'intrusion dans le châssis
Panneau avant
Support de câble
Support de
carte AGP
Support de retenue de
carte de montage
mémoire
(si requis)
Hautparleur
Monture de
passage d'air
de microprocesseur
Connecteurs de panneau d'E/S
Emplacements d'extension
Ventilateur de
refroidissement de
carte d'extension
Bloc d'alimentation
Carte système
Prise d'alimentation en CA
Orifices d'aération du bloc d'alimentation
G u i d e d e c o n f i g u r a t i o n e t de r éf é r e nc e r apide
63
w w w. d e l l . c o m | s u p p o r t . e u r o . d e l l . c o m
Retrait et installation de pièces
Les instructions à suivre pour le retrait et l'installation des diverses pièces
figurent dans le Guide d'utilisation qui se trouve sur votre disque dur. Pour
accéder à ce document :
1
Double-cliquez sur l'icône User's Guides (Guides d'utilisation) située
sur votre bureau.
REMARQUE : Le Guide d'utilisation est également disponible sous
forme de document de format PDF à partir du site support.dell.com.
2
Cliquez sur System Information (Informations système).
3
Cliquez sur System Documentation (Documentation système).
4
Cliquez sur Dell Precision WorkStation 530 System User's Guide
(Guide d'utilisation système de la station de travail Dell
Precision 530).
5
Cliquez sur Removing and Installing Parts (Retrait et installation de
pièces).
6
Sélectionnez Print (Imprimer) dans le menu File (Fichier) pour
imprimer la procédure avant de commencer à travailler.
REMARQUE : Pour imprimer l'intégralité du Guide d'utilisation à partir de
Microsoft Internet Explorer, sélectionnez Print all linked documents
(Imprimer tous les documents liés) dans la boîte de dialogue Print (Imprimer).
Ajout de mémoire
Procédez comme décrit précédemment pour accéder au Guide d'utilisation,
puis consultez la section « System Memory (Mémoire système) ».
Ajout d'un disque dur ou d'une unité accessible de l'extérieur
Votre ordinateur est doté d'une ou de plusieurs unités EIDE (Enhanced
Integrated Drive Electronics) ou SCSI. Pour déterminer les types d'unités
installés, reportez-vous au bon de commande accompagnant votre
ordinateur.
Procédez comme décrit précédemment pour accéder au Guide d'utilisation,,
puis consultez la section « Disk (Disque) Drives and Media (Lecteurs et
périphériques) ».
64
Guide de configuration et d e r é f é r e n c e r a p i d e
Ajout d'une carte d'extension PCI
Pour ajouter une carte d'extension PCI (Peripheral Component
Interconnect), par exemple un modem, à votre ordinateur, procédez comme
décrit précédemment pour accéder au Guide d'utilisation, puis consultez la
section « Expansion Cards (Cartes d'extension) ».
Mise à niveau de la carte vidéo
Pour effectuer une mise à niveau de la carte AGP, reportez-vous à la
documentation fournie avec celle-ci, ainsi qu'à toutes autres instructions
spécifiques. La documentation de la carte vidéo est incluse dans son kit de
mise à niveau. Vous pouvez également accéder à la documentation en ligne
de votre carte vidéo à partir du site support.dell.com. Accédez à la page
applicable à votre ordinateur, puis cliquez successivement sur
Dell Documents (Documents Dell) et Video Adapter (Carte vidéo).
Sélectionnez la carte vidéo appropriée dans la liste qui s'affiche.
Pour savoir comment installer la carte dans votre ordinateur, accédez au
Guide d'utilisation, comme décrit précédemment, puis consultez la section
« Expansion cards (Cartes d'extension) ».
Mise à niveau de votre processeur
Accédez au Guide d'utilisation, comme décrit précédemment, puis
consultez la section « Microprocessor (Microprocesseur) ».
Résolution des problèmes
REMARQUE : Si des problèmes nécessitant l'assistance de Dell surviennent,
notez votre Code de service express et votre Numéro de service ci-dessous, puis
contactez Dell depuis l'endroit où se trouve votre ordinateur.
Code de service express : ___________________________
Numéro de service :
___________________________
G u i d e d e c o n f i g u r a t i o n e t de r éf é r e nc e r apide
65
w w w. d e l l . c o m | s u p p o r t . e u r o . d e l l . c o m
Dell fournit divers outils qui vous aident à résoudre les problèmes éventuels.
Les outils répertoriés dans cette section peuvent vous aider à résoudre un
problème, lorsque aucun autre outil en ligne n'est disponible. Les outils
suivants figurent sur votre ordinateur :
D I A G N O S T I C S D E L L — Le CD Dell Precision ResourceCD contient les
Diagnostics Dell qui testent divers composants de l'ordinateur et vous aident à
identifier la cause des problèmes survenant sur votre ordinateur. Pour plus
d'informations, consultez la section « Quand utiliser les Diagnostics Dell » à la
page 66.
V O Y A N T S D U S Y S T È M E — Situés à l'avant de l'ordinateur, ces voyants peuvent
indiquer un problème lié à l'ordinateur. Pour plus d'informations, consultez la
section « Voyants du système » à la page 71.
V O Y A N T S D E D I A G N O S T I C — Situés à l'avant de l'ordinateur, ces voyants
peuvent indiquer un problème lié à l'ordinateur. Pour plus d'informations,
consultez la section « Voyants de diagnostic » à la page 73.
M E S S A G E S D U S Y S T È M E — L'ordinateur affiche ces messages pour vous
avertir d'un problème actuel ou susceptible de se produire. Pour plus
d'informations, consultez la section « Messages du système » à la page 78.
C O D E S S O N O R E S — Une série de bips sonores émis par votre ordinateur peut
vous aider à identifier un problème. Pour plus d'informations, consultez la
section « Codes sonores » à la page 78.
Quand utiliser les Diagnostics Dell
Si vous rencontrez un problème lors de l'utilisation de votre ordinateur,
exécutez les vérifications répertoriées dans la section « Finding Solutions
(Recherche de solutions) » de votre Guide d'utilisation et exécutez les
Diagnostics Dell avant de contacter le service d'assistance technique Dell.
L'exécution des Diagnostics Dell peut vous permettre de résoudre un
problème, sans qu'il soit nécessaire de contacter Dell. Si vous devez
contacter Dell, les résultats des tests peuvent fournir des informations
importantes pour l'équipe de support technique de Dell.
66
Guide de configuration et d e r é f é r e n c e r a p i d e
Les Diagnostics Dell vous permettent de :
•
effectuer des tests express, complets ou personnalisés sur un ou sur
l'ensemble des périphériques ;
•
sélectionner les tests en fonction du problème rencontré ;
•
spécifier combien de fois un test doit être exécuté ;
•
afficher les résultats des tests ;
•
interrompre un test lorsqu'une erreur est détectée ;
•
accéder à des informations d'aide en ligne décrivant les tests et les
périphériques ;
•
recevoir des messages d'état vous indiquant si les tests ont été
correctement exécutés ;
•
recevoir des messages d'erreur en cas de détection de problèmes
Démarrage des Diagnostics Dell
Il est recommandé d'imprimer ces procédures avant de commencer.
AVIS : Utilisez les Diagnostics Dell pour tester uniquement votre ordinateur
Dell™. L'utilisation de ce programme avec d'autres ordinateurs peut entraîner
l'affichage de messages d'erreur.
Accédez au programme de configuration du système, vérifiez les
informations de configuration de votre ordinateur et assurez-vous que le
périphérique que vous allez tester est affiché dans la configuration du
système et qu'il est actif.
Lancez les Diagnostics Dell à partir de votre disque dur ou du CD Drivers
and Utilities (Pilotes et utilitaires) (également appelé ResourceCD).
G u i d e d e c o n f i g u r a t i o n e t de r éf é r e nc e r apide
67
w w w. d e l l . c o m | s u p p o r t . e u r o . d e l l . c o m
Démarrage des Diagnostics Dell à partir du disque dur
REMARQUE : Si un
message vous informe
qu'aucune partition
d'utilitaire de diagnostics
n'a été trouvée, suivez les
instructions pour exécuter
les Diagnostics Dell à
partir de votre CD Drivers
and Utilities (Pilotes et
utilitaires).
1
Arrêtez puis redémarrez l'ordinateur.
2
Lorsque le logo DELL apparaît, appuyez immédiatement sur <F12>.
Si vous attendez trop longtemps et que le logo Windows apparaît,
attendez encore jusqu'à ce que le bureau Windows s'affiche. Arrêtez
ensuite votre ordinateur à partir du menu Start (Démarrer) et faites
une nouvelle tentative.
3
Lorsque la liste des périphériques d'initialisation s'affiche, mettez en
surbrillance l'option Boot to Utility Partition (Initialisation sur la
partition de l'utilitaire) et appuyez sur <Entrée>.
4
Lorsque le menu principal des Diagnostics Dell s'affiche, sélectionnez
le test à exécuter.
Démarrage des Diagnostics Dell à partir du CD Pilotes et utilitaires
1
Insérez le CD Pilotes et utilitaires dans le lecteur de CD.
2
Arrêtez puis redémarrez l'ordinateur.
Lorsque le logo DELL apparaît, appuyez immédiatement sur <F12>.
Si vous attendez trop longtemps et que le logo Windows apparaît,
attendez encore jusqu'à ce que le bureau Windows s'affiche. Arrêtez
ensuite votre ordinateur à partir du menu Start (Démarrer) et faites
une nouvelle tentative.
REMARQUE : Cette
fonctionnalité change la
séquence d'initialisation
pour une fois seulement.
Lors du prochain
démarrage, l'ordinateur
s'initialisera en fonction
des périphériques
spécifiés dans la
configuration du système.
68
3
Lorsque la liste des périphériques d'initialisation s'affiche, mettez en
surbrillance l'option IDE CD-ROM Device (Périphérique CD-ROM
IDE) et appuyez sur <Entrée>.
4
Sélectionnez IDE CD-ROM Device (Périphérique CD-ROM IDE)
dans le menu d'initialisation du CD.
5
Sélectionnez l'option Boot from CD-ROM (Initialiser à partir du
CD-ROM) dans le menu qui s'affiche.
6
Entrez 1 pour lancer le menu du CD ResourceCD.
7
Entrez 2 pour démarrer les Diagnostics Dell.
Guide de configuration et d e r é f é r e n c e r a p i d e
8
Sélectionnez Run the 32-Bit Dell Diagnostics (Exécuter les
Diagnostics Dell 32 bits) dans la liste numérotée. Si plusieurs
versions sont répertoriées, sélectionnez la version appropriée pour
votre plate-forme.
9
Lorsque le menu principal des Diagnostics Dell s'affiche, sélectionnez
le test à exécuter.
Menu principal des Diagnostics Dell
1
Une fois les Diagnostics Dell chargés et l'écran Main Menu (Menu
principal) affiché, cliquez sur le bouton correspondant à l'option
requise.
.
Option
Function (Fonction)
Express Test
(Test express)
Effectue un test rapide des périphériques. Ce test dure
généralement de 10 à 20 minutes et ne requiert aucune
intervention de votre part. Commencez par exécuter ce
test pour augmenter vos chances d'identifier rapidement le
problème.
Extended Test
(Test complet)
Effectue une vérification approfondie des périphériques.
Ce test dure généralement une heure au minimum et vous
devrez répondre à des questions à intervalles réguliers.
Custom Test
(Test personnalisé)
Teste un périphérique spécifique. Vous pouvez
personnaliser le test à exécuter.
Symptom Tree
(Liste des
symptômes)
Répertorie les problèmes les plus susceptibles de se
produire et vous permet de sélectionner un test en fonction
du problème rencontré.
2
REMARQUE : Le
numéro de service de
votre ordinateur est
affiché au sommet de
chaque écran de test.
Si un problème survient durant l'exécution d'un test, un message
affiche le code d'erreur et une description du problème. Notez ces
informations et suivez les instructions affichées à l'écran.
Si vous ne parvenez pas à résoudre le problème, contactez Dell.
3
Si vous exécutez un test à partir de l'option Custom Test (Test
personnalisé) ou Symptom Tree (Liste des symptômes), cliquez sur
l'onglet approprié, tel que décrit dans le tableau suivant, pour obtenir
de plus amples informations.
G u i d e d e c o n f i g u r a t i o n e t de r éf é r e nc e r apide
69
w w w. d e l l . c o m | s u p p o r t . e u r o . d e l l . c o m
Onglet
Function (Fonction)
Results
(Résultats)
Affiche les résultats du test et les erreurs rencontrées, le
cas échéant.
Errors
(Erreurs)
Répertorie les erreurs rencontrées, les codes d'erreur
ainsi qu'une description des problèmes.
Help (Aide)
Décrit le test et indique éventuellement les conditions
requises pour son exécution.
Configuration
Affiche la configuration matérielle du périphérique
sélectionné.
Les Diagnostics Dell obtiennent les informations se
rapportant à votre configuration à partir du programme
de configuration du système, de la mémoire et de divers
tests internes. Ces informations sont affichées dans la
liste de périphériques, dans la partie gauche de l'écran. Il
est possible que la liste des périphériques ne répertorie
pas les noms de tous les composants installés sur votre
ordinateur, ou de tous les périphériques connectés à ce
dernier.
Parameters
(Paramètres)
70
Vous permet de personnaliser le test en modifiant ses
paramètres.
4
Si vous exécutez les Diagnostics Dell à partir du CD Drivers and
Utilities (Pilotes et utilitaires), retirez le CD du lecteur, une fois les
tests achevés.
5
Fermez l'écran de test pour revenir à l'écran Main Menu (Menu
principal). Pour quitter les Diagnostics Dell et redémarrer l'ordinateur,
fermez l'écran Main Menu (Menu principal).
Guide de configuration et d e r é f é r e n c e r a p i d e
Modification de la séquence d'initialisation
REMARQUE : Pour plus d'informations, consultez le Guide d'utilisation.
1
Allumez l'ordinateur (s'il est déjà allumé, redémarrez-le).
2
Lorsque F2 = Setup (F2 = Configuration) s'affiche dans le
coin supérieur droit de l'écran, appuyez sur <F2>.
Le menu System Setup (Configuration système) s'affiche.
REMARQUE : Si vous attendez trop longtemps et que le système
d'exploitation commence son chargement en mémoire, laissez-le terminer
son chargement, puis redémarrez l'ordinateur et faites une nouvelle
tentative.
3
Utilisez les touches de direction pour mettre en surbrillance l'option
de menu Boot Sequence (Séquence d'initialisation), puis appuyez sur
<Entrée> pour accéder au menu contextuel.
REMARQUE : Consignez la séquence d'initialisation en cours au cas où
vous vous souhaiteriez la restaurer après l'exécution des Diagnostics Dell.
4
À l'aide des touches de direction, mettez en surbrillance CD Device
(Périphérique CD) dans l'option de menu Boot First Device (Initialiser
premier périphérique) : et appuyez sur <+> pour le placer au sommet
de la liste.
5
Appuyez sur <Alt><b> pour redémarrer votre ordinateur.
Messages et codes
Vos programmes d'application, votre système d'exploitation et l'ordinateur
peuvent identifier les problèmes et vous alerter. En cas de problème, un
message peut s'afficher sur votre écran, un bip sonore peut retentir ou un
code de voyant peut être généré. Les sous-sections suivantes contiennent
des informations sur les messages, les codes sonores et les codes de voyant.
Voyants du système
Votre ordinateur comporte plusieurs voyants qui peuvent vous aider à
analyser et résoudre les problèmes éventuels. Pour identifier ces voyants,
consultez la section « Caractéristiques de l'ordinateur » à la page 48.
Le tableau suivant répertorie les codes correspondants aux voyants système,
détaille les causes probables et propose des actions correctives.
REMARQUE : Pour de nombreux codes de voyants système, il peut être utile
de vérifier les voyants de diagnostic pour établir si un problème spécifique a été
identifié. Consultez la section « Voyants de diagnostic » à la page 73.
G u i d e d e c o n f i g u r a t i o n e t de r éf é r e nc e r apide
71
w w w. d e l l . c o m | s u p p o r t . e u r o . d e l l . c o m
Codes des voyants système
Voyant
d'alimentation
Voyant d'unité de Cause
disque dur
Action corrective
Vert fixe
N/A
Ordinateur sous tension et
fonctionnant correctement.
Aucune action corrective n'est
requise.
Vert clignotant
Aucune
L'ordinateur est en état suspendu
(Windows 2000 et Windows XP).
Utilisez l'une des méthodes
appropriées pour le réactiver.
Consultez la section « Power
Management (Gestion de l'énergie) »
du Guide d'utilisation.
Vert qui clignote à
plusieurs reprises
puis s'arrête
N/A
Erreur de configuration.
Vérifiez les voyants de diagnostic pour
établir si le problème spécifique a été
identifié.
Jaune fixe
N/A
Les Diagnostics Dell exécutent un
test, ou un périphérique de la carte
système est défectueux ou
incorrectement installé.
Si les Diagnostics Dell sont en cours
d'exécution, attendez que le test
s'achève.
Vérifiez les voyants de diagnostic pour
établir si le problème spécifique a été
identifié. Consultez également la
section « System Board Problems
(Problèmes de carte système) » du
Guide d'utilisation.
Si l'ordinateur ne s'initialise pas,
contactez Dell pour obtenir une
assistance technique.
Jaune clignotant
Aucune
Défaillance du bloc d'alimentation ou Vérifiez les voyants de diagnostic pour
de la carte système.
établir si le problème spécifique a été
identifié. Consultez également les
sections « Power Problems (Problèmes
d'alimentation) » et « System Board
Problems (Problèmes de carte
système) » du Guide d'utilisation.
Jaune clignotant
Vert fixe
Défaillance de la carte système.
Vérifiez les voyants de diagnostic pour
établir si le problème spécifique a été
identifié. Consultez également la
section « System Board Problems
(Problèmes de carte système) » du
Guide d'utilisation.
Vert fixe et code
sonore durant le
test POST
N/A
Détection d'un problème durant
l'exécution du BIOS.
Consultez la section « Codes
sonores » à la page 78 pour savoir
comment interpréter les codes
sonores. Vérifiez également les
voyants de diagnostic pour établir si le
problème spécifique a été identifié.
72
Guide de configuration et d e r é f é r e n c e r a p i d e
C o d e s d e s v o y a n t s s y s t è m e (suite)
Voyant
d'alimentation
Voyant d'unité de Cause
disque dur
Action corrective
Voyant
N/A
d'alimentation vert
fixe, aucun code
sonore ni de vidéo
durant le test POST
Moniteur ou carte graphique
défectueux ou incorrectement
installé.
Voyant
N/A
d'alimentation vert
fixe, aucun code
sonore et blocage de
l'ordinateur durant
le test POST
Périphérique intégré de carte système Vérifiez les voyants de diagnostic pour
défectueux.
établir si le problème spécifique a été
identifié. Si le problème ne peut pas
être identifié, contactez Dell pour
obtenir une assistance technique.
Vérifiez les voyants de diagnostic pour
établir si le problème spécifique a été
identifié. Consultez également la
section « Video Problems (Problèmes
vidéo) » du Guide d'utilisation.
Voyants de diagnostic
Lorsque vous démarrez votre ordinateur, il effectue une série de tests
d'auto-diagnostic. Si le test automatique à la mise sous tension (POST) est
correctement effectué, l'ordinateur émet un seul bip sonore, indiquant un
début de fonctionnement normal. S'il n'est pas en mesure d'achever le test
POST, plusieurs voyants de l'ordinateur peuvent vous aider à identifier le
test ayant échoué ou à établir pourquoi l'ordinateur a cessé de fonctionner.
Ces voyants signalent des problèmes rencontrés avant et durant le test
POST uniquement, et non durant le fonctionnement normal. Pour
identifier ces voyants de diagnostic, consultez la section « Caractéristiques
de l'ordinateur » à la page 48.
Le tableau suivant répertorie les codes correspondants aux voyants de
diagnostic, détaille les causes probables et propose des actions correctives.
Les voyants sont identifiés pour vous aider à comparer les illustrations du
tableau aux voyants de votre ordinateur.
G u i d e d e c o n f i g u r a t i o n e t de r éf é r e nc e r apide
73
w w w. d e l l . c o m | s u p p o r t . e u r o . d e l l . c o m
Codes de voyants de diagnostic avant le test POST
Le tableau suivant répertorie les codes de voyants de diagnostic susceptibles
de s'afficher avant le début de l'exécution du test POST par l'ordinateur.
Codes de voyants de diagnostic avant le test POST
Voyants
Cause
Action
Pas d'alimentation électrique pour
l'ordinateur.
Connectez votre ordinateur à une prise électrique. Assurezvous que le voyant d'alimentation est allumé sur le panneau
avant. S'il est éteint, vérifiez que l'ordinateur est branché à
une prise électrique en état de marche, puis appuyez sur le
bouton d'alimentation.
A B C D
Si le problème n'est toujours pas résolu, contactez Dell
pour obtenir une assistance technique.
A B C D
Mise hors tension normale.
Assurez-vous que le voyant d'alimentation est allumé sur le
L'ordinateur est connecté à une prise panneau avant. S'il est éteint, vérifiez que l'ordinateur est
électrique.
branché à une prise électrique en état de marche, puis
appuyez sur le bouton d'alimentation.
Lorsque l'ordinateur fonctionne normalement, il peut être
démarré automatiquement ou à distance tant qu'il reste
branché à une prise électrique. Pour plus d'informations,
consultez la section « Power Management (Gestion de
l'énergie) » du Guide d'utilisation.
Si le problème n'est toujours pas résolu, contactez Dell
pour obtenir une assistance technique.
Ordinateur en mode d'alimentation
minimale, ou « mode veille ».
A B C D
Utilisez l'une des méthodes appropriées pour le réactiver.
Consultez la section « Power Management (Gestion de
l'énergie) » du Guide d'utilisation.
Si le problème n'est toujours pas résolu, contactez Dell
pour obtenir une assistance technique.
Non exécution du BIOS.
Consultez la section « Reset Corrupted BIOS Settings
(Réinitialisation de paramètres BIOS endommagés) » du
Guide d'utilisation.
Défaillance du bloc ou du cordon
d'alimentation.
Consultez la section « Power Problems (Problèmes
d'alimentation) » du Guide d'utilisation.
A B C D
A B C D
= jaune
= vert
= éteint
74
Guide de configuration et d e r é f é r e n c e r a p i d e
C o d e s d e v o y a n t s d e d i a g n o s t i c a v a n t l e t e s t P O S T (suite)
Voyants
Cause
Action
Défaillance de la carte système.
Contactez Dell pour obtenir une assistance technique.
Microprocesseur et/ou module
régulateur de tension (VRM)
incompatible.
Consultez la section « Microprocessor Problems
(Problèmes de microprocesseur) » du Guide d'utilisation.
Défaillance du VRM 0.
Consultez la section « Microprocessor Problems
(Problèmes de microprocesseur) » du Guide d'utilisation.
Défaillance du VRM 1.
Consultez la section « Microprocessor Problems
(Problèmes de microprocesseur) » du Guide d'utilisation.
Défaillance des VRM 0 et 1.
Consultez la section « Microprocessor Problems
(Problèmes de microprocesseur) » du Guide d'utilisation.
A B C D
A B C D
A B C D
A B C D
A B C D
Défaillance de la carte de montage de Consultez la section « System Memory Problems
mémoire A.
(Problèmes de mémoire système) » du Guide d'utilisation.
A B C D
Défaillance de la carte de montage de Consultez la section « System Memory Problems
mémoire B.
(Problèmes de mémoire système) » du Guide d'utilisation.
A B C D
Défaillance des cartes de montage de Consultez la section « System Memory Problems
mémoire A et B.
(Problèmes de mémoire système) » du Guide d'utilisation.
A B C D
= jaune
= vert
= éteint
G u i d e d e c o n f i g u r a t i o n e t de r éf é r e nc e r apide
75
w w w. d e l l . c o m | s u p p o r t . e u r o . d e l l . c o m
Codes de voyants de diagnostic durant le test POST
Le tableau suivant répertorie les codes de voyants de diagnostic susceptibles
de s'afficher durant l'exécution du test POST par l'ordinateur.
REMARQUE : Si l'ordinateur est en marche et que les quatre voyants de
diagnostic sont éteints, consultez la section « Codes de voyants de diagnostic
avant le test POST » à la page 74.
Codes de voyants de diagnostic durant le test POST
Voyants
Cause
Action
Défaillance du BIOS et ordinateur en mode
récupération.
Exécutez l'utilitaire de récupération du BIOS,
puis redémarrez l'ordinateur pour faire un
nouveau test. Consultez la section « BIOS
Recovery Utility (Utilitaire de récupération du
BIOS) » du Guide d'utilisation.
A B C D
Si le problème n'est toujours pas résolu,
consultez la section « Reset Corrupted BIOS
Settings (Réinitialisation de paramètres BIOS
endommagés) » du Guide d'utilisation.
Défaillance du microprocesseur.
Consultez la section « Microprocessor
Problems (Problèmes de microprocesseur) » du
Guide d'utilisation.
Défaillance de mémoire.
Consultez la section « System Memory
Problems (Problèmes de mémoire système) »
du Guide d'utilisation.
Défaillance ou conflit de carte d'extension.
Consultez les sections « Expansion-Card
Problems (Problèmes de carte d'extension) » et
« Hardware Conflicts (Conflits de matériel) »
du Guide d'utilisation.
A B C D
A B C D
A B C D
= jaune
= vert
= éteint
76
Guide de configuration et d e r é f é r e n c e r a p i d e
C o d e s d e v o y a n t s d e d i a g n o s t i c d u r a n t l e t e s t P O S T (suite)
Voyants
Cause
Action
Défaillance de carte vidéo.
Réinstallez la carte vidéo, puis redémarrez
l'ordinateur pour exécuter un nouveau test.
Pour plus d'informations sur le retrait et
l'installation d'une carte d'extension, consultez
la section « Removing an Expansion Card
(Retrait d'une carte d'extension) » du Guide
d'utilisation.
A B C D
Si cela ne résout pas le problème, consultez la
section « Expansion-Card Problems (Problèmes
de carte d'extension) » du Guide d'utilisation.
Si le problème n'est toujours pas résolu,
contactez Dell pour obtenir une assistance
technique.
Défaillance du lecteur de disquette ou de
l'unité de disque dur.
Consultez les sections « Diskette Drive
Problem (Problèmes de lecteur de disquette) »
et « Hard Drive Problems (Problèmes de disque
dur) » du Guide d'utilisation.
Défaillance USB.
Débranchez tous les périphériques et câbles
USB, puis redémarrez l'ordinateur pour
exécuter un nouveau test. Rebranchez ensuite
tous les périphériques et câbles USB, puis
redémarrez l'ordinateur et exécutez un
nouveau test.
A B C D
A B C D
Si le problème n'est toujours pas résolu,
contactez Dell pour obtenir une assistance
technique.
A B C D
Défaillance de ressource de carte système et/ou Consultez les sections « System Board
de matériel.
Problems (Problèmes de carte système) » et
« Hardware Conflicts (Conflits de matériel) »
du Guide d'utilisation.
A B C D
Défaillance de ressource de carte système et/ou Consultez les sections « System Board
de matériel.
Problems (Problèmes de carte système) » et
« Hardware Conflicts (Conflits de matériel) »
du Guide d'utilisation.
= jaune
= vert
= éteint
G u i d e d e c o n f i g u r a t i o n e t de r éf é r e nc e r apide
77
w w w. d e l l . c o m | s u p p o r t . e u r o . d e l l . c o m
C o d e s d e v o y a n t s d e d i a g n o s t i c d u r a n t l e t e s t P O S T (suite)
Voyants
Cause
Action
Défaillance ou conflit de carte d'extension.
A B C D
Consultez les sections « System Board
Problems (Problèmes de carte système) » et
« Hardware Conflicts (Conflits de matériel) »
du Guide d'utilisation.
A B C D
Défaillance de ressource de carte système et/ou Consultez les sections « System Board
de matériel.
Problems (Problèmes de carte système) » et
« Hardware Conflicts (Conflits de matériel) »
du Guide d'utilisation.
Condition de fonctionnement normale après le Aucune action n'est requise.
test POST.
A B C D
= jaune
= vert
= éteint
Messages du système
Si une erreur survient durant le démarrage, un message identifiant le
problème peut s'afficher à l'écran. Lors de l'affichage d'un message système,
consultez la section « System Messages (Messages système) » du Guide
d'utilisation, pour vérifier les suggestions de résolution proposées. Les
messages systèmes sont répertoriés dans l'ordre alphabétique.
REMARQUE : Si le message système affiché n'est pas répertorié dans le
Guide d'utilisation, consultez la documentation du programme d'application qui
était en cours d'exécution au moment où le message s'est affiché et/ou la
documentation du système d'exploitation ; vous y trouverez probablement
l'explication du message et la mesure à prendre.
Codes sonores
Si l'erreur qui survient durant le démarrage ne peut pas être signalée à
l'écran, l'ordinateur peut émettre un code sonore identifiant le problème. Le
code sonore se compose d'une série de bips : par exemple, un bip suivi d'un
second bip, puis d'une série de trois bips successifs (code 1-1-3) signifie que
l'ordinateur n'a pas pu lire les données contenues dans la mémoire NVRAM.
En cas d'émission d'un code sonore, notez-le et vérifiez sa signification dans
la section « System Beep Codes (Codes sonores système) » du Guide
d'utilisation.
78
Guide de configuration et d e r é f é r e n c e r a p i d e
Dell Precision™ Workstation 530
Installatiegids en
beknopte handleiding
w w w. d e l l . c o m | s u p p o r t . e u r o . d e l l . c o m
Opmerkingen, kennisgevingen en
waarschuwingen
OPMERKING: Een OPMERKING duidt belangrijke informatie aan voor een
beter gebruik van de computer.
KENNISGEVING: Een KENNISGEVING duidt mogelijke beschadiging van
de hardware of gegevensverlies aan en geeft aan hoe u dergelijke problemen
kunt voorkomen.
WAARSCHUWING: Een WAARSCHUWING duidt het risico van
schade aan eigendommen, persoonlijk letsel of de dood aan.
____________________
De informatie in dit document kan zonder voorafgaande kennisgeving worden gewijzigd.
© 2002 Dell Computer Corporation. Alle rechten voorbehouden.
Verveelvoudiging van dit materiaal, op welke wijze dan ook, is alleen toegestaan na uitdrukkelijke,
schriftelijke toestemming van Dell Computer Corporation.
Handelsmerken in dit document: Dell, het DELL-logo en Dell Precision zijn handelsmerken
van Dell Computer Corporation; Microsoft en Windows zijn gedeponeerde handelsmerken van
Microsoft Corporation.
Andere handelsmerken en handelsnamen die mogelijk in dit document worden gebruikt, dienen ter
aanduiding van de rechthebbenden met betrekking tot de merken en namen of ter aanduiding van
hun producten. Dell Computer Corporation claimt op geen enkele wijze enig eigendomsrecht
ten aanzien van andere handelsmerken of handelsnamen dan haar eigen handelsmerken en
handelsnamen.
December 2002
P/N 402GU
Rev. A03
Inhoud
Informatie en hulp zoeken
. . . . . . . . . . . . . . . . . . . .
De ResourceCD (bron-cd) voor de Dell Precision™
gebruiken . . . . . . . . . . . . . . . . . . . .
. . . . . . .
87
. . . . . . . . . . . . . . . . . . . . . . .
88
. . . . . . . . . . . . . . . . . . . . . . . . .
95
De computer instellen
Twee monitors
83
Veelgestelde vragen
. . . . . . . . . . . . . . . . . . . . . . . .
Veiligheid voorop – voor uzelf en uw computer
. . . . . . . . . .
100
. . . . . . . . . . . . . . . . . .
101
. . . . . . . . . . . . . . . . . . . . . .
101
. . . . . . . . . . . . . . . . . . . . . .
103
De computerbehuizing openen
De behuizing openen
Binnen in de computer
Onderdelen verwijderen en installeren
Geheugen toevoegen
. . . . . . . . . . . . . .
104
. . . . . . . . . . . . . . . . . . . . . .
104
. . . .
104
. . . . . . . . . . . . .
105
Een vaste schijf of extern toegankelijk station toevoegen
Een PCI-uitbreidingskaart toevoegen .
Een upgrade uitvoeren van de videokaart .
. . . . . . . . . . .
105
. . . . . . . . . .
105
. . . . . . . . . . . . . . . . . . . . . . . .
105
Een upgrade aanbrengen van de processor(s)
Problemen oplossen
96
. . . . . . .
106
. . . . . . . . . . . . .
107
. . . . . . . . . . . . . . . . . . . . . . .
111
Wanneer u het Dell-diagnoseprogramma gebruikt
Het Dell-diagnoseprogramma starten .
Berichten en codes
Inhoud
81
82
Inhoud
Informatie en hulp zoeken
In de volgende tabel vindt u de bronnen die Dell ter ondersteuning biedt.
Er kunnen nog extra bronnen bij de computer zijn meegeleverd.
Waar bent u naar op zoek?
Hier kunt u het vinden
• Een diagnostisch programma voor
de computer
• Stuurprogramma’s voor de computer
• De Gebruikershandleiding
• Documentatie voor een apparaat
De cd Drivers and Utilities (Stuur- en
hulpprogramma’s), ook wel de ResourceCD
of bron-cd genoemd
U kunt deze cd gebruiken voor het lezen van documentatie, het
opnieuw installeren van stuurprogramma’s of het uitvoeren van
diagnostische hulpprogramma’s.
•
•
•
•
•
De computer instellen
De computer onderhouden
Informatie voor probleemoplossing
De behuizing van de computer openen
Overige documentatie vinden
Installatiegids en beknopte handleiding
Installatiegids en beknopte handleiding
83
w w w. d e l l . c o m | s u p p o r t . e u r o . d e l l . c o m
Waar bent u naar op zoek?
Hier kunt u het vinden
• Express Service Code en servicelabel
• Microsoft® Windows®-licentielabel
Express Service Code en productcode
De etiketten bevinden zich op de computer.
• Het besturingssysteem opnieuw installeren
Cd met het besturingssysteem en de
installatiehandleiding
Nadat u het besturingssysteem opnieuw hebt geïnstalleerd, gebruikt
u de cd Drivers and Utilities (Stuur- en hulpprogramma’s) om de
stuurprogramma’s voor de apparaten die bij de computer zijn
geleverd, opnieuw te installeren.
84
Installatiegids en beknopte handleiding
Waar bent u naar op zoek?
Hier kunt u het vinden
•
•
•
•
Pictogram User’s Guide (Gebruikershandleiding)
(Microsoft Windows 2000)
Onderdelen verwijderen en vervangen
Technische specificaties
Systeeminstellingen configureren
Problemen vaststellen en oplossen
Dubbelklik op het pictogram User’s Guide (Gebruikershandleiding)
op het bureaublad van de computer.
Help and Support Center (Help en ondersteuning)
van Windows XP
1 Klik op de knop Start en klik vervolgens op Help and Support
(Help en ondersteuning).
2 Klik op User’s Guide (Gebruikershandleiding).
• Locatie van connectoren op het moederbord S y s t e e m i n f o r m a t i e l a b e l
of
Het etiket bevindt zich aan de binnenkant van de behuizing van
de computer.
Installatiegids en beknopte handleiding
85
w w w. d e l l . c o m | s u p p o r t . e u r o . d e l l . c o m
Waar bent u naar op zoek?
Hier kunt u het vinden
• De meest recente stuurprogramma’s voor
de computer
• Antwoorden op vragen op het gebied van
technische diensten en ondersteuning
• On line discussies met andere gebruikers
en technische ondersteuning
• Documentatie voor de computer met
inbegrip van de Service Manual
(servicehandleiding)
D e l l - w e b s i t e v o o r o n d e r s t e u n i n g — support.dell.com
• Status van serviceverzoeken en
ondersteuningsgeschiedenis
• De belangrijkste technische informatie
over de computer
• Veelgestelde vragen
• Downloadbare bestanden
• Meer informatie over de configuratie van
de computer
• Onderhoudscontract voor de computer
Dell Premier Support-website —
premiersupport.dell.com
• Informatie omtrent garantie
Systeeminformatiegids
86
De Dell Support-website biedt verschillende on line hulpprogramma’s,
waaronder:
• Knowledge Base — hints, tips en on line cursussen
• Customer Forum (Klantenforum) — on line discussies met andere
gebruikers van Dell-producten
• Upgrades — upgrade-informatie voor onderdelen zoals het
geheugen, de vaste schijf en het besturingssysteem.
• Customer Care (Klantenzorg) — contactinformatie, een
statusoverzicht van bestellingen, informatie over garantie
en reparaties
• Downloads — stuurprogramma’s, patches en software-updates
• Reference (Naslag) — computerdocumentatie, productspecificaties
en andere documenten
De Dell Premier Support-website is aangepast voor de overheid,
zakelijke klanten en onderwijsinstellingen. Mogelijk is deze website
niet overal beschikbaar.
Installatiegids en beknopte handleiding
Waar bent u naar op zoek?
Hier kunt u het vinden
• Met Windows XP werken
• Documentatie voor de computer
en apparaten
Help and Support Center (Help en ondersteuning)
van Windows XP
1 Klik op de knop Start en klik vervolgens op Help and Support
(Help en ondersteuning).
2 Geef met een of meer woorden een beschrijving aan van het
probleem en klik vervolgens op het pijlpictogram.
3 Klik op het onderwerp dat uw probleem beschrijft.
4 Volg de instructies op het scherm.
OPMERKING: Als u Help-informatie wilt voor Windows 2000,
klikt u op de knop Start en klikt u op Help.
De ResourceCD (bron-cd) voor de Dell Precision™ gebruiken
U gaat als volgt te werk om de ResourceCD van de Dell Precision te
gebruiken binnen het besturingssysteem Microsoft® Windows®:
1
Plaats de ResourceCD van de Dell Precision in het cd-station.
Als u de cd Drivers and Utilities (Stuur- en hulpprogramma’s) van
Dell voor de eerste keer op deze computer gebruikt, wordt in het
installatievenster aangegeven dat de cd gereed is voor de installatie.
2
Klik op OK om door te gaan.
Voer de installatie uit door te reageren op de aanwijzingen van het
installatieprogramma.
3
Klik op Volgende in het venster Welkom, gebruiker van het
Dell-systeem.
4
Selecteer het juiste System Model (systeemmodel) , Operating
System (besturingssyteem), Device Type (apparaattype), en
Topic (onderwerp).
Als u de Dell Precision ResourceCD Guide (Handleiding bij Dell Precisionbron-cd) wilt openen, klikt u op User’s Guides (Gebruikershandleidingen)
in het vervolgkeuzemenu Topic (Onderwerp) en klikt u vervolgens op
Dell Precision ResourceCD (Dell Precision-bron-cd).
OPMERKING: Als u toegang wenst tot stuurprogramma’s en gebruikersdocumentatie, moet u de ResourceCD (bron-cd) gebruiken vanuit Windows. Voor
gebruik van het Dell-diagnoseprogramma dient u de ResourceCD (bron-cd) in
het cd-station te plaatsen en de computer opnieuw op te starten. Zie “Wanneer
u het Dell-diagnoseprogramma gebruikt” op pagina 106 voor informatie over
het gebruik van het Dell-diagnoseprogramma.
Installatiegids en beknopte handleiding
87
w w w. d e l l . c o m | s u p p o r t . e u r o . d e l l . c o m
De computer instellen
De in de volgende afbeelding gebruikte nummers komen overeen met
de taken die worden beschreven in de afzonderlijke stappen van de
installatieprocedure.
OPMERKING: De computer is pas juist ingesteld nadat alle stappen uit de
procedure zijn uitgevoerd.
Computerkenmerken
6
controlelampjes
1
4
2
3
7
5
Achterkant
88
Installatiegids en beknopte handleiding
Voorkant
(geopende behuizing)
1
Toetsenbord en muis
Sluit het toetsenbord en de muis aan zoals is aangegeven in de volgende
afbeelding.
OPMERKING: Als u een PS/2-toetsenbord (Personal System/2) hebt,
sluit u dit aan op de PS/2-toetsenbordconnector. Als u een USB-toetsenbord
(Universal Serial Bus) hebt, sluit u dit aan op een USB-connector zoals is
aangegeven in de volgende afbeelding. Sluit een USB-muis of –toetsenbord
niet aan op de USB-connectoren op de voorzijde van de computer.
OPMERKING: Probeer niet een PS/2-muis en een USB-muis tegelijkertijd
te gebruiken.
PS/2- of USBtoetsenbord
PS/2- of USBmuis
Installatiegids en beknopte handleiding
89
w w w. d e l l . c o m | s u p p o r t . e u r o . d e l l . c o m
2
Netwerkadapter en modem
Sluit de netwerkstekker (dus niet de telefoonstekker) aan op de
netwerkconnector.
OPMERKING: In de computer bevindt zich een geïntegreerde netwerkadapter.
Als in de computer echter tevens een netwerkuitbreidingskaart is geïnstalleerd,
sluit u de netwerkkabel aan op de netwerkkaart en niet op de connector op
het achterpaneel van de computer.
Als de computer beschikt over een modem, sluit u de telefoonlijn aan op
de modem.
KENNISGEVING: Sluit geen modemkabel aan op de netwerkadapter. Het
voltage van apparaten voor telefooncommunicatie kan de netwerkadapter
beschadigen.
netwerkkabel
90
Installatiegids en beknopte handleiding
modemkabel
3
Monitor
Houd de stekker van de monitorkabel in de juiste positie voor de connector
op de computer en duw de stekker voorzichtig in de connector. Op die
manier voorkomt u dat pennen in de connector worden verbogen. Draai
vervolgens de vingerschroeven op de kabelconnector aan.
OPMERKING: Als de computer beschikt over een videokaart voor twee
monitors (optioneel) en u gebruikt slechts één monitor, moet u de primaire
aansluiting gebruiken. Als u ondersteuning van twee monitors wilt inschakelen,
moeten beide monitors zijn aangesloten wanneer u de computer opstart.
Zie “Twee monitors” op pagina 95 voor informatie over het instellen van
twee monitors.
primaire aansluiting
optionele secundaire aansluiting
Installatiegids en beknopte handleiding
91
w w w. d e l l . c o m | s u p p o r t . e u r o . d e l l . c o m
4
Luidsprekers
Sluit de luidsprekers aan op de computer volgens de instructies die bij
de luidsprekers zijn meegeleverd.
OPMERKING: In de computer bevindt zich een geïntegreerde audiocontroller. Als in de computer echter tevens een audio-uitbreidingskaart is
geïnstalleerd, sluit u externe audioapparaten aan op de geluidskaart en
niet op de connectoren op het achterpaneel van de computer.
92
Installatiegids en beknopte handleiding
5
Stroomaansluiting
Sluit de stekkers van de computer en de monitor aan op een stopcontact.
6
Aan/uit
Druk op de aan/uit-knop van de computer en de monitor om deze in
te schakelen.
Installatiegids en beknopte handleiding
93
w w w. d e l l . c o m | s u p p o r t . e u r o . d e l l . c o m
7
Het besturingssysteem instellen
Wanneer u de computer voor het eerst opstart, worden mogelijk enkele
opstartberichten van het systeem weergegeven. In een van deze berichten
wordt het servicelabel en de Express Service Code weergegeven.
De computer is vooraf geconfigureerd en het besturingssysteem is reeds
geïnstalleerd. Voordat u de computer de eerste keer inschakelt, moet u de
voorafgaande instelprocedure volledig hebben uitgevoerd en alle apparaten
voor de computer hebben aangesloten.
De beginfase van de installatie van het besturingssysteem is automatisch en
kan enkele minuten in beslag nemen. Voor de installatie kan extra tijd vereist
zijn, afhankelijk van de interne en externe apparaten van het systeem.
Volg de aanwijzingen van het besturingssysteem om de installatie te
voltooien. Mogelijk wordt u gevraagd de productcode van Windows
(ook wel product-id genoemd) op te geven om de installatie te voltooien.
U kunt deze code vinden boven het servicelabel op uw computer.
OPMERKING: Zie de installatiehandleiding van het besturingssysteem voor
meer informatie over het installeren van het besturingssysteem.
Noteer hieronder het nummer zodat u dit beschikbaar hebt wanneer dat
nodig zou zijn.
Productcode (of product-id): ______________________________________
Voor meer informatie opent u de documentatie via het pictogram
User’s Guides (Gebruikershandleidingen)op het bureaublad of vanuit
de ResourceCD (bron-cd) van de Dell Precision.
94
Installatiegids en beknopte handleiding
Twee monitors
Sluit de hoofdmonitor aan op de primaire aansluiting. Zie “Veelgestelde
vragen” op pagina 96 voor meer informatie.
secundaire aansluiting
primaire aansluiting
OPMERKING: Een tweede monitor is optioneel. Deze vereist een
videoadapterkaart die ondersteuning biedt voor meerdere monitors.
OPMERKING: Als u ondersteuning van twee monitors wilt inschakelen,
moeten beide monitors zijn aangesloten wanneer u de computer opstart.
Installatiegids en beknopte handleiding
95
w w w. d e l l . c o m | s u p p o r t . e u r o . d e l l . c o m
Veelgestelde vragen
Probleem?
Probeer...
U kunt ook op de
ResourceCD (bron-cd) van
de Dell Precision naar een
oplossing zoeken
Hoe gebruik ik de
ResourceCD (bron-cd)
van de Dell Precision?
Zie “De ResourceCD (broncd) voor de Dell Precision™
gebruiken” op pagina 87
voor meer informatie.
Ga naar het hoofdmenu
op de ResourceCD van de
Dell Precision. Klik in het
vervolgkeuzemenu Topic
(Onderwerp) op User’s Guides
(Gebruikershandleidingen)
en klik op Dell Precision
ResourceCD Guide
(Handleiding bij Dell
Precision-bron-cd).
Waar kan ik een
uitgebreide
Gebruikershandleiding
vinden voor mijn
computer?
Afhankelijk van het
besturingssysteem dat u
gebruikt, dubbelklikt u op
het pictogram User’s Guides
(Gebruikershandleidingen)
op het bureaublad of klikt
u op de knop Start en
selecteert u Help and
Support Center (Help
en ondersteuning) om
toegang te krijgen tot
de documentatie op de
vaste schijf.
Ga naar het hoofdmenu
op de ResourceCD van de
Dell Precision. Klik in het
vervolgkeuzemenu Topic
(Onderwerp) op User’s Guides
(Gebruikershandleidingen)
en klik op de handleiding
voor uw computer.
Documentatie als de
Gebruikershandleiding is
beschikbaar als bestand op
de vaste schijf van de
computer.
96
Installatiegids en beknopte handleiding
Of ga naar de
ondersteuningswebsite
van Dell
Ga naar support.dell.com. Klik
in de pagina Welcome (Welkom)
op Dell Documents (Delldocumenten). Selecteer de
opties voor uw systeem om de
Gebruikershandleiding te openen.
Probleem?
Probeer...
U kunt ook op de
ResourceCD (bron-cd) van
de Dell Precision naar een
oplossing zoeken
Of ga naar de
ondersteuningswebsite
van Dell
Waar kan ik een
garantieverklaring
vinden voor mijn
computer?
Afhankelijk van het
besturingssysteem dat u
gebruikt, dubbelklikt u op
het pictogram User’s Guides
(Gebruikershandleidingen)
op het bureaublad of klikt
u op de knop Start en
selecteert u Help and
Support Center (Help en
ondersteuning). Zie het
gedeelte “Limited Warranty
and Return Policy”
(“Beperkte garantie en
retourbeleid”) in uw
Gebruikershandleiding.
Ga naar het hoofdmenu
op de ResourceCD van de
Dell Precision. Klik in het
vervolgkeuzemenu Topic
(Onderwerp) op User’s Guides
(Gebruikershandleidingen),
klik op de handleiding voor
uw computer en raadpleeg
vervolgens “Limited Warranty
and Return Policy (Beperkte
garantie en retourbeleid).”
Ga naar support.dell.com. Klik
in de pagina Welcome (Welkom)
op Dell Documents (Delldocumenten). Selecteer de
opties voor uw systeem om de
Gebruikershandleiding te openen.
Zie “Limited Warranty and
Return Policy (Beperkte garantie
en retourbeleid)” in de
Gebruikershandleiding.
Waar kan ik de
productcode (ook wel
Product-id genoemd)
vinden voor het
registreren van het
besturingssysteem?
Zie pagina 94 van dit
document.
Waar vind ik
technische
specificaties voor
mijn computer?
Afhankelijk van het
besturingssysteem dat u
gebruikt, dubbelklikt u op
het pictogram User’s Guides
(Gebruikershandleidingen)
op het bureaublad of klikt
u op de knop Start en
selecteert u Help and
Support Center (Help en
ondersteuning). Zie het
gedeelte “Technical
Specifications”
(“Technische specificaties”)
in uw Gebruikershandleiding.
Ga naar support.dell.com. Klik
in de pagina Welcome (Welkom)
op Ask Dudley! en voer een
zoekactie uit met het trefwoord
productcode.
Ga naar het hoofdmenu
op de ResourceCD van de
Dell Precision. Klik in het
vervolgkeuzemenu Topic
(Onderwerp) op User’s Guides
(Gebruikershandleidingen),
klik op de handleiding voor
uw computer en raadpleeg
“Technical Specifications”
(“Technische specificaties”).
Ga naar support.dell.com. Klik
in de pagina Welcome (Welkom)
op Dell Documents (Delldocumenten). Selecteer de
opties voor uw systeem om de
Gebruikershandleiding te openen.
Zie “Technical Specifications”
(“Technische specificaties”) in
de Gebruikershandleiding.
Installatiegids en beknopte handleiding
97
w w w. d e l l . c o m | s u p p o r t . e u r o . d e l l . c o m
Probleem?
Probeer...
U kunt ook op de
ResourceCD (bron-cd) van
de Dell Precision naar een
oplossing zoeken
Of ga naar de
ondersteuningswebsite
van Dell
Ik heb een computer
met een videokaart die
ondersteuning biedt
voor twee monitors.
Hoe stel ik de tweede
monitor in?
Afhankelijk van het
besturingssysteem dat u
gebruikt, dubbelklikt u op
het pictogram User’s Guides
(Gebruikershandleidingen)
op het bureaublad of klikt u
op de knop Start,, selecteert
u Help and Support Center
(Help en ondersteuning) en
zoekt u naar dual monitor
(twee monitors). U vindt
een stapsgewijze
procedurebeschrijving
voor het instellen van
twee monitors in de
Gebruikershandleiding
van de videocontroller.
Ga naar het hoofdmenu
op de ResourceCD van de
Dell Precision. Klik in het
vervolgkeuzemenu Topic
(Onderwerp) op User’s Guides
(Gebruikershandleidingen)
en klik vervolgens op de
handleiding voor uw computer.
Ga naar http://support.dell.com.
Klik in de pagina Welcome
(Welkom) op Dell Knowledge
Base en voer een zoekactie uit
met de trefwoorden dual
monitor (twee
monitors).
Waar vind ik een
stuurprogramma voor
mijn videokaart,
netwerkadapter,
geluidskaart, SCSIsoftware (Small
Computer System
Interface) of een ander
apparaat?
Zie “De ResourceCD (broncd) voor de Dell Precision™
gebruiken” op pagina 87
voor meer informatie.
Zie de Dell Precision
WorkStations ResourceCD
Guide (Handleiding bij de Dell
Precision WorkStations-broncd) voor meer informatie.
Hoe open ik de
computer?
Zie “De computerbehuizing Ga naar het hoofdmenu
openen” op pagina 101.
op de ResourceCD van de
Dell Precision. Klik in het
vervolgkeuzemenu Topic
(Onderwerp) op User’s Guides
(Gebruikershandleidingen),
klik op de handleiding voor
uw computer en raadpleeg
“Removing and Installing
Parts” (“Onderdelen
verwijderen en installeren”).
98
Het is mogelijk dat u een
cd voor het desbetreffende
apparaat hebt. In dat geval
zoekt u op de cd naar
documentatie en een
of meer geschikte
stuurprogramma’s.
Installatiegids en beknopte handleiding
Ga naar support.dell.com
voor informatie over het
algemeen gebruik, de installatie
en probleemoplossing.
Probleem?
Probeer...
U kunt ook op de
ResourceCD (bron-cd) van
de Dell Precision naar een
oplossing zoeken
Of ga naar de
ondersteuningswebsite
van Dell
Het scherm van de
monitor is leeg en
het aan/uit-lampje
knippert groen. Hoe
kan ik de computer
weer normaal
gebruiken?
De computer is naar
een speciale modus voor
laag energieverbruik (de
slaapstand) overgeschakeld.
Gebruik een van de
geschikte methoden om
de computer te “wekken”.
Ga naar het hoofdmenu
op de ResourceCD van de
Dell Precision. Klik in het
vervolgkeuzemenu Topic
(Onderwerp) op User’s Guides
(Gebruikershandleidingen),
klik op de handleiding voor
uw computer en raadpleeg
“Power Management”
(“Energiebeheer”).
Ga naar support.dell.com. Klik
in de pagina Welcome (Welkom)
op Dell Documents (Delldocumenten). Selecteer de
opties voor uw systeem om
de Gebruikershandleiding
te openen. Zie “Power
Management” (“Energiebeheer”)
in de Gebruikershandleiding.
Ga naar het hoofdmenu
op de ResourceCD van de
Dell Precision. Klik in het
vervolgkeuzemenu Topic
(Onderwerp) op User’s Guides
(Gebruikershandleidingen),
klik op de handleiding voor
uw computer en raadpleeg
“Removing and Installing
Parts” (“Onderdelen
verwijderen en installeren”).
Ga naar support.dell.com. Klik
in de pagina Welcome (Welkom)
op Dell Documents (Delldocumenten). Selecteer de
opties voor uw systeem om de
Gebruikershandleiding te openen.
Zie “Removing and Installing
Parts” (“Onderdelen verwijderen
en installeren”) in de
Gebruikershandleiding.
Afhankelijk van het
besturingssysteem dat u
gebruikt, dubbelklikt u op
het pictogram User’s Guides
(Gebruikershandleidingen)
op het bureaublad of klikt
u op de knop Start en
selecteert u Help and
Support Center (Help
en ondersteuning). Zie
“Power Management”
(“Energiebeheer”) in de
Gebruikershandleiding.
Hoe installeer ik extra
hardware op de
computer?
Zie het servicelabel aan
de binnenkant van de
computer dat wordt
beschreven in “Binnen in de
computer” op pagina 103.
Zie ook “Onderdelen
verwijderen en installeren”
op pagina 104.
Installatiegids en beknopte handleiding
99
w w w. d e l l . c o m | s u p p o r t . e u r o . d e l l . c o m
Probleem?
Probeer...
U kunt ook op de
ResourceCD (bron-cd) van
de Dell Precision naar een
oplossing zoeken
Of ga naar de
ondersteuningswebsite
van Dell
Ik heb 4 GB
systeemgeheugen
geïnstalleerd. Waarom
lijkt het alsof er
geheugen ontbreekt?
Afhankelijk van het
besturingssysteem dat u
gebruikt, dubbelklikt u op
het pictogram User’s Guides
(Gebruikershandleidingen)
op het bureaublad of klikt
u op de knop Start en
selecteert u Help and
Support Center (Help
en ondersteuning). Zie
“System Memory”
(“Systeemgeheugen”) in
het gedeelte “Removing
and Installing Parts”
(“Onderdelen verwijderen
en installeren”) in de
Gebruikershandleiding.
Ga naar het hoofdmenu
op de ResourceCD van de
Dell Precision. Klik in het
vervolgkeuzemenu Topic
(Onderwerp) op User’s Guides
(Gebruikershandleidingen),
klik op de handleiding voor
uw computer en raadpleeg
“System Memory”
(“Systeemgeheugen”).
Ga naar support.dell.com. Klik
in de pagina Welcome (Welkom)
op Dell Documents (Delldocumenten). Selecteer de
opties voor uw systeem om de
Gebruikershandleiding te
openen. Zie “System Memory”
(“Systeemgeheugen”) in de
Gebruikershandleiding.
Hoe installeer ik het
besturingssysteem
opnieuw?
Raadpleeg de
installatiehandleiding van
het besturingssysteem voor
informatie over het opnieuw
installeren van het
besturingssysteem.
Veiligheid voorop – voor uzelf en
uw computer
Voer alleen de handelingen uit die in dit document en de overige Delldocumentatie worden beschreven wanneer u werkzaamheden verricht in
de computer. Volg de instructies altijd nauwlettend op.
Het verrichten van werkzaamheden in de computer is veilig – mits u let op
de volgende voorzorgsmaatregelen.
WAARSCHUWING: VOOR UW EIGEN VEILIGHEID EN
BESCHERMING VAN DE APPARATUUR
100
Installatiegids en beknopte handleiding
Voordat u begint met de werkzaamheden aan de computer, moet u de
volgende stappen in de aangegeven volgorde uitvoeren:
1
Schakel de computer en alle randapparatuur uit.
2
Raak het ongeverfde metalen oppervlak op de computer aan, zoals het
metaal bij de openingen van de kaartsleuven aan de achterkant van de
computer, voordat u iets aanraakt binnen in de computer.
3
Haal de stekkers van de computer en alle randapparatuur uit het
stopcontact. Hiermee vermindert u de kans op persoonlijk letsel of
elektrische schokken. Koppel tevens eventuele telefoon- of
telecommunicatielijnen los van de computer.
OPMERKING: Voordat u een apparaat loskoppelt van de computer of een
onderdeel verwijdert van het moederbord, controleert u of het aan/uit-lampje
voor stand-by op de computer uit is. Op het servicelabel aan de binnenkant van
de computer kunt u zien waar het aan/uit-lampje voor stand-by zich op de
computer bevindt.
Raak tijdens het werken zo nu en dan een ongeverfd metalen
oppervlak op de computer aan om eventuele statische elektriciteit
te ontladen die de interne onderdelen zou kunnen beschadigen.
Verder raadt Dell aan met enige regelmaat de veiligheidsinstructies door te
nemen in de documentatie die bij uw computer werd geleverd.
De computerbehuizing openen
Als u een onderdeel wilt installeren of verwijderen, een vergeten
wachtwoord opnieuw wilt instellen of de oorzaak wilt vaststellen van
een probleem met de computer, moet u wellicht de behuizing van de
computer openen.
WAARSCHUWING: Zie “Veiligheid voorop – voor uzelf en uw
computer” op pagina 100 voordat u deze procedure uitvoert.
De behuizing openen
1
Schakel de computer en alle randapparatuur uit, haal de stekkers van
de computer en alle randapparatuur uit het stopcontact en wacht
10 tot 20 seconden.
2
Als u een hangslot hebt geplaatst in de hangslotbevestiging op het
achterpaneel, maakt u het hangslot los (zie de volgende afbeelding).
Installatiegids en beknopte handleiding
101
w w w. d e l l . c o m | s u p p o r t . e u r o . d e l l . c o m
3
Leg de computer op de rechterzijde.
4
Open de computerbehuizing.
a
Schuif het ontgrendelingsschuifje naar de bovenkant van de
computer toe (zie de volgende afbeelding).
b
Til de achterkant van de behuizing op en kantel deze naar de
voorkant van de computer toe.
ontgrendelingsschuifje
voor behuizing
beveiligingskabelslot
hangslotbevestiging
102
Installatiegids en beknopte handleiding
Binnen in de computer
In de volgende afbeelding ziet u de computer met de behuizing geopend.
OPMERKING: Op een servicelabel aan de binnenkant van de
computerbehuizing vindt u informatie over het uitvoeren van werkzaamheden
in de computer.
servicelabel aan de
binnenkant van de computer
beugel voor diskettestation
beugel voor vaste-schijfstation
beugel voor extern toegankelijk station
schakelaar voor melding van chassistoegang
beugel voor
AGP-kaart
voorpaneel
kabelclip
bevestigingsbeugel
voor opstaande
geheugenkaart
(indien nodig)
luidspreker
kanaal voor
luchtdoorstroming
van microprocessor
I/O-paneelconnectoren
sleuven voor uitbreidingskaarten
ventilator voor
koeling van
uitbreidingskaarten
voeding
moederbord
stroomaansluiting
ventilatieopeningen voor voeding
Installatiegids en beknopte handleiding
103
w w w. d e l l . c o m | s u p p o r t . e u r o . d e l l . c o m
Onderdelen verwijderen en installeren
Instructies voor het verwijderen en installeren van verschillende onderdelen
zijn te vinden in de User’s Guide (Gebruikershandleiding) op de vaste schijf.
U opent dit document als volgt:
1
Dubbelklik op het pictogram User’s Guides (Gebruikershandleidingen)
op het bureaublad van de computer.
OPMERKING: De Gebruikershandleiding is ook verkrijgbaar als PDFbestand (Portable Document Format) op support.dell.com.
2
Klik op System Information (Systeeminformatie).
3
Klik op System Documentation (Systeemdocumentatie).
4
Klik op Dell Precision WorkStation 530 System User’s Guide
(Gebruikershandleiding bij Dell Precision WorkStation 530systeem).
5
Klik op Removing and Installing Parts (Onderdelen verwijderen
en installeren).
6
Selecteer Print (Afdrukken) in het menu File (Bestand) om de
procedure af te drukken voordat u met de werkzaamheden begint.
OPMERKING: Als u de gehele Gebruikershandleiding wilt afdrukken met
de Internet Explorer-browser, selecteert u Print all linked documents (Alle
gekoppelde documenten afdrukken) in het venster Print (Afdrukken).
Geheugen toevoegen
Voer de voorafgaande stappen uit om de Gebruikershandleiding te openen
en raadpleeg “System Memory” (“Systeemgeheugen”).
Een vaste schijf of extern toegankelijk station toevoegen
Uw systeem beschikt over een of meer EIDE-stations (Enhanced Integrated
Drive Electronics) of SCSI-stations. Zie het bestelformulier dat bij uw
computer werd geleverd om vast te stellen welk type stations uw
computer bevat.
Voer de voorafgaande stappen uit om de Gebruikershandleiding te openen
en raadpleeg vervolgens “Drives and Media” (“Schijfstations en media”).
104
Installatiegids en beknopte handleiding
Een PCI-uitbreidingskaart toevoegen
Als u een PCI-uitbreidingskaart (Peripheral Component Interconnect),
zoals een modem, wilt aansluiten op uw computer, voert u de voorafgaande
stappen uit om de Gebruikershandleiding te openen en raadpleegt u
“Expansion Cards” (“Uitbreidingskaarten”).
Een upgrade uitvoeren van de videokaart
Zie de documentatie bij de videokaart en eventuele overige speciale
instructies als u een upgrade wilt uitvoeren op de AGP-kaart (Accelerated
Graphics Port). De documentatie voor uw videokaart wordt bij uw
upgradepakket voor de videokaart meegeleverd. U kunt tevens on line
documentatie aantreffen over uw videokaart op support.dell.com. Ga naar
de pagina voor uw computer, klik op Dell Documents (Dell-documenten)
en klik op Video Adapter (Videoadadapter). Selecteer uw videokaart in
het overzicht.
Voor instructies voor het installeren van de kaart in de computer voert u
de voorafgaande stappen uit om de Gebruikershandleiding te openen en
raadpleegt u “Expansion Cards” (“Uitbreidingskaarten)”.
Een upgrade aanbrengen van de processor(s)
Voer de voorafgaande stappen uit om de Gebruikershandleiding te openen
en raadpleeg “Microprocessor”.
Problemen oplossen
OPMERKING: Als zich computerproblemen voordoen waarvoor u de hulp
van Dell-ondersteuning nodig hebt, noteert u hieronder uw Express Service
Code en Service Tag (servicelabel), waarna u contact opneemt met Dell vanaf
dezelfde locatie als uw computer.
Express Service Code: ___________________________
Servicelabel:
___________________________
Installatiegids en beknopte handleiding
105
w w w. d e l l . c o m | s u p p o r t . e u r o . d e l l . c o m
Dell biedt hulpmiddelen om u te helpen bij het oplossen van problemen.
De in dit gedeelte beschreven hulpmiddelen kunnen u mogelijk helpen bij
het oplossen van problemen wanneer er geen andere on line hulpmiddelen
beschikbaar zijn. Uw computer bevat de volgende hulpmiddelen:
D E L L - D I A G N O S E P R O G R A M M A — De ResourceCD van de Dell Precision bevat
een Dell-diagnoseprogramma waarmee verscheidene onderdelen op uw computer
worden getest. Dit programma kan u helpen bij het vaststellen van de oorzaak
van computerproblemen. Zie “Wanneer u het Dell-diagnoseprogramma
gebruikt” op pagina 106 voor meer informatie.
S Y S T E E M L A M P J E S — Deze lampjes aan de voorzijde van de computer kunnen
aangeven of er een probleem is met de computer. Zie “Systeemlampjes” op
pagina 111 voor meer informatie.
C O N T R O L E L A M P J E S — Deze lampjes aan de voorzijde van de computer
kunnen aangeven of er een probleem is met de computer. Zie “Controlelampjes”
op pagina 113 voor meer informatie.
S Y S T E E M B E R I C H T E N — De computer geeft deze berichten weer om u op de
hoogte te stellen van huidige of toekomstige storingen. Zie “Systeemberichten”
op pagina 118 voor meer informatie.
G E L U I D S C O D E S — Een reeks geluidssignalen van de computer kan u helpen
bij het vaststellen of er een probleem is. Zie “Geluidscodes” op pagina 118 voor
meer informatie.
Wanneer u het Dell-diagnoseprogramma gebruikt
Als u een probleem ondervindt met uw computer, voert u de controlestappen
uit die worden beschreven in “Finding Solutions” (“Oplossingen zoeken”)
in de Gebruikershandleiding en voert u het Dell-diagnoseprogramma uit
voordat u contact opneemt met Dell voor technische ondersteuning. Door
het Dell-diagnoseprogramma uit te voeren kunt u wellicht het probleem
oplossen zodat u geen contact hoeft op te nemen met Dell. Als u wel contact
opneemt met Dell, kunnen de testresultaten belangrijke informatie geven
voor het service- en ondersteuningspersoneel van Dell.
106
Installatiegids en beknopte handleiding
Met het Dell-diagnoseprogramma kunt u:
•
Snelle, uitgebreide of aangepaste tests uitvoeren voor een bepaald
apparaat of voor alle apparaten
•
Tests selecteren op basis van een symptoom van het probleem dat
u ondervindt
•
Kiezen hoe vaak een test moet worden uitgevoerd
•
De testresultaten weergeven
•
De testprocedure uitstellen als een fout wordt gevonden
•
On line Help-informatie opvragen waarin de tests en apparaten
worden beschreven
•
Statusberichten ontvangen waarin u wordt meegedeeld of de tests met
goed gevolg zijn uitgevoerd
•
Foutberichten ontvangen als problemen worden aangetroffen
Het Dell-diagnoseprogramma starten
Het verdient aanbeveling deze procedures af te drukken voordat u begint.
KENNISGEVING: Gebruik het Dell-diagnoseprogramma alleen om uw
Dell™-computer te testen. Het gebruik van dit programma op andere
computers kan leiden tot foutberichten.
Start het Setup-programma van het systeem, controleer de configuratiegegevens van de computer en verzeker u ervan dat het apparaat dat u
wilt testen, wordt weergegeven in het Setup-programma van het systeem
en actief is.
Start het Dell-diagnoseprogramma vanaf de vaste schijf of vanaf de
cd Drivers and Utilities (Stuur- en hulpprogramma’s) (ook wel de
ResourceCD of bron-cd genoemd).
Installatiegids en beknopte handleiding
107
w w w. d e l l . c o m | s u p p o r t . e u r o . d e l l . c o m
Het Dell-diagnoseprogramma starten vanaf de vaste schijf
OPMERKING: Als
een bericht wordt weergegeven dat geen partitie is
aangetroffen met het Delldiagnoseprogramma,
volgt u de instructies voor
het uitvoeren van het Delldiagnoseprogramma
vanaf de cd Drivers and
Utilities (Stuur- en
hulpprogramma’s).
1
Sluit de computer af en start deze opnieuw op.
2
Druk zodra het DELL-logo wordt weergegeven, onmiddellijk op <F12>.
Als u te lang hebt gewacht en het Windows-logo wordt weergegeven,
moet u wachten totdat het bureaublad van Windows wordt
weergegeven. Sluit vervolgens de computer af via het menu Start
en probeer het opnieuw.
3
Selecteer in de lijst met opstartapparaten Boot to Utility Partition
(Opstarten vanaf partitie van hulpprogramma) en druk op <Enter>.
4
Selecteer de test die u wilt uitvoeren wanneer het hoofdmenu van
het Dell-diagnoseprogramma wordt weergegeven.
Het Dell-diagnoseprogramma starten vanaf de cd Drivers and Utilities
(Stuur- en hulpprogramma’s)
1
Plaats de cd Drivers and Utilities (Stuur- en hulpprogramma’s) in
het cd-station.
2
Sluit de computer af en start deze opnieuw op.
Druk zodra het DELL-logo wordt weergegeven, onmiddellijk op <F12>.
Als u te lang hebt gewacht en het Windows-logo wordt weergegeven,
moet u wachten totdat het bureaublad van Windows wordt
weergegeven. Sluit vervolgens de computer af via het menu Start
en probeer het opnieuw.
OPMERKING: Met
deze optie wordt de
opstartvolgorde eenmalig
gewijzigd. Wanneer u de
computer opnieuw
inschakelt, start de
computer op met de
hardwarevolgorde die
is aangegeven in de
systeeminstellingen.
108
3
Selecteer IDE CD-ROM Device (IDE CD-ROM-apparaat) in de
lijst met opstartapparaten en druk op <Enter>.
4
Selecteer de optie IDE CD-ROM Device (IDE CD-ROM-apparaat)
in het opstartmenu van de cd.
5
Selecteer de optie Boot from CD-ROM (Opstarten vanaf cd-rom)
in het menu dat wordt geopend.
6
Typ 1 om het menu van de ResourceCD weer te geven.
7
Typ 2 om het Dell-diagnoseprogramma te starten.
8
SelecteerRun the Dell 32-bit Diagnostics (32-bits Dell-diagnoseprogramma uitvoeren) in de genummerde lijst. Als de lijst meerdere
versies bevat, moet u de juiste versie voor uw platform selecteren.
9
Wanneer het hoofdmenu van het Dell-diagnoseprogramma wordt
weergegeven, selecteert u de test die u wilt uitvoeren.
Installatiegids en beknopte handleiding
Hoofdmenu van Dell-diagnoseprogramma
1
Nadat het Dell-diagnoseprogramma is geladen en het scherm met
het hoofdmenu wordt weergegeven, klikt u op de knop voor de
gewenste optie.
.
2
Optie
Functie
Snelle test
Hiermee wordt een snelle test uitgevoerd van
apparaten. Deze test neemt doorgaans 10 tot 20
minuten in beslag. Er is geen interactie vereist. Als u
de snelle test eerst uitvoert, vergroot u de kans om
het probleem snel op te sporen.
Uitgebreide
test
Hiermee wordt een grondige controle uitgevoerd van
apparaten. Deze test neemt doorgaans een uur of
langer in beslag. U moet af en toe vragen
beantwoorden.
Aangepaste test
Hiermee kunt u een bepaald apparaat testen. U kunt
de uit te voeren tests aanpassen.
Symptomenstructuur
Hier vindt u de meest voorkomende symptomen.
U kunt hier een test kiezen op basis van de symptomen
van het aangetroffen probleem.
OPMERKING: Boven in
elk testscherm ziet u het
servicelabel voor uw
computer.
Als tijdens het uitvoeren van een test een probleem wordt aangetroffen, wordt een bericht weergegeven met de foutcode en een
beschrijving van het probleem. Noteer de foutcode en de beschrijving
van het probleem en volg de instructies op het scherm.
Neem contact op met Dell, als u de foutconditie niet kunt herstellen.
3
Wanneer u een test uitvoert van de optie Custom Test (Aangepaste
test) of Symptom Tree (Symptomenstructuur), kunt u op een van de
tabbladen klikken die in de volgende tabel worden beschreven voor
meer informatie over de test.
Tabblad
Functie
Results
(Resultaten)
Hier worden de resultaten van de test weergegeven,
samen met eventuele foutcondities die zijn
aangetroffen.
Errors
(Fouten)
Hier worden aangetroffen foutcondities, foutcodes en
probleembeschrijvingen weergegeven.
Installatiegids en beknopte handleiding
109
w w w. d e l l . c o m | s u p p o r t . e u r o . d e l l . c o m
Help
Hier wordt de test beschreven en worden eventuele
vereisten voor het uitvoeren van de test vermeld.
Configuration
(Configuratie)
Hier wordt de hardwareconfiguratie beschreven voor het
geselecteerde apparaat.
Het Dell-diagnoseprogramma verkrijgt de configuratiegegevens voor alle apparaten van het Setup-programma
van het systeem, het geheugen en verschillende interne
tests. Deze gegevens worden weergegeven in het linkerdeelvenster van het scherm. Mogelijk worden in het
apparaatoverzicht niet de namen van alle onderdelen
weergegeven die zijn geïnstalleerd in of aangesloten
op de computer.
Parameters
Hiermee kunt u de test aanpassen door de
testinstellingen te wijzigen.
4
Wanneer u het Dell-diagnoseprogramma uitvoert vanaf de cd Drivers
and Utilities (Stuur- en hulpprogramma’s), moet u de cd verwijderen
zodra de tests voltooid zijn.
5
Sluit het testscherm om terug te keren naar het scherm met het
hoofdmenu. Als u het Dell-diagnoseprogramma wilt afsluiten en
de computer opnieuw wilt opstarten, sluit u het scherm met het
hoofdmenu.
De opstartvolgorde wijzigen
OPMERKING: Zie de Gebruikershandleiding voor meer informatie.
1
Zet de computer aan (of start de computer opnieuw op als deze al
aan staat).
2
Als de tekst F2 = Setup rechtsboven in het scherm wordt
weergegeven, drukt u op de knop <F2>.
Het menu System Setup (Systeem-Setup) wordt weergegeven.
OPMERKING: Als u te lang hebt gewacht en het besturingssysteem
wordt in het geheugen geladen, moet u de computer deze actie laten
voltooien en vervolgens de computer opnieuw opstarten en het opnieuw
proberen.
3
Gebruik de pijltoetsen om de optie Boot Sequence (Opstartvolgorde)
te selecteren en druk op <Enter> om het popupmenu te openen.
OPMERKING: Schrijf de huidige opstartvolgorde op voor het geval u
deze moet herstellen na het uitvoeren van het Dell-diagnoseprogramma.
110
Installatiegids en beknopte handleiding
4
Gebruik de pijltoetsen om de optie CD Device (Cd-apparaat) te
selecteren in de lijst Boot First Device: (Eerst opstarten met:) en
druk op <+> om de optie naar boven te verplaatsen in de lijst.
5
Druk op <Alt><b> om de computer opnieuw op te starten.
Berichten en codes
Toepassingsprogramma’s, het besturingssysteem en de computer kunnen
problemen ontdekken en u hierop attenderen. Als een probleem optreedt,
kan een bericht worden weergegeven op het monitorscherm, een
geluidscode worden weergegeven of een lichtcode worden gegenereerd.
In de volgende gedeelten vindt u informatie over berichten, geluidscodes
en lichtcodes.
Systeemlampjes
Uw computer beschikt over een aantal lampjes die u kunnen helpen bij
het opsporen en oplossen van problemen. Zie “Computerkenmerken” op
pagina 88 voor informatie over de locatie van deze lampjes.
In de volgende tabel vindt u de codes voor de systeemlampjes, mogelijke
oorzaken en suggesties voor oplossingen.
OPMERKING: Bij een groot aantal codes van systeemlampjes is het een goed
idee om de controlelampjes te raadplegen. Het is mogelijk dat het probleem
hier is vastgesteld. Zie “Controlelampjes” op pagina 113.
Codes van systeemlampjes
Aan/uit-lampje
Lampje voor
vaste schijf
Oorzaak
Te ondernemen actie
Groen
n.v.t.
De computer is ingeschakeld en werkt Er is geen verdere actie vereist.
normaal.
Knippert groen
Leeg
De computer is in de onderbroken
modus geschakeld (Windows 2000
en Windows XP).
Knippert een paar
keer groen en gaat
vervolgens uit
n.v.t.
Er is een configuratiefout opgetreden. Controleer de diagnoselampjes om
te zien of een bepaald probleem is
vastgesteld.
Gebruik een van de methoden om de
computer te “wekken”. Zie “Power
Management” (“Energiebeheer”) in
de Gebruikershandleiding.
Installatiegids en beknopte handleiding
111
w w w. d e l l . c o m | s u p p o r t . e u r o . d e l l . c o m
C o d e s v a n s y s t e e m l a m p j e s (vervolg)
Aan/uit-lampje
Lampje voor
vaste schijf
Oorzaak
Te ondernemen actie
Geel
n.v.t.
Het Dell-diagnoseprogramma voert
een test uit, of een apparaat op het
moederbord is beschadigd of onjuist
geïnstalleerd.
Als het Dell-diagnoseprogramma
wordt uitgevoerd, moet u wachten
tot de test voltooid is.
Controleer de diagnoselampjes om
te zien of een bepaald probleem is
vastgesteld. Zie ook “System Board
Problems” (“Problemen met
het moederbord”) in de
Gebruikershandleiding.
Als de computer niet kan worden
opgestart, neemt u contact op met
Dell voor technische ondersteuning.
Knippert geel
Leeg
Er is een probleem met de voeding of Controleer de diagnoselampjes om
met het moederbord.
te zien of een bepaald probleem is
vastgesteld. Zie ook “Power
Problems” (“Problemen met de
stroom”) en “System Board
Problems” (“Problemen met het
moederbord”) in de
Gebruikershandleiding.
Knippert geel
Groen
Er is een probleem met het
moederbord.
Controleer de diagnoselampjes om
te zien of een bepaald probleem is
vastgesteld. Zie ook “System Board
Problems” (“Problemen met
het moederbord”) in de
Gebruikershandleiding.
Groen en een
n.v.t.
geluidscode tijdens
POST
Er is een probleem vastgesteld terwijl Zie “Geluidscodes” op pagina 118
het BIOS werd uitgevoerd.
voor instructies voor het maken van
een diagnose aan de hand van de
geluidscode. Controleer ook de
diagnoselampjes om te zien of een
bepaald probleem is vastgesteld.
Groen aan/uitn.v.t.
lampje zonder
geluidscode of
beeld tijdens POST
Mogelijk is de monitor of de
videokaart beschadigd of onjuist
geïnstalleerd.
112
Installatiegids en beknopte handleiding
Controleer de diagnoselampjes om
te zien of een bepaald probleem is
vastgesteld. Zie ook “Video Problems”
(“Videoproblemen”) in de
Gebruikershandleiding.
C o d e s v a n s y s t e e m l a m p j e s (vervolg)
Aan/uit-lampje
Lampje voor
vaste schijf
Groen aan/uitn.v.t.
lampje zonder
geluidscode en de
computer loopt vast
tijdens POST
Oorzaak
Te ondernemen actie
Mogelijk is een geïntegreerd apparaat Controleer de diagnoselampjes om na
op het moederbord beschadigd.
te gaan of een bepaald probleem is
vastgesteld. Als het probleem niet kan
worden vastgesteld, neemt u contact
op met Dell voor technische
ondersteuning.
Controlelampjes
Wanneer u de computer inschakelt, wordt een reeks diagnostische
tests uitgevoerd op het systeem. Aan het eind van een met goed gevolg
uitgevoerde POST (Power-On Self Test) wordt een enkel geluidssignaal
weergegeven als teken dat de computer begint met de normale uitvoering.
Als de computer de POST niet met goed gevolg doorloopt, kunt u aan de
hand van een aantal lampjes op de computer zien welke test is mislukt en
waarom de computer niet meer reageert. Deze lampjes geven alleen een
indicatie van problemen die zijn aangetroffen vóór en tijdens de POST,
niet tijdens de normale werking. Zie “Computerkenmerken” op pagina 88
voor informatie over de locatie van deze lampjes.
In de volgende tabel vindt u de codes voor de controlelampjes, mogelijke
oorzaken en suggesties voor oplossingen. De lampjes zijn voorzien van een
aanduiding zodat u het patroon op de computer gemakkelijker kunt
vergelijken met een van de patronen in de tabellen.
Installatiegids en beknopte handleiding
113
w w w. d e l l . c o m | s u p p o r t . e u r o . d e l l . c o m
Codes van controlelampjes voor POST
In de volgende tabel vindt u de codes voor de controlelampjes die
plaatsvinden voordat de computer de POST uitvoert.
Codes van controlelampjes voor de POST
Lichtpatroon
Oorzaak
Actie
De computer krijgt geen stroom.
Steek de stekker van de computer in het stopcontact.
Controleer of het aan/uit-lampje op het voorpaneel aan is.
Als het lampje uit is, dient u te controleren of de computer
is aangesloten op een werkend stopcontact en vervolgens de
aan/uit-knop in te drukken.
A B C D
Als het probleem nog niet is opgelost, neemt u contact op
met Dell voor technische ondersteuning.
Normale uitgeschakelde toestand.
De computer is aangesloten op het
stopcontact.
A B C D
Controleer of het aan/uit-lampje op het voorpaneel aan is.
Als het lampje uit is, dient u te controleren of de computer
is aangesloten op een werkend stopcontact en vervolgens de
aan/uit-knop in te drukken.
Als de computer naar behoren functioneert, kan deze
automatisch of op afstand worden opgestart als de
stekker van de computer in het stopcontact blijft.
Zie “Power Management” (“Energiebeheer”) in de
Gebruikershandleiding voor meer informatie.
Als het probleem nog niet is opgelost, neemt u contact op
met Dell voor technische ondersteuning.
De computer is naar een speciale
modus voor laag energieverbruik
(de slaapstand) overgeschakeld.
A B C D
Gebruik een van de geschikte methoden om de computer
te “wekken”. Zie “Power Management” (“Energiebeheer”)
in de Gebruikershandleiding.
Als het probleem nog niet is opgelost, neemt u contact op
met Dell voor technische ondersteuning.
Het BIOS wordt niet uitgevoerd.
Zie “Reset Corrupted BIOS Settings” (“Beschadigde BIOSinstellingen opnieuw instellen”) in de
Gebruikershandleiding.
Mogelijk probleem met de voeding
of het snoer.
Zie “Power Problems” (“Problemen met de stroom”) in de
Gebruikershandleiding.
A B C D
A B C D
= geel
= groen
= uit
114
Installatiegids en beknopte handleiding
C o d e s v a n c o n t r o l e l a m p j e s v o o r d e P O S T (vervolg)
Lichtpatroon
Oorzaak
Actie
Mogelijk probleem met het
moederbord.
Neem contact op met Dell voor technische ondersteuning.
Microprocessor en/of VRM
(Voltage Regulator Module, ofwel
spanningsregelaar) komen niet met
elkaar overeen.
Zie “Microprocessor Problems” (“Problemen met de
microprocessor”) in de Gebruikershandleiding.
Mogelijk probleem met VRM 0.
Zie “Microprocessor Problems” (“Problemen met de
microprocessor”) in de Gebruikershandleiding.
Mogelijk probleem met VRM 1.
Zie “Microprocessor Problems” (“Problemen met de
microprocessor”) in de Gebruikershandleiding.
Mogelijk probleem met VRM 0
en VRM 1.
Zie “Microprocessor Problems” (“Problemen met de
microprocessor”) in de Gebruikershandleiding.
Mogelijk probleem met opstaande
geheugenkaart A.
Zie “System Memory Problems” (“Problemen met het
systeemgeheugen”) in de Gebruikershandleiding.
Mogelijk probleem met opstaande
geheugenkaart B.
Zie “System Memory Problems” (“Problemen met het
systeemgeheugen”) in de Gebruikershandleiding.
Mogelijk probleem met opstaande
geheugenkaart A en opstaande
geheugenkaart B.
Zie “System Memory Problems” (“Problemen met het
systeemgeheugen”) in de Gebruikershandleiding.
A B C D
A B C D
A B C D
A B C D
A B C D
A B C D
A B C D
A B C D
= geel
= groen
= uit
Installatiegids en beknopte handleiding
115
w w w. d e l l . c o m | s u p p o r t . e u r o . d e l l . c o m
Codes van controlelampjes tijdens POST
In de volgende tabel vindt u de codes voor de controlelampjes die
plaatsvinden terwijl de computer de POST uitvoert.
OPMERKING: Zie “Codes van controlelampjes voor POST” op pagina 114
wanneer de computer is ingeschakeld en de controlelampjes niet alle vier
branden.
Codes van controlelampjes tijdens POST
Lichtpatroon
Oorzaak
Actie
Mogelijk probleem met het BIOS en de
computer bevindt zich in de herstelmodus.
Voer het hulpprogramma voor het herstellen
van het BIOS uit en start de computer opnieuw
op om het systeem opnieuw te testen. Zie
“BIOS Recovery Utility” (“Hulpprogramma
voor het herstellen van het BIOS”) in de
Gebruikershandleiding.
A B C D
Zie “Reset Corrupted BIOS Settings”
(“Beschadigde BIOS-instellingen opnieuw
instellen”) in de Gebruikershandleiding als
het probleem hiermee niet is opgelost.
Mogelijk probleem met de microprocessor.
Zie “Microprocessor Problems” (“Problemen
met de microprocessor”) in de
Gebruikershandleiding.
Mogelijk probleem met het geheugen.
Zie “System Memory Problems” (“Problemen
met het systeemgeheugen”) in de
Gebruikershandleiding.
Mogelijk probleem met uitbreidingskaart
of conflict.
Zie “Expansion-Card Problems” (“Problemen
met uitbreidingskaarten”) en “Hardware
Conflicts” (“Hardwareconflicten”) in de
Gebruikershandleiding.
A B C D
A B C D
A B C D
= geel
= groen
= uit
116
Installatiegids en beknopte handleiding
C o d e s v a n c o n t r o l e l a m p j e s t i j d e n s P O S T (vervolg)
Lichtpatroon
Oorzaak
Actie
Mogelijk probleem met de videokaart.
Plaats de videokaart opnieuw en start de
computer opnieuw op om het systeem opnieuw
te testen. Zie “Removing an Expansion Card”
(“Een uitbreidingskaart verwijderen”) in de
Gebruikershandleiding voor instructies voor
het verwijderen en installeren van
uitbreidingskaarten.
A B C D
Zie “Expansion-Card Problems”
(“Problemen met uitbreidingskaarten”) in
de Gebruikershandleiding als het probleem
hiermee niet is opgelost.
Als het probleem nog niet is opgelost, neemt
u contact op met Dell voor technische
ondersteuning.
Mogelijk probleem met het diskettestation
of het vaste-schijfstation.
Zie “Diskette Drive Problems” (“Problemen
met diskettestations”) en “Hard Drive
Problems” (“Problemen met vasteschijfstations”) in de Gebruikershandleiding.
Mogelijk USB-probleem.
Ontkoppel alle USB-apparaten en -kabels, en
start de computer opnieuw op om het systeem
opnieuw te testen. Sluit vervolgens alle USBapparaten en -kabels weer aan, en start de
computer opnieuw op om het systeem
opnieuw te testen.
A B C D
A B C D
Als het probleem nog niet is opgelost, neemt
u contact op met Dell voor technische
ondersteuning.
Mogelijk probleem met moederbordbron
en/of hardware.
Zie “System Board Problems” (“Problemen met
het moederbord”) en “Hardware Conflicts”
(“Hardwareconflicten”) in de
Gebruikershandleiding.
Mogelijk probleem met moederbordbron
en/of hardware.
Zie “System Board Problems” (“Problemen met
het moederbord”) en “Hardware Conflicts”
(“Hardwareconflicten”) in de
Gebruikershandleiding.
Mogelijk probleem of conflict met
uitbreidingskaart.
Zie “System Board Problems” (“Problemen met
het moederbord”) en “Hardware Conflicts”
(“Hardwareconflicten”) in de
Gebruikershandleiding.
A B C D
A B C D
A B C D
= geel
= groen
= uit
Installatiegids en beknopte handleiding
117
w w w. d e l l . c o m | s u p p o r t . e u r o . d e l l . c o m
C o d e s v a n c o n t r o l e l a m p j e s t i j d e n s P O S T (vervolg)
Lichtpatroon
Oorzaak
Actie
Mogelijk probleem met moederbordbron
en/of hardware.
Zie “System Board Problems” (“Problemen met
het moederbord”) en “Hardware Conflicts”
(“Hardwareconflicten”) in de
Gebruikershandleiding.
Systeem werkt normaal na POST.
Er is geen verdere actie vereist.
A B C D
A B C D
= geel
= groen
= uit
Systeemberichten
Als tijdens het opstarten een fout optreedt, wordt mogelijk een
bericht weergegeven waarin het probleem wordt aangegeven. Als een
systeembericht wordt weergegeven, kunt u dit opzoeken bij “System
Messages” (“Systeemberichten”) in de Gebruikershandleiding. Mogelijk
worden hier suggesties geboden voor het oplossen van problemen. De
systeemberichten worden in alfabetische volgorde vermeld.
OPMERKING: Als het systeembericht dat op uw systeem werd weergegeven
niet is opgenomen in de Gebruikershandleiding, dient u de documentatie
te raadplegen bij het toepassingsprogramma dat u gebruikte op het
moment dat het bericht werd weergegeven, en/of de documentatie bij het
besturingssysteem. Mogelijk vindt u hier een beschrijving van het bericht
en een aanbevolen actie.
Geluidscodes
Als tijdens het opstarten een fout optreedt die niet op het beeldscherm kan
worden weergegeven, geeft de computer mogelijk een geluidscode weer die
het probleem aangeeft. De geluidscode bestaat uit een serie geluidssignalen:
zo betekent één pieptoon, gevolgd door een tweede pieptoon, gevolgd door
drie opeenvolgende pieptonen (code 1-1-3) dat de computer de gegevens
niet kon lezen in niet-vluchtig RAM-geheugen (NVRAM).
Als een geluidscode wordt weergegeven, noteert u deze en zoekt u deze
op bij “System Beep Codes” (“Geluidscodes van het systeem”) in de
Gebruikershandleiding.
118
Installatiegids en beknopte handleiding
Dell Precision™ Workstation 530
Setup- und
Schnellreferenzhandbuch
w w w. d e l l . c o m | s u p p o r t . e u r o . d e l l . c o m
Hinweise, Vorsichtshinweise und
Warnungen
HINWEIS: Ein HINWEIS macht auf wichtige Informationen aufmerksam,
mit denen Sie das System besser einsetzen können.
VORSICHT: VORSICHT warnt vor möglichen Beschädigungen der Hardware
oder vor Datenverlust und zeigt, wie diese vermieden werden können.
WARNUNG: Eine WARNUNG weist auf Gefahrenquellen hin,
die materielle Schäden, Verletzungen oder sogar den Tod von
Personen zur Folge haben können.
____________________
Irrtümer und technische Änderungen vorbehalten.
© 2002 Dell Computer Corporation. Alle Rechte vorbehalten.
Nachdrucke jeglicher Art ohne die vorherige schriftliche Genehmigung der Dell Computer
Corporation sind strengstens untersagt.
Marken in diesem Text: Dell, das DELL-Logo und Dell Precision sind Marken der Dell Computer
Corporation; Microsoft und Windows sind eingetragene Marken der Microsoft Corporation.
Alle anderen in dieser Dokumentation genannten Marken und Handelsbezeichnungen sind
Eigentum der entsprechenden Hersteller und Firmen. Die Dell Computer Corporation verzichtet
auf alle Besitzrechte an Marken und Handelsbezeichnungen, die nicht ihr Eigentum sind.
Dezember 2002
P/N 402GU
Rev. A03
Inhalt
Informationsquellen und Unterstützung
. . . . . . . . . . . . .
127
. . . . . . . . . . . . . . . . . . . .
128
. . . . . . . . . . . . . . . . . . . . . . .
135
Einrichten des Computers .
Dual-Bildschirme
Häufig gestellte Fragen
. . . . . . . . . . . . . . . . . . . . . .
Sicherheit geht vor – für Sie und das System .
Öffnen der Systemabdeckung
136
. . . . . . . . . .
140
. . . . . . . . . . . . . . . . . . .
141
. . . . . . . . . . . . . . . . . .
141
. . . . . . . . . . . . . . . . . . . . . . .
142
Öffnen der Systemabdeckung
Interne Komponenten
123
. . . . . . . . . .
Verwenden der Dell Precision™ ResourceCD
. . . . . . . . . .
143
. . . . . . . . . . . . .
143
Entfernen und Installieren von Komponenten
Installieren weiterer Speichermodule .
Hinzufügen einer Festplatte oder eines extern zugänglichen
Laufwerks . . . . . . . . . . . . . . . . . . . . . . . . .
. .
143
. . . . . . . . . . .
144
Aufrüsten der Grafikkarte
. . . . . . . . . . . . . . . . . . .
144
Aufrüsten des Prozessors .
. . . . . . . . . . . . . . . . . . .
144
. . . . . . . . . . . . . . . . . . . . . . . . . . .
145
Hinzufügen einer PCI-Erweiterungskarte
Problemlösung
. . . . . .
146
. . . . . . . . . . . . .
146
. . . . . . . . . . . . . . . . . .
150
Wann wird das Dell-Diagnoseprogramm eingesetzt?
Starten des Dell-Diagnoseprogramms
Meldungen und Systemcodes
Inhalt
121
122
Inhalt
Informationsquellen und
Unterstützung
Die folgende Tabelle enthält Informationsquellen und Hilfsprogramme, die
von Dell zu Ihrer Unterstützung bereit gestellt werden. Weiteres Informations- und Dokumentationsmaterial ist möglicherweise im Lieferumfang
des Computers enthalten.
Wonach suchen Sie?
Hier finden Sie es
• Ein Diagnoseprogramm für
den Computer.
• Treiber für den Computer
• Benutzerhandbuch
• Die Dokumentation für das Gerät
CD „Drivers and Utilities“
(diese wird auch als ResourceCD bezeichnet)
Verwenden Sie diese CD, um auf die Dokumentation zuzugreifen,
Treiber neu zu installieren oder Diagnoseprogramme auszuführen
• Informationen zum Einrichten
des Computers
• Informationen zur Pflege
des Computers
• Informationen zur Fehlerbeseitigung
• Informationen zum Öffnen der
Computerabdeckung
• Informationen zum Suchen nach
weiterer Dokumentation
Setup- und Schnellreferenzhandbuch
Setup- und Schnellr eferenzhandbuch
123
w w w. d e l l . c o m |
Wonach suchen Sie?
Hier finden Sie es
• Expressdienst-Codenummer und
Service-Kennnummer
• Microsoft® Windows®-Lizenzetikett
Expressdienst-Codenummer und Produktschlüssel
• Informationen zum Neuinstallieren des
Betriebssystems
Betriebssystem-CD und Installationshandbuch
Die Etiketten sind am Computer angebracht.
Verwenden Sie die Drivers and Utilities-CD, um neuere Treiber für
die mit Ihrem Computer ausgelieferten Geräte zu installieren, wenn
Sie das Betriebssystem Ihres Computers neu installiert haben.
124
Setup- und Schnellreferenzhandbuch
Wonach suchen Sie?
Hier finden Sie es
• Informationen zum Entfernen und
Austauschen von Komponenten
• Technische Daten
• Informationen zum Konfigurieren von
Systemeinstellungen
• Informationen zur Fehlerbeseitigung
und Problemlösung
Symbol für das Benutzerhandbuch
(Microsoft Windows 2000)
Doppelklicken Sie auf dem Desktop auf das Symbol User's Guide
(Benutzerhandbuch).
Hilfe- und Supportcenter unter Windows XP
1 Auf die Schaltfläche Start und anschließend auf Help and Support
(Hilfe und Support) klicken.
2 Auf User's Guide (Benutzerhandbuch) klicken.
• Anschlüsse auf der Systemplatine
Etikett mit den Systeminformationen
od
Das Etikett befindet sich an der Innenseite der Computerabdeckung.
Setup- und Schnellr eferenzhandbuch
125
w w w. d e l l . c o m |
Wonach suchen Sie?
Hier finden Sie es
• Aktuelle Treiber für den Computer
• Informationen zum technischen Support
und Kundendienst
• Onlinediskussionen mit anderen Benutzern
und dem technischen Support
• Dokumentation für den Computer,
einschließlich des Servicehandbuchs
D e l l - S u p p o r t - W e b s i t e – support.euro.dell.com
• Status der Serviceanrufe und SupportHintergrundinformationen
• Technische Top-Themen für den
Computer
• Häufig gestellte Fragen
• Herunterladen von Dateien
• Details über die Konfiguration des
Computers
• Servicevertrag für den Computer
Dell Premier Support-Website –
premiersupport.dell.com
• Garantieinformationen
Systeminformationshandbuch
126
Die Dell Support-Website bietet verschiedene Online-Werkzeuge,
unter anderem:
• Wissensdatenbank – Hinweise, Tipps und Onlinekurse
• Kundenforum – Onlinediskussionen mit anderen Dell-Kunden
• Aktualisierungen – Aktualisierungsinformationen für Komponenten,
z. B. für den Speicher, das Festplattenlaufwerk und das
Betriebssystem
• Kundenbetreuung – Kontaktinformationen, Bestellstatus, Garantie
und Informationen in Notfällen
• Downloads – Treiber, Patches und Software-Updates
• Referenz – Computerdokumentation, Produktspezifikationen und
Whitepapers
Die Dell Premier Support-Website ist speziell auf Großkunden und
Kunden aus den Bereichen öffentlicher Dienst, Regierung/Verwaltung
und Bildungswesen zugeschnitten. Diese Website ist möglicherweise
nicht in allen Ländern verfügbar.
Setup- und Schnellreferenzhandbuch
Wonach suchen Sie?
Hier finden Sie es
• Anleitung zum Arbeiten mit Windows XP
• Dokumentation für den Computer
und die zugehörigen Geräte
Hilfe- und Supportcenter unter Windows XP
1 Auf die Schaltfläche Start und anschließend auf Help and Support
(Hilfe und Support) klicken.
2 Ein Wort oder einen Ausdruck eingeben, das bzw. der Ihr Problem
beschreibt, und anschließend auf das Pfeilsymbol klicken.
3 Auf das Thema klicken, das Ihr Problem beschreibt.
4 Den Anweisungen auf dem Bildschirm folgen.
HINWEIS: Klicken Sie unter Windows 2000 auf die Schaltfläche Start
und dann auf Help (Hilfe).
Verwenden der Dell Precision™ ResourceCD
So nutzen Sie die Dell Precision ResourceCD mit dem Betriebssystem
Microsoft® Windows®:
1
Die Dell Precision ResourceCD in das CD-ROM-Laufwerk einlegen.
Wenn Sie die Dell Precision ResourceCD zum ersten Mal verwenden,
wird das Fenster ResourceCD-Installation geöffnet, das Sie über
den Beginn der Installation von der ResourceCD informiert.
2
Auf OK klicken, um fortzufahren.
Den Bildschirmanweisungen des Installationsprogramms folgen, um
die Installation abzuschließen.
3
Im Fenster Welcome Dell System Owner (Willkommen) auf Weiter
klicken.
4
Die geeignete Auswahl für Systemmodell, Betriebssystem, Gerätetyp
und Thema treffen.
Um auf das Dell Precision ResourceCD-Handbuch zuzugreifen, im Listenfeld Thema auf Benutzerhandbücher und anschließend auf Dell Precision
ResourceCD klicken.
HINWEIS: Verwenden Sie die ResourceCD unter Windows, um auf Gerätetreiber und Benutzerdokumentation zuzugreifen. Um das Dell-Diagnoseprogramm zu verwenden, legen Sie die ResourceCD in das CD-ROM-Laufwerk
ein und starten den Computer neu. Informationen zum Ausführen des DellDiagnoseprogramms finden Sie unter „Wann wird das Dell-Diagnoseprogramm
eingesetzt?“ auf Seite 146.
Setup- und Schnellr eferenzhandbuch
127
w w w. d e l l . c o m |
Einrichten des Computers
Die Zahlen in der folgenden Abbildung entsprechen den dazugehörigen
Schritten zum Einrichten des Systems.
HINWEIS: Sie müssen alle Schritte ausführen, um den Computer korrekt
einzurichten.
Merkmale des Computers
6
Diagnoseanzeigen
1
4
2
3
7
5
Rückseite
128
Setup- und Schnellreferenzhandbuch
Vorderseite
(bei geöffnetem Gehäuse)
1
Tastatur und Maus
Schließen Sie die Tastatur und die Maus gemäß der nachfolgenden
Abbildung an.
HINWEIS: Wenn es sich um eine PS/2-(Personal System/2-)Tastatur
handelt, schließen Sie diese an den PS/2-Tastaturanschluss an. Wenn Sie eine
USB-(Universal Serial Bus-)Tastatur verwenden möchten, verbinden Sie
diese mit einem der USB-Anschlüsse (siehe Abbildung). Schließen Sie eine
USB-Maus oder -Tastatur nicht an den USB-Anschluss an der Vorderseite
des Computers an.
HINWEIS: Verwenden Sie eine PS/2- und eine USB-Maus nicht gleichzeitig.
PS/2- oder
USB-Tastatur
PS/2- oder
USB-Maus
Setup- und Schnellr eferenzhandbuch
129
w w w. d e l l . c o m |
2
Netzwerkadapter und Modem
Schließen Sie das Netzwerkkabel an den Netzwerkanschluss an. Achten Sie
darauf, nicht das Telefonkabel mit diesem Anschluss zu verbinden.
HINWEIS: Der Computer verfügt über einen integrierten Netzwerkadapter.
Ist eine Netzwerkerweiterungskarte installiert, verbinden Sie das Netzwerkkabel mit der Netzwerkkarte und nicht mit dem Anschluss auf der Rückseite
des Computers.
Wenn Sie ein optionales Modem verwenden möchten, schließen Sie das
Telefonkabel an das Modem an.
VORSICHT: Schließen Sie kein Modemkabel an den Netzwerkadapter an.
Die bei der Telefonkommunikation entstehende Spannung kann den
Netzwerkadapter beschädigen.
Netzwerkkabel
130
Setup- und Schnellreferenzhandbuch
Modemkabel
3
Bildschirm
Richten Sie das Bildschirmkabel aus, und schließen Sie es vorsichtig an,
damit die Anschlussstifte nicht verbogen werden. Ziehen Sie anschließend
die Rändelschrauben des Steckers fest.
HINWEIS: Wird nur ein Bildschirm mit einer optionalen Dual-MonitorKarte verwendet, muss der Bildschirm mit dem Primäranschluss verbunden
werden. Um eine Dual-Monitor-Unterstützung zu ermöglichen, müssen beide
Bildschirme beim Starten des Computers angeschlossen sein.
Um zwei Bildschirme einzurichten, beachten Sie die Hinweise unter
„Dual-Bildschirme“ auf Seite 135.
Primäranschluss
Optionaler Sekundäranschluss
Setup- und Schnellr eferenzhandbuch
131
w w w. d e l l . c o m |
4
Lautsprecher
Beachten Sie beim Anschließen der Lautsprecher die Anweisungen, die im
Lieferumfang der Lautsprecher enthalten sind.
HINWEIS: Der Computer verfügt über einen integrierten Audiokontroller.
Ist eine Audio-Erweiterungskarte installiert, verbinden Sie externe Audiogeräte mit der Soundkarte und nicht mit den Anschlüssen auf der Rückseite
des Computers.
132
Setup- und Schnellreferenzhandbuch
5
Stromversorgung
Schließen Sie den Computer und den Bildschirm an Steckdosen an.
6
Einschalten
Drücken Sie den jeweiligen Netzschalter, um den Computer und den
Bildschirm einzuschalten.
Setup- und Schnellr eferenzhandbuch
133
w w w. d e l l . c o m |
7
Einrichten des Betriebssystems
Wird der Computer zum ersten Mal gestartet, erscheinen möglicherweise
einige Startmeldungen, u. a. eine Meldung, in der die Service-Kennnummer
und die Expressdienst-Codenummer aufgeführt werden.
Der Computer ist vorkonfiguriert und das Betriebssystem bereits installiert.
Führen Sie vor dem ersten Einschalten des Computers alle vorgenannten
Schritte durch, um alle Geräte anzuschließen.
Das erste Einrichten des Betriebssystems erfolgt automatisch und kann
einige Minuten in Anspruch nehmen. Je nachdem, welche internen und
externen Geräte an Ihrem Computer angeschlossen sind, wird möglicherweise mehr Zeit für das Setup benötigt.
Folgen Sie den Anweisungen auf dem Bildschirm, um das Setup durchzuführen. Möglicherweise erscheint eine Aufforderung, den WindowsProduktschlüssel (wird auch als Produkt-ID oder COA bezeichnet) einzugeben, um die Registrierung durchzuführen. Sie finden diesen oberhalb der
Service-Kennnummer auf dem Computer.
HINWEIS: Weitere Informationen zum Einrichten des Betriebssystems
finden Sie im dazugehörigen Installationshandbuch.
Um den Produktschlüssel schnell zur Hand zu haben, notieren Sie diesen:
Produktschlüssel (Produkt-ID oder COA): ___________________________
Weitere Informationen finden Sie in der Computerdokumentation.
Um diese aufzurufen, klicken Sie auf dem Desktop auf das Symbol User’s
Guides (Benutzerhandbücher), oder verwenden Sie die Dell Precision
ResourceCD.
134
Setup- und Schnellreferenzhandbuch
Dual-Bildschirme
Schließen Sie den Hauptbildschirm an den Primäranschluss an.
Weitere Informationen hierzu finden Sie unter „Häufig gestellte Fragen“
auf Seite 136.
Sekundäranschluss
Primäranschluss
HINWEIS: Optional kann ein weiterer Bildschirm angeschlossen werden.
Dafür ist eine Grafikadapterkarte erforderlich, die mehrere Bildschirme
unterstützt.
HINWEIS: Um eine Dual-Monitor-Unterstützung zu ermöglichen,
müssen beide Bildschirme beim Starten des Computers angeschlossen sein.
Setup- und Schnellr eferenzhandbuch
135
w w w. d e l l . c o m |
Häufig gestellte Fragen
Problem
Lösungsmöglichkeit
Unter Verwendung der
Dell Precision ResourceCD
Unter Verwendung der
Dell Support-Website
Wo finde ich
Informationen zur
Verwendung der
Dell Precision
ResourceCD?
Informationen hierzu
finden Sie unter „Verwenden
der Dell Precision™
ResourceCD“ auf Seite 127.
Rufen Sie das Hauptmenü der
Dell Precision ResourceCD
auf.Klicken Sie im Listenfeld
Thema auf Benutzerhandbücher und anschließend auf
Dell Precision ResourceCD
Guide (Dell Precision
ResourceCD-Handbuch).
Wo finde ich ein
detailliertes
Benutzerhandbuch
für den Computer?
Je nach Betriebssystem,
doppelklicken Sie auf dem
Desktop auf das Symbol
User’s Guides (Benutzerhandbücher), oder klicken
Sie auf die Schaltfläche
Start, und wählen Sie die
Option Help and Support
(Hilfe und Support).
Rufen Sie das Hauptmenü der
Dell Precision ResourceCD
auf. Klicken Sie im Listenfeld
Thema auf Benutzerhandbücher, und wählen Sie
anschließend das entsprechende Handbuch für Ihren
Computer aus.
Rufen Sie die Website
support.euro.dell.com auf.
Klicken Sie auf der Begrüßungsseite auf Dell Documents (Dell
Dokumente). Wählen Sie die
entsprechenden Optionen aus,
um das Benutzerhandbuch für
den Computer aufzurufen.
Rufen Sie das Hauptmenü der
Dell Precision ResourceCD
auf. Klicken Sie im Listenfeld
Thema auf Benutzerhandbücher, wählen Sie anschließend das entsprechende
Handbuch für Ihren Computer aus, und beachten
Sie den Abschnitt „Eingeschränkte Garantie- und
Rückgabebedingungen“.
Rufen Sie die Website
support.euro.dell.com auf.
Klicken Sie auf der Begrüßungsseite auf Dell Documents
(Dell Dokumente). Wählen Sie
die entsprechenden Optionen
aus, um das Benutzerhandbuch
für den Computer aufzurufen.
Beachten Sie die Informationen
im Abschnitt „Eingeschränkte
Garantie- und Rückgabebedingungen“ des Benutzerhandbuchs.
Die Dokumentation, z. B.
das Benutzerhandbuch, steht
Ihnen auf der Festplatte des
Computers zur Verfügung.
Wo finde ich Garantie- Je nach Betriebssystem,
informationen für
doppelklicken Sie auf dem
den Computer?
Desktop auf das Symbol
User’s Guides (Benutzerhandbücher), oder klicken
Sie auf die Schaltfläche
Start, und wählen Sie die
Option Help and Support
(Hilfe und Support).
Beachten Sie die Informationen im Abschnitt
„Eingeschränkte Garantieund Rückgabebedingungen“
des Benutzerhandbuchs.
136
Setup- und Schnellreferenzhandbuch
Problem
Lösungsmöglichkeit
Unter Verwendung der
Dell Precision ResourceCD
Wo finde ich den
Informationen dazu finden
Produktschlüssel (wird Sie auf Seite 134 dieses
auch als Produkt-ID
Dokuments.
oder Echtheitszertifikat [Certificate of
Authenticity (COA)]
bezeichnet) für die
Registrierung des
Betriebssystems?
Unter Verwendung der
Dell Support-Website
Rufen Sie die Website support.euro.dell.com auf. Klicken
Sie auf der Begrüßungsseite auf
Ask Dudley!, und geben Sie den
Suchbegriff Product Key
(Produktschlüssel) ein.
Wie finde ich
technische
Informationen
zum Computer?
Je nach Betriebssystem,
doppelklicken Sie auf dem
Desktop auf das Symbol
User’s Guides (Benutzerhandbücher), oder klicken
Sie auf die Schaltfläche
Start, und wählen Sie die
Option Help and Support
(Hilfe und Support).
Beachten Sie die Informationen im Abschnitt
„Technische Daten“ des
Benutzerhandbuchs.
Rufen Sie das Hauptmenü der
Dell Precision ResourceCD
auf. Klicken Sie im Listenfeld
Thema auf Benutzerhandbücher, wählen Sie anschließend das entsprechende
Handbuch für Ihren
Computer aus, und beachten
Sie den Abschnitt „Technische
Daten“.
Rufen Sie die Website support.euro.dell.com auf. Klicken
Sie auf der Begrüßungsseite auf
Dell Documents (Dell Dokumente). Wählen Sie die entsprechenden Optionen aus, um das
Benutzerhandbuch für den Computer aufzurufen. Beachten Sie
den Abschnitt „Technische
Daten“ des Benutzerhandbuchs.
Ich verwende einen
Computer mit einer
Dual-Monitor-fähigen
Grafikkarte. Wie
richte ich den zweiten
Bildschirm ein?
Je nach Betriebssystem,
doppelklicken Sie auf dem
Desktop auf das Symbol
User’s Guides (Benutzerhandbücher), oder klicken
Sie auf die Schaltfläche
Start, und wählen Sie die
Option Help and Support
(Hilfe und Support).
Suchen Sie nach dem Begriff
dual monitor. Im Benutzerhandbuch des Grafikkontrollers finden Sie schrittweise
Anweisungen zum Einrichten von zwei Bildschirmen.
Rufen Sie das Hauptmenü der
Dell Precision ResourceCD
auf. Klicken Sie im Listenfeld
Thema auf Benutzerhandbücher, und wählen Sie
anschließend das entsprechende Handbuchfür Ihren
Computer aus.
Rufen Sie die Website support.euro.dell.com auf. Klicken
Sie auf der Begrüßungsseite auf
Dell Knowledge Base (Wissensdatenbank), und suchen Sie
nach dem Suchbegriff dual
monitor.
Setup- und Schnellr eferenzhandbuch
137
w w w. d e l l . c o m |
Problem
Lösungsmöglichkeit
Unter Verwendung der
Dell Precision ResourceCD
Wo finde ich Treiber
für die Grafikkarte,
den Netzwerkadapter,
die Soundkarte,
für SCSI-(Small
Computer System
Interface-)Software
oder andere Geräte?
Informationen hierzu
finden Sie unter „Verwenden
der Dell Precision™
ResourceCD“ auf Seite 127.
Weitere Informationen finden
Sie im Dell Precision
WorkStations ResourceCDBenutzerhandbuch.
Wie öffne ich den
Computer?
Siehe „Öffnen der
Systemabdeckung“
auf Seite 141.
Rufen Sie das Hauptmenü der
Dell Precision ResourceCD
auf. Klicken Sie im Listenfeld
Thema auf Benutzerhandbücher, wählen Sie anschließend das entsprechende
Handbuch für Ihren
Computer aus, und beachten
Sie den Abschnitt „Komponenten entfernen und
installieren“.
Falls Sie Hilfe bei der allgemeinen
Nutzung und Installation benötigen oder Fragen zur Fehlerbeseitigung haben, besuchen Sie die
Website support.euro.dell.com.
Auf dem Bildschirm
wird nichts angezeigt;
die Stromanzeige
blinkt grün. Wie kann
ich am Computer
weiterarbeiten?
Der Computer befindet
sich im Energiesparmodus.
Verwenden Sie eine der
geeigneten Methoden, um
den Computer wieder zu
aktivieren.
Rufen Sie das Hauptmenü der
Dell Precision ResourceCD
auf. Klicken Sie im Listenfeld
Thema auf Benutzerhandbücher, wählen Sie anschließend das entsprechende
Handbuch für Ihren
Computer aus, und
beachten Sie den Abschnitt
„Stromverwaltung“.
Rufen Sie die Website
support.euro.dell.com auf.
Klicken Sie auf der
Begrüßungsseite auf Dell
Documents (Dell Dokumente).
Wählen Sie die entsprechenden
Optionen aus, um das Benutzerhandbuch für den Computer
aufzurufen. Beachten Sie die
Informationen im Abschnitt
„Stromverwaltung“ des
Benutzerhandbuchs.
Möglicherweise wurde für
das jeweilige Gerät eine CD
mitgeliefert. Suchen Sie in
diesem Fall auf der CD nach
der Dokumentation und den
geeigneten Treibern.
Je nach Betriebssystem,
doppelklicken Sie auf dem
Desktop auf das Symbol
User’s Guides (Benutzerhandbücher), oder klicken
Sie auf die Schaltfläche
Start, und wählen Sie die
Option Help and Support
(Hilfe und Support).
Beachten Sie die Informationen im Abschnitt
„Stromverwaltung“ des
Benutzerhandbuchs.
138
Unter Verwendung der
Dell Support-Website
Setup- und Schnellreferenzhandbuch
Problem
Lösungsmöglichkeit
Unter Verwendung der
Dell Precision ResourceCD
Unter Verwendung der
Dell Support-Website
Wie installiere ich
weitere HardwareKomponenten?
Beachten Sie die Informationen auf dem Hinweisetikett an der Innenseite
der Computerabdeckung.
Nähere Informationen
dazu finden Sie unter
„Interne Komponenten“
auf Seite 142. Beachten
Sie auch den Abschnitt
„Entfernen und Installieren
von Komponenten“
auf Seite 143.
Rufen Sie das Hauptmenü der
Dell Precision ResourceCD
auf. Klicken Sie im Listenfeld
Thema auf Benutzerhandbücher, wählen Sie anschließend das entsprechende
Handbuch für Ihren
Computer aus, und beachten
Sie den Abschnitt „Komponenten entfernen und
installieren“.
Rufen Sie die Website support.euro.dell.com auf. Klicken
Sie auf der Begrüßungsseite auf
Dell Documents (Dell Dokumente). Wählen Sie die entsprechenden Optionen aus, um das
Benutzerhandbuch für den Computer aufzurufen. Beachten Sie
den Abschnitt „Komponenten
entfernen und installieren“ des
Benutzerhandbuchs.
Ich habe den Systemspeicher um 4 GB
erweitert. Warum wird
nicht die gesamte
Kapazität angezeigt?
Je nach Betriebssystem,
doppelklicken Sie auf dem
Desktop auf das Symbol
User’s Guides (Benutzerhandbücher), oder klicken
Sie auf die Schaltfläche
Start, und wählen Sie die
Option Help and Support
(Hilfe und Support).
Beachten Sie die Informationen unter „Systemspeicher“ im Abschnitt
„Komponenten entfernen
und installieren“ des
Benutzerhandbuchs.
Rufen Sie das Hauptmenü der
Dell Precision ResourceCD
auf.Klicken Sie im Listenfeld
Thema auf Benutzerhandbücher, wählen Sie anschließend das entsprechende
Handbuch für Ihren
Computer aus, und beachten
Sie den Abschnitt
„Computerspeicher“.
Rufen Sie die Website support.euro.dell.com auf. Klicken
Sie auf der Begrüßungsseite auf
Dell Documents (Dell Dokumente). Wählen Sie die entsprechenden Optionen aus, um
das Benutzerhandbuch für den
Computer aufzurufen. Weitere
Informationen finden Sie
unter „Computerspeicher“ im
Benutzerhandbuch.
Wie installiere ich das Informationen zum
Betriebssystem neu?
erneuten Installieren des
Betriebssystems finden
Sie im zugehörigen
Installationshandbuch.
Setup- und Schnellr eferenzhandbuch
139
w w w. d e l l . c o m |
Sicherheit geht vor – für Sie und das
System
Führen Sie beim Arbeiten im Inneren des Computers nur Wartungsarbeiten aus, die in diesem Handbuch oder einer anderen Dokumentation
von Dell beschrieben werden. Beachten Sie alle Anweisungen stets genau.
Die Arbeit im Inneren des Systems ist völlig ungefährlich, wenn folgende
Sicherheitshinweise berücksichtigt werden.
WARNUNG: ZU IHRER PERSÖNLICHEN SICHERHEIT UND ZUM
SCHUTZ DES SYSTEMS
Bevor Sie mit der Arbeit am System beginnen, sind unbedingt die
folgenden Schritte in der angegebenen Reihenfolge auszuführen:
1
Den Computer und alle Peripheriegeräte ausschalten.
2
Eine unbeschichtete Metalloberfläche des Computers berühren,
beispielsweise den Metallrahmen der Kartensteckplätze an der Rückseite des Computers, bevor Sie eine Komponente im Inneren des
Systems berühren.
3
Den Computer und die Peripheriegeräte von der Stromversorgung
trennen. So wird die Gefahr von Verletzungen oder Stromschlägen
verringert. Außerdem alle Telefon- und Datenübertragungskabel
vom System trennen.
HINWEIS: Überprüfen Sie vor dem Trennen eines Gerätes vom Computer
bzw. dem Entfernen einer Komponente von der Systemplatine, dass die Standby-Stromanzeige der Systemplatine erloschen ist. Informationen zur Position
dieser Stand-by-Stromanzeige finden Sie auf dem Hinweisetikett an der
Innenseite der Computerabdeckung.
Diese Erdung während der Arbeit im System regelmäßig wiederholen,
um statische Elektrizität abzuleiten, die interne Bauteile beschädigen
könnte.
Es empfiehlt sich ebenfalls, die Sicherheitshinweise in der Dokumentation
des Computers regelmäßig zu lesen.
140
Setup- und Schnellreferenzhandbuch
Öffnen der Systemabdeckung
Möglicherweise müssen Sie die Computerabdeckung öffnen, um eine
Komponente zu installieren oder zu entfernen, das Passwort zurückzusetzen
oder die Ursache für ein Computerproblem zu finden.
WARNUNG: Bevor Sie mit den nächsten Schritten fortfahren,
beachten Sie die Hinweise unter „Sicherheit geht vor – für Sie
und das System“ auf Seite 140.
Öffnen der Systemabdeckung
1
Den Computer und die Geräte ausschalten, von der Steckdose
trennen und danach mindestens 10 bis 20 Sekunden warten.
2
Ist auf der Rückseite ein Vorhängeschloss angebracht, dieses entfernen
(siehe folgende Abbildung).
3
Den Computer auf die rechte Seite legen.
4
Die Systemabdeckung öffnen:
a
Die Freigabeklinke der Abdeckung in Richtung
Computeroberseite schieben (siehe folgende Abbildung).
b
Den hinteren Teil der Abdeckung anheben und zur Vorderseite
des Computers schwenken.
Freigabeklinke
der Abdeckung
Sicherungskabeleinschub
Ring für das
Vorhängeschloss
Setup- und Schnellr eferenzhandbuch
141
w w w. d e l l . c o m |
Interne Komponenten
In der folgenden Abbildung ist der Computer mit geöffneter Abdeckung
dargestellt.
HINWEIS: Auf dem Hinweisetikett an der Innenseite der Abdeckung finden
Sie Informationen zum Arbeiten im Inneren des Computers.
Hinweisetikett
Diskettenlaufwerkhalterung
Festplattenlaufwerkhalterung
Halterung des extern zugänglichen Laufwerks
Schalter für die Gehäuseeingriffswarnung
AGPKartenverstrebung
Frontblende
Kabelhalterung
Halterung der
Speicherkartenplatine
(sofern erforderlich)
Lautsprecher
Luftstromschutzblech des Mikroprozessors
E/A-Anschlüsse
Erweiterungskartensteckplätze
Erweiterungskartenlüfter
Netzteil
Systemplatine
Netzanschluss
Belüftungsöffnungen des Netzteils
142
Setup- und Schnellreferenzhandbuch
Entfernen und Installieren von
Komponenten
Anweisungen zum Entfernen und Installieren von Komponenten finden
Sie im Benutzerhandbuch auf der Festplatte. So öffnen Sie das Dokument:
1
Auf dem Desktop auf das Symbol User's Guide (Benutzerhandbuch)
doppelklicken.
HINWEIS: Das Benutzerhandbuch ist auch im PDF-Format auf der
Website support.euro.dell.com verfügbar.
2
Auf System Information (Systeminformationen) klicken.
3
Auf System Documentation (Systemdokumentation) klicken.
4
Auf Dell Precision WorkStation 530 System User’s Guide
(Dell Precision WorkStation 530 System Benutzerhandbuch) klicken.
5
Auf Komponenten entfernen und installieren klicken.
6
Im Menü File (Datei) die Option Print (Drucken) auswählen, um
die Anweisungen auszudrucken, bevor Sie mit der Arbeit beginnen.
HINWEIS: Um das gesamte Benutzerhandbuch von Internet Explorer aus
zu drucken, wählen Sie die Option Print all linked documents (Alle durch Links
verbundenen Dokumente drucken) im Fenster Drucken.
Installieren weiterer Speichermodule
Führen Sie die im vorangegangenen Abschnitt aufgeführten Schritte durch,
um das Benutzerhandbuch aufzurufen, und lesen Sie dann den Abschnitt
„Computerspeicher“.
Hinzufügen einer Festplatte oder eines extern zugänglichen
Laufwerks
Der Computer ist mit einem oder mehreren EIDE-Laufwerken (Enhanced
Integrated Drive Electronics) oder SCSI-Laufwerken ausgestattet. Angaben
zu den Laufwerken Ihres Systems finden Sie auf dem Bestellformular, das
mit dem Computer ausgeliefert wurde.
Führen Sie die im vorangegangenen Abschnitt aufgeführten Schritte durch,
um das Benutzerhandbuch aufzurufen, und lesen Sie dann den Abschnitt
„Festplattenlaufwerke und Medien“.
Setup- und Schnellr eferenzhandbuch
143
w w w. d e l l . c o m |
Hinzufügen einer PCI-Erweiterungskarte
Um eine PCI-Erweiterungskarte (Peripheral Component Interconnect)
hinzuzufügen, beispielsweise ein Modem, führen Sie zum Aufrufen des
Benutzerhandbuchs die im vorangegangenen Abschnitt aufgeführten
Schritte durch, und lesen Sie anschließend den Abschnitt „Erweiterungskarten“.
Aufrüsten der Grafikkarte
Informationen zum Aufrüsten der AGP-Karte (Accelerated Graphics
Port) finden Sie in der dazugehörigen Dokumentation und in anderen
Dokumenten. Die Dokumentation der Grafikkarte ist im entsprechenden
Aufrüstsatz enthalten. Die Online-Dokumentation zur Grafikkarte kann
ebenfalls über die Website support.euro.dell.com aufgerufen werden. Rufen
Sie die Seite für Ihren Computer auf, klicken Sie auf Dell Documents
(Dell Dokumente) und anschließend auf Video Adapter (Grafikkarte).
Wählen Sie in der angezeigten Liste die Grafikkarte aus.
Führen Sie die im vorangegangenen Abschnitt aufgeführten Schritte durch,
um das Benutzerhandbuch aufzurufen. Im Abschnitt „Erweiterungskarten“
finden Sie Informationen zum Installieren der Karte.
Aufrüsten des Prozessors
Führen Sie die im vorangegangenen Abschnitt aufgeführten Schritte durch,
um das Benutzerhandbuch aufzurufen, und lesen Sie dann den Abschnitt
„Mikroprozessor“.
144
Setup- und Schnellreferenzhandbuch
Problemlösung
HINWEIS: Wenn bei dem System Probleme auftreten, die Sie allein nicht
lösen können, notieren Sie die Expressdienst-Codenummer sowie die ServiceKennnummer und wenden sich an Dell. (Bleiben Sie dabei am Computer.)
Expressdienst-Codenummer: ___________________________
Service-Kennnummer:
___________________________
Dell stellt Ihnen eine Reihe von Werkzeugen zur Verfügung, um Computerprobleme zu lösen. Mit den hier aufgeführten Werkzeugen können Sie ein
Problem lösen, wenn keine anderen Online-Werkzeuge verfügbar sind. Der
Computer beinhaltet folgende Werkzeuge:
D E L L -D I A G N O S E P R O G R A M M – Auf der Dell Precision ResourceCD finden
Sie das Dell-Diagnoseprogramm, mit dem verschiedene Komponenten des
Systems geprüft und die Ursachen für Computerprobleme gesucht werden
können. Weitere Informationen hierzu finden Sie unter „Wann wird das
Dell-Diagnoseprogramm eingesetzt?“ auf Seite 146.
S Y S T E M A N Z E I G E N – Diese Anzeigen an der Vorderseite des Computers
weisen auf ein Computerproblem hin. Weitere Informationen hierzu finden
Sie unter „Systemanzeigen“ auf Seite 150.
D I A G N O S E A N Z E I G E N – Diese Anzeigen an der Vorderseite des Computers
weisen auf ein Computerproblem hin. Weitere Informationen hierzu finden
Sie unter „Diagnoseanzeigen“ auf Seite 152.
S Y S T E M M E L D U N G E N – Diese Meldungen weisen auf aktuelle oder mögliche
Fehlfunktionen des Systems hin. Weitere Informationen hierzu finden Sie unter
„Systemmeldungen“ auf Seite 157.
S I G N A L T O N C O D E S – Es werden eine Reihe von Signaltönen ausgegeben,
anhand deren ein Computerproblem erkannt werden kann. Weitere Informationen hierzu finden Sie unter „Signaltoncodes“ auf Seite 157.
Setup- und Schnellr eferenzhandbuch
145
w w w. d e l l . c o m |
Wann wird das Dell-Diagnoseprogramm eingesetzt?
Wenn Probleme mit dem Computer auftreten, führen Sie die unter
„Lösungen finden“ im Benutzerhandbuch aufgeführten Maßnahmen durch,
und führen Sie das Dell-Diagnoseprogramm aus, bevor Sie von Dell technische Unterstützung anfordern. Durch die Verwendung des Dell-Diagnoseprogramms kann das Problem möglicherweise auch ohne die Hilfe von
Dell gelöst werden. Wenn Sie sich an Dell wenden, können die Testergebnisse den Service-Technikern von Dell wichtige Informationen liefern.
Mit dem Dell-Diagnoseprogramm können Sie:
•
schnelle, ausführliche oder benutzerdefinierte Tests für ein Gerät oder
alle Geräte durchführen
•
die entsprechenden Tests für das jeweilige Problem auswählen
•
auswählen, wie oft ein Test ausgeführt werden soll
•
die Testergebnisse anzeigen
•
den Test unterbrechen, wenn ein Fehler festgestellt wird
•
über die Online-Hilfe auf Informationen zu den Tests und Geräten
zugreifen
•
Statusmeldungen anzeigen, die angeben, ob die Tests erfolgreich
ausgeführt wurden
•
Fehlermeldungen erhalten, die angezeigt werden, wenn Probleme
festgestellt werden
Starten des Dell-Diagnoseprogramms
Es wird empfohlen, diese Anweisungen vor der Installation auszudrucken.
VORSICHT: Verwenden Sie das Dell-Diagnoseprogramm nur zum Testen
Ihres Dell™-Computers. Wenn Sie das Programm auf anderen Computern
ausführen, erhalten Sie möglicherweise Fehlermeldungen.
Rufen Sie das System-Setup-Programm auf, prüfen Sie die Konfiguration
des Computers, und stellen Sie sicher, dass das zu prüfende Gerät im
System-Setup aufgeführt wird sowie aktiviert ist.
Starten Sie das Dell-Diagnoseprogramm auf der Festplatte oder der Drivers
and Utilities-CD. (Diese CD wird auch als ResourceCD bezeichnet.)
146
Setup- und Schnellreferenzhandbuch
Starten des Dell-Diagnoseprogramms auf der Festplatte
1
Den Computer herunterfahren und erneut starten.
2
Wenn das DELL-Logo angezeigt wird, sofort <F12> drücken.
Falls so lange gewartet wurde, bis das Windows-Logo erscheint, noch
warten, bis der Windows-Desktop angezeigt wird. Den Computer über
das Menü Start herunterfahren und erneut starten.
3
Wenn die Liste der Startgeräte erscheint, die Option Boot to Utility
Partition (In Dienstprogrammpartition starten) markieren und
<Eingabe> drücken.
4
Wenn das Hauptmenü des Dell-Diagnoseprogramms erscheint, den
gewünschten Test auswählen.
HINWEIS: Wenn eine
Meldung erscheint, dass
keine Partition mit dem
Diagnosedienstprogramm
gefunden wurde, folgen
Sie den Anweisungen,
um das Dell-Diagnoseprogramm von der
Drivers and Utilities-CD
auszuführen.
Starten des Dell-Diagnoseprogramms von der Drivers and Utilities-CD
1
Die Drivers and Utilities-CD in das Laufwerk einlegen.
2
Den Computer herunterfahren und erneut starten.
Wenn das DELL-Logo angezeigt wird, sofort <F12> drücken.
Falls so lange gewartet wurde, bis das Windows-Logo erscheint, noch
warten, bis der Windows-Desktop angezeigt wird. Den Computer über
das Menü Start herunterfahren und erneut starten.
3
Wenn die Liste der Startgeräte erscheint, die Option IDE CD-ROM
Device (IDE CD-ROM-Gerät) markieren und <Eingabe> drücken.
4
Die Option IDE CD-ROM-Gerät im CD-Startmenü auswählen.
5
Im anschließend erscheinenden Menü die Option Boot from
CD-ROM (Von CD-ROM starten) auswählen.
6
1 eingeben, um das ResourceCD-Menü aufzurufen.
7
2 eingeben, um das Dell-Diagnoseprogramm aufzurufen.
8
Run Dell 32-bit Diagnostics (Dell 32-Bit-Diagnose ausführen)
aus der nummerierten Liste auswählen. Wenn mehrere Versionen
aufgeführt sind, die Ihrer Plattform entsprechende Version wählen.
9
Wenn das Hauptmenü des Dell-Diagnoseprogramms erscheint, den
gewünschten Test auswählen.
HINWEIS: Durch diese
Funktion wird die Startreihenfolge nur einmal
geändert. Beim nächsten
Start wird der Computer
gemäß den im SystemSetup festgelegten
Geräten gestartet.
Setup- und Schnellr eferenzhandbuch
147
w w w. d e l l . c o m |
Hauptmenü des Dell-Diagnoseprogramms
1
HINWEIS: Die ServiceKennnummer des
Computers finden Sie
im oberen Bereich der
einzelnen Testanzeigen.
Wenn das Dell-Diagnoseprogramm geladen wurde und das Hauptmenü erscheint, auf die Schaltfläche für die gewünschte Option
klicken.
.
2
Option
Funktion
Express Test
(Schnelltest)
Es wird ein Schnelltest der Geräte durchgeführt. Dieser
Test dauert normalerweise etwa 10 bis 20 Minuten. Es
ist keine Benutzeraktion erforderlich. Führen Sie zuerst
den Schnelltest durch, um die Ursache des Problems
möglicherweise schnell zu erkennen.
Extended Test
(Erweiterter
Test)
Es wird ein ausführlicher Test der Geräte durchgeführt.
Dieser Test nimmt normalerweise mindestens eine Stunde
in Anspruch. Dabei muss der Benutzer in regelmäßigen
Abständen Informationen eingeben.
Custom Test
(Benutzerdefinierter Test)
Es wird ein bestimmtes Gerät geprüft. Die auszuführenden
Tests können vom Benutzer angepasst werden.
Symptom Tree
(Problemübersicht)
Es werden die am häufigsten auftretenden Probleme
aufgeführt. Vom Benutzer kann der entsprechende Test
für das jeweils aufgetretene Problem ausgewählt werden.
Tritt während eines Tests ein Problem auf, werden in einer Meldung
der Fehlercode und eine Beschreibung des Problems angezeigt.
Den Fehlercode und die Problembeschreibung notieren und den
Anweisungen auf dem Bildschirm folgen.
Kann das Problem nicht gelöst werden, an Dell wenden.
3
148
Wird ein Test der Kategorie Custom Test (Benutzerdefinierter Test)
oder Symptom Tree (Problemübersicht) ausgeführt, auf die entsprechende, im Folgenden beschriebene Registerkarte klicken, um weitere
Informationen zu erhalten.
Setup- und Schnellreferenzhandbuch
Registerkarte
Funktion
Results
(Ergebnisse)
Es werden die Testergebnisse und möglicherweise
gefundene Probleme angezeigt.
Errors
(Fehler)
Es werden die gefundenen Fehler, die Fehlercodes
und eine Beschreibung des Problems angezeigt.
Help
(Hilfe)
Beschreibt den Test und verweist auf mögliche
Voraussetzungen für die Durchführung des Tests.
Configuration
(Konfiguration)
Die Hardware-Konfiguration der ausgewählten Geräte
wird angezeigt.
Parameters
(Parameter)
Der Test kann durch Änderungen an den Einstellungen
an Ihre Bedürfnisse angepasst werden.
Das Dell-Diagnoseprogramm sammelt über das SystemSetup-Programm, den Speicher und verschiedene
interne Tests Konfigurationsinformationen für alle
Geräte. Diese werden in der Geräteliste auf der linken
Seite angezeigt. In der Geräteliste werden möglicherweise nicht alle Namen von Geräten angezeigt, die im
Computer installiert oder daran angeschlossen sind.
4
Werden die Tests von der Drivers and Utilities -CD ausgeführt, nach
Abschluss der Tests die CD aus dem Laufwerk entfernen.
5
Das Testfenster schließen, um zum Hauptmenü zurückzukehren. Um
das Dell-Diagnoseprogramm zu verlassen und den Computer neu zu
starten, das Fenster des Hauptmenüs schließen.
Ändern der Startreihenfolge
HINWEIS: Weitere Informationen finden Sie im Benutzerhandbuch.
1
Den Computer einschalten oder einen Neustart durchführen, falls er
bereits eingeschaltet ist.
2
Wenn F2 = Setup in der rechten oberen Ecke des Bildschirms
angezeigt wird, die Taste <F2> drücken.
Das Menü System Setup erscheint.
HINWEIS: Wenn Sie zu lange warten und das Laden des Betriebssystems bereits eingeleitet wurde, den Computer den Ladevorgang
beenden lassen. Anschließend den Computer neu starten und es erneut
versuchen.
Setup- und Schnellr eferenzhandbuch
149
w w w. d e l l . c o m |
3
Mit den Pfeiltasten die Menüoption Boot Sequence (Startreihenfolge) markieren und <Eingabe> drücken, um das Listenfeld zu
öffnen.
HINWEIS: Notieren Sie sich die aktuelle Startreihenfolge, falls Sie
diese nach dem Durchführen des Dell-Diagnoseprogramms
wiederherstellen möchten.
4
Mit Hilfe der Pfeiltasten die Option CD Device (CD-Gerät) unter Boot
First Device (Erstes Startgerät) markieren und die Taste <+> drücken,
um dieses an die erste Stelle der Liste zu verschieben.
5
Die Tastenkombinatioin <Alt><b> drücken, um den Computer neu
zu starten.
Meldungen und Systemcodes
Probleme können von Anwendungsprogrammen, dem Betriebssystem und
vom Computer selbst erkannt und gemeldet werden. Tritt ein Problem auf,
erscheint möglicherweise eine Meldung auf dem Bildschirm, oder es wird
ein Signalton bzw. ein Anzeigecode ausgegeben. In den nachfolgenden
Abschnitten finden Sie Informationen zu den Meldungen, Signaltönen oder
Anzeigecodes.
Systemanzeigen
Der Computer verfügt über eine Reihe von Anzeigen, mit deren Hilfe
Probleme erkannt und behoben werden können. Informationen über das
Suchen dieser Anzeigen finden Sie unter „Merkmale des Computers“
auf Seite 128.
In der folgenden Tabelle finden Sie die Codes der Systemanzeigen,
mögliche Ursachen der Probleme sowie Lösungsvorschläge.
HINWEIS: Für viele Anzeigecodes empfiehlt es sich, die Diagnoseanzeigen
zu prüfen, durch die möglicherweise das Problem angezeigt wird. Siehe
„Diagnoseanzeigen“ auf Seite 152.
150
Setup- und Schnellreferenzhandbuch
Systemanzeigecodes
Stromanzeige
FestplattenUrsache
laufwerkanzeige
Lösung
Stetig grün
leuchtend
–
Der Computer ist eingeschaltet
und funktioniert problemlos.
Keine korrigierende Maßnahme
erforderlich.
Grün blinkend
Keine
Der Computer befindet sich
im Energiesparmodus (unter
Windows 2000 und Windows XP).
Verwenden Sie eine der geeigneten
Methoden, um den Computer wieder
zu aktivieren. Beachten Sie die Informationen im Abschnitt „Stromverwaltung“ des Benutzerhandbuchs.
Mehrmals grün
blinkend und
dann aus
–
Es liegt ein Konfigurationsfehler vor.
Prüfen Sie die Diagnoseanzeigen, um
festzustellen, ob sich das spezifische
Problem ausfindig machen lässt.
Stetig gelb
leuchtend
–
Das Dell-Diagnoseprogramm
führt einen Test durch, oder eine
Komponente auf der Systemplatine
ist möglicherweise fehlerhaft oder
wurde nicht richtig installiert.
Warten Sie bei Ausführung des
Dell-Diagnoseprogramms, bis die
Tests vollständig abgeschlossen sind.
Prüfen Sie die Diagnoseanzeigen, um
festzustellen, ob sich das spezifische
Problem ausfindig machen lässt.
Weitere Informationen finden Sie
unter „Systemplatinenprobleme“
im Benutzerhandbuch.
Startet der Computer nicht, wenden
Sie sich an Dell, um technische
Unterstützung anzufordern.
Gelb blinkend
Keine
Es ist ein Ausfall bei der
Stromversorgung oder der
Systemplatine aufgetreten.
Prüfen Sie die Diagnoseanzeigen, um
festzustellen, ob sich das spezifische
Problem ausfindig machen lässt.
Weitere Informationen finden Sie
unter „Stromversorgungsprobleme“
und „Systemplatinenprobleme“ im
Benutzerhandbuch.
Gelb blinkend
Stetig grün
leuchtend
Es ist ein Fehler an der
Systemplatine aufgetreten.
Prüfen Sie die Diagnoseanzeigen, um
festzustellen, ob sich das spezifische
Problem ausfindig machen lässt.
Weitere Informationen finden Sie
unter „Systemplatinenprobleme“ im
Benutzerhandbuch.
Setup- und Schnellr eferenzhandbuch
151
w w w. d e l l . c o m |
S y s t e m a n z e i g e c o d e s (Fortsetzung)
Stromanzeige
FestplattenUrsache
laufwerkanzeige
Lösung
Stetig grün
–
leuchtend und ein
Signaltoncode
während des POST
Während der Ausführung des BIOS
wurde ein Problem ermittelt.
Informationen zum Auswerten des
Signaltoncodes finden Sie unter
„Signaltoncodes“ auf Seite 157.
Prüfen Sie auch die Diagnoseanzeigen, um festzustellen, ob sich
das spezifische Problem ausfindig
machen lässt.
Stetig grün leuch- –
tende Stromanzeige und kein
Signaltoncode
sowie keine Anzeige
während des POST
Der Bildschirm oder die Grafikkarte
ist möglicherweise fehlerhaft oder
wurde nicht richtig installiert.
Prüfen Sie die Diagnoseanzeigen,
um festzustellen, ob sich das spezifische Problem ausfindig machen
lässt. Weitere Informationen finden
Sie unter „Videoprobleme“ im
Benutzerhandbuch.
Stromanzeige stetig –
grün leuchtend,
kein Signaltoncode,
Computer stürzt ab
bei POST
Eine integrierte Komponente der
Systemplatine ist möglicherweise
fehlerhaft.
Prüfen Sie die Diagnoseanzeigen, um
festzustellen, ob sich das spezifische
Problem ausfindig machen lässt.
Wenn Sie das Problem nicht finden
können, wenden Sie sich an Dell,
um technische Unterstützung
anzufordern.
Diagnoseanzeigen
Beim Einschalten des Computers wird eine Reihe von Selbsttests durchgeführt. Wird der POST-Vorgang (Power-on Self Test) erfolgreich durchgeführt, gibt das System einen einzelnen Signalton aus, durch den das
Starten des normalen Betriebs angezeigt wird. Wird der POST-Vorgang
nicht abgeschlossen, können Sie mit Hilfe der Anzeigen des Computers
feststellen, welcher Test fehlgeschlagen ist bzw. aus welchem Grund das
System nicht mehr reagiert. Diese Anzeigen weisen nur auf Probleme vor
oder während des POST hin, nicht auf Probleme während des normalen
Betriebs. Informationen über das Suchen dieser Diagnoseanzeigen finden
Sie unter „Merkmale des Computers“ auf Seite 128.
In der folgenden Tabelle finden Sie die Codes der Diagnoseanzeigen,
mögliche Ursachen der Probleme sowie Lösungsvorschläge. Die
Anzeigen sind gekennzeichnet, so dass Sie schneller die entsprechenden
Informationen aus den Tabellen ablesen können.
152
Setup- und Schnellreferenzhandbuch
Diagnoseanzeigecodes vor dem POST
In der folgenden Tabelle finden Sie die Diagnoseanzeigecodes, die vor dem
POST ausgegeben werden.
Diagnoseanzeigecodes vor dem POST
Anzeigemuster
Ursache
Maßnahme
Der Computer wird nicht mit Strom
versorgt.
Schließen Sie den Computer an eine Steckdose an.
Vergewissern Sie sich, dass die Stromanzeige an der Vorderseite leuchtet. Leuchtet die Stromanzeige nicht, stellen
Sie sicher, dass der Computer mit einer funktionierenden
Steckdose verbunden ist, und drücken Sie dann den
Netzschalter.
A-B-C-D
Wenn das Problem nicht gelöst werden konnte, wenden Sie
sich an Dell, um technische Unterstützung anzufordern.
Der Computer ist ausgeschaltet.
Das System ist an eine Steckdose
angeschlossen.
A-B-C-D
Vergewissern Sie sich, dass die Stromanzeige an der Vorderseite leuchtet. Leuchtet die Stromanzeige nicht, stellen
Sie sicher, dass der Computer mit einer funktionierenden
Steckdose verbunden ist, und drücken Sie dann den
Netzschalter.
Wenn der Computer ordnungsgemäß funktioniert, kann er
automatisch oder per Fernzugriff gestartet werden, sofern
er an eine funktionierende Steckdose angeschlossen ist.
Weitere Informationen finden Sie unter „Stromverwaltung“ im Benutzerhandbuch.
Wenn das Problem nicht gelöst werden konnte, wenden Sie
sich an Dell, um technische Unterstützung anzufordern.
Der Computer befindet sich im
Energiesparmodus.
A-B-C-D
Verwenden Sie eine der geeigneten Methoden, um
den Computer wieder zu aktivieren. Beachten Sie die
Informationen im Abschnitt „Stromverwaltung“ des
Benutzerhandbuchs.
Wenn das Problem nicht gelöst werden konnte, wenden Sie
sich an Dell, um technische Unterstützung anzufordern.
Das BIOS wird nicht ausgeführt.
Weitere Informationen finden Sie unter „Beschädigte
BIOS-Einstellungen zurücksetzen“ im Benutzerhandbuch.
A-B-C-D
= gelb
= grün
= aus
Setup- und Schnellr eferenzhandbuch
153
w w w. d e l l . c o m |
D i a g n o s e a n z e i g e c o d e s v o r d e m P O S T (Fortsetzung)
Anzeigemuster
Ursache
Maßnahme
Möglicherweise sind Probleme
bei der Stromversorgung bzw. am
Netzkabel aufgetreten.
Beachten Sie die Informationen im Abschnitt
„Stromversorgungsprobleme“ des Benutzerhandbuchs.
A-B-C-D
Die Systemplatine ist möglicherweise Wenden Sie sich für technische Unterstützung an Dell.
fehlerhaft.
A-B-C-D
Es liegt ein Mikroprozessor- und/oder Beachten Sie die Informationen im Abschnitt
VRM-(Voltage Regulator Module-)
„Mikroprozessorprobleme“ im Benutzerhandbuch.
Konflikt vor.
A-B-C-D
Möglicher VRM 0-Fehler.
Beachten Sie die Informationen im Abschnitt
„Mikroprozessorprobleme“ im Benutzerhandbuch.
Möglicher VRM 1-Fehler.
Beachten Sie die Informationen im Abschnitt
„Mikroprozessorprobleme“ im Benutzerhandbuch.
Möglicher VRM 0- und
VRM 1-Fehler.
Beachten Sie die Informationen im Abschnitt
„Mikroprozessorprobleme“ im Benutzerhandbuch.
Möglicher Fehler der
Speicherkartenplatine A.
Weitere Informationen finden Sie unter
„Systemspeicherprobleme“ im Benutzerhandbuch.
Möglicher Fehler der
Speicherkartenplatine B.
Weitere Informationen finden Sie unter
„Systemspeicherprobleme“ im Benutzerhandbuch.
Möglicher Fehler der
Speicherkartenplatinen A und B.
Weitere Informationen finden Sie unter
„Systemspeicherprobleme“ im Benutzerhandbuch.
A-B-C-D
A-B-C-D
A-B-C-D
A-B-C-D
A-B-C-D
A-B-C-D
= gelb
= grün
= aus
154
Setup- und Schnellreferenzhandbuch
Diagnoseanzeigecodes während des POST
In der folgenden Tabelle finden Sie die Diagnoseanzeigecodes, die während
des POST ausgegeben werden.
HINWEIS: Ist der Computer eingeschaltet und alle vier Diagnoseanzeigen
leuchten nicht, beachten Sie die Informationen unter „Diagnoseanzeigecodes
vor dem POST“ auf Seite 153.
Diagnoseanzeigecodes während des POST
Anzeigemuster
Ursache
Maßnahme
Es ist möglicherweise ein BIOS-Fehler
aufgetreten; der Computer befindet sich
im Wiederherstellungsmodus.
Führen Sie das BIOS-WiederherstellungsDienstprogramm aus, und starten Sie den
Computer neu, um einen erneuten Test
durchzuführen. Beachten Sie den Abschnitt
„BIOS-Wiederherstellungs-Dienstprogramm“
im Benutzerhandbuch.
A-B-C-D
Tritt das Problem weiterhin auf, beachten Sie
die Hinweise unter „Beschädigte BIOS-Einstellungen zurücksetzen“ im Benutzerhandbuch.
Der Mikroprozessor ist möglicherweise
fehlerhaft.
Beachten Sie die Informationen im Abschnitt
„Mikroprozessorprobleme“ im Benutzerhandbuch.
Möglicher Speicherfehler.
Weitere Informationen finden Sie unter
„Systemspeicherprobleme“ im Benutzerhandbuch.
Möglicher Erweiterungskartenfehler oder
-konflikt.
Beachten Sie die Informationen unter
„Erweiterungskartenprobleme“ und „Hardwarekonflikte“ im Benutzerhandbuch.
A-B-C-D
A-B-C-D
A-B-C-D
= gelb
= grün
= aus
Setup- und Schnellr eferenzhandbuch
155
w w w. d e l l . c o m |
D i a g n o s e a n z e i g e c o d e s w ä h r e n d d e s P O S T (Fortsetzung)
Anzeigemuster
Ursache
Maßnahme
Möglicher Grafikkartenfehler.
Setzen Sie die Grafikkarte noch einmal ein,
und starten Sie den Computer für einen weiteren Test erneut. Anweisungen zum Entfernen
und Installieren von Erweiterungskarten finden
Sie unter „Erweiterungskarte entfernen“ im
Benutzerhandbuch.
A-B-C-D
Tritt das Problem weiterhin auf, beachten
Sie die Hinweise unter „Erweiterungskartenprobleme“ im Benutzerhandbuch.
Wenn das Problem nicht gelöst werden konnte,
wenden Sie sich an Dell, um technische
Unterstützung anzufordern.
Möglicher Disketten- oder
Festplattenlaufwerkfehler.
Weitere Informationen finden Sie unter
„Diskettenlaufwerkprobleme“ und „Festplattenlaufwerkprobleme“ im Benutzerhandbuch.
Möglicher USB-Fehler.
Trennen Sie alle USB-Geräte sowie alle Kabel,
und starten Sie den Computer für einen
weiteren Test erneut. Schließen Sie danach alle
USB-Geräte und Kabel wieder an, und starten
Sie den Computer erneut für einen weiteren
Test.
A-B-C-D
A-B-C-D
Wenn das Problem nicht gelöst werden konnte,
wenden Sie sich an Dell, um technische
Unterstützung anzufordern.
Systemplatinenressourcen und/oder die
Hardware sind möglicherweise fehlerhaft.
Beachten Sie die Informationen unter
„Systemplatinenprobleme“ und
„Hardwarekonflikte“ im Benutzerhandbuch.
Systemplatinenressourcen und/oder die
Hardware sind möglicherweise fehlerhaft.
Beachten Sie die Informationen unter
„Systemplatinenprobleme“ und
„Hardwarekonflikte“ im Benutzerhandbuch.
Möglicher Erweiterungskartenfehler oder
-konflikt.
Beachten Sie die Informationen unter
„Systemplatinenprobleme“ und
„Hardwarekonflikte“ im Benutzerhandbuch.
A-B-C-D
A-B-C-D
A-B-C-D
= gelb
= grün
= aus
156
Setup- und Schnellreferenzhandbuch
D i a g n o s e a n z e i g e c o d e s w ä h r e n d d e s P O S T (Fortsetzung)
Anzeigemuster
Ursache
Maßnahme
Systemplatinenressourcen und/oder die
Hardware sind möglicherweise fehlerhaft.
Beachten Sie die Informationen unter „Systemplatinenprobleme“ und „Hardwarekonflikte“
im Benutzerhandbuch.
Normale Betriebsbedingung nach POST.
Keine Maßnahme erforderlich.
A-B-C-
A-B-C= gelb
= grün
= aus
Systemmeldungen
Wenn während des Starts ein Fehler auftritt, wird möglicherweise eine Meldung angezeigt, die auf ein Problem hinweist. Falls eine solche Meldung
angezeigt wird, schlagen Sie unter „Systemmeldungen“ im Benutzerhandbuch nach, um Vorschläge zur Lösung des Problems zu erhalten. Die
Systemmeldungen werden in alphabetischer Reihenfolge aufgeführt.
HINWEIS: Wenn die Meldung nicht im Benutzerhandbuch aufgeführt ist,
finden Sie in der Dokumentation des Anwendungsprogramms, das beim
Auftreten der Störung ausgeführt wurde, und/oder in der Dokumentation
zum Betriebssystem eine Erklärung zu der Meldung sowie eine empfohlene
Korrekturmaßnahme.
Signaltoncodes
Tritt während des Systemstarts ein Fehler auf, der nicht auf dem Bildschirm
angezeigt werden kann, gibt der Computer möglicherweise einen Signaltoncode aus, der auf das Problem hinweist. Der Signaltoncode ist eine Kombination aus Signaltönen: beispielsweise ein Signalton gefolgt von einem
zweiten und anschließend eine Folge von drei Signaltönen (Code 1-1-3).
Dies bedeutet, dass nicht vom NVRAM gelesen werden kann.
Wenn ein Signaltoncode ausgegeben wird, notieren Sie diesen und schlagen
ihn imBenutzerhandbuch unter „System-Signaltoncodes“ nach.
Setup- und Schnellr eferenzhandbuch
157
w w w. d e l l . c o m |
158
Setup- und Schnellreferenzhandbuch
Dell Precision™ Workstation 530
Guía de instalación
y de referencia rápida
w w w. d e l l . c o m | s u p p o r t . e u r o . d e l l . c o m
Notas, avisos y precauciones
NOTA: Una NOTA proporciona información importante que le ayuda a
utilizar su equipo de la mejor manera posible.
AVISO: Un AVISO indica un posible daño en el hardware o la pérdida de
datos y le explica cómo evitar el problema.
PRECAUCIÓN: Una PRECAUCIÓN indica un posible daño
material, lesión corporal o muerte.
____________________
La información contenida en este documento puede modificarse sin aviso previo.
© 2002 Dell Computer Corporation. Reservados todos los derechos.
Queda estrictamente prohibida la reproducción de este documento por cualquier medio sin la
autorización por escrito de Dell Computer Corporation.
Marcas comerciales utilizadas en este texto: Dell, el logotipo de DELL y Dell Precision son marcas
comerciales de Dell Computer Corporation; Microsoft y Windows son marcas comerciales
registradas de Microsoft Corporation.
Otras marcas y nombres comerciales pueden utilizarse en este documento para hacer referencia a
las entidades que los poseen o a productos de las mismas. Dell Computer Corporation renuncia a
cualquier interés sobre la propiedad de marcas y nombres comerciales que no sean los suyos.
Diciembre 2002
P/N 402GU
Rev. A03
Contenido
Localización de información y ayuda
. . . . . . . . . . . . . . .
163
. . . . . . . . . . . . . .
167
. . . . . . . . . . . . . . . . . . . . .
168
Monitores duales .
. . . . . . . . . . . . . . . . . . . . . . .
175
Preguntas frecuentes
. . . . . . . . . . . . . . . . . . . . . . .
176
Uso de Dell Precision™ ResourceCD
Configuración del equipo
La seguridad es lo primero; para usted y para su equipo
. . . . .
180
. . . . . . . . . . . . . . . .
181
. . . . . . . . . . . . . . . . . . . .
181
. . . . . . . . . . . . . . . . . . . . . . . .
182
Apertura de la cubierta del equipo
Apertura de la cubierta
Interior del equipo .
. . . . . . . . . . . . . . . .
183
. . . . . . . . . . . . . . . . . . . . . .
183
Extracción e instalación de piezas
Adición de memoria
Adición de una unidad de disco duro o de una unidad
de acceso externo . . . . . . . . . . . . . . . . .
. . . . . . . . . . . .
184
184
. . . . . . . . . . . . . . . . . .
184
. . . . . . . . . . . . . . . . . . . . . .
185
Actualización de la tarjeta de vídeo
Actualización del procesador
. . . . . . . . . . . . . .
186
. . . . . . . . . . . . . . . . .
186
. . . . . . . . . . . . . . . . . . . . . .
190
Cuándo utilizar los Diagnósticos Dell
Inicio de los Diagnósticos Dell
Mensajes y códigos .
183
. . . . . . . . . . . . . .
Adición de una tarjeta de expansión PCI
Solución de problemas .
. . . . . .
Contenido
161
162
Contenido
Localización de información y ayuda
La tabla siguiente enumera los recursos que Dell proporciona como
herramientas de asistencia. El ordenador puede entregarse con recursos
adicionales.
Si busca
Aquí lo encontrará
• Un programa de diagnóstico para el
equipo
• Controladores para el equipo
• La Guía del usuario
• La documentación del dispositivo
El CD Drivers and Utilities (Controladores y
utilidades), también conocido como ResourceCD
(CD de recursos)
Puede utilizar este CD para acceder a la documentación, volver a instalar los
controladores o ejecutar las herramientas de diagnóstico.
• Cómo configurar el equipo
• Cómo cuidar del equipo
• Información sobre solución de
problemas
• Cómo abrir la cubierta del equipo
• Cómo encontrar documentación
Guía de instalación y de referencia rápida
G u í a d e i n s t a l a c i ó n y de referencia rápida
163
w w w. d e l l . c o m | s u p p o r t . e u r o . d e l l . c o m
Si busca
Aquí lo encontrará
• Código de servicio rápido y etiqueta
de servicio
• Etiqueta de licencia de Microsoft®
Windows®
Código de servicio rápido y clave del producto
Estas etiquetas se encuentran en el equipo.
• Cómo volver a instalar el sistema
operativo
CD del sistema operativo y Guía de instalación
Después de volver a instalar el sistema operativo, utilice el CD Drivers and
Utilities (Controladores y utilidades) para volver a instalar los controladores de
los dispositivos que se entregaron con el equipo en el momento de su compra.
164
Guía de instalación y de referencia rápida
Si busca
Aquí lo encontrará
• Cómo quitar y sustituir piezas
• Especificaciones técnicas
• Cómo configurar los valores del
sistema
• Cómo identificar y solucionar
problemas
Icono de la Guía del usuario (Microsoft Windows 2000)
Haga doble clic en el icono de la Guía del usuario que aparece en el escritorio.
Centro de Ayuda y soporte técnico de Windows XP
1 Haga clic en el botón Start (Inicio) y, a continuación, en Help and Support
(Ayuda y soporte técnico).
2 Haga clic en la Guía del usuario.
• Ubicación de conectores en la placa
base
Etiqueta de información del sistema
o
La etiqueta está situada en la parte interior de la cubierta del equipo.
• Controladores actualizados para el
S i t i o W e b d e a s i s t e n c i a t é c n i c a d e D e l l : support.dell.com
equipo
El sitio Web de asistencia técnica de Dell proporciona varias herramientas en
• Respuesta a preguntas relacionadas
línea, incluidas:
con la asistencia y el servicio técnico
• Knowledge Base: consejos, sugerencias y cursos en línea
• Conversaciones en línea con otros
• Customer Forum: conversaciones en línea con otros clientes de Dell
usuarios y asistencia técnica
• Actualizaciones: información de actualización para componentes tales
• Documentación del equipo, incluido
como la memoria, la unidad de disco duro y el sistema operativo
el manual de servicio, Service Manual
• Atención al cliente: información de contacto, estado de los pedidos,
garantía e información de reparación
• Descargas: controladores, revisiones y actualizaciones de software
• Consulta: documentación del equipo, especificaciones de productos y
documentos oficiales
G u í a d e i n s t a l a c i ó n y de referencia rápida
165
w w w. d e l l . c o m | s u p p o r t . e u r o . d e l l . c o m
Si busca
Aquí lo encontrará
• Estado de la llamada de solicitud de
servicio e historial de asistencia
técnica
• Principales cuestiones técnicas
relacionadas con el equipo
• Preguntas frecuentes
• Descargas de archivos
• Detalles sobre la configuración del
equipo
• Contrato de servicio del equipo
Sitio Web de asistencia preferente de Dell:
premiersupport.dell.com
• Información de garantía
Guía de información del sistema
• Cómo utilizar Windows XP
• Documentación del equipo y de los
dispositivos
Centro de ayuda y soporte técnico de Windows XP
1 Haga clic en el botón Start (Inicio) y, a continuación, en Help and Support
(Ayuda y soporte técnico).
2 Escriba una palabra o frase que describa el problema y haga clic en el icono
de flecha.
3 Haga clic en el tema que describa el problema.
4 Siga las instrucciones que aparecen en pantalla.
NOTA: Para obtener ayuda a la hora de utilizar Windows 2000, haga clic en
el botón Start (Inicio) y, a continuación, en Help (Ayuda).
166
El sitio Web de asistencia preferente de Dell, Dell Premier Support, está
personalizado para empresas e instituciones gubernamentales y educativas.
Es posible que este sitio Web no esté disponible en todos los países o regiones.
Guía de instalación y de referencia rápida
Uso de Dell Precision™ ResourceCD
Para usar Dell Precision ResourceCD (CD de recursos de Dell Precision)
desde el sistema operativo Windows® de Microsoft®:
1
Inserte Dell Precision ResourceCD (CD de recursos de Dell Precision)
en la unidad de CD.
Si utiliza Dell Precision ResourceCD (CD de recursos de Dell
Precision) por primera vez en este equipo, la ventana ResourceCD
Installation (Instalación del CD de recursos) le informará de que el
CD va a comenzar la instalación.
2
Haga clic en OK (Aceptar) para continuar.
Para finalizar la instalación, responda a los mensajes mostrados por el
programa.
3
En la pantalla Welcome Dell System Owner (Bienvenida al propietario
del sistema Dell), haga clic en Next (Siguiente).
4
Seleccione el System Model (Modelo del sistema), Operating System
(Sistema operativo), Device Type (Tipo de dispositivo) y Topic
(Tema) adecuados.
Para acceder a la Dell Precision ResourceCD Guide (Guía del CD de recursos
de Dell Precision), haga clic en Guías del usuario, en el menú desplegable
Topic (Tema) y, a continuación, haga clic en Dell Precision ResourceCD
(CD de recursos de Dell Precision).
NOTA: Para acceder a los controladores de los dispositivos y a la
documentación del usuario, debe utilizar ResourceCD (CD de recursos)
desde Windows. Para utilizar Dell Diagnostics (Diagnósticos Dell), inserte
ResourceCD (CD de recursos) en la unidad correspondiente y reinicie el equipo.
Para obtener información sobre cómo ejecutar Dell Diagnostics (Diagnósticos
Dell), consulte "Cuándo utilizar los Diagnósticos Dell" en la página 186.
G u í a d e i n s t a l a c i ó n y de referencia rápida
167
w w w. d e l l . c o m | s u p p o r t . e u r o . d e l l . c o m
Configuración del equipo
Los números que aparecen en la imagen se corresponden con las tareas
descritas en el procedimiento de configuración.
NOTA: Para configurar correctamente el equipo, siga todos los pasos
indicados.
Características del equipo
6
indicadores
de
diagnóstico
1
4
2
3
7
5
Vista posterior
168
Guía de instalación y de referencia rápida
Vista delantera
(puertas abiertas)
1
Teclado y ratón
Conecte el teclado y el ratón como se muestra en la siguiente ilustración.
NOTA: Si dispone de un teclado Personal System/2 (PS/2), conéctelo a la
salida correspondiente para teclados PS/2. Si se trata de un teclado bus serie
universal (Universal Serial Bus, USB), enchúfelo al conector USB tal y como
se muestra en la ilustración. No conecte un teclado o un ratón USB a los
conectores USB de la parte delantera del equipo.
NOTA: No intente utilizar un ratón PS/2 y un ratón USB al mismo tiempo.
PS/2 o USB
teclado
PS/2 o USB
ratón
G u í a d e i n s t a l a c i ó n y de referencia rápida
169
w w w. d e l l . c o m | s u p p o r t . e u r o . d e l l . c o m
2
Módem y adaptador de red
Inserte el cable de red, no el cable del teléfono, en el conector de red.
NOTA: El equipo cuenta con un adaptador de red integrado. No obstante, si el
equipo tiene instalada una tarjeta de expansión de red, conecte el cable de red
a la tarjeta, no al conector situado en el panel posterior del equipo.
Si dispone de un módem opcional, conecte el cable del teléfono al módem.
AVISO: No conecte el cable de módem al adaptador de red, ya que el voltaje
requerido para las comunicaciones telefónicas podría dañarlo.
cable de red
170
Guía de instalación y de referencia rápida
cable del módem
3
Monitor
Alinee e inserte con suavidad el cable del monitor para evitar que se doblen
las patillas del conector. A continuación, ajuste los tornillos del conector
del cable.
NOTA: Si está utilizando sólo un monitor con una tarjeta de monitor dual
opcional, utilice el puerto principal. Para activar el sistema de monitor dual,
los dos monitores deben estar conectados cuando se inicie el equipo.
Para configurar monitores duales, consulte "Monitores duales" en la
página 175.
puerto principal
puerto secundario opcional
G u í a d e i n s t a l a c i ó n y de referencia rápida
171
w w w. d e l l . c o m | s u p p o r t . e u r o . d e l l . c o m
4
Altavoces
Conecte los altavoces al equipo como se indica en las instrucciones que
acompañan a los mismos.
NOTA: El equipo cuenta con un controlador de audio integrado. No obstante,
si el equipo tiene instalada una tarjeta de expansión de audio, conecte los
dispositivos de audio externos a la tarjeta de sonido, no a los conectores
situados en el panel posterior del equipo.
172
Guía de instalación y de referencia rápida
5
Alimentación
Enchufe el equipo y el monitor a las tomas de corriente eléctrica.
6
Encendido
Pulse los botones de encendido del equipo y del monitor para encenderlos.
G u í a d e i n s t a l a c i ó n y de referencia rápida
173
w w w. d e l l . c o m | s u p p o r t . e u r o . d e l l . c o m
7
Configuración del sistema operativo
Cuando se inicia el equipo por primera vez, puede que aparezcan algunos
mensajes de inicialización del sistema, entre los que se incluye uno que
muestra la etiqueta de servicio y el código de servicio rápido.
El equipo se preconfigura con el sistema operativo instalado. Antes de
encender el equipo por primera vez, siga todos los pasos anteriores y conecte
todos los dispositivos.
La configuración inicial del sistema operativo es automática y puede
requerir varios minutos. Puede que la configuración tarde más tiempo del
habitual, dependiendo de los dispositivos internos y externos del sistema.
Siga las indicaciones del sistema operativo para finalizar la configuración.
Quizá se le indique que introduzca la clave de producto de Windows
(Windows Product Key), también denominada Id. de producto (Product
ID) o Certificado de autenticidad (COA) a fin de finalizar el proceso de
registro. Estos datos aparecen encima de la etiqueta de servicio del equipo.
NOTA: Para obtener más información sobre cómo configurar el sistema
operativo, consulte la guía de instalación del mismo.
Para futuras consultas, escriba el número aquí:
Clave de producto (Id. o COA):
________________________________________
Para obtener más información, acceda a la documentación del equipo desde
el icono de Guías de usuario situado en el escritorio o desde Dell Precision
ResourceCD (CD de recursos de Dell Precision).
174
Guía de instalación y de referencia rápida
Monitores duales
Conecte el primer monitor al puerto principal. Consulte "Preguntas
frecuentes" en la página 176 para obtener más información.
puerto secundario
puerto principal
NOTA: Un segundo monitor es opcional y requiere una tarjeta adaptadora de
gráficos para varios monitores.
NOTA: Para activar el sistema de monitor dual, los dos monitores deben estar
conectados cuando se inicie el equipo.
G u í a d e i n s t a l a c i ó n y de referencia rápida
175
w w w. d e l l . c o m | s u p p o r t . e u r o . d e l l . c o m
Preguntas frecuentes
Problema
Pruebe lo siguiente...
O pruebe con Dell
Precision ResourceCD
(CD de recursos de
Dell Precision)
Cómo utilizar Dell
Precision ResourceCD
(CD de recursos de
Dell Precision)
Consulte "Uso de Dell
Precision™ ResourceCD" en
la página 167 para obtener
más información.
Vaya al menú principal de Dell
Precision ResourceCD (CD de
recursos de Dell Precision).
Haga clic en Guías de usuario
en el menú desplegable Topic
(Tema) y, a continuación, en
Dell Precision ResourceCD
Guide (Guía del CD de
recursos de Dell Precision).
Dónde encontrar una
Guía del usuario
detallada del equipo
Dependiendo del sistema
operativo, haga doble clic en
el icono de Guías de usuario
del escritorio o en el botón
Start (Inicio) y seleccione
Help and Support (Ayuda y
soporte técnico).
Vaya al menú principal de Dell
Precision ResourceCD (CD de
recursos de Dell Precision).
Haga clic en Guías de usuario
en el menú desplegable Topic
(Tema) y, a continuación, en
la guía de usuario
correspondiente a su equipo.
Vaya a support.dell.com. En la
página Welcome (Bienvenido),
haga clic en Dell Documents
(Documentos de Dell). Elija las
opciones correspondientes a su
equipo para acceder a la Guía del
usuario.
Vaya al menú principal de Dell
Precision ResourceCD (CD de
recursos de Dell Precision).
Haga clic en Guías de usuario
en el menú desplegable Topic
(Tema) , haga clic en la guía
de usuario correspondiente a
su equipo y, a continuación,
consulte "Limited Warranty
and Return Policy" (Garantía
limitada y política de
devoluciones).
Vaya a support.dell.com. En la
página Welcome (Bienvenido),
haga clic en Dell Documents
(Documentos de Dell). Elija las
opciones correspondientes a su
equipo para acceder a la Guía
del usuario. Consulte "Garantía
limitada y política de
devoluciones" de la User’s
Guide (Guía del usuario).
Documentos como la Guía
del usuario está disponible
en la unidad de disco duro.
Dónde encontrar la
Dependiendo del sistema
declaración de garantía operativo, haga doble clic en
del equipo
el icono de Guías de usuario
del escritorio o en el botón
Start (Inicio) y seleccione
Help and Support (Ayuda y
soporte técnico). Consulte la
sección "Garantía limitada y
política de devoluciones" de
la Guía del usuario.
176
Guía de instalación y de referencia rápida
O pruebe con el sitio de
asistencia técnica de Dell
Problema
Pruebe lo siguiente...
O pruebe con Dell
Precision ResourceCD
(CD de recursos de
Dell Precision)
O pruebe con el sitio de
asistencia técnica de Dell
Dónde encontrar la
clave del producto
(Product Key),
también denominada
Id. de producto
(Product ID) o
certificado de
autenticidad
(Certificate of
Authenticity, COA) a
fin de registrar el
sistema operativo
Consulte la página 174 de
este documento.
Cómo encontrar las
especificaciones
técnicas del equipo
Dependiendo del sistema
operativo, haga doble clic en
el icono de Guías de usuario
del escritorio o en el botón
Start (Inicio) y seleccione
Help and Support (Ayuda y
soporte técnico). Consulte
la sección "Technical
Specifications"
(Especificaciones técnicas)
de la Guía del usuario .
Vaya al menú principal de Dell
Precision ResourceCD (CD de
recursos de Dell Precision).
Haga clic en Guías de usuario
en el menú desplegable Topic
(Tema) , haga clic en la guía
de usuario correspondiente a
su equipo y, a continuación,
consulte la sección
"Especificaciones técnicas".
Vaya a support.dell.com. En la
página Welcome (Bienvenido),
haga clic en Dell Documents
(Documentos de Dell). Elija las
opciones correspondientes a su
equipo para acceder a la Guía
del usuario. Consulte la sección
"Especificaciones técnicas" de la
Guía del usuario.
Tengo un equipo con
una tarjeta gráfica que
admite dos monitores.
¿Cómo debo
configurar el segundo
monitor?
Dependiendo del sistema
operativo, haga doble clic en
el icono de Guías de usuario
del escritorio o en el botón
Start (Inicio) y seleccione
Help and Support (Ayuda y
soporte técnico) y busque
dual monitor (monitor dual).
Encontrará un
procedimiento paso a paso
para configurar monitores
duales en la Guía del usuario
del controlador de vídeo.
Vaya al menú principal de Dell
Precision ResourceCD (CD de
recursos de Dell Precision).
Haga clic en Guías de usuario
en el menú desplegable Topic
(Tema) y, a continuación,
en la guía de usuario
correspondiente a su equipo.
Vaya a http://support.dell.com.
En la página Bienvenido, haga
clic en Dell Knowledge Base y
busque utilizando las palabras
dual monitor (monitor dual).
Vaya a support.dell.com. En la
página Welcome (Bienvenido),
haga clic en Ask Dudley! y busque
utilizando las palabras clave
Product Key (Clave de
producto).
G u í a d e i n s t a l a c i ó n y de referencia rápida
177
w w w. d e l l . c o m | s u p p o r t . e u r o . d e l l . c o m
Problema
Pruebe lo siguiente...
O pruebe con Dell
Precision ResourceCD
(CD de recursos de
Dell Precision)
Si necesito un
controlador para la
tarjeta gráfica, el
adaptador de red, la
tarjeta de sonido,
software SCSI (small
computer system
interface, interfaz para
sistemas informáticos
pequeños) o algún otro
dispositivo, ¿dónde
puedo encontrarlo?
Consulte "Uso de Dell
Precision™ ResourceCD" en
la página 167 para obtener
más información.
Consulte Dell Precision
WorkStations ResourceCD
Guide (Guía del CD de
recursos de Dell Precision)
para obtener más información.
Cómo abrir el equipo
Consulte "Apertura de la
cubierta del equipo" en la
página 181.
La pantalla del
monitor está en blanco
y la luz de encendido
está parpadeando en
color verde. ¿Cómo
reinicio las operaciones
con el equipo?
Vaya al menú principal de Dell
Precision ResourceCD (CD de
recursos de Dell Precision).
Haga clic en Guías de usuario
en el menú desplegable Topic
(Tema) , haga clic en la guía
Dependiendo del sistema
operativo, haga doble clic en de usuario correspondiente a
el icono de Guías de usuario su equipo y, a continuación,
del escritorio o en el botón consulte la sección
"Administración de energía".
Start (Inicio) y seleccione
Help and Support (Ayuda y
soporte técnico). Consulte la
sección "Administración de
energía" de la Guía del
usuario.
178
Puede que haya un CD
específico para el dispositivo.
En ese caso, busque en el
CD la documentación y los
controladores pertinentes.
Vaya al menú principal de Dell
Precision ResourceCD (CD de
recursos de Dell Precision).
Haga clic en Guías de usuario
en el menú desplegable Topic
(Tema) , haga clic en la guía
de usuario correspondiente a
su equipo y, a continuación,
consulte la sección "Removing
and Installing Parts"
(Extracción e instalación de
piezas).
El equipo está en modo de
consumo reducido o
"dormido" Utilice uno de los
métodos indicados para
"despertarlo".
Guía de instalación y de referencia rápida
O pruebe con el sitio de
asistencia técnica de Dell
Vaya a support.dell.com
para obtener ayuda sobre
cuestiones generales de uso,
instalación e instrucciones sobre
la solución de problemas.
Vaya a support.dell.com. En la
página Welcome (Bienvenido),
haga clic en Dell Documents
(Documentos de Dell). Elija las
opciones correspondientes a su
equipo para acceder a la Guía del
usuario. Consulte la sección
"Administración de energía" de la
Guía del usuario.
Problema
Pruebe lo siguiente...
O pruebe con Dell
Precision ResourceCD
(CD de recursos de
Dell Precision)
O pruebe con el sitio de
asistencia técnica de Dell
Cómo instalar
Consulte la etiqueta de
hardware adicional en servicio interna que se
el equipo
describe en "Interior del
equipo" en la página 182.
Consulte también
"Extracción e instalación de
piezas" en la página 183.
Vaya al menú principal de Dell
Precision ResourceCD (CD de
recursos de Dell Precision).
Haga clic en Guías de usuario
en el menú desplegable Topic
(Tema) , haga clic en la guía
de usuario correspondiente a
su equipo y, a continuación,
consulte la sección "Removing
and Installing Parts"
(Extracción e instalación
de piezas).
Vaya a support.dell.com. En la
página Welcome (Bienvenido),
haga clic en Dell Documents
(Documentos de Dell). Elija las
opciones correspondientes a su
equipo para acceder a la Guía
del usuario. Consulte la sección
"Extracción e instalación de
piezas" de la Guía del usuario.
He instalado una
memoria del sistema
de 4 GB. ¿Por qué
parece como si faltara
parte de la memoria?
Vaya al menú principal de Dell
Precision ResourceCD (CD de
recursos de Dell Precision).
Haga clic en Guías de usuario
en el menú desplegable Topic
(Tema) , haga clic en la guía
de usuario correspondiente a
su equipo y, a continuación,
consulte "System Memory"
(Memoria del sistema).
Vaya a support.dell.com. En la
página Welcome (Bienvenido),
haga clic en Dell Documents
(Documentos de Dell). Elija las
opciones correspondientes a su
equipo para acceder a la Guía
del usuario. Consulte la sección
"System Memory" (Memoria del
sistema) de la Guía del usuario.
Dependiendo del sistema
operativo, haga doble clic en
el icono de Guías de usuario
del escritorio o en el botón
Start (Inicio) y seleccione
Help and Support (Ayuda y
soporte técnico). Consulte
"System Memory" (Memoria
del sistema) en la sección
"Extracción e instalación
de piezas" de la Guía del
usuario.
Cómo volver a instalar Consulte la guía de
el sistema operativo
instalación del sistema
operativo a fin de obtener la
información necesaria para
volver a instalarlo.
G u í a d e i n s t a l a c i ó n y de referencia rápida
179
w w w. d e l l . c o m | s u p p o r t . e u r o . d e l l . c o m
La seguridad es lo primero;
para usted y para su equipo
No intente reparar usted mismo el ordenador, salvo de acuerdo con las
instrucciones que figuran en esta guía o en otra documentación de Dell.
Siga siempre paso a paso las instrucciones proporcionadas.
Manipular el interior del equipo es seguro, siempre que observe las siguientes
precauciones.
PRECAUCIÓN: PARA SU SEGURIDAD PERSONAL Y LA
PROTECCIÓN DEL EQUIPO
Antes de comenzar a trabajar en el equipo, siga los siguientes pasos en
el orden indicado:
1
Apague el equipo y todos los dispositivos.
2
Toque una superficie metálica que no lleve pintura, como el marco
metálico que rodea las ranuras para tarjetas situadas en la parte
posterior del equipo, antes de tocar nada del interior del mismo.
3
Desenchufe el equipo y los dispositivos de sus respectivas tomas de
corriente. De este modo se reducirá la posibilidad de sufrir daños
personales o una descarga eléctrica. Desconecte también cualquier
línea telefónica o de telecomunicaciones del equipo.
NOTA: Antes de desconectar un dispositivo del equipo o retirar cualquier
pieza de la placa base, asegúrese de que la luz del indicador de energía en
espera de la misma está apagado. Consulte la etiqueta de servicio que se
encuentra en el interior de la cubierta para localizar la luz del indicador de
energía en espera.
Mientras trabaja, toque periódicamente una superficie metálica del
equipo que no lleve pintura para disipar la electricidad estática y evitar
que se dañen los componentes internos.
Dell recomienda, además, que se revisen periódicamente las instrucciones
de seguridad contenidas en la documentación del equipo.
180
Guía de instalación y de referencia rápida
Apertura de la cubierta del equipo
Necesitará abrir la cubierta del equipo cuando desee retirar o instalar una
pieza, restablecer una contraseña olvidada o diagnosticar un problema.
PRECAUCIÓN: Antes de realizar este procedimiento, consulte la
sección "La seguridad es lo primero; para usted y para su equipo"
en la página 180.
Apertura de la cubierta
1
Apague el equipo y los dispositivos, desconéctelos de las tomas de
corriente y espere de 10 a 20 segundos.
2
Si ha instalado un candado en el anillo suministrado a tal fin del panel
posterior, retírelo (observe la siguiente figura).
3
Apoye el equipo sobre el lado derecho.
4
Para abrir la cubierta del equipo:
a
Deslice el pestillo de enganche de la cubierta hacia arriba (como
muestra la siguiente figura).
b
Levante la parte posterior de la cubierta y gírela hacia la parte
delantera del equipo.
cubierta
pestillo de
enganche
ranura para cable
de seguridad
anillo del candado
G u í a d e i n s t a l a c i ó n y de referencia rápida
181
w w w. d e l l . c o m | s u p p o r t . e u r o . d e l l . c o m
Interior del equipo
La siguiente figura muestra el equipo con la cubierta abierta.
NOTA: La etiqueta de servicio adosada a la parte interior de la cubierta del
equipo proporciona información acerca de cómo manipular las distintas
piezas.
etiqueta de servicio interna
soporte de la unidad de disquete
soporte de la unidad de disco duro
soporte de la unidad de acceso externo
interruptor de intrusiones del chasis
panel delantero
dispositivo de
retención del cable
abrazadera de sujeción
de la placa de memoria
vertical (si es
necesaria)
abrazadera
de la tarjeta
AGP
altavoz
cubierta para la
circulación de aire
del microprocesador
conectores del panel de E/S
ranuras para tarjetas de expansión
ventilador para
la tarjeta de
expansión
alimentación eléctrica
placa base
enchufe de CA
rejillas de ventilación
182
Guía de instalación y de referencia rápida
Extracción e instalación de piezas
Las instrucciones para extraer e instalar las distintas piezas se encuentran en
la Guía del usuario en la unidad de disco duro. Para acceder a este
documento:
1
Haga doble clic en el icono de Guías de usuario que aparece en el
escritorio.
NOTA: La Guía del usuario también está disponible en formato PDF
(Portable Document Format) en support.dell.com.
2
Haga clic en System Information (Información del sistema).
3
Haga clic en System Documentation (Documentación del sistema).
4
Haga clic en Guía del usuario del sistema Dell Precision
WorkStation 530.
5
Haga clic en Removing and Installing Parts (Extracción e instalación
de piezas).
6
Seleccione Print (Imprimir) en el menú File (Archivo) para imprimir
el procedimiento antes de empezar a trabajar.
NOTA: Para imprimir la Guía del usuario completa con Internet Explorer,
seleccione Print all linked documents (Imprimir todos los documentos
vinculados) en la ventana Print (Imprimir).
Adición de memoria
Siga los pasos anteriores para acceder a la Guía del usuario y consulte la
sección "System Memory" (Memoria del sistema).
Adición de una unidad de disco duro o de una unidad de acceso
externo
El equipo cuenta con una o varias unidades EIDE (Enhanced Integrated
Drive Electronics, electrónica de unidad integrada mejorada) o SCSI. Para
determinar el tipo de unidades de que dispone, consulte el formulario de
pedido que acompaña al equipo.
Siga los pasos anteriores para acceder a la Guía del usuario y consulte la
sección "Medios y unidades de disco".
G u í a d e i n s t a l a c i ó n y de referencia rápida
183
w w w. d e l l . c o m | s u p p o r t . e u r o . d e l l . c o m
Adición de una tarjeta de expansión PCI
Para añadir al equipo una tarjeta de expansión PCI (Peripheral Component
Interconnect, interconexión de componentes periféricos), como un módem,
siga los pasos anteriores para acceder a la Guía del usuario y consulte la
sección "Tarjetas de expansión".
Actualización de la tarjeta de vídeo
Para actualizar la tarjeta AGP (Accelerated Graphics Port, puerto para
gráficos acelerados), consulte la documentación de la tarjeta de vídeo y
cualquier otra instrucción especial. La documentación de la tarjeta de vídeo
se incluye en el paquete de actualización de la misma. También puede
encontrar documentación en línea acerca de la tarjeta de vídeo en
support.dell.com. Vaya a la página correspondiente a su equipo y haga clic
en Dell Documents, (Documentos de Dell) y haga clic en Video Adapter
(Adaptador de vídeo). Elija la tarjeta de vídeo correspondiente entre las que
figuran en la lista.
Si desea obtener instrucciones para instalar la tarjeta en el equipo, siga los
pasos anteriores para acceder a la Guía del usuario y consulte la sección
"Tarjetas de expansión".
Actualización del procesador
Siga los pasos anteriores para acceder a la Guía del usuario y consulte la
sección "Microprocesadores".
184
Guía de instalación y de referencia rápida
Solución de problemas
NOTA: Si se producen problemas que requieren la ayuda del servicio de
asistencia técnica de Dell, anote el código de servicio rápido y el número de la
etiqueta de servicio y póngase en contacto con la oficina de Dell más cercana.
Código de servicio rápido:___________________________
Número de la etiqueta de servicio:___________________________
Dell le ofrece las herramientas necesarias para ayudarle a resolver los
problemas. Las herramientas que figuran en esta sección pueden ayudarle a
resolver problemas cuando no se dispone de herramientas en línea. Su
equipo cuenta con las siguientes herramientas:
D I A G N Ó S T I C O S D E L L — Dell Precision ResourceCD (CD de recursos de Dell
Precision) contiene la herramienta Diagnósticos Dell que comprueba diferentes
componentes del equipo y ayuda a identificar problemas. Para obtener más
información, consulte "Cuándo utilizar los Diagnósticos Dell" en la página 186.
I N D I C A D O R E S D E L S I S T E M A — Situados en la parte frontal del equipo, estos
indicadores pueden señalar la existencia de problemas. Para obtener más
información, consulte "Indicadores del sistema" en la página 190.
I N D I C A D O R E S D E D I A G N Ó S T I C O — Situados en la parte frontal del equipo,
estos indicadores pueden señalar la existencia de problemas. Para obtener más
información, consulte "Indicadores de diagnóstico" en la página 192.
M E N S A J E S D E L S I S T E M A — El equipo muestra estos mensajes para avisar de
un fallo existente o posible. Para obtener más información, consulte "Mensajes
del sistema" en la página 197.
C Ó D I G O S D E S O N I D O — Una serie de códigos de sonido audibles emitidos por
el equipo para ayudarle a identificar un problema. Para obtener más información,
consulte "Códigos de sonido" en la página 197.
G u í a d e i n s t a l a c i ó n y de referencia rápida
185
w w w. d e l l . c o m | s u p p o r t . e u r o . d e l l . c o m
Cuándo utilizar los Diagnósticos Dell
Si tiene problemas con el equipo, realice las comprobaciones sugeridas en la
sección "Búsqueda de soluciones" de la Guía del usuario y ejecute los
Diagnósticos Dell antes de ponerse en contacto con Dell para solicitar
asistencia técnica. La ejecución de los Diagnósticos Dell puede ayudarle a
resolver el problema sin tener que ponerse en contacto con Dell. Si se pone
en contacto con Dell, el resultado de las pruebas puede proporcionar
información importante al personal de servicio y asistencia de Dell.
Los Diagnósticos Dell le permiten:
•
Realizar pruebas rápidas, extendidas o personalizadas de uno o todos
los dispositivos
•
Seleccionar pruebas basándose en uno de los síntomas del problema
•
Elegir cuántas veces desea ejecutar una prueba
•
Mostrar el resultado de la prueba
•
Suspender la prueba si se detecta un error
•
Acceder a información de ayuda en línea que describa las pruebas y los
dispositivos
•
Recibir mensajes de estado que indiquen si las pruebas se han
terminado con éxito
•
Recibir mensajes de error si se detectan problemas
Inicio de los Diagnósticos Dell
Se recomienda imprimir estos procedimientos antes de empezar.
AVISO: Utilice los Diagnósticos Dell únicamente para probar el equipo
Dell™. Si se utiliza este programa con otros equipos pueden aparecer mensajes
de error.
Acceda a la configuración del sistema, revise la información de
configuración del equipo y asegúrese de que el dispositivo que desea probar
aparece y está activo.
Inicie los Diagnósticos Dell desde la unidad de disco duro o desde el CD
Drivers and Utilities (Controladores e utilidades) (también denominado
ResourceCD [CD de recursos]).
186
Guía de instalación y de referencia rápida
Inicio de los Diagnósticos Dell desde la unidad de disco duro
1
Apague y reinicie el equipo.
2
Cuando aparezca el logotipo de DELL, presione <F12>
inmediatamente.
Si espera demasiado y aparece el logotipo de Windows, siga esperando
hasta que vea el escritorio de Windows. A continuación, cierre el
equipo mediante el menú Start (Inicio) e inténtelo de nuevo.
3
Al aparecer la lista de dispositivos de inicio, resalte Boot to Utility
Partition (Iniciar en la partición de la utilidad) y presione <Intro>.
4
Cuando aparezca la opción Main Menu (Menú principal) de los
Diagnósticos Dell, seleccione la prueba que desea ejecutar.
Inicio de los Diagnósticos Dell desde el CD Drivers and Utilities
(Controladores y utilidades)
1
Introduzca el CD Drivers and Utilities (Controladores y utilidades) en
la unidad de CD-ROM.
2
Apague y reinicie el equipo.
NOTA: Si recibe un
mensaje indicando que no
se ha encontrado ninguna
partición para la utilidad
de diagnóstico, siga las
instrucciones para
ejecutar los Diagnósticos
Dell desde el CD Drivers
and Utilities
(Controladores y
utilidades).
Cuando aparezca el logotipo de DELL, presione <F12>
inmediatamente.
Si espera demasiado y aparece el logotipo de Windows, siga esperando
hasta que vea el escritorio de Windows. A continuación, cierre el
equipo mediante el menú Start (Inicio) e inténtelo de nuevo.
3
Cuando aparezca la lista de dispositivos de inicio, resalte IDE
CD-ROM Device (Dispositivo CD-ROM IDE) y presione <Intro>.
4
Seleccione la opción IDE CD-ROM Device (Dispositivo CD-ROM
IDE) en el menú de inicio del CD.
5
Seleccione la opción Boot from CD-ROM (Iniciar desde el
CD-ROM) en el menú que aparece.
6
Escriba 1 para abrir el menú ResourceCD (CD de recursos).
7
Escriba 2 para iniciar los Diagnósticos Dell.
8
Seleccione Run the 32 Bit Dell Diagnostics (Ejecutar los Diagnósticos
Dell de 32 bits) en la lista numerada. Si aparecen varias versiones,
seleccione la versión apropiada para su plataforma.
9
Cuando aparezca la opción Main Menu (Menú principal) de los
Diagnósticos Dell, seleccione la prueba que desea ejecutar.
NOTA: Esta operación
cambia la secuencia de
inicio sólo una vez. La
próxima vez que se
encienda, el equipo se
iniciará según los
dispositivos especificados
en la configuración del
sistema.
G u í a d e i n s t a l a c i ó n y de referencia rápida
187
w w w. d e l l . c o m | s u p p o r t . e u r o . d e l l . c o m
Menú principal de los Diagnósticos Dell
1
NOTA: La Etiqueta de
servicio del equipo se
encuentra en la parte
superior de cada una de
las pantallas de prueba.
Después de que se carguen los Diagnósticos Dell y de que aparezca la
pantalla Main Menu (Menú principal), haga clic en el botón de la
opción que desee.
.
2
Opción
Función
Express Test
(Prueba
rápida)
Realiza una prueba rápida de los dispositivos. Esta prueba
dura normalmente de 10 a 20 minutos y no requiere
interacción por su parte. Ejecute Express Test (Prueba
rápida) en primer lugar para aumentar la posibilidad de
realizar un seguimiento rápido del problema.
Extended Test
(Prueba
extendida)
Realiza una prueba completa de los dispositivos. Esta
prueba dura normalmente una hora o más y requiere que
responda a unas preguntas periódicamente.
Custom Test
(Prueba
personalizada)
Prueba un dispositivo específico. Puede personalizar las
pruebas que desee ejecutar.
Symptom Tree
(Árbol de
síntomas)
Enumera los síntomas más comunes encontrados y permite
seleccionar una prueba basándose en el síntoma del
problema.
Si se encuentra un problema durante una prueba, aparece un mensaje
que indica el código de error y una descripción del problema. Anote el
código de error y la descripción del problema y siga las instrucciones de
la pantalla.
Si no puede resolver el error, póngase en contacto con Dell.
3
188
Si ejecuta una prueba mediante la opción Custom Test (Prueba
personalizada) o Symptom Tree (Árbol de síntomas), haga clic en la
ficha correspondiente descrita en la siguiente tabla para obtener más
información.
Ficha
Función
Results
(resultados)
Muestra el resultado de la prueba y los errores
encontrados.
Errors (errores)
Muestra los errores encontrados, los códigos de error y la
descripción del problema.
Help (Ayuda)
Describe la prueba y puede indicar los requisitos para
ejecutarla.
Guía de instalación y de referencia rápida
Configuration
(Configuración)
Muestra la configuración de hardware del dispositivo
seleccionado.
Los Diagnósticos Dell obtienen información acerca de la
configuración de todos los dispositivos desde la
configuración del sistema, la memoria y varias pruebas
internas y la muestran en la lista de dispositivos del
panel izquierdo de la pantalla. La lista de dispositivos
puede que no muestre los nombres de todos los
componentes instalados en el equipo o de todos los
dispositivos conectados al equipo.
Parameters
(parámetros)
Permite personalizar la prueba cambiando la
configuración de la misma.
4
Al finalizar las pruebas, si está ejecutando los Diagnósticos Dell desde
el CD Drivers and Utilities (Controladores y utilidades), extraiga el CD.
5
Cierre la pantalla de la prueba para volver a la pantalla Main Menu
(Menú principal). Para salir de los Diagnósticos Dell y reiniciar el
equipo, cierre la pantalla Main Menu (Menú principal).
Cambio de la secuencia de inicio
NOTA: Para obtener más información, consulte la Guía del usuario.
1
Encienda el equipo (si ya está encendido, reinícielo).
2
Cuando aparezca F2 = Setup (F2 = Configuración) en la esquina
superior derecha de la pantalla, pulse <F12>.
Aparecerá el menú System Setup (Configuración del sistema).
NOTA: Si espera demasiado y el sistema operativo empieza a cargarse en
la memoria, deje que el equipo finalice la operación y, a continuación,
reinícielo y vuelva a intentarlo.
3
Use las teclas de flecha para resaltar la opción de menú Boot Sequence
(Secuencia de inicio) y pulse <Intro>para acceder al menú
emergente.
NOTA: Escriba la secuencia de inicio actual por si deseara modificarla
después de ejecutar los Diagnósticos Dell.
4
Utilice las teclas de flecha para resaltar CD Device (Dispositivo de CD)
en la opción de menú Boot First Device: (Primer dispositivo de inicio) y
pulse <+> para colocarlo en la parte superior de la lista.
5
Pulse <Alt><b> para reiniciar el equipo.
G u í a d e i n s t a l a c i ó n y de referencia rápida
189
w w w. d e l l . c o m | s u p p o r t . e u r o . d e l l . c o m
Mensajes y códigos
Los programas de aplicación, el sistema operativo y el propio equipo pueden
identificar problemas y alertarle sobre la existencia de los mismos. Cuando
se produce un problema, éste puede indicarse mediante un mensaje en la
pantalla del monitor, un sonido o un indicador luminoso. Las siguientes
subsecciones presentan información sobre los mensajes, los sonidos y los
indicadores luminosos.
Indicadores del sistema
El equipo cuenta con una serie de indicadores luminosos que pueden
ayudarle a analizar y solucionar problemas. Para localizar estos indicadores,
consulte "Características del equipo" en la página 168.
La siguiente tabla muestra una lista de los códigos de los indicadores
luminosos, proporciona posibles causas y sugiere acciones correctivas.
NOTA: Para muchos de los códigos de los indicadores luminosos del sistema es
útil comprobar las luces de diagnóstico para ver si identifica el problema.
Consulte "Indicadores de diagnóstico" en la página 192.
Códigos de los indicadores luminosos del sistema
Indicador de
alimentación
Indicador de unidad Causa
de disco duro
Luz verde fija
N/D
El equipo está encendido y funciona No es necesario realizar ninguna
correctamente.
acción correctiva.
Luz verde
parpadeante
En blanco
El equipo se encuentra en estado
suspendido (Windows 2000 y
Windows XP).
Utilice uno de los métodos indicados
para "despertarlo". Consulte la sección
"Administración de energía" de la
Guía del usuario.
Parpadea en color N/D
verde varias veces
y después se apaga
Existe un error de configuración.
Compruebe las luces de diagnóstico
para ver si identifica el problema
especificado.
Luz amarilla fija
Los Diagnósticos Dell están
ejecutando una prueba o un
dispositivo de la placa base está
defectuoso o incorrectamente
instalado.
Si los Diagnósticos Dell se están
ejecutando, deje que la prueba
finalice.
N/D
Acción correctiva
Compruebe las luces de diagnóstico
para ver si identifica el problema
especificado. Consulte "Problemas de
la placa base" de la Guía del usuario.
Si el equipo no se inicia, póngase en
contacto con Dell para solicitar
asistencia técnica.
190
Guía de instalación y de referencia rápida
C ó d i g o s d e l o s i n d i c a d o r e s l u m i n o s o s d e l s i s t e m a (continuación)
Indicador de
alimentación
Indicador de unidad Causa
de disco duro
Acción correctiva
Luz amarilla
parpadeante
En blanco
Hay un problema de suministro
Compruebe las luces de diagnóstico
eléctrico o un fallo en la placa base. para ver si identifica el problema
especificado. Consulte "Problemas
con la alimentación" y "Problemas con
la placa base" en la Guía del usuario.
Luz amarilla
parpadeante
Luz verde fija
Hay un problema en la placa base.
Compruebe las luces de diagnóstico
para ver si identifica el problema
especificado. Consulte "Problemas
con la placa base" en la Guía del
usuario.
Luz verde fija y un N/D
código de sonido
durante POST
Se ha detectado un problema
mientras se ejecutaba el BIOS.
Consulte "Códigos de sonido" en la
página 197 a fin de obtener
instrucciones para diagnosticar el
código de sonido. Compruebe
también las luces de diagnóstico
para ver si identifica el problema
especificado.
Luz de
N/D
alimentación
verde fija y ningún
código de sonido
ni vídeo durante
POST
El monitor o la tarjeta gráfica
pueden estar defectuosos o
instalados incorrectamente.
Compruebe las luces de diagnóstico
para ver si identifica el problema
especificado. Consulte también
"Video Problems" (Problemas de
vídeo) en la Guía del usuario.
Luz de
N/D
alimentación
verde fija y ningún
código de sonido,
pero el equipo se
bloquea durante
POST
Un dispositivo integrado en la placa Compruebe las luces de diagnóstico
base puede estar defectuoso.
para ver si identifica el problema
especificado. Si no identifica el
problema, póngase en contacto con
Dell para solicitar asistencia técnica.
G u í a d e i n s t a l a c i ó n y de referencia rápida
191
w w w. d e l l . c o m | s u p p o r t . e u r o . d e l l . c o m
Indicadores de diagnóstico
Cuando se enciende el equipo, éste lleva a cabo una serie de pruebas de
autodiagnóstico. Si la prueba de autodiagnóstico de encendido (POST,
Power-on Self Test) se realiza correctamente, oirá un pitido que indica el
comienzo del funcionamiento normal. Si el equipo no completa esta
prueba, una serie de indicadores luminosos pueden ayudarle a entender
las causas del fallo de la prueba o el motivo por el que el equipo dejó de
responder. Estos indicadores luminosos comunican únicamente los
problemas encontrados antes y durante POST, no durante el
funcionamiento normal. Para localizar los indicadores de diagnóstico,
consulte "Características del equipo" en la página 168.
La siguiente tabla muestra una lista de los códigos de los indicadores de
diagnóstico, proporciona posibles causas y sugiere acciones correctivas.
Los indicadores luminosos tienen una etiqueta para ayudarle a establecer
correspondencias entre el equipo y la tabla.
Códigos de luces de diagnóstico antes de POST
La siguiente tabla muestra una lista de los códigos de las luces de
diagnóstico que se iluminan antes de que el equipo empiece la
prueba POST.
Códigos de luces de diagnóstico antes de POST
Patrón de
indicadores
luminosos
A B C D
Causa
Acción
El equipo no recibe energía eléctrica. Conecte el equipo a una toma de corriente eléctrica.
Asegúrese de que la luz de alimentación del panel delantero
está encendida. Si está apagada, asegúrese de que el equipo
está conectado a una toma de corriente que funcione y
pulse el botón de encendido.
Si el problema sigue sin solucionarse, póngase en contacto
con Dell para solicitar asistencia técnica.
= amarillo
= verde
= apagado
192
Guía de instalación y de referencia rápida
C ó d i g o s d e l u c e s d e d i a g n ó s t i c o a n t e s d e P O S T (continuación)
Patrón de
indicadores
luminosos
Causa
Acción
Condición de apagado normal.
El equipo está enchufado a una
toma de corriente eléctrica.
Asegúrese de que la luz de alimentación del panel delantero
está encendida. Si está apagada, asegúrese de que el equipo
está conectado a una toma de corriente que funcione y
pulse el botón de encendido.
A B C D
Durante el funcionamiento normal del equipo, éste puede
iniciarse de forma automática o remota siempre que esté
enchufado a una toma de corriente. Para obtener más
información, consulte la sección "Administración de
energía" de la Guía del usuario.
Si el problema sigue sin solucionarse, póngase en contacto
con Dell para solicitar asistencia técnica.
El equipo está en modo de consumo
reducido o "dormido".
A B C D
Utilice uno de los métodos indicados para "despertarlo".
Consulte la sección "Administración de energía" de la
Guía del usuario.
Si el problema sigue sin solucionarse, póngase en contacto
con Dell para solicitar asistencia técnica.
El BIOS no se está ejecutando.
Consulte "Reset Corrupted BIOS Settings" (Restablecer la
configuración del BIOS) en la Guía del usuario.
Posible fallo de alimentación o del
cable.
Consulte la sección "Problemas con la alimentación" de la
Guía del usuario.
Posible fallo de la placa base.
Póngase en contacto con Dell para solicitar asistencia
técnica.
El microprocesador y/o el módulo
regulador de tensión (VRM) no
concuerdan.
Consulte la sección "Problemas con el microprocesador"
de la Guía del usuario.
A B C D
A B C D
A B C D
A B C D
= amarillo
= verde
= apagado
G u í a d e i n s t a l a c i ó n y de referencia rápida
193
w w w. d e l l . c o m | s u p p o r t . e u r o . d e l l . c o m
C ó d i g o s d e l u c e s d e d i a g n ó s t i c o a n t e s d e P O S T (continuación)
Patrón de
indicadores
luminosos
Causa
Acción
Posible fallo VRM 0.
Consulte la sección "Problemas con el microprocesador"
de la Guía del usuario.
Posible fallo VRM 1.
Consulte la sección "Problemas con el microprocesador"
de la Guía del usuario.
Posible fallo VRM 0 y VRM 1.
Consulte la sección "Problemas con el microprocesador"
de la Guía del usuario.
Posible fallo de la placa de memoria
vertical A.
Consulte "System Memory Problems" (Problemas en la
memoria del sistema) en la Guía del usuario.
Posible fallo de la placa de memoria
vertical B.
Consulte "System Memory Problems" (Problemas en la
memoria del sistema) en la Guía del usuario.
A B C D
A B C D
A B C D
A B C D
A B C D
Posible fallo en las placas de memoria Consulte "System Memory Problems" (Problemas en la
vertical A y B.
memoria del sistema) en la Guía del usuario.
A B C D
= amarillo
= verde
= apagado
194
Guía de instalación y de referencia rápida
Códigos de luces de diagnóstico durante POST
La siguiente tabla muestra una lista de los códigos de las luces de
diagnóstico que se iluminan mientras el equipo está realizando la
prueba POST.
NOTA: Si enciende el equipo y ninguna de las cuatro luces de diagnóstico
se ilumina, consulte "Códigos de luces de diagnóstico antes de POST" en la
página 192.
Códigos de luces de diagnóstico durante POST
Patrón de
indicadores
luminosos
Causa
Acción
Posible fallo del BIOS; el equipo se encuentra
en el modo de recuperación.
Ejecute la utilidad de recuperación del BIOS y
reinicie el equipo para repetir la prueba.
Consulte la sección "BIOS Recovery Utility"
(Utilidad de recuperación del BIOS) en la Guía
del usuario.
A B C D
Si el problema sigue sin resolverse, consulte
"Reset Corrupted BIOS Settings"(Restablecer
la configuación del BIOS) en la Guía del
usuario.
Posible fallo del microprocesador.
Consulte la sección "Problemas con el
microprocesador" en la Guía del usuario.
Posible fallo de memoria.
Consulte "System Memory Problems"
(Problemas en la memoria del sistema) en la
Guía del usuario.
Posible fallo o conflicto con la tarjeta de
expansión.
Consulte "Expansion-Card Problems"
(Problemas con la tarjeta de expansión) y
"Hardware Conflicts" (Conflictos de hardware)
en la User’s Guide (Guía del usuario).
A B C D
A B C D
A B C D
= amarillo
= verde
= apagado
G u í a d e i n s t a l a c i ó n y de referencia rápida
195
w w w. d e l l . c o m | s u p p o r t . e u r o . d e l l . c o m
C ó d i g o s d e l u c e s d e d i a g n ó s t i c o d u r a n t e P O S T (continuación)
Patrón de
indicadores
luminosos
Causa
Acción
Posible fallo de la tarjeta de vídeo.
Vuelva a colocar la tarjeta de vídeo y reinicie el
equipo para repetir la prueba. Para obtener
instrucciones acerca de cómo extraer e instalar
una tarjeta de expansión, consulte "Removing
an Expansion Card" (Extracción de tarjetas de
expansión) en la Guía del usuario.
A B C D
Si el problema sigue sin resolverse, consulte
"Expansion-Card Problems" (Problemas con la
tarjeta de expansión) en la Guía del usuario.
Si el problema sigue sin solucionarse, póngase
en contacto con Dell para solicitar asistencia
técnica.
Posible fallo de la unidad de disquetes o de la
unidad de disco duro.
Consulte "Diskette Drive Problems"
(Problemas en la unidad de disquetes) y
"Problemas con la unidad de disco duro" en
la Guía del usuario.
Posible fallo USB.
Desconecte todos los dispositivos y cables USB
y vuelva a iniciar el equipo para repetir la
prueba. A continuación, vuelva a conectar
todos los dispositivos y cables USB y reinicie
el equipo para repetir la prueba.
A B C D
A B C D
Si el problema sigue sin solucionarse, póngase
en contacto con Dell para solicitar asistencia
técnica.
Posible fallo de un recurso la placa base y/o de
hardware.
Consulte "System Board Problems" (Problemas
con la placa base) y "Hardware Conflicts"
(Conflictos de hardware) en la Guía del usuario.
Posible fallo de un recurso la placa base y/o de
hardware.
Consulte "System Board Problems" (Problemas
con la placa base) y "Hardware Conflicts"
(Conflictos de hardware) en la Guía del usuario.
A B C D
A B C D
= amarillo
= verde
= apagado
196
Guía de instalación y de referencia rápida
C ó d i g o s d e l u c e s d e d i a g n ó s t i c o d u r a n t e P O S T (continuación)
Patrón de
indicadores
luminosos
Causa
Acción
Posible fallo o conflicto con la tarjeta de
expansión.
Consulte "System Board Problems" (Problemas
con la placa base) y "Hardware Conflicts"
(Conflictos de hardware) en la Guía del usuario.
Posible fallo de un recurso la placa base y/o de
hardware.
Consulte "System Board Problems" (Problemas
con la placa base) y "Hardware Conflicts"
(Conflictos de hardware) en la Guía del usuario.
A B C D
A B C D
Condición de funcionamiento normal después No es necesario realizar ninguna acción.
de POST.
A B C D
= amarillo
= verde
= apagado
Mensajes del sistema
Si se produce un fallo mientras se inicia el equipo, puede aparecer en
pantalla un mensaje identificando el problema. Si aparece un mensaje del
sistema, busque en "System Messages" (Mensajes del sistema) en la Guía
del usuario para obtener sugerencias que le ayuden a resolver los problemas.
Los mensajes están ordenados alfabéticamente.
NOTA: si el mensaje recibido no aparece en la Guía del usuario, consulte la
documentación de las aplicaciones que se estuvieran ejecutando en el momento
en que apareció el mensaje y/o la documentación del sistema operativo, a fin de
encontrar la explicación del mensaje y la acción que se recomienda.
Códigos de sonido
Si durante el inicio se produce un error del que no se puede informar en el
monitor, el equipo puede emitir un código de sonido que identifique el
problema. El código de sonidos sigue un patrón: por ejemplo, un pitido,
seguido de otro, y después tres juntos (código 1-1-3) significa que el equipo
no pudo leer los datos de la memoria no volátil de acceso aleatorio
(NVRAM).
Cuando el equipo emita un código de sonido, anótelo y luego búsquelo en
"Códigos de sonido del sistema" en la Guía del usuario.
G u í a d e i n s t a l a c i ó n y de referencia rápida
197
198
Guía de instalación y de referencia rápida
w w w. d e l l . c o m | s u p p o r t . e u r o . d e l l . c o m