1
Cover with 6mm spine NEW BACK PG_Layout 1 15/06/2011 12:04 Page 1
Kilwee Business Park
Dunmurry
BT17 OHD
Northern Ireland
United Kingdom
T:
F:
E:
W:
028 9060 2277
028 9060 0795
[email protected]
www.leckey.com
LS258-02
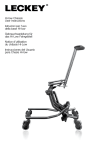
Squiggles Saddle Seat
User Instructions
Der Squiggles Aktivsitz,
Benutzerhandbuch
Manuale d'uso del Seggiolone polifunzionale
“a sella” Squiggles Saddle
Manual de Uuario
del Asiento Activo Squiggles
The Squiggles Saddle Seat has been
designed to offer a comfortable and
functional seating posture from where
children can enjoy a broad range of
activities. This manual shows how you
can quickly, safely and easily make use
of all the functions. The instructions on
the safety and maintenance will ensure
that you will enjoy the use of this
product for a long time.
Contents
01
02
03
04
05
06
07
08
09
10
11
12
13
14
15
16
Intended use
Declaration of conformity
Terms of warranty
Product history record
Product training record
Safety information
How to unpack and assemble the seating system
Fitting the cushions
Clinical setup for postural management
Frequent adjustments for daily use
Cleaning & care information
Daily product inspection
Annual product inspection
Reissuing Leckey products
Product servicing
Technical information
1. Intended Use
The Squiggles Saddle Seat is an activity
chair which has been designed for
children with special needs aged 2-5 who
would benefit from additional support
when sitting to enable them to focus their
attention on various activities. This seating
system has a maximum user weight of
22kg (48.4lbs).The seat can be used at
home or in the classroom.
2. Declaration of Conformity
James Leckey Design Ltd as
manufacturer with sole responsibility
declares that the Squiggles Saddle Seat
conforms to the requirements of the
93/42/EEC Guidelines and EN12182
Technical aids for disabled persons
general requirements and test methods.
3. Terms of Warranty
The warranty applies only when the
product is used according to the specified
conditions and for the intended purposes,
following all manufacturer’s
recommendations (also see general terms
of sales, delivery and payment). A two
year warranty is provided on all Leckey
manufactured products and components.
4. Product History Record
Your Leckey product is classified as a
Class 1 Medical device and as such
should only be prescribed, set up or
reissued for use by a technically
competent person who has been trained
in the use of this product. Leckey
recommend that a written record is
maintained to provide details of all setups,
reissue inspections and annual
inspections of this product.
5. Product Training Record
(Parents, Teachers & Carers)
Your Leckey product is a prescribed Class
1 Medical Device and as such Leckey
recommend that parents, teachers and
carers using the equipment should be
made aware of the following sections of
this user manual by a technically
competent person:
Section 6
Safety Information
Section 10
Frequent Adjustments for Daily use
Section 11
Cleaning and Maintenance
Section 12
Daily Product Inspection
Leckey recommend that a written record
is maintained of all those who have
trained in the correct use of this product.
4 Safety Information
1. Always read instructions fully before use.
2 Users should not be left unattended at
any time whilst using Leckey equipment.
3. Only use Leckey approved components
with your product. Never modify the
product in any way. Failure to follow
instructions may put the user or car er at
risk and will invalidate the warranty on
the product.
4. If in any doubt to the continued safe
use of your Leckey product or if any parts
should fail, please cease using the
product and contact our customer
services department or your local dealer
as soon as possible.
5. Carry out all positional adjustments and
ensure that they are securely fastened
before you put the user into the pr oduct.
Some adjustments may require the use
of a tool which is provided with each
product. Keep all tools out of r each
of children.
6. When putting the user into a seating
system, both for positional and safety
reasons, always secure the pelvic
harness first.
7. When the product is stationary ensure
that all castors are locked and facing
away from the base as this will impr ove
product stability. This is especially
important when the tilt in space or back
recline facility is in use.
8. When the seat is in use on a Hi low
chassis please ensure that the height
adjustment pedal and tilt in space lever
are locked off and cannot be adjusted
accidentally by other children.
When used on an Easy chassis please
ensure that the height adjustment ratchet
handle and the tilt in space lever ar e
locked off and cannot be adjusted
accidentally by other children.
9. When the Leckey Seating systems ar e
used on the Hi low or Easy chassis we do
not recommend that users are moved over
uneven surfaces when in the equipment.
All due care and attention should be
taken if transporting the user in and out
of the seat.
10. Never leave the product on a sloping
surface, greater than 5 degrees. Always
remember to lock all the castors.
11. Only use the push handle to steer and
move the seat from one area to another.
Never use the tray for this purpose.
12. The product contains components
which could present a choking hazard to
small children. Always check that locking
knobs and bolts within the child’s reach
are tightened and secure at all times.
13. Leckey products comply with fire
safety regulations in accordance with
EN12182. However the product contains
plastic components and therefore should
be kept away from all direct sources of
heat including naked flames, cigarettes,
electric and gas heaters.
14. Do not place hot objects on the tray
greater than 40ºC.
15. Clean the product regularly.
Do not use abrasive cleaners. Carry
out maintenance checks on a regular
basis to ensure your product is in good
working condition.
16 The product is designed for indoor use
and when not in use should be stor ed in a
dry place that is not subjected to
extremes of temperature. The safe
operating temperature range of the
product is +5 to +40 deg Celsius.
17 Always check the plastic hand knobs
on the push handle are tightened securely
before you move the seat unit.
18 Before using the seating system always
check that the interface handle on the
seat unit is fully engaged with the chassis.
Make sure the locking pin in engaged
so the handle cannot be accidentally
released. If the handle is not engaged
properly the seat unit may come loose
and could cause serious injury to the
child or carer.
How to
unpack and
assemble
the saddle
seat
7
Check parts
Congratulations on purchasing your
Squiggles Saddle Seat. When opening the
boxes, cut the straps, taking care not
to cut through the tape as you may damage
some of the parts contained inside. All of the
parts will be contained in polythene bags
with each one clearly labelled. Carefully
remove them from the boxes and check you
have all the parts you have ordered.
Safety First
Keep polythene bags away from children.
Multi-tool
A number of adjustments outlined below will
require the use of an allen key, which are
supplied with each seat.
Attaching the
footplate
If you have ordered a footplate we
recommend that you attach it first.
You will need the multi tool and spanner
which are supplied.
To attach the foot plate first set the seat base
upside down on a secure surface at working
height. Hold the foot plate support stem in
place and push the socket bolt provided
through the hole in the side. Feed it through
the holes and set on the securing nut,
tightening the socket cap bolt a couple of
turns to hold it in place.
Next, use the spanner to hold the nut and
tighten the socket cap bolt using the multi
tool. Do not over tighten them as this needs
to be free to allow the footplate and stem to
be angled.
Finally fit the adjustment lever. To do this
feed the cup square bolt through the slot and
hole. Set on the washer and hand lever.
Tighten the bolt clockwise a couple of turns
to start it on the thread. Then push the bolt
into the slot and tighten the hand lever. You
will have to tighten half a turn at a time. To
do this turn the hand lever half a turn
clockwise, then lift the lever and rotate it
back half a turn like this. Keep turning back
and forward until it is secure.
Always make sure the footplate is
firmly attached.
Attaching the seating system to the
Hi Low or the Easy Chassis
Adjust the height of the chassis to its
maximum to reduce risk of back strain while
attaching the seat unit. Refer to section 10
on how to adjust the height of the chassis
you have purchased.
Always check the handle and locking pin
are fully engaged before you place the
child in the seating system. If the handle
is not engaged properly the seat unit can
come loose and could cause serious
injury to the child or carer.
First release the safety locking pin at the
front of the seat. To do this pull the pin out
and rotate through 90 degrees. Carefully lift
the seat and place it into the chassis. At the
rear of the underside of the seat you will see
a receiving channel. Place this securely over
the tube towards the back of the chassis.
Pull the handle at the front of the seat unit up
and then pivot the seat forward and down.
Once the front of the seat is lowered fully,
release the handle and push it forward to
ensure it has fully engaged on the front tube.
Rotate the safety locking pin (A) so it
engages in front of the handle. If it hits the
handle then the seat is not inserted properly,
remove and repeat process outlined above.
A
Attaching the
back rest
Attaching the
push handle
To attach the backrest, slide the backrest tube
into upright receiving tube at the back of the
product, then tighten the knob (A) securely.
The push handle is attached to both the
Hi Low chassis and the Easy Chassis by
inserting the two lower stems into the
receiving tubes as shown. The push handle
has safety poppers, which need to be
pressed in when inserting the lower stems.
On the Hi Low chassis push the stems in until
the poppers protrude from the other end of
the receiving tubes.
On the Easy chassis the popper will engage
in a hole in the receiving tube. Once inserted
secure the push handle by tightening the two
hand knobs (B) underneath.
Check the knobs are tight before youmove
the product, particularly if you are moving
the seat unit along corridors that may have
uneven or sloping surfaces.
B
A
B
Attaching the sandals
Attaching the lateral
supports
If sandals are required they can be attached to
the footplates with a single fixing bolt. To
position the sandals simply loosen the knob
under the footplate, select the position you
require and re-fasten the knob.
Remove the plastic knob from the locking
nut. Slide the bracket through the slot. Place
the nut on the inside, insert the knob through
the hole and tighten securely.
Fitting the
cushions
8
Seat cushion
To begin, slide the cushion over the pommel,
press down on the central seat base to locate
the velcro panels. Then wrap the side panels
around the sides of the seat base and attach
the velcro panels to the underside of the seat
cushion. Feed the pelvic harness through the
slits in the fabric. Wrap the side panels around
the seat and secure the snap fasteners on
the inside of the seatbase. Finally, secure
the tabs at the front under the pommel
with the snap fasteners.
Lateral support
padded cushions
Backrest cushion
To attach the lateral support padded cushions,
simply slide the cushions on with the padded
side towards the inside of the seat. Sleeve the
plastic buckle (A) through the slot in the
cushion. Then bring the two Velcro fastener
straps around the bottom of the moulding and
attach them to the Velcro panel as shown.
Close over the flap.
Place the cushion centrally on the backrest,
wrap the upper tab over the top of the
backrest and snap the fastener in place. Bring
the lower tab under the backrest and attach to
the upper tab using the Velcro panels.
A
Chest harness
The chest harness can be attached by
clipping the male buckle into the female
buckle at either side of the lateral supports.
Clinical setup
for postural
management
The clinical setup of the product
should be completed by a
technically and clinically competent
person who has been trained in the
use of the product. Leckey
recommend a written record is
maintained of all clinical setups for
this product.
9
Backrest depth
Backrest height
The depth of the backrest can be adjusted
by loosening the knob (B), adjusting to
the correct position for the child and
retightening securely.
The overall height of the backrest can be
adjusted by loosening the hand knob (A),
then positioning to the required height for the
child. Once in position the hand knob should
be retightened securely.
B
A
Backrest angle
Footplate height
The backrest can be angled by loosening the
ratchet handle (B) on the backrest pivot lock,
setting to the required angle and retighten the
ratchet handle securely.
To set the height of the footplate loosen the
knob (A) on the back of the calf support tube
and slide the footplate to the required height
and retighten the knob.
B
A
Footplate angle
To set the angle of the footplate stem, loosen
the ratchet handle (B), move to the required
position then retighten securely.
To set the angle to accommodate
plantarflexion and dorsiflexion, simply
loosen or tighten the allen bolt to select
the angle you require.
B
Sandals
Pelvic harness
To position the sandals simply loosen the
knob under the footplate, select the position
you require and re-fasten the knob. To
position the user’s feet in the sandals secure
the Velcro ankle and toe straps provided.
Always secure the Pelvic harness first when
placing the child in the seat. Loosen all the
straps to their maximum to secure the
harness around the child’s hips. First secure
the plastic buckle (C) in the middle. To adjust
the depth, adjust straps (A) on both sides, (B)
for height and (D) for depth.
A
D
B
C
Lateral supports
Chest harness
Loosen the hand knob (A) to adjust the width
of the lateral supports and retighten when
you have achieved the desired position.
To change the width of the chest harness,
lift the front cover, adjust the Velcro straps to
the desired width and replace the cover.
If ordered, the laterals supports may be
attached with bolts instead of hand knobs.
If so, use the multi tool provided, to adjust.
A
Frequent
adjustment
for daily use
(therapists/
carers/parents)
Parents and carers should be
shown how to make frequent
adjustments and made aware of the
safety checks in Section 6 by a
technically and clinically competent
person who has been trained in the
use of the product. Leckey
recommend that a written record is
maintained of all parent and carers
who have been trained in the use of
this product.
10
Transferring your child into
and out of the seat
Adjusting the Pelvic
Harness
Before transferring the child into the seat
carry out the daily product inspection as
outlined in section 12 of this user manual.
The correct positioning and tensioning of the
pelvic harness is key to a child’s postural
management affecting their comfort and
ability to achieve functional goals. Please ask
your therapist as to the correct tensioning of
straps for your child as this is critical to good
postural management.
Adjust the seat to a comfortable height to
facilitate transfer. Lock all the castors,
ensuring that they are facing outwards to
maximise product stability. Make sure the
safety buckle on the chest harness is
released and is out of the way to
facilitate transfer.
Unclip the pelvic harness in the middle and
allow the harness to open out to facilitate
transfer. Lastly if sandals are fitted open the
straps. You are now ready to manually
transfer or hoist the child into the seat.
Always secure the pelvic harness first
before fastening other buckles or
harnesses. Adjust the harness so the child
cannot slide or creep forward in the seat.
Always secure the Pelvic harness first when
placing the child in the seat. Loosen all the
straps to their maximum to secure the
harness around the child’s hips. First secure
the plastic buckle (C) in the middle. To adjust
the depth, adjust straps (A) on both sides, (B)
for height and (D) for depth.
Check harness is secure to ensure the
child is safe and cannot slide forwar d
in the seat.
A
D
B
C
Chassis
Height adjustment –
Hi Low chassis
To prepare the chassis for the seating system
we recommend that you raise the chassis to a
comfortable working height by pressing the
foot lever shown.
You can carry out this adjustment with the
child in the chair. To adjust the height of the Hi
low chassis press the foot lever (A) at the rear
of the chassis whilst holding the push handle
(B). Once you remove your foot from the pedal
the seat will be fixed at the chosen height.
For safety the height adjustment pedal on the
chassis can be locked by engaging the pull
pin (C) on the right hand side of the pedal. To
unlock pull the pin out and rotate 90 degrees,
the pedal can then be operated. The locking
pin (C) should be kept in the locked position
when you are not adjusting the chassis.
Always keep the locking pin engaged when
you are not adjusting the chassis. This will
prevent the foot pedal being operated
accidentially.
B
C
A
Height Adjustment –
Easy chassis
Tilt in space
The height of the easy chassis should be set
before putting the child in the seat. To adjust
the height loosen the ratchet handle (A) at the
rear of the main stem and adjust the seat to
the required height. To lower the seat height,
apply weight centrally on the seat base above
the center stem. Re-tighten the ratchet handle
to secure.
The tilt in space can be angled while the user
is in the seat. Before you adjust the tilt-inspace angle of the seat always ensure the
pelvic harness is secured preventing the user
from sliding forward in the seat.
Check the ratchet handle regularly
to ensure the seat height adjustment
is secure.
The collar (B) should always be in the locked
position when the seat is in use. To actuate
the lever(C) first unlock the collar (B) by
rotating it until it clicks into the open position.
Press the lever down and set to the desired
angle holding the handle bar throughout. Relock the locking collar after you have set the
tilt position.
Always keep the collar (B) in the locked
position to prevent accidental actuation of
the lever which could cause the seat unit to
jolt and possibly cause injury to the child.
Please use handle bars when operating
tilt in space.
Always check with your therapist that the
use of “tilt in Space” will not cause any
obstructions to the child’s airways.
B
C
A
Chest harness adjustment
Sandals
If the child requires chest support as part of
their postural support programme the seat
will be fitted with a combination of laterals
and a chest harness. These may need to be
adjusted on a daily basis to accommodate
differences in clothing.
To position the user’s feet in the sandals
secure the Velcro straps provided so the foot
is held in place. The straps should be placed
over the bridge of the foot and over the toes.
Always check with your therapist as to the
optimum positioning and tensioning of the
straps and support items for the child.
To change the width of the chest harness, lift
the front cover, adjust the Velcro straps and
set to the desired width. When the correct
width has been achieved replace the cover.
If the child is wearing sandals or light
footwear check the straps to make sur e
the webbing does not irritate the skin.
11 Cleaning & Care
Information
12 Daily Product Inspection
How to Maintain
When cleaning we recommend that you
use only warm water and a non-abrasive
detergent. Never use organic solvents
or dry cleaning fluids.
(Therapists, parents & carers)
We recommend that daily visual checks of
the equipment are carried out by therapists,
carers or parents to ensure the product is
safe for use.The recommended daily checks
are detailed below.
Upholstery and fabrics
1. The upholstery and fabrics can be cleaned
by hand whilst in place. When cleaning we
recommend that you use only warm water
and a nonabrasive detergent.
2. The best cleaning method is a ‘wipe
& dry’ technique.
3. Staining should be removed as quickly as
possible with absorbent cloth, towels
or a sponge. Routine soap and warm water
sponging is effective for ordinary soiling and
minor spills. Be careful not to over
wet the fabric as this will cause the staining
to spread.
4 Antiseptic cleaning agents can be used on
more stubborn stains. These may require a
safe solvent such as Isopropyl Alcohol or
Mineral Spirit. A half cup of household
bleach to 5 litres of water can also be used
as a useful disinfectant.
5. The pelvic and trunk harnesses can be
machine washed at 40 Deg C. Make sure
all bolts and fasteners are removed first as
they may cause damage to your washing
machine. Store these in a safe place and out
of reach from children.
6 Always ensure the product is dry
before use.
Metal and plastic components
1. Soap and water or antibacterial spray can
be used for daily cleaning.
2. For deep cleaning a low pressure steam
cleaner can be used.
3. Do not use solvents to clean plastic or
metal components.
4. Make sure the product is dry before use.
1. Ensure all adjustment knobs and bolts are
in place and secure.
2. Check all upholstery and velcro for signs
of wear and tear.
3. Check all castors are moving freely and
lock securely.
4. Ensure the handle and locking pin on the
seat interface plate are fully engaged and the
seat unit is securely fixed onto the chassis.
5. Ensure the pelvic harness is fully secured
around the user and they cannot slide or
creep forward in the seat.
6. Ensure the footplate is attached securely.
If in any doubt to the continued safe use
of your Leckey product or if any parts
should fail, please cease using the
product and contact our customer service
department or your local dealer as soon
as possible.
13 Annual Product
Inspection
(Therapist, Technician, Leckey Product
Advisor, Dealer)
Leckey recommend that each product should
be subject to a detailed inspection at least
once a year and every time the product is
reissued for use. This inspection should be
carried out by a technically competent
person who has been trained in the use of
the product and should include the following
checks as a minimum requirement.
5. Lift the base to check each castor
individually. Make sure they are moving
freely and remove any dirt from the rubber
wheels. Check that the brakes lock the
wheels securely.
1. Check all knobs, nuts, bolts and plastic
buckles are in place, replacing any missing
items. Paying particular attention to the
following items;
> Backrest height and angle
adjustments bolts
> Pelvic harness / hip guide
attachment bolts.
> Footrest height and angle
adjustment
7. Leckey recommend that a written
record is maintained of all annual
product inspections.
2. Check the chassis height adjustment
mechanism is working properly. If the chassis
is foot pedal operated ensure the seat height
doesn’t change when the pedal is released.
Also, check that the locking pin engages
securely to prevent accidental height
adjustment of the chassis.
3. Adjust the seat to its maximum range of
tilt-in-space and ensure that the locking lever
locks the seat out securely at varying point in
this range.
4. Check that were the seat and chassis join
there is no visible wear or tear on the metal
components.
6. Visually check the structure of the product
paying attention to weld points
on the frame ensuring there are no signs
of fatigue or cracking around the welds.
If in any doubt to the continued safe use
of your Leckey product or if any parts
should fail, please cease using the
product and contact our customer
service department or your local dealer
as soon as possible.
14 Re-issuing Leckey
Products
15 Product Servicing
Most Leckey products are assessed and
ordered to meet the needs of an individual
user. Before reissuing a product we
recommend that the therapist prescribing the
product has carried out an equipment
compatibility check for the new user and has
ensured that the product being
re-issued contains no modifications
or special attachments.
Servicing of all Leckey products should only
be carried out by technically competent
persons who have been trained in the use of
the product.
A detailed technical inspection should be
carried on the product prior to re-issuing.
This should be carried out by a technically
competent person who has been trained
in the use and inspection of the product.
Please refer to section 13 for the required
checks to be carried out.
Ensure the product has been cleaned
thoroughly in accordance with section 11
of this manual.
Ensure a copy of the user manual is supplied
with the product. A copy can be downloaded
from our website www.leckey.com
Leckey recommend that a written record is
maintained of all product inspections carried
out during the reissue of the product.
If in any doubt to the continued safe use
of your Leckey product or if any parts
should fail, please cease using the
product and contact our customer
service department or your local dealer
as soon as possible.
In the UK & ROI please contact the Leckey
Service Centre on UK 0800 318265 or ROI
1800 626020 and our customer service
department will be delighted to assist you
with your servicing requirements.
All international service enquiries should be
directed to the appropriate Leckey distributor
who will be delighted to assist you. For
further information on Leckey distributors
please visit our website www.leckey.com
16 Technical Information
Product and Accessory codes
122-600 Seat shell
122-751 Seat covers - green
122-752 Seat covers - orange
122-753 Seat covers - blue
122-754 Seat covers - pink
Chassis
120-800 Hi low chassis -foot pedal
122-717 Easy chassis -manual adjustment
122-710 Push bar handle
Accessories
Codes prefixed by an asterix are
available in four colour options.
01
02
03
04
-
green
orange
blue
pink
117-781 Sandals - small
117-782 Sandals - medium
122-664 Footrest assembly
122-719 Four point pelvic harness - medium
120-762* Rigid lateral supports
118-750* Support harness
Squiggles seat dimensions
Ages
(approx)
Max User Weight
2-5
22kg / 48.8lbs
Chest Width
(Distance between laterals)
Min 160mm / 6.25 inches
Max 255mm / 10 inches
Seat Depth
(Back support to back of knee)
Min 215mm / 8 inches
Max 290mm / 11 inches
Back Support / Lateral Height
(Seat base to top of support)
Min 190mm / 7.5 inches
Max 265mm / 10.5 inches
Tilt in Space
(Easy chassis)
Prone 20º
Recline 20º
Tilt in Space
(Hi low chassis)
Prone 20º
Recline 20º
Seat to Footplate
(Sole of foot to back of knee)
Min 190mm / 7 inches
Max 300mm / 12 inches
Footplate Angle
Plantarflexion 10º
Dorsiflexion 10º
Armrest Height
(Seat base to elbow)
Min 160mm / 6.3 inches
Max
Top of Seat to Floor
(Easy chassis)
Min 280mm / 11 inches
Max 380mm / 15 inches
Top of Seat to Floor
Top of Seat to Floor
(Hi low chassis)
(Hi low chassis)
Min 270mm / 10 inches
Min 270mm / 10 inches
Saddle Seat Unit
Min 270mm / 10.5 inches
Saddle Seat Unit
Min 270mm / 10.5 inches
Min Dimensions for Storage
Weight 28kg / 17.6lbs
Width 390mm / 15.4 inches
Min Dimensions for Storage
Weight 28kg / 17.6lbs
Width 390mm / 15.4 inches
Der Squiggles Aktivsitz wurde
entwickelt, um eine bequeme und
funktionelle Sitzhaltung zu bieten,
in der Kinder eine große Auswahl an
Aktivitäten genießen können und bietet
mehr Mobilitätsmöglichkeiten. Dieses
Handbuch zeigt, wie du sicher fasten
und alle Funktionen leicht gebrauchen
kannst. Die Anleitungen bezüglich der
Sicherheit und Wartung gewährleisten,
dass Sie dieses Produkt über einen
langen Zeitraum hinweg
genießen können.
Inhalt
01
02
03
04
05
06
07
08
09
10
11
12
13
14
15
16
Verwendungszweck
Konformitätserklärung
Gewährleistungsbedingungen
Dokumentation der Produktgeschichte
Hinweise zum Produkt-Training
Sicherheitshinweise
Das Auspacken und Zusammenbauen des Sitz-Systems
Das Anpassen der Sitzkissen
Klinische Einstellungen für die Positionierung
Häufige Anpassungen für den täglichen Gebrauch
Reinigungs- & Pflegehinweise
Tägliche Überprüfung des Produkts
Jährliche Inspektion des Produkts
Erneute Herausgabe von Leckey Produkten
Produktwartung
Technische Informationen
1. Verwendungszweck
Der Squiggles Aktivsitz ist ein Aktivitätssitz
für Kinder mit Behinderungen im Alter von
2-5 Jahren, die beim Sitzen von
zusätzlicher Unterstützung profitieren, um
sich auf verschiedene Aktivitäten zu
konzentrieren. Das Sitz-System hat eine
Belastungsfähigkeit von maximal 22kg
(48.4lb). Der Sitz kann zu Hause oder im
Klassenzimmer verwendet werden.
2. Konformitätserklärung
James Leckey Design Ltd. als Hersteller
mit alleiniger Haftung erklären, dass
das Squiggles Sitz-System den
Anforderungen der 93/42/EEC Richtlinien
und EN12182 technischen Hilfen für
Personen mit Behinderungen und
Testmethoden entspricht.
3. Gewährleistungsbedingungen
Die Garantie wird nur dann gültig, wenn
das Produkt im Einklang mit den
festgelegten Bedingungen und zum
beabsichtigten Zweck und außerdem
unter Befolgung aller Empfehlungen des
Herstellers verwendet wurde (siehe auch
generelle Geschäfts-, Lieferungs- und
Zahlungsbedingungen). Für alle von
Leckey hergestellten Produkte und Teile
gilt eine zweijährige Gewährleistung.
4. Dokumentation der
Produktgeschichte
Ihr Leckey Produkt ist ein als Klasse 1
eingestuftes Gerät und darf nur als
solches verschrieben, eingesetzt oder
durch eine technisch kompetente Person,
die zur Benutzung dieses Produktes
ausgebildet wurde, zur erneuten
Benutzung herausgegeben werden.
Leckey empfehlen, dass ein schriftliches
Protokoll geführt wird, damit alle
Details des Aufbaus, der erneuten
Herausgabe und der jährlichen
Inspektion vorhanden sind.
5. Hinweise zum Produkt-Training
Ihr Leckey Produkt ist ein als Klasse 1
verschriebenes medizinisches Gerät und
als solches empfehlen Leckey, dass
Eltern, Lehrer und Pflegepersonal, die
dieses Produkt benutzen, von einer
technisch kompetenten Person auf
die folgenden Abschnitte des
Benutzerhandbuchs aufmerksam
gemacht werden:
Abschnitt 6
Sicherheitshinweise
Abschnitt 10
Häufige Anpassungen für den täglichen
Gebrauch
Abschnitt 12
Tägliche Produktüberprüfung
Leckey empfehlen, dass ein schriftliches
Protokoll aller Personen, die in der
richtigen Handhabung dieses Produktes
unterwiesen wurden, geführt wird.
4 Sicherheitshinweise
1. Lesen Sie immer vor Gebrauch die
gesamte Anleitung.
2 Benutzer dürfen zu keinem Zeitpunkt
unbeaufsichtigt bleiben, während Sie
Leckey Geräte benutzen.
3. Benutzen Sie nur von Leckey
anerkannte Teile mit unserem Produkt.
Nehmen Sie niemals irgendwelche
Veränderungen an dem Produkt vor.
Versäumnis der Befolgung der Anleitung
kann ein Risiko für den Benutzer oder
dessen Pflegeperson darstellen und macht
die Gewährleistung des Produktes hinfällig.
4. Falls Sie irgendwelche Zweifel an der
Sicherheit Ihres Leckey Produkts haben
oder falls irgendwelche Teile versagen,
stellen Sie bitte sofort die Benutzung ein
und nehmen Sie schnellstmöglich Kontakt
mit unserem Kundendienst oder Ihrem
ortsansässigen Händler auf.
5. Nehmen Sie alle positionellen
Anpassungen vor und stellen Sie sicher,
dass diese sicher festgestellt sind, bevor
Sie den Benutzer in den Sitz setzen.
Bewahren Sie alle Werkzeuge außerhalb
der Reichweite von Kindern auf.
6. Wenn Sie einen Benutzer in das SitzSystem setzen, schließen Sie immer
zuerst den Beckengurt, sowohl aus
positionstechnischen als auch aus
Sicherheitsgründen.
7. Wenn das Produkt still steht, stellen Sie
bitte sicher, dass alle Rollen fest stehen und
von der Basis wegzeigen, da dies die
Stabilität des Produkts verbessert.
Dies ist besonders wichtig wenn die
Neigungseinstellung gewählt wurde oder die
Rückenlehne nach hinten gelassen wurde.
8. Wenn der Sitz mit einem Hi low Chassis
benutzt wird, stellen Sie sicher, dass das
Pedal für die Höhenanpassung und der
Hebel für die Sitzkantelung feststehen und
nicht versehentlich von anderen Kindern
verstellt werden können.
Wenn der Sitz auf einem Easy Fahrgestell
benutzt wird, stellen Sie sicher, dass die
Sperrklinke für die Höhenanpassung und
der Hebel für die Sitzkantelung feststehen
und nicht versehentlich von anderen
Kindern verstellt werden können.
9. Wenn die Leckey Sitz-Systeme auf den
Hi low oder Easy Chassis benutzt wer den,
empfehlen wir, dass Benutzer nicht über
unebene Oberflächen bewegt werden,
während Sie sich im Sitz befinden. Beim
Hineinsetzen und Herausheben des
Benutzers in und aus dem Sitz muss die
nötige Aufmerksamkeit erbracht werden.
10. Das Produkt darf nie auf einem Hang
von mehr als 5° Grad stehen gelassen
werden. Denken Sie immer daran, alle
Rollen festzustellen.
11. Benutzen Sie zum Steuer n und dazu
den Sitz von einem Ort zu einem ander en
zu bewegen immer nur den Schiebegriff.
12. Dieses Produkt beinhaltet
verschiedene Bestandteile, die eine
Erstickungsgefahr für kleine Kinder
darstellen. Überprüfen Sie immer, dass
alle Sicherheitsknöpfe und Schrauben
innerhalb der Reichweite des Kindes
immer fest angezogen und sicher sind.
13. Leckey Produkte erfüllen die FeuerSicherheits- Vorschriften im Einklang mit
EN12182. Allerdings beinhaltet das
Produkt Plastikteile und muss daher von
allen direkten Hitzequellen, wie offenem
Feuer, Zigaretten, elektrischen und
Gasöfen ferngehalten werden.
14. Legen Sie niemals heiße Gegenstände
auf den Tisch, die heißer als 40°C sind.
15. Reinigen Sie das Produkt regelmäßig.
Benutzen Sie dazu keine Scheuermittel.
Führen Sie regelmäßig
Instandhaltungsprüfungen durch, um
sicherzugehen, dass sich Ihr Produkt in
gutem Zustand befindet.
16 Das Produkt wurde zur Benutzung in
Innenräumen entworfen und sollte, wenn
es nicht benutzt wird, an einem trockenen
Ort aufbewahrt werden, der keinen
extremen Temperaturschwankungen
unterliegt. Die sichere Spanne der
Betriebstemperatur liegt zwischen +5°
und +40° Celsius.
17 Überprüfen Sie immer, ob die
Handknöpfe aus Plastik an der
Schiebestange sicher angezogen sind,
bevor Sie die Sitzeinheit bewegen.
18 Bevor Sie das Sitz-System
benutzen, überprüfen Sie immer,
dass der Verbindungshandgriff am
Sitz vollständig mit dem Fahrgestell
verbunden ist. Vergewissern Sie sich,
dass der Sicherheitsstift eingerastet ist,
sodass der Hangriff nicht versehentlich
gelöst werden kann.
Falls der Handgriff nicht richtig verbunden
ist, kann sich die Sitzeinheit locker n und
schwere Verletzungen beim Benutzer oder
bei der Pflegeperson zur Folge haben.
Das Auspacken
und
Zusammensetzen
7
Überprüfen Sie die Teile
Herzlichen Glückwunsch zum Kauf Ihres
Squiggles Aktivsitz. Zum Öffnen der Kartons,
schneiden Sie die Gurte durch. Passen
Sie dabei auf, dass Sie nicht durch das
Klebeband schneiden, da Sie die Teile, die
sich im Karton befinden beschädigen können.
Alle Teile befinden sich in Plastiktüten,
die jeweils klar etikettiert sind. Nehmen
Sie diese vorsichtig aus dem Karton und
überprüfen Sie, dass Sie alle Teile haben,
die Sie bestellt haben.
Sicherheit an erster Stelle
Bewahren Sie Plastiktüten außerhalb der
Reichweite von Kindern auf.
Das Mehrzweck-Werkzeug
Eine Anzahl von Einstellungen macht
die Benutzung des Mehrzweck-Werkzeugs
notwendig,welche mit jedem Sitz
geliefert warden.
Das Anbringen
der Fußplatte
Falls Sie eine Fußplatte bestellt haben,
empfehlen wir, dass Sie diese zuerst
anbringen. Sie benötigen dazu das
mitgelieferte Mehrzweck-Werkzeug und den
Schraubenschlüssel.
Um die Fußplatte anzubringen, drehen Sie
die Sitzeinheit zuerst auf den Kopf und legen
Sie sie in einer angemessenen Arbeitshöhe
auf eine sichere Oberfläche. Halten Sie die
Stützstange der Fußplatte so an deren Platz
und drücken Sie die dafür vorgesehene
Schraube durch das Loch in der Seite.
Stecken Sie sie durch die Löcher und setzen
Sie die Mutter auf, wobei Sie die Schraube
ein paar Mal drehen bis Sie fest sitzt.
Als nächstes benutzen Sie den
Schraubenschlüssel, um die Mutter
festzuhalten und drehen Sie die Schraube
mithilfe des Mehrzweck-Werkzeugs fest.
Überdrehen Sie sie nicht, da Sie frei sein
muss, um die Fußplatte und das Rohr
bezüglich des Winkels zu verstellen.
Zuletzt setzen Sie den Einstellungshebel ein.
Stecken Sie hierzu die quadratische
Schraube durch das Loch. Setzen Sie die
Unterlegscheibe und den Klemmhebel auf.
Drehen Sie die Schraube im Uhrzeigersinn
ein paar Mal fest, damit sie fasst. Stecken
Sie dann die Schraube in das Loch und
ziehen Sie den Handhebel an. Sie müssen
immer eine halbe Drehung im Uhrzeigersinn
vornehmen. Dazu drehen Sie den Handhebel
eine halbe Umdrehung im Uhrzeigersinn,
heben Sie den Hebel an und drehen Sie ihn
eine halbe Umdrehung zurück; drehen Sie
weiterhin vor und zurück, bis er sie fest sitzt.
Vergewissern Sie sich immer, dass die
Fußstütze fest angebracht ist.
Die Anbringung des Sitz-System auf
dem Hi Low oder Easy Chassis
Stellen Sie die Höhe des Untergestells auf
die maximale Position ein, um das Risiko der
Rückenbelastung zu verringern, wenn Sie die
Sitz-Einheit anbringen. Beziehen Sie sich auf
Abschnitt 10, für die Höheneinstellung des
Fahrgestells, das Sie gekauft haben.
Drehen Sie den Sicherheitsstift, sodass er
vor dem Handgriff einrastet. Wenn er am
Handgriff anstößt, ist der Sitz nicht richtig
angebracht. Entfernen Sie ihn und nehmen
Sie die oben genannten Schritte erneut vor.
Öffnen Sie zuerst den Sicherheitsstift
vorne am Sitz. Dazu ziehen Sie den Stift
heraus und drehen ihn um 90° Grad. Heben
Sie den Sitz vorsichtig an und setzen Sie ihn
auf das Untergestell. Am hinteren unteren
Ende des Sitzes finden Sie den dafür
vorgesehenen Kanal.
Überprüfen Sie immer den Handgriff und
den Sicherheitsstift, bevor Sie das Kind
auf das Sitz-System setzen. Wenn der
Handgriff nicht richtig einrastet, kann die
Sitz-Einheit sich lockern und dem Kind
oder der Pflegeperson schwere
Verletzungen zufügen.
Öffnen Sie zuerst den Sicherheitsstift
vorne am Sitz. Dazu ziehen Sie den Stift
heraus und drehen ihn um 90° Grad. Heben
Sie den Sitz vorsichtig an und setzen Sie ihn
auf das Untergestell. Am hinteren unteren
Ende des Sitzes finden Sie den dafür
vorgesehenen Kanal.
A
Das Anbringen der
Rückenlehne
Das Anbringen des
Schiebegriffs
Um die Rückenlehne anzubringen, schieben
Sie das Rohr der Rückenlehne in die aufrechte
dafür vorgesehene Öffnung am hinteren Teil
des Produkts. Ziehen Sie dann den Knopf
(A) fest an.
Der Schiebegriff wird sowohl beim Hi low als
auch beim Easy Untergestell angebracht,
indem Sie die beiden niedriger sitzenden
Stämme in die dafür vorgesehenen Rohre
schieben (siehe Abbildung). Der Schiebegriff
hat Sicherheits-Druckknöpfe, die beim
Einschieben der unteren Stämme gedrückt
werden müssen. Am Hi low Untergestell
schieben Sie die Stämme bis die
Druckknöpfe aus dem anderen Ende der
Rohre hervorstehen.
Am Easy Untergestell rasten die Druckknöpfe
in Löcher an den dafür vorgesehenen Rohren
ein. Sobald die Stämme eingeschoben sind,
sichern Sie den Schiebehandgrif, indem Sie
die beiden Handknöpfe aus Plastik (A)
unterhalb anziehen.
Überprüfen Sie, dass die Knöpfe fest
sitzen, bevor Sie das Produkt bewegen,
bevor Sie das Produkt bewegen, dass
diese fest angezogen sind, besonders
wenn Sie die Sitz-Einheit über Flure
bewegen, die uneben sind oder ein
Gefälle aufweisen.
B
A
B
Das Anbringen der
Fußschalen
Attaching the lateral
supports
Wenn Fußschalen benötigt werden, können
diese mit einer einzigen Schraube an den
Fußplatten angebracht werden. Um die
Fußschalen in Position zu bringen, lösen Sie
einfach den Knopf (B) unter der Fußplatte,
wählen Sie die gewünschte Position und ziehen
Sie den Knopf wieder an.
Entfernen Sie den Plastikknopf von der
Sicherheitsmutter, schieben Sie die Halterung
durch das Loch, legen Sie die Mutter auf die
Innenseite, schieben Sie den Knopf durch das
Loch und ziehen Sie fest an.
Das
Anbringen der
Polsterteile
8
Das Sitzpolster
Zu Beginn, schieben Sie das Polster
über den Abduktionskeil, drücken Sie
es auf der Mitte der Sitzbasis nach unten
um die Klettverschlussteile zu finden.
Wickeln Sie dann die Seitenteile um die
Seiten der Sitzbasis und befestigen Sie
die Klettverschlussteile an der Unterseite
des Sitzkissens
Führen Sie den Becken-Gurt durch
die Schlitze im Stoff. Wickeln Sie die
Seitenpanelen um den Sitz und sichern
Sie die Schnappverschlüsse an der
Innenseite der Sitzbasis. Letztendlich
sichern Sie die Laschen vorne unter dem
Knauf mit den Druckknöpfen.
Die Kissen für die
Thoraxpelotten
Das Polster für die
Rückenlehne
Um die Kissen für die Thoraxpelotten
anzubringen, schieben Sie die Kissen
einfach auf, wobei die gepolsterte Seite
zum Sitz-Inneren zeigt. Schieben Sie die
Plastikschnalle (A) durch das Loch im Bezug.
Bringen Sie dann die beiden Gurte mit dem
Klettverschluss unten um die Fassung herum
und bringen Sie sie am Klettverschluss an,
wie gezeigt. Schließen Sie jetzt wieder die
Klappe (B).
Legen Sie das Polster in die Mitte der
Rückenlehne, falten Sie die obere Lasche
über die obere Kante der Rückenlehne und
drücken Sie den Druckknopf fest. Führen
Sie die untere Lasche unter der Rückenlehne
hindurch und befestigen Sie sie mit den
Klettverschlüssen an der oberen Lasche.
A
Die Sternumpelotte
Die Sternumpelotte kann durch das
Einschnappen der Schnalle in die dafür
vorgesehene Öffnung an beiden Seiten der
Thoraxpelotten angebracht werden.
Klinische
Einstellungen
für die
Positionierung
Die klinischen Einstellungen für
dieses Produkt müssen von einer
klinisch und technisch kompetenten
Person durchgeführt werden, die
in der Benutzung des Produktes
unterwiesen wurde. Leckey
empfehlen, ein schriftliches Protokoll
aller klinischen Einstellungen für
dieses Produkt zu führen.
9
Die Tiefe der Rückenlehne
Die Höhe der Rückenlehne
Die Tiefe der Rückenlehne kann eingestellt
werden, indem Sie den Knopf (B) lockern, in
die für das Kind erwünschte Position
einstellen und den Knopf wieder anziehen.
Die Höhe der Rückenlehne kann eingestellt
werden, indem Sie den Handknopf (A) lockern.
Stellen Sie die Rückenlehne auf die für das
Kind erwünschte Position ein. Wenn die
gewünschte Position erreicht ist, ziehen
Sie den Handknopf wieder an.
B
A
Der Winkel der
Rückenlehne
Höhe der Fußplatte
Der Winkel der Rückenlehne kann eingestellt
werden, indem Sie den Klemmhebel (b) am
Drehschloss an der Rückenlehne lockern, auf
den gewünschten Winkel einstellen und den
Klemmhebel wieder anziehen. Benutzen Sie
die Skala an der Seite der Röhre als
Hilfestellung bei der Winkelauswahl.
Um die Höhe der Fußplatte einzustellen,
lockern Sie die Knebelschraube (A) hinten am
Unterschenkelstütz-Rohr und schieben Sie die
Fußplatte auf die gewünschte Höhe und ziehen
Sie die Knebelschraube wieder an.
B
A
Der Winkel der Fußplatte
Stellen Sie den Winkel des Fußplattenrohres
ein, indem Sie den Klemmhebel (B) lockern,
die gewünschte Position einstellen und den
Klemmhebel wieder fest anziehen.
Um den Winkel so einzustellen, dass
er die Plantarflexion und Dorsalflexion
ermöglicht, lösen Sie einfach die
Inbusschraube, oder ziehen Sie sie an,
je nach gewünschtem Winkel.
B
Die Fußschalen
Der Beckengurt
Zum Positionieren der Fußschalen lösen
Sie einfach den Handknopf (B) unter der
Fußplatte, wählen Sie die gewünschte
Position und ziehen Sie den Knopf wieder
an. Um die Füße des Benutzers in den
Fußschalen zu positionieren, sichern Sie
diese mit den dafür vorgesehenen Gurten.
Sichern Sie immer zuerst den Beckengurt,
wenn Sie das Kind in den Sitz setzen.
Lockern Sie alle Gurte auf ihre maximale
Länge, um den Gurt um die Hüften des
Kindes zu sichern. Sichern Sie zuerst die
Plastikschnalle (c) in der Mitte. Um die Tiefe
einzustellen, passen Sie die Gurte (a) an
beiden Seiten an, die Gurte (b) für die Höhe
und die Gurte (d) für die Tiefe.
A
D
B
C
Die Thoraxpelotten
Die Sternumpelotte
Lockern Sie den Handknopf (A) um die Weite,
Höhe und den Winkel der Thoraxpelotten
einzustellen und ziehen Sie ihn wieder an,
wenn Sie die erwünschte Position gewählt
haben. Falls die Thoraxpelotten mit
Schrauben statt Handknöpfen angebracht
sind, können Sie mithilfe des MehrzweckWerkzeugs eingestellt werden.
Um die Weite der Sternumpelotte
zu verändern, heben Sie die vordere
Abdeckung an, stellen Sie die Gurte mit
den Klettverschlüssen auf die gewünschte
Weite ein und legen Sie die Abdeckung
wieder darüber.
A
Häufige
Anpassungen für
den täglichen
Gebrauch
(Therapeuten/
Pflegepersonal/
Eltern)
10
Eltern und Pflegepersonal müssen
von einer technisch und klinisch
kompetenten Person, die für die
Benutzung des Produkts ausgebildet
wurde, in den häufig vorgenommenen
Anpassungen unterwiesen, und auf
die Sicherheits-Überprüfungen in
Abschnitt 6 aufmerksam gemacht
werden. Leckey empfehlen, ein
schriftliches Protokoll aller Eltern
und allen Pflegepersonals zu führen,
die in der Benutzung dieses
Produkts unterwiesen wurden.
Der Transfer des Kindes in
und aus dem Sitz
Das Einstellen des
Beckengurts
Bevor Sie Ihr Kind in den Sitz setzen, führen
Sie die tägliche Produktinspektion durch, wie
sie in Abschnitt 13 dieses Handbuchs
beschrieben ist.
Die richtige Positionierung und Spannung
des Beckengurts ist für die Positionierung
ausschlaggebend, da sie das Wohlbefinden
des Kindes und dessen Fähigkeit funktionelle
Ziele zu erreichen beeinflusst. Bitten Sie Ihren
Therapeuten, die Spannung der Gurte für Ihr
Kind zu korrigieren, da dies für eine gute
Positionierung ausschlaggebend ist.
Stellen Sie den Sitz auf eine bequeme Höhe
ein, um den Transfer zu erleichtern. Sichern
Sie alle Rollen, vergewissern Sie sich, dass
diese nach außen zeigen, um die Stabilität
des Produktes zu maximieren. Vergewissern
Sie sich außerdem, dass die
Sicherheitsschnalle am Brustgurt offen und
aus dem Weg gelegt ist, um den Transfer zu
ermöglichen.
Öffnen Sie den Beckengurt in der Mitte
und lassen Sie den Gurt offen, um den
Transfer zu ermöglichen. Zuletzt öffnen
Sie die Fußgurte, falls Fußhalterungen
vorhanden sind. Jetzt sind Sie bereit,
Ihr Kind manuell oder mithilfe eines Lifters
in den Sitz zu setzen.
Um den Gurt um die Hüften des Kindes
herum zu sichern, passen Sie die Stützgurte
(A) für die Tiefe und (B) für die Höhe an.
Zuletzt sichern Sie die Plastikschnalle in der
Mitte und spannen Sie den Gurt (D).
Überprüfen Sie den Gurt regelmäßig, um
sicherzugehen, dass das Kind sicher sitzt
und in seinem Sitz nicht nach vor ne
rutschen kann.
Schließen Sie immer zuerst den
Beckengurt, bevor Sie andere Schnallen
oder Gurte schließen. Passen Sie den
Gurt an, sodass das Kind im Sitz nicht
nach vorne rutschen kann.
A
D
B
C
Das Untergestell
Die Höheneinstellung
– Hi Low Untergestell
Um das Untergestell auf das Sitz-System
vorzubereiten empfehlen wir, dass Sie das
Untergestell in eine bequeme Arbeitshöhe
bringen, indem Sie das Fußpedal betätigen,
wie gezeigt.
Diese Einstellung können Sie vornehmen,
während das Kind im Sitz sitzt. Um die Höhe
des Hi Low Untergestells einzustellen,
betätigen Sie das Fußpedal (A) am hinteren
Ende des Fahrgestells, während Sie
gleichzeitig die Schiebestange (B) festhalten.
Sobald Sie den Fuß vom Pedal nehmen, stellt
sich der Sitz auf die gewählte Höhe ein.
Aus Sicherheitsgründen kann das Pedal
zur Höheneinstellung festgestellt werden,
indem Sie den Zugstift (C) rechterhand des
Pedals einsetzen. Um das Pedal wieder
freizustellen, ziehen Sie den Stift wieder
heraus und drehen Sie um 90°Grad. Das
Pedal kann jetzt wieder benutzt werden.
Der Sicherheitsstift (C) muss sich immer in
der gesicherten Position befinden, wenn
Sie keine Anpassungen vornehmen.
Stecken Sie den Sicherheitsstift immer
ein, wenn Sie keine Einstellungen am
Untergestell vornehmen. Dadurch
werden versehentliche Betätigungen
des Pedals verhindert.
B
C
A
Die Höheneinstellung
– Easy Untergestell
Die Sitzkantelung
Die Höhe des Easy Untergestells muss immer
eingestellt werden, bevor Sie das Kind in den
Sitz setzen. Um die Höhe einzustellen, lösen
Sie die Sperrklinke (A) am hinteren Ende der
Hauptstange und stellen Sie den Sitz auf die
gewünschte Höhe ein. Um die Sitzhöhe zu
verringern, üben Sie Druck auf die Mitte der
Sitzbasis über der Zentralstange aus. Ziehen
Sie die Sperrklinke wieder an, um den
Sitz zu sichern.
Die Sitzkantelung kann eingesetzt werden,
während der Benutzer im Sitz sitzt. Bevor Sie
die Kantelung des Sitzes einstellen,
vergewissern Sie sich immer, dass der
Beckengurt sicher angebracht ist, um zu
verhindern, dass der Benutzer im Sitz nach
vorne rutscht.
Überprüfen Sie die Sperrklinke regelmäßig,
um sicherzugehen, dass die
Höheneinstellung sicher ist.
Die Sicherung (B) muss während der Benutzung
des Sitzes immer fest gestellt sein. Um den
Hebel (C) zu betätigen, öffnen Sie zuerst die
Sicherung (B), indem Sie sie solange rotieren,
bis sie in die offene Position einrastet. Drücken
Sie den Hebel runter und stellen ihn auf den
gewünschten Winkel ein, wobei Sie den
Handgriff währenddessenfesthalten. Sperren Sie
dann die Sicherung wieder, nachdem Sie den
Neigungswinkel eingestellt haben.
Lassen Sie die Sicherung (B) immer
in der geschlossenen Position, um die
versehentliche Betätigung des Hebels zu
verhindern, welche der Sitzeinheit einen
Ruck geben und dem Kind Verletzungen
zufügen kann.
Benutzen Sie bitte die Handgriffe, wenn
Sie die Sitzkantelung in Anspruch nehmen.
Überprüfen Sie immer mit Ihrem
Therapeuten dass die Benutzung der
Sitzkantelung keine Beeinträchtigung der
Atemwege Ihres Kindes darstellt.
B
C
A
Das Einstellen des
Brustgurts
Die Fußhalterungen
Falls das Kind als Teil seines Programms zur
Haltungsunterstützung Rumpf-Unterstützung
benötigt, kann der Sitz mit oder einer
Kombination aus Seitenstützen und
Brustgurten ausgerüstet werden. Diese
müssen möglicherweise täglich angepasst
werden, um sich der unterschiedlichen
Kleidung anzupassen.
Um die Füße des Benutzers in den
Fußhalterungen zu positionieren, sichern Sie
die Bänder mit den Klettverschlüssen, sodass
der Fuß in der Position gehalten wird. Die
Bänder müssen über den Fußrücken und über
die Zehen gelegt werden.
Überprüfen Sie immer mit Ihrem
Therapeuten, dass Sie die optimale
Positionierung und Spannung der
Gurte und Stützfunktionen für Ihr
Kind eingestellt haben.
Um die Weite des Brustgurts zu verändern,
heben Sie die vordere Stoffklappe an, stellen
Sie die Bänder mit den Klettverschlüssen auf
die gewünschte Weite ein. Wenn Sie die
gewünschte Weite erreicht haben, legen Sie
die Stoffklappe wieder darüber.
Falls das Kind Sandalen oder leichtes
Schuhwerk anhat, überprüfen Sie die
Bänder, um sicherzugehen, dass das
Gewebe die Haut nicht irritiert.
11 Informationen zur
Reinigung und Pflege
Instandhaltung
Zur Reinigung empfehlen wir warmes Wasser
und ein nicht scheuerndes Reinigungsmittel zu
verwenden. Benutzen Sie niemals organische
Lösungsmittel oder trockene Reinigungsmittel.
Polster und Stoffe
1. Die Polster und Stoffe können an Ort und
Stelle von Hand gereinigt werden. Zur
Reinigung empfehlen wir nur lauwarmes
Wasser und ein nicht scheuerndes
Reinigungsmittel zu verwenden.
2. Die beste Reinigungsmethode ist eine
“Wisch & Trocken” Technik.
3. Flecken müssen so schnell wie möglich
mit einem aufnahmefähigen Tuch, Handtuch
oder Schwamm entfernt werden. Normale
Seife und warmes Wasser mit einem
Schwamm aufzutragen, ist wirksam bei
normalen Flecken und unbedeutenden
Verschüttungen. Passen Sie auf, dass Sie
den Stoff nicht zu nass machen, da dies eine
Vergrößerung des Flecks verursacht.
4 Antiseptische Reinigungsmittel können für
hartnäckigere Flecken benutzt werden. Diese
benötigen unter Umständen ein sicheres
Lösungsmittel wie Isopropylalkohol oder
Mineralspiritus. Eine halbe Tasse Bleichmittel
auf 5 Liter Wasser kann ebenfalls als
Desinfektionsmittel benutzt werden.
5. Die Becken- und Rumpfgurte sind in der
Waschmaschine bei 40°C waschbar.
Vergewissern Sie sich, dass alle Schrauben
und Knöpfe vorher entfernt wurden, da diese
Ihre Waschmaschine beschädigen können.
Bewahren Sie diese an einem sicheren Ort,
außerhalb der Reichweite von Kindern auf.
6 Vergewissern Sie sich, dass das Produkt
trocken ist, bevor es wieder benutzt wird.
Teile aus Metall und Plastik
1. Seife und Wasser oder rein antibakterielles
Spray können zur täglichen Reinigung
verwendet werden.
2. Für eine tiefer gehende Reinigung kann ein
Dampfstrahler mit niedrigem Druck
verwendet werden.
3. Benutzen Sie keine Lösungsmittel, um
Teile aus Metall oder Plastik zu reinigen.
4. Vergewissern Sie sich, dass das Produkt
trocken ist, bevor es wieder benutzt wird.
12 Tägliche
Produktinspektion
13 Jährliche
Produktinspektion
(Therapeuten, Eltern & Pflegepersonal)
Wir empfehlen tägliche visuelle
Überprüfungen des Geräts durch den
Therapeuten, das Pflegepersonal oder die
Eltern, um sicherzustellen, dass das Produkt
für den sicheren Gebrauch geeignet ist. Wir
empfehlen die im Folgenden genannten
täglichen Inspektionen.
(Therapeut, Techniker, Leckey
Produktberater, Händler)
Leckey empfehlen, dass alle Produkte
mindestens einmal im Jahr und vor jeder
erneuten Herausgabe inspiziert werden.
Diese Inspektion muss von einer technisch
kompetenten Person durchgeführt werden,
die in der Benutzung des Produkts
ausgebildet ist, und muss zumindest die
folgenden Prüfungen beinhalten.
1. Vergewissern Sie sich, dass alle
Einstellungsknöpfe und –schrauben an
Ort und Stelle und gesichert sind.
2. Überprüfen Sie alle Polster
und Klettverschlüsse auf Anzeichen
von Verschleiß.
3. Überprüfen Sie, ob sich alle Rollen frei
bewegen und sicher feststellen lassen.
4. Vergewissern Sie sich, dass der
Schiebegriff und der Sicherheitsstift an der
Verbindungsstelle mit dem Sitz vollständig
eingesetzt ist und dass sich der Sitz sicher
auf dem Fahrgestell befindet.
6. Vergewissern Sie sich, dass die Fußplatte
angebracht und gesichert ist.
Falls Sie irgendwelche Zweifel an der
sicheren Benutzung Ihres Leckey
Produkts haben oder falls irgendwelche
Teile ausfallen, stellen Sie bitte die
Benutzung ein und nehmen Sie
schnellstmöglich Kontakt mit unserem
Kundendienst oder Ihrem ortsansässigen
Händler auf.
1. Überprüfen Sie, ob alle Knöpfe,
Muttern, Schrauben und Plastikschnallen
an ihrem Platz sind und ersetzen Sie alle
fehlenden Teile.
> Schrauben zur Höhen- und
Winkeleinstellung der Rückenlehne
> Schrauben an der Beckengurt /
Hüftschienen- Anbringung
> Höhen- und Winkeleinstellung
der Fußstütze
2. Überprüfen Sie, ob der Mechanismus zur
Höheneinstellung des Untergestells richtig
funktioniert. Falls das Untergestell mit einem
Fußpedal betrieben wird, vergewissern Sie
sich, dass sich die Höhe nicht verändert,
wenn das Pedal losgelassen wird.
Überprüfen Sie außerdem, ob der
Sicherheitsstift richtig passt, um
versehentliche Neueinstellungen der
Untergestell-Höhe zu verhindern.
3. Stellen Sie den Sitz auf den
Maximalbereich der Sitzkantelung ein und
vergewissern Sie sich, dass der
Sicherheitshebel den Sitz sicher in jeder
Stellung der Sitzkantelung sichert.
4. Überprüfen Sie, dass keine
Verschleißerscheinungen an den Metallteilen
der Verbindungsstelle zwischen Sitz und dem
Untergestell auftreten.
14 Die erneute Herausgabe
eines Leckey Produkts
5. Heben Sie die Basis an und überprüfen
Sie jede Rolle einzeln. Vergewissern Sie sich,
dass sich die Rollen frei bewegen und
entfernen Sie allen Schmutz von den
Gummirädern. Überprüfen Sie, dass die
Bremsen alle Räder sicher anhalten.
6. Überprüfen Sie visuell die Struktur des
Produkts, wobei Sie Ihre Aufmerksamkeit auf
die Schweißpunkte am Rahmen richten, und
stellen Sie sicher, dass keine Anzeichen von
Stress oder Brüchigkeit an den
Schweißstellen vorliegen.
7. Leckey empfehlen, dass Sie ein
schriftliches Protokoll über alle jährlichen
Produktinspektionen führen.
Falls Sie irgendwelche Zweifel zum
sicheren Betrieb Ihres Leckey Produkts
haben oder falls irgendwelche Teile
versagen, stellen Sie bitte die Benutzung
ein und nehmen Sie schnellstmöglich
Kontakt mit unserem Kundendienst oder
Ihrem ortsansässigen Händler auf.
Die meisten Leckey Produkte werden
eingeschätzt und auf die Bedürfnisse des
individuellen Benutzers angepasst. Bevor ein
Produkt erneut herausgegeben wird,
empfehlen wir, dass der Therapeut, der das
Produkt verschrieben hat, einen
Kompatibilitätstest des Produkts für den
neuen Benutzer durchführt und sicherstellt,
dass das erneut herausgegebene Produkt
keinen Veränderungen oder besonderen
Anbringungen unterliegt.
Eine detaillierte technische Inspektion muss
vor der erneuten Herausgabe durchgeführt
werden. Diese muss von einer technisch
kompetenten Person, die in der Benutzung
und Wartung des Produkts unterwiesen
wurde, durchgeführt werden. Beziehen Sie
sich bitte auf Abschnitt 13 für die nötigen,
auszuführenden Prüfungen.
Vergewissern Sie sich, dass das Produkt im
Einklang mit Abschnitt 11 dieses Handbuchs
richtig gereinigt wurde.
Stellen Sie sicher, dass seine Kopie des
Benutzerhandbuchs mit dem Produkt
mitgeliefert wird. Eine Kopie kann von
unserer Website www.leckey.com
heruntergeladen werden.
Leckey empfehlen, dass Sie ein schriftliches
Protokoll aller jährlich durchgeführten
Wartungen, während der erneuten
Herausgabe des Produkts führen.
Falls Sie irgendwelche Zweifel an der
sicheren Benutzung Ihres Leckey
Produkts haben oder falls irgendwelche
Teile versagen, stellen Sie bitte die
Benutzung ein und nehmen Sie
schnellstmöglich mit unserem
Kundendienst oder Ihrem ortsansässigen
Händler Kontakt auf.
15 Produktwartung
16 Technische
Informationen
Die Wartung aller Leckey Produkte darf nur
von einer technisch kompetenten Person, die
in der Benutzung des Produkts ausgebildet
wurde, durchgeführt werden.
Kodierungen des Produkts und
Zubehörs
122-600 Sitzeinheit
122-751 Sitzpolster - grün
122-752 Sitzpolster orange
122-753 Sitzpolster - blau
122-754 Sitzpolster - rosa
In Großbritannien & Irland nehmen Sie bitte
Kontakt mit dem Leckey Service Centre unter
GB 0800318265 oder IE 1800626020 auf und
unser Kundendienst wird Ihnen gerne bei
Ihren Wartungsfragen zur Seite stehen.
Alle internationalen Wartungsfragen müssen
an den jeweiligen Leckey Vertragspartner
weitergeleitet werden, der Ihnen gerne
weiterhilft. Für weitere Informationen über
Leckey Vertragspartner, besuchen Sie bitte
unsere Website www.leckey.com.
Chassis
120-800 Hi Low Untergestell – mit
Gasdruckfeder
122-717 Easy Untergestell – Anpassung von
Hand
122-710 Schiebehandgriff
Zubehör
Kodierungen mit einem Stern stehen in vier
verschiedenen Farben zur Verfügung.
01
02
03
04
-
grün
orange
blau
rosa
117-781 Fußschalen - klein
117-782 Fußschalen - mittel
*120-762 Thoraxpelotten
122-664 Fußrasten
122-719 Vier-Punkte Beckengurt - mittel
*118-750 Stützgurt
120-762* grün Seitenstützen
118-750* Stützgurt
Squiggles seat dimensions
Alter
(ungefähr)
Maximales Benutzergewicht
2-5
22kg / 48,8lbs
Rumpfweite
(Abstand zwischen den Seitenstützen)
Min 160mm / 6.25 Zoll
Max 255mm / 10 Zoll
Sitztiefe
(Rückenstütze bis Kniekehle)
Min 215mm / 8 Zoll
Max 290mm / 11 Zoll
Höhe der Rückenstütze
(Sitzbasis zur oberen Stützkante)
Min 190mm / 7.5 Zoll
Max 265mm / 10,5 Zoll
Sitzkantelung
(Easy Untergestell)
Nach vorne geneigt 20º
Nach hinten geneigt 20º
Sitzkantelung
(Hi Low Untergestell)
Nach vorne geneigt 20º
Nach hinten geneigt 20º
Unterschenkellänge
(Fußseite bis Kniekehle)
Min 190mm / 7 Zoll
Max 300mm / 12 Zoll
Fußplatte Winkel
Plantarflexion 10º
Dorsiflexion 10º
Höhe der Armlehnen
(Sitzbasis bis Ellenbogen)
Min 160mm / 6,3 Zoll
Max
Sitzhöhe
(Easy Untergestell)
Min 280mm / 11 Zoll
Max 380mm / 15 Zoll
Sitzhöhe
Top of Seat to Floor
(Hi Low Untergestell)
(Hi Low Untergestell)
Min 270mm / 10 Zoll
Min 270mm / 10 Zoll
Sattel-Sitz-Einheit
Min 270mm / 10,5 Zoll
Saddle Seat Unit
Min 270mm / 10,5 Zoll
Minimale Ausmaße zur Aufbewahrung
Gewicht 28kg / 17,6lbs
Breite 390mm / 15,4 Zoll
Min Ausmaße zur Aufbewahrung
Länge 450mm - 17,7mm
Höhe 370mm - 14,6mm
Il seggiolone polifunzionale “a sella”
Squiggles Saddle è stato progettato per
offrire soluzioni confortevoli e funzionali nel
posizionamento posturale seduto. Da questo
i bambini possono svolgere una vasta
gamma di attività e godere di condizioni di
mobilità ancor migliori. Questo manuale vi
mostrerà come se ne possano utilizzare tutte
le funzioni in modo rapido, facile e sicur o. Le
istruzioni sulla sicurezza e sulla manutenzione
del prodotto ne consentiranno l'utilizzo per un
periodo di tempo molto lungo.
Indice
01
02
03
04
05
06
07
08
09
10
11
12
13
14
15
16
Destinazione d'uso
Dichiarazione di conformità
Termini di Garanzia
Storia del prodotto
Formazione all'utilizzo del prodotto
Informazioni sulla sicurezza
Come rimuoverlo dall'imballaggio ed assemblarlo
Sistemazione dell’imbottitura
Assetto clinico per la gestione posturale
Regolazione frequente per l'utilizzo quotidiano
Informazioni sulla pulizia e sulla cura.
Ispezioni quotidiane del prodotto
Ispezioni annuali del prodotto
Ri-distribuzione dei prodotti Leckey
Assistenza tecnica del prodotto
Informazioni Tecniche
1. Destinazione d'uso
Il seggiolone polifunzionale “a sella”
Squiggles Saddle è un sistema di seduta
attivo, disegnata per bambini con bisogni
particolari di età compresa tra i 2 e i 5
anni. Questi possono infatti beneficiare di
un sostegno aggiuntivo mentre seduti
permettendogli di concentrarsi sulle
diverse attività. Il sistema di seduta può
sostenere un peso massimo di 22
chilogrammi (48.4lbs) e può essere usato
a casa come in classe.
2. Dichiarazione di Conformità
James Leckey Design S.r.l. in qualità di
costruttore sotto la sua esclusiva
responsabilità dichiara che, il seggiolone
polifunzionale “ a sella “ Squiggles Saddle
della Leckey è conforme ai requisiti delle
linee guida 93/42/EEC e al EN12182 ,
requisiti generali degli ausili tecnici per
persone disabili e relativi metodi di esame.
3. Termini di Garanzia
La Garanzia è applicabile solo quando il
prodotto viene utilizzato rispettando le
condizioni specificate e, per gli scopi
stabiliti, seguendo tutte le raccomandazioni
della casa produttrice (vedi inoltre i termini
generali di vendita, consegna e
pagamento). Per tutti i prodotti ed i vari
componenti fabbricati dalla Leckey è
prevista una garanzia di due anni.
4. Storia del prodotto
Il vostro prodotto Leckey è catalogato
come un dispositivo medico di classe 1
ed, in quanto tale, deve essere prescritto,
messo in assetto e ridistribuito per l'uso,
solo da una persona dal punto di vista
tecnico competente, adeguatamente
istruita sull'utilizzo di questo prodotto. La
Leckey raccomanda inoltre che si tenga
un rapporto scritto per fornire i dettagli di
tutti gli assetti, i controlli della rimessa in
circolazione e le verifiche annuali di
questo prodotto.
5. Rapporto sulla formazione per
l'utilizzo del prodotto (Genitori,
Insegnanti & Assistenti di cura)
Il vostro prodotto Leckey è un dispositivo
medico di classe 1 disponibile a seguito di
prescrizione medica ed in quanto tale la
Leckey raccomanda che i genitori, gli
insegnanti e gli assistenti di cura che
utilizzeranno tali ausili siano adeguatamente
informati da parte di personale
tecnicamente competente circa le seguenti
sezioni di questo manuale per l'uso.
Sezione 6
Informazioni sulla sicurezza
Sezione 10
Regolazione frequente per l'utilizzo
quotidiano
Sezione 11
Informazioni sulla Pulizia & Cura
Sezione 12
Controllo quotidiano del prodotto
La Leckey raccomanda che si tenga un
rapporto scritto su tutti coloro che sono
stati istruiti circa il corretto utilizzo di
questo prodotto.
4 Informazioni
sulla sicurezza
1. Leggere sempre tutte le istruzioni
prima dell'uso.
2 Gli utenti non devono esser e
mai lasciati senza assistenza mentre
utilizzano l'ausilio Leckey.
3. Utilizzare solamente componenti
originali Leckey . Non apportare in nessun
caso e in nessun modo modifiche al
prodotto. La mancata corretta esecuzione
delle istruzioni potrebbe esporre l'utente o
l'assistente a rischi e rendere nulla la
garanzia del prodotto.
4. Nel caso di qualsiasi dubbio sulla
sicurezza del vostro seggiolone
polifunzionale “a sella” Leckey o qualora
dovessero danneggiarsi delle parti, si
prega di cessarne immediatamente
l'utilizzo e di contattare il servizio clienti o
il vostro rivenditore al più presto.
5. Effettuare tutte le regolazioni e
assicurarsi che siano fissate in modo
sicuro prima di posizionare la persona che
ne farà utilizzo sulla seduta. Alcune
regolazioni potrebbero richiedere l'uso di
una chiave esagonale che è for nita con
ogni prodotto. Tenere tutti gli attrezzi
lontani dalla portata dei bambini.
6. Quando viene posta la persona sulla
seduta, allacciare sempre prima la cintura
pelvica, sia per motivi posturali che di
sicurezza.
7. Quando il prodotto è fermo assicurarsi
che tutte e quattro le rotelle siano
bloccate e non siano rivolte verso l’inter no
della base. Ciò è importante in special
modo quando si effettua il basculamento
o la reclinazione.
8. Quando il prodotto è in uso su un telaio
Hi low assicurarsi che il pedale di
regolazione dell'altezza e la leva di
regolazione dell'inclinazione siano fissate
in modo sicuro e non possano essere
azionate accidentalmente, specialmente
se ci sono dei bambini nelle vicinanze.
Quando il prodotto è in uso sul telaio Easy
assicurarsi che la manopola dentata per
regolazione dell'altezza e la leva di
inclinazione nello spazio, siano fermate in
modo sicuro e non possano essere
spostati accidentalmente, da altri bambini.
9. Il seggiolone polifunzionale “a sella”
della Leckey non è una sedia a r otelle e
anche se la mobilità è una caratteristica
importante di tale ausilio si raccomanda
di non utilizzarlo come presidio per la
mobilità specialmente su superfici
irregolari. Devono essere prese poi tutte le
dovute precauzioni durante i trasferimenti
da e per il sistema di seduta.
10. Non lasciare mai il prodotto su una
superficie con un inclinazione maggiore di
5 gradi. Ricordare sempre di bloccare in
modo sicuro tutte le ruote.
11. Usare sempre la maniglia di spinta per
direzionare o muovere il sedile da una
zona all'altra Non usare mai il tavolino a
questo scopo.
12. Il prodotto è costituito di componenti
che potrebbero rappresentare un rischio
di soffocamento per I bambini più piccini.
Controllare sempre che le manopole di
fissaggio e i bulloni raggiungibili dai
bambini siano sempre ben stretti e fissati
in modo sicuro.
13. I prodotti Leckey sono conformi alle
norme antincendio previste dalla EN12182.
Comunque il prodotto contiene
componenti di legno e quindi dovrebbe
essere tenuto lontano da fonti dirette di
calore, fiamma viva, sigarette, radiatori a
gas o elettrici ecc.
14. Non porre oggetti caldi sul tavolino in
quanto potrebbero danneggiare la
plastica.
15. Pulire regolarmente il prodotto. Non
utilizzare oggetti abrasivi. Eseguire
regolari controlli di mantenimento per
assicurarsi che il prodotto è in buone
condizioni e ben funzionante.
16. Il prodotto è stato disegnato per
essere utilizzato in spazi chiusi. Quando
non è usato dovrebbe essere conservato
in un uno luogo asciutto non soggetto a
temperature estreme. Un intervallo di
temperature in cui si può operare in
sicurezza è compreso tra +5 e +40
gradi Celsius.
17. Controllare sempre che le manopole
sulla maniglia siano strette in modo sicuro
prima di muovere l'unità di sedile.
18. Prima di usare il seggiolone
polifunzionale controllare sempre
che la maniglia di aggancio dell’unità
di seduta all’interfaccia della base sia
completamente incastrata nel telaio.
Se la maniglia non è incastrata
correttamente il sistema di seduta
può staccarsi e causare danni fisici
seri al bambino o all'assistente.
Come
rimuovere
dall'imballaggio
ed assemblare
il seggiolone
polifunzionale
7
Controllo dei componenti
Complimenti per l'acquisto del vostro
seggiolone polifunzionale “a sella” Squiggles
Saddle. Quando si apre la scatola tagliare i
nastri prestando attenzione a non recidere
oltre le strisce adesive per non rischiare di
danneggiare alcune parti del contenuto Tutte
le componenti sono spedite protette in buste
di politilene ed ognuna chiaramente
etichettata. Rimuoverle con attenzione dalla
scatola e controllare che ci siano tutte le
componenti da voi ordinate
In primo luogo la sicurezza
Tenere le buste di politilene
lontane dai bambini.
Chiave esagonale multiuso
Una serie di regolazioni richiederanno
l'uso di una chiave esagonale che è fornita
con ogni seggiolone.
Fissare le pedane
Se sono state ordinate le pedane
raccomandiamo di fissarle per prime. Avrete
bisogno di un attrezzo-multiplo o di una
chiave inglese che sono fornite con i prodotti.
Per fissare le pedane in primo luogo sistemare
la base del sedile sotto-sopra su una
superficie sicura e ad altezza di lavoro
adeguata.Tenere l'asta del sostegno per le
pedane in posizione in questo modo e
spingere il perno della cavità fornito,
attraverso il foro nel lato . Farlo passare
attraverso i fori e posizionare su il dado di
sicurezza, stringere la testa del bullone della
cavità per un paio di giri e tenerlo in posizione.
Quindi usare la chiave inglese per tenere il
dado e stringere la testa del bullone della cavità
usando l'attrezzo-multiplo. Non stringerli troppo
in quanto questo ha bisogno di gioco per
permettere alla pedana e all'asta di inclinarsi.
Infine sistemare la leva di regolazione. Per fare
ciò far passare la testa quadrata del bullone
attraverso la fessura ed il foro. Sistemare poi
le rondelle e la leva a mano. Stringere il
bullone in senso orario per un paio di giri fino
all'inizio della filettatura. Poi spingere il bullone
nella fessura e stringere la leva a mano.
Dovrete stringere un mezzo giro alla volta. Per
procedere in questo senso far fare alla leva a
mano un mezzo giro orario quindi sollevare la
leva e ruotarla per metà giro indietro come
questo.. Continuare a girare avanti ed indietro
finché non si sia fermata in modo sicuro.
Accertarsi sempre che la pedana sia
fissata in modo fermo.
Fissare il sistema di seduta
al telaio Hi-low e Easy
Regolare l'altezza del telaio al suo massimo
per ridurre il rischio di sforzo della schiena
mentre si fissa l'unità di sedile. Fare
riferimento alla Sezione 10 per regolare
l'altezza del telaio acquistato.
In primo luogo, rilasciare il perno bloccante
di sicurezza nella parte anteriore del sedile.
Per effettuare questa operazione tirare il
perno verso l’esterno e ruotarlo di 90 gradi.
Quindi sollevare con cura il sedile e
posizionarlo sul telaio. Sulla parte posteriore
della superficie sottostante al sedile presenta
una scanalatura che funge da guida per il
fissaggio del sedile alla base. Posizionarlo in
modo sicuro al di sopra del traversino
tubolare verso la parte posteriore del telaio..
Controllare sempre che le maniglie e i per ni
di blocco siano innestati completamente
prima di posizionare il bambino nel sistema
di seduta. Se la maniglia non è incastrata
in modo appropriato il gruppo sedile può
saltare via e causare seri danni fisici al
bambino e all'assistente.
Quindi tirare su completamente la maniglia
posta davanti al gruppo sedile e spingerlo in
avanti e in basso. Una volta che la parte
anteriore del sedile è completamente
abbassata, rilasciare la maniglia e spingerla
in avanti per assicurarsi che si chiuda bene
attorno al traversino tubolare anteriore.
Ruotare il perno bloccante di sicurezza così
da farlo incastrare di fronte alla maniglia. Se
colpisce la maniglia il sedile non è inserito in
modo appropriato, rimuoverlo e ripetere il
procedimento spiegato sopra.
A
Fissare il sostegno
per la schiena
Fissare il maniglione
di spinta
Per fissare il sostegno per la schiena
Leckey far scivolare il traversino tubolare
nella guida verticale nella parte posteriore
del seggiolone, quindi stringere la manopola
(A) in modo fermo.
Il maniglione di spinta viene fissato sia nella
base Hi low che Easy inserendo le due aste
inferiori nelle guide come illustrato. Il
maniglione ha dei pulsanti di sicurezza, che
devono essere pigiati mentre si inseriscono le
aste negli appositi alloggiamenti. Lasciare
entrare le aste nel telaio fino a che i pulsanti
di sicurezza non fuoriescano dall'altra
estremità della guida scattando in posizione
di blocco.
Sulla base Easy i pulsanti si innesteranno nei
fori presenti nel tubo guida. Una volta
incastrati in modo sicuro stringere le due
manopole di plastica.
Controllare questi componenti con
regolarità per assicurarsi che siano ben
fissati, in particolar modo se l’utilizzo per
gli spostamenti è frequente.
B
A
B
Fissare i Sandali
(supporti del piede)
Fissare i sostegni
laterali
Se i sandali sono stati richiesti possono essere
fissati alle pedane con una semplice vite
passante. Per regolarne la posizione allentare
la manopola sotto la pedana ed stringerla una
volta raggiunta la posizione richiesta. Per
posizionare i piedi di un bimbo usale le cinghie
di Velcro fornite. Se non sono stati richiesti dei
sandali sono fornite delle cinghie di velcro per
posizionare il piede.
Mentre tenete insieme le componenti
rimuovere la manopola di plastica (A) e le
rondelle. Allineare cardine e rondelle di
plastica nella fessura e riposizionare le
rondelle e la manopola di plastica.
Sistemare le
imbottiture
8
Imbottitura del sedile
Iniziare facendo scivolare l’imbottitura sul
cuneo anteriore, spingere in basso verso la
parte centrale del sedile per porre in posizione
le chiusure a velcro, quindi avvolgere i lembi
laterali intorno ai lati della base del sedile e
fissare le chiusure a velcro nella parte
sottostante l'imbottitura.
Fissare avvolgendo le alette sotto la base del
sellino e posizionando i bottoni automatici di
chiusura nel lato sottostante la base del
sedile, Infine fermare le due alette sotto la
zona del cuneo usando il bottone di chiusura
e quelle di Velcro.
Imbottiture dei supporti
laterali per il tronco
Imbottitura per il sostegno
per la schiena
Per fissare le imbottiture dei supporti laterali
per il tronco, far scivolare semplicemente le
imbottiture stesse con la parte imbottita verso
l'interno della seduta sui supporti. Inserire la
fibbia di plastica (A) attraverso la fessura nella
copertura. Quindi fissare le due cinghie di
velcro intorno ai supporti laterali stessi e
fissarle al pannello di velcro come illustrato.
Chiudere il lembo dell’imbottitura.
Posizionare l'imbottitura centralmente sullo
schienale, avvolgi i lembi superiori sulla parte
superiore dello schienale e chiudi con i bottoni
automatici. Porta il lembo inferiore sotto lo
schienale e fissalo al lembo superiore usando
le chiusure Velcro.
A
Imbracatura per il petto
L'Imbracatura per il petto può essere fissata
facendo scattare la fibbia maschio in quella
femmina ad entrambi i lati dei sostegni laterali.
Assetto
clinico per
la gestione
posturale
L'assetto clinico del prodotto deve
essere completato da una persona
tecnicamente e clinicamente
competente che è stato istruito
circa il modo in cui il prodotto deve
essere utilizzato. La Leckey
raccomanda che sia tenuto un
rapporto scritto di tutti gli assetti
clinici di questo prodotto.
9
Profondità del sostegno
della schiena
L'altezza del sostengo
della schiena
Per regolare la profondità del sedile allentare
semplicemente la manopola (B) regolando fino
alla posizione giusta per il bambino quindi
stringere in modo sicuro.
L'altezza totale del sostegno per la schiena
può essere regolata allentando la manopola (A)
e quindi posizionando all'altezza richiesta dal
bambino. Una volta in posizione le manopole
devono essere strette in modo sicuro.
B
A
Inclinazione del sostegno
per la schiena
L'altezza delle pedane
Lo schienale può essere inclinato allentando la
manopola dentata (B) posizionata sul perno di
blocco dello schienale. Selezionare
l'inclinazione richiesta e stringere la maniglia in
modo sicuro.
Per regolare l'altezza delle pedane allentare la
manopola (A), sul retro dell'asse del supporto per
i polpacci, e far scivolare la pedana sull'altezza
richiesta quindi stringere di nuovo la manopola.
B
A
Regolazione dell'inclinazione
della pedana
Per fissare l'inclinazione dell'asse della
pedana allentare la manopola dentata (B),
selezionare l'inclinazione.da te richiesta, quindi
stringere in modo sicuro.
Per fissare l'inclinazione per sistemare il plataflettori ed i dorso-flettori, allentare il bullone
esagonale e selazionare la posizione desiderata.
B
Sandali (sostegni per
il piede)
L'imbracatura
pelvica
Per posizionare i sandali è necessario
semplicemente allentare la manopola sotto la
pedana, selezionare la posizione desiderata e
ri-assicurare la manopola. Per posizionare i
piedi dell'utente nei sandali assicurare le
cinghie di Velcro fornite alle caviglie e alle
dita. Qualora non siano richiesti i sandali
sono fornite cinghie in Velcro per il
posizionamento dei piedi
Assicurare sempre l ' imbracatura pelvica
quando si sistema il bambino nel seggiolone.
Per assicurare l ' imbracatura pelvica intorno
alle anche di un bambino, regolare le cinghie
di sostegno (A) per la profondità e (B)
l'altezza. Infine assicurare la fibbia (C) di
plastica nel mezzo e tendere le cinghie.
A
D
B
C
Sostegni Laterali
Imbracatura
del torace
Allentare la manopola (A) per regolare
la larghezza, dei supporti laterali e stringere
di nuovo quando si sarà raggiunta la
posizione desiderata.
Per cambiare la larghezza dell'imbracatura
per il petto, sollevare il rivestimento anteriore,
regolare le cinghie Velcro. sistemarle
alla larghezza desiderata e riposizionare
il rivestimento.
Se ordinati, i supporti laterali potrebbero essere
fissati con i bulloni invece che con le manopole.
Se così fosse, possono essere regolati con la
chiave esagonale multiuso fornita.
A
Regolazioni
frequenti per
uso quotidiano
(terapisti/
assistenti/
genitori)
10
Bisognerebbe mostrare ai genitori e
agli assistenti come effettuare
frequenti regolazioni ed informarli
circa i controlli di sicurezza di cui
alla Sezione 6 attraverso personale
tecnicamente e clinicamente
competente ed istruita ad hoc
sull'uso del prodotto. La Leckey
raccomanda la compilazione di un
dossier in cui si tenga nota di tutti i
genitori e gli assistenti istruiti circa
l'utilizzo di questo prodotto.
Spostare il bambino dentro
e fuori il seggiolone
polifunzionale
Regolazione della
cinghia pelvica
Prima di trasferire il bambino dentro e fuori il
sedile eseguire controlli del prodotto su base
giornaliera come sottolineato nella Sezione
12 di questo manuale.
Il corretto posizionamento e la giusta tensione
della cinghia pelvica è il punto chiave per la
gestione globale della postura del bambino.
Pertanto si consiglia vivamente di chiedere al
terapista come regolare appropriatamente la
tensione delle varie cinghie per ogni singolo
bambino, questo è un aspetto fondamentale
per una buona gestione dei supporti posturali.
Regolare il sedile ad una altezza comoda per
facilitare gli spostamenti. Bloccare le rotelle,
assicurandosi che siano rivolte verso l'esterno
per massimizzare la stabilità del prodotto.
Assicurarsi che tutte le fibbie e i supporti
posturali del tronco siano aperti o comunque
non intralcino le operazioni di trasferimento.
Sganciare la cinghia pelvica e lasciare aperte
le imbottiture e le cinghie per facilitare il
trasferimento .Infine se sono sistemati i
sostegni per il piede, aprire le cinghie. Ora
siete pronti per spostare manualmente il
bambino da e per il seggiolone polifunzionale.
Assicurare sempre l'imbracatura pelvica
prima di chiudere le altre fibbie o cinghie.
Regolare l'imbracatura in modo che il
bambino non possa slittare in avanti o
scivolare all'interno del sedile.
Per assicurare bene la cinghia pelvica
intorno alle anche del bambino tirare le due
cinghie di supporto (A) per la profondità e (B)
per l'altezza. Infine assicurare la fibbia di
plastica (C) posizionata centralmente e
tendere le cinghie (D).
Controllare regolarmente l'imbracatura
per assicurarsi che il bambino sia in
posizione sicura e non rischi di scivolar e
in avanti nel sedile.
A
D
B
C
Basi
Regolazione dell'altezza
della seduta – con base
Hi low
Per preparare le basi ad accogliere il
seggiolone polifunzionale raccomandiamo di
sollevare il telaio ad una altezza comoda per
lavorare facendo pressione sul comando a
pedale come illustrato.
Queste regolazioni possono essere effettuate
con il bambino posizionato nel sedile. Per
regolare l'altezza del telaio Hi low abbassare
la leva a pedale (A) che si trova nella parte
posteriore del telaio impugnando
contemporaneamente la maniglia di spinta (B).
Per fissare il sedile all'altezza desiderata
spostare semplicemente il piede dal pedale.
Per sicurezza il pedale per la regolazione in
altezza può essere bloccato inserendo il perno
di sicurezza (C) posto sulla destra del pedale.
Per sbloccare il perno di sicurezza tirare verso
l’esterno e ruotare di 90 gradi. Il perno di
sicurezza deve essere mantenuto posizione di
fermo quando non si effettuano regolazioni
dell’altezza della base.
Tenere sempre Il perno di sicurezza in
posizione di fermo quando non si
effettuano regolazioni in alt5ezza della
base. Eviterà che il pedale possa esser e
azionato accidentalmente.
B
C
A
Regolazione dell'altezza
del sedile – con base Easy
Basculazione
Vi raccomandiamo di non effettuare questa
regolazione prima di posizionare il bambino
nella seduta. Per effettuare tale regolazione,
allentare la manopola dentata (A) posta
nella parte posteriore del piantone centrale,
portare all’altezza necessaria e fissare
nuovamente sempre agendo sulla manopola.
Per diminuire l'altezza del sedile, applicare
il peso centralmente sul sedile. Anche in
questo caso stringere di nuovo la manopola
e fermare con sicurezza.
La basculazione può essere effettuata mentre
l'utente si trova all'interno del sedile. Prima di
regolare la basculazione assicurarsi sempre
che la cinghia pelvica sia legata in modo
sicuro prevenendo così che il bambino scivoli
accidentalmente. Il perno di bloccaggio (B)
dovrebbe essere sempre nella posizione
bloccata quando il sedile è in uso. Per attivare
la leva (C) in primo luogo sbloccare il perno di
bloccaggio (B) e ruotarlo finché non si troverà
nella posizione di apertura. Premere la leva
verso il basso e basculare tenendo
contemporaneamente la maniglia di spinta.
Inserire nuovamente il perno di bloccaggio
al termine dell’operazione di regolazione.
Controlla regolarmente il serraggio della
manopola dentata per assicurarsi che la
regolazione dell'altezza del sedile sia ferma.
Tenere sempre il perno di bloccaggio (B)
inserito per prevenire accidentali attivazioni
della leva di regolazione del basculamento
che potrebbe causare lo spostamento
dell'unità di seduta e potenzialmente
provocare danni fisici al bambino.
Si prega di utilizzare sempre il maniglione
di spinta quando si regola la basculazione
del sistema di postura.
Controllare sempre con il tuo terapista che
l'utilizzo di gradi di basculazione eccessivi
non provochino accidentali ostruzioni alle
vie respiratorie del bambino comunque
problemi di deglutizione.
B
C
A
Regolazione dei supporti
per il tronco e per il petto
Sandali (Supporti del
piede)
Se il programma posturale del bambino
prevede l’utilizzo di supporti posturali, il
seggiolone sarà fornito di una combinazione
di imbracatura laterale e toracica. La
regolazione di questi andrà controllata
quotidianamente anche a seconda degli abiti.
Per posizionare i piedi dell'utente nei supporti
piede assicurare le cinghie di Velcro fornite in
modo che il piede sia mantenuto in posizione.
Le cinghie dovranno essere poste sul collo e
sulle dita del piede.
Controllare sempre con il terapista la
posizione, la tensione e l’appropriatezza
dei supporti e sostegni posturali.
Per regolare la larghezza dell'imbracatura
del torace, sollevare il lembo anteriore
dell’imbottitura, regolare le cinghie di velcro
e riposizionare il rivestimento quando si è
raggiunta la larghezza desiderata.
Se il bimbo indossa i saldali o calzatur e
leggere controllare le cinghie di velcro
regolarmente per assicurarsi che queste
non irritino la pelle
11 Informazioni sulla
Pulizia & Cura
12 Ispezioni quotidiane
del Prodotto
Per la conservazione del prodotto
Per la pulizia raccomandiamo di utilizzare
solo acqua calda ed un detergente non
abrasivo. Non usare in nessun caso solventi
o liquidi per la pulizia a secco.
(Terapisti, genitori & assistenti)
Raccomandiamo che i terapisti, gli assistenti
o i genitori eseguano ispezioni visive
quotidiane dell’ausilio, per assicurarsi che il
prodotto possa essere utilizzato in sicurezza.
I controlli quotidiani consigliati sono elencati
in dettaglio in seguito.
Imbottiture e stoffe
1. Le imbottiture e le stoffe possono essere
lavate a mano anche montate. Per la pulizia
raccomandiamo di utilizzare solo acqua
calda ed un detergente non abrasivo.
1. Assicurarsi che tutte le manopole
di regolazione e tutti I bulloni siano in
posizione e ben stretti.
2. Il metodo di pulizia migliore è la tecnica
‘tampona & asciuga’.
2. Controllare la tappezzeria e il velcro
per segni di usura e rottura.
3. Le macchie devono essere rimosse
immediatamente utilizzando panni assorbenti,
asciugamani o una spugna. Un normale
sapone ed acqua calda sono efficaci per
sporco ordinario e piccole macchie. Prestar
attenzione a non inumidire troppo la stoffa
questo potrebbe far espandere la macchia.
3. Controllare che tutte le ruote si
muovano in modo scorrevole e si
blocchino in modo sicuro.
4. Agenti di pulizia antisettici possono essere
utilizzati contro le macchie più ostinate.
Come disinfettate inoltre può essere usata
una mezza tazza di candeggina per uso
domestico diluita in 5 litri di acqua.
5. La cinghia pelvica e lo stabilizzatore
pettorale possono essere lavati in lavatrice
ad una temperatura di 40 gradi C.
6. Assicurarsi sempre che il prodotto sia
asciutto prima dell'uso.
Componenti metallici e di plastica
1. Per la pulizia quotidiana possono
essere usati acqua e sapone o uno
spray antibatterico.
2. Per una pulizia più profonda può
essere utilizzato un pulitore a vapore
a bassa pressione.
3. Non utilizzare solventi per pulire
componenti di plastica o di metallo.
4. Assicurarsi che il prodotto sia
asciutto prima dell'uso.
4. Assicurarsi che il sistema di aggancio
del sedile alla base sia ben fissato.
5. Assicurarsi che la cinghia pelvica sia
fissata correttamente e che l'utente non
possa scivolare in avanti.
6. Assicurarsi che la pedana sia fissata
in modo sicuro.
Nel caso di qualsiasi dubbio sulla
sicurezza nell'uso continuativo del vostro
prodotto Leckey o qualora dovesse
danneggiarsi una parte, si prega di
cessare l'utilizzo del prodotto e contattare
immediatamente il servizio clienti o il
vostro rivenditore di zona.
13 Ispezione Annuale del
Prodotto
(Terapisti, Tecnici, Informatori dei
prodotti Leckey, Venditori)
La Leckey raccomanda di sottoporre ogni
prodotto ad una scrupolosa ispezione
almeno una volta all'anno o ogni volta che il
prodotto venga rimesso in circolazione per
l'uso. Questa ispezione deve essere
effettuata da personale tecnicamente e
clinicamente competente che sia stato
adeguatamente istruito sull'utilizzo del
prodotto e dovrebbe includere i seguenti
controlli come requisito minimo.
1. Controllare che tutte le manopole, I dadi,
i bulloni e le fibbie di plastica siano al loro
posto,sostituendole con nuovi dove
mancanti. Prestare particolare attenzione ai
successivi oggetti;
> I bulloni per la regolazione dell'altezza
e dell'inclinazione dello schienale
> I bulloni per il fissaggio dell'imbracatura
pelvica.
> La regolazione dell'altezza e
dell'inclinazione della pedana
2. Controllare che il dispositivo per la
regolazione dell'altezza del telaio funzioni
in modo appropriato. Se il telaio funziona
attraverso il pedale assicurarsi che l'altezza
del sedile non cambi quando si lascia il
pedale. Controllare inoltre, che il perno di
bloccaggio si incastri in modo fermo per
prevenire accidentali regolazioni di altezza
del telaio.
3. Regolare il sedile al suo massimo intervallo
di Inclinazione nello spazio e assicurarsi che
la leva di bloccaggio fermi il sedile in modo
sicuro, al variare dei punti in questo intervallo
4. Controllare che il sedile ed il telaio siano
uniti e che non vi siano visibili segni di usura
o rottura sui componenti metallici .
5. Sollevare la base per controllare
singolarmente ogni rotella . Assicurarsi che
si muovano in modo scorrevole e rimuovere
ogni accumulo di sporcizia dalle ruote di
gomma . Controllare che i freni blocchino
le ruote in modo sicuro e fermo.
7. Controllare visivamente la struttura del
prodotto prestando attenzione ai punti di
saldatura sullo scheletro della struttura
assicurandosi non vi siano segni di
cedimento o crepe intorno alle saldature.
8. La Leckey raccomanda di tenere
un dossier scritto sulle ispezioni annuali
del prodotto.
In caso di qualsiasi dubbio sull'uso
continuato in sicurezza del vostro
prodotto Leckey o qualora dovesse
danneggiarsi una parte, si prega di
cessare l'utilizzo del prodotto e contattare
immediatamente il nostro reparto servizio
clienti o il vostro rivenditore di zona.
14 Ri-distribuzione dei
prodotti Leckey
15 Assistenza tecnica
per il prodotto
Molti dei prodotti sono stai valutati e ordinati
per soddisfare i bisogni di un singolo utente.
Prima di rimettere in circolazione un prodotto
si raccomanda al terapista prescrivente di
effettuarne un controllo di compatibilità sulle
attrezzature per il nuovo utente e che si sia
assicurato che il prodotto rimesso in
circolazione non contenga modifiche o
attacchi speciali.
L'assistenza tecnica di tutti prodotti Leckey
dovrebbe essere effettuata solo da personale
tecnicamente competente ed adeguatamente
istruito circa l'uso del prodotto.
Una scrupolosa ispezione tecnica dovrebbe
essere condotta sul prodotto prima di essere
rimesso in circolazione. Questo dovrebbe
essere condotto da una persona
tecnicamente competente che sia stata
istruita per l'utilizzo e l'ispezione del
prodotto. Si prega di far riferimento alla
Sezione 14 per effettuare i richiesti controlli.
Assicurarsi che il prodotto sia stato pulito
affondo secondo quanto stabilito dalla
sezione11 di questo manuale..
Assicurarsi che una copia del manuale
dell'utente sia fornito con il prodotto.
Una copia può essere scaricata dal nostro
sito www.leckey.com
La Leckey raccomanda di tenere un dossier
scritto su tutte le ispezioni del prodotto
effettuate durante la sua rimessa in
circolazione.
Per qualsiasi dubbio sull'uso continuato
in sicurezza del tuo prodotto Leckey o
qualora dovesse danneggiarsi una parte,
si prega di cessare l'utilizzo del prodotto
e contattare immediatamente il nostro
reparto servizio clienti o il vostro
rivenditore di zona.
Nel Regno Unito e nella Repubblica di Irlanda
contattare il Centro di Servizi Leckey nel
Regno Unito 0800 318265 o in Eire 1800
626020 e il nostro reparto del servizio clienti
sarà lieto di prestarvi assistenza per ogni
richiesta avanzata.
Ogni richiesta di assistenza internazionale
deve essere rivolta al distributore Leckey più
vicino, che sarà lieto di fornirvi aiuto. Per
ulteriori informazioni sui distributori Leckey
si prega di visitare il nostro sito web
www.leckey.com
16 Informazioni Tecniche
Codici dei Prodotti e degli Accessori
122-600 Conchiglia sedile
122-751 Copertura Sedile - verde
122-752 Copertura Sedile - arancio
122-753 Copertura Sedile - blu
122-754 Copertura Sedile - rosa
Telai
120-800 Telai Hi low -pedaliera
122-717 telai Easy –regolazione manuale
122-710 maniglia a barra
Accessori
I codici prefissati da un asterisco sono
disponibile in una gamma di 4 colori.
01 - verde
03 - blu
02 - arancio
04 - rosa
117-781 Sandali - piccola
117-782 Sandali- media
*120-762 Sostegni laterali rigidi - verde
*118-750 Sostegno per l Imbracatura–
sostegni laterali verdi
122-664 Gruppo pedana
122-719 Imbracatura pelvica 4 punti – media
Dimensioni della
Squiggles saddle seat
Eta
(approx)
Peso massimo utente
2-5
22kg / 48.8lbs
Larghezza toracica
(distanza tra i laterali)
Min 160mm / 6.25 pollici
Max 255mm / 10 pollici
Profondità sedile
(dal sostegno dorsale a ginocchia)
Min 215mm / 8 pollici
Max 290mm / 11 pollici
Sostegno schiena/altezza laterale
(dalla base del sedile alla parte alta del sostegno)
Min 190mm / 7.5 pollici
Max 265mm / 10.5 pollici
Basculazione
(su base Easy)
Prona 20º
Reclinato 20º
Basculazione
(su base Hi low)
Prona 20º
Reclinato 20º
Dal sedile alla pedana
(dalla pianta del piede alla parte posteriore del ginocchio)
Min 190mm / 7 pollici
Max 300mm / 12 pollici
Inclinazione della pedana
Plantaflessione 10º
Deflessione 10º
Altezza bracciolo
(base al gomito)
125mm / 5 pollici
Dalla parte più alta del sedile al pavimento
(Base Easy)
Min 280mm / 11 pollici
Max 380mm / 15 pollici
Dalla parte più alta del sedile al pavimento
(Base Hi low)
Min 270mm / 10 pollici
Min 270mm / 10 pollici
Gruppo seduta saddle
Min 270mm / 10.5 pollici
Gruppo seduta saddle
Min 270mm / 10.5 pollici
Dimensioni minime per la conservazione
Peso 28kg / 17.6lbs
Larghezza 390mm / 15.4 pollici
Peso 28kg / 17.6lbs
Larghezza 390mm / 15.4 pollici
El Asiento Activo Squiggles ha sido
diseñado para ofrecer una postura de
asiento cómoda y funcional en la que los
niños puedan realizar una amplia gama
de actividades, proporcionándoles una
mayor movilidad. Este manual detalla
cómo usar todas las funciones de forma
rápida con seguridad y sencilla.
Las instrucciones sobre seguridad
y mantenimiento aseguran
el uso de este producto
durante mucho tiempo.
Contenidos
01
02
03
04
05
06
07
08
09
10
11
12
13
14
15
16
Uso
Declaración de conformidad
Garantía
Informe histórico del producto
Instrucciones
Seguridad
Cómo desempaquetar y montar el sistema de asiento
Ajuste de los cojines
Configuración clínica para el posicionamiento
Ajustes frecuentes para el uso diario
Limpieza y cuidado
Revisión diária
Revisión anual
Redistribuir productos Leckey
Reparación del producto
Información técnica
1. Uso
El Asiento Activo Squiggles ha sido
diseñado para niños con necesidades
especiales de entre 2-5 años. Estando
sentados se benefician de un soporte
adicional que por otro lado les permite
centrar su atención en varias
actividades. El peso máximo del usuario
es de 22 kg (48.4 lbs). Puede usarse en
casa o en la escuela.
2. Declaración de conformidad
James Leckey Design Ltd. como
fabricante y bajo su responsabilidad
declara que el Asiento Activo Squiggles
cumple con los requisitos de la
normativa 93/42/CE y con los requisitos
generales y métodos de prueba para
personas con minusvalías de la
EN12182 de Ayudas Técnicas.
3. Garantía
La garantía tiene validez únicamente
cuando el producto se usa de acuerdo
a las condiciones especificadas y para
las finalidades estipuladas siguiendo
todas las recomendaciones del
fabricante (vea también los términos
generales para la venta, entrega y pago).
Se otorga una garantía de dos años en
todos los productos y componentes
fabricados por Leckey.
4. Informe histórico del producto
Su producto Leckey está clasificado como
un aparato médico de Clase 1 y cómo tal
solo un técnico especializado que haya
sido entrenado en el uso de este producto
puede prescribir, instalar o redistribuirlo.
Leckey recomienda que se lleve un
informe por escrito para proporcionar
detalles de todos los ajustes,
inspecciones de redistribución e
inspecciones anuales.
5. Informe de Instrucción del
Producto (Padres, Maestros &
Cuidadores)
Su producto Leckey está clasificado como
un Aparato de Clase 1 y como tal Leckey
recomienda que los padres, maestros y
cuidadores que usen el equipo sigan las
indicaciones de este manual:
Sección 6
Seguridad
Sección 10
Ajustes Frecuentes para un uso diario
Sección 11
Limpieza y cuidado
Sección 12
Revisión diária
Leckey recomienda que se lleve un
informe por escrito de todos aquellos
que se han entrenado en el uso correcto
de este producto. .
6 Seguridad
1. Antes de usar el producto, lea siempre
las instrucciones de uso.
2 No deje nunca al usuario desatendido
mientras use el equipo de Leckey.
3. Use con su producto únicamente
componentes aprobados por Leckey.
Nunca modifique el producto. Si no sigue
las instrucciones de uso podría poner en
peligro al usuario o al cuidador y se
anularía la garantía de este producto.
4. SI tiene alguna duda sobre el uso de su
producto Leckey o si falla alguna pieza,
deje de usar el producto y contacte con
nuestro departamento técnico o con su
establecimiento especializado tan pronto
como sea posible.
5. Lleve a cabo todos los ajustes de
posicionamiento necesarios y asegurese
de que están fijos antes de colocar al
niño. Algunos de estos ajustes puede
requerir el uso de herramienta que se
adjunta a cada suministro. Mantenga
todo tipo de herramienta fuera del
alcance de los niños.
6. Cuando siente al niño asegure en
primer lugar el arnés pélvico, tanto por
razones de posicionamiento como
también de seguridad.
7. Cuando no valla a utilizar el pr oducto,
asegurese de que las ruedecillas
giratorias estén bloqueadas y
posicionadas en la misma dirección
para mejorar la estabilidad del producto.
Esto es de especial importancia si el
asiento está inclinado.
8. Cuando se está utilizando el chasis con
regulación de altura, asegurese de que el
pedal de ajuste y la palanca de inclinación
estén bloqueadas para que otros niños no
puedan manipularlas accidentalmente.
Cuando utilice el chasis básico (Easy)
asegúrese de que la palanca de ajuste de
altura y la de inclinación estén bloqueadas
de forma que no puedan ser manipuladas
accidentalmente por otros niños.
9.
9. Cuando el usuario se encuentre en el
sistema de asiento no deberá moverlo
sobre superficies desniveladas. Preste
mucha atención al realizar la transferencia
del niño al sistema de asiento.
10. Nunca deje el producto sobre
una superficie con una inclinación
mayor a 5 grados. Bloquee siempre
as ruedas giratorias.
11. Use el manillar de empuje sólo para
guiar y mover el asiento de un sitio a otr o.
12.El producto contiene componentes
que podrían producir asfixia en niños
pequeños. Compruebe que los botones/
pomos y los tornillos de cierre estén
siempre fuera del alcance de los niños.
13. Los productos Leckey cumplen con la
normativa de seguridad de incendios
EN12182. Sin embargo, el producto
contiene componentes de plástico y, por
tanto, debería mantenerse alejado de
todas las fuentes de calor directas
incluyendo llamas al descubierto,
cigarrillos y calentadores.
14. No poner objetos calientes a más de
40ºC en la bandeja.
15. Limpie el producto con regularidad.
No use productos de limpieza abrasivos.
Lleve a cabo pruebas de mantenimiento
con regularidad para asegurarse de que
su producto está en buenas condiciones
de funcionamiento.
16 El producto está diseñado para
su uso en el interior y cuando no se
use debería guardarse en un lugar seco
que no esté sujeto a temperaturas
extremas. El rango de temperatura
de funcionamiento seguro del producto
es de +5 a +40 grados Centígrados.
17 Compruebe que los manillares de
plástico estén fijos antes de mover el
sistema de asiento de lugar.
18 Antes de usar el sistema para
sentarse, compruebe siempre que el
manillar de interacción de la unidad de
asiento está totalmente enganchado al
chasis. Si el manillar no está enganchado
correctamente, el asiento podría soltarse
y provocar una lesión grave al niño
o al cuidador.
Cómo
desempaquetar
y montar
el sistema
de asiento
7
Revisión de componentes
Para abrir las cajas, corte las tiras teniendo
cuidado de no cortar a través de la cinta
adhesiva ya que podría dañar algunas de las
piezas que vienen dentro. Todas las piezas
estarán en bolsas de plástico claramente
etiquetadas. Sáquelas con cuidado de las
cajas y compruebe que tiene todas las
piezas que ha pedido.
La Seguridad lo primero
Mantenga las bolsas de plástico
fuera del alcance de los niños.
La multi-herramienta
Algunos ajustes requeriran el uso de una llave
Allen, que se adjunta a cada asiento.
Sujetar el reposapiés
Si ha pedido un reposapiés, le recomendamos
que lo fije en primer lugar. Necesitará la
multi-herramienta y la llave inglesa.
Para fijar el reposapiés, primero ponga el
asiento boca abajo en una superficie segura
a una altura de trabajo. Sujete la barra del
soporte del reposapiés en su sitio y empuje
el perno del casquillo a través del agujero del
lateral. Introdúzcalo a través de los agujeros
y ponga la tuerca de seguridad, apretando el
perno de la tapa del casquillo con un par de
vueltas para sujetarlo en su sitio.
Luego use la llave inglesa para sujetar la
tuerca y apriete el perno de la tapa del
casquillo usando la multi-herramienta.
No los apriete demasiado ya que necesitan
cierta libertad para poner en ángulo el
reposapiés y la barra.
Por último, coloque la palanca de ajuste.
Para ello, introduzca el perno cuadrado de la
copa a través de la ranura y del agujero.
Ponga la arandela y la palanca manual.
Apriete el perno en sentido de las agujas del
reloj con un par de vueltas para iniciarlo en la
rosca. Después empuje el perno en la ranura
y apriete la palanca manual. Tendrá que
apretarlo de media vuelta en media vuelta.
Para ello, gire la palanca manual media
vuelta en sentido de las agujas del reloj,
luego levante la palanca y gírela hacia atrás
otra media vuelta. Siga girándola hacia atrás
y hacia delante hasta que esté asegurada.
Asegúrese de que el reposapiés
esté bien fijado.
Sujetar el sistema de asiento
a ambos chasis
Ajuste la altura del chasis al máximo para
reducir el riesgo de lesiones en la espalda
mientras se fija la unidad del asiento. Vea la
sección 10 para saber cómo ajustar la altura
del chasis que ha comprado.
Primero libere la clavija de cierre de
seguridad en la parte delantera del asiento.
Para ello, saque la clavija y gire 90 grados.
Levante con cuidado el asiento y colóquelo
en el chasis. En la parte de atrás de la parte
inferior del asiento verá un canal de
recepción. Asegúrelo sobre el tubo en la
parte de atrás del chasis. Tire hacia arriba de
la manilla de la parte delantera de la unidad
del asiento y luego gire el asiento hacia
delante y hacia abajo. Una vez que la parte
delantera del asiento ha bajado por
completo, libere la manilla y empújela hacia
delante para asegurarse de que se ha
enganchado totalmente al tubo frontal. Gire
la clavija de cierre de seguridad para que se
enganche delante de la manilla. Si golpea la
manilla, entonces es que el asiento no está
insertado correctamente, quítelo y repita el
proceso descrito arriba.
Compruebe siempre que la manilla
y la clavija de cierre de seguridad
están totalmente enganchadas antes
de poner al niño en el sistema de asiento.
Si la manilla no está correctamente
enganchada, la unidad del asiento
puede soltarse y podría causar serias
lesiones al niño o al cuidador.
A
Sujetar el respaldo
Fijar el manillar
Para sujetar el respaldo, deslice el tubo del
respaldo dentro del tubo receptor vertical en
la parte de atrás del producto, luego apriete
el pomo (A) con seguridad.
El manillar se sujeta tanto al chasis con
regulación de altura como al básico (Easy)
insertando las dos barras inferiores en los
tubos receptores como se muestra. El
manillar tiene unos cierres de seguridad que
hay que presionar al insertar las barras
inferiores. En el caso del chasis con
regulación de altura empuje las barras hacia
dentro hasta que los cierres sobresalgan por
el otro extremo de los tubos de recepción.
En el chasis básico Easy el cierre se
enganchará en los agujeros de los tubos de
recepción. Una vez introducido, asegure el
manillar apretando las dos manijas de
plástico (A) por debajo.
Revíselas regularmente para asegurarse
de que están apretadas, sobre todo si está
moviendo la unidad del asiento por
pasillos que podrían tener un suelo
desigual o en desnivel.
B
A
B
Fijar las sandalias
Fijar los soportes
laterales
Si las sandalias son necesarias, pueden
sujetarse al reposapiés con un único perno de
fijación. Para colocar las sandalias, simplemente
afloje la manivela (B) bajo el reposapiés,
seleccione la posición que necesite y vuelva a
apretar la manija. Para posicionar los pies del
niño, asegure los pies con las cinchas de velcro.
Quite la perilla de plástico de la tuerca
de bloqueo, deslice la abrazadera por
la ranura, ponga la tuerca por dentro,
introduzca la perilla a través del agujero
y apriete con firmeza.
Si no se necesitan las sandalias, se
proporcionan unas tiras de velcro para
colocar los pies.
Ajuste de
los cojines
8
Cojín del asiento
Para comenzar, deslice el cojín por encima del
pomo del asiento, presione hacia abajo en la
base central del asiento para localizar los
paneles de velcro. Luego enrolle los paneles
laterales alrededor de los laterales de la base
del asiento y sujete los paneles de velcro por
la parte inferior del cojín del asiento. Meta el
arnés pélvico a través de las aberturas del
tejido. Ponga los paneles laterales alrededor
del asiento y abroche los broches por dentro
de la base del asiento. Por último, asegure las
lengüetas frontales por debajo del pomo con
los broches. Afloje todas las correas al
máximo para asegurar el arnés alrededor de
la cadera del niño, primero abroche la hebilla
de plástico (c) en el medio..
Cojines acolchados
del soporte lateral
Cojín del respaldo
Para fijar los cojines acolchados de
soporte lateral, simplemente deslice los
cojines con la parte acolchada hacia el interior
del asiento. Acople la hebilla de plástico (A) a
través de la ranura del cojín. Después lleve las
dos correas de sujeción de velcro alrededor
de la parte inferior de la modulra y fíjelas al
penel de velcro como muestra la imagen.
Cierre la solapa.
Coloque el cojín en la parte central del
respaldo, enrolle la lengüeta superior por
encima de la parte superior del respaldo y
abroche el corchete en su sitio. Lleve la
lengüeta inferior por debajo del respaldo y
sujétela a la lengüeta superior usando los
paneles de velcro.
A
Arnes para el pecho
El arnés para el pecho puede fijarse
abrochando la hebilla macho en la hebilla
hembra a cada lado de los soportes laterales.
Configuración
clínica para el
posicionamiento
La configuración clínica del
producto debe ser realizado
por un técnico especializado
que previamente se halla entrenado
en el uso del producto. Leckey
recomienda un informe escrito de
todas las configuraciones clínicas
que se realicen en este producto.
9
Profundidad del respaldo
Altura del respaldo
La profundidad del respaldo puede ajustarse
aflojando el pomo (B), ajustando el respaldo a
la posición correcta para el niño y volviendolo
a apretar firmemente.
La altura general del respaldo puede ajustarse
aflojando el pomo manual (A) y luego
colocándolo en la altura requerida para el
niño. Una vez que esté en posición, se debe
volver a apretar firmemente.
B
A
Angulo del respaldo
Altura de la plataforma
para los pies
El respaldo puede inclinarse aflojando la
manivela (B) situada en el cierre del pivote del
respaldo, ajustándolo al ángulo requerido y
volviendo a apretar la manivela.
Para fijar la altura del reposapiés, afloje la
manivela (B) situada en la parte posterior del
tubo de apoyo de la pantorrilla, deslice el
reposapiés a la altura deseada y vuelva a
apretar la palanca.
B
A
Ángulo del reposapiés
Para establecer el ángulo del reposapiés,
afloje la manivela (B), póngala en la posición
requerida y vuelva a apretarla.
Para establecer el ángulo y acomodar la
flexión plantar y la dorsal, simplemente afloje
o apriete el perno allen para seleccionar el
ángulo que necesite.
B
Las Sandalias
Arnés pélvico
Para colocar las sandalias, simplemente
afloje la manivela bajo el reposapiés,
seleccione la posición que necesite y vuelva
a apretarla. Para posicionar los pies del niño,
asegure los pies con las cinchas de velcro.
Coloque siempre primero el arnés pélvico
cuando vaya a poner al niño en el asiento.En
primer lugar y antes de colocar al niño en el
asiento asegure siempre el arnés pélvico.
Para asegurar el arnés alrededor de la
cadera del niño, ajuste las correas del
soporte (A) a la profundidad adecuada y (B) a
la altura adecuada. Por último, asegure la
hebilla de plástico (C) situada en el centro y
tense la correa (D).
Si no necesita sandalias, las Cintas de
Velcro sirven igualmente..
A
D
B
C
Soportes laterales
Arnés para el pecho
Afloje el pomo (A) para ajustar la anchura,
altura y ángulo de los soportes laterales
y vuelva a apretarla cuando haya
seleccionado la posición deseada.
Si los soportes laterales están fijados con
pernos en vez de con manijas, pueden
ajustarse con la multi-herramienta.
Para cambiar el ancho del arnes, levante
la funda delantera, ajuste las cinchas de
Velcro a la anchura deseada y vuelva a
colacar la funda.
A
Ajustes
frecuentes
para uso diario
(terapeutas/
cuidadores/
padres)
10
Una persona con experiencia técnica y
clínica que haya sido entrenada en el
uso del producto debería mostrar los
padres y cuidadores cómo hacer
ajustes frecuentes y explicar las
comprobaciones de seguridad en la
Sección 6. Leckey recomienda que se
mantenga un registro de todos los
padres y cuidadores que hayan sido
entrenados en el uso de este producto.
Transferir al niño al
asiento y fuera de él
Ajustar el arnés
pélvico
Antes de transferir al niño en el asiento
lleve a cabo la inspección diaria del producto
como se describe en la sección 13 de este
manual del usuario.
El correcto posicionamiento y tensado del
arnés pélvico es clave para la gestión
postural del niño dando como resultado
mayor comodidad y capacidad para alcanzar
sus objetivos funcionales. Por favor, pregunte
a su terapeuta sobre el tensado correcto de
las correas para su niño ya que esto es muy
importante para una buena gestión postural.
Ajuste el asiento a una altura cómoda
para facilitar la transferencia. Bloquee
todas las ruedecillas, asegurándose de
que miran hacia fuera para maximizar la
estabilidad del producto. Asegúrese de
que la hebilla de seguridad del arnés para
el pecho está suelta y que no estorbe
para facilitar la transferencia.
Quite el clip situado en el centro del arnés
pélvico y abra el arnés para facilitar la
transferencia. Por último, si las sandalias
están puestas, abra las correas. Ahora ya
está listo para transferir manualmente o
con grúa al niño al asiento.
Asegure siempre el arnés pélvico
primero antes de cerrar otras hebillas
o arneses. Ajuste el arnés para que
el niño no pueda deslizarse o moverse
hacia delante en el asiento.
En primer lugar y antes de colocar al niño en
el asiento asegure siempre el arnés pélvico.
Para asegurar el arnés alrededor de la
cadera del niño, ajuste las correas del
soporte (A) a la profundidad adecuada y (B)
a la altura adecuada. Por último, asegure
la hebilla de plástico (C) situada en el centro
y tense la correa (D).
Revise que el arnes esté bien colocado
para verificar que el niño esté segur o
y no pueda deslizarse hacia delante
en el asiento.
A
D
B
C
El Chasis
Ajuste de altura – chasis
con regulación de altura
Para preparer el chasis para el sistema de
asiento, recomendamos que eleve el chasis
hasta una altura de trabajo cómoda,
presionando el pedal como aparece en imagen.
Puede llevar a cabo este ajuste con el niño en
la silla. Para ajustar la altura del chasis con
regulación de altura, presione el pedal (A)
situado en la parte de atrás del chasis
mientras sujeta el manillar (B). Una vez que
retire el pie del pedal, el asiento quedará
fijado a la altura elegida.
Por seguridad, el pedal de ajuste de la altura
del chasis puede bloquearse enganchando la
clavija (C) del lado derecho del pedal. Para
desbloquearlo, tire de la clavija hacia fuera y
gire 90 grados, entonces el pedal vuelve a
funcionar. La clavija de bloqueo (C) debería
mantenerse en la posición de bloqueo cuando
no esté ajustando el chasis.
Mantenga siempre la clavija de bloqueo
enganchada cuando no esté ajustando el
chasis. Esto evitará que se haga funcionar
al pedal accidentalmente.
B
C
A
Ajuste de altura –
chasis básico Easy
Basculación
La altura del chasis básico debería
fijarse antes de poner al niño en el asiento.
Para ajustar la altura, afloje la manivela (A)
situada en la parte de atrás del chasis y
ajuste el asiento a la altura requerida.
Para bajar la altura del asiento, aplique
peso en el centro de la base del asiento.
Vuelva a apretar la manivela.
La basculación se puede realizar, mientras el
usuario esté sentado. Antes de ajustar el
ángulo de la basculación del asiento,
asegúrese de que el arnés pélvico está fijo,
evitando así que el usuario se deslice hacia
delante en el asiento.
Compruebe la manivela con regularidad
para asegurarse de que el ajuste de la
altura del asiento es segura.
El anillo (B) debería estar siempre en
posición de bloqueo cuando el asiento está
en uso. Para hacer funcionar la palanca (C),
primero desbloquee el anillo (B) girándolo
hasta que chasquea en la posición de
apertura. Presione hacia abajo la palanca
y fije el ángulo deseado sujetando la barra
del manillar todo el tiempo. Vuelva a bloquear
el anillo de bloqueo después de haber
establecido la basculación.
Mantenga siempre el anillo (B) en
la posición de bloqueo para evitar la
activación accidental de la palanca
que podría provocar una sacudida
de la unidad del asiento y posiblemente
causar una lesión al niño.
Por favor, use el manillar cuando
realice la basculación.
Compruebe siempre con su terapeuta que
el uso de la basculación no pr ovocará
ninguna obstrucción en las vías
respiratorias del niño.
B
C
A
Ajuste del arnes del pecho
Las sandalias
Si el niño necesita soporte para el pecho
como parte de su programa de soporte
postural, el asiento llevará una combinación
de soportes laterales y arneses para el
pecho. Puede que éstos necesiten ajustarse
a diario para acomodar las diferencias en la
ropa que lleve el niño.
Para colocar los pies del usuario en las
sandalias, asegure las correas de velcro que
se proporcionan de manera que el pie se
mantenga en su lugar. Las correas deberían
colocarse por encima del puente del pie
y por encima de los dedos.
Compruebe siempre con su terapeuta
el posicionamiento y tensado óptimo
de las correas y de los elementos de
soporte para el niño.
Para cambiar la anchura del arnés
del pecho, levante la cubierta delantera,
ajuste las correas de velcro y establezca
la anchura deseada. Cuando se ha
conseguido la anchura deseada,
vuelva a colocar la cubierta.
Si el niño lleva sandalias o calzado liger o,
compruebe las correas para asegurarse de
que las cinchas no le irritan la piel.
11 sobre Limpieza y
Cuidado
12 Revisión Diaria
Mantenimiento
Cuando realice la limpieza, le recomendamos
que use solo agua templada y un detergente
suave. No use nunca disolventes orgánicos o
líquidos de limpieza en seco.
(Terapeutas, padres y cuidadores)
Le recomendamos que los terapeutas,
cuidadores o padres lleven a cabo
comprobaciones visuales diarias del equipo
para asegurarse de que el producto es
seguro para su uso. Las comprobaciones
diarias recomendadas se detallan abajo.
Tapizados y tela
1. El tapizado y las telas pueden limpiarse a
mano mientras están colocadas en su sitio.
Cuando las limpie, le recomendamos que use
solo agua templada y un detergente no suave.
2. El mejor método de limpieza es una
técnica de ‘enjuagado y secado’
3. Las manchas deberían eliminarse tan pronto
como sea posible con un paño absorbente,
toallas o una esponja. Pasarle una esponja con
jabón normal y agua templada es eficaz para
las manchas normales. Tenga cuidado de no
mojar demasiado la tela ya que esto podría
provocar que la mancha se extienda.
4 En manchas más difíciles se pueden usar
agentes de limpieza antisépticos. Éstos puede
que necesiten un disolvente seguro como
Alcohol Isopropílico o Alcohol Mineral. También
se puede usar como desinfectante útil media
taza de lejía casera por cada 5 litros de agua.
5. Los arneses pélvico y del tronco pueden
lavarse a máquina a 40 grados Centígrados.
Asegúrese de quitar primero todos los
pernos y broches ya que podrían dañar su
lavadora. Póngalos en un lugar seguro y
fuera del alcance de los niños.
6 Asegúrese siempre de que el producto
está seco antes de usarlo.
Componentes de metal y de plástico
1. Para una limpieza diaria se pueden usar
jabón y agua o un aerosol antibacterias.
2. Para una limpieza más profunda se puede
usar un limpiador a vapor de baja presión.
3. No use disolventes para limpiar los
componentes de plástico o metal.
4. Asegúrese de que el producto está seco
antes de usarlo.
1. Asegúrese de que todas los pomos y
pernos de ajuste estén en su sitio y fijos.
2. Compruebe todo el tapizado y el velcro
en busca de señales de desgaste.
3. Compruebe que todas las ruedas
se muevan libremente y que se bloqueen
con seguridad.
4. Asegúrese de que el manillar en la placa y
la clavija de loqueo de interacción del asiento
esté totalmente enganchado y de que la
unidad del asiento esté sujeta al chasis.
5. Asegúrese de que el arnés pélvico esté
completamente asegurado alrededor del
usuario y que no puede deslizarse
hacia delante en el asiento.
6. Asegúrese de que la plataforma para los
pies está fijada con seguridad.
Si tiene alguna duda sobre el uso
seguro de su producto Leckey o si alguna
pieza falla, por favor deje de usar el
producto y póngase en contacto con
nuestro departamento de servicio al
consumidor o con su distribuidor local
tan pronto como sea posible.
13 Anual del Producto
(Terapeuta, Técnico, Asesor de
Productos Leckey, Distribuidor)
Leckey recomienda que cada producto
pase unainspección detallada al menos una
vez al año y cada vez que estel producto sea
redistribuido para su uso. Esta inspección
debería llevarse a cabo por una persona
con experiencia técnica que haya sido
entrenada en el uso del producto y debería
incluir las siguientes comprobaciones
como requisito mínimo:
5. Levante la base para comprobar cada
ruedecilla individualmente. Asegúrese de que
se mueven con libertad y elimine cualquier
suciedad de las llantas. Compruebe que los
frenos bloquean las ruedas con seguridad.
1. Compruebe que todos los pomos,
tuercas, pernos y hebillas de plástico están
en su sitio, sustituyendo las que se hayan
perdido. Preste particular atención a los
siguientes elementos;
> Pernos de ajuste de la altura y
el ángulo del respaldo
> Pernos de sujeción del arnés pélvico /
guía de la cadera
> Pernos de ajuste de la altura y
el ángulo del reposapiés
7. Leckey recomienda que se mantenga
un registro por escrito de todas las
inspecciones anuales del producto.
2. Compruebe que el mecanismo de ajuste de
la altura del chasis funciona correctamente.
Si el chasis funciona mediante un pedal ,
asegúrese de que la altura del asiento no
cambia cuando se libera el pedal. Compruebe
también que la clavija de bloqueo engancha
con seguridad para evitar un ajuste de la
altura del chasis accidental.
3. Ajuste el asiento a su rango máximo de
basculación y asegúrese de que la palanca
de bloqueo bloquea el asiento con seguridad
en un punto variante en este rango.
4. Compruebe que donde se unen el asiento
y el chasis no hay desgaste visible de los
componentes metálicos.
6. Compruebe visualmente la estructura del
producto prestando atención a los puntos de
soldadura en el chasis y asegurándose de
que no hay señales de desgaste o de grietas
alrededor de las soldaduras.
Si tiene alguna duda sobre el uso seguro
continuado de su producto Leckey o si
alguna pieza falla, por favor deje de usar
el producto y póngase en contacto con
nuestro departamento de servicio al
consumidor o con su distribuidor local tan
pronto como sea posible.
14 Redistribución de
Productos Leckey
15 Reparación
del Producto
La mayoría de los productos Leckey son
evaluados y pedidos para que atiendan
las necesidades de un usuario individual.
Antes de redistribuir un producto, le
recomendamos que el terapeuta que
prescribe el producto lleve a cabo una
comprobación de compatibilidad del
equipo para el nuevo usuario y que se
asegure de que el producto que se va a
redistribuir no contiene modificaciones
o accesorios especiales.
La reparación de todos los productos Leckey
solo debería llevarse a cabo por personas
con experiencia técnica que hayan sido
entrenados en el uso del producto.
Se debería llevar a cabo una inspección
técnica detallada del producto antes de su
redistribución. Ésta debería ser llevada a
cabo por una persona con experiencia
técnica que haya sido entrenada en el
uso e inspección del producto. Por favor,
refiérase a la sección 13 para conocer las
comprobaciones requeridas a llevar a cabo.
Asegúrese de que el producto se ha
limpiado a fondo de acuerdo con la
sección 11 de este manual.
Asegúrese de que se proporciona una copia
de este manual de usuario con el producto.
Se puede descargar una copia del mismo
desde nuestra página web www.leckey.com
Leckey recomienda que se lleve un informe
escrito de todas las inspecciones que
se han llevado a cavo del producto
durante su redistribución.
Si tiene alguna duda sobre el uso seguro
continuado de su producto Leckey o si
alguna pieza falla, por favor deje de usar
el producto y póngase en contacto con
nuestro departamento de servicio al
consumidor o con su distribuidor local
tan pronto como sea posible.
En el Reino Unido e Irlanda, por favor
póngase en contacto con el Centro de
Servicio de Leckey, en el Reino Unido 0800
318265 o en Irlanda 1800 626020, y nuestro
departamento de servicio al consumidor
estará encantado de ayudarle con sus
requisitos de reparación.
Todas las consultas sobre reparación
internacionales deberían dirigirse al
distribuidor Leckey apropiado, quien estará
encantado de ayudarle. Para más
información sobre los distribuidores de
Leckey, por favor visite nuestra página web
www.leckey.com
16 Información técnica
Códigos de los productos y accesorios
122-600 Armazón del asiento
122-751 Cubiertas del asiento - verde
122-752 Cubiertas del asiento - anaranjado
122-753 Cubiertas del asiento - azul
122-754 Cubiertas del asiento - rosa
Chassis
120-800 Chasis Hi low – pedal de pie
122-717 Chasis Easy – ajuste manual
122-710 Manillar de barra para empujar
Accesorios
Los códigos que llevan un asterisco
delante están disponibles en las cuatro
opciones de color.
01
02
03
04
-
verde
anaranjado
azul
rosa
117-781 Sandalias - pequeñas
117-782 Sandalias - medianas
122-664 Ensamblaje del reposapiés
122-719 Arnés pélvico de cuatro puntos - mediano
Squiggles seat dimensions
Edad
(aprox)
Peso Máximo del Usuario
2-5
22kg / 48.8lbs
Anchura del pecho
(Distancia entre los laterales)
Min 160mm / 6.25 pulgadas
Max 255mm / 10 pulgadas
Profundidad del Asiento
(Del soporte de la espalda a la parte de atrás de la rodilla)
Min 215mm / 8 pulgadas
Max 290mm / 11 pulgadas
Altura Soporte/Lateral de la Espalda
(De la base del asiento a la parte superior del soporte)
Min 190mm / 7.5 pulgadas
Max 265mm / 10.5 pulgadas
Espacio de Inclinación
(Chasis Easy)
Boca abajo 20º
Reclinado 20º
Espacio de Inclinación
(Chasis Hi Low)
Boca abajo 20º
Reclinado 20º
Asiento a Plataforma Pies
(De planta del pie a parte de atrás de la rodilla)
Min 190mm / 7 pulgadas
Max 300mm / 12 pulgadas
Ángulo de la Placa para los pies
Flexión plantar 10º
Dorsiflexion 10º
Altura del apoyabrazos
(De base del asiento al codo)
Min 160mm / 6.3 pulgadas
Max
De la parte superior del asiento al suelo
(Chasis Easy)
Min 280mm / 11 pulgadas
Max 380mm / 15 pulgadas
De la parte superior del asiento al suelo
Top of Seat to Floor
(Chasis Hi-Low)
(Hi low chassis)
Min 270mm / 10 pulgadas
Min 270mm / 10 pulgadas
Unidad del Asiento de Terapia
Min 270mm / 10.5 pulgadas
Saddle Seat Unit
Min 270mm / 10.5 pulgadas
Dimensiones mínimas para almacenaje
Peso 28kg / 17.6lbs
Anchura 390mm / 15.4 pulgadas
Min Dimensions for Storage
Peso 28kg / 17.6lbs
Anchura 390mm / 15.4 pulgadas
Cover with 6mm spine NEW BACK PG_Layout 1 15/06/2011 12:04 Page 1
Kilwee Business Park
Dunmurry
BT17 OHD
Northern Ireland
United Kingdom
T:
F:
E:
W:
028 9060 2277
028 9060 0795
[email protected]
www.leckey.com
LS258-02
Squiggles Saddle Seat
User Instructions
Der Squiggles Aktivsitz,
Benutzerhandbuch
Manuale d'uso del Seggiolone polifunzionale
“a sella” Squiggles Saddle
Manual de Uuario
del Asiento Activo Squiggles