1
Cover-55-canada
5/29/03
2:15 PM
Page 2
SAMSUNG ELECTRONICS CANADA, INC.
HEADQUARTERS
7037 Financial Drive, Mississauga, Ontario, Canada L5N 6R3
TEL: 1-905-542-3535
www.samsung.ca
SERVICE DIVISION
7037 Financial Drive, Mississauga, Ontario, Canada L5N 6R3
1-800-SAMSUNG (1-800-726-7864)
AH68-01292E (Rev 0.0)
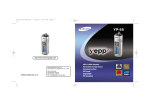
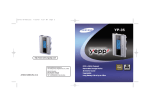
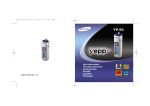
MP3 & WMA Playback
Removable Storage Device
Encoding Function
3D Sound
Upgradable
FM Reception
55-eng-can
5/29/03
2:18 PM
Page 2
Contents
Preparations
Safety Instructions ................................................................................................................4
Features ................................................................................................................................6
Components ..........................................................................................................................9
Location of Controls (yepp) ..................................................................................................10
Connection to Computer
Connecting yepp to PC ........................................................................................................12
Manual Installation of USB Driver ........................................................................................16
Using the removable storage................................................................................................20
● Downloading/Uploading files ......................................................................................20
● Disconnecting the USB cable ....................................................................................21
● Formatting ..................................................................................................................22
Installing CD Ripper ............................................................................................................23
Basic Usage
Listening to Music with yepp ................................................................................................24
Setting up Volume/Hold Functions ......................................................................................25
Changing Modes ..................................................................................................................26
Recording Voice....................................................................................................................27
MP3 Encoding ....................................................................................................................28
Searching for Music/Voice Files ..........................................................................................30
Listening to FM Radio ..........................................................................................................32
FM Encoding ........................................................................................................................34
2
Additional Usage
Loop Repeating ....................................................................................................................35
Setting up SRS ....................................................................................................................36
Setting up MENU ..................................................................................................................37
Repeating Tracks ................................................................................................................38
Setting up EQ ......................................................................................................................39
Managing Files ....................................................................................................................40
● Deleting ......................................................................................................................40
● Formatting ..................................................................................................................41
Setting up DIRECT PLAY ....................................................................................................42
Customizing Options (Display) ............................................................................................43
● DISPLAY ....................................................................................................................44
● BACKLIGHT ................................................................................................................44
● BEEP ..........................................................................................................................45
● CONTRAST ................................................................................................................45
● SCROLL SPEED ........................................................................................................46
● POWER OFF TIME ....................................................................................................46
● DEFAULT VOLUME ....................................................................................................47
● WOW LEVEL ..............................................................................................................47
● ENCODE ....................................................................................................................48
Firmware Upgrade ................................................................................................................50
Appendix
Description of Buttons (yepp player) ....................................................................................52
MENU Table ........................................................................................................................54
Customer Support
Troubleshooting ....................................................................................................................56
Specifications........................................................................................................................58
Safety Information ................................................................................................................60
Warranty ..............................................................................................................................62
3
55-eng-can
5/29/03
2:18 PM
Page 4
Safety Instructions
Read and understand all the instructions to avoid injury to yourself and damage to the equipment.
Do not expose to extreme
temperatures (above 95°F or
below 23°F). Do not expose to
moisture.
Do not apply excessive pressure
to the device.
Do not let any foreign matter spill
into the device.
Earphones
Follow Traffic Safety Instructions
● Do not use the earphones while driving an automobile or riding a bicycle.
It’s not only dangerous, but also against the law.
● It may cause an accident if you turn up the volume of the earphones while walking down the street,
especially crossing at intersections.
Protect your ears
Do not place heavy objects on top
of the device.
Do not expose to chemicals such
as benzene and thinners.
Remove batteries when the
device is left unused for a long
period of time.
● Do not turn up the volume too high.
Doctors warn against prolonged exposure to high volume.
● Stop using the device or turn the volume down if you have ringing in your ears.
Ambient operating conditions
Do not expose to direct sunlight
or heat sources.
Do not store in dusty areas.
Do not try to disassemble and
repair the device yourself.
● Ambient temperature: 5°C ~ 35°C (41°F ~ 95°F)
Humidity
: 10 ~ 75%
Environmental Information
● Follow local guidelines for waste disposal when discarding packages, batteries, and old
electronic appliances.
● Yepp packages use cardboard, polyethylene etc., and do not use any unnecessary materials.
4
5
55-eng-can
5/29/03
2:18 PM
Page 6
Removable Storage Device
You can easily copy and paste files to the yepp player using
Windows Explorer.
Featuring an Encoding Function
You can make a MP3 file out of an source using the ENC jack
on the main unit.
You can also convert an FM radio program into an MP3 file in real time.
Upgradable
You can upgrade the built-in programs when available.
Add functions, CODEC, etc.
Please check the yepp home page (http://www.samsungyepp.com)
for upgrades.
MP3 & WMA Playback
MP3 is an MPEG1 Layer3 audio format.
WMA is a Microsoft Windows Media audio format.
FM Reception
Listening to an FM program is made easy with Auto Search and
Frequency Memory functions.
Featuring 3D Sound
The 3D feature adds spaciousness to the sound.
55-eng-can
5/29/03
2:18 PM
Page 8
Components
MODE
You can do a Voice Recording with high quality and use it for a conference.
VOL
REC / ENC
Voice Recording Function
Earphones
USB Cable
User manual
Installation CD
AH30-00056B
AH39-00498A
AH68-01292E
AH80-00049B
Sound
You can adjust equalizer manually.
Player
4301-000115
Playing Time
This unit uses one AAA/LR03 alkaline battery. Operation can last up to 15 hours.
Actual playing time may vary according to the type and capacity of the battery.
One Battery
Neck Strap
(1.5V AAA/LR03 type) AH61-01370A
Carrying case Direct Connect Line Cable
AH39-00488A
AH61-01369A USB Adaptor
AH39-00489A
Model
YP-55 H
YP-55 i
YP-55 V
Built-in memory
128MB
192MB
256MB
● The capacity of the useable built-in memory is less than indicated as the internal
firmware uses a part of the memory as well.
● Design of accessories is subject to change for improvement without notice.
9
55-eng-can
5/29/03
2:18 PM
Page 10
Location of Controls (yepp)
MENU/Loop Repeating Button
Display
Voice Recording Button
Neck strap Hook
MODE
Volume Button
VOL
Playtime indicator
Microphone
Display
Repeat A-B indicator
Remaining Battery
Power indicator
NOR 0 0 : 0 1 : 3 0
001
Track Number indicator
NOR
Get Original, Black Eyed
Title (track & artist) indicator
REC / ENC
Play/Stop/Pause Button
Equalizer, SRS indicator
Music/Voice/FM indicator
Play mode indicator
Move to Track/
Speed Search Lever
Inserting a Battery
WOW Button
How to Use the Carrying Case
Use as follows.
➡
HOLD
USB Cable
Connection Port
1
Hold Switch
Battery Cover
ENC Jack
10
Earphone Jack
➪
Slide the cover in
the direction of the
arrow to open.
Œ
´
a battery to the right
2 Insert
poles + , – and push-close
the cover in the direction
the arrow as indicated.
Note :
● Do not place heavy objects on the cover.
11
55-eng-can
5/29/03
2:19 PM
Page 12
Connecting yepp to PC
System Requirements.
● Pentium 133MHz or greater
● Windows 98 SE/ME/2000/XP
● 20MB of available hard disk space
● CD-ROM drive
(double speed or greater)
● USB port (1.1) supported
● VGA graphic
Note :
Before connecting yepp to PC, make sure to install
USB driver. If “Add New Hardware Wizard” appears,
press the [Cancel] button and install USB driver.
Installing software
1
Insert the Installation CD into CD-ROM drive.
The picture shown below appears.
Select [USB Driver Install].
When installation is completed,
connect yepp to PC and use it
as shown on the next page.
2
Click [Next] in the series of windows that appear.
● Install the operating system in Administrator
Account mode for Windows 2000 or XP.
Otherwise, installation will not be completed.
● Windows ME, 2000 and XP can recognize
the driver without installing the provided
program. However, you must install the
program in order to format yepp and
upgrade firmware.
● If the YP-55 program has not been
installed in Windows 98, then it will not
communicate with your removable disk.
You must install the USB driver file first.
Continued...
12
13
55-eng-can
5/29/03
2:19 PM
Page 14
Note :
Connecting yepp to PC with USB cable
How to check USB driver
3
4
Windows 98:
Control Panel ➝ System ➝ Device Manager ➝
Universal Serial Bus controllers/Samsung YP-55 Class
Windows 2000:
Control Panel ➝ System ➝ Hardware ➝
Device Manager ➝ Universal Serial Bus controllers ➝
USB Mass Storage Device
Windows XP:
Control Panel ➝ System ➝ Hardware ➝
Device Manager ➝ Universal Serial Bus controllers ➝
Plug one end of the USB cable into the USB
port on the back of the PC.
Connect the opposite end of the USB cable to
the USB cable port on the bottom of the yepp.
● If you disconnect the USB cable from your PC while
implementing a command or initializing during USB driver
installation, your PC may not function correctly.
● The yepp will automatically turn on.
14
VOL
MODE
6
Upon installation of the USB driver
"SAMSUNG YP-55” will appear in the
[System Properties] ➝ [Device Manager].
USB connect cable
5
REC / ENC
USB Mass Storage Device
USB driver is installed with a message saying that it
is searching for a new device. You may not see the
display screen during installation.
Go to the device manager to check that installation
has been successfully completed.
7
When USB driver is not Installed automatically,
refer to next page.
Note :
For WinXP, the following window will appear whenever
you connect the USB cable to your yepp.
15
55-eng-can
5/29/03
2:19 PM
Page 16
Manual Installation of USB Driver
Go to “Downloading/Uploading files” on page 20 if the USB driver is in place.
Follow these steps if the USB driver is not in place :
1
Check the device manager.
2
Check if there is a device listed with
an exclamation point or a question
mark (displayed as unknown device
or USB device).
3
Double click on the device listed with an
exclamation point or a question mark.
Windows 98,ME:
Control Panel ➝ System ➝ Device Manager
Windows 2000:
Control Panel ➝ System ➝ Hardware ➝
Device Manager
Windows XP:
Control Panel ➝ System ➝ Hardware ➝
Device Manager
Note :
● If you are using Windows 2000 and your version of Windows does not recognize the USB driver
please download and install the latest service pack from windowsupdate.microsoft.com
● The installation method may vary depending on the type of PC or operating system.
Contact your PC dealer or service center for installation information.
● If errors occur continuously when you install the USB driver, reconnect the USB cable
after rebooting your system.
16
4
After selecting the driver, click on [Update Driver].
5
Select a compatible driver, click on [Next] to finish.
For Windows 98, refer to page 18.
Continued...
17
55-eng-can
5/29/03
2:19 PM
Page 18
In Windows 98
Click [Next] button in the series of windows that appear.
USB driver location
[CD ROM]\setup\Drivers
● You must reboot your computer
to complete the installation.
18
19
55-eng-can
5/29/03
2:19 PM
Page 20
Using the removable storage
Downloading/Uploading files
Disconnecting the USB cable
After completing the file transmission, you must disconnect the cable in the following way:
1
2
3
Turn on the yepp and connect yepp to PC.
Open Windows Explorer on PC.
1
Double-click on the green arrow
in the taskbar on the bottom
right of the window. Disconnect
the USB cable.
2
Select the USB device, and then
press the [Stop] button.
Select the file to save and drag-and-drop it into the removable disk icon.
Notice :
● The “WRITING/READING” message will appear during file
download or upload. Disconnecting the USB cable while
“WRITING/READING” is displayed may cause malfunction
of the unit.
● Files within a user created folder can only be played in
Music Mode.
● The order of music files is not relative to the replay order
when you select a Removable Disk in Windows Explorer.
20
Note :
The green arrow is not displayed on the Task Bar in
Windows 98 system. If “READY” message is shown in
Display window, please disconnect the USB cable.
Continued...
21
55-eng-can
5/29/03
2:19 PM
Page 22
Installing CD Ripper
Formatting
Insert the Installation CD in the CD-ROM drive.
1
Select the removable disk icon
and click the right mouse button
to select [Format].
2
Press the [Start] button.
Click [Next] button in the series
of windows that appear.
● All saved files will be formatted.
● You can change the name of
removable disk by selecting
[Volume label].
Refer to the Help file [?]
after executing CD Ripper.
Notice :
● If you format yepp in the PC without installing the provided program, it may not read the data.
● Care must be taken as formatted files can not be recovered.
● By formatting, all previously preset menus will be initialized.
Note :
When you install the CD-Ripper, Windows displays "for Windows 98", but you can use it with Windows
2000 and XP as well.
Note :
● You can format by executing "YP-55 Format" located under [Start] ➔ [All Programs]
22
23
55-eng-can
5/29/03
2:19 PM
Page 24
Listening to Music with yepp
Setting up Volume/Hold Functions
First, insert the battery and connect the earphones to the player.
Adjusting the Volume
Playing Music
Stopping Music
(Power On)
(Power Off)
When you press the
button, the
yepp logo appears and a music/voice
file is played.
When you press the
button while playing,
the music stops. If no buttons are pressed within
10 seconds (changes depending on settings), the
yepp automatically powers off.
Move the
button on the side of the yepp
player to adjust the volume while playing.
● You can also turn off the power by pressing and
holding the
button on the main body.
Note :
NOR
00:01:30
001
20
NOR
● Volume ranges from 00 to 30.
● Press to adjust the volume by one level.
Press and hold to increase or decrease the volume
in greater increments.
HOLD Function
FREE MEMORY
114.37 MB
NOR
NOR
Note :
24
00:01:30
NOR
NOR
001
Get Original, Black Eyed
00:01:30
Under Hold mode, buttons will not work.
001
Get Original, Black Eyed
GOOD BYE
Slide the
switch on the player in the
direction of the arrow.
HOLD
❈ When a button is pressed, “
will appear on the display.
NOR
NOR
00:01:30
001
20
HOLD!” message
● WMA files can only be played at bit rates between 48Kbps and 192Kbps.
[supplied by Windows Media Player (Ver 8.0)] WMA files less than 48Kbps may not be played.
● Power off time can be set in the MENU mode.
25
55-eng-can
5/29/03
2:19 PM
Page 26
Changing Modes
1
2
Press the
Recording Voice
To Record Voice
button briefly while the player is stopped.
Move to the mode you want by using the
press the
button.
button, and then
M ODE S ELECT
MUSIC VOICE FM Music Mode
1
2
Slide the
To stop the recording, move the
switch in the opposite
direction and a new voice file will be created.
Note :
26
M ODE S ELECT
MUSIC VOICE FM
REC/ENC
00:00:02
V002. WAV
M ODE S ELECT
MUSIC VOICE FM Voice Mode
FM
switch to the ENC position to begin Voice Recording.
REC/ENC
001
00:00:30
V002. WAV
NOR
001
NOR
00:00:00 V
V001. WAV
001
Note :
FM Mode
● You will exit from the Mode Switching function if no action is taken for 15 seconds or if
another button is pressed during mode switching.
● The Voice Mode settings will not be saved if the mode is switched to the Music or FM
modes or if the power is turned OFF.
● Recording is done in the order of V001,V002..…
● If the Memory is full, the Voice Recording is stopped automatically.
● The Voice Recording is also enabled in Music Mode.
● The backlight will not illuminate during a Voice Recording.
● The number of saved voice files and hours available for recording will be displayed
when Voice Mode is selected while the player is stopped.
● To Record Voice, be sure nothing is connected to the ENC jack.
● Voice Recording does not work in FM Mode or when the Line cable is connected.
27
55-eng-can
5/29/03
2:19 PM
Page 28
MP3 Encoding
1
Connect the Audio Output port on the external audio source (or the Line
Out port) to the ENC port on the device with the Line cable.
3
Slide the
switch to the REC position while recording to stop
the encoding, and a new encoding file will be created.
REC/ENC
● Recording will take place in the order of L001, L002, L003…. When the recording
is finished, the files will be saved as MP3 files.
Note :
● Bit Rates can be set within the range of 32Kbps~128Kbps.
● To pause during Encoding, press the
button.
Press the button once again to recommence recording.
● Volume can be adjusted from level 0 to 10 while monitoring the Encoding.
2
28
Notice :
Slide the
REC/ENC
switch to the ENC position begin MP3 encoding.
● Do not disconnect the Line cable during Encoding.
● If the battery is not charged enough, encoding will not be done.
● Adjust the volume of the external audio source to a suitable level and encode it.
If the volume level is extremely high, the sound quality may not be good.
29
55-eng-can
5/30/03
4:27 PM
Page 30
Searching for Music/Voice Files
Note :
● VBR(Variable Bit Rate) file:
MP3 file whose compression rate
changes when played.
● With VBR files, Turning the
lever to the direction within 5
seconds from the start of the track
may not result in the previous track
playing.
● With VBR files, the actual running
time may differ from that of the
player display.
● This player may not play back
MPEG1 LAYER1 files.
Searching for Specific Parts in PLAY Mode
● To find a certain track, turn the
lever to the
up or down during play.
● Release the lever and the lever will return to its original
position. Playing will recommence in the normal way.
NOR
NOR
NOR
NOR
30
00:04:30
00:01:30
Searching for Music Files in
PLAY Mode.
Searching for Music Files
in STOP Mode.
● The next track will play if you turn the
lever to the direction during play.
● To move to and play the previous track, turn
the lever to the direction within 5 seconds
of the beginning of play. To move to and play
the current track from the beginning, turn the
lever to the direction 5 seconds after the
beginning of play.
Turn the lever to the up or down while the
player is stopped. It moves to the
track and plays it.
NOR
001
Get Original, Black Eyed
001
Get Original, Black Eyed
NOR
NOR
00:00:15
NOR
001
Get Original, Black Eyed
NOR
NOR
00:00:01
00:01:30
NOR
002
End of the World, Cold
NOR
003
Girl Inside, Blues Traveler
NOR
00:00:01
NOR
001
Get Original, Black Eyed
NOR
NOR
00:00:01
00:01:30
002
End of the World, Cold
003
Girl Inside, Blues Traveler
NOR
NOR
00:00:01
001
Get Original, Black Eyed
31
55-eng-can
5/29/03
2:19 PM
Page 32
Listening to FM Radio
While the player is stopped, select FM Mode by using the
Manual Search for a Frequency
Turn the
lever briefly to find
the frequency you want.
FM
MO
FREE CH
99.1 MHz
Manual Storage of a Frequency
Upon finding a frequency you want,
press the
button to store the
frequency.
FM
MO
CH 02
99.1 MHz
button.
Automatic Search for a Frequency
Turn and hold the
lever to
automatically find and tune in to a
transmitted frequency.
FM
AUTO
SEARCHING
99.1 MHz
● Press the WOW button briefly while in FM Mode.
● The stored frequencies are successively searched.
FM
MO
● Press and hold the WOW button
while in FM Mode.
● Frequencies within the range of
88MHz to 108MHz are automatically
selected and stored.
● Frequencies are automatically stored,
starting from 1.
CH 01
89.1 MHz
FM
MO
CH 02
99.1 MHz
FM
MO
CH 03
100.7 MHz
MUTE Function
Automatic Storage of a Frequency
● Press and hold the
button while
in FM Mode.
● As soon as ‘MUTE’ appears on the
display no sound will be heard.
● To cancel the MUTE function, adjust
the volume with
Switch.
FM
MO
FM
MO
FREE CH
99.1 MHz
MUTE
FREE CH
99.1 MHz
Note :
Note :
● To exit from FM Mode, press the
button.
● Mono (MO) or Stereo (ST) is automatically selected.
Searching Stored Frequencies
FM
SET
AUTO PRESET
89.1 MHz
1
32
● You can store up to 20 frequencies.
● You can replace an existing frequency with a new one but you
cannot delete a stored frequency.
33
Number of Channels to be Stored
55-eng-can
5/29/03
2:19 PM
Page 34
FM Encoding
Loop Repeating
FM Encoding to MP3
1
Slide the
switch to the ENC
position during FM
REC/ENC
● Encoding of the currently transmitted
FM broadcast begins.
2
Loop Function
Slide the
REC/ENC
switch to REC.
● A file is created and the encoding stops.
● Files are saved in order of F001, F002,
F003… and stop automatically when the
memory is full.
00:01:00
F001. MP3
00:01:00
F001. MP3
001
Starting Point
Ending Point
While playing music files, press the
button briefly at the beginning
of the loop you want to set.
Press the
button briefly
again to set the end of the loop.
A appears in the display.
appears in the display.
The loop is played repeatedly.
NOR
NOR
00:01:30
NOR
001
Get Original, Black Eyed
NOR
00:02:30
001
Get Original, Black Eyed
Note :
● Press the
button briefly to cancel the loop.
● Loop Repeat is automatically released if you Speed Search with
34
button.
35
55-eng-can
5/29/03
2:19 PM
Page 36
Setting up SRS (Sound Retrieval System)
1
2
Press the WOW button while in Music Mode.
To switch to Menu Mode, press and hold the
Music/Voice Mode.
Press the WOW button to move, and then press and hold
the SRS button to select the mode you want.
Press the
S OUNDE FFECT
SRS TRUBASS
WOW EQ
S OUNDE FFECT
SRS TRUBASS
WOW EQ
S OUNDE FFECT
EQ
SRS TRUBASS
WOW EQ
● SRS : You will hear 3D Stereo sound.
● TRUBASS: This is a bass boost feature that adds fullness to the sound.
● WOW : This feature allows you to enjoy the SRS and Trubass features simultaneously.
● EQ : Plays at the last EQ setting you made.
Note :
●
button while in
button briefly to select the menu you want.
To exit from Menu Mode, press and hold the
button once again.
S OUNDE FFECT
SRS TRUBASS
WOW EQ
MENU
MENU
MENU
PLAY MODE EQUALIZER FILE
DIRECT PLAY SETTING EXIT
PLAY MODE EQUALIZER FILE
DIRECT PLAY SETTING EXIT
PLAY MODE EQUALIZER FILE
DIRECT PLAY SETTING EXIT
MENU
MENU
MENU
PLAY MODE EQUALIZER FILE
DIRECT PLAY SETTING EXIT
PLAY MODE EQUALIZER FILE
DIRECT PLAY SETTING EXIT
PLAY MODE EQUALIZER FILE
DIRECT PLAY SETTING EXIT
● PLAY MODE : To select track repeating mode.
● EQUALIZER : To use equalizer function.
● FILE : To delete or format music files.
● DIRECT PLAY : It plays files encoded in Music, FM or Line.
● SETTING : To change the basic setup options of the display.
● EXIT : To exit MENU.
SRS
WOW is a trademark of SRS Labs, Inc.
WOW technology is incorporated under license from SRS labs, Inc..
● Please adjust the volume to a suitable level, as the volume may increase in the SRS setting.
● This unit supports sampling frequencies of 32KHz, 44.1KHz or 48KHz.
● You can set SRS functions only in Music Mode.
36
Setting up MENU
Note :
● In MENU mode, no input for 15 seconds will cancel the MENU mode.
● Menu mode will be released if any button other than the MODE button is pressed.
37
55-eng-can
5/29/03
2:19 PM
Page 38
Repeating Tracks
Setting up EQ
EQ Function
Track Repeating Function
1
2
In MENU, select PLAY MODE. (refer to “Setting up MENU”)
In PLAY MODE, use the
want and press the
ALL
button to move to the mode you
button to select.
PLAY MODE
PLAY MODE
INTRO NORMAL REPEAT ONE
REPEAT ALL SHUFFLE EXIT
INTRO NORMAL REPEAT ONE
REPEAT ALL SHUFFLE EXIT
PLAY MODE
PLAY MODE
PLAY MODE
INTRO NORMAL REPEAT ONE
REPEAT ALL SHUFFLE EXIT
INTRO NORMAL REPEAT ONE
REPEAT ALL SHUFFLE EXIT
INTRO NORMAL REPEAT ONE
REPEAT ALL SHUFFLE EXIT
ONE
PLAY MODE
1
2
3
In MENU, select EQUALIZER. (refer to “Setting up MENU”)
In EQ, use the
button to move to the setting you
want (out of the 4 settings) and press the
button to select.
● Select the DBB Mode if you want to fine-tune the sound.
If you want to manually adjust the equalizer, select User and Bass/Treble.
● The adjustment range of Bass/Treble is 0 to 10.
INTRO NORMAL REPEAT ONE
REPEAT ALL SHUFFLE EXIT
EQUALIZER
NORMAL CLASS JAZZ
DBB USER EXIT
EQUALIZER
ROCK
EQUALIZER
● INTRO: To play the first 10 seconds of each track.
● NORMAL: To play all the tracks in order one time.
● REPEAT ONE: To repeat one track.
● REPEAT ALL: To repeat all tracks.
● SHUFFLE: To play tracks at random.
● EXIT: To move to the upper menu.
NORMAL CLASS JAZZ
DBB USER EXIT
USER
BASS
TREBLE
ROCK
CLASS
NOR
NORMAL CLASS JAZZ
DBB USER EXIT
EQUALIZER
ROCK
EQUALIZER
NORMAL CLASS JAZZ
DBB USER EXIT
NORMAL CLASS JAZZ
DBB USER EXIT
ROCK
EQUALIZER
ROCK
NORMAL CLASS JAZZ
DBB USER EXIT
ROCK
EQUALIZER
EXIT
NORMAL CLASS JAZZ
DBB USER EXIT
ROCK
Note :
● DBB is for Dynamic Bass Booster, which enhances bass response.
38
39
55-eng-can
5/29/03
2:19 PM
Page 40
Managing Files
Deleting
1
2
3
Formatting
1
2
In MENU, select FILE. (refer to “Setting up MENU”)
In FILE, select DELETE and the mode the target file is in.
In MENU, select FILE. (refer to “Setting up MENU”)
In File, select FORMAT.
Move to the file you want to delete and then press the
button.
Select CONFIRM and then select CANCEL to exit from the setup.
FORMAT
DELETE
FILE
DELETE
DELETE
FORMAT EXIT
MUSIC
CONFIRM
MUSIC
40
CANCEL
Get Original, Black Eyed
DELETE
MUSIC VOICE FM ENC
LINE ENC EXIT
CONFIRM
CANCEL
COMPLETED
MUSIC
001-Get Original, Black Ey
FORMAT EXIT
FORMAT
CONFIRM
CANCEL
Note :
● All files will be deleted when formatting the built-in memory.
● It is recommended that formatting be carried out on a PC that has the provided
program installed as formatting in the Menu may take a long time.
41
55-eng-can
5/29/03
2:19 PM
Page 42
Setting up DIRECT PLAY
Customizing Options (Display)
DIRECT PLAY Function
Setting Function
● Set the player to this function for playing MP3 and FM encoded songs.
1
2
In MENU, select DIRECT PLAY. (refer to “Setting up MENU”)
In DIRECT PLAY, move to the mode you want by pressing the
and then press the
button to select.
DIRECT PLAY
DIRECT PLAY
DIRECT PLAY
MUSIC
EXIT
MUSIC
EXIT
MUSIC
EXIT
FM ENC
LINE ENC
FM ENC
LINE ENC
DIRECT PLAY
MUSIC
EXIT
FM ENC
LINE ENC
● MUSIC: To play music files that are downloaded in the music folder
● FM ENC: To play encoded files in the FM ENC folder
● LINE ENC: To play encoded files in the LINE ENC folder
● EXIT: To move to the previous menu
42
button,
FM ENC
LINE ENC
1
2
In MENU, select SETTING. (refer to “Setting up MENU”)
In SETTING, use the
button to move to the function you
want to change and select the function by using the
button.
SETTING
SETTING
SETTING
DISPLAY BACK LIGHT BEEP
CONTRAST SCROLL SPEED
DISPLAY BACK LIGHT BEEP
CONTRAST SCROLL SPEED
DISPLAY BACK LIGHT BEEP
CONTRAST SCROLL SPEED
SETTING
SETTING
DISPLAY BACK LIGHT BEEP
CONTRAST SCROLL SPEED
POWER OFF TIME DEFAULT VOL
WOW LEVEL ENCODE EXIT
SETTING
DISPLAY BACK LIGHT BEEP
CONTRAST SCROLL SPEED
DEFAULT SETTING
POWER OFF TIME DEFAULT VOL
WOW LEVEL ENCODE EXIT
SCROLL
SPEED
SETTING
SETTING
POWER OFF TIME DEFAULT VOL
WOW LEVEL ENCODE EXIT
POWER OFF TIME DEFAULT VOL
WOW LEVEL ENCODE EXIT
SETTING
POWER OFF TIME DEFAULT VOL
WOW LEVEL ENCODE EXIT
Continued...
43
55-eng-can
5/29/03
2:19 PM
Page 44
BEEP
DISPLAY
● PLAY TIME: displays current play time
● REMAIN TIME: displays remaining play time
● USED SIZE: displays using memory
● Use the
DISPLAY
button to set the
BEEP mode.
● BEEP ON: A beep sounds each time a
button is pressed.
● BEEP OFF: No beep sounds when a
button is pressed.
PLAY TIME
REMAIN TIME
USED SIZE FREE SIZE EXIT
● FREE SIZE: displays remaining memory
BEEP
ON
OFF
Note :
BACK LIGHT
● Use the
button to set the
Backlight “ON” time.
● The setting range of Backlight-On Time is
0 to 10 seconds.
✽ The backlight does not illuminate when the
residual battery level is insufficient.
● No beep sounds while playing or recording of a
music/voice file even when set to ‘BEEP ON’.
BACK LIGHT
05
CONTRAST
● Use the
button to set the Contrast.
● The setting range of the contrast, which
CONTRAST
06
adjusts the brightness of the screen, is
0 to 10.
Continued...
44
45
55-eng-can
5/29/03
2:19 PM
Page 46
SCROLL SPEED
● Use the
DEFAULT VOLUME
button to set the Scroll Speed.
● Use the
● The setting range of the scroll speed, which
adjusts the speed of the track title flow,
is 0 to 10.
SCROLL
SPEED
SCROLL SPEED
06
POWER OFF TIME
● Use the
0 to 25 seconds. The power will turn off after the
set time if no button is pressed when the
playback ends.
0 to 25. If the Volume is above 25(26-30) when
you turn the device off, it will default to 25 when the
device is turned back on.
● If the Volume is set to 25 or lower when you turn the
device off, it will return to that setting when it is
turned back on.
POW OFF TIME
● When ‘0 second’ is set, the power will not turn off but
will remain in Standby Mode.
5SEC
● Select the mode you want by using the
button.
● The level for SRS and TRUBASS can each be set within the range of 0 to 10.
SRS TRUBASS EXIT
WOW LEVEL
SRS TRUBASS EXIT
46
17
● The levels of SRS and TRUBASS can be adjusted.
WOW LEVEL
Note :
DEFAULT DEFAULT VOL
WOW LEVEL
button to set the Power Off Time.
● The setting is 5 different levels ranging from
button to set the Default Volume.
● The default volume setting range of the unit is
SRS LEVEL
01
Tru Bass LEVEL
01
Continued...
47
55-eng-can
5/29/03
2:19 PM
Page 48
ENCODE
BIT RATE
AUTO SYNC
● Use the
32Kbps
BIT RATE
button to set the
AUTO SYNC
AUTO
SYNC
Encode AUTO SYNC.
● ON: Automatically creates a file for each track.
● OFF: All songs recorded in ENC mode are
saved in a single file.
ON OFF
● Use the
button to set the
Encode BIT RATE.
● When encoding music into an MP3 file, you can
select one of the following bit rates: 32Kbps,
48Kbps, 64Kbps, 96Kbps and 128Kbps.
BIT RATE
48Kbps
BIT RATE
Note :
● What is Auto Sync?
Auto Sync senses the input sound during MP3 encoding.
If there is no sound, encoding stops automatically. Otherwise,
encoding keeps going. You can save MP3 files separately.
Example) If you encode a CD including 10 music files with MP3,
10 MP3 files are created automatically when set the Auto Sync to ON.
64Kbps
BIT RATE
96Kbps
● Auto Sync function can support from 64Kbps to 128Kbps.
BIT RATE
128Kbps
48
49
55-eng-can
5/29/03
2:19 PM
Page 50
Firmware Upgrade
1
2
3
4
5
50
Download the latest Firmware from www.samsungyepp.com
6
Install the latest Firmware program on your PC.
Connect to the USB port on your PC using the
USB cable or adapter while holding the play button
on the main body. If you press the Play button
more than 5 seconds, the “Player Recovery
Device” message is displayed on Device Manager
as shown in the picture on the right.
The upgrade window will appear when the
Recovery process is complete. Ensure
that ‘Quick Download’ is deselected. Click
Start to begin the upgrade.
7
The upgrade is complete.
8
Reconnect the USB for the driver to be newly recognized.
Run the upgrade program.
When the program is running, the screen
will show the progress.
Note :
● If you do not release Quick Download, you cannot proceed to upgrade.
● When the Quick Download is deselected, formatting will commence at the same time, and
the saved file will be deleted.
● If your operating system is Windows 98, you will have to restart the YP-55 Upgrade program.
51
55-eng-can
5/29/03
2:19 PM
Page 52
Description of Buttons (yepp player)
BUTTON
STATUS
PRESSING LENGTH
RESPONSE
Power Off
Power On, and play
Play
Pause(When no button is
pressed for 10 seconds, yepp
powers off automatically)
Press and hold the 2 seconds
Power Off.
MENU Mode
Cancel
Intro Play
Cancels Intro, returns to Play mode
Play
Less than 1 second
Play the next track
Play
Longer than 1 Second
Fast forward search in PLAY mode
Play
Volume
Play the next track
FM Mode
52
FM Mode
Frequency Search
Play or Stop Mode
Volume increase/decrease
MENU Mode
Move MENU
Play
Short
Set the starting point for loop function
During Loop Setting
Short
Loop mode
Loop Mode
Short
Cancel loop mode
Stop
Short
Changing modes (music ↔ voice↔ FM)
Play or Stop Mode
Longer than 2 Seconds
Enter MENU
Frequency Search
MENU Mode
Play
Fast reverse search in
PLAY mode
Play the previous track
Stop/Pause
Mode
Stop/Pause
Longer than 1 Second
Cancel MENU
Short
Within 5 seconds from the start:
Play the previous track
After 5 seconds from the start:
Play the beginning of the current track.
REC/ENC
MENU Mode
Selection/Exiting MENU
Play or Stop Mode
Voice recording
VoiceRecording/Encoding
Voice Recording/Encoding Stop
Line in Connect
MP3 Encoding
FM Mode
FM Encoding
53
55-eng-can
5/29/03
2:19 PM
Page 54
MENU Table
MENU
PLAY MODE
INTRO
NORMAL
EQUALIZER
FILE
NORMAL
DELETE
JAZZ
REPEAT ALL
ROCK
SHUFFLE
DBB
EXIT
USER
EXIT
DIRECT PLAY
MUSIC
VOICE
CLASS
REPEAT ONE
BASS
TREBLE
EXIT
EXIT
button and move.
MUSIC
DISPLAY
PLAY TIME
REMAIN TIME
FM ENC
BACK LIGHT
USED SIZE
LINE ENC
BEEP
FREE SIZE
EXIT
EXIT
CONTRAST
CONFIRM
SCROLL SPEED
CANCEL
POWER OFF TIME
DEFAULT VOL
WOW LEVEL
ENCODE
EXIT
54
EXIT
SETTING
LINE ENC
FM ENC
FORMAT
● Select with the
EXIT
SRS
TRU BASS
EXIT
AUTO SYNC
BIT RATE
EXIT
55
55-eng-can
5/29/03
2:19 PM
Page 56
Troubleshooting
yepp does not work and the LCD displays nothing.
● Check the battery capacity
● Check to see if the battery is inserted to the right poles (
,
)
In PLAY mode, music is not played after pressing the
button
● Check to see if MP3 or WMA files are saved in the built-in memory.
● Check to see if the HOLD switch is locked.
● Check if the REC button is on.
● Check if the memory is full.
Files cannot be downloaded.
● Check to see if the driver is installed correctly in the computer.
● Check the connection between yepp and computer.
● Check and/or replace the battery, turn on the yepp's power.
● The Windows98 operating system limits the number of files you can save.
Please save your music files by creating a subfolder.
The buttons do not work.
● Check setting of Hold switch.
● When the message "Please Reformat" is displayed, please format your
YP-55 by installing the software using Windows Explorer.
yepp keeps being turned off.
● In Stop mode, the power is automatically turned off after ten seconds
(changes depending on settings).
● Check to see if there are files saved in it.
Something’s wrong with play time displayed during Play mode.
● “VBR SONG” message is displayed while VBR (Variable Bit Rate) file is playing.
LCD window is dark
● Check Contrast
Backlight does not work.
● Check the backlight setup.
● When the battery power is low, the backlight will go out.
56
57
55-eng-can
5/29/03
2:19 PM
Page 58
Specifications
Samsung Limited Warranty
Samsung Electronics Canada Inc. (SECA),
warrants that this product is free from defective material and workmanship.
Model
Built-in Memory capacity
Voltage
Playing time
Dimensions/Weight
Case
Noise Ratio
Earphones Jack Output Power
Output Frequency Range
Operating Temperature Range
FM Frequency
FM Signal to Noise Ratio
FM T.H.D
FM Useable Sensitiivity
File Support
58
YP-55
256MB(YP-55 V)/192MB(YP-55 i)/128MB(YP-55 H)
1.5V✕1 (AAA/LR03 size alkaline battery)
lasts up to 15hours (Alkaline battery, MP3 128Kbps, Vol level 20)
SECA further warrants that if this product fails to operate properly within the
specified warranty period and the failure is due to improper workmanship or
defective material SECA will repair or replace the product at its option.
All warranty repairs must be performed by a SECA authorized service
centre. (The name and address of the location nearest you can be obtained by
calling toll free 1-800-726-7864 or visiting our web site at www.samsung.ca)
1.02 ✕ 3.19 ✕ 1.02 inches/1.6oz (without battery)
Plastic/Aluminum
Labour
one (1) year (carry-in)
Parts
one (1) year
80dB with 20kHz LPF (1KHz 0dB)
5mW(Max 10mW)/CH (16 Ω)
20Hz~20kHz
-5 ~ +35˚C (23 ~ 95F)
On carry-in models, transportation to and from the service centre is the
customer’s responsibility.
The original dated sales receipt must be retained by the customer and
is the only acceptable proof of purchase. It must be presented to the
authorized service centre at the time service is requested.
88.0 ~ 108.0 MHz
45 dB
1%
10 dB
MPEG1/2/2.5 Layer3 (8Kbps ~ 320Kbps, 8KHz ~ 48 KHz)
WMA (48Kbps ~ 192Kbps, 8KHz ~ 48KHz)
Exclusions
This warranty does not cover damage due to accident, fire flood and/or
other acts of God; misuse, incorrect line voltage, improper installation,
improper or unauthorized repairs, commercial use, or damage that occurs in
shipping. Exterior and interior finish, lamps and glass are not covered under this
warranty. Customer adjustments which are explained in the instruction manual
are not covered under the terms of this warranty. This warranty will automatically
be voided for any unit found with a missing or altered serial number.
This warranty is valid only on products purchased and used in Canada.
55-eng-can
5/29/03
MEMO
2:19 PM
Page 60
MEMO