1
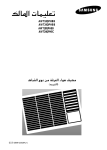
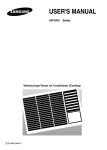
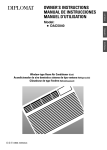
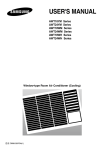
1 OWNER’S INSTRUCTIONS AWT18QPHBB AWT24QPHBB AWT18QPHEB AWT24QPHEC Window-type Room Air Conditioner ( Cool ) E A DB98-23028A(1) AQ07S2GE IB_E_15110 04/2/2 15:35 Page 2 Register your product at www.samsung.com/global/register Safety Precautions The following safety precautions must be taken when using your air conditioner. WARNING DURING OPERATION Risk of electric shock. • Can cause injury or death. • Disconnect all remote electric power supplies before servicing, installing or cleaning. • This must be done by the manufacturer or its service agent or a similar qualified person in order to avoid a hazard. Users of this product are cautioned not to attempt repair of this product at their own discretion. Instead, they are requested to directly contact a designated service center or the outlet at which the product was purchased. Never spill any kind of liquid into the unit. Should this happen, unplug or main switch off the unit and contact an authorized service center. Do not insert anything between the air outlet blades because the inner fan may be damaged and could cause injury. Keep children away from the unit. Do not place any obstacles in front of the unit. Do not spray liquid of any kind into the indoor unit. Should this happen, switch off the breaker used for your air conditioner and contact your installation specialist. Make sure that the unit is correctly ventilated at all times: Do not place clothing or other materials over it. If the wireless remote control will not be used for a long time, remove the batteries. (If applicable) When using a wireless remote control, the distance should not be more than 7 meters from the air conditioner. (If applicable) The air conditioner must be plugged into its own specific power source, which must be installed in compliance with national wiring,earthing and safety regulations. If the power cord is damaged in any way, it must be replaced by the manufacturer or its service agent or a similarly qualified person in order to avoid a hazard. This device must be installed according to the national electrical rules. The appliance must be installation that the plug should be easily accessible after installation. If the fuse on PC board is broken please change it with the type of T 3.15A 250V. The breaker of the air conditioner should be all-pole switch; and the distance between its two contacts should be no less than 3.5mm. Such means for disconnection must be incorporation in the fixed wiring. DISPOSING OF THE UNIT Before throwing out the device, it is necessary to pull back the battery cells and get rid of them safely for recycling reasons. When you need to dispose of the unit, consult your dealer. If pipes are removed incorrectly, refrigerant may blow out and come into contact with your skin,causing injury. Releasing refrigerant into the atmosphere also damages the environments. Please recycle or dispose of the packaging material for this product in an environmentally responsible manner. OTHERS Never store or ship the air conditioner upside down or sideways to avoid damage to the compressor. The appliance is not intended for use by young children or infirm persons without supervision: Young children should be supervised to ensure that they do not play with the appliance. Max current is measured according to IEC standard for safety and current is measured according to ISO standard for energy efficiency. E-2 AWT18PHHBA_E_17028 04/2/23 10:37 Page 3 Contents PREPARING YOUR AIR CONDITIONER ■ ■ ■ ■ ■ Safety Precautions ......................................................................................... Air Conditioning Unit - Main Parts, Buttons and Display ............................... Remote Control - Buttons .............................................................................. Getting Started ............................................................................................... Inserting the Remote Control Batteries .......................................................... 2 4 5 6 7 OPERATING YOUR AIR CONDITIONER ■ ■ ■ ■ ■ Cooling Your Room ........................................................................................ 8 Airing Your Room ........................................................................................... 9 Removing Excess Humidity............................................................................. 10 Adjusting the Air Flow Direction Horizontally .................................................. 11 Adjusting the Air Flow Direction Vertically ...................................................... 11 PROGRAMMING YOUR AIR CONDITIONER ■ ■ ■ ■ Setting the On Timer ...................................................................................... Setting the Off Timer ...................................................................................... Setting the Sleep Timer .................................................................................. Selecting Energy Saving mode ...................................................................... 12 13 14 15 RECOMMENDATIONS FOR USE ■ ■ ■ ■ Temperature and Humidity Ranges ................................................................ Cleaning Your Air Conditioner ........................................................................ Solving Common Problems ............................................................................ Technical Specifications ................................................................................. METHODOF 15 16 17 18 INSTALLATION .................................................................................... 19 CAUTION " The high inrush current of the starting compressor motor can have adverse effects to the operation of other equipment under unfavorable mains conditions. This equipment does not comply with the relevant technical standards for the limitation of voltage fluctuations and flicker." Before connecting this equipment to the power supply system, please report to your supply authority and obtain the consent. Do not connect other electric appliances to the same supply lines. E-3 Description of Each Component Inner air flow blades (right/left orientation) Air inlet (Inside) Outer air flow blades (up/down orientation) Air filter (Inside) Air inlet (Outside) Air outlet Ventilation lever Po w er BLUE BROWN YELLOW/GREEN Main Power Operating mode indicators (Cool/Fan/Dry) Earth Power cable connection should be committed to an installation engineer. Temperature/ Timer settings Mode selection button (Cool/Fan/Dry) Temperature adjustment buttons Energy Saver indicator Energy Saver button Timer indicator Sleep timer indicator Air flow blade swing button Sleep timer setting button Power On/Off button Timer setting button Fan speed adjustment button E-4 Remote control signal receiver AWT18PHHBA_E_17028 04/2/23 10:37 Page 5 Remote Control - Buttons Timer setting button Sleep timer setting button Operating mode selection buttons Temperature adjustment buttons Fan speed adjustment buttons Energy Saver button Air flow blade swing button On/Off button E-5 AWT18PHHBA_E_17028 04/2/23 10:37 Page 6 Getting Started You have just purchased a window-type room air conditioner and it has been installed by your installation specialist. Your Owner’s Instructions contain valuable information on using your air conditioner. Please take the time to read them as they will help you take full advantage of the unit’s functions. This Owner’s Instructions is just for using your air conditioner correctly. Thus, the illustrations shown in this manual may not exactly match your air conditioners. The booklet is organized as follows. ◆ The following figures are shown on pages 4 and 5: - Air conditioning unit (main parts, buttons and display) - Remote control (buttons) They will help you find the buttons and understand the symbols displayed. ◆ In the manual, you will find a series of step-by-step procedures for each function available. The illustrations in the step-by-step procedures use four different symbols: PRESS PUSH ☛ ➢ IMPORTANT NOTE Moreover, applicable, wherever the illustrations show the positions of the buttons on both the remote control and the unit itself. E-6 For the... The illustrations have a... Remote control Gray background. Example: Unit itself White background. Example: AWT18PHHBA_E_17028 04/2/23 10:37 Page 7 Inserting the Remote Control Batteries You must insert or replace the remote control batteries when: ◆ You purchase the air conditioner ◆ The remote control does not work correctly ☛ Use two AAA, LR03 1.5 V batteries. Do not use old batteries or different kinds of batteries together. Batteries may be completely discharged after 12 months, even if they have not actually been used. 1 Push the battery cover on the rear of the remote control with your thumb in the direction of the arrow and remove it. 2 Insert the two batteries, taking care to respect the polarities: ◆ + on the battery with + on the remote control ◆ – on the battery with – on the remote control 3 Close the cover by sliding it back until it clicks into place. Result: You can control all the functions on your air conditioning unit directly from your seat, using the remote control. E-7 Cooling Your Room Remote Control Control Panel You must select the Cool mode if you wish to lower the temperature in your room.You can also set the fan speed. 1 If necessary, press the (On/Off ) button. The air conditioner starts up in the Cool mode. Result: The unit beeps twice. The air conditioner is fitted with a protection mechanism to prevent the unit from being damaged when it is started immediately after being: Plugged in Stopped It will start up automatically after about three minutes. 2 If the COOL indicator is not lit up on the unit: button on the remote control Press the or Press the button on the unit one or more times until the COOL indicator lights up The unit beeps each time you press the / button. Result: The air conditioner starts up in Cool mode. You can change modes at any time. 3 4 To adjust the temperature, press the or button on the remote control one or more times until the required temperature is displayed. To adjust the temperature, press the or button on the unit one or more times until the required temperature is displayed. Possible temperatures are between 18 C and 30 C inclusive. Each time you press the temperaure bottons: Result: The temperature is adjusted by 1 C and displayed on the control panel The unit beeps The air conditioner starts cooling if the room temperature is higher than the selected temperature. To set the fan speed to... Then... Press the , or button on the remote control as desired. or Press the button on the unit one or more times until the the desired fan speed(F1, F2, or F3) is displayed. : Low Speed : Med Speed : High Speed 5 E-8 To control the direction of the air flow, refer to page 10. AiringYour Room If the atmosphere in your room is stale, you can air it using the Fan feature and if necessary, evacuate the stale air outside. 1 If you wish to evacuate stale air outside, push the ventilation lever on the front of the unit to the right and the open position ( ). The air inside the room circulates and stale air is evacuated Result: outside. Otherwise, push the ventilation lever to the left and the closed position ( ). Result: The air simply circulates inside the room. Remote Control 2 If necessary, press the (On/Off) button. The air conditioner starts up in the Cool mode. Result: The unit beeps twice. 3 If the FAN indicator is not lit up on the unit: button on the remote control Press the or Press the button on the unit one or more times until the FAN indicator lights up. / button. The unit beeps each time you press the Result: The air conditioner starts up in Cool mode. Control Panel You can change modes at any time. When the air conditioner is in the Fan mode, the temperature is not displayed; in this case, you do not need to set the temperature. 4 To set the fan speed to... Then... button on the remote control as desired. Press the , or or Press the button on the unit one or more times until the the desired fan speed(F1, F2, or F3) is displayed. : Low Speed : Med Speed : High Speed 5 To control the direction of the air flow, refer to page 10. E-9 Removing Excess Humidity If the atmosphere in your room is very humid or damp, you can remove excess humidity without lowering the room temperature too much. Remote Control Control Panel 1 If necessary, press the Result: (On/Off) button. The air conditioner starts up in the Cool mode. The unit beeps. The air conditioner is fitted with a protection mechanism to prevent the unit from being damaged when it is started immediately after being: Plugged in Stopped It will start up normally after three minutes. 2 If the temperature is not displayed at the top of the control panel, press the button on the control panel one or more times until it appears. Result: Dry The unit beeps each time you press the The air conditioner runs in Dry mode. button. You can change modes at any time. 3 To adjust the temperature, press the or buttons one or more times until the required temperature is displayed. Possible temperatures are between 18°C and 30°C inclusive. Result: 4 E-10 Each time you press the or buttons: - The temperature is adjusted by 1°C - The unit beeps The air conditioner starts removing the excess humidity; the quantity of air is adjusted automatically. To control the direction of the air flow, refer to page 11. Adjusting the Air Flow Direction Horizontally Depending on the position of the unit in your room, you can adjust the orientation of the inner air flow blades on the right-hand side of the unit, thus increasing the efficiency of the air conditioner. 1 Press the Result: (or Remote Control Control Panel on the unit) button on the remote control. The inner blades swing automatically left and right. In the Energy Saving mode, the blades may stop when the compressor is off. For details on the Energy Saving mode, refer to page 14. 2 To stop the blades moving left and right, press the button in the remote control. (or on the unit) To stop the blades in a specific position and orient the air flow in the corresponding direction, simply press the (or on the unit) button on the remote control when the blades are in the desired position. Adjusting the Air Flow Direction Vertically Again depending on the position of the unit in your room, you can adjust the orientation of the outer air flow blades on the right-hand side of the unit. RECOMMENDATION When... Adjust the blades to face... Cooling Upwards. Adjust the air flow blades to the desired position, by pushing them upwards or downwards. If you orient the air flow blades downwards and the unit operates in Cool mode for a long period of time, dew may: From on the surface of the blades Drip from the blades E-11 Setting the On Timer Remote Control Control Panel The On Timer enables you to switch on the air conditioner automatically after a given period time.You can set the period of time from 1 hour to 24 hours. You can select the On Timer only when the air conditioner is off. 1 Check that the air conditioner has been switched off; if necessary, press the (On/Off) button. 2 Set the operating time by pressing: on the remote control. or on the unit one or more times. Possible time is between 1 hour and 24 hours inclusive. Result: The remaining time is displayed and decreased by 1 hour automatically to indicate the remaining time. The air conditioner switches on automatically when the operating time reaches zero. You can change the setting mode, fan speed, and air flow direction after setting the On Timer. To Cancel the On Timer To cancel the On Timer, press: on the remote control or on the unit one or more times until " " is displayed. or (On/Off) button on the remote control or unit. (The air conditioner operates in the cool mode.) button on the unit. button on the Remote control. E-12 Setting the Off Timer The Off Timer enables you to switch off the air conditioner automatically after a given period of time. Y ou can set the period of time from 1 hour to 24 hours. You can select the Off Timer only when the air conditioner is on. 1 Check that the air conditioner has been switched on; if necessary, press the (On/Off) button. 2 Set the operating time by pressing: on the remote control. or on the unit one or more times. Remote Control Control Panel Possible times is between 1 hour and 24 hours inclusive. Result: The remaining time is displayed and decreased by 1 hour automatically to indicate the remaining time. The air conditioner switches off automatically when the operating time reaches zero. You can change the setting mode, fan speed, and air flow direction after setting the Off Timer. To Cancel the Off Timer To cancel the Off Timer, press: on the unit one or more times until on the remote control or " " is displayed. or on the remote control or unit (The air conditioner operates in the mode selected when the unit was last used.) button on the unit. button on the Remote control. E-13 Setting the Sleep Timer The Sleep Timer can be used when you are cooling your room to switch the air conditioner off automatically after a period of 8 hours. Remote Control Control Panel If you wish to switch the unit off at a specific time, refer to page 12. 1 Make sure that you have selected either COOL mode. 2 Press the or Press the Result: Cooling button on the remote control button on the unit until the indicator lights up. Each time you press a butoon, the unit beeps. The indicator and " " will be displayed. The remaining time is displayed and decreased by 1 hour automatically to indicate the remaining time. The air conditioner will be controlled as illustration below. When the temperature has been increased by 1 C(after 1 hour), it is maintained for 7 hours. To Cancel the Sleep Timer To cancel the timer, press: on the remote control. or on the unit. Result: The unit beeps. The indicator is no longer displyed. The air conditioner operates in the mode selected last. If you select the Energy Saving mode in the Sleep Timer mode, the Sleep Timer will be cancelled and the air conditioner will start up in the Energy Saving mode. E-14 Selecting Energy Saving Mode If you wish to save Energy when using your air conditioner, select the Energy Saving mode with the Energy Saver button. 1 Remote Control Control Panel To select the Energy Saving mode, press the Energy Saver button on the remote control or unit one or more times until the Energy Saver indicator lights up. Result: The fan and compressor cycle on and off together. The fan will continue to run for a short time after the compressor cycles off. If you would like the air conditioner to run in Fan mode do not press the Energy Saver button.You cannot use the Fan mode in the Energy saving mode. 2 To stop the Energy Saving mode, press the Energy Saver button on the remote control or unit again. Result: The fan runs at all times, while the compressor cycles on and off. If you select the Sleep Timer in the Energy Saving mode, the Energy Saving will be cancelled and the air conditioner will start up in the Sleep Timer mode. Temperature and Humidity Ranges The following table indicates the temperature and humidity ranges within which the air conditioner can be used. Mode IndoorTemperature OutdoorTemperature Indoor Humidity Cooling 21 C to 32 C approx. 21 C to 54 C approx. 80% or less If the air conditioner is used at... Then... Higher temperatures The automatic protection feature may be triggered and the air conditioner stopped. Lower temperatures A water leakage or some other malfunction may happen if the heat exchanger freezes. Higher humidity levels Water way condense on and drip from the surface of the unit if it is used for long periods. E-15 Cleaning Your Air Conditioner Be sure to clean the air filter periodically two weeks to maintain the air conditioner in the best condition for a long period of time. IMPORTANT When cleaning the air conditioner, turn it off and pull out the power plug. 1 Hold the front grille handle, slightly pull it to the left side and open the front grille. The removal of the front grille makes it easier to clean the air conditioner. Open the grille as much as possible. Po w er CA U T I O N Removal and Reassembly of the Front Grille 1 Grasp the lower part of the front grille and the air filter handle, then open the grille. (The open angle of front grille has not to be exceeded 90 degree) 2 Lift the front grille slightly and remove it from the front panel. Po w er 3 Reassembling of front grille should be done in reverse order of disassembly. Front grille Grille groove 2 Pull the air filter to the right side. Body guide 3 Remove all dust on the air filter with a vacuum cleaner or brush. 4 When you have finished, insert the air filter back into its original position. 5 Wipe the surface of the unit with a neutral detergent and then wipe it again with dry cloth. (Be sure not to use benzene, solvent or other chemical products.) Po w er The air conditioner has two or three grille grooves depending on the model. If you... Will not be using the air conditioner for a long period of time Have not used the air conditioner for a long period of time E-16 Then... Set the fan going for three to four hours to dry the inside of the air conditioner thoroughly. Switch the air conditioner off and unplug it from the wall socket. Clean the filter and outer surfaces. Set the fan going for a few hours to dry the inside of the air conditioner thoroughly. AWT18PHHBA_E_17028 04/2/23 10:37 Page 17 Solving Common Problems Before contacting the after-sales service, perform the following simple checks. They may save you the time and expense of an unnecessary service call. Problem Explanation/Solution The air conditioner does not operate at all ◆ ◆ ◆ Check that the circuit breaker used for the air conditioner has not been triggered. Check that the power cable is plugged into a wall socket and the socket is switched on, if necessary. Check that the operating mode indicator (COOL or FAN) on the unit is lit up; if necessary press (On/Off) button on the remote control or unit. The air conditioner does not operate with the remote control ◆ ◆ ◆ Check that there are no obstacles between you and the unit. Replace the remote control batteries if necessary. Check that you are close enough to the unit (seven metres/yards or less). No beep is heard when you press (On/Off) on the remote control ◆ Check that you are pointing the remote control at the remote control sensor on the unit. Replace the remote control batteries if necessary. ◆ The air conditioner does not cool ◆ ◆ ◆ ◆ Check that the correct operating mode has been selected COOL. The room temperature may be too low. Dust may be blocking the air filter; refer to page 16 for cleaning instructions. Check that there is no obstacle blocking the air flow into or out of the unit. The air flow direction does not change when you press the or on the unit button ◆ Check that the air conditioner has been switched on; if necessary, press (On/Off) button on the remote control or unit. The timer is not correctly triggered ◆ Check that the timer has been programmed correctly; see page 11~13. Odour is permeated in the room during air conditioning ◆ Air the room. E-17 AWT18PHHBA_E_17028 04/2/23 10:37 Page 18 Technical Specifications Design and specifications are subject to change without notice. Model AWT18QPHBB AWT24QPHBB AWT18QPHEB AWT24QPHEC E-18 Power Supply 220V~, 60Hz 220-240V~, 50Hz AWT18PHHBA_E_17028 04/2/23 10:37 Page 19 Method of Installation Before installation, be sure to check the installation area or the air conditioner, and drain hose. Checkpoints prior to installation 1 Check the cabinet and front grille of the unit for any harmful defects such as scratches. 2 Be sure to check the power supply. - Refer to the specifications on the label attached to the unit. Installation Conditions 1 As the unit is heavy, the wall or window of the installation area should have sufficient strength and durability for operation of the air conditioner, and for prevention of any vibration or noise. If it is weak, reinforcement work should be performed separately. 2 It is advisable to install the air conditioner in the north or west side to prevent the effect of direct sunlight. When installing it in the south or east side due to unavoidable circumstances, it is advisable to install the sunshade to prevent the direct sunlight. In this case, take care not to cause any hindrance to the flow of outside air. 3 When installing the air conditioner, be sure to obtain sufficient space on the rear side of the unit for smooth flow of air. When operating the air conditioner in closed areas such as inner building with cooling operation, and result in trouble with the unit. See the illustration below. Awning 75mm min. 500mm 500mm 300mm "A" 500mm Fence, wall or other obstacle P o w er Approx.3˚ 750mm 150mm min. If the wall is greater than 150mm thick, cut the wall back on a 45˚ angle if possible. MODEL AWT18/AWT24 Outdoor side 45˚ "A" 260 45˚ Indoor side 100mm or more E-19 AWT18PHHBA_E_17028 04/2/23 10:37 Page 20 Method of Installation (cont.) Rear Rubber cap Installation of the Drain Tube Fix the drain tube as shown in the figure. Gasket Drain Tube Screws(2EA) Installation of the Drain Pan The procedure for installing the drain pan should be determined by the condition of the installing area. ◆ In the case of an area where the drain pan can not be directly installed on the rear side of the unit after installing the air conditioner. Example: High storage Po w er 1 Open the front grille. CAUTION Removal and Reassembly of the Front Grille 1 Grasp the lower part of the front grille and the air filter handle, then open the grille. (The open angle of front grille has not to be exceeded 90 degree) Po w er 2 Push the front grille on the left and remove it from the front panel. 3 Reassembling of front grille should be done in reverse order of disassembly. 2 Remove the front panel. 2-1 Press both sides of the cabinet in the direction of the arrow as shown in the figure. 2-2 Pull the lower part of the front panel slightly forward. (below three inches) 2-3 Lift the front panel upward. ☛ Front panel 3 E-20 Applying excessive force to remove the front panel may cause damage to the tab ; be sure not to use excessive force. Remove four screws on the lower, right and left sides of the unit. Method of Installation (cont.) 4 Remove the chassis from the cabinet. Drain Pan Rear 5 Remove the rubber cap inserted into the basepan. Rubber cap Drain Hose 6 Fix the drain pan as shown in the figure, and then connect the drain hose. (You can use any commercially-available drain hose.) Screw Bottom-Side View with Drain Pan and Hose in Place 7 Install the cabinet at the specified area after installing the drain pan, and then re-assemble it in the original condition. When assembling the front panel be sure to fix with a supplied screw. (TH 2S 4X10) In the case of an area where the drain pan can be directly installed on the rear side of the unit after installing the air conditioner. 1 Follow steps 5 and 6 only. Screw If the air conditioner has accessory seal ,please install the seal as shown in the figure Installation of the accessory seal ( Except AWT12*******) Seal Cabi Side ( T40,W50,L430 Qty-2) Seal Cabi Top ( T30,W40,L700 Qty-1) Seal Base ( T10,W30,L630 Qty-1) P o w er SEAL-BASE SEAL CABI TOP SEAL-CABI SIDE SEAL-CABI SIDE E-21 AWT18PHHBA_E_17028 04/2/23 10:37 Page 22 THIS AIR CONDITIONER IS MANUFACTURED BY: