1
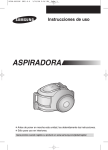
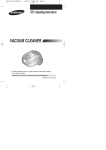
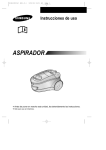
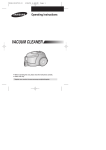
DJ68-00339S (EN-1)-0.0 2/12/07 3:50 PM EN Page 1 Operating Instructions VACUUM CLEANER ❈ Before ❈ Indoor operating this unit, please read the instructions carefully. use only. Register your product at www.samsung.com/global/register DJ68-00339S (EN-1)-0.0 2/12/07 3:50 PM Page 2 IMPORTANT SAFEGUARDS 1. Read all instructions carefully. Before switching on, make sure that the voltage of your electricity supply is the same as that indicated on the rating plate on the bottom of the cleaner. 2. WARNING: Do not use the vacuum cleaner when rug or floor is wet. Do not use to suck up water. 3. Close supervision is necessary when any appliance is used by or near children. Do not allow the vacuum cleaner to be used as a toy. Do not allow the vacuum cleaner to run unattended at any time. Use the vacuum cleaner only for its intended use as described in these instructions. 4. Do not use the vacuum cleaner without a dust bin. Empty the dust bin before it is full in order to maintain the best efficiency. 5. Do not use the vacuum cleaner to pick up matches, live ashes or cigarette butts. Keep the vacuum cleaner away from stoves and other heat sources. Heat can deform and discolour the plastic parts of the unit. 6. Avoid picking up hard, sharp objects with the vacuum cleaner as they may damage the cleaner parts. Do not stand on the hose assembly. Do not put weight on the hose. Do not block the suction or the exhaust port. 7. Switch the vacuum cleaner off on the body of the machine before unplugging from the electrical outlet. Disconnect the plug from the electrical outlet before changing the dust bag or dust container. To avoid damage, please remove the plug by grasping the plug itself, not by pulling on the cord. 8. This appliance is not intended for use by young persons or infirm persons without supervision unless they are adequately supervised by a responsible person to ensure that they can use the appliance safely. Young children should be supervised to ensure that they do not play with the appliance. 9. The plug must be removed from the socket outlet before cleaning or maintaining the appliance. 10. The use of an extension cord is not recommended. 11. If your vacuum cleaner is not operating correctly, switch off the power supply and consult an authorized service agent. 12. If the supply cord is damaged, it must be replaced by the manufacturer or its service agent or a similarly qualified person in order to avoid a hazard. 13. Don’t carry the vacuum cleaner by holding the hose. Use the handle on the vacuum cleaner set. EN-1 DJ68-00339S (EN-1)-0.0 2/12/07 3:50 PM Page 3 1 ASSEMBLING THE CLEANER ▼ OPTION Features may vary according to model. CAUTION Please do not press the button of dust bin handle when carrying machine. For storage, park the floor nozzle. EN-2 DJ68-00339S (EN-1)-0.0 2/12/07 3:50 PM Page 4 2 OPERATING THE CLEANER 2-1 ON/OFF SWITCH 1) BODY CONTROL TYPE 2) ON/OFF TYPE 2-2 POWER CORD NOTE When removing the plug from the electrical outlet, grasp the plug, not the cord. 2-3 POWER-CONTROL 1) SILDE CONTROL TYPE ONLY (Optional) • SLIDE TO THE STOP POSITION Vacuum-cleaner switches off (stand by mode) • SLIDE FORWARD TO MAX Suction capacity increases smoothly up to maximum. 2) BODY-CONTROL TYPE / ON/OFF TYPE - HOSE To reduce suction for cleaning draperies, small rugs, and other light fabrics, pull the tap air until the hole is open. - BODY (BODY-CONTROL TYPE ONLY) MIN = For delicate surface e.g. net curtains. MAX = For hard floors and heavily soiled carpets. EN-3 DJ68-00339S (EN-1)-0.0 2/12/07 3:50 PM Page 5 ▼ 2-4 HOW TO USE AND MAINTAIN THE ACCESSORIES Features may vary according to model. PIPE Adjust the length of the telescopic pipe by sliding the length control button located in the center of the telescopic pipe back and forth. ACCESSORY To check for blockages, separate the telescopic pipe and adjust to shorten. This allows for easier removal of waste clogging the tube. Push the accessory on to the end of the hose handle. Pull out and turn the dusting brush for cleaning delicate areas. To use the upholstery tool, push the accessory on to the end of the hose handle in the opposite direction. OPTION Carpet Cleaning Floor Cleaning Adjust the inlet lever according to the floor surface. OPTION Remove waste matter completely if the inlet is blocked. - Detach transparent drum cover for easy cleaning. EN-4 DJ68-00339S (EN-1)-0.0 2/12/07 3:50 PM Page 6 3 EMPTYING THE DUST BIN 1 2 Option Once dust reaches the dust full mark, or once the dust full light is on, empty the dust bin. 3 Take the dust bin out by pressing the button. Separate the dust bin cover. CLICK 4 5 Throw away dust into the bin. 6 Close the dust bin cover. - Empty into a plastic bag (recommended for asthma/allergy sufferers) NOTE You may rinse the dust bin with cold water EN-5 Before use, push the dust bin into the main body of the vacuum cleaner until you hear the "click" sound. DJ68-00339S (EN-1)-0.0 2/12/07 3:50 PM Page 7 4 CLEANING THE DUST PACK 4-1 WHEN TO CLEAN THE DUST PACK - If suction is noticeably reduced during cleaning, please check the dust pack as indicated below. Suction is significantly weakened during cleaning. Shaking sound of inlet stuck to the floor (soft mats, blankets, etc.) is heard. Turn the vacuum power to 'MAX' HANDLE CONTROL If the filter check indicator turns red with the inlet floating 10 cm above flat floor, clean it. When the indicator light comes on, please empty the Dust Pack(4-2) as shown in the following illustrations. EN-6 DJ68-00339S (EN-1)-0.0 2/12/07 3:50 PM Page 8 4-2 CLEANING THE DUST PACK 1 3 2 Remove the dust bin and dust pack as shown. 4 Remove the fixed frame of the dust pack cover. Remove the sponge pad from the dust pack . 5 Wash the sponge and the filter of the dust pack with water. 7 6 Let the sponge and dust pack dry in the shade for more than 12 hours. Put the sponge into the dust pack. 8 Before reassembly, align the dust pack cover and dust pack correctly. Put the assembled dust pack into the main body. NOTE : Make sure the filter is completely dry before putting it back into the vacuum cleaner. Allow 12 hours for it to dry. EN-7 DJ68-00339S (EN-1)-0.0 2/12/07 3:50 PM Page 9 5 CLEANING THE MOTOR PROTECTION FILTER Remove the motor protection filter from the vacuum cleaner. Shake and tap the dust from it and put back in machine. Take out both the dust bin and the dust pack. 6 CLEANING THE OUTLET FILTER Press the fixed frame part at the back of the main body to remove. Pull out the HEPA Filter Dust the HEPA filter. using the tab. Put the HEPA filter into the main body until you hear a ‘click’ sound. - IF YOU HAVE A PROBLEM PROBLEM Motor does not start. CAUSE REMEDY 0 No power supply. Thermal cut-out. Nozzle, suction hose or tube is blocked. Check cable, plug and socket. Leave to cool. Check for blockage and remove it. Check that the cord is not twisted or wound unevenly. Pull the cord out 2-3m and push the cord rewind button. Vacuum cleaner does not pick up dirt. Crack or hole in hose. Check hose and replace if required. Low or decreasing suction Filter is full of dust. Please check filter and, if necessary, clean as illustrated in the instructions. Suction force is gradually decreasing. Cord does not rewind fully. EN-8 DJ68-00339S (ES-2)-0.0 2/12/07 3:50 PM ES Page 1 Instrucciones de uso ASPIRADORA ❈ Antes ❈ de poner en marcha esta unidad, lea detenidamente las instrucciones. Sólo para uso en interiores. Gane premios cuando registre su producto en www.samsung.com/global/register DJ68-00339S (ES-2)-0.0 2/12/07 3:50 PM Page 2 MEDIDAS DE SEGURIDAD IMPORTANTES 1. Lea detenidamente las instrucciones. Antes de ponerlo en marcha, compruebe que la tensión del suministro eléctrico es la misma que la indicada en la placa dedatos situada en la parte inferior del aspiradora. 2. ADVERTENCIA: No use el aspiradora con la alfombra o el piso húmedo. No lo use para aspirar agua. 3. Cuando se utilice este electrodoméstico por niños o cerca de ellos, hágalo manteniendo una estricta supervisión. No permita que se utilice como si fuese un juguete. No lo deje funcionando sólo. Úselo solo para lo que sirve, según lo indicado en estas instrucciones. 4. No utilice el aspiradora sin instalar el contenedor de polvo. Vacíe el contenedor de polvo antes de que esté lleno con el fin de mantener la máxima eficiencia. 5. No utilice el aspiradora para recoger cerillas, cenizas o colillas de cigarro encendidas. Manténgalo alejado de estufas y otras fuentes de calor, ya que podrían deformarse y decolorarse las piezas de plástico. 6. No recoja objetos duros o afilados, podría dañar las piezas de limpieza. No pise ni coloque ningún peso sobre el conjunto de la tubería. No bloquee la zona de succión o de escape de aire. 7. Apague primero el aspiradora pulsando el control de la carcasa antes de desenchufarlo de la red. Desenchufe la clavija antes de cambiar la bolsa para el polvo o el contenedor de polvo. Para evitar cualquier daño, desenchufe el aparato tirando de la propia clavija y no del cable. 8. Este aparato no ha sido diseñado para personas jóvenes o enfermas sin supervisión salvo que estén bajo la supervisión de una persona responsable que garantice la seguridad durante el uso del aparato. Se recomienda vigilar a los niños para que no jueguen con el aparato. 9. El enchufe macho debe retirarse del enchufe hembra antes de proceder a la limpieza o mantenimiento del dispositivo. 10. No es aconsejable usar un prolongador. 11. Si el aspiradora no funciona correctamente, apáguelo y consulte al servicio técnico. 12. En caso de que el cable de alimentación esté dañado, el fabricante o su servicio técnico o persona cualificada para ello deberá sustituirlo con el fin de evitar cualquier peligro. 13. No transporte el aspiradora sujetándolo por la manguera. Utilice el asa del kit del aspiradora. ES-1 DJ68-00339S (ES-2)-0.0 2/12/07 3:50 PM Page 3 1 MONTAJE DEL ASPIRADORA ▼ OPCIONAL Las características pueden variar en función del modelo. PRECAUCIÓN No presione el botón del depósito de polvo situado en el mango cuando transporte la máquina. Para guardarlo, quite el accesorio para el suelo. ES-2 DJ68-00339S (ES-2)-0.0 2/12/07 3:50 PM Page 4 2 FUNCIONAMIENTO DEL ASPIRADORA 2-1 INTERRUPTOR ON/OFF 1) CONTROL EN CARCASA 2) TIPO ON/OFF 2-2 CABLE DE ALIMENTACIÓN NOTA Al retirar la clavija de la toma de corriente, procure tirar de la clavija y no del cable. 2-3 CONTROL DE ASPIRACIÓN 1) SÓLO CONTROL CORREDIZO (Opcional) • COLOQUE EL ASPIRADORA EN LA POSICIÓN STOP El aspiradora se apaga (modo en espera). • COLOQUE EL ASPIRADORA EN MÁX. La capacidad de succión aumenta suavemente hasta el máximo. 2) CONTROL EN CARCASA / TIPO ON/OFF - TUBO FLEXIBLE Con el fin de reducir la aspiración de los trapos de limpieza, alfombrillas y otros tejidos ligeros, presione la tapa hasta que se abra el orificio. - CARCASA (MODELO CON CONTROL EN LA CARCASA) MIN = Para superficies delicadas, p. ej. visillos. MAX = Para suelos duros y alfombras muy sucias. ES-3 DJ68-00339S (ES-2)-0.0 2/12/07 3:50 PM Page 5 ▼ 2-4 CÓMO UTILIZAR Y MANTENER LOS ACCESORIOS Las características pueden variar en función del modelo. TUBO Ajuste la longitud del tubo telescópico deslizando el botón de control de longitud situado en el centro del mismo como corresponda. ACCESORIOS Para comprobar obstrucciones, separe el conducto telescópico y ajuste para reducir. Esto le permitirá retirar de forma más sencilla la suciedad que obstruye el tubo. Coloque el accesorio al final del mango del tubo flexible. Retire y gire el cepillo de polvo para limpiar zonas delicadas. Si desea utilizar el acceso io para tapicerías, colóquelo al final del mango del tubo flexible en la dirección opuesta. OPCIONAL Limpieza de alfombras Limpieza de suelos Ajuste la palanca de admisión como corresponda para su limpieza. OPCIONAL Retire los restos de suciedad por completo si la entrada está obstruida. - Retire la cubierta transparente del tambor para facilitar la limpieza. ES-4 DJ68-00339S (ES-2)-0.0 2/12/07 3:50 PM Page 6 3 VACIADO DEL CONTENEDOR DE POLVO 1 2 OPCIONAL Cuando el polvo llegue a la marca indicadora de lleno de polvo o cuando se encienda el testigo de polvo, vacíe el depósito de polvo. 3 Saque el depósito de polvo presionando el botón. Quite la cubierta del depósito de polvo. CLICK 4 5 Tire el polvo a la basura. 6 Cierre la cubierta del depósito de polvo. Antes de utilizar el aparato, introduzca el contenedor en la carcasa del mismo hasta que escuche un "clic". - Vacíe el contenedor en una bolsa de plástico (recomendado en caso de sufrir asma/alergia) NOTA Puede aclarar el contenedor de polvo con agua fría. ES-5 DJ68-00339S (ES-2)-0.0 2/12/07 3:50 PM Page 7 4 LIMPIEZA DEL FILTRO DE ESPONJA 4-1 CUÁNDO LIMPIAR EL FILTRO DE ESPONJA - La fuerza de aspiración ha descendido notablemente. Suction is significantly weakened during cleaning. Shaking sound of inlet stuck to the floor (soft mats, blankets, etc.) is heard. Seleccione la posición 'MAX'. CONTROL EN EL ASA Si el indicador del filtro se pone rojo al situar la boquilla de admisión a 10 cm del suelo, límpielo. Cuando el indicador luminoso se encienda, vacíe el filtro de esponja (4-2), tal y como se muestra en las siguientes ilustraciones. ES-6 DJ68-00339S (ES-2)-0.0 2/12/07 3:50 PM Page 8 4-2 LIMPIEZA DEL FILTRO DE ESPONJA 1 3 2 Quite el depósito de polvo y el contenedor tal y como se muestra en la ilustración. 4 Retire el marco fijo de la cubierta del contenedor de polvo. 5 Limpie la almohadilla y el filtro del contenedor de polvo con agua. 7 Retire la almohadilla del contenedor de polvo. 6 Deje secar la almohadilla y el contenedor de polvo durante más de 12 horas sin que les llegue el sol directo. Coloque la almohadilla en el contenedor de polvo. 8 Antes del montaje, alinee la cubierta del contenedor de polvo y el contenedor de polvo correctamente. Coloque el contenedor de polvo una vez montado en la carcasa principal. NOTA : Asegúrese de que el filtro está completamente seco antes de volverlo a colocar en el aspiradora. Deje secar durante 12 horas. ES-7 DJ68-00339S (ES-2)-0.0 2/12/07 3:50 PM Page 9 5 LIMPIEZA DEL FILTRO DE PROTECCIÓN DEL MOTOR Retire el filtro de protección del motor del aspiradora, sacuda el polvo y vuelva a colocarlo donde corresponda. Extraiga el contenedor del polvo y el filtro de esponja. 6 LIMPIEZA DEL FILTRO DE SALIDA DEL AIRE Presione la pieza de fijación del marco fijo situado en la parte posterior de la carcasa y extraiga el filtro. Extraiga el Filtro HEPA con ayuda de la lengüeta. Limpie el filtro HEPA. Inserte el filtro HEPA en la carcasa hasta que oiga un "clic". - SI TIENE ALGÚN PROBLEMA PROBLEMA El motor no arranca. La fuerza de succión disminuye gradualmente. El cable no rebobina completamente. CAUSA SOLUCIÓN No hay alimentación eléctrica. Corte térmico. Compruebe el cable, el enchufe y la toma de corriente. Deje que se enfríe. La boquilla, la tubera de succión Retire el objeto y cambie la o el tubo está bloqueado. bolsa. Compruebe que el cable no está retorcido o arrollado de forma desigual. Saque el cable de 2 a 3 m y presione el botón de rebobinado. El aspiradora no recoge la suciedad. La tubera está rota o perforada. Compruebe la tubera y cámbiela si fuese necesario. Aspiración baja o decreciente. El filtro está lleno de polvo. Compruebe el filtro y si es necesario límpielo siguiendo las instrucciones gráficas. ES-8 DJ68-00339S (ES-2)-0.0 2/12/07 3:50 PM Page 10 MEMO DJ68-00339S (ES-2)-0.0 2/12/07 3:50 PM Page 11 If you have any comments or questions regarding Samsung products, contact the SAMSUNG customer care center. Country Customer Care Center ☎ Web Site PANAMA 800-7267 www.samsung.com/latin COLOMBIA 01 8000 112 112 www.samsung.com/co DJ68-00339S REV(0.0)