1
CM1029-EU-1
2/11/00 4:58 AM
Page 1
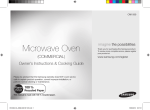
MICROWAVE OVEN
CM1029(1000Watts)
Owner’s Instructions
P
+ 30sec
Code No.
CM1029-EU-1
2/11/00 4:58 AM
Page 2
You have just purchased a
SAMSUNG microwave oven.
Your Owner’s Instructions contain valuable
information on cooking with your
microwave oven. Take the time to read them
as they will help you take full advantage of
the microwave oven features.
GB
Contents
◆ Oven Features
■
■
■
Oven ..............................................................................................................
Control Panel.................................................................................................
Using this Instruction Booklet........................................................................
3
4
5
◆ Installing and Preparing Your Microwave Oven
■
■
■
■
■
Safety Precautions ........................................................................................
Installing Your Microwave Oven ....................................................................
Cleaning Your Microwave Oven ....................................................................
Storing and Repairing Your Microwave Oven ...............................................
Cookware Guide............................................................................................
6
8
9
9
10
◆ Cooking with Your Microwave Oven
■
■
■
■
■
■
■
■
■
■
■
■
■
Cooking/Reheating ........................................................................................
Power Levels and Time Variations ................................................................
Repeat Feature .............................................................................................
Using +30sec pad .........................................................................................
Using the Defrost Feature .............................................................................
Memory Pads Programming..........................................................................
How to Operate Memory Cooking.................................................................
Stopping the Cooking ....................................................................................
Double Quantity Pad Programming ..............................................................
How to Operate Double Quantity Pad...........................................................
Controlling Beep Tone ...................................................................................
Error Codes ...................................................................................................
Hidden Keys ..................................................................................................
11
12
12
13
13
14
15
15
16
17
17
17
18
◆ Recommendations for Use
■
■
■
■
■
2
Care of Your Microwave Oven ......................................................................
Programming Air Filter Clean Time ...............................................................
Replacement of Lamp ...................................................................................
Cooking Guide...............................................................................................
Technical Specifications ................................................................................
19
20
21
22
26
CM1029-EU-1
2/11/00 4:58 AM
Page 3
Oven
GB
CONTROL PANEL
OVEN LAMP
+30sec PAD
(230V 25W)
DISPLAY
STOP/CANCEL
PAD
OVEN LAMP COVER
P
START BUTTON
+ 30sec
CEILING COVER
DOOR HANDLE
AIR FILTER
DOOR LATCHES
PLATE TRAY
DOOR
SAFETY INTERLOCK
HOLES
3
CM1029-EU-1
2/11/00 4:58 AM
Page 4
Control Panel
GB
1
2
4
P
+ 30sec
3
5
6
7
8
9
10
1. DISPLAY
2. PROGRAM PAD
3. PROGRAM LOCK PAD
4. NUMBER PADS(Time, Memory Programming)
5. POWER LEVEL SELECTOR PAD
6. DEFROST SELECTOR PAD
7. DOUBLE QUANTITY PAD
8. +30sec PAD (One Touch Cook Pad)
9. STOP/CANCEL PAD
10. START BUTTON
DISPLAY
TIME DISPLAY
PROGRAM
INDICATOR
AIR FILTER CHECK
INDICATOR
MEMORY PAD
NUMBER INDICATOR
DATA CHECK
INDICATOR
POWER SOURCE
CHECK INDICATOR
(When it shows,
heating does not work)
DOUBLE QUANTITY
INDICATOR
POWER LEVEL
INDICATORS
4
DEFROST
INDICATORS
CM1029-EU-1
2/11/00 4:58 AM
Page 5
Using this Instruction Booklet
GB
You have just purchased a SAMSUNG microwave oven. Your Owner’s Instructions contain valuable
information on cooking with your microwave oven:
◆ Safety precautions
◆ Suitable cookware
◆ Useful cooking tips
At the start of the booklet you will find illustrations of the oven, and more importantly the control panel
corresponding to your microwave model type, so that you can find the buttons more easily.
The step-by-step procedures use the different symbols below.
Press
☛
➢
Important
Note
PRECAUTIONS TO AVOID POSSIBLE EXPOSURE TO EXCESSIVE MICROWAVE ENERGY
◆ WARNING ◆
Failure to observe the following safety precautions may result in harmful exposure to microwave energy.
(a) Under no circumstances should any attempt be made to operate the oven with the door open or to tamper
with the safety interlocks (door latches) or to insert anything into the safety interlock holes.
(b) Do not place any object between the oven door and front face or allow food or cleaner residues to accumulate
on sealing surfaces. Ensure that the door and door sealing surfaces are kept clean by wiping after use first
with a damp cloth and then with a soft dry cloth.
(c) Do not operate the oven if it is damaged until it has been repaired by a qualified microwave service technician
trained by the manufacturer.
It is particularly important that the oven door closes properly and that there is no damage to the:
(1) Door, door seals and sealing surfaces
(2) Door hinges (broken or loose)
(3) Power cable
(d) The oven should not be adjusted or repaired by anyone other than a properly qualified microwave service
technician trained by the manufacturer.
5
CM1029-EU-1
2/11/00 4:58 AM
Page 6
Safety Precautions
GB
Before cooking food or liquids in your microwave oven, please check that the following safety
precautions are taken.
1
DO NOT use any metallic cookware in the microwave oven:
◆
◆
◆
Metallic containers
Dinnerware with gold or silver trimmings
Skewers, forks, etc.
Reason: Electric arcing or sparking may occur and may damage the oven.
2
DO NOT operate the microwave oven when it is empty.
Reason: The oven walls may be damaged.
Tip:
3
Leave a glass of water inside the oven at all times. The water will absorb the microwaves if you accidentally
set the oven going when it is empty.
DO NOT cover the rear ventilation ducts with cloths or paper.
Reason: The cloths or paper may catch fire as hot air is expelled from the oven.
4
ALWAYS use oven gloves when removing a dish from the oven.
Reason: Some dishes absorb microwaves and heat is always transferred from the food to the dish.
The dishes are therefore hot.
5
To reduce the risk of fire in the oven cavity:
◆ Do not store flammable materials in the oven
◆ Remove wire twist ties from paper or plastic bags
◆ Do not use your microwave oven to dry newspapers
◆ If smoke is observed, keep the oven door closed and switch off or disconnect the oven from the power supply
6
Be careful not to damage the power cable.
◆
◆
7
Do not immerse the power cable or plug in water and keep the power cable away from heated surfaces.
Do not operate this appliance if it has a damaged power cable or plug.
Stand at arm’s length from the oven when opening the door.
Reason: The hot air or steam released may cause scalding.
8
Keep the inside of the oven clean.
◆
Clean the inside of the oven after each use with a mild detergent solution, but let the microwave oven cool down
before cleaning in order to avoid injury.
Reason: Food particles or spattered oils stuck to oven walls or top can cause damage to the ceiling cover and
reduce the efficiency of the oven.
9
“Clicking” sound might be noticed while operating, especially at defrosting mode.
Reason: When the power output is changing electrically, you may hear this sound. This is normal.
6
CM1029-EU-1
2/11/00 4:58 AM
Page 7
Safety Precautions (continued)
GB
◆ WARNING ◆
DO NOT heat:
◆
Airtight or vacuum-sealed bottles, jars, containers
Example:
Baby food jars
◆
Airtight food - Food with skins
Example:
Eggs, nuts in shells, tomatoes
Reason: The increase in pressure may cause them to explode.
Tip:
Remove lids and pierce skins, bags, etc.
Take particular care when heating liquids and baby foods.
◆
◆
◆
◆
◆
◆
◆
◆
ALWAYS allow a standing time of at least 30 seconds after the oven has been switched off to allow the temperature
to equalize.
Stir during heating if necessary and ALWAYS stir after heating.
To prevent eruptive boiling and possible scalding, you should stir before, during, and after heating.
In the event of scalding, follow these FIRST AID instructions:
•
Immerse the scalded area in cold water for at least 10 minutes.
•
Cover with a clean, dry dressing.
•
Do not apply any creams, oils or lotions.
NEVER fill the container to the top and choose a container that is wider at the top than at the bottom to prevent the
liquid from boiling over. Bottles with narrow necks may also explode if overheated.
ALWAYS check the temperature of baby food or milk before giving it to the baby.
NEVER heat a baby’s bottle with the teat on, as the bottle may explode if overheated.
During microwave heating of beverages, there are results in delayed eruptive boiling, therefore care has
to be taken when handling the container.
IMPORTANT SAFETY INSTRUCTIONS
During cooking, you should look into the oven from time to time when food is being heated or cooked
in disposable containers of plastic, paper or other combustible materials.
IMPORTANT
Young children should NEVER be allowed to use or play with the microwave oven.
Nor should they be left unattended near the microwave oven when it is in use.
Items of interest to children should not be stored or hidden just above the oven.
7
CM1029-EU-1
2/11/00 4:58 AM
Page 8
Installing your Microwave Oven
This microwave oven can be placed almost anywhere (kitchen
work surface or shelf, movable trolley, table).
GB
☛
◆ Properly earthed (3-pin plug)
Recommendations
DO NOT install the microwave oven in
hot or damp surroundings.
Example: Next to a traditional oven or
radiator.
The power supply specifications of the
oven must be respected and any
extension cable used must be of the
same standard as the power cable
supplied with the oven.
Wipe the interior and the door seal
with a damp cloth before using your
microwave oven for the first time.
For your personal safety, this appliance must be:
◆ Plugged into a standard 230 Volt, 50 Hz,
AC earthed socket
1
Install the oven on a flat, level, stable surface. Make sure there is adequate
ventilation for your oven by leaving at least 10cm(four inches) of space
behind and on the sides of the oven and 20cm(eight inches) above.
2
Never block the air vents as the oven may overheat and automatically
switch itself off. It will remain inoperable until it has cooled sufficiently.
3
Remove all packing materials inside the oven.
4
Plug the cable into a 3-pin, earthed socket. If the power cable of this
appliance is damaged, it must be replaced by a special cable as supplied
from service centre.
☛
Be sure to remove the protective film from outer case.
The protective film is on the outer case to prevent
scratches.
When installing or before using, be sure to remove it.
Outdoor Use
This microwave oven is not designed for outdoor use.
You should use it indoors only.
During Air Cooling
Do not turn power off while the cooling fan is automatically aircooling for 1min.
8
CM1029-EU-1
2/11/00 4:58 AM
Page 9
Cleaning Your Microwave Oven
GB
The following parts of your microwave oven should be cleaned
regularly to prevent grease and food particles from building up:
◆ Inside and outside surfaces
◆ Door and door seals
◆ Plate tray
☛
ALWAYS ensure that the door seals are clean and the
door closes properly.
1
Clean the outside surfaces with a soft cloth and warm, soapy water. Rinse
and dry.
2
Remove any splashes or stains on the inside surfaces with a soapy cloth.
Rinse and dry.
3
To loosen hardened food particles and remove smells, place a cup of diluted
lemon juice on the plate tray and heat for three minutes at maximum power.
Recommendations
DO NOT spill water in the vents.
NEVER use any abrasive products or
chemical solvents.
Take particular care when cleaning the
door seals to ensure that no particles:
◆ Accumulate
◆ Prevent the door from closing
correctly
Storing and Repairing Your Microwave Oven
A few simple precautions should be taken when storing or having
your microwave oven serviced.
The oven must not be used if the door or door seals are damaged:
◆ Broken hinge
◆ Deteriorated seals
◆ Distorted or bent oven casing
Only a qualified microwave service technician should perform
repairs.
☛
NEVER remove the outer casing from the oven. If the
oven is faulty and needs servicing or you are in doubt
about its condition:
◆ Unplug it from the wall socket
◆ Contact the nearest after-sales service centre
9
CM1029-EU-1
2/11/00 4:58 AM
Page 10
Cookware Guide
GB
To cook food in the microwave oven, the microwaves must be able to penetrate the food, without being
reflected or absorbed by the dish used.
Care must therefore be taken when choosing the cookware. If the cookware is marked microwave-safe,
you do not need to worry.
The following table lists various types of cookware and indicates whether and how they should be used
in a microwave oven.
Cookware
Microwave-Safe
Comments
Aluminium foil
✔ ✘
Browning plate
✔
Do not preheat for more than three minutes.
China and earthenware
✔
Porcelain, pottery, glazed earthenware and bone china are
usually suitable, unless decorated with a metal trim.
Disposable polyester
cardboard dishes
✔
Some frozen foods are packaged in these dishes.
✔
Can be used to warm food. Overheating may cause the
polystyrene to melt.
May catch fire.
May cause arcing.
Fast-food packaging
• Polystyrene cups and
containers
• Paper bags or newspaper
• Recycled paper or metal trims
Glassware
• Oven-to-tableware
• Fine glassware
•
•
Can be used, unless decorated with a metal trim.
Can be used to warm foods or liquids. Delicate glass may
break or crack if heated suddenly.
Must remove the lid. Suitable for warming only.
✔
Dishes
Freezer bag twist ties
✘
✘
May cause arcing or fire.
Plates, cups, napkins and
kitchen paper
Recycled paper
✔
For short cooking times and warming. Also to absorb excess
moisture.
May cause arcing.
Paper
•
✔
✔
Glass jars
Metal
•
•
✘
✘
Can be used in small quantities to protect areas against
overcooking. Arcing can occur if the foil is too close to the
oven wall or if too much foil is used.
Plastic
• Containers
✘
✔
✔
•
Cling film
•
Freezer bags
✔ ✘
Wax or grease-proof paper
✔
10
Particularly if heat-resistant thermoplastic. Some other
plastics may warp or discolour at high temperatures. Do not
use Melamine plastic.
Can be used to retain moisture. Should not touch the food.
Take care when removing the film as hot steam will escape.
Only if boilable or oven-proof. Should not be airtight. Prick
with a fork, if necessary.
Can be used to retain moisture and prevent spattering.
CM1029-EU-2
2/11/00 4:59 AM
Page 11
Cooking/Reheating
This oven is preset at the factory for automatic operation.
1
Make sure the oven is plugged into a properly earthed electrical outlet and
“ON” appears in the display window.
2
Open the door.
The oven lamp will be turned on.
3
Put the food into a suitable container, place it in the centre of the oven and
then close the door securely.
Result: The oven lamp will go off.
4
Select the desired power level by pressing the Power Level Selector pad.
Result: The selected power level will be displayed in the display window.
5
Set the desired heating time by pressing the Number pads.
Result: The selected time is displayed in the display window.
6
Press
Result:
GB
P
P
button:
The oven lamp and cooling fan will be turned on.
Heating will start.
The time on digital display will count down.
START BUTTON
7
When all time is elapsed, the end of cycle Beep Tone will sound 4 times and
all heating will stop. The oven lamp will go off. For 1 min, the display shows
‘
‘ and the cooling fan will keep working in order to cool down the interior
parts. During the time, the fan will not stop even when you open the door. 1
min later it will stop and “ON” appears again. Food may be removed from
oven whilst the fan is still running.
➢ When you first plug in the power cord, the oven
beeps once and all the indicators show for 5 sec
in the display window.
➢ When heating cycle is completed and you open
the door, the oven lamp automatically turns on
and goes off 1 min later.
8
Open the door and take the food out.
9
Close the door. The oven lamp will go off.
➢
Whilst in a heating cycle, one press on
pad stops the oven.
At this time, the Power Check Indicator “ON” starts blinking and
goes off when the
pad or
button is pressed again. You can
restart it by pressing the
button or a second press on
pad
will cancel the selected program. While NOT in a heating cycle,
one tap on
pad cancels the selected program.
You can press +30sec pad one or more times in order to add the
cooking time by 30 seconds. But you can not exceed the
maximum time per power level allowed for power level
selected.
➢ When you open the door whilst in a heating
cycle, the oven stops operating and the oven
lamp automatically turns on for 1 min and goes
off 1 min later. If you leave the oven door open
for more than 1 min, the oven beeps once every
minute and after 5 min the power source check
indicator ‘ON’ appears in the display window.
11
CM1029-EU-2
2/11/00 4:59 AM
Page 12
Power Levels and Time Variations
GB
The power level function enables you to adapt the amount of
energy dissipated and thus the time required to cook or reheat
your food, according to its type and quantity. You can choose
between the power levels below.
Power Level
HIGH(
)
MEDIUM(
LOW(
)
)
HIGH DEFROST(
LOW DEFROST(
)
)
Output
CM1029
100%
1000 W
70%
700 W
50%
500 W
30%
300 W
18%
180 W
The cooking times given in recipes and in this booklet correspond
to the specific power level indicated.
Power Level
HIGH(
)
MEDIUM(
LOW(
Max. Time
25 min.
)
40 min.
)
40 min.
HIGH DEFROST(
LOW DEFROST(
)
)
50 min.
50 min.
Power levels may be changed during the cooking/reheating cycle
by pressing the power level pad or defrost selector pad. The oven
doesn’t need to be stopped to do this.
Repeat Feature
START BUTTON
12
1
You can repeat the previous cooking setting (regardless of manual or
automatic memory heating) by pressing the START button. The oven starts
with exactly the same heating time and power level that were used in the
last operation.
2
The repeat feature will be cancelled once the power source is cut off.
CM1029-EU-2
2/11/00 4:59 AM
Page 13
Using +30sec Pad
This is a ONE TOUCH COOK pad.
By touching the pad once, you can start heating instantly.
You can increase the cooking time by pressing the +30sec pad
while heating is being done.
GB
A cooking time increases by 30 seconds at each press on +30sec
pad. But it can not exceed the maximum time.
Like traditional cooking, you may find that, depending on the
food’s characteristics or your tastes, you have to adjust the cooking
times slightly. You can:
◆ Check how cooking is progressing at any time simply by
opening the door
◆ Close the door
◆ Increase the remaining cooking time
+ 30sec
Before operating the oven, times can be increased/decreased using either the time
pads or +30sec button. During the operating, time may only be added by using the
+30sec button.
Using the Defrost Feature
The Defrost feature enables you to defrost meat, poultry or fish.
☛
Use only containers that are microwave-safe.
1
Open the door.
2
Place the frozen food in the centre of the plate tray.
3
Close the door.
4
Press the Defrost selector pad to set DEFROST HIGH (
) or DEFROST
LOW (
) as you wish.
Result: The selected DEFROST indicator appears in the display.
➢ When the oven was operating for longer than 25
min under Defrosting cycle, you can NOT
change the power level from Defrosting to
Heating(Cooking/Reheating) mode.
P
5
Press the Number pads to set the defrosting time. (Max. 50 min)
P
6
Press
Result:
➢
button.
Defrosting begins.
It is not possible to set a defrosting time for longer than 50min. The
defrost indicator will flash and it is advisable to press CANCEL and
enter a new defrost level and time.
START BUTTON
13
CM1029-EU-2
2/11/00 4:59 AM
Page 14
Memory Pads Programming
GB
1
P
Hold down PROGRAM LOCK and then press PROGRAM pad. Hold together
for 2 sec.
➢
Result:
Be sure to press the pads firmly.
PROG indicator appears in the digital display.
2
Press appropriate NUMBER pad for the desired memory number.
Result: Selected memory program code appears below the PROGRAM
indicator.
3
Select power level by pressing the POWER LEVEL pad.
Result: Default power level HIGH appears in the display at first press of
the POWER LEVEL pad.
P
➢
P
4
Press the POWER LEVEL pad one or more times until you get the
desired power level.
Press NUMBER pads to set the cooking time.
➢
P
The maximum time according to each cooking power level can be
referred to in the title “Power Levels and Time Variations” on page
11~12. The NUMBER pads will not operate or respond when you
press a cooking time exceeding the maximum value.
It is not possible to set a cooking time for longer than the maximum
time allowed on the chosen program. The power level indicator will
flash and it is advisable to press CANCEL and to enter a new power
level and cooking time.
5
Hold down PROGRAM LOCK and then press PROGRAM pad. Hold
together for 2 sec once again.
Result: PROG indicator and memory number indicator blink 3 times in the
digital display with a beep sound. And then the display goes blank.
Caution: Be sure to press the pads firmly in the right position.
6
When you want to program more, repeat the procedures above again.
P
➢
Memory programs are available up to 20 items. Make sure the unit
is properly programmed.
After programming is finished, all you have to do for memory cooking
is to press the NUMBER pad. Then the selected memory program
automatically starts cooking.
14
CM1029-EU-2
2/11/00 4:59 AM
Page 15
How to Operate Memory Cooking
GB
After having finished memory programming, just press the
NUMBER pad of the memory number you want to select. The oven
will automatically start heating according to the pre-programmed
cooking time and power level after a short delay (5 sec).
1
Make sure the oven is plugged into a properly earthed electrical outlet and
“ON” appears in the display window.
2
Open the door.
The oven lamp will be turned on.
3
Put the food into a suitable container, place it in the centre of the oven and
then close the door securely.
Result: The oven lamp will go off.
4
Press NUMBER pad.
Result: After 2 seconds, the selected memory program automatically
starts heating.
P
Stopping the Cooking
You can stop cooking at any time so that you can:
◆ Check the food
◆ Turn the food over or stir it
◆ Leave it to stand
To stop the cooking...
Then...
Temporarily
◆ Open the door or press
Result:
+ 30sec
pad once.
Cooking stops.
To resume cooking, close the door and
press
again.
Completely
Press the
Result:
pad twice.
The cooking settings are
cancelled.
If you want to cancel any cooking settings before starting cooking, simply press
CANCEL once.
15
CM1029-EU-2
2/11/00 4:59 AM
Page 16
Double Quantity Pad Programming
GB
1
Hold down
2
Select desired program code by using NUMBER pads.
3
Press NUMBER pads to set the magnification factor within the range from
1.00 to 9.99.
+ 30sec
➢
P
and then press
pad. Hold together for 2 seconds.
Default factor is 1.65 preset from the manufacturer for increasing the
cooking time.
Make sure that you set a correct factor between 1.00 and 9.99 for
each memory code number.
4
Press
button.
5
Press
pad to exit the programming mode.
➢
+ 30sec
Though you can successfully set a double quantity factor whose
setting might result in excess of the maximum time allowed for each
power level, the oven does not operate exceeding the maximum
time.
START BUTTON
Double Quantity Factor Editing
Feature
Key Entry
Display
Remark
Hold down CANCEL and then
pad.
Hold down for 2 sec.
Code No.
After 1 sec, default value shows
in the display window.
(Input desired factor value.)
1.00 ~ 9.99 available
(Change the factor if required.)
If you don’t want to change
START
more, press CANCEL to exit
the editing mode.
New Code No.
Skip this step if not necessary.
(Input desired factor value.)
Skip this step if not necessary.
START
Skip this step if not necessary.
Double Quantity
Factor Edit
CANCEL
16
(Mode cancel)
This exits the editing mode.
CM1029-EU-2
2/11/00 4:59 AM
Page 17
How to Operate Double Quantity Pad
GB
1
Press the Double Quantity pad.
2
Press the desired memory number pad.
Result:
➢
P
Cooking time which was multiplied by the preset factor appears
in the display and cooking starts with time digits counting down.
You don’t need to press
button to start heating.
P
Controlling Beep Tone
You can select the beep tone you require. There are 4 sound levels
available.
1
Hold down
and then press NUMBER 0 pad. Hold together for 2
seconds.
Result: Beep tone is changed to one level higher than current one.
➢
Beep tone 0 does not make beep sound.
+ 30sec
Settings are circulating whenever you press the hidden keys in the following order.
Snd 0 → Snd 1 → Snd 2 → Snd 3 → Snd 0 (No sound)
➢
Default tone is Snd 2.
Error Codes
Error Items
Power frequency Error(50/60Hz)
Code
E1
Error Beep
One long beep
for 2 sec
Cause/Remedy
Cause:
Power frequency is other than 50 Hz.
Remedy: • Unplug the power cord plug and check if the
power frequency is 50 Hz.
• Plug the power cord in 50 Hz power source and
see If “E1” appears. If the error code is displayed
again even after the correct power source is
provided, contact the nearest service centre.
Cause:
EEPROM Error
E5
One long beep
for 2 sec
Remedy:
Memory IC (EEPROM IC) is not working correctly.
In this case, other features except for memory
function work properly. (You can operate the oven
manually)
Press CANCEL pad one or more times and try
to start a memory heating. If the error code “E5”
persists, contact your nearest service centre.
17
CM1029-EU-2
2/11/00 5:00 AM
Page 18
Hidden Keys
GB
Note: Press Key 1 and then the next one. Hold for 2 secs.
Key Entry
Feature
Display
Key 1
Remark
Next
Continuity time total
CANCEL
1
Hold together for 2 sec.
Unit: 10 hrs.
Magnetron oscillating
time total
CANCEL
2
Hold together for 2 sec.
Unit: 1 hr.
CANCEL
Start
Hold together for 2 sec.
Code No.
739 times of use
(Data display after 2 sec.)
Number of times of use by
memory program code
(New code can be set after
data display)
CANCEL
CANCEL
P
Hold together for 2 sec.
(Sequentially displays for
3 sec from 1 to 20)
Heating time per memory
program code
(Automatic sequential display)
CANCEL
18
(Mode Cancel)
(Mode Cancel)
CM1029-EU-2
2/11/00 5:00 AM
Page 19
Care of Your Microwave Oven
GB
Cleaning the Microwave Oven
1
Unplug the oven from the electrical socket before cleaning.
2
Clean the inside of the oven. Wipe up all spills with a damp cloth. Kitchen
detergent solution may be used if the oven gets too dirty. Do not use harsh
detergents or abrasives.
➢
If food remnant or spilled liquids stick to the oven walls, or between
door seal and door surface, they will absorb microwaves possibly
resulting in arcing or sparks.
3
Clean the outside of the oven with soap and water, then dry with a soft cloth.
Caution: Make sure that water does not get into the back ventilation or
control panel opening.
4
When you clean the window of the door, be sure to use a soft cloth after
washing with very mild soap and water. Do not use window cleaner as the
front door can be scratched by harsh soap or cleaners.
Cleaning the Ceiling Cover
P
+ 30sec
1
Hold side stoppers of ceiling cover with both hands and pull them in and
down. Then take the ceiling cover out of the oven cavity.
2
Rinse ceiling cover in soapy water or Food Sanitizer Solution.
3
Be sure to replace the ceiling cover before using the oven.
CAUTION
Ceiling cover must be in place securely when you use the oven.
When you removed the Ceiling Cover for the purpose of cleaning, be
sure to be extremely careful about the exposed inside components on
the top of the oven cavity. If any of them are deformed, abnormal
symptom can happen such as arcing or sparks during operation. In case
of such problem, contact the nearest after-sales service centre.
Ceiling Cover
19
CM1029-EU-2
2/11/00 5:00 AM
Page 20
Care of Your Microwave Oven (continued)
GB
Cleaning the Air Filter
P
+ 30sec
Clean the Air Filter regularly according to the following
instructions. The oven may have problems when the Air Filter
becomes clogged with dust.
1
Remove the bolt at both ends of the Air Filter.
2
Lift the Air Filter off the post carefully.
3
Wash this filter in warm soapy water.
4
Be sure to replace the Air Filter before using the oven.
Bolt
➢
➢
If the Air Filter becomes clogged with debris, this will cause an
overheating problem on the oven.
If the want to change the air filter clean time, refer to “Programming
Air Filter Clean Time”.
Programming Air Filter Clean Time
When the air filter check indicator (FILTER) appears in the display
window after a certain time of use, you should clean the air filter
according to the instructions “Cleaning the Air Filter” on page 20
in this booklet. Then follow the procedure as below if you want to
change the air filter clean time.
P
1
P
Hold down PROGRAM LOCK and then press NUMBER 3 pad. Hold
together for 2 seconds.
Result: The display will show the length of time in hours between
cleaning the air filter you have programmed in or the original time
preset by the manufacturer.
➢
2
Default clean time is 500 hours in terms of pure oscillating time, not
the continuity time.
Press NUMBER pads to set the desired clean time.
➢
You can set up to 999 hours.
P
+ 30sec
20
3
Hold down PROGRAM LOCK and then press NUMBER 3 pad. Hold
together for 2 seconds in order to save the new value.
This completes the programming of the air filter clean time.
4
Press CANCEL pad to return to cooking mode.
➢
After the clean time has expired, you should clean the air filter.
CM1029-EU-2
2/11/00 5:00 AM
Page 21
Replacement of Lamp
GB
Important
1
Remove a screw securing the lamp cover.
➢
You don’t need to remove outer panel to replace lamp.
2
Remove the lamp by rotating it clockwise.
3
Replace with a new lamp by rotating it counter-clockwise.
Lamp Cover
Lamp Holder
Lamp
(230V 25W)
Outer Panel
21
CM1029-EU-2
2/11/00 5:00 AM
Page 22
Cooking Guide
GB
Cooking Guide for fresh vegetables
Use a suitable glass pyrex bowl with lid. Cook covered for the minimum time - see table.
Continue cooking to get the result you prefer. Stir once during and once after cooking !
Add salt, herbs or butter after cooking.
Cover during a standing time of 3 minutes.
Hint: Cut the fresh vegetables into even sized pieces. The smaller they are cut, the quicker they will
cook.
Fresh
Vegetables
Portion
Method
Power
Time
(min.)
Standing
Time(min.)
Broccoli
500 g
Cut into even sized florets.
Add 60-75 ml cold water (4-5 tbsp.).
High
4-4 1/2
3
Brussel sprouts
500 g
Add 120-150 ml (8-10 tbsp.) water.
High
5-51/2
3
Carrots
500 g
Cut into even sized slices.
Add 60-75 ml cold water (4-5 tbsp.).
High
41/2-5
3
Cauliflower
500 g
Cut into even sized florets.
Add 60-75 ml cold water (4-5 tbsp.).
High
5-51/2
3
Green Beans
500 g
Cut into slices.
Add 60-75 ml cold water (4-5 tbsp.).
High
5-51/2
3
Potatoes
500 g
Cut the peeled potatoes into halves.
Add 60-75 ml cold water (4-5 tbsp.).
High
5-51/2
3
Cooking Guide for frozen vegetables and frozen rice
Use a suitable glass pyrex bowl with lid. Cook covered for the minimum time - see table.
Continue cooking to get the result you prefer.
Stir twice during cooking and once after cooking! Add salt, herbs or butter after cooking.
Cover during standing time.
Frozen
Vegetables/Rice
Portion
Method
Power
Time
(min.)
Standing
Time(min.)
Cauliflower
500 g
Add 60-75 ml (4-5 tbsp.) cold water.
Medium
91/2 -101/2
3
Peas
500 g
Add 15-30 ml (1-2 tbsp.) cold water.
Medium
9 - 10
3
Mixed Vegetables 500 g
(carrots, peas, corn)
Add 15-30 ml (1-2 tbsp.) cold water.
Medium
10-11
3
Mixed Vegetables 500 g
(e.g. Ratatouille)
Add 15-30 ml (1-2 tbsp.) cold water.
Medium
101/2 -111/2
3
White Rice
500 g
Stir once or twice during reheating.
Medium
7-8
2-3
Rice + Vegetables 300 g
Stir once or twice during reheating.
Medium
6-7
2-3
22
CM1029-EU-2
2/11/00 5:00 AM
Page 23
Cooking Guide
GB
Reheating Soup and Stew
Use the power levels and times in this table as a guide lines for reheating.
Fresh
Vegetables
Portion
Method
Power
Time
(min.)
Standing
Time(min.)
Soup
(chilled)
250 g
Pour into a deep ceramic plate.
Reheat covered. Stir during reheating.
High
2 -21/2
2-3
Stew
(chilled)
250 g
500 g
Pour into a deep ceramic plate or bowl.
Reheat covered. Stir during reheating.
Medium
41/2 -5
51/2 -6
2-3
Bean Stew
(canned)
350 g
Pour into a deep ceramic plate or bowl.
Reheat covered. Stir during reheating.
Medium
31/2 -4
2-3
Chilli
(chilled)
350 g
Pour into a deep ceramic plate.
Reheat covered. Stir during reheating.
Medium
4-41/2
2-3
Soup
(frozen)
500 g
Pour into a glass pyrex dish with lid.
Reheat covered. Stir during reheating.
High
10-12
2-.3
Time
(min.)
Standing
Time(min.)
Reheating Dish Entrees
Use the power levels and times in this table as a guide lines for reheating.
Fresh
Vegetables
Portion
Method
Power
Plated Meal
(chilled)
350g
Plate a meal of 2-3 chilled components Medium
on a ceramic dish. Reheat covered.
31/2 -41/2
3
Chicken Curry
& Rice
(chilled)
300 g
Plate a meal of 2 chilled components
on a ceramic dish (e. g rice and curry).
Reheat covered.
Medium
21/2 -31/2
3
Pasta, plain
(chilled)
500 g
Put the plain pasta in a glass pyrex
bowl with lid. Reheat covered.
Stir once ore twice during reheating.
Medium
4-5
1-2
Pasta with sauce 350 g
(chilled)
Put pasta (e.g. spaghetti or egg
noodles) on a flat ceramic plate.
Reheat covered.
Stir during reheating.
High
3-4
3
Filled pasta in
350 g
Put filled pasta (e.g. ravioli,
tortellini) in a deep ceramic plate.
Reheat covered.
Stir occasionally during reheating.
Medium
4-5
3
Lasagne
400 g
Put chilled lasagne in an oval dish.
Place the dish in the oven widthways.
Reheat covered.
High
41/2 -51/2
3
Bechamel
Potatoes
(chilled)
400 g
Put bechamel potatoes on a flat
ceramic plate. Reheat covered.
Medium
51/2 -61/2
3
High
31/2 - 41/2
2-3
Baked
500 g
Pierce film and put potatoes
Potatoes
(2 x 250 g) on a flat ceramic plate.
(ready cooked
and chilled)
23
CM1029-EU-2
2/11/00 5:00 AM
Page 24
Cooking Guide
GB
Cooking Breakfast
Use the power levels and times in this table as a guide lines for cooking.
Fresh
Vegetables
Bacon
(chilled)
Portion
Method
2 slices à 20 g Put bacon slices on kitchen paper
on a flat ceramic plate.
Power
Time
(min.)
Standing
Time(min.)
High
ca 11/2
1
Scrambled
Eggs
(chilled)
2 eggs
Beat eggs, add salt and 2 tbsp. milk.
Put in a deep ceramic plate.
Stir several times during cooking.
Medium
ca. 11/2
1
Baked Beans
(canned)
250 g
Put the beans in a deep ceramic plate. Medium
Reheat covered. Stir during reheating.
21/2 -3
1-2
Power
Time
(min.)
Standing
Time(min.)
Medium
2 - 21/2
2-3
Medium
ca 11/2
2-3
Low
11/2 -2
1-2
Medium
2-21/2
2-3
Reheating Snacks
Use the power levels and times in this table as a guide lines for cooking.
Fresh
Vegetables
Portion
Method
Cheeseburger
(frozen)
150 g (1pc)
Put burger on kitchen paper on a
ceramic plate.
Hot Dog
(chilled)
125 g (1 pc) Put hot dog on kitchen paper on
a ceramic plate.
Pizza; Slice
(chilled)
100 g
Put the pizza slice on a ceramic plate.
Quiche/ Pie
(chilled)
150 g
Put quiche on kitchen paper on
a ceramic plate.
24
CM1029-EU-2
2/11/00 5:00 AM
Page 25
Cooking Guide
GB
Defrosting Bread and Cake
Use the power levels and times in this table as a guide lines for cooking.
Fresh
Vegetables
Portion
Baguettes
150 g (1pc)
Bread Rolls
Method
Power
Time
(min.)
Standing
Time(min.)
2-21/2
3-5
Defrost 2
41/2 -5
3-5
High
ca 1/2
1-2
Put the baguette widthways on
Defrost 2
kitchen paper in the oven.
Turn over after half of defrosting time.
8-10 pc a 50 g Put the rolls side by side on kitchen
paper in the oven. Turn over after
half of defrosting time.
Croissants
(defrosting
& warming)
2 pc a 40 g
Put the croissants on kitchen paper on
a ceramic plate.
Cream Cake
(slight de
frosting)
100 g (1pc)
Put the piece of cake on a ceramic
plate. Let stand until cream is
totally defrosted.
Defrost 1
1 - 11/2
10-20
Fruit Cake
(defrosting
& warming)
100 g (1pc)
Put the piece of cake on a
ceramic plate.
Defrost 2
11/2 - 2
5-10
Power
Time
(min.)
Standing
Time(min.)
Defrosting or Reheating Desserts
Use the power levels and times in this table as a guide lines for cooking.
Fresh
Vegetables
Portion
Method
Defrosting
Berries
(frozen)
250 g
Distribute berries on a flat glass
pyrex dish.
Defrost 2
5-6
5-10
Cooking
Berries in sauce
(chilled)
250 g
Put fruits in a glass pyrex bowl
with lid. Reheat covered.
Stir occasionally during cooking.
Medium
3 - 31/2
2-3
100 g
Put frozen pastry on kitchen paper
on a ceramic plate.
Low
11/2 - 2
1-2
Medium
31/2 - 4
2-3
Warming
Puff Pastry,
filled
(frozen)
Reheating
Yeast Dumplings 300 g (3-4)
with jam filling
(frozen)
Put yeast dumplings side by side in
a glass pyrex bowl with lid. Moist the
top of them with cold water.
Cook covered.
25
CM1029-EU-2
2/11/00 5:00 AM
Page 26
Technical Specifications
GB
SAMSUNG strives to improve its products at all times. Both the design specifications and these user
instructions are thus subject to change without notice.
Model
CM1029
Power source
230 V ~ 50 Hz
Power consumption
Microwave
1, 700 W
Output power
1, 000W (IEC-705)
Operating frequency
2, 450 MHz
Dimensions (W x H x D)
Outside
464 x 368 x 557 mm
Oven cavity
370 x 190 x 370 mm
Volume
26 litre
Net Weight
26.5 Kg approx.
43
557
530
26
1000
368
464
444
10
26
486
514
CM1029-EU-2
2/11/00 5:00 AM
Page 27
Memo
GB
27
CM1029-EU-2
2/11/00 5:00 AM
Page 28
THIS APPLIANCE IS MANUFACTURED BY:
ELECTRONICS
Printed in Korea