1
Administering AD DS Domain Controllers Administering AD DS Domain Controllers
Module 12
Administering AD DS Domain Controllers
Contents:
Lesson 1: Domain Controller Installation Options
12-3
Lab A: Install Domain Controllers
12-24
Lesson 2: Install a Server Core Domain Controller
12-29
Lab B: Install a Server Core Domain Controller
12-35
Lesson 3: Manage Operations Masters
12-38
Lab C: Transfer Operations Master Roles
12-53
Lesson 4: Configure Global Catalog
12-57
Lab D: Configure Global Catalog and
Universal Group Membership Caching
12-64
Lesson 5: Configure DFS-R Replication of SYSVOL
12-67
Lab E: Configure DFS-R Replication of SYSVOL
12-74
12-1
12-2
Configuring and Troubleshooting Windows Server® 2008 Active Directory® Domain Services
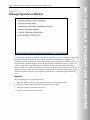
Module Overview
Domain controllers host the Active Directory® Domain Services (AD DS) and perform the services that
support identity and access management in a Windows® enterprise. Until now, you saw how you can
support the logical and management components of an AD DS infrastructure such as users, groups,
computers, and Group Policy. Each of these components is contained in the directory database and in
SYSVOL on domain controllers. In this module, you will explore the service-level components of Active
Directory, starting with the domain controllers. You will learn how to add Windows Server® 2008 and
Windows Server 2008 R2 domain controllers to a forest or domain, how to prepare a Windows Server
2003 forest or domain for its first Windows Server 2008 or Windows Server 2008 R2 domain controller,
and how to manage the roles performed by domain controllers. In addition, you will see how to migrate
the replication of SYSVOL from the File Replication Service (FRS) used in the previous versions of Windows
to the Distributed File System Replication (DFS-R) mechanism that provides more robust and manageable
replication.
Objectives
After completing this module, you will be able to:
•
Describe the various options for installing domain controllers.
•
Install and configure a domain controller on Server Core.
•
Manage the placement, transfer, and seizure of operations master roles.
•
Migrate SYSVOL replication from FRS to DFS-R.
Administering AD DS Domain Controllers Administering AD DS Domain Controllers
12-3
Lesson 1
Domain Controller Installation Options
In Module 1, Introducing Active Directory Domain Services, you used the Add Roles Wizard in Server
Manager to install AD DS. Then, you used the Active Directory Domain Services Installation Wizard to
create the first domain controller in the contoso.com forest. Because domain controllers are critical to
authentication, you need to maintain at least two domain controllers in each domain in your forest to
provide a level of fault tolerance if one domain controller fails. You might also need to add domain
controllers to remote sites or create new domains or trees in your Active Directory forest. In this lesson,
you will learn user-interface, command-line, and unattended methods for installing domain controllers in
various scenarios.
Objectives
After completing this lesson, you will be able to:
•
Install a domain controller using the Windows interface, dcpromo.exe command-line parameters, or
an answer file for unattended installation.
•
Add Windows Server 2008 or Windows Server 2008 R2 domain controllers to a domain or forest with
Windows Server 2003 and Windows 2000 Server domain controllers.
•
Create new domains and trees.
•
Perform a staged installation of a read-only domain controller.
•
Install a domain controller from installation media to reduce network replication.
•
Remove a domain controller.
12-4
Configuring and Troubleshooting Windows Server® 2008 Active Directory® Domain Services
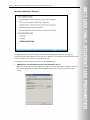
Install a Domain Controller by Using the Windows Interface
To use the Windows interface for installing a domain controller, you need to perform two major steps.
First, you must install the AD DS role, which can be accomplished by using the Add Roles Wizard in Server
Manager. After the AD DS role installation has copied the binaries required for the role to the server, you
must install and configure AD DS by launching the Active Directory Domain Services Installation Wizard
by using one of these methods:
•
Click Start and, in the Start Search box, type dcpromo, and then click OK.
•
When you complete the Add Roles Wizard, click the link to launch the Active Directory Domain
Services Installation Wizard.
•
After adding the AD DS role, links appear in Server Manager that remind you to run the Active
Directory Domain Services Installation Wizard. Click any of those links.
Note Microsoft documentation for Windows Server 2008 emphasizes the role-based
model, so it recommends that you add the AD DS role and then run Dcpromo.exe (the Active
Directory Domain Services Installation Wizard). However, you can simply run Dcpromo.exe,
and as a first step, the wizard detects that the AD DS binaries are not installed and adds the
AD DS role automatically.
Administering AD DS Domain Controllers Administering AD DS Domain Controllers
12-5
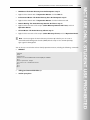
Unattended Installation Options and Answer Files
You can also add or remove a domain controller at the command line by using unattended installation
supported by the Windows Server 2008 and Windows Server 2008 R2 version of dcpromo.exe.
Unattended installation options provide values to the Active Directory Domain Services Installation
Wizard. For example, the NewDomainDNSName option specifies a fully qualified domain name (FQDN)
for a new domain.
These options can be provided at the command line by typing dcpromo /unattendOption:value, such as
dcpromo /newdomaindnsname:contoso.com. Alternatively, you can provide the options in an unattended
installation answer file. The answer file is a text file that contains a section heading, [DCINSTALL], followed
by options and their values in the option=value form. For example, the following file provides the
NewDomainDNSNameoption.
[DCINSTALL]
NewDomainDNSName=contoso.com
The answer file is called by adding its path to the unattended parameter, as shown in the following
example:
dcpromo /unattend:"path to answer file"
The options in the answer file can be overridden by parameters on the command line. For example, if the
NewDomainDNSName option is specified in the answer file, and the /NewDomainDNSName parameter is
used on the command line, the value on the command line takes precedence. If any required values are
neither in the answer file nor on the command line, the Active Directory Domain Services Installation
Wizard prompts for the answers, so you can use the answer file to partially automate an installation,
providing a subset of configuration values to be used during an interactive installation.
The wizard is not available when running dcpromo.exe from the command line in Server Core. In that
case, the dcpromo.exe command returns with an error code.
12-6
Configuring and Troubleshooting Windows Server® 2008 Active Directory® Domain Services
For a complete list of parameters that you can specify as part of an unattended installation of AD DS,
open an elevated command prompt and type the following command:
dcpromo /?[:operation]
In the preceding command, operation is one of the following:
•
Promotion returns all parameters that you can use when creating a domain controller.
•
CreateDCAccount returns all parameters that you can use when creating a prestaged account for a
read-only domain controller (RODC).
•
UseExistingAccount returns all parameters that you can use to attach a new domain controller to a
prestaged RODC account.
•
Demotion returns all parameters that you can use when removing a domain controller.
Note When you use the Windows interface to create a domain controller, the Active
Directory Domain Services Installation Wizard gives you the option, on the Summary page, to
export your settings to an answer file. If you need to create an answer file for use from the
command line—for example, on a Server Core installation—you can use this shortcut to
create an answer file with the correct options and values.
Administering AD DS Domain Controllers Administering AD DS Domain Controllers
12-7
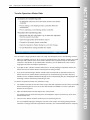
Install a New Windows Server 2008 Forest
In Module 1, the installation of the first Windows Server 2008 domain controller in a new forest by using
the Windows interface was discussed. You learned the detailed steps to add the AD DS role to a server by
using Server Manager and then running Dcpromo.exe to promote the server to a domain controller.
When creating a new forest root domain, you must specify the forest root domain name system (DNS)
name, its NetBIOS name, and the forest and domain functional levels. The first domain controller cannot
be an RODC and must be a global catalog server. If the Active Directory Domain Services Installation
Wizard detects that it is necessary to install or configure DNS, it does so automatically.
You can also use an answer file by typing dcpromo /unattend:"path to answer file" where the answer file
contains unattended installation options and values. The following example contains the minimum
parameters for an unattended installation of a new Windows Server 2008 domain controller in a new
forest.
[DCINSTALL]
ReplicaOrNewDomain=domain
NewDomain=forest
NewDomainDNSName=fully qualified DNS name
DomainNetBiosName=domain NetBIOS name
ForestLevel={0=Windows 2000 Server Native;
2=Windows Server 2003 Native;
3=Windows Server 2008}
DomainLevel={0=Windows Server 2000 Native;
2=Windows Server 2003 Native;
3=Windows Server 2008}
InstallDNS=yes
DatabasePath="path to folder on a local volume"
LogPath="path to folder on a local volume"
SYSVOLPath="path to folder on a local volume"
SafeModeAdminPassword=password
RebootOnCompletion=yes
12-8
Configuring and Troubleshooting Windows Server® 2008 Active Directory® Domain Services
You can also specify one or more unattended installation parameters and values at the command line. For
example, if you don’t want the Directory Services Restore Mode password in the answer file, leave the
entry blank and specify the /SafeModeAdminPassword:password parameter when you run
dcpromo.exe.
You can also include all options on the command line itself. The following example creates the first
domain controller in a new forest in which you don’t expect to install any Windows Server 2003 domain
controllers.
dcpromo /unattend /installDNS:yes /dnsOnNetwork:yes
/replicaOrNewDomain:domain /newDomain:forest
/newDomainDnsName:contoso.com /DomainNetbiosName:contoso
/databasePath:"e:\ntds" /logPath:"f:\ntdslogs"
/sysvolpath:"g:\sysvol"
/safeModeAdminPassword:password /forestLevel:3 /domainLevel:3
/rebootOnCompletion:yes
Administering AD DS Domain Controllers Administering AD DS Domain Controllers
12-9
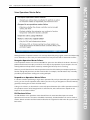
Prepare an Existing Domain for Windows Server 2008 Domain Controllers
If you have an existing forest with domain controllers running Windows Server 2003 or Windows 2000
Server, you must prepare them before creating your first Windows Server 2008 or Windows Server 2008
R2domain controller.
The ADPrep command is used to prepare Active Directory for a domain controller that is running a
version of Windows Server that is newer than the existing domain controllers in the forest or domain.
Adprep.exe is a command-line tool that is included in the installation disk of each version of Windows
Server. Adprep.exe performs operations that must be completed in an existing Active Directory
environment before you can add a domain controller that runs that version of Windows Server.
Adprep.exe has parameters that perform a variety of operations to prepare an existing Active Directory
environment for a domain controller that runs a later version of Windows Server. Not all versions of
Adprep.exe perform the same operations. However, in general, the different types of operations that
Adprep.exe can perform include the following:
•
Updating the Active Directory schema
•
Updating security descriptors
•
Modifying access control lists (ACLs) on Active Directory objects and on files in the SYSVOL shared
folder
•
Creating new objects, as needed
•
Creating new containers, as needed
12-10
Configuring and Troubleshooting Windows Server® 2008 Active Directory® Domain Services
Note In Windows Server 2008 R2, Adprep.exe is located in the \Support\Adprep folder of
the operating system disk. In Windows Server 2008, Adprep.exe is located in the
\Sources\Adprep folder. Windows Server 2008 R2 includes a 32-bit version and a 64-bit
version of Adprep.exe. The 64-bit version runs by default. If you want to run one of the
Adprep.exe commands on a 32-bit computer, use the 32-bit version of Adprep.exe
(Adprep32.exe).
To prepare the forest for the first domain controller running Windows Server 2008 or Windows Server
2008 R2, follow these steps:
1.
Log on to the schema master as a member of the Enterprise Admins, Schema Admins, and Domain
Admins groups.
Lesson 3 discusses operations masters and provides steps for identifying which domain controller is
the schema master.
2.
Copy the contents of the \sources\adprep folder from the Windows Server 2008 DVD to a folder on
the schema master.
3.
Open an elevated command prompt, and change directories to the adprep folder.
4.
Type adprep /forestprep, and then press Enter.
You must allow time for the operation to complete. After the changes have replicated throughout the
forest, you can continue to prepare the domains for Windows Server 2008.
To prepare a domain for the first domain controller running Windows Server 2008, perform these steps:
1.
Log on to the domain infrastructure operations master as a member of Domain Admins.
Lesson 3 provides steps for identifying which domain controller is the infrastructure operations
master.
2.
Copy the contents of the \sources\adprep folder from the Windows Server 2008 DVD to a folder on
the infrastructure master.
3.
Open a command prompt and change directories to the adprep folder.
4.
Type adprep /domainprep /gpprep, and then press Enter.
On Windows Server 2003, you might receive an error message stating that updates were unnecessary. You
can ignore this message.
Allow the change to replicate throughout the forest before you install a domain controller that runs
Windows Server 2008.
To prepare AD DS for the first RODC, follow these steps:
1.
Log on to any computer as a member of the Enterprise Admins.
2.
Copy the contents of the \sources\adprep folder from the Windows Server 2008 DVD to a folder on
the computer.
3.
Open an elevated command prompt, and change directories to the adprep folder.
4.
Type adprep /rodcprep, and then press Enter.
Administering AD DS Domain Controllers Administering AD DS Domain Controllers
12-11
You can also run adprep /rodcprep at any time in a Windows 2000 Server or Windows Server 2003 forest.
It does not have to be run in conjunction with /forestprep. However, you must run adprep /rodcprep and
allow its changes to replicate throughout the forest prior to installing the first RODC.
12-12
Configuring and Troubleshooting Windows Server® 2008 Active Directory® Domain Services
Options for Installing Domain Controllers in a Domain
You can install a domain controller in an environment in various scenarios. For example, you can choose
to add a new domain controller into an existing domain, or you can create a new domain in an existing
forest. If you deploy a new domain, you can also select and make it a subdomain to an existing domain or
make a new domain tree. This topic will discuss the various options for installing a domain controller.
Installing Additional Domain controllers
Additional domain controllers can be added by installing AD DS and launching the Active Directory
Domain Services Installation Wizard. You are prompted to choose the deployment configuration, enter
network credentials, select a domain and site for the new domain controller, and configure the domain
controller with additional options such as DNS Server, global catalog (GC), or RODC. The remaining steps
are the same as for the first domain controller: configuring file locations and the Directory Services
Restore Mode Administrator password.
If you have one domain controller in a domain, and if you select the Use Advanced Mode Installation
check box on the Welcome to the Active Directory Domain Services Installation Wizard page, you can
configure the following advanced options:
•
Install From Media. By default, a new domain controller replicates all data for all directory partitions
it hosts from other domain controllers during the Active Directory Domain Services Installation
Wizard. To improve the performance of installation, particularly over slow links, you can use
installation media created by existing domain controllers. Installation media is a form of backup. The
new domain controller can read data from the installation media directly and then replicate only
updates from other domain controllers. Install From Media (IFM) is further discussed in the Install AD
DS from Media topic.
•
Source Domain Controller. If you want to specify the domain controller from which the new domain
controller replicates its data, you can click Use This Specific Domain Controller.
Administering AD DS Domain Controllers Administering AD DS Domain Controllers
12-13
Note Dcpromo/adv is still supported. In Windows Server 2003, dcpromo/adv was used to
specify advanced installation options. The adv parameter is still supported; it simply
preselects the Use Advanced Mode Installation check box on the Welcome page.
To use Dcpromo.exe with command-line parameters to specify unattended installation options, you can
use the minimal parameters shown in the following example.
dcpromo /unattend /replicaOrNewDomain:replica
/replicaDomainDNSName:contoso.com /installDNS:yes /confirmGC:yes
/databasePath:"e:\ntds" /logPath:"f:\ntdslogs"
/sysvolpath:"g:\sysvol"
/safeModeAdminPassword:password /rebootOnCompletion:yes
If you are not logged on to the server with domain credentials, specify the userdomain and username
parameters as well. A minimal answer file for an additional domain controller in an existing domain is as
follows.
[DCINSTALL]
ReplicaOrNewDomain=replica
ReplicaDomainDNSName=FQDN of domain to join
UserDomain=FQDN of domain of user account
UserName=DOMAIN\username (in Administrators group of the domain)
Password=password for user specified by UserName (* to prompt)
InstallDNS=yes
ConfirmGC=yes
DatabasePath="path to folder on a local volume"
LogPath="path to folder on a local volume"
SYSVOLPath="path to folder on a local volume"
SafeModeAdminPassword=password
RebootOnCompletion=yes
Installing a New Windows Server 2008 Child Domain
If you have an existing domain, you can create a new child domain by creating a Windows Server 2008 or
Windows Server 2008 R2 domain controller. However, before you do this, , you must run
adprep/forestprep as described in the earlier section, Preparing an Existing Domain for Windows Server
2008 DCs.
Then, install AD DS and launch the Active Directory Domain Services Installation Wizard. On the Choose a
Deployment Configuration page, click Existing Forest and Create a new domain in an existing forest. You
are prompted to select the domain functional level. Because it is the first domain controller in the domain,
it cannot be an RODC, and it cannot be installed from media. If you select the Use Advanced Mode
Installation check box on the Welcome page, the wizard presents you with a Source Domain Controller
page on which you specify a domain controller from which to replicate the configuration and schema
partitions.
Using dcpromo.exe, you can create a child domain with the minimal options shown in the following
command.
dcpromo /unattend /installDNS:yes
/replicaOrNewDomain:domain /newDomain:child
/ParentDomainDNSName:contoso.com
/newDomainDnsName:subsidiary.contoso.com /childName:subsidiary
/DomainNetbiosName:subsidiary
/databasePath:"e:\ntds" /logPath:"f:\ntdslogs"
12-14
Configuring and Troubleshooting Windows Server® 2008 Active Directory® Domain Services
/sysvolpath:"g:\sysvol"
/safeModeAdminPassword:password /forestLevel:3 /domainLevel:3
/rebootOnCompletion:yes
The following answer file reflects the same minimal parameters.
[DCINSTALL]
ReplicaOrNewDomain=domain
NewDomain=child
ParentDomainDNSName=FQDN of parent domain
UserDomain=FQDN of user specified by UserName
UserName= DOMAIN\username (has permissions to add a child domain)
Password=password for user specified by UserName or * for prompt
ChildName=single-label prefix for domain
(Child domain FQDN will be ChildName.ParentDomainDNSName)
DomainNetBiosName=Domain NetBIOS name
DomainLevel=domain functional level (not lower than current forest level)
InstallDNS=yes
CreateDNSDelegation=yes
DNSDelegationUserName=DOMAIN\username with permissions to create
DNS delegation, if different than UserName, above
DNSDelegationPassword=password for DNSDelegationUserName or * for prompt
DatabasePath="path to folder on a local volume"
LogPath="path to folder on a local volume"
SYSVOLPath="path to folder on a local volume"
SafeModeAdminPassword=password
RebootOnCompletion=yes
Install a New Domain Tree in a Forest
You learned in Module 1, Introducing Active Directory Domain Services that in an Active Directory forest, a
tree is composed of one or more domains that share contiguous DNS namespace. So, for example, the
contoso.com and subsidiary.contoso.com domains would be in a single tree.
Additional trees are simply additional domains in the same forest that are not in the same namespace. For
example, if Contoso, Ltd bought Tailspin Toys, the tailspintoys.com domain would be in a separate tree in
the domain. There is very little functional difference between a child domain and a domain in another
tree, and the process for creating a new tree is, therefore, very similar to creating a child domain. In both
cases, domains in the same forest share the same Active Directory schema and configuration partition, as
well as global catalog.
First, you must run adprep/forestprep as described in the earlier section, Preparing an Existing Domain for
Windows Server 2008 DCs. Then, you can install AD DS and run the Active Directory Domain Services
Installation Wizard.
The following options provided as parameters to dcpromo.exe create a new tree for thetailspintoys.com
domain within the contoso.com forest.
dcpromo /unattend /installDNS:yes
/replicaOrNewDomain:domain/newDomain:tree
/newDomainDnsName:tailspintoys.com /DomainNetbiosName:tailspintoys
/databasePath:"e:\ntds" /logPath:"f:\ntdslogs"
/sysvolpath:"g:\sysvol"
/safeModeAdminPassword:password/domainLevel:2
/rebootOnCompletion:yes
The domain functional level is configured at 2—Windows Server 2003 Native—so the domain could
include Windows Server 2003 domain controllers.
Administering AD DS Domain Controllers Administering AD DS Domain Controllers
12-15
An unattended installation answer file that creates the same new tree would look similar to the following
example.
[DCINSTALL]
ReplicaOrNewDomain=domain
NewDomain=tree
NewDomainDNSName=FQDN of new domain
DomainNetBiosName=NetBIOS name of new domain
UserDomain=FQDN of user specified by UserName
UserName= DOMAIN\username (with permissions to create a new domain)
Password=password for user specified by UserName or * for prompt
DomainLevel=domain functional level (not lower than current forest level)
InstallDNS=yes
ConfirmGC=yes
CreateDNSDNSDelegation=yes
DNSDelegationUserName=account with permissions to create DNS delegation
required only if different than UserName, above
DNSDelegationPassword=password for DNSDelegationUserName or * for prompt
DatabasePath="path to folder on a local volume"
LogPath="path to folder on a local volume"
SYSVOLPath="path to folder on a local volume"
SafeModeAdminPassword=password
RebootOnCompletion=yes
12-16
Configuring and Troubleshooting Windows Server® 2008 Active Directory® Domain Services
Stage the Installation of an RODC
As you remember from Module 10, Improving the Security of Authentication in an AD DS Domain, RODCs
are designed to support branch office scenarios by providing authentication local to the site while
mitigating the security and data integrity risks associated with placing a domain controller in a less wellcontrolled environment. Many times, there are few or no IT support personnel in a branch office. How,
then, should a domain controller be created in a branch office?
Using Windows Server 2008, you can to create a staged, or delegated, installation of an RODC. The
process includes two stages:
•
Create the account for the RODC. A member of Domain Admins creates an account for the RODC
in Active Directory. The parameters related to the RODC are specified at this time: the name, the
Active Directory site in which the RODC will be created, and, optionally, the user or group that can
complete the next stage of the installation.
•
Attach the server to the RODC account. After the account has been created, AD DS is installed, and
the server—which must be a member of a workgroup and not the domain—is joined to the domain
and as an RODC attached to the prestaged account. These steps can be the users or groups specified
when the RODC account was prestaged; these users do not require any privileged group membership.
A server can also be attached by a member of Domain Admins or Enterprise Admins, but the ability to
delegate this stage to a nonprivileged user makes it much easier to deploy RODCs in branches
without IT support. The domain controller will replicate its data from another writable domain
controller in the domain, or you can use the IFM method discussed in the Installing AD DS from
Media section.
Creating the Prestaged Account for the RODC
To create the account for the RODC by using the Active Directory Users and Computers snap-in, rightclick the Domain Controllers OU and click Pre-Create Read-Only Domain Controller Account. A wizard
similar to the Active Directory Domain Services Installation Wizard appears. You prompted to specify the
Administering AD DS Domain Controllers Administering AD DS Domain Controllers
12-17
RODC name and site. You can also configure the password replication policy, as detailed in Module 10,
Improving the Security of Authentication in an AD DS Domain.
On the Delegation of RODC Installation and Administration page, you can specify one security principal—
user or group—that can attach the server to the RODC account you create. The user or group will also
have local administrative rights on the RODC after the installation. Delegate to a group rather than to a
user. If you do not specify a user or group, only members of the Domain Admins or Enterprise Admins
groups can attach the server to the account.
You can create prestaged RODC accounts by using dcpromo.exe with numerous parameters or by
creating an answer file for dcpromo.exe. The steps for doing so are detailed at:
http://go.microsoft.com/fwlink/?LinkId=168471.
12-18
Configuring and Troubleshooting Windows Server® 2008 Active Directory® Domain Services
Attach a Server to a Prestaged RODC Account
After you have prestaged the account, the server can be attached to it.
To attach a server to a prestaged RODC account:
1.
Ensure that the server is a member of a workgroup, not a member of the domain.
Promote from a workgroup. When you create an RODC by using the staged approach—when you
attach an RODC to a prestaged account—the server must be a member of a workgroup, not of the
domain, when you launch dcpromo.exe or the Active Directory Domain Services Installation Wizard.
The wizard will look in the domain for the existing account with its name and will attach to that
account.
2.
Run dcpromo.exe /UseExistingAccount:attach.
The wizard prompts for network credentials and then finds the RODC account in the domain
indicated by the credentials. Remaining steps are similar to other domain controller promotion
operations.
To use an answer file, provide the following options and values.
[DCINSTALL]
ReplicaDomainDNSName=FQDN of domain to join
UserDomain=FQDN of user specified by UserName
UserName=DOMAIN\username (in Administrators group of the domain)
Password=password for user specified by UserName
InstallDNS=yes
ConfirmGC=yes
DatabasePath="path to folder on a local volume"
LogPath="path to folder on a local volume"
SYSVOLPath="path to folder on a local volume"
SafeModeAdminPassword=password
RebootOnCompletion=yes
Administering AD DS Domain Controllers Administering AD DS Domain Controllers
12-19
Run dcpromo with the/unattend:"answer file path” and the /UseExistingAccount:Attach options, as shown
in the following example.
dcpromo /useexistingaccount:attach /unattend:"c:\rodcanswer.txt"
All the options just shown in the answer file can also be specified or overridden directly on the command
line as shown in the following example.
dcpromo /unattend /UseExistingAccount:Attach
/ReplicaDomainDNSName:contoso.com
/UserDomain:contoso.com /UserName:contoso\dan /password:*
/databasePath:"e:\ntds" /logPath:"f:\ntdslogs"
/sysvolpath:"g:\sysvol"
/safeModeAdminPassword:password /rebootOnCompletion:yes
12-20
Configuring and Troubleshooting Windows Server® 2008 Active Directory® Domain Services
Install AD DS from Media
When you add domain controllers to a forest, data from the existing directory partitions are replicated to
the new domain controller. In an environment with a large directory or where bandwidth is constrained
between a new domain controller and a writable domain controller from which to replicate, you can
install AD DS more efficiently by using the install-from-media (IFM) option.
Installing from media involves creating installation media—a specialized backup of Active Directory that
can be used by the Active Directory Domain Services Installation Wizard as a data source for populating
the directory on a new domain controller. Then, the new domain controller replicates only updates from
another writable domain controller. So, if the installation media is recent, you can minimize the impact of
replication to a new domain controller.
Remember that it is not only the directory that must be replicated to a new domain controller, but also
the SYSVOL. When you create your installation media, you can specify whether to include SYSVOL on the
installation media.
Using IFM also allows you to control the timing of impact to your network bandwidth. You can, for
example, create installation media and transfer it to a remote site during off hours and then create the
domain controller during normal business hours. Because the installation media is from the local site,
impact to the network is reduced, and only updates will be replicated over the link to the remote site.
To create installation media:
1.
Open an elevated command prompt on a writable domain controller, running Windows Server 2008
or Windows Server 2008 R2.
The installation media can be used to create both writable and read-only domain controllers.
2.
Run ntdsutil.exe.
3.
At the ntdsutil prompt, type activate instance ntds, and then press Enter.
4.
Type ifm, and then press Enter.
Administering AD DS Domain Controllers Administering AD DS Domain Controllers
5.
12-21
At the ifm: prompt, type one of the following commands, based on the type of installation media you
want to create:
•
create sysvol full path. Creates installation media with SYSVOL for a writable domain controller
in the folder specified by path.
•
create full path. Creates installation media without SYSVOL for a writable domain controller or
an Active Directory Lightweight Directory Services (AD LDS) instance in the folder specified by
path.
•
create sysvolrodc path. Creates installation media with SYSVOL for an RODC in the folder
specified by path.
•
create rodc path. Creates installation media without SYSVOL for an RODC in the folder specified
by path.
When you run the Active Directory Domain Services Installation Wizard, select the Use Advanced Mode
Installation check box, and you will be presented with the Install From Media page later in the wizard.
Select the Replicate data from media at the following location check box. You can use the
ReplicationSourcePath installation option in an answer file or on the dcpromo.exe command line.
12-22
Configuring and Troubleshooting Windows Server® 2008 Active Directory® Domain Services
Remove a Domain Controller
You can remove a domain controller by using Dcpromo.exe to launch the Active Directory Domain
Services Installation Wizard or from a command prompt, specifying options at the command line or in an
answer file. When a domain controller is removed while it has connectivity to the domain, it updates the
forest metadata about the domain controller so that the directory knows the domain controller has been
removed.
To use an answer file, provide the following options and values.
[DCINSTALL]
UserName=DOMAIN\username (in Administrators group of the domain)
UserDomain=FQDN of user specified by UserName
Password=password for user specified by UserName
AdministratorPassword=password will be assigned to local Administrator
RemoveApplicationPartitions=yes
RemoveDNSDelegation=yes
DNSDelegationUserName=DOMAIN\username with permissions to remove
DNS delegation
DNSDelegationPassword=password for the account
Run dcpromo with the /unattend:"answer file path" and the /UninstallBinaries options, as in the following
example:
dcpromo /uninstallbinaries /unattend:"c:\rodcanswer.txt"
All the options just shown in the answer file can also be specified or overridden directly on the command
line. Just type a command similar to the following:
dcpromo /unattend/uninstallbinaries
/UserName:contoso\dan
/password:*
/administratorpassword:Pa$$w0rd
Administering AD DS Domain Controllers Administering AD DS Domain Controllers
If a domain controller must be demoted while it cannot contact the domain, you must use the
forceremoval option of dcpromo.exe. Type dcpromo /forceremoval, and the Active Directory Domain
Services Installation Wizard steps you through the process. You are presented warnings related to any
roles the domain controller hosts. Read each warning and, after you have mitigated or accepted the
impact of the warning, click Yes. You can suppress warnings by using the demotefsmo:yes option of
dcpromo.exe. After the domain controller has been removed, you must manually clean up the forest
metadata.
12-23
12-24
Configuring and Troubleshooting Windows Server® 2008 Active Directory® Domain Services
Lab A: Install Domain Controllers
Lab Setup
For this lab, you will use the available virtual machine environment. Before you begin the lab, you must
complete the following steps:
1.
On the host computer, click Start, point to Administrative Tools, and then click Hyper-V Manager.
2.
In Hyper-V™ Manager, click 6425C-NYC-DC1, and in the Actions pane, click Start.
3.
In the Actions pane, click Connect. Wait until the virtual machine starts.
4.
Log on by using the following credentials:
•
User name: Pat.Coleman
•
Password: Pa$$w0rd
•
Domain: Contoso
5.
Repeat steps 2 and 3 for the 6425C-NYC-SVR1 and 6425C-NYC-SVR2 virtual machines.
6.
Log on to NYC-SVR1 and NYC-SVR2 by using the following credentials:
•
User name: Administrator
•
Password: Pa$$w0rd
•
Domain: Contoso (only for NYC-SVR1)
Lab Scenario
You decide to add a new domain controller to provide fault tolerance for the directory service. You have
already installed new servers named NYC-SVR1 and NYC-SVR2.
Administering AD DS Domain Controllers Administering AD DS Domain Controllers
12-25
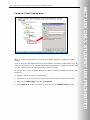
Exercise 1: Create an Additional Domain Controller with the Active
Directory Domain Services Installation Wizard
In this exercise, you will use the Active Directory Domain Services Installation Wizard (DCPromo.exe) to
create an additional domain controller in the contoso.com domain. You will not complete the installation,
however. Instead, you will save the settings as an answer file, which will be used in the next exercise.
The main task for this exercise is as follows:
•
Promote a domain controller by using the Active Directory Domain Services Installation Wizard.
Task: Promote a domain controller by using the Active Directory Domain Services
Installation Wizard.
1.
On NYC-SVR1, run DCPromo.exe. Accept all of the defaults provided by the Active Directory
Administration Wizard except those listed below:
•
Additional domain controller in an existing forest
•
Domain: contoso.com
•
Alternate credentials: Pat.Coleman_Admin with the password Pa$$w0rd.
•
Select domain: contoso.com.
•
When a warning appears informing you that a DNS delegation could not be found, click Yes.
•
Directory Services Restore Mode Administrator Password: Pa$$w0rd
2.
Export the settings to a file on your desktop called AdditionalDC.
3.
Cancel the installation of the domain controller on the Summary page. Do not continue with the
Active Directory Domain Services Installation Wizard.
Results: In this exercise, you simulated promoting NYC-SVR1 to a domain controller.
12-26
Configuring and Troubleshooting Windows Server® 2008 Active Directory® Domain Services
Exercise 2: Add a Domain Controller from the Command Line
In this exercise, you will examine the answer file you created in Exercise 1. You will use the installation
options in the answer file to create a dcpromo.exe command line to install the additional domain
controller.
The main tasks for this exercise are as follows:
1.
Create the DCPromo command.
2.
Execute the DCPromo command.
Task 1: Create the DCPromo command.
1.
Open the AdditionalDC.txt file you created in Exercise 1.Examine the answers in the file. Can you
identify what some of the options mean?
Tip Lines beginning with a semicolon are comments or inactive lines that have been
commented out.
2.
Open a second instance of Notepad, as a new text file. Turn on word wrap. Position the windows so
you can see both the blank text file and the AdditionalDC.txt file as a reference.
3.
In Notepad, type the dcpromo.exe command line just as you would do in a command prompt.
Determine the command line to install the domain controller with the same options as those listed in
the answer file. Parameters on the command line take the form /option:value, whereas in the answer
file, they take the form option=value. Configure both the Password and SafeModeAdminPassword
values as Pa$$w0rd. Instruct DCPromo to reboot when complete.
4.
As you will learn in Lab B, you can set the Password value to an asterisk (*), and then you will be
prompted to enter the password when you run the command.
5.
When you have created the command, open the Exercise2.txt file, found in the \\NYCDC1\d$\Labfiles\Lab11a folder. Compare the correct command in Exercise2.txtwith the command
you created in the previous step. Make any necessary corrections to your command.
Task 2: Execute the DCPromo command.
1.
Open the Command Prompt window.
2.
Switch to the Notepad file with the dcpromo.exe command you built in Task 1. Turn off word wrap,
copy the command line you created, paste it into the command prompt window, and then press
Enter to execute the command.
NYC-SVR1 is promoted to a domain controller. This takes a few minutes.
Results: In this exercise, you promoted NYC-SVR1 as an additional domain controller in the contoso.com
domain and forest.
Administering AD DS Domain Controllers Administering AD DS Domain Controllers
12-27
Exercise 3: Create a Domain Controller from Installation Media
You can reduce the amount of replication required to create a domain controller by promoting the
domain controller by using the IFM option. IFM requires that you provide installation media, which is, in
effect, a backup of Active Directory. In this exercise, you will create the installation media on NYC-DC1,
transfer it to NYC-SVR2, and then simulate the promotion of NYC-SVR2 to a domain controller by using
the installation media.
The main tasks for this exercise are as follows:
1.
Create installation media.
2.
Promote a domain controller by using installation media.
Task 1: Create installation media.
1.
On NYC-DC1, run the Command Prompt as an administrator, with the user name
Pat.Coleman_Admin and the password Pa$$w0rd.
2.
Use ntdsutil.exe to create installation media in a folder named C:\IFM.
Task 2: Promote a domain controller by using installation media.
1.
Switch to NYC-SVR2, and log on as Administrator with the password Pa$$w0rd. Change DNS
address on primary LAN adapter to 10.0.0.10.
2.
Copy the IFM folder from the NYC-DC1 drive C to the NYC-SVR2 drive C.
3.
On NYC-SVR2, run DCPromo.exe. Select the advanced mode installation and then accept all of the
defaults provided by the Active Directory Administration Domain Services Installation Wizard except
those listed below:
•
Additional domain controller in an existing forest.
•
Domain: contoso.com.
•
Select domain: contoso.com.
•
Select a site: Default-First-Site-Name
•
When a warning appears informing you that a DNS delegation could not be found, click Yes.
•
Install from Media: Replicate data from media stored at C:\IFM.
•
After the Source Domain Controller page, cancel the wizard without completing the promotion.
Results: In this exercise, you created installation media on NYC-DC1 and simulated the promotion of
NYC-SVR2 to a domain controller using the installation media.
To prepare for the next lab
When you finish the lab, revert the virtual machines to their initial state. To do this, complete the
following steps:
1.
On the host computer, start Hyper-V Manager.
2.
Right-click 6425C-NYC-DC1 in the Virtual Machines list, and then click Revert.
3.
In the Revert Virtual Machine dialog box, click Revert.
4.
Repeat these steps for 6425C-NYC-SVR1 and 6425C-NYC-SVR2.
12-28
Configuring and Troubleshooting Windows Server® 2008 Active Directory® Domain Services
Lab Review Questions
Question: Why would you choose to use an answer file or a dcpromo.exe command line to
install a domain controller rather than the Active Directory Domain Services Installation
Wizard?
Question: In which situations does it make sense to create a domain controller using
installation media?
Administering AD DS Domain Controllers Administering AD DS Domain Controllers
12-29
Lesson 2
Install a Server Core Domain Controller
Many organizations want to implement the maximum available security for servers acting as domain
controllers because of the sensitive nature of information stored in the directory—particularly user
passwords. Although the role-based configuration of Windows Server 2008 reduces the security surface of
a server by installing only the components and services required by its roles, it is possible to reduce its
servers and security surface further by installing Server Core. A Server Core installation is a minimal
installation of Windows that forgoes even the Windows Explorer GUI and the Microsoft .NET Framework.
You can administer a Server Core installation remotely by using GUI tools; however, to configure and
manage a server locally, you must use command-line tools. In this lesson, you will learn to create a
domain controller from the command line within a Server Core installation. You will also learn how to
remove domain controllers from a domain.
Objectives
After completing this lesson, you will be able to:
•
Identify the benefits and functionality of installing Server Core.
•
Install and configure Server Core.
•
Add and remove AD DS by using command-line tools.
12-30
Configuring and Troubleshooting Windows Server® 2008 Active Directory® Domain Services
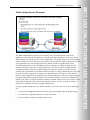
Understand Server Core
Windows Server 2008 or Windows Server 2008 R2 Server Core Installation, better known as Server Core, is
a minimal installation of Windows that consumes about 3 gigabytes (GB) of disk space and less than 256
megabytes (MB) of memory. Server Core installation limits the server roles and features that can be
added, but improves the security and manageability of the server by reducing its attack surface. The
number of services and components running at any one time are limited, so there are fewer opportunities
for an intruder to compromise the server. Server Core also reduces the management burden of the server,
which requires fewer updates and less maintenance.
Server Core, in Windows Server 2008, supports nine server roles:
•
Active Directory Domain Services (AD DS)
•
Active Directory Lightweight Directory Services (AD LDS)
•
Dynamic Host Configuration Protocol (DHCP) Server
•
DNS Server
•
File Services
•
Print Server
•
Streaming Media Services
•
Web Server (IIS) (as a static Web server—ASP.NET cannot be installed)
•
Hyper-V (Windows Server Virtualization)
Server core, in Windows Server 2008, also supports these 11 optional features:
•
Microsoft Failover Cluster
•
Network Load Balancing
Administering AD DS Domain Controllers Administering AD DS Domain Controllers
•
Subsystem for UNIX-based applications
•
Windows Backup
•
Multipath I/O
•
Removable Storage Management
•
Windows Bitlocker® Drive Encryption
•
Simple Network Management Protocol (SNMP)
•
Windows Internet Naming Service (WINS)
•
Telnet client
•
Quality of Service (QoS)
Note
12-31
The content in the following section is specific to Windows Server 2008 R2.
The Server Core installation option of Windows Server 2008 R2 includes support for additional server roles
and features. Server Core installations of Windows Server 2008 R2 now use the Deployment Image
Servicing and Management (DISM) tool to install and uninstall server roles.
In addition to the server roles available in Server Core installations of Windows Server 2008, the following
roles are available:
•
The Active Directory Certificate Services (AD CS) role
•
The File Server Resource Manager(FSRM) component of the File Services role
•
A subset of ASP.NET in the Web Server role
In addition to the Windows features available in Server Core installations of Windows Server 2008, the
following features are available in R2 version:
•
.NET Framework
•
A subset of .NET Framework 2.0
•
A subset of .NET Framework 3.0, including Windows Communication Foundation (WCF) and Windows
Workflow Foundation (WF)
•
A subset of .NET Framework 3.5, including WF additions from .NET Framework 3.5 and .NET
Language-Integrated Query (LINQ)
•
Windows PowerShell, including cmdlets for Server Manager and the Best Practices Analyzer
•
Windows-on-Windows 64-bit (WoW64)
Note
The Removable Storage feature has been removed.
You can remotely configure a server running a Server Core installation of Windows Server 2008 R2 by
using Server Manager.
12-32
Configuring and Troubleshooting Windows Server® 2008 Active Directory® Domain Services
Install Server Core
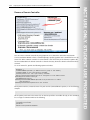
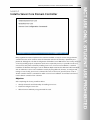
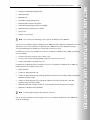
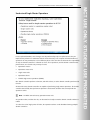
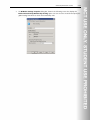
You can install Server Core by using the same procedure as a full installation. The differences between a
full installation and a Server Core installation are:
•
You select Server Core Installation in the Installing Windows Wizard shown on the following page.
•
When the installation is complete and you log on, a command prompt appears.
When you install Windows Server 2008 from the installation DVD, the initial password for the
Administrator account is blank. When you log on to the server for the first time, use a blank password.
You will be prompted to change the password on first logon.
Administering AD DS Domain Controllers Administering AD DS Domain Controllers
12-33
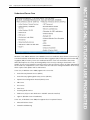
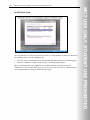
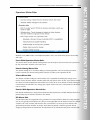
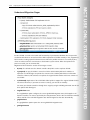
Server Core Configuration Commands
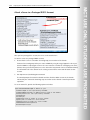
On a full installation of Windows Server 2008, the Initial Configuration Tasks window opens to guide you
through post-installation configuration of the server. Server Core provides no GUI, so you must complete
the tasks by using command-line tools. The following table lists common configuration tasks and the
commands you can use. To learn more about any command, open a command prompt and type the
name of the command followed by /?.
Server Core Configuration Commands
Task
Command
Change the Administrator password
When you log on with Ctrl+Alt+Delete, you will be
prompted to change the password.
You can also type the following command:
net user administrator *
Set a static IPv4 configuration
netsh interface ipv4
Activate Windows Server
cscript c:\windows\system32\slmgr.vbs –ato
Join a domain
netdom
Add Server Core roles, components,
or features
ocsetup.exe package or feature
Note that the package or feature names are case-sensitive.
Display installed roles, components,
and features
oclist.exe
Enable Remote Desktop
cscript c:\windows\system32\scregedit.wsf /AR 0
Promote a domain controller
dcpromo.exe
Configure DNS
dnscmd.exe
12-34
Configuring and Troubleshooting Windows Server® 2008 Active Directory® Domain Services
Task
Command
Configure DFS
dfscmd.exe
The Ocsetup.exe command is used to add supported Server Core roles and features to the server. The
exception to this rule is AD DS. Do not use Ocsetup.exe to add or remove AD DS. Use Dcpromo.exe
instead.
Because there is no Active Directory Domain Services Installation Wizard in Server Core, you must use the
command line to run Dcpromo.exe with parameters that configure AD DS. To learn about the parameters
of dcpromo.exe, open a command line and type dcpromo.exe /?. Each configuration scenario has
additional usage information. For example, type dcpromo.exe /?:Promotion for detailed usage instructions
for promoting a domain controller.
In Windows Server 2008 R2 Server Core, you can use a new utility for server configuration known as the
Server Configuration tool (Sconfig.cmd). You can use this tool to configure and manage several common
aspects of Server Core installations. You must be a member of the Administrators group to use the tool.
This tool allows you to configure basic settings of your server, without using complicated commands.
When you choose an appropriate option by typing the option number, you will be prompted for
parameters that will be used to configure the server.
Administering AD DS Domain Controllers Administering AD DS Domain Controllers
12-35
Lab B: Install a Server Core Domain Controller
Lab Setup
For this lab, you will use the available virtual machine environment. Before you begin the lab, you must
complete the following steps:
1.
On the host computer, click Start, point to Administrative Tools, and then click Hyper-V Manager.
2.
In Hyper-V Manager, click 6425C-NYC-DC1, and in the Actions pane, click Start.
3.
In the Actions pane, click Connect. Wait until the virtual machine starts.
4.
Log on by using the following credentials:
5.
•
User name: Pat.Coleman
•
Password: Pa$$w0rd
•
Domain: Contoso
Repeat steps 2 and 3 for the 6425C-NYC-DC3. Do not log on to NYC-DC3 until directed to do so.
Lab Scenario
You are a domain administrator for Contoso, Ltd, and you want to add a domain controller to the AD DS
environment. To enhance the security of the new domain controller, you plan to use Server Core. You
have already installed Server Core on a new computer, and you are ready to configure the server as a
domain controller.
12-36
Configuring and Troubleshooting Windows Server® 2008 Active Directory® Domain Services
Exercise 1: Perform Post-Installation Configuration on Server Core
In this exercise, you will perform post-installation configuration of the server to prepare it with the name
and TCP/IP settings required for the remaining exercises in this Lab.
The main tasks for this exercise are as follows:
•
Perform post-installation configuration on Server Core.
Note This exercise uses commands that must be typed in cmd.exe window to configure
the server. Alternatively, you can use the sconfig.exe utility to perform these tasks
Task: Perform post-installation configuration on Server Core.
1.
Log on to NYC-DC3as Administrator with the password Pa$$w0rd.
2.
Configure the IPv4 address and DNS server by typing each of the following commands.
netsh interface ipv4 set address name="Local Area Connection"
source=static address=10.0.0.14 mask=255.255.255.0
gateway=10.0.0.1
netsh interface ipv4 set dns name="Local Area Connection"
source=static address=10.0.0.10 primary
3.
Confirm the IP configuration you entered previously with the command ipconfig /all.
4.
Rename the server by typing netdomrenamecomputer %computername% /newname:NYC-DC3.
You will be prompted to press Y to confirm the operation.
5.
Restart by typing shutdown -r -t 0.
6.
Log on as Administrator with the password Pa$$w0rd.
7.
Join the domain using the following command.
netdom join %computername% /domain:contoso.com /UserD:CONTOSO\Administrator
/PasswordD:Pa$$w0rd /OU:"ou=servers,dc=contoso,dc=com"
8.
Restart by typing shutdown -r -t 0.
Results: In this exercise, you configured the Server Core installation as a member of the contoso.com
domain named NYC-DC3.
Administering AD DS Domain Controllers Administering AD DS Domain Controllers
12-37
Exercise 2: Create a Domain Controller with Server Core
In this exercise, you will add the DNS and AD DS roles to the Server Core installation.
The main tasks for this exercise are as follows:
1.
Add the DNS Server role to Server Core.
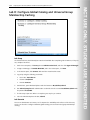
2.
Create a domain controller on Server Core with the dcpromo.exe command.
Task 1: Add the DNS Server role to Server Core.
1.
Log on to NYC-DC3as Contoso\Administrator with the password Pa$$w0rd.
2.
Display available server roles by typing oclist. What is the package identifier for the DNS server role?
What is its status?
3.
Type ocsetup, and then press Enter. There is a minor amount of GUI in Server Core. Click OK to close
the window.
4.
Type ocsetup DNS-Server-Core-Role and then press Enter. Note that package identifiers are casesensitive.
5.
Type oclist |more and confirm that the DNS server role is installed.
Task 2: Create a domain controller on Server Core with the dcpromo.exe command.
1.
Make sure you are still logged on to NYC-DC3 as Contoso\Administrator with the password
Pa$$w0rd
2.
Type dcpromo.exe /?, and then press Enter. Review the usage information.
3.
Type dcpromo.exe /?:Promotion, and then press Enter. Review the usage information.
4.
Type the following command to add and configure the AD DS role, and then press Enter.
dcpromo /unattend /ReplicaOrNewDomain:replica
/ReplicaDomainDNSName:contoso.com /ConfirmGC:Yes
/UserName:CONTOSO\Administrator /Password:* /safeModeAdminPassword:Pa$$w0rd
Results: In this exercise, you promoted the Server Core server, NYC-DC3, to a domain controller in the
contoso.com domain.
To prepare for the next lab
When you finish the lab, revert the virtual machines to their initial state. To do this, complete the
following steps:
1.
On the host computer, start Hyper-V Manager.
2.
Right-click 6425C-NYC-DC1 in the Virtual Machines list, and then click Revert.
3.
In the Revert Virtual Machine dialog box, click Revert.
4.
Repeat these steps for 6425C-NYC-DC3.
Lab Review Questions
Question: Did you find the configuration of Server Core to be particularly difficult?
Question: What are the advantages of using Server Core for domain controllers?
12-38
Configuring and Troubleshooting Windows Server® 2008 Active Directory® Domain Services
Lesson 3
Manage Operations Masters
In an Active Directory domain, all domain controllers are equivalent. They are all capable of writing to the
database and replicating changes to other domain controllers. Read-Only Domain Controllers are
exceptions to this rule because they cannot make changes to the Active Directory database. However, in
any multimaster replication topology, certain operations must be performed by only one system. In an
Active Directory domain, operations masters are domain controllers that play a specific role. Other
domain controllers are capable of playing the role, but do not. This lesson will introduce you to the five
operations masters found in Active Directory forests and domains. You will learn their purposes, how to
identify the operations masters in your enterprise, and the nuances of administering and transferring
roles.
Objectives
After completing this lesson, you will be able to:
•
Define the purpose of the five single master operations in Active Directory forests.
•
Identify the domain controllers that perform operations master roles.
•
Plan the placement of operations master roles.
•
Transfer and seize operations master roles.
Administering AD DS Domain Controllers Administering AD DS Domain Controllers
12-39
Understand Single Master Operations
In any replicated database, some changes must be performed by only one replica because they are
impractical to perform in a multimaster fashion. Active Directory is no exception. A limited number of
operations are not permitted to occur at different places at the same time and must be the responsibility
of only one domain controller in a domain or forest. These operations, and the domain controllers that
perform them, are referred to by a variety of terms:
•
Operations masters
•
Operations master roles
•
Single master roles
•
Operations tokens
•
Flexible single master operations (FSMOs)
One domain controller performs a function, and while it does, no other domain controller performs that
function.
All Active Directory domain controllers are capable of performing single master operations. The domain
controller that actually does perform an operation is the domain controller that currently holds the
operation’s token.
Note
An RODC cannot host any operation master roles.
An operation token, and thus the role, can be transferred easily to another domain controller without a
reboot.
To reduce the risk of single points of failure, the operations tokens can be distributed among multiple
domain controllers.
12-40
Configuring and Troubleshooting Windows Server® 2008 Active Directory® Domain Services
AD DS contains five operations master roles. Two roles are performed for the entire forest:
•
Domain naming
•
Schema
Three roles are performed in each domain:
•
Relative identifier (RID)
•
Infrastructure
•
PDC Emulator
Each of these roles is detailed in the following sections. In a forest with a single domain, there are,
therefore, five operations masters. In a forest with two domains, there are eight operations masters
because the three domain master roles are implemented separately in each of the two domains.
Administering AD DS Domain Controllers Administering AD DS Domain Controllers
12-41
Operations Master Roles
Windows Server 2008 includes several Operations Master roles, each of which has specific functionality
and scope.
Forest-Wide Operations Master Roles
The schema master and the domain naming master must be unique in the forest. Each role is performed
by only one domain controller in the entire forest.
Domain Naming Master Role
The domain naming role is used when adding or removing domains in the forest. When you add or
remove a domain, the domain naming master must be accessible, or the operation will fail.
Schema Master Role
The domain controller holding the schema master role is responsible for making any changes to the
forest’s schema. All other domain controllers hold read-only replicas of the schema. If you want to modify
the schema or install an application that modifies the schema, do so on the domain controller holding the
schema master role. Otherwise, the changes you request must be sent to the schema master to be written
into the schema.
Domain-Wide Operations Master Roles
Each domain maintains three single master operations: RID, Infrastructure, and PDC Emulator. Each role is
performed by only one domain controller in the domain.
RID Master Role
The RID master plays an integral part in the generation of security identifiers (SIDs) for security principals
such as users, groups, and computers. The SID of a security principal must be unique. Because any domain
controller can create accounts, and therefore, SIDs, a mechanism is necessary to ensure that the SIDs
generated by a domain controller are unique. Active Directory domain controllers generate SIDs by
assigning a unique RID to the domain SID. The RID master for the domain allocates pools of unique RIDs
12-42
Configuring and Troubleshooting Windows Server® 2008 Active Directory® Domain Services
to each domain controller in the domain. Thus, each domain controller can be confident that the SIDs it
generates are unique.
Note The RID master role is like DHCP for SIDs. If you are familiar with the concept that
you allocate a scope of IP addresses for the Dynamic Host Configuration Protocol (DHCP)
server to assign to clients, you can draw a parallel to the RID master, which allocates pools of
RIDs to domain controllers for the creation of SIDs.
Infrastructure Master Role
In a multidomain environment, it is common for an object to reference objects in other domains. For
example, a group can include members from another domain. Its multivalued member attribute contains
the distinguished names of each member. If the member in the other domain is moved or renamed, the
infrastructure master of the group’s domain updates the group’s member attribute accordingly.
Note You can think of the infrastructure master as a tracking device for group members
from other domains. When those members are renamed or moved in the other domain, the
infrastructure master identifies the change and makes appropriate changes to group
memberships so that the memberships are kept up to date.
PDC Emulator Role
The PDC Emulator role performs multiple, crucial functions for a domain:
•
Emulates a Primary Domain Controller (PDC) for backward compatibility
In the days of Windows NT® 4.0 domains, only the PDC could make changes to the directory.
Previous tools, utilities, and clients written to support Windows NT 4.0 are unaware that all Active
Directory domain controllers can write to the directory, so such tools request a connection to the
PDC. The domain controller with the PDC emulator role registers itself as a PDC so that down-level
applications can locate a writable domain controller. Such applications are less common now that
Active Directory is nearly 10 years old, and if your enterprise includes such applications, work to
upgrade them for full Active Directory compatibility.
•
Participates in special password update handling for the domain
When a user's password is reset or changed, the domain controller that makes the change replicates
the change immediately to the PDC emulator. This special replication ensures that the domain
controllers know about the new password as quickly as possible. If a user attempts to log on
immediately after changing passwords, the domain controller responding to the user’s logon request
might not know about the new password. Before it rejects the logon attempt, that domain controller
forwards the authentication request to a PDC emulator, which verifies that the new password is
correct and instructs the domain controller to accept the logon request. This function means that any
time a user enters an incorrect password, the authentication is forwarded to the PDC emulator for a
second opinion. The PDC emulator, therefore, should be highly accessible to all clients in the domain.
It should be a well-connected, high-performance domain controller.
•
Manages Group Policy updates within a domain
If a Group Policy object (GPO) is modified on two domain controllers at approximately the same time,
there could be conflicts between the two versions that could not be reconciled as the GPO replicates.
To avoid this situation, the PDC emulator acts as the focal point for all Group Policy changes. When
you open a GPO in the Group Policy Management Editor (GPME), the GPME binds to the domain
Administering AD DS Domain Controllers Administering AD DS Domain Controllers
12-43
controller performing the PDC emulator role. Therefore, all changes to GPOs are made on the PDC
emulator by default.
•
Provides a master time source for the domain
Active Directory, Kerberos, File Replication Service (FRS), and DFS-R each rely on timestamps, so
synchronizing the time across all systems in a domain is crucial. The PDC emulator in the forest root
domain is the time master for the entire forest, by default. The PDC emulator in each domain
synchronizes its time with the forest root PDC emulator. Other domain controllers in the domain
synchronize their clocks against that domain’s PDC emulator. All other domain members synchronize
their time with their preferred domain controller. This hierarchical structure of time synchronization,
all implemented through the Win32Time service, ensures consistency of time. Universal Coordinated
Time (UTC) is synchronized, and the time displayed to users is adjusted based on the time zone
setting of the computer.
Note Change the time service in only one way. Allow Windows to maintain its native,
default time synchronization mechanisms. The only change you should make is to configure
the PDC emulator of the forest root domain to synchronize with an extra time source. If you
do not specify a time source for the PDC emulator, the System event log will contain errors
reminding you to do so. See http://go.microsoft.com/fwlink/?LinkId=91969, and the articles
it refers to, for more information.
•
Acts as the domain master browser
When you open Network in Windows, you see a list of workgroups and domains, and when you open
a workgroup or domain, you see a list of computers. These two lists, called browse lists, are created by
the Browser service. In each network segment, a master browser creates the browse list: the lists of
workgroups, domains, and servers in that segment. The domain master browser serves to merge the
lists of each master browser so that browse clients can retrieve a comprehensive browse list.
12-44
Configuring and Troubleshooting Windows Server® 2008 Active Directory® Domain Services
Optimize the Placement of Operations Masters
When you create the forest root domain with its first domain controller, all five operations master roles
are performed by the domain controller. As you add domain controllers to the domain, you can transfer
the operations master role assignments to other domain controllers to balance the load among domain
controllers or to optimize placement of a single master operation. The best practices for the placement of
operations master roles are as follows:
•
Co-locate the schema master and domain naming master
The schema master and domain naming master roles should be placed on a single domain controller
that is a GC server. These roles are rarely used, and the domain controller hosting them should be
tightly secured. The domain naming master must be hosted on a GC server because when a new
domain is added, the master must ensure that there is no object of any type with the same name as
the new domain. The GC’s partial replica contains the name of every object in the forest. The load of
these operations master roles is very light unless schema modifications are being made.
•
Co-locate the RID master and PDC emulator rules
Place the RID and PDC emulator roles on a single domain controller. If the load mandates that the
roles be placed on two separate domain controllers, those two systems should be physically well
connected and have explicit connection objects created in Active Directory so that they are direct
replication partners. They should also be direct replication partners with domain controllers that you
have selected as standby operations masters.
•
Place the infrastructure master on a domain controller that is not a GC
The infrastructure master should be placed on a domain controller that is not a global catalog server
but is physically well connected to a global catalog server. The infrastructure master should have
explicit connection objects in Active Directory to that global catalog server so that they are direct
replication partners. The infrastructure master can be placed on the same domain controller that acts
as the RID master and PDC emulator.
Administering AD DS Domain Controllers Administering AD DS Domain Controllers
12-45
Note If all domain controllers in a domain are global catalog servers—which is indeed a
best practice recommendation that will be discussed in Module 13, Managing Sites and
Active Directory Replication—you do not need to worry about which domain controller is the
infrastructure master. When all domain controllers are global catalogs, all domain controllers
have up-to-date information about every object in the forest, which eliminates the need for
the infrastructure master role.
•
Have a failover plan
In the following sections, you will learn to transfer single operations master roles between domain
controllers, which is necessary if there is lengthy planned or unplanned downtime of an operations
master. Determine, in advance, a plan for transferring operations roles to other domain controllers in
the event that one operations master is offline.
12-46
Configuring and Troubleshooting Windows Server® 2008 Active Directory® Domain Services
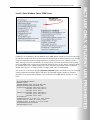
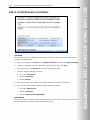
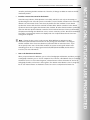
Identify Operations Masters
To implement your role placement plan, you must know which domain controllers are currently
performing single master operations roles. Each role is exposed in an Active Directory administrative tool
as well as in other user interface and command-line tools.
To identify the current master for each role, use the following tools:
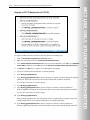
•
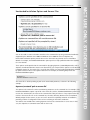
PDC Emulator: The Active Directory Users And Computers snap-in
Right-click the domain and choose Operations Masters. Click the PDC tab. An example is shown on
the following page, which indicates that SERVER01.contoso.com is currently the PDC operations
master.
Administering AD DS Domain Controllers Administering AD DS Domain Controllers
12-47
•
RID Master: The Active Directory Users And Computers snap-in
•
Right-click the domain and click Operations Masters. Click the RID tab.
•
Infrastructure Master: The Active Directory Users And Computers snap-in
•
Right-click the domain and click Operations Masters. Click the Infrastructure tab.
•
Domain Naming: The Active Directory Domains And Trusts snap-in
•
Right-click the root node of the snap-in (Active Directory Domains And Trusts) and click
Operations Master.
•
Schema Master: The Active Directory Schema snap-in
•
Right-click the root node of the snap-in (Active Directory Schema) and click Operations Master.
Note You must register the Active Directory Schema snap-in before you can create a
custom Microsoft Management Console (MMC) with the snap-in. At a command prompt,
type regsvr32 schmmgmt.dll.
You can also use several other tools to identify operations masters, including the following commands.
•
NTDSUtil
ntdsutil
roles
connections
connect to serverDomainControllerFQDN:portnumber
quit
select operation target
list roles for connected server
quit
quit
quit
•
dcdiag /test:knowsofroleholders /v
•
netdom query fsmo
12-48
Configuring and Troubleshooting Windows Server® 2008 Active Directory® Domain Services
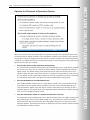
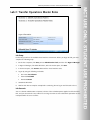
Transfer Operations Master Roles
You can transfer a single operations master role easily. You will transfer roles in the following scenarios:
•
When you establish your forest, all five roles are performed by the first domain controller you install.
When you add a domain to the forest, all three domain roles are performed by the first domain
controller in that domain. As you add domain controllers, you can distribute the roles to reduce
single-point-of-failure and improve performance.
•
If you plan to take a domain controller offline that is currently holding an operations master role,
transfer that role to another domain controller prior to taking it offline.
•
If you are decommissioning a domain controller that currently holds an operations master role,
transfer that role to another domain controller prior to decommissioning. The Active Directory
Domain Services Installation Wizard will attempt to do so automatically, but you should prepare for
demoting a domain controller by transferring its roles.
To transfer an operations master role, follow these steps:
1.
You should ensure that the new role holder is up to date with replication from the former role holder
before transferring the role. You can use the skills introduced in Module 13 to force replication
between the two systems.
2.
Open the administrative tool that exposes the current master.
For example, open the Active Directory Users and Computers snap-in to transfer any of the three
domain master roles.
3.
Connect to the domain controller to which you are transferring the role.
This is accomplished by right-clicking the root node of the snap-in and clicking Change Domain
Controller or Change Active Directory Domain Controller. (The command differs between snap-ins.)
Administering AD DS Domain Controllers Administering AD DS Domain Controllers
4.
12-49
Open the Operations Master dialog box, which will show you the domain controller currently
holding the role token for the operation. Click the Change button to transfer the role to the domain
controller to which you are connected.
When you transfer an operations master role, both the current master and the new master are online.
When the token is transferred, the new master immediately begins to perform the role, and the former
master immediately ceases to perform the role. This is the preferred method of moving operations master
roles.
12-50
Configuring and Troubleshooting Windows Server® 2008 Active Directory® Domain Services
Seize Operations Master Roles
Although transfer of operations master roles can be performed by using regular consoles and without any
service downtime, in some cases you cannot transfer role from previous holder if that holder is offline.
Recognize Operations Master Failures
Several operations master roles can be unavailable for quite some time before their absence becomes a
problem. Other master roles play a crucial role in the day-to-day operation of your enterprise. You can
identify problems with operations masters by examining the Directory Service event log.
However, you will often discover that an operations master has failed when you attempt to perform a
function managed by the master, and the function fails. For example, if the RID master fails, eventually
you will be prevented from creating new security principals.
Respond to an Operations Master Failure
If a domain controller performing a single master operation fails, and you cannot bring the system back to
service, you can seize the operations token. When you seize a role, you designate a new master without
gracefully removing the role from the failed master.
Seizing a role is drastic, so determine the cause and expected duration of the offline operations master. If
the operations master can be brought online in sufficient time, wait. Sufficient time depends on the
impact of the role that has failed.
PDC Emulator Failure
The PDC Emulator is the operations master that will have the most immediate impact on normal
operations and on users if it becomes unavailable. Fortunately, the PDC Emulator role can be seized to
another domain controller and then transferred back to the original role holder when the system comes
back online.
Administering AD DS Domain Controllers Administering AD DS Domain Controllers
12-51
Infrastructure Master Failure
A failure of the infrastructure master will be noticeable to administrators but not to users. Because the
master is responsible for updating the names of group members from other domains, it can appear as if
group membership is incorrect although, membership is not actually affected. You can seize the
infrastructure master role to another domain controller and then transfer it back to the previous role
holder when that system comes online.
RID Master Failure
A failed RID master will eventually prevent domain controllers from creating new SIDs and, therefore, will
prevent you from creating new accounts for users, groups, or computers. However, domain controllers
receive a sizable pool of RIDs from the RID master, so unless you are generating numerous new accounts,
you can often go for some time without the RID master online while it is being repaired. Seizing this role
to another domain controller is a significant action. After the RID master role has been seized, the domain
controller that had been performing the role cannot be brought back online.
Schema Master Failure
The schema master role is necessary only when schema modifications are being made, either directly by
an administrator or by installing an Active Directory integrated application that changes the schema. At
other times, the role is not necessary. It can remain offline indefinitely until schema changes are necessary.
Seizing this role to another domain controller is a significant action. After the schema master role has
been seized, the domain controller that had been performing the role cannot be brought back online.
Domain Naming Master Failure
The domain naming master role is necessary only when you add a domain to the forest or remove a
domain from a forest. Until such changes are required to your domain infrastructure, the domain naming
master role can remain offline for an indefinite period of time. Seizing this role to another domain
controller is a significant action. After the domain naming master role has been seized, the domain
controller that had been performing the role cannot be brought back online.
Seize an Operations Master Role
Although you can transfer roles by using the administrative tools, you must use Ntdsutil.exe to seize a
role. To seize an operations master role, perform the following steps:
1.
At the command prompt, type ntdsutil, and then press Enter.
2.
At the ntdsutil prompt, type roles, and then press Enter.
The next steps establish a connection to the domain controller you want to perform the single master
operation role.
3.
At the fsmo maintenance prompt, type connections, and then press Enter.
4.
At the server connections prompt, type connect to server DomainControllerFQDN, and then press
Enter.
DomainControllerFQDN is the FQDN of the domain controller you want to perform the role.
Ntdsutil responds that it has connected to the server.
5.
At the server connections prompt, type quit, and then press Enter.
6.
At the fsmo maintenance prompt, type seize role, and then press Enter.
Role is one of the following:
12-52
Configuring and Troubleshooting Windows Server® 2008 Active Directory® Domain Services
•
schema master
•
domain naming master
•
RID master
•
PDC
•
infrastructure master
7.
At the fsmo maintenance prompt, type quit, and then press Enter.
8.
At the ntdsutil prompt, type quit, and then press Enter.
Returning a Role to Its Original Holder
To provide for planned downtime of a domain controller if a role has been transferred, not seized, the
role can be transferred back to the original domain controller.
If, however, a role has been seized and the former master is able to be brought back online, you must be
very careful. The PDC emulator and infrastructure master are the only operations master roles that can be
transferred back to the original master after having been seized.
Note Do not return a seized schema, domain naming, or RID master to service. After
seizing the schema, domain naming, or RID roles, you must completely decommission the
original domain controller.
If you have seized the schema, domain naming, or RID roles to another domain controller, you must not
bring the original domain controller back online without first completely decommissioning the domain
controller. That means you must keep the original role holder physically disconnected from the network,
and you must remove AD DS by using the dcpromo /forceremoval command. You must also clean the
metadata for that domain controller as described at http://go.microsoft.com/fwlink/?LinkId=80481.
After the domain controller has been completely removed from Active Directory, if you want the server to
rejoin the domain, you can connect it to the network and join the domain. If you want it to be a domain
controller, you can promote it. If you want it to resume performing the operations master role, you can
transfer the role back to the domain controller.
Note Because of the critical nature of domain controllers, completely reinstall the former
domain controller in this scenario.
Administering AD DS Domain Controllers Administering AD DS Domain Controllers
12-53
Lab C: Transfer Operations Master Roles
Lab Setup
For this lab, you will use the available virtual machine environment. Before you begin the lab, you must
complete the following steps:
1.
On the host computer, click Start, point to Administrative Tools, and then click Hyper-V Manager.
2.
In Hyper-V Manager, click 6425C-NYC-DC1, and in the Actions pane, click Start.
3.
In the Actions pane, click Connect. Wait until the virtual machine starts.
4.
Log on by using the following credentials:
•
User name: Pat.Coleman
•
Password: Pa$$w0rd
•
Domain: Contoso
5.
Start 6425C-NYC-DC2.
6.
Wait for NYC-DC2 to complete startup before continuing. Do not log on until directed to do so.
Lab Scenario
You are a domain administrator at Contoso, Ltd. One of the redundant power supplies has failed on NYCDC1, and you must take the server offline for servicing. You want to ensure that AD DS operations are not
interrupted while the server is offline.
12-54
Configuring and Troubleshooting Windows Server® 2008 Active Directory® Domain Services
Exercise 1: Identify Operations Masters
In this exercise, you will use both user interface and command-line tools to identify operations masters in
the contoso.com domain.
The main tasks for this exercise are as follows:
1.
Identify operations masters using the Active Directory administrative snap-ins.
2.
Identify operations masters by using NetDom.
Task 1: Identify operations masters by using the Active Directory administrative snapins.
1.
On NYC-DC1, run Active Directory Users and Computers as an administrator, with the user name
Pat.Coleman_Admin and the password Pa$$w0rd.
2.
Use Active Directory Users and Computers to identify the operations master role token holders for
RID, PDC and Infrastructure. Which domain controller holds those roles?
3.
Close Active Directory Users and Computers.
4.
Run Active Directory Domains and Trusts as an administrator, with the user name
Pat.Coleman_Admin and the password Pa$$w0rd.
5.
Use Active Directory Domains and Trusts to identify the operations master role token holders for
Domain Naming. Which domain controller holds this role?
6.
Close Active Directory Domains and Trusts.
7.
Run the Command Prompt as an administrator, with the user name Pat.Coleman_Admin and the
password Pa$$w0rd.
8.
Type regsvr32 schmmgmt.dll, and then press Enter.
9.
Run mmc.exe as an administrator, with the user name Pat.Coleman_Admin and the password
Pa$$w0rd.
10. Add the Active Directory Schema snap-in to the console.
11. Use Active Directory Schema to identify the operations master role token holders for Schema.
Which domain controller holds this role?
12. Close the console. You do not need to save any changes.
Task 2: Identify operations masters by using NetDom.
1.
Run the Command Prompt as an administrator, with the user name Pat.Coleman_Admin and the
password Pa$$w0rd.
2.
Type the command netdom query fsmo, and press Enter.
Results: In this exercise, you used both administrative snap-ins and NetDom to identify operations
masters.
Administering AD DS Domain Controllers
12-55
Exercise 2: Transfer Operations Master Roles
In this exercise, you will prepare to take the operations master offline by transferring its role to another
domain controller. You will then simulate taking it offline, bringing it back online, and returning the
operations master role.
The main tasks for this exercise are as follows:
1.
Transfer the PDC role by using the Active Directory Users And Computers snap-in.
2.
Consider other roles before taking a domain controller offline.
3.
Transfer the PDC role by using NTDSUtil.
Task 1: Transfer the PDC role by using the Active Directory Users And Computers snapin.
1.
Run Active Directory Users and Computers as an administrator, with the user name
Pat.Coleman_Admin and the password Pa$$w0rd.
2.
Connect to NYC-DC2.
3.
Before transferring an operations master, you must connect to the domain controller to which the
role will be transferred.
4.
The root node of the snap-in indicates the domain controller to which you are connected: Active
Directory Users And Computers [NYC-DC2.contoso.com].
5.
Transfer the PDC operations master role to NYC-DC2.
Task 2: Consider other roles before taking a domain controller offline.
You are preparing to take NYC-DC1 offline. You have just transferred the PDC operations role to NYCDC2.
1.
List other operations master roles that must be transferred prior to taking NYC-DC1 offline.
2.
List other server roles that must be transferred prior to taking NYC-DC1 offline.
Task 3: Transfer the PDC role by using NTDSUtil.
You have finished performing maintenance on NYC-DC1. Now, you need to bring it back online.
Remember you cannot bring a domain controller back online if the RID, schema, or domain naming roles
have been seized. But, you can bring it back online if a role was transferred.
1.
Run the Command Prompt as an administrator, with the user name Pat.Coleman_Admin and the
password Pa$$w0rd.
2.
Use NTDSUtil to connect to NYC-DC1 and transfer the PDC role back to it.
Results: In this exercise, you should have transferred the PDC role to NYC-DC2by using the Active
Directory Users and Computers snap-in, and then transferred it back to NYC-DC1 using NTDSUtil.
12-56
Configuring and Troubleshooting Windows Server® 2008 Active Directory® Domain Services
To prepare for the next lab
When you finish the lab, revert the virtual machines to their initial state. To do this, complete the
following steps:
1.
On the host computer, start Hyper-V Manager.
2.
Right-click 6425C-NYC-DC1in the Virtual Machines list, and then click Revert.
3.
In the Revert Virtual Machine dialog box, click Revert.
4.
Repeat these steps for 6425C-NYC-DC2.
Lab Review Questions
Question: If you transfer all roles before taking a domain controller offline, is it okay to bring
the domain controller back online?
Administering AD DS Domain Controllers
12-57
Lesson 4
Configure Global Catalog
As soon as you have more than one domain controller in your domain, you must consider replication of
the directory database between domain controllers. In this lesson, you will learn which directory partitions
are replicated to each domain controller in a forest and how to manage the replication of the global
catalog and of application partitions.
Objectives
After completing this lesson, you will be able to:
•
Define the purpose of the global catalog.
•
Configure domain controllers as global catalog servers.
•
Implement universal group membership caching.
•
Understand the role of application directory partitions.
12-58
Configuring and Troubleshooting Windows Server® 2008 Active Directory® Domain Services
Understand the Global Catalog
Imagine a forest with two domains. Each domain has two domain controllers. All four domain controllers
will maintain a replica of the Schema and Configuration NCs for the forest. The domain controllers in
Domain A have replicas of the Domain NC for Domain A, and the domain controllers in Domain B have
replicas of the Domain NC for Domain B.
What happens if a user in Domain B is searching for a user, computer, or group in Domain A? The Domain
B domain controllers do not maintain any information about objects in Domain A, so a domain controller
in Domain B could not answer a query about objects in the Domain NC of Domain A.
That’s where the global catalog comes in. The global catalog is a partition that stores commonly used
information about every object in the forest. When a user in Domain B looks for an object in Domain A,
the global catalog provides the results of the query. To optimize efficiency of the global catalog, it does
not contain every attribute of every object in the forest. Instead, it contains a subset of attributes that are
useful for searching across domains. That is why the global catalog is also called the partial attribute set.
In terms of its role supporting search, you can think of the global catalog as a kind of index for the AD DS
data store.
Administering AD DS Domain Controllers
12-59
Global Catalog Servers Placement
The global catalog improves efficiency of the directory service tremendously and is required for
applications such as Microsoft Exchange Server and Microsoft Office Outlook®. Therefore, you want a
global catalog to be available to these and other applications. The global catalog can be served only by a
domain controller and, in an ideal world, every domain controller would be a global catalog server. In fact,
many organizations are now configuring all of their domain controllers as global catalog servers.
The potential downside to such a configuration relates to replication. The global catalog is another
partition that must be replicated. In a single domain forest, very little overhead is actually added by
configuring all domain controllers as global catalog servers because all domain controllers already
maintain a full set of attributes for all domain and forest objects. In a large, multidomain forest, there will
be overhead related to replication of changes to the partial attribute set of objects in other domains.
However, many organizations are finding that Active Directory replication is efficient enough to replicate
the global catalog without significant impact to their networks and that the benefits far outweigh such
impact. If you choose to configure all domain controllers as global catalog servers, you no longer need to
worry about the placement of the infrastructure operations master; its role is no longer necessary in a
domain where all domain controllers are global catalog servers.
Configure a global catalog server on a domain controller in a site where one or more of the following is
true:
•
A commonly used application performs directory queries by using port 3268, the global catalog.
•
The connection to a global catalog server is slow or unreliable.
•
The site contains a computer running Exchange Server.
12-60
Configuring and Troubleshooting Windows Server® 2008 Active Directory® Domain Services
Configure a Global Catalog Server
When you create the first domain in the forest, the first domain controller is configured as a global
catalog.
You must decide for each additional domain controller whether it should be a global catalog server. The
Active Directory Domain Services Installation Wizard and the Dcpromo.exe command each enable you to
configure a global catalog server when promoting a domain controller.
You can also add or remove the global catalog from a domain controller by using Active Directory Sites
and Services.
To configure a domain controller as a global catalog:
1.
Expand the site, the Servers container within the site, and the domain controller’s server object.
2.
Right-click the NTDS Settings node and click Properties.
3.
On the General tab, shown in the following screen shot, select the Global Catalog check box.
Administering AD DS Domain Controllers
To remove the global catalog from a domain controller, perform the same steps, and clear the Global
Catalog check box.
12-61
12-62
Configuring and Troubleshooting Windows Server® 2008 Active Directory® Domain Services
Universal Group Membership Caching
In Module 4, you learned that Active Directory supports groups of universal scope. Universal groups are
designed to include users and groups from multiple domains in a forest. The membership of universal
groups is replicated in the global catalog. When a user logs on, the user’s universal group membership is
obtained from a global catalog server. If a global catalog is not available, universal group membership is
not available. It’s possible that a universal group is used to deny the user access to resources, so Windows
prevents a security incident by denying domain authentication to the user. If the user has logged on to his
or her computer before, he or she can log on by using cached credentials, but as soon as the user
attempts to access network resources, access is denied.
To summarize, if a global catalog server is not available, users will effectively be unable to log on and
access network resources.
If every domain controller is a global catalog server, this problem will not arise.
However, if replication is a concern, and if you have, therefore, chosen not to configure a domain
controller as a global catalog server, you can facilitate a successful logon by enabling universal group
membership caching. For example, when you configure universal group membership caching on a
domain controller in a branch office, that domain controller will obtain universal group membership
information from a global catalog for a user when the user first logs on to the site, and the domain
controller will cache that information indefinitely, updating universal group membership information
every eight hours. That way, if the user later logs on and a global catalog server is not accessible, the
domain controller can use its cached membership information to permit logon by the user.
In sites with unreliable connectivity to a global catalog server, configure universal group membership
caching on the site’s domain controllers.
To configure universal group membership caching:
1.
Open the Active Directory Sites and Services snap-in and select the site in the console tree.
2.
In the details pane, right-click NTDS Site Settings and click Properties.
Administering AD DS Domain Controllers
3.
12-63
The NTDS Site Settings Properties dialog box, shown in the following screen shot, displays the
Enable Universal Group Membership Caching option. You can select the check box and specify the
global catalog from which to refresh the membership cache.
12-64
Configuring and Troubleshooting Windows Server® 2008 Active Directory® Domain Services
Lab D: Configure Global Catalog and Universal Group
Membership Caching
Lab Setup
The virtual machines should already be started and available after completing Lab A. However, if they are
not, complete Lab A first.
1.
On the host computer, click Start, point to Administrative Tools, and then click Hyper-V Manager.
2.
In Hyper-V Manager, click 6425C-NYC-DC1, and in the Actions pane, click Start.
3.
In the Actions pane, click Connect. Wait until the virtual machine starts.
4.
Log on by using the following credentials:
•
User name: Pat.Coleman
•
Password: Pa$$w0rd
•
Domain: Contoso
5.
On NYC-DC1, open Windows Explorer and then browse to D:\Labfiles\Lab12d.
6.
Run Lab12d_Setup.bat with administrative credentials. Use the account Pat.Coleman_Admin with
the password Pa$$w0rd.
7.
The lab setup script runs. When it is complete, press any key to continue.
8.
Close the Windows Explorer window, Lab12d.
Lab Scenario
You are an administrator at Contoso, Ltd. To improve the availability and resilience of the directory
service, you decide to configure additional global catalog servers and universal group membership
caching.
Administering AD DS Domain Controllers
Exercise 1: Configure a Global Catalog
The first domain controller in a forest acts as a global catalog server. You might want to place global
catalog servers in additional locations to support directory queries, logon, and applications such as
Exchange Server. In this exercise, you will configure NYC-DC2 to host a replica of the partial attribute
set—the global catalog.
The main task for this exercise are as follows:
•
Configure a global catalog server.
Task: Configure a global catalog server.
1.
On NYC-DC1, run Active Directory Sites and Services as an administrator, with the user name
Pat.Coleman_Admin and the password Pa$$w0rd.
2.
Configure NYC-DC2 in Default-First-Site-Name site to be a global catalog server.
3.
Confirm that BRANCHDC02 in BRANCHA site is a global catalog server.
Results: In this exercise, you configured NYC-DC2 to be a global catalog server and confirmed that
BRANCHDC02 is already a global catalog server.
12-65
12-66
Configuring and Troubleshooting Windows Server® 2008 Active Directory® Domain Services
Exercise 2: Configure Universal Group Membership Caching
In sites without global catalog servers, user logon might be prevented if the site’s domain controller is
unable to contact a global catalog server in another site. To reduce the likelihood of this scenario, you can
configure a site to cache the membership of universal groups. In this exercise, you will configure
BRANCHA to cache universal group membership.
The main tasks for this exercise are as follows:
•
Configure universal group membership caching.
Task: Configure universal group membership caching.
•
Configure the NTDS Site Settings of BRANCHA site so that domain controllers cache universal group
membership.
Results: In this exercise, you configured domain controllers in BRANCHA to cache universal group
membership.
Important Do not shut down the virtual machines after you finish this lab because the
settings you have configured here will be used in subsequent labs in this module.
Lab Review Questions
Question: When you enable global catalog, what actually happens on that domain
controller?
Question: On which level would you enable Universal Group Membership Caching?
Administering AD DS Domain Controllers
12-67
Lesson 5
Configure DFS-R Replication of SYSVOL
SYSVOL, a folder located at %SystemRoot%\SYSVOL, contains logon scripts, group policy templates
(GPTs), and other resources critical to the health and management of an Active Directory domain, by
default. Ideally, SYSVOL should be consistent on each domain controller. However, changes to Group
Policy objects (GPOs) and logon scripts are made often, so you must ensure that those changes are
replicated effectively and efficiently to all domain controllers. In the previous versions of Windows, the FRS
was used to replicate the contents of SYSVOL between domain controllers. FRS has limitations in both
capacity and performance that causes it to break occasionally. Unfortunately, troubleshooting and
configuring FRS is quite difficult. In Windows Server 2008 and Windows Server 2008 R2 domains, you have
the option to use DFS-R to replicate the contents of SYSVOL. In this lesson, you will learn how to migrate
SYSVOL from FRS to DFS-R.
Objectives
After completing this lesson, you will be able to:
•
Raise the domain functional level.
•
Migrate SYSVOL replication from FRS to DFS-R.
12-68
Configuring and Troubleshooting Windows Server® 2008 Active Directory® Domain Services
Raise the Domain Functional Level
In Module 1, Introducing Active Directory Domain Services, you were introduced to the concept of domain
and forest functional levels. In Module 15, Managing Multiple Domains and Forests, you will learn about
forest and domain functional levels in detail. A domain’s functional level is a setting that both restricts the
operating systems that are supported as domain controllers in a domain and enables additional
functionality in Active Directory. A domain with a Windows Server 2008 R2 domain controller can be at
one of four functional levels: Windows 2000 Native, Windows Server 2003 Native, Windows Server 2008,
and Windows Server 2008 R2. At the Windows 2000 Native domain functional level, domain controllers
can be running Windows 2000 Server or Windows Server 2003. At the Windows Server 2003 Native
domain functional level, domain controllers can be running Windows Server 2003. At the Windows Server
2008 domain functional level, all domain controllers must be running Windows Server 2008.At the
Windows Server 2008 R2 domain functional level, all domain controllers must be running Windows Server
2008 R2.
As you raise functional levels, new capabilities of Active Directory are enabled. At Windows Server 2008
domain functional level, for example, you can use DFS-R to replicate SYSVOL. If you upgrade domain
functional level to Windows Server 2008 R2, you will get authentication mechanism assurance, which
packages information about the type of logon method (smart card or user name/password) that is used to
authenticate domain users inside each user’s Kerberos token. Also, Automatic SPN management will be
enabled.
Simply upgrading all domain controllers to Windows Server 2008 or newer is not enough: You must
specifically raise the domain functional level. You do this by using Active Directory Domains and Trusts.
To raise the domain functional level:
1.
Run the Active Directory Domains and Trusts snap-in.
2.
Right-click the domain and choose Raise Domain Functional Level.
3.
Select Windows Server 2008 or 2008R2 as the desired functional level, and then click Raise.
Administering AD DS Domain Controllers
12-69
After you set the domain functional level to Windows Server 2008 R2, you cannot add domain controllers
running Windows 2000 Server, Windows Server 2003 or Windows Server 2008. The functional level is
associated only with domain controller operating systems; member servers and workstations can be
running Windows Server 2003, Windows 2000 Server, Windows 7, Windows Vista®, Windows XP, or
Windows 2000 Workstation.
12-70
Configuring and Troubleshooting Windows Server® 2008 Active Directory® Domain Services
Understand Migration Stages
Because SYSVOL is critical to the health and functionality of your domain, Windows does not provide a
mechanism with which to convert from FRS to DFS-R replication of SYSVOL instantly. In fact, migration to
DFS-R involves creating a parallel SYSVOL structure. When the parallel structure is successfully in place,
clients are redirected to the new structure as the domain’s system volume. When the operation has
proven successful, you can eliminate FRS.
Migration to DFS-R therefore consists of four stages or states:
•
0 (start). The default state of a domain controller. Only FRS is used to replicate SYSVOL.
•
1 (prepared). A copy of SYSVOL is created in a folder called SYSVOL_DFSR and is added to a
replication set. DFS-R begins to replicate the contents of the SYSVOL_DFSR folders on all domain
controllers. However, FRS continues to replicate the original SYSVOL folders and clients continue to
use SYSVOL.
•
3 (eliminated). Replication of the old SYSVOL folder by FRS is stopped. The original SYSVOL folder is
not deleted. Therefore, if you want to remove it entirely, you must do so manually.
You move your domain controllers through these stages by using the DFSMig command. You will use
three options with dfsrmig.exe:
•
Setglobalstate state
The setglobalstate option configures the current global DFSR migration state, which applies to all
domain controllers. The state is specified by the state parameter, which is 0–3. Each domain controller
will be notified of the new DFSR migration state and will migrate to that state automatically.
•
getglobalstate
The getglobalstate option reports the current global DFSR migration state.
•
getmigrationstate
Administering AD DS Domain Controllers
12-71
The getmigrationstate option reports the current migration state of each domain controller. Because
it might take time for domain controllers to be notified of the new global DFSR migration state, and
because it might take even more time for a domain controller to make the changes required by that
state, domain controllers will not be synchronized with the global state instantly. The
getmigrationstate option enables you to monitor the progress of domain controllers toward the
current global DFSR migration state.
If there is a problem moving from one state to the next higher state, you can revert to previous states by
using the setglobalstate option. However, after you have used the setglobalstate option to specify state 3
(eliminated), you cannot revert to the earlier states.
12-72
Configuring and Troubleshooting Windows Server® 2008 Active Directory® Domain Services
Migrate to DFS-R Replication of SYSVOL
To migrate SYSVOL replication from FRS to DFS-R, perform the following steps:
1.
Open the Active Directory Domains and Trusts snap-in.
2.
Right-click the domain and choose Raise Domain Functional Level.
3.
If the Current domain functional level box does not indicate Windows Server 2008, select Windows
Server 2008 or Windows Server 2008 R2 from the Select an available domain functional level list.
4.
Click Raise. Click OK twice in response to the dialog boxes that appear.
5.
Log on to a domain controller and open a command prompt.
6.
Type dfsrmig /setglobalstate 1.
7.
Type dfsrmig /getmigrationstate to query the progress of domain controllers toward the Prepared
global state. Repeat this step until the state has been attained by all domain controllers.
This can take 15 minutes to an hour or longer.
8.
Type dfsrmig /setglobalstate 2.
9.
Type dfsrmig /getmigrationstate to query the progress of domain controllers toward the
Redirected global state. Repeat this step until the state has been attained by all domain controllers.
This can take 15 minutes to an hour or longer.
10. Type dfsrmig /setglobalstate 3.
After you begin migration from state 2 (prepared) to state 3 (replicated), any changes made to the
SYSVOL folder will have to be replicated manually to the SYSVOL_DFSR folder.
11. Type dfsrmig /getmigrationstate to query the progress of domain controllers toward the
Eliminated global state. Repeat this step until the state has been attained by all domain controllers.
Administering AD DS Domain Controllers
This can take 15 minutes to an hour or longer.
12. For more information about the dfsrmig.exe command, type dfsrmig.exe /?.
12-73
12-74
Configuring and Troubleshooting Windows Server® 2008 Active Directory® Domain Services
Lab E: Configure DFS-R Replication of SYSVOL
Lab Setup
For this lab, you will use the available virtual machine environment. Before you begin the lab, you must
complete the following steps:
1.
On the host computer, click Start, point to Administrative Tools, and then click Hyper-V Manager.
2.
In Hyper-V Manager, click 6425C-NYC-DC1, and in the Actions pane, click Start.
3.
In the Actions pane, click Connect. Wait until the virtual machine starts.
4.
Log on by using the following credentials:
•
User name: Pat.Coleman
•
Password: Pa$$w0rd
•
Domain: Contoso
5.
Repeat steps 2–4 for 6425C-NYC-DC2. In Hyper-V Manager, click 6425C-BRANCHDC02, and in the
Actions pane, click Start. Do not logon to 6425C-BRANCHDC02.
6.
On NYC-DC1, open Windows Explorer and then browse to D:\Labfiles\Lab12e.
7.
Run Lab12e_Setup.bat with administrative credentials. Use the account Pat.Coleman_Admin with
the password Pa$$w0rd.
8.
The lab setup script runs. When it is complete, press any key to continue.
9.
Close the Windows Explorer window, Lab12e.
Administering AD DS Domain Controllers
12-75
Lab Scenario
You are an administrator at Contoso, Ltd. You have recently upgraded the last remaining Windows Server
2003 domain controller to Windows Server 2008, and you want to take advantage of the improved
replication of SYSVOL by using DFS-R.
12-76
Configuring and Troubleshooting Windows Server® 2008 Active Directory® Domain Services
Exercise 1: Observe the Replication of SYSVOL
In this exercise, you will observe SYSVOL replication with File Replication Service (FRS) by adding a logon
script to the NETLOGON share and observing its replication to another domain controller.
The main task for this exercise are as follows:
1.
Observe SYSVOL replication.
Task: Observe SYSVOL replication.
1.
On NYC-DC1, open %SystemRoot%\ Sysvol\sysvol\contoso.com\Scripts.
2.
Run Notepad as an administrator, with the user name Pat.Coleman_Admin and the password
Pa$$w0rd.
3.
Save a test file as %SystemRoot%\Sysvol\sysvol\contoso.com\Scripts
\TestFRS.txt.
4.
On NYC-DC2, open %SystemRoot%\Sysvol\sysvol\contoso.com\Scripts.
5.
Confirm that TestFRS.txt has replicated to the NYC-DC2 Scripts folder.
6.
If the file does not appear immediately, wait. It can take up to 15 minutes for replication to occur. You
can, optionally, continue with Exercise 2. Before continuing with Exercise 3, check to ensure that the
file has replicated.
7.
After you have observed the replication, close the Windows Explorer window showing the Scripts
folder on both NYC-DC1 and NYC-DC2.
Results: In this exercise, you observed the replication of a test file between the SYSVOL\Scripts folders of
two domain controllers.
Administering AD DS Domain Controllers
12-77
Exercise 2: Prepare to Migrate to DFS-R
Before you can migrate to DFS-R of SYSVOL, the domain must contain only Windows Server 2008 domain
controllers, and the domain functional level must be raised to Windows Server 2008.
The main tasks for this exercise are as follows:
1.
Confirm that the current domain functional level is Windows Server 2008.
2.
Confirm that DFS-R replication is available at Windows Server 2008 domain functional level.
Task 1: Confirm that the current domain functional level is Windows Server 2008.
1.
On NYC-DC1, run Active Directory Users and Computers as an administrator, with the user name
Pat.Coleman_Admin and the password Pa$$w0rd.
2.
Confirm that the current domain functional level is Windows Server 2008.
Task 2: Confirm that DFS-R replication is available at the Windows Server 2008 domain
functional level.
•
Open the command prompt. Use the account Pat.Coleman_Admin with the password Pa$$w0rd.
Type dfsrmig /getglobalstate, and then press Enter. A message appears informing you that DFS-R
migration has not yet been initialized.
Results: In this exercise, you verified the domain functional level is Windows Server 2008 and confirmed
that by doing so you have made it possible to migrate SYSVOL replication to DFS-R.
12-78
Configuring and Troubleshooting Windows Server® 2008 Active Directory® Domain Services
Exercise 3: Migrate SYSVOL Replication to DFS-R
In this exercise, you will migrate the replication mechanism from FRS to DFS-R.
The main task for this exercise is as follows:
1.
Migrate SYSVOL replication to DFS-R
Task: Migrate SYSVOL replication to DFS-R.
1.
Switch to the Command Prompt
2.
Type dfsrmig /setglobalstate 0, and then press Enter.
The following message appears.
Current DFSR global state: 'Start'
New DFSR global state: 'Start'
Invalid state change requested.
The default global state is already 0, ‘Start,’ so your command is not valid. However, this does serve to
initialize DFSR migration.
3.
Type dfsrmig /getglobalstate, and then press Enter.
The following message appears.
Current DFSR global state: 'Start'
Succeeded.
4.
Type dfsrmig /getmigrationstate, and then press Enter.
The following message appears.
All Domain Controllers have migrated successfully to Global state
('Start').
Migration has reached a consistent state on all Domain Controllers.
Succeeded.
5.
Type dfsrmig /setglobalstate 1, and then press Enter.
The following message appears.
Current DFSR global state: 'Start'
New DFSR global state: 'Prepared'
Migration will proceed to 'Prepared' state. DFSR service will
copy the contents of SYSVOL to SYSVOL_DFSR
folder.
If any DC is unable to start migration then try manual polling.
OR Run with option /CreateGlobalObjects.
Migration can start anytime between 15 min to 1 hour.
Succeeded.
6.
Type dfsrmig /getmigrationstate, and then press Enter.
A message appears that reflects the migration state of each domain controller. Migration can take up
to 20-30 minutes. You can try to speed up migration by forcing replication between NYC-DC1, NYCDC2 and BRANCHDC02.
Administering AD DS Domain Controllers
7.
12-79
Repeat step 6. until you receive the following message that indicates migration has progressed to the
‘Prepared’ state and is successful.
All Domain Controllers have migrated successfully to Global state
('Prepared').
Migration has reached a consistent state on all Domain Controllers.
Succeeded.
When you receive the message just shown, continue to the next step.
During migration to the ‘Prepared’ state, you might see one of these messages.
The following Domain Controllers are not in sync with Global state
('Prepared'):
Domain Controller (LocalMigrationState) - DC Type
===================================================
NYC-DC1 ('Start') - Primary DC
NYC-DC2 ('Start') - Writable DC
Migration has not yet reached a consistent state on all Domain Controllers.
State information might be stale due to AD latency.
or
The following Domain Controllers are not in sync with Global state
('Prepared'):
Domain Controller (LocalMigrationState) - DC Type
===================================================
NYC-DC1 ('Start') - Primary DC
NYC-DC2 ('Waiting For Initial Sync') - Writable DC
Migration has not yet reached a consistent state on all Domain Controllers.
State information might be stale due to AD latency.
or
The following Domain Controllers are not in sync with Global state
('Prepared'):
Domain Controller (LocalMigrationState) - DC Type
===================================================
12-80
Configuring and Troubleshooting Windows Server® 2008 Active Directory® Domain Services
BRANCHDC02 ('Start') – Read-Only DC
Migration has not yet reached a consistent state on all Domain Controllers.
State information might be stale due to AD latency.
8.
Click Start, point to Administrative Tools, right-click Event Viewer, and then click Run as
administrator.
9.
Click Use another account.
10. In the User name box, type Pat.Coleman_Admin.
11. In the Password box, type Pa$$w0rd, and then press Enter.
Event Viewer opens.
12. In the console tree, expand Applications and Services Logs, and select DFS Replication.
13. Locate the event with Event ID 8014 and view its properties.
14. Close Event Viewer.
15. Switch to the Command Prompt.
16. Type dfsrmig /setglobalstate 2, and then press Enter.
The following message appears:
Current DFSR global state: 'Prepared'
New DFSR global state: 'Redirected'
Migration will proceed to 'Redirected' state. The SYSVOL share will be
changed to SYSVOL_DFSR folder.
If any changes have been made to the SYSVOL share during the state
transition from 'Prepared' to 'Redirected', please robocopy the changes
from SYSVOL to SYSVOL_DFSR on any replicated RWDC.
Succeeded.
17. Type dfsrmig /getmigrationstate, and then press Enter.
A message appears that reflects the migration state of each domain controller. Migration can take up
to 15 minutes. You can try to speed up migration by forcing replication between NYC-DC1, NYC-DC2
and BRANCHDC02.
18. Repeat step 17 until you receive the following message that indicates migration has progressed to the
‘Prepared’ state and is successful.
All Domain Controllers have migrated successfully to Global state
('Redirected').
Migration has reached a consistent state on all Domain Controllers.
Succeeded.
When you receive the message just shown, continue to the next task.
During migration, you might receive messages like the following.
The following Domain Controllers are not in sync with Global state
('Redirected'):
Administering AD DS Domain Controllers
12-81
Domain Controller (LocalMigrationState) - DC Type
===================================================
NYC-DC2 ('Prepared') - Writable DC
Migration has not yet reached a consistent state on all Domain Controllers.
State information might be stale due to AD latency.
or
The following Domain Controllers are not in sync with Global state
('Redirected'):
Domain Controller (LocalMigrationState) - DC Type
===================================================
BRANCHDC02 ('Prepared') – Read-Only DC
Migration has not yet reached a consistent state on all Domain Controllers.
State information might be stale due to AD latency.
Results: In this exercise, you migrated the replication of SYSVOL to DFS-R in the contoso.com domain.
12-82
Configuring and Troubleshooting Windows Server® 2008 Active Directory® Domain Services
Exercise 4: Verify DFS-R Replication of SYSVOL
In this exercise, you will verify that SYSVOL is being replicated by DFS-R.
The main tasks for this exercise are as follows:
1.
Confirm the new location of SYSVOL.
2.
Observe SYSVOL replication.
Task 1: Confirm the new location of SYSVOL.
•
At the Command Prompt, type net share, and then press Enter. Confirm that the NETLOGON share
refers to the %SystemRoot%\SYSVOL_DFSR
\Sysvol\contoso.com\Scripts folder, and that the SYSVOL share refers to the
%SystemRoot%\SYSVOL_DFSR\Sysvol folder.
Task 2: Observe SYSVOL replication.
1.
On NYC-DC1, open %SystemRoot%\SYSVOL_DFSR\Sysvol
\contoso.com\Scripts.
Note that the TestFRS.txt file created earlier is already in the Scripts folder. While the domain
controllers were at the Prepared state, files were replicated between the legacy, FRS SYSVOL folder
and the new, DFS-R SYSVOL folder.
2.
Run Notepad as an administrator, with the user name Pat.Coleman_Admin and the password
Pa$$w0rd.
3.
Save a test file as %SystemRoot%\SYSVOL_DFSR\Sysvol\contoso.com
\Scripts \TestDFSR.txt.
4.
On NYC-DC2, open %SystemRoot%\SYSVOL_DFSR\Sysvol\contoso.com
\Scripts.
5.
Confirm that the TestDFSR.txt file has replicated to the NYC-DC2 Scripts folder.
If the file does not appear immediately, wait a few moments.
Results: In this exercise, you observed the replication of a test file between the SYSVOL_DFSR Scripts
folders of two domain controllers.
To prepare for the next module
When you finish the lab, revert the virtual machines to their initial state. To do this, complete the
following steps:
1.
On the host computer, start Hyper-V Manager.
2.
Right-click 6425C-NYC-DC1in the Virtual Machines list, and then click Revert.
3.
In the Revert Virtual Machine dialog box, click Revert.
4.
Repeat these steps for 6425C-NYC-DC2 and 6425C-BRANCHDC02.
Administering AD DS Domain Controllers
Lab Review Questions
Question: What would you expect to be different between two enterprises, one which
created its domain initially with Windows 2008 domain controllers, and one that migrated to
Windows Server 2008 from Windows Server 2003?
Question: What must you be aware of while migrating from the Prepared to the Redirected
state?
12-83
12-84
Configuring and Troubleshooting Windows Server® 2008 Active Directory® Domain Services
Module Review and Takeaways
s
Review Questions
Question: In which scenario will you have the option to choose domain and forest functional
level during dcpromo wizard?
Question: How can you easily prepare an unattended file for domain controller installation?
Question: How can you say that RID master is not working?
Question: If you seize the operations master role, can you bring online the original
operation master?
Common Issues Related to Administering AD DS Domain Controllers
Issue
Troubleshooting tip
Cannot raise domain or forest
functional level
You cannot transfer one or more
operation masters roles
You cannot install role or feature
on Server Core
You cannot add additional domain
controller to current AD DS
infrastructure
Best Practices Related to Administering AD DS Domain Controllers
•
Always install at least two domain controllers per one domain to achieve high availability.
Administering AD DS Domain Controllers
•
Use the Server Core domain controller when using role-centric servers, and to maintain higher
security and easier management.
•
Distribute operations masters roles on several servers. Be sure to co-locate compatible roles.
•
Use DFS-R for SYSVOL replication.
12-85
Tools
Tool
Used for
Where to find it
Active Directory Users
and Computers
• Managing operation masters
• Managing domain functional
level
• Creating and managing AD
objects
Administrative Tools
Active Directory
Domains and Trusts
• Managing domain and forest
functional level
• Trust management
Administrative Tools
Dcpromo.exe
• Installation and
configuration of Active
Directory Domain Services
You can run it manually
Server Manager
• AD DS role installation
Administrative Tools
Active Directory
Schema Management
• Managing schema master
role
Must be added as a separate snap-in
Windows Server 2008 R2 Features Introduced in this Module
Windows Server 2008 R2 feature
Description
New Server Core roles and
Features
In Windows Server 2008 R2, new roles and features are provided
for Server Core installation
12-86
Configuring and Troubleshooting Windows Server® 2008 Active Directory® Domain Services