1
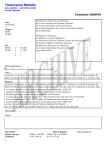
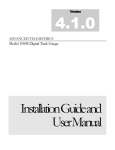
FUTURA REWARDS CREDITING SYSTEM
(FRCS V4.0)
STAFF USER GUIDE
REVISION DATE: JANUARY 10, 2012
REVISION: VERSION 4.0.2
This page was left blank intentionally
The Futura Loyalty Group Inc.
Confidential
2
Table of Contents
1. INTRODUCTION ........................................................................................................................................... 4
1.1 IDENTIFICATION ................................................................................................................................................4
1.2 PURPOSE .........................................................................................................................................................4
1.3 DOCUMENT CONVENTIONS .................................................................................................................................4
2. LOGIN.......................................................................................................................................................... 5
2.1 LOGIN TO THE FUTURA REWARDS CREDITING SYSTEM ..............................................................................................5
3. CREDIT REWARDS ........................................................................................................................................ 7
3.1 DESCRIPTION ...................................................................................................................................................7
3.2 HOW TO CREDIT REWARDS TO FUTURA MEMBERS ..................................................................................................7
4. REPORTS ................................................................................................................................................... 14
4.1 TRANSACTION HISTORY REPORT ........................................................................................................................14
4.2 PRINTING YOUR TRANSACTION HISTORY REPORT ..................................................................................................18
4.3 EXPORTING YOUR TRANSACTION HISTORY REPORT ................................................................................................19
The Futura Loyalty Group Inc.
Confidential
3
1. INTRODUCTION
1.1 IDENTIFICATION
The Futura Rewards Crediting System (FRCS v4.0) shown in Figure 1.1 is a self-contained
multi-user web application that provides Merchants (Partners) the ability to credit Futura
Rewards to Futura Member accounts via the internet.
1.2 PURPOSE
This User Guide provides step-by-step instructions on using the various features contained
within the FRCS application.
1.3 DOCUMENT CONVENTIONS
Text that is in Bold Italics is meant to identify content coming from the applications, for
example: “user must click the Login button”.
Figure 1.1
The Futura Loyalty Group Inc.
Confidential
4
2. LOGIN
2.1 LOGIN TO THE FUTURA REWARDS CREDITING SYSTEM
1. Start your Internet Browser and navigate to the URL:
https://services.futurarewards.ca
2. The Futura Rewards Crediting System Login web page shown in Figure 2.1.1 will
display.
3. Please enter your User Name and Password in the corresponding fields and click the
Login button. Please note that these two fields are case sensitive (i.e. username “Test” is
not the same as username “test” and password “B2a53e” is not the same as “b2a53e”).
Figure 2.1.1
4. If you have forgotten your password, click the “Forgot Password?” Button shown in
Figure 2.1.1 and the page shown in Figure 2.1.2 will appear. Enter your email address
and your password will be sent to you, but if it doesn’t match the Email Address found in
the system, the errors shown in Figures 2.1.2.1 or 2.1.2.2 will display.
Figure 2.1.2
The Futura Loyalty Group Inc.
Confidential
5
Figure 2.1.2.2
5. If you have successfully logged in, you will see the Credit Rewards page similar to the
one shown in Figure 2.1.3.
The Futura Loyalty Group Inc.
Confidential
6
3. CREDIT REWARDS
3.1 DESCRIPTION
The Credit Rewards screen has the ability to add multiple transaction items to the transaction
record before submitting to Futura Rewards for processing.
3.2 HOW TO CREDIT REWARDS TO FUTURA MEMBERS
1. Select Credit Rewards from the menu shown in
Figure 3.2.1 and a blank Credit Rewards page
will display on the left side of the screen as
shown in Figure 3.2.2.
2. Simply type in the Member’s 9 digit Futura Rewards Number in the Futura Member ID
field shown in Figure 3.2.2 from one of the many varieties of cards available as shown in
Figure 3.2.3. A USB card reader can be used to auto-populate this field when the cursor is
placed in the Futura Member ID field as shown in Figure 3.2.2 and swipe the Members
Futura Rewards card through the card reader. If the field is left blank or contains invalid
data, the error shown in Figure 3.2.32 will display.
The Futura Loyalty Group Inc.
Confidential
7
3. Enter the Futura Rewards Member’s postal code in
the Member’s Postal Code field shown in Figure
3.2.4. The postal code can be used to plot the
geographic location of the shopper in relation to
your Merchant’s locations. If the field is left blank or contains invalid data, the error
shown in Figure 3.2.33 will display.
4. Enter the pre-tax transaction amount without dollar
signs or commas (e.g. 100) in the Pre-Tax Trans Amt ($) field
shown in Figure 3.2.5. If the field is left blank or contains
invalid data, the errors shown in Figures 3.2.36 and 3.2.35 will
display.
5. The Transaction Date field shown in Figure 3.2.7
always defaults to the current date, but if the actual
transaction date is another date, you may change
the date by clicking on the Calendar Icon and
selecting the day (date of payment) from the pop up calendar.
6. Select the appropriate Base Offer by clicking the
Base Offer Type pull-down shown in Figure 3.2.8
and selecting one from the list (e.g. Percentage or
Flat).
7. If a Base Offer Type of “Percentage” is selected, you
must enter the percentage amount in the
Percent Amount field shown in Figure 3.2.9. After
entering a percentage in the Percentage Amount field, the Base Rewards and
Total Rewards fields shown in Figure 3.2.6 will display with the applicable rewards
based on the Base Offer Type, Percentage Amount and Transaction Amount entered.
8. If a Base Offer Type of “Flat” is selected, you must
enter the flat amount in the Flat Amount field
shown in Figure 3.2.10. After entering an amount in
the Flat Amount field, the Base Rewards and Total Rewards fields shown in Figure
3.2.6 will display with the applicable rewards based on the Base Offer Type, Flat Amount
and Transaction Amount entered.
The Futura Loyalty Group Inc.
Confidential
8
9. Select from the 3 types of optional Bonus Offers
available (e.g. Custom, Double Rewards and
Triple Rewards), by clicking the Bonus Offer
Type pull-down shown in Figure 3.2.11 and
selecting the appropriate Bonus Offer from the
list.
10. If a Bonus Offer Type of “Custom” is selected
(default), you can either enter the bonus value in
the Bonus Rewards field shown in
Figure 3.2.12, leave the field blank or enter a 0
(zero) and no bonus will be calculated. If a Bonus Rewards value
is entered, the Bonus Rewards and Total Rewards fields shown in
Figure 3.2.13 will recalculate.
11. If a Bonus Offer Type of “Double Rewards” or “Triple Rewards”
is selected, the Bonus Rewards and Total Rewards fields shown in Figure 3.2.13 will
recalculate based on the Base Rewards and the Bonus Offer Type.
12. The Internal Reference field shown in
Figure 3.2.14 is an optional field that can contain
an identifier to help track reward activity
(e.g. invoice #, “Tires” or “Toyo”) by transaction.
You could use the same type of identifier for all transactions to simplify reporting or a
different one for each transaction.
13. Enter the Member’s E-mail Address in the
optional Member’s E-mail Address field
shown in Figure 3.2.15.
14. If you have more than one transaction for the same member, due to a different Base or
Bonus Offer or the internal reference is different, proceed to the next step; otherwise
proceed to Step # 28 to submit the transaction for processing.
The Futura Loyalty Group Inc.
Confidential
9
15. Click the Add Another Transaction link shown in
Figure 3.2.16 and the current transaction is saved on the
screen as shown in Figure 3.2.17 and the Transaction
Amount, Internal Reference and Bonus Rewards value
fields are blanked out, so you can enter another
transaction.
16. The Transaction List shown in Figure 3.2.17 will
display details of the transaction you saved. Please
review the Transaction List and make sure the
information is correct. If the information is
NOT correct, then click the Remove link shown in
Figure 3.2.17 to remove this entry and redo the
transaction. If the transaction is correct, then proceed to
the next step.
17. Enter the pre-tax transaction amount without dollar
signs or commas (e.g. 200) in the Pre-Tax Trans Amt
field shown in Figure 3.2.18. If the field is left blank
or contains invalid data, the errors shown in Figures 3.2.36 and 3.2.35 will display.
18. Select the appropriate Base Offer for this transaction
by clicking the Base Offer Type pull-down shown in
Figure 3.2.19 and selecting one from the list (e.g. Flat
or Percentage).
19. If a Base Offer Type of “Percentage” is selected, you
must enter the percentage amount in the
Percent Amount field shown in Figure 3.2.20. After
entering a percentage in the Percentage Amount field, the Base Rewards
and Total Rewards fields shown in Figure 3.2.21 will display with the
applicable rewards based on the Base Offer Type, Percentage Amount
and Transaction Amount entered.
The Futura Loyalty Group Inc.
Confidential
10
20. If a Base Offer Type of “Flat” is selected, you
must enter the flat amount in the Flat Amount
field shown in Figure 3.2.22. After entering an amount in the
Flat Amount field, the Base Rewards and Total Rewards fields
shown in Figure 3.2.23 will display with the applicable rewards
based on the Base Offer Type, Flat Amount and Transaction Amount
entered.
21. Select from the 3 types of optional Bonus Offers
available (e.g. Custom, Double Rewards and Triple
Rewards), by clicking the Bonus Offer Type
pull-down shown in Figure 3.2.24 to select the
appropriate Bonus Offer from the list.
22. If a Bonus Offer Type of “Custom” is selected
(default), you can optionally enter the bonus
value in the Bonus Rewards field shown in
Figure 3.2.25 or leave the field blank or enter a 0
(zero) and no bonus will be calculated. If a Bonus Rewards value is entered, the Bonus
Rewards and Total Rewards fields shown in Figure 3.2.23 will recalculate.
23. If a Bonus Offer Type of “Double Rewards” or “Triple Rewards” is selected from the list
shown in Figure 3.2.24, the Bonus Rewards and Total Rewards fields shown in Figure
3.2.23 will recalculate based on the Base Rewards and Bonus Offer Type values.
24. The Internal Reference field shown in Figure
3.2.26 is an optional field that can contain an
identifier to help track reward activity
(e.g. invoice #, “Tires” or “Toyo”) by transaction.
You could use the same type of identifier for all transactions to simplify reporting or a
different one for each transaction.
The Futura Loyalty Group Inc.
Confidential
11
25. Click the Add Another Transaction link shown in
Figure 3.2.27 and review your transactions in the
Transaction List. All of your transactions will be listed
as shown in Figure 3.2.28, so that you can not only see
the individual transactions, but the transaction totals. If
you find any transactions that are not correct, then delete
them.
26. If you wish to add another transaction, then proceed to
Step # 18.
27. If you wish to cancel the entire Credit Rewards
transaction and start over, you can click the Reset button
shown in Figure 3.2.29 at any time.
28. You must press the Submit button shown in Figure 3.2.29 to send the transaction for
processing.
29. After clicking the Submit button shown in
Figure 3.2.29 you will receive a confirmation box
like the one shown in Figure 3.2.30. If you are
satisfied with the transaction(s), click the Yes
button to submit the transaction record for
processing, otherwise press the No button to cancel
the transaction.
The Futura Loyalty Group Inc.
Confidential
12
30. The confirmation message shown in Figure
3.2.31 will display confirming the record has
been submitted for processing. You must click
the Finish button to close the window.
The Futura Loyalty Group Inc.
Confidential
13
4. REPORTS
4.1 TRANSACTION HISTORY REPORT
1. Select Reports from the menu shown in Figure 4.1.1 and the Transaction History screen
shown in Figure 4.1.2 will display.
2. The Transaction History screen shown in Figure 4.1.2 allows you to view, print or export
your Transaction History.
3. If the Search By or Configuration fields are not visible as shown in Figure
4.1.2, then click the Down Arrow shown in Figure 4.1.3 to display the
fields.
4. If you wish to hide the Search By or Configuration fields, then click the
Up Arrow shown in Figure 4.1.4 to hide the fields.
5. You can use the Entry Date From and Entry
Date To fields shown in Figures 4.1.5 and 4.1.6
to filter the results to only those records that have
an Entry Date that falls between the two dates.
To change the date, click the Calendar Icon and
select the day from the pop up calendar
The Futura Loyalty Group Inc.
Confidential
14
6. If you wish to view transactions with a specific
transaction status, then click the Status field
drop-down shown in Figure 4.1.7 and select one
from the list.
7. You can use the Transaction ID field shown in
Figure 4.1.8 to enter a specific Transaction ID
to view the details on that specific transaction.
8. To view all transactions for a specific member,
enter their Member ID in the Member ID field
shown in Figure 4.1.9.
9. If you are looking for all transactions that have
a specific value in the Internal Reference field,
you can enter that value in the Internal Ref
field shown in Figure 4.1.10.
10. You can view all transactions entered by a
specific staff member, by entering their Staff ID
in the Entered By field shown in Figure 4.1.11.
11. To view all transactions that meet a specific
Total Rewards range, enter the From and To
range in the respective Total Rewards From and
Total Rewards To fields shown in Figure 4.1.12.
12. When you have finished
selecting your Search By
criteria, click the Search
button shown in Figure
4.1.13 to filter and
display your data.
The Futura Loyalty Group Inc.
Confidential
15
13. After your data has been displayed in the grid at the bottom of the screen as shown in
Figure 4.1.14, you can choose the fields to display by Checking / Un-Checking the
individual fields shown in Figure 4.1.15. For example, if you wish to remove the Status
field from the data, uncheck the Transaction ID field check box shown in Figure 4.1.16
and the Transaction ID Field vanishes from the report as shown in Figure 4.1.17.
14. You can sort your data by clicking the column names in the report header shown in
figure 4.1.14. For example, you will notice that the Member ID field has an Up-Arrow
beside it, which denotes that this field is the sort field and it is sorted in Ascending order.
If you were to click the Member ID field again, the Up-Arrow would change to a
Down-Arrow meaning that the sort order is now Descending. You may click any column
name in the report header and the program will sort the data based on the data in that
column.
The Futura Loyalty Group Inc.
Confidential
16
15. The number of records that display on a report defaults to 10
records as shown in Figure 4.1.18, but you can change it by
clicking the Page Size field drop-down and selecting a value
from the list.
16. You can choose to display scroll bars at the bottom of the report by
clicking the Scroll field check-box as shown in Figure 4.1.19. If you
turn on the Scroll bars, then they will appear at the bottom of the
screen as shown in Figure 4.1.20.
17. You can make all of your configuration selections the default by clicking
the Save button shown in Figure 4.1.22.
The Futura Loyalty Group Inc.
Confidential
17
4.2 PRINTING YOUR TRANSACTION HISTORY REPORT
1. You can print your data by clicking the Print button shown in Figure 4.2.1.
2. The Print dialog box will appear like the one shown in Figure 4.2.2 and from there, you
can select your printer and print options. Click the Print button shown in Figure 4.2.2
after making your changes to print your data.
The Futura Loyalty Group Inc.
Confidential
18
4.3 EXPORTING YOUR TRANSACTION HISTORY REPORT
1. If you wish to export your data to Excel or to a CSV file, click the Export
button shown in Figure 4.3.1.
2. When you click the Export button, you will receive the File Download dialog box shown
in Figure 4.3.2 and you have the option to “Open” or “Save” the file.
The Futura Loyalty Group Inc.
Confidential
19