1
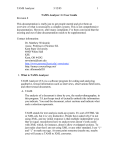
TAMS Analyzer
Revision 4
5/2/04
1
TAMS Analyzer 2.47 User Guide
This documentation is really just to get people started and give them an
overview of what is necessarily a complex system. This is not comprehensive
documentation. However, after many complaints I’ve been convinced that the
existing and out of date documentation needs to be supplemented.
Contact information:
Dr. Matthew Weinstein
Assoc. Professor of Science Ed.
Kent State University
404D White Hall
KSU
Kent, OH 44242
[email protected]
http://educ.kent.edu/~mweinste/tams/
aim: allemandel3ft
I. What is TAMS Analyzer
TAMS Analyzer (TA) is a software program for coding and analyzing
qualitative, textual information such as interviews, observations/field notes,
and other textual documents.
A. TAMS
The analysis of a document is done by you, the reader-ethnographer, in
this program. TA just keeps track of (actually embeds) the information
you indicate. You read the document, select sections and indicate what
such a selection represents.
TAMS stands for text analysis mark-up system. It’s sort of HTML’ish
or XML-ish, but it is very distinctive. People have asked why I’m not
using XML, and my initial response is that multiple independent ways
that we (qual. researchers) have to analyze texts doesn’t work easily
with XML which, for instance, doesn’t allow overlapped sections. To
just make clear that I am not using XML or any other standard, I use
“{“ and “}” to mark my tags. At some point someone (maybe me,
maybe you) will create a TAMS to XML converter.
B. Coding
TAMS Analyzer
5/2/04
2
TA’s first job is to help you code, that is to mark sections of
documents as to their significance. Whether importing documents
(TAMS can work directly with rtf, rtfd and text documents) or creating
them in TA your first job is to select text and indicate what it means.
C. Analyzing
TA’s second job is to extract information from a marked up document.
Basically TA just compiles a table of text meeting specified criteria.
This is called analysis. After compiling this table TA let’s you search
the table and generate summary statistics (counts of how many records
meet such and such criteria). It also lets you use this table to change the
codes in your original source document.
D. License issues
TAMS is released under the GPL license, the text of which is available
at www.gnu.org. At some point I’ll do the tedious work of including a
statement in every source file regarding it; there are also some parts of
the program which are released under Apple’s License which is not as
liberal as GPL; so be careful (in particular the parts of the program
concerning the find text dialog box).
II. Getting started with a project
TAMS Analyzer
5/2/04
3
Figure 1. A project window (aka a workbench)
A project consists of a series of files each of which usually represent one
thing: an interview, an observation, a memo, etc. When you start TAMS
Analyzer you will get a “Workbench”, a special window that represents and
allows you to control the content of your project. I will also call the work
bench a project window. The project file is the document that is created
when you save a project window. It is through this window that you will
add files to your project, remove files from your project, and open files
you have already added to the project, as well as do multi-file searches.
This window also holds all of the codes and definitions that are in your
project. Here are some ways of putting together a project:
A. Case 1: the files already exist
If you have already typed in your interviews, save them as RTF
documents. Click the small Add button over the “Files” list view on the
project window and use the standard open file dialog to select the files
you want to add. The files will then appear in the “File” list. They will
not be open. At this point your workbench will be “dirty” and need to
be saved. You can add text (.txt), RTF and RTFD files to your
workbench.
Figure 2. File added to a project
TAMS Analyzer
5/2/04
4
Now save your project by picking File->Save. (This means pick Save
from the File menu).
B. Case 2: creating data files in TA
When you save files in TA, you will be saving them as RTF files. You
can also save them as text files by picking the file type from the save
dialogue. (You can choose this when you do a save, save as, or save to)
Simply click on the “New” button over the file list and a blank,
untitled file window will appear and be added to the project. Save
the file and save the workbench!
C. Saving & restoring projects
The overall details of a project are saved in a project file: a saved
representation of the project window. This file includes, among many
other things, the location of the files that comprise the project, a list of
files to be searched through for information, and, vitally, the codes that
you have created. To save the project file, simply move the
project/workbench window to the front and pick File->Save.
Unlike all the other windows that TAMS provides, project files
automatically save themselves as new information is added, after it is
saved the first time.
The File->New and File->Open menu commands (on the File menu)
operate only on project files. Never open a document or source file
directly (i.e., an interview, observation, etc.) directly (i.e., through
the finder). Instead open the project and then double click the
document you want to see from the file list. TAMS can open a
project by simply double clicking a project file, a file which has the
extension “.tprj.” To add, delete, and create source/document files
(interviews, memos, etc.), use the menu items on the Project menu
(not the ones on the File menu).
NOTE: If you are upgrading from TAMS 1 to TAMS 2, pick
“Convert ver 1 prefs to project files” from the Project menu. This will
create a series of TAMS project files on your desktop. You are not
quite done, however. When you load the file, you need to move the
codes and definitions from the central code file to the project file.
TAMS Analyzer
5/2/04
5
Select the code file from the “Files” list view. Then pick “Import codes
and defs from code file” from the project menu and save the project
file. You now have upgraded your project to TAMS 2.
III. Coding
A. What is a code
A code is a name that identifies the meaning or significance of a
passage of text. In TAMS the passage is surrounded by tags that have
the code and other information with it. Codes can be nested and
overlapped without problem.
1. Valid characters
The names of codes can have letters, numbers, and underscores
(“_”). They cannot have spaces.
Codes can be hierarchical, i.e., you can create a whole family of
codes, indicating the various levels with “>”. For instance, to create
a “food” family with carrot, parsley, and cilantro in it you would
name the codes
food>carrot
food>parsley
food>cilantro
carrot, parsley, and cilantro are subcodes of food. Note that TAMS
is case sensitive. Also you can still use food (no subcode) as a code.
You could specify further levels of coding such as
food>parsley>curly
food>parsley>italian
2. From codes to tags
In your text to indicate that something is coded you surround the
passage with “tags” which contain the “code”. Showing is easier
than telling in this case. Say that you are going to code the
following passage in your document.
Parsley makes me sick.
TAMS Analyzer
5/2/04
6
To do so in TAMS you just surround it with tags containing the
code:
{food>parsley}Parsley makes me sick.{/food>parsley}
The end tag must begin with a slash, the front tag must not have a
slash, just like HTML. Every open data tag must have a matching
close tag. Your Coding menu has a couple of diagnostic tools to
help you find “bad” or missing tags. Note here you can see that tags
contain codes but are not the same thing as codes. They have that
other stuff (“{“,”}” and “/”) as well.
Note you could just type all that junk in, but what would be the
purpose of my program? In TA you select the text and either pick
the code out of a list or type it in a box on the side of the document
(if it’s a new code). More on this below.
3. Signed tags
To support multiple coders, TA 1.0 introduced a new syntax that
added a signature to a tag. A signature is a group of letters (no
spaces) that are your handle for coding. These are stuck in brackets
after the code inside the tag. If my handle is “mgw” then I could
sign the passage by coding it as
{food>parsley [mgw]}I hate parsley.{/food>parsley [mgw]}
note the code and the signature must match!!!
Again, it would be silly for you to type all that. You indicate that
you want to sign your tags in TA’s preferences dialog on TAMS
Analyzer menu.
4. Tags with comments
Sometimes you want to leave yourself a little memo about the
passage. TAMS does this by allowing you to leave it in the close
tag after the signature (if there is one). The memo is offset from
the code or signature by a space.
{food>parsley [mgw]}I hate parsley.{/food>parsley [mgw]
This guy’s crazy!!!}
You can also insert it with a colon after the signature (or code if
there is no signature)
TAMS Analyzer
5/2/04
7
{food>parsley [mgw]}I hate parsley.{/food>parsley [mgw]:
This guy’s crazy}
which makes it look a little nicer.
TA does not facilitate adding memos (or comments, as I prefer to
call them), you just type them in (though see the preferences in
appendix 4). Now you can see that tags have a lot more than just
the code, they also include signatures and commments.
B. Adding a new code1
TA makes it easy to add a new code.
•First, select the text that will be coded.
•Second, just fill in the name of the new code in the box on the left
side of a document window and
• press the button marked “New”.
1
This documentation was written before 4.1 when a media player was introduced above the
button panel in document windows. Everything described in this documentation still holds,
but the document windows do look quite different (now sporting a series of buttons labeled
+, <<, >, ^ and v). To read about attaching media files see the Audio-Visual How To
documentation in the How To folder.
TAMS Analyzer
5/2/04
8
Figure 3. Entering new codes
Then you’ll be prompted for the definition of your new code and when
you click ok, and
1. your code and definition will be added to the code dictionary in the
project workbench (which you better save!)
2. added to the codes list under the box you typed in your code name
into
3. as noted, applied to the selected text.
WARNING
NOW SAVE YOUR FILE AND PROJECT FILE (if not yet saved)
SINCE BOTH WILL BE CHANGED.
TAMS Analyzer
5/2/04
9
C. Applying an existing code
Now things get really easy. If you already have the code in your list,
just select a passage and double click the code as it appears in the code
list.
So in this example just double click food>parsley to code the selected
text.
Fig. 4. coding
After double clicking the choice in the “Codes” list on the left side of
the window, this will look like this.
TAMS Analyzer
5/2/04
10
Figure 5. After coding
Notice that the text is still selected so you could keep applying codes to
this section of text!
ADVANCED:
When you have a lot of codes, it’s convenient to have a couple of
frequently used ones on the tool bar. To put a code there select a code
from the code list (click on it one time) and press “Code to toolbar”
REALLY ADVANCED:
What if you want the button bar to come up each time with certain
codes. Put a metatag at the top of your document which lists the codes
you want on the button bar, you can also have text and insert vertical
bars as well:
{!button food>parsley, |, “{!end}”}
The first time you type this in you will need to pick “Build button bar”
from the Coding menu.
This example will create 2 buttons separated by a vertical bar. The left
button will be a coding button that will code selections “food>parsley”.
The other button will insert {!end} when clicked. Note that this second
button has quotes around it. They signal that this is not a code.
TAMS Analyzer
5/2/04
11
This weird syntax with the ! is explained in III.E. below. For full
documentation of the document toolbar see the tool bar HOW TO in
the how to folder.
D. Working with tags and codes
To help you work with tags TA provides some very simple tools to
select and move tags around as well as to delete tag pairs and leap from
the open tag to the close tag of the pair (and vice versa). These are all
on the Coding menu. I wont walk you through them, they should be
pretty obvious.
The one practical piece of knowledge that I will share is that I often
find the need to move the end tag of a pair to a different location after
I find that the next paragraph should also have been included. No
problem. Click in the end tag, pick “Find current code” from the
Coding menu. This will select the tag. Now drag it to its new location.
E.
Working with codes in the code browser.
Figure 6. Code browser
TAMS Analyzer
5/2/04
12
To allow you to modify and amend, as well as indicate which codes are
active and inactive, TA2 has a code browser. This is made visible by
picking Project->Code browser. One thing you will notice is that there
is no save button. The fact is things are saved every time you do
anything whether it’s click clear, exit, or select another code. The
program is always saving your codes. So if you hit clear it will save the
codes and definitions you have just entered. To get rid of a code, use
the explict “Delete” button. Evoking the code browser always leaves
your project in a dirty (need to save) state; if you have already saved
you project (i.e., it has a file) it will save automatically.
E. Universal codes and metatags (sometimes erroneously called metacodes
by me)
The types of codes we’ve been talking about are data codes. They
specify the meaning of some portion of text. In comparison, universal
codes describe a whole document rather than a section of it. For
example you may want to indicate that the type of data you are dealing
with in this particular file is an interview. You could put at the top of
the document the following to remind yourself of this in the output:
{!universal dataType="Interview"}
This will produce one column in your output called “dataType” and for
records from this document it with fill it with “Interview”.
This type of tag, which starts with a “!” is called a metatag (rather than
a coding tag). It conveys information to the program rather than marks
information. There are a large number of metatags in TA all of which
are listed in the Coding->Insert metatag submenu. They are described
in Appendix 3.
F. Reminding yourself of a code definition.
At some point after 50 or more codes are added, it is useful to quickly
see the definition of a code. To do this, pick the code off of the code
list (i.e., click one time on the code list of your document window or
the workbench) and press the “Def” button. A window explaining the
code will pop up! You can also click on the code lists and pick Coding>Code definition. Alternatively, you can select the code in your
TAMS Analyzer
5/2/04
13
document (or even from a results window, which is getting ahead of
myself) and pick Coding->Code definition of selected text.
G. Creating code sets
Some times it’s easier to work with smaller sets of your codes than the
whole body of codes in your project. These smaller groups of codes are
called code sets in TA. The easiest way to access code sets is from the
small menu next to the workbench:
Figure 7. Code sets menu
Picking “Manage code sets…” provides a dialogue that allows you to
create subsets of code. The procedure is to select the codes you want in
the set by clicking, or extending the list by shift and apple clicking the
codes; then name the code set by filling in the top blank of the form
and register it with the + button.
TAMS Analyzer
5/2/04
14
Figure 8. The Code Set dialogue
As an alternative to selecting the codes by hand you can use the search
criteria to pick more or fewer codes. This way you can select entire
code families in a single go. You can also revise code sets and delete
them using the menu and the – button. The “- -“ button deletes all
current code sets. Be careful.
Creating a code set does not select it. You need to return to the code set
menu (on the workbench or the “Project->Code sets” menu) and select
your code set’s name.
Code sets are not just a convenience feature. Many elements are
linked to code sets. Count, co-frequency count, dotGraph output
all look at the current code set to generate their output. In
addition you can look for records from a code set within your
results window.
H. Problems coding
There are a number of problems with coding that can crop up; and TA
provides two tools to help you catch these problems.
TAMS Analyzer
5/2/04
15
1. Broken up codes: sometimes the mouse slips and tags can end up in
tags: {setting>ru{sound>cat}ral}. Here {sound>cat} has accidentally
been inserted inside of {setting>rural}. This will not make any sense to
TA. If you pick “Check for pairs” this will select problem tags,
basically tags that don’t seem to have an end or beginning. The one it
shows you probably is not the problem tag, but it will be near the
problem tag. It is a clue as to where the problem is. TA is saying that
for some reason, it can’t find the other end.
2. Incomplete codes: Sometimes in working with a document, a tag at
one end or the other will get deleted. The solution is the same as for
problem #1. Choose “Check for pairs” off of the Coding menu. A tag
will be selected if there are problems (i.e., if there are not an even # of
beginning and ending tags). This is a clue to the problem; for some
reason, TA did not find a match for this.
3. Nested codes: Sometimes the same codes can end up inside each
other. This might be represented by the following situation:
{a}Some text{a} that I’m {/a} trying to code {/a}.
This is not the sort of nested code that works with TA. It would be fine
if the inner code was any code including a subcode of a; if it were a>b,
for instance, or even if it was done by a different coder (with a
different signature);. The problem is that TA can’t figure out where the
passage ends, and it will choose the shortest passage. In this example,
the phrase “trying to code” is not seen by TA. These problems can be
found by picking “Check for nested” from the Coding menu.
One type of error that TA is not good at catching is missing close
braces. Often times if you’re getting an error message while doing
a search, this is the source of the problem.
The moral of the story is clear, run “Check for pairs” and “Check
for nested” from the Coding menu often.
TAMS Analyzer
5/2/04
16
IV. Documents, sections, and repeat information
A. Repeat Codes and the Repeat tag
I will be using the example of an interview here, but we could be
talking about field notes in which case time code would probably
substitute. In an interview, I always want to know who is speaking
when I look at results. (Unfortunately if a coded passage crosses
speakers, only the first will be included). To include that information I
need to take two steps: first, indicate who the speaker is, second
indicate where that information is found.
To mark whom the speaker is just code it as you would any data. We
might call the speaker “speaker” for instance:
{speaker}John{/speaker}: {food>parsley}I hate
parsley.{/food>parsley}{!end}
Now, speaker is really a different sort of code than food>parsley. One
indicates data, the other information you want attached to that data. To
indicate that “speaker” is a special sort of code that isn’t data you put a
metatag at the top that says that this is what I call a “repeat code”
{!repeat speaker}
If you have time-code information, you could also add that like this
{!repeat speaker, time_code}, and so on. But see the next section for
problems that could arise.
B. Breaking a document into sections
Initially, starting with TA 2.47, TA starts by assuming that your
documents are “unstructured” (Actually, this is only true if you have a
new installation. Check the default by going to the TAMS Analyzer
Preferences, and looking under the Search tab for the “Documents
treated as unstructured” check box. If it is checked then the
assumption—unless you use one of the triggering metatags—will be
that the document has not been structured, else it will assume it has).
By structuring a document you enable additional features of TA,
especially the section search. Using this search you can ask questions
like “which turns in my interview with Bob involved the code food and
the code parsley.” If your document is unstructured, TA will not know
TAMS Analyzer
5/2/04
17
what “a turn” is in your document. A search will return either the
entire interview (if it had those 2 codes in it) or any coded passage
meeting the criteria, depending on how you have set up your program
preferences. Similarly, empty searches will only work correctly if your
document is structured. On the other hand, unstructured documents are
very easy to work with and initially will give the results you want in
most circumstances: Repeat codes providing the context for subsequent
data codes through your documents.
If you are updating TA, you might want to turn off this new default
unstructured behavior. Easily done. Put the metatag {!struct} in your
init file (or on top of each interview if you don’t have an init file).
What is the structure of a document? Often qualitative documents have
a sort of natural syntax: interviews have speakers, field notes have
time coded passages, etc. One reason I created TAMS was so that there
was a way to have associated information: the name of the speaker, the
time code of the field notes, included with the results of queries into
the data. To take advantage of these natural sections, the first thing you
will need to do, and TA offers few tools to help with this, is mark the
ends of these natural sections with {!end} metatags (or {!endsection}
metatags, see §IV.C.)
Manual structuring: You can manually structure your document by
putting {!end} metatags after each natural break in your document:
After a person speaks, at the end of a time coded passage, or at the end
of a newspaper article, for instance. After an {!end} TA2 will forget
who is talking and what time it is, etc., so you’ll need to have repeat
tags indicate all of that at the front of the next section. Alternatively,
you can use {!endsection} which carries values of repeat forward (i.e.,
if you think of structuring a document as cutting each part of an
interview—for instance—onto 4x5 cards, {!end} carries no
information to the next card, {!endsection} carries everything to the
next card.). You may also need to play with various program
preferences regarding !endsections and !ends in the program preference
dialogue (look on the searching tab) to get the results you expect. The
original use of an !endsection was to allow users to subdivide a section
into smaller parts (e.g., coding letters to the editor. The whole “letters
to the editor” article may terminate with an !end, but each letter would
get an !endsection).
HINT:
TAMS Analyzer
5/2/04
18
You may want to check out Nisus Express or TexEdit Plus for this,
both of which have very fancy search and replace functions which can
save a lot of time in marking up documents initially.
TAMS also has a very fancy though very technically complex search
and replace mechanism known as “regular expressions.” You can use
this to bulk code a document often. But the learning curve is steep.
There is documentation included in the source folder regarding regular
expressions (often called regex) as implemented in TAMS which uses a
programming library called PCRE (perl c regular expressions) to
implement them. Also search the web for tutorials on regular
expressions. There are a lot of them out there. Powerful stuff.
HINT:
TA will let you turn a passage of text into a tool bar button. After the
first time you type {!end} (or pick it from the Insert metatag submenu
of the Coding menu) select it and pick “Turn selection into toolbar
button” from the Coding menu. Then it’s a simple, single click to stick
{!end}s where you need them.
Automatic structuring: Rather than manually structure, there is some
support for having TA structure your document for you. There are two
metatags which you can use to save yourself a lot of time and have TA
automatically structure your document. These are the !inner and !last
metatags (use one or the other, not both). You use both of these with
repeat values, which can act as a sort of demarcation of sections in your
document (see last section of this guide).
The syntax for !inner is {!inner repeatCodeName} and for !last,
similarly, is {!last repeatCodeName}. These should appear in the init
file or towards the top (i.e., before data codes) of your document files.
!inner indicates that each occurrence of repeatCodeName should be
treated as though it has an !endsection before it.
!last indicates that repeatCodeName is the last repeat code being
assigned to this section. If TA finds another repeat code it should act as
though there is an !endsection before it.
These are easiest to use if only one repeat value is happening through
the document. Then you just make that one the !last.
T in paradise: The way that endsection and end work (or implied
endsections with !last) is that no data is written until it finds that
!end/!endsection metatag. Also, repeat values aren’t paired with data
until the section ends. This means that if in a given section the repeat
TAMS Analyzer
5/2/04
19
code “time” changes value, only the last value it received will be
reported. Consider this case:
1 {!repeat time, speaker}{!last speaker}
2
3 {time}100{/time}
4
5 {speaker}bob{/speaker}: {a}food's good{/a}
6 {time}110{/time}
7
8 {food>parsley}I like parsley.{/food>parsley}
9
10 {time}112{/time}
11
12 {speaker}bob{/speaker}: {food>parsley}it really cleans my
13 breath.{/food>parsley}
14
15 {time}115{/time}
Here speaker is our !last code. There are two sections, one starting at
line 1 and going to line 6 (since that is the first time a repeat code is
found after speaker—our designated !last code) and the second going
from line 6 all the way to 15. Again, it’s the speaker in line 12 that
tells TA that the next repeat code should be treated as if it had a
{!endsection} before it. Now consider the value of the time code for
each of these: For the first section all data will be reported with time =
100. For the second ALL DATA will be reported with time = 112. The
110 never gets registered because it is changed (in line 10) before the
data is written (in line 15). Even the food>parsley code in line 8 will
say time=112. The answer to the problem is to put a speaker before
line 8 so that when {time} is found in line 10 the data is written, or put
an !endsection metatag on line 9:
1 {!repeat time, speaker}{!last speaker}
2
3 {time}100{/time}
4
5 {speaker}bob{/speaker}: {a}food's good{/a}
6 {time}110{/time}
7
8 {speaker}bob{/speaker} {food>parsley}I like parsley.{/food>parsley}
9
10 {time}112{/time}
11
12 {speaker}bob{/speaker}: {food>parsley}it really cleans my
13 breath.{/food>parsley}
14
15 {time}115{/time}
The moral: Automation is useful (in fact necessary) but dangerous.
Make sure that every intended section has as its last !repeat value the
TAMS Analyzer
5/2/04
20
one listed in !last, filling it in if necessary. You may need to hand enter
{!endsection}s to cover those places that don’t fit the pattern. Also, see
!inner in the Metatag appendix, appendix 3.
C. !end vs. !endsection
To reiterate, these are used when manually structuring a document.
When TAMS hits an {!end} tag it clears all the repeats that it has
found. None of the values will carry forward from the previous part of
the document. Using {!endsection} rather than {!end} is one answer to
this. It keeps the last values, so that if only a few change in the next
section of the document, the previous values will be retained. In the
previous example with an interview where you are tracking who is
talking and maybe only occasionally entering a time_code you will
want to use {!endsection}, but be careful to mark all the speakers, or
you will think the wrong people are saying the things you are
finding!!! Also make sure that you put in an {!endsection} whenever
the value of speaker changes, or you will be seriously mislead as to
who is speaking.
ADVANCED NOTE
An alternative to the {!endsection} metatag is the {!dirty} and {!clean}
metatags which can be sprinkled throughout your document. They
handle how {!end} metatags are handled. {!dirty} tells the TAMS
processor to carry old values forward when it finds an {!end}; {!clean}
tells TAMS to zero values when it finds an {!end}. By default TAMS
assumes that {!end}s should be {!clean}.
V. Getting information out of documents
A. Workbench vs. Document searches
After you have coded your documents you will want to extract
information from them. This generally involves looking up different
codes and sifting through the results. There are two ways to do this on
TA: through the workbench and through the Search tab of each
document window (if I port this to X11/Linux, only workbench
searches are likely to be supported, in fact, workbench searches can do
everything and more that workbench searches can do). If you want to
search across multiple documents you need to use the workbench.
TAMS Analyzer
5/2/04
21
1. Workbench searches
To search from the workbench, first put together your search
list. This means moving files over by selecting them from the file
list clicking the “Add” and “Remove” buttons to move them onto
the right hand, search list. Put a code into the “Search” field and
hit the button called “search”. That’s pretty much all there is.
Ok, there are a few details still to cover.
2. Document searches
Really, it works the same way only results will be for this
document only.
B. The unlimited search
This simply refers to searching without putting in a code into the
search field; just leaving it blank. It will return a record for every
coded passage in your document. That means the following will
generate two results records:
{veggie}{food>parsley}I like eating things with
parsley{/veggie}{/food>parsley}
One for veggie and one for food>parsley, even though the data will be
almost identical. This is coded twice and it will provide two results in
an unlimited search (this assumes simple is selected as the search type).
(Note: the tags do not have to be properly nested, as this example
shows, the end tags and start tags could be in either order).
C. Looking for particular codes
Of course, more often you will want to look for particular codes. From
the workbench you just double click the code from the code list on the
workbench and hit search. You could also manually type them into the
search field and hit the search button. By the way, searching for “food”
will return the whole food family: food, food>parsley, etc. If you want
to find only food, search for ‘food. That’s a single quote and the word
food. This is called an exact search, and you could alternatively do it
through turning on the exact flag (under the search) as well.
What if you want to find both food (and its family) OR things coded
likes>food which is part of the “likes” family. You can search for food
at any coding level by searching for “>food”. This indicates that it
should look for food at all levels of the code.
TAMS Analyzer
5/2/04
22
What if you wanted to find food or good or neighborhood. You could
search for “*ood” (asterisk followed by a pattern) this basically just
searches the code name for a substring.
D. And & Or
I’m no expert in designing lexical analyzers. As a result there are not
proper Boolean operators. Sorry. However, you can do AND’s and
OR’s. AND’s are indicated with the “+” sign and or’s with a comma
“,”. AND’s take higher precedence than OR’s and there is no grouping
with parentheses, so you have to distribute things yourself. Again, so
sorry. But at least the feature is there!!!
To search for either food>parsley or food>carrot you would enter
“food>parsley, food>carrot” To find passages that are both food>carrot
and loves>vegetarians you would search for
“food>carrot+loves>vegetarians”
Figure 9. A search involving AND
E. Search Flags
In both the document search pane and on the workbench there are three
flags or check boxes that control how TA does searches:
1. Raw searches
Raw simply means that the tags are shown in the results. TAMS
will show you all the tags that are open for the start of the found
passage, by the way. For actually putting things into papers you
will want to turn off the raw flag when you search. By the way,
returns are substituted with “\n” and tabs with “\t”. The original
characters would be confusing to Excel or other databases.
2. Empty searches
Usually, when you search for data you only want to know what
passages meet certain criteria. If you turn on the empty switch TA
TAMS Analyzer
5/2/04
23
will produce a record, data or not, at every !end (or !endsection if
you turn on that feature in the preferences panel). This way you can
find out how many times someone didn’t mention X, Y or Z...
Note this only works for structured documents.
3. Exact searches
Normally if you search for food, you will get the whole food
family:
food
food>parsley
food>carrot
etc.
To look for only those things coded food, but not food>carrot, turn
on the exact flag.
NOTE: you could also prefix a ' (single quote) in front of food.
F. Search types
TA can search a wide variety of ways giving very different result sets
depending on need. These search types are chosen from a pull down
menu under the check boxes on the workbench:
Figure 10. Search types
1. Simple searches and non-simple searches
There are three types of searches that TA can do given a mix of
codes. The first two, simple and non-simple are the primary ways
researchers will search for data. In the first case TA searches for the
tags that match what you’ve indicated and returns passages that
TAMS Analyzer
5/2/04
24
meet the criteria you’ve set. In the second case (non-simple), TA
will check at each character whether this character is in a “zone”
that meets the criteria you’ve set. Consider searching for “food,
veggie” for a document that contained this passage:
{veggie}{food>parsley}I like eating things with
parsley{/veggie}{/food>parsley}
If you are doing a simple search, both food>parsley and veggie
meet the criteria. So TA will generate a result for each tag. You
will have two rows (one for each tag) in your results windows with
almost identical data. On the other hand, if you select non-simple
search, TA will ask if each character in “I like eating...” is in a
zone that is either food or veggie and return it as meeting the
criteria. There will only be one result record for this. TA indicates
that this is not a simple search by prefixing the code in the results
window with a “+” or “-”. Generally you will want the simple flag
checked.
NOTE: Searches with “AND” (“+”) are always non-simple
searches.
WARNING: Only simple search results can be recoded!!! This is
because passages returned from searches with “AND” may not be at
tag boundaries.
2. Section searches
If you have used {!end} markers ( or {!inner} or{!last}) to mark
up your text so your text has sections, you can look for sections that
meet certain criteria regarding codes. For example you could look
for all sections that have either code “veggie” or code “animal”
(your search would be “veggie, animal”). Or you could look for
sections that have both codes in them: “veggie+animal”. Notice that
AND and OR mean different things in this context. If a section has
both codes in it even if they do not apply to the same passage of
text that section (i.e., an area ending with a {!end} metatag) will be
shown in the results window. Similarly for OR, if either code
appears in that section of text, that section will be copied into the
results.
WARNING:
TAMS Analyzer
5/2/04
25
Because {!inner}and {!last} implies that {!endsection} rather than
{!end} is the break point, TA may not return the data you want.
Normally TA looks only for {!end}’s. To make TA aware of
{!endsections} Go to TAMS Analyzer->Preferences, and under the
searching tab make sure “Report empty searches for each
{!endsection}” is checked.
3. String searches and Regex searches
In addition to searching for codes, TA provides two mechanisms
for searching for raw text in your documents. Entering a string of
characters into the search field and conducting a string search will
return all occurrences of that string (defaults to case
insensitive—check the exact box to make it case sensitive).
Furthermore, the browser will show not just the string but a little
bit of context for the string (how much is determined by a
preference option).
Regex string searches use the regular expression support to search
for text. With this you can search for all sentences, or occurrences
at the beginning of a sentence, or words that start with b followed
by three of any character and ending with x. It’s powerful but
really requires its own manual. Look on line for tutorials on perl
regular expressions (or just regular expressions).
G. Searching for coders
If you want results for simple searches only from a certain coder you
could simply put in their code in the “Coder IDs” field of either the
workbench or the document. You could also list coder’s separated by
commas. If you want to include unsigned tags use * (no this doesn’t
mean wildcard in the context of the “Coder IDs” field, it means no
coder was provided). To look for unsigned and tags signed by mgw I’d
fill in “*, mgw”.
You can do much more complex searches however by including coder
information in the search field! If I want all cases of food coded by
mgw, I could search for “food[mgw]”, or if I wanted unsigned results
as well I could do “food[mgw; *]”. Notice that the coders are separated
by semicolons rather than commas . If I wanted only unsigned results
I’d look for “food[*]”. If there was another coder with bob as his
initials I could look for “food[mgw; bob]” or if I want to know what
TAMS Analyzer
5/2/04
26
both mgw and bob coded as food I could look for
“food[mgw]+food[bob]”
ADVANCED FEATURE:
You can set up pretty complex coder name systems and search for all
sorts of subsets by using the ~ (tilde) in a search. Searching for [~m]
will return all coder’s whose name begins with m. Or searching for
“food[~m;*]” will return all passages coded as food by anyone whose
name starts with m or was unsigned. Again this is not done in the
“Coder IDs” field but in the Search field itself.
H. Saving for Excel and databases
When you have results, you may want to export them to a database. TA
produces very nice tab delimited files readable pretty much straight
away by Excel and other databases. Just pick Save To: and pick “Text”
from the “File format” menu on the save dialogue.
BEWARE:
If you’re using a classic environment database you’ll need to pick “Use
old Mac new line character for results” from the preferences menu
before you do a search.
BEWARE:
Panorama database stops reading things at the end of quotes. Put the
following metatag at the top of your documents: {!noquote}. This will
turn quotes into \Q for double quotes and \q for single quotes.
VII. From results to analysis
Once you have searched the list of files in the search list you will be
looking at a “results window”, something like this:
TAMS Analyzer
5/2/04
27
Figure 11. A results window
A results window is a browser for data. It allows you to move through
your data, further search your data, and even modify your source
documents. This section will talk about the first two of those ways of
analyzing your data. First let us note the anatomy of the results window.
The lower pane. In the lower half of the results window you will see one
row for each record returned by the search. This row is broken into
columns: a # column which just keeps count of the records that are
showing, a column for each universal code that applies to the data in that
row, a column for each repeat code that applies to the data in that row, the
data that met the search criteria, comments attached to that data, the coder
for that passage, the name of the document for that passage, and the
beginning character offset in that document for that passage! These
TAMS Analyzer
5/2/04
28
columns can be resized and dragged around (reordered) by dragging the
column titles.
The browser pane. The upper half of the window is dominated by the
browser pane that shows the value of the _data field/column (which is the
part of the table that has the actual data in it) for whichever record is
selected in the lower pane. If you want the browser to show a different
column value change it using “Results->Set field to browse…” You can
also adjust how much of the window should be browser and how much
should be lower pane by dragging the dot on the bar between them.
Figure 12. Results window button pane
Button pane. Next to the browser pane is the button pane. The top two
buttons are a forward and backward that allow you to flip through different
“selections” of data (more on “selecting data” below). The “Proj” (for
project) button brings up the workbench for this result window; sort
provides a quick and dirty ascending sort for the selected column (not the
best way to sort in TA, however). “Find record” will take you back to the
document window and select the text connected with the currently selected
row. This is the best way to go back and see the context of that particular
row’s data. Refresh re-runs the search (in case the source document has
changed). You’ll be tipped off that such changes have occurred by a check
mark next to the Refresh button. Finally, below the refresh button is an
indicator that shows how many rows (aka records) are visible from the
TAMS Analyzer
5/2/04
29
whole. At first the top and bottom numbers will be the same. They will
change as you conduct selections of data. Selections are subsets of the
records searched for, as we will now explore.
A. Selecting data
Often clicking the search button is only the first step in exploring the
meaning of data. Having pulled up the records related to veggies, we
now want to find out, what did “Bob” say about veggies? What (or
how many) passages about veggies included the word carrot? Did any
of those also include rutabaga? What records under veggie have neither
rutabaga or carrot?
To answer these questions we need to do complex searches of our result
window. The result window is really a fairly complete “flat file”
database, i.e., a database program that works on one file at a time.
Searches have to be done one column at a time BUT through doing
multiple searches you can create complex AND and OR relationships.
Furthermore, once you find a set of records that answer your question
you can “name” this set of records so you can pull them up instantly.
You can also create “autosets”, macros or little programs that can pull
up similar records from any result file!
I used the word search in the last sentence, but from here forward I
will use the word select to mean “search in a result file window” and
reserve the word “search” for workbench or file searches of your
source documents.
Finding a value in a repeat or universal column. I will use the example
of finding “Bob” who I have marked as a {speaker}, which I have
named as a {!repeat} code. If this is unclear, review section IV. To
find only Bob as speaker I first click on the head of the column titled
“speaker” so the entire column is highlighted. I then pick Results>Select… from the menu and am confronted by this dialogue box:
TAMS Analyzer
5/2/04
30
Figure 13. The select dialogue box
Enter Bob into the Select string field and press “OK.” Now only
records with Bob or bob or boB in the “speaker” column will be
visible.
Now the record count will have changed in the button panel, as well.
And we can see in our fictional example here that (for instance) 4 out
of the total of 7 records in our search had speaker “Bob”:
Figure 14. Changed record count
Seeing all of the records. Given that only one “select” ago we were
looking at all the records, we could use our browser forward and back
buttons to leap back one selection and see all of our records.
Figure 15. The browse back button
TAMS Analyzer
5/2/04
31
Alternatively we could leap to all records by picking “Results->Select
all”
Selecting values in your data. What if we want to find things that were
coded veggie and have in their coded text the word carrot? This
basically is done through two selects. In this case the order of the
selects does not matter, though there may be cases when it does (I’ll
discuss one shortly). The first thing to do here is to select all those
records coded as “veggie”. “veggie” is a code and these are put in the
column called “_code” (all of the columns that TA creates start with an
underscore). Pick this column by clicking it’s title and making sure that
the whole column is highlighted. Then select “veggie”: pick the
“Results->Select…” menu option and type in “veggie” and click ok.
Now only the veggie items are selected.
We now want to further whittle down the data to be only the ones
where people used the word “carrot.” To do this we simply do another
“Results->Select…” after clicking on the _data column, where the
coded text resides. Each time we select data we are working only with
the records showing, not with the entire count of records returned from
the work bench search. So in this case we will pick the “_data” column
by clicking on the title (“_data”) and picking “Results->Select…” a
second time and press OK. Now only records that met criteria in both
selections will be visible: we have selected “veggie” in the _code
column and “carrot” in the _data column.
Logical ORs in selecting records. What if we wanted records that were
either coded “veggie” or “fruit”? If we select veggie the fist time the
way we’ve already described, we will have all the records coded
“veggie”. To add to this the records coded fruit we select the _code
column and pick “Results->Select additional…” This will give us the
same dialogue box to type in “fruit” but instead of selecting from the
shown records, TA goes back to the whole pool of records and adds the
ones meeting this new condition to those shown.
Naming a selection. TA is very big on “sets”, meaning subsets of lists
of things. It supports working with “code sets” (subsets of all your
codes, so you don’t have to scroll through however many hundreds of
codes you’ve created), file sets (so you can keep your memos separate
from your interviews), and results sets (aka data sets) which name a
portion of the records returned from a search.
In the case of having found all of those records that are coded “veggie”
and spoken by “bob” and use the word “carrot”, it might be nice to
“bookmark” these records so you can just leap back to them whenever
TAMS Analyzer
5/2/04
32
you need. With just those records showing (i.e., you’ve just done the
selection of speaker=bob, _code=veggie and _data=carrot (by equal we
means contains, in reality)) pick “Results->Result sets->Create named
set”. You should be prompted to provide a name, type in something
like “bob-veggie-carrot”, i.e., some meangful identifier for this
selection of data. Click “OK” and you have now created a named set. A
new item has been added to the “Results->Result sets” menu which
is your named set!
To show these records at any time you can just pick “Results->Result
sets->bob-veggie-carrot”.
WARNING:
Named sets are saved with result files, but are disposed of the minute
you refresh your data. As a result. If you need something persistent
use auto sets!!! Named sets are best for on the fly data analysis since
they are easier to use than autosets, but autosets have the advantage of
permanence and shareability.
ADVANCED:
Named sets and autosets are not just book marks for your data (though
they are primarily that). You can do complex set operations with data
sets. Using the “Results->Result sets->Set operations…” menu option
you can take the selection that is showing in your results window and
do things like intersect it with a named set or find the union of it and a
named set. These of course can then be named as well. This allows for
very complex analysis and mining of data.
Autosets. In named sets you are just giving a name to a group of
records. With autosets you actually teach TAMS how to find records
meeting the criteria you used. The advantages of this are many:
autosets will persist after you refresh and autosets can be applied to
other searches. To create an auto set, choose the “Results->Result sets>Create autoset…” option. That will show the following dialogue:
TAMS Analyzer
5/2/04
33
5.
4.
1.
2.
3.
6
Figure 16. Autoset dialogue
With the autoset dialogue you teach TA the steps needed to make a
results set. If you have done a selection, and want the steps involved
in that selection to be your autoset, press “Add history” (the
sequence of steps you have just done) in area #3. You may need to
modify what appears in area #4 using areas #1 #2, and # 3, and
removing wrong steps using the – button in area #4.
To create an autoset from scratch, you start in area #1 (see Figure 14)
by indicating whether the steps you indicate should start with all of the
result records (no matter what is currently showing) or with a current
selection. If you have used the Results->Sort up and Results->Sort
down to organize your data TA can remember this sort order and
automatically sort your data before applying the next actions to it.
To the base established in step 1, you can add two types of steps, first
you can apply selections through the menus and fields in area #2.
Alternatively you can do set operations using other autosets through
area #3. In either case once you’ve filled in the information through
the menus, fields, and check boxes, click add step to have this
TAMS Analyzer
5/2/04
34
operation registered in the autoset. If you don’t click “Add step” the
act will not be registered.
Area #4 is where these steps show up. In area #4 you can rearrange the
order of steps (using the ^ and v arrows), you can delete one step (click
on it and press the – button) or all steps (press the – button).
Once the steps are in place, decide if you want this auto set available
project wide. If yes make sure the box in area #6 is checked. In all
cases you need to enter a name for this autoset in the box in area 5 and
press save.
Under area #5 is a menu which allows you to recall and delete older
autosets.
When done press the Exit button in area #6. To actually run your
autoset pick the name you entered off of the “Results->Result sets”
menu.
Sorting. There are two ways to sort data in TA. The first is through the
sort button right in the button panel on the results window. This sorts
up (A before Z) and is good for quickly arranging a single column.
The preferred method of sorting however is through the Results->Sort
up and Results->Sort down menus. These allow you to nest sorts so
you can sort columns inside of columns. You can also control the type
of data that is being sorted, i.e., you can specify whether the column
contains dates (but set the date format first through Results->Date
format), integer, string, real number (floating point) or a code. Sorting
codes require you to set a code level through the Results->code level
menu item. If the code level is 0, then the code is simply treated as a
string and is sorted alphabetically. If code level is 1 then a>b and a>c
are considered the same! Only the first level is examined. If code level
is 2 then a>b>c is the same a>b>d but, bother are different from a>c or
just “a”.
When you use the menus first you sort using one of the criteria that
does not have the word “within” included. This tells TA to forget all
previous sorts and start again. The menu items that include the word
“within” add onto whatever sorts have been done. So after the first
time you sort, use the within’s to sort additional s.
What’s important is that TA remembers the sorts done by the menu and
can import the criteria for sorting into data summary reports and
autosets. If you use the sort button none of those criteria are available
to the TA program.
TAMS Analyzer
5/2/04
35
VI. Interactively reworking your coding
Based on what you find in your searches you will want to go back and
“recode” your document; which usually means adding another layer of
subtlety to your codes. First time through you may have just wanted to
catch any mention of veggies. So you coded anything that seemed slightly
relevant “veggies”. Then you want to see what people are saying about
vegetables, so after searching for veggies you’ll want to change those codes
to veggies>good, veggies>bad, veggies>whatever. I refer to this process as
reanalysis, and it involves recoding your data (which fits the example I just
gave) and adding codes to your data.
A. Finding the results in the text
The first way you could do revise your initial codes is “manually”. To
go back to the original place in the text from a result window, click on
the record (row) you want to look at in the original context, and then
just click the “Find record” button and the coded text in the original
document will pop up!
Consider this section of a mock interview
Figure 17. A mock interview
TAMS Analyzer
5/2/04
36
If you do an unlimited search you should get a results window like the
following:
Figure 18. Unlimited results from the mock interview
Here, the first row is selected (you can see the text for that record in
the browser above). Now click on “Find record” and you’ll be taken
back to that first record, with it selected:
Figure 19. Find record takes us back to the original text
TAMS Analyzer
5/2/04
37
NOTE: This is an important tool for examining context!!! This takes
you back to your source document and scrolls to the original text.
Figure 20. The result refresh button and a check indicating a changed
document file
You can use the “Refresh” to re-synch your results and your original
documents. This can be a long process, which is why I recommend
starting at the bottom and working your way up; you’ll be less likely to
be off.
B. Marking results
An alternative to manual recoding is to have the program go through
and change or add codes to for you. This involves “marking” the
records you want to change and then picking “Results->Recode->Add
code” or “Results->Recode->Recode”. TA works very hard to keep the
source document and result document “in step” at least as far as the
location of the listed result passages are. If you manually type in the
source window all bets are off. TA will lose track of where the coded
passages are. The best thing to do is to lock out those functions that
will put TA out of synch between source/document windows and
results windows. To do that pick “Project->Reanalysis mode.” Pick
it again to turn it off.
TAMS Analyzer
5/2/04
38
To mark records (rows) for adding codes or recoding, select a row and
pick “Results->Recode->Mark.” That will add a “+” sign after the
record number (your signal that this record is marked). You can
unmark records by picking “Results->Recode->Unmark”.
Figure 21. A marked record (notice the + sign by the #1)
NOTE:
In reanalysis mode the only things you are allowed to do in your
document windows are double-click code, code using the code button
(which you can set up to prompt for comments), and delete code pairs.
These steps will keep open results windows in synch with the document
windows.
C. Adding codes
Adding codes simply surrounds passage associated with the marked
records with an additional code; the original code is not affected. After
marking records (See §VI.B) you want to add a code to, pick “Results>Recode->Add codes”. You will get a dialog like this:
TAMS Analyzer
5/2/04
39
Figure 22. The Add code dialog box
You have two ways to go here: you can pick a code that exists from the
menu and press the top OK button, or you can type in a new code into
the Name: field and its definition and press the lower OK.
This may take some time, it’s doing complex cutting and pasting and
then refreshing of the window.
WARNING: See problems section for bad things that can happen when
you add codes.
D. Recoding
Recoding is trickier for TA than adding codes. This goes through and
actually replaces the codes and includes comments that the original
codes had. Note that you cannot recode based on any search that
involves an “and” or is not simple. So be warned. As with adding codes
you are presented with a dialog that either allows you to pick from
existing codes or substitute a new one to the code file:
TAMS Analyzer
5/2/04
40
Figure 23. A filled in Recode dialog box
Here I am recoding the first speaker’s comment giving it a negative
spin by defining a new code: veggie>bad. I’ll click the lower “OK”
since I’m filling in the lower information, and voila, the code will be
changed. You could see codes disappear from your results window
since they may no longer meet the search criteria. Also see the next
section for warnings about bad side effects from adding and recoding
data.
E. Problems with Adding and Recoding
Adding and recoding can make a mess of codes. The general problem
is that you can land up with a nested situation which doesn’t make
sense to TAMS (or anyone else). If the original was
{a}This is {b}some text that {/a} will be recoded {/b}
and we recode b to a, we’ll have
{a}This is {a}some text that {/a} will be recoded {/a}
TAMS Analyzer
5/2/04
41
Basically TA will have no idea that the second {/a} is there or which
{a} it goes with, it will stop looking. And that second {/a} will give all
sorts of problems in any case.
You may not get an error, but you’ll get unexpected results. The
answer: check the syntax by running “Check for nested” from the
Coding menu. Check often.
F. Updating your results
This is redundant with what has been said elsewhere, but if you see a
results window with a check by the “Refresh” button, it means one of
the documents that feed this results window has changed. Clicking the
“Refresh” button should update your results:
VII. Reports
Getting results is one step of transforming an interview into data. An
additional step is done through generating reports from your data.
A. Frequency counts
The simplest report to generate is a count of the codes in the files in the
search list. This is done by having your project’s workbench as your
front window and picking Reports->Count from the menu. This will
list the number of times each code was used in the files listed on the
search list (not broken down by file… But wait, there is a way! See
data summaries below).
TAMS Analyzer
5/2/04
42
Figure 24. Code count report
Note that this report only uses the codes in the current code set, so you
can control the codes reported upon.
B. Co-frequency counts
A second easy report to generate is the co-coding frequency report.
This report shows how many times a passage of text in the file list has
been coded with each pair of codes in the current code set. This is a
good report for analysis, to see what codes seem related to each other
across the project (or portions thereof).
C. Data summaries
Data summaries are the most complex and powerful reports in TAMS.
They operate from the current selection in a results window. A data
summary report allows you to group data in a column and then count
matching criteria. These counts assume that data is arranged to be
counted. In other words, the data has to be sorted so that the what you
are grouping is together. To keep the meaningful data together you
need to use the “Results->Sort up” and “Results->Sort down” menus
NOT THE sort button on the button panel. Data summaries are
described in separate documentation: Data Summary How To. This
report can generate a frequency count by document (or speaker, or just
about any other selectable/sortable criteria).
D. DotGraph Output
DotGraph refers to the file name extension of the files generated by
this report (“.dot”). The actual program “Graphviz” (available at
www.pixelglow.com) makes images like concept maps: nodes
connecting to each other. This is perhaps the most dramatic report that
TA produces. The same menu option actually produces two very
different reports. When “Reports->dotGraph Output” is selected from a
document window or the workbench it produces a “graph” of the tree
structure of the current code set:
TAMS Analyzer
5/2/04
43
Figure 25. A “graph” of the codes in a project
Here sound>cat and sound>pig have been converted into a tree picture
representing the coding system in this project.
More complex images can be generated from result files. In result files,
“dotGraph” files represent the connection between different columns
(think of the columns as variables). The lines connecting the values in
the column show the frequency count.
Figure 26. A “graph” of the _code and speaker columns of a result file
The shape and arrows of both whole levels and individual values at ach
level can be individually specified. See the “Dot Graph Output How
To” for more instructions on producing these type of graphical reports.
E. Exporting data
Most reports including counts and summary reports can be saved at text.
Actually it is saving the files as tab delimited text so that these files can
be dropped right on Excel or FileMaker and open. You can also copy
and paste data (not the reports) to other programs using the File->Export
Data… dialogue. This dialogue provides powerful flexibility in terms of
moving data to other programs either through a file or through the
clipboard. The dialogue takes the current selection only and allows you
to rearrange the column order (dragging the column names into different
locations), and select which columns you want exported.
TAMS Analyzer
5/2/04
44
Figure 27: The export data dialogue
You have a variety of options: you can either export the selected records,
or all the records, have it escape (“\”) returns, tabs and other characters
that can cause problems in excel, strip the selections of tags, and export
to the clipboard or save to disk. In addition you can separate the columns
with tabs, commas, returns, or your own delimiters (use \t and \n to
indicate tab and new space if you enter your own).
Good luck, write if you have problems.
Matthew Weinstein
[email protected]
http://educ.kent.edu/~mweinste/
TAMS Analyzer
5/2/04
45
Appendix 1
Types of codes
TAMS works with three types of codes:
1. universal codes which are generated for every results window record and
hold their value through the whole document. The syntax is as follows:
{!universal codename="mydata"}. I use "{" since most documents don't use
this. At some point I will add an escape character so you can use "{" without
triggering a response by the processor. A typical example would be {!universal
type="interview"}
2. repeat codes which change their value throughout the document and generate
a separate value in each record produced. These mark distinctive attributes for
a section of a document (marked by {!end} or {!endsection}): typical repeat
codes include speaker, time, question all of which you would want to be
attached to a passage of text you have marked (coded) in some way. To
indicate that the code "author" is a repeat code place {!repeat author} toward
the top of the document or in the Init file. Then mark each occurance of author
by surrounding it with a start and end tag: {author}Matthew
Weinstein{/author} (notice that unlike the !repeat command there is no ! mark
here, this is just a data code). In an interview the speaker might be marked as a
repeat code. In field notes the time of an observation might be a repeat code.
In our project which involves numerous newspaper articles per document,
author, title and date of each article were repeat codes.
3. data codes. These are the passages that you are really interested in. These are
marked with {code}interesting passage{/code}. You don't need to declare
anything, just fill in the word code with whatever you see fit: {sample}Just
some text{/sample} is now coded as sample! Note codes consist of numbers,
spaces and underscore ("_") charaters. No spaces permitted. Passages of text
can have multiple codes; codes can be nested and can overlap.
TAMS Analyzer
5/2/04
46
Appendix 2
Working with large projects
TA has a large variety of tools to help researchers manage large
numbers of files and data. I hope in this section to just point them out
and give some tips; I will not be doing much in the way of hand
holding.
Named searches. The first tool for large projects is the possibility of
saving and restoring different search lists. This way you can just by
picking an item off of a menu pull up a search list that just has memos,
for instance. The search list menu is just above the search list. To save
the current search list (and init file) just press the + button above the
search list on the work bench. You will be prompted for a name. To
restore a saved search list, just pick it from the menu above the search
list. To delete a searchlist, first select it from the menu and then press
the – button. You can clear the search list of all search lists by pressing
the - - button.
The init file. Perhaps the most important element for multiple file
searches. Conceptually the idea is simple. The init file is simple a file
with commands (metatags) that you want designated as the start of a
search. It is just the first file searched. To indicate which is your init
file just select the file from the file list on the work bench and press the
button marked “Init File”. The init file is subsequently listed at the
bottom of the work bench.
There are five tags that I usually will put into an init file: a !button
command which provides project wide code buttons for the document
button bar, an empty !universal command which simply lists the
universals in the order I want them to appear in results windows:
{!universal name=””, city=””, type=””}. At the top of each document I
will have a !universal with those values filled in (in whatever order).
Third, I will declare my repeat codes in the header: {!repeat speaker,
time, gender}. Fourth, if I am using an !inner or !last repeat I will
declare that value in the init file as an indicater of the structure of my
files. Finally, I will use the !if statement to attach any additional
information to my result files: {!if speaker=”Amy”=>gender=”F”}. If I
have declared a repeat value gender it will automatically be assigned a
value “F” everytime speaker becomes “Amy”.
File sets. TAMS allows you to group your files together so that the file
list can display just a subset of files rather than the whole body of data
in your project. You can create a file set for just memos or just
TAMS Analyzer
5/2/04
47
interviews. This is selected by the little set menu that is to the left of
the file list. Every project always has one set already established which
is the results set, which contains every saved (and open) results
window/file. In fact the menu item “View all files” should really be
view all files except the result files. See the code sets section on how to
operate the dialogue box that comes up with manage file sets. They are
identical.
Inter-rater reliability. TAMS can calculate the interrater reliability as
both a percent and as kappa. This requires the construction of special
“test” files that two coders will attempt. See the Inter-rater reliability
information folder in the How To folder in the docs folder.
Line number documents. TA can wrap and line number your
interviews and field notes to help discussions of particular lines. Make
sure you turn on the “Scan for line numbers” option in the results so
that line number information is included in results.
Shareable project format. By default TA is not shareable between
machines. If after initially saving your project you change the project
type to Same folder or relative, keeping all of your files either in a
single folder or in the same file tree respectively, the project will be
shareable. If a colleague gives you a project folder that can’t seem to
find its files then move all files to a single folder and change the
project type to “Same folder”, close and reopen the project. These
options are in the Project->Preferences menu option (not the usual
preferences).
Multiple coders. There is support for codes being “signed” by different
coders; searches can be coder specific. The signature is specified in the
preference panel. Searches can be done for specific coders. One can
even do searches that amount show me passages of veggie coded by
MGW and passages of fruit coded by LJS (where MGW and LJS
represent 2 different coders).
Polymorphous data. The search list can contain multiple types of data.
To facilitate mixing data types, the !map metatag allows researchers to
have different codes in the same repeat data column.
TAMS Analyzer
5/2/04
48
Appendix 3
The Metacodes
{!backloadrepeat} = for a coded passage that crosses an !end value, the
record will have it’s repeat values assigned from the values at
the end of the passage.
{!block X} = if repeat code X has already been declared then no values
for X will be returned in results (X will be ignored)
{!bookmark X} = designates a bookmark in the document file
(accessible through the Coding->Bookmarks menu
{!button X} = creates a button bar with button X.
{!clean} = designates that subsequent repeat values should have their
values cleared at {!end} metatags
{!dirty} = designates that subsequent repeat values do not reset their
value at an {!end}
{!dummy X} = {!comment X} = a do nothing code which allows you
to insert parenthetical comments into your code.
{!emptysection} = specifies that the program should report on empty
{!endsection}s when doing empty searches
{!end} = marks the end of a section; by default !repeat values are
cleared. Data found is stored.
{!endsection} = like !end, but !repeat codes keep their values, they are
not cleared
{!eofisend} = end of file is treated as {!end}
{!eofisnotend} = end of file is not treated as end
{!escapeoff} = treat “\” as a regular character
{!escapeon} = attend to “\” as an escape character, i.e., it is a flag to
TAMS to not treat the next character as special. Useful for
texts that have braces ({ and }) in them.
{!frontloadrepeat} = for a coded passage that crosses an !end value, the
record will have it’s repeat values assigned from the start of the
passage.
TAMS Analyzer
5/2/04
49
{!if X=”something” => Y = “a value”} = For already declared
universal or repeat code values X and Y, the program will
automatically assign Y to “a value” every time that X is
assigned to “something”. X and Y must both be repeat values
or they must both be universal values; you cannot mix and
match.
{!struct} = Indicates that a document or document part is structured,
i.e., is broken up using !end, !endsection, !last or !inner.
Important for conducting section searches.
{!unstruct} = indicates that there is no structuring elements. Program
treats each close tag as though it had an !endsection
immediately after it. Section searches are pretty much
meaningless. This is the default state of the tams interpreter.
{!zapmap} = Clears the map of all entries.
{!map X->Y, A->B, …} = specifies that instances of repeat value X
should be put in the column called Y (mapped into Y), values
of repeat value A should be put in the column called B. X, Y,
A, and B must all be designated as repeat values. Y and B
should be repeats at the beginning of your search list so that
columns are created for them.
{!inner X} = short for innerrepeat; designates a code already declared
as a repeat code should be treated as if it had a {!endsection}
before it. Warning: !inner cancels !last and vice versa.
{!last X} = short for lastrepeat; designates that existing repeat code X
will always be the last repeat for a section and that the next
occurrence of any repeat code after X should be treated as
having {!endsection} before it. Warning: !inner cancels !last
and vice versa.
{!name X} = creates or assigns a universal code called FileName to
value X.
{!noemptysection} = specifies that empty searches should only be
returned for !end’s not !endsections.
{!noheader} = specifies that result files should not produce a header
row when saved as text
{!noquote} = specifies that quotes should be converted to escape
characters.
TAMS Analyzer
5/2/04
50
{!nozapuniversal} = specifies that universals should not be cleared at
end of file
{!repeat X} = used to indicate that code X is designated a repeat code
{!setrepeat X=”Y”} = sets existing repeat code X to value Y—if X
does not exist it creates it.
{!universal X=”Y”} = creates or assigns an existing universal code X
and assigns it value Y
{!zapuniversal} = specifies that universals should be cleared at the end
of each file
TAMS Analyzer
5/2/04
51
Appendix 4
Preferences
Coding preferences
Prompt for new code definition: Should TA ask you for a code definition
when you enter a new code (i.e., press the new button on the document
window)?
Use time-date stamp in new code definition: Should TA prefix a new code
definition with a cryptic time/date stamp
Take the code by double clicking list: Is double clicking the code list your
preferred way to code data? Turn off if you want it to take the code
from the little box under the buttons on the document window (fill in
box and click code)
Code list reveals codes as tool tips: a legacy from before TA used split views to
accommodate long codes. Codes appear as tool tips. Slows down the
system significantly. Not recommended.
Use coder id: insert a coder id (you provide it in the box) as you code.
Scan init file… : Should TA scan the init file every time you open a document
to see if there are !button metacodes?
Color tags: What is the default color for meta and code tags?
Automatically refresh tag colors: Should TA automatically refresh the colors
when a file is opened or other changes occur? Could slow down your
system. You can manually uncolor and recolor tags from the coding
menu.
Display comment dialogue for code button: rather than manually typing
comments into the end tag you can set this up so that when you single
click a code and then use the code button you are given a dialogue box
into which to put your comments.
Searching Preferences
Detached result sheets: Should dialogue boxes float above all windows or be
attached to them (affects some not all dialogues)? Recommended.
Autoreload after… : Should the results window refresh after recoding or add
coding?
Report empty…: Should an empty search report at {!end} or {!endsection}?
Show coder…: Should the coder be reported when examining a raw search
TAMS Analyzer
5/2/04
52
EOF is same as {!end}: Should the end of a file be treated as if it had an
implied {!end} there
Evaluate repeat variables…: If checked, coded passages that cross an {!end}
boundary are evaluated in the last section, other wise they are
evaluated at the first section that the coded passage includes.
Universal variables zapped…: Should universal variables carry their value
from document to document or be cleared?
Include repeat variables…: If checked repeats are treated just as normal data
codes when doing a non-simple search.
Use old Mac new line…: When doing a save to of result files should the
program use OSX file new lines or older style new line characters (if
you are exporting to programs that are run in classic you probably
need this checked).
Export result file format: This sets the character set of data being exported
when a result file is saved with “save to” type text.
Number of characters…: This sets how much context should be given when
doing a string search.
Recognize ‘\’…: Should ‘\’ be taken as itself or as an escape character?
Scan for line numbers: If you use the line number and wrap feature you should
have TA scan for line numbers: adds a line number to the first line of
results.
Unmark…: Should marked records be unmarked after doing a recode or
addcode?
Update results…: Should TA attempt to revise your results based on addcodes
and recodes. This is an art (and I’m not an artist). If you really need to
see accurate results uncheck this and refresh your windows.
Save Graphviz files: If you want the default response of Report->dotGraph
Output to be to save the report (rather than open it directly in
graphviz) check this box. Useful if you want to use X11 graphviz
software rather than the aqua version.
Enable the back button…: Should the back (and forward buttons) of the result
window button panel be enabled? Why disable them? They use a lot of
memory!!! If you’re close to the limit you might want to turn off this
feature.
Open document…: Should TA open affected files as it recodes, add codes etc.?
This can get quite messy, with possibly dozens of files being opened,
TAMS Analyzer
5/2/04
53
but these can then be “undone” file by file. Otherwise (unchecked) add
code and recode etc. work in the background and are not undo-able.
Documents treated as structured…: When doing a search should TA treat the
document as structured, which means that repeat values aren’t matched
up with data until an explicit or implicit (set through !last or !inner)
{!end}/{!endsection} is found? Otherwise the program assumes
documents are unstructured which means that every end tag is treated
as if it has an !endsection following it.