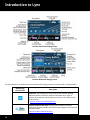
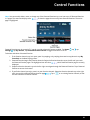
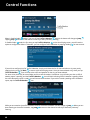
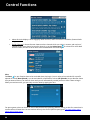
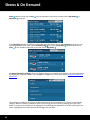
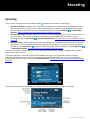
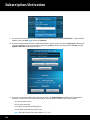
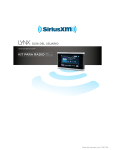
1
Lynx User Guide 121214a
Table of Contents
Introduction to Lynx ...................................................................................................................... 6
Lynx Buttons and Controls ........................................................................................................................................................ 6
Battery ......................................................................................................................................................................................... 8
Installing the Battery .............................................................................................................................................................. 8
Charging the Battery .............................................................................................................................................................. 8
Home Screen ............................................................................................................................................................................ 10
Listening Modes.................................................................................................................................................................... 12
Satellite Radio ....................................................................................................................................................................... 12
Internet Radio ....................................................................................................................................................................... 13
My Library ............................................................................................................................................................................. 13
Shows & On Demand ........................................................................................................................................................... 14
Bluetooth Connect................................................................................................................................................................ 14
Settings .................................................................................................................................................................................. 15
Now Playing Screen .................................................................................................................................................................. 15
Status Bar Icons........................................................................................................................................................................ 18
Audio Options ........................................................................................................................................................................... 20
microSD Card (Optional) .......................................................................................................................................................... 20
Installing the SD Card........................................................................................................................................................... 20
Formatting the SD Card ....................................................................................................................................................... 21
Audio File Compatibility ....................................................................................................................................................... 22
Channel Tuning ............................................................................................................................ 23
Now Playing Screen .................................................................................................................................................................. 23
Spectrum Channel Tuning ....................................................................................................................................................... 23
Channel List Tuning .................................................................................................................................................................. 24
Direct Channel Tuning ............................................................................................................................................................. 25
Using the Sort and Filter Options ............................................................................................................................................ 25
Favorite Channels (Presets) ......................................................................................................... 27
Favorite Channels ..................................................................................................................................................................... 27
Saving Favorite Channels ......................................................................................................................................................... 27
Replacing Favorite Channels ................................................................................................................................................... 28
Deleting Favorite Channels ...................................................................................................................................................... 30
Rearranging Favorite Channels ............................................................................................................................................... 31
Tune Start.................................................................................................................................................................................. 32
Tune Scan .................................................................................................................................................................................. 32
Tune Mix ................................................................................................................................................................................... 33
Featured Favorites.................................................................................................................................................................... 34
Control Functions......................................................................................................................... 36
Back ........................................................................................................................................................................................... 36
Home ......................................................................................................................................................................................... 37
Now Playing .............................................................................................................................................................................. 37
Pause and Replay (Play/Pause, Fast-Forward, Rewind) ......................................................................................................... 38
Traffic & Weather /Jump .......................................................................................................................................................... 39
2
Table of Contents
Action Panel .............................................................................................................................................................................. 41
Learn More............................................................................................................................................................................ 42
Alert ....................................................................................................................................................................................... 44
Edit ......................................................................................................................................................................................... 45
Start Now .............................................................................................................................................................................. 45
Record ................................................................................................................................................................................... 46
Download .............................................................................................................................................................................. 46
My Shows .............................................................................................................................................................................. 46
Shows & On Demand .................................................................................................................... 47
What is Shows & On Demand ................................................................................................................................................. 47
Finding a Show ......................................................................................................................................................................... 48
Search Shows ........................................................................................................................................................................ 49
On Demand ........................................................................................................................................................................... 50
My Shows .............................................................................................................................................................................. 54
Shows by Channel ................................................................................................................................................................ 55
Shows by Category ............................................................................................................................................................... 56
Shows by Name .................................................................................................................................................................... 57
Setting a Show Alert ................................................................................................................................................................. 58
Managing Alerts........................................................................................................................................................................ 58
My Library .................................................................................................................................... 60
My Recorded Shows ................................................................................................................................................................. 60
My Recorded Channels ............................................................................................................................................................ 60
My Downloads .......................................................................................................................................................................... 60
Now Playing Screen .............................................................................................................................................................. 62
Radio Replays ........................................................................................................................................................................... 64
Now Playing Screen .............................................................................................................................................................. 64
Turning Radio Replays On/Off ............................................................................................................................................. 66
My Music ................................................................................................................................................................................... 68
Now Playing Screen .............................................................................................................................................................. 68
Installing the Optional microSD Card ................................................................................................................................. 70
Connecting to your PC or Mac ............................................................................................................................................. 70
Managing Music and Playlists.............................................................................................................................................. 70
Recording ..................................................................................................................................... 73
Channel Recording (Immediate) ............................................................................................................................................. 75
Starting a Channel Recording (Immediate) ........................................................................................................................ 75
Listening to a Channel Recording ....................................................................................................................................... 77
Cancelling a Channel Recording in Progress...................................................................................................................... 78
Deleting Channel Recordings .............................................................................................................................................. 78
Channel Recording (Scheduled) .............................................................................................................................................. 79
Scheduling a Channel Recording (Scheduled) .................................................................................................................... 79
Listening to a Channel Recording ....................................................................................................................................... 81
Cancelling a Channel Recording in Progress ...................................................................................................................... 82
3
Table of Contents
Deleting Channel Recordings .............................................................................................................................................. 82
Changing or Deleting a Scheduled Channel Recording ..................................................................................................... 83
Show Recording ........................................................................................................................................................................ 83
Scheduling a Show Recording ............................................................................................................................................. 83
Listening to a Show Recording ............................................................................................................................................ 84
Cancelling a Show Recording in Progress........................................................................................................................... 85
Deleting Show Recordings ................................................................................................................................................... 86
Changing or Deleting a Scheduled Show Recording .......................................................................................................... 86
Scheduled Recording Priority .................................................................................................................................................. 87
Browser ........................................................................................................................................ 89
Bluetooth Setup ........................................................................................................................... 92
Pairing and Connecting a Bluetooth Device with Lynx.......................................................................................................... 92
Unpair (Disconnect) a Bluetooth Device................................................................................................................................. 93
Lynx Bluetooth Behavior ......................................................................................................................................................... 94
Lynx LH1 Home Kit ................................................................................................................................................................... 95
Wi-Fi Setup ................................................................................................................................... 96
Connecting to a Wi-Fi Network ................................................................................................................................................ 96
Manually Connecting to a Wi-Fi Network ............................................................................................................................... 98
Connecting to a Wi-Fi Network Using a Static IP Address ................................................................................................... 100
Managing Wi-Fi Networks ...................................................................................................................................................... 102
Connecting to the Internet from behind a Captive Portal .................................................................................................. 103
Settings ....................................................................................................................................... 105
My Account ............................................................................................................................................................................. 105
Wi-Fi & Bluetooth ................................................................................................................................................................... 106
My Content ............................................................................................................................................................................. 107
Game Alert .......................................................................................................................................................................... 108
Parental Controls ................................................................................................................................................................ 109
Hidden Channels ................................................................................................................................................................ 113
Display, Audio & Power.......................................................................................................................................................... 114
System Sounds ....................................................................................................................................................................... 116
Time ......................................................................................................................................................................................... 117
About Lynx .............................................................................................................................................................................. 118
Reset & Erase .......................................................................................................................................................................... 119
Application Tour ..................................................................................................................................................................... 120
Demo Mode ............................................................................................................................................................................ 120
User Guide & FAQs ................................................................................................................................................................. 120
Subscription/Activation ............................................................................................................. 121
Subscription/Activation Activate your SiriusXM Satellite Radio Subscription ................................................................... 121
Activate your SiriusXM Internet Radio Subscription ........................................................................................................... 122
Accessories ................................................................................................................................. 126
LH1 Home Kit .......................................................................................................................................................................... 126
4
Table of Contents
LV1 Vehicle Kit ........................................................................................................................................................................ 126
BB2 Portable Speaker Dock ................................................................................................................................................... 127
Troubleshooting ......................................................................................................................... 128
Advisory Messages ................................................................................................................................................................. 128
Problem Troubleshooting ...................................................................................................................................................... 130
Important Legal Information .................................................................................................... 136
5
Introduction to Lynx
Introduction to Lynx
Lynx Buttons and Controls
The buttons and controls of Lynx are identified in the illustration below. The details of each begin below the illustration.
Touch Screen: Interactive display screen which is sensitive to touch. Using your finger, tap the interactive screen icons
to display and select items. Swipe your finger across the screen left or right, and up or down, to browse through lists.
Tap+hold+drag your finger across the screen to move scroll bars and sliders, and favorite channel icons.
Volume Control:
Press < to decrease or > to increase the audio volume.
Power/Lock/Brightness Button:
Press for 3 seconds to turn Lynx On or Off. If you have connected Lynx to a
computer using the USB cable, press and hold the Power button
for 5 seconds to turn Lynx On. The Power button
also has additional functions, depending on the mode in which Lynx is being used: handheld or in a dock.
Handheld Mode: When Lynx is on, and not in any dock, press and hold the Power button
for 3 seconds to
display a menu where you can select to turn airplane mode on or off, put Lynx in sleep mode, or to power Lynx
off. Airplane mode turns off all wireless connections while Sleep mode conserves battery life without turning Lynx
completely off. (Airplane mode can also be turned on and off through Settings : tap Home
+ + Settings
+ Wi-Fi & Bluetooth + Airplane Mode.)
6
Introduction to Lynx
Press and release the Power button
to lock or unlock the touch screen. To unlock, swipe the key to the lock.
Vehicle or Home Dock Mode: When Lynx is on, and in a LV1 Vehicle Dock or in a LH1 Home Dock, press and
release the Power button
to adjust the brightness of the display screen, and the brightness of the dock LED.
Audio Speaker: Built-in audio speaker.
Back:
Tap to return to the previous screen or menu item.
Now Playing:
content.
Tap to display the Now Playing screen to find information about the currently playing song or other
Home:
Tap to display the Home screen where you can select Satellite radio , Internet Radio , My Library
or to navigate the Home
Shows & On Demand
, Connect (Bluetooth) , Settings , and Browser . Tap
screen.
,
7
Introduction to Lynx
Headphone Jack: Connection for your own headphones or earbuds.
Battery Compartment: Contains the battery that powers Lynx in handheld mode.
microSD Card Slot: Slot for an optional microSD memory card, used to store your own personal music and playlists for
playback through Lynx. (microSD memory card sold separately.)
Battery
Installing the Battery
To install the battery into Lynx, follow these steps:
1. Turn Lynx over and grasp it firmly in your hand. Using your other hand, place your fingernail into the groove
on the side of Lynx, placing it more toward the left side. Pull with your fingernail to remove the rear cover.
2. Orient the battery as shown and install it into the battery compartment.
3. Replace the rear cover. (Note that Lynx will not power on if the battery is not installed, even when inserted
into a powered dock or the USB Travel Charger.)
Lynx will automatically power on once the battery is installed.
Charging the Battery
When using your Lynx for the first time, charge the battery until fully charged. Then use your Lynx until the battery is
completely drained. This charge/discharge cycle calibrates the battery level meter so that it accurately reports the state
of the battery.
Lynx’s battery can be charged by using the USB Travel Charger and USB Cable. Connect the larger end of the USB Cable
into the bottom of Lynx, and the smaller end into the bottom of the USB Travel Charger. Plug the charger into an
electrical outlet.
8
Introduction to Lynx
Lynx can also be charged via a USB port on any computer. When charging via a computer, it is recommended that Lynx
be turned off, or not in any audio playing mode, otherwise the battery will not charge. Connect the larger end of the
USB Cable into the bottom of Lynx, and the smaller end into a USB port on the computer.
Lynx will also be charged while docked in the optional LV1 Vehicle Dock, LH1 Home Dock, or BB2 Portable Speaker Dock.
The status of the battery charge is indicated by the battery level indicator in the lower right corner of the Now Playing
screen, when Lynx is not charging (i.e., disconnected from the Travel Charger or a computer, and not in a dock).
9
Introduction to Lynx
The battery can become too hot or too cold to charge, and Lynx will not charge the battery. If this happens, move Lynx
to a cooler/warmer place, or remove the battery and move it to a cooler/warmer place.
Home Screen
Lynx has three Home screens (shown below) from which you make selections. Navigate between the Home screens by
swiping your finger across the screen left and right, or by tapping or . Tap an icon to select it.
The function of each item on the Home screen is summarized in the following table, and explained in more detail in the
sections following the table.
Home Screen Icon
Description
Satellite radio. Tap to listen to SiriusXM Satellite Radio
when Lynx is in an LV1 Vehicle Dock, in an LH1 Home
Dock, or in a BB2 Portable Speaker Dock that has the
Indoor/Outdoor Home Antenna connected to it, and
correctly aimed at the satellites. Subscription required.
10
Introduction to Lynx
Home Screen Icon
Description
Internet Radio. Tap to listen to SiriusXM Internet
®
Radio when Lynx is connected to a Wi-Fi network that
has Internet access. Subscription required.
My Library. Tap to select to listen to channel and show
recordings, Radio Replays, downloaded on demand
shows, or to your own personal songs, which you have
added to Lynx with a microSD memory card (sold
separately).
When the My Library icon displays a number, it
indicates the amount of new recordings and
downloaded on demand shows that have been added
to My Shows since the last time you accessed My
Library.
Shows & On Demand. Tap to access a SiriusXM
program guide, which you can explore to find content
to listen to. Find the upcoming programming for the
SiriusXM channels.
When the Shows and On Demand icon displays a
number, it indicates that new on demand content is
available for the shows in My Shows since the last time
you accessed Shows & On Demand.
Connect (Bluetooth). Access a list of available
Bluetooth devices with which you can pair and connect.
Settings. Configure and change Lynx’s options,
settings, and behavior.
Browser. Tap to open a browser to view websites on
the Internet. A Wi-Fi connection is required.
The Home screen icons also indicate whether Satellite and Internet Radio are available; and which mode is currently
playing.
Icon Status
Description
Unavailable. Indicates that the Satellite Radio
and/or Internet Radio mode is unavailable for
listening, for example, when Lynx is not in a
Home or Vehicle Dock, or if there is no Wi-Fi
availability.
Available. Indicates that the Satellite Radio
and/or Internet Radio mode is available for
listening.
11
Introduction to Lynx
Icon Status
Description
Mode Now Playing. Indicates the mode which
is currently playing.
Listening Modes
There are several ways to listen to SiriusXM content. Whether you are connected to a Wi-Fi network, at home or at the
office, in your vehicle, or just out jogging or walking, there will always be SiriusXM content to which you can listen. You
can also add your own personal songs to Lynx with a microSD card (sold separately). The listening modes are selected
from the Home screen, Satellite radio, Internet Radio, or My Library.
Satellite Radio
SiriusXM Satellite Radio provides the ability to listen to SiriusXM broadcast from the satellites. SiriusXM Satellite
Radio has exciting features such as Radio Replays, which saves and stores music from your favorite channels so you can
listen to them anywhere, anytime. Another great feature is Tune Start, which plays the current song from the beginning
when you tune to one of your favorite channels. For the sports fan, set Game Alert for your favorite sports teams and be
alerted when they begin playing a game. Easily tune to the game with a single tap.
Record your favorite shows by scheduling a recurring recording of the show, or record a special show by scheduling a
one-time recording. Record the channel you are listening to using the channel recording feature so you can listen again
later, or schedule a channel or specific show recording for a future time or date.
Choose to display either the conventional background on the Now Playing screen, or the channel graphics background.
12
Introduction to Lynx
Purchase an LV1 Vehicle Kit for your vehicle, and enjoy live Satellite Radio anywhere you drive in the SiriusXM coverage
area. Listen to that sports game that’s playing when you’re not home. Get up-to-date traffic and weather with a tap of
the Traffic/Weather icon.
Purchase an LH1 Home Kit for your home or office and enjoy the additional features of Satellite Radio in your home or
office. Connect your Lynx to the Home Dock using Lynx’s Bluetooth wireless connection capability, and carry Lynx with
you around the home or office. (Approximate range 30 ft.)
Internet Radio
SiriusXM Internet Radio provides the ability to listen to SiriusXM using a Wi-Fi connection in your home, office, or
anywhere there is a Wi-Fi hotspot to which you can connect, and which is connected to the Internet. When you activate
your SiriusXM Internet Radio subscription you will create a username and password that allow Lynx to connect and
receive service. You can also use your username and password to enjoy SiriusXM Internet Radio on your computer or
other compatible device. Tap here to learn how to connect to a Wi-Fi network.
Missed an episode of your favorite show? Use the On Demand feature of the Internet Radio Shows & On Demand to find
and listen to shows which have aired on SiriusXM Internet Radio
in the past.
My Library
My library is where you will find content that you can listen to anytime, and when Satellite Radio
or Internet
Radio
is unavailable. You can listen to shows that you have recorded, listen to channels which you have recorded,
shows that you have downloaded, or listen to Radio Replays which are blocks of content saved from your favorite
channels, while you were in Satellite Radio mode. You can also listen to your own personal music, which you have
added to Lynx with an optional microSD memory card. Tap here to learn more about My Library.
13
Introduction to Lynx
Shows & On Demand
Shows & On Demand is where you can find and discover all the shows on SiriusXM. Search for and locate
shows for both Satellite Radio
and Internet Radio
by channel, by category, or by name, and view show
descriptions and schedules in the program guide. Save shows that interest you in the My Shows category for easy access
in the future. Highlighted Shows are an easy way to find new and exciting shows that the SiriusXM programming
department has highlighted. If you find an upcoming show you’d like to listen to, set an alert to be notified when the
show begins to play, or set a recurring alert to be notified every time the show plays. Even better, schedule a recording
of the show. When listening to Internet Radio , use On Demand to locate and listen to or download shows that have
aired on SiriusXM Internet Radio in the past. In Shows & On Demand, you can also manage your saved shows and
show alerts. Tap here to learn more about Shows & On Demand.
Bluetooth Connect
Connect is how you connect to Bluetooth devices, whether they’re your own Bluetooth earbuds, headphones,
speakers, or your vehicle stereo, or to the LH1 Home Dock. Easily access the Bluetooth devices menu to turn Bluetooth
on or off and scan for Bluetooth devices to pair and connect to them. Lynx Bluetooth is compatible with stereo audio
streaming devices (A2DP Profile) but is not compatible with the Hands Free Profile (HFP), which is typically used for a
Bluetooth connection to a cell phone. Tap here to learn more about Bluetooth.
14
Introduction to Lynx
Settings
Settings are where you configure, manage, and adjust the behavior of Lynx. You can also view information such
as the Radio ID, satellite signal strength, Wi-Fi connection status, battery strength, and memory usage. Tap here to learn
more about Settings.
Browser
Browser is where you can open a web browser to view websites on the Internet. You will need to be connected to
a Wi-Fi network and connect to the Internet in order use the browser. Tap here to learn more about the Browser.
Now Playing Screen
The Satellite Radio
and Internet Radio
Now Playing screen is where you see what’s currently playing. You can
browse and change channels, pause, rewind and replay live radio, create and manage favorite channels, and learn more
about the current song or show and artist. You can also set show and sports alerts for future events.
15
Introduction to Lynx
Satellite Radio Now Playing Screen
Internet Radio Now Playing Screen
The items found on the Satellite and Internet Radio Now Playing screens are summarized in the table below.
Now Playing
Screen Items
Description
Spectrum. Tap to display a preview card for each channel showing
detailed channel information. Swipe the Spectrum left or right to
explore other channels. Tap the Spectrum screen in the center to tune
to the channel.
Tap here to learn more about Spectrum.
Channel Number and Logo. Directly tune to another channel by
tapping the channel number. Use the on-screen keypad to enter the new
channel number.
Tap here to learn more Direct Tune.
16
Introduction to Lynx
Now Playing
Screen Items
Description
Channel List. Tap to display a scrollable list of channels with the
currently playing content for each channel. You can sort and filter the
channel list to assist in finding channels.
Tap here to learn more Channel List.
Album/Channel Art. Displays the album cover of the currently playing
song (when available), or the channel logo. (Internet Radio only.)
Pause and Replay. Tap to pause, rewind, and replay live radio, up to
approximately 60 minutes of Satellite Radio, and 5 hours of Internet
Radio. Note that for music channels, you are limited to one rewind and 5
fast-forwards per channel, per hour, while listening to Internet Radio.
Tap here to learn more about Pause and Replay.
Traffic & Weather or Jump. When configured for Traffic & Weather
, tapping Traffic & Weather tunes to the channel broadcasting traffic
and weather conditions of a city of your choice. The city is selectable
from a list of the 22 most congested cities. (Satellite Radio only.)
When configured for Jump
, tapping Jump tunes to the previous
channel that was played. Tapping Jump again returns to the original
channel. (Satellite and Internet Radio.)
Tap here to learn more Traffic & Weather/ Jump.
Action Panel. Tap to learn more about the channel, show, or artist, and
find similar channels. You can also set show (and sports alerts for
Satellite Radio) for future events.
Tap here to learn more the Action Panel.
Tune Scan. Tap to play a few seconds of audio from each of the favorite
channels currently displayed on the Now Playing screen. (Satellite Radio
only.)
Tap here to learn more about Tune Scan.
Tune Mix. Tap to play songs from your favorite music channels on the
Now Playing screen, in a shuffle type format. (Satellite Radio only.)
Tap here to learn more about Tune Mix.
Go Live. Tap to resume live Satellite or Internet Radio. The time
displayed below the Go Live icon shows how far behind the live
broadcast you are currently listening.
Favorite Channel Pages. Pages of channels you have saved as favorites.
Swipe left or right to select a favorite channel page (up to 5 selectable
pages). The selected page is shown as a highlighted heart.
Tap here to learn more Favorite Channels.
17
Introduction to Lynx
Now Playing
Screen Items
Description
Featured Favorite Channel Pages. Groups of channels that are created
by the SiriusXM Programming Department and are saved as featured
favorites while listening to Satellite Radio. They are dynamic and can
change often, allowing you to discover new channels. Up to 5 selectable
pages may be available at any time. The selected page is shown as a
highlighted star.
Tap here to learn more about Featured Favorites.
Favorite Channels. Tap to tune to a saved favorite channel. Tap + to
add the current channel as a favorite channel, and tap+hold+drag to
reorder, replace, or delete favorite channels. Tap the Status Bar to
display or hide favorite channels.
Tap here to learn more about Favorite Channels.
Status Bar Icons. These icons display information about Lynx, such as
Lynx is recording, Airplane mode, satellite and Wi-Fi signal strength,
Bluetooth, battery status, and the current time.
Tap here to learn more about the Status Bar Icons.
Status Bar Icons
The Now Playing screen displays status icons in the status bar of the Now Playing screen. These icons display
information about Lynx.
Status Icon
Description
Recording. Lynx is recording a channel or a show.
(Satellite Radio only.)
Satellite Signal Strength. Indicates the strength of the
satellite signal being received. If the icon is gray, Satellite
Radio is available but you are not currently listening to
Satellite Radio.
18
Introduction to Lynx
Status Icon
Description
Wi-Fi Signal Strength. Indicates the strength of the Wi-Fi
signal being received. If the icon is gray, Internet Radio is
available but you are not currently listening to Internet
Radio.
Bluetooth Disconnected/Connected. Indicates if Lynx is
currently connected to a Bluetooth device. If the icon is
gray, Lynx is not connected to any Bluetooth device.
Battery Level. Shows the current battery level, and if the
battery is being charged.
Airplane Mode. Indicates that Lynx is in Airplane mode.
Airplane mode turns off Bluetooth and Wi-Fi connections.
Note: Be sure to turn Airplane Mode Off before inserting
Lynx into a LH1 Home Dock.
Clock. Indicates the current time. The clock is set
automatically from the SiriusXM signal.
19
Introduction to Lynx
Audio Options
You can listen to the audio from Lynx in three different ways:
•
Internal Speaker. Lynx has an internal speaker on the top, next to the Power button, through which you can
listen.
•
Headphones/Earbuds. You can plug your own headphones or earbuds into the Headphone Jack on the right
side of Lynx.
•
Bluetooth Stereo. You can connect to a Bluetooth device, such as headphones, earbuds or speakers, for the
audio. Lynx Bluetooth is compatible with stereo audio streaming devices (A2DP Profile) but is not compatible
with the Hands Free Profile (HFP), which is typically used for a Bluetooth connection to a cell phone. Tap here to
learn more about Bluetooth.
microSD Card (Optional)
Installing a microSD card in your Lynx will allow you to save your own personal songs and content, and playlists, to the
memory card for playback on Lynx. Lynx is compatible with microSD and microSDHC cards. There is no limitation to the
size (capacity) of the microSD card.
Installing the SD Card
To install a memory card:
1. Press and hold the Power button
for 3 seconds and turn Lynx Off.
2. Turn Lynx over and grasp it firmly in your hand. Using your other hand, place your fingernail into the groove
on the side of Lynx, placing it more toward the left side. Pull with your fingernail to remove the rear cover.
3. If the battery is installed, remove the battery.
4. Insert the microSD card into the slot, oriented as shown.
20
Introduction to Lynx
5. Install the battery.
6. Replace the rear cover.
Lynx will power on automatically once the battery is installed.
Formatting the SD Card
You may need to format a new microSD card after you install it. To format the card:
1. Tap Home
, tap , tap Settings
Card and tap Format SD Card.
, scroll down and tap About Lynx. Tap Memory, scroll down under SD
2. You’ll be prompted to confirm that you want to proceed. Tap OK.
21
Introduction to Lynx
Audio File Compatibility
Lynx supports audio files in the formats:
•
AAC LC
•
AAC LTP
•
HE-AAC v1 and HE-AAC v2 (.3gp, .mp4, .m4a)
•
MP3 CBR and MP3 VBR (.mp3)
Lynx also supports the playlist format:
•
.m3u
Note: Lynx does not support playback of any Digital Rights Management (DRM) content.
22
Channel Tuning
Channel Tuning
Now Playing Screen
Channels can be tuned in several ways from the Now Playing screen: by using Spectrum, from a list of channels
(Channel List), and by directly entering a channel number (Direct Tune).
Spectrum Channel Tuning
Spectrum displays a preview card for each channel, which shows details about what is playing on the channel. You can
explore other channels without changing the channel to which you are currently listening. Swipe the Now Playing screen
left or right across the middle of the screen to display Spectrum.
23
Channel Tuning
To advance a single preview card at a time, tap
finger left or right.
or
. To scroll more quickly through the preview cards, swipe your
To quickly move through the preview cards, tap+hold+drag the slider at the bottom of the screen left or right. As you
drag the slider, the channel numbers are displayed indicating your current position in the preview cards.
The lighter preview card bars indicate channels which have been saved as favorite channels.
If you find a channel you’d like to tune, tap the Spectrum screen in the center area. To learn more about a channel tap
the channel logo to enter the Action Panel. Tap here to learn more about the Action Panel.
To exit Spectrum, tap Back
, or wait a few seconds for Spectrum to time-out and return to Now Playing screen.
You can also Sort and Filter the channels displayed in Spectrum. Tap here to learn more about Sort and Filter.
Channel List Tuning
Channel List
displays a scrollable list of channels, along with the currently playing content for each channel. Scroll
through the channels by swiping your finger up or down, or quickly scroll by using the scroll bar at the right of the
screen. Tune to a channel by tapping the channel in the list. To exit the channel list, tap Back
.
24
Channel Tuning
You can also Sort and Filter the channels displayed in Spectrum. Tap here to learn more about Sort and Filter.
Direct Channel Tuning
Channels can be tuned directly by entering the channel number. Tap the Channel Number on the Now Playing screen
to display the on-screen numerical keypad. Enter the channel number and tap Done to tune to the new channel, or tap
Clear to enter a digit. Direct Tune will not allow you to tune an invalid channel number. If you enter a three digit
channel number, such as 005, Lynx will immediately tune to the channel; you do not have to tap Done.
Using the Sort and Filter Options
The preview cards in Spectrum, and the Channel List, can be sorted numerically, alphabetically, and by category. Tap the
area next to Sort
to display a menu of sorting choices.
•
123: Displays items in numerical order by channel number. (Default)
•
Category: Displays items in order by category, i.e., Pop, Rock, Hip-Hop/R&B.
•
ABC: Displays items in alphabetical order by channel name.
25
Channel Tuning
The preview cards in Spectrum, and the Channel List, can also be filtered to display all channels, filtered by a custom
filter, or to display only favorite channels. Tap All, Custom, or Favorites to change the type of filter.
•
All: All channels in your subscription plan will be displayed, except hidden channels. (Default)
•
Custom: Only channels in the categories you have selected, when you created a custom filter, will be
displayed. Create a custom filter by tapping and holding Custom until the Custom Filter screen is displayed.
Select, or de-select, categories from your custom filter by tapping the check box to the right of each category.
Categories with a check mark
will be displayed. To quickly select to display all categories, tap the check
box next to Select all. When you are done, tap Back
.
•
26
Favorites: Only the channels which you have saved as favorite channels will be displayed.
Control Functions
Favorite Channels (Presets)
Favorite Channels
Favorite channels are channels you have saved for quick access (presets). Tapping a favorite channel immediately tunes
to the channel. Lynx can save a total of 25 channels in 5 pages of favorite channels. The status bar displays hearts
which show the pages to which favorite channels have been saved. The active page is highlighted.
The favorite channel tray can be displayed or hidden on the Now Playing screen. Tapping the Status Bar, or swiping it
up or down, will display or hide the tray.
Saving Favorite Channels
To save a channel as a favorite channel:
1. Tune to the channel you wish to save as a favorite channel.
2. If the favorite channels tray isn’t open, open it by tapping the status bar, or by swiping it up, where it says My
Favorites on the Now Playing screen.
3. Swipe the favorite channels tray left or right to navigate to the page where you want to save the channel
(pages 1-5). The highlighted heart
will show which favorite channels page is currently displayed.
to save the channel. You will be prompted if you want to enable Radio Replays for all favorite
4. Tap +
channels, if you had not done so previously. If enabled, Lynx will record blocks of content from the favorite
channels in the currently selected page as Radio Replays in My Music. Tap here to learn more about Radio
Replays.
27
Control Functions
If you always want Radio Replays enabled for all favorite channels, tap the check box
longer be prompted each time you save a favorite channel. Tap Close.
and you will no
5. If you decided not to enable Radio Replays, you will be prompted again, informing you that Radio Replays are
currently disabled. If you do not wish to be prompted again to enable Radio Replays for all favorite channels,
tap the Do not ask again check box. Tap Close.
Replacing Favorite Channels
To replace an existing favorite channel:
1. Tune to the channel you wish to save as a favorite channel.
2. If the favorite channels tray isn’t open, open it by tapping the status bar, or by swiping it up, where it says My
Favorites on the Now Playing screen.
3. Swipe the favorite channels tray left or right to navigate to the page where you want to replace a favorite
channel (pages 1-5). The highlighted heart
will show which favorite channels page is currently
displayed.
4. Tap+hold the favorite channel to be replaced. You will be prompted to replace the channel. Tap Yes.
28
Control Functions
5. You will be prompted if you want to enable Radio Replays for all favorite channels, if you had not done so
previously. If enabled, Lynx will record blocks of content from the favorite channels in the currently selected
page as Radio Replays in My Music. Tap here to learn more about Radio Replays.
If you always want Radio Replays enabled for all favorite channels, tap the check box
longer be prompted each time you save a favorite channel. Tap Close.
and you will no
6. If you decided not to enable Radio Replays, you will be prompted again, informing you that Radio Replays are
currently disabled. If you do not wish to be prompted again to enable Radio Replays for all favorite channels,
tap the Do not ask again check box. Tap Close.
29
Control Functions
Deleting Favorite Channels
To delete favorite channels:
1. If the favorite channels tray isn’t open, open it by tapping the status bar, or by swiping it up, where it says My
Favorites on the Now Playing screen.
2. In the favorite channels tray, tap+hold the favorite channel you wish to delete.
3. If you are not currently tuned to the favorite channel you are deleting, the Replace? screen will be displayed.
Tap Edit.
4. The delete screen will be displayed. Tap+hold+drag the favorite channel you wish to delete to the garbage can
icon.
5. You can move between pages, deleting favorite channels until you have finished. When you are finished, tap
Back
.
30
Control Functions
Rearranging Favorite Channels
You can rearrange the order of favorite channels within the favorite channels page that is displayed on the Now Playing
screen. To rearrange favorite channels:
1. If the favorite channels tray isn’t open, open it by tapping, or by swiping the status bar up (where it says My
Favorites) on the Now Playing screen.
2. Swipe the favorite channels tray left or right to navigate to the page where you want to rearrange the favorite
channels (pages 1-5). The highlighted heart
will show which favorite channel page is currently
displayed.
3. Tap+hold the favorite channel you wish to rearrange.
4. If you are not currently tuned to the favorite channel you are rearranging, the Replace? screen will be
displayed. Tap Edit.
5. The delete screen will be displayed. Tap+hold+drag the favorite channel you wish to rearrange to the left of
the new position, and hold it there for a moment until the favorite channel beneath it moves out of the way.
Then drop the channel (remove your finger from the screen) and Lynx will rearrange the order.
6. You can move between pages, rearranging favorite channels until you have finished. When you are finished,
tap Back
.
31
Control Functions
Tune Start
When a favorite channel is tuned, Tune Start starts the song that is currently playing on the channel from the beginning.
Tune Start automatically rewinds to the beginning of the song, and begins playing.
Note: This feature is available when listening to music channels, and is limited to one occurrence per song. Tune
Start will work for all Internet Radio music channels currently displayed on the Satellite Radio Now Playing screen.
If you tune away from a favorite channel while a song is playing, and then tune back to the channel while the same song
is playing, the song will continue to play from live.
Note that when a Tune Start has occurred, you will be listening behind the live broadcast. You will see a Go Live icon
on the Now Playing screen with a time below it which indicates how far behind the live broadcast you are listening. Tap
Go Live to return to the live broadcast. Tapping Fast-Forward
also returns the live broadcast. Tune Start is
available for the favorite channels currently displayed on the Now Playing screen, except for news and live events, and
is limited to one occurrence per song.
Tune Start may be turned off, if you do not wish to have this feature enabled. To turn off the Tune Start feature, tap
Home
, tap , tap Settings , tap My content, and tap Tune Start On/Off to toggle the feature on or off.
Tune Scan
Tune Scan plays a few seconds of the songs which have not been listened to, from each of the favorite music channels
which are currently displayed on the Satellite Radio Now Playing screen. As a song is being played, the favorite channel
will be highlighted to indicate which channel is playing. Tune Start will play several seconds of the songs that are in the
Pause and Replay buffer for each favorite music channel, starting from the oldest to the newest.
Note: This feature is available when listening to Satellite Radio
.
Tap Tune Scan to begin to scanning the music in the currently displayed favorite channels. The Tune Scan icon will
blink slowly to indicate Tune Scan is active. If the favorites tray is closed, it will automatically open, closing again when
32
Control Functions
Tune Scan ends. As a song is playing, tap Tune Scan to stop the scan and continue listening to the song. To cancel
Tune Scan and tune back to the channel to which you were listening before the Tune Scan began, tap+hold Tune Scan
for 2 seconds. Tapping Rewind
or Fast-Forward
will skip back or skip forward to the previous or next song in
Tune Scan.
Using Direct Tune, Spectrum tuning, or tapping a favorite channel will end Tune Scan, and tune to the selected channel.
Tapping Pause
will stop the Tune Scan and pause the audio. Tapping Play will continue from the same point, or
tap Tune Scan again to begin the Tune Scan again.
Tune Mix
Tune Mix plays songs in a shuffle format from the favorite music channels which are currently displayed on the Satellite
Radio Now Playing screen. Tune Mix plays songs that are in the Pause and Replay buffer from each favorite music
channel, so that the longer the Lynx has been turned on, the greater the amount of songs are available for Tune Mix.
Note: This feature is available when listening to Satellite Radio
.
Use Tune Mix to create your own unique listening experience by grouping your favorite channels together. For instance,
if you’d like to listen to an all rock genre, group your favorite rock channels together in a favorite channel bank. If you’d
also like to have a mix of your favorite decades of music, create another bank of favorite channels with those music
channels. Then you can easily switch Tune Mix to the music you’re in the mood to listen to by simply changing favorite
channel banks. You need to have at least two music channels saved as favorites for Tune Mix to work.
Tap Tune Mix
to begin to play songs from the favorite channels currently displayed on the Now Playing screen. The
Tune Mix icon will become highlighted to indicate that Tune Mix is active. As a song is playing, tapping Tune Mix
will
stop Tune Mix and continue playing the song, and remain tuned to the channel. Tapping Fast-Forward
will skip to
the next song in Tune Mix while tapping Pause
will pause Tune Mix. Tapping Play will resume Tune Mix.
33
Control Functions
Tapping Tune Mix or tuning to another channel will end the Tune Mix function and continue playing from the last
channel. If you change to a different page of favorite channels while Tune Mix is on, it will continue to play the last
channel from the previous page until the new channels have been buffered to allow for a smooth transition to the new
set of channels. If there are no music channels in the new favorite page, Tune Mix will end and continues to paly from
the last tuned channel.
If Tune Mix was selected before the Lynx was tuned off, it will automatically restart after a power cycle while in the
Home or Vehicle Docks. After a power cycle, it may take a few minutes to have enough content for Tune Mix.
Note: When Tune Mix switches songs there may be times when the last 1~2 seconds of the song that is playing is cut
short, or you may occasionally hear portions of a DJ talking, all of which is normal.
Featured Favorites
Featured Favorites are groups of channels that are created by the SiriusXM Programming Department, which are saved
(and refreshed) to your Lynx while listening to Satellite Radio. They are dynamic and can change often, allowing you to
discover new channels. Once added to your Lynx, Featured favorites can be viewed anytime, in both Satellite and
Internet Radio modes. Note that some channels may not be available on Internet Radio.
Note: Radio Replays for Featured Favorite channels are not saved.
34
Control Functions
Note: You cannot edit, delete, move, or change any of the Featured Favorites.Lynx can have up to 25 featured favorites
in 5 pages. The status bar displays stars
to show the pages that currently have featured favorites. The active
page is highlighted.
Featured Favorites may be turned off, if you do not wish to have this feature enabled. Tap Home
Settings , tap My content, tap Featured Favorites On/Off to toggle the feature On or Off.
, tap
, tap
To browse and select a Featured Favorite:
1. If the favorite channels tray isn’t open, open it by tapping, or by swiping the status bar up (where it says My
Favorites) on the Now Playing screen.
2. Featured Favorites begin after favorite channels. Swipe the favorite channels tray to the left until you reach
the Featured Favorite pages. The highlighted star will show
which Featured Favorite page is currently
displayed.
3. Swipe the favorite channels tray to the left or right to navigate through the Featured Favorites. Tap a Featured
Favorite to tune to the channel.
4. If you find a channel you enjoy, save it to your favorite channels. Swipe the favorite channels tray to the right
until you reach the desired favorite channels page
. Tap +
, or an existing favorite channel, to save
the new channel as a favorite channel.
35
Control Functions
Control Functions
Back
Back
is found on the front left of Lynx.
Tapping Back
returns you to the previous screen or menu item that you had been viewing. Repeatedly tapping Back
continues to step back until you eventually reach the Home screen. When browsing the User Guide & FAQs, tapping
Back
returns you to the previous page you had been viewing.
36
Control Functions
Home
Home
is found on the front right of Lynx.
Tapping Home
displays the Home screen where you can select Satellite radio , Internet radio , My Library ,
Shows & On Demand
, Connect (Bluetooth) and Settings . Tap or to navigate the Home screen. Tap here
to learn more about the Home screen.
Now Playing
Now Playing
is found on the front right of Lynx.
Tapping Now Playing
displays the Now Playing screen for the current listening mode. The Now Playing screen
provides information about the currently playing song, or other content. From the Now Playing screen, you can tune
other channels, Pause and Replay the channel, select and manage favorite channels and featured favorites, etc. Tap
here to learn more about the Now Playing screen.
37
Control Functions
Pause and Replay (Play/Pause, Fast-Forward, Rewind)
Pause and Replay allows you to pause, rewind, and replay live radio. For Satellite Radio , depending upon how long
you have been listening to the channel, you can rewind up to the last 60 minutes of the broadcast, and for the favorite
channels displayed on the Now Playing screen, you can rewind up to 60 minutes each. For Internet Radio, you can
rewind up to 5 hours on most channels.
If you want to hear a song again, tap Rewind
you’re interrupted by a phone call, tap Pause
on the Now Playing screen to rewind to the beginning of the song. If
. When ready, tap Play to resume listening, without missing anything.
When you enter Pause and Replay, a broadcast timeline is displayed near the bottom of the screen indicating that you
are currently in Pause and Replay. (The favorite channels tray must be closed to see the broadcast timeline.) Tap FastForward
to advance to the next song or show segment, or tap Go Live to exit Pause and Replay and resume the
live broadcast.
The items found on the Pause and Replay screen are described below.
Pause and Replay
Screen Items
Description
Pause. Tap to pause playing of the channel, and enter pause and replay. While you
are paused, if the Pause and Replay content reaches the maximum amount, Lynx will
beep to alert you. When Pause and Replay is full, the oldest content is discarded to
so that new content can continue to be saved.
Play. Tap to resume playing the channel from the point where it was paused.
38
Control Functions
Pause and Replay
Screen Items
Description
Rewind/Skip Back. Tap to skip back to the beginning of a song or show segment. In
Satellite Radio mode, tap+hold rewinds through the replay content so you can hearthat-again. As you are rewinding, Lynx will beep when you are approaching the
beginning of the Pause and Replay content.
Tap here for an important note.
Fast-Forward/Skip Forward. Tap to skip ahead to the next song or show segment.
In Satellite Radio mode, tap+hold will advance through the replay content until the
live broadcast is reached. As you are fast-forwarding, Lynx will beep when you are
reaching the end of the Pause and Replay buffer.
Tap here for an important note.
List. Tap to display the Start Now list in Internet Radio mode, or to see a list of songs
and artists in My Music mode. (Not available in Satellite Radio or Radio Replay
modes.) The Start Now Tap here for an important note.
Go Live. Tap to resume live Satellite or Internet Radio. The time displayed on the Go
Live icon shows how far behind the live broadcast you are currently listening.
Broadcast Timeline. Shows the status of pause and replay. For Satellite Radio, the
broadcast timeline fills from left to right. For Internet Radio, the last 5 hours of the
broadcast is available.
Time Behind the Current Play Point. Shows the amount of replay content through
which you can rewind. For Satellite Radio, Lynx begins storing replay content when
you tune a channel, and also stores up to 60 minutes for the favorite channels
displayed on the Now Playing screen. For Internet Radio, the last 5 hours of the
broadcast is available.
Current Play Point. Shows where you currently are in the replay content.
Tap+hold+drag left or right to move through the broadcast timeline. (Some content
may be restricted and this feature disabled.)
Time To Live. Shows the amount of time you are currently behind live Satellite or
Internet Radio. You can fast-forward through replay, to eventually reach live Satellite
or Internet Radio.
Note: For Internet Radio, and Radio Replays, you will be limited to one rewind and five song skips per channel, per
hour on music channels. Most other channels have no restrictions. Lynx will alert you if you have reached a limit.
List may be disabled for some content.
Traffic & Weather /Jump
This feature is configurable for either traffic & weather, or jump, depending upon your preference. Traffic &
Weather/Jump is found on the Now Playing screen.
Note: Traffic and Weather is only available when listening to Satellite Radio
Satellite Radio and Internet Radio .
, while Jump is available for both
39
Control Functions
When in Satellite Radio
mode, if you turn off the Traffic & Weather
feature, the button will change to Jump
Tapping Jump
will tune to the channel to which you were previously listening.
.
In Satellite Radio
mode, the first time you tap Traffic & Weather
on the Now Playing screen, you will have the
option to configure the feature. Thereafter, you can configure Traffic & Weather by tapping+holding
for two seconds.
If you wish to configure Lynx for Traffic & Weather, simply scroll down the list of cities and select a city near you by
tapping the city name. Tap Back
to return to the Now Playing screen. Once you have selected a city, when you tap
Traffic & Weather
, Lynx will tune to the traffic and weather for the city you have selected.
For some cities, there may be a small delay until the traffic & weather is broadcast. Lynx will alert you that a traffic &
weather report is pending, and the Traffic & Weather
icon will blink indicating traffic & weather is pending. When
the traffic & weather report is ready, Lynx will tune to the broadcast. If you wish to cancel a pending traffic & weather
report, tap the Traffic & Weather
icon.
While you are tuned to the traffic & weather channel, the traffic & weather icon will change to Jump
. When you are
done listening to the traffic & weather, tap Jump
to return to the channel to which you had been previously
listening.
40
Control Functions
If you wish to configure Lynx for Jump, tap Traffic & Weather On/Off to remove the check mark from the check box,
and tap Back
to return to the Now Playing screen.
You can also configure traffic & weather or jump by tapping Home
Traffic & Weather channel jump.
, tap
, tap Settings
, tap My content, and tap
Action Panel
The Action Panel
is where you can explore and learn more about the channel and show to which you are listening.
Within the Action Panel, you can view show schedules, find future episodes, and set an alert for a particular episode, or
for all episodes of the show. Using the Action Panel, you can also add shows to your personal collection of shows, My
Shows, for easy access. When listening to Satellite Radio , you can also record the channel. The Action Panel contents
are dynamic depending on the mode you are in, and from where you access the Action Panel. The Action Panel is found
on the Now Playing screen, and also in lists of shows.
Using the Action Panel, you can explore all the shows which air on the channel by using the Show Guide. Learn more
about them, and set alerts for shows to be reminded when the show begins. When you receive an alert, you can easily
tune the show by tapping the alert.
In the Action Panel, you can also discover similar channels, learn more about them, and set an alert for them.
When listening to Satellite Radio, use the Action Panel to set Game Alerts for sports games. When your favorite team
begins playing a game, Lynx will alert you and you can tune the game with a tap.
The items in the Action Panel are described in more detail in the following sections.
41
Control Functions
Learn More
Learn More
is where you can find additional information about the channel, about the currently playing show, and
find and explore other channels with shows similar to the one to which you are currently tuned.
•
42
About this Channel displays a brief description about the channel, and what you might expect to hear on the
channel. You can also explore similar channels, and view the show guide for the currently tuned channel.
o
Similar Channels is how to discover shows on other channels which are similar in content, and may
be of interest to you. Tap a channel to tune the channel, or tap the Action Panel
of a channel for
more detail about the channel, about the show currently playing on the channel, and also to set an
alert to be reminded when the show begins.
o
Show Guide is where to see the upcoming shows for the currently tuned channel, and explore other
shows on the channel. Tap the Action Panel
of a show for more detail about the show, and also to
set an alert to be reminded when the show begins.
Control Functions
o
•
Listen Now will immediately tune the channel you are viewing on the About screen.
About this Show displays a brief description about the show, and what you might expect to hear on the show.
o
View Schedule is where to see the schedule of the show. Tap the Action Panel
of a show to set
alerts for a specific episode, or all episodes, to be reminded when the show begins.
o
On Demand is where you can find episodes of the show which aired previously on SiriusXM Internet
Radio. Tap an episode to begin listening or use the Action Panel to download the episode. (Internet
Radio only.)
43
Control Functions
•
About this Artist displays a brief biography about the artist, when information is available. (Internet Radio
only.)
•
Similar Channels is how to discover shows on other channels which are similar in content, and may be of
interest to you. Tap a channel to tune the channel, or tap the Action Panel
of a channel for more detail
about the show, and also to set an alert to be reminded when the show begins.
Alert
Set Alerts
for your favorite shows to be reminded when they begin. You can select to be reminded for a specific
episode of a show (Next Episode), or to be reminded for all episodes of a show (All Episodes). As you discover shows
that you want to listen to, set alerts for them and Lynx will automatically remind you that a show is about to begin.
When you receive an alert, you can easily tune the show by tapping the alert.
For sports games, alerts can be set for one or both teams that are playing; however, setting an alert for a team here is
not the same as a Game Alert. An alert set here will only alert for this specific sports game. Tap here to learn more
about setting Game Alerts.
44
Control Functions
Edit
While listening to Satellite Radio
or Internet Radio , Edit
is where you can turn Radio Replays on or off for
specific channels, and set a Preferred Channel. If Radio Replays has not been globally turned on for all favorite
channels, you can enable them here for specific channels. Radio Replays can only be enabled for channels which have
been saved as a favorite channels. If the Edit selection is disabled, the currently tuned channel has not been saved as a
favorite channel. Tap here to learn more about Radio Replays.
A Preferred Channel is a favorite channel which will save Radio Replays, even if the favorite channel is not currently
displayed in the favorite channel tray on the Now Playing screen. The preferred channel can be any channel within the 5
pages of favorite channels.
When listening to a recording or downloaded show, Edit
is where you can select to delete them.
Start Now
Start Now
begins playing a show that has played on the currently tuned SiriusXM Internet Radio channel from the
beginning. Tap Action Panel , then tap Start Now for a list that shows the currently playing show, and all shows from
the past 5 hours. Tap any show to begin playing the show from the beginning. Shows are listed in order from the newest
to the oldest, with the time that the show began. The speaker icon denotes the show which is currently playing.
If you tune to a show that began prior to the past 5 hours, indicated as a partial show by , you will not be able to listen
to it from the beginning. If you select a partial show, you will be notified that you will be only able to listen to the
portion of the show from the past 5 hours.
Note: Start Now is available only when listening to Internet Radio
live events.
, and may not be available for certain news and
45
Control Functions
Record
Record records the channel to which you are listening and saves it in My Library, My Recorded Channels. You can
select the duration of the recording, and also whether the recording should repeat. Tap here to learn more about
recordings.
Note: Recording is available only when listening to Satellite Radio
.
Download
Download
downloads the currently selected SiriusXM On Demand show to your Lynx and saves it in My Library, My
downloads.
Note: Download is available only for Internet Radio
On Demand Shows, and may not be available for all shows.
My Shows
My Shows adds (or removes) the show to which you are currently listening to your personal collection of favorite
shows. You can view and manage your collection of shows, My Shows, by tapping Home
, tap , tap Shows & On
Demand
, tap My Shows.
If the My Shows icon has a plus + sign , the show is not in currently My Shows, and can be added by tapping My
Shows . If the My Shows icon has a minus - sign , the show has already been added to My Shows and can be
removed by tapping My Shows . Tap here to learn more about My Shows.
46
Shows & On Demand
Shows & On Demand
What is Shows & On Demand
Shows & On Demand
is where you can find all the shows which air on SiriusXM, and shows that have already aired
and are available on demand and for download. Search, browse, and explore to find shows which interest you. Search
with your own search criteria, or search by channel, by category, or by show name. Search for On Demand shows, or
Highlighted Shows that the SiriusXM Programming Department has selected for you to discover. Shows & On Demand
also contains your personal collection of shows which you have saved using My Shows .
When the Shows & On Demand icon displays a number, it indicates the amount of new SiriusXM on demand content for
your shows in My Shows, since the last time you accessed Shows & On Demand.
Use the Action Panel
of a show to learn more about the show, and view the show schedule. If you’d like to be
reminded of a show when it begins, set an alert for a specific episode of the show, or for all episodes of the show. When
you receive an alert, you can easily tune the show by tapping the alert. You can also schedule a recording for the show,
or add the show to My Shows (Satellite Radio only). If you are searching on demand shows, you can also choose to
download a show episode to listen to at another time.
In My Shows within Shows & On Demand, you can manage the shows which you have selected for alerts, modifying or
deleting the alerts you have set for your shows, manage your recordings, and delete shows.
47
Shows & On Demand
Within Shows & On Demand, you will encounter several indicator icons associated with the shows and show episodes,
with your recordings, and with downloaded shows:
Indicator Icon
Description
Full Circle. A new recording, or On Demand show episode, to which you have not
listened.
Partially filled Circle. A recording, or On Demand show episode, to which you have
partially listened, or a partial On Demand episode.
Empty Circle. A recording, or On Demand show episode, to which you have listened
in its entirely.
Speaker. Denotes a show (or show episode) that is currently playing.
Finding a Show
Open Shows & On Demand by tapping Home
, tap , and tap Shows & On Demand . In the upper left corner of
the Shows & On Demand screen, tap to select the guide for Live Satellite for Satellite Radio , or Live Internet for
Internet Radio .
Using Shows & On Demand, shows can be found by using Search Shows , or searched for by channel (Shows by
Channel), by category (Shows by Category), or by show name (Shows by Name).
On Demand
allows you to search for and find shows which have already aired on SiriusXM. On Demand is available
for Internet Radio
only. On demand content may also be available to download to your Lynx so you can listen at your
convenience, for example, when you do not have a Wi-Fi connection.
My Shows contain the shows which you have added to My Shows using My Shows
for which you’ve set alerts.
in the Action Panel
, and shows
Highlighted Shows are shows which the SiriusXM programming department has selected for you so you can discover
new content.
Each Shows & On Demand option is explained in the sections that follow.
48
Shows & On Demand
Search Shows
Search Shows will search for show names or descriptions which contain your search criteria. Tap Search Shows
and then tap the search bar at the top of the screen to display the on-screen keyboard. As you enter what you’d like to
search for, the search is dynamic and will show results as you are entering the characters. Tap Done on the keyboard to
dismiss the keyboard.
Once you have located a show, you can tap the show to see the show episode schedule, or tap the Action Panel
of
the show to Learn More , or to set an Alert for when the show begins playing, or to schedule a Recording of the
show, or to add the show to My Shows. Tap here to learn more about the Action Panel.
Tap the show name to view the episodes of the show. If an episode is currently playing, indicated by , tap the episode
to begin listening, or tap the Action Panel
of any episode to Learn More , or to set an Alert for when the
episode begins playing, or to schedule a Recording of the episode. Tap here to learn more about the Action Panel.
49
Shows & On Demand
On Demand
On Demand
is where you can find shows that have already aired on SiriusXM, shows that are currently playing, and
upcoming shows. Shows which have already aired may also be available to download to your Lynx so you can listen at
your convenience. On Demand is available for Internet Radio
only. Only channels or categories that contain on
demand content will be displayed.
For shows that have already aired, and shows that are currently playing, you can tap the show name to listen to the
show. For upcoming shows, you can set an Alert or a schedule a Recording of the show (Satellite Radio
only)
using the Action Panel
of the show. Shows which have already aired and are available for download can be
downloaded by selecting Download
in the Action Panel .
On Demand provides access to large library of shows of all varieties which have already aired on SiriusXM. The following
sections describe ways in which you can find On Demand shows.
On Demand Listening History. Listening History is a list of the last 20 On Demand show episodes to which you
have listened. You can tap a show episode to listen to it again, or if it was only partially listened to, for some content
you can resume listening from the point at which you had stopped listening.
Tap the Action Panel
of a show to Learn More about the show, set an Alert
show, save the show to My Shows , or Download
a previously aired show.
for future episodes of the
On Demand Featured Shows. Featured Shows content are On Demand shows the SiriusXM Programming
Department has selected for you to discover. Shows which are currently playing are listed first, and shows which
have already aired are listed after in alphabetical order. Tap a show under Now Playing to begin listening to the
show, or tap a show name to see all the On Demand episodes that are available for a show. Some shows may also
be available to download.
Scroll through the list of available On Demand shows by swiping your finger up or down, and tap a show to begin
listening to the show.
50
Shows & On Demand
Tap the Action Panel
of a show to Learn More about the show, set an Alert
show, save the show to My Shows , or Download
a show.
for future episodes of the
On Demand Shows by Channel displays a scrollable list of channels, along with the currently playing show title.
Scroll through the channels by swiping your finger up or down, or quickly scroll by tapping (or tap+hold+drag) the
scroll bar at the right of the screen. You can Sort and Filter the channels to narrow your search. Tap here to learn
more about Sort and Filter.
Tap a channel to see all the shows that are available on the channel. The show currently playing on the channel is
listed first under Now Playing. Scroll through the list of available On Demand shows by swiping your finger up or
down, or quickly scroll alphabetically by tapping (or tap+hold+drag) the alphabetical scroll bar at the right of the
screen. Highlighted letters indicate show names which begin with that letter.
Tap a show to see all the On Demand episodes that are available for the show. Episodes are listed in order from
newest to oldest. Tap an episode from the list to begin listening, or tap the Action Panel
of a show to Learn
51
Shows & On Demand
More about the show, set an Alert
Download
the show.
for future episodes of the show, save the show to My Shows
, or
If the Upcoming selection is displayed in the upper left of the screen, you can tap Upcoming if you wish to see
upcoming episodes of the show. Tap the Action Panel
of a show to Learn More about the show, set an
Alert for the episode of the show, or save the show to My Shows .
On Demand Shows by Category. Shows by Category displays a scrollable list of categories. Scroll through the list
by swiping your finger up or down. You can Filter the categories to narrow your search. Tap here to learn more
about Filter.
Tap a category to display a list of all the On Demand shows which are available for all channels in the selected
category. Shows are listed in alphabetical order. Scroll through the list of shows by swiping your finger up or
down, or quickly scroll alphabetically by tapping (or tap+hold+drag) the alphabetical scroll bar at the right of the
screen. Highlighted letters indicate shows which begin with that letter.
52
Shows & On Demand
Tap a show to see all the On Demand episodes that are available for the show. Episodes are listed in order from
newest to oldest. Tap an episode from the list to begin listening, or tap the Action Panel
of an episode to
Learn More about the show, set an Alert for future episodes of the show, save the show to My Shows , or
Download
the show.
If the Upcoming selection is displayed in the upper left of the screen, you can tap Upcoming if you wish to see
upcoming episodes of the show. Tap the Action Panel
of a show to Learn More about the show, set an
Alert for the episode of the show, or save the show to My Shows .
On Demand Shows By Name displays an alphabetical, scrollable list of On Demand shows. Scroll through the list
by swiping your finger up or down, or quickly scroll alphabetically by tapping (or tap+hold+drag) the alphabet
scroll bar at the right of the screen. Highlighted letters indicate shows which begin with that letter. You can Filter
the shows to narrow your search. Tap here to learn more about Filter.
53
Shows & On Demand
Tap a show to see all the On Demand episodes that are available for the show. Episodes are listed in order from
newest to oldest. Tap an episode from the list to begin listening, or tap the Action Panel
of an episode to
Learn More about the show, set an Alert for future episodes of the show, save the show to My Shows , or
Download
the show.
If the Upcoming selection is displayed in the upper left of the screen, you can tap Upcoming if you wish to see
upcoming episodes of the show. Tap the Action Panel
of a show to Learn More about the show, set an
Alert for the episode of the show, or save the show to My Shows .
My Shows
My Shows is a collection of shows and show episodes that you have added using My Shows in the Action Panel
and all the shows for which you have set an Alert . My Shows provides easy access to your shows.
To add a show to My Shows while listening to a show, tap Action Panel
To add a show you have found in Show Finder, tap the Action Panel
54
and tap My Shows
.
of the show, and tap My Shows
.
,
Shows & On Demand
To add a show or show episode that you have found in On Demand
episode, and tap My Shows .
To remove a show from My Shows, tap the Action Panel
, tap the Action Panel
of the show and tap My Shows
of the show or show
.
Shows by Channel
Shows by Channel displays a scrollable list of channels, along with the currently playing show title. Scroll through the
channels by swiping your finger up or down, or quickly scroll by tapping (or tap+hold+drag) the scroll bar at the right of
the screen. You can Sort and Filter the channels to narrow your search. Tap here to learn more about Sort and Filter.
Find all the shows which air on a channel by tapping a channel name in the list. Shows are listed in alphabetical order,
with the currently playing show listed first under Now Playing. Tap the Action Panel
of a show to Learn More
about the show, set an Alert for future episodes of the show, or save the show to My Shows .
Tap the Now Playing show to listen to the show, or tap a show in the list to see the show schedule. Tap the Action
Panel
of an episode to Learn More about the show, set an Alert for future episodes of the show, or save the
show to My Shows . Tap here to learn how to set a Show Alert.
55
Shows & On Demand
To return to the previous screen, tap Back
.
Shows by Category
Shows by Category displays a scrollable list of categories. You can Filter the categories to narrow your search. Tap
here to learn more about Filter.
My Sports and Live Sports are special categories. My Sports contains the sports games for which you have already set
alerts, and Live Sports contains sports games which are currently in progress.
Select a category to display a list of all the shows which air for all channels in the selected category. Shows are listed in
alphabetical order. Scroll through the list by swiping your finger up or down, or quickly scroll alphabetically by tapping
(or tap+hold+drag) the alphabetical scroll bar at the right of the screen. Highlighted letters indicate show titles which
begin with that letter.
Tap a show in the list to see the show schedule. Tap the Action Panel
of a show to Learn More about the show,
set an Alert for future episodes of the show, or save the show to My Shows . Tap here to learn how to set a Show
Alert.
56
Shows & On Demand
To return to the previous screen, tap Back
.
Shows by Name
Shows by Name displays a scrollable list of every available show for the service you selected, Satellite or Internet Radio.
Scroll through the list by swiping your finger up or down, or quickly scroll alphabetically by tapping (or tap+hold+drag)
the alphabet scroll bar at the right of the screen. Highlighted letters indicate show titles which begin with that letter. You
can Filter the shows to narrow your search. Tap here to learn more about Filter.
Tap a show in the list to see the show schedule. Tap the Action Panel
of a show to Learn More about the show,
set an Alert for future episodes of the show, or save the show to My Shows . Tap here to learn how to set a Show
Alert.
To return to the previous screen, tap Back
.
57
Shows & On Demand
Setting a Show Alert
Set an alert for shows to be reminded when they begin. You can select to be reminded for a specific episode of a show
(Next Episode), or to be reminded for all episodes of a show (All Episodes). You can select up to 100 shows for show
alerts.
As you discover shows that you want to listen to, set alerts for them and Lynx will automatically remind you when a
show is about to begin. When you receive an alert, you can easily tune the show by tapping the alert.
Alerts are set through the Action Panel
Action Panel
of the show.
. Once you have located a show for which you like to set an alert, tap the
From the Action Panel screen, tap Alert . Tap a check box to set an alert for the selected episode of the show (Next
Episode), or to be reminded for all episodes of the show (All Episodes).
To return to the previous screen, tap Back
.
Managing Alerts
The alerts which you have set for your shows can be modified or deleted through Shows & On Demand
.
TIP: All show alert notifications can be turned off, if you no longer wish to receive them. This does not delete the
show alerts that you have set, but stops the alert notifications. You can turn them back on at a later time, if you
choose. Tap Home
, tap , tap Settings , and tap My Content. Tap Show Alert On/Off to toggle Show Alerts
on or off. A check mark in the heck box indicates the feature is on.
Tap My Shows for a list of your shows.
58
Shows & On Demand
Tap the Action Panel
of the show you wish to modify or delete, and tap Alert
.
To delete an alert, tap the check box which has a check mark, to remove the check mark. Tap Back
the My Shows list, and you will see that the show is no longer listed.
twice to return to
To modify an alert, tap the check box for the type of alert you desire, Next Episode or All Episodes. Tap Back
to return to the My Shows list.
twice
59
My Library
My Library
My Library is where you will find content that you can listen to anytime, and even when SiriusXM Satellite or Internet
Radio is not available. You can listen to shows (My Recorded Shows) and channels (My Recorded Channels) that you
recorded, listen to content that Lynx has automatically saved from your favorite channels (Radio Replays), or listen to
your own personal music which you have added to Lynx with an optional microSD memory card (My Music, My
Playlists). When the My Library icon displays a number, it indicates the amount of new recordings, downloaded show
eipsodes, and My Shows that have been added since the last time you accessed My Library.
My Recorded Shows
My Recorded Shows is where shows that have been recorded are saved. Shows can be recorded while listening to while
listening to Satellite Radio . If new shows have been recorded, it will be indicated to right. For example, (2 New)
would indicate that 2 new shows have been recorded since the last time you visited My Recorded Shows.
Tap My Recorded Shows to select a show to listen to, or manage your recorded shows using the Action Panel. Check
for upcoming episodes of a show, delete show episodes, or delete the scheduled recording for a show.
Tap here to learn how to schedule shows to be recorded, and how to manage your recorded shows.
My Recorded Channels
My Recorded Channels is where content recorded from a channel is saved. Channels can be recorded while listening to
while listening to Satellite Radio . If new channel recordings have been recorded, it will be indicated to right. For
example, (4 New) would indicate that 4 new channel recordings have been recorded since the last time you visited My
Recorded Channels.
Tap My Recorded Channels and select a channel recording to listen to, or manage your recorded channels using the
Action Panel. Check for upcoming channel recordings which you have scheduled, delete channel recordings, or delete a
scheduled channel recording.
Tap here to learn how to record a channel and how to schedule future channel recordings, and how to manage your
channel recordings.
My Downloads
My Downloads is where show episodes that you have downloaded are saved. Show episodes can be downloaded
through My Shows and On Demand, while listening to Internet Radio. If new show episodes have been downloaded, it
will be indicated to the right. For example, (4 New) would indicate that 4 new shows episodes have been downloaded
since the last time you visited My Downloads.
60
My Library
When you tap My Downloads, the shows you have downloaded are listed in the order in which they were downloaded
with the first on top and last on the bottom. In addition, each show will list the total number of episodes and the
number of new show episodes have been added since the last time you visited My Downloads.
Tapping a show name will display the show episodes that are available for listening. Tap a show episode to begin
listening. Each show episode has an expiration date. When the expiration date is reached, the show episode is
automatically deleted. The episodes will be listed by the order they were downloaded.
My Downloads will also display Download Queue for show episodes that have been queued for download, along with
the number of show episodes currently queued. If the download queue is empty, Download Queue will not be
displayed.
When you tap Download Queue, the download queue is displayed.
61
My Library
Show episodes are downloaded one at a time. You can pause a download by tapping Pause and restart the download
by tapping Play . If you tap Play on an show episode that is not currently downloading, the show episode that is
currently downloading will pause while the one you selected will begin downloading.
You can cancel downloads from the queue by tapping Edit.
Tap Delete on a show episode to cancel the download. You’ll be prompted to confirm that you wish to cancel the
download. Tap OK to confirm, or Cancel to abort.
Now Playing Screen
The On Demand Now Playing screen is where you see what’s currently playing. You can see the show title and artist,
pause, rewind and replay the show episode, and explore in more detail with the Action Panel.
62
My Library
The items found on the On Demand Now Playing screen are described below.
On Demand Now Playing
Screen Items
Description
Pause. Tap to pause playing the show episode.
Play. Tap to resume playing the show episode from the point where it was paused.
Rewind/Skip Back. Tap+hold rewinds through the show episode. Tap to skip back to
the beginning of the show episode.
Fast-Forward/Skip Forward. Tap+hold will advance through the show episode until
the end of the show episode is reached. Tap to skip to the end of the show episode.
Action Panel. Tap to learn more about the show, find channels with similar shows,
and view the Show Guide. Use Edit to delete the show episode.
Tap here to learn more about the Action Panel.
List. Tap to see a list of all the downloaded episodes of the show.
Show Episode Timeline. Shows the time status of the show episode.
Total Time Played. Shows the length of time the show episode has already played.
Current Play Point. Shows where you currently are in the show episode. Tap+drag
left or right to move through the broadcast timeline. (Some content may be
restricted and this feature disabled.)
Length of Show Episode. Shows the total length of the show episode.
63
My Library
Radio Replays
Radio Replays are saved while listening to Satellite Radio . They are also saved while you’re listening to Radio Replays,
if you have a Satellite Radio connection. Once saved, they can be listened to anytime. Note that certain channels may
not be eligible for Radio Replays.
Radio Replays are blocks of SiriusXM content that Lynx has recorded and saved for you from your favorite channels,
while you were listening to Satellite Radio. Lynx saves Radio Replays from the channels in the currently selected favorite
channel page on the Now Playing screen.
It takes a minimum of 15 minutes of listening to SiriusXM Satellite Radio for Lynx to begin saving Radio Replays. This
ensures that you have enough content to enjoy when listening to Radio Replays.
TIP: The more channels you save as favorite channels, the more channels you will have that are eligible for Radio
Replays. Simply rotate the favorite channel page on the Now Playing screen every so often, so that Lynx will save
Radio Replays from your other favorite channels. Tap here for more information about favorite channels.
One favorite channel can be selected from all your favorite channels to be the Preferred Channel. Radio Replays will
always be saved from the Preferred Channel, regardless of whether the channel is in the currently selected favorite
channel page on the Now Playing screen.
Radio Replays are continuously refreshed to keep them current. Radio Replay content that you have listened to is
erased when you tune to other content, or turn Lynx off. If you don’t listen to a favorite channel for 30 days, the Radio
Replay for that channel is automatically deleted. Also, if you do not connect to Satellite Radio for 30 days, all Radio
Replay content is deleted.
Now Playing Screen
The Radio Replays Now Playing screen is where you see what’s currently playing. You can see the current song title and
artist, pause, rewind and replay songs, and explore in more detail with the Action Panel.
64
My Library
The items found on the Radio Replays Now Playing screen are described below.
Radio Replays Now
Playing Screen Items
Description
Pause. Tap to pause playing the Radio Replay.
Play. Tap to resume playing the Radio Replay from the point where it was paused.
Rewind/Skip Back. Tap+hold rewinds through the Radio Replay. Tap to skip back to
the beginning of the song.
Tap here for an important note.
Fast-Forward/Skip Forward. Tap+hold will advance through the Radio Replay until
the end of the Radio Replay is reached. Tap to skip the song.
Tap here for an important note.
Action Panel. Tap to learn more about the show, find channels with similar shows,
and view the Show Guide. Use Edit to enable/disable Radio Replays for the channel,
and set the Preferred Channel.
Tap here to learn more about the Action Panel.
Radio Replay Timeline. Shows the time status of the Radio Replay.
Total Time Played. Shows the length of time the Radio Replay has already played.
Current Play Point. Shows where you currently are in the song. Tap+drag left or
right to move through the broadcast timeline. (Some content may be restricted and
this feature disabled.)
Length of Radio Replay. Shows the total length of the Radio Replay.
Note: For Radio Replays, you will be limited to one rewind and five song skips per channel, per hour on music
channels.
65
My Library
Turning Radio Replays On/Off
The Radio Replays feature can be turned on or off for all favorite channels, and can also be turned on or off for specific
favorite channels.
Turning Radio Replays On/Off For All Channels
The first time you save a favorite channel, you will be prompted to turn on Radio Replays for all favorite channels. If
desired, tap the Enable Radio Replays check box to enable Radio Replays for all favorite channels.
If you decided not to enable Radio Replays, you will be prompted again, informing you that Radio Replays are currently
disabled. If you do not wish to be prompted again to enable Radio Replays for all favorite channels, tap the Do not ask
again check box. Tap Close.
You can also turn Radio Replays on or off for all favorite channels through Settings
content, and tap Radio Replays On/Off to toggle Radio Replays On or Off.
. tap Settings
, tap My
Caution: When turning Radio Replays off for all channels, all Radio Replays will be deleted. Be sure that you
want to want to delete all Radio Replays before proceeding. If not, tap Cancel to keep the Radio Replays.
66
My Library
Turning Radio Replays On/Off For Specific Channels
To turn Radio Replays on or off for specific favorite channels:
1. From the Now Playing screen, tap a favorite channel to tune to the channel.
2. Tap Action Panel
, and then tap Edit
.
3. At the Edit Radio Replays screen, tap the check box for Enable for this Channel to toggle Radio Replays for
this favorite channel on or off.
4. If you also want to make this favorite channel the Preferred Channel, tap the Make this the Preferred
Channel check box. If you had already chosen another favorite channel as the Preferred Channel, you will be
prompted to confirm that you want to change the Preferred Channel.
Another way to turn Radio Replays off for a specific favorite channel is by tapping Home
, tap My Library
, and
tap Radio Replays. From the list of Radio Replays, tap the Action Panel
of a Radio Replay, tap Edit , and tap the
Enable for this Channel check box to remove the check mark. You will be prompted to confirm that all the Radio
Replay content for the channel will be deleted. Tap OK.
67
My Library
My Music
My Music and My Playlist are your own personal songs and playlists which you have added to Lynx. You will need to
install a microSD memory card in Lynx (purchased separately) to enable this feature. Note that Lynx supports microSD
and microSDHC cards.
The My Music list can be sorted by artist or by song, by tapping either Artist or Song.
When the list is sorted by Song, the songs will be listed in alphabetical order by song title. Tapping a song from the list
will play the song, and continue playing your other songs in song title order, until all the songs have been played. When
all songs have played, you are returned to the My Music list.
Tapping Shuffle
will play all your music in random order, until all the songs have been played. Shuffle is only
available when the list is sorted by song title.
When the list is sorted by Artist, tapping an artist name will show a list of all your songs by the artist. Tapping a song
from list will play the song, and continue playing all your other songs by the same artist, until all the songs have been
played. When all the songs by the artist have played, you are returned to the My Music list.
Now Playing Screen
The My Music Now Playing screen is where you see what’s currently playing. You can see the current song title and
artist, the album cover (if available), pause, rewind and replay songs, and repeat and shuffle your songs. You can also
access the My Music list.
68
My Library
The items found on the My Music Now Playing screen are described below.
My Music Now Playing
Screen Items
Description
Pause. Tap to pause playing the song.
Play. Tap to resume playing the song from the point where it was paused.
Rewind/Skip Back. Tap+hold rewinds through the song. Tap to skip back to the
beginning of the song.
Fast-Forward/Skip Forward. Tap+hold will advance through the song until the end
of the song is reached. Tap to skip the song.
Repeat. (Tap once.) When all your songs have been played, they will be repeated
again.
Repeat One. (Tap twice.) Continuously repeats the currently playing song,
Shuffle. Plays all your songs in random order. Shuffle can be combined with Repeat.
List. Tap to display the My Music list.
My Music Timeline. Shows the time status of the song.
Total Time Played. Shows the length of time the song has already played.
Current Play Point. Shows where you currently are in the song. Tap+hold+drag left
or right to move through the My Music timeline. (Some content may be restricted
and this feature disabled.)
Length of Song. Shows the length of the song.
69
My Library
Installing the Optional microSD Card
Click here for instructions on how to install the optional microSD card.
Connecting to your PC or Mac
When Lynx is connected to a computer, the memory card will be recognized as a removable storage device. You can
then copy and manage your personal songs and .m3u playlists on the microSD card.
Connect Lynx to a computer using the USB Cable provided with Lynx. Connect the larger end of the USB Cable into the
bottom of Lynx, and the smaller end into an available USB port on the computer.
Managing Music and Playlists
To manage your music and playlists on the microSD card:
1. Connect Lynx to a computer as shown in the previous section.
2. Lynx will recognize when it has been connected to a USB port, and prompt you if you want to manage the
microSD card. Tap Manage SD Card.
The screen will show that you are managing the microSD card.
70
My Library
3. Using your computer, go to Computer or My Computer (PC), or Finder (MAC), and locate the memory card. It
will be recognized as a removable storage device.
4. Add your music and playlists to the microSD card by dragging and dropping it on the memory card. Delete
unwanted music and playlists from the microSD card by dragging them to the trash.
5. When you are finished, you’ll need to un-mount the microSD card. On a PC, look for the “Safely Remove
Hardware” icon
or
in the task bar, click it, and then click the entry for the microSD card. On a MAC,
drag the microSD removable storage device to the trash to eject it.
Caution: Be certain to un-mount/eject the microSD card before proceeding with the next step.
6. On Lynx, tap Done. You will be prompted that you are ending the microSD card management. Tap Yes.
7.
You will be prompted to disconnect the USB cable. Disconnect the USB cable and tap OK.
8. View and play your music by tapping Home
, tap , tap My Library
several moments to prepare your music and playlists.
, and tap My Music. Lynx may take
71
My Library
Lynx supports MP3 and ACC+ audio files in the formats:
•
AAC LC
•
AAC LTP
•
HE-AAC v1 and HE-AAC v2 (.3gp, .mp4, .m4a)
•
MP3 CBR and MP3 VBR (.mp3)
Lynx also supports the playlist format:
•
.m3u
Note: Lynx does not support playback of any Digital Rights Management (DRM) content.
72
Recording
Recording
Lynx can record and save content from Satellite Radio
. Recordings can be done in several ways:
•
Channel Recording (Immediate). Record the channel to which you are listening for a specified period of time:
until the show ends, or for up to 6 hours. When recording until the show ends, you can also specify to repeat
the recording for all episodes of the show. Channel Recordings are saved in My Library , in My Recorded
Channels. Tap here to learn how to immediately begin recording a channel.
•
Channel Recording (Scheduled). Schedule a channel to be recorded, beginning on a specific date and time, and
for a set duration. You can also schedule the recording to repeat on specific days of the week. Channel
Recordings are saved in My Library , in My Recorded Channels. Tap here to learn how to schedule a channel
recording.
•
Show Recording. Schedule a specific show to be recorded once, or schedule to record all episodes of the show.
Find the show or show episode to be recorded using Shows & On Demand, or, if you are currently listening to
the show, use the Action Panel
to schedule the show recording. Show recordings are saved in My Library
, in My Show Recordings. Tap here to learn how to schedule a show recording.
If memory for storing recordings becomes low, Lynx will prompt you that it will automatically delete older content to
make room for newer content.
In the event that there is a recording conflict with scheduled recordings, Lynx will prompt you with a list of the
scheduled recordings and ask you to select the scheduled recording that should have priority. Tap the scheduled
recording that you want to have priority and tap Select Preferred. Tap here to learn more setting scheduled recording
priorities.
The recording Now Playing screen allows you to pause, rewind, and replay while listening to a recording.
Lynx User Guide 121214a
Recording
If you want to hear a song again, tap Rewind
on the Now Playing screen to rewind to the beginning of the song or
show segment. Tap Pause
to stop, and tap Play to resume listening. Tap Fast-Forward
to advance to the next
song or show segment. A recording timeline is displayed near the bottom of the screen indicating where you are
listening in the recording.
The items found on the Recording Now Playing screen are described below.
My Music Now Playing
Screen Items
Description
Pause. Tap to pause playing the recording.
Play. Tap to resume playing the recording from the point where it was paused.
Rewind/Skip Back. Tap+hold rewinds through the recording. Tap to skip back to the
beginning of the previous song or show segment.
Fast-Forward/Skip Forward. Tap+hold will advance through the recording until the
end of the recording is reached. Tap to skip the song or show segment.
List. Tap to display the list of recordings.
Recording Timeline. Shows the time status of the recording.
Total Time Played. Shows the length of time the recording has already played.
Current Play Point. Shows where you currently are in the recording. Tap+hold+drag
left or right to move through the recording timeline. (Some content may be
restricted and this feature disabled.)
Length of the Recording. Shows the length of the recording.
When you view the recordings in My Library, each recording will have a status indicator described below.
Status Indicator
Description
Full Circle. A new recording to which you have not listened.
Partially filled Circle. A recording to which you have partially listened, or an
incomplete recording.
Empty Circle. A recording to which you have listened in its entirely, but have not
deleted.
74
Recording
Channel Recording (Immediate)
The immediate recording of a channel is initiated while you are listening to the channel on live Satellite Radio . Once
the channel recording has begun, you can tune to other channels while the recording finishes. Channel recordings can
be up to 6 hours long, or a minimum of 15 minutes.
Channel recordings cannot be initiated while you are in Pause and Replay mode, nor can you initiate another immediate
channel recording until the first has finished, or has been cancelled.
Starting a Channel Recording (Immediate)
To start recording the channel to which you are currently listening:
1. Tap Action Panel
, and then tap Record
.
2. If another channel recording is in progress, Lynx will warn you that another recording is taking place, and give
you the option to cancel the other recording. Tap OK to cancel the other recording, or tap Cancel to continue
recording.
3. Next, you can select to record until the end of the show, or specify the amount of time for the recording. If
you do want to specify the duration of the recording, tap Duration.
75
Recording
4. Tap Specify duration. Tap either + or – to adjust the recording time and tap OK. Recordings can be 15min
increments up to 6 hours maximum. When complete, tap OK.
5. If you selected the duration to be until the end of the show, the option to repeat the recording is enabled. If
you would like to always record the show, tap Repeat, tap All episodes at this time, and tap OK.
6. Tap Start to begin the recording. The Action Panel
Record icon will indicate that Lynx is recording. Tap
Back
, or tap Now Playing to return to the Now Playing screen.
76
Recording
Listening to a Channel Recording
When a channel recording has completed, you can select and listen to the recording which has been saved in My
Library .
To locate and listen to a channel recording, tap Home
, tap My Library
channel name, and tap the recording from the list to begin playing.
, tap My Recorded Channels, tap the
Once you have listened to the recording in its entirety, you may be prompted to delete the recording. Tap OK to delete
the recording, or tap Cancel to keep the recording.
Note: Certain content is automatically deleted once it has been listened to. Lynx will notify you that the recording
was deleted.
If you partially listen to a recording, the next time you listen to the recording Lynx may ask whether you want to resume
listening where you left off, or to play the recording from the beginning. Tap your choice to begin listening.
Note: Recorded music channels or shows cannot be started over due to licensing restrictions.
77
Recording
Cancelling a Channel Recording in Progress
You can cancel a channel recording that is in progress in two ways:
•
Tune to the channel that is being recorded, and tap Action Panel
•
Tap Home
, tap My Library , tap My Recorded Channels and tap the channel being recorded. In the list
of recordings, tap the Action Panel
of the channel recording and tap Stop Record .
and tap Stop Record
.
Lynx will prompt you whether you want to keep the partial recording (Keep Partial), delete the recording (Delete), or
continue recording (Continue Rec). Tap your selection and tap Back
, or tap Now Playing to return to the Now
Playing screen.
Deleting Channel Recordings
You can delete specific channel recordings or delete all recordings associated with the channel.
78
•
To delete a specific channel recording, tap Home
, tap My Library , tap My Recorded Channels and tap
the channel from which the recording took place. In the list of recordings, tap the Action Panel
of the
specific channel recording, tap Edit , and tap Delete this recording.
•
To delete all the recording associated with a channel, tap Home
Channels and tap the Action Panel
of the channel. Tap Edit
, tap My Library , tap My Recorded
and tap Delete all recordings.
Recording
Channel Recording (Scheduled)
The scheduled recording of a channel takes place while you are listening to Satellite Radio , and happens in the
background. You can tune other channels while the recording is taking place. Channel recordings can be up to 6 hours
long, with a minimum of 15 minute.
While a scheduled recording is taking place, you cannot initiate another recording until the first has finished, or has
been cancelled.
Scheduling a Channel Recording (Scheduled)
To schedule a channel recording:
1. Tap Home
, tap My Library , tap My Recorded Channels, scroll down to bottom of the list under
Scheduled, to the last item, and tap Schedule new recording. You will then select the channel, the duration
of the recording, the start time of the recording, and whether the scheduled recording should repeat.
2. Tap Channel, and select the channel that will be recorded. Use the Sort and Filter to help you find the
channel. When you have located the channel in the list, tap the channel.
3. Tap Duration, and set the duration of the recording. Tap either + or – to adjust the recording time and tap
OK. Maximum recording time is 6 hours, and minimum time is 1 minute.
79
Recording
4. Tap Scheduled Start, and set the date and time when the recording should commence. Tap either + or – to
adjust the date and time, and tap OK. You cannot schedule a recording to start in the past. If you attempt to
do so, the recording will commence one year from the start date specified.
5. Scroll down and tap Repeat. Select the days of the week that the scheduled channel recording should repeat,
by tapping each day to select (or deselect), the day. If you do not want the scheduled recording to repeat,
don’t select any days. When complete, tap OK.
6. Tap OK to schedule the channel recording. The scheduled recording will be listed under Scheduled.
80
Recording
Listening to a Channel Recording
When a channel recording has completed, you can select and listen to the recording which has been saved in My
Library .
To locate and listen to a channel recording, tap Home
, tap My Library
channel name, and tap the recording from the list to begin playing.
, tap My Recorded Channels, tap the
Once you have listened to the recording in its entirety, you may be prompted to delete the recording. Tap OK to delete
the recording, or tap Cancel to keep the recording.
Note: Certain content is automatically deleted once it has been listened to. Lynx will notify you that the recording
was deleted.
If you partially listen to a recording, the next time you listen to the recording Lynx may ask whether you want to resume
listening where you left off, or to play the recording from the beginning. Tap your choice to begin listening.
Note: Recorded music channels or shows cannot be started over due to licensing restrictions.
81
Recording
Cancelling a Channel Recording in Progress
You can cancel a channel recording that is in progress in two ways:
•
Tune to the channel that is being recorded, and tap Action Panel
•
Tap Home
, tap My Library , tap My Recorded Channels and tap the channel being recorded. In the list
of recordings, tap the Action Panel
of the channel recording and tap Stop Record .
and tap Stop Record
.
Lynx will prompt you whether you want to keep the partial recording (Keep Partial), delete the recording (Delete), or
continue recording (Continue Rec). Tap your selection and tap Back
, or tap Now Playing to return to the Now
Playing screen.
Deleting Channel Recordings
You can delete specific channel recordings or delete all recordings associated with the channel.
82
•
To delete a specific channel recording, tap Home
, tap My Library , tap My Recorded Channels and tap
the channel from which the recording took place. In the list of recordings, tap the Action Panel
of the
specific channel recording, tap Edit , and tap Delete this recording.
•
To delete all the recording associated with a channel, tap Home
Channels and tap the Action Panel
of the channel. Tap Edit
, tap My Library , tap My Recorded
and tap Delete all recordings.
Recording
Changing or Deleting a Scheduled Channel Recording
Channel recordings that you have scheduled can be changed or deleted before the recording commences. If the
recording has already commenced, the recording parameters cannot be changed, however, if the channel recording is
set to repeat, you can change the recording parameters of the future channel recordings.
•
To delete a scheduled channel recording which has not yet commenced, tap Home
, tap My Library , tap
My Recorded Channels, scroll to the end of the list under Scheduled and tap the scheduled channel recording.
Tap Delete.
•
To delete a scheduled channel recording which has already commenced, tune to the channel being recorded,
tap Action Panel
and tap Record . Select whether to keep the partial recording (Keep Partial), delete the
recording (Delete), or continue recording (Continue Rec). Tap your selection and tap Back
or Now Playing
to return to the Now Playing screen.
•
To change the scheduled recording parameters, tap Home
, tap My Library , tap My Recorded Channels,
scroll to the end of the list under Scheduled and tap the scheduled channel recording. Tap the channel number,
Duration, Scheduled Start, or Repeat to modify the parameters. When complete, tap Change to save the
modified scheduled channel recording.
Show Recording
The scheduled recording of a show takes place while you are listening to Satellite Radio , and happens in the
background. While a scheduled recording is taking place, you cannot initiate another recording until the first has
finished, or has been cancelled.
A recorded show may have an expiration date when it will be automatically deleted. This information is displayed when
you view the recording in My Library , My Recorded Shows.
Scheduling a Show Recording
To schedule a show recording:
1. There are two methods to select a show to be recorded:
•
One is by using Shows & On Demand. Tap Home
, tap , and tap Shows & On Demand
. Select
how you will search for the show, and use the Sort and Filter to help you find the show that you want
to record. When you have located the show, tap the Action Panel
of the show.
•
Another method is when you are already tuned to the show you want to record, tap the Action Panel
on the Now Playing screen, tap Learn More , tap About this Show, tap View Schedule, and tap
the Action Panel
of a show.
83
Recording
2. In the Action Panel tap Record . You will be prompted to schedule the recording, either for just a single
episode (default), or for all episodes. If you want to record just this one episode tap Start. If you want to
record all episodes of the show tap All episodes at this time and tap Start. Tap Back
, or tap Now
Playing to return to the Now Playing screen.
3. The Action Panel will reflect that the recording has begun. Tap Back
the Now Playing screen.
, or tap Now Playing
to return to
Listening to a Show Recording
When a show recording has completed, you can select and listen to the recording which has been saved in My
Library .
To locate and listen to a show recording, tap Home
, tap My Library
name from the list, and tap the show episode to begin playing.
84
, tap My Recorded Shows, tap the show
Recording
Once you have listened to the recording in its entirety, you may be prompted to delete the recording. Tap OK to delete
the recording, or tap Cancel to keep the recording.
Note: Certain content is automatically deleted once it has been listened to. Lynx will notify you that the recording
was deleted.
If you partially listen to a recording, the next time you listen to the recording Lynx may ask whether you want to resume
listening where you left off, or to play the recording from the beginning. Tap your choice to begin listening.
Note: Recorded music channels or shows cannot be started over due to licensing restrictions.
Cancelling a Show Recording in Progress
You can cancel a show recording that is in progress in two ways:
•
Tune to the channel where the show is being recorded, and tap Action Panel
•
Tap Home
, tap My Library , tap My Recorded Shows and tap the show being recorded. In the list of
recordings, tap the Action Panel
of the show recording and tap Stop Record .
and tap Stop Record
.
Lynx will prompt you whether you want to keep the partial recording (Keep Partial), delete the recording (Delete), or
continue recording (Continue Rec). Tap your selection and tap Back
, or tap Now Playing to return to the Now
Playing screen.
85
Recording
Deleting Show Recordings
You can delete specific show episode recordings or delete all recordings associated with the show.
•
To delete a specific show episode recording, tap Home
, tap My Library , tap My Recorded shows, and
tap the show name. In the list of show episodes, tap the Action Panel
of the show episode you wish to
delete, tap Edit , and tap Delete this recording.
•
To delete all the episodes associated with a show, tap Home
, tap My Library , tap My Recorded show
and tap the Action Panel
of the show name. Tap Edit and tap Delete all recordings.
Changing or Deleting a Scheduled Show Recording
Show recordings that you have scheduled can be changed or deleted before the recording commences. If the recording
has already commenced, the recording parameters cannot be changed, however, if the show recording is set to repeat,
you can change the recording parameters of the future show recordings.
86
Recording
•
To delete a scheduled show recording which has not yet commenced, tap Home
, tap My Library , tap My
Recorded Shows, scroll to the end of the list under Scheduled and tap the scheduled show recording. Tap
Delete.
•
To delete a scheduled show recording which has already commenced, tune to the channel being recorded, tap
Action Panel
and tap Record . Select whether to keep the partial recording (Keep Partial), delete the
recording (Delete), or continue recording (Continue Rec). Tap your selection and tap Back
or Now Playing
to return to the Now Playing screen.
•
To change the scheduled recording parameters, tap Home
, tap My Library , tap My Recorded Shows,
scroll to the end of the list under Scheduled and tap the scheduled show recording. Tap This episode, or All
episodes at this time to modify the parameters. When complete, tap Change to save the modified scheduled
show recording.
Scheduled Recording Priority
Scheduled recordings can be prioritized in sequence. Arranging the priority will decide which scheduled recording takes
precedence when there is a conflict or overlap with another scheduled recording. Although Lynx will alert you at
recording time of a recording conflict, if you do not respond Lynx will use the recording priority to determine which
recording takes precedence.
To set the priority order of the scheduled recordings:
1. Tap Home
, tap My Library , tap My Recorded Shows (or My Recorded Channels), and tap Set
priority in the upper right corner.
2. Tap+hold+drag the Priority
icon at the right side of the show or channel recording that you wish to
reprioritize. Drag the show/channel up or down the list to where you want it to be, and then lift your finger to
complete setting the priority.
87
Recording
3. You can continue ordering the priority of other show/channel recordings. When you have completed setting
the priorities, tap Back
.
88
Browser
Browser
Browser is a fully functional web browser which allows you to view websites while listening to your Lynx. Browser works
similar to a web browser on a computer, and is configurable to be either a regular browser or a mobile browser
(default). Some websites detect whether browser is on a mobile device, and will provide content optimized for the
mobile device.
Note: Lynx needs to be connected to a Wi-Fi network which with Internet access in order to view websites.
To open the browser, tap Home
, tap until you reach home page with the Browser icon, and tap Browser . The
browser will open, and if you have a Wi-Fi connection to the Internet, Lynx connect to the SiriusXM website by default.
To browse to a different website, tap+hold+drag down on the Browser screen to reveal the location bar with the website
address.
To navigate to a different website, tap the location bar to display the on-screen keyboard, and enter the website address
(URL) for the new website. When complete, tap the Go key on the keyboard to display the new website. Tap Back
to
return to the previous website.
Lynx User Guide 121214a
Browser
Tap Menu
in the upper right corner to display more navigation buttons and the settings button.
The following table describes the selections in the menu.
Selection
Description
New Window. Tap to open a new window in the browser.
Bookmarks. Tap to open a list of websites that have been saved. Tap a website to
open the website in the browser. You can also save the current website as a
bookmark by tapping the icon which says Add.
Windows. Tap to display a list of open browser windows. Tap a window from the list
to open that window, or tap the X to the far right to close the window. Tap New
Window to open a new browser window.
Refresh. Tap to reload the current web page.
Forward. Tap to open the next web page that you had already accessed.
90
Browser
Selection
Description
More. Tap to access more selections, and the settings menu:
Add Bookmark. Tap to add the current web page to bookmarks.
Find on page. Tap to open a search box to find words in the web page.
Page info. Tap to view information about the web page.
Downloads. Tap to view the download history,
Settings. Tap to open the settings menu where you can configure the behavior of
the Browser, including text size, home page, clearing cookies and browser history,
managing website passwords, etc.
Mobile view/Desktop view. Tap to switch browser view between mobile view
and desktop view.
91
Bluetooth® Setup
Bluetooth Setup
Pairing and Connecting a Bluetooth Device with Lynx
You can connect to a Bluetooth device, such as headphones, earbuds, speakers, or the LH1 Home Dock for audio. Lynx
Bluetooth is compatible with stereo audio streaming devices (A2DP Profile), but is not compatible with the Hands Free
Profile (HFP), which is typically used for a Bluetooth connection to a cell phone. Lynx remembers the audio volume
setting for the Bluetooth devices which were paired and connected with Lynx.
To use a Bluetooth device for audio, you’ll need to pair and connect it with Lynx. You’ll need to know how to place your
Bluetooth device in discoverable mode, and may also need the Bluetooth device passcode.
TIP: If Lynx is in Airplane mode, Wi-Fi and Bluetooth will be turned off. Check to be sure Lynx is not in Airplane
mode by pressing the Power button
for 3 seconds in handheld mode, or by tapping Home
, tap , tap
Settings , tap Wi-Fi & Bluetooth, and tap Airplane Mode.
To pair and connect a Bluetooth device, follow these steps. You can pair as many Bluetooth devices as desired by
repeating these steps.
1. Tap Home
, tap
, tap Connect
.
2. In the Bluetooth devices menu, if Bluetooth On/Off does not have a check mark, tap Bluetooth On/Off to
turn it on. A check mark will appear in the box at the right once Bluetooth is turned on.
3. If necessary, consult the instructions for your Bluetooth device. Place your device in Bluetooth
discoverable/pairing mode.
4. From the Bluetooth Devices menu tap Scan for devices. Allow Lynx to scan for a few moments for
Bluetooth devices. If Lynx found your device, its name will be listed below Bluetooth devices.
5. Tap your Bluetooth device name in the menu and Lynx will attempt to pair with the device. (You may be
prompted for the passcode for your device. If so, enter the passcode.) If pairing is successful, the Paired but
not connected message will be displayed below your Bluetooth device name.
92
Bluetooth® Setup
6. Tap your Bluetooth device name again and Lynx will connect to the device. If successful, the Connected to...
message will be displayed below your Bluetooth device name. You should now hear the SiriusXM audio
playing through your Bluetooth device.
Unpair (Disconnect) a Bluetooth Device
If you no longer use a Bluetooth device which had been previously connected to Lynx, you can unpair the device which
will cause Lynx to “forget” the device so it will no longer be displayed in the Bluetooth devices list. To unpair a device,
follow these steps:
1. Tap Home
, tap
, tap Connect
.
2. In the Bluetooth devices menu, locate the Bluetooth device name and tap+hold until a menu is displayed.
3. Tap Unpair to remove the device.
93
Bluetooth® Setup
Lynx Bluetooth Behavior
Lynx will remember the Bluetooth devices with which you have paired and connected. When Bluetooth is on, Lynx will
behave as follows with Bluetooth devices:
•
If Lynx is not connected to a Bluetooth device, and you come into range of a previously connected Bluetooth
device which is on, it is possible that the device will initiate a connection to Lynx automatically.
•
If Lynx is not connected to a Bluetooth device, and it is placed in the LH1 Home Dock, Lynx will connect to the
Home Dock.
•
If Lynx is not connected to a Bluetooth device, and it had previously connected to the LH1 Home Dock, tapping
the Bluetooth button on the Home Dock will connect Lynx to the Home Dock.
•
If Lynx is connected to a Bluetooth device (such as headphones), and Lynx is placed in the LH1 Home Dock, you
will be prompted to select if you wish to connect to the Home Dock or stay connected to the current Bluetooth
device.
•
When Lynx is currently connected to a Bluetooth device, and then it comes into range of another Bluetooth
device to which it had previously connected, it will not break the current Bluetooth connection.
To manually switch Bluetooth devices, follow these steps:
1. Tap Home
, tap
, and tap Connect
.
2. In the Bluetooth devices menu, tap Scan for devices. Allow Lynx to scan for a few moments for Bluetooth
devices. If Lynx found your device, its name will be listed below Bluetooth devices.
3. Tap the Bluetooth device name and Lynx will connect to the device. If successful, the Connected to...
message will be displayed below your Bluetooth device name. You should now hear the SiriusXM audio
playing through the selected Bluetooth device.
•
94
If Lynx has been paired with a Bluetooth device when in the LV1 Vehicle Dock, and you had selected, Always
connect to this device when using the Vehicle Kit, during the pairing process, whenever Lynx is placed into
Bluetooth® Setup
the Vehicle Dock, Lynx will disconnect from any other Bluetooth device and connect to the preferred Bluetooth
device. (See the second bullet (above) for the behavior when two or more preferred Bluetooth devices are
encountered, when in the Vehicle Dock.)
Lynx LH1 Home Kit
The LH1 Home Kit includes a Bluetooth Home Dock which allows for a wireless stereo audio connection with your Lynx.
This allows you to take your Lynx out of the dock and carry it with you, and manage your listening experience up to
approximately 30 feet away from the dock, depending upon the dock location and the surrounding environment.
(Listening to Satellite Radio, or using the Remote Control, requires Lynx to be inserted in the dock.)
To automatically connect Lynx to the Home Dock using Bluetooth:
1. Insert Lynx into the dock. Lynx must have Bluetooth turned on. (Tap Home
tap Bluetooth On/Off to turn it on.)
2.
, tap
, tap Connect
, and
The Bluetooth Indicator Light on the right side of the dock will blink rapidly 3 times and then remain on
indicating that your Lynx is now connected. You should now hear the SiriusXM audio playing through the
Home Dock.
To manually pair and connect Lynx to the Home Dock using Bluetooth:
1. Tap the Bluetooth button on the Home Dock. The Bluetooth Indicator Light will blink slowly.
TIP: If Lynx and the Home Dock had been previously connected, they will now connect. The Bluetooth
Indicator Light will flash rapidly and then become steady. If not, continue with step 2.
2. On Lynx, tap Home
, tap
, tap Connect
.
3. Lynx must have Bluetooth turned on. (Tap Bluetooth On/Off to turn it On.)
4. Tap Scan for devices and Lynx will scan for and show available Bluetooth devices under Bluetooth devices.
5. Tap the Home Dock name in the list. Lynx will connect with the dock. The Bluetooth Indicator Light on the
dock will blink rapidly 3 times during the connection process and then remain on indicating that your Lynx is
now connected. If successful, the Connected to... message will be displayed below dock name. You should
now hear the SiriusXM audio playing through the Home Dock.
95
Wi-Fi® Setup
Wi-Fi Setup
A connection to a Wi-Fi network with Internet access is necessary to listen to SiriusXM Internet Radio.
Lynx remembers the Wi-Fi networks that you have connected to in the past and any passwords associated with them.
When you come into range of a Wi-Fi network to which you had previously connected, Lynx will automatically connect to
the Wi-Fi network it remembered.
Note: If you are experiencing issues with Wi-Fi connectivity when connecting to a Wireless-N router or access point,
you can try disabling the Wireless Multimedia Extensions. Tap Home
, tap , tap Settings , tap Wi-Fi &
Bluetooth, tap Wi-Fi settings, tap Advanced, and tap Disable Wireless Multimedia Extensions. It is
recommended that you keep the Wireless Multimedia Extensions enabled if you are not experiencing a problem.
Connecting to a Wi-Fi Network
Be sure you are in a location where a Wi-Fi connection is available. If the Wi-Fi network is secured, you will need to know
the password.
1. Tap Home
, tap
, tap Settings
, and tap Wi-Fi & Bluetooth.
2. If Wi-Fi On/Off does not have a check mark in the check box, tap Wi-Fi On/Off to turn Wi-Fi On.
3. Tap Wi-Fi settings, and then tap Scan for networks. Lynx will scan for and detect any Wi-Fi networks within
its range, and display them under Wi-Fi networks. If no Wi-Fi networks were detected, move to a location
where there is a Wi-Fi network and tap Scan for networks again.
96
Wi-Fi® Setup
4. Find your Wi-Fi network name in the list and tap it.
5. If the network is secured, you will be prompted to enter the password, otherwise skip ahead to step 7.
Tap Show Password if you wish to see the password as you are entering it. Tap in the area below Password
to display the on-screen keyboard and enter the password. Wi-Fi passwords are typically case sensitive.
6. When you have completed entering the password, tap Done, and then tap Connect.
7. Lynx will show Obtaining IP address…. Once connected to the Wi-Fi network, it will show Connected under
the Wi-Fi network name.
97
Wi-Fi® Setup
8. If the Wi-Fi network displays Obtaining IP address… for an extended period of time, and then shows
Disabled, and you never get the Connected message, you have probably entered the password incorrectly.
Tap+hold the Wi-Fi network name, and select Modify network. Tap in the area below Password to display
the on-screen keyboard, and enter the password again. Passwords are typically case sensitive.
Manually Connecting to a Wi-Fi Network
If the Wi-Fi network name (SSID) is hidden, you will have to manually enter the network name, and the type of security
the network may have.
1. Tap Home
, tap
, tap Settings
, and tap Wi-Fi & Bluetooth.
2. If Wi-Fi On/Off does not have a check mark in the check box, tap Wi-Fi On/Off to turn Wi-Fi On.
3. Tap Wi-Fi settings, scroll to the bottom of the screen and tap Add Wi-Fi network.
98
Wi-Fi® Setup
4. Tap the area below Network SSID to display the on-screen keyboard, and enter the network name (SSID).
Tap Done.
5. If the Wi-Fi network is secured, tap the area below Security, and tap the type of network security, otherwise
continue with step 6.
6. Scroll down the Add Wi-Fi network box, if necessary, to the password section. Tap Show Password if you’d
like to see the password as you enter it. Tap the area below Password to display the on-screen keyboard, and
enter the password. Tap Done, and tap Save.
7. The network is now saved, but Lynx has not yet connected to it. Find the network name in the list and tap it.
Lynx will show Obtaining IP address…. Once connected to the Wi-Fi network, it will show Connected under
the Wi-Fi network name.
8. If the Wi-Fi network displays Obtaining IP address… for an extended period of time, and then shows
Disabled, and you never get the Connected message, you have probably entered the Wi-Fi network name,
the security type, or the password incorrectly. Tap+hold the Wi-Fi network name, and select Modify network.
99
Wi-Fi® Setup
Tap in the area below Password to display the on-screen keyboard, and enter the password again. Passwords
are case sensitive.
Connecting to a Wi-Fi Network Using a Static IP Address
If your Wi-Fi network does not use DHCP to automatically assign network IP information, or you want to use a static IP
address, you can enter this information manually into Lynx.
Note: If at another time you connect to a different Wi-Fi network, remember to turn off the static IP address,
otherwise Lynx will connect to every Wi-Fi network using the static IP address, and you will not have a working Wi-Fi
connection. To turn off the Static IP address, tap Home
, tap , tap Settings , tap Wi-Fi & Bluetooth, tap WiFi settings, tap Advanced, and tap Use static IP to remove the check mark from the check box.
To use a static IP address, you will need to know the following information. Incorrect IP information will prevent you
from establishing a working Wi-Fi network connection, even though it may appear that Lynx has connected to the Wi-Fi
network.
What is the static IP address?
What is the Gateway IP address?
What is the Subnet Mask IP address?
What is the Primary DNS IP address (DNS 1)?
What is the Secondary DNS IP address (DNS 2)? (optional)
Once you have the above information, follow these steps to enter the information into Lynx:
1. Tap Home
, tap
, tap Settings
, and tap Wi-Fi & Bluetooth.
2. If Wi-Fi On/Off does not have a check mark in the check box, tap Wi-Fi On/Off to turn Wi-Fi On.
3. Tap Wi-Fi settings, and then tap Advanced.
4. Tap Use static IP. A check mark will appear in the check box.
100
Wi-Fi® Setup
5. Tap IP address, and enter your static IP address using the on-screen keyboard. When complete, tap Done.
6. The IP address you entered will be confirmed. Tap OK.
7. Tap Gateway, and enter your Gateway IP address. When complete, tap Done, and tap OK to confirm.
8. Tap Netmask, and enter your Netmask IP address. When complete, tap Done, and tap OK to confirm.
9. Tap DNS 1, and enter your primary DNS IP address. When complete, tap Done, and tap OK to confirm.
10. If you have a secondary DNS IP address, tap DNS 2, and enter your secondary DNS IP address. When
complete, tap Done, and tap OK to confirm.
11. When all the information has been correctly entered, tap Back
.
If you have not yet connected to a Wi-Fi network, you will have to do so before you can connect to Internet Radio.
If, after you have connected to a Wi-Fi network, you are unable to connect to Internet Radio, most likely you have
entered the wrong information for one or more of the IP addresses, or the IP address information is incorrect. Verify all
IP address information.
101
Wi-Fi® Setup
Managing Wi-Fi Networks
Lynx remembers the Wi-Fi networks that you have connected to in the past and any passwords associated with them.
When you come into range of a Wi-Fi network to which you had previously connected, Lynx will automatically connect to
the Wi-Fi network it remembered.
If the password for a Wi-Fi network has changed, or you wish to have Lynx forget that it had connected to a Wi-Fi
network, you can manage the settings for the Wi-Fi network.
1. Tap Home
, tap
, tap Settings
, tap Wi-Fi & Bluetooth, and tap Wi-Fi settings.
2. Under Wi-Fi networks, find the network name to which you had previously connected, and tap+hold the
network name until a menu is displayed.
3.
Tap Forget network if you want Lynx to forget it had ever connected to the Wi-Fi network, and also forget
any password that may have been associated with the Wi-Fi network.
Tap Modify network if you want to change the password for the Wi-Fi network. Tap the area below
Password to display the on-screen keyboard and enter a new password. When you have entered the
password, tap Done, then tap Save.
102
Wi-Fi® Setup
Connecting to the Internet from behind a Captive Portal
Public hotspots often set up their Wi-Fi networks so that the first time someone connects a laptop or other device and
tries to browse the Internet, their browser gets redirected to a web page where you have to login, and/or agree to their
terms and conditions. This type of configuration is referred to as a captive portal. To use the Wi-Fi connection, you
must provide some credentials, and/or agree to acceptable terms of use, before you are permitted to access the
network. Captive portals are common in places like airports, hotels, coffee shops, shopping malls, or other common
areas where Wi-Fi is provided. Some other examples are sites like Bongo, AT&T, and T-Mobile hotspots.
A sample captive portal web page login is shown below. You may need to scroll down using your finger to view the
captive portal web page in its entirety.
Note: Your captive portal web page will look different, and may request different information than the one shown
here.
If Lynx detects a captive portal as you attempt to connect to a Wi-Fi network, you will be alerted that a captive portal
has been found. You’ll have the opportunity to select to not see the alert again and proceed.
Next you will be taken to the captive portal web page to enter whatever information is required to access the Wi-Fi
network. This information may be as simple as agreeing to the terms and conditions of the service provider, or entering
a username and password, or entering a credit card to pay for Wi-Fi access to the Internet. You can use the multi-touch
display capabilities of Lynx to help navigate the captive portal web page, if necessary.
To enter the requested information on the captive portal web page, tap the area where you wish to enter information
(such as Username in the example). Lynx will display an on-screen keyboard so you can enter the information
requested.
103
Wi-Fi® Setup
Once you have entered the information, and need to move to the next area to enter any additional information
requested (such as Password in the example), tap the next key on the bottom row of the on-screen keyboard to
advance to the next area, or tap Back
on Lynx to dismiss the on-screen keyboard.
If you dismissed the on-screen keyboard, you can use your finger to scroll to the next area where you need to enter
additional information. Tap the area to display the on-screen keyboard again.
Enter the requested information, and tap the next
key, or tap Back
again to dismiss the on-screen keyboard.
Repeat this process until all the requested information has been entered. When complete, either tap Go on the onscreen keyboard, or tap the appropriate button on the captive portal web page to submit the information (Sign In on
the sample captive portal web page).
If the information you entered was correct and accurate, tap the X in the upper right corner of the display to dismiss the
captive portal web page. Lynx will connect to SiriusXM Internet Radio.
104
Settings
Settings
Settings
are where you view, configure, manage, and adjust the behavior of Lynx.
Each of the menu items in Settings
are explained in the sections which follow.
My Account
My Account provides the Radio ID of Lynx, and the status of Satellite and Internet Radio.
Menu Item
Description
Radio ID
This is the unique Radio ID of your Lynx, and is used when subscribing Lynx to
SiriusXM Satellite and Internet Radio.
Account Status
Indicates whether your Lynx is subscribed to SiriusXM Satellite Radio service.
Login Status
Indicates whether Lynx is connected to SiriusXM Internet Radio, and the last date it
was connected.
Logout
Tap to disconnect (logout) Lynx from Internet Radio. Lynx will remember your
username and password, so you will not have to enter them again the next time you
want to listen to Internet Radio.
105
Settings
Wi-Fi & Bluetooth
Wi-Fi & Bluetooth is where you configure and manage Wi-Fi and Bluetooth connections, and airplane mode.
Menu Item
Airplane mode On/Off
Wi-Fi On/Off
Description
Tap to turn Airplane mode on or off. Airplane mode disables all wireless
connections.
Tap to turn Wi-Fi on or off. Connect to a wireless network with Internet access to
listen to SiriusXM Internet Radio.
Tap here to learn more about connecting to Wi-Fi networks and hotspots.
Wi-Fi Settings
Bluetooth On/Off
Tap to manage Wi-Fi connections.
Tap here to learn more about connecting to Wi-Fi networks and hotspots.
Tap to turn Bluetooth on or off. With Bluetooth, you can connect to Bluetooth
devices such as headphones and earbuds, speakers, and the LH1 Home Dock.
Tap here to learn more about connecting to Bluetooth devices.
Bluetooth Settings
106
Tap to manage your Bluetooth connections.
Tap here to learn more about connecting to Bluetooth devices.
Settings
My Content
My Content is where you configure several of the features of Lynx.
Menu Item
Description
When a favorite music channel is tuned, Tune Start starts the song that is
currently playing on the channel from the beginning.
Tune Start On/Off
Tap to toggle Tune Start on or off.
Tap here to learn more about Tune Start.
Radio Replays On/Off
Radio Replays are blocks of SiriusXM content that Lynx has recorded and
saved for you from your favorite channels, while you were listening to
Satellite Radio. Radio Replays are saved only while listening to Satellite Radio,
and only from the current page of favorite channels displayed on the Now
Playing screen.
Note: When you turn off Radio Replays, all Radio Replay content is deleted.
Tap to toggle Radio Replays on or off.
Tap here to learn more about Radio Replays.
Featured Favorites On/Off
Featured Favorites are groups of channels that are created by the SiriusXM
Programming Department, which are saved (and refreshed) to your Lynx
while listening to SiriusXM Satellite Radio.
Tap to toggle Featured Favorites on or off.
Tap here to learn more about Featured Favorites.
107
Settings
Menu Item
Description
Show Alerts are alerts that you have set for shows, to be notified when a
show begins.
Show Alert On/Off
Tap to globally turn all notifications on or off. Turning Show Alerts off does
not delete the Show Alerts that have been set; it only turns the notification
off.
Tap here to learn more about setting Show Alerts.
Game Alert is where you can select and edit your favorite sports teams, to be
notified when they begin playing in a live sports event. Game alerts are only
available when listening to SiriusXM Satellite Radio.
Game Alert
Tap to turn Game Alert on or off, and to select and edit your favorite sports
teams.
Tap here to learn more about setting a Game Alert.
When configured for Traffic & Weather
, Lynx will tune to a channel with
traffic & weather reports for a city nearest you. (Satellite Radio only.)
Traffic & Weather is found only on the Satellite Radio Now Playing screen.
Traffic & Weather
channel jump
When configured for Jump
, Lynx will return to the channel to which you
were previously listening. (Satellite and Internet Radio.)
Tap to configure for either Traffic & Weather, or for Jump. For Traffic and
Weather, select a city that is nearest to your location.
Tap here to learn more about Traffic & Weather and Jump.
Parental controls allow you to lock access to all mature content channels,
designated as “xL” channels, with a lock code. Channels are displayed in lists
as locked, and can be tuned by entering the lock code.
Parental controls
Lock Mature Content Channels: Turn on the lock for mature channels, and
set a lock code.
Manage Password: Change the lock code you had previously set.
Locked Channels List: View a list of all the mature content channels.
Tap here to learn more about Parental Controls.
Hidden channels
Hidden channels are channels that do not display in Spectrum or in channels
lists. You can hide channels which do not interest you, and channels to which
you have not subscribed. Hidden channels can still be tuned by using Direct
Channel Tune and entering the channel number.
Tap to select channels to hide.
Tap here to learn more about Hidden Channels.
Game Alert
Game alerts notify you when your favorite sports teams begin playing in a live sports event. When you receive a game
alert, tap the alert to tune to the game. You can select up to 100 teams for game alerts.
To set (or edit) game alerts:
108
Settings
1. Tap Home
, tap
, tap Settings
, tap My content, and tap Game Alert.
2. If there is no check mark in the Game Alerts check box, tap Game Alerts.
3. Tap a sports league from the list under Leagues.
4. From the list of teams, tap the team names to select (or de-select) teams for game alerts. A check mark in the
check box indicates the team is selected. If you are interested in getting alerts for all the teams in a given
league, you can check Select All. When you select this option, the individual team list check boxes will
become inactive so you cannot make individual team selections. Lynx will remember any checked teams if
you turn off the Select All option.
5. Tap Back
to return to the previous screen if you want to continue to select teams from other leagues.
Parental Controls
Parental controls allow you to lock access to all mature content channels with a lock code. Mature content channels are
designated with an “xL” in the channel logo.
Locked channels are displayed in channel lists as locked, and do not show the channel name or show content. Locked
channels can be tuned by entering the lock code.
109
Settings
The following sections will show how to lock and unlock mature channels, and how to change the lock code.
To lock all mature content channels:
1. Tap Home
, tap
, tap Settings
, tap My content, and tap Parental controls.
2. Tap Lock mature content channels. You will be prompted to create a 4-digit numerical lock code.
110
Settings
3. Tap the numerical keypad to enter the 4-digit lock code of your choice and tap Done.
4. The lock code you entered will be verified. Tap OK.
All mature content channels are now locked, and will require the lock code to be entered in order to tune the channel.
To unlock all mature content channels:
1. Tap Home
, tap
, tap Settings
, tap My content, and tap Parental controls.
2. Tap Lock mature content channels. You will be prompted to enter your lock code.
3. Enter your lock code and tap Done.
All mature content channels are now unlocked, and your lock code has been deleted.
111
Settings
To change your lock code:
1. Tap Home
, tap
, tap Settings
, tap My content, and tap Parental controls.
2. Tap Manage password. You will be prompted to enter your current lock code.
3. Enter your current lock code and tap Done. You will be prompted to enter a new lock code.
4. Enter the new lock code and tap Done.
5. The lock code you entered will be verified. Tap OK.
The lock code is now changed.
Note: If you forget your 12lock code, you must use the Reset & erase > Reset all settings option in the Settings
menu to erase the lock code. Doing so will reset all settings back to the default settings, including erasing your
favorite channels, show and game alerts, Radio Replay content, and any other adjustments you have made to Lynx.
112
Settings
Hidden Channels
Hidden channels are channels that do not display in Spectrum or in channels lists. You can hide channels which do not
interest you, and hide channels to which you have not subscribed. Hidden channels can still be tuned by using Direct
Channel Tune and entering the channel number.
To hide (or un-hide) channels:
1. Tap Home
, tap
, tap Settings
, tap My content, and tap Hidden channels.
2. If you wish to hide the channels to which you are not subscribed, tap Hide unsubscribed channels.
3. All other channels are listed by category. To hide (or un-hide) all channels in a category, tap the category
name. To hide specific channels, tap the channel name. A check mark in the check box indicates the channel
will be hidden.
TIP: Use Select All and the category check box to quickly select and deselect hidden channels. As you
select channels to hide, the check box will have a dash in it, indicating that some, but not all, channels
have been selected.
Tap the dash in the category check box to deselect all channels in the category, or tap Select All to
deselect all hidden channels.
4. Tap Back
to exit.
113
Settings
Display, Audio & Power
Display, audio & power is where you configure settings that are specific to Lynx, when Lynx is handheld, or in a Home
Dock or Vehicle Dock, or in a Portable Speaker Dock. These settings are only available for configuration when you dock
Lynx in a specific dock, and will not be displayed in the menu until you have placed Lynx in the dock for the first time.
Menu Item
Description
Show Channel Background
Graphics
Tap to toggle background graphics displayed on the Satellite Radio Now
Playing screen on or off. Note: Channel background images are dynamically
updated over the Satellite Radio network, so the images may change without
notice.
Handheld is when Lynx is not in any dock. You can adjust:
Handheld
Brightness: Set the brightness level of the display screen by
tapping+holding+dragging the brightness slider, or tap Automatic
brightness to have Lynx adjust the brightness according to the ambient
light.
Display timeout & lock: Select the amount of time that the display screen
remains on, after the last time it was touched. Scroll the list and tap to select
Never, 30 seconds (default), or 1, 2, 3, 4, or 5 minutes. A shorter time will
extend the battery time.
114
Settings
Menu Item
Description
Vehicle Dock is when Lynx is in the LV1 Vehicle Dock. You can adjust:
Power Connect FM transmitter On/Off: Tap to toggle the FM transmitter on
or off.
Power Connect FM transmitter settings: Tap to select an FM channel, and
set FM presets.
Note: If there is a connection to the Audio connector of the Vehicle
Dock, PowerConnect is automatically disabled.
Brightness: Tap to adjust the brightness level of the display screen or the
Vehicle Dock LED. If you wish to manually adjust the brightness, tap the
checkbox next to Automatic brightness.
Vehicle Dock
Tap+hold+drag the brightness slider for the display screen to manually
adjust the brightness, or tap Automatic brightness to have Lynx adjust the
brightness according to the ambient light.
Tap+hold+drag the brightness slider for the dock to manually adjust the
brightness of the Vehicle Dock LED,
Audio level: Tap to adjust the audio level (also known as line level).
Tap+hold+drag the slider to match the audio output level of the vehicle
radio. Tap Cassette Adapter if your audio connection option is a cassette
adapter.
Auto off: Tap to adjust the amount of time before Lynx turns itself off. This is
useful if your vehicle does not have a power adapter that turns off when the
vehicle is turned off. Tap Never (default), 30 minutes, 1, 2, or 3 hours. If
Auto Off is on, and you touch any of the controls or display screen, the Auto
Off countdown will begin over again.
Bluetooth Home Dock is when Lynx is in the LH1 Home Dock. You can
adjust:Brightness: Tap to adjust the brightness level of the display screen or
the Home Dock LED. If you wish to manually adjust the brightness, tap the
checkbox next to Automatic brightness.
Tap+hold+drag the brightness slider for the display screen to manually
adjust the brightness, or tap Automatic brightness to have Lynx adjust the
brightness according to the ambient light.
Tap+hold+drag the brightness slider for the dock to manually adjust the
brightness of the Home Dock LED
Bluetooth Home Dock
Display timeout: Tap to adjust the amount of time that the display screen
remains on, after the last time it was touched. Tap Never (default), 30
seconds, or 1, 2, 3, 4, or 5 minutes.
Audio level: Tap to adjust the audio level (also known as line level).
Tap+hold+drag the slider to match the audio output level of other devices
which might be attached to your home stereo system. You can also use the
Volume Control
to adjust the Audio level.
Auto off: Tap to adjust the amount of time before Lynx turns itself off. This is
useful if you are listening to Lynx as you fall asleep. Tap Never (default), 30
minutes, or 1, 2, or 3 hours. If Auto Off is on, and you touch any of the
controls or the display screen, the Auto Off countdown will begin over again.
115
Settings
Menu Item
Description
Portable Speaker Dock is when Lynx is in the SXABB2 Portable Speaker Dock.
You can adjust:
Portable Speaker Dock
Brightness: Set the brightness level of the display screen by
tapping+holding+dragging the brightness slider, or tap Automatic
brightness (default) to have Lynx adjust the brightness according to the
ambient light.
Display timeout: Tap to adjust the amount of time that the display screen
remains on, after the last time it was touched. Tap Never (default), 30
seconds, or 1, 2, 3, 4, or 5 minutes.
System Sounds
System Sounds is where you manage the sounds and touch screen feedback of Lynx, and adjust the volume of the
sounds.
Menu Item
116
Description
System alert sounds On/Off
This option plays a sound when an alert notification is displayed. Tap to
toggle on or off.
System alert sound level
This option adjusts the volume level for audible alert notifications.
Tap+hold+drag the volume slider to adjust. Tap OK to set level.
Audible touch tone On/Off
This option plays a tone as you tap items on the display screen. Tap to
toggle on or off.
Screen lock sounds On/Off
This option plays a sound when the display screen is being locked or
unlocked. Tap to toggle on or off.
Touch feedback On/Off
This option vibrates Lynx when you tap items on the display screen, or
touch other controls. Tap to toggle on or off.
Settings
Time
Time is where you set your local time zone, and select a 12 or 24 hour clock format.
Menu Item
Description
Current time
Displays the current time. The time is sent with the SiriusXM signal and is
not adjustable.
Current date
Displays the current date. The date is sent with the SiriusXM signal and is
not adjustable.
Select time zone
Tap to select your time zone so the clock displays the correct time. Scroll
through the list of time zones and tap your local time zone. This setting is
important for making sure the Show & On Demand times match your time
zone.
Use 24-hour format
Tap to toggle between a 12-hour or 24-hour clock. The current format is
shown, 1:00 for 12-hour clock, or 13:00 for 24-hour clock.
117
Settings
About Lynx
About Lynx displays information about Lynx, such as the Radio ID, system update status, satellite and terrestrial signal
strength, Wi-Fi connection status, battery usage, memory usage, MAC and IP addresses, and legal information. There is
also an option to format a microSD card.
Menu Item
Radio ID
System update
Description
Displays the unique 8-character ID of your Lynx Radio. It is used when
subscribing to SiriusXM Satellite and Internet Radio.
Tap to manually check if a system update is available for Lynx. Lynx needs
to be connected to a Wi-Fi network with Internet access in order to check
for, and receive, updates.
SiriusXM may send updates periodically, and Lynx will automatically alert
you when an update is available.
Connection status
Tap to display the satellite and terrestrial signal strength. This is useful
when installing a satellite antenna, or troubleshooting satellite signal
reception problems.
Connection status also displays the Wi-Fi connection status, and shows the
name of the Wi-Fi network to which Lynx is connected.
Battery
Memory
Tap to display the status of the battery. Shows the percentage of charge,
and whether the battery is currently charging.
Battery also displays the percentage of battery usage by the elements of
Lynx: by the Lynx system, by the display screen, by Bluetooth, and by Wi-Fi.
Tap to display information about memory usage, both for Lynx and for the
microSD card, if installed. Also shows the total time of all Radio Replays.
There is also an option to format a microSD card.
118
Settings
Menu Item
Description
Tap to display information about Lynx such as model, Radio ID, Application
version, Baseband firmware version, OS version, Kernel version, and Device
ID.
Device information
Device information also shows the MAC address of Lynx, and the IP address,
if connected to a Wi-Fi network.
If Lynx is in a dock, the version number of the dock is also shown.
If Lynx is in a Home Dock, there is also the option to rename the Home
Dock. Refer to the User Guide for the LH1 Home Kit for instructions about
how to rename the Home Dock.
Legal information
Tap to display important legal information about Lynx, SiriusXM
subscriptions, copyrights, trademarks, and warnings.
Reset & Erase
Reset and Erase sets Lynx back to the factory settings, which resets all configuration changes and adjustments you
have made. Reset and erase also has an option to delete all Radio Replays.
Menu Item
Reset all settings
Description
Note: All configuration changes and adjustments you have made will be reset,
and all favorite channels, show and game alerts, and Radio Replays will be
deleted. Use with caution.
Tap to reset Lynx to the default settings. You will be prompted to confirm that you are
certain that you want to reset all settings.
Delete all content
Tap to erase all downloaded show episodes, channel and show recordings, and Radio
Replays from Lynx. (Does not erase personal content on the optional microSD
memory card.)
119
Settings
Application Tour
Application Tour is an interactive tour of Lynx to help you learn about the features and functions of Lynx. Tap a topic
from the list to begin the tour.
Demo Mode
Demo Mode is a non-interactive tour of Lynx. Tap Home
to exit Demo Mode.
User Guide & FAQs
User Guide & FAQs allows you to view the Lynx User Guide, the LH1 Home Kit User Guide, the LV1 Vehicle Kit User
Guide, and a list of Frequently Asked Questions (FAQs). These User Guides are updated automatically when changes
occur to them.
120
Subscription/Activation
Subscription/Activation
Lynx allows you to connect to SiriusXM Satellite Radio, SiriusXM Internet Radio, or both. Connecting to both services
provides you with the complete experience, giving you access to all of the features Lynx has to offer. Whether you’re in
your home, in your vehicle*, out walking or jogging, or within range of a Wi-Fi network, you’ll always have a variety
SiriusXM content available. (* To listen to Satellite Radio in your vehicle you will need to purchase the LV1 Vehicle Kit.)
SiriusXM Internet Radio provides the ability to listen to SiriusXM using a Wi-Fi connection in your home, office, or
anywhere there is a hotspot. When you activate your SiriusXM Internet Radio subscription you will create the
credentials (username and password) that allow Lynx to connect and receive service. You can also use your credentials
to enjoy SiriusXM Internet Radio on your computer or other compatible device.
SiriusXM Satellite Radio adds additional exciting features such as Radio Replays, which saves and stores music
from your favorite channels so you can listen to them anywhere, anytime. Another great feature is Tune Mix which will
play songs from your favorite music channels in a shuffle type format. For the sports fan, set Game Alerts for your
favorite sports teams to be alerted when they begin playing a game. Easily tune to the game with a tap. If you’re
listening in your vehicle*, you’ll have live Satellite Radio anywhere you drive in the SiriusXM coverage area, and get upto-date traffic and weather with a tap of the Traffic/Weather icon.
Remember, you can subscribe to both services at the same time. US residents call 1-866-635-2349, and Canadian
residents call 1-877-438-9677, to subscribe.
Subscription/Activation Activate your SiriusXM Satellite Radio Subscription
If Lynx is in a LV1 Vehicle Dock or LH1 Home Dock with the Indoor/Outdoor Home Antenna connected, you will be
prompted to subscribe to Satellite Radio. Be sure that you have installed the dock according to the instructions included
with the Kit, and that you are at the Activation screen. If you’re using a Vehicle Dock, keep your vehicle parked where it
has a clear view of the sky throughout the activation process.
Follow the instructions on the screen to subscribe.
1. If Lynx is off, turn it on by pressing and holding the Power button
for 3 seconds.
2. If you are prompted to set the time zone, set Lynx to your time zone and tap Continue.
3. If prompted to take the tour tap No thanks.
4. To subscribe to SiriusXM Satellite Radio, you will need the Radio ID which can be found:
•
on the Activation screen
•
by tuning to channel 0
•
on a label on the bottom of the gift box
•
on the label inside the rear cover of Lynx
Note: The Radio ID does not use the letters I, O, S, or F.
5. Lynx should be displaying the Activation screen.
121
Subscription/Activation
6. To subscribe:
•
By phone: US residents call 1-866-635-2349, Canadian residents call 1-877-438-9677
•
Online: US residents go to www.siriusxm.com/activatenow, Canadian residents go to
www.xmradio.ca/activate
7. Activation usually takes 10 to 15 minutes after you have completed the subscription process, but may take up
to an hour. We recommend that Lynx remain on and in the dock until subscribed. Lynx will display a
Subscription Updated message when it receives the activation signal. Once subscribed, you’ll be able to tune
to the channels in your subscription plan.
Hardware and subscription sold separately. Service will automatically renew for additional periods of the same
length as the plan you choose, on the subscription package you choose (which may differ from the package
which arrived with the radio) until you call us at 1-866-635-2349 to cancel. See our Customer Agreement for
complete terms at www.siriusxm.com. Fees and taxes apply. All fees and programming are subject to change. For
residents in Canada, see our Customer Agreement for complete terms at www.siriusxm.ca.
Activate your SiriusXM Internet Radio Subscription
In order to subscribe (or connect to SiriusXM Internet Radio if you already are subscribed), you will need to connect to a
Wi-Fi Internet connection, so be sure you are in a location where a Wi-Fi connection is available. If the Wi-Fi network is
secured, you will need to know the password. Lynx should not be in a Vehicle Dock or a Home Dock during the
activation.
1. If Lynx is off, turn it on by pressing and holding the Power button
for 3 seconds.
2. If you are prompted to set the time zone, set Lynx to your time zone and tap Continue.
3. If prompted to take the tour tap No thanks.
4. If you are not at the Home screen, tap Home
122
.
Subscription/Activation
5. From the Home screen, tap Internet
Settings.
. You will be prompted that Wi-Fi is not connected. Tap View
6. From the Wi-Fi settings screen, tap Wi-Fi On/Off to turn on the Wi-Fi.
7. Lynx will scan for and detect any Wi-Fi networks within its range and display them under Wi-Fi networks. If no
Wi-Fi networks were detected, move to a location where there is a Wi-Fi network and tap Scan for networks.
Note: If your Wi-Fi network name (SSID) is hidden, refer to Manually Connecting to a Wi-Fi Network for
instructions on how to connect to the Wi-Fi network with a hidden name.
8. Find your Wi-Fi network name in the list and tap it. If the network is secured, you will be prompted to enter
the password. If you have entered a password, tap Done. Tap Connect and Lynx will connect to the Wi-Fi
network.
123
Subscription/Activation
9. Once you have connected to the Wi-Fi network, and the Wi-Fi network shows Connected to… under the Wi-Fi
network name, tap Back
and then tap Continue.
10. If you are already subscribed to SiriusXM Internet Radio, tap the area to the right of Username to display the
on-screen keyboard. Enter your username, and then tap Next and enter your password. Tap Done, and tap
Login & Listen Now. Skip ahead to step 11.
11. If you are not yet subscribed to SiriusXM Internet Radio, tap Subscribe Now and follow the instructions to
subscribe. To subscribe to SiriusXM Internet Radio, you will need the Radio ID which can be found:
• on the Activation screen
• by tuning to channel 0
• on a label on the bottom of the gift box
• on the label inside the rear cover of Lynx
Note: The Radio ID does not use the letters I, O, S, or F.
124
Subscription/Activation
12. To subscribe:
•
By phone: US residents call 1-866-635-2349, Canadian residents call 1-877-438-9677
•
Online: US residents go to www.siriusxm.com/activatenow, Canadian residents go to
www.xmradio.ca/activate
13. When you have subscribed and obtained your Internet Radio username and password, tap Continue. Tap the
area to the right of Username to display the on-screen keyboard. Enter your username, then tap Next and
enter your password. Tap Done and tap Login & Listen Now.
14. Lynx will check your credentials and connect to SiriusXM Internet Radio. If you entered them incorrectly, tap
Close to try again.
Hardware and subscription sold separately. Service will automatically renew for additional periods of the same
length as the plan you choose, on the subscription package you choose (which may differ from the package
which arrived with the radio) until you call us at 1-866-635-2349 to cancel. See our Customer Agreement for
complete terms at www.siriusxm.com. For residents in Canada, see our Customer Agreement for complete terms at
www.siriusxm.ca. Fees and taxes apply. All fees and programming are subject to change.
125
Accessories
Accessories
LH1 Home Kit
The LH1 Home Kit has everything you need to listen to your Lynx Radio through your home stereo or powered speakers.
Included with the Home Kit are:
•
•
•
•
•
Bluetooth Home Dock
Home Power Adapter
Stereo Audio Cable
Remote Control
Indoor/Outdoor Home Antenna (to receive Satellite Radio)
The Home Kit adds these additional features:
•
•
•
•
•
Listen to SiriusXM Satellite Radio and SiriusXM Internet Radio in your home or office.
Connect to a home audio system or powered speakers with easy, do-it-yourself set-up.
Stream SiriusXM audio from your Lynx Radio to the home dock from across the room with Bluetooth.
Change channels easily with the included Remote Control.
Charge your Lynx Radio while you listen at home or at the office.
LV1 Vehicle Kit
The LV1 Vehicle Kit has everything you need to listen to your Lynx Radio through your vehicles stereo. Included with the
Vehicle Kit are:
•
•
•
•
•
•
126
Lynx PowerConnect™ Vehicle Dock
Magnetic Mount Antenna
Dash and Vent Mounting Accessories
PowerConnect Power Adapter
AUX IN Cable
Remote Control
Accessories
The Vehicle Kit adds these additional features:
•
•
•
•
•
•
Listen to live Satellite Radio using your Lynx Radio directly through your vehicle’s stereo system.
Browse and quickly tune to channels with the Rotary Knob.
Connect your Lynx Radio to your vehicle’s radio with revolutionary SiriusXM PowerConnect technology, with
easy, do-it-yourself installation.
Change channels easily with the included Remote Control.
Connect to your car stereo using AUX IN, Bluetooth Stereo Streaming or PowerConnect FM Transmitter.
Charge your Lynx Radio while you listen in your vehicle.
BB2 Portable Speaker Dock
The BB2 Portable Speaker Dock has everything you need to listen to your Lynx Radio at a party, in your backyard,
poolside, or at the park. Included with the Portable Speaker Dock are:
•
•
•
Remote Control
Indoor/Outdoor Home Antenna (to receive Satellite Radio)
AC Power Adapter
The Portable Speaker Dock has these features:
•
•
•
•
•
•
•
Enjoy class-leading sound quality with a powerful 30 watt amplifier and 2-way speaker system.
The concealed handle makes it easy to carry.
The built-in antenna cradle with cable storage makes it easy to listen to Satellite Radio wherever you are.
Plug into an available AC outlet, or listen anywhere with battery power (8 C-cell batteries sold separately).
Change channels easily with the included Remote Control.
Listen privately using the headphone jack.
Connect and play MP3 players, CD players, or other audio devices via the AUX IN jack. (AUX IN cable sold
separately.
127
Troubleshooting
Troubleshooting
Advisory Messages
Message
Check Satellite Antenna
Explanation
The satellite antenna is not connected to the dock. Connect the
satellite antenna to the ANT connector on the dock.
Lynx is not receiving the satellite signal from the satellite antenna.
Verify that the antenna is correctly aimed at the satellites. Follow the
antenna aiming instructions in the Quick Start Guide which accompanied
the dock.
No Satellite Signal
Make sure that the antenna cable is firmly and securely plugged into the
dock, and that the antenna cable is not bent or broken.
Turn Lynx Off, then On, to reset this message.
If this message persists, the antenna cable may have been damaged.
Replace the antenna.
Satellite Radio not available
To listen to Satellite Radio, Lynx has to be in a powered dock, with a
properly installed Satellite Radio antenna connected and correctly aimed.
Tap here to learn more about accessories for Lynx.
Waiting for Satellite
initialization
Lynx is initializing and acquiring the Satellite Radio signal. Wait a moment
for initialization to complete, and Lynx will begin playing Satellite Radio.
Unsubscribed channel
You have attempted to tune to a channel which is not in your
subscription plan. Upgrade your subscription, or tune to a channel in
your subscription plan.
Are you still listening?
If there has been no interaction with Lynx for a period of time while
listening to Internet Radio, you will receive this message. Tap Yes to
continue listening.
Inactivity Time Out
Internet Radio has been disconnected due to inactivity. Tap Play
resume Internet Radio.
SXM Internet Radio
Interrupted
128
to
Internet Radio has been interrupted and can no longer play. Tap OK, and
press Play , or select a different channel to resume Internet Radio.
You may have been disconnected from the Wi-Fi network. Check your
Wi-Fi connection: Tap Home
, tap , tap Settings , tap Wi-Fi &
Bluetooth, and see if you are connected to a Wi-Fi network.
Checking User Credentials
Lynx is attempting to connect to Internet Radio. Wait a moment until the
login is complete, and Lynx will begin playing Internet Radio.
Waiting for Wi-Fi connection
Lynx is attempting to connect to the Wi-Fi network to which you had
previously connected. Wait for the connection to finish.
Troubleshooting
Message
Explanation
Lynx is not connected to a Wi-Fi network. There are several reasons you
may receive this message:
You have not yet connected to any Wi-Fi network. Tap View Settings to
connect to a Wi-Fi network.
Wi-Fi not connected
You are out of range of the Wi-Fi network to which you had previously
connected. Move closer and tap View Settings to connect.
The Wi-Fi network to which Lynx was attempting to connect took
unusually long to respond. Lynx will continue to attempt to connect. Tap
View Settings to view the status of the Wi-Fi network connection.
Game Alert memory full
Show Alert memory full
You have attempted to add more than 100 Show Alerts or Game Alerts.
Game and Show alerts are limited to 100 each. Delete some old alerts
before attempting to add new ones.
Initializing Show & On Demand
Show & On Demand is being prepared for viewing. Wait a moment for
initialization to complete.
Show & On Demand is Off-Line
You have selected to view the Show & On Demand guide for a listening
mode which is not currently connected (Satellite or Internet Radio).
Some of the information in the guide may not be up to date.
This channel is locked
You have enabled Parental Control for channels with mature content
(xL). Tap and enter your Lock Code to listen to the channel.
Please wait
Lynx is busy with a task. Wait a moment for Lynx to finish.
Power your home dock
Power is disconnected from the Home Dock. The Home Dock needs
power in order to play audio, and charge the battery. Connect the Home
Power Adapter to the Home Dock.
The microSD card is being formatted. Wait for the formatting to finish.
Preparing media
Pending Broadcast
System updates are available
Updating
The music on your microSD card is being cataloged. Wait for the
cataloging to finish.
You have selected to listen to traffic and weather, but the traffic/weather
for your selected city isn’t being broadcast at the moment. Lynx will
automatically tune the traffic and weather when the broadcast begins.
SiriusXM has a system update for Lynx. Tap OK to install the system
update, which will take several minutes, or tap Remind Later to install it
at another time.
When a system update is available, you can install it anytime by tapping
Home
, tap , tap Settings , tap About Lynx, tap System update,
and tap OK to install the update.
Lynx is applying a software update. Do not power Lynx off until the
updated has completed.
129
Troubleshooting
Problem Troubleshooting
Problem
Lynx will not turn on.
Solution
Is the battery installed in Lynx? Lynx will not turn on without the
battery installed. Install the battery.
The battery may be too discharged to power Lynx. Charge the battery,
then trying turning Lynx on.
I connected Lynx to my computer
to charge the battery, but it does
not charge.
Lynx will not charge from the computer if it is in any audio playing
mode. It’s recommended that Lynx be turned off, or not in any audio
playing mode, when charging from a computer.
I connected the USB Travel
Charger to Lynx, or I placed Lynx
in a dock, but the battery will not
charge.
The battery is either too hot or too cold to charge. Move Lynx to a
warmer/cooler place, or remove the battery from Lynx and move it to
a warmer or cooler place.
A gray icon indicates that the service is currently unavailable.
The Satellite and/or Internet
Radio icon on the Home screen is
gray, and I cannot select it.
Invalid Login (Internet Radio).
For Satellite Radio, Lynx must be in a dock, with the satellite antenna
connected.
For Internet Radio, Lynx must be connected to a Wi-Fi network. To
listen, Lynx must also be connected to the SiriusXM Internet Radio
service.
Your credentials were entered incorrectly. Verify they are correct and
try again. Your password is case sensitive, so be sure you have
entered it correctly.
Your subscription is no longer valid. Re-subscribe to the service.
Have you already activated your Lynx Satellite Radio subscription? If
not, refer to Activate your SiriusXM Satellite Radio Subscription.
I can only tune to channels 0 and
1 on Satellite Radio.
I don’t receive all the Satellite
Radio channels to which I
subscribed.
If you have already activated your Lynx Satellite Radio subscription,
your Lynx may not have received the activation signal. While Lynx is
on and playing Satellite Radio, go to http://www.siriusxm.com/refresh
and enter the Radio ID of your Lynx. (For Canadian residents, go to
http://refresh.xmradio.ca.) Once you have entered the Radio ID, the
subscription information will be sent to your Lynx within 5 minutes.
Lynx will display a Subscription Updated message when it receives
the activation signal.
You can find the Radio ID of your Lynx by tapping Home
tap Settings , and tap My Account.
Not all the channels on Internet
Radio are on Satellite Radio.
Not all the channels on Satellite
Radio are on Internet Radio.
130
, tap
,
The channel lineup differs slightly between Satellite Radio and
Internet Radio.
For the US go to www.siriusxm.com/channellineup to view the
channels available on SiriusXM Satellite Radio and SiriusXM Internet
Radio. For Canada go to www.xmradio.ca/onxm for the complete upto-date channel lineup.
Troubleshooting
Problem
Solution
, tap , tap Settings , tap
Is Bluetooth turned on? Tap Home
Wi-Fi & Bluetooth, and tap Bluetooth On/Off to turn it on.
Lynx does not show any of my
Bluetooth devices.
Lynx does not recognize my
Bluetooth device.
Is Airplane mode on? Tap Home
, tap , tap Settings , tap Wi-Fi
& Bluetooth, and tap Airplane mode On/Off to turn it off.
Is your Bluetooth device A2DP compatible? Lynx Bluetooth is
compatible with stereo audio streaming devices (A2DP Profile), but is
not compatible with the Hands Free Profile (HFP), which is typically
used for a Bluetooth connection to a cell phone.
You may have to set your device into pairing/discoverable mode for
Lynx to find it. Consult the instructions for your device and set it in
pairing/discoverable mode.
Lynx does not find my Wi-Fi
network.
Does the Wi-Fi network have a hidden name (SSID)? If so, You will
have to manually enter the information about the network to connect
to it.
Tap here to learn how to manually connect to a Wi-Fi network.
Are you too far away (out of range) from the Wi-Fi network? Try
moving closer to the wireless access point.
I entered the password for a
Wi-Fi network, but Lynx displays
“Obtaining IP address…” for a
long time, and eventually shows
“Disabled”.
I entered a static IP address for
Wi-Fi, but Lynx is unable to
connect to Internet Radio.
You have probably entered the wrong password for the Wi-Fi network.
Wi-Fi passwords are case sensitive, so be sure you have entered it
accurately.
To re-enter the password, tap+hold the Wi-Fi network name, and
select Modify network. Tap in the area below Password to display
the on-screen keyboard, and enter the password again.
Did you enter the correct IP information? If even one digit is incorrect
in any of the IP addresses, it may prevent Wi-Fi network
communication. Double check your IP addresses.
Do you have the correct IP address information?
Have you have entered the IP addresses into Lynx correctly?
I entered a static IP address for
my Wi-Fi network, but now Lynx
is unable to connect to any other
Wi-Fi networks.
I am having problems connecting
Lynx to my D-Link 600 series
wireless router.
The static IP address is specific to the Wi-Fi network for which it was
entered. You have to turn off the static IP address before you can
connect to a different Wi-Fi network.
To turn off the static IP address, tap Home
, tap , tap
Settings , tap Wi-Fi & Bluetooth, tap Wi-Fi settings, tap Advanced,
and tap Use static IP to remove the check mark from the check box.
Try disabling the Wireless Multimedia Extensions. Tap Home
,
tap , tap Settings , tap Wi-Fi & Bluetooth, tap Wi-Fi settings, tap
Advanced, and tap Disable Wireless Multimedia Extensions.
It is recommended that you keep the Wireless Multimedia Extensions
enabled if you are not experiencing a problem.
131
Troubleshooting
Problem
Tune Start does not work.
Solution
Have you turned off the Tune Start feature? Tap Home
, tap , tap
Settings , and tap My content, and tap Tune Start On/Off to turn
it on.
Tune Start is only available for music channels.
Start Now is grayed out when I
listen to Satellite Radio.
The Start Now feature is available only for Internet Radio.
Tune Scan does not work
The Tune Scan feature is only available for Satellite Radio. Tune Scan
requires that at least 2 music channels are stored as favorites on the
current Now Playing screen. It may take a few minutes to begin after
tapping Tune Scan as it needs time to buffer content from the favorite
channels.
Tune Mix does not work
The Tune Mix feature is only available for Satellite Radio. Tune Mix
requires that at least 2 music channels are stored as favorites on the
current Now Playing screen. It may take a few seconds to begin after
tapping Tune Mix, as it needs time to buffer some content from the
favorite channels. The initial song may not always start from the
beginning.
Tune Mix seems to cut off the
end of some songs
This is a normal as Tune Mix is attempting to mix songs from different
channels.
Some channels are missing from
the channel lists.
Did you hide channels? Hidden channels are not shown in any
channel lists. Tap here for more information about Hidden Channels.
Lynx is not saving any Radio
Replays.
Lynx does not save Radio Replays
from all my favorite channels.
Have you turned on the Radio Replays feature? Tap Home
, tap ,
tap Settings , tap My content, and tap Radio Replays On/Off to
turn it on.
Radio Replays are saved while listening to Satellite Radio.
Have you saved any favorite channels? Radio Replays are saved from
the favorite channels currently displayed on the Now Playing screen,
and also from one favorite channel designated to be the Preferred
Channel.
Some channels are ineligible for Radio Replays.
I never get any Featured
Favorites.
Have you turned off the Featured Favorites feature? Tap Home
,
tap , tap Settings , tap My content, and tap Featured Favorites
On/Off to turn it on.
Featured Favorites are received when listening to Satellite Radio.
132
Troubleshooting
Problem
Solution
Have you set any Show Alerts and/or Game Alerts?
Tap here for more information on setting Show Alerts.
Tap here for more information on setting Game Alerts.
I don’t receive any Show Alerts.
I don’t receive any Game Alerts.
Have you turned off the alert notification feature?
For Show Alerts, Tap Home
, tap , tap Settings
content, and tap Show Alert On/Off to turn it on.
, tap My
For Game Alerts, Tap Home
, tap , tap Settings , tap My
content, tap Game Alert, and tap Sports Alerts to turn it on.
The Lock Code cannot be recovered. It can only be removed by setting
Lynx back to the factory defaults.
I forgot my Lock Code.
Note: When you do a factory reset, all configuration changes and
adjustments you have made will be reset. All favorite channels, all
show and game alerts, and all Radio Replays will be deleted. Use
with caution.
Tap Home
, tap , tap Settings , tap Reset & erase, and tap
Reset all settings to reset Lynx to the factory defaults.
I copied my songs to the microSD
card but some songs do not show
in the list.
There is no Traffic & Weather
icon on the Now Playing screen.
I pressed rewind and now the
rewind icon is grayed out.
I was skipping forward through
songs and now the fast-forward
icon is grayed out.
I am in Pause and Replay, and the
list icon is grayed out.
Certain music file formats, and all music files with DRM, are not
compatible with Lynx.
Tap here for a list of compatible music file formats.
Traffic & Weather is available only for Satellite Radio.
For music channels on Internet Radio, and for Radio Replays from
music channels, you will be limited to one rewind and five song skips
per hour. Most other channels have no restrictions. Lynx will alert you
if you have reached a limit.
List is disabled for some content.
If your Lynx does not automatically turn on when the Vehicle Dock
has power applied, try the following:
My Lynx did not turn on
automatically when inserted into
a powered Vehicle Dock.
•
•
•
Press the Power button on Lynx for 3 seconds. Lynx should
turn on.
Remove and reinsert Lynx into the Vehicle Dock.
Check your vehicle power source for the correct voltage.
133
Troubleshooting
Problem
Solution
It is likely that you are attempting to connect to a captive portal that
will require you to enter additional credentials, or accept terms and
conditions, to access the Internet from that Wi-Fi access point. If you
are not able to connect to SiriusXM Internet Radio, try the following.
•
I can’t seem to connect to an
open Wi-Fi access point, such as
at my hotel or airport.
•
•
The Now Playing screen does not
seem to be updating the channel
and artist or song information,
but the audio continues to play
normally.
Power your Lynx off and then on. Check the SiriusXM Internet
Radio connection again.
Logout and logon to SiriusXM Internet Radio. Tap Home
,
tap , tap Settings , tap My Account, then tap Logout.
You will need to enter your user name and password when
you access SiriusXM internet Radio again.
Consult the section, Connecting to the Internet from behind a
Captive Portal.
Try one of the following:
•
•
Switch to another listening mode such as Satellite Radio,
Internet Radio, Radio Replays, etc., and then switch back to
the original mode.
Power cycle your Lynx by turning it off and then on again.
If your Lynx does not stay connected to your Wi-Fi access point, check
the following:
My Lynx does not stay connected
to my Wi-Fi access point
Radio ID is not displayed on
Channel 0
134
•
Make sure you are in range of your Wi-Fi network. Check the
Wi-Fi signal strength on the status bar of Lynx, and make sure
you see at least 1-2 bars. You can also check the signal
strength by tapping on the Wi-Fi network name in the
Settings
menu.
The Radio ID should always be displayed on Channel 0. If for some
reason the ID is not displayed, or has incorrect information, try the
following:
•
•
Tune to another channel, then back to channel 0.
Tap Home
, tap , tap Settings , tap My Account. The
Radio ID will be displayed.
My Lynx thinks it is in a different
type of dock than it is
Your Lynx is designed to know the difference between the various
accessory docks. If for some reason Lynx does not correctly recognize
the dock, or thinks it is a different type of dock, simply remove Lynx
from the dock and reinsert it again.
Bluetooth is not working
Power cycle your Lynx by turning it off and then on again.
Troubleshooting
Problem
My Lynx is on, but does not
respond to any touchscreen
controls
Solution
Power off Lynx by pressing and holding the power button for 3
seconds. If it does not respond, remove the battery for 10 seconds
and reinstall. Lynx should power on automatically when the battery is
reinstalled.
135
Important Legal Information
Important Legal Information
Hardware and subscription sold separately. Activation fee, other fees, and taxes required. Service will automatically
renew for additional periods of the same length as the plan you choose, on the subscription package you
choose (which may differ from the package which arrived with the radio), and you will automatically be
charged at the rates then in effect at each renewal, until you call us at 1-866- 635-2349 to cancel. See our
Customer Agreement for complete terms at www.siriusxm.com. For residents in Canada, see our Customer
Agreement for complete terms at www.siriusxm.ca. All fees and programming are subject to change. Our satellite
service is available only to those at least 18 and older in the 48 contiguous USA and DC. Our Sirius satellite service is
also available in PR (with coverage limitations). Our Internet radio service is available throughout our satellite service
area and in AK and HI. Certain channels are not available on our Internet radio service, including MLB® play-by-play.
This product contains chemicals known to the State of California to cause cancer and birth defects or other reproductive
harm.
©2013 Sirius XM Radio Inc. Sirius, XM and all related marks and logos are trademarks of Sirius XM Radio Inc. The
microSD and microSDHC logos are a trademark of SD-3C, LLC. The Bluetooth® word mark and logos are registered
trademarks owned by Bluetooth SIG, Inc. and any use of such marks by Sirius XM Radio Inc is under license.
TouchSense® Technology Licensed from Immersion Corporation. Immersion TouchSense 2000 and haptic effect
libraries may be covered under one or more of the following United States Patents: 6147674, 7039866, 6169540,
6697086, 7027032, 6300936, 7168042, 6285351, 6131097, 6374255, 7191191, 6424356, 6750877, 7091948, and
7280095. Additional patents pending. The AMBE® voice compression software included in this product is protected by
intellectual property rights including patent rights, copyrights, and trade secrets of Digital Voice Systems, Inc. The Wi-Fi
CERTIFIED Logo is a certification mark of the Wi-Fi Alliance. “Wi-Fi” is a trademark of the Wi-Fi Alliance. Major League
Baseball trademarks and copyrights are used with permission of Major League Baseball Properties, Inc. Visit the official
website at MLB.com. Visit www.siriusxm.com/channellineup for updates. All other marks and logos are the property of
their respective owners. All rights reserved.
136