1
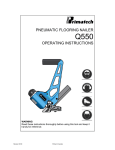
performance of the tool. Pay special attention to any air leaks. Do not use a compressed air pressure higher than 110 psi (7.6 bar). Higher pressure can cause premature wear or damage to certain components. After assembly, check all the connections to prevent the leaks and to have maximum efficiency. TO PREVENT ACCIDENTAL DAMAGE TO THE FINISHED SURFACE OF THE INSTALLED FLOOR, REST THE TOOL ONTO THE SUBFLOORING WHEN CONNECTING AIR, LOADING TOOL WITH NAILS OR PERFORMING ANY MAINTENANCE TO THE TOOL. LOADING THE TOOL Insert a row of PRIMATECH's cleats inside the feeder channel and pull back on the plastic tab gently until it engages behind the cleats. To release, simply squeeze the tab with your thumb and index and allow the spring to recoil slowly. The clip must be released slowly to prevent damage. The Q550 uses standard Ltype 18GA cleats available in lengths of 1¾" (45 mm), 1½" (38 mm) and 1¼" (32 mm). Make sure that the proper type of cleats is used. Primatech's 18GA cleats are packaged into green color-coded boxes. For MAXIMUM PERFORMANCE, always use PRIMATECH cleats. USE ONLY THE TYPE OF CLEATS IDENTIFIED ON THE FEEDER CHANNEL. THE USE OF ANY OTHER TYPE OF CLEATS WILL DAMAGE THE TOOL. OPERATION Unload tool and rest it onto the subflooring, Connect the hose and cycle tool once or twice without nails. After loading the tool with PRIMATECH cleats, the PNEUMATIC NAILER model Q550 is ready for use. Only use the 2.5 lbs (1.1 kg) hammer supplied with the tool. The use of other type of hammers may affect performance. The rubber face of the hammer can be used with care to help position the boards. With the flooring firmly in place, position the tool onto the flooring, with the resting block Q-034 against the tongue. Apply downward pressure to ensure proper seating of the cleat. Strike the head cap Q-001 with the hammer to activate the tool, Use only the RUBBER FACE of the hammer to activate the tool. Using the steel end will damage the tool and void the warranty. If wood is slightly twisted, hitting the tool with more force will assist in pulling the board up snugly. NEVER strike the head cap when the tool is not sitting on the working surface. OPERATING THE TOOL WHEN THE SAFETY CONTACT IS NOT FULLY DEPRESSED WILL CAUSE PREMATURE WEAR OR DAMAGE TO THE DRIVING BLADE, PISTON AND CYLINDER. Eye protection is recommended and should be worn by the operator and other in working area. Accidental ejection of nails or wood debris could cause severe eye injury. In some environments, ear protection might be required, as working condition may include exposure to high noise levels which lead to hearing damage. Wearing safety boots and safety hat is also highly recommended. NOTE: All the personal protection equipments must meet national standards. Be it raw, factory finished or engineered, hardwood is a natural material subject to various factors, such as humidity, subflooring, installation procedure, type of tools, fasteners, etc. Installer should always ensure optimal surface pr epar ation, c om ply with all m anufactur er 's recommendations and conduct a pre-installation test prior beginning any installation. BEFORE STARTING AN INSTALLATION, FASTEN DOWN FEW BOARDS TO ASCERTAIN THAT YOU ARE USING THE RIGHT FASTENER AND THAT THE TOOL IS PROPERLY ADJUSTED. ADJUSTING FOR HARDWOOD THICKNESS The Q550 pneumatic nailer is fitted with a fully adjustable plastic base Q-033, designed to prevent contact with the top edge of the flooring. Since there is no standard among manufacturers about the dimensions of the tongue, it is important to adjust the nailer to fit the flooring prior any installation. The Q550 also features a resting block Q-034 which prevent damage to the top edge of the flooring by positioning the tool against the tongue, preventing the gate/foot assembly from contacting the board. Step 1: adjusting the base for flooring thickness: Using the supplied Allen wrench, loosen but do not remove screws (A); one on each side of the tool. With the tool in an upside down position, place a short piece of flooring against the gate/foot assembly (Q-029/Q-032). Engage the Allen wrench in knob (B) as shown; rotate to move the base up or down. Note that knob (B) has a rotation range of only about 1/2 turn. Do not apply force when a limit is reached. Adjust the height of the plastic base to obtain a small gap between the gate/foot assembly and the top side of the tongue of the sample board. A gap of 1/32", about half the thickness of the nail, should be adequate for most situations. Tighten both screws (A).