1
Complete Solutions in Emergency Lighting STANILITE
Complete Solutions in Emergency Lighting Doc No: 29-00134
CONSTRUCTION SITES
Continuously switching on and off of the mains power supply that is connected to emergency light fittings, during the installation process
(due to building works or for some other reason), could cause affected emergency light fittings to discharge and charge their batteries
many times over a short period; this may shorten the life of the battery and may result in voiding of the battery warranty. Thomas & Betts
does not recommend such practices and may not honour the warranty on batteries when they are subjected to such harsh operating
conditions. Emergency light fittings are designed to be regularly discharge tested once every 6 months as per AS/NZS2293.2, deliberate
repeated discharge testing over short periods of time is regarded as an abuse of the fittings.
Thomas & Betts Australasia. ABN 062 074 810 898
Head Office: Unit D3, 3-29 Birnie Avenue, Lidcombe NSW 2141, Australia
Manufacturing: 23a Nyrang Street, Lidcombe NSW 2141, Australia
Telephone: (+61) 1300 666 595 Facsimile: (+61) 1300 666 594 Website: www.tnbaust.com
Emergency Light LED Flash Patterns for Nexus Fittings
LED Pattern Description
State
LX: Yellow flashing
Wink mode cable tracing is on. Valid messages are being received by the unit.
LX: Yellow static
Wink mode cable tracing has been turned off.
LX/RF: Red static
Unit has been commissioned, battery is charging, lamp filament is intact.
LX/RF: Red flashing
Unit is under test.
LX: Green / Off flashing
Unit uncommissioned, otherwise normal (Unit PID is not nefw003b).
LX: Red / Yellow flashing
Unit uncommissioned, otherwise normal (Unit PID is nefw003b).
LX/RF: Green on steady
Okay when button pressed or unit faulty when button is not pressed.
LX/RF: Off
Fitting is not powered or battery is not charging.
RF: Green very slow flash
Unconfigured.
RF: Yellow flash - 1 long 6 short
Configured and in flash yellow mode for identification.
RF: Green flash with 2 red blinks
Configured and hardware okay but unit uncommissioned and no RF network connection.
RF: Green flash with 3 red blinks
Configured and hardware okay and RF network connection okay but unit uncommissioned.
RF: Green flash with 4 red blinks
Configured, commissioned and hardware okay but no RF network connection.
LED Flood Light
Installation Manual
FL210LED, FLNXS210LED, FLNRF210LED
Fault
Possible Causes
1
Red LED not lit
AC supply not connected; or
AC supply turned off; or
Test switch damaged
2
Red LED is lit but lamp doesn’t come on when test switch
is pressed
Lamp damaged; or
Lamp not connected properly; or
Battery pack damaged; or
Test switch damaged
Lamp is lit momentarily when test switch is pressed; or
When mains fail
Battery not fully charged; or
Battery pack damaged
Electrical Safety Warning
Flood Unit
Installation Instructions
LED Lamps (2)
Removal Instructions
Accessory Kit
Testing Precautions
Installation Manual
Trouble Shooting Guide
Warranty Information
SAFETY WARNING
In Australia and New Zealand, only licensed electricians are permitted by law to work with 240 Volt electrical installations.
Do not attempt to install or connect this product unless you are a licensed electrician.
Turn off and isolate the electrical supply before connecting this fitting to the building wires.
Do not touch the terminals of the terminal block when the light fitting is energised.
The only user-serviceable parts are fluorescent or halogen lamp/s. LED light sources are not user-servicable
Do not tamper with the fitting or the warranty will be void.
As the installer, it is your responsibility to ensure compliance with all relevant building and safety codes, (ie: AS3000, AS/NZS2293).
Refer to the applicable standards for data and mains cabling installation procedures and requirements.
NEXUS LX (DATA CABLE SYSTEM)
If the unit still doesn’t work after checking these possible causes, contact Thomas & Betts Service in Australia on 1300 666 595, Monday
to Friday, 8.30am to 4.30pm (AEST) and ask for help. Our trained service personnel will usually be able to take your call immediately and
assist you in resolving your difficulty. Thomas & Betts is committed to providing valuable Through-Life Support for its products.
© Copyright 2013. Thomas & Betts Australasia ABN: 062 074 810 898. What’s Inside the box
Congratulations on choosing to use this Thomas & Betts product covered by our unique Through-Life Support system. This document is
designed to assist you during the installation of this product; for the safety of yourself and others Thomas & Betts recommends
that you read this document thoroughly before commencing installation. The fittings are designed for easy
installation. They are advanced pieces of electronic equipment which, when treated with care and maintained through regular and
appropriate servicing, will perform reliably for many years to come.
If you’ve installed and connected the unit as per the instructions listed earlier and it doesn’t function correctly, use the following table as a
guide to fixing the problem. Look up the type of fault in the left column and check the possible causes from the right column.
#
Contents
GREETINGS
TROUBLE SHOOTING GUIDE
3
STANILITE
Rev: 2.0
19 November 2013
4
The Nexus range of emergency light fitting are designed to be connected together into a special communication network over a Level
4 (or higher) high speed, single twisted pair data cable. The Nexus LX User & Technical Guide describes all you need to know to
successfully install a Nexus project. Ask for it from your supervisor, from your employer or from your nearest Thomas & Betts product
supplier. The network cabling of the building must be installed as per the procedure detailed in the Nexus LX User & Technical Guide. No
mains or mains carrying cables are to be connected to the data terminals or cables.
NEXUS RF (WIRELESS SYSTEM)
The Nexus RF range of emergency light fitting are designed to be connected together via a proprietary radio-frequency (RF) communication
network. The installation of a Nexus RF emergency light fitting is no different from the installation of a standard, non-monitored product,
with the exception that the MAC address of the Nexus RF fitting must to be noted, along with the SPUID, at the time of installation in order
for commissioning to be performed. Commissioning of Nexus RF product is done by Thomas & Betts service personal, please contact
Product Support Hotline for more information in Australia on 1300 666 595.
© Copyright 2013. Thomas & Betts Australasia ABN: 062 074 810 898. Rev: 2.0 19 November 2013
1
Complete Solutions in Emergency Lighting STANILITE
Complete Solutions in Emergency Lighting STANILITE
INSTALLATION INSTRUCTIONS
1.
2.
3.
Remove the unit from the packing box and inspect it for damage or imperfections. If any damage is found, do not install the unit,
but replace it carefully into the packing box and notify the Thomas & Betts Product Support Hotline in Australia on 1300 666 595.
If all looks okay, installation can proceed. Remove the lid by unscrewing 4 screws on each side.
Determine the mounting and mains cable entry direction, allow at least 100mm of clearance space on either side of the enclosure to
ensure adequate operation space for the LED / push-button when the unit is installed. The mounting holes are indicated by keyway
slots. See Figure 1 for more details (69mm centre distance and smaller diameter 7mm). Hold the enclosure against the wall, use a
pencil to mark the position of the screw holes and remove the enclosure. Double check the holes centre distance, make adjustment
as required ensuring they are correct and level.
Secure LED lamp
in place. Fasteners
are provided in
lamp head box.
Mounting
Holes for
Fitting
Lamp Head Termination
Lamp Head Earth Lug
Connection
10. Position the enclosure’s key way slots to the mounting screws, slide it in place and tighten the screws to secure the unit to the wall.
11. Plug the power cord to the power point. For mains hard wiring, remove the power cord, strip 9mm insulation length from the mains
cable, connect and terminate wires to the terminal block. Be careful with multi-strand conductors that all the strands are twisted
together before insertion into the terminal block. Any stray strands that inadvertently come into contact with their neighboring
terminal will cause undesirable results when fitting is powered.
Tilt lamp head
parallel to bracket
Test Switch
•
Nexus Data Cable
Entry
Lid Screw
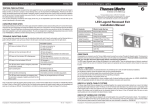
Figure 1: LED Flood Light Fitting Details
4.
5.
Fix two appropriate M6 screws to the wall (due to the wide variety of building construction materials, fasteners are not supplied).
Allow approx 10mm between wall and screw head for the enclosure to slide and drop into the position. Make sure the mounting
screws are fixed into solid material that is enough to support the weight of the unit (approx 4kg). Strengthen or support the mounting
material if required.
Install the LED lamps, use fasteners provided from each box to secure the lamp head in place as shown in the image below. Insert
a cable glade over each lamp cable then insert the cable into the flood unit housing. Allow approx 100mm slack cable from the
back of lamp to the enclosure‘s cable entry hole then tighten the cable gland in place. Swing the lamp head around to make sure
adequate wire length for movement, re-adjust the cable length if need to.
Nylock Nut
Lamp Head
1.
2.
Nylon Washer
3.
SS Flat Washer
8.
9.
Before removing the installed unit, switch off the mains supply to the fitting.
Remove the lid, disconnect the mains and data (for Nexus only) cable connection from the terminal block using suitable size screw
driver.
Undo the mounting screws and remove the unit from wall.
Note: When sending Flood Units for repairs make sure that the LED lamps are included.
Tilt the lamp head parallel to the bracket. This is an important step to avoid excessive lamp head tilt which may cause over shadow.
Terminate the lamp cables into the terminal block, make sure wire polarity is correct to each marked terminal block. The lamp heads
are provided with earth lug. Locate earth stud marked with earth label near the termination point. Remove nut and one earth washer
only. Drop both lamp head earth lugs, earth washer and secure it with hex nut. In no circumstances second locking nut should be
accessed as it can cause earthing problem.
If the cable and data cable entry is from the side, punch out the appropriate cable entry hole as required. Remove all burrs and
sharp edges after drilling.
Run mains cable in the ceiling or wall space as appropriate or surface mounted in conduit, slide the cable gland over the cable then
feed the cable through the entry hole of the enclosure. Allow adequate wire length to reach to the terminal block then secure the
cable gland in place. Repeat the process for Nexus LX data cable.
© Copyright 2013. Thomas & Betts Australasia ABN: 062 074 810 898.
12. Check operation of the unit to ensure that the installation was successful. When powered up, allow a few minutes to give the battery
a small charge, then press the manual test button located at the top right hand side edge of the unit. Hold the test button in for a
few seconds and observe the operation of the lamp switching from mains to the emergency mode. If the lamp on emergency mode
works momentarily, that’s okay. Try again in a few more minutes in case battery is completely discharged, it may take a little time
to charge up enough to operate even momentarily. After this time, press the test button again and if the lamp doesn’t work at all,
check the supply, the connections and the trouble shooting guide at the end of this document.
13. This step is for Nexus LX or Nexus RF unit only. Once manually checked, it is ready for the commissioning into the Nexus network.
Keep the information details of this Flood Unit including exact location description, DB (distribution board) and CB (circuit breaker)
numbering, channel and router numbering, plan number and cross referencing information as all of this will be required for entry
into the database during commissioning. Refer to the Nexus LX User & Technical Guide for full details. As the installer, it is your
responsibility to conduct the initial discharge testing of the installed unit. Refer to AS/NZS 2293.
14. If the installation is successful, secure the lid to the enclosure.
15. While the lamp heads are on, check the lamp head tilt final position and make sure there is no over shadow. Adjust lamp head
position as required.
REMOVAL INSTRUCTIONS
SS Flat Washer
6.
7.
Data connection for Nexus LX product installation:
The same colour wire from each data cables connects to the terminal marked +.
The other colour wire from each of the data cables connects to the terminal marked -.
No mains or mains carrying cables are to be connected to the data terminals or cables.
Rev: 2.0
19 November 2013
2
TESTING PRECAUTIONS
If the unit is to be left permanently connected to the mains supply from now on, you will need to allow 24 hours for the battery to fully
charge, after which you must conduct a manual discharge test as per the requirements of AS/NZS2293.2. Presently (at the time of
writing), the standard requires that units operate in emergency mode for a period not less than 2 hours for their first test upon installation
and for not less than 90 minutes thereafter once every 6 months. You will need to keep the records for the initial test and enter them into
the building emergency services logbook.
If the unit isn’t permanently connected to mains supply at this time, it is your responsibility to carry out the initial 2 hour test when you do
connect it permanently to the mains supply.
© Copyright 2013. Thomas & Betts Australasia ABN: 062 074 810 898.
Rev: 2.0
19 November 2013
3