1
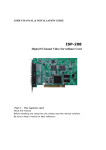
USER’S MANUAL & INSTALLATION GUIDE
ISP-208F
Digital Face and Object Detecter
Part II - Smart Detection Application
About this manual
Before installing and using this unit, please read this manual carefully.
Be sure to keep it handy for later reference.
PC-Based MPEG-4 DVR
12.1 12.2 12.3 12.4 12.5 12.6 12.7 13. User’s Manual & Installation Guide
MAIN DISPLAY SCREEN .................................................................................. 49 THE FUNCTION KEYS ..................................................................................... 50 THE STATUS OF DVR CLIENT APPLICATION ..................................................... 51 SETUP .......................................................................................................... 52 ADVANCED OPTIONS...................................................................................... 54 ALARM ......................................................................................................... 55 ELECTRONIC MAP ......................................................................................... 56 WEB-BASED CLIENT .............................................................................................. 57 13.1 WEB SERVER................................................................................................ 57 13.2 HTTP CONNECTION ...................................................................................... 57 14. OBJECT COUNTING ............................................................................................... 59 14.1 BRIEF OVERVIEW .......................................................................................... 59 14.2 SYSTEM REQUIREMENT ................................................................................. 59 14.3 SETUP .......................................................................................................... 60 14.3.1 Enable/Disable .................................................................................... 61 14.3.2 Camera Setup Issue ............................................................................ 65 15. ZONE MONITORING .............................................................................................. 66 15.1 BRIEF OVERVIEW .......................................................................................... 66 15.2 SYSTEM REQUIREMENT ................................................................................. 66 15.3 SETUP .......................................................................................................... 67 15.3.1 Enable/Disable .................................................................................... 68 15.3.2 Camera Setup Issue ............................................................................ 73 15.4 ZONE MONITORING BROWSER ........................................................................ 74 16. FACE DETECTION .................................................................................................. 76 16.1 BRIEF OVERVIEW .......................................................................................... 76 16.2 SYSTEM REQUIREMENT ................................................................................. 76 16.3 SETUP .......................................................................................................... 77 16.3.1 Enable/Disable .................................................................................... 77 16.4 SEARCH BY FACE .......................................................................................... 80 16.5 FACE BROWSER ............................................................................................ 82 -2-
PC-Based MPEG-4 DVR
User’s Manual & Installation Guide
14. OBJECT COUNTING
14.1 Brief Overview
Objects are usually basic monitoring targets in video surveillance. Objects can be various
kinds of things, such as walking people, moving vehicles, cats and dogs, etc. The object
counting function can automatically count the amount of objects pass though a user-defined
line by video. There are two counters for both directions of object moving tracks. According
to the characteristic of interested objects, we offer two types of options, traffic or human, for
optimal application.
14.2 System Requirement
1. DVR System Requirement
¾
CPU: Intel Pentium 4 2.8GHz or above
¾
Memory: 512MB or above
¾
Display Card:
Color Depth: 32 bits
Resolution: 1024x768
VRAM Size: 64MB or above
2. Limitations
¾ At most 2 cards (16 channels) are allowed to be installed in a machine
¾
4CIF is not allowed for the channel you enable this function
- 59 -
PC-Based MPEG-4 DVR
User’s Manual & Installation Guide
14.3 Setup
1
2
First, click “SETUP” button to enter DVR setup menu.
- 60 -
PC-Based MPEG-4 DVR
User’s Manual & Installation Guide
14.3.1 Enable/Disable
Open Object Counting service in the Intelligent Service Manager.
Select the channel that you want to enable object counting function.
- 61 -
PC-Based MPEG-4 DVR
User’s Manual & Installation Guide
Enable this object counting function.
Click “Set Line” button to set the line that objects will go through.
Click “Clear” button to clear the line and then you can re-draw the line.
Click “Color” button to set the color of the line showed on the live display.
- 62 -
PC-Based MPEG-4 DVR
User’s Manual & Installation Guide
Choose object mode. If the traffic volume counting is applied, choose the radio button
“Traffic”. If the human (body) counting is applied, choose the radio button “Human” for
optimal performance.
Click “Apply” or “OK” to activate counting function.
- 63 -
PC-Based MPEG-4 DVR
User’s Manual & Installation Guide
You can see two increasing numbers in the “Count” field. Those mean the results of both
directions for the user-defined line.
Both numbers are showed on the live display also.
If you want to manually start, stop, or reset the counting anytime, click object counting
setup icon on the bottom-right side of the front panel for operation.
- 64 -
PC-Based MPEG-4 DVR
User’s Manual & Installation Guide
14.3.2 Camera Setup Issue
In order to get the optimal performance, there are some precautions for camera installation.
1. Higher Angle – Adjust the shooting angle of the camera to the bird’s eye view.
2. Suitable Distance – The distance between camera and target objects must be suitable.
For general cases, the suitable distance is long enough. If the long-enough distance is
not allowed in the applied environment, a wide-angle lens mounted camera is required.
Camera
Suitable Distance
Higher Angle
Target
Object
- 65 -
PC-Based MPEG-4 DVR
User’s Manual & Installation Guide
15. ZONE MONITORING
15.1 Brief Overview
Sometimes we need to draw a restricted region by the video, monitor whether there are any
objects, such as people, animals, and suspicious moving objects, to enter or leave the
region. The Zone Monitoring function is what you need. You may draw at most 4 separated
rectangle zones for monitoring. Once some objects enter the zones the event “Object
Enter” will be issued for further processing; some objects leave the zones the event “Object
Leave” will be issued too. Both events will be logged for later search.
15.2 System Requirement
1. DVR System Requirement
¾
CPU: Intel Pentium 4 2.8GHz or above
¾
Memory: 512MB or above
¾
Display Card:
Color Depth: 32 bits
Resolution: 1024x768
VRAM Size: 64MB or above
2. Limitations
¾ At most 2 cards (16 channels) are allowed to be installed in a machine
¾
4CIF is not allowed for the channel you enable this function
- 66 -
PC-Based MPEG-4 DVR
User’s Manual & Installation Guide
15.3 Setup
1
2
First, click “SETUP” button to enter DVR setup menu.
- 67 -
PC-Based MPEG-4 DVR
User’s Manual & Installation Guide
15.3.1 Enable/Disable
Open Zone Monitoring service in the Intelligent Service Manager.
- 68 -
PC-Based MPEG-4 DVR
User’s Manual & Installation Guide
Select the channel you want to apply zone monitoring, and then enable the function. Two
channels can be supported simultaneously, but cannot be set to the same camera.
Click the “Set” button and drag a rectangle on the sample video by mouse pointer. The first
restricted zone is ready.
You can set at most four restricted zones per channel.
Click the “Clear All” button to clear all rectangles.
Zone monitoring offers a useful supplementary function called “Zone Monitoring Browser”.
The snapshot images which “object entry” and “object leave” events issue will be stored in
the disk. If you want to enable this function please check the option “Store Image”.
The snapshot images will be preserved for a certain amount of time. Choose to keep the
images for recent one week, half month, one month, or forever. If you choose to forever
keep the images, you should be responsible for the problem caused by disk full.
- 69 -
PC-Based MPEG-4 DVR
User’s Manual & Installation Guide
Click “Apply” or “OK” to activate the monitoring function.
- 70 -
PC-Based MPEG-4 DVR
User’s Manual & Installation Guide
If you want to search the issued events of zone monitoring, click the “LOG” button to open
Alarm Notify Log.
Set the time range. Have the “Object Enter” and “Object Leave” checked. Choose the
interested cameras and click “OK” to start searching.
- 71 -
PC-Based MPEG-4 DVR
User’s Manual & Installation Guide
Finally you can get the item list of “Object Enter” and “Object Leave” events. Double-click a
single item to playback the recorded video if the video is right in the disk. No activity will
occurs if the recorded video does not exist
- 72 -
PC-Based MPEG-4 DVR
User’s Manual & Installation Guide
15.3.2 Camera Setup Issue
In order to get the optimal performance, there are some precautions for camera installation.
1. Higher Angle – Adjust the shooting angle of the camera to the bird’s eye view.
2. Suitable Distance – The distance between camera and target objects must be suitable.
For general cases, the suitable distance is long enough. If the long-enough distance is
not allowed in the applied environment, a wide-angle lens mounted camera is required.
Camera
Suitable Distance
Higher Angle
Target
Object
- 73 -
PC-Based MPEG-4 DVR
User’s Manual & Installation Guide
15.4 Zone Monitoring Browser
Click the corresponding icon on the front panel to enter the zone monitoring browser.
List by Date
Image Browser
Backup Information
Preview Window
View Mode
Function Buttons
The snapshot images are stored in the date-format folders. The format of individual file
name is “hhmmss-cc-n.jpg”. “hhmmss” is the time the image are created. “cc” is the
two-digit channel number. “n” is the serial number of the specific second and channel. You
can easy know the time and channel of each image was created by the file name.
Choose your preferred display mode by View Mode selection. Click the thumbnail the
preview window will display the bigger image. Double-click the thumbnail the corresponding
video will be playback in another pop-up window if the video is still in the disk. If the video
does not exist in the disk, maybe recording disabled or deleted by cyclic recording, no
action will occur.
- 74 -
PC-Based MPEG-4 DVR
User’s Manual & Installation Guide
Function buttons include Backup, Delete, and Refresh. Check the thumbnails and press
Backup button for copying them to other place. The bottom area will show the backup
information.
Have some thumbnails checked and press Delete button, they will be deleted from the disk.
Press Refresh button will reload all images. Because images continue being saved during
the execution time of browser, the refresh function will give you the latest result.
- 75 -
PC-Based MPEG-4 DVR
User’s Manual & Installation Guide
16. FACE DETECTION
* This function is only supported for ISP-208F
16.1 Brief Overview
Making DVR more Intelligent is the trend in the digital surveillance technology. People want
to get more information inside the video. The face detection function is one step to reach the
field. After all, men are always the most important targets to be focused.
The faces emerged on the video will be detected and logged if the face detection function is
enabled for the specific channel. The lower limit of the face size which can be detected is
about 30x30 pixels. The maximum number of simultaneous detected faces will be 18.
Once faces detected, the event will be logged into the system. You can choose to
automatically record video for some channels, send email to somebody, or notify the man
using the remote client. Moreover, you can search log by face detection event. Then view
the recorded video or get the snapshot from the search result. For the live display, the
detected faces can be automatically marked out for better viewing.
When the remote client is running, the face events will be immediately received once DVR
detects faces. You can choose to automatically display the remote video.
16.2 System Requirement
1. DVR System Requirement
¾
CPU: Intel Pentium 4 2.8GHz or above
¾
Memory: 512MB or above
¾
Display Card:
Color Depth: 32 bits
Resolution: 1024x768
VRAM Size: 64MB or above
2. Camera Installation Precautions
¾
Avoid back lighted
¾
Avoid too bright: Adjust the brightness of the video by the camera color function
3. Limitations
¾ At most 2 cards (16 channels) are allowed to be installed in a machine
¾
4CIF is not allowed for the channel you enable this function
¾
If this function is enabled upon the invalid card the program will automatically close
at a random execution time
- 76 -
PC-Based MPEG-4 DVR
User’s Manual & Installation Guide
16.3 Setup
1
2
First, click “SETUP” button to enter DVR setup menu.
16.3.1 Enable/Disable
Open Face Detection function in the Intelligent Service Manager.
- 77 -
PC-Based MPEG-4 DVR
User’s Manual & Installation Guide
Select the channel you want to apply face detection function and enable it.
Choose the common size of emerged faces. Adjust this option to get the optimal
performance according to applied environment.
Have this checked to show the rectangles around the detected faces in the live display.
Face detection offers a useful supplementary function called “Face Browser”. The snapshot
images which face detected events issue will be stored in the disk. If you want to enable
this function please check the option “Store Image”. You can choose to save the pictures of
- 78 -
PC-Based MPEG-4 DVR
User’s Manual & Installation Guide
face only or full frame.
The snapshot images will be preserved for a certain amount of time. Choose to keep the
images for recent one week, half month, one month, or forever. If you choose to forever
keep the images, you should be responsible for the problem caused by disk full.
Click “Apply” or “OK” to activate Face Detection function.
- 79 -
PC-Based MPEG-4 DVR
User’s Manual & Installation Guide
16.4 Search by Face
You can make face detection to be the event for recording schedule. Face detection events
can trigger pre-recording or post-recording of one specific channel, or trigger some related
channels to start recording.
By searching the event log, the events of face detection in the specific channels during the
specific time range can be listed. If the recorded video of some event exists in the current
storage, you can view the corresponding video and get the snapshot right away.
Click the “LOG” button, the log search dialog will show up.
Choose the Face Detected as the search filters. Set the time range, channels, and other
options you are interested in. Press “OK” button to search and wait for the result shown.
- 80 -
PC-Based MPEG-4 DVR
User’s Manual & Installation Guide
The search results look like the below chart.
Double-click any item of search result, the corresponding recorded video will show up if the
video exists in the storage. No activity will occur if the recorded video does not exist.
Snapshot
Stop
Pause
Playback
- 81 -
PC-Based MPEG-4 DVR
User’s Manual & Installation Guide
16.5 Face Browser
Click the corresponding icon on the front panel to enter the face browser.
List by Date
Image Browser
Backup Information
Preview Window
View Mode
Function Buttons
The snapshot images are stored in the date-format folders. The format of individual file
name is “hhmmss-cc-n.jpg”. “hhmmss” is the time the image are created. “cc” is the
two-digit channel number. “n” is the serial number of the specific second and channel. You
can easy know the time and channel of each image was created by the file name.
Choose your preferred display mode by View Mode selection. Click the thumbnail the
preview window will display the bigger image. Double-click the thumbnail the corresponding
video will be playback in another pop-up window if the video is still in the disk. If the video
does not exist in the disk, maybe recording disabled or deleted by cyclic recording, no
- 82 -
PC-Based MPEG-4 DVR
User’s Manual & Installation Guide
action will occur.
Function buttons include Backup, Delete, and Refresh. Check the thumbnails and press
Backup button for copying them to other place. The bottom area will show the backup
information.
Have some thumbnails checked and press Delete button, they will be deleted from the disk.
Press Refresh button will reload all images. Because images continue being saved during
the execution time of browser, the refresh function will give you the latest result.
- 83 -