1
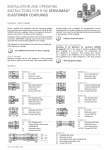
Installation and operating instructions for R+W Servomax®- Elastomer couplings
Please carefully and completely read the following installation, operation and maintenance procedures for the R+W
SERVOMAX elastomer couplings. Failure to comply with these procedures may result in the failure of the coupling.
Installation of the couplings should be performed by a qualified technician. SERVOMAX couplings may only be used in
accordance with the technical data supplied in the catalog.
This installation and operation instruction does not apply for ATEX-Elastomer coulings.
See additional instruction for these couplings.
General functioning
Safety warning
Rotating couplings can be very dangerous. Proper
guarding should be in place at all times and is the
responsibility of the machine builder, user or operator. Do not approach or touch a coupling while it is
rotating. Make sure that the machine is „locked out”
and cannot be accidentally started during installation or maintenance of the coupling.
Indicates important points
Manufacturer’s declaration
According to EG guidelines for machinery 2006/42/EG Appendix II B
In the sense of machine guidelines (MR) shaft couplings are
no machines, but components for the installation in machines.
Their putting into operation is subject to the fulfillment of all
requirements of machine guidelines by or after integration in
the final product.
Warning against danger
Models
Model EK 1
2 x EK 1-Hub
1 x Elastomer insert
2 x Set screws DIN 916
Model EK 2
2 x EK 2-Clamping hub
1 x Elastomer insert
2 x Scews ISO 4762
Model EK 4
1 x EK2-Clamping hub
1 x Elastomer insert
1 x Conical hub
1 x Screws ISO 4762
Model EK 6
2x
Conical clamping ring
2x
Conical clamping hub
1x
Elastomer insert
12 -20 x
Screws ISO 4762
Model EK 7
1 x EKL-Clamping hub
1 x Expanding hub shaft
1 x Elastomer insert
2 x Screws ISO 4762
Model EKL
2 x EKL-Clamping hub
1 x Elastomer insert
2 x Screws ISO 4762
Model EKH
2 x Clamping split hubs
1 x Elastomer insert
4 x Screws ISO 4762
(8 x)
Model ESL
1 x EK 1-Hub
1 x Elastomer insert
3 x Screws DIN 916
1 x Safety part
Model ES 2
1 x EKL-Clamping hub
1 x Torque limiter section with clamping hub
1 x Elastomer insert
2 x Screws ISO 4762
Model EZ 2
2 x Clamping split hubs
2 x Elastomer insert
1 x Intermediate tube
4 x Screws ISO 4762
(8 x)
Model EZV
2 x Clamping split hubs
2 x Elastomer inserts
1 x Intermediate tube with clamping hub
1 x Expanding intermediate tube
6 x Screws ISO 4762
Pictures 1
R+W
Anl_Servomax_engl.indd 1
1
09.02.11 09:11
Function
The equalizing element of EK couplings is the elastomer insert. It transmits torque without
backlash or vibration. The elastomer insert defines the characteristics of the entire drive
system.
Series 2-800
Series 2500 - 9500
coupling assembly
includes 5 individual
elastomer segments
A
The coupling is backlash free due to a pretension of the elastomer insert between the two
coupling halves. SERVOMAX couplings compensate for lateral, angular and axial misalignment.
Shore hardness 98 Sh A
A
B
Specifications of the elastomer inserts
Shore hardness 98 Sh A
Shore hardness 64 Sh D
Temperature
range
Features
0.4 - 0.5
-30°C to +100°C
high damping
TPU
0.3 - 0.45
-30°C to +120°C
high torsional stiffness
TPU
0.3 - 0.4
-30°C to +100°C
very high damping
Type
Shore
hardness
Color
Material
A
98 Sh A
red
TPU
B
64 Sh D
green
C
80 Sh A
yellow
Relative
damping (ψ)
C
B
Shore hardness 64 Sh D
Shore hardness 80 Sh A
Maximum transmittable torques / Misalignment values
Series
Model series EK
2
Type (Elastomer insert)
Max. torque
(Nm)
TKN
TKmax
Distance
(mm)
A
Nominal torque
(Nm)
lateral
(mm)
angular
(degree)
axial
Max.
values
Max. torque
(Nm)
Distance
(mm)
A
lateral
(mm)
angular
(degree)
axial
Max.
values
(mm)
150
A
B
C
A
B
C
A
B
C
A
B
C
A
B
C
2
2.4
0.5
9
12
2
12.5
16
4
17
21
6
60
75
20
160
200
42
4
4.8
1
18
24
4
25
32
6
34
42
12
120
150
35
320
400
85
7
9
11.5
16
18
20
0.08
0.06
0.2
0.08
0.06
0.2
0.1
0.08
0.22
0.1
0.08
0.25
0.12
0.1
0.25
0.15
0.12
0.3
1
0.8
1.2
1
0.8
1.2
1
0.8
1.2
1
0.8
1.2
1
0.8
1.2
1
0.8
1.2
±1
300
TKN
TKmax
60
C
Model series EK
(Nm)
20
B
±1
Type (Elastomer insert)
10
A
(mm)
Nominal torque
5
±1
±2
±2
Series
800
450
±2
2500
4500
9500
A
B
C
A
B
C
A
B
C
A
B
A
B
A
B
325
405
84
530
660
95
950
1100
240
1950
2450
5000
6200
10000
12500
650
810
170
1060
1350
190
1900
2150
400
3900
4900
10000
12400
20000
24
26
31
37
46
0.18
0.14
0.35
0.2
0.18
0.35
0.25
0.2
0.4
0.5
0.3
0.5
0.3
0.6
1
0.8
1.2
1
0.8
1.2
1
0.8
1.2
1.5
1
1.5
1
1.5
±2
±2
±2
±3
25000
57
±4
0.4
1
±5
Table 2
CAUTION! The maximum permissible misalignment values in the chart are based on the following parameters:
Nominal torqueTKN, rational speed n = 1500 rpm- and a ambient temperatur of -10° to +30° C.
Mounting preparation
All mounting surfaces including shafts, bores, keys and key ways, must be clean and free of burrs, nicks and dents. Inspect
shaft diameters, coupling bore diameters, key and key-way dimensions and tolerances. All R+W coupling bores are machined to ISO tolerance H7.Clearances between the shaft and hub are maintained to be within 0.01 and 0.05 mm. A light
coating of oil is recommended to ease the mounting process and will not affect the clamping force of the hub.
CAUTION:
Do not use sliding grease, or oils or grease with molybdenum disulfide or other high pressure additives.
To achieve zero backlash the coupling hubs must be pressed together
with an axial force (F) compressing the elastomer ring. Cleaning the
elastomer ring and hubs and applying a light film of oil will aid in the
assembly process. (Picture 3).
Caution!
Use PU – compatible greases such as e.g. vaseline.
2
Distance
(see Table 2)
Mounting Force
Contact surfaces
Picture 3
R+W
Anl_Servomax_engl.indd 2
09.02.11 09:11
Machining the pre bored hubs
CAUTION:
The maximum permissible bore diameters D1 and D2 (see catalog) must not be
exceeded! The coupling may burst if these values are exceeded. Serious injury
or death may result from flying debris.
picture 4
During manufacturing the concentricity and run-out of the coupling hub are
precisely controlled. Applying excess forces on the jaw end of the hub will
deform the coupling negatively affecting its performance.
Custom modification of the coupling hub is possible by the customer. The hub
may be custom machined to a maximum dimension (H) (see catalog for specific
values). The customer assumes all responsibility for the performance of the coupling anytime a modification is made. R+W cannot guarantee the performance of
the coupling once the customer performs any modification to the original design.
Consult your R+W representative for custom design technical assistance.
Do not clamp here
picture 5
Screws / Tigthening torque
Series
Clamping models
EK2 / EKL / EKH / EZ2 / EZV
E1
Conical clamping hubs
Model EK6
E2
Expanding hub shaft
Model EK7
E3
Torque limiter section with
clamping hub Model ES2
E4
Tube clamping hub EZV
E5
Press in force ES2
(full disengagement)
N
Distance ES2
O
2
5
10
20
60
150
300
450
800
1500
2500
4500
9500
M2
0.6 Nm
M3
2 Nm
M4
4 Nm
M5
8 Nm
M6
15 Nm
M8
35 Nm
M10
70 Nm
M12
120 Nm
M16
290 Nm
M16
300 Nm
M16
300 Nm
M16
300 Nm
M24
980 Nm
M3
2 Nm
M4
3 Nm
M5
6 Nm
M5
7 Nm
M6
12 Nm
M8
35 Nm
M10
55 Nm
M10
60 Nm
M12
100 Nm
M16
160Nm
M4
4 Nm
M5
9 Nm
M6
12 Nm
M8
32 Nm
M10
60 Nm
M12
110 Nm
M16
240 Nm
M16
300 Nm
M4
4 Nm
M4
4.5 Nm
M6
15 Nm
M8
40 Nm
M10
70 Nm
M12
130 Nm
M16
200 Nm
M16
250 Nm
M4
4 Nm
M4
4.5 Nm
M5
8 Nm
M6
18 Nm
M8
35 Nm
M10
70 Nm
10 - 20 N
15 -3 0 N
25 - 50 N
30 - 60 N
35 -70 N
0.7
1.1
0.7
1.3
1.3
M20
470 Nm
80 -200 N 200 - 500 N 500 - 1000 N
Table 3
Mounting EK 1
Motor
Access hole
Picture 6
Spindle
Slide a coupling half onto the shaft to the correct axial position. Tighten the set
screw(s) to the appropriate torque using a torque wrench. Insert the elastomer
ring and press the two coupling halves together. Make sure that the fit length (A)
is maintained. (See table 1) Mount the assembled coupling onto the second shaft
and tighten the set screw(s).
Dismounting:
Loosen the set screws and remove the coupling. Use an appropriate tool that will
not damage the coupling to pry the coupling halves apart.
Set screws DIN 916
Mounting EKL / EK 2
Spindle
(E1) Set screws ISO 4762
Spindle
(E1) Set screws ISO 4762
Motor
Access hole
Access hole
Motor
Pictures 7
Slide a coupling half onto the shaft to the correct
axial position. Using a torque wrench, tighten the
clamp screw (E) to the appropriate torque indicated in Table 2. Insert the elastomer ring and press
the two coupling halves together. Ensure that the
fit length (A) is maintained. (See table 1). Mount
the assembled coupling onto the second shaft and
tighten the clamp screw (E).
Dismounting:
Simply loosen the clamp screw (E) and remove the
coupling. Use an appropriate tool that will not damage the coupling to pry the coupling halves apart.
R+W
Anl_Servomax_engl.indd 3
3
09.02.11 09:11
Mounting EKH
Motor
Spindle
The coupling needs to be pre- mounted.
The pre-mounted coupling can be set in place radialy
under consideration of distance P. Now the two split
hubs can be mounted while using the locking screws
E1, applying the right tightening torque. Distance A,
as shown on table 2 must be kept.
Dismounting:
For dismounting simply loosen the screws E1.
(E1) Screws ISO 4762
Picture 8
Mounting EK 4
Fanuc-Motor
Access hole
Mounting of the clamping hub:
Slide the coupling on the shaft ends, at the right axial
position thighten the mounting screw E1 to the specified tightening torque as shown in the table 3.
Cone 1:10
Mounting of the conical hub:
After inserting the key into the keyway of the motor
shaft slide the coupling hub on the shaft. Check if the
conical hub has a proper seat on the shaft. Now the
nut (3) can be tightened on the motor shaft using the
exact tightening torque specified by the motor manufacturer.
Motor
Spindle
(E1) Screws ISO 4762
Dismounting:
Loosen the screws of the clamping hub and demount
the coupling with the proper tool.
Pictures 9
Mounting EK 6
Motor
Spindle
(E1) Screws ISO 4762
Pictures 10
E2
ISO 4762
positive stop
The EK6 uses a clamping ring with axial fastening
screws (E). Slide the coupling hub onto the first shaft,
using a torque wrench, uniformly tighten the clamping screws (E) using a cross-wise tightening pattern
until all the clamping screws are evenly tightened
to the correct tightening torque as given in table 3.
The clamping ring will come to a positive stop (1).
This avoids excessive loading of the clamping ring
and improves the TIR (Total Indicator Run-out) of the
coupling on the shaft. Insert the elastomer ring. The
other coupling hub is mounted onto the second shaft
end using the same procedure. Press the two coupling halves together and ensure that the fit length
(A) is maintained (See Table 1).
Dismounting:
Pull the coupling halves apart and remove the axial
fastening screws (E2). Threaded holes (3) have been
machined into the hub to accept the fastening screws
which will now be used to push off the tapered ring
(picture 4). CAUTION: Prior to re-assembly make
sure the fastening screws are in the proper holes to
draw in the taper ring.
4
R+W
Anl_Servomax_engl.indd 4
09.02.11 09:11
Mounting EK 7
Mounting of the clamping hub:
Slide the coupling onto the shaft ends, at the right axial position
tighten the mounting screw to the specified tightening torque.
(E3) Screws ISO 4762
machine
Maschine
Motor
Dismounting of the clamping hub:
For dismounting loosen the mountingscrew E3.
Mounting of the expanding shaft:
Push the shaft hub into the bore, at the right axial position
thighten the mountingscrew E3 to the specified tightening
torque.
(E1) Screws ISO 4762
Dismounting of the expanding shaft:
For dismounting loosen the screw E3 a few turns. By putting
pressure on the screwhead, the inner cone slides out of its
sleeve. The shaft is now loose.
Pictures 11
Mounting EZ 2 / EZV
Pictures 12
Overall length G
(E1) Screws ISO 4762
EZ2
Machine
Motor
Distance P
Overall length G
moveable tube
(E1) Screws ISO 4762
Mounting:
The coupling needs to be pre- mounted. The pre-mounted
coupling can be set in place radial under consideration of
distance P. Now the two split hubs can be mounted while
using the locking screws E1 applying the right tightening torque. Distance A, as shown on table 2 must be kept.
Adjusting the length of the EZV
After loosen the screws (E5), the axial adjustable tube 1 can
be pushed into the other intermediate tube 2. After receiving
the wanted axial position, the fastening screws E1 + E5 can
be fastened under consideration of the specitic tightening
torque (see tabele 3). The tube of the moving part is exactly
conducted in the fixed part of the coupling. A high concentricity is ensured.
Dismounting:
Loosen the screws E1 of the hubs and demount the shaft.
EZV
Motor
Machine
Series
Distance
fixed tube
Distance
10
20
60 150 300 450 800 2500 4500 9500
O 16.6 18.6 32
37
42
52
62
67
84
105
(E5) Screws ISO 4762
P min / P max
The installation length G results out of the distance
P+2x0
ATTENTION
Do always notice the max. critical speed given by the manufacturer. An abrasion of the elastomer insert can decrease the
max. critical speed. Do constantly check the elastomer inserts for abrasion.
A fast turning bended tube can cause a major oscillation (Rework or replacement of the tube).
Lateral misalignment Δ Kr
Angular misalignment Δ Kw
Axial misalignment Δ Ka
Δ Krmax = ca. (10 mm) x G (m)
Δ Kwmax = ca. 2˚
Δ Kamax = ca. ± 2 (mm)
Pictures 13
R+W
Anl_Servomax_engl.indd 5
5
09.02.11 09:11
Mounting instructions ES 2
Proximity switch
Picture 14
Access hole
Mounting:
Slide the coupling on the shaft ends to the proper axial position.
Using a torque wrench, tighten the clamp screws (E1/E4) to the
correct tightening torque as indicated (in the table page 3)
CAUTION! Both clamping hubs have different
screws and different tightening torques.
Motor
Spindle
Dismounting: Simply loosen the clamp screw E1, E4 and remove the safety coupling.
Emergency cut off: The axial path of the actuation ring activates the mechanical switch or the proximity sensor.
(E1) Screws
ISO 4762
Actuation path
CAUTION! Upon assembly, it is absolutely necessary to check the function of the switch 100%
(E4) Screws ISO 4762
Single-position / Multi-position
Picture 16
Actuation path
1 Adjustment nut
2 Spring
3 Actuation ring
4 Balls
5 Detents
6 Proximity switch
engaged
Picture 15
Full-disengagement
disengaged
In a torque overload, with the single-position design (standard)
and multi-position design, the spring disengages to allow the
balls to come out of their detents, separating the drive and driven elements. Very low residual spring pressure remains so that
the coupling will re-engage once the torque is reduced below
the overload setting.)
Re-engagement may only be effected at low
speed.
engaged
disengaged
With this design, when a torque overload is detected, the disc
spring completely flips over and places no residual spring pressure on the actuation ring. The drive and driven elements are
completely separated.
Re-engagement of the coupling is not automatic and must be performed manually
(Picture 17 + 18).
Picture 17
Full-disengagement
The R+W full-disengage torque limiting coupling can be reengaged in six different positions or every 60 degrees with low
„press-in” force (E). Marks on the actuation ring and body (13)
of the coupling must line up and indicate the re-engagement
points (17).
As of size 60 and up the re-engagement can be done with 2
lever which will be supported at a recess on the adjustment nut
(picture 18). Screwdrivers can be used as a lever.
Press-in force
Picture 18
Recess on the adjustment nut
CAUTION: Re-engagment should only be performed when the coupling stands still and not
rotating!
Press-in force
Lever (Screwdriver)
6
R+W
Anl_Servomax_engl.indd 6
09.02.11 09:11
Disengagement torque setting
Picture 20
Picture 19
1 adjustment nut
12 adjustment range
11 locking screw
13 marking
3 steel actuation ring
Positive stop
Picture 21
At ES 2 couplings, the slot of the clamping hub serves as a marking (13).
The adjustment range may not be exceeded while re-adjusting.
To adjust the disengagement torque, loosen the locking screws (11) and rotate the adjustment ring using a spanner wrench to the desired new setting. Tighten the 3 locking
screws (11) and test the coupling.
TKN max.
spring force
R+W torque limiters are factory set to the customer specified disengagement torque,
which is marked onto the coupling. The adjustment range (min/max) is also marked on
the adjustment nut (1). The customer can adjust the disengagement torque as long as it
is in the range (12) indicated on the adjustment nut.
adjustment actuation
range
path
TKN min.
Diagramm 1
spring path
Caution: R+W torque limiters incorporate disc springs that exhibit a special spring characteristic. It is important to stay in the max-min range of the coupling. (Diagramm 1)
Mounting instructions ESL
Mounting:
Slide hub on to shaft and tighten at specific position with fastening screws DIN 916. The screws are for the axial fixation of
the hub.
Distance (table 3)
Access hole
Screws DIN 916
Motor
Spindle
The distance 0 regarding table 3 page 3 must be met at any
time, bacause the safety part is moving after disengagement
along the actuation path.
Dismounting:
Loosen the screws. And pull of the hubs while using an appropriate tool.
actuation path
Picture 22
Latching function
CAUTION! The point of disengagement must be tested
before shipping the machine.
Disengagement torque setting
Picture 23
Disengaged
Engaged
actuation path
Engaged
Latching balls in base element
The ESL torque limiter is axactly pre adjusted by the manufacturer and is permantent secured against readjusting. (The steel
adjustment nut will be solid connected to the base element)
A re-adjusting of the desengagement torque is
not possible.
Latching balls in hub
This safety coupling works at a ball latching system. High durable hardened steel balls are latching into each other. A latch is
followed by another (Multi position).
The overdrive must be shut of immediately.
R+W
Anl_Servomax_engl.indd 7
7
09.02.11 09:11
Maximum Shaft misalignment
R+W SERVOMAX elastomer couplings compensate for lateral, axial, and angular shaft misalignment.
lateral misalignment
axial misalignment
angular misalignment
In Table 2 you will find the maximum permissible values for the three axis of misalignment. It is important to remain within
these limits to ensure long life and proper operation of the coupling. If several misalignment types occur at the same time,
it is necessary to reduce the maximum permissible misalignment values. The percentage of the maximum value summing up actual
misalignments must not exceed 100 %.
CAUTION:
Lateral misalignment has a negative effect on the service life of the elastomer. Exact alignment of the coupling considerably
increases the service life of the elastomer. By reducing or eliminating lateral misalignment the radial load of the adjacent bearings
is eliminated, increasing service life and reducing heat. For drives running at high speed we recommend the alignment of the R+W
coupling with a dial indicator (Picture 23/24).
Mounting with intermediate flange
Picture 24
Intermediate flange is fixed
Motor
Centering
If an R+W SERVOMAX coupling is to be installed within an
intermediate flange, it is important that the drive and driven
shafts align as precisely as possible. The flange must be precision machined with centering pilots, and the mounting surfaces must be parallel to each other and perpendicular to the
shaft axis.
Spindle
Caution!
Do check fit length (A) indicated in table 2.
The elastomer insert must be axially movable.
Spindle
Dial gauge or lever cauge
Magnet measuring support
Open installation
If the R+W SERVOMAX coupling is to be mounted between a
foot mounted motor and a gearbox for example, care must be
taken to ensure that the gearbox and motor shafts are in alignment and the devices are permanently mounted.
Caution!
Do check the fit length A indicated in table 2. The
elastomer insert must be axially movable.
Picture 25
90˚ turn is sufficient
Maschine
Maintenance
R+W Antriebselemente GmbH
Phone +49 (0)9372 / 9864-0 · Telefax +49 (0)9372 / 9864-20
[email protected] · www.rw-couplings.com
8
The above-mentioned information is based on our present knowledge and experiences and does not free the user of his own regular checks. A legally binding guarantee is not given even in regard
to protection rights of Third parties.
558/01/11/5.000
R+W SERVOMAX couplings are maintenance-free as long as they are properly mounted and the maximum misalignment values are
not exceeded. Extreme ambient or installed conditions such as very high or low temperatures, acidic or basic solutions, cutting fluids,
etc. may cause wear and tear on the elastomer insert. Regular inspection of the insert is recommended. If replacement is required use
only R+W original spare parts.
R+W
Anl_Servomax_engl.indd 8
09.02.11 09:11