1
USER MANUAL
concept2.com/ski
TABLE OF CONTENTS
USE AND TRAINING
Before Your First Ski...................................................... 4
Important Safety Notes................................................. 4
SKIING TECHNIQUE
Grips............................................................................. 5
How to Ski.................................................................... 5
Technique Variations..................................................... 6
WORKOUT INTENSITY
User-Controlled Resistance...........................................
Damper Setting.............................................................
Cadence........................................................................
Immediate, Accurate Feedback......................................
7
7
7
7
TRAINING
General Notes............................................................... 8
Getting Started: Workouts for New Users..................... 8
Benchmark Pieces....................................................... 10
Using Workout Data to Get Faster and Fitter............... 10
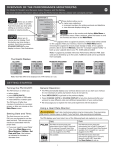
OVERVIEW OF THE PERFORMANCE MONITOR............ 11
MAINTENANCE............................................................... 15
WARRANTY.................................................................... 17
0709
3
USE AND TRAINING
The Concept2 SkiErg
The SkiErg offers terrific exercise for the entire body. Each pull engages the legs, arms, shoulders and
core in a downwards “crunch,” using body weight to help accelerate the handles. Each pull finishes by
extending the arms down along the hips with knees partly bent.
The SkiErg is designed to be pulled with both hands at the same time. Although no machine can
duplicate all the subtleties of Nordic skiing, the SkiErg enables you to train using the motion that is
essential to all techniques of skate and classic skiing.
Before Your First Ski
1) Consult your physician. Be sure that it is not a health risk for you to undertake an exercise program.
2) Carefully review the skiing technique information on the next page. Improper technique such as
letting go of the handle can result in injury.
3) Start each workout with several minutes of easy skiing for a warm-up.
4) Start your exercise program gradually. Ski no more than 5 minutes the first day to let your body
adjust to the new exercise.
5) Gradually increase your skiing time and intensity over the first two weeks. Do not ski at full power
until you are comfortable with the technique and have skied for at least a week. Like any physical
activity, if you increase the volume and intensity too rapidly, fail to warm up properly, or use poor
technique, you will increase the risk of injury.
Important Safety Notes
• Use of this machine with worn or weakened parts (pulleys, cords, handle or shock cord) may result
in injury to the user. When in doubt about the condition of any part, Concept2 strongly advises that
it be replaced immediately using only genuine Concept2 parts. Use of other parts may result in
injury or poor performance of your machine.
• The SkiErg with optional floor stand should be used on a stable, level surface.
• The wall-mounted SkiErg must be securely fixed to the wall. Be sure that your mounting bolts are
going into a solid material such as wood or concrete, and that you are using the proper hardware
for the wall material.
• Do not let handles fly up from pulled out position.
• Take care not to twist or cross cords, and avoid pulling cords all the way out to the point at which
they stop.
• Perform maintenance as suggested on page 11 including inspection of cords and pulleys.
4
0709
SKIING TECHNIQUE
Grips
Use the strap and grip as you
would use a Nordic ski pole.
Slip your hand up through the loop
and then come down over the
strap and grasp the handle.
How to Ski
Begin with your
hands shoulderwidth apart and
slightly above your
head. Your arms
should be slightly
bent. Your feet
should be shoulderwidth apart.
0709
Drive the handles
downward by
engaging your core
abdominal muscles
and bending your
knees. Maintain the
bend in your arms to
keep the handles fairly
close to your face.
Finish the drive with
knees slightly bent, and
arms extended down
alongside your thighs.
5
Bring your arms
back up and
straighten your body
to return to the start
position.
SKIING TECHNIQUE
Technique Variations
Once you are comfortable with the basic skiing technique, you
can add variations such as standing with one foot forward and
one foot back, then switching feet. You may also find yourself
coming up on your toes at certain parts of the drive, just as you
do on your skis.
The SkiErg can also be used without using legs to work just the
upper body and core. Used this way, the SkiErg provides a high
quality workout option for those recovering from leg or foot
injuries. This may be done from either a standing position, or
seated on a stool.
Whether you use your entire body, or just your upper body and core, the SkiErg may be used for all
kinds of workouts, from long steady state to short hard intervals. And you can work as hard or as
easy as you like since the resistance is user-controlled. The harder you pull, the faster the flywheel
spins, and the more resistance you will feel.
6
0709
WORKOUT INTENSITY
User-Controlled Resistance
The harder you pull, the more resistance you will feel. This is because the Concept2 SkiErg uses
wind resistance, which is generated by the spinning flywheel. The faster the wheel spins, the more
resistance there will be.
You can ski as hard or as easily as you wish. The SkiErg will not force you to ski at any set intensity
level. It is up to you. As you put more effort into your skiing, you will go faster, produce more watts,
and burn more calories. All of these outputs will be measured and displayed by the Performance
Monitor (PM). Keep your goals in mind. For example, if your goal is to burn calories, it is more
important to ski for a long time than to ski hard. If you ski too hard, it will be difficult to ski long
distances.
Damper Setting
The SkiErg features a spiral damper with settings from 1 to 10. The damper
setting is like bicycle gearing. It affects the feel of the skiing but does not
directly affect the resistance. By changing the damper, you can simulate the
range of skiing speeds that occur on snow. Higher numbers feel more like
skiing in slow conditions or uphill. Lower numbers simulate faster snow
conditions, flats and skiing down hills.
10
9
8
7
6
5
4
3
2
1
For general fitness and a good aerobic workout, use a damper setting
between 1 and 4.
Cadence (Strokes Per Minute = SPM)
Cadence (or Tempo) is displayed in terms of strokes per minute (SPM) in the upper right corner of
the Performance Monitor. If you are skiing for general fitness, aim for a cadence between 30 and 40 SPM. Your cadence will
probably be lower for long steady workouts, and higher for short intense work intervals.
Skiers are encouraged to vary their cadence to match their poling tempo for the range of conditions
that occur on snow.
Immediate, Accurate Feedback
You can view your performance in pace, watts and calories. The PM displays your output in a choice
of units and display options. You can choose the units and displays that work best for you. Press
CHANGE UNITS at any time to view your performance in different units.
For more information about the Performance Monitor, see page 11.
0709
7
TRAINING
General Notes
Training Log: Start a training log if you do not already have one. You can set up a free online log at
concept2.com, or start your own spreadsheet. It is rewarding to monitor your progress.
Warm Up and Stretch: Ski easily for at least 5 minutes to warm up, then stretch for a few minutes
before continuing with your workout. Stretch again after your workout.
Getting Started: Workouts for New Skiers
Resist the temptation to ski for 30 minutes the first time you try the SkiErg. We recommend starting
with a series of short bouts of skiing, with breaks in between, taking care to master proper technique
from the start.
Your First SkiErg Workout
1. Begin with a minute or two of easy skiing to learn the technique. Keep the cadence between
25 and 30 spm (slower if you prefer). Follow the technique steps as shown on page 5, or
check out the technique video at concept2.com/ski.
2. Ski steadily and easily for 3 minutes at a cadence between 30 and 35 spm. Continue to think
about good technique while also settling into a comfortable rhythm. Keep an eye on the
Performance Monitor, which will show you how hard you are pulling on each stroke, how many
meters (or watts or calories) you have skied, how long you have been skiing, your cadence and,
if you are connected via a HR monitor, your heart rate.
3. Take a break for several minutes. Try pushing the and buttons on the PM
to see what is offered. Walk around, stretch, etc.
4. Ski easily again for 3-5 minutes. Depending on what is comfortable for you, your cadence may
be anywhere between 30 and 45 spm.
5. Rest again for 1-2 minutes.
6. Repeat Step 4 once more; twice more if you’re feeling really good.
The Second Ski
1. Warm up easily for 5 minutes, thinking about good technique, then stretch.
2. Ski steadily a little harder for 2 minutes.
3. For the next five minutes, alternate 30 seconds of moderate skiing with 30 seconds of very
easy skiing. Cadence can be anywhere between 30 and 45 spm.
4. Ski easily for 2 minutes.
5. Repeat Step 3.
6. Ski easily for 3-5 minutes for a cool-down. Stretch.
8
0709
TRAINING
The Third Ski
1. Warm up easily for 5 minutes, thinking about good technique, then stretch.
2. Ski steadily for 10 minutes at a comfortable pace.
3. Ski easily for 3-5 minutes.
4. Repeat Step 2.
5. Ski easily for 3-5 minutes for a cool-down. Stretch.
The Fourth Ski
1. Warm up easily for 5 minutes, thinking about good technique, then stretch.
2. Ski steadily for 4 minutes at a moderately intense pace. You should be feeling quite tired by the
end of this work interval.
3. Ski easily for 3 minutes to rest.
4. Repeat Steps 2 and 3 three to four more times for a total of 3–4 four-minute intervals.
5. Ski easily for 3–5 minutes for a cool-down. Stretch.
The Fifth Ski
1. Warm up easily for 5 minutes, thinking about good technique, then stretch.
2. Ski steadily a little harder for 2 minutes.
3. For the next five minutes, alternate 1:40 of moderately intense skiing with 20 seconds of very
easy skiing. Cadence can be anywhere between 30 and 45 spm.
4. Ski easily for 2 minutes
5. Repeat Steps 3 and 4 two more times for a total of 15 minutes of these “short-rest” intervals.
6. Ski easily for 3–5 minutes for a cool-down. Stretch.
0709
9
TRAINING
Benchmark Pieces
Choose from the following suggested benchmark pieces and do them non-stop as hard as you can.
Record your meters and time skied for these pieces. You should repeat these benchmark pieces
periodically, every month or so, to see how you are progressing. You can also enter them in the
Concept2 Online Ranking.
• Sprint benchmark: 500 meters
• Aerobic benchmark: 2000 meters
• Endurance benchmark: 5000 meters or 30 minutes
Using Workout Data to Get Faster and Fitter
The Concept2 SkiErg uses the same Performance Monitor that has been helping rowers train
for many years. The PM is a powerful training partner because it is accurate, repeatable and selfcalibrating. Here are several ways to use the PM to improve your fitness and your skiing performance.
Longitudinal Testing
To measure your progress over time, repeat one or more tests on the SkiErg every month or two.
Keep everything the same (time or distance of test, damper setting, etc.) so that any differences
measured will reflect differences in your conditioning.
Testing Across a Range of Distance/Time
To assess your relative conditioning over different distances, perform a series of SkiErg tests from
100 meters to 10 kilometers. To assess your relative conditioning over different times, perform a
series of SkiErg test from 4 minutes to 30 minutes.
Speed Efficiency Testing
Perform the same test piece at a range of damper settings to determine your strengths and
weaknesses in application of power. For skiers, this will determine your effectiveness at different
skiing speeds: fast conditions vs. slow conditions, uphill vs. flat, etc.
10
0709
OVERVIEW OF THE PERFORMANCE MONITOR(PM)
For more detailed information about using the Performance Monitor, please visit concept2.com/pm.
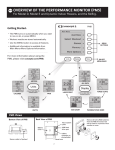
These buttons allow you to:
• make menu selections
• increment numbers for setting workouts and date/time
• view alternate displays while skiing
allows you to select
meters, pace, watts or calories.
Push this button any time while
setting up a workout, skiing or
viewing results.
allows you to
choose another display. Push
this button any time while skiing.
Each time you press [CHANGE
DISPLAY] a new display is
shown. See below.
LogCard – when a LogCard is present, workout data will be stored
on the LogCard. After your workout, return to the Main Menu before
removing the LogCard to ensure proper storage of data. (If no LogCard
present, data is stored in Memory.) Use the “Concept2 LogCard
Utility” to back up your LogCard data to your PC. (USB cable provided)
Note: A LogCard is provided with every Performance Monitor (PM).
Each card can be shared by up to five users. Additional cards can be
purchased from Concept2.
Five Graphic Displays
ALL DATA
turns on the monitor and displays Main Menu
or the previous menu. After a workout, press this button to
end the workout and return to the Main Menu.
FORCE CURVE
PACESKIER
BAR CHART
LARGE PRINT
Note: Heart Rate (HR) will be displayed only if HR Interface is in use.
GETTING STARTED
Turning the PM On/Off:
General Operation:
The PM will turn on when you:
• The PM automatically displays your workout data as soon as you start
skiing. It is not necessary to press any buttons if you do not want to.
•
•
•
•
start to pull
press [MENU/BACK]
insert a LogCard or USB cable
insert batteries or battery pack
The PM turns off after four minutes of inactivity
on a workout screen, or after one minute on the
Main Menu screen.
Setting Date and Time:
The first time you turn on the PM, you are
prompted to set the date and time. This ensures
your results are associated with the proper date.
• Press [MENU/BACK] to go back to the previous display.
• Press [CHANGE UNITS] or [CHANGE DISPLAY] at any time during and
after your ski to view different units and a different presentation of your
workout data.
• We encourage you to explore the menu and experiment with the buttons!
Using a Heart Rate Monitor:
The PM displays your heart rate if one of the following heart rate systems
is in use:
• If you ever need to re-set Date/Time, from
Main Menu press More Options > Utilities >
Set Date and Time. Use buttons as indicated
to increase or decrease time.
11
PM3
PM4
The PM3 will receive heart
rate transmission from a
Polar™ chest belt IF the
optional Concept2 Heart
Rate Receiver (available
from Concept2) is in use
and plugged into the PM3.
The PM4 will receive heart rate
transmission from a Polar™ chest belt
IF the optional Concept2 Heart Rate
Receiver (available from Concept2) is in
use and plugged into the PM4.
Not available.
The PM4 will receive heart rate
transmission directly from a Suunto™,
Garmin™ or ANT+SPORT™ chest belt. See More Options for set up.
UNDERSTANDING THE PM MENU OF OPTIONS
Just Ski – Automatic Operation
Main Menu
Just Ski
•
Select Workout
•
Games
•
Information
•
More Options
•
Just Ski is designed for those days when you would rather not push any buttons or pre-set your
workout. Your first pull will turn on the PM and start recording your workout time and distance
automatically. You may also select Just Ski to set up the PM screen before you start skiing.
Note: You must ski for at least one minute for results to be saved in memory or on your LogCard.
Just Ski allows you to ski up to 50,000 meters.
Select Workout
Select Workout
Standard List •
Custom List •
ReSki •
New Workout •
Favorites •
The PM lets you choose or create a wide variety of workouts. You can choose
from the Standard List of pre-set workouts provided on the PM, or you can
create workouts of your own and build your own Custom List. If you have a
LogCard, you can store your five favorite workouts (Favorites) on the LogCard.
The ReSki function allows you to “re-ski” a saved workout (in Memory or on
the LogCard) by skiing against a Paceskier driven by a split-by-split* replay of the
saved workout. You can also race a Paceskier in a New Workout by entering a
pace for the Optional Paceskier setting when you set up the workout.
New Workout
Single Distance
•
Single Time
•
Intervals: Distance
•
Intervals: Time
•
Intervals: Variable
•
*Understanding Splits: Your workout results will be displayed and stored in
two ways: as a final result for the total distance or time, and as a set of points
along the way called splits. The splits show how your pace varied through
the workout. If you select a workout from Standard List, Custom List, or
Favorites, the duration of the split will be set for you. If you set up a New
Workout you have the opportunity to set the split duration. The PM divides your
New Workout into five segments, or splits, unless you alter the split duration
during set up. Interval workouts are not formatted to utilize splits.
To edit Custom List you must have a LogCard inserted. From Main Menu
select
More Options > LogCard > LogCard Utilities > Edit Custom List. This
enables you to copy workouts from Favorites on your LogCard to the Custom
List on the monitor.
Games
Fish Game •
Darts •
Target Training •
Racing •
Games
Fish Game: Earn points by catching good fish, and avoid losing points by
getting caught by the bad fish! Ski harder and your fish swims up. Ski easier and
your fish swims down. Each game lasts four minutes. Your Fish Game workout
information (time, distance, pace per 500 meters, etc.) is logged to your
LogCard (or PM Memory if skiing without a LogCard) just like a regular workout.
Darts (PM4 Only): This game rewards consistency in stroke rate and power
output. You get 300 darts to “throw” in a game and your score is calculated just
like a real game of darts. A bull’s eye is worth 50 points and the next three rings
are worth 25, 10 and 5 points each.
Target Training (PM4 Only): This game rewards consistency and gives you
additional options to make it a more powerful training tool. Your score is the
percent of the best possible score obtainable. A bull’s eye is worth 5 points,
and the remaining rings are worth 3, 2, and 1 point.
Score
6800
Target
s/m
27
72.4
Darts
154
Target
/500
2:26
Score
%
3:15
Target Training offers two choices:
• Just Ski – An open-ended target training session that allows you to ski for as
long as you like. Like the Darts game, the target pace will be based on your
recent pull.
• Advanced – Gives maximum control of your target training session by
allowing you to set your target pace, target stroke rate and workout time.
If you are interested in achieving a target pace and stroke rate, and holding
it for a pre-determined length of time, this is the game for you.
Racing (PM4 Only): The PM4 enables you to set up races with up to eight PM4equipped SkiErgs without using a computer. This can be done wirelessly or by
using Ethernet patch cables available from Concept2. If using cables, be sure to
plug them in before starting the race.
12
Target
s/m
26
Target
/500
2:12
Race Display
1-4 racers
1530m 32 /
s
1:55
m
/500
ave
1:53.2 Watt
Lane 1
-25
m
Lane 2
-20
m
Lane 3
peterd
-2000m
0709
One person creates the race on their PM4 by following the
PM4 menu; others join in using their own PM4.The race creator
is always in Lane 1 and starts the race when all are ready.
Remaining lane numbers are assigned based on order of entry
into the race. The race screen displays names for racers using
LogCards.
If using Suunto™ chest belts, you must use cables to race. In
certain environments where other devices (WiFi, Bluetooth, etc.)
are in use, Concept2 suggests use of cables. Only one wireless
race can be in progress at a time.
Race Display
5-8 racers
1530m 32 /
s
1:55
m
/500
ave
1:53.2 Watt
Race leader
Racer just ahead of you
You
Racer just behind you
1 Lane 7
+23m
4 Lane 4
+ 9m
5 Lane 1
6 peterd
Position
in race
-12m
Meters
ahead(+)
or behind(-)
Information/Help
Information
Overview
•
PM Details
•
How to Ski
•
Drag Factor
•
More
•
The PM contains on-board information to help you if the manual is not
available. This section includes a brief skiing lesson with an animation of
proper skiing technique, an explanation of the Drag Factor, information about
batteries and more. We encourage you to press the Information button from
the Main Menu and read through the information provided.
More Options
The More Options menu provides the following functions and utilities:
More Options
Display Drag Factor •
Utilities •
Connect Suunto HR •
Memory/Logcard •
Switch User •
Memory
Summary
•
Month Totals
•
List by Date
•
List by Type
•
LogCard Utilities
•
• Display Drag Factor: Drag factor is a measure of fan load. The PM self-calibrates by recalculating
the drag factor every stroke so you get a true measure of your effort regardless of the damper
setting or changing conditions.
• Utilities: Allows you to re-set the date, time or language. You can also adjust the contrast of the
LCD, check battery status and add workouts to the Custom List.
• Connect Suunto HR: (PM4 only) Suunto™ heart rate chest belts can be used to display and
record your heart rate. Each Suunto chest belt has a unique ID number. Use this menu to select
your chest belt’s ID number. Save your ID number to a LogCard to have the LogCard automatically
recognize your Suunto™ chest belt (for future workouts). Garmin and other ANT SPORT™ chest
belts may also be used. For more information, visit concept2.com/heartrate.
• Memory/LogCard: The PM stores workouts in two ways. If no LogCard
is present, the PM will store your most recent workouts in Memory. The
oldest are automatically deleted. If a LogCard is inserted before a workout,
the workout data is stored on the LogCard, which stores approximately 300
workouts. The LogCard enables you to track your total and monthly meters
and your performance during each split or interval of your workout (including
heart rate, if available). You can view your workouts listed by date or by type.
Workout data can be moved from Memory to LogCard.
Monthly Totals
Dec
Nov
Oct
Sep
Aug
July
Jun
May
Apr
Mar
Feb
Jan
7:44:40
3:04:10
7:37:50
8:40:50
47:10
:00
1:44:50
5:59:10
9:09:30
8:32:10
7:20
1:55:10
Judy
88260
34880
89000
100950
9050
0
21050
72160
109390
99260
1500
21570
• Switch Users: Enables you to switch from one user to another on a shared LogCard.
Additional information is available at concept2.com and c2forum.com.
BATTERY INFORMATION
PM3
PM4
The PM3 uses two alkaline D-Cell (LR20)
batteries. When you are skiing, the
flywheel provides a portion of the power
to extend battery life.
Comes equipped with rechargeable battery pack. Recharge rate depends
on usage pattern of skier: the more and harder you ski, the more quickly
the PM4 charges. Under certain usage patterns, it may be better to use
two alkaline D-Cell (LR20) batteries.
May also be recharged by connecting PM4 to PC using USB cable.
Refer to concept2.com/pm4 for more info.
0709
13
Notes:
1) Remove batteries or battery pack from the PM3 or PM4 if
monitor will not be used for a period of four months or more.
PM3
Battery compartment: Loosen screw and press
thumbstrike in direction shown to open.
PM4
Safety Information for PM4 Rechargeable Battery Pack
Do not:
Do:
• Open the plastic case
• Use only in a PM4; if not used in PM4, store carefully so pins are not shorted
• Drop the battery pack
• Keep clean and dry
• Allow battery pack pins to touch each
other or any metal object
• Use between 0˚ and 40˚ C
• Use if damaged or leaking
• Keep battery pack away from children
• Trash, incinerate, crush, etc.
• Charge (ski or plug PM4 into USB) after prolonged period of non-use
• Recycle properly
WARNING: If batteries leak, do not use them. Battery fluids are corrosive and can damage eyes, irritate skin, etc. If
contact occurs, wash affected area immediately and thoroughly with water.
MISCELLANEOUS
Cleaning the PM
Use a cloth lightly dampened with water only. Do not spray with a cleaner or leave in the rain.
Formulas Used
Watts = 2.80/(sec/meter)^3
Calories/Hour = Kcal/hr = (watts) x (4) x (0.8604) + 300
Bottom View of PM
Back View of PM
Flywheel sensor cable must be connected
here for the PM to operate.
PM3
PM4
Race system jacks
Port for the optional
Polar™ heart rate
receiver.
USB port for connecting to a computer. Beveled
corners on USB cable plug face the back of the
monitor. DO NOT FORCE when plugging in.
See concept2.com/pm for current information.
Battery cover
Reset here
PM TROUBLESHOOTING
1. If the PM malfunctions or does not “wake up,” try one of the following:
• Insert a paper clip (PM3) or pen/pencil tip (PM4) into the reset hole on the back and press lightly.
• Remove the batteries for 30 minutes and insert two new alkaline D-Cell (LR20) batteries.
2. To change language: press [MENU/BACK] until screen stops changing. Press fifth grey button on right, then press second
grey button on right twice, and select your language. Alternately, hold down CHANGE UNITS and CHANGE DISPLAY and
reset monitor. You can then select your desired language.
3. If your computer does not recognize that your PM3/PM4 is connected to it try one of the following:
• Use another computer and/or USB cable.
• Remove batteries for 30 minutes then reinsert batteries and try again.
Refer to concept2.com/pm for more information and software updates.
14
0709
MAINTENANCE
A minimal amount of maintenance performed on a regular basis will assure proper function and
prolong the life of your SkiErg. The PM will keep track of accumulated, or lifetime, meters. This will
help you determine when to perform maintenance procedures. To view lifetime meters on the PM
push Main Menu/More Options/ Utilities/ Product ID/More Information.
Every 500,000 meters (approximately 50 hours of use)
Inspect the Cords
There are three separate cords and one bungee cord to inspect. Important! All cords are of a specific
type and should be replaced with the appropriate Concept2 replacement cord if significant wear or
damage is observed. See below for a description of cord wear/damage.
Cord Inspection:
1. The blue cord is a single cord connected to both handles and can be easily inspected by pulling
the handles all the way out and visually checking for wear. See below for a description of cord
wear.
2. To inspect the cords working inside the vertical frame, the lower back cover must be removed. If
the SkiErg is mounted to a wall it must be removed for this inspection.
• Remove the lower back cover by removing the six screws. This will expose the light grey cord
that winds onto the flywheel spool, the blue cord that winds onto the spool (this is a separate
cord form the one attached to the handles), and the bungee cord.
• Have a helper slowly pull the ski pole grip handles all the way out and observe the condition of
the cords. Pulling the handles out will allow you to see the entire working length of these three
cords.
A Description of Cord Wear/Damage:
• The blue cord is made up of strong, white inner fibers and the blue braided covering. Some
“fuzzing” of the blue covering is to be expected, but once the white fibers are exposed the
cord should be replaced immediately.
• The light grey cord is a solid braid (not a covering over inner fibers). Over time the surface will
show “fuzzing.” If this “fuzzing” becomes worse in a localized spot on the cord it is time to
replace the cord.
• The bungee cord is similar to the blue cord but has elastic fibers with a braided covering. Some
“fuzzing” of the covering is to be expected, but once the white fibers are exposed the cord
should be replaced immediately.
Inspect the Fasteners
Check that all fasteners are tight and have not loosened during use. If your SkiErg is wall mounted,
pay particular attention to the wall mount fasteners.
0709
15
MAINTENANCE
As needed
•Clean grips and straps after each workout. Use a mild soap or cleaning product.
•Clean surfaces of your SkiErg with any household cleaner. DO NOT spray any fluid onto the
monitor.
•Clean dust and lint which can collect inside of the flywheel enclosure. This buildup can restrict
airflow reducing the resistance of the fan. The outer cover of the fan enclosure can be removed
for cleaning by removing the four screws connecting the cover halves.
See illustrations below.
1.
2.
4.
5.
3.
6.
7.
IMPORTANT: The Performance Monitor (PM) is a sealed unit. DO NOT TAKE APART.
Any attempt to dissassemble will void warranty. Contact Concept2 if there are
problems with the PM.
16
0709
SKIERG WARRANTY
Concept2 SkiErgs are backed by a limited 2 year and 5 year warranty. For complete warranty
information in the U.S. and Canada, visit concept2.com.
For warranty information outside the U.S. and Canada, contact the authorized Concept2 dealer
from where your SkiErg was purchased. A list of authorized Concept2 dealers can be found at
concept2.com/international. If you do not find a local dealer in your territory visit concept2.com
or email [email protected].
0709
17
concept2.com/ski