1
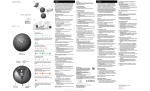
Karaoke Master HD
KM210 User Guide
使用手冊
FRONTIER TECHNOLOGY INC.
www.frontier.com.tw
5F, No.69-8, Sec.2, Chung-Cheng E. Rd., TamShui Dist.,
New Taipei City 251,
Taiwan
Tel: +886-2-2809-6300
Fax: +886-2-2809-6225
Email: [email protected]
寶鐶實業有限公司
251新北市淡水區中正東路2段69-8號5樓
IMPORTANT!
Contents
To prevent from Bluetooth
transmission lost or bad receiving
of wireless microphones, DO
NOT use or store the device and
its microphones in a magnetic
environment.
Do NOT expose the device to high
temperatures or place it near a fire or
heat source, so to avoid damaging
the battery.
This devise is NOT waterproof. Do
NOT use or store the device in a place
near water, raindrops, juice, coffee,
perspiration, etc., or otherwise in places
with excessive humidity or steam.
Do NOT drop the device or apply
excessive force to it.
Do NOT subject the device to
extreme temperatures.
Clean only with a soft, dry cloth.
PART1 Getting Started
1.1
Package Contents
1.2
Jacks
1.3
Remote Control & Use
PART2 Connecting Setup
2.1
Microphones Connecting
2.2
Connecting to Input Devices
2.3
Connecting to Output Devices
PART3 Using KM210
WARNING!
Do NOT attempt to disassemble, repair,
reassemble the device on your own,
or remove the warranty sticker. Any of
these actions will void the warranty and
any repair services covered thereunder.
1
he information provided in
T
this User Guide is subject to
change without prior notice.
3.1
Basic Operation
3.2
Advanced Features
PART4 Certifications, Liability,
and Trademarks
2
3
7
10
12
1.2 Jacks
PART 1 Getting Started
Rear View
⑤
⑧ ⑨
Front View
1.1 Package Contents
Magic Control
Included in this package are:
myCAST Wireless HD AV
Receiver
KM210 Main Set
AC Power Adpater
Portable Hi-End Active
Speaker
(DC 5V1.5A out)
①
(Version 1.4a, Type A connector)
Microphone(Ø6.3mm connector,
A
ctual contents may vary according
to sales territories and their respective
sales representatives.
impedance 600Ω±30%)
Audio Cable
(Dual RCA connectors to
Ø3.5mm connector, or Ø3.5mm
connectors at both ends)
Accessory options are:
W1 2.4GHz Wireless
Microphone Set
3
⑦
Storage of recorded files, for use of Micro SD
cards up to 32MB
③ AUX: Wired audio input, connects to earphones
using Ø3.5mm connector
HDMI Cable
Warranty Card
⑥
② Micro SD Card Slot:
Accessory Recommendations
User Guide
④
① Power Jack: Input voltage DC 5V1.5A
Microphone Jacks Panel Opened
IR Remote Control
Audio Cable
② ③
①
④ HDMI Input Jack:
②③
Connects to input sources using Type-A
connectors
① Microphone Input Jacks:
⑤ L/R Analog Output Jacks:
MIC-A and MIC-B
Connects to active speakers using RCA red/
white connectors
② IR Receiving Area
⑥ Ω: Connects to earphone using Ø3.5mm
③ LED Indication:
connector
Blue- Active
Blue BlinkingWaiting for Bluetooth Connection
⑦ HDMI Output Jack:
Connects to TV using TYPE-A connector
⑧ Optical Audio: Connects to stereo using
Red- On Recording
Red Blinking Once- Remote Control
Command Received
S/PDIF optical connector
⑨ ANT: Connection for 2.4GHz wireless
microphone antenna
4
Perspective of Bottom View
③ Music Volume Adjustment
The 2.4GHz wireless
microphone receiver module
can be slid into the receiver slot.
Open the
bottom case
here
①
②
③
④
⑤
⑥
⑦
⑨
⑧
Increases or decreases the music volume
from 0-9 range. The lower button is mute
and it is preset to "5".
⑧ REC(Recording):
④ Microphone Volume Adjustment
Press ON to start the recording and OFF
to stop the recording. Do remember to
plug Micro SD card into the slot and make
sure there is enough memory space. The
LED will turn to RED as soon as recording
started. Be aware of micro SD card may
not be plugged into the slot or there is not
enough memory space on SD card if LED
does not turn to RED or RED light is off.
The recording is using high quality
48KHz/16-bit sample rate; the file size of
each recorded song (average 4 minutes) is
about 45MB.
Increases or decreases the microphone
volume from 0-9 range. The lower button is
mute and it is preset to "6".
⑤ Pitch Adjustment
The device takes full range pitch adjustment
from +12 to -12. Pressing the lower button
「0」 will force back to original key.
⑥ Reverb Echo Adjustment
1.3 Remote Control & Use
The LED will blink RED once whenever
you press any button to confirm the
command received.
① Power Button
Turn on or turn off the KM210 during
AC power adapter connected.
② Choose Input Sources
「2.4GHz Wireless
Microphone Set」
Choose one of input sources from
AUX, Bluetooth or HDMI to enable
the audio (music) input.
Receiver Module
5
The vocal reduce effect may differ due
to different song recording. Normally
it will reduce 80% original vocal in
average.
The device is with versatile 8 reverb
echo sound effects. They are Jazz, Hall,
Superpro, Church, Pro, Echo, OnStage and
SuperEcho in low to strong sequence. It
is preset to「OnStage」to provide stronger
effect.
⑦ Vocal Multiplexing and Vocal
DO press the OFF button to stop
recording to prevent the latest recorded
file damaged.
⑨ SET:
Reduce:
The button is to match the frequency of
Wireless Microphone module with the
2.4GHz wireless microphone. The wireless
microphone set is optional accessory and
the module is included. Please refer to
the user guide of wireless microphone for
further setting instruction.
Switch between right track or left track on
karaoke vocal multiplexing. The device will
reduce about 80% original vocal of MP3/
Movie Video once「Reduce Vocal」 pressed.
The「Stereo」will release the settings and go
back to preset stereo playback.
6
PART 2 Connecting Setup
2.1 Microphones Connecting
2. Using 2.4GHz wireless
microphone:
1. Connect the wired
microphone plug into either
MIC A or MIC B.
To use XCUBE’s 2.4GHz wireless
microphone, you need to install the
receiver module onto the designated slot
and fasten the 2.4GHz Antenna on the
rear side of KM210.
2.2 Connecting input devices
Input sources:
Smart phones, Tablets, Other
smart devices with display
Smart TV
RCA
Connector
3.5mm
Connector
Bluetooth
AC Power
Adapter
Wired microphone inputs:
2 ports, MIC A and MIC B
HDMI Type A connector
MIC Jacks: Ø6.3mm
Input sources:
Smart phones, Tablets, Smart
TV Dongle/Box, Set Top Boxes,
Laptops, Game Players, DVDs,
other HDMI Smart Devices
Impedance: 600Ω±30%
7
8
2.3 Connecting to Output Devices
PART 3 Using KM210
3.1 Basic Operation
Amplifier
Portable Active
Speakers
DO follow PART 2 Connecting Setup to connect
the necessary devices before using KM210. As
soon as the setup completed and the input
source is ready, follow up the procedures
sequentially.
3.5mm
Connector
RCA
Connector
Micro SD card
Gold-Plate
Side Down
S/PDIF Optical
Connector
Bluetooth
The device will receive wireless audio input
by using Bluetooth. Press Bluetooth button
and then speaker will make a beep sound
that stands for waiting device match. Enable
your player’s Bluetooth and choose「KM210」
device , speaker will confirm with beep while
devices matching completed.
1. Turn the device ON with remote
control. Speaker confirms with
a beep.
HDMI
After TV displays the video input from HDMI
source device, press HDMI button to receive
audio input from HDMI source too.
The
device will turn ON directly as
soon as AC power adapter plugs in.
HDMI Type A Connector
AC Power
Adapter
2. Select one of the following input
sources with remote control.
3. Now start to playback songs & sing.
UX and Bluetooth are used for audio
A
input only
Input sources support smart phones,
tablets, TV Dongles/boxes, STB Set
top box, laptops, game players, DVD
players, and other smart devices.
AUX:
3.5mm
Connector
This is wired audio input by using Ø3.5mm
connectors to connect KM210 AUX audio
jack and input source’s headphone jack.
HDTV
Headphone
9
10
3.2 Advanced Features
the preset effect.
Remember to use IR remote control as
the input interface always!
Vocal Multiplexing and Vocal
Reduce
Volume Control
Volumes of music and microphone can
be adjusted separately. To prevent the
bad sound quality caused by speaker
overload, always tune your input under
80% of volume
User can switch between LEFT,
RIGHT, or STEREO tracks for karaoke
vocal multiplexing, otherwise to press
「Reduce Vocal」button to remove the
original vocal from MP3/MV (movie
video) songs. Refer to chapter 1.3 for
further information.
Pitch Adjustment
Recording
Pitch can be adjusted dynamically
from +12 to -12 ranges. Whenever you
change a pitch, this pitch will be fixed
until the「0」button pressed.「0」will
make pitch to go back the original key.
The device provides high quality
recording feature. The recording is
not only for singing recording but also
music and speech recording. Pressing
REC ON button will start recording
immediately, and make sure to press
REC OFF to stop recording for end of
song playback or speech.
Reverb Echo Effects
The device is with 8 varieties of reverb/
echo sound effects. From weak
to stronger effect, they are Jazz,
Hall, SuperPro, Church, Pro, Echo,
OnStage, and SuperEcho. OnStage is
PAR T 4
C e rtific atio ns, L iab ility,
and Trad e m arks
Certifications
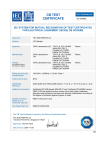
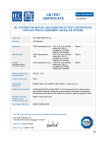
This device is CE and FCC certified.
Limited Liability
Neither the manufacturer nor the dealer will be
responsible for any accidental damage including
bodily injury resulting from any misuse or
improper operation by any user.
★ This product ismanufactured and assembled in
Taiwan.
11
12
中文 篇
重要注意事項
目錄
不要使主機及麥克風置於鐵器或磁性環境下及使用,以
避免藍芽傳輸或無線麥克風接收受到干擾。
第一章 使用前
請勿隨意摔落主機或者讓主機過度承受重力。
不要使主機承受極端過高或過低溫度。
不要將主機置於高溫曝曬環境下,避免電池受損。
本產品不防水,請勿於雨滴,水霧,果汁,咖啡,蒸汽,汗
水等流體能飛濺到它的地方使用或儲存。
僅可使用柔軟及乾燥的布清潔主機。
1.1
包裝內容與配件
1.2
主機插槽定義
1.3
遙控器定義與使用
第二章 設備連接
2.1
連接麥克風
2.2
連接輸入設備
2.3
連接輸出設備
重要警示
第三章 開始使用
決不可自行拆除、修理、重組主機、或者撕除保固貼紙,
上述行為將導致主機保固失效並不予維修。
決不可自行更換電池,上述行為將導致電池爆裂風險。
本
手冊裡提供的內容與訊息可能隨時調整,恕不另行
3.1
基本操作
3.2
功能使用
第四章 安全認證、有限責任、與商標
通知。
1
2
3
7
10
12
1.2 主機插槽定義
第一章 使用前
後視圖
⑤
③
⑧ ⑨
前視圖
1.1 包裝內容與配件
選配項目
W1 超高頻 2.4GHz
標準包裝內容,含下列項目:
KM210 主機
無線麥克風組
電源連接器
魔力棒 Magic Control
(DC 5V1.5A out)
①
④
⑥
⑦
① 電源輸入孔:
前蓋板打開後
5V1.5A 輸入(請使用公司標準配件)
myCAST 無線 HD 影音接收器
IR 遙控器
②
② SD 卡插槽:
使用 Micro SD 卡(支援 32GB),提供錄音檔儲存
可攜式高音質擴音機
③ AUX:
音源線
音源輸入,使用 Ø3.5mm 接頭
使用手冊
①
使用者自行購買配件建議規格
HDMI 影音連接線
保固卡
(支援 1.4a,雙邊 TypeA 接頭)
包
裝內容依地區及經銷商不同,會有
不同調整。
有線麥克風
(Ø6.3mm 接頭,600Ω±30% 阻抗)
音源線
(雙 RCA 接頭 - Ø3.5mm 接頭,
或雙邊 Ø3.5mm 接頭)
②③
④ HMDI 輸入:
① 麥克風輸入孔:
使用 TYPE-A 接頭,輸入影音訊號
MIC-A、MIC-B
⑤ L/R 輸出:
使用 RCA 紅 / 白色雙接頭,輸出音源訊號
② IR 紅外線遙控器接收點
⑥ Ω:耳機輸出孔,使用 Ø3.5mm 接頭
③ LED 燈號:
⑦ HMDI 輸出:
藍色 主機開機
藍色閃爍 藍芽搜尋中
使用 TYPE-A 接頭,輸出影音訊號至電視
⑧ Optical Audio:
紅色 錄音中
紅色閃爍一次 接收到遙控器按鍵訊號
使用 S/PDIF 光纖接頭,輸出音源訊號至擴大機
⑨ ANT:
2.4GHz 無線麥克風天線插孔
3
4
後蓋透視圖
將後蓋板掀起後,可將專屬選購
配件「2.4GHz 無線麥克風組」之
接收器插入接收器插槽,接收器
插槽具方向性及防呆裝置。
①
②
③
④
⑤
⑥
⑦
主機下蓋蓋板
由此拆開
⑧
⑨
1.3 遙控器定義與使用
使用遙控器時,每次按鍵後主機前端 LED
燈號會出現紅燈閃爍一次,代表收到按鍵
訊息。
① 電源開關:
連接電源狀態下,可以開啟(ON)或關
閉(OFF)主機。
② 輸入源選擇:
AUX/ 藍芽 /HDMI 3 種選擇,開機
後必需先選擇輸入源,才會啟動音訊
(Music)輸入。
「2.4GHz 無線
麥克風組」接收器
5
③ 音樂音量調整:
音量調整範圍為 0-9 階,最下方為音樂
靜音鍵,音量預設值為 5。
④ 麥克風音量調整:
音量調整範圍為 0-9 階,最下方為麥克
風靜音鍵,音量預設值為 6。
⑧ 錄音(REC):
人聲消除(Reduce Vocal)效果依
每首歌曲錄製特性不同而有差異,
降低約 80% 為平均值。
按開啟(ON)後可立即開始錄音,按關
閉(OFF)後立即停止;開始錄音前請插
入 Micro SD 卡並確認預留充足記憶空
間,錄音開始後主機前方 LED 會轉為
紅燈,如未轉為紅燈或紅燈消失,表示
Micro SD 卡未插入或記憶空間不足。
錄音採高音質 48KHz/16 位元取樣
⑤ 升降調(Key)調整:
升降調調整範圍為 +12 至 -12 全音域,
最下方「0」為歸零回復原調(Key)鍵。
⑥ 迴音殘響(Reverb)調整:
本機具備 8 種預設音場,由低至高依序
為爵士、劇院、唱將、教堂、迴蕩、歌神、
演唱會、舞台;最下方「0」為迴音關閉
(OFF)鍵,預設值為「演唱會」。
錄製,每首歌(4 分鐘)錄音檔案約為
45MB。
⑦ 聲道切換與人聲消除:
卡拉 OK 歌曲可經由按「左聲道(Left)」
或「右聲道(Right」選擇伴唱或原音
歌唱錄音時,歌唱完畢需按關閉
(OFF)鍵停止錄音;拔出 SD 卡前
需停止錄音,以免損壞錄音檔案。
⑨ 無線麥克風對頻(SET):
本公司之選購配件「2.4GHz 無線麥克
風」於出廠前會預先完成對頻,如使用
時發現無法完成對頻,可按此鍵重新對
頻(SET),操作方式參見「2.4GHz 無
線麥克風」說明書。
播出,一般 MP3/MV 歌曲可選擇按
「人聲消除(Reduce Vocal)」鍵,將
原音人聲降低約 80%,解除「人聲消
除(Reduce Vocal) 」可按「立體聲
道 Stereo」,開機預設值為「立體聲道
Stereo」。
6
第二章 設備連接
2.1 連接麥克風
2. 使用無線麥克風:將無線麥克
2.2 連接輸入設備
風接收器插入下蓋插槽,並插入
1. 使用有線麥克風:將麥克風接
頭插入 MIC-A 或 MIC-B。
輸入源:
智慧型手機、平板電腦、
其他具螢幕播放裝置
天線。
RCA 接頭
3.5mm 接頭
智慧型電視
Bluetooth
藍芽無線傳輸
有線麥克風插孔:2 個 (MIC-A、
MIC-B)
接頭規格:Ø6.3mm
電源接頭
HDMI Type A 接頭
阻抗規格:600Ω±30%
輸入源:
智慧型手機、平板電腦、智
慧電視棒 ( 盒 )、機上盒、筆
電、遊戲機、DVD、及其他具
備播放功能裝置
7
8
2.3 連接輸出設備
第三章 開始使用
3.1 基本操作
AMP 擴大機
3.5mm 接頭
RCA 接頭
隨身型主動式喇叭
Micro SD 卡
S/PDIF 光纖接頭
鍍金接觸面
向下插入
芽並搜尋「KM210」配對,當喇叭發聲
「嘟」,表示配對完成。
開始使用前,請依第二章所述將主機連接
音響擴大機,如欲使用 HDMI 輸入則需連
接電視,插入麥克風,插入電源供應器後,
並將輸入源開機待命;完成後依下列步驟
順序操作。
HDMI 影音輸入:
依第 2.2/2.3 節完成連接,確認電視已
出現影像後,按 HDMI 鍵即可將音訊傳
1. 以搖控器開機,開機後喇叭會發
入電視及音響擴大機。
聲確認開機完成。
3. 播放輸入源之影音,即可開始歌唱
插入電源供應器,主機會直接開機。
AUX 及 BT 藍芽僅為音源輸入,使用
輸入源螢幕作為影像顯示。
輸入源可為智慧型手機、平板電腦、智
慧電視棒(盒)、機上盒、筆電、 遊戲
機、DVD、及其他具備播放功能裝置。
2. 以搖控器選擇輸入源:
AUX:
為有線輸入,以 3.5mm 接頭音訊線連
接輸入源之耳機孔。
HDMI Type A 接頭
電源接頭
BT 藍芽無線輸入:
按藍芽鍵後,喇叭會發聲「嘟嘟嘟嘟 -
3.5mm 接頭
嘟嘟」待命配對,此時輸入源請開啟藍
HDTV
耳機
9
10
3.2 功能使用
第四章 安全認證、有限責任、與商標
主機功能使用,以搖控器作為輸入
控制介面。
聲道切換與人聲消除
卡拉 OK 歌曲由「左聲道」或「右聲道」
選擇伴唱或原音播出。
音量調整
安全認證
本主機通過 CE 、FCC 、BSMI 安全認證。
音樂音量與麥克風音量可分開調整,請
參考第 8 頁使用說明。
一般 MP3/MV 歌曲選擇「人聲消除」,
將原唱人聲降低。
有限責任
輸入源原始音量建議勿超過 80%,以
避免破音。
解除「人聲消除」按「立體聲道」,回復
預設值。
製造商或經銷商,不對起因於使用者的錯
用或不當使用,致造成包括人身傷害在內
的任何意外或損壞負責。
升降調(key)調整
錄音(REC)
本機升降調(key)為全音域 +12 至 -12
按開啟(ON)開始錄音,按關閉(OFF)
後立即停止。
調整,請參考第 8 頁使用說明。
升降調(key)設定後會固定音階,唱下
一首歌時可按「0」作歸零回復。
迴音殘響(Reverb)調整
本機具備 8 種預設音場,由低至高依序
為爵士、劇院、唱將、教堂、歌神、迴蕩、
舞台、演唱會;預設值為「舞台」。
本產品於台灣製造。
11
12