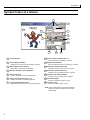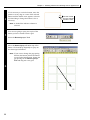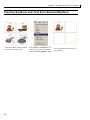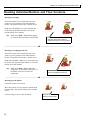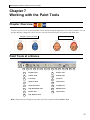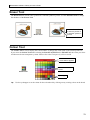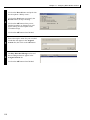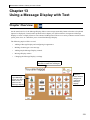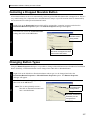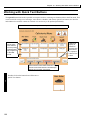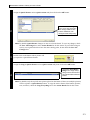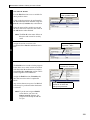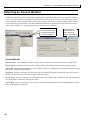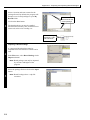
1
Boardmaker Software Family
User’s Guide
Version 6
Trademarks
Boardmaker and Speaking Dynamically Pro are registered trademarks of Mayer-Johnson LLC.
Picture Communication Symbols is a trademark of Mayer-Johnson LLC.
RealSpeak is a trademark of Nuance Communications, Inc. and or its licensors and is used under license.
Windows is a registered trademark of Microsoft Corporation.
Internet Explorer is a registered trademark of Microsoft Corporation.
In accordance with copyright law, the manuals and software may not be copied, in whole or in part,
without the written consent of Mayer-Johnson LLC
© Copyright 2007 Mayer-Johnson LLC. All Rights Reserved Worldwide
Mayer-Johnson LLC
P.O. Box 1579
Solana Beach, CA 92075-7579
U.S.A.
Phone: (800) 588-4548 or (858) 550-0084
Fax: (858) 550-0449
Web: www.mayer-johnson.com
E-mail: [email protected]
"MAYER-JOHNSON LLC'S LICENSOR(S) MAKES NO WARRANTIES, EXPRESS OR IMPLIED, INCLUDING WITHOUT LIMITATION THE
IMPLIED WARRANTIES OF MERCHANTABILITY AND FITNESS FOR A PARTICULAR PURPOSE, REGARDING THE SOFTWARE.
MAYER-JOHNSON, INC.'S LICENSOR(S) DOES NOT WARRANT, GUARANTEE OR MAKE ANY REPRESENTATIONS REGARDING THE
USE OR THE RESULTS OF THE USE OF THE SOFTWARE IN TERMS OF ITS CORRECTNESS, ACCURACY, RELIABILITY, CURRENTNESS OR OTHERWISE. THE ENTIRE RISK AS TO THE RESULTS AND PERFORMANCE OF THE SOFTWARE IS ASSUMED BY YOU.
THE EXCLUSION OF IMPLIED WARRANTIES IS NOT PERMITTED BY SOME
JURISDICTIONS. THE ABOVE EXCLUSION MAY NOT APPLY TO YOU."
"IN NO EVENT WILL MAYER-JOHNSON LLC'S LICENSOR(S), AND THEIR DIRECTORS, OFFICERS, EMPLOYEES OR AGENTS (COLLECTIVELY MAYER-JOHNSON LLC'S LICENSOR) BE LIABLE TO YOU FOR ANY CONSEQUENTIAL, INCIDENTAL OR INDIRECT DAMAGES (INCLUDING DAMAGES FOR LOSS OF BUSINESS PROFITS, BUSINESS INTERRUPTION, LOSS OF BUSINESS INFORMATION,
AND THE LIKE) ARISING OUT OF THE USE OR INABILITY TO USE THE SOFTWARE EVEN IF MAYER-JOHNSON LLC'S LICENSOR HAS
BEEN ADVISED OF THE POSSIBILITY OF SUCH DAMAGES. BECAUSE SOME JURISDICTIONS DO NOT ALLOW THE EXCLUSION OR
LIMITATION OF LIABILITY FOR CONSEQUENTIAL OR INCIDENTAL DAMAGES, THE ABOVE LIMITATIONS MAY NOT APPLY TO YOU.
MAYER-JOHNSON LLC'S LICENSOR'S LIABILITY TO YOU FOR ACTUAL DAMAGES FROM ANY CAUSE WHATSOEVER, AND REGARDLESS OF THE FORM OF THE ACTION (WHETHER IN CONTRACT, TORT (INCLUDING NEGLIGENCE), PRODUCT LIABILITY OR OTHERWISE), WILL BE LIMITED TO $50."
License Agreement
This is a legal agreement between you (either an individual or an entity), the end user, and Mayer-Johnson LLC. If you do not agree to the terms
of this Agreement, promptly return the disk package and accompanying items (including written materials and binders or other containers) to the
place you obtained them for a full refund. Using the accompanying diskettes indicates that you accept these terms.
Mayer-Johnson LLC Software License
GRANT OF LICENSE. This Mayer-Johnson LLC License Agreement ("License") permits you to use one copy of the accompanying Boardmaker, Boardmaker with Speaking Dynamically Pro, or Boardmaker Plus! software ("SOFTWARE") on any single computer, provided the
SOFTWARE is in use on only one computer at any time. If you have multiple Licenses for the SOFTWARE, then at any time you may have as
many copies of the SOFTWARE in use as you have Licenses. The SOFTWARE is "in use" on a computer when it is loaded into the temporary
memory (i.e., RAM) or installed into the permanent memory (e.g., hard disk, CD-ROM, or other storage device) of that computer, except that a
copy installed on a network server for the sole purpose of distribution to other computers is not "in use". Only the licensed number of individual
computers should be allowed access to the copy of SOFTWARE installed on a network server. If the SOFTWARE is permanently installed on
the hard disk or other storage device of a computer (other than a network server) and one person uses that computer more than 80% of the time
it is in use, then that person may also use the SOFTWARE on a portable or home computer. For versions of the SOFTWARE that only run when
the CD is in the CD drive, SOFTWARE can be loaded on multiple computers and the CD, but only one installed copy of the SOFTWARE can be
running at any one time.
COPYRIGHT. The SOFTWARE is owned by Mayer-Johnson LLC or its suppliers and is protected by United States copyright laws and international treaty provisions. Therefore, you must treat the SOFTWARE like any other copyrighted material (e.g., a book or musical recording). You
may not copy the written materials accompanying the SOFTWARE.
OTHER RESTRICTIONS. You may not rent or lease the SOFTWARE, but you may transfer your rights under this Mayer-Johnson LLC License
Agreement on a permanent basis provided you transfer this License Agreement, the SOFTWARE and all accompanying written materials and
retain no copies, and the recipient agrees to the terms of this Agreement. You may not reverse engineer, decompile, or disassemble the SOFTWARE. Any transfer of the SOFTWARE must include the most recent update and all prior versions.
Limited Warranty
LIMITED WARRANTY. To the original buyer only, MAYER-JOHNSON LLC. ("MJ") warrants for the period of ninety (90) days from the date of
delivery of the SOFTWARE to you as evidenced by a copy of your receipt, or until the SOFTWARE is modified by you, whichever period is
shorter, that: (1) The SOFTWARE, unless modified by you, will perform substantially the functions described in the documentation provided by
MJ; and (2) The media on which the SOFTWARE is furnished will be free from defects in materials and workmanship under normal use.
MJ does not warrant that the SOFTWARE will meet your requirements, that the operation of the SOFTWARE will be uninterrupted or error-free,
or that all SOFTWARE errors will be corrected. MJ is not responsible for problems caused by changes in the operating characteristics of computer hardware or computer operating systems which are made after the release of the SOFTWARE nor for problems in the interaction of the
SOFTWARE with non-MJ software. MJ will have no responsibility to replace or refund the purchase price of the media damaged by accident,
abuse or misapplication.
CUSTOMER REMEDIES. MJ's entire liability and your sole remedy under this warranty is that MJ will undertake to correct within a reasonable
period of time any reported "SOFTWARE Error" (failure of the SOFTWARE to perform substantially the functions described in the documentation), correct any errors in the documentation, and replace any magnetic media which proves defective in materials and workmanship on an
exchange basis without charge. In order to make a claim under this warranty you must return the defective item with proof of purchase to MJ or
an authorized dealer, postage prepaid, during the warranty period. If MJ is unable to replace defective media or MJ is unable to provide corrected SOFTWARE or corrected documentation within a reasonable time, MJ will at its sole and exclusive option, either replace the SOFTWARE with a functionally equivalent program at no charge to you or refund the purchase price of the SOFTWARE. These are your sole and
exclusive remedies for any breach of warranty.
NO OTHER WARRANTIES. THE ABOVE WARRANTIES ARE EXCLUSIVE AND IN LIEU OF ALL OTHER WARRANTIES, WHETHER
EXPRESS OR IMPLIED, INCLUDING THE IMPLIED WARRANTIES OF MERCHANTABILITY AND FITNESS FOR A PARTICULAR PURPOSE, NO ORAL OR WRITTEN INFORMATION OR ADVICE GIVEN BY MJ, ITS EMPLOYEES, DISTRIBUTORS, DEALERS OR AGENTS
SHALL INCREASE THE SCOPE OF THE ABOVE WARRANTIES OR CREATE ANY NEW WARRANTIES.
SOME STATES DO NOT ALLOW THE EXCLUSION OF IMPLIED WARRANTIES, SO THE ABOVE EXCLUSION MAY NOT APPLY TO YOU.
IN THAT EVENT, ANY IMPLIED WARRANTIES ARE LIMITED IN DURATION TO NINETY(90) DAYS FROM THE DATE OF DELIVERY OF
THE SOFTWARE. THIS WARRANTY GIVES YOU SPECIFIC LEGAL RIGHTS. YOU MAY HAVE OTHER RIGHTS, WHICH VARY FROM
STATE TO STATE.
Limitations of Remedies
NO LIABILITY FOR CONSEQUENTIAL DAMAGES. REGARDLESS OF WHETHER ANY REMEDY SET FORTH HEREIN FAILS OF ITS
ESSENTIAL PURPOSE, IN NO EVENT WILL MJ BE LIABLE FOR ANY SPECIAL, INCIDENTAL, CONSEQUENTIAL, INDIRECT OR SIMILAR
DAMAGES, INCLUDING ANY LOST PROFITS OR LOST DATA ARISING OUT OF THE USE OR INABILITY TO USE THE SOFTWARE OR
ANY DATA SUPPLIED THEREWITH EVEN IF MJ OR AN AUTHORIZED MJ DEALER HAS BEEN ADVISED OF THE POSSIBILITY OF SUCH
DAMAGES, OR FOR ANY CLAIM BY ANY OTHER PARTY. SOME STATES DO NOT ALLOW THE LIMITATION OR EXCLUSION OF LIABILITY FOR INCIDENTAL OR CONSEQUENTIAL DAMAGES SO THE ABOVE LIMITATION OR EXCLUSION MAY NOT APPLY TO YOU. IN NO
CASE SHALL MJ'S LIABILITY EXCEED THE PURCHASE PRICE OF THE SOFTWARE.
Nuance Communications, Inc. RealSpeak™ License
1. License Grant. Mayer-Johnson LLC. grants to End User a non-exclusive, non-transferable right and license to use RealSpeak on a
single copy of Speaking Dynamically Pro.
2. Ownership of RealSpeak. End User acknowledges that Mayer-Johnson LLC and its licensors and/or suppliers retain all right, title
and interest in and to the original, and any copies, of software which is incorporated into Speaking Dynamically Pro. Without limiting
the generality of the foregoing, End User agrees not to: (i) modify, port, translate, or create derivative works of the Speaking
Dynamically Pro; (ii) decompile, disassemble, reverse engineer or attempt to reconstruct, identify or discover any source code,
underlying user interface techniques or algorithms of the Speaking Dynamically Pro by an means whatsoever, or disclose any of the
foregoing; (iii) knowingly take any action that would cause Speaking Dynamically Pro to be placed in the public domain.
3. LIMITATION OF LIABILITY. MAYER-JOHNSON LLC AND ITS LICENSORS’ LIABILITY TO END USER FOR ANY CLAIM
ARISING UNDER THIS AGREEMENT OR OTHERWISE ARISING FROM THE TRANSACTIONS CONTEMPLATED HEREIN,
REGARDLESS OF THE FORM OF ACTION WILL NOT EXCEED AGGREGATE FEES ACTUALLY PAID TO MAYER-JOHNSON LLC
DURING THE ONE YEAR PERIOD PRECEDING SUCH CLAIM.
4. CONSEQUENTIAL DAMAGE. IN NO EVENT SHALL MAYER-JOHNSON LLC OR ITS LICENSORS OR SUPPLIERS BE LIABLE
FOR ANY SPECIAL, INDIRECT OR CONSQUENTIAL DAMAGES, INCLUDING, BUT NOT LIMITED TO, LOSS OF REVENUES AND
LOSS OF PROFITS, EVEN IF MAYER-JOHNSON LLC HAS BEEN ADVISED OF THE POSSIBILITY OF SUCH DAMAGES.
Boardmaker Family for Windows User Guide
Table of Contents
Introduction
1
System Requirements . . . . . . . . . . . . . . . . . . . . . . . . . . . . . . . . . . . . . . . . . . . . . . . . . . . . . . . . . . . . . . . . . . . . . .
Where to Get Additional Support . . . . . . . . . . . . . . . . . . . . . . . . . . . . . . . . . . . . . . . . . . . . . . . . . . . . . . . . . . . . .
Program Window at a Glance . . . . . . . . . . . . . . . . . . . . . . . . . . . . . . . . . . . . . . . . . . . . . . . . . . . . . . . . . . . . . . . .
Symbol Finder at a Glance . . . . . . . . . . . . . . . . . . . . . . . . . . . . . . . . . . . . . . . . . . . . . . . . . . . . . . . . . . . . . . . . . .
Exploring the Templates and Sample Boards . . . . . . . . . . . . . . . . . . . . . . . . . . . . . . . . . . . . . . . . . . . . . . . . . . . .
Basic Mouse Skills . . . . . . . . . . . . . . . . . . . . . . . . . . . . . . . . . . . . . . . . . . . . . . . . . . . . . . . . . . . . . . . . . . . . . . . .
Chapter 1
Building a Board and Working with its Appearance
Chapter Overview . . . . . . . . . . . . . . . . . . . . . . . . . . . . . . . . . . . . . . . . . . . . . . . . . . . . . . . . . . . . . . . . . . . . . . . .
Setting the Correct Paper and Board Size . . . . . . . . . . . . . . . . . . . . . . . . . . . . . . . . . . . . . . . . . . . . . . . . . . . . . .
Creating Multi-Page Boards . . . . . . . . . . . . . . . . . . . . . . . . . . . . . . . . . . . . . . . . . . . . . . . . . . . . . . . . . . . . . . . .
Working with Multiple Boards . . . . . . . . . . . . . . . . . . . . . . . . . . . . . . . . . . . . . . . . . . . . . . . . . . . . . . . . . . . . . .
Resizing a Board’s Window . . . . . . . . . . . . . . . . . . . . . . . . . . . . . . . . . . . . . . . . . . . . . . . . . . . . . . . . . . . . . . . .
Creating a Grid of Buttons . . . . . . . . . . . . . . . . . . . . . . . . . . . . . . . . . . . . . . . . . . . . . . . . . . . . . . . . . . . . . . . . .
Changing the Board or Button Background Colour . . . . . . . . . . . . . . . . . . . . . . . . . . . . . . . . . . . . . . . . . . . . . .
Changing the Button Border Thickness . . . . . . . . . . . . . . . . . . . . . . . . . . . . . . . . . . . . . . . . . . . . . . . . . . . . . . .
Invisible Button Borders . . . . . . . . . . . . . . . . . . . . . . . . . . . . . . . . . . . . . . . . . . . . . . . . . . . . . . . . . . . . . . . . . . .
Changing the Button Border Colour . . . . . . . . . . . . . . . . . . . . . . . . . . . . . . . . . . . . . . . . . . . . . . . . . . . . . . . . . .
Changing the Button Shape . . . . . . . . . . . . . . . . . . . . . . . . . . . . . . . . . . . . . . . . . . . . . . . . . . . . . . . . . . . . . . . .
Drawing a Line . . . . . . . . . . . . . . . . . . . . . . . . . . . . . . . . . . . . . . . . . . . . . . . . . . . . . . . . . . . . . . . . . . . . . . . . . .
Applying Dashed Button Borders . . . . . . . . . . . . . . . . . . . . . . . . . . . . . . . . . . . . . . . . . . . . . . . . . . . . . . . . . . . .
Applying 3-D Button Shadows . . . . . . . . . . . . . . . . . . . . . . . . . . . . . . . . . . . . . . . . . . . . . . . . . . . . . . . . . . . . . .
Clearing a Group of Buttons . . . . . . . . . . . . . . . . . . . . . . . . . . . . . . . . . . . . . . . . . . . . . . . . . . . . . . . . . . . . . . . .
Drawing a Freeform Button . . . . . . . . . . . . . . . . . . . . . . . . . . . . . . . . . . . . . . . . . . . . . . . . . . . . . . . . . . . . . . . . .
Drawing a Polygonal Freeform Button . . . . . . . . . . . . . . . . . . . . . . . . . . . . . . . . . . . . . . . . . . . . . . . . . . . . . . . .
Drawing a Button with Straight and Freeform Sides . . . . . . . . . . . . . . . . . . . . . . . . . . . . . . . . . . . . . . . . . . . . .
Creating a Regular Polygon from a Freeform Button . . . . . . . . . . . . . . . . . . . . . . . . . . . . . . . . . . . . . . . . . . . . .
Chapter 2
Working with the Symbol Finder
Chapter Overview . . . . . . . . . . . . . . . . . . . . . . . . . . . . . . . . . . . . . . . . . . . . . . . . . . . . . . . . . . . . . . . . . . . . . . . .
Searching for Symbols . . . . . . . . . . . . . . . . . . . . . . . . . . . . . . . . . . . . . . . . . . . . . . . . . . . . . . . . . . . . . . . . . . . .
Searching for Symbols Using Categories . . . . . . . . . . . . . . . . . . . . . . . . . . . . . . . . . . . . . . . . . . . . . . . . . . . . . .
Copying a Symbol to a Button . . . . . . . . . . . . . . . . . . . . . . . . . . . . . . . . . . . . . . . . . . . . . . . . . . . . . . . . . . . . . .
Using the Alternative Symbol Names Menu . . . . . . . . . . . . . . . . . . . . . . . . . . . . . . . . . . . . . . . . . . . . . . . . . . . .
Making a One-Time Symbol Name Change . . . . . . . . . . . . . . . . . . . . . . . . . . . . . . . . . . . . . . . . . . . . . . . . . . . .
Using Different Languages with the Symbols . . . . . . . . . . . . . . . . . . . . . . . . . . . . . . . . . . . . . . . . . . . . . . . . . . .
Selecting a Search Category . . . . . . . . . . . . . . . . . . . . . . . . . . . . . . . . . . . . . . . . . . . . . . . . . . . . . . . . . . . . . . . .
Working with a Category Search . . . . . . . . . . . . . . . . . . . . . . . . . . . . . . . . . . . . . . . . . . . . . . . . . . . . . . . . . . . .
Enlarging the Symbol Finder Window . . . . . . . . . . . . . . . . . . . . . . . . . . . . . . . . . . . . . . . . . . . . . . . . . . . . . . . .
Selecting the Display Option for Symbol Names . . . . . . . . . . . . . . . . . . . . . . . . . . . . . . . . . . . . . . . . . . . . . . . .
Chapter 3
Working with Button Text
Chapter Overview . . . . . . . . . . . . . . . . . . . . . . . . . . . . . . . . . . . . . . . . . . . . . . . . . . . . . . . . . . . . . . . . . . . . . . . .
Adding Text with the Text Tool . . . . . . . . . . . . . . . . . . . . . . . . . . . . . . . . . . . . . . . . . . . . . . . . . . . . . . . . . . . . .
Repositioning Text Fields . . . . . . . . . . . . . . . . . . . . . . . . . . . . . . . . . . . . . . . . . . . . . . . . . . . . . . . . . . . . . . . . . .
Editing a Symbol Name with the Text Tool . . . . . . . . . . . . . . . . . . . . . . . . . . . . . . . . . . . . . . . . . . . . . . . . . . . .
Changing the Text Colour . . . . . . . . . . . . . . . . . . . . . . . . . . . . . . . . . . . . . . . . . . . . . . . . . . . . . . . . . . . . . . . . .
Setting the Font, Style, and Size . . . . . . . . . . . . . . . . . . . . . . . . . . . . . . . . . . . . . . . . . . . . . . . . . . . . . . . . . . . . .
Changing the Text Justification . . . . . . . . . . . . . . . . . . . . . . . . . . . . . . . . . . . . . . . . . . . . . . . . . . . . . . . . . . . . .
Changing the Text Settings on Multiple Buttons . . . . . . . . . . . . . . . . . . . . . . . . . . . . . . . . . . . . . . . . . . . . . . . .
2
2
3
4
5
8
13
13
14
16
17
18
19
21
22
22
23
23
24
24
25
25
26
28
29
30
31
31
32
33
34
35
35
36
37
38
39
40
41
41
42
42
43
43
44
45
45
v
Table of Contents
Chapter 4
Working with Symbols on a Board
47
Chapter Overview . . . . . . . . . . . . . . . . . . . . . . . . . . . . . . . . . . . . . . . . . . . . . . . . . . . . . . . . . . . . . . . . . . . . . . . . 47
Replacing a Symbol on a Button . . . . . . . . . . . . . . . . . . . . . . . . . . . . . . . . . . . . . . . . . . . . . . . . . . . . . . . . . . . . . 48
Adding an Additional Symbol to a Button . . . . . . . . . . . . . . . . . . . . . . . . . . . . . . . . . . . . . . . . . . . . . . . . . . . . . 49
Resizing and Repositioning a Symbol . . . . . . . . . . . . . . . . . . . . . . . . . . . . . . . . . . . . . . . . . . . . . . . . . . . . . . . . . 50
Using a Portion of a Symbol (Marquee/Lasso) . . . . . . . . . . . . . . . . . . . . . . . . . . . . . . . . . . . . . . . . . . . . . . . . . . 51
Clearing Symbols and Text from Selected Buttons . . . . . . . . . . . . . . . . . . . . . . . . . . . . . . . . . . . . . . . . . . . . . . . 52
Chapter 5
Working with Symbolate Buttons
53
Chapter Overview . . . . . . . . . . . . . . . . . . . . . . . . . . . . . . . . . . . . . . . . . . . . . . . . . . . . . . . . . . . . . . . . . . . . . . . . 53
Creating a Symbolate Button . . . . . . . . . . . . . . . . . . . . . . . . . . . . . . . . . . . . . . . . . . . . . . . . . . . . . . . . . . . . . . . . 54
Editing Symbolate Text . . . . . . . . . . . . . . . . . . . . . . . . . . . . . . . . . . . . . . . . . . . . . . . . . . . . . . . . . . . . . . . . . . . . 55
Changing the Symbol for a Word-Symbol Pairing . . . . . . . . . . . . . . . . . . . . . . . . . . . . . . . . . . . . . . . . . . . . . . . 56
Making New Word-Symbol Pairs . . . . . . . . . . . . . . . . . . . . . . . . . . . . . . . . . . . . . . . . . . . . . . . . . . . . . . . . . . . . 58
Changing the Default Word-Symbol Pairing . . . . . . . . . . . . . . . . . . . . . . . . . . . . . . . . . . . . . . . . . . . . . . . . . . . . 60
Changing the Text for a Word-Symbol Pairing . . . . . . . . . . . . . . . . . . . . . . . . . . . . . . . . . . . . . . . . . . . . . . . . . . 61
Changing the Text Position . . . . . . . . . . . . . . . . . . . . . . . . . . . . . . . . . . . . . . . . . . . . . . . . . . . . . . . . . . . . . . . . . 62
Adjusting the Button Border . . . . . . . . . . . . . . . . . . . . . . . . . . . . . . . . . . . . . . . . . . . . . . . . . . . . . . . . . . . . . . . . 63
Changing the Font and Symbol Size . . . . . . . . . . . . . . . . . . . . . . . . . . . . . . . . . . . . . . . . . . . . . . . . . . . . . . . . . . 65
Setting the Button’s Symbolate Properties . . . . . . . . . . . . . . . . . . . . . . . . . . . . . . . . . . . . . . . . . . . . . . . . . . . . . 66
Read with Highlighting Action . . . . . . . . . . . . . . . . . . . . . . . . . . . . . . . . . . . . . . . . . . . . . . . . . . . . . . . . . . . . . . 67
Chapter 6
Working with the Board Layout
69
Chapter Overview . . . . . . . . . . . . . . . . . . . . . . . . . . . . . . . . . . . . . . . . . . . . . . . . . . . . . . . . . . . . . . . . . . . . . . . . 69
Resizing Individual Buttons and Their Contents . . . . . . . . . . . . . . . . . . . . . . . . . . . . . . . . . . . . . . . . . . . . . . . . . 70
Resizing Multiple Buttons . . . . . . . . . . . . . . . . . . . . . . . . . . . . . . . . . . . . . . . . . . . . . . . . . . . . . . . . . . . . . . . . . . 71
Swapping Button Content and Appearance . . . . . . . . . . . . . . . . . . . . . . . . . . . . . . . . . . . . . . . . . . . . . . . . . . . . . 72
Shuffling Buttons . . . . . . . . . . . . . . . . . . . . . . . . . . . . . . . . . . . . . . . . . . . . . . . . . . . . . . . . . . . . . . . . . . . . . . . . . 73
Anchoring Images and Symbols on the Background . . . . . . . . . . . . . . . . . . . . . . . . . . . . . . . . . . . . . . . . . . . . . . 74
Chapter 7
Working with the Paint Tools
75
Chapter Overview . . . . . . . . . . . . . . . . . . . . . . . . . . . . . . . . . . . . . . . . . . . . . . . . . . . . . . . . . . . . . . . . . . . . . . . . 75
Paint Tools at a Glance . . . . . . . . . . . . . . . . . . . . . . . . . . . . . . . . . . . . . . . . . . . . . . . . . . . . . . . . . . . . . . . . . . . . 75
Important Paint Tools Information . . . . . . . . . . . . . . . . . . . . . . . . . . . . . . . . . . . . . . . . . . . . . . . . . . . . . . . . . . . 76
Transparency Colour . . . . . . . . . . . . . . . . . . . . . . . . . . . . . . . . . . . . . . . . . . . . . . . . . . . . . . . . . . . . . . . . . . . . . . 77
Pointer Tool . . . . . . . . . . . . . . . . . . . . . . . . . . . . . . . . . . . . . . . . . . . . . . . . . . . . . . . . . . . . . . . . . . . . . . . . . . . . . 78
Pencil Tool . . . . . . . . . . . . . . . . . . . . . . . . . . . . . . . . . . . . . . . . . . . . . . . . . . . . . . . . . . . . . . . . . . . . . . . . . . . . . . 78
Eraser Tool . . . . . . . . . . . . . . . . . . . . . . . . . . . . . . . . . . . . . . . . . . . . . . . . . . . . . . . . . . . . . . . . . . . . . . . . . . . . . . 79
Colour Tool . . . . . . . . . . . . . . . . . . . . . . . . . . . . . . . . . . . . . . . . . . . . . . . . . . . . . . . . . . . . . . . . . . . . . . . . . . . . . 79
Thickness Tool . . . . . . . . . . . . . . . . . . . . . . . . . . . . . . . . . . . . . . . . . . . . . . . . . . . . . . . . . . . . . . . . . . . . . . . . . . . 80
Fill Tool . . . . . . . . . . . . . . . . . . . . . . . . . . . . . . . . . . . . . . . . . . . . . . . . . . . . . . . . . . . . . . . . . . . . . . . . . . . . . . . . 80
Fill All Tool . . . . . . . . . . . . . . . . . . . . . . . . . . . . . . . . . . . . . . . . . . . . . . . . . . . . . . . . . . . . . . . . . . . . . . . . . . . . . 81
Invert Tool . . . . . . . . . . . . . . . . . . . . . . . . . . . . . . . . . . . . . . . . . . . . . . . . . . . . . . . . . . . . . . . . . . . . . . . . . . . . . . 81
Flip Horizontal Tool and Flip Vertical Tool . . . . . . . . . . . . . . . . . . . . . . . . . . . . . . . . . . . . . . . . . . . . . . . . . . . . 82
Rotate Tool . . . . . . . . . . . . . . . . . . . . . . . . . . . . . . . . . . . . . . . . . . . . . . . . . . . . . . . . . . . . . . . . . . . . . . . . . . . . . 82
Chapter 8
Adding New Symbols or Photos to the Symbol Finder
83
Chapter Overview . . . . . . . . . . . . . . . . . . . . . . . . . . . . . . . . . . . . . . . . . . . . . . . . . . . . . . . . . . . . . . . . . . . . . . . . 83
Importing Saved Photos or Graphics . . . . . . . . . . . . . . . . . . . . . . . . . . . . . . . . . . . . . . . . . . . . . . . . . . . . . . . . . . 84
Copying a New Symbol from a Button . . . . . . . . . . . . . . . . . . . . . . . . . . . . . . . . . . . . . . . . . . . . . . . . . . . . . . . . 85
Naming and Categorising New Symbols . . . . . . . . . . . . . . . . . . . . . . . . . . . . . . . . . . . . . . . . . . . . . . . . . . . . . . . 86
Using Drag and Drop to Add Images . . . . . . . . . . . . . . . . . . . . . . . . . . . . . . . . . . . . . . . . . . . . . . . . . . . . . . . . . 88
Dragging and Dropping Images onto the Board Background . . . . . . . . . . . . . . . . . . . . . . . . . . . . . . . . . . . . . . . 91
Dragging and Dropping Images from a Web Browser . . . . . . . . . . . . . . . . . . . . . . . . . . . . . . . . . . . . . . . . . . . . 92
vi
Boardmaker Family for Windows User Guide
Dragging Images into the Symbol Finder . . . . . . . . . . . . . . . . . . . . . . . . . . . . . . . . . . . . . . . . . . . . . . . . . . . . . . 93
Dragging Multiple Images into the Symbol Finder . . . . . . . . . . . . . . . . . . . . . . . . . . . . . . . . . . . . . . . . . . . . . . . 95
Chapter 9
Preparing Your Boards for Printing
97
Chapter Overview . . . . . . . . . . . . . . . . . . . . . . . . . . . . . . . . . . . . . . . . . . . . . . . . . . . . . . . . . . . . . . . . . . . . . . . . 97
Printer Considerations . . . . . . . . . . . . . . . . . . . . . . . . . . . . . . . . . . . . . . . . . . . . . . . . . . . . . . . . . . . . . . . . . . . . . 98
Checking the Print Layout . . . . . . . . . . . . . . . . . . . . . . . . . . . . . . . . . . . . . . . . . . . . . . . . . . . . . . . . . . . . . . . . . . 99
Using Print Preview . . . . . . . . . . . . . . . . . . . . . . . . . . . . . . . . . . . . . . . . . . . . . . . . . . . . . . . . . . . . . . . . . . . . . . 100
Printing a Board on a Single Page . . . . . . . . . . . . . . . . . . . . . . . . . . . . . . . . . . . . . . . . . . . . . . . . . . . . . . . . . . . 101
Chapter 10
Making a Board Set
Chapter Overview . . . . . . . . . . . . . . . . . . . . . . . . . . . . . . . . . . . . . . . . . . . . . . . . . . . . . . . . . . . . . . . . . . . . . . .
Design Considerations . . . . . . . . . . . . . . . . . . . . . . . . . . . . . . . . . . . . . . . . . . . . . . . . . . . . . . . . . . . . . . . . . . . .
Mapping Out the Boards and Links . . . . . . . . . . . . . . . . . . . . . . . . . . . . . . . . . . . . . . . . . . . . . . . . . . . . . . . . . .
Creating a Main Board . . . . . . . . . . . . . . . . . . . . . . . . . . . . . . . . . . . . . . . . . . . . . . . . . . . . . . . . . . . . . . . . . . .
Creating Separate Folders for Board Organisation . . . . . . . . . . . . . . . . . . . . . . . . . . . . . . . . . . . . . . . . . . . . . .
Chapter 11
Assigning Basic Button Actions
Chapter Overview . . . . . . . . . . . . . . . . . . . . . . . . . . . . . . . . . . . . . . . . . . . . . . . . . . . . . . . . . . . . . . . . . . . . . . .
Button Actions Window at a Glance . . . . . . . . . . . . . . . . . . . . . . . . . . . . . . . . . . . . . . . . . . . . . . . . . . . . . . . . .
Action Categories . . . . . . . . . . . . . . . . . . . . . . . . . . . . . . . . . . . . . . . . . . . . . . . . . . . . . . . . . . . . . . . . . . . . . . .
Basic Button Actions . . . . . . . . . . . . . . . . . . . . . . . . . . . . . . . . . . . . . . . . . . . . . . . . . . . . . . . . . . . . . . . . . . . . .
Making a Button Speak . . . . . . . . . . . . . . . . . . . . . . . . . . . . . . . . . . . . . . . . . . . . . . . . . . . . . . . . . . . . . . . . . . .
Making a Button Play a Recorded Message . . . . . . . . . . . . . . . . . . . . . . . . . . . . . . . . . . . . . . . . . . . . . . . . . . .
Making a Button Play a Saved Sound . . . . . . . . . . . . . . . . . . . . . . . . . . . . . . . . . . . . . . . . . . . . . . . . . . . . . . . .
Giving a Button a Spoken Preview . . . . . . . . . . . . . . . . . . . . . . . . . . . . . . . . . . . . . . . . . . . . . . . . . . . . . . . . . .
Giving a Button a Recorded Preview . . . . . . . . . . . . . . . . . . . . . . . . . . . . . . . . . . . . . . . . . . . . . . . . . . . . . . . .
Adding a Preview Display . . . . . . . . . . . . . . . . . . . . . . . . . . . . . . . . . . . . . . . . . . . . . . . . . . . . . . . . . . . . . . . . .
Changing a Button’s Text Preview . . . . . . . . . . . . . . . . . . . . . . . . . . . . . . . . . . . . . . . . . . . . . . . . . . . . . . . . . .
Editing a Button’s Assigned Actions . . . . . . . . . . . . . . . . . . . . . . . . . . . . . . . . . . . . . . . . . . . . . . . . . . . . . . . .
Chapter 12
Linking Boards Together
Chapter Overview . . . . . . . . . . . . . . . . . . . . . . . . . . . . . . . . . . . . . . . . . . . . . . . . . . . . . . . . . . . . . . . . . . . . . . .
Linking Boards Together . . . . . . . . . . . . . . . . . . . . . . . . . . . . . . . . . . . . . . . . . . . . . . . . . . . . . . . . . . . . . . . . . .
Adding a Button Link to the Main Board . . . . . . . . . . . . . . . . . . . . . . . . . . . . . . . . . . . . . . . . . . . . . . . . . . . . .
Adding a Button Link to the Previous Board . . . . . . . . . . . . . . . . . . . . . . . . . . . . . . . . . . . . . . . . . . . . . . . . . .
Linking Specific Boards Together . . . . . . . . . . . . . . . . . . . . . . . . . . . . . . . . . . . . . . . . . . . . . . . . . . . . . . . . . . .
Navigating Board Links in the Design Mode . . . . . . . . . . . . . . . . . . . . . . . . . . . . . . . . . . . . . . . . . . . . . . . . . .
Chapter 13
Using a Message Display with Text
Chapter Overview . . . . . . . . . . . . . . . . . . . . . . . . . . . . . . . . . . . . . . . . . . . . . . . . . . . . . . . . . . . . . . . . . . . . . . .
Adding a Message Display . . . . . . . . . . . . . . . . . . . . . . . . . . . . . . . . . . . . . . . . . . . . . . . . . . . . . . . . . . . . . . . .
Making a Button Type a Text Message . . . . . . . . . . . . . . . . . . . . . . . . . . . . . . . . . . . . . . . . . . . . . . . . . . . . . . .
Adding Simple Message Display Controls . . . . . . . . . . . . . . . . . . . . . . . . . . . . . . . . . . . . . . . . . . . . . . . . . . . .
Message Display Actions . . . . . . . . . . . . . . . . . . . . . . . . . . . . . . . . . . . . . . . . . . . . . . . . . . . . . . . . . . . . . . . . .
Changing the Message Display’s Settings . . . . . . . . . . . . . . . . . . . . . . . . . . . . . . . . . . . . . . . . . . . . . . . . . . . .
Chapter 14
Using a Message Display with Pictures
105
105
106
107
108
109
111
111
112
113
113
114
115
117
119
120
122
123
124
127
127
128
129
130
131
132
133
133
134
135
136
137
138
139
Chapter Overview . . . . . . . . . . . . . . . . . . . . . . . . . . . . . . . . . . . . . . . . . . . . . . . . . . . . . . . . . . . . . . . . . . . . . . . 139
Placing a Picture into the Message Display . . . . . . . . . . . . . . . . . . . . . . . . . . . . . . . . . . . . . . . . . . . . . . . . . . . 140
Uniform Line Spacing - Pictures and Text . . . . . . . . . . . . . . . . . . . . . . . . . . . . . . . . . . . . . . . . . . . . . . . . . . . . 142
vii
Table of Contents
Chapter 15
“Use Button Text” Boards
143
Chapter Overview . . . . . . . . . . . . . . . . . . . . . . . . . . . . . . . . . . . . . . . . . . . . . . . . . . . . . . . . . . . . . . . . . . . . . . . 143
Creating a “Use Button Text” Template Board . . . . . . . . . . . . . . . . . . . . . . . . . . . . . . . . . . . . . . . . . . . . . . . . . 144
Actions that Can Use Button Text . . . . . . . . . . . . . . . . . . . . . . . . . . . . . . . . . . . . . . . . . . . . . . . . . . . . . . . . . . . 147
Chapter 16
Working with Movable Buttons
149
Chapter Overview . . . . . . . . . . . . . . . . . . . . . . . . . . . . . . . . . . . . . . . . . . . . . . . . . . . . . . . . . . . . . . . . . . . . . . . 149
Showing the Movable Button Tool . . . . . . . . . . . . . . . . . . . . . . . . . . . . . . . . . . . . . . . . . . . . . . . . . . . . . . . . . . 150
Creating Movable and Destination Buttons . . . . . . . . . . . . . . . . . . . . . . . . . . . . . . . . . . . . . . . . . . . . . . . . . . . . 151
Editing Actions for a Movable-Destination Button Pair . . . . . . . . . . . . . . . . . . . . . . . . . . . . . . . . . . . . . . . . . . 153
Setting a Movable Button to “Snap Back” . . . . . . . . . . . . . . . . . . . . . . . . . . . . . . . . . . . . . . . . . . . . . . . . . . . . 155
Setting a Movable Button to Clone Itself . . . . . . . . . . . . . . . . . . . . . . . . . . . . . . . . . . . . . . . . . . . . . . . . . . . . . 156
Centering a Dropped Movable Button . . . . . . . . . . . . . . . . . . . . . . . . . . . . . . . . . . . . . . . . . . . . . . . . . . . . . . . . 157
Changing Button Types . . . . . . . . . . . . . . . . . . . . . . . . . . . . . . . . . . . . . . . . . . . . . . . . . . . . . . . . . . . . . . . . . . . 157
Scanning and Movable Buttons . . . . . . . . . . . . . . . . . . . . . . . . . . . . . . . . . . . . . . . . . . . . . . . . . . . . . . . . . . . . . 158
Limitations of Movable Buttons with Scanning Access Methods . . . . . . . . . . . . . . . . . . . . . . . . . . . . . . . . . . . 159
Chapter 17
Working with PopUp Boards
161
Chapter Overview . . . . . . . . . . . . . . . . . . . . . . . . . . . . . . . . . . . . . . . . . . . . . . . . . . . . . . . . . . . . . . . . . . . . . . . 161
Creating a PopUp Board . . . . . . . . . . . . . . . . . . . . . . . . . . . . . . . . . . . . . . . . . . . . . . . . . . . . . . . . . . . . . . . . . . 162
Using PopUp Boards with a Message Display . . . . . . . . . . . . . . . . . . . . . . . . . . . . . . . . . . . . . . . . . . . . . . . . . 164
Chapter 18
Working with Quick Action Buttons
165
Chapter Overview . . . . . . . . . . . . . . . . . . . . . . . . . . . . . . . . . . . . . . . . . . . . . . . . . . . . . . . . . . . . . . . . . . . . . . . 165
Working with Quick Text Buttons . . . . . . . . . . . . . . . . . . . . . . . . . . . . . . . . . . . . . . . . . . . . . . . . . . . . . . . . . . . 166
Creating Optional Quick Text Control Buttons . . . . . . . . . . . . . . . . . . . . . . . . . . . . . . . . . . . . . . . . . . . . . . . . . 169
Working with Quick Picture Buttons . . . . . . . . . . . . . . . . . . . . . . . . . . . . . . . . . . . . . . . . . . . . . . . . . . . . . . . . . 170
Working with Quick Record Buttons . . . . . . . . . . . . . . . . . . . . . . . . . . . . . . . . . . . . . . . . . . . . . . . . . . . . . . . . 173
Adding Quick Day, Quick Date, or Quick Time Buttons . . . . . . . . . . . . . . . . . . . . . . . . . . . . . . . . . . . . . . . . . 176
Chapter 19
Other Useful Program Features
177
Chapter Overview . . . . . . . . . . . . . . . . . . . . . . . . . . . . . . . . . . . . . . . . . . . . . . . . . . . . . . . . . . . . . . . . . . . . . . . 177
Random Action . . . . . . . . . . . . . . . . . . . . . . . . . . . . . . . . . . . . . . . . . . . . . . . . . . . . . . . . . . . . . . . . . . . . . . . . . 178
Playing Movies . . . . . . . . . . . . . . . . . . . . . . . . . . . . . . . . . . . . . . . . . . . . . . . . . . . . . . . . . . . . . . . . . . . . . . . . . 179
Voice and Sound Volume . . . . . . . . . . . . . . . . . . . . . . . . . . . . . . . . . . . . . . . . . . . . . . . . . . . . . . . . . . . . . . . . . 180
Selecting and Changing Voices . . . . . . . . . . . . . . . . . . . . . . . . . . . . . . . . . . . . . . . . . . . . . . . . . . . . . . . . . . . . . 181
Changing the Pronunciation of Words . . . . . . . . . . . . . . . . . . . . . . . . . . . . . . . . . . . . . . . . . . . . . . . . . . . . . . . . 182
Printing Interactive Boards . . . . . . . . . . . . . . . . . . . . . . . . . . . . . . . . . . . . . . . . . . . . . . . . . . . . . . . . . . . . . . . . 183
Chapter 20
Working with Variables
185
Chapter Overview . . . . . . . . . . . . . . . . . . . . . . . . . . . . . . . . . . . . . . . . . . . . . . . . . . . . . . . . . . . . . . . . . . . . . . . 185
Variables Button Actions . . . . . . . . . . . . . . . . . . . . . . . . . . . . . . . . . . . . . . . . . . . . . . . . . . . . . . . . . . . . . . . . . . 186
Assigning Variables and Values . . . . . . . . . . . . . . . . . . . . . . . . . . . . . . . . . . . . . . . . . . . . . . . . . . . . . . . . . . . . 187
Testing Variables and Assigning Conditional Actions . . . . . . . . . . . . . . . . . . . . . . . . . . . . . . . . . . . . . . . . . . . 188
Chapter 21
Creating Boards for Writing
191
Chapter Overview . . . . . . . . . . . . . . . . . . . . . . . . . . . . . . . . . . . . . . . . . . . . . . . . . . . . . . . . . . . . . . . . . . . . . . . 191
Typing Board Layout Considerations . . . . . . . . . . . . . . . . . . . . . . . . . . . . . . . . . . . . . . . . . . . . . . . . . . . . . . . . 192
Word Prediction . . . . . . . . . . . . . . . . . . . . . . . . . . . . . . . . . . . . . . . . . . . . . . . . . . . . . . . . . . . . . . . . . . . . . . . . . 193
Adding Prediction Buttons . . . . . . . . . . . . . . . . . . . . . . . . . . . . . . . . . . . . . . . . . . . . . . . . . . . . . . . . . . . . . . . . . 194
Abbreviation Expansion . . . . . . . . . . . . . . . . . . . . . . . . . . . . . . . . . . . . . . . . . . . . . . . . . . . . . . . . . . . . . . . . . . 195
viii
Boardmaker Family for Windows User Guide
Chapter 22
Access Methods and Custom Scanning
Chapter Overview . . . . . . . . . . . . . . . . . . . . . . . . . . . . . . . . . . . . . . . . . . . . . . . . . . . . . . . . . . . . . . . . . . . . . . .
Selecting an Access Method . . . . . . . . . . . . . . . . . . . . . . . . . . . . . . . . . . . . . . . . . . . . . . . . . . . . . . . . . . . . . . .
Configuring Switches . . . . . . . . . . . . . . . . . . . . . . . . . . . . . . . . . . . . . . . . . . . . . . . . . . . . . . . . . . . . . . . . . . . .
The Default Scanning Sequence . . . . . . . . . . . . . . . . . . . . . . . . . . . . . . . . . . . . . . . . . . . . . . . . . . . . . . . . . . . .
Creating Scanning Groups . . . . . . . . . . . . . . . . . . . . . . . . . . . . . . . . . . . . . . . . . . . . . . . . . . . . . . . . . . . . . . . . .
Displaying the Scan Tools . . . . . . . . . . . . . . . . . . . . . . . . . . . . . . . . . . . . . . . . . . . . . . . . . . . . . . . . . . . . . . . . .
Using the Sequence Tool . . . . . . . . . . . . . . . . . . . . . . . . . . . . . . . . . . . . . . . . . . . . . . . . . . . . . . . . . . . . . . . . . .
Using the Scan Next Tool . . . . . . . . . . . . . . . . . . . . . . . . . . . . . . . . . . . . . . . . . . . . . . . . . . . . . . . . . . . . . . . . .
Using the Scan Pause Tool . . . . . . . . . . . . . . . . . . . . . . . . . . . . . . . . . . . . . . . . . . . . . . . . . . . . . . . . . . . . . . . .
Chapter 23
Designing Boards for Alternative Access Methods
Chapter Overview . . . . . . . . . . . . . . . . . . . . . . . . . . . . . . . . . . . . . . . . . . . . . . . . . . . . . . . . . . . . . . . . . . . . . . .
Access Methods for Scanners . . . . . . . . . . . . . . . . . . . . . . . . . . . . . . . . . . . . . . . . . . . . . . . . . . . . . . . . . . . . . .
Access Methods for Touchscreen Users . . . . . . . . . . . . . . . . . . . . . . . . . . . . . . . . . . . . . . . . . . . . . . . . . . . . . .
On-Screen Keyboard . . . . . . . . . . . . . . . . . . . . . . . . . . . . . . . . . . . . . . . . . . . . . . . . . . . . . . . . . . . . . . . . . . . .
Working with Head-Tracking Device Users . . . . . . . . . . . . . . . . . . . . . . . . . . . . . . . . . . . . . . . . . . . . . . . . . . .
197
197
198
199
200
201
202
203
205
206
207
207
208
209
210
210
Appendix A
Keyboard Shortcuts
211
Appendix B
Button Actions
213
Appendix C
Exporting and Importing Board Packages
215
Appendix D
Exporting Boards to Version 5.3
219
Appendix E
Creating a Template Board
221
Appendix F
Launching a Board at Computer Startup
223
ix
Table of Contents
x
Boardmaker Software Family v6 User’s Guide
Introduction
Printed User’s Guide
This user's guide was written to support version 6 of the complete Boardmaker Software Family (BSF) of
products; Boardmaker (BM), Boardmaker Plus! (BM Plus) and Boardmaker with Speaking Dynamically Pro
(BM with SDP).
Boardmaker is the premiere software among clinicians, SLPs, and educators for
creating printed symbol-based communication and educational materials.
Boardmaker is a drawing program combined with a graphics database featuring
more then 4,500 Picture Communication Symbols (PCS). Boardmaker is the
backbone of the BSF because its complete set of features are part of both BM Plus
and BM with SDP.
Boardmaker Plus! allows you to bring the static BM activities to life and make your
computer an interactive student-learning and speaking tool. Featuring the ability to
talk, play recordings, move between boards and interact with buttons on the screen,
BM Plus allows you to create interactive books, worksheets, schedules, basic
communication, learning games and more, all of which can be adapted to each
student’s needs.
Boardmaker with Speaking Dynamically Pro is for power users and high-level AAC
needs. With the addition of Word prediction, abbreviation expansion and the high
quality RealSpeak® voices, plus all the capabilities of BM Plus, BM with SDP will
turn your computer into a speech output device and a powerful learning tool.
This manual is divided into two parts. The first part focuses on the features provided within Boardmaker and the
use of those features. All the information in this part of the manual applies to all the BSF products. The second
part focuses on the interactive features of BM Plus and BM with SDP and their use. This part of the manual does
not apply to Boardmaker. To help you identify the chapters that apply to the BSF product you purchased,
product icons (shown above) will appear at the beginning of each chapter and on specific sections within a
chapter as necessary.
In-Program Help
The topics covered in this printed manual cover all the basic skills a
typical user might need to successfully create fantastic printed
materials and/or interactive activities. Many advanced program
features and skills are not covered here, but are instead covered in the
in-program help. Select Help Topics from the Help menu to access
the browser based in-program help, which includes the advanced
features and skills plus the complete contents of this printed user's
guide.
Note: The in-program help will be updated as necessary via free downloadable program updates available at the
Mayer-Johnson website (www.mayer-Johnson.com) or via the on-line updater (Start menu > All
Programs > Mayer-Johnson > Check for Updates).
1
Introduction
System Requirements
The system requirements to run version 6 in Windows are:
• Windows 2000 or higher
• 512 Mb RAM
• 400 Mb free disk space
Where to Get Additional Support
If you have access to the Internet, you can get support online at:
http://www.mayer-johnson.com
In the UK, email [email protected]
or you can access the Widgit Live Support at http://www.widgit.com/support/index.htm
Answers to frequently-asked questions will appear under the Support link at the top of the home page. If you
don’t find the answer to your question there, you may send an e-mail with your technical support question to our
office for a prompt response.
If you don’t have Internet access, you may call our office for assistance:
In the UK, contact Widgit Software
Phone: 01223 425558 ext 771
Fax: 01223 435349
To assist us in quickly answering your questions, please be ready to provide computer and system information,
as well as the program version number (on startup screen). It is extremely helpful if you can call when you are in
front of the computer.
2
Boardmaker Software Family v6 User’s Guide
Program Window at a Glance
1
2
3
4
5
6
7
8
9
10 11 12 13 14 15 16 17
19
18
20
21
22
1
Title Bar
2
Menu Bar
3
Symbol Finder Tool (Ctrl + F)
Makes the Symbol Finder window visible
4
Pointer Tool (Ctrl + F1)
Selects buttons, text, graphics, etc.
5
Button Tool (Ctrl + F3)
Creates buttons for symbols and pictures
6
12
Thickness Tool
Displays a palette of line thickness options
13
Corner Tool
Displays a palette of button corner options
14
Shadow Tool
Toggles 3-D button shadows
15
Zoom In
16
Zoom Out
Freeform Button Tool (Ctrl + F7)
Create freeform or polygon buttons
17
Movable Button Tool
Create Movable/Destination button pairings
7
Button Sprayer Tool (Ctrl + F2)
Sprays out button copies to make a grid
18
Board Workspace
8
Line Tool (Ctrl + F4)
Draws lines
19
Symbol Finder Window
Searches for symbols
9
Text Tool (Ctrl + F5)
Insert and edit text
20
Page Break Indicator
Displays where printed page breaks will occur
21
Board Magnification Indicator
Displays the current view magnification
22
Dynamic Help
Displays helpful information relative to the
pointer position and action being performed
10 Symbolate Button Tool
Creates a button in which symbols will
appear as text is typed
11 Colour Tool
Displays a colour palette to set the colour of
buttons, text, graphics, and backgrounds
3
Introduction
Symbol Finder at a Glance
3
4
1
5
7
2
8
6
9
11
10
12
13
14
1
Current Symbol
8
Select Categories Button (Ctrl + L)
Selects the symbol categories to search
2
Current Symbol Number
Displays the current and total matching symbols
9
Symbol Names Button
Adds an alternative name or category to a symbol
3
Symbol Name Search Options
Begin Word, Anywhere, Whole Word
10 Alternative Symbol Name Field
Replaces a symbol name with a new name
4
Minimise, Maximise & Close Buttons
11 Alternative Symbol Names List
Displays a list of alternative names to select
5
Search Text Field
Finds a symbol from a full or partial name
12 Symbol Finder Settings Button
Changes various Symbol Finder settings
6
Display Thumbnail View (Ctrl + T))
Display thumbnails of matching symbols
13 Selection Marquee
Selects a rectangular region to copy
7
Previous/Next Symbol Arrows
Steps through the symbols or thumbnail screens
14 Selection Lasso
Selects a freeform region to copy
Note: Pop-up descriptions of each button appear
when you position the pointer on them and
pause briefly.
4
Boardmaker Software Family v6 User’s Guide
Exploring the Templates and Sample Boards
Templates for Printing
All of the Boardmaker Software Family products come with over 325 print templates. Templates for calendars
and schedules and most communication devices are provided in the Templates folder.
The templates can be accessed by clicking on the Open a Template button on the open options screen that
appears when you first launch the program or when you select Open (Ctrl + O) from the File menu.
Note: The templates are “read only” files and will open as “untitled” boards. This prevents the template from
accidentally being written over.
Navigate to the
desired template.
Click here to access
all template boards.
Interactive Templates (not included with Boardmaker)
Boardmaker Plus and Boardmaker with Speaking Dynamically Pro come with over 250 sample boards, designed
to demonstrate how the features and symbols can be applied to cover a range of curricular areas, provide
communication and language support, assist in the development of functional living skills, and more. The
activities are designed to provide a range of applications that target ability levels that vary from early childhood
through adult. Please take some time to explore the sample boards to help you gain an understanding of the
features presented throughout this reference manual.
Boardmaker Plus and Boardmaker with Speaking Dynamically Pro both have a Use mode and a Design mode.
The Use mode will allow you to interact with your boards. The Design mode is for creating and editing boards,
buttons and actions. The program can be put in the Use mode by pressing Ctrl + U, and then return to the Design
mode by pressing Esc or Ctrl + D.
5
Introduction
Starting the Program in the Use Mode on the
Main Sample Board
Double-click on the BSF Interactive Sample
Boards icon on your desktop. This will launch
the program, open the main board for the
interactive samples, and place the program in the
Use mode.
1
Not included with
Boardmaker
You may now proceed to the next section, or
review the alternative steps below.
---------------------------------------------------------------------- OR ----------------------------------------------------------Opening the Main Sample Board from within
the Program
Launch the program by double-clicking on the
appropriate icon on your desktop or select the
program within the Start menu (Start > All
Programs > Mayer-Johnson).
Select the Open a template button.
2
The Select a Board dialogue will display the
contents of the Templates folder.
Double-click on the Interactive Sample Boards
folder.
3
6
Note: You will find the templates for printing
in the folders that start with “BM,”
although you can print any of the
interactive boards in the “BM Plus”
folders as well.
Boardmaker Software Family v6 User’s Guide
Double-click on the +Main board to open it. This
board gives you access to the over 250 sample
boards.
4
You will need to put the program in the Use mode to explore the sample boards.
Select Use in the Dynamic Boards menu or press Ctrl + U. Click on the buttons to explore different
sample boards. The “Main” button in the bottom right corner of each board will bring you back to the
main board shown above.
Press the Esc key or press Ctrl + D to return to the Design mode.
5
You must put the program
in the Use mode to use the
interactive sample boards.
7
Introduction
Basic Mouse Skills
As with any modern program, it is important that you are familiar with basic mouse skills. This is especially
important with a drawing program like Boardmaker. Here is a quick review of the basic mouse skills that are
used repeatedly throughout this user's guide.
Click
Press the left mouse button to select buttons, text,
graphics, and lines within the program. This is typically
done with the Pointer Tool.
Click to select items like symbols.
Right-click
Press the right mouse button to access contextual menus
and perform special functions. This is typically done with
the Pointer Tool.
Right-clicking on most items will provide access to
contextual (right-click) menus containing commands that
are specific to the item or items that are selected. The
right-click menus provide a quick way to perform common
tasks like copying, pasting, aligning, setting properties,
and much more.
Note: Some advanced program commands are only
available in the right-click menus.
Right-click to access the contextual
menu for items.
Double-click
Click twice, quickly, with the left mouse button to open
buttons and displays so that actions can be assigned or
settings changed. This is typically done with the Pointer
Tool. (BM Plus and BM with SDP only)
Double-click on a button to assign it
actions (BM Plus & BM with SDP only.)
Click and Drag
Click and hold the left mouse button down while moving
the mouse in the appropriate direction. Click and drag is
used with a variety of tools to select, draw and move.
Click and drag to draw a button or
move items around.
8
Boardmaker Software Family v6 User’s Guide
Shift-click
Click on the first item, then hold the Shift key down then
click on the next item or items. Shift+click is used to select
multiple items or buttons. Each item you shift-click will be
added to the selection group. Shift-click an item that is part
of a selection group to de-select it.
Note: Buttons can not be added to a selection group that
started with a graphic, line or text and vice versa.
Shift-click on items to add them to the
selection group.
9
Introduction
10
Boardmaker Software Family v6 User’s Guide
Chapter 1
Building a Board and Working with its
Appearance
Chapter Overview
When creating a new communication board, it is important to understand how to properly orient and size a board
for printing, create a grid of buttons, and manage boards within the drawing window. You will also learn how to
change the colour, shape, and size of the buttons on a board which helps to organise its content and makes it
easier for the user to understand.
The following topics will be covered:
•
Setting the board size
•
Creating a multi-page board
•
Working with multiple board windows
•
Resizing a board’s window
•
Creating a grid of buttons
•
Adjusting the Sprayer Tool gap spacing
•
Changing the appearance of the buttons
•
Drawing a line on a button or board
•
Clearing symbols and text from selected buttons
Use different sizes of
buttons and symbols.
Organise the board using
coloured button borders.
Create boards
that will print to
match an exact
size need.
Select from a variety
of button corners.
Organise the board using
coloured button backgrounds.
13
Chapter 1 - Building a Board and Working with its Appearance
Setting the Correct Paper and Board Size
The first step in creating a new board is to determine its size. You will need to tell the program how
big of a workspace you will need and what size paper you will be using in your printer.
Printer Setup
The printer settings for paper size and orientation should be set for a board before you enter the
dimensions for a board size. This will help you create boards that print on a single piece of paper.
Current printer page
size and orientation
information.
1
Click here to
change the paper
size or orientation.
Select Print Setup (Board Size/Ruler/Grid/Gaps) in the File menu. Check the current printer
settings for the proper paper size and orientation. If the paper size or orientation is not correct, click on
the Print Setup button.
Make sure the
correct printer
is chosen.
Select the print
orientation for
your board.
2
Choose the
size of paper
that you will be
using.
Make sure the paper size you will be using is selected, then set the print orientation for your board.
Click on the OK button when finished.
14
Boardmaker Software Family v6 User’s Guide
Setting the Board Size
Current Board Size
Use Display
Size
Click here to set
the board size
to match the
display size for
on-screen use.
To set a specific board
size, specify the values
here.
Click here to use
the current board
size setting on all
new boards.
Use Printer
Page
3
Click here to
set the board
size to match
the printer page
size.
Click here to use
the current printer
page orientation
on all new boards.
Typically, you will click on the Use Printer Page button to make the board size match the printable
area for the paper size and orientation you previously set. (In the next section you will learn to work
with multi-page boards.) Click on the OK button when finished.
Note: The printable area for a specific paper size and orientation can vary from one printer to the
next. You may need to adjust the board size if you try printing this board on a different
printer.
Tip:
Setting a Default Board Size and Printer Page Setting for All New Boards
If you will be making a lot of boards that need to be the same size, i.e a set of boards for a
specific device or activity, you will want to use the “Remember” buttons on the right side of
the Print Setup screen above. You may click on one or both of these buttons to automatically
apply the current board size and/or printer page orientation settings to any new board you
create.
15
Chapter 1 - Building a Board and Working with its Appearance
Creating Multi-Page Boards
You have the option to create boards that can span multiple sheets of paper. Creating multi-page boards allows
you to support larger communication devices or make poster-sized communication boards.
1
Enter the
desired
board size.
Select Print Setup (Board Size/Ruler/Grip/Gaps) in the File menu. Check the current printer
settings for the proper paper size and orientation. If not correct, click on the Print Setup button.
In the Width and Height boxes shown above, enter the desired dimensions for the board up to the
values listed under Maximum. Click on the OK button when finished.
The different
pieces of paper
are marked by
green dashed
page break lines.
2
When the board is viewed as Reduce To Fit (default), the page break lines will mark the different
sheets of paper.
Most printers have a minimum necessary margin and cannot printed right up to the edge of the
paper. Therefore, when a multi-page board is assembled, you will need to trim the edges of each
page before taping them together.
16
Boardmaker Software Family v6 User’s Guide
Working with Multiple Boards
The first board opened or created in the program is
maximised and will fill the screen as shown above.
You can have multiple boards open at once. As
additional boards are opened, they will appear in
smaller windows cascaded on the screen.
View Options
Selecting Tile in the View menu will allow you to view all currently open boards at the same time. The Tile
view is useful for copying and pasting buttons between boards.
By default, a board’s window is set to the Fit To
Window view so the entire board can be seen.
Different view sizes are available in the View menu
and are useful especially when editing a symbol.
Note: The button sizes as viewed on screen do
not necessarily match the printed size.
Refer to the rulers in the window to
determine the actual print sizes.
17
Chapter 1 - Building a Board and Working with its Appearance
Resizing a Board’s Window
Manually
By moving the pointer over any edge of the window,
the pointer will become a double arrow. Click and
drag the edge of the window to a new position.
Drag to resize
a window.
- - - - - - - - - - - - - - - - - - - - - - - - - - - - - - - - OR - - - - - - - - - - - - - - - - - - - - - - - - - - - - - - - Using the Maximise and Restore Buttons
The board is shown
maximised.
Click on the Maximise button in the upper right
corner of a board’s window to expand it to fill the
workspace as shown above.
18
The board is shown
restored to its
smaller size.
Click on the Restore button in the upper right corner
of a maximised board’s window to restore it to its
reduced size as shown above.
Boardmaker Software Family v6 User’s Guide
Creating a Grid of Buttons
First, you must create the initial button for your
grid.
Select the Button Tool in the Standard Tool
Palette.
1
Tip:
Change the orientation of the Standard
Tool Palette by dragging the bar next to
the Symbol Finder Tool to either the
top or left side of the screen.
Standard Tool Palette
(Vertical and horizontal
orientations)
Move the crosshair into the blank workspace.
Tip:
2
Noting the initial position of the red
indicators in the rulers will help you
create a specific size button.
Red position
indicators
Note: The rulers can be set to display inches
or centimeters. The units of measure
can be set by selecting Print Setup
(Board Size/Ruler/Grid/Gaps) in the
File menu.
crosshair
Click and drag diagonally to create a button.
Release the mouse button when the new button
is the correct size.
Tip:
3
To create a square button, hold down
the Shift key while dragging out the
button.
Note: The cursor moves in 0.3 cm (1/8 inch)
increments on an invisible grid. You
can change the grid spacing by
selecting Print Setup (Board Size/
Ruler/Grid/Gaps) in the File menu or
unchecking the Snap to Grid feature in
the View menu.
19
Chapter 1 - Building a Board and Working with its Appearance
4
If it is necessary to resize the button, move the
pointer over any edge or corner of the selected
button until the double arrow appears as shown.
Click and drag to change the button’s size as
necessary.
Note: A dashed line indicates a button is
selected.
5
You are now going to spray out copies of the
button you have created to form a grid.
Select the Button Sprayer Tool.
Move the Button Sprayer Tool on top of the
button. Click and drag diagonally to spray out
the desired grid of buttons.
Note: If you want to change the gap spacing
between the buttons, delete all buttons
except for the initial button, change the
gap spacing for the Button Sprayer
Tool and drag out a new grid.
6
20
Use the double
arrow to change
a button’s size.
Boardmaker Software Family v6 User’s Guide
While all the buttons are still selected*, click
and drag on any button to reposition the whole
grid in the centre of the page.
*If the buttons become deselected, choose
Select All (Ctrl + A) in the Edit menu.
Tip:
7
If you create a board layout you would
like to use as a template for future
boards, please refer to Appendix E Creating a Template Board.
Changing the Board or Button Background Colour
Click on the board’s background
or select a button or group of
buttons.
Select the Colour Tool
Click on the desired colour in the
Colour Palette.
21
Chapter 1 - Building a Board and Working with its Appearance
Changing the Button Border Thickness
Select a button or group of
buttons.
Select the Thickness Tool.
Click on the desired button border
thickness.
Invisible Button Borders
The dashed line in the Thickness Tool represents an “invisible” border. When selected, the buttons will appear
with a light-grey dot-dash border that will not print.
Note: Do not confuse the dashed line in the Thickness Tool with dashed button borders which are set by right-
clicking on a button and selecting Dashed Border from the Properties submenu. (Refer to the Applying
Dashed Button Borders section.)
Selecting the
invisible border.
22
Solid border
Invisible border
(Will not print.)
Dashed border
Boardmaker Software Family v6 User’s Guide
Changing the Button Border Colour
Click Border to change the
button border colour.
Select a button or group of
buttons.
Tip:
Select the Colour Tool.
Click on Border, then select the
desired button border colour.
Use the eye dropper to select a colour that does not appear in the palette by clicking on any colour
shown on the board.
Changing the Button Shape
Select a button or group of buttons.
Select the Corner Tool.
Select the desired button border corner.
Note: If a freeform button is selected, the Corner Tool will act as a “polygon tool.” Refer to the Creating
a Regular Polygon from a Freeform Button section.
23
Chapter 1 - Building a Board and Working with its Appearance
Drawing a Line
Select the Line Tool.
Click and drag on a button or on
the board background to draw a
line.
Click on the Thickness Tool, and
make a selection to change the
line’s thickness.
Applying Dashed Button Borders
Select a button or group of
buttons.
Right-click on a button and select
Dashed Borders in the Properties submenu. Uncheck this
option to return to solid border
lines.
The dashed borders are great for
cutting activities and worksheets.
Note: Dashes can also be applied to lines created with the Line Tool.
Tip:
24
Dashed borders look better with thicker button borders (Thickness Tool).
Boardmaker Software Family v6 User’s Guide
Applying 3-D Button Shadows
Select a button or group of
buttons.
Select the Shadow Tool.
Select the shadowed box to create
the 3-D button shadows.
Note: The Thickness Tool, Corner Tool, and Colour Tool can be used to change the look of the button
shadows.
Clearing a Group of Buttons
Select a button or group of
buttons.
Select Clear in the Edit menu or
right-click on one of the buttons
and select Clear Buttons > Face.
The symbols and text are
removed from the buttons.
25
Chapter 1 - Building a Board and Working with its Appearance
Drawing a Freeform Button
The Freeform Button Tool allows you to draw buttons that have any shape. You can use this tool to create
“hotspots” around parts of a background picture, emphasize certain buttons by giving them a very different look
from the others, or simply create fun new shapes.
Create uniquely shaped buttons
over an item in a photo and
make them invisible.
Turn any freeform button
into a standard polygon.
Create polygon shapes and
make the borders dashed.
Note: A freeform button behaves exactly like a standard button with two exceptions; it can’t have shadowed
borders and its corners can’t be rounded.
1
Select the Freeform Button Tool.
On the board background, click and hold the
mouse button down. Drag the mouse around
to draw the freeform button.
2
26
Click and drag to
draw a freeform
button.
Boardmaker Software Family v6 User’s Guide
Release the mouse button to automatically
close off the button border with a straight line
between the mouse position and where you
started drawing the freeform button.
3
Release the mouse
button to close the
button with a
straight line.
27
Chapter 1 - Building a Board and Working with its Appearance
Drawing a Polygonal Freeform Button
1
The Freeform Button Tool can also be used
to draw polygons.
Select the Freeform Button Tool.
Press and hold the Control (Ctrl) key, click to
set the starting point for the button and move
the mouse to drag out the first side of the
polygon. Click to set that side.
2
While continuing to hold down the Ctrl key,
click the mouse where you want each corner
of the polygon to be.
3
4
28
To finish your polygonal freeform button,
double-click to specify the position of the
final corner (or you can just release the Ctrl
key). The program will automatically close
the polygon.
While holding down the
Ctrl key, click then
move the mouse and
click to create the first
side of the button.
Continue to hold
down the Ctrl key
and click to set
each corner.
Release the Ctrl key
and the program will
automatically close
the button.
Boardmaker Software Family v6 User’s Guide
Drawing a Button with Straight and Freeform Sides
1
The Freeform Button Tool can be used to
draw buttons that have both freeform and
straight sides.
Select the Freeform Button Tool.
Press and hold the Ctrl key, then click and
drag to define out the first side of the polygon.
While holding down the
Ctrl key, click then
move the mouse and
click to create the first
side of the button.
2
Now, while continuing to hold the mouse
button down, release the Ctrl key. Move the
mouse around to draw a freeform side.
Hold down the
mouse button
and release the
Ctrl key to draw a
freeform side.
3
To draw a straight side again, press and hold
the Ctrl key and release the mouse button.
Click to set the next corner.
4
Alternate between holding down the Ctrl key
and the mouse button to switch between
drawing straight or freeform sides.
Hold down the Ctrl
key again and
release the mouse
button to define
another straight
side.
29
Chapter 1 - Building a Board and Working with its Appearance
To finish your freeform button, simply release
the mouse button and the Ctrl key. The
program will automatically close the polygon.
5
Release the Ctrl
key or the mouse
button to close
the button with a
straight line.
Creating a Regular Polygon from a Freeform Button
Although it's possible to manually draw regular polygons (like triangles and hexagons) using the methods
described in the Drawing a Polygonal Freeform Button section, it can be very tricky to get such polygons
just right. The program therefore provides a way to convert any freeform button to a regular polygon by
using the Corner Tool.
The freeform button will appear
with the new shape.
Select a freeform button.
Select the Corner Tool; then
select a shape.
Tip:
30
Hold the Shift (constrain) key while selecting a shape to create a regular polygon (all sides the same
length).
Boardmaker Software Family v6 User’s Guide
Chapter 2
Working with the Symbol Finder
Chapter Overview
The Symbol Finder allows you to quickly search for symbols and copy them to buttons or to other programs.
You can easily change the text above a symbol or work in another language. This section will show you how to
use the Symbol Finder’s different features so you can easily get the symbols and text you need.
The following topics will be covered:
•
Searching for symbols
•
Using the Alternative Symbol Names menu
•
Making a one-time symbol name change
•
Editing a symbol’s list of names
•
Setting the Symbol Finder font size
•
Using different languages with the symbols
•
Working with the Symbol Finder’s settings
•
•
Copying a symbol to a button
Selecting the Display Option for Symbol
Names
You can use different
languages or display
two at once. The text
can also be hidden
or positioned below
the symbol.
Enter alternative
symbol names.
Browse multiple
symbols using the
thumbnail view.
Select just a portion
of a symbol to copy.
31
Chapter 2 - Working with the Symbol Finder
Searching for Symbols
Select the appropriate Symbol Name Search Option button. This determines how the Symbol Finder
matches symbols to your search text.
Type the name of the symbol you want to find.
Search Options
Search Text Field
Beginning of Word
Search text: “her”
Matches: “here,” “her,” “come here”
1
Anywhere
Search text: “her”
Matches: “where,” “cherries,” “here”
Whole Word
Search text: “her”
Matches: “her” (only match)
The symbols that match your search text can be displayed either one at a time within the Symbol Finder
window or in a popup window with up to 49 thumbnail pictures.
Searching for Symbols Individually
Next Arrow
2
Previous Arrow
Indicates the current
symbol number and
total number of
matching symbols.
If the first symbol that appears is not correct, use the Previous/Next Arrows or the right and left arrows
on your keyboard to step through the symbols that match the search.
32
Boardmaker Software Family v6 User’s Guide
Searching for Symbols Using Thumbnails
Click the symbol you want to use, or
Right-click the symbol to paste it
into the highlighted region.
Alternative Symbol
Name Field
Name of the highlighted
thumbnail.
Thumbnail
Button
3
You will be shown
thumbnail pictures
of the first 49
matching symbols.
Click on the Thumbnails button (Ctrl + T) to view thumbnail pictures of all symbols that match the
search.
You can use the Previous/Next Arrows or the arrow keys on your keyboard to step through the
thumbnail screens. Click on the thumbnail picture of the symbol you want to use.
Note: As you pass the pointer over each thumbnail picture, its symbol name will appear in the
Alternative Symbol Name Field.
Tip:
Right-click on a thumbnail to paste it into the currently highlighted button. The thumbnail
view will remain open so you can continue right-clicking on thumbnails to quickly paste them
into your blank buttons.
Searching for Symbols Using Categories
If you are working on a topic-based board, i.e. breakfast or clothes items, you may find doing a category search
will be quicker than searching for each symbol separately. You can set the Symbol Finder to search for or
display only those symbols within a specific category.
Category searches are covered in-depth in Chapter 3 - Working With Symbol Categories.
33
Chapter 2 - Working with the Symbol Finder
Copying a Symbol to a Button
Automatic Placement
The Symbol Finder will highlight the first empty
button on the board.
Pressing the Enter key on the keyboard will
automatically place the current symbol on the
highlighted button.
Once the symbol is placed, the next empty button
will become highlighted.
Note: If there are no empty buttons, the Symbol
Finder will try to place the symbol on the
board background.
Highlighted Button
- - - - - - - - - - - - - - - - - - - - - - - - - - - - - - - - OR - - - - - - - - - - - - - - - - - - - - - - - - - - - - - - - Manual Placement
You can place the current symbol on any button on
the board, not just the highlighted button.
Using the Placement Cursor, click on the button
where the symbol should be placed.
Note: The next empty button that follows the
button you just clicked on will become
highlighted for automatic placement.
Please refer to Chapter 4 - Working with Symbols on
a Board for information on deleting, replacing, or
adding multiple symbols to a button.
Tip:
34
With the Placement Cursor, you can click
and drag out a marquee box into which the
current symbol will be placed. This is an
easy way to size and position a symbol
within a button or on the board background.
Placement Cursor
Boardmaker Software Family v6 User’s Guide
Using the Alternative Symbol Names Menu
Click here to show any
alternative symbol
names.
Alternative names for
the current symbol.
Many symbols are assigned alternative symbol names (synonyms). If you search for any of these alternative
names, the symbol will appear in the Symbol Finder with that name above it.
If you want to use an alternative name for a symbol, click on the black triangle and select a name from the pulldown menu.
Note: Changing the text using the Alternative Symbol Names field is a one-time change and will not affect the
original symbol name.
Making a One-Time Symbol Name Change
Original search text
Alternative Names
Symbol field
You can change the text that appears above a symbol by typing in the Alternative Symbol Names field. As you
type the text, it will automatically appear above the symbol.
Note: Changing the text using the Alternative Symbol Names field is a one-time change and will not affect the
original symbol name.
35
Chapter 2 - Working with the Symbol Finder
Using Different Languages with the Symbols
The PCS libraries that came with your software are translated into many different languages. You may change
the displayed language, add a second language line, or set a different search language.
Line 1 Language: Spanish
Line 2 Language: English
Symbol Finder
Settings Button
1
2
Click on the Symbol Finder Settings button.
Use the pull-down menus to select the desired languages for the Line 1 Language and/or Line 2
Language.
Click on the OK button when finished.
Changing the Line 1 Language changes the Search Language to match. You can set the Search
Language independently after setting the Line 1 Language (see above; an English speaker can
make a board for a Spanish speaker).
Note: Some languages require special fonts and font scripts to display their text correctly. The
fonts and scripts for the Eastern European languages are available within Windows 2000 or
higher if Multilanguage Support is enabled in the Windows Setup. Refer to Enabling
Multilanguage Support in Help Topics in the Help menu.
36
Boardmaker Software Family v6 User’s Guide
Selecting a Search Category
Select Categories button
Click here to select a category
to search or view.
1
2
Checks all category fields
Unchecks all category fields
Shows/selects any user categories
Cancels any
selection changes
Closes the Categories
window
Click Clear All Standard Categories to uncheck all category selections.
Check any category or categories you want to search or browse. Click the OK button when finished.
37
Chapter 2 - Working with the Symbol Finder
Working with a Category Search
Symbol Finder Details
Once you have selected a search category, only those symbols assigned to that category will be available in the
Symbol Finder.
If the search field is
blank, you can step
through all symbols in
a selected category.
Steps through
the matching
symbols.
Selected search category
Current symbol
number
Number of
matching symbols
Using the Thumbnails View
Search categories are best used in conjunction with the thumbnail view. The thumbnail view will allow you to
see up to 49 symbols at a time from a selected category. This will allow you to quickly locate the symbols you
want to use. Use the Next Arrow to view the next 49 symbol thumbnails.
The search field must
be blank to view all
symbols in a selected
category.
Click on the
thumbnail of the
symbol you want.
Previous/Next
Arrows
Displays the name
of the highlighted
symbol thumbnail.
Filling a Topic Board Quickly
There are two methods you can use to quickly fill a topic-based board with symbols from a specific search
category. In the examples below, the “breakfast” category is selected.
Method 1 - The Enter key and automatic placement
Repeatedly pressing the Enter key on the keyboard fills the buttons with “breakfast” symbols in the order they
appear within that category. Use the Right Arrow key on your keyboard to skip unwanted symbol(s).
38
Boardmaker Software Family v6 User’s Guide
Symbol 8 of 25
Press the Return key
Symbol 9 of 25
Symbol 10 of 25
Press the Return key
Press the Return key
Method 2 - Right-click a thumbnail and automatic placement
Right-click on a thumbnail to paste it onto the currently highlighted button. The thumbnail view will remain
open so you can continue right-clicking on thumbnails to quickly paste them onto your blank buttons.
Enlarging the Symbol Finder Window
Mazimise
button
Symbol Finder
Settings button
The Symbol Finder can be enlarged to give you a larger view of the symbols. This is useful when using the
Selection Marquee/Lasso.
To enlarge the Symbol Finder, click on the Maximise button. The Maximise button is then replaced by the
Restore button and is used to return the Symbol Finder to its normal size.
You can set the size of the enlarged Symbol Finder by clicking on the Symbol Finder Settings button, then
selecting a magnification in the Magnification for Enlarged Window box Magnification popup.
39
Chapter 2 - Working with the Symbol Finder
Selecting the Display Option for Symbol Names
The Symbol Finder can be set to display the symbol names above the symbol, below the symbol or not at all.
Select the display
option for the
symbol names.
To change the symbol names display option, click on the Symbol Finder Setting button then select the desired
option.
Note: When the No Labels option is selected, the Line1 and Line2 language settings are preserved, but appear
grayed out and are unselectable.
40
Boardmaker Software Family v6 User’s Guide
Chapter 3
Working with Button Text
Chapter Overview
You can use the Text Tool and Text menu to edit text above a symbol or add text directly to a button or the
background. This chapter will show you how to work with the text on your boards.
The following topics will be covered:
•
Adding text with the Text Tool
•
Repositioning text fields
•
Editing symbol names with the Text Tool
•
Changing the text colour
•
Setting the text font, style, and size
•
Changing the text settings on multiple buttons
•
On-screen keyboard
Create buttons or boards with only text.
Use the Text Tool to
change a symbol’s name.
You can change the font, size, style, and colour of the
text on all selected buttons in one step.
41
Chapter 3 - Working with Button Text
Adding Text with the Text Tool
Select the Text Tool.
Click with the I-beam cursor where
you want to type text.
Type your text.
The blinking insertion cursor marks
your position in the text field.
Repositioning Text Fields
Select the Pointer Tool.
42
Click and drag the text field to a
new position. You may also use
the keyboard arrow keys to nudge
the text field around.
Tip:
You can also click and
drag on the top or
bottom of a multi-word
text field to resize the
text block.
Boardmaker Software Family v6 User’s Guide
Editing a Symbol Name with the Text Tool
Select the Text Tool.
Click with the I-beam cursor on the symbol name, then type the new
name.
Note: The first time you click on a text field with the I-beam cursor the entire text field will be selected.
The second click places the insertion cursor. A double-click will select a single word.
Tip:
Right-click on any text with the pointer and select Edit Text from the contextual menu to edit
the text. Move the I-beam cursor off the text and Right-click again to select the Pointer Tool.
Changing the Text Colour
Select the text field using the
Text Tool or Pointer Tool.
Select the Colour Tool.
Click on the desired colour in the
Colour Palette.
Tip:
You can change the colour of text with the Pointer Tool by right-clicking on the text and selecting
the colour from the Font Colour submenu.
Tip:
Use the eyedropper to set a custom colour for the text by clicking on any colour on the board.
43
Chapter 3 - Working with Button Text
Setting the Font, Style, and Size
Select the text to be
changed using the Text
Tool or Pointer Tool.
The font size can be set within
the Text menu.
Select Font in the Text menu to change the
settings for the Text Tool or a selected text
field.
Note: You can change the default font, style, and size used by the Text Tool by first double-clicking on
the Text Tool, then selecting Font in the Text menu and making the desired changes.
Tip:
44
You can quickly increase or decrease the font size by one point by using keyboard shortcuts. Ctrl
+ "+" will increase the size, and Ctrl + "-" will decrease the size.
Boardmaker Software Family v6 User’s Guide
Changing the Text Justification
Select the text field using the
Text Tool or Pointer Tool.
Select the desired alignment in
The text in this example is now
the Justify submenu in the Text
centered.
menu.
Tip: You can change the alignment of text with the Pointer Tool by right-clicking on the text and
selecting the desired setting from the Justify submenu.
Changing the Text Settings on Multiple Buttons
Select the buttons whose text will
be changed.
Make the desired changes in the
Text menu.
All selected buttons will reflect
the text change.
Note: If you are increasing the text size on your buttons by a significant amount the text may appear
underneath the top portion of some symbols. It may be necessary to resize or reposition some
symbols within their buttons in order to avoid clipping the text.
45
Chapter 3 - Working with Button Text
46
Boardmaker Software Family v6 User’s Guide
Chapter 4
Working with Symbols on a Board
Chapter Overview
A symbol on a button can be easily replaced, added to, resized, moved, or deleted. This chapter will show you
how to manipulate the symbols and create your own symbols.
The following topics will be covered:
•
Replacing a symbol on a button
•
Adding an additional symbol to a button
•
Resizing and repositioning a symbol
•
Using a portion of a symbol
•
Importing a picture onto a button
•
Resizing buttons and graphics
•
Clearing pictures and text from selected buttons
Quickly replace a button’s
symbol and text.
Position multiple symbols on a
button to make a new symbol.
Quickly clear the contents
of any selected buttons.
47
Chapter 4 - Working with Symbols on a Board
Replacing a Symbol on a Button
Search for a new symbol in the Symbol
Finder.
1
Using the Placement Cursor, click on the
button whose symbol will be replaced.
Placement Cursor
2
Click on the Replace button to confirm the
action.
The new symbol and text will replace the old
ones.
3
48
Boardmaker Software Family v6 User’s Guide
Adding an Additional Symbol to a Button
\
Search for the symbol you want to add.
1
Press the Tab key to move to the Alternative
Symbol Name Field, then press the
Backspace or Delete key to remove the
symbol text (you don’t want an extra symbol
name appearing on the button).
Alternative Symbol Name Field
Delete this text to temporarily
remove the symbol’s text.
2
Using the Placement Cursor, click on the
button that will receive the additional symbol
or click and drag out a marquee box that will
determine the size and position of the
additional symbol.
Placement Cursor
3
Click on the Add To button to confirm the
symbol addition.
The new symbol is added to the button on top
of the previous symbol.
4
The Pointer Tool will automatically become
selected and the symbols are ready to be
resized and repositioned (see next section).
49
Chapter 4 - Working with Symbols on a Board
Resizing and Repositioning a Symbol
Select the symbol to be resized.
1
2
Note: The first click selects the symbol on top,
the next click selects the next symbol
down, etc.
Move the pointer over any portion of the dashed
selection box. The pointer will become a double
arrow.
Click and drag the lower right-hand corner to resize
the symbol.
Tip:
Hold down the Shift key while resizing
the symbol to maintain the symbol’s
proportions.
Tip:
If the symbol get distorted as a result of
resizing it, right-click on the symbol and
select Restore Proportion to return the
symbol to it original aspect ratio.
3
If necessary, move the pointer over the symbol,
then click and drag to reposition the symbol.
4
50
Tip:
You can change the order in which the
symbols are stacked on a button by
selecting a symbol, then selecting Send
To Back in the View menu.
Double
arrows are
used to
resize.
Boardmaker Software Family v6 User’s Guide
Using a Portion of a Symbol (Marquee/Lasso)
Selecting a Portion of a Symbol
1
Marquee is selected.
Lasso is selected.
Select either the Marquee or Lasso button then click and drag to select the desired portion of a
symbol.
Placing the Selection
2
Completed button
(after resizing and
positioning).
You can click with the Placement Cursor or press the Enter key to place the symbol selection on a
button. You can also click and drag out a marquee box with the Placement Cursor to set the
position and size of the selected portion of the symbol within the button.
To learn how to save a new symbol in the Symbol Finder, please refer to Chapter 8 - Adding New
Symbols or Photos to the Symbol Finder.
51
Chapter 4 - Working with Symbols on a Board
Clearing Symbols and Text from Selected Buttons
Select the buttons whose symbols
and text you want to clear.
52
Select Clear in the Edit menu or
right-click on one of the buttons
and select Clear Buttons > Face.
The cleared buttons are ready for
new symbols.
Boardmaker Software Family v6 User’s Guide
Chapter 5
Working with Symbolate Buttons
Chapter Overview
Symbolate Buttons provide a quick and easy way to create symbol adapted sentences, stories, direction strips
and other instructional materials and aids. As text is typed into a symbolate button, appropriate symbols will
appear above each word. By design, text and symbols can not be moved around in Symbolate buttons, but in
most other respects, Symbolate buttons are similar to standard buttons. Their background colour, border
thickness, corner setting, font size, style and colour can be set in the usual fashion. They can be positioned and
resized according to your needs. In Boardmaker Plus! and Boardmaker with Speaking Dynamically Pro, you can
assign a select set of actions to these buttons, including the new Read With Highlighting action designed
specifically for Symbolate buttons.
The following topics will be covered:
•
Creating a Symbolate button
•
Changing the text position
•
Editing symbolate text
•
Adjusting the button border
•
Changing the symbol for a word-symbol pairing
•
Changing the font and symbol size
•
Making new word-symbol pairs
•
Setting the button symbolate properties
•
Changing the default word-symbol pairing
•
Read with Highlight action (Plus! and SD Pro)
•
Changing the text for a word-symbol pairing
Symbolate
Button
Symbolate
Buttons
Quickly create symbol-supported learning activities like this current events page using the Symbolate
Tool. The symbols automatically appear as you type. (Many of the symbols shown above come from
the optional PCS addendum libraries.)
53
Chapter 5 - Working with Symbolate Buttons
Creating a Symbolate Button
1
Select the Symbolate Tool in the Tool Palette.
Click on the background where you would like to
start typing.
2
A new Symbolate button will extend from that
location to the right edge of the board. You will be
able to adjust the width of the button later. A
Symbolate button's height is automatically
determined by its font and symbol size settings.
Tip:
Click and drag horizontally with the
Symbolate Tool to set the initial width of
the Symbolate button.
Begin typing in the new Symbolate button. If there is
a valid word-symbol match, then the symbol will
appear as each word is completed.
3
The text will automatically wrap when it reaches the
right edge of the button. You can move to a new line
at any time by using the Enter (or Return) key.
There is no limit to the amount of text you can type
into a Symbolate button. However, you are limited to
what you can see by the dimensions of your board.
Tip:
To access symbols paired with multi-word phrases, like “solar system” you must type
“solar_system.” The underscore (“_”), which will appear as a space, prevents the program
from attempting to symbolate the first word.
Note: You can apply standard button appearance options such as border thickness and colour,
background colour and shadow borders to a symbolate button.
54
Boardmaker Software Family v6 User’s Guide
Editing Symbolate Text
Select the Symbolate Tool and click on the text
you'd like to edit. The Symbolate button will behave
like a very simple text editor.
1
Tip:
Right-click a symbolate button to quickly
select the Symbolate Tool for editing the
text.
Use the Symbolate Tool
to edit Symbolate text.
Once the text cursor is positioned, text can be
inserted and deleted as in any word processor. Move
around within the text by repositioning the cursor or
by using the arrow keys.
2
Note: Although you can use standard Windows
techniques to select text (for example,
clicking and dragging across the letters you
want to select), your selection cannot span
multiple word-symbol pairs.
You can not click and drag
to select multiple words.
The program will automatically re-symbolate the text
as it is changed.
3
Note: You can prevent the program from
automatically re-symbolating the text by
holding down the Alt key while you type.
Refer to the Changing the Text for a WordSymbol Pairing section for more
information.
Click between two symbolate word-symbol pairs to
insert new text.
4
55
Chapter 5 - Working with Symbolate Buttons
Changing the Symbol for a Word-Symbol Pairing
The program uses a set of pre-defined word-symbol pairings and symbol library searches to determine the symbol
that will first appear when a word is typed. The first symbol that appears will not always be appropriate for the
context of the word. In this situation you can manually step through the candidate symbols (i.e. all symbols paired
with the word).
The symbol for “saw” is
not correct for the context.
Using the F1 and F2 Keys
With the Symbolate Tool, click on the word or symbol you want to change, then press the F2 or F1 keys to
step forward or backward through any candidate symbols paired to the word. This can also be done for the
last word you typed.
F1
F2
- - - - - - - - - - - - - - - - - - - - - - - - - - - - - - - - OR - - - - - - - - - - - - - - - - - - - - - - - - - - - - - - - -
56
Boardmaker Software Family v6 User’s Guide
Using the Symbolate Candidates Dialogue
With the Symbolate Tool selected, double-click on the symbol (not the word) that you want to change. The
Symbolate Candidates dialogue will appear.
Click on the appropriate candidate symbol then click on the OK button.
Tip:
Double-clicking on the appropriate symbol will automatically select the symbol and dismiss the
Symbolate Candidates dialogue.
Tip:
Selecting a word and pressing the Esc key will also open the Symbolate Candidates dialogue.
Note: This symbol change only applies to this instance of the word. If you want to make this symbol the
new default for the word, click on the Make Default button. Refer to the Changing the Default
Word-Symbol Pairing section.
57
Chapter 5 - Working with Symbolate Buttons
Making New Word-Symbol Pairs
You have access to a large number of PCS symbols in the libraries provided with the program and through the
optional PCS addendum libraries, but there will be words that will not have any paired symbols. This will be
especially true for names, places and other proper nouns. In this situation, you can manually make a new wordsymbol pairing.
There is no symbol associated with “astronomer.” You will need to make a new word-symbol pairing.
Using the Symbolate Tool, double-click above the
word (where a symbol would be) to open the
Symbolate Candidates dialogue.
Tip:
Selecting the word and pressing the Esc key
will also open the Symbolate Candidates
dialogue.
Double-click above a word to create
a new word-symbol paring.
1
There are no
candidate symbols
for this word yet.
Click on the Add New Symbol button. This will
open a special version of the Symbol Finder.
Search for the symbol that you would like to pair
with the word (shown in the Label field).
2
58
Click on the OK button when you have located the
appropriate symbol.
Click on the Add New
Symbol button to
search for a symbol to
pair to the word.
Boardmaker Software Family v6 User’s Guide
3
The “stars” symbol is now paired with the word
“astronomer.” Click on the OK button. The newly
paired symbol will appear in the symbolate button.
This new word-symbol pairing will be remembered
by the program for future use.
Tip:
Import photos into the Symbol Finder to
make them available for use in Symbolate
buttons. The name(s) you provide for the
photo will determine its automatic wordsymbol pairing.
59
Chapter 5 - Working with Symbolate Buttons
Changing the Default Word-Symbol Pairing
You may want to change the default word-symbol pairing to a more appropriate symbol or imported photo, or to
set the default so that no symbol appears initially. This can be accomplished using the Symbolate Candidates
dialogue.
In this example you might want to change the default word-symbol pairing so no
symbol appears for the word “a” and find a better symbol for the word “huge.”
With the Symbolate Tool, double-click on the
symbol for the word-symbol pairing to be changed.
This will open the Symbolate Candidates dialogue.
1
Symbols that are already paired to the word.
Click on the symbol you want to become the new
default then click on the Make Default button.
2
Select the No Symbol entry in the candidate list to
prevent the program from displaying a symbol for the
word.
Click on the OK button to save the changes.
Note: Use the Remove Symbol button to remove
a candidate symbol from the list and prevent
it from appearing when pressing F1 or F2 to
step through the word-symbol pairs.
60
Boardmaker Software Family v6 User’s Guide
Changing the Text for a Word-Symbol Pairing
Temporary changes can be made to words and phrases in existing word-symbol pairs. This can be done using a
keyboard shortcut or through the Symbolate Candidates dialogue.
In this example you might want to change
the word “Man” to a person’s name.
Note: Changes to the text in a word-symbol pair are temporary and only apply to that word-symbol pair.
Tip:
For specific people, places or things, import photos into the Symbol Finder to make them available for use
in Symbolate buttons. The name(s) you provide for the photo will determine its automatic word-symbol
pairing.
Using the Symbolate Candidates Dialogue
Using the Symbolate Tool, double-click on the symbol whose word is to be changed.
Type the new word or phrase in the Label field. Click OK when finished.
Edit the label to only change the
text for this word-symbol pair.
- - - - - - - - - - - - - - - - - - - - - - - - - - - - - - - OR - - - - - - - - - - - - - - - - - - - - - - - - - - - - - - - -
61
Chapter 5 - Working with Symbolate Buttons
Using the ALT Key
With the Symbolate Tool, select the word you want to change.
While holding down the Alt key, type the new text for the symbol. Holding the Alt key prevents the
program from attempting to re-symbolate the text.
Hold the Alt key while typing to directly
edit the text without changing the symbol.
Click elsewhere in the button when finished.
Changing the Text Position
The text in a Symbolate button can appear on top of or below the symbols.
Right-click on the Symbolate
Button to adjust the text position.
Note: This change only affects the current button. To change the text position for all future Symbolate buttons,
make sure nothing is selected, then change the setting by selecting Symbolate Properties in the Edit
menu.
62
Boardmaker Software Family v6 User’s Guide
Adjusting the Button Border
It is not uncommon to have a gap between the right border of a Symbolate button and its contents. The border can
be adjusted either manually or by using the Autofit Border option (right-click menu). Each option yields a slightly
different result.
After entering the text, a gap is present
between the text and the right border.
Adjust the right border to improve the
appearance of the button.
Manual Resizing
Using the Pointer Tool, click and drag on the left or right border to resize the button. The text and symbols
in the button will not change as you change its width. The height of the entire Symbolate button will change
to accommodate its contents.
Click and drag on the
right or left border to
resize the button.
- - - - - - - - - - - - - - - - - - - - - - - - - - - - - - - - OR - - - - - - - - - - - - - - - - - - - - - - - - - - - - - - - -
63
Chapter 5 - Working with Symbolate Buttons
Autofit Border
Right-click on the Symbolate button and select Autofit Border. This will fit the border to leave a consistent
margin around its contents. This option will never change the top or bottom border of the button.
Use the Autofit Border
option to fit the border
for a consistent margin.
64
Boardmaker Software Family v6 User’s Guide
Changing the Font and Symbol Size
As with any text, you can adjust the font size, colour, style and justification in a Symbolate button. All of these
settings are available by right-clicking on the Symbolate button. Many of these options can also be found in the
Text menu.
Right-click on the
Symbolate button to
adjust the font settings.
Right-click on the
Symbolate button to
adjust the size of
the symbols.
65
Chapter 5 - Working with Symbolate Buttons
Setting the Button’s Symbolate Properties
A convenient method of setting the properties of the symbolate button is to use the Symbolate Properties
dialogue.
Note: A few of the more commonly used Symbolate Properties are available directly in the right click menu,
however, this dialogue contains all available properties of a symbolate button.
Set the text
position.
Make all word-symbol
pairs the same width,
based on the widest
pair.
Set the justification.
Specify a set
symbol size.
Set the line
spacing –
small, medium
or large.
Restores your default
settings if you have
made setting changes.
Note: You can define your personal default properties for symbolate buttons by setting the Symbolate
Properties from the Edit menu and modifying the default values. You can restore your default settings to
the factory default settings for Symbolate buttons by selecting Symbolate Properties from the Edit menu
and clicking on the Restore Factory Default Settings button.
66
Boardmaker Software Family v6 User’s Guide
Read with Highlighting Action
In Boardmaker Plus! and Boardmaker with Speaking Dynamically Pro, Symbolate buttons can be set to read aloud
and highlight each word-symbol pair as each word is spoken.
Double-click on the button and select the Read With Highlighting action (Basics tab). By default, the entire
word-symbol pair is highlighted as it is spoken. Check the Highlight Text Only box to highlight just the text.
Note: This action is only available on Symbolate buttons.
67
Chapter 5 - Working with Symbolate Buttons
68
Boardmaker Software Family v6 User’s Guide
Chapter 6
Working with the Board Layout
Chapter Overview
The program contains a variety of useful features that make it easy to change the appearance of a board by
quickly scaling and rearranging the content of buttons, aligning and centering symbols and text.
The following topics will be covered:
•
Swapping the content of two buttons
•
Aligning and centering items
•
Shuffling the contents of multiple buttons
•
Anchoring large background graphics
•
Resizing buttons and their contents
.
Shuffle the content of selected buttons.
Align groups
of items.
Resize multiple buttons and their contents.
69
Chapter 6 - Working with the Board Layout
Resizing Individual Buttons and Their Contents
Resizing everything
Select the button to be resized, then move the
pointer over any portion of the dashed button
border. The pointer will become a double arrow.
Hold down the Ctrl key on your keyboard and
click and drag the button border to resize the
button and all of its contents.
Tip:
Hold down Shift + Ctrl while dragging
to constrain the proportions of the button.
Hold down the Ctrl key while
dragging the button border to
resize the button and its contents.
- - - - - - - - - - - - - - - - - - - - - - - - - - - - - - - - OR - - - - - - - - - - - - - - - - - - - - - - - - - - - - - - - Resizing everything but the text
Select the button to be resized, then move the
pointer over any portion of the dashed button
border. The pointer will become a double arrow.
Hold down the Ctrl + Alt keys on your keyboard,
then click and drag the button border to resize the
button, lines and symbols.
Tip:
Hold down Shift + Ctrl + Alt while
dragging to constrain the proportions of
the button and leave the font size
unchanged.
Hold down the Ctrl + Alt keys to
resize everything but the text.
- - - - - - - - - - - - - - - - - - - - - - - - - - - - - - - OR - - - - - - - - - - - - - - - - - - - - - - - - - - - - - - - Resizing just the button
Select the button to be resized.
Move the pointer over any portion of the dashed
button border. The pointer will become a double
arrow.
Click and drag to resize only the button.
70
Drag the border to
resize just the button.
Boardmaker Software Family v6 User’s Guide
Resizing Multiple Buttons
Multiple buttons on a board can be resized
together using the same methods as described
for single buttons.
1
Select the buttons
to be resized.
Select the buttons to be resized (Using the
Pointer Tool while holding down the Shift
key or click on the background and drag out a
marquee box that touches all the buttons).
Press the Ctrl key. A red dashed border will
appear around all the selected buttons.
While holding down the Ctrl key, click and
drag the red dashed border around the selected
buttons to resize them and all of their contents.
2
To resize the buttons, symbols and lines while
leaving the text the original size, hold down
both the Ctrl + Alt keys at the same time you
click and drag.
Note: As with resizing single buttons,
holding down the Shift key will force
the buttons to be resized
proportionally.
Resized with the
Ctrl key held. The
text resizes.
Resized with the Ctrl
+ Alt keys held. The
text does not resize.
71
Chapter 6 - Working with the Board Layout
Swapping Button Content and Appearance
Button content (symbols, text and lines) and appearance (colour, border colour, border thickness, etc.) can easily
be swapped between two buttons. If the buttons are different sizes, the content will be scaled to fit the button.
Using the Pointer Tool, select the
button you want to swap.
Hold down the Alt key and click
and drag the button on top of the
button you want to swap it with.
The buttons will exchange
positions. Each button will scale
accordingly, but will maintain its
appearance.
Note: You can also swap buttons by using the Swap Buttons option under the Edit menu. Both buttons have to
be selected first (hold down the Shift key and click on each button).
Note: For Boardmaker Plus! and Boardmaker with Speaking Dynamically Pro users, all button actions
associated with the buttons will also be swapped.
Tip:
72
If you are interested in just moving the appearance (button and border colour) from one button to another,
but not the content of the button, you can copy the button and use the Paste Look option (refer to the inprogram Help Topics).
Boardmaker Software Family v6 User’s Guide
Shuffling Buttons
The content (symbols, text and lines) and appearance (button colour, border colour, border thickness, etc.) of
multiple buttons on a board can be shuffled easily using the Shuffle Buttons option in the Edit menu.
Select all the buttons you want to
shuffle with the Pointer Tool.
Go to the Edit menu and click
Shuffle Buttons.
The contents of all selected
buttons will be randomly
shuffled.
Note: As with the Swap Buttons feature, the shuffled buttons can be of different sizes. The content will be
scaled appropriately.
Note: For Boardmaker Plus! and Boardmaker with Speaking Dynamically Pro users, all assigned button actions
associated with the buttons will also be shuffled.
73
Chapter 6 - Working with the Board Layout
Anchoring Images and Symbols on the Background
When designing a board that includes background images, accidentally selecting those background images can
be a nuisance. To prevent accidental selection, right-click on the background image (or images) and select the
Anchor Picture on Background property from the menu.
Anchoring the image on
the board background
prevents you from
accidentally selecting it.
When this property is set, the background image becomes non-selectable while using the left mouse button. To
reset the property, simply right-click on it again and deselect the Anchor Picture on Background option.
74
Boardmaker Software Family v6 User’s Guide
Chapter 7
Working with the Paint Tools
Chapter Overview
You have access to a set of paint tools that can be used to change the appearance of a selected symbol. You can
quickly add lines, change the colour of a face, erase an unwanted portion of a symbol, and much more.
.
Change a symbol’s colour
Draw on the symbol.
Paint Tools at a Glance
1
2
3
4
5
6
7
8
9
10
11
12
1
Pointer Tool
9
Eraser Tool
2
Colour Tool
10
Rotate Tool
3
Line Tool
11
Fill Tool
4
Zoom In Tool
12
Invert Tool
5
Zoom Out Tool
13
Fill All Tool
6
Flip Horizontal Tool
14
Marque Tool
7
Pencil Tool
15
Lasso Tool
8
Flip Vertical Tool
13
14
15
Note: The paint tools will appear only after you select a symbol with the Pointer Tool.
75
Chapter 7 - Working with the Paint Tools
Important Paint Tools Information
Conversion to Bitmap Format
The PCS library contains metafiles (scalable line drawings) that cannot be directly edited. The symbols must
first be converted into a bitmap format before the paint tools can be used.
Once a symbol is converted into a bitmap format it will lose some print quality. The curved lines in the symbol
will no longer print smoothly, but will appear stair-stepped. When you first select a paint tool to use on a selected
symbol, the dialogue box shown above will appear. Click on the Yes button to continue.
Limited Drawing Area
When you select a symbol, it is surrounded by a dashed selection box. This selection box defines the available
drawing space in which you can use the paint tools.
As you draw a line, the pencil
(and all other paint tools) will
not work outside of the
dashed selection box.
76
Boardmaker Software Family v6 User’s Guide
Transparency Colour
Symbol Transparency
When a symbol is converted to the bitmap format (by using a paint tool), any portion of the selected symbol that
is white will become transparent to the button background colour. If you select the Colour Tool before selecting
the Pencil Tool, Fill Tool, or Fill All Tool, you can change the transparency colour. Typically, you will want to
leave white as the transparency colour.
Using the eraser,
another white region is
created in the symbol.
The new white region
is transparent to the
background.
When the transparency
colour is changed, the
white regions become visi-
All the PCS
have white
backgrounds
when selected.
Imported Picture Transparency
When importing pictures into the program, you may find it necessary to change the transparency colour for that
picture. If a portion of the imported picture is white (the transparency colour), the background will be visible
through the picture. To correct this, you will need to select a different transparency colour by first selecting the
picture, then selecting an obscure colour using the Colour Tool.
With the transparency
set to bright green,
none of the
background is visible
through the picture.
When the transparency
colour is white, the
background shows
through the picture.
Tip:
If you want to drop the background out of an imported picture, paint the unwanted portions of the picture
with the transparency colour.
Painting the
unwanted
background with the
transparency colour.
This portion of the
picture is now
transparent.
77
Chapter 7 - Working with the Paint Tools
Pointer Tool
The Pointer Tool is used to select and move symbols, text, and buttons. When you select a symbol with the
Pointer Tool, the paint tools palette will appear in place of the Standard Tool Palette.
Double-click on the Pointer Tool (or single-click on the Pointer Tool while it is already selected) to make the
Standard Tool Palette reappear.
Click on the symbol
to select it.
Paint tools
palette.
(dragged into
a vertical
orientation.)
Pencil Tool
The Pencil Tool is used to draw on a selected symbol or picture. Use the Colour Tool and/or Thickness Tool to
set the colour and line thickness before using the Pencil Tool.
Pencil Tool
78
Use the Pencil Tool
to draw on a selected
symbol or picture.
Boardmaker Software Family v6 User’s Guide
Eraser Tool
The Eraser Tool is used to erase a portion of a selected symbol or picture. Use the Thickness Tool to change
the thickness of the Eraser Tool.
Use the Eraser Tool
to erase a portion of
a selected symbol or
picture.
Eraser Tool
Colour Tool
The Colour Tool is used to display the Colour Palette. It changes the colour used on the selected paint tool.
If you select the Colour Tool before selecting the Pencil Tool, Fill Tool, or Fill All Tool, the colour you select
will become the new transparency colour. Please refer to the Transparency Colour section.
Identifies where the
colour will be applied.
Select the desired
colour.
Colour Tool
Eyedropper
Tip:
Use the eyedropper to set the colour for the selected tool by clicking on any existing colour on the board.
79
Chapter 7 - Working with the Paint Tools
Thickness Tool
The Thickness Tool is used to display the thickness palette. When using the paint tools, it only affects the Pencil
Tool and Eraser Tool.
Eraser shown with a
larger thickness.
Eraser shown with a
smaller thickness.
Thickness Tool
Fill Tool
The Fill Tool is used to fill a selected portion of a symbol or picture with the chosen colour. The selected colour
will flow through that portion of the symbol until is encounters bordering colours.
Fill Tool
Colour Tool
and palette
Position the tip of the paint
pouring from the can over
the portion of the symbol
you want to colour and click.
The selected portion of the
symbol will be filled with the
chosen colour.
Note: To avoid accidentally changing the transparency colour, select the Fill Tool before selecting a colour with
the colour palette. (Refer to the Transparency Colour section more information.)
80
Boardmaker Software Family v6 User’s Guide
Fill All Tool
The Fill All Tool is used to replace all instances of a colour throughout a symbol with the chosen colour.
Fill All Tool
Colour Tool
and palette
Position the tip of the paint
pouring from the can over
the colour to be replaced
throughout the symbol.
All areas of the same
colour will be filled
with the chosen
Note: To avoid accidentally changing the transparency colour, select the Fill All Tool before selecting a colour
with the colour palette. (Refer to the Transparency Colour section more information.)
Invert Tool
The Invert Tool is used to invert the colours of a selected symbol or picture. This tool is only useful with black
& white symbols.
The symbol’s
colours are
reversed.
Invert Tool
81
Chapter 7 - Working with the Paint Tools
Flip Horizontal Tool and Flip Vertical Tool
The Flip Horizontal Tool and Flip Vertical Tool are used to flip a symbol along a desired axis.
Tip:
You can also right-click on a symbol and select a rotation option from the Rotate submenu.
The symbol is
flipped horizontally.
Flip Horizontal Tool
Flip Vertical Tool
Rotate Tool
The Rotate Tool is used to rotate a selected symbol or picture counterclockwise 90 degrees.
Tip:
You can also right-click on a symbol and select a flip option from the Flip submenu.
First click
Second click
Rotate Tool
Note: In most cases, the symbol will need to be repositioned in the cell after it has been rotated.
82
Boardmaker Software Family v6 User’s Guide
Chapter 8
Adding New Symbols or Photos to the
Symbol Finder
Chapter Overview
You are not limited to the use of the Picture Communication Symbols (PCS) when creating boards. You can
copy and paste, or import drawings, clip art, scanned photos, or digital pictures directly into the Symbol Finder.
The graphics you add to the Symbol Finder will need to be named and categorised so you can quickly find them
in the future.
The following topics will be covered:
•
Importing saved photos or graphics
•
Copying a new symbol from a button
•
Naming and categorising new symbols
•
Adding a screen shot to the Symbol Finder
•
Library organisation overview
Pictures from a variety of sources can easily be
imported into the Symbol Finder for future use.
Digital Pictures
Clip Art
Web Images
A symbol created from other symbols within a
button can be pasted into the Symbol Finder.
83
Chapter 8 - Adding New Symbols or Photos to the Symbol Finder
Importing Saved Photos or Graphics
If you intend to use photos or clip art on your boards, you should import them into the Symbol Finder where they
can be easily accessed again and again. If you import a photo directly to a button, you will have to re-import it or
copy it from that button the next time you want to use that photo again.
With the Symbol Finder visible, select Import
> Picture in the File menu.
1
Note: The File menu is active, even though
it appears grayed out.
Locate and open your saved photo or clip art
file.
2
You can import any files with the following
file extensions: .jpg, .gif, .png .wmf, .emf, or
.bmp.
Choose the
type of file to
import.
The imported graphic will appear in a dialogue
box where it will be named and categorised.
Please refer to the Naming and
CategorizingCategorising New Symbols
section in this chapter.
3
The newly
imported
picture.
The new picture must be given a
name and assigned to a category
so you can find it later.
84
Boardmaker Software Family v6 User’s Guide
Copying a New Symbol from a Button
While these instructions specifically refer to copying a new symbol from a button in the program, the
basic steps apply if you are copying a new symbol from another program.
Symbols you create or modify on a button can be
copied to the Symbol Finder, saving them for future
use.
1
Select the symbol you want to save. If it is made
up of multiple symbols, be sure to select them
all.
Note: Do not select the symbol’s text name.
A new symbol created
by combining other
symbols.
To select multiple
symbols, hold down
the Shift key while
clicking each symbol.
Select Copy in the Edit menu.
2
You can also Right + click on any of the
selected items and choose Copy Items from the
contextual menu.
Click on the Symbol Finder Tool, then select
Paste in the Edit menu.
3
Note: When symbols are copied and pasted from a button, they are converted into a bitmap and will
lose some image and print quality.
The symbol you pasted will appear in a dialogue box where it will be named and categorised. Please
follow the directions in the next section, Naming and CategorizingCategorising New Symbols, to
complete this process.
85
Chapter 8 - Adding New Symbols or Photos to the Symbol Finder
Naming and Categorising New Symbols
Once a symbol is pasted into the Symbol Finder, you must assign it a name and a category.
Naming the Symbol
You can assign names
in other languages.
Names assigned to
the new symbol.
1
Click here to add your
name to the arranged list.
Type your symbol
name here.
Type a name for your new symbol in the appropriate field, then click on the Add a Name button. You
can add alternative names to the symbol if appropriate.
Tip:
86
If you are working in multiple languages, you can add symbol names in each language by
choosing the languages in the menu.
Boardmaker Software Family v6 User’s Guide
Categorising the Symbol
The new symbol
pasted into the
Symbol Finder.
Categories
assigned to
the symbol.
2
Click here to assign
a category to the
new symbol.
Click on the Assign Categories button. In the categories window, check the category boxes that apply
to the new symbol.
Note: When you categorise a symbol, that categorisation applies to all languages, not just the current
language.
87
Chapter 8 - Adding New Symbols or Photos to the Symbol Finder
Using Drag and Drop to Add Images
Images saved on a computer or found in other applications can be easily imported onto a button or board by
using the "Drag & Drop" process. A few examples of applications that support this feature include the My
Computer browser, Windows Explorer, Internet Explorer, Firefox, Word and Outlook.
With the program open and in the background, find the image on the computer using the Windows
Explorer.
1
88
Boardmaker Software Family v6 User’s Guide
Click and drag the image from the Windows Explorer over to the desired button and release.
The cursor will
change to an arrow
with a “+” when you
are over a valid drop
zone.
2
Note: In the example above, the Windows Explorer is on top of the Boardmaker window. This
makes it easy to drag and drop images. If the Windows Explorer (or whichever program is
supplying the images) fills the screen or obscures the target button, drag the image over the
Boardmaker product tab in the Windows Taskbar (as shown below). The program will move
to the foreground and the image can then be dropped into the desired button.
89
Chapter 8 - Adding New Symbols or Photos to the Symbol Finder
Once the image is dropped, it will show on the face of the button. The filename of the image will
appear as the button label. The position of the label (above or below the symbol) will be determined by
the current Symbol Finder setting.
If the imported image has a label that is not appropriate, it can be changed using the Text Tool or it can
be omitted during the "Drag & Drop" process by holding down the Alt key when the image is dropped
on a button.
The label position,
font and size will
match the current
setting used in the
Symbol Finder.
3
Drag and drop an image and its
file name will become its label.
Tip:
90
Hold down the Alt key when an
image is dropped and it will have
no label.
If you select the No Label option in the Symbol Finder dialogue, labels will be automatically
omitted during the "Drag & Drop" process, thus making it unnecessary to hold the Alt key.
Boardmaker Software Family v6 User’s Guide
Dragging and Dropping Images onto the Board
Background
Images can also be imported to the background of a board by using the same “Drag & Drop” process described
in the Using Drag and Drop to Add Images section.
By default, when an image is dropped on a board’s background the program will attempt to scale the image to
fill the background, unless there is already an image filling the background. The program will scale the image as
best it can without distorting the image too much. Otherwise, it will preserve the image's aspect ratio. Any
subsequent image dropped onto the board's background will be scaled as if it were being placed in a fivecentimeter square button. The file name will appear as the image's label.
The first image dropped on the background of a
board will be scaled to fill the board without distorting the image.
Hold the Ctrl key when dropping an image on the
background to scale it as if to fill a 5cm x 5cm
button. The file name will be used as the label.
Tip:
Hold down the Ctrl key when dropping an image on the background to prevent the image from being
scaled to fill the background.
Tip:
Hold down the Ctrl + Alt keys to omit the label.
Note: Regardless of how an imported image is scaled, you can manually resize the image if necessary by
dragging on it borders.
91
Chapter 8 - Adding New Symbols or Photos to the Symbol Finder
Dragging and Dropping Images from a Web Browser
Using images from websites is a popular way to enhance a board or activity. The same "Drag & Drop" process
described in the Using Drag and Drop to Add Images section can be used to grab images from most web
browsers. The example below shows an image being dragged from a popular image search engine. As with
saved images, the image name will be used as a label. Some website images (like the one in the example below)
do not have image names. The program will automatically label these images as "unknown.”
Drag and drop image
from a web browser
to a button.
Tip:
Hold down the Alt key when dropping an image to omit the label.
Note: Web browsers are notorious for the widely varied ways they store and present images. Some may not
support "Drag & Drop" methods. In that case, the solution is to right-click on the image and choose the
Copy Image option. Then, in Boardmaker, right-click on a button or on the board background and select
Paste.
92
Boardmaker Software Family v6 User’s Guide
Dragging Images into the Symbol Finder
"Drag & Drop" can also be used to add
images to the Symbol Finder libraries.
1
Open the Symbol Finder.
With Boardmaker open in the background, find the image to be added to the Symbol Finder.
With the Pointer Tool, click and drag the image over the symbol view area of the Symbol Finder and
release.
2
Drag an image
directly into the
Symbol Finder to
add it to the Mine
library.
93
Chapter 8 - Adding New Symbols or Photos to the Symbol Finder
The My Symbols\Mine window will open. Give the image a name and assign it a category.
Click on the OK button when finished.
3
Give the new image a name and
assign it to a category. It will then
be available in the Symbol
Finder.
Note: If the image has a file name, it will automatically be used as the default name for the image.
94
Boardmaker Software Family v6 User’s Guide
Dragging Multiple Images into the Symbol Finder
Multiple images can also be added to the Symbol Finder at the same time using the “Drag & Drop” method. This
is a convenient way to quickly add an entire folder of images.
Select the desired images.
Note: Multiple files in a window can be
1
selected by holding down the Shift
key while clicking.
Drag and drop the selected images into the Symbol Finder.
An Import Symbols window will open. Choose the proper naming and categorisation options for the
imported images. (Refer to the Naming and CategorizingCategorising New Symbols section for more
specific instructions.)
Symbol Name Options
Choose to automatically use the image
file names as the names within the
library, or opt to name each image
individually.
2
Symbol Category Options
Choose to assign all the images to a
single selected category, or opt to
manually make category assignments
to each image individually.
Note: Individual, unwanted images that have been added to the Symbol Finder can be deleted later
using the Cut (Ctrl + X) option in the Edit menu.
95
Chapter 8 - Adding New Symbols or Photos to the Symbol Finder
96
Boardmaker Software Family v6 User’s Guide
Chapter 9
Preparing Your Boards for Printing
Chapter Overview
You can create both printed activities and interactive, on-screen activities. Boards created for each purpose may
be sized and oriented differently. It is important to understand how boards are sized so that the appropriate steps
can be taken to print the boards correctly.
The following topics will be covered:
•
Printer considerations
•
Print Board on Single Page command
•
Checking the print layout
•
Using Print Preview
This board is a pre-made template
that is used with the Tech II 32
digitised communication device. It
is designed to be printed on legal
paper oriented in landscape mode.
Page Break line indicates the board will not print
on a single page with the current print settings
97
Chapter 9 - Preparing Your Boards for Printing
Printer Considerations
There are hundreds of different types, makes, and models of printers. Because of this fact, a board that prints
correctly on one computer-printer combination may need to be adjusted to print correctly on another printer.
Here are a few facts to keep in mind when preparing to print a board:
98
•
A printer cannot use the entire piece of paper. There is typically a 6mm to 12mm inch margin along each
edge of the paper that cannot be used.
•
Because the unprintable margin size may vary on different printers, boards that contain content close to the
margin may not fit to a single piece of paper on all printers.
•
The maximum size board you can create is 150cm x 150cm.
•
The boards you create are very graphics intensive. They may take a long time to print, especially on older
computers or printers.
•
Most printing problems are related to your printer’s driver software. Make sure you are using the most
current driver. (Updates are available on most manufacturers’ web sites.)
Boardmaker Software Family v6 User’s Guide
Checking the Print Layout
Before you print your board, make sure you look at it in Fit to Window view (default). You'll probably want to
make sure that your board will fit on a single page using the current paper size and orientation. The printer page
breaks will appear as dashed green lines.
Page Break Line
This board spans
two pieces of paper.
An extra blank page
will print. The board
size needs to be
smaller.
Shown in Fit To
Window view
If you see a page break running through the board, as shown below, the board does not have the correct paper
size and/or orientation. This board will unnecessarily print on two pieces of paper. You will need to adjust the
board’s size so that it fits entirely on a single page. Please refer to - Setting the Correct Paper and Board Size.
Page Break Line
This board needs to
be printed on two
pieces of paper.
To print larger boards, you may need multiple pieces of paper which have to be trimmed and taped together.
99
Chapter 9 - Preparing Your Boards for Printing
Using Print Preview
1
It is a good idea to get in the habit of checking your
boards with Print Preview before printing. The Print
Preview will allow you to catch any sizing or paper
orientation problems before you actually print the
board.
Select Print Preview in the File menu.
Prints the board.
Steps through
multi-page Boards.
Toggles One Page
or Two Page view.
2
Zooms In or Out.
Closes the Print
Preview window.
In this example, you can see it will be necessary after printing the board to trim some paper from each
page so the overlay can be spliced together.
Tip:
If only a very small portion of the board prints on another page, you may find it difficult to
splice the board together. Try changing the page orientation or using smaller paper to more
evenly divide the board between the pages.
If the board looks correct on the Print Preview, click on the Print button to print the board. Click on
the Close button if you need to make changes to the board.
100
Boardmaker Software Family v6 User’s Guide
Printing a Board on a Single Page
Some boards you create may be designed to span multiple pages or fit on larger paper sizes. You can use the
Print Board on Single Page command in the File menu to automatically scale the board to print on a single
piece of paper. Use the Properties button in the Print dialogue to temporarily change the paper size and print
orientation for the board you are printing.
Click the Properties button to temporarily
change the paper size and print orientation.
101
Chapter 9 - Preparing Your Boards for Printing
102
Boardmaker Software Family v6 User’s Guide
Chapter 10
Making a Board Set
Chapter Overview
This you will learn how to create a dynamic screen communication board set. You will start by exploring the
sample boards provided with the program. This will help familiarise you with board organisation and the
program’s features. Next, you will begin to plan your board set and build the user’s main board.
The following topics will be covered:
•
Design considerations
•
Creating a main board
•
Mapping out the board links
•
Creating separate folders for organising your
boards
Each button is linked to
a board or set of
boards that address the
pictured topic.
The main board is the
gateway to the other
boards.
105
Chapter 10 - Making a Board Set
Design Considerations
When making a board set, a little planning will go a long way. When you are planning activities, here are a few
of the major design questions you will need to answer.
•
What is the goal of the activity (reading, verb tensing, story telling, etc.)?
•
How many boards will be needed, i.e. number of pages in a story, etc.?
•
How many buttons will be necessary on each board?
•
Do you want buttons with only text or also symbols and/or photos?
•
Do you want some kind of feedback for a correct answer? An incorrect answer?
The answer to each of these questions will have a direct impact on how you will create and link the boards
together. It may be helpful to map it out on a piece of paper before designing the boards.
106
Boardmaker Software Family v6 User’s Guide
Mapping Out the Boards and Links
Once you have your activities planned, you are ready to work out the content of each board and how they will be
linked together.
Typically, boards will be organised by topic or activity. You will start with a “Main” board that should have a
button for each of the topics or activities that you would like to be included in this set of boards. Linked to each
topic button you will have a topic branch which might be a single board or a group of boards. The number of
boards you use to develop a specific topic will vary from one activity to the next.
Try to create a board layout diagram like the one shown below. This will help you visualise the arrangement of
the topics and activities you want to cover. If you have a large list, you might try diagramming each specific
branch off the main board separately. This diagram will be helpful for future planning and also serves as a paper
backup of your board set’s arrangement.
107
Chapter 10 - Making a Board Set
Creating a Main Board
The first board you should create is the “main” board. This is the board they will start with whenever they use
the program. It should contain a button for each of the major communication topics you identified.
Every other board you create for this user will typically have a button linking it back to this main board. This
will allow you to easily move between boards and switch topics.
Sample activities:
- The Ocean
- Math
- Sentence Writing
- Behavior
- Classroom Jobs
- Bingo
Each board you create
should have a button
linking it back to the
“Main” board.
108
Boardmaker Software Family v6 User’s Guide
Creating Separate Folders for Board Organisation
The “Main” board you created in the previous section was saved in the My Boards folder which is the default
location for saving boards. If you are creating boards for different users or activities, you may want to create
separate folders within the My Boards folder to help you keep your boards organised. Organisation is especially
important for the program because all boards that will eventually be linked together must be saved in the same
folder.
My Documents
Default board
storage location.
My Boards
Butterfly Unit
An example of how
folders may be used
to organise boards.
Reading Activities
Math Activities
When you finish the tutorials and start creating
boards for a specific user, you should create a
separate folder where those boards will be
saved.
1
When you save the first board for a new user,
click on the Create Folder button. Windows
will create a “New Folder.”
Note:
Creating a new folder
within the My Boards
folder.
Make sure the folder you create is
within the My Boards folder.
Type in a new name for the folder, then press
the Enter key on your keyboard to save the
folder’s new name. Click on the Open button to
open the folder.
2
Now you can click on the Save button to save
your board in the new folder.
Note:
Until you quit the program or save a
board in another folder, your new folder
will be the default location for saving
boards.
109
Chapter 10 - Making a Board Set
110
Boardmaker Software Family v6 User’s Guide
Chapter 11
Assigning Basic Button Actions
Chapter Overview
This chapter will introduce you to assigning basic actions to your buttons.
The following topics will be covered:
•
Introduction to button actions
•
Button speech
•
Playing recorded messages
•
Playing saved sounds
•
Providing spoken and recorded previews
•
Working with the Preview Display
•
Editing a button’s assigned actions
Add a Preview
Display and/or
the Text Preview
action to provide
a text cue to the
user.
Assign Speak
actions to use
the synthesised
voice.
Assign Play
Recording
actions to play
saved sound
files (.wav).
111
Chapter 11 - Assigning Basic Button Actions
Button Actions Window at a Glance
You can assign actions to your buttons by double-clicking on them. The Actions list window (shown below) will
appear. You can assign multiple actions to each button. There are over 135 actions to choose from. Refer to
Appendix B - Button Actions for a complete listing.
Action Categories
Select the category of
actions that will appear
in the Actions list.
Play/Delete Buttons
Used to preview or
delete the selected
action.
112
Actions List
Click an action to assign
it to the button. The
actions listed belong to a
specific action category.
Assigned Actions
Lists the actions assigned
to the button. Drag the
actions to change their
order.
Dynamic Help Window
Displays helpful information about the item under
the mouse pointer.
Action Details
Shows what an action
will say, type, or do.
Double-click the action
detail to edit the action.
Boardmaker Software Family v6 User’s Guide
Action Categories
There are over 135 button actions to choose from. To help you locate a specific button action they are grouped
into categories by function. Selecting the appropriate tab in the Button Actions dialogue will display that
category of actions in the Actions list.
•
Basics - Most commonly used actions, i.e. Speak Message, Type Message, Change Board, etc.
•
Messages - Actions that control the function of a Message Display.
•
Board Change - Actions that link buttons to other boards or PopUps.
•
Text & Cursor - Actions that perform cursor movements and text selections.
•
Message Files - Actions that open and save text and picture documents.
•
Settings - Actions that allow a user to change access and preference settings.
•
Variables - Actions that are used to create conditional button responses, i.e. If, Else, Otherwise, etc.
•
Quick Actions - Actions used to create buttons (picture, text, recorded message) that can be edited in Use
mode.
•
Cool Stuff - Cool actions, such as Random, Launch Application, and Set Picture.
Basic Button Actions
The Basics category contains the most commonly used button actions. All of the actions in this list will be
covered in this chapter with the exception of Change Board and Picture Button, which will be covered in later
chapters.
•
Speak Message - Makes the button speak the message you enter using a synthesised computer voice.
•
Read with Highlighting - Reads and highlights the symbols and text on the face of a Symbolate button.
(Only appears in the action list for Symbolate buttons.)
•
Type Message - Places a message you enter into the Message Display. You must have a Message Display
on your board to use this button action.
•
Play Recorded Message - Plays a message you record or a selected saved sound.
•
Change Board - Displays the board you select.
•
Change Board Back- Steps the user through the boards they were previously using.
•
Text Preview - Displays a text cue for the button’s function. You must have a Preview Display on your
board to use this button action.
•
Spoken Preview - Plays a spoken (synthesised voice) cue for the button’s function.
•
Recorded Preview - Plays a recorded cue for the button’s function.
•
Clear Message Display - Clears the contents of the Message Display, if present on the board.
•
Picture Button - Places the symbol and/or graphic on the face of a button into the Message Display. You
will use two associated actions, Picture Speech and Picture Sound, with this action. You must have a
Message Display on your board to use this button action.
113
Chapter 11 - Assigning Basic Button Actions
Making a Button Speak
Double-click the button you want to speak.
The Button Action window will appear.
1
The button’s border will appear as a dashed
line when it is selected.
Select Speak Message in the Action
Menu.
2
In the dialogue box enter the message you
want this button to say.
Tip:
3
You can have the button
automatically speak the text on the
button face by clicking on the Use
Button Text button.You can listen to
your message by clicking on the
Speak button.
Click on the OK button or press the Enter
key on the keyboard when finished.
4
The Speak Message action and its message now appear in the Assigned Actions and Action Details
lists. Click on the OK button when finished.
114
Boardmaker Software Family v6 User’s Guide
5
Put the program in the Use mode by
selecting Use in the Dynamic Boards menu
(Command+ U). Try clicking on the
buttons that have been assigned speak
actions.
When you are finished, put the program
back in the Design mode by pressing the
Esc key or pressing Command+ D.
Making a Button Play a Recorded Message
1
Double-click on the button you want to play
a recorded message. The Button Actions
window will appear.
Select Play Recorded Message in the
Actions list.
2
Note: You must have a sound card with a
microphone or a built-in
microphone to use this feature.
Click on the Record a New Sound button.
3
115
Chapter 11 - Assigning Basic Button Actions
Click on the Record button and speak into
the microphone “Bobby wants.”
Click on the Stop button (previously the
Record button) to stop recording.
4
Click on the OK button when you are
finished recording. A dialogue box will
appear asking for a description of the
recorded message.
Click on the OK button when finished.
5
6
Enter a descriptive name for your recorded
sound that will appear in the Assigned
Actions list, then click on the OK button.
The Play Recorded Message action and
the recording name now appear in the
Assigned Actions list.
Click on the OK button when finished.
116
Boardmaker Software Family v6 User’s Guide
Making a Button Play a Saved Sound
Double-click the button you want to play a
saved sound.
1
Select Play Recorded Message in the
Actions list.
Click here to attach a
sound used on another
board.
Click here to attach a
sound file saved on
your computer or disk.
2
Click here to attach
one of the sounds
provided in the MJ
Sounds library.
Click on the Select Sound from Computer button. A navigation window will appear.
Navigate to any sounds you have saved on
your computer.
Note:
3
4
Although rare, some .wav files
contain compressed audio in
unsupported formats. Although
ending in .wav, these types of files
are actually in a different format
and will not play.
Enter a descriptive name for the sound you
selected, then click on the OK button when
finished.
The descriptive name will help you identify
the sound later.
117
Chapter 11 - Assigning Basic Button Actions
5
The Play Recorded Message action and
the sound file name now appear in the
Assigned Actions list.
6
Tip:
You can listen to the sound by clicking on the Play Recorded Message action then clicking on
the Play button. The Play button can also be used to preview any selected button actions that
speak or play a recording.
Click on the OK button when you are finished editing the button.
118
Boardmaker Software Family v6 User’s Guide
Giving a Button a Spoken Preview
1
The Spoken Preview action will cause a button to speak a message whenever the mouse cursor moves
over the button or that button is highlighted while using one of the scanning methods of access. A
preview message is commonly used to provide an audio cue for individuals with visual challenges.
Double-click on the button you want to assign a Spoken Preview to. The Button Action window will
appear.
Select Spoken Preview in the Actions list.
2
In the dialogue box type the preview message
you want to hear.
Click on the OK button when finished.
3
Note: A preview message should be only one
or two words. Long previews can slow
scanning or button access.
The Spoken Preview action and the preview
message now appear in the Assigned Actions
list.
4
Click on the OK button when finished.
Note: For information on setting the preview volume level or completely disabling all preview
messages, refer to the Voice and Sound Volume section.
119
Chapter 11 - Assigning Basic Button Actions
Giving a Button a Recorded Preview
As an alternative to the synthesised speech of the Spoken Preview action, the Recorded Preview action will
cause a button to play a recorded message whenever the mouse cursor moves over the button or that button is
highlighted while using one of the scanning methods of access. A preview message is commonly used to provide
an audio cue for individuals with visual challenges.
Double-click the button you want to assign a
Recorded Preview to. The Button Action
window will appear.
1
Note:
You must have a sound card with a
microphone or a built-in microphone to
use this feature.
Select Recorded Preview in the Actions list
You can record a preview
sound using a microphone
or select (import) a saved
sound file (.wav).
2
Click on the Record a New Sound button to use a microphone to record the preview.
Click the Select Sound from Computer button to use a pre-recorded sound. If you choose this option,
a navigation window will appear allowing you to locate and import the desired sound.
Note:
120
A preview message should be only one or two words. Long previews can slow scanning and
button access.
Boardmaker Software Family v6 User’s Guide
If you select the Record a New Sound option, the
Record Sound box will appear.
3
Click on the Record button and speak the preview
message into the microphone.
Click on the Stop button (previously the Record
button) to stop recording.
Click on the OK button when you are finished
recording.
4
Enter a descriptive name for your recorded
preview, then click on the OK button when
finished.
The Recorded Preview action and the recording
name now appear in the Assigned Actions list.
5
Note: Click on the OK button when you are
finished editing the button. For
information on setting the preview
volume level or completely disabling all
preview messages, refer to Voice and
Sound Volume section.
121
Chapter 11 - Assigning Basic Button Actions
Adding a Preview Display
The Preview Display will automatically display the messages or actions assigned to a button whenever the
mouse cursor moves over the button or that button is highlighted while using one of the scanning methods of
access.
Select Preview Display in the Dynamic
Buttons menu.
1
The Preview Display will appear toward
the top of the board.
2
Reposition and resize the Preview Display so that it appears according to your needs.
As you pass the cursor over your buttons
you can view the text previews. The
Preview Display functions in the Design
mode as well as the Use mode.
Note:
3
122
The size and colour of the display
text can be changed. Refer to
Adding a Message Display in
Chapter 13.
Boardmaker Software Family v6 User’s Guide
Changing a Button’s Text Preview
If you don’t like the preview text that appears
automatically, you can assign your own
preview text using the Text Preview action.
1
Double-click on the desired button. The
Button Actions window will appear.
Select Text Preview in the Actions list.
In the dialogue box, enter the text preview
message for the button.
2
3
The Text Preview action and the text preview
message now appear in the Assigned Actions
list.
Click on the OK button when you are finished
editing the button.
123
Chapter 11 - Assigning Basic Button Actions
Editing a Button’s Assigned Actions
In the process of creating a board you will probably find it necessary to edit the actions assigned to your buttons.
The actions in a button’s Assigned Actions list can easily be edited, added to, deleted, or rearranged.
Editing an Assigned Action
1
To edit an action on a button, doubleclick on the button then double-click in
the Action Details list for that action. In
this case, double-click on “math class”
for the Speak Message action.
The appropriate dialogue box for the
action will appear, allowing you to make
the necessary changes.
Note:
2
Many actions perform a set
function and cannot be edited.
Adding an Action to the List
3
124
There is no limit to the number of
actions a button can be assigned.
Any action added to a button will appear
after the highlighted action. To add an
action in a specific location, highlight
the action that will precede it.
Any action(s) you add will appear
after the highlighted action. Typically, this is the last action in the list.
Boardmaker Software Family v6 User’s Guide
Rearranging the Assigned Actions
4
To change the order of the Assigned
Actions list, you can click and drag an
action into a different location.
Note:
Click and drag actions to change
their order in the list.
Action order can be very
important. For example, all
board change actions must be
last in the list.
Deleting an Assigned Action
5
To delete an action, select it in the
Assigned Actions list, then click on the
Delete button.
Tip:
If you need to delete a series of
actions, select the top most
action and you can repeatedly
click on the Delete button to
remove the actions.
125
Chapter 11 - Assigning Basic Button Actions
126
Boardmaker Software Family v6 User’s Guide
Chapter 12
Linking Boards Together
Chapter Overview
With Boardmaker Plus! and the Boardmaker-Speaking Dynamically Pro combo, you have access to a "dynamic
display". This allows you to display different boards as needed - changing them as the user interacts with
buttons on the screen. In this chapter you will learn the basic methods of linking boards together to create the
first part of a navigable board set.
The following topics will be covered:
•
Overview of linking boards together
•
Creating a button link to the main board
•
Creating a button link to the previous board
•
Linking boards together
•
Board change indicators
Buttons can be linked
to specific boards that
provide additional
topic choices.
“Recipe” Topic Branch
The "Home" button
returns the user to
the main board.
The "go back" button
automatically returns
the user to the
previously used board.
127
Chapter 12 - Linking Boards Together
Linking Boards Together
Once a main/topic board has been created, the next step is to create the supporting boards for a specific topic
branch, e.g., recipe boards. Usually, you want to start by building the boards at the end of a topic branch first.
The general sequence for building a topic branch is outlined in the steps below. Following this building sequence
will allow you to make the necessary board links as each board is created.
"Recipe" topic branch is linked to the
"recipe" button on the Main board.
Main Board
Recipe 2 Board
You would create and
link the boards at the
end first, then work
toward the main
board.
Recipe 1 Board
Food Review
Board
Recipe 1
General Building Sequence
1
Start by building the boards at the end of the topic
branch first. These boards can then be linked directly
to the main board.
Note:
2
Every board you create should have a button
that links it to the main board.
Recipe 2
Board
Food Review
Board
Create any additional boards, working back up the
branch toward the main board.
Main Board
(Recipe button)
In the example pictured, the “Recipe 1” board is
created next. This board can then be linked to the
“Recipe 2,” “Food Review,” and “Main” boards.
Recipe 1
Board
Note:
3
Board
Every board you create should have a button
assigned the Change Board Back action to
aid in navigation.
Once the boards in a topic branch are linked together,
the appropriate button on the “Main” board can be
linked to the completed branch.
Recipe 2
Board
Food Review
Board
Main Board
(Recipe button)
Recipe 1
Board
128
Boardmaker Software Family v6 User’s Guide
Adding a Button Link to the Main Board
All the boards you create should have a link to the main board. This prevents a user from navigating down a
topic branch and then getting stuck at the end.
By creating the boards at the end of a topic branch first, the only direct link you need to add is to the main board
which should already exist. You cannot create a link to a board that doesn’t exist, i.e. if you started by creating
the “Recipe 1” board you couldn’t create a link to the “Recipe 2” board until after that board was itself created.
“Recipe” Topic Branch
Create and link the
last board in the
recipe branch first.
You should create and position the “Main”
button in the same location on every board.
Double-click on the “Main” button.
1
Select Change Board in the Action Menu.
Click on your main board in the list of boards,
then click on the OK button.
Note:
2
Only boards saved in the same folder
as the current board will appear in the
list.
129
Chapter 12 - Linking Boards Together
3
The Change Board action and the linked
board now appear in the Assigned Actions
list.
Click on the OK button when you are finished
editing the button.
Adding a Button Link to the Previous Board
Adding a Change Board Back action to a button on a board, provides the user with an easy way to
automatically return to the previous board - much like one would use the "Back" button on a web browser. The
program keeps track of the user's board history, which means the user can return not just to the previous board
but back many boards if necessary.
There is also a complementary Change Board Forward action (Board Change tab) that will step forward
through the board history if needed.
“Recipe” Topic Branch
The "go back" button
is an automatic link to
the previous board.
1
You should create and position the “go back”
button in the same location on every board.
Double-click on the “go back” button.
Select Change Board Back in the Action menu.
2
The Change Board Back action appears in the
Assigned Actions list.
Click on the OK button when finished.
130
Boardmaker Software Family v6 User’s Guide
Linking Specific Boards Together
Having created and linked the board at the end of the topic branch, work toward the main board. For example, if
you’ve created a story you’ll want to link page 2 to page 1 and so on.
The "Story" button
will be linked to the
"Page 1" board.
1
“Story” Topic Branch
The "Next Page"
button will be linked to
the "Page 2" board.
Double-click the button that will link to the next
board.
Select Change Board in the Action menu.
A list of boards that have been saved in the
same folder as the one you’re working on will
appear. Double-click the name of the board you
want to link to.
2
3
If the board is not listed, make sure it is in the
same folder as the one you’re currently working
on.
The Change Board action and the linked board
now appear in the Assigned Actions list.
Click on the OK button when finished.
131
Chapter 12 - Linking Boards Together
Navigating Board Links in the Design Mode
In the Design mode, it is possible to quickly open a board that is linked to a specific button. Simply right-click
on the button and select Open Board: <board name>. The Open Board option can be a real time-saver if you
are editing a large collection of linked boards.
Actions assigned to the “breakfast” button.
In this example,
selecting the Open
Board option will
open the linked
“breakfast” board.
Note: If a button has more than one Change Board or Go to Popup action (which is possible if the board
change actions are inside If or Random action blocks), a separate Open Board option will be available
for each link (up to six).
132
Boardmaker Software Family v6 User’s Guide
Chapter 13
Using a Message Display with Text
Chapter Overview
On the most basic level, the Message Display allows text messages entered by button selections or keyboard
input to be displayed, created, and/or printed. In this chapter you will learn how to incorporate a Message
Display to create a simple picture-to-text sentence building board. There are a variety of button actions such as
speak, print, clear, etc. that allow you to control the Message Display.
The following topics will be covered
•
Adding a Message Display and configuring its appearance
•
Making a button type a text message
•
Adding simple Message Display controls
•
Message Display actions
•
Changing the Message Display’s settings
Adding a Message Display allows
the user to create text messages.
Buttons using a
Type Message
action can add a
letter, word, or
phrase to the
Message Display.
There are a
variety of
button actions
designed to
control the
Message
Display.
133
Chapter 13 - Using a Message Display with Text
Adding a Message Display
1
Select Message Display in the Dynamic
Buttons menu.
You can reposition and resize the Message
Display according to your needs.
2
Click and drag the Message Display to the
appropriate position, then drag its border to
change its size.
Changing the Text Size
3
If the display text is too small, you can change
it to the size you want.
With the Message Display selected, you can set
the font, style, and size using the Text menu, or
right-click the Message Display and select the
desired option.
Changing the Text and Display Colours
If desired, you can change the colour of the text
or the Message Display itself.
4
With the Message Display selected, click on
the Colour Tool.
In the Colour Palette click on Button, Border,
or Text, then click on the desired colour.
Note:
134
You can also change the colour of the
Message Display text by right-clicking
the Message Display and selecting
Font Colour.
Colour Tool
Boardmaker Software Family v6 User’s Guide
Making a Button Type a Text Message
1
Double-click on a button that you want to
type a message in the Message Display.
This button will
type the "I" in the
Message Display.
Select Type Message in the Actions list.
2
In the dialogue box, enter the text to be typed
in the Message Display.
Tip:
3
4
Add a space after the text to keep it
from being combined with any
additional text added to the Message
Display.
The Type Message action and the text
message now appear in the Assigned
Actions list.
Click on the OK button when finished.
135
Chapter 13 - Using a Message Display with Text
Adding Simple Message Display Controls
Making the Message Display Speak
This button
will make the
display
speak.
Double-click on the button you want to use to
speak the contents of the Message Display.
1
This button
will remove
the last word
entered.
Select the Say Message action (Messages tab).
2
3
The Say Message action now appears in the
Assigned Actions list. This action will make
the Message Display speak its contents when
this button is selected.
Click on the OK button when finished.
Removing the Last Message
4
136
Double-click on the button you want to use to
remove the last message from the Message
Display.
Select the Say Message action (Messages tab).
Viewing actions that control
the Message Display.
Boardmaker Software Family v6 User’s Guide
The Remove Last Message action now
appears in the Assigned Actions list. This
action causes the button, when selected, to
remove the last text message entered in the
Message Display. The button will behave as a
backspace key if you click on it again.
5
Click on the OK button when finished.
Message Display Actions
The Messages tab contains button actions used to control the various functions of a Message Display.
•
Type Message - Places a message you enter into the Message Display.
•
Say Message - Speaks the contents of the Message Display.
•
Say Selection - Speaks any selected text in the Message Display.
•
Delete - Deletes any selected text, or if no text is selected, deletes the character before the cursor.
•
Remove Last Message - Removes the last text message entered into the display by a button or any text
typed with the keyboard since the last button selection.
•
Clear Message Display - Clears the contents of the Message Display.
•
Select All - Selects the entire contents of the Message Display.
•
Cut - Cuts the selected text from the Message Display and places it on the clipboard.
•
Copy - Copies the selected text from the Message Display to the clipboard.
•
Paste - Pastes text from the clipboard into the Message Display.
•
Print Message - Prints the contents of the Message Display.
•
Capitalise Next - Capitalises the next character entered into the Message Display.
•
Picture Button - Makes a button add its symbol to the Message Display.
•
Picture Speech - Assigns the message to be spoken by a Picture button.
•
Picture Sound - Assigns the recorded message to be played by a Picture button.
•
Caps On - Turns on Automatic Capitalisation. All characters entered will be in upper case.
•
Caps Off - Turns off Automatic Capitalisation.
•
Expand Abbreviation - Expands defined word/phrase abbreviations.
137
Chapter 13 - Using a Message Display with Text
Changing the Message Display’s Settings
The Message Display has a variety of built-in settings that can be used to change its look and behavior. Doubleclicking on a Message Display will open the Message Display Settings window shown below.
Note: The Message Display settings apply only to the display on the current board.
These settings are used with
pictures and will be covered
later.
Click here to change the
selection highlight colour.
Select either or both of
these options to make the
display speak as text is
being entered.
Select one or all of these
options to set how and in
what order the display
will speak.
Select this option to make the display
selectable like a button. The display
will speak when selected.
Selecting the contents of the
display after it is made to
speak will cause the text
entered to replace the
display's current contents.
Setting Notes:
•
Saying the Message - Selecting all three boxes will make the display speak the message, speak the
message again while highlighting each word, and speak the message one final time. Typically, only one
Say Message is checked when used with Say with Highlighting.
•
The Delay box is used to specify a pause between each spoken word when using Say with Highlighting.
•
When Selectable Display is checked you cannot use the mouse to edit the contents of the display. The
display text can only be edited by using buttons which are assigned text editing actions. The Cancel
Speech and Pause Speech actions will not work when this option is selected.
138
Boardmaker Software Family v6 User’s Guide
Chapter 14
Using a Message Display with Pictures
Chapter Overview
This chapter will show you how to create picture sentences rather than text sentences. A Message Display can
accept picture input from buttons on your board in addition to text. Pictures placed in a Message Display can be
edited, spoken, printed, and saved just like text.
The following topics will be covered:
•
Making a button place a picture.
•
Changing the Message Display’s settings regarding pictures.
The Message Display accepts pictures
as well as text from a button.
Picture Buttons
copy the picture
and text on
their face into
the Message
Display.
139
Chapter 14 - Using a Message Display with Pictures
Placing a Picture into the Message Display
1
Double-click on the desired button whose
picture you want placed in the Message
Display.
Note:
In actuality, a picture of the button, its
symbol and text, will the be placed in
the Message Display.
Select Picture Button in the Action menu.
Three actions will automatically appear in the
Assigned Actions list:
• Picture Button tells the button to place its
picture in the Message Display.
• Picture Speech makes the button speak
when selected and when the Message
Display is spoken.
2
• Picture Sound makes the button play a
recording or sound when selected and when
the Message Display is spoken.
Note:
You can create a button with the Picture Button, Picture Speech, and Picture Sound actions
already assigned, by selecting Picture from the Dynamic Buttons menu.
Note:
These actions can be assigned separately and are found in the Pictures action tab. The Picture
Button action must precede any Picture Speech or Picture Sound action.
Note:
The Picture Speech action is similar to the Speak Message action in that both make a button
speak when it is selected. However, the Picture Speech action is required to make a button’s
picture speak from within a Message Display. The Picture Sound action behaves in the same
fashion.
Double-click on the Picture Speech action to
edit it.
3
In the dialogue box, type the word/text you
want the button to speak, then click OK.
If you want the button to speak the text that’s on
the face of the button, click the Use Button
Text radio button in the Enter Text dialogue
box.
140
Boardmaker Software Family v6 User’s Guide
4
Action Options
• Hide Text (Picture Button) - When this box is checked, any editable text on the face of the button
will not be placed in the Message Display along with the button’s picture.
• Suppress (Picture Speech/Sound) - When this box is checked, the action(s) will not be performed
when the button is selected. The Picture Speech/Sound action(s) will be performed only when the
Message Display is spoken.
Setting the Picture Size in the Message Display
5
The Message Display will scale pictures sent by any size picture button to a uniform size. The default
size is 1 inch.
Double-click on the Message Display to edit its settings. Click in the Picture Size box and enter “2.5,
then click on the OK button when finished.
141
Chapter 14 - Using a Message Display with Pictures
Uniform Line Spacing - Pictures and Text
The Message Display will accept both text and pictures from the buttons on your boards. If you plan on using
both, it is recommended that you check the Uniform Line Spacing box in the Message Display Settings
window. This feature will make all lines in the Message Display the same height, allowing space for either
pictures or text.
142
Boardmaker Software Family v6 User’s Guide
Chapter 15
“Use Button Text” Boards
Chapter Overview
In this chapter you will learn about the special Use Button Text option that allows a button to speak and/or type
whatever text is on its face. With this option selected, you can quickly create a board whose buttons will speak or
type any text placed on them. This feature makes it possible to create pre-programmed template activities which
can be customised quickly by changing the symbols and labels on the buttons.
A collection of template boards are provided which take advantage of the Use Button Text option. You can use
one of the templates to quickly create a board for spoken communication or writing with text or pictures.
The following topics will be covered:
•
Creating a Use Button Text template board.
•
Actions that can use button text.
The Picture Buttons on
this board will speak
whatever text is on the
button face.
A template board that makes use
of the Use Button Text option.
All of the buttons are
already assigned the
necessary Picture Button actions set to use
the button text. Simply
add the desired symbols (with text) and the
board is ready to use.
Later, if you change
the symbol and text,
the button will speak
the new text.
143
Chapter 15 - "Use Button Text" Boards
Creating a “Use Button Text” Template Board
The key to this method of board construction is to assign the necessary actions and appearance to the first button
you create - the template button. When you then use the Button Sprayer Tool to create a grid of buttons, each
button in the grid will have the same assigned actions and appearance as the template button. This saves you
from having to assign actions to each button individually.
Create a new board with a message display and
then make one button that will become your
template button.
Double-click on the blank (template) button.
1
Select Picture Button in the Actions list. The
three picture button actions will appear in the
Assigned Actions list.
OR
Another option of creating a Picture Button is to
click the Dynamic Buttons menu and select
Picture. This will create a 25mm square button
with the three picture button actions already
assigned to it.
Double-click on the Picture Button.
Select Use Button Text.
This makes the button
speak any text on the
button face.
2
Double-click on the Picture Speech action.
In the Enter Text window, click on the Use Button Text option. This will cause the Picture Button to
speak any editable text that is placed on the face of the button. If you were to change the text and picture
on the button’s face at a later time, you would not need to change the Picture Speech message; the Use
Button Text option does it for you.
Click on the OK button when finished.
144
Boardmaker Software Family v6 User’s Guide
3
Under Action Details you will see “Use Button Text” as the description for the Picture Speech action.
This lets you know that the button is set to speak the text on the button face.
Uncheck the Suppress box to make the button speak when it is selected.
In this example, we will also make the button
provide an audible cue using the text on the button
face.
Add a Spoken Preview that speaks
the text on the button face.
Select Spoken Preview in the Actions list.
4
As in step 3, click on the Use Button Text option.
Click on the OK button when finished.
5
Under Action Details you will see “Use Button Text” as the description for the Spoken Preview
action. This lets you know that the button is set to preview the text on the button face.
You are finished assigning actions to this template button. Click on the OK button when finished.
Now that actions have been assigned to the
template button, make any appearance changes to
the button.
6
For this example, click on the Shadow Tool and
turn on button shadows.
Set the
appearance for
your template
button.
Turn on button
shadows.
145
Chapter 15 - "Use Button Text" Boards
Once you have the template button completed,
you can use the Button Sprayer Tool to drag out
a grid of picture buttons.
7
8
Double-click on any one of the new buttons to
verify that it has the same actions you assigned to
the template button. Click on the OK button when
finished.
You can then move the buttons around according to the needs of the activity being created. The buttons
are now ready to accept pictures and be used.
NOTE: Make sure you have a Message Display on your board if you’re going to use Picture Buttons.
See Chapter 14 - Using a Message Display with Pictures for more information about Message
Displays.
NOTE: You must have text on the buttons if you want them to speak or preview.
NOTE: At this point, you can turn this board into a locked template board that can be accessed using
the Open a template button. This will allow you to use the blank template again and again to
make different activities. For information on saving a board as a locked template, refer to
Appendix E - Creating a Template Board.
146
Boardmaker Software Family v6 User’s Guide
Actions that Can Use Button Text
The Use Button Text option is available with the following actions:
•Speak Message
•Type Message
•Text Preview
•Spoken Preview
•Picture Speech
This window is common
to all the above actions.
With the Type Message action,
you are provided with an
additional option to Add a
Space after the Text. Typically,
you will leave this selected. You
would deselect this option if you
are working with individual
letters that will be combined to
form words, for example when
creating a keyboard or spelling
activity.
147
Chapter 15 - "Use Button Text" Boards
148
Boardmaker Software Family v6 User’s Guide
Chapter 16
Working with Movable Buttons
Chapter Overview
Movable buttons allow you to create on-screen activities in which the position of buttons can be manipulated.
Buttons no longer need to be static objects; instead, they can be dragged around the screen and dropped on others
buttons to trigger a spoken message or other actions. Movable buttons allow you to create dynamic activities for
counting, sorting, sequencing and more. The Movable Button Tool allows you to quickly pair a Movable button
with a Destination button and assign actions to be performed when the Movable button is dropped on that
Destination.
The following topics will be covered:
•
Showing the Movable Button Tool
•
Setting a Movable button “clone” itself
•
Creating Movable and Destination buttons
•
•
Editing the actions for a Movable-Destination
button pair
Setting a Destination button to “centre”
incoming Movable buttons
•
Scanning and Movable buttons
•
Setting Movable button to “snap back”
Invisible Movable
buttons. They can
be moved and
dropped on any
valid destination.
This button is
being dragged
into the green
box.
Destination buttons will
perform actions when the
correct movable button is
dropped on them.
In this sorting and counting activity, the student moves
the specified number of shapes into the correct box.
149
Chapter 16 - Working with Movable Buttons
Showing the Movable Button Tool
Initially, the Movable Button Tool is not visible in the Tool Palette. You will need to set the program to show
this tool. Select Movable Button Tool in the Show submenu in the Dynamic Boards menu.
Movable Button Tool
The Movable Button Tool
is initially hidden. You
must set the program to
display this tool.
150
Boardmaker Software Family v6 User’s Guide
Creating Movable and Destination Buttons
Click on the Movable Button Tool.
1
2
Click on the button you want to make
movable. The Enter Name dialogue for the
Movable button will appear. Every Movable
button must be given a unique name.
Movable Button Tool cursor
Enter a name for the Movable Button then
click on the OK button when finished.
3
Note: Movable button names will appear in
a green box displayed in the centre of
the button whenever the Movable
Button Tool is active.
Click and drag the Movable button on top of
the button that will be the destination, then
release the mouse button to drop it. The Enter
Name dialogue will appear for the Destination
button.
4
The red highlight indicates the original position
of the Movable button.
Note: The board background can be a valid
destination for a Movable button.
Simply drag the Movable button to
any location on the board
background to create that pairing.
Drag and drop the Movable
button onto the desired
Destination button.
151
Chapter 16 - Working with Movable Buttons
Enter a name for the Destination button then
click on the OK button when finished.
5
Note: Destination button names will appear
in a green box displayed in the centre
of the button whenever the Movable
Button Tool is active.
Assign actions to the Destination button that
will get performed when the current Movable
button is dropped on this Destination button.
Note: A Destination button can be paired
with multiple Movable buttons.
6
Note: A Destination button can not be
A recorded “boing” sound will be played when
the paired movable button is dropped here.
selected itself unless it is assigned its
own actions that are not associated
with a specific Movable-Destination
pairing. Refer to the Editing Actions
for a Movable-Destination Button
Pair section for more information.
When the program is placed in the Use mode
and the “Square” Movable button is dropped
on the “Green Box” Destination button, the
assigned Speak Message action will be
performed.
7
152
When you drop
the square into
the green box,
you will hear the
“boing” sound.
Boardmaker Software Family v6 User’s Guide
Editing Actions for a Movable-Destination Button Pair
Using the Movable Button Tool (Preferred
Method)
Using the Movable Button Tool, drag the Movable
button on top of the Destination button you want to
edit. Since you’ve already given names to the
Movable and Destination buttons, you won’t be
asked again to enter names.
The Button Actions dialogue will appear. Only the
actions that are associated with this MovableDestination button pair will be displayed. Edit the
action list as necessary.
The easiest method to edit the
assigned actions for a
Movable-Destination pair is to
drag and drop the Movable
button onto the Destination
using the Movable Button Tool.
- - - - - - - - - - - - - - - - - - - - - - - - - - - - - - - - OR - - - - - - - - - - - - - - - - - - - - - - - - - - - - - - - -
153
Chapter 16 - Working with Movable Buttons
Editing the Destination Button (advanced)
Double-click on the Destination button as you would to edit the actions of a normal button.
The Button Actions dialogue will appear. All actions assigned to this button will appear. Edit the actions in
the If or Else If action block with the name of the appropriate movable button.
Action that is performed if the
button is selected directly or via
scanning.
Actions that are performed only
if the Movable button “Square”
is dropped on this button.
Actions that are performed only
if the Movable button
“Diamond” is dropped on this
button.
Note: Refer to the Chapter 20 - Working with Variables for more information on conditional If blocks.
154
Boardmaker Software Family v6 User’s Guide
Setting a Movable Button to “Snap Back”
A movable button can be set to “snap back” to its original position if it is dropped on an invalid destination. (By
default, the program would leave the movable button wherever it was dropped.) This can be useful if you want to
create an activity that provides feedback as to correct Movable-Destination pairs.
In this activity, the
board background is
not a valid destination.
The background of the board is not a paired destination for the circle movable button.
If this button is dropped on the background, it will snap back to its original position.
Right-click on the Movable button which will
be assigned the “snap back” property and
select the Movable Button Properties option.
The Button Properties dialogue will appear.
1
Check the box next to the Snap Back setting,
then click on the OK button.
The name of the
movable button
being edited.
2
The Snap Back setting returns the
Movable button to its original position if
it is not dropped on a valid destination.
155
Chapter 16 - Working with Movable Buttons
Setting a Movable Button to Clone Itself
A Movable button can be set to “clone” itself. When such a movable button is dragged to a new position, the
original button will remain in place and an identical copy of the button will be moved. A single Movable button
now becomes a source for an unlimited number of cloned Movable buttons. This is especially useful in counting
activities.
The original button
remains in place.
A cloned copy of the
original button is
moved in its place.
1
Right-click on the Movable button which will be assigned the “clone” property and select the Movable
Button Properties option. The Button Properties dialogue will appear.
Check the box next to the Move Clones
setting, then click on the OK button.
The name of the
movable button
being edited.
2
The Move Clones setting returns the
Movable button to its original position if
it is not dropped on a valid destination.
156
Boardmaker Software Family v6 User’s Guide
Centering a Dropped Movable Button
A Destination button can be set to automatically centre any paired Movable button that is dropped on it. This is a
very useful setting if it is important for a movable button to snap to a specific location which is determined by
the location and size of the paired destination button.
1
Right-click on the Destination button which will be assigned the “centering” property and select the
Destination Button Properties option. The Buttons Properties dialogue will appear.
Check the box next to the Center Movables
setting, then click on the OK button.
The name of the
movable button
being edited.
2
The Center Movables setting
will center a dropped movable
button within this button.
Changing Button Types
Using the Button Properties dialogue, it is possible to change a Movable button into a Standard or Destination
button. Similarly, a Destination button can be changed into a Movable or Standard button.
1
Right-click on the Movable or Destination button whose type is to be changed and select the
Destination Button Properties or Movable Button Properties option. The Buttons Properties
dialogue will appear.
Check the box next to the appropriate option,
then click on the OK button.
Note: This is done primarily to turn a
2
Movable or Destination button back
into a standard button.
The name of the
movable button
being edited.
The type of the button
(Movable, Destination,
Standard) can be
changed here.
157
Chapter 16 - Working with Movable Buttons
Scanning and Movable Buttons
Movable buttons are best used with one of the direct selection access methods. However, Movable buttons can
also be used with any of the scanning access methods. Special scanning behaviors were added to the program to
allow Movable buttons to function with the various scanning access methods.
Select the Auto Scan access method
(Dynamic Boards > Access Method), then
place the program in the Use mode.
1
In this activity, only the Movable buttons will scan.
The program will highlight buttons according
to normal scanning rules.
Note: Destination buttons will not scan
unless they are also assigned actions
that are not associated with a specific
Movable-Destination button pairing.
Once a Movable button is selected, it will
remain highlighted in blue as a reminder that
it is selected. The subsequent scanning
choices will be limited to only paired
Destination buttons.
2
Selecting one of the Destination buttons will
cause the Movable button to glide from its old
position into the Destination button.
The selected Movable button
remains highlighted in blue.
Only valid Destination
buttons will scan.
Note: If a movable button is accidentally
selected, it can be deselected by
allowing the scan to loop through the
destination buttons until the loop
limit is reached as specified in the
Scan Loop Settings (Dynamic
Boards > Access Method >
Scanning Options).
The program attempts to distribute the Movable
buttons around in the Destination button.
Note: By default, when in a scanning access method, the program attempts to distribute selected Movable
buttons within the Destination button to prevent them from being stacked on one another. If appropriate
for the activity, use the “centering” Destination button property to have the Movable buttons centered in
the Destination button. Refer to the Centering a Dropped Movable Button section.
158
Boardmaker Software Family v6 User’s Guide
Limitations of Movable Buttons with Scanning Access
Methods
While Movable buttons can be used with scanning access methods, there are limitations that need to be taken
into consideration when designing a Movable button activity for use with a scanning access method.
•
If the board background is paired with a movable button, it will not be highlighted as a valid destination for
a selected Movable button. The workaround for this is to make an invisible button on the background that
is paired to the Movable button.
•
Movable and Destination buttons should not be placed within scanning groups. They will exhibit
unexpected scanning behavior if they are part of a scanning group.
159
Chapter 16 - Working with Movable Buttons
160
Boardmaker Software Family v6 User’s Guide
Chapter 17
Working with PopUp Boards
Chapter Overview
You have the ability to create small communication boards that pop up on top of the current board in use.
PopUps allow you to keep the overall appearance of a board very simple while allowing the user access to
additional button choices when necessary. PopUps are an excellent way to contextually organise a large quantity
of vocabulary that is related to a specific activity.
The following topics will be covered:
•
Creating a PopUp board
•
Using PopUp boards with a Message Display
A PopUp board can
provide a user with
more button choices
when they are needed.
161
Chapter 17 - Working with PopUp Boards
Creating a PopUp Board
To create a PopUp board, lay out the buttons for the PopUp right on the topic board itself. A special command
will remove the additional buttons and create a PopUp board sized to exactly fit them.
The board that
opens a PopUp
is called the
topic board.
This button will
open the PopUp
board shown.
The buttons for
this PopUp are
first arranged on
the topic board
before the PopUp
is created.
Note: A PopUp board can open another PopUp board, but it should not be used to change to another board
(Board Change action). The Change Board Back action should be used to leave a PopUp board and
return to the topic board that called it.
Create the buttons that will become the PopUp
board in the location where the PopUp board
should appear.
1
2
Tip:
Create the buttons wherever it is
convenient, then use the Pointer Tool
to move them into final position where
the PopUp board should appear.
NOTE: Make sure ALL the buttons created
for the PopUp board are selected
before proceeding with this step.
(Hold down the Shift key while
clicking on each button.)
Select Create PopUp Board in the Dynamic
Buttons menu.
162
Boardmaker Software Family v6 User’s Guide
The selected buttons are cut from the topic
board and pasted into a new board that is sized
accordingly.
3
When the Save As dialogue box appears, enter
the name for your new PopUp board.
Tip:
The program will
set the PopUp
board size to be
slightly larger
than the selected
buttons.
It will be helpful to give the PopUp
board a name that will identify it as a
PopUp; for example, "Utensil PopUp",
or “PopUp-Utensil". That way, it can
quickly be identified for other use as a
PopUp on other boards.
Once the PopUp board has been created, the appearance of the buttons can be set by choosing the
desired colour, border, and corner settings.
4
Add symbols, text, and button actions to the PopUp if that was not done before using the Create
PopUp Board command.
NOTE: Be sure to assign at least one button the Change Board Back Action, then save the board.
5
Go back to the original topic board.
Double-click the button that will be used to activate your PopUp board.
Select Go To PopUp Board (Board Change
tab) in the Action menu.
6
163
Chapter 17 - Working with PopUp Boards
The new PopUp boards will automatically be
selected in the board list. Its location is based
on where you originally placed the buttons on
the topic board when you used the Create
PopUp Board command.
7
Specifies the
PopUp board's
location on the
topic board.
Click on the OK button when finished.
Tip:
To reposition the PopUp board later,
edit the assigned Go To PopUp Board
action and adjust the location
measurements, which are relative to the
upper left corner of the board.
Using PopUp Boards with a Message Display
PopUp boards can be used to place text into or control a Message Display on the topic board or a previous
PopUp board. Message Display actions selected on a PopUp board without its own Message Display will flow
back down PopUp links until a Message Display is found.
PopUps without Message Displays
164
PopUps with and without MessageDisplays
Boardmaker Software Family v6 User’s Guide
Chapter 18
Working with Quick Action Buttons
Chapter Overview
A collection of “Quick” actions are provided to create buttons whose content can be edited while working in the
Use mode. Quick Text buttons and actions allow a user to compose and save text messages to the face of a
button. Quick Picture buttons and actions allow the user to copy a picture from one button to another. Quick
Record buttons and actions allow the user to record and save a message to a button. There are also Quick Day,
Quick Date, and Quick Time buttons which automatically display the current day, date and time.
These “Quick” buttons and their associated actions provide a means by which the content of a specific board or
activity can be quickly updated or personalised as needed, without having to edit the board in the Design mode.
The following topics will be covered:
•
Working with Quick Text buttons
•
Working with Quick Record buttons
•
Creating optional Quick Text control buttons
•
•
Working with Quick Picture buttons
Adding a Quick Day, Quick Date, or Quick
Time button
Save text messages using
Quick Text buttons
Quick Day
button
Quick Date
button
Quick Time
button
Record
messages
using Quick
Record
buttons.
Change
pictures using
Quick Picture
buttons
165
Chapter 18 - Working with Quick Action Buttons
Working with Quick Text Buttons
The Quick Text actions make it possible to compose and save a message to a button while in the Use mode. This
can be useful for saving novel messages, notes home, schedules, and menus. Quick Text buttons are ideal for
individuals who need the content on a board or in an activity to be updated periodically.
Quick Text buttons make it possible to update this daily cafeteria menu.
The text on
these Quick
Text buttons
can be quickly
updated while
the program is
in the Use
mode.
A Message
Display is
needed to
compose the
text that will
be copied to
a Quick Text
button.
Special actions allow these buttons to copy
text back and forth between the Message
Display and a Quick Text button.
Double-click on the button that will become a
Quick Text button.
1
166
Boardmaker Software Family v6 User’s Guide
Assign the Quick Text action (Quick Actions
tab). The Enter Text dialogue will appear.
2
3
Type an initial message for the Quick Text or
leave the message blank and it can be filled in
later by the user.
Assign the Quick Speak and/or the Quick
Type actions (Quick Actions tab) to make the
button speak and/or type its message into the
Message Display when selected.
4
5
Type the initial message
or leave it blank.
Click on the OK button when finished.
Click OK when finished.
Double-click on the button to be used to copy
the Message Display text to a Quick Text
button. Assign the Display to Quick Text
action (Quick Actions tab), then click on the
OK button.
The Quick
Speak and
Quick Type
actions tell the
button how to
use its saved
message text.
This button will copy the
new message and start
the Quick button
selection mode.
167
Chapter 18 - Working with Quick Action Buttons
To use a Quick Text button, place the program in the Use mode (Ctrl +U).
Type a message in the Message Display.
Select the “Paste to Button” button. The cursor will change to a pointing finger, indicating the program
is in the Quick button selection mode.
Click on a Quick Text button. The new message text will appear on the face of the button. Any existing
text will be replaced.
Click on the Quick Text button to hear it speak the message.
6
Click on the Quick
Text button and
the new message
will appear.
Type a new
message.
Click here to enter
the Quick button
selection mode.
Note: The font and font appearance of Quick Text buttons can be set through the right-click or the
Text menu options.
168
Boardmaker Software Family v6 User’s Guide
Creating Optional Quick Text Control Buttons
Buttons with additional Quick Text actions can provide the user with control over the content of the Quick Text
buttons.
Clearing the Message Display
Double-click on the button to be used to clear
the Message Display.
1
This button clears the
Message Display.
Assign the Clear Message Display action
(Messages tab), then click on the OK button.
In the Use mode, click on this button to clear
the Message Display so you can type a new
message.
Clearing a Quick Text Button
Double-click on the button to be used to clear
a Quick Text button.
2
This button clears a
Quick Text button.
Assign the Clear Message Display action
(Messages tab) and the Display to Quick
Text action (Quick Actions tab), then click
on the OK button.
In the Use mode, click on this button, then
click on a Quick Text button to clear its
contents.
Copying text from a Quick Text button to
the Message Display
Double-click on the button to be used to copy
the text from a Quick Text button to the
Message Display.
3
Assign the Clear Message Display action
(Messages tab) and the Quick Text to
Display action (Quick Actions tab), then
click on the OK button.
This button will copy
the text from a
Quick Text button
into the Message
Display where it can
be edited, printed,
or spoken.
In the Use mode, click on this button, then
click on a Quick Text button whose text will
be copied to the Message Display.
169
Chapter 18 - Working with Quick Action Buttons
Working with Quick Picture Buttons
The Quick Picture action makes it possible to change the picture on the face of a button while working with the
board in the Use mode. This is extremely useful for creating interactive activities, quizzes and games.
Quick Picture
buttons will display the answer
the student
selects.
The answer buttons are set to
copy their pictures to any one of
the Quick Picture
buttons.
Quick Picture buttons make it possible to create “fill in the blank” activities like this one.
Note: The Set Button Picture action can also change the picture on a button while in the Use mode. Please refer
to Using the Set Button Picture Action section in the in-program help (Help Topics in the Help menu) for
more information on this action.
1
170
Double-click on the button that will become a
Quick Picture button.
Boardmaker Software Family v6 User’s Guide
Assign the Quick Picture action (Quick Actions tab), then click on the OK button.
Check Save All Changes
box to save any Quick Picture change made to this
button. Otherwise, the
changes will be temporary.
2
Note: By default, Quick Picture changes are not saved on the board. To save any changes, check
the Save All Changes box in the Action Details list for this action. If you will be using an
activity over again and wish to have the same starting point, do not check the Save All
Changes box.
3
Double-click on the button whose picture will
get copied to a Quick Picture button.
Assign the Copy to Quick Picture action (Quick Actions tab), then click on the OK button.
4
Check the Copy Everything box to copy everything on the button face to
the selected Quick Picture
button.
Note: By default, only the top-left most picture placed on the button (if there are multiple pictures)
will be copied to a Quick Picture button. To copy the entire content of the button (pictures,
text, and lines), check the Copy Everything box in the Action Details list for this action.
171
Chapter 18 - Working with Quick Action Buttons
To use a Quick Picture button, place the program in the Use mode (Ctrl +U).
Select any button assigned the Copy to Quick Picture action. The cursor will change to a pointing
finger, indicating the program is in the Quick button selection mode.
Click on any Quick Picture button.
Click on the “cow” button and
then on the blank Quick Picture
button to fill in the blank.
The pointing finger indicates the
program is in Quick button
selection mode.
5
Note: After selecting a button with the Copy to Quick Picture action, selecting any button other
than a Quick Picture button will cancel the Quick button selection mode.
172
Boardmaker Software Family v6 User’s Guide
Working with Quick Record Buttons
The Quick Record action makes it possible to record and save a message on a button while in the Use mode.
This can be useful for recording novel messages, sending audio notes to or from home/school, or in creating
articulation activities.
Quick Record
buttons. One
message button is provided
for each
potential
need.
This button
initiates the
Quick Record
mode.
Quick Record buttons make it possible to create activities in which
messages can be quickly recorded and saved while in the Use mode.
Note: Quick Record requires partner assistance to be fully accessible. Be careful when using Quick Record
buttons on boards designed for individuals using scanning access. Consider removing these buttons from
the scanning sequence (refer to the Using the Sequence Tool in Chapter 22). Buttons removed from the
scanning sequence can still access Quick Record buttons by enabling the Allow Direct Selection When
Possible option in the Scanning Options dialogue (Dynamic Boards >Access Method > Scanning
Options…).
Double-click on the button that will become a
Quick Record button.
1
173
Chapter 18 - Working with Quick Action Buttons
Assign the Quick Record action (Quick
Actions tab), then click on the OK button.
2
Double-click on the button that will be used to
initiate the Quick Record mode.
3
4
Assign the Set Quick Record action (Quick
Actions tab), then click on the OK button.
To use a Quick Record button, place the
program in the Use mode (Ctrl +U).
Select the “Record Notes Home” button. The
cursor will change to a pointing finger,
indicating the program is in the Quick button
selection mode.
5
Click on any Quick Record button. The
Record Sound dialogue will appear.
Note: After selecting a button with the Set
Quick Record action, selecting any
button other than a Quick Record
button will cancel the Quick button
selection mode.
174
Click here
to initiate
the Quick
Record
mode.
The pointing finger indicates
the program is in Quick button selection mode
Boardmaker Software Family v6 User’s Guide
Click on the Record button to begin recording
the message. Click on the Stop button
(previously the Record button) when finished
recording. Click on the Play button to hear the
recorded message.
6
Click on the OK button to close the dialogue
and save the recorded message.
Note: The Record Sound dialogue is not
accessible via scanning selection. To
prevent an individual using scanning
access from being unable to cancel
out of this dialogue, it has been
modified so that it will automatically
dismiss after 15 seconds if a
recording has not been initiated.
After saving a Quick Record message,
selecting the button again will play the
message that was just recorded.
7
The Record button will
become the Stop button
once recording has started.
Recording time counter.
Selecting
the button
again will
play the
message.
“Sarah
needs to
practice….”
175
Chapter 18 - Working with Quick Action Buttons
Adding Quick Day, Quick Date, or Quick Time Buttons
The program provides button actions that will display the current day, date, or time on the face of a button. Two
additional button actions allow these buttons to speak or send their contents to a Message Display.
Note: Your computer must be set for the correct date and time. This can be changed using the Windows Date/
Time control panel.
Double-click on the button that will be used to
display the current day, date, or time.
This invisible button will
display the current date.
Assign the Quick Day, Quick Date or Quick
Time action (Quick Actions tab) as
appropriate.
1
Note: To change the display format of the
date or time, click on the Customise
button in the Regional and
Language Options Windows
control panel (Regional Options
tab.)
2
Assign the Speak Day/Date/Time/Prediction
and/or Type Day/Date/Time actions (Quick
Actions tab) to make the button speak and/or
type its contents in to the Message Display.
Use these actions to display, speak,
or type, in this case, the current date.
176
Boardmaker Software Family v6 User’s Guide
Chapter 19
Other Useful Program Features
Chapter Overview
This chapter provides instructions and information on a variety of very useful program features. Some of the
most common “how to” questions about the program are answered and explained in this chapter.
The following topics will be covered:
•
Launching other programs from the program
•
Creating random button responses
•
Playing movies on a button
•
Selecting and changing voices
•
Setting the voice and sound volume
•
Setting a private audible cue
•
Changing the pronunciation of words
•
Password protecting the Design mode
•
Setting a greeting message
•
Displaying the menu or title bars
•
Saving a board’s button action list
•
Button usage counts
•
Printing the program boards
•
Moving or duplicating boards
You can play movies on your
buttons, in a Message
Display, or on the board itself.
Change and configure the
voices you want to use.
Change the pronunciation
of mispronounced words.
177
Chapter 19 - Other Useful Program Features
Random Action
You have the ability to create buttons that can perform a random action from their list of assigned actions. This
allows you to create a button that might randomly select a response from a list of greetings or randomly select a
name, number, or colour.
1
The following is an example of creating a
button that will speak students’ names at
random.
Create a button and assign it the Random
action (Cool Stuff tab).
Assign a series of Speak Message (or other)
actions, each given a different student’s
name.
When placed in the Use mode, the button
will randomly speak one of the student’s
names each time it is selected
2
Only the indented actions under the
Random action are selected randomly.
Note: If you want a button to perform another action after a Random action, e.g., a board change, assign the
End Random action (Cool Stuff tab) then assign the other desired action.
178
Boardmaker Software Family v6 User’s Guide
Playing Movies
You have the ability to play a movie from a button. The movie can play on the face of the button, in the Message
Display, or it can fill the entire board.
The program supports movies in the .avi, .mpg, and .wmv formats.
Note: There are many variations of all the formats. Certain variations will require the installation of additional
encoding software.
Double-click on the button that you want to
use to play a movie.
1
Click on the Cool Stuff tab.
Click on the Play Movie action.
Locate and open a saved movie.
2
3
The Play Movie action and the name of the selected movie will appear in the Assigned Actions list.
By default, the movie is set to play on the face of the button. Clicking where it says Play on Button
will change where the movie is played. You have the following three options:
• Play on Button - Plays the movie on the face of the button.
• Play on Message Display - Plays the movie in the board’s Message Display.
• Play on Board - Plays the movie on the board.
179
Chapter 19 - Other Useful Program Features
Voice and Sound Volume
The various types of sounds (voices, recordings, feedback sounds) in the program can be configured with
different volume levels or turned off entirely. To set the volume levels, select Speaker Volumes in the Dynamic
Boards menu.
Configure how the
different volumes are
set and controlled.
Set the Loud
and Soft
volumes.
Normal
voice and
recording
volume.
Audible feedback
sound volumes.
Preview
voice and
recording
volume.
Separation of Sounds
These three options let you choose how the program volume levels will be controlled.
•
No Separation. Use Control Panel Volume Setting - All volume levels are set by the Windows Sounds
control panel.
•
No Separation. Use Volume Settings Below - Allows you to set volume levels for each of the different
types of sounds (pictured above).
•
Left Channel and Right Channel - Allows you to set independent volume levels for the right and left
speakers for each of the different types of sounds. This is used to set up a private audible cue. Please see
the next section for details.
Loud and Soft Volume Settings
You can set the individual volume levels for two different volume sets, Soft or Loud. Click on the Show Soft
Settings button to change the volume levels for that set. A user can change between the Soft or Loud volume
sets by clicking on buttons assigned the Use Loud Settings and Use Soft Settings actions (Settings tab).
Turning Off Audible Cues
If you would like to turn off any spoken or recorded previews that are assigned to your boards, select Mute as
the Preview Sounds volume level. Any Spoken Preview or Recorded Preview action assigned to a button will
be ignored, rather than just playing the sound and muting the volume.
180
Boardmaker Software Family v6 User’s Guide
Selecting and Changing Voices
Speaking Dynamically Pro comes with the English Microsoft SAPI voices and the Nuance RealSpeak™ voices
in the appropriate language (installed with the localised SDP files). You can also use other software-based SAPI
4.0 and SAPI 5.1 compliant voices.
Boardmaker Plus comes with only the English Microsoft SAPI voices. You can also use other software-based
SAPI 4.0 and SAPI 5.1compliant voices.
You can change the voice settings by selecting Voice in the Dynamic Boards menu. At the top of the window,
you can choose to use either the Nuance RealSpeak™ or the SAPI 4 voices or SAPI 5 voices. You will have
different voices and voice settings in each speech engine.
Note: The Nuance RealSpeak™ voices are female only. US English is the only language that includes a male
voice. Nuance RealSpeak™ voices for other languages can be purchased separately. Contact your local
Mayer-Johnson reseller for more information.
Access the
voice settings.
Main speaking
voice.
Voice used for
spoken previews.
Change speed
and pitch settings.
Two alternative voices can be configured.
See description below.
Switching Voices from a Button
You can make your buttons switch between any of the four
voices by using one of the Use Voice actions (Cool Stuff
tab).
Note: These actions should only be used on a fast computer
due to the potential delay resulting from a voice
change.
181
Chapter 19 - Other Useful Program Features
Changing the Pronunciation of Words
The synthesised voices will not always say words correctly, especially in the case of certain proper names and
foreign-derived words. Alternative phonetic spellings for words can be saved to correct pronunciation problems
for all available voices.
Select Voice in the Dynamic Boards menu.
Click on the Change Word Pronunciations
button.
1
Note:
Make sure the voice you need to edit is
selected as the Main Voice.
Type the word that needs its pronunciation
changed.
Click on the Play button to hear the current
pronunciation.
2
182
Note: The screens shown in this example are
for the SAPI voices. The
pronunciation screens for the
RealSpeak voices will look different,
but function in a similar fashion.
Boardmaker Software Family v6 User’s Guide
Click Play to hear the current pronunciation of
the word.
Click in the empty box in the middle of the
screen. Type a phonetic spelling for the word.
As you type each letter you will hear the
progress of the new pronunciation.
3
Click Play again if you need to hear the new
pronunciation.
Click Finish when you are satisfied with the
new pronunciation.
Note:
If you click on the Phonemes button,
you must enter language specific
phonemes.
Printing Interactive Boards
Typically, interactive boards are designed to fill the computer screen which will make the board too large to
print on a single piece of paper. To get around this problem, use the Print Board on Single Page option in the
File menu. The program will automatically scale the board to fit on the piece of paper according to the current
printer page settings. Refer to Setting the Correct Paper and Board Size in Chapter 1 for help with the printer
page settings.
If you use the
Print command,
the board will print
on multiple pieces
of paper.
Use the Print
Board on Single
Page command to
scale the board to
fit the selected
paper.
Note: Typically, interactive boards should be set to print in landscape mode rather than portrait mode as
depicted above. Refer to the Setting the Correct Paper and Board Size in Chapter 1 to learn how to set a
board to print in landscape mode.
183
Chapter 19 - Other Useful Program Features
184
Boardmaker Software Family v6 User’s Guide
Chapter 20
Working with Variables
Chapter Overview
The Variables group of button actions gives you the ability to create buttons that will respond differently based
upon previous button selections. These actions are based on the use of variables and “if, then, else” logic, i.e. “if”
a condition is met (a certain button is selected), “then” a particular action is performed (when another button is
selected), “else” a different action is performed. With these conditional actions, you can create smart buttons that
can provide personalised responses, perform verb tensing, and a range of other custom behaviors.
The following topics will be covered:
•
Introduction to the Variables button actions
•
Assigning variables and values
•
Testing variables and assigning responses
Note: Only very basic variable programming is covered. More advanced techniques, features and examples are
covered in the in-program help topics (Help Topics in the Help menu).
These buttons assign
the person’s name to a
variable called “person.”
These buttons
check the value
of the “person”
variable to
determine what
message to
speak.
185
Chapter 20 - Working with Variables
Variables Button Actions
The Variables tab of button actions provides actions that can make your buttons respond conditionally. A list of
the Variables actions is given below. Don’t be discouraged if you don’t understand the actions after reading
their descriptions. This tutorial will walk you through their use.
Example of conditional
actions assigned to a button.
•
Assign Variable - Assigns a variable value to a button, i.e. Person = “Mum.”
•
Assign Variable From Display - Assigns the contents of the Message Display to a variable.
•
Adjust Variable - Adjusts a numerical variable by an amount, or adjusts a string (or word) by appending
additional characters.
•
Speak Variable - Speaks the value of a variable.
•
Type Variable - Sends the value of a variable to the Message Display.
•
If - Performs a conditional test on a variable to check for a specific value, i.e. does Person = “Mum”? If the
condition is true, actions assigned after the If action will be performed.
•
Else If - Used in conjunction with the If action. This action is used to check a variable for alternative
values, i.e. if Person NOT = “Mum,” then does Person = “Dad”? If this condition is true, actions assigned
after the Else If action will be performed.
•
Otherwise - Used to provide a default action if all conditional tests are false, i.e. Person NOT = “Mum” or
“Dad.” Actions assigned after the Otherwise action will be performed.
•
End If - Used to end a block of actions that are performed after an If, Else If, or Otherwise action.
•
Variable To Quick Text - Saves the value of a variable on a Quick Text button.
186
Boardmaker Software Family v6 User’s Guide
Assigning Variables and Values
Having a button or buttons assign a value to a variable is the first step in creating a board with conditional button
responses. Once a button assigns a value to a given variable (i.e. the user selects that button) other buttons can
then test that variable for a specific value and perform actions accordingly.
Double-click a button that will be used to set
the value of a variable.
1
In this example, the name of the conversation
partner depicted on the button is assigned to a
variable.
Choose a button
that will assign a
variable a value.
Assign the Assign Variable action
(Variables tab) to the buttons.
2
Enter a variable name and a value for that
variable.
3
In this example the name of the person
depicted on the button is assigned to the
variable “person.”
Click on the OK button when finished.
187
Chapter 20 - Working with Variables
Testing Variables and Assigning Conditional Actions
Having created at least one button that assigns a value to a specific variable, the If action can be used to check
the value of the variable and conditionally perform an action or a block of actions. The Else If and Otherwise
actions can also be used to check a variable for additional values and to define default actions when all If
variable tests are false.
.
The “If” Action
1
Double-click on a button that will test a
variable and conditionally perform an
action.
In this example, the variable “person” will
be tested to determine if a specific message
will be spoken.
This button will
speak a specific
message based on
the value of the
“person” variable.
Enter the name of the variable to test and
the value being tested for, then click on the
OK button when finished.
2
In this example, the variable “person” is
being test for the value of “mum”.
Note: Variable/value comparison is not
limited to just the “=” option.
Other comparison options such as
“not =” are available in the dropdown menu.
Assign the action or actions that will get
performed when the If variable test is true.
3
Note:
The indented action will be
performed only if “person = mum".
Actions that follow an If action
will automatically be indented to
help visually organised the actions.
The “Otherwise” Action
The Otherwise action is used to provide a
default response when all the If and Else If
conditional tests are false.
4
Assign the Otherwise action (Variables
tab) to the button, then assign the default
action or actions to be performed.
Note: The Otherwise action must
follow an If action and can not be
used by itself.
188
The Otherwise action
provides a default response
when all If conditions are false.
Boardmaker Software Family v6 User’s Guide
The “Else If” Action
Use the Else If action to test a variable for
other possible values.
5
Use Else If to test for
other possible value.
Click on the last action to be performed in
the If conditional block and then assign the
Else If action (Variables tab) to the button.
Enter the name of the variable to test and
the next value to be tested for, then click on
the OK button when finished.
Note: The Else If action must follow an
If action and can not be used by
itself.
Assign the action or actions to be
performed if the Else If conditional test is
true.
This action get performed
if “person = dad.”
6
If Blocks and End If Actions
The End If action is used to let the program
know there are no more actions associated
with the initial If conditional test, and any
related Else If or Otherwise actions. These
actions together form an If block.
7
Use an End If action to
terminate an “If” block.
Assign the End If action (Variables tab)
after the last action in the complete If
block.
Any actions that are not part of an If block
will always be performed when the button
is selected.
Any actions that precede or
follow an “If” block will
always be performed.
Note: If you do not assign an End If
action before you close the
Button Actions dialogue, the
program will attempt to add one
for you.
189
Chapter 20 - Working with Variables
Variables in Action
When in the Use mode, selecting the
“Mum” button will assign the value
“Mum” to the variable “person.” This value
will remain until another person is selected
or the Use mode is exited.
8
When any of the conversation buttons are
selected, they will speak a message that is
specific to that person (assuming one was
specifically defined for that person).
If a button does not have an If block testing
the variable “person” for the value of
“Mum”, then it would speak the default
message that follows the Otherwise action.
190
Select the
“Mum” button.
These button will
speak a message
that is specific to
mum.
Boardmaker Software Family v6 User’s Guide
Chapter 21
Creating Boards for Writing
Chapter Overview
There are a wide range of features and button actions that allow you to create boards that can function as writing
aids or talking word processors. Numerous typing boards are supplied with your software, but you can also
create your own. Features like word prediction, abbreviation expansion, and typing shortcuts can be used to
improve the speed and quality of a user’s writing.The ability to save and open different message files can easily
be added. The message files can contain text and/or symbols.
The following topics will be covered:
•
Word prediction.
•
Abbreviation expansion.
Sample typing board
Word
prediction
buttons
Abbreviation
expansion
button
Message
Display
Speaks the
Message
Display
Each button
uses a Type
Message
action to
input the
letter.
Button to
open and
save
message
files
Print button
191
Chapter 21 - Creating Boards for Writing
Typing Board Layout Considerations
A big advantage of using the program as your talking word processor or writing aid is that you can create a board
that contains the exact buttons and features needed by your user. The cognitive and physical needs of the user
will dictate the layout of the board you create. All typing boards share the same basic components: a Message
Display, letters, function keys, and Message Display controls.
Message
Display
Letter keys
add a letter to
the display.
Function keys
control the
display.
Message Display
The text in the Message Display can be made any size or colour that will benefit the user. The display can be
configured to read letters or words as they are typed, or highlight words as they are read back. Refer to - Using
a Message Display with Text.
Key Layout
There are a variety of different letter layouts for a typing board. The layout you choose will most likely be
determined by the user’s method of access. Typically, the letters are arranged to either simplify locating the
desired letter or maximise access speed. An ABC layout is shown above, and two other examples of letter
layouts are shown below.
This layout is based on the
standard QWERTY keyboard.
The “frequency
of use” layout
positions the
most often used
letters in the
first positions in
the scanning
sequence.
Display Control Buttons
Typically, you will want to provide the user with common function buttons such as space, return, shift,
backspace, clear, speak, and print. Typically, these actions, with the exception of the space, are placed at the end
of the scan sequence because of their relatively infrequent use.
192
Boardmaker Software Family v6 User’s Guide
Word Prediction
For many users, the word prediction feature available in Speaking Dynamically Pro can be tremendously helpful
in assisting them in the writing process. Word prediction works by searching for and displaying the most
frequently used words that begin with the letter or letters the user is typing. The user can then select their word
when it appears in the list of predicted words. Word prediction saves a lot of time and effort by freeing the user
from potentially typing every letter of each word.
When letters are typed, the prediction
buttons search for the most frequently
used words that start with the letter or
letters.
Clicking on a prediction button copies
the word to the display.
The Prediction buttons in the program can be arranged and configured to suit the user’s access, visual, and
cognitive needs. The word prediction can be customised to:
•
learn and then predict new words entered by the user.
•
predict phrases manually entered into the dictionary.
•
make audible predictions to assist the pre-literate or visually impaired user.
•
be accessed either by on-screen selection or keyboard key.
•
make predictions either alphabetically or based on frequency of use.
•
use alternative dictionaries with specific vocabulary for language-based activities.
These options will be covered in the next few sections.
193
Chapter 21 - Creating Boards for Writing
Adding Prediction Buttons
You can add up to 100 Prediction buttons to a board. Only the Button Speak (Cool Stuff tab) and the actions in
the Board Change tab can be assigned to a prediction button.
Open the “T10 Keyboard” board found in the
Tutorials folder.
1
Save this board in the My Boards folder as
“Basic Keyboard.”
You can use this board throughout this tutorial to
try the various writing features covered.
Select Prediction in the Dynamic Buttons menu.
2
Drag the first button into the upper right corner of
the board.
3
Stretch out the button and increase the font size.
Tip:
Assign the Button Speak action to the
Prediction button to make it speak the
predicted word when selected.
Use the Button Sprayer Tool to make five
additional Prediction buttons.
4
Save the board, then place the program in the Use
mode. As you type letters, the Prediction buttons
will start predicting words. Click on a Prediction
button to enter its word into the Message
Display.
Return to the Design mode when finished.
194
Use the Button
Sprayer Tool to
create additional
Predition buttons.
Boardmaker Software Family v6 User’s Guide
Abbreviation Expansion
Abbreviation expansion allows the user to quickly enter a phrase or block of text into the Message Display by
entering only a few letters. Abbreviations are useful for full names, addresses, or other frequently used phrases
and text.
When an abbreviation is entered into the Message Display, the user will need to hit a key or button to expand the
abbreviation. You have the choice of expanding abbreviations using a button assigned the Expand
Abbreviation action (Message tab), a keyboard key, or a Prediction button.
Expansion Button (used by scanners)
Abbreviation
Expand the Abbreviation
using the assigned button.
Expansion
Keyboard Key (used by keyboarders)
The default expander is the “ ‘ “ (accent)
key. You may assign a different key.
Prediction Button (used by scanners)
It is possible to use the word prediction buttons to
expand abbreviations. Each abbreviation will need to
be entered into the word prediction dictionary
followed by the abbreviation expander character, e.g.,
enter “mj`” for the “mj”/”Mayer-Johnson”
abbreviation. The Expander character/key is assigned
as shown above.
The abbreviation and the expander, e.g., “mj‘ “,
can be added to the prediction dictionary.
195
Chapter 21 - Creating Boards for Writing
196
Boardmaker Software Family v6 User’s Guide
Chapter 22
Access Methods and Custom Scanning
Chapter Overview
The program can be accessed through a wide range of access methods such as a mouse, a touchscreen, single or
multiple switch scanning, etc. The program also provides a variety of special settings and tools designed to let
you customise the way your boards scan to better meet a user’s needs.
The following topics will be covered:
•
Selecting an access method
•
Button selection options
•
Changing the keyboard response
•
Configuring your switches
•
Creating scanning groups
•
Displaying the scan tools
•
Using the Sequence Tool
•
Using the Scan Next Tool
•
Using the Scan Pause Tool
A Scan Pause can be
assigned to stop the scan.
Buttons can
be grouped
to scan as a
single unit.
A Scan Next
location can
be assigned
to create
predictive
scanning.
Each button has
an order in the
scan sequence
that can be
changed.
197
Chapter 22 - Access Methods and Custom Scanning
Selecting an Access Method
Within the program, a user can control their communication boards by using almost any alternative method of
access. You can set the access method by selecting from a menu of choices. Each access method, through an
options window, can be customised to meet the specific needs of the user. A brief description of the available
access methods is provided below. For more detailed information on designing boards for alternative access
users, refer to Chapter 23 - Designing Boards For Alternate Access Methods.
You can change how
the user accesses the
program by selecting
an access method.
Each access
method has its
own window to
adjust the settings.
Access Methods
Direct Pointer - Used with direct selectors using a mouse, trackball, joystick, head mouse, or touchscreen.
Direct Touch - Used with touchscreen users and provides touch, release, and dwell time selection options.
Auto Scan - Provides basic scanning access for single switch users. Settings are provided to control the scan rate
and use of a switch or keyboard key.
Step Scan - Provides scanning access for users who can control their button selections by using one switch to
advance the scan and a second switch to make a button selection.
Inverse Scan - Provides scanning access that requires the user to hold down the switch to start and maintain the
scan. Selections are made by releasing the switch.
Arrow Keys - Provides scanning access for a user who can directionally guide the scan using multiple switches,
keys, or an alternative keyboard.
198
Boardmaker Software Family v6 User’s Guide
Configuring Switches
Standard desktop and laptop computers are not equipped with jacks that enable you to plug in a switch. A switch
interface will be required to access the computer via switch input. Typically, a switch interface plugs in between
the computer and the keyboard, and provides one to five switch jacks. Most switch interfaces are keyboard
emulators which means that the switches are mimicking keys on your keyboard.
.
A typical switch interface will
emulate arrow keys on the
computer’s keyboard.
A switch interface
connects between
the computer and
keyboard.
Plug your switch into one of the jacks on the
switch interface.
1
Select the appropriate scanning access method.
Auto Scan will be used in this example.
2
199
Chapter 22 - Access Methods and Custom Scanning
Set Activate Button Using to Key Click, then press your switch. The program should read the input
from the switch and will display the emulated key in the box. Click on the OK button when the switch
input is set correctly.
The program is now set to accept input from your switch.
3
Use Key click
with a switch
interface.
Press the switch
or type in the
key the switch is
emulating here.
The Default Scanning Sequence
The program will scan the buttons on a board from top to bottom, and for buttons at the same height, from left to
right. This may not be the ideal scanning sequence for one or all of the activities.
1
You can create any board and select Auto Scan
in the Access Method submenu in the Dynamic
Boards menu to see how the default scan
functions.
The Auto Scan Access window will appear.
Click OK. You will be using your mouse button
as a switch for this tutorial.
2
200
Place the program in the Use mode and observe the default scanning sequence for this board. The
linear scanning sequence does not follow the visual organisation of the board, or assist the user in
selecting messages in a logical order. Return to the Design mode when finished.
Boardmaker Software Family v6 User’s Guide
Creating Scanning Groups
A collection of buttons can be grouped together so that they will highlight as a single group in the scan. When a
user selects a scanning group, the scan will then work its way through the buttons that make up the group.
Scanning groups allow the scan to conform to the visual or logical arrangement of the activities.
Select the buttons that you want to become a
scanning group.
Then select Scanning Group in the
Dynamic Buttons menu.
1
The program will create a button that
surrounds the selected buttons.
Tip:
A scanning group is simply a button
that surrounds other buttons. You can
use the Button Tool to drag out a
scanning group like you would a
button.
With the scanning group selected, change the
background colour to transparent and make
the border thickness none.
Note:
2
Tip:
When the group is deselected, the
buttons will appear on top of the
group. Smaller buttons always
appear on top of larger buttons that
fully surround them.
You are going
to create a
scanning
group around
these buttons.
The scanning
group will be
transparent
except when
scanning.
For some users, giving scanning
groups different colours can help to
visually organise a board.
Place the program in the Use mode and observe the new scanning sequence.
3
Each scanning group highlights instead of each button. Selecting a group causes the program to scan
through the buttons in the group. If a button selection is not made within a selected group, the scan will
break out of the group after three cycles through the buttons.
Return to the Design mode when finished.
Tip:
Because a scanning group is a button, you can assign actions to the group. You might use a
Speak Message action to talk when the group is selected or a Text Preview, Spoken Preview,
or Recorded Preview action to provide a cue during the scan.
201
Chapter 22 - Access Methods and Custom Scanning
Displaying the Scan Tools
The program provides you with three special scanning tools, the Sequence Tool, the Scan Next Tool, and the
Scan Pause Tool. These tools allow you to completely customise the scanning sequence on your boards, both
before and after the user makes a button selection. The Scan Tools are not normally visible in the Standard Tool
Palette and must be turned on in order to access them.
Display the Scan Tools by
choosing Scan Tools from
the Show submenu of the
Dynamic Boards menu.
Sequence
Tool
Scan Next
Tool
202
Scan Pause
Tool
Boardmaker Software Family v6 User’s Guide
Using the Sequence Tool
1
The Sequence Tool is used to change the
scanning order of the buttons on a board.
Sequence Tool
Select the Sequence Tool in the tool palette.
Click one of the buttons on your board.
Numbers will appear in the middle of each
button or group. This is the default scanning
order for the buttons and groups on this board.
Note:
2
Clicking on a button that is part of a
scanning group will display the
scanning order for only the buttons in
the group.
You will be removing some buttons from the
scanning sequence and changing the scanning
order of the buttons to help structure the
activity.
3
The first button in the scanning order
is assigned. All other buttons are
waiting to be assigned their order.
Click on the same button again. Notice that it
is marked as “1” and all other buttons are
marked with a “?.”
The “?” indicates a button is not currently part
of the scanning sequence.
203
Chapter 22 - Access Methods and Custom Scanning
Click on the buttons in the order you would like them to scan. You want the buttons and groups to scan
in the logical order the user would select them in.
Tip:
If you make a mistake in assigning the scanning order, double-click on the Sequence Tool to
reset the default scanning order.
1
4
2
8
Note:
204
3
4
5
7
6
9
Buttons that are not assigned a number in the scanning sequence will not scan or be selectable
even when using a direct selection access method. Unassigned buttons can be accessed
through Button Key assignments. Please refer to the Button Keys section in the in-program
help (Help Topics in the Help menu).
Boardmaker Software Family v6 User’s Guide
Using the Scan Next Tool
1
The Scan Next Tool is used to specify the
next button or group that will scan after the
user selects a particular button. This is called
predictive scanning.
Scan Next Tool
Select the Scan Next Tool in the Tool Palette.
Move the pointer over one of the Quick Text
buttons in the “Main dishes” group, then click
and hold the mouse button down. The button
you click on and another button will highlight.
2
Click and hold a
button to show the
next button to scan.
Next button
to scan.
The other highlighted button is the next button
that will scan if the user were to select the
current button. By default this is the first
button in the scanning sequence.
To change the Scan Next assignment, while
still holding down the mouse button, drag the
cursor over to the button or group where you
want the scan to go next.
3
If you drag over a button that is part of a
scanning group, you will see the highlight
cycle between the button and the group.
Release the mouse button when the one you
want is highlighted.
Tip:
Click and drag
to change the
Scan Next
assignment.
You can reset the default Scan Next
assignment for the board by doubleclicking on the Scan Next Tool.
205
Chapter 22 - Access Methods and Custom Scanning
Using the Scan Pause Tool
1
The Scan Pause Tool is used to temporarily stop the scan on a button until
the user hits their switch. There are three different types of Scan Pauses that
can be applied to a button or group. Each type of pause is used to achieve a
slightly different scanning goal.
Scan Pause Tool
Select the Scan Pause Tool in the tool palette.
2
anyClick once on any button. All the buttons on
the board, or in that scanning group, will
appear highlighted in green. The green
highlight means no Scan Pauses have been
applied.
Click repeatedly on the button. The highlight
changes to red and different letters will appear
in the upper left corner of the button. Each
letter represents a different type of Scan Pause.
Continue clicking on the button until an “I”
appears. This will pause the scan on this first
button.
3
Green highlight
means no Scan
Pauses are
assigned.
Red highlight
Each letter
indicates a
different type of
Scan Pause.
Scan Pause Types
"B" The scan will pause on the button when it becomes highlighted. A switch hit will restart the scan
on that button.
"A" The scan will pause on the button after it is selected. It will remain highlighted as a visual cue to
the user as to which button they just selected. A switch hit will restart the scan on the next button
in the scanning sequence.
"I" The scan will pause on the button when it becomes highlighted. A switch hit will select the current
button and restart the scan. The scan will then continue on to the next button in the scanning
sequence.
206
Boardmaker Software Family v6 User’s Guide
Chapter 23
Designing Boards for Alternative Access
Methods
Chapter Overview
A wide range of access methods, features, and options are available to help you accommodate any special access
needs a user may have. This chapter will help you sort through all the features and options that are related to
access. Access methods and board design techniques are briefly discussed for each of the major categories of
alternative: access scanning, touchscreen, and/or head-tracking devices.
The following topics will be covered:
•
Access methods for scanners
•
Access methods for touchscreen users
•
Access methods for head-tracking device users
Scanning Access
Head-Tracking Access
Touchscreen Access
Low-Vision Access
207
Chapter 23 - Designing Boards for Alternate Access Methods
Access Methods for Scanners
There are four access methods in the program that are designed for scanners: Auto Scan, Step Scan, Inverse
Scan, and Arrow Keys. Each of these access methods can be configured to suit a user’s specific needs. You will
need to use a switch and/or switch interface with these access methods. Please refer to Creating Scanning
Groups in Chapter 22 for information on creating scanning groups.
You can change how the user
accesses the program by
choosing the Access Method.
Each access method
has its own window to
adjust the settings.
Auto Scan
This is the most commonly used scanning access method. When enabled, the buttons on the board will highlight
in a set order, one at a time. To make a selection, the user will hit a switch. The scanning rate, the time each
button remains highlighted, can be set to meet the needs of the user.
Step Scan
Step scanning allows a user to more directly control button selection by allowing them to advance the scan as
needed. The user advances the scan by hitting a switch. Button selection can be triggered either automatically,
by dwelling on a button for a set period of time, or by using a second switch.
Inverse Scan
This scanning access method combines aspects of both the Step Scan and the Auto Scan methods. The scan highlight will move only while the user holds down their switch. Button selection can be triggered either automatically,
by releasing the switch and dwelling on a button for a set period of time, or by using a second switch.
Arrow Keys
This scanning access method requires the use of the arrow keys on a keyboard or multiple switches. The user
will control the direction that the scan highlight moves by using a switch or key to move up, down, right, and
left. Button selection can be triggered either automatically, by dwelling on a button for a set period of time, or by
using a fifth switch or key for selection. When the user encounters the last button in a row or column, the scan
highlight will wrap around the screen and continue on the other side.
208
Boardmaker Software Family v6 User’s Guide
Access Methods for Touchscreen Users
When using the program with a touchscreen, you will use either the Direct Touch or Direct Pointer access
method. Each access method can be configured to support a user’s specific physical needs.
Direct Touch
This access method supports users who rest or drag their hand on the touchscreen when making a button
selection. Button selection can be triggered by either the user breaking contact with the screen or automatically,
by dwelling on a button for a set period of time.
Direct Pointer
This access method supports users who can touch and remove their hand from the touchscreen. Button selection
can be triggered by either the user making contact with the screen or automatically, by dwelling on a button for a
set period of time.
Access Method Toggling
If the user is prone to fatigue due to direct selection on a touchscreen, you can provide them with a button to
change their method of access (perhaps to some type of scanning). The button action Access Method (Settings
tab) allows you to set and configure an alternative access method for the user. This button may also be helpful if
the user needs to access a more complicated board, such as an onscreen keyboard, which may be difficult for
them to access via direct selection.
Starting Pointer Position
Use this feature to set the starting location for the pointer when the
program starts and after a board change. You will want to set the
starting pointer position to a location on your boards where no
buttons are located. This feature corrects the problem where a button
could automatically highlight or select because the pointer happens to
appear on top of the button after a board change. Select Starting
Pointer Position in the Access Method submenu in the Dynamic
Boards menu.
209
Chapter 23 - Designing Boards for Alternate Access Methods
On-Screen Keyboard
The program includes an on-screen keyboard that
will allow you to type text on computers that have a
touchscreen, but no keyboard.
Select Use On-Screen Keyboard in the View menu
to turn this feature on.
Working with Head-Tracking Device Users
Head-tracking input devices allow users to manipulate the cursor on the computer screen by simply moving their
head. Head-tracking devices behave like a mouse or trackball except the user is not in physical contact with the
computer. A timed dwell select access method and a special button action are provided to support this type of
user access.
Access Method
Since these devices emulate a standard mouse, you will use the Direct Touch access method. Typically, the
Automatically Activate Button After option (dwell selection) should be used with an appropriate dwell time.
The problem with using dwell selection is that it is always on, so the user has to make a conscious effort to keep
the pointer off of any buttons to avoid making unwanted selections. The Rest Toggle button action (Settings
tab) is provided to address this problem. By selecting a rest toggle button, the user can temporarily disable the
dwell selection for all buttons on the board except the rest toggle button. This allows the user to freely move his/
her head until ready to communicate, in which case he/she would dwell on the Rest Toggle button again to reenable the dwell selection.
Most head tracking device users will use
a dwell select as their selection option.
210
Add a button like this to toggle on and off
the dwell selection.
Action: Rest Toggle (Settings tab)
Boardmaker Family for Windows User Guide
Appendix A
Keyboard Shortcuts
Most of the keyboard shortcuts and key modifiers listed below are also listed in the program’s various menus
next to their respective commands.
.
Draw Window
Ctrl + D
or ESC
Ctrl + U
Ctrl + N
Ctrl + O
Ctrl + S
Ctrl + P
Ctrl + Q
Ctrl + Z
Enter the Design Mode
Ctrl + R
Enter the Use Mode
New board
Open a board
Save a board
Print a board
Quits the program
Undo (negates the results of
your last action)
Select all
Cut the selection
Copy the selection
Paste from the clipboard
Create a scanning group
around the selected buttons
Show rulers
Delete
Delete the selection
Ctrl + 1
Ctrl + 2
Ctrl + 3
Ctrl + 4
Ctrl + F
Ctrl + F1
Ctrl + F2
Ctrl + F3
Ctrl + F4
Ctrl + F5
Ctrl + F7
Ctrl + →
Ctrl + ←
Ctrl + F6
Actual size window view
Half size window view
Reduce to fit view
Double size window view
Open Symbol Finder
Select Pointer Tool
Select Button Sprayer Tool
Select Button Tool
Select Line Tool
Select Text Tool
Select Freeform Tool
Open next board in folder
Open previous board in folder
View the next open board
Ctrl + A
Ctrl + X
Ctrl + C
Ctrl + V
Ctrl + G
Symbolate
Alt + typing
Esc
Don’t resymbolate the text
Open Symbolate Candidates
dialogue
With Text Selected
Ctrl + “+”
Increase the font size
Ctrl + “-”
Decrease the font size
Tab
Select all Text
With Symbolate Text Selected
Ctrl + “+”
Increase the symbol size
Ctrl + “-”
Decrease the symbol size
Symbol Finder
Ctrl + T
Ctrl + L
→
←
Ctrl + H
Ctrl + 1
Ctrl + (2 - 9)
Display thumbnail view
Select categories
Next image in search
Previous image in search
Change Line 1 to “Hidden”
Change Line 1 to “English”
Ctrl + Shift +
Ctrl + C
Change Line 1 to
corresponding language
Copy current symbol as a
bitmap instead of a metafile
Pasting Images
Ctrl + paste
Shift + paste
Alt + paste
Size for a 5cm x 5cm button
Use native resolution
Suppress the label
Shuffle Buttons
Ctrl + Shuffle
Swap Buttons
Alt + drag
Make sure every button
changes place
Swap buttons
Freeform Button Tool
Ctrl + click
Set a vertex for a polygon
Shift + select
Make the polygon regular
polygon in
211
Appendix A - Keyboard Shortcuts
Alt + “_”
“_”
Insert an underscore instead
of a pseudo-space
Insert a space without
creating a new word-symbol
pair
Resizing Buttons
Ctrl + resize
Resize contents
Shift + resize Maintain the aspect ratio
Ctrl + Alt
Resize contents (excluding
+ resize
text)
212
Corner Tool
Selection with Pointer Tool
Shift + click
Select the button
(no items selected)
Shift + click
Select/deselect additional
(items selected)
item/button
Shift + click
Select all stacked items
(stacked item
selected)
Ctrl + drag
Select and move button in
one step
Boardmaker Family for Windows User Guide
Appendix B
Button Actions
Button actions are listed by action category.
Basics
Speak Message
Type Message
Play Recorded Message
Change Board
Change Board Back
Text Preview
Spoken Preview
Recorded Preview
Clear Message Display
Picture Button
Message
Type Message
Say Message
Say Selection
Delete
Remove Last Message
Clear Message Display
Select All
Cut
Copy
Paste
Print Message
Capitalise Next
Caps On
Caps Off
Picture Button
Picture Speech
Picture Sound
Expand Abbreviation
Board Change
Change Board
Change Board Forward
Change Board Back
Return to Last Board
Set Bookmark
Return To Bookmark
Text & Cursor
Move Up
Move Down
Scroll Up
Scroll Down
Move Left Char
Move Left Word
Move Left Sentence
Move Left Return
Move Begin
Move Right Char
Move Right Word
Move Right Sentence
Move Right Return
Move End
Select Left Char
Select Left Word
Select Left Sentence
Select Left Return
Select Left Begin
Select Right Char
Select Right Word
Select Right Sentence
Select Right Return
Select Right End
Retract Left Char
Retract Left Word
Retract Left Sentence
Retract Left Return
Retract Right Char
Retract Right Word
Retract Right Sentence
Retract Right Return
Settings
Normal Volume Up
Normal Volume Down
Preview Volume Up
Preview Volume Down
Use Loud Settings
Use Soft Settings
Use Voice 1
Use Voice 2
Use Voice 3
Use Voice 4
Quit
Shutdown
Access Method
Design Mode
Rest Toggle
Word Prediction Toggle
Typing Shortcut Setting
Reset Stopwatch
Variables
Speak Message
Type Message
Play Recorded Message
Assign Variable
Assign Variable From
Display
Adjust Variable
Speak Variable
Type Variable
If
Else if
Otherwise
End if
Variable To Quick Text
Quick Actions
Quick Text
Quick Speak
Display To Quick Text
Quick Text To Display
Variable To Quick Text
Quick Picture
Copy To Quick Picture
Quick Record
Set Quick Record
Quick Day
Quick Date
Quick Time
Speak Day/Date/Time/
Prediction
Type Day/Date/Time
Cool Stuff
Launch Application
Play Movie
Random
End Random
Pause Speech
Cancel Speech
Set Button Picture
Set Button Label
Set Button Properties
Delay
Activate Macro
213
Appendix B - Button Actions
214
Boardmaker Software Family v6 User’s Guide
Appendix C
Exporting and Importing Board Packages
A user may want to transfer a collection of Boardmaker boards to someone from one computer to another. In
previous versions, there was no easy and efficient way to share your boards with others.
Now individual boards or an entire folder of boards can be “packaged” into a single compressed file that can be
transferred easily. Once transferred, a package must be imported before the boards are ready for use.
Exporting a Board Package
1
From the File menu, select Export. Select
either the Individual Boards to a Package or
the Folder of Boards to a Package option.
Select a board, multiple individual boards or a folder of boards to be packaged as appropriate for the
export option you selected.
Click on the Open or OK button when finished.
Selecting individual
boards to package.
2
Tip:
Select a
folder to
package.
Multiple boards can be selected by holding down the Control (Ctrl) key on your keyboard
while clicking on the individual boards.
Note: Any multimedia files (i.e. sounds, videos) associated with the selected boards will
automatically be included in the board package.
215
Appendix C - Exporting and Importing Board Packages
Select a location and enter a name for the
packaged board. By default, the program will
attempt to save board packages in your My
Boards folder.
Select a location
and name for the
board package.
Click on the Save button.
3
The board package can now be emailed,
transferred to a memory stick, transferred over
a network, archived as a backup, etc.
Board Packages
will have a .zbp
file extension.
Importing a Board Package
A compressed board package must be
imported before the boards it contains can be
used.
4
In the File menu, select Board Package in the
Import submenu.
Note: Board packages can only be imported
by version 6 and higher of the
program.
Select the package file then click on the Open
button.
5
216
Note: Board Packages have a .zbp file
extension.
Boardmaker Software Family v6 User’s Guide
Select the location where the imported boards
will be saved. The default location will be the
My Boards folder, but another location can
easily be selected.
Click on the OK button when finished.
6
Select Open in the File menu to open the
imported boards from the board package.
Note: If you attempt to import a board or a
folder that has the same name as a
board or a folder which already exists
in the same location, you will be
asked if you want to overwrite that
board or folder.
217
Appendix C - Exporting and Importing Board Packages
218
Boardmaker Software Family v6 User’s Guide
Appendix D
Exporting Boards to Version 5.3
Due to the addition of exciting new features in Version 6, the file format of the saved boards has changed.
Although this makes Version 6 boards incompatible with Version 5 of the program, there is a way to share
boards created in Version 6 with Version 5.3 users. If you want to open a board or boards created in the Version
6 in Version 5.3, you will first have to “export” them using the appropriate Export option in the File menu.
Note: Version 6 of the program can directly open version 5 boards without needing to use the export/import
options. Whenever possible, the program will attempt to save boards in the version 5.3 format to maintain
backward compatibility.
When you select Export from the File menu,
Boardmaker allows you to export a single board or a
folder of boards.
The Current Board to a Version 5.3 Board…
option will export only the current board you have
open.
1
Note: If you have not yet saved the board, you
will be prompted to give your board a name
and a place to save it.
The Folder of Boards to a Version 5.3 Folder…
option will allow you to choose a folder of boards to
export. It will create a folder with the same name as
the target folder with “5.3” appended to it.
Note: The new folder will be placed in the same
folder as the target folder.
219
Chapter D - Exporting Boards to Version 5.3.x
The board or folder of boards can then be transferred to a computer with the Version 5.3 Boardmaker
on it and be opened directly through the Open a Saved Board or Add-On function.
The symbolate button is converted to a
standard button with
multiple symbols.
The freeform button is
converted
into a
standard
square
button.
2
Basic Boardmaker
board before export.
The dashed button border
is converted into a standard solid border.
Board after export
with alterations.
Caution:If the exported boards contain features that are not supported in Version 5, the export
function will warn you about the incompatibilities. If you choose to proceed with the
export process, the incompatible features will either be stripped out or replaced with
reasonable alternatives.
Boardmaker features not supported in version 5.3:
•
Dashed lines
•
Freeform buttons (replaced with rectangles)
•
Symbolate buttons
•
Background image anchors
Boardmaker Plus and SDP features not supported in version 5.3:
•
Movable buttons
•
Advanced variables (embedded, numeric, system)
•
Open board actions
•
Advanced conditional statements
•
Macros
•
Nested, not selectable, hidden buttons, and button names
Button Actions not supported in version 5.3:
•
Change Board Back
•
Set Button Properties
•
Adjust Variable
•
Change Board Forward
•
Reset Stopwatch
•
Set Button Picture
•
Quick Record
•
Quick Type
•
Read with Highlighting
•
Set Button Label
•
Quick Picture
•
Activate a Macro
220
Boardmaker Software Family v6 User’s Guide
Appendix E
Creating a Template Board
The blank template boards supplied with the program are set up in a fashion to prevent users from saving over
them. You can turn any board you create into a protected template board.
1
All Template boards are stored in the Templates
folder which can be found in the Boardmaker
with SD Pro folder (typically in C:\Program
Files).
Note: You can create your own subfolders in
the Templates folder to help organise
your templates.
Program Files
Boardmaker with SD Pro
Templates
Once you create a board that you want to keep
as a template, select Save as Template in the
File menu.
2
The Save As window will open. You can save
your board in the Templates folder or create
your own subfolder. Enter a name for your new
template.
3
Click on the Save button. Your template will
now be automatically saved and designated as
”read only”.
When your template board is opened, it will
appear as an untitled board. This forces the user
to give the template board a new name every
time it is used, preserving the original.
The Save as Template
function automatically
directs your template
boards here.
Give your template board a name
221
Appendix E - Creating a Template Board
222
Boardmaker Software Family v6 User’s Guide
Appendix F
Launching a Board at Computer Startup
Your computer, at startup, can be set to automatically launch a specific the program board. This is especially
useful on a computer that is dedicated to providing communication for a set user.
Open the board you want the program to open on
startup. From the Dynamic Boards menu select
Startup Board.
1
Click on the Use Current Board button then click on
the OK button. Provided the board you select is a the
program board, the program will open the board in the
Use mode.
NOTE: You can change or remove the startup board
any time using the steps above.
On the desktop, right-click on the the program shortcut and hold the mouse button down. Drag the
shortcut to Start > Programs > Startup then position the shortcut in the Startup submenu, then
release the right mouse button. In the context menu that appears, select Copy Here.
2
3
Your computer is now set to automatically launch the the program board you set with the program in
the Use mode.
223
Appendix F - Launching a Board at Computer Startup
224
Boardmaker Software Family v6 User’s Guide
Index
A
Abbreviation expansion 191, 195
Access methods 197
alternative 207
Arrow Keys 198, 208
Auto Scan 198, 208
Direct Pointer 198, 209
Direct Touch 198, 209, 210
Inverse Scan 198, 208
scanning 208
Starting Pointer Position 209
Step Scan 198, 208
toggle 209
touchscreen users 209
Action categories 113, 213
Basics 113, 213
Board Change 113, 213
Cool Stuff 113, 213
Message 113, 213
Message Files 113
Settings 113, 213
Text & Cursor 113, 213
Variables 113, 213
Action Details 112
Action Menu 112, 113
Aligning text 45
Alternative access methods 207
Alternative Symbol Name field 4, 31, 35
Alternative symbol names 35
Arrow Keys 198, 208
Assigned actions 112
adding 124
deleting 125
editing 124
rearranging 125
Audible cueing 145, 180
Auto Scan 198, 208
B
Background colour
board 21
button 21
Basic button actions 113, 213
Bitmap format 76, 85
Board change action category 113, 213
Board Change Indicator 74
Board dimensions 14
Board Magnification Indicator 3
Board size 15
Board Workspace 3
Boardmaker’s Symbol Finder at a
Glance 4
Boards
assigning basic actions 111
background colour 21
creating a template 221
default storage 109
design considerations 106
filling with symbols 38
gap spacing 20
layout diagrams 107
linking 127
main 108
multi-page 16
multiple, working with 17
opening 6, 211
organizing 109
orientation 14
page break lines 16
paper size 99
planning content of 107
PopUp 161
sample 5
separate folders for 109
setting default size 15, 99
setting the size 15, 99
storage 109
template 221
typing 192
viewing multiple (Tile) 17
Borders
3-D shadow 25
hidden 22
thickness 22
Button actions
basic 113
complete listing 213
variables 186
Button actions window 112
Button gap spacing 20
Button Sprayer Tool 3, 20
Button Tool 3
Buttons
assign actions 112
basic actions 113
design aspects 210
display control 192
edit assigned actions 124
link to other boards 127
picture 139, 140
scanning group 201, 211
selecting multiple 162
Use Button Text option 143
Word Prediction 193
Buttons (cells)
3-D shadows 25
adding additional symbol to 49, 70, 71
background colour 21
border colour 21
border thickness 22
clearing a group of 25
clearing symbols and text from 25
combining symbols in 49, 70, 71
copy new symbol from 85
creating 19
creating a grid of 19
creating a square 19
dimensions 15
filling quickly 38
gap spacing 15
importing clip art and photos 83
placing a symbol on 34
replacing a symbol on 48
resizing 20
select all 21
shape 23
C
Categories
adding a new symbol 87
Categories Button 4
selecting a search 37
Cells. See Buttons
Change Board 113, 129, 213
Changing text on multiple buttons 45
Clear 25
Clear Symbols. See also categories
clearing 52
Clip art
importing 83
Clipboard button 4
Colour
board background 21
border colour 23
button background 21
changing colours in symbols 81
transparency 77, 79
Colour palette 21, 43, 79, 80
Colour Tool 3, 21, 23, 43, 79
Cool Stuff action category 213
Copying symbols
automatic placement 34
manual placement 34
to a button 34
to the Symbol Finder 85
Corner Tool 3
225
Index
162
Create Popup Board
Flip Horizontal Tool 75, 82
Flip Vertical Tool 75, 82
Fonts
setting size on symbol 44
style 44
type 44
D
Default
board size 15
for Text Tool 44
print settings 15
Default board storage location 109
Design Board menu
Abbreviations 195
Access Method 198
Design mode 7
Show Scan Tools 202
Speaker Volume 180
Use mode 5, 115
Voice 181
Design considerations 106
Design mode 5, 115
Direct Pointer 198, 209
Direct Touch 198, 209, 210
Display control buttons 192
Draw Window at a Glance 3
Drawing on symbols 78
limited drawing area 76
Dynamic Buttons menu
Action, see Making Boards Tutorial
manual
Create PopUp Board 162, 163
Message Display 134
Picture 140
Prediction 194
Preview Display 122
Dynamic Help 3
G
Gap spacing 20
Getting Started 105
Grid
Snap to Grid 19
spacing 19
Groups. See also scanning groups
H
Head tracking device users
design aspects 210
Help 3
I
Imported picture transparency
Importing
clip art 83, 84
photos 83
pictures 83
Inverse Scan 198, 208
Invert Tool 75, 81
Keyboard (on-screen)
226
210
L
39
Languages
assigning symbol names 86
Lines 1 and 2 in symbols 36
Search Language 36
Launching a board at startup 223
Line Tool 3, 24
Lines 1 and 2 Languages 36
Linking boards 127
building sequence 128
main board button link 129
previous board button link 130
topic branch 128
M
F
File menu
Import 84
Print Board on Single Page
Print Preview 100
Print Setup 14, 16
Fill All Tool 75, 77, 81
Fill Tool 75, 77, 80
77
K
E
Edit
button’s assigned actions 124
Edit menu
Clear 25, 52
Copy 85
Paste 85
Select All 21
Editing a symbol name 43
Enlarging the Symbol Finder window
Eraser Tool 75, 79
change thickness of 79
210
Magnification for Enlarged Window 39
Main board ??–7, 105, 107, 108, 127,
129, 131
101
Mapping out the boards and links 107
Marquee/Lasso button 51
Maximise size of window 18, 39
Menu Bar 3
Message action category 113, 213
Message Display 133
actions 137
adding 134
adding simple controls 136
changing the text and display
colours 134
changing the text size 134
Remove Last Message 136
settings 138
Type Message 135
Use Button Text 143
with pictures 139
Message Display settings 138
picture size 141
Uniform Line Spacing 142
Message Files action category 113
Modifying symbols
combining 51
drawing on 78
limited drawing area 76
Multiple boards 17
My Boards folder 6, 109
N
Names (symbol)
alternative 35
Naming a new symbol
86
O
One-time symbol name change 35
On-Screen Keyboard 210
Open
board 211
new board 211
next board 211
previous board 211
saved board 6
Symbol Finder 211
Orientation of paper and boards 14
P
Page break lines 16
Paint Tool Palette 78
Paint Tools
Colour 75, 79
Eraser 75, 79
Fill 75, 80
Fill All 75, 81
Flip Horizontal 75, 82
Flip Vertical 75, 82
Invert 75, 81
Pencil 75, 78
Pointer 75, 78
Rotate 75, 82
Thickness 75, 80
Boardmaker Software Family v6 User’s Guide
Paint tools 75
Paint Tools Palette 75
Paper orientation 16
Paper size 16
Pencil Tool 77, 78
setting the colour of 78
setting the line thickness of 78
Photos
importing 83
Picture Button 113, 139, 140
Picture Sound 113
Picture Speech 113, 140
suppress 141
Placement Cursor 34, 48, 49, 51
Placing a symbol in a button 34
Play
movie 179
recorded message 113, 117
Play Movie 179
Play Recorded Message 113, 115, 117,
213
Pointer Tool 3
PopUp boards 161
creating 162
using with a Message Display 164
Prediction buttons 191, 194, 195
adding 194
Preview Display 122
Previous/Next Arrows 4, 32, 33, 38
Print Board on Single Page 101
Print Preview 100
Print Setup 14, 16
Printer considerations 98
Printer Setup 14
Printing 183
checking the print layout 99
default settings 15
on single page 183
preparing boards for 98
Print Preview 100
setting the board size 14
setting the orientation 14
setting the printer paper size 14
Pronunciation 182
R
Random action 178
RealSpeak 181
Recorded message 117
Recorded Preview 113, 120, 213
Reduce To Fit view 16, 99
Replace button 48
Replacing a symbol on a button 48
Repositioning
symbols 50
text fields 42
Resizing
a board’s window 18
buttons 20
text 44
Restoring window size 18, 39
Return to Last Board 128, 213
Rotate Tool 75, 82
Ruler 19
units of measure 19
S
Sample boards 5–7
explore 5
Scan Next Tool 205
Scan Pause Tool 206
Scan tools
Scan Next Tool 202, 205
Scan Pause Tool 202, 206
Sequence Tool 203, 204
Scanning 208
access methods 198
default sequence 200
feedback sounds 180
groups
Scanning groups
Scroll Bars 3
Search Language 36
Search options 32
anywhere 32
beginning of word 32
whole word 32
Searching for symbols
individually 32
using categories 33
using thumbnails 33
see On-Screen Keyboard 210
Select All 21
Select Categories button 37
Selecting
b&w or colour libraries 40
portion of a symbol 51
search category 37
Send To Back 50
Sequence Tool 203
Setting
board size 14
font, style, and size 44
paper size 14
Shadow 25
Shadow Tool 3
Snap To Grid 19
Sound
separation 180
volume 180
Speak
button 114
Speak Message 113, 114, 147, 213
Speaker Volume 180
Spoken Preview 113, 119, 147, 213
Standard Tool Palette 19
Button Sprayer Tool 20
Button Tool 19
Line Tool 24
Pointer Tool 43
Shadow Tool 25
Text Tool 43
Starting Pointer Position 209
Starting pointer position 209
Starting the program 6
in the Use mode 6
Step Scan 198, 208
Switches 199
Symbol Finder
adding a symbol to 83
alternative name field 35
at a glance 4
category search 37
enlarging the window 39
importing a picture to 83
language settings 36
line 1 and 2 languages 36
Previous/Next Arrows 32
Search Language 36
search options 32
selecting b&w or colour symbols 40
Selection Marquee/Lasso 4
Settings Button 4
thumbnail view 38
window 3
Symbol Finder Tool 39
Symbol Name Search option 32
anywhere 32
beginning of word 32
whole word 32
Symbol Names button 4
Symbol transparency 77
Symbols. See also categories
adding to a button 49, 70, 71
alternative names 35
assigning categories 87
changing colours in 81
clearing a group of 25
colour changes 81
combining 49, 70, 71
conversion to bitmap format 76, 85
copying new to Symbol Finder 85
creating new 49, 70, 71, 85
deleting parts of 51
drawing on 78
227
Index
editing name 43
erasing a portion of 79
filling selected portions of 80
flipping 82
inverting black & white 81
metafiles 76
modifying 75
naming new 86
placement in button 34
replacing on a button 48
repositioning in button 50
resizing 50
rotating 82
selecting 78
selecting a portion of 51
selecting multiple 85
transparency colour 77
Synonyms for symbol names 35
T
Technical support 2
Template boards 221
creating 221
premade 221
Use Button Text 144
Text
adding to symbol 43
alignment 45
alternative symbol names 35
changing on multiple buttons 45
changing the colour 43
editing a symbol name 43
font size 44
font style 44
one-time symbol name change 35
repositioning 78
Text & Cursor action category 113, 213
Text Preview 88, 91, 92, 93, 95, 113,
122, 123, 147, 213
Text Tool 3, 41
adding text with 42
editing symbol name with 43
Thicknes 78
Thickness Tool 3, 22, 75, 78, 79
Thumbnails 38
Thumbnails Button 4
using to search for symbols 33
Tile view 17
Title Bar 3
Tools
Button 19
Button Tool 20
Colour Tool 21, 23, 43, 75, 78
Corner Tool 23
Eraser 75
228
Fill 75, 77, 79, 80
Fill All 75, 77, 79, 81
Flip Horizontal 75, 82
Flip Veritcal 82
Invert 75, 81
Line 24
Pencil 75, 77
Pointer 75, 78
Rotate 75, 82
Symbol Finder 85
Thickness 22, 75
Topic board 162
Touchscreen users 209
Transparency Colour 77
Type Message 113, 133, 135, 137,
147, 213
Typing boards
192
U
Use All Standard Categories button 37
Use Button Text 143
actions that can Use Button Text 147
creating template board with 144
Use mode 5, 115
V
Variables 185
actions listing 213
View menu
Reduce To Fit 16
Send To Back 50
Snap To Grid 19
Tile 17
Voices 181
pronunciation 182
selecting and changing 181
switching from a button 181
volume 180
Volume 180
W
Window
maximising 18
resizing 18
viewing multiple 17
Word Prediction 193
adding 194
Word pronunciation 182