1
Self-Diagnostic Error Codes
The Spa Power 600 controller has extensive self diagnostic capabilities. In the event of a problem it will indicate
an error number according to the nature of the problem. The error numbers and their meanings are listed below.
Note: When in an error state the alarm can be muted by pushing theAIR/AUX button.
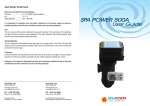
SPA POWER 600
Error 1 (H20) - Prime Failed
This is not necessarily a problem with the SP600 itself, but indicates that no water is being detected in the heater housing. Prime
failed is a special case in that it can be recovered from by pushing a button. A push of the pump button will run the pump for 10
seconds to try to get water to the heater. If successful normal operation will resume. If unsuccessful, Error 1 (H20) will be indicated on
the display again.
User Guide
Error 2 - Not Used. With any Error 3-8, spa operation will stop and not continue until the controller is
reset. (Switched off and on again at the main power supply)
s
t
r
a
Error 3 - Stuck Button
This error indicates that one of the buttons in the touchpad is stuck or has been held down for more than one minute. This may be
caused by the pool cover pressing on the touchpad or by water getting into the touchpad or by damage to the touchpad or its cable.
Try to reset the spa. If there is still a problem then contact your spa pool reseller.
P
a
p
S
n
Error 4 - No Water Sensor
ia
l
a
tr
This error indicates a problem with the optical water sensor in the heater. The problem may by caused by the sensor being
disconnected or by damage to the sensor. Try to reset the spa. If there is still a problem then contact your spa pool reseller.
Error 5 - Overtemperature
This error indicates that the digital temperature sensor in the heater or pool has detected a temperature of 45oC or more. This may
not be a problem with the SP600, it may be caused by excessive pump use in hot weather, or pump failure. Turn off the spa and allow
time for the water to cool. If there is still a problem then contact your spa pool reseller.
Error 6 - Thermal Cut Out Tripped
au
.
m
-
s
u
A
This error indicates that the safety electromechanical over temperature cut out on the heater has operated. This is not necessarily a
problem with the SP600. It may have occurred from an air lock around the element, high temperatures during shipping, or failure of
the pump. This automatic cut out will only reset once the element has cooled below about 38oC. The unit must then be reset before it
will resume operation (Switch off and on at the mains power supply).
Error 7 - Stuck Relay
o
c
.
ts
r
a
ap
This error indicates a problem with the heater control circuitry inside the unit. Contact your spa pool reseller.
Error 8 - No Temperature Data
sp
Spa-Quip Australia Pty Ltd
Spa-Quip Ltd
www.spa-quip.com.au
[email protected]
www.spa-quip.co.nz
[email protected]
Ph: 61 2 9634 5600
Fax: 61 2 9634 5900
Ph: 64 9 415 8622
Fax: 64 2 415 8621
Unit 2 13, Hoyle Avenue
Castle Hill NSW 2154 Australia
Cnr Rothwell Ave & Albany Hwy
North Harbour Industrial Park, Auckland NZ
Spa-Power Equipment
Spa-Power Equipment
SP600 User Guide (A&B Models).pdf
Booklet Part Number 916318
8th Oct 2004
This error indicates a problem with the digital temperature sensor in the heater or pool wall or that both the in heater and in pool
sensors are connected. Check that only one sensor is connected and that it has not become disconnected or damaged. Try to reset
the spa. If there is still a problem then contact your spa pool reseller.
SP600A (1 Speed Pump)
SP600B (2 Speed Pump)
SPA CONTROLS
Sleep Time (Optional Timeclock)
Temperature Control
The Spa Power 600 automatically controls the pump and heater to filter the water and maintain it at the desired
temperature as set by the user. (see below)The user can leave the system to look after the spa and know it will be at
the correct temperature whenever he or she wants to use it.
Adjusting Set Temperature
The Spa Power 600 gives the user direct control of the pool temperature from the poolside control panel. Holding
down the Up or Down button will adjust the temperature set point as shown on the digital readout. There is a slight
delay before the buttons operate to reduce the risk of accidental adjustment. The pool temperature will be
maintained very close to the set temperature.
UP
o
o
DOWN Decrease the set temperature by 0.5 C per beep (Min = 10.0 C)
Default Display
37.0
The display normally shows the temperature set point, unless the optional in pool temperature sensor is fitted in
which case the sensed water temperature is displayed. In either case the temperature set point will be displayed
while being adjusted as described above.
Non-Default Display Value
Press both buttons
simultaneously
37.0
m
o
c
.
HEATER
ON
AIR
The non-default display value (either sensed water
temperature or temperature set point) can be checked if
necessary by pressing the Up & Down buttons simultaneously.
Heating Mode Selection
.au
AUTO
PUMP
rts
pa
a
sp
37.0
AIR
SPA POWER 600
HE
AT
PU
M
AU P
TO
AIR
Press both buttons
simultaneously
Page 1
ON
Press Up or Down
buttons to toggle
between heating
modes.
TIM
E
HO
R
P
UR
DAY
Press the RESET button before use. NOTE: This is optional. It will clear the current time and program settings.
Hold down the CLOCK button and press the DAY button until the correct day is selected. Release both buttons.
Hold down the CLOCK button and press the HOUR button until the correct hour is set. Release both buttons.
Hold down the CLOCK button and press the MIN button until the correct minute is set. Release both buttons.
After setting the weekday and time, the seconds will reset automatically and the clock will begin keeping time.
1.
Press the TIMER button. "1ON" will appear at the left side of the display. This is the start time of the first programmed sleep
block (the time you want the spa to enter the sleep mode).
2.
Press the DAY button to select the days on which this sleep program will operate. There are 15 settings to choose from.
3.
Press the HOUR button to set the hour of the desired time to enter sleep mode.
4.
Press the MIN button to set the minutes of the desired time to enter sleep mode.
5.
Now the start time has been set, press the TIMER button again. "1OFF" will appear on the display. This is the end time of the first
programmed sleep block (the time you want the spa to resume normal operation).
6.
Repeat the same procedure (2 to 4 above) until the "1OFF" time is set.( Be careful to set the same days as used in the "1ON" time).
7.
Your timer gives you up to 8 different programmable periods. You can use all 8 settings , or as few as you like.
8.
To Review your set programs press the TIMER button and keep pressing it to advance through each setting.
P
a
p
S
n
ia
l
a
To Set r
t Programs
s
Au
AUTO
PUMP
HEATER
ON
IMPORTANT NOTE: The "MANUAL" button on the clock can be used to override the programmed sleep settings. It is
very important to ensure that the clock is set to "AUTO" so that the programmed times can operate. If the clock is
manually set to ON then the pool will stay in sleep mode and THE WATER WILL GO COLD. If it is left in "OFF" then the
pool will not enter the sleep mode. The clock does not return to "AUTO" by itself.
NOTE: If the “MANUAL” button on the clock is pushed the spa will not return to the programmed settings until the next
programmed time.
AIR
SPA POWER 600
HE
AT
PU
M
AU P
TO
AIR
AUTO
PUMP
HEATER
OFF
ON
In addition to the temperature setting the user can select the preferred heating mode. The two available heating
modes are...
1/ Demand Heating (displayed as Ht.d).This is the default setting in which the pump and heater will come on
automatically whenever the temperature drops slightly below the set point.
2/ Filtration Only Heating (displayed as Ht.F) .In this mode the pump and heater will come on automatically no more
than once per hour to filter and heat the water. This mode is provided as an option for those who prefer to limit the
natural cycling of the system.
To select the heating mode first press the Pump and Down buttons simultaneously to display the current heating
mode, then press and hold the Up or Down buttons to change modes.
ON
AUTO
MANUAL
1.
2.
3.
4.
5.
HE
AT
PU
M
AU P
TO
AIR
SPA POWER 600
-
ON
ON
s
t
r
a
To Set Current Time and Day
Increase the set temperature by 0.5oC per beep (Max = 41.5oC)
9 :3139
MON
K
OC
CL
If the optional time clock has been fitted, sleep mode is used to disable
automatic temperature maintenance and filtration in order to silence the spa
pool during your hours of sleep. The sleep time setting is done using the digital
time clock on the front of the control box (See below for setting instructions). If
the spa is in use it will not enter sleep mode until 30 minutes after the last
manual button push, even if the clock is calling for sleep mode. The spa can
still be used manually within sleep mode times as normal. On wake up from
sleep the system will run the blower for 15 seconds to purge the blower
plumbing. This prevents any stagnant water from collecting in the pipes if the
pool is not used for an extended period.
MI
N
Congratulations on choosing the latest Spa Power 600 control system. This controller
makes use of the latest technology, including innovative optical and digital sensor designs.
The greater variety of optional accessories, user-friendly touchpad and reliable components
provide you with the most sophisticated controller in its class.
ON
Page 6
Auto Sanitising (Filtration)
Pump Operation
The Spa Power 600 automatically maintains the filtration/sanitising of the spa pool water. The minimum amount of
filtration time is programmable by the user and can be adjusted between 0 and 15 minutes per hour (0 to 6 hours per
day). In order to maintain correct filtration of the pool water, the SP600 monitors the time for which the pump runs in
normal pool operation. If the pump has only run for a short time, the system will automatically run the pump for an
additional period every hour to reach the minimum filtration time set by the user.
The default state is Auto Mode in which the pump and heater are controlled automatically to filter the water
and maintain the desired water temperature. The Pump Button allows the user to control the water pump
as desired when using the pool. It is used to turn the pump on and off, and select speeds if a two-speed
pump has been fitted. 3 pushes (A models) or 4 pushes (B models)on the pump button cycle the system as
follows:
Single Speed Pump (A Models)
Adjusting Minimum Filtration Time
HEATER
AIR
AT
37.0
Press both buttons
simultaneously
P
a
p
S
n
ON
(Heater automatic)
(Heater automatic)
(Heater OFF)
(Pump & Heater automatic)
Note: If the user does not set the system back into Auto mode, the system reverts to
automatic operation by itself, 90 minutes after the last push of the pump button.
SPA POWER 600
ia
l
a
tr
The default setting is 10 minutes per hour (= 4 hours per day). Holding down the Up Button
or Down
Button
will adjust the filtration time setting between 0 and 15 minutes per hour. (= 0 to 6 hrs per day).
Clean Up Cycle
If desired, a clean up cycle can be initiated to filter the water after the spa pool has been used. This is done by simply
pushing the Pump Button
to leave auto mode and switch on the pump. This will circulate the water through
the filter for 90 minutes. After 90 minutes the system will return to auto mode and maintain the temperature ready for
the next time the spa pool is used.
au
.
m
sp
o
c
.
ts
r
a
ap
My spa is too hot in Summer!
During summer or warm periods of the year there may be times when the actual water temperature exceeds the desired
temperature as set by the user. e.g. If the spa is set to heat to 35oC , but the actual water temperature is hotter than 35oC. Please
consider this - In the winter your spa gets cold because the air temperature is cold. To combat this we heat the water and keep the
spa covered when not in use. If the spa is turned off and the ambient temperature is 15oC, eventually the spa water will lose heat
until it too is 15oC. In the summer the same applies but in reverse - you can turn the heater down, even turn the pump off, but if the
ambient daytime temperature is 35oC - 42oC then the spa water will also remain at that temperature.
Manufacturers make no attempt to supply a system that cools water. The quickest way to combat the problem is to change the
water, but even this new water will eventually heat up to the air temperature. Turn the set temperature down so the heater does not
come on. Reduce the minimum filtration time so the pump runs less. The less the pump runs the more the water will cool. If the
nighttime temperature is low, leave the cover off the spa to let heat escape, but put it back on during the day to keep heat out. If the
optional timeclock is fitted increase the sleep time period otherwise turn the spa off overnight. Also make sure the spa is shaded
from direct sunlight.
Page 5
Push 1 - Pump LOW
Push 2 - Pump HIGH
Push 3 - Pump OFF
Push 4 - Auto Mode
-
s
u
A 37.0
Indicator Lights
AUTO
PUMP
ON
HEATER
AIR
AUTO Flashing = No Water
PUMP Flashing = Sleep Mode
HEATER Flashing = Error
Pump Button
37.0
HE
AT
PU
M
AU P
TO
AI
R
ON
s
t
r
a
M
AU P
TO
AI
R
AUTO
PUMP
Press both buttons
simultaneously
Push 1 - Pump ON (Heater automatic)
Push 2 - Pump OFF (Heater OFF)
Push 3 - Auto Mode (Pump & Heater automatic)
buttons together to display the filtration time setting on the digital
PU
and Air/Aux
HE
First push the Down
readout
Two Speed Pump (B Models)
ON
SPA POWER 600
Auto Light
The yellow or blue Auto indicator light will appear on the touch pad whenever the system is in full
automatic control mode. In this mode the system automatically activates the pump and heater to
filter the water and maintain the set water temperature. If this light is flashing the water sensor is not
detecting any water.
Pump Light
The green Pump indicator light will appear on the touch pad whenever the pump is running, in both auto
and manual use mode. If this light is flashing, the spa is in Sleep Mode.
Heater Light
The red Heater indicator light will appear on the touchpad whenever the heater element is on, in both
auto and manual use mode. For safety the heater is always automatically controlled. Usually
switching on the air blower accessory will cause the heater to switch off (loadshedding). This is in order
to keep the total power load to a safe level. If this light is flashing the system has an error (see back page).
Page 2
Light Operation
Auxiliary Air Button
The multi-function Light Button
is used to turn the light on and off and select through the different
operating modes of the Spa Power Variable Colour Light. Five short presses of the button will cycle the
light as follows:
The Air Button controls an auxiliary air blower. It is used to turn the blower on and off, and select different
operating modes if a Spa Power Variable-Speed Blower (SPVSB) has been fitted. 2 pushes (STD) or 4
pushes (SPVSB) of the air button cycles the blower as follows:
Light Button
Standard Air Blower (STD)
Push 1 - Light ON (Colour - White)
Push 1 - Blower ON
Push 2 - Light ADJUST (Adjustable Colour Mode)
Push 2 - Blower OFF
s
t
r
a
Push 3 - Light CYCLE SLOW (Cycle through colours - slowly)
Spa Power Variable-Speed Blower (SPVSB) (if fitted)
P
a
p
Push 5 - Light OFF
S
an
i
l
a
r
t
s
u
A
Push 4 - Light CYCLE FAST (Cycle through colours - quickly)
Push 1 - Blower ON (Full Speed)
AIR
Red
Light
Push 2 - Blower ADJUSTABLE (Adjustable Speed)
AIR
Orange
Light
(Default State)
Note: This is a multi-function button which performs the following -
Push 3 - Blower OSCILLATING (Oscillating Speed)
Push 4 - Blower OFF (Default State)
AIR
Green
Light
AIR
No
Light
au
.
m
o
c
.
ts
Note: If left on, this accessory will automatically switch off after 20 minutes. If the heater element is on, switching on
this accessory may cause the heater to loadshed and switch off. This is to keep the total power load to a safe level.
r
a
ap
p
s
If a Spa Power Variable-Speed Blower is fitted, the spa user has the ability to adjust the blower speed to
Adjustable Speed Mode
any desired setting. The Up and Down buttons are used to set the desired blower speed. Note: If the
blower is in Full Speed or Oscillating modes then pushing the Up or Down button will put it into
Adjustable Speed mode and then adjust the speed.
Step 1) Press Air Button twice to set Adjustable Speed Mode
Step 2) Press Up
to increase speed of blower
Step 3) Press Down
to decrease speed of blower
AIR
Light turns
to orange
-
1)
2)
3)
Short presses of the button activate the light functions as detailed above.
Holding the button will begin to increase the set temperature of the spa.
When a Spa Power Variable Speed Blower is fitted and is turned on the button increases the blower speed.
Adjustable Colour Mode
When the light is on short presses of the Down button
will put the light into adjustable colour mode
and then sequentially select through all the available colours. The last colour set in this mode will be
remembered the next time the light is used.
Indicator Light
A small red dot in the bottom corner of the digital readout indicates when the
light is turned on. If left on the light will automatically switch off after 30
minutes.
ON
Safety Notes
Before using ensure that the spa pool has been connected to a suitable weather protected outlet socket, equipped with a double
pole isolating switch, which is of the correct rating and complies with the local wiring regulations.
When installing refer to your local wiring code. In particular refer to ECP 2 & ECP 25 (AS / NZ) and EN 60364-4-1 & EN 60364-7-1
(EU). The system must be installed in such a way that live parts are not accessible by a person in the pool. If a supply cord is not
fitted the system must be permanently connected to fixed wiring through a 30mAor less RCD.
This appliance is not intended for use by young children or infirm persons without supervision. Young children should be supervised
to ensure they do not play with the appliance.
Page 3
Page 4