1
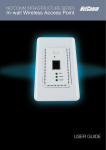
User Guide NP731 – Outdoor Dual Band WiFi N Access Point Copyright Copyright© 2014 NetComm Wireless Limited. All rights reserved. The information contained herein is proprietary to NetComm Wireless. No part of this document may be translated, transcribed, reproduced, in any form, or by any means without prior written consent of NetComm Wireless. Note: This document is subject to change without notice. Save our environment When this equipment has reached the end of its useful life, it must be taken to a recycling centre and processed separately from domestic waste. The cardboard box, the plastic contained in the packaging, and the parts that make up this device can be recycled in accordance with regionally established regulations. Never dispose of this electronic equipment along with your household waste. You may be subject to penalties or sanctions under the law. Instead, ask for disposal instructions from your municipal government. Please be responsible and protect our environment. This manual covers the following products: NP731 Outdoor Dual Band WiFi N Access Point DOCUMENT VERSION 1.0 - Initial document release DATE 9/1/2015 Table 1 - Document Revision History NP731 User Guide 2 www.netcommwireless.com Ver 1.0 Table of contents Table of contents ........................................................................................................................................................................... 3 Overview ........................................................................................................................................................................................ 4 Introduction ................................................................................................................................................................................................... 4 Target audience............................................................................................................................................................................................. 4 Prerequisites ................................................................................................................................................................................................. 4 Notation ........................................................................................................................................................................................................ 4 Product introduction...................................................................................................................................................................... 5 Product overview ........................................................................................................................................................................................... 5 Package contents.......................................................................................................................................................................................... 5 System concept ............................................................................................................................................................................................ 6 Hardware overview ........................................................................................................................................................................ 7 Bottom Panel ................................................................................................................................................................................................ 7 Top Panel ...................................................................................................................................................................................................... 8 Hardware Installation ..................................................................................................................................................................... 9 Alternative configuration ............................................................................................................................................................................... 10 Accessing the NP731’s user interface ........................................................................................................................................ 11 Setting the IP address of your computer....................................................................................................................................................... 11 Logging in to the NP731 .............................................................................................................................................................................. 13 Advanced configuration .............................................................................................................................................................. 14 System........................................................................................................................................................................................................ 14 AP............................................................................................................................................................................................................... 20 Firewall ........................................................................................................................................................................................................ 36 Utilities ........................................................................................................................................................................................................ 42 Status ......................................................................................................................................................................................................... 46 www.netcommwireless.com Ver 1.0 NP731 User Guide 3 Overview Introduction This document provides you all the information you need to set up, configure and use the Outdoor Dual Band WiFi N Access Point. Target audience This guide is intended to be used by wireless service providers or network administrators to set up a network environment using the NP731 system. It contains step-by-step procedures and graphic examples to guide IT staff or individuals with some network system knowledge to complete the installation. Prerequisites Before continuing with the installation of your NP731, please confirm that you have the following: A device with a working Ethernet network adapter. Wireless client device(s) if using the NP731 to create a wireless network. A web browser such as Internet Explorer, Mozilla Firefox or Google Chrome. Notation The following symbols are used in this user guide: The following note requires attention. The following note provides a warning. The following note provides useful information. NP731 User Guide 4 www.netcommwireless.com Ver 1.0 Product introduction Product overview Designed to meet the needs of today’s most demanding wireless LAN deployments, the NP731 offers a solution to create a reliable and scalable wireless network. The NP731 is an outdoor device that will operate in access point, repeater and WDS bridge mode. Its rugged IP68-rated metal housing is weatherproof, pressure balancing, water-tight and rust-resistant, making it an ideal solution for deployments in harsh conditions, such as outdoor or industrial environments. With its multi-mode set up, the device can be used in many instances to increase and enhance wireless coverage. Package contents The NP731 package includes: # ITEM 1 DESCRIPTION NetComm Wireless NP731 Outdoor Dual Band WiFi N Access Point Dual band 5dBi Outdoor Omni Antennas 2 3 Ground wire (green) 4 PoE injector 5 10m RJ45 Outdoor-grade Ethernet cable 6 Detachment tool (for RJ45 connector) 7 Mounting kit 8 Quick Start Guide 9 Not pictured Warranty Card If any of these items are missing or damaged, please contact NetComm Wireless Support immediately. The NetComm Wireless Support website can be found at: http://support.netcommwireless.com. We recommend that you keep the original packaging materials in case repair or maintenance is necessary. This will protect the NP731 from damage during transport. www.netcommwireless.com Ver 1.0 NP731 User Guide 5 System concept The NP731 has four modes of operation: Repeater mode (default) – the NP731 repeats the wireless signal of your existing network to provide coverage to a greater area of your premises. Note: The NP731 can only rebroadcast the wireless network using the same band, i.e if the router is broadcasting on 2.4GHz, the NP731 can only repeat the signal on 2.4GHz. Additionally, if the router broadcasts on both 2.4GHz and 5GHz simultaneously, the repeater may only repeat one of those bands. Access Point mode – the NP731 connects to an existing router via Ethernet and provides a wireless signal for wireless devices. This is useful in situations where there is no existing wireless access point or where you wish to provide a wireless signal to a remote area (up to 100 metres) from where the router is located. Note: The NP731 provides wireless connectivity on the 2.4GHz or 5GHz band but not on both bands simultaneously. CPE mode – the NP731 connects wirelessly to a remote network and provides access to that network to clients connected via Ethernet. Use of a switch is required for multiple clients. WDS mode – the NP731 connects to up to 16 other NP731 units to create a wireless mesh network. This is similar to repeater mode but in WDS mode, the NP731 uses a single MAC address to provide seamless roaming. NP731 User Guide 6 www.netcommwireless.com Ver 1.0 Hardware overview Bottom Panel 1 # 2 NAME 3 DESCRIPTION 1 Ventilation Valve Due to fluctuations in temperature and humidity, water vapour inside the unit may condense. This valve provides ventilation to prevent moisture from building up inside the unit. 2 Ground connector Used to attach the ground wire. 3 PoE connector Used to connect the NP731 to either the PoE injector or to a router providing Power over Ethernet (PoE). www.netcommwireless.com Ver 1.0 NP731 User Guide 7 Top Panel 1 # 1 NAME N-type connectors NP731 User Guide 8 1 DESCRIPTION Connect antennas here. Use both antennas in conjunction for 802.11n MIMO optimized performance. www.netcommwireless.com Ver 1.0 Hardware Installation The following diagram illustrates the basic network topology that should be used for testing and configuration: Connect the two Dual band antennas to the primary and secondary N-type antenna connectors on the NP731 Unscrew the weather seal from the PoE port and disassemble it so that it is in three parts. Place the Ethernet cable through the bottom piece (A) first, as shown below. www.netcommwireless.com Ver 1.0 NP731 User Guide 9 Open the middle piece (B) and slide the Ethernet cable into it. Take care to orient the middle piece as shown below. Place the third piece (C) over the top with the same orientation as shown below. Connect the weather sealed end of the Ethernet cable to the Ethernet port of the NP731. Screw part A onto the Ethernet port of the NP731. Connect the other end of the Ethernet cable to the P+D/OUT port of the PoE injector. Connect one end of another Ethernet cable to the DATA/IN port of the PoE injector and the other end of the cable to a computer. Connect the power cord to the PoE injector and power it on. Alternative configuration When you have completed the configuration of the NP731, you can connect it to a PoE switch to provide power and data connectivity. The following diagram illustrates the alternative network topology. NP731 User Guide 10 www.netcommwireless.com Ver 1.0 Accessing the NP731’s user interface The NP731 offers a web based configuration page. After completing the hardware installation above, the NP731 can be configured through a computer using a web browser with JavaScript enabled. The NP731 has a static IP address of 192.168.1.254. To access the web management interface, you must set the IP address of your computer to be within the range of 192.168.1.2 to 192.168.1.253. Setting the IP address of your computer To set the IP address of your computer: Open the Control Panel then select Network and Sharing Center. Select the Ethernet connection for the Unidentified network. Click on the Properties button. www.netcommwireless.com Ver 1.0 NP731 User Guide 11 Select Internet Protocol Version 4 (TCP/IPv4) and then click on the Properties button. Select the Use the following IP address option, then enter an IP address between the range of 192.168.1.2 and 192.168.1.253. In the Subnet mask field, enter 255.255.255.0. Click the OK button. Close the Ethernet Properties and Ethernet Status windows. NP731 User Guide 12 www.netcommwireless.com Ver 1.0 Logging in to the NP731 To access the NP731’s user interface: Open a web browser and enter http://192.168.1.254 into the address bar. Press Enter. The login page of the NP731 is displayed. Enter admin into both the Username and Password fields, then click the Login button www.netcommwireless.com Ver 1.0 NP731 User Guide 13 Advanced configuration The device’s interface consists of 5 main menu items listed along the top of the screen; System, AP, Firewall, Utilities and Status. You can select any of these menu items to reveal additional sub-menus. System The System menu provides the configuration of network related settings. General The General tab includes configuration options for System Information to identify the access point as well as NTP server configuration. The fields marked with a red asterisk are mandatory fields and must contain some data in order for the access point to function correctly. FIELD DESCRIPTION System Information Name This is a name to identify the access point on the network and is a mandatory field. Description An optional field used to describe the access point. This is useful for identification purposes where multiple access points are being used. Location An optional field that describes the location of the access point. This is useful for identification purposes where multiple access points are being used. Time Device Time Displays the time on the device. Time Zone Used to select the time zone in which the device is located. Time Selects whether the access point should retrieve the time from a time server or use a manually specified time. NTP Server 1 A mandatory field if NTP is enabled. You must specify at least one NTP server for the access point to synchronize its time. NTP Server 2 An optional secondary time server address. NP731 User Guide 14 www.netcommwireless.com Ver 1.0 Operating Mode The Operating Mode tab allows you to select between Access Point or CPE mode. To change the mode of operation, select the desired option and then click the Save button. Click the OK button on the pop-up confirmation window to reboot the access point so that the change can take effect. When set to CPE mode, the NP731 becomes a DHCP server operating on the 192.168.20.X address range and retrieves a DHCP client address for the WAN interface. Network Interface The Network Interface tab provides you with the ability to configure network settings. www.netcommwireless.com Ver 1.0 NP731 User Guide 15 FIELD DESCRIPTION Network Settings Mode Specifies whether the access point should use a Static IP or a DHCP address. When Static is selected, you must specify an IP address, Netmask, Default Gateway and Primary DNS Server. Ethernet IGMP Snooping Enables or disables the IGMP Snooping function. When enabled, the access point forwards IGMP traffic transferred via the access point’s network interface and the IP multicast host. Registration information is recorded and sorted into multicast groups. The internal switch forwards traffic only to those ports that request multicast traffic. Adversely, without IGMP snooping, multicast traffic is treated like broadcast traffic, with packets forwarded to all ports causing network inefficiencies. Layer2 STP Enables or disables the Layer2 Spanning Tree Protocol. If the access point is set up to bridge other network components, this option can be enabled to prevent undesired loops because a broadcasting storm may occur in a multiswitch environment where broadcast packets are forwarded in an endless loop between switches. Enabling Layer2 STP can lower undesired occurrences of broadcast storms. Management Management services such as VLAN, SNMP and the System log may be configured via this page. FIELD DESCRIPTION Management Services VLAN for Management When this is enabled, management traffic from the system is tagged with a VLAN ID. To access the VLAN, traffic must be tagged with the same VLAN ID. SNMP Configuration When SNMP is enabled, an administrator can obtain system information and configure settings of the access point remotely. System Log When enabled, the access point can log system activity to a remote syslog server. Management IP List Select this option to edit the Management IP list. NP731 User Guide 16 www.netcommwireless.com Ver 1.0 SNMP Account List The System allow 5 SNMP users with Read or Read & Write access. Use the SNMP Account List page to configure access rights. Management IP List The administrator can grant access to the web management interface by specifying a list of IP addresses or ranges of IP addresses. These addresses may be LAN or WAN addresses. Use this page to configure the IP addresses that are allowed access. www.netcommwireless.com Ver 1.0 NP731 User Guide 17 CAPWAP CAPWAP is a standard interoperable protocol that enables a controller to manage a collection of wireless access points. There are 5 methods of auto AP discovery, namely DNS SRV, DHCP option, Broadcast, Multicast and Static. FIELD DESCRIPTION CAPWAP Configuration CAPWAP Enables or disables the CAPWAP function. Certificate Date Check To enable this, select the Enable option then click the Manage Certificates button to display the Upload Certificate page. See below for details. DNS SRV Discovery Enables or disables the DNS SRV Discovery method. DHCP Option Discovery Enables or disables the DHCP Option Discovery method. Broadcast Discovery Enables or disables the Broadcast Discovery method. Multicast Discovery Enables or disables the Multicast Discovery method. Static Discovery Enables or disables the Static Discovery method. AC Address The IP address of the access controller. The access point attempts to discover the controllers from the top down, so if the first address is not reachable, it will attempt to find the second controller and so on. Manage Certificates Use the Browse button to locate the appropriate certificate files on your computer, then click the Save button to save your settings. NP731 User Guide 18 www.netcommwireless.com Ver 1.0 IPv6 The access point supports both IPv4 and IPv6 address schemes. IPv6 is disabled by default but can be enabled on this screen. When it is enabled, you can choose whether the access point should have a static IP address or be assigned a DHCP address. www.netcommwireless.com Ver 1.0 NP731 User Guide 19 AP The AP section provides configuration options for the access point function. The NP731 supports up to sixteen Virtual Access Points (VAPs). Each VAP can have its own settings (e.g. ESSID, VLAN ID, security settings, etc). VAP Overview This page displays a summary of the virtual access points and their statuses. To use more than one virtual access point, the NP731 must have repeater mode disabled. See the Repeater section for more information. NP731 User Guide 20 www.netcommwireless.com Ver 1.0 General Here you can configure the general AP wireless settings. FIELD DESCRIPTION General Settings Band Select the desired wireless band. Available options are Disabled, 2.4GHz or 5GHz. Protocol Select the appropriate wireless protocol: 802.11a, 802.11b, 802.11g, 802.11b+802.11g, 802.11g+802.11n, 802.11a+802.11n, 802.11ac or select Disable if the wireless function is not required. Select the Pure 11n option to enable 802.11n only. Short Preamble The short preamble with a 56-bit synchronization field can improve WLAN transmission efficiency. Select Enable to use Short Preamble or Disable to use Long Preamble. Short Guard Interval The guard interval is the space between symbols (characters) being transmitted to eliminate inter-symbol interference. In order to further boost throughput with 802.11n, the short guard interval is half of what it used to be. Channel Width A wider channel width increases the bandwidth available. This option only appears when a protocol using 802.11n is selected. Channel Width Extension This option restricts the channel selection when 40MHz channel width is selected. Channel Use the drop down list to select a channel for the WiFi network. The default channel is 6. For North America, you may select channels 1 to 11 while channels 1 to 13 are available for Europe. Max Transmit Rate This is the maximum wireless transmission rate. When set to Auto, the access point will use the highest possible rate. Transmit Power The signal strength transmitted by the access point. Each level signifies are decrement of 1dBm from the highest power. Level 1 is the highest transmission power, level 2 is the highest power minus 1dBm and so on. ACK Timeout Indicates a period of time when the system waits for an acknowledgment frame sent back from a station without retransmission. www.netcommwireless.com Ver 1.0 NP731 User Guide 21 Beacon Interval Indicates how often the beacon signal is sent from the access point. Airtime Fairness When multiple protocols are enabled, e.g. 802.11b + 802.11g, they can occupy airtime and affect throughput for 802.11n devices. When this option is enabled, the access point ensures all devices with different band compatibilities have the same air time. When set to Preferred Airtime, priority is given to devices using the 802.11n protocol. Packet Delay Threshold When the access point is busy transmitting to a client which is busy or out of range, it is delayed from transmitting to other clients. When this option is enabled, this transmission queue flushing mechanism drops packets and immediately begins to process others if the queue has been processed for more than x milliseconds. Idle Timeout The time after which a client disconnects when inactivity reaches the configured amount of time in seconds. Interference Detection When utilization, latency (and invalid packet rate) of the current channel or adjacent channel reaches the configured threshold (in %), the AP switches to a different channel. WME Configuration Access priority can be configured using different parameters. Transmission Rate Threshold When the transmission rate drops below the configured threshold, the client is dropped. This ensures high throughput for all clients. VAP Configuration This section provides configuration of each virtual access point with settings such as Profile Name, ESSID and VLAN ID. FIELD DESCRIPTION VAP Configuration VAP Enables or disables the selected VAP. Profile Name The profile name of the virtual access point for identification and management purposes. ESSID The Extended Service Set ID serves as an identifier for clients to associate with the specific VAP. VLAN ID The NP731 supports tagged VLANs (virtual LANs). To enable the VLAN function, each VAP should be given a unique VLAN ID between the range of 1 and 4094. CAPWAP Tunnel Interface Select this option to designate traffic for the VAP to pass through the CAPWAP tunnel established between the AP and the controller. NP731 User Guide 22 www.netcommwireless.com Ver 1.0 Security Each VAP profile can be configured with independent wireless authentication and data encryption methods. A description of each of the security types is listed below. Open When security type is set to Open, the access point provides no encryption or authentication for clients connecting to the VAP. WEP Wired Equivalent Privacy (WEP) is a data encryption mechanism based on a 64-bit, 128-bit or 152-bit shared key algorithm. www.netcommwireless.com Ver 1.0 NP731 User Guide 23 FIELD DESCRIPTION Security Settings 802.11 Authentication Select from Open System, Shared Key or Auto. WEP Key Length Select from 64-bit, 128-bit, 152-bit key length. WEP Key Format Select from ASCII or Hex format for the WEP key. WEP Key Index Select a key index from 1~4. The WEP key index is a number that specifies which WEP key will be used for the encryption of wireless frames during data transmission. WEP Keys Provide the pre-defined WEP key value; the system supports up to 4 sets of WEP keys. 802.1X When 802.1X authentication is selected, RADIUS authentication and Dynamic WEP are provided. FIELD DESCRIPTION Dynamic WEP Dynamic WEP For 802.1X security type, Dynamic WEP is always enabled to automatically generate WEP keys for encryption. WEP Key Length Select a key length from 64-bit or 128-bit. Re-keying Period The time interval (in seconds) for the dynamic WEP key to be updated. RADIUS Server Settings (Primary/Secondary) Host Enter the IP address or domain name of the RADIUS server. Authentication Port The port used by the RADIUS server. Secret Key The secret key for the system to communicate with the RADIUS server. Accounting Service Enabling this option allows accounting of login and logouts through the RADIUS server. Accounting Port The port number used by the RADIUS server for accounting purposes. Accounting Interim Update Interval The system updates accounting information to the RADIUS server every specified interval. NP731 User Guide 24 www.netcommwireless.com Ver 1.0 WPA-Personal WPA-Personal is a pre-shared key authentication method. FIELD DESCRIPTION Security Settings Cipher Suite The cipher suite is the encryption method used. Roaming Target AP List When 802.11r is enabled, click the Configure button to display 802.11r Roaming Settings. Pre-shared Key Type You can select a PSK (Hex) or a passphrase as the key format. Pre-shared Key Enter the key value as the pre-shared key. The format and number of characters is dependent on the Preshared Key Type Group Key Update Period The time interval (in seconds) for the group key to be renewed. www.netcommwireless.com Ver 1.0 NP731 User Guide 25 WPA-Enterprise When selected, this option provides RADIUS authentication and data encryption. FIELD DESCRIPTION Security Settings Cipher Suite The cipher suite is the encryption method used. Group Key Update Period The time interval (in seconds) for the group key to be renewed. RADIUS Server Settings (Primary/Secondary) Host Enter the IP address or domain name of the RADIUS server. Authentication Port The port used by the RADIUS server. Secret Key The secret key for the system to communicate with the RADIUS server. Accounting Service Enabling this option allows accounting of login and logouts through the RADIUS server. Accounting Port The port number used by the RADIUS server for accounting purposes. Accounting Interim Update Interval The system updates accounting information to the RADIUS server every specified interval. NP731 User Guide 26 www.netcommwireless.com Ver 1.0 Repeater Settings The NP731 access point is capable of using WDS or Universal Repeater mode to extend wireless network coverage. If WDS is enabled, the AP can support up to 8 WDS links to its peer APs per radio. WDS FIELD DESCRIPTION Repeater Settings WDS Enables or Disables the WDS function. WDS Link Address The MAC address for the WDS interface. Remote AP MAC Address Enter the remote peer’s MAC address. Security Type May be set to None, WEP or WPA-PSK. When this is set to None, there is no security on the WDS link. CAPWAP Tunnel Interface When selected, this designates WDS traffic to pass through the CAPWAP tunnel established between the AP and the controller. www.netcommwireless.com Ver 1.0 NP731 User Guide 27 Universal Repeater FIELD DESCRIPTION Repeater Settings The SSID of Upper-Bound AP Enter the SSID of the upper-bound AP for the uplink connection. Security Type You can configure a security type for this connection but it must be the same as the upper-bound AP. Advanced (AP mode) The Advanced Wireless Settings page provides configuration options for data transmission settings. These parameters can be fine tuned to improve communication performance if a poor connection occurs. NP731 User Guide 28 www.netcommwireless.com Ver 1.0 FIELD DESCRIPTION Advanced Wireless Settings RTS Threshold Request To Send (RTS) Threshold determines the packet size at which the system issues a request to send before sending the fragment to prevent the hidden node problem. The RTS mechanism is activated if the packet exceeds the value provided. A lower RTS Threshold setting can be useful in areas where many client devices are associating with the AP or in areas where the clients are far apart and can detect on the AP but not each other. DTIM Period Input the DTIM Interval that is generated within the periodic beacon at a specified frequency. A higher DTIM allows the wireless client to save energy but lowers throughput. Consecutive Dropped Packets This is the maximum number of transmission retries the AP will attempt when packet transmission is dropped before deciding the client is out of transmission reach. When transmission retries fail for the configured number of times, the access point drops the clients to optimize performance for other connected clients. Broadcast SSID When enabled, the access point’s wireless network is visible to clients during a network scan. If disabled, the wireless client must know the SSID of the access point in order to connect to it. Wireless Station Isolation When enabled, clients may not communicate with one another and may only communicate with the access point. IAPP Inter Access Point Protocol (IAPP) is a protocol by which access points share information about the stations connected to them. When enabled, the system automatically broadcasts information about associated wireless stations to its peer access points. Multicast-to-Unicast Conversion When enabled, the access point intelligently forwards traffic only to those ports that request multicast traffic. Multicast/Broadcast Rate Allows the configuration of multicast/broadcast packet bandwidth. Management Frame Rate This feature controls the bandwidth for Management Frames. Higher rates result in shorter transmission range. Receiving RSSI Threshold To ensure quality connection speeds, a wireless client will not be allowed to connect unless it meets the configured minimum RSSI threshold. Advanced (CPE Mode) In CPE mode, the Advanced tab allows for configuration of advanced wireless settings such as RTS Threshold, Roaming and the ability to specify particular channels to use. www.netcommwireless.com Ver 1.0 NP731 User Guide 29 FIELD DESCRIPTION Advanced Wireless Settings RTS Threshold Request To Send (RTS) Threshold determines the packet size at which the system issues a request to send before sending the fragment to prevent the hidden node problem. The RTS mechanism is activated if the packet exceeds the value provided. A lower RTS Threshold setting can be useful in areas where many client devices are associating with the AP or in areas where the clients are far apart and can detect on the AP but not each other. Roaming When enabled, you are able to select the interval at which the NP731 performs a background scan for the RSSI. You may also configure the RSSI threshold that determines when the NP731 switches between access points. Choose Scan and Connect Channels When enabled, you are able to select the bands and channels that the NP731 will scan for. Access Control This page allows the administrator to configure a maximum number of clients and to specify an access control method. FIELD DESCRIPTION Access Control Settings Maximum Number of Clients Specifies the maximum number of clients that may connect to the access point. Access Control Type Allows you to specify an access control type. Available options are Disabled, MAC ACL Allow List, MAC ACL Deny List and RADIUS ACL. NP731 User Guide 30 www.netcommwireless.com Ver 1.0 MAC ACL Allow List When selecting MAC ACL Allow List, only the client devices identified by their MAC addresses listed in the Allow List are granted access to the system. The administrator can temporarily block any allowed MAC address by checking Disable. www.netcommwireless.com Ver 1.0 NP731 User Guide 31 MAC ACL Deny List When selecting MAC ACL Allow List, all clients except those listed in the Deny List are granted access to the system. The administrator can temporarily allow any denied MAC address by checking Disable. NP731 User Guide 32 www.netcommwireless.com Ver 1.0 RADIUS ACL Authenticate incoming MAC addresses by an external RADIUS server. Use these settings to specify the address, port and secret key to the RADIUS server. Site Survey The access point can scan for available wireless networks within its range. The administrator can then select a network to connect to. This option is only available when the AP is in CPE mode or when one of the repeater modes is enabled. Select the desired channels to scan and then press the Scan! Button. Click the Setup button next to the desired network then enter the required authentication details in the section that appears below. www.netcommwireless.com Ver 1.0 NP731 User Guide 33 Hotspot 2.0 The NP731 may be used as a hotspot providing WiFi access to the public NP731 User Guide 34 www.netcommwireless.com Ver 1.0 FIELD DESCRIPTION Hotspot 2.0 Status Enable of disable the hotspot function. Internet Access When enabled, the wireless clients are allowed access to the internet. Private: Home and Enterprise Networks Private and Guest Access: Enterprises offering guest connectivity Chargeable Public Network: Available to all but requires a fee. Access Network Type Free Public Network: Available to all without fees. Personal Device Network: For peripherals in an ad-hoc mode. Emergency Services Test/Experimental/Wild Card Venue Information The Group/Type of the venue is selected here. This identifies the general class of the venue and the specific type of venue within each group. Venue Name List The name of the venue for the network which may be useful to end users for network selection. The additional steps to acquire access for an unsecure network Network Authentication Type Acceptance of terms and conditions Online enrolment supported HTTP/HTTPS redirection DNS redirection Roaming Consortium Organizational Identifier A roaming consortium is a group of service providers with which a user’s credentials can be used for authentication. Roaming consortiums are identified by an organization identifier (OI) that is assigned by the IEEE – similar to the first half of a MAC address. An OI is often 24-bits in length but can also be 36-bits. IP Address Type IPv4 or IPv6. NAI Realm List An NAI Realm identifies the proper authentication server or domain for the user’s authentication exchange. By discovering which authentication realms are supported by a network, a mobile device can selectively authenticate to its preferred networks. Domain Name List Lists one or more domain names for the entity operating the AP. This is critical for Hotspot 2.0 network selection policy as it identifies the operator of the network. It indicates to the mobile device whether it is at home or connected to a visitor hotspot. Cellular Network Information List (PLMN) Identifies 3GPP cellular networks available through the AP. Specifically, this field identifies the Public Land Mobile Network (PLMN) ID, comprised of the Mobile Country Code (MCC) and Mobile Network Code (MNC) of the mobile operator. www.netcommwireless.com Ver 1.0 NP731 User Guide 35 Firewall Firewall List The NP731 features a layer 2 firewall which provides an extra level of security on possible threats coming from or going to WLAN interfaces. The firewall list may contain up to 20 rules. The table below describes the fields of the firewall list. FIELD DESCRIPTION Layer 2 Firewall Settings No. The number determines the priority of the rule in the firewall list. State When a rule is checked, it is enabled. Rules which are not checked are disabled. Action DROP indicates a block rule while ACCEPT indicates a pass rule. Name The name of the rule. EtherType Indicates the type of traffic subjected to this rule. Remark Displays any notes configured for the rule. There are 4 actions available. Setting NP731 User Guide 36 Del: Click to delete the rule Ed: Click to edit the rule. In: Click to insert a rule Mv: Click to move the rule. www.netcommwireless.com Ver 1.0 Deleting a specific rule Select the Del option next to the rule you wish to delete, then click the Save button. Editing a specific rule Select the Ed option next to the rule you wish to edit. Adjust the settings you desired then click the Save button when you have finished. www.netcommwireless.com Ver 1.0 NP731 User Guide 37 FIELD DESCRIPTION Layer 2 Firewall Configuration Rule ID The rule ID determines the priority that the rule has among other firewall rules. Rule Name A name given to the rule for easy identification. EtherType Provides available types of traffic subjected to this rule. Interface Indicates the virtual access point and the direction of this rule. DSAP/SSAP This is only displayed when EtherType is IEEE 802.3. The value can be further specified for fields in the 802.2 LLC frame header. Type This is only displayed when EtherType is IEEE802.3. This field is used to indicate the type of encapsulated traffic. VLAN ID This is only displayed when EtherType is 802.1Q. The VLAN ID is provided to associate with certain VLANtagging traffic. Priority This is only displayed when EtherType is 802.1Q. Indicates the priority level with associated VLAN traffic. Encapsulated Type This is only displayed when EtherType is 802.1Q. Used to indicate the type of encapsulated traffic. Opcode This is only displayed when EtherType is ARP/RARP. This list can be used to specify the ARP Opcode in the ARP header. Source MAC address/mask indicates the source MAC; IP address/mask indicates the source IP address when EtherType is IPv4; ARP IP/MAC and Mask indicate the ARP payload fields. Destination MAC address/mask indicates the destination MAC; IP address/mask indicates the destination IP address when EtherType is IPv4; ARP IP/MAC and Mask indicate the ARP payload fields. Action Valid actions are block or pass. Remark Use this field to specify any notes particular to this rule. Inserting a rule Select the In option to create a new rule in the selected slot. Moving a rule Select the Mv next to the desired rule to move it up or down the list to alter its priority. The Move Rule screen is displayed and you are able to move the rule before or after a specified rule number. Click the Save button when you have finished. NP731 User Guide 38 www.netcommwireless.com Ver 1.0 IP/Port Forwarding (CPE mode only) FIELD DESCRIPTION IP/Port Forwarding Service Name The administrator can provide an easy to remember alias for the specific forwarding rule. External Port Range The range of external ports for forwarding traffic can be defined manually by the administrator. Internal IP Address Enter the LAN IP address to receive the forwarding traffic. Protocol Forwarding traffic protocol can be selected from the drop-down list to be TCP/UDP, TCP or UDP. Add Click to activate the new rule. IP/Port Forwarding Displays the details of the current services available. Click Delete to remove the specified service. Click Edit to configure the current setting. DMZ (CPE mode only) The DMZ (Demilitarized Zone) allows one local computer or server (used as a DMZ Host) to be exposed to the Internet for special purpose Internet services such as functioning as a web server. External users can access the DMZ host without authentication. www.netcommwireless.com Ver 1.0 NP731 User Guide 39 FIELD DESCRIPTION Demilitarized Zone State Select Enable to activate this function or Disable to de-activate it. Internal IP Address Fill in the internal IP address to allow the system to forward traffic other than those listed in the specific IP/Port Forwarding list. Service The administrator can add or delete firewall services here. The services in this list become options that are selectable in the firewall rules (when EtherType is set to IPv4). The access point provides a list of rules to block or pass traffic of layer-3 or above. These services are available to choose from a drop-down list of layer2 firewall rules on the Edit page. The first 28 entries are default settings and may not be deleted but may be disabled. Click the Save button to save your changes when you have finished. NP731 User Guide 40 www.netcommwireless.com Ver 1.0 Advanced This page provides additional settings for firewall rules. FIELD DESCRIPTION Advanced Firewall Settings Trust Interface Each VAP interface can be checked individually to mark as trusted interfaces. Security enforcements on DHCP/ARP like DHCP snooping and ARP inspection are carried out on non-trusted interfaces. DHCP Snooping When enabled, DHCP packets are validated against possible threats like DHCP starvation attack. Additionally, the trusted DHCP server (IP/MAC) can be specified to prevent rogue DHCP servers. When enabled, ARP packets are validated against ARP spoofing. Proxy ARP: when enabled, AP replies to ARP requests on behalf of the downlink stations. The ARP table maintained by the access point is used as a look up table upon receipt of an ARP request from the AP uplink. Adversely, without Proxy ARP, ARP requests are broadcast down in the AP’s wireless network causing inefficiencies. Force DHCP: when enabled, the AP only learns MAC/IP pair information through DHCP packets. Since devices configured with static IP addresses do not send DHCP traffic, any clients with static IP addresses will be blocked from internet access unless its MAC/IP pair is listed and enabled in the Static Trust List. Trust List Broadcast: when enabled, this let’s other Aps (with L2 firewall feature) to learn the trusted MAC/IP pairs to issue ARP requests. Static Trust List: used to add MAC or MAC/IP pairs of devices that are trusted to issue ARP requests. Other network nodes can still send their ARP requests, however, if their IP appears on the static list (with a different MAC), their ARP requests will be dropped to prevent eavesdropping. ARP Inspection VAP Isolation (within RF) www.netcommwireless.com Ver 1.0 Clients on different VAPs on the same RF card are isolated. NP731 User Guide 41 Utilities The Utilities pages provide administrators with various means of maintaining the system. Change Password Using this page, you may change the administrator account password or the user account password. A maximum of 32 alphanumeric characters are allowed in a password. When you have finished making changes, click the Save button to have them take effect. The user account is not able to modify many settings and is generally used for users to monitor the status of the access point. Backup & Restore This function is used to back up and restore the configuration of the access point. To back up the NP731 settings, click the Backup button then choose a location to save the configuration file. To restore the configuration file to the access point, click the Browse button and locate the file, then click the Restore button. NP731 User Guide 42 www.netcommwireless.com Ver 1.0 System Upgrade This page allows the system administrator to upgrade the firmware of the access point. There are two methods by which the access point may be upgraded; via the web user interface or via TFTP server. Reboot This page is used to reboot the access point. The access point may require a reboot when configuration changes are made. www.netcommwireless.com Ver 1.0 NP731 User Guide 43 Upload Certificate This page allows administrators to upload security certificates for use with CAPWAP. Channel Analysis This tool is for use by administrators to chart the channel dynamics. It presents a spectrogram, density graph and other charts to detect interference from other Bluetooth, microwave and cordless devices. NP731 User Guide 44 www.netcommwireless.com Ver 1.0 Background Scan The background scan function can be used in conjunction with the channel analysis tool for diagnostics. Press the Scan Now button to trigger the AP to scan for wireless networks in range. This is done in the background and does not affect normal operation. www.netcommwireless.com Ver 1.0 NP731 User Guide 45 Status The Status pages provide information about the current status of the access point’s many functions. Overview Upon logging in to the access point, you are presented at the Overview tab of the Status page. This page gives an overview of the settings and status of the access point NP731 User Guide 46 www.netcommwireless.com Ver 1.0 FIELD DESCRIPTION System Overview System Name The system name given to the access point. Firmware Version The current firmware version in use on the AP. Build Number The build number of the firmware in use on the AP. Location The location of the AP. Site The site code of the AP. Device Time The current system time on the AP. System Up Time The amount of time that the AP has been in operation. CPU/RAM Usage Displays the CPU/RAM utilization. MAC Address The MAC address of the LAN interface. IP Address The IP address of the LAN interface. Subnet Mask The Subnet Mask of the LAN interface. Gateway The Gateway of the LAN interface. MAC Address The MAC address of the wireless radio. Band The radio band in use. Channel The channel in use. Tx Power The transmission power of the wireless radio. Profile Name The profile name of the access point. BSSID Basic Service Set ID ESSID Extended Service Set ID Security Type Security type of the virtual access point. Online Clients The number of online clients. Tunnel The status of the used tunnel. IPv6 Status Enabled/Disabled. CAPWAP Status Enable/Disabled. System LAN Interface Radio Status AP Status www.netcommwireless.com Ver 1.0 NP731 User Guide 47 Interfaces This page displays the traffic information per interface. Click the Plot button to display the traffic information in a graph format. Associated Clients The administrator can remotely oversee the status of all associated clients on this page. When a low signal-to-noise ratio is found here, the administrator can tune the corresponding parameters or investigate the settings of associated clients to improve network performance. NP731 User Guide 48 www.netcommwireless.com Ver 1.0 FIELD DESCRIPTION Associated Client Status Associated VAP The name of the virtual AP that the client is associated with. ESSID The Extended Service Set ID which the client is associated with. MAC Address The MAC address of associated clients. RSSI The Received Signal Sensitivity Index of the respective client’s association. Packet Error Ratio Indication of the associated client’s service quality to see if packets are not received. Idle Time Time period, in seconds, that he associated client is inactive for. Up Time Time period, in seconds, that the client is associated for. Real Time A real time plot of each associated client’s traffic information including packets in/out, traffic in/out in Kb, RSSI, Uplink/Downlink rates etc. Link Status This page displays the status of the wireless link between the NP731 and the upper-bound access point. www.netcommwireless.com Ver 1.0 NP731 User Guide 49 Event Log The event log provides a record of system activities. The administrator can monitor the system status by checking this log. NP731 User Guide 50 www.netcommwireless.com Ver 1.0 Monitor This page gives a summary of the CPU utilization, memory usage, associated station numbers, TX rate distribution, airtime utilization and short retries. www.netcommwireless.com Ver 1.0 NP731 User Guide 51