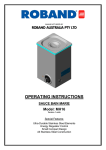
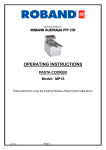
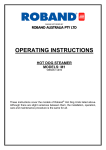
1
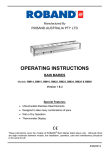
MANUFACTURED BY
ROBAND AUSTRALIA PTY LTD
OPERATING INSTRUCTIONS
LAMP ASSEMBLIES
MODELS: HF900, HF1500
Version 1 Units
Special Features:
On/Off Isolating Switch
Stylised Design
Prismatic Diffuser included
®
These instructions cover the models of Roband Lamp Assemblies listed
above. Although there are slight variances between models, the installation,
operation, care and maintenance procedure is the same for all.
Roband Australia is a wholly Australian owned company, which has
been manufacturing quality commercial catering equipment for the
food service industry for more than 45 years. Roband products are
engineered and manufactured to the highest standards to provide
functionality, reliability and durability, and our quality products are
exported world-wide.
Included in the comprehensive Roband® range are Toasters, Fryers,
Milkshake Mixers, Rotisseries, Food Display Cabinets and much
more.
Roband Australia also acts as the Australian agents for Vitamix®
Blenders, NOAW® Meat Slicers, RYNO Stainless Benching, RobalecTM
Soup/Rice warmers and Dito Food Processors.
In addition to a vast range of machines, Roband Australia has its own
line of commercial cookware and accessories under the Robinox®
brand name.
For a complete set of brochures please contact your nearest
authorised dealer or contact Roband directly at our head office.
Roband Australia Pty Ltd
11 Inman Road
CROMER
NSW 2099
Australia
Telephone: 61 – 2 – 9971 1788
Facsimile: 61 – 2 – 9971 1336
E-mail: [email protected]
Website: www.roband.com.au
© Copyright 2000 – Roband Australia Pty Ltd
All rights reserved. No part of this work may be reproduced or copied in any form or by any means,
electronic or mechanical, including photocopying or posting to a website, without the written permission of
the publisher. The material contained within this document is intended entirely for instructional purposes.
Page 2
CONTENTS
INTRODUCTION................................................................4
GENERAL PRECAUTIONS ..............................................4
PACKAGING .....................................................................5
COMPLIANCE ...................................................................5
INSTALLATION.................................................................6
OPERATION......................................................................9
GENERAL SAFETY ........................................................10
CLEANING, CARE & MAINTENANCE...........................11
Fluorescent Replacement:.............................................12
SPECIFICATIONS ...........................................................14
CIRCUIT DIAGRAM* .......................................................15
Models: HF Series .............................................................15
EXPLODED DIAGRAM (HF900).....................................16
NOTES.............................................................................17
Warranty..........................................................................19
Page 3
INTRODUCTION
Congratulations on your purchase of this quality Roband® product. With
proper care and management your new purchase will give you years of
trouble free service.
By reading these instructions carefully you can ensure that this equipment
is used and maintained properly, helping your new investment to perform
well for you now, and to continue performing in the many years to come.
GENERAL PRECAUTIONS
This equipment must only be operated by qualified person(s) who are fully
versed in the operating and safety instructions described in this manual.
Servicepersons should be instructed to familiarise themselves with any and
all safety instructions described in this manual prior to commencement of any
maintenance or service.
In the case of new personnel, training is to be provided in advance. This
equipment should not be operated by persons (including children) with
reduced physical, sensory or mental capabilities, or lack of experience or
knowledge, unless they have been given supervision or instruction
concerning the safe use of the appliance by a person responsible for their
safety.
This equipment is for lighting, and as with any commercial lighting unit the
surfaces on these Lamp assemblies may get hot. Always be careful when
near an operating Lamp, and ensure that any risk to unwary customers or
staff is minimised with additional signage if necessary. Due to the obvious
heat hazard Roband recommends that these units be kept out of reach of
children.
The performance of this unit cannot be guaranteed for operational use
outside its design parameters. These Lamp assemblies are designed to
provide illumination only.
The machine should be disconnected from all power and allowed to cool
before cleaning.
Roband will accept no liability if;
♦ Non-authorised personnel have tampered with the machine.
♦ The instructions in this manual have not been followed correctly.
♦ Non-original spare parts are used.
♦ The machine is not cleaned correctly, with the right product.
♦ There is any damage to the unit.
Page 4
PACKAGING
All care is taken when packing and Roband ensures that every unit is
functional and undamaged at the time of packaging.
The Package of this Lamp Assembly should include:
1)
One Lamp Assembly (appropriate model)
2)
This Manual
3)
Packaging Materials
Any damage to the machine as a result of freight must be reported to the
Freight Company and to the agent responsible for the despatch of said unit
within three (3) days of receipt. No claims will be accepted or entertained
after this period.
COMPLIANCE
Roband® products have been designed and manufactured to comply with
any and all specifications set out by the Australian Communications
Authority (ACA) in regards to Electromagnetic Compatibility. As testament
to such compliance these units bear the C-Tick symbol.
For further information contact the Australian Communications Authority, PO
Box 13112, Law Courts, Melbourne VIC 8010.
Page 5
INSTALLATION
Remove all the packaging materials and tape, as well as any protective
plastic from the machine. Clean off any glue residue left over from the
protective plastic or tape. In general we recommend that the lamps be
mounted so as to be roughly 320-650mm above the level of the product to be
illuminated/displayed. In general terms, the higher the Lamp assembly is
mounted, the greater the area illuminated - but the intensity of illumination will
decrease.
For model HF900, HF1500
These units are designed to be mounted above food serving and
preparation areas providing LIGHT.
We recommend mounting heights between 320mm and 650mm above the
surfaces / products. Note the lower the mounting height the smaller the
light coverage area will be. The higher the mounting height, the larger the
light coverage area.
To mount, use the mounting brackets provided. Connect to a standard
single-phase 10-amp outlet with the cord provided and operate the switch
located on the end of the unit. Caution make certain that any excess cord
length is kept away from the Lamp body.
Warning
These units must not be installed near flammable materials.
Page 6
Mounting procedure
STEP 1, hold the Lamp in the position where it is to
be mounted and mark the position of the mounting
plates as shown.
STEP 2, remove the mounting plates from the
Lamp and position within the markings previously
made and mark the drilling position for the holes
through the slots in the plate as shown.
STEP 3, Drill holes on of the correct size for the
mounting screws / bolts being used.
STEP 4, screw / bolt the mounting plates to the
mounting face as shown.
Page 7
STEP 5, fit the Lamp hanging brackets into the
mounting plates both ends at once as shown.
STEP 6, slide the Lamp into the mounting plates
and lift it up at the same time then pull the Lamp
back so that it rests on the hanging brackets as
shown.
STEP 7, refit the screw locking the mounting plates
to the Lamp hanging brackets making sure that
they are firmly tightened.
Page 8
OPERATION
After the lamps have been installed, the unit is operable through the on/off
switch located on the end of the unit.
As these Lamps are intended for use by equipment manufacturers, and
their application and installation are beyond our control, they are only
covered by a limited warranty against faulty workmanship and materials for
a period of 12 months from date of purchase. All goods that are claimed
under this warranty must be returned to the factory, freight prepaid, for
inspection. Any part deemed to be defective will be replaced, however, no
claims will be entertained for parts damaged in transport, misused or
modified in any way without our approval.
Page 9
a SAFETY a
GENERAL SAFETY
Electricity is dangerous, and should only be handled by
qualified professionals. It’s your life – Don’t risk it.
This machine contains no user-serviceable parts. Roband Australia, one of
our agents, or a similarly qualified person(s) should carry out any and all
repairs. Any repair person(s) should be instructed to read the Safety
warnings within this manual before commencing work on these units.
Cutting processes such as those used in the construction of this equipment
result in sharp edges. Whilst any such edges are removed to the best of
our ability it is always wise to take care when contacting any edge.
Particular care should be taken to avoid contact with any steel edge, and
warnings should be given in regards to the danger of such contact to any
repair or maintenance person(s) prior to commencement of any servicing.
Do not remove any cover panels that may be on the machine.
National Standards exist outlining the positioning, spacing and ventilation
requirements when installing new appliances. These Standards should be
consulted and new equipment should be installed accordingly. In any
situation where specifications allow a distance of less than 100mm we
would still recommend that a well-ventilated air gap of not less than 100mm
be maintained on all sides and that any materials closer than 100mm be
non-flammable. If the machine is near particularly heat-sensitive materials
common sense should be employed in determining sufficient distancing.
Ensure that any damaged cables are replaced before further use.
Keep this unit out of reach of children.
This unit can get hot. Ensure everyone is aware that the equipment is
operating and take care to avoid contact with hot surfaces.
Always ensure the power cable is not in contact with hot parts of the
machine when in use.
Page 10
CLEANING, CARE & MAINTENANCE
Attention to regular care and maintenance will ensure long and trouble free
operation of your Lamp assembly. Although scheduled servicing is not
required we do recommend you adopt a program of regular maintenance to
ensure that the Lamp assemblies are clean and functional and to avoid
inadvertently damaging the unit.
Daily cleaning should be considered mandatory for all cooking equipment.
In order to ensure the proper cleaning and to avoid damage to the Lamp
assemblies the instructions below should be followed.
♦ Ensure the power is off and the Lamp is cool before attempting to clean
any part of the machine.
♦ Wipe the lamp cover down with warm soapy water using a damp sponge
or cloth. Do not immerse the Lamps in water.
♦ Do not let any moisture enter inside the Lamp or near the Fluorescent
lamp.
♦ Always ensure the power cable is not in contact with hot parts of the Lamp
assemblies when in use.
♦ Do not clean this unit with the use of a water jet.
Although every care is taken during manufacture to remove all sharp edges,
care should be taken when cleaning and handling the Lamp assemblies to
avoid injury.
Page 11
Fluorescent Replacement:
Fluorescent replacement is an easy operation that can be carried out by a
suitably capable person. Ballast/starter and other component replacement
should only be carried out by a qualified person such as an electrician.
Fluorescent Lamp Replacement
1.
Remove the Diffuser cover (the white plastic cover beneath the
lamp). This can be done by pushing the cover up and maneuvering
and twisting it sideways.
2.
Hold the lamp at each end and rotate it in the sockets until it comes
free.
3.
Install the new lamp by pushing the lamp up into the sockets and
rotating the lamp until it locks in.
4.
Replace the diffuser.
Qualified Persons instructions: - Ballast and other part replacement
1. Turn the unit off and unplug the machine.
2. Remove the 4 screws on the underside of the assembly
3. Squeeze the lower sides of the Lamp together and pull one side down
to allow it to snap away.
4. Replace or repair parts as required.
5. Snap the cover back in place and refit the four screws.
6. Tag and Test before returning to service.
Page 12
TROUBLESHOOTING
If the Lamp Assembly does not function check the following points before
calling for service.
The device is plugged in correctly and the power at the wall switched on.
The on/off Switch is switched to the on position.
The power point is not faulty.
The fluorescent has not failed.
Page 13
SPECIFICATIONS
Nominal Dimensions
Model
HF900
HF1500
Power
Source
Lamp
Rating
220-240V
AC
220-240V
AC
18
Watts
36
Watts
Power
Rating
Length mm
91-180W
900
108
65
118-141W
1500
108
65
Depth - mm Height - mm
Constant Research & Development may necessitate machine changes at
any time.
Page 14
CIRCUIT DIAGRAM*
Models: HF Series
*This circuit diagram has been provided for reference and to assist qualified service and
repair agents only. Under no circumstances should person’s not suitably qualified
attempt repairs to any electrical equipment.
Page 15
EXPLODED DIAGRAM (HF900)
Page 16
NOTES
Record any preferred times or settings etc. here to act as a quick reference for other users.
Page 17
NOTES
Record any preferred times or settings etc. here to act as a quick reference for other users.
Page 18
Warranty
Every care is taken to ensure that no defective equipment leaves our factory and all
goods manufactured by us are guaranteed against faulty workmanship and materials for
a period of 12 months from the date of purchase. Glass and lamps are not included in
this warranty. Generally, all goods claimed under this warranty must be returned to the
factory or an authorised service agent, freight prepaid, for inspection. Any part deemed
to be defective will be replaced, however, no claims will be entertained for parts
damaged in transport, misused or modified in any way without our approval. For
machines that are not considered to be portable (e.g. food bars, rotisseries, large
hotplates and some bain maries), on site warranty service will be provided in capital city
metropolitan areas only. In all other locations, the customer is responsible for all
travelling time/service call costs and payment for this will be required prior to the
commencement of the repair. The labour costs to actually repair the fault will be met by
this company.
This company reserves the right to reject a claim for warranty if it is not completely
satisfied with the circumstances under which it occurred and any costs incurred for false
claims or faults due to incorrect usage etc. are the responsibility of the claimant. Under
no circumstances shall Roband Australia Pty Ltd or any subsidiary company or Agent
be liable for loss of profit or damage to other equipment and property.
Generally, authorised service agents are located in all areas, which have authorised
distribution dealers. For the name of your nearest Australian authorised service agent
please contact:
ROBAND AUSTRALIA PTY LTD
Warranty Number: 1800 268 848
Phone: (02) 9971 1788 Fax: (02) 9971 1336
All other countries please contact your selling agent.
Please complete the following details and keep this card in a safe place.
NAME: ________________________________________________________________________
ADDRESS: _____________________________________________________________________
MODEL No.: _____________
SERIAL No.: _____________ DATE PURCHASED: __________
NAME OF DEALER:______________________________________________________________
PLEASE RETAIN THIS SECTION FOR YOUR RECORDS
DO NOT POST
ROBAND AUSTRALIA PTY LTD
Page 19
ALSO AVAILABLE THROUGH YOUR ROBAND
DISTRIBUTOR
Conveyor Toasters
π-Plus
Pie & Food Warmers
NOAW Slicers
High Performance Deep Fryers
Vitamix Blenders
Manufactured/Imported in Australia by
ROBAND AUSTRALIA PTY LTD
Authorised Distributor/Agent
Page 20