1
Gebrauchsanleitung Weintemperierschrank
Seite 2-13
Operating Instructions for Wine Cooler
Page 14-25
Gebruiksaanwijzing Wijnklimaatkast
Pagina 26-37
Consignes d’utilisation
Armoire de mise en température des vins
Page 38-49
Instrucciones de manejo
Armario para acondicionamiento de vinos
Página 50-61
Istuzione d'uso
Frigorifero temperato per vini
Pagina 62-73
7080 175-00 504
Many thanksfor your trust.
Congratulations on your purchase of this wine cooler. In buying this product, which is
distinguished by its perfect user-friendliness, impeccable reliability and high quality,
you have chosen a top class appliance. We wish you a lot of pleasure with your new
wine cooler – and a lot of enjoyment from your wines.
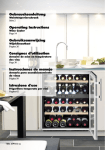
The under worktop wine cooler
GB
Wines only develop their full flavour and aroma when they are at the right temperature for drinking. In your wine cooler, wines can be brought slowly and evenly to the
ideal drinking temperature. Red wines and white wines can be stored at the same time
at the optimal drinking temperature in two separately adjustable temperature zones.
The fewer the grapes
produced in an area,
the better the wine.
Poor, well-drained soils are best for good
wines. The properties of the soil influence
the vitality of the vine, which in turn affects the quality of the grape. Climate is
another factor that is important for wine.
Because light and air humidity are important for the development of the flavour of
the wine.
14
The right environment
for your wines.
A vine is an extremely sensitive plant.
From the time it is planted to its maturing period and the time the grapes are
harvested and the wine is made, it is
dependent on three factors: light, air
humidity and ambient temperature. This
sensitivity continues even once the wine
is bottled. To allow the flavour of the
wine to fully develop or to preserve the
excellent aroma, the wine has to be stored
perfectly – and your wine cooler offers
the best conditions for this.
Contents
Page
Setting up / Connecting to the mains
Fitting dimensions / Installation and fitting
Changing over door hinges
Operating and control elements .........................16-17
Switching the appliance on and off
Setting the temperature
Fan button
Additional functions
Audible warning signal .......................................18-19
Interior light / Equipment
Air exchange with activated carbon filter
Storage diagram ..................................................20-21
Defrosting / Cleaning
Malfunctions ........................................................22-23
Safety instructions and warnings
Shutting your appliance down
Environmental protection and disposal notes
General information ............................................24-25
15
Setting up
Changing over door hinges
GB
• Avoid locating the appliance it in direct sunlight or near heat sources such as an oven
or a radiator.
• The floor should be level and even. You can compensate for an uneven floor by adjusting the adjustable feet.
• Standard EN 378 specifies that the room in which you install your appliance must
have a volume of 1 m3 per 8 g of R 600a refrigerant used in the appliance, so as to
avoid the formation of inflammable gas/air mixtures in the room where the appliance
is located in the event of a leak in the refrigerant circuit. The quantity of refrigerant
used in your appliance is indicated on the type plate on the inside of the appliance.
• The appliance is set to operate within specific ambient temperature limits according
to its climate rating. These temperature limits should not be exceeded. The correct
climate rating for your appliance is indicated on the type plate.
SN = +10°C to +32°C
SN - ST = +10°C to +38°C
Electrical requirement
Power supply (AC) and voltage at the operating point must comply with the details on
the type plate. The type plate is located on the top left-hand side on the inside of the
appliance. The socket must be fused with a 10 A fuse or higher, it must be away from
the rear of the appliance and must be easily accessible.
Fitting dimensions (mm)
Installation and fitting
Operating and control elements
• Connect the appliance to the mains.
• Slide the appliance into the recess.
• Secure the appliance in the recess
using 4 x 14 screws.
• Adjust to recess height using the 4 adjustable feet on the underside of the appliance.
The ventilation cross-section in the plinth panel must be min. 300 cm².
16
n Lower compartment temperature display
o Upper compartment temperature display
p Lower compartment temperature setting buttons
q Upper compartment temperature setting buttons
r Audible warning on/off button
s Interior light on/off button
t Child-proof lock
u On/off button
v Fan button
17
GB
Switching the appliance on and off
Additional functions
You are recommended to clean the appliance before switching it on for the first time
(see "Cleaning"). Connect the appliance to the mains - the appliance is switched on.
The alarm will sound when the appliance is switched on for the first time and when the
appliance is warm. Press the "Alarm" button to switch it off. The temperature display
will also flash.
In set-up mode you can set the child-proof lock and adjust the brightness of the display. The child-proof lock is designed to protect the appliance from being switched off
accidentally by children.
• To switch the appliance off: Keep the "ON / OFF" button pressed
for 3 sec. so that the temperature display goes out.
• To switch the appliance on: Press the "ON / OFF" button until the
Display lights up.
Setting the temperature
The temperature of both compartments can be set separately. When the appliance
is switched on for the first time, the temperature is preset to +12°C in the upper and
lower compartments.
To reduce the temperature: Press the DOWN button;
- on the left for the upper compartment, on the
right for the lower compartment.
To increase the temperature: Press the UP button.
- While you are entering the temperature, the set
temperature will flash on the display.
- You can change the settings in increments of 1°C briefly pressing the button again.
- The electronic controls will switch over automatically about 5 seconds after the
last time you pressed the button, and the actual temperature will be displayed.
If "F0" or "F1" appears in the display, the appliance has a fault. Consult your nearest
customer service point, quoting the type of appliance, index and appliance number.
Fan button
Should you wish to use the wine cooler to store wine for long periods of
time, activate the "Ventilation" button. The light in the button comes on.
Thereby a climate which corresponds to that of a wine cellar is achieved
inside the wine cooler. Corks are prevented from drying out due to an
increased level of humidity.
18
Activating set-up mode:
• Press fan button for approx. 5 secs
- the fan button flashes - the display
shows c for child-proof lock.
Note: the value to be altered flashes.
• Select the required function by pressing the Up/Down button:
c = child-proof lock, h = brightness of the display
• Now select/acknowledge function by pressing fan button briefly:
> For c = child-proof lock,
press the Up/Down button to select
c1 = child-proof lock on or
c0 = child-proof lock off and acknowledge with the fan button.
When the symbol
is lit, the child-proof lock is activated.
> For h = brightness, press Up/Down button to select
h1= minimum to
h5 = maximum brightness and acknowledge with fan button.
Exit set-up mode:
• Exit the set-up mode by pressing the On/Off button; after 2 min.
the electronic system switches over automatically. The normal
operating mode is activated again.
Audible warning signal
The audible warning signal helps to protect your wines against excessive temperature
fluctuations.
- It sounds when the door has been left open for longer than about 60
seconds. The audible warning device is switched off by pressing the
"Alarm" button.
- It sounds when the interior gets too warm or too cold. The temperature display will also flash. The audible warning device is switched
off by pressing the "Alarm" button. The temperature display will continue to flash until the cause of the alarm has been rectified.
19
GB
Interior light
Air exchange with activated carbon filter
A lightbar is integrated into the upper and
lower compartments.
The way in which wines continue to mature depends on the ambient conditions. The
quality of the air is therefore decisive for preserving the wine. For this reason, an
activated charcoal filter is fitted in the
interior rear wall of both the upper
and lower compartments.
We recommend that you replace the
filter once a year. Filters can be obtained from your dealer.
The interior light can be switched on and off
using the "Light" button.
Caution - class 1M laser radiation. When
cover is removed, do not look directly at
light through optical instruments.
• Press the “Light” button. The indicator lamp in the switch will light up.
Changing the filter: Take the filter by
the handle. Turn it 90° to the left or
right and remove.
• Press and hold the "Light" button and at the same
time press the temperature setting buttons for the
lower compartment to increase or decrease the
brightness. "Down" = darker, "UP" = brighter.
Inserting the filter: Insert with the
handle in a vertical position. Turn it
90° to the left or right until it clicks
into place.
Equipment
Storage diagram
Furthermore, the brightness of the lighting can be adjusted.
Pull-out shelf
The pull-out shelf allows bottles of wine to be
removed more easily.
for 750 ml Bordeaux bottles
Total: 43 bottles
Labels
The appliance is supplied with a label holder
with labels for each shelf. Use these to label
the type of wine stored on each shelf. Use a
soft pencil on the labels so that you can erase
it again when necessary. Additional labels
can be obtained from your dealer.
20
21
GB
Defrosting
Malfunctions
The appliance defrosts automatically. The water that forms on the rear wall drains into
a reservoir at the back of the appliance and evaporates automatically through the compressor heat.
Your appliance is designed and manufactured for a lengthy, reliable operating life with
no malfunctions. If a malfunction nonetheless occurs during operation, check whether
it is due to an operating error. Please note that even during the warranty period the
resultant servicing costs in this case will have to be borne by the owner.
Cleaning
You may be able to rectify the following faults by checking the possible causes yourself:
Before cleaning always switch off the appliance. Pull out the mains plug or remove/
unscrew the fuse.
Never use abrasive or acidic cleaning agents or chemical solvents. We recommend the
use of an all-purpose cleaner with neutral pH.
Do not use steam cleaners because of the risk of injury and damage.
• Clean the inside and equipment parts with lukewarm water and a little detergent.
• Ensure that no cleaning water penetrates into the electrical components.
• Dry all parts well with a cloth.
• Do not remove the type plate from the inside of the appliance; it is important for after-sales servicing.
• Appliance does not function:
- Check that the appliance is properly connected to the mains.
- Is the socket fuse intact?
• Loud running noise: Check that the appliance is standing firmly on the ground.
Please note that it is impossible to avoid flowing noises in the refrigeration circuit.
• The temperature inside your wine cooler is too warm: Check the setting in accordance with the section "Setting the temperature".
- Does the separately installed thermometer show the correct reading?
- Is the air extraction working properly?
- Is the wine cooler too close to a heat source?
• Please note that, as can happen with other forms of storage, slight mould may form
depending on the type of adhesive on the labels. This can be rectified by carefully
cleaning any adhesive residues off the bottles.
If none of the above causes apply and you
cannot rectify the fault yourself, contact the
nearest customer service department stating
the type c of appliance, index d and appliance number e as indicated on the type
plate. The type plate is located on the lefthand inside wall.
22
23
Safety instructions and warnings
Environmental protection and
• To prevent injury or damage to the unit, the appliance should be unpacked and set
up by two people.
• In the event that the appliance is damaged on delivery, contact the supplier immediately before connecting to the mains.
• To guarantee safe operation, ensure that the appliance is set up and connected as
described in these operating instructions.
• Disconnect the appliance from the mains if any fault occurs. Pull out the plug,
switch off or remove the fuse.
• When disconnecting the appliance, pull on the plug, not on the cable.
• Any repairs and work on the appliance should only be carried out by the customer
service department, as unauthorised work could prove highly dangerous for the
user. The same applies to changing the mains power cable.
• Do not stand on the plinth, drawers or doors or use them to support anything else.
• Do not let children play with the appliance, e.g. do not allow them to sit in the drawers or swing on the doors.
• If you have a lockable appliance, do not keep the key near the appliance or within
reach of children.
• Do not use electrical appliances inside the appliance.
• Do not allow naked flames or ignition sources to enter the appliance. When transporting and cleaning the appliance ensure that the refrigerant circuit is not damaged. In the event of damage, make sure that there are no ignition sources nearby
and keep the room well ventilated.
disposal notes
Shutting your appliance down
If your appliance is to be shut down for any
length of time, switch it off and disconnect
the plug or remove the fuse. Clean the appliance and leave the door open in order to
prevent unpleasant smells.
GB
The packaging is designed to protect the appliance and individual components during
transport and is made of recyclable materials.
• corrugated cardboard/cardboard (predominantly recycled paper)
• moulded polystyrene (foamed, CFC-free polystyrene)
• polyethylene bags and sheets
• polypropylene straps
• Please return the packaging material to the nearest official collection point so that
the various materials can be recycled or reused as far as possible and so as to avoid
throwing them away.
Old appliances still contain reusable materials and should not be disposed of with
household or bulk refuse.
• Disable discarded appliances immediately by removing the plug and cutting through
the connection cable.
• Remove the spring-action or bolt catch from the appliance or render it unusable so
that children cannot become trapped inside and suffocate.
• Ensure that the refrigerant circuit and in particular the heat exchanger on the rear of
the appliance is not damaged before the appliance that is no longer needed is taken
away for disposal. In this way the refrigerant will not escape into the environment.
– Information concerning the refrigerant and insulating materials used can be found
on the type plate.
– Information on collection dates or collection points can be obtained from the waste
disposal authorities or local council.
General information
The refrigerant circuit has been tested for leaks.
The appliance is radio-suppressed to EN 55014 and thus complies with EC Directive
87/308/EEC.
All types and models are subject to continuous improvement and the manufacturer
therefore reserves the right to make modifications to the shape, equipment and technology.
24
25