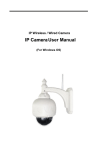
Download 25-044WiFi Camera User Manual
Transcript
Operating Instructions
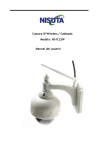
Waterproof Wifi Camera
Please read this manual thoroughly before operating the unit,
and keep it for further reference.
Contents
1. Product Overview.....................................................................2
1.1 Product Description…………………………………………….2
1.2 Specification……………………………………………………..2
2. Application Instructions.............................................................3
2.1 Android system………………………………………………….3
2.1.1 Installation……………………………………………………..3
2.1.2 Menu Operation………………………………………………6
2.2 ISO system………………………………………………………7
2.2.1 Installation……………………………………………………..7
2.2.2 Menu Operation………………………………………………9
2.3 PC System………………………………………………………10
2.3.1 Installation……………………………………………………..10
2.3.2 Menu Operation………………………………………………11
3. Accessories..............................................................................15
1
1. Product Overview
2. Application Instructions
1.1 Product Description
This manual can help you to know and use WIFI camera, please read this manual
carefully before use
As the development of wireless technology, wireless products quickly step into
people's lives, this product combined image compression technology and data
transmission technology, introduced a WIFI camera, for the continuously higher
requirements of the public. The product has advanced digital image / voice
compression, wireless transmission, iPod / phone / PC/ tablet monitoring functions,
and completely replaces the traditional baby monitors!
1.2 Specification
1. Image Sensor: 0.3Mega 1/4 inch CMOS Sensor
2. Total Pixel: VGA(640*480), QVGA(320*240)
3. Video format: VGA
4. Infrared LED light: 12 PCS
5. IR distance: 15m
6. Distance: 100m ( barrier-free)
7. Mirror/ Normal image: Switchable via Client Software
8. Display: LAN Peer to peer connection monitoring via Smart Phone (IOS
device or Android)
9. Image Compression: MJPEG
10. Frame Rate: 30fps(VGA),30fps(QVGA) on PC;20-25fps(VGA) on mobile
or tablet pc
11. Wireless Standard: IEEE 802.11b/g/n
12. Client Software: Wifi camera.apk/REECAM/ipcamera_8
13. Audio Output: 1 channel with 4 pin connector
14. Waterproof level: IP69K
15. Language: Chinese/English
16. Power supply: DC12-32V
17. Working temperature: -10°C~65°C
2
2.1 Android System
2.1.1 Installation
Note: The operating system for Android client (smart phone / tablet) shall not be
lower than version 2.2. Version 4.0 is preferred.
1) Copy the Android client “WIFI Camera.apk” into a smart phone. Set the
software up and find the application program
2) Connect the camera to power
3) Open the WLAN in smart phone. Search the hotspot of WIFI camera and
connect
(commonly
the
one
not
encrypted),
such
as
Note: Close and then re-open WLAN if the hotspot cannot be found.
4) When connected to WIFI signal from the camera, click
[Search camera]
3
and click
2. Manual search of the camera: click [Manual] to set up the username and
password. Then click [Enter monitor] to view the camera.
5) Click [Add] to add the camera
Host: 192.168.1.1
Port: 80
User: admin
Password: blank
Name: user-default
Buffer time (ms): 1000
6) Search the camera
1. Auto search of the camera: click [Auto search] to search the camera. When
camera is found, its IP address will be displayed. Click the IP address to
view the camera.
4
7) When camera is being viewed, video will be displayed on the smart phone. The
connection to camera will be automatically saved. When screen is clicked on,
menu will be displayed. When smart phone is displayed horizontally, the image
will be zoomed to a full screen.
5
8) When connection to camera is saved, the camera can be found on the monitor list
as a small icon. Click the icon to view the camera. You can click [Edit] in the
camera list to edit the camera name or delete the camera.
: To decrease / increase brightness.
: To adjust menu size between 1:1, 4:3, 16:9 and full-screen mode.
2.2 ISO System
2.2.1 Installation
1) Download The client “Ipcamera_8” (updated version “ipcamera_12” ) from App
Store.
2) Connect the camera to power
3) Open the Wi-fi function in setting. Search the hotspot of WIFI camera and
connect (commonly the one not encrypted), such as
2.1.2 Menu Operation
4) Click
to display below dialog box
: To enable audio from the camera.
: To enable intercom (not available to this model).
: To take photo. Photos are automatically saved in the root directory of
storage card.
: To take video. Videos are automatically saved in the root directory of
storage card. If sound is to be recorded, audio shall be enabled first.
: PTZ Controller (not available to this model).
: To set the image as mirrored / non-mirrored.
6
7
.
5) Click [NEW] to automatically search the IP address of camera - 192.168.1.1
6) Click the address 192.168.1.1 to display the dialog box for settings and input below
information:
Host: 192.168.1.1
Port: 80
User: admin
Password: blank
7)Click [Preview] to view the camera.
When the device is
displayed horizontally, the image will be zoomed to a full screen
2.1.2 Menu Operation
8)Click [Save] to save the camera. You can edit the camera name. And then it will
show on the camera list. It is convenient to view next time. You can click [Edit] to
delete the camera.
8
[Audio]: To enable audio from the camera
[Speak]: Not available to this model
[Video record]: To take video. Videos are automatically saved in the root directory
of storage card. If sound is to be recorded, audio shall be
enabled first
[Sanpshot]: To take a photo
[Resolution]: To select the video resolution (the video of high resolution is
more clear but slower)
[Mode]: To choose the frequency of light wherever you are
[Vertical Patrol]: Not available to this model
[Level Patrol]: Not available to this model
[Mirror]: To switch mirror/ normal image
[Flip]: To reverse the image
[Brightness]: To adjust the image brightness.
[Contrast]: To adjust the image contrast
9
2.3 PC System
2.3.1 Installation
1)
6)
Select the browser type to sign in
7)
The left side is cameras image, and the right side is menu.
Install software “PC IPCamSetup.exe” into a PC.
2) Connect the camera to power
3) Open the Wi-Fi function. Search the hotspot of WIFI camera and connect
(commonly the one not encrypted), such as
4)
After install the software, click
to display below dialog box. The
software will auto search the Wi-Fi camera. It can be set language.
2.3.2 Menu Operation
2.3.2.1 For visitor
5)
Click the IP address, the browser will appear. And then you will see the box as
below, and enter the username “admin”, password : blank.
Switch normal/quad display (Quad display is not available
Select”√”, the time will show on the video record
Disable the time show up or choose the time show up color
Chose 1
To take a photo
To enable audio from the camera
10
Not available to this model
To enable record from the camera
11
1. [Device Info]: View the Wifi camera information
2. [Alisa Setting]: Set the name of Wi-fi camera
2.3.2.1 For Operator
This part is not available now
3. [Date & Time Settings]: Set the time which show up in the recording.
Select ”√” in sync with PC time, it is auto update the local time.
To switch mirror/ normal image
To reverse the image
To select the video resolution
To choose the frequency of light wherever you are
To adjust the image brightness
To adjust the image contrast
4. [User Settings]: Set the visitor and administrator user name and password.
2.3.2.1 For Administrator
5. [Multi-Devices Settings]: Not available
6. [Basic Network Settings]: Do not change the setting
7.
8.
9.
10.
11.
12.
13.
14.
12
[Wireless Lan Settings]: Not available
[ADSL Settings]: Not available
[Upnp Settings]: Not available
[DDNS Service Settings]: Not available
[Mail Service Settings]: Not available
[Ftp Service Settings]: Not available
[MSN Settings]: Not available
[Alarm Service Settings]: Not available
13
15.
16.
17.
18.
[PTZ Settings]: Not available
[A & V daily schedule setting]: Not available
[Decorder Settings]: Not available
[Upgrade Device Firmware]: If we have any upgrade files, we will send to
you. Then you can find the files and upgrade.
19. [Backup & Restore Settings]: You can back up the settings. When you want
to use that setting you can restore it.
3. Accessories
1. Power Cable
2. Antenna
20. [Restore Factory Settings]: If you set something wrong and cannot view the
image, please restore the settings at first.
21. [Reboot Device]:Restart the software
22. [Log]: You can check the log in record
23. [Back]: Back to the video page
14
15


