1
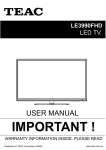
LEV3994FHD
LED TV
USER MANUAL
IMPORTANT !
WARRANTY INFORMATION INSIDE. PLEASE READ
Trademark of TEAC Corporation JAPAN
www.teac.com.au
WARRANTY PROCEDURE
v1.5.2: DEC 2011
Please read the owner’s manual carefully and ensure that you have followed the correct installation and operating
procedures.
1.
2.
3.
Please read this warranty card.
Keep your purchase receipt to enable you to proceed quickly in the event of a Warranty Service.
If you require Warranty Service, please contact the TEAC Customer Support Hotline at 1300 553 315 for
assistance. Please ensure that you have the model number, serial number and purchase receipt ready when
you call.
Please complete the section below and keep this information for your own records.
Owner’s Name
Owner’s Address
Postcode
Model Name/No.
Serial No.
Dealer’s Name
Dealer’s Address
Postcode
Authorised Service Centres in Major Australian Cities
NSW
151 Arthur Street
Homebush West, NSW 2140
Queensland
Unit 1, 320 Curtin Ave West
Eagle Farm, QLD 4009
South Australia
11 McInnes Street
Ridleyton, SA 5008
Victoria
282 Normanby Road
South Melbourne, VIC 3205
Western Australia
Unit 2, 50 Pilbara Street
Welshpool, WA 6106
Thank you for selecting a TEAC product .
If you should require assistance with your product regarding its setup
or operation, or if any difficulties arise, please call us directly for advice
between Monday to Friday at 8:30AM – 6PM AEST at the
TEAC Customer Support Hotline
1300 553 315
[email protected]
www.teac.com.au
WARRANTY INFORMATION
v1.5.2: DEC 2011
Our goods come w ith guarantees that cannot be excluded under the Australian Consumer Law . You are
entitled to a replacement or refund for a major failure and for compensation for any other reasonably
foreseeable loss or damage. You are also entitled to have the goods repaired or replaced if the goods fail
to be of acceptable quality and the failure does not amount to a major failure.
Warranty Terms & Conditions
1.
TEAC warrants that this product is free from defects in material and workmanship under normal domestic use with
reasonable care and skill. Maintenance and cleaning (i.e. laser head) is not covered by this warranty. The TEAC
warranty only applies to TEAC products purchased, used and serviced in Australia.
2.
The benefits to the consumer given by this Warranty are in addition to other rights and remedies of the consumer
under a law in relation to goods or services to which the warranty relates, being the Australian Consumer Law.
3.
Refund or replacement via your retailer is available for a period of 14 days after purchase for goods that have been
inspected and determined to have a major failure. Refund and exchange is not applicable for change of mind.
4.
Subject to the terms herein, this warranty effectively covers the equipment as specified in the Warranty Periods
Table below from the date of purchase.
TEAC PRODUCT
LED/LCD TV 32” (80 cm) and above
All other TEAC products
5.
WARRANTY PERIOD
1 Year (In-Home Service/ Pick up Available)*
1 Year (Carry-in Service)
In Home Service/Pick up* Service
This service will only be provided as part of this warranty if all the following conditions are met;
a) The product is indicated in the Warranty Period Table.
b) The product is within the warranty period.
c) The product is located within the normal service area of the local TEAC Authorised Service Centre.
If TEAC determines that the product is not repairable on site, TEAC can complete the repair by taking the product to
a TEAC Authorised Service Centre.
Carry-in Service
Where In-Home service/Pick up* is not available, the purchaser is required to send the product to the nearest TEAC
Authorised Service Centre for repair. In this event, proof of purchase is required to support a warranty claim. After
the repair, the product will be available for collection by or return to the purchaser at a fee upon request. TEAC inhome service can be made available at a fee upon request.
6.
A 12-month replacement warranty is applicable to all Accessories such as Remote, Power Adaptors and Cables.
7.
TEAC will ensure to the best of its abilities that all required parts are made available for any required service/repair.
8.
TEAC Australia Pty Ltd and its Authorised Service Centres will use their best endeavours to complete product
repairs within a reasonable period based on available resources and workload during the time when service is
requested and performed.
9.
Refurbished parts may be used to repair the product. In the case of a replacement, the product may be replaced,
with a refurbished unit of the same type or, if one is unavailable, a similar refurbished model with equal or better
features & specifications.
10.
Please be advised that if the product presented for repair is capable of retaining user-generated data, the data may
be lost during servicing. Customers are strongly encouraged to back up all important information/data before
sending the product in for service/repair.
11.
Service will be provided only during normal business hours and under safety conditions and circumstances. TEAC
and its authorised service agents can refuse any repair if safety, in relation to OH&S, becomes a concern to its staff
or authorised service agents’ personnel.
12.
The warranty is void and warranty claims may be refused, subject to the Australian Consumer Law, if:
a) The product was not transported, installed, operated or maintained according to manufacturer instruction, or
b) The product was abused, damaged, tampered, altered or repaired by any unauthorised persons, or
c) Product failure is due to accidents during use, installation or transit, power surges, use of defective or
incompatible external devices, exposure to abnormal conditions such as excessive temperatures or humidity, or
entry of liquids, objects or creatures into the product.
13.
No one is authorised to assume any liability on behalf of TEAC or impose any obligation on it, in connection with the
sale of any equipment other than as stated in this warranty and outlined above.
14.
TEAC reserves the right to inspect and verify whether the product is exhibiting a major failure as claimed by
customers/retailers.
15.
LED dead pixel policy, please contact TEAC Customer Support Hotline on 1300 553 315 for assistance.
Contents
Safety Precautions
Power Supply..................................................................................................................................................... 1
Installation......................................................................................................................................................... 2
Use and Maintenance....................................................................................................................................... 3
Important Safety Instructions ............................................................................................................................ 4-5
User Guidance Information
Fixing the Stand ................................................................................................................................ ............... 6
Wall Mounting Information ......................................................................................................... ........ ............... 7
Accessories/Names of Each Part (Front View) ............................................................................ ....................... 8
Names of Each Part(Back View) ........................................................................................................................ 9
Remote Control .................................................................................................................................................. 10-11
Basic Operation
Basic Operation ................................................................................................................................................. 12-13
OSD Menu
1. PICTURE Menu ................................................................................................................ .............................14
2. SOUND Menu ............................................................................................................................................... 15
3. CHANNEL Menu ...............................................................................................................
.............................. 16-17
4. Feature Menu ............................................................................................................... ................................ 18-19
5. Setup Menu .................................................................................................................... ................................20
Multimedia Operation
Multimedia Operation ........................................................................................................................................ 21-23
Recording Operation
Recording Operation ......................................................................................................................................... 24-26
DVD Operation
DVD Operation ................................................................................................................................................... 27-38
Maintenance and Service
Troubleshooting ............................................................................................................................................... 39
Specifications ................................................................................................................................................... 40-41
DO NOT plug several devices
into the same outlet.
the outlet to overheat and start
a fire.
fire or electric shock.
Insert the power plug fully into
the outlet.
loose or improperly
inserted power plug
may result in fire.
User Guidance
Information
electric shock.
DO NOT use a damaged
power cord or plug or a
loose outlet.
Basic Operation
DO NOT touch the power
plug with wet hands.
Safety Precautions
Power Supply
OSD Menu
DO NOT bend the power cord
excessively or place heavy
objects on it.
When disconnecting the
power cord from an
outlet, always grasp it by
the plug.
Recording
Operation
Multimedia
Operation
fire or electric shock.
cleaning.
fire or electric shock.
Maintenance
and Service
It is the responsibility of
the user to make sure all
precautions and warnings
are heeded and followed.
DVD Operation
can damage the internal wire
and may result in a fire.
1
DO NOT place containers with
liquids such as vases, drink cans,
bottles or small metallic objects
on top of the unit.
metal object falls into the unit, it
may result in a shortcircuit, fire,
or electric shock.
DO NOT place the unit where
it is exposed to rain, excessive
moisture or grease.
DO NOT use or store flammable DO NOT place the unit on an unstable
surface, such as a sloped table, or any
or combustible materials near
stand with a contact area smaller than
the unit.
the bottom surface of the unit stand.
electric shock, malfunction,
or deformation.
or explosion.
DO NOT place a burning candle, DO NOT place the unit in a poorly
burning incense, or lighted
ventilated enclosure, such as a
cigarette on top of the unit.
cabinet.
DO NOT place the unit near
any heat source such as a fireplace or space heater.
of overheating and a possible fire
outbreak.
of overheating and a possible fire
outbreak.
can prevent accidents from happening.
Ignoring this precaution may result in the
unit toppling over and causing injury.
.
DO NOT run power cords near Install the antenna away from
heat-producing appliances such high-voltage power lines and
as radiators, stoves, or irons.
communication cables. Make sure
it is installed securely.
The excessive heat can melt
the insulation and expose live
contact with the antenna may result
wires, resulting in fire or electric in fire, electric shock, or serious injury.
shock.
DVD Operation
Recording
Operation
Multimedia
Operation
OSD Menu
Basic Operation
User Guidance
Information
Safety Precautions
Installation
Install the unit at an adequate
distance from the wall to ensure
sufficient ventilation.
Insufficient ventilation may result
in the unit overheating, which
may cause a possible fire
outbreak.
Do not cover the unit with a
tablecloth, curtain, or other
material.
Be sure to place the unit on a
level surface.
result in the unit overheating,
which may cause a possible
fire outbreak.
The following precautions are divided into "Warnings" and "Cautions".
Maintenance
and Service
Disconnect this device from power by turning the power off at the AC power outlet and unplugging the AC plug.
Warning : Ignoring this precaution may result in death or serious injury.
Caution : Ignoring this precaution may result in injury or property damage.
2
Disconnect the power cord from
the power source during a
thunderstorm.
objects, such as a screwdriver,
paper clip, or a bent wire into
the ventilation openings or A/V
terminals.
onto the unit.
unit in any way. Do not attempt to
service the unit yourself.
The unit could topple over
onto a child and result in
serious injury.
or electric shock.
of fire or electric shock.
Always have two or more people
at hand to lift or move the unit.
Wipe off any moisture, dirt, or
dust on the power plug pins
with a clean, dry cloth.
Always turn off the unit and
unplug the power cord when
cleaning the unit. Use a soft dry
cloth to clean the unit.
fire or electric shock.
industrial
strength polish, wax, benzene,
paint thinner, air freshener,
lubricant, detergent, or other
such chemicals. Also, do not
clean with a damp cloth.
get damaged or otherwise
cause injury.
fire or electric shock.
battery, seek medical attention
immediately.
3
Do not display still images and partially
still images on the LED panel for more
than 2 hours as it can cause screen
image retention. This image retention is
also known as “screen burn”. To avoid
such image retention, reduce the
degree of brightness and contrast of the
screen when displaying a still image.
Watching the LED TV in 4:3 format for a
long period of time may leave traces of
borders displayed on the left, right and
centre of the screen caused by the
difference of light emission on the
screen. Playing a DVD or a game
console may cause a similar effect to
the screen. Damages caused by the
above effect are not covered by the
Warranty. Displaying still images from
Video games and PC for longer than a
certain period of time may produce
partial after-images. To prevent this
effect, reduce the ‘brightness’ and
‘contrast’ when displaying still images.
Multimedia
Operation
power cord connected to the
outlet may cause damage to
the cord, resulting in fire or
electric shock.
When removing the batteries
from the remote control, make
sure children do not swallow
them. Keep the batteries out of
the reach of infants and
children.
Recording
Operation
particles at ventilation holes
could cause the unit to heat up,
and ignite when switched on,
which may result in a fire
outbreak.
or smoke around the unit,
immediately disconnect the unit
from the outlet and contact the
service center.
DVD Operation
When moving the unit, be sure
to turn off the unit and unplug
the power cord from the wall
outlet.
Maintenance
and Service
When not using the unit for
long periods of time, disconnect the power cord from the
wall outlet.
OSD Menu
Basic Operation
requires repair, contact the
service center.
User Guidance
Information
Although the LED screen is made with high-precision technology and 99.99% or more of the pixels are effective,
black dots may appear or bright points of light (red, blue, or green) may appear constantly on the LED screen.
This is a property of the LED screen and is not a malfunction.
Safety Precautions
Use and Maintenance
Basic Operation
User Guidance
Information
Safety Precautions
Important Safety Instructions
Multimedia
Operation
OSD Menu
5)
Do not bend the power cord excessively. Prevent the cord from being walked on or
pinched by weights placed on it.
Maintenance
and Service
DVD Operation
Recording
Operation
power socket.
4
13)
This symbol indicates that dangerous voltage instituting a risk of electric shock is
present within this unit.
This symbol indicates that there are important operation and maintenance
instructions in the literature accompanying the appliance.
Basic Operation
12)
User Guidance
Information
Safety Precautions
Important Safety Instructions
OSD Menu
Caution: Laser radiation when open. Do not stare into beam.
NOTE:
a) To prevent damage which may result in fire or hazards, the unit should not be
exposed to rain or liquids.
Multimedia
Operation
Caution: Use of any controls, adjustments, or procedures other than those specified herein may
Important
Instructions
result
in hazardous Safety
radiation exposure.
have been spilled on the unit, unplug the unit from the power source and refer to
TEAC service personnel for assistance.
c) Servicing of this unit should be conducted by qualified and certified TEAC service
personnel.
Recording
Operation
b) Do not place objects containing liquids, such as vases on the unit. If drinks or liquids
Maintenance
and Service
modifications done on the product without authorisation from the manufacturer’s
authorised service agent.
DVD Operation
d) The manufacturer will not be held responsible for any damage caused by any
5
Wall Mounting Information
Wall Mounting (optional)
Your LED TV is able to accommodate wall mounting with the use of a wall mount bracket (not supplied, please contact your
local hardware store) and the mounting hole screw size (M6X10mm) on the back of the unit. If the TV stand is already
installed, remove it prior to wall mounting. Please refer to the figures and procedure below.
Basic Operation
NOTE: Make sure the power is completely disconnected and unplugged before starting.
1. Place the unit (face down) on a soft surface.
2. Loosen and remove the screws securing the stand to the TV.
3. Gently remove the stand.
4. To reinstall the stand, place the unit (face down) on a soft surface and reverse the aboveinstructions.
User Guidance
Information
Removing the stand
(Stand)
1. After detaching the stand, fasten 4 mounting screws (thread size M6X10mm - NOT SUPPLIED. Please contact your
local hardware store) into the 4 screw holes on the rear cover, see the figure below.
2. Fasten the wall mounting bracket (NOT SUPPLIED, please contact your local hardware store) with screws to the wall.
3. Carefully check for the strength of the connection before releasing the LED TV.
NOTE : For more detailed instructions please refer to your “after market” wall mounting instruction book.
200mm
200mm
Thread hole size – M6 x 10mm depth (TV mounting screw size) on the TV.
DVD Operation
How to mount the LED TV on the wall
Maintenance
and Service
Alternatively, secure the TV to the wall directly behind it by fixing eyebolts to the wall and tying them to screws fixed on the
centre of the TV back panel.
Recording
Operation
Multimedia
Operation
1. Install a wood screw or eyebolt into the table that is supporting the TV.
2. Fix a machine screw into a screw hole near the base in the back of the TV.
3. Tie the wood screw or eyebolt to the machine screw with a strong cord.
OSD Menu
Fall prevention (NOTE: Important safety measure)
To prevent the TV from tilting forward and falling over to cause damage or injury, please secure the TV to your table or wall
using screws or eyebolts and strong cord (not provided). An example on fixing the TV to a table is shown below:
User Guidance
Information
Accessories
User’s Guide
Remote Control
Quick Start Guide
2 x AAA Batteries
Contact Card
Basic Operation
* Accessories included may look different from the illustrations shown.
Names of each part
OSD Menu
Front View
Maintenance
and Service
DVD Operation
Recording
Operation
Multimedia
Operation
DVD: Insert a 12cm DVD/
CD with the label side
facing towards the
back.
LED Indicator
Remote Control Sensor
(keep clear of obstacles)
INPUT MENU
CH-
CH+
VOL-
VOL+
PLAY
EJECT
POWER
INPUT: Display the input source menu.
MENU: Display/exit the OSD menu.
CH+/-: Scan through channels.
VOL+/-: Adjust the volume.
PLAY: Play/Pause DVD program.
EJECT: Load/eject DVD disc.
POWER: Turn on/standby the TV set.
8
Names of each part
COAX
AC POWER IN
VIDEO
L-i n
R-in
AC POWER IN: Connect to AC power supply.
SWITCH: Turn on/off the power supply.
Headphone out: Connect to your headphones or other audio equipment.
HDMI1/2/3: Connect to the HDMI output of external devices like DVD players with a HDMI cable.
VIDEO: Connect to video output terminal of external devices.
L/R in: Connect to the audio output terminal of external devices.(shared with YPbPr)
RF: Connect an antenna or a 75 Ohm coaxial cable to receive a TV signal.
COAX : Digital output to AV receiver.
YPbPr: Connect to the YPbPr video output sockets of external devices.
VGA: For PC video input. Connect to the VGA/RGB plug on the PC.
PC-IN: Connect to the audio output terminal on the PC.
USB: Connect USB storage devices/hard disk drives .
NOTE: Before making or changing cable connections, please make sure that power to
the unit is completely disconnected by switching off the power supply and unplugging
the power cable from the wall outlet.
9
Multimedia
Operation
HDMI3
Recording
Operation
HDMI2
DVD Operation
HDMI1
Maintenance
and Service
Headphone out
OSD Menu
Y
Pb
SWITCH
Basic Operation
Pr
User Guidance
Information
USB
Back View
Remote Control
OSD Menu
Basic Operation
User Guidance
Information
(POWER) : Turn the TV on/standby.
DTV/USB
AUDIO
INPUT
PICTURE SOUND
MUTE
SLEEP
ASPECT
1
2
3
4
5
6
7
8
9
CH.FAV
0
NUMBER BUTTONS: Choose channel directly. Press number buttons to view
the channel.
: Return to the previous channel viewed.
EXIT
MENU
CH
VOL
VOL
OK
SUBTITLE
DISPLAY
A-B
CH.FAV: Displays Channel List, and the Favourite Program List.
MENU: Press to display the OSD menu.
EXIT: Press to exit the OSD menu.
OK)
CURSOR KEYS
Allows you to navigate through the on-screen menus and adjust the system settings
to your preference.
: Channel/Program+/- .
CH
Volume +/-. (Not available in DVD Input mode)
EPG: To show the Electronic Program Guide.
DISPLAY: Press to display the current mode’s information.
GOTO
VOL
D.SETUP
D.MENU
D.TITLE
TV/TXT
CANCEL
REVEAL
REPEAT
HOLD
SIZE
SUBPAGE
INDEX
DELETE
REC.LIST
SCH.LIST
SCREEN
VOL+/-: Volume +/-.
SUBTITLE: Select available subtitles in DTV and DVD mode.
A-B: During playback, trigger A-B looping playback by pressing once to park point A
and again to mark point B. Stop looping playback by pressing PLAY/PAUSE or STOP.
GOTO: Play your favourite title/chapter/track.
D.SETUP: DVD system setup.
D.MENU : DVD play list/Disc menu.
D.TITLE: DVD title.
REPEAT: Repeat playing the title or chapter.
DELETE: Delete REC program.
REC.LIST: Record List.
SCH.LIST: Display Scheduled Recordings list.
SCREEN : 1- While playing music, press this button to turn off the LED TV screen.
2- While in HDMI input, press this button to change between Video and PC
mode.
3- While in VGA (PC) input, press to auto-align screen.
Maintenance
and Service
DVD Operation
Recording
Operation
Multimedia
Operation
CH
EPG
DTV/USB: Switch to DTV/USB.
INPUT: Display the input source menu.
AUDIO : Select different audio languages, subject to availability from broadcaster.
MUTE: Press to mute the sound, press again or press VOL+ to unmute.
PICTURE: Press repeatedly to cycle through the available video picture modes.
SOUND: Press to cycle through the different sound settings.
SLEEP: Repeatedly press to scroll to preferred off time.
ASPECT: Adjust picture size.
10
PICTURE SOUND
SLEEP
ASPECT
1
2
3
4
5
6
7
8
9
CH.FAV
0
Buttons for USB/DVD operation:
(REC): Press to start recording the program in DTV mode.
: Load/eject DVD disc.
: Stop program.
: Previous chapter.
: Next chapter.
: Play/Pause program.
: Fast reverse.
: Fast forward.
EXIT
Buttons for TELETEXT operating
Teletext is an information system broadcasted by certain channels which can be
consulted for news, weather forecasts, puzzles, etc, and also offers subtitles for
viewers with hearing problems or who are not familiar with the transmitted
language. Subject to availability from your service provider.
VOL
OK
CH
EPG
DISPLAY
SUBTITLE
A-B
GOTO
D.SETUP
D.MENU
D.TITLE
TV/TXT
CANCEL
REVEAL
REPEAT
HOLD
SIZE
SUBPAGE
INDEX
DELETE
REC.LIST
SCH.LIST
SCREEN
VOL
TV/TXT: Turn off/on the Teletext display.
CANCEL: Cancel the Teletext display.
REVEAL: Reveal any hidden text.
HOLD: Hold or carry on the current subpage.
SIZE: Press to see top half of page double size. Press again to see the bottom
half of page double size. Press again for normal size.
SUBPAGE: Press to subpage, again to cancel.
INDEX: Go to index.
Colour buttons: Short cuts - follow the coloured links on screen.
Recording
Operation
VOL
DVD Operation
CH
Maintenance
and Service
MENU
Basic Operation
MUTE
OSD Menu
AUDIO
Multimedia
Operation
INPUT
DTV/USB
User Guidance
Information
Remote Control
11
Basic Operation
The following section conveys the unit’s general operation, such as switching the unit on,
selecting the input source, and using the automated channel search command.
Selecting an input source
The unit incorporates multiple input sources which can be
selected via the INPUT button on the television panel or
remote control. The following steps explain the procedures
involved.
1. Press the INPUT button to enter the Input menu. The
screen will display the Input Source menu.
2. Use the CH+/- button on the TV set or /\ / \/ direction
buttons to select the desired input source.
3. Press OK to enter the selected source.
NOTE: Please make sure the corresponding device is
connected before selecting the input source.
M
aint enanc e
Maintenance
aand
n d Se
rvic e
Service
DVD Operation
Recording
Operation
Multimedia
Operation
OSD Menu
Basic Operation
Switching the unit on
1. Connect the television unit to the antenna wall socket using a coax television cable plug.
2. Connect the power cord to the power supply and flip the POWER Switch at the back of
the TV to the ON position.
3. Press the POWER button on the remote control or on the television panel.
4. The On Screen Display (OSD) should appear.
12
DTV
ATV
AV
YPBPR
HDMI1
HDMI2
HDMI3
PC
Media
DVD
Basic Operation
Using the On Screen Display Menu
The On Screen Display (OSD) menu acts as the Main Menu and aids the user in browsing
through the different options/properties available on the television unit. Press the MENU
button on the remote control to access the OSD menu as shown below:
Use the / direction buttons to make a selection from the main menu (PICTURE, SOUND,
FEATURE, CHANNEL, SETUP). Press the
button to enter the submenu system.
Once in the submenu, use / buttons to select an item. Press the OK button to access the
selected item to make changes to the settings.
To return to the main menu, press the MENU button.
OSD Menu
Multimedia
Operation
Hints
Operation hints are shown
at the bottom of the screen
Recording
Operation
Submenu
The Picture submenu is
shown here as an example
Basic Operation
Main menu: Picture Sound Channel Feature Setup
Maintenance
and Service
NOTE:
Some menu items can only be activated when the relevant INPUT selection has been
made (ie. the CHANNEL selection can only be accessed under DTV and ATV input
modes).
DVD Operation
To exit the menu display, press the EXIT button.
13
OSD Menu
1. Picture menu
OSD Menu
Description
Picture Mode: Select your desired picture mode. (Dynamic, Standard, Mild, User)
Brightness: Adjust image brightness.
Contrast: Adjust image contrast.
Multimedia
OSD M e n u
Operation
Sharpness: Adjust image sharpness (not available in VGA/PC mode).
Colour: Adjust image colour saturation.
Tint: Control the tint (available in NTSC mode only).
Mult im edia
Recording
Op e r a t i o n
Operation
Colour Temperature: Select a preferred color temperature mode. (Standard, Cool, Warm)
Aspect Ratio: Change the picture’s aspect ratio. (Auto, 4:3, 16:9, Zoom1, Zoom2, Cinema,
Just Scan)
Noise Reduction: If the broadcast signal received is weak, you can select the Noise Reduction
option to reduce the video noise level. (Off, Low, Middle, High).
M
aint enanc e
Maintenance
aand
n d Se
rvic e
Service
Re c o r d i n g
DVD
OpOperation
erat ion
Backlight: Adjust the backlight.
14
OSD Menu
2. Sound menu
Multimedia
Operation
Maintenance
M
aint enanc e
Service
aand
n d Se
rvic e
DVD Operation
Recording
Operation
Sound Mode: Select your desired sound mode. (Standard, Movie, Music, Speech, User)
Bass: Adjust the level of the lower pitched tones.
Treble: Adjust the level of the higher pitched tones.
Balance: Adjust the audio output between left and right speakers.
Surround: Turn on/off the surround sound function.
Auto Volume Level (AVL): Turn this function on to auto-adjust volume levels from different
input sources.
SPDIF: Select the SPDIF mode for the TV. (Off, PCM, Auto)
OSD Menu
Description
15
OSD Menu
3. Channel menu (In ATV/DTV mode)
Description
DELETE: Press the RED button to mark the channels you want to delete. You will be prompted to
confirm when you exit this menu.
LOCK: (Reminder - To activate channel locks, “Lock Enable” must be set to “ON” from the FEATURE
submenu.) Press the GREEN button to toggle channels to be locked. While locks are enabled,
these channels will require a 4-digit password (default: 0000) for viewing access.
SKIP: Press the YELLOW button to toggle channels to be skipped when flipping through channels
using the CH+/- buttons. (These channels will still be listed in the EPG.)
SWAP: Press the BLUE button to mark the channel to be moved. Press the
/
buttons to move it to
its new location in the list. Press the OK button to confirm the move.
Favourite Management: Add or remove favourite
channels to up to 4 Favourite lists using the colour
buttons. Available Favourite lists can be accessed
with the CH.FAV button while watching DTV.
Maintenance
and Service
DVD Operation
Recording
Operation
Multimedia
Operation
OSD Menu
..
Channel Management: Enter the Channel management menu to edit the channels.
16
OSD Menu
Country : Select the country.
NOTE: If Channel Locks has been enabled (Feature>Lock submenus), first enter the
current password (default: 0000) to enter the Auto and Manual Search menus.
Auto Search
Select the desired search mode, and then press the OK button to start Auto Channel Search.
Note:
1. ALL: Auto search channels for DTV, ATV and
radio.
DTV: Auto search channels for DTV and radio.
ATV: Auto search channels for ATV.
2. During the auto tune process, you can
press the MENU button to stop auto tuning and
return to the previous menu.
Multimedia
Operation
OSD Menu
DTV Manual Search
Press
buttons to select the “Channel” field, and the
buttons to select the channel.
Select the Start button and press the OK button to start Manual Channel Search.
DVB-T
Current Channel: Select the channel for manual searching.
Search: Press the OK button to enter the search menu, and set the frequency with
the
buttons.
Fine Tune: Press the OK button to enter the Fine Tune menu, and adjust the frequency
with the
buttons.
Color/Sound System: Select the Color/Sound system for the program.
17
MMaintenance
aint enanc e
Service
a nand
d Se
rvic e
DVD Operation
Recording
Operation
ATV Manual Search
OSD Menu
4. Feature menu
Lock: This menu allows you to lock certain features of the television so that they can not be used
or viewed. For example, setting a program rating lock for children, locking specific channels, and
preventing unauthorised channel deletion or channel retuning.
Every time you enter the Lock menu you will be asked for a password. The default is 0000. You
are recommended to change the password to your own and keep it in a safe place.
Maint enanc e
Maintenance
a n d Service
Se r v i c e
and
DVD Operation
Recording
Operation
Multimedia
Operation
OSD Menu
Description
Lock Enable
Lock Enable - Turn on/off the Lock function.
NOTE: When it is turned on, the Parental Guidance and Change Pin Code settings become
active. Channel Lock/Delete (in Channel Management), Auto Search, DTV Manual Search,
ATV Manual Search (in the Channel menu) will also require password access.
Parental Guidance - Adjust Parental Guidance settings or turn it off (No Block).
Change Pin Code – Press the OK button to start. First enter the current password, then
enter the new password twice to confirm.
18
OSD Menu
Language: Choose a desired language for the OSD menus.
Clock: Adjust the clock (by default the time is synced automatically from the DTV signal)
Sleep Timer: Set the sleep timer so the television automatically switches off after a set
amount of time. Options range from 10 minutes to 240 minutes.
Auto Power Off: The TV will switch itself off automatically if it has not been issued any new
actions for a set amount of time. Choose from 1H, 2H, 4H or OFF.
Hearing Impaired: Switch on this feature to display additional on-screen information and
subtitles. (Subject to content from broadcaster.)
DVR File System: See page 24-26.
Auto Standby: Enable both the TV and a compatible HDMI device to Standby together.
Amplifier Control: Turn on/off Amplifier Control function.
NOTE: Speaker settings can only be adjusted when Amplifer Control is turned on.
Speaker Preference: Select preferred speakers from TV Speakers and Amplifier.
19
DVD Operation
Auto PowerOn: Enable both the TV and a compatible HDMI device to turn on together.
Maintenance
and Service
Enable HDMILink:Turn on/off the HDMI Link function.
Recording
Operation
Multimedia
Operation
OSD Menu
HDMILink: Compatible devices connected by HDMI may be able to receive commands
through the HDMI Link. Make use of this feature for the convenience of operating the
connected device directly using the TV. (ONLY available in HDMI Input Mode.)
OSD Menu
5. SETUP menu
OSD Timer: Lets you adjust the amount of time the On Screen Menu stays on the screen
before disappearing.
PC Setup: Change the PC Settings in PC mode.
M
aint enanc e
Maintenance
aand
n d Se
rvic e
Service
DVD Operation
Recording
Operation
Multimedia
Operation
OSD Menu
Description
Auto Adjust: Adjust the parameter of the screen automatically.
H/V-Position: Adjust the horizontal/vertical position of the screen.
Phase: Adjust the phase of the ADC sampling clock relative to the sync signal, until a
stable image is obtained.
Clock: Adjust the pixel clock frequency, until the image size is maximized for the screen.
Blue Screen: Changes the background colour when there is no input between clear and a blue
background (Not available in some input modes like ATV).
Restore To Default: This clears all the TV settings for the television. Password input required.
System Info: Display the TV system information and customer support information.
20
Multimedia Operation
Basic Operation
1). Press the INPUT button on the remote control to display the input source menu, select Media
source with the /
buttons, and press the OK button to enter the Multimedia menu as shown below.
DTV
ATV
AV
YPBPR
HDMI1
HDMI2
HDMI3
PC
Media
DVD
Operation hints
Return to
previous
folder list
Preview
File/folder
list
File information
Hints
Press
/
buttons to move through the list. Press OK to select the file or enter the folder.
Press OK to add or remove a selected file to the playlist. Press the RED button to delete a selected file.
Press the GREEN button to add or remove all files to/from playlist.
Press
to return to the previous folder. Press EXIT to choose the folder view (list or thumbnail view).
Press EXIT again to return to the Multimedia menu.
Press the
PLAY button to start playback of all selected files. (See more on playback in the next pages.)
Press STOP to stop and exit full screen playback.
21
Recording
Operation
buttons to select a desired device/folder. Press the OK button to enter the file list below.
DVD Operation
/
Maintenance
and Service
3). Press
Multimedia
Operation
2). Insert a USB memory device such as a thumb drive. Depending on what you wish to play, choose the
corresponding Media Mode (Photo, Music, Movie, eBook). The directory of your USB device will be shown.
Multimedia Operation
1. Photo
Run a photo slideshow from USB.
Press the
/ buttons to select the options on the toolbar, and OK to confirm.
NOTE: Press OK to display and use the control bar after it has disappeared.
Play/Pause the photo playing.
Stop and exit the full screen slideshow.
Play the previous or next file immediately.
Rotate the picture (0, 90, 180, 270).
Zoom in/out on the picture. Move around in a zoomed-in picture using the direction buttons.
Display information about the current file.
Display the photo setup menu to adjust Repeat Mode, Background Music, Slide Time, Effect.
Display the playlist. (Press the MENU button to hide it again.)
Maintenance
and Service
DVD Operation
Recording
Operation
Multimedia
Operation
2. Music
Play music files from USB.
Press the
/ buttons to select the options on the toolbar, and OK to confirm.
Play/Pause music playback.
Stop and exit music playback.
Fast rewind or forward.
Play the previous or next file directly.
Input the time in HH:MM:SS to start playing directly from the specified time point on the music track.
ALL Select to cycle through these playback modes: Repeat All, Shuffle, Repeat Folder, Repeat 1.
Toggle the window display between “File Information” and “Playlist”.
Select this (or press the BLUE button) to switch off the screen display. NOTE: This is NOT Standby.
Turn the screen on with any button on the remote other than the POWER button.
22
Multimedia Operation
3. Movie
Play compatible movie files from USB.
Press the
/ buttons to select the options on the toolbar, and OK to confirm.
NOTE: Press OK to display and use the control bar after it has disappeared.
Multimedia
Operation
AB
Play/Pause the movie.
Stop and exit the full screen playback.
Fast rewind or forward.
Play the movie in slow mode.
Skip forward in small steps.
Press once to set “Point A”, a second time for “Point B”. Playback will loop A-B until it is stopped.
Play the previous or next file immediately.
Display the playlist.
Display information about the current file.
Display the movie setup menu to adjust options for the Program, Subtitle, Audio, Repeat Mode.
Input HH:MM:SS to start playback from the specified time point in the movie track.
DVD Operation
Recording
Operation
4. eBook
Display text files from USB.
Turn to previous/next file.
Maintenance
and Service
Turn to previous/next page of the text.
RED button: Add or delete a bookmark.
GREEN button: Go to the specified page.
YELLOW button: Display the bookmark list.
BLUE button: Display the playlist.
23
Recording Operation
DVR settings
Press the MENU button, then select Feature > DVR File System. Press OK to enter the menu below.
Format
USB device information
Format: Press the RED button to format the selected USB device.
CAUTION: Formatting will wipe all data from the USB device.
Please back up existing data before formatting. TEAC is not
responsible for lost data.
USB flash drives, or an external hard disk using its own power
supply is recommended for recording and playback.
The USB storage device will need to be formatted before being used for recording functions, to
ensure that it is formatted in the FAT32 file system, and that there is sufficient storage space
available for recording programs.
Timeshift Buffer
Set Timeshift Buffer mode: Auto, 30Mins, 1hr, 2hr.
Schedule List
Enter the Schedule List to setup and manage the timer recording schedule.
Maintenance
and Service
DVD Operation
Recording
Operation
Free Record Time
Select recording time limit from 1 hour to 4 hours.
Press the YELLOW button to schedule a new recording. Follow the button hints on the screen.
24
Recording Operation
Recorder: Turn on/off recording. (If it is off, the scheduled item is set as a Reminder.)
Type: Select the type of content. (DTV, Radio)
Channel: Select the channel.
Start Date: Set the start date.
Start Time: Set the start time.
End Date: Set the end date.
End Time: Set the end time.
Mode: Select the repeat mode. (Once, Daily, Weekly, Monthly)
Record List
Display the Record List.
Delete: Press the RED button to delete the
selected recording/reminder schedule.
Recorder Start
Press OK to start recording. Alternately, use the REC button on the remote control directly while
watching DTV.
EPG, Timer Record and Reminders
25
Maintenance
and Service
EPG mode: Press the RED button to change the EPG display mode.
Daily mode: Displays information of the program schedule in daily mode.
Weekly mode: Displays the information of the program schedule in weekly mode.
Reminder: Press the GREEN button once to set a program reminder. When the reminder triggers at the
set time, the TV will switch to the specified channel automatically.
Record : Press the RED button to quick-set a scheduled recording according to the program shown on
the EPG. To manually edit the timer record before it is added to the recording schedule, press
the REC button instead.
Previous/Next Day: Press YELLOW/BLUE buttons to display schedules up to 7 days in advance.
DVD Operation
Recording
Operation
Press EPG on the remote control to display the EPG menu. It may take a couple of seconds to load.
Recording Operation
Recording
Press REC on the remote control to start recording immediately in DTV mode.
NOTE:
a. A compatible USB memory device must be connected to the TV.
b. Ensure that the USB device has enough speed and data space.
Press the STOP button to exit the recording mode. You will be prompted to confirm.
Press the REC.LIST button to display the Recorder List to play a selected recording.
You cannot play a recorded file while recording is still in progress.
You can also view and play the recorded program in USB Multimedia input mode.
Time Shift
Press
on the remote control to start Time Shift in DTV mode.
NOTE:
a. A compatible USB memory device must be connected to the TV.
b. Ensure that the USB device has enough speed and data space.
Press the STOP button to exit Time Shift and return to watching live TV. You will be prompted to
confirm.
Maintenance
and Service
DVD Operation
Recording
Operation
Press PLAY to resume watching the TV program. Meanwhile, Time Shift will continue recording.
A Time Shift indicator in the corner shows the elapsed time between the current picture and the live
broadcast.
NOTE: During recording, if the signal is lost, the recording process will pause until the signal is stable
again.
26
DVD Operation
Preparation
1. Connect the unit to the power supply and press the POWER button to switch the unit on.
2. Press the INPUT button on the remote control to select DVD mode and press OK to select DVD
mode.
3. Gently insert the disc, with the label side away from the television, into the disc tray slot. The
disc will be drawn into the disc tray and loaded automatically.
4. Press the EJECT button to eject the disc. The disc cannot be drawn into the disc tray by
pressing the EJECT button again. The disc must be manually pushed into the tray until it is
drawn in automatically.
Reflective side
NOTE: -
DVD mode must be selected before inserting the disc.
-
The contents of each disc may vary, as to how the disc was authored and what
features are included.
-
Some discs have an autoplay function. Some offer different modes, such as Menu
Play, Sequence Play and other modes as illustrated below.
Menu Play
2. If the disc is a DVD, a ROOT MENU will appear on the screen. If it is SVCD or VCD 2.0, please
press the Menu button to see the menu.
3. When a DVD disc is loaded, use the toggle buttons to highlight the menu item you would like to
choose. With SVCD or VCD 2.0, press the numeric buttons to select a track to play.
DVD Operation
1. Compatible with DVD, SVCD or VCD2.0.
5. Return to Menu when Playing: When playing a DVD disc press the Menu button to return to the
"ROOT" menu. When playing a SVCD or VCD, and Playback control (PBC) is "on" press the Menu
or Return button to return to the disc menu.
27
Maintenance
and Service
4. Press OK or Play to start when highlighted.
DVD Operation
Title Play
1. DVD disc dependant only, according to DVD manufacturer specifications.
2. During DVD playback, press Title button to display the DVD title content and main menu.
3. Press the /\ / \/ buttons to highlight the title you would like to choose and press OK; you can also opt
to press the numeric buttons.
4. The DVD player begins with the chapter 1 of the chosen title.
Sequence Play
1. Compatible with DVD, SVCD, VCD, CD, HD-CD, WMA, Digital Audio disc /JPEG discs.
2. When a SVCD or VCD disc is loaded and playback control (PBC) is "on", press the MENU button
once to switch PBC "off". The player can now playback in sequence mode. To turn PBC back on ,
press the MENU button again.
3. When the disc is stopped, press the Play button to start play back in "Sequence" mode. This is
for all compatible discs except VCD and SVCD.
Additional operations
Selecting Tracks
DVD Operation
Compatible with DVD, SVCD, VCD, CD, HD-CD, WMA, Digital Audio disc /JPEG discs.
1.
When playing a DVD disc, press the numeric buttons on the menu or title page to select tracks;
During DVD playback, you can input desired title numbers directly.
2.
During sequence playback of a SVCD or VCD disk, press the numeric buttons to select tracks.
(During Program Playback and when the playback control (PBC) is on, you can only press Prev
/ Next
button to select)
3.
As for CD, HD-CD, discs, press Numeric buttons directly to select tracks.
4.
When playing WMA, Digital Audio disc/JPEG discs, press Numeric buttons to select different tracks
on current track list.
Skipping Tracks
Maintenance
and Service
Compatible with DVD, SVCD, VCD, CD, HD-CD, WMA, Digital Audio disc /JPEG discs.
1. To skip forward to the beginning of the next title / chapter / track on a disc, press Next
remote or the right side of the player.
on the
2. To skip backward to the beginning of the preceding title / chapter/track on a disc, press Prev
the remote.
28
on
DVD Operation
Multispeed Fast Motion Play
Compatible with DVD, SVCD, VCD, CD, HD-CD, WMA, Digital Audio discs.
1. Press the Multispeed Fast Forward button on the remote during play to search through a disc.
has four speeds: x2, x4, x8, x16,. x32 With each consecutive press of the
Multispeed Fast Forward
button, the search speed increases. If you press the button five times, it would resume normal play.
2. During DVD playback, normal play resumes when Fast Forward reaches the beginning of the next
title/chapter, During SVCD or VCD play with PBC on, when Fast Forward reaches the beginning
of the next track, it resumes normal play.
Freeze Frame
Compatible with DVD, SVCD, VCD, CD, HD-CD, WMA, Digital Audio disc/JPEG discs.
once to freeze
Maintenance
and Service
DVD Operation
During CD, HD-CD, WMA or Digital Audio disc / JPEG playback, press Pause
button to resume normal playback.
playback; Press Play
29
DVD Operation
Display Features
This feature aids the user in viewing options readily available, and is compatible with the following
disc types: DVD, SVCD, VCD, CD, HD-CD, WMA, Digital Audio discs. This display is available while
the files on the disc are being played.
DVD Display feature
When the DISPLAY button is pressed repeatedly while a DVD is being played, the response will
show as follows.
-
Disc Type, Title (Title being played/Total number of titles), Chapter (Chapter being
played/Total number of chapter), Time (Elapsed time of disc playtime)
-
Language (Language selection/Number of optional languages), Language Type, Audio Type,
Subtitle(Subtitle selection/Number of optional languages), Angle(Angle being played/Number
of playing angles)
-
Disc Type, Title (Title being played/Total number of titles), Chapter (Chapter being
played/Total number of chapter), Time (Countdown of chapter time)
-
Disc Type, Title (Title being played/Total number of titles), Chapter (Chapter being
played/Total number of chapter), Time (Title elapsed time)
-
Disc Type, Title (Title being played/Total number of titles), Chapter (Chapter being
played/Total number of chapter), Time (Countdown of total time)
SVCD Display feature
When the DISPLAY button is pressed repeatedly while a SVCD is being played, the response will
show as follows.
Disc Type, Track(Track being played/ total tracks), Mute, PBC, Repeat Mode, Elapsed Time
Language (Language being played/ Total Number of languages), Language Type, Audio Type,
Subtitle (Subtitle being played/Total number of subtitles)
DVD Operation
VCD Display Feature
When the DISPLAY button is pressed repeatedly while a VCD is being played, the response will show
as follows.
Disc Type, Track(Playing track/Total Number of tracks), Mute, Repeat Mode, Elapsed Time
Maintenance
and Service
CD, HD-CD, WMA, Digital Audio/JPEG Discs Display Feature
When the DISPLAY button is pressed repeatedly while a CD, HD-CD, WMA, or Digital Audio/JPEG
disc is being played, the response will show as follows.
Disc Type, Track (laying track number/Total Number of tracks), Mute, Repeat Mode, Elapsed
Time
30
DVD Operation
Using the Search Feature
Compatible with DVD, SVCD, VCD, CD, HD-CD discs.
I.
Press the GOTO button on the remote control to bring up the search Display Feature menu.
II.
Press the Arrow buttons to highlight the Title/ Chapter/ Track Number/ Time Elapsed options.
III.
Use the Numeric buttons to enter the Title/ Chapter/ Track number or Time you would like to
view in the title.
IV.
Press OK to resume playback. To illustrate, entering 01:23:56 on the Time Elapsed selection will
start the playback from that time frame forwards.
NOTE:a) This feature does not work in Program Play mode.
b) If PBC is on, it will turn off automatically when Search Playback starts.
c) When playing WMA, MP3 / JPEG discs, Search Feature does not work. Changing
the Audio Soundtrack / Language
-
Compatible with DVD SVCD, VCD, CD, HD-CD, WMA, Digital Audio disc /JPEG discs.
-
This function varies in its purpose for different disc types. Press the AUDIO button to display
the current Soundtrack being played.
Audio Selection for SVCD or VCD
There are five audio selections available: Stereo (L/R), L/L, R/R, L/L Auto A/D Detect, and R/R Auto
A/D Detect. With each consecutive press of the button, the audio selection cycles through these options.
For example, if you press the button six times, the audio selection cycles back to Stereo.
Audio Selection for CD, HD-CD, WMA, Digital Audio Discs
There are three selections available: Stereo (L/R), L/L, and R/R.
Maintenance
and Service
When playing a DVD or SVCD disc, press the AUDIO button to display the current audio language.
Press the button again to browse and select the next supported audio language. NOTE: Certain DVDs
have limited language selections, or none at all. Subjective to manufacturer specifications.
DVD Operation
Audio Selection for DVD and SVCD
31
DVD Operation
Press the Power button on the TV or the remote control, then press the INPUT button to select DVD mode.
If there is no disc in the DVD player the screen will show "NO DISC".
Insert a disc with the label facing the correct direction according to the picture next to the disc slot.
Do not touch the disc’s reflective surface.
Hold the disc at the edges with your fingers and gently place the disc into the slot. The player will
automatically draw the disc into the player.
To eject the disc, press the EJECT button on the TV or the EJECT " " button on the remote control.
Maintenance
and Service
DVD Operation
Audio
32
DVD Operation
Enable
Screen saver will prevent image burn and screen damage.
Maintenance
and Service
DVD Operation
The Last Memory function can memorize where disc playback was stopped, and resume from there when the same
disc is inserted again.This function can memorize up to 4 discs, and is dependent on the disc content. Select "On" to
enable the function, and "Off" to turn it off.
33
DVD Operation
the "Speaker Setup" option, then press OK
Select to downmix multichannel audio soundtracks to LT/RT channel output.
Maintenance
and Service
DVD Operation
Select to downmix multichannel audio soundtracks to stereo output.
34
DVD Operation
Volume
Select to downmix multichannel audio soundtracks to stereo output.
Maintenance
and Service
DVD Operation
Choose a preferred language track to be played if it is available on the disc. If it is not available, the
default language will be played.
35
DVD Operation
Choose a preferred subtitle language to be used if it is available on the disc. If it is not available, the default
language will be used.
Choose a preferred menu language to be used if it is available on the disc. If it is not available, the default
Maintenance
and Service
DVD Operation
language will be used.
36
Maintenance
and Service
DVD Operation
DVD Operation
disc rating
37
DVD Operation
Maintenance
and Service
DVD Operation
Reset the DVD settings to the original factory settings by choosing RESET and pressing the OK button.
38
Troubleshooting
Do not use other functions that are not mentioned in this user manual.
If a problem occurs with your LED TV, please take the following steps first.
If you still have the problem, turn the power off and contact your dealer or an authorized service center.
Action
Problem
The picture does not appear.
Is the power plugged in? Insert the power plug.
Press the power button on the remote control.
The picture appears too
slowly after the power is turned on.
Like your computer, the TV has to run a number of diagnostic and
software checks before it can display any broadcast channels. The
picture should appear in approximately 15 seconds.
Screen is too bright or too dark.
Perform brightness adjustment or contrast adjustment.
Screen is too large or too small.
Adjust the aspect settings.
Stripes appear on the screen
and it shakes.
Keep any appliances that emit magnetic radiation away from the TV
The screen does not move.
Screen appears but there is no sound
Press the PAUSE button. Check if the Pause button is pressed on
external equipment.
1. Check if the "MUTE" function has been activated
2. Increase the sound level by pressing volume adjustment button.
3. Check if sound terminal of external input is connected properly.
4. Check if audio cables are connected properly.
5. Select and check the other input.
If the sound still does not work and the other channels are the
same after you have done as the above, contact your dealer or
an autorized service center.
1. Check if main power is On.
2. Check that the batteries of the remote controller were loaded
properly.
3. Check to see if any obstacle exists between the LED TV and
the remote control , then remove it, if any.
4. If the batteries have no power, replace them with two new
batteries.
Picture is distorted
Compression of video contents may cause distortion especially on
fast moving pictures such as sports and action movies.
Low signal level can cause picture distortion. This is not a TV issue.
Have the antenna assessed.
USB not playing
Please check if the USB is connected properly.
Please make sure USB disk is compatible and the multimedia data
formats are supported (see Specifications page).
39
Maintenance
and Service
Remote control does not work
Specifications
Panel Size
LED Panel
Max. Resolution
1920x1080
Input Connector
Output Connector
VIDEO
1
YPbPr
1
AUDIO (L/R)
1
VGA
1
PC/AUDIO
1
HDMI
3 The HDMI support 1.3, the HDCP support 1.1)
RF
1
HEADPHONE
1
COAX
1
Power Source
100-240V ~ 50/60Hz
Power Consumption
75W
Standby Power Consumption
< 0.5W
TV receive system
PAL BG/DK/I SECAM BG/DK
Frequency range
48.25 - 863.25 MHz
Speaker output power
2×8W
Antenna impedance
75 ohm
USB file system
NTFS FAT32 (Maximum supported hard disk size: 400G)
Recommended USB standard
USB2.0
Supported Multimedia Player formats
See the table on next page
PC Input supported resolution
WUXGA (Maximum supported resolution: 1920X1080 @ 60Hz)
Dimensions
(With stand)
(Without stand)
Maintenance
and Service
39”
891x265x618mm
891x86x529mm
Weight
8.77kg
Wall mounting dimensions
200x200mm
Wall mounting screw size
M6X10
Operating temperature range
0~40 C
Specifications are subject to change without notice.
Weight and dimensions are approximate.
40
Specifications
Supported Formats:
MOVIE
(AVI)
The max bitrate is 6Mbps. The max resolution is 720x576 pixels.
PHOTO
Mono colour, 16-colour, 256-colour, 16-bit, 24-bit, 32-bit. The max
resolution is 3000x3000 pixels; min resolution is 100x100 pixels.
MUSIC
Sample rate: 8K – 48K, Bitrate: 32K-320K
Maintenance
and Service
Special note:
1. The Media Unit can only support USB memory devices, such as hard disk drives and
flash drives, and will not support multimedia devices such as mobile phones and cameras
for recording purposes.
2. Unit will only support hard disk drives with additional power supply, maximum disk
partition size of 400GB and a maximum capacity of 1.5TB. For optimum performance, it
is highly recommended that a hard disk drive with an external power supply be used for
larger capacities.
3. The maximum number of files that each folder can contain is 5000 files.
4. When using external USB, it is suggested that high quality USB extension cables
(supported 480mHz) be used to ensure smooth playing of video files.
5. The television unit can only support audio formats of single and binary channels.
41
TEAC CUSTOMER SUPPORT HOTLINE (TCS)
1300 553 315
Between Monday to Friday – AEST 8:30AM to 6PM