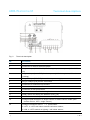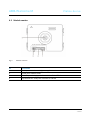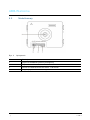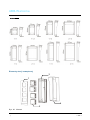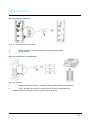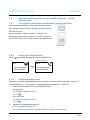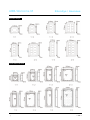
1
M25102xx-x outdoor station user manual
please select the language
English
Français
Italiano
Polski
Español
Português
eština
Sloven ina
Suomi
Norsk
Svenska
Dansk
VER:1.0 │
│ 04.04.2014
ABB-Welcome M
Pos: 2 /DinA4 - Anl eitun gen Online /Inh alt/KNX/Doo rEntry /832 20-AP- xxx/Tit elblat t - 832 20-AP-xxx - ABB @ 1 9\m od_ 132 3249 806 476 _15. docx @ 11 108 4 @ @ 1
M25102xC
M25102xA-xM25102xPx.
M25102xK-x.
M25102xCR.
5102xDN
Outdoor station
=== E nde der Liste für Tex tma rke C over == =
ABB-Welcome
Pos: 4 /Busc h-Ja ege r (N eust rukt ur)/ Mo dul-St ruktu r/Onli ne-D oku ment ation /Inh altsve rzeich nis ( --> Fü r alle Doku men te <-- )/In haltsve rzeic hnis @ 19\ mod _13 206 490 4438 6_1 5.d ocx @ 109 653 @ @ 1
1
2
3
4
5
6
7
8
Safety ....................................................................................................... 3
Intended use ............................................................................................. 3
Environment.............................................................................................. 3
3.1
ABB devices ............................................................................. 3
Terminal description .................................................................................. 5
4.1
Audio module ............................................................................ 5
4.1.1
Lock connected with terminals 3&4 ............................................ 8
4.2
Camera module ........................................................................ 9
4.2.1
Analog camera connected with terminal 1 ................................ 10
4.2.2
Detached camera connection .................................................. 11
4.3
Push button module ................................................................ 12
4.4
Keypad module ....................................................................... 13
4.5
Display and card reader module .............................................. 15
4.6
Nameplate module .................................................................. 17
Operation................................................................................................ 18
5.1
Pushbutton outdoor station ...................................................... 18
5.1.1
Addressing.............................................................................. 18
5.1.2
Setting the language for the voice messages ........................... 22
5.2
Pushbutton Outdoor Station with display module ...................... 24
5.3
Pushbutton Outdoor Station with keypad module ..................... 25
5.4
Keypad outdoor station............................................................ 27
5.4.1
Call a resident (3 types)........................................................... 27
5.4.2
Call the guard unit ................................................................... 28
5.4.3
If an indoor station is in "leave home mode" ............................. 29
5.4.4
If a guard unit is in "intercept mode" ......................................... 29
5.4.5
System settings....................................................................... 30
5.5
Keypad outdoor station without display .................................... 39
5.5.1
Calling a resident, just input physical address .......................... 39
5.5.2
Call guard unit......................................................................... 39
5.5.3
System settings....................................................................... 39
Advanced configuration ........................................................................... 41
Technical data......................................................................................... 42
Mounting / Installation.............................................................................. 43
8.1
Requirements for the electrician............................................... 43
8.2
General installation instructions ............................................... 44
8.3
Mounting................................................................................. 45
=== E nde der Liste für Tex tma rke TOC == =
|
—2—
ABB-Welcome M
Safety
Pos: 6 /Busc h-Ja ege r (N eust rukt ur)/ Mo dul-St ruktu r/Onli ne-D oku ment ation /Übe rschri ften (- -> Für alle D okum ent e < --)/ 1. Eb ene/S - T /Sicher heit @ 18\ mod _13 026 127 917 90_ 15.d ocx @ 103 357 @ 1 @ 1
1
Safety
Pos: 7 /Busc h-Ja ege r (N eust rukt ur)/ Mo dul-St ruktu r/Onli ne-D oku ment ation /Sicher heit (-- > Für alle Dok um ente <- -)/Wa rn hinweise /Sicher heit - 23 0 V @ 18\m od_ 130 260 681 675 0_15 .docx @ 1 033 08 @ @ 1
Warning
Electric voltage!
Risk of death and fire due to electrical voltage of 100-240 V.
–
W ork on the 100-240V supply system may only be performed by
–
Disconnect the mains power supply prior to installation and/or
authorised electricians!
disassembly!
Pos: 8 /Busc h-Ja ege r (N eust rukt ur)/ Mo dul-St ruktu r/Onli ne-D oku ment ation /Übe rschri ften (- -> Für alle D okum ent e < --)/ 1. Eb ene/A - F /Bestim mun gsge mä ßer Geb rau ch @ 18\ mod _13 027 6332 131 6_1 5.do cx @ 1034 83 @ 1 @ 1
2
Intended use
Pos: 9 /DinA4 - Anl eitun gen Online /Inh alt/KNX/Doo rEntry /832 20-AP- xxx/Besti mmu ngsg em aesse r Ge bra uch - 83 220 -AP-xxx- 500 @ 2 0\mo d_1 324 561 168 699 _15. docx @ 11 272 8 @ @ 1
The outdoor station is an integral part of the ABB W elcome door communication system
and operates exclusively with components from this system. The device must only be
used with suitable ABB flush-mounted installation sockets and rain hood.
Pos: 10 /B usch-J aeg er (Neus truk tur )/M odul -Strukt ur/O nline -Doku me ntatio n/Übe rsch rifte n ( --> Fü r alle Doku men te < -- )/1. E bene /U - Z/U mwelt @ 18\ mod _13 026 141 5896 7_1 5.d ocx @ 103 383 @ 1 @ 1
3
Environment
Pos: 11 /B usch-J aeg er (Neus truk tur )/M odul -Strukt ur/O nline -Doku me ntatio n/Umw elt ( --> F ür all e Doku me nte <-- )/Hinweis e/Hinw eis - U mwelt - Hinweis Elektr oge räte @ 1 8\mo d_1 302 763 973 434 _15. docx @ 10 350 0 @ @ 1
Consider the protection of the environment!
Used electric and electronic devices must not be disposed of with
domestic waste.
–
The device contains valuable raw materials which can be recycled.
Therefore, dispose of the device at the appropriate collecting
depot.
Pos: 12 /Di nA4 - A nleitu ngen Onlin e/Ueb ersc hrift en/2 ./ABB Gera ete @ 19 \mo d_1 323 162 843 832_ 15. docx @ 11 087 5 @ 2 @ 1
3.1
ABB devices
Pos: 13 /B usch-J aeg er (Neus truk tur )/M odul -Strukt ur/O nline -Doku me ntatio n/Umw elt ( --> F ür all e Doku me nte <-- )/Hinweis e/Hinw eis - U mwelt - ABB Elektro ger äte @ 19\ mo d_1 3231 627 458 39_ 15.d ocx @ 110 867 @ @ 1
All packaging materials and devices from ABB bear the markings and test seals for
proper disposal. Always dispose of the packing materials and electric devices and their
components via the authorized collection depots and disposal companies.
|
—3—
ABB-Welcome M
Environment
ABB products meet the legal requirements, in particular the laws governing electronic
and electrical devices and the REACH ordinance.
(EU-Directive 2002/96/EG W EEE and 2002/95/EG RoHS)
(EU-REACH ordinance and law for the implementation of the ordinance (EG)
No.1907/2006)
|
—4—
ABB-Welcome M
4
Terminal description
4.1
Audio module
Fig. 1
Terminal description
Terminal description
No.
Function
1
LED flashes slowly, indicating a call established
LED flashes fast, indicating that the system is busy
2
LED illuminates, indicating possible communication.
3
LED illuminates, indicating the door is unlocked
4
Call pushbuttons
|
—5—
ABB-Welcome M
Fig. 2
Terminal description
Terminal description
No.
Functions
1
Connector for camera module
2
Connector for device software update
3
Plug-in clamps (COM-NC-NO) for floating output, door opener (30VAC/DC
1A)
4
Plug-in clamps (Lock-GND) for door opener (18V 4A impulsive, 250 mA
holding)
5
Plug-in clamps (DC-GND) for additional power supply
6
Plug-in clamps (a-b) for Bus connection
7
Connector for induction loop module
8
Connector for next module
9
Connector for exit push button
10
Connector for sensor for checking the door status
11
Rotary switch for setting the address of OS (1-9)
12
Set feedback tones for push buttons: ON/OFF
13
Configure push buttons in a single column or double column mode (ON=
14
Configure functions of the 1 st / 2nd push button.
double column; OFF= single column)
3->OFF, 4->OFF=call indoor station/call indoor station;
3->ON, 4->OFF=switch on lighting / call indoor station;
|
—6—
ABB-Welcome M
Terminal description
3->OFF, 4->ON=call guard unit / call indoor station;
3->ON, 4->ON=switch on lighting / call guard unit.
15
Adjust the loudspeaker volume.
16
Adjust the door lock release time, 1-10s (available for the
lock connected with the Lock-GND)
|
—7—
ABB-Welcome M
4.1.1
|
Terminal description
Lock connected with terminals 3&4
—8—
ABB-Welcome M
4.2
Fig. 3
Terminal description
Camera module
Terminal description
No.
Functions
1
Connector for additional analog camera
2
Connector for audio module
3
Jumper for setting the video format: PAL /NTSC
4
Adjust the camera view area
|
—9—
ABB-Welcome M
4.2.1
Terminal description
Analog camera connected with terminal 1
All the cameras with the video output of 1Vp-p 75Ω ,CVBS (composite video broadcast signal)
can be connected with the camera module.
Generally, the transmission distance from analog cam era to the outdoor station can reach up
to 50 meters by Coax cables or about 10 m eters by other types of cables.
Two types of connections:
Option 1: The analog cam era is powered on all the time
Option 2: The analog cam era is powered on only during working hours
|
— 10 —
ABB-Welcome M
4.2.2
Terminal description
Detached camera connection
Cam era m odule can be used as a detached camera, and the wiring is shown in below.
3 pairs 2-wire
bus together
Max:10 metres
|
— 11 —
ABB-Welcome M
4.3
Fig. 4
Push button module
Terminal description
No.
Functions
1
Connector for previous module
2
Connector for next module
Fig. 5
|
Terminal description
Terminal description
— 12 —
ABB-Welcome M
Terminal description
No.
Functions
1
Regardless of the structure of the push button module, the button numbers
are listed from the top to bottom and from left to right (in the double column
mode)
2
Lighting switch / call guard unit function is always assigned to the 1 st /2nd
button.
3
User names can be printed by the labelling tool of the W elcome M
configuration software.
4.4
Fig. 6
Keypad module
Terminal description
No.
Functions
1
Program button
2
Connector for previous module
3
Connector for device software update
4
USB connector for the connection to the PC : download/upload the
configuration
5
|
Connector for next module
— 13 —
ABB-Welcome M
Terminal description
Pic 1
Fig. 7
Pic 2
Terminal description
No.
Functions
1
Call resident
A visitor inputs an indoor station number (001) or apartment number (e.g.
0101, programmed in advance) to call a resident.
*Also, the visitor can select a resident name with the button
button
or the
of the accompanying display module to make a call.
Meanwhile, pressing the button
can cancel the call.
*This function is only available in Pic1.
2
Calling the guard unit
A visitor can call a guard unit by pressing the button
if the guard unit is
available in the system.
3
Unlocking by password
Press"
+ password+
“to release the lock connected with terminals
"LOCK-GND” of the audio module.
Press "
+2 +
+ password +
" to release the 2nd-lock connected
with terminals "COM-NC-NO" of the audio module.
The initial password is 123456 and residents can set their own customized
password with indoor stations.
4
System engineering configuration
Press "
+
+ system password +
" to enter the system
engineering configuration menu.
The initial system password is 345678 and it can be modified by the
administrator.
|
— 14 —
ABB-Welcome M
4.5
Fig. 8
Terminal description
Display and card reader module
Terminal description
No.
Functions
1
Program button
2
Connector for previous module
3
Connector for device software update
4
Connector for W iegand output
5
USB connector for connecting to the PC: download/upload the
configuration
6
Fig. 9
|
Connector for the next module
Terminal description
— 15 —
ABB-Welcome M
No.
Functions
1
LCD display
2
Support ID or IC card.
Terminal description
Swipe the registered card to release the door lock. The card can be
programmed through the module itself, or using a PC to download the
program file. (M251021CR is accompanied with an ID card reader, while
the M251022CR is accompanied with an IC card reader.)
3
Support Wiegand output.
The default Wiegand format is 26 bits but it can also be extended to 34
bits.
*The display m odule must be connected after audio module.
Technical Specification:
M251021CR:Display module with ID card reader
W ork
Frequency
Standard
Support
card
Output
format
125KHz
ISO18000-2
EM4100, EM4205, EM4305, EM4450, TK4100, T5567 / T5577 Compatible
HID 2
Wiegand 26, 34bit
M251022CR:Display module with IC card reader
W ork
Frequency
Standard
Support
card
Output
format
|
13.56MHz
ISO 14443A
Mifare One S50/S70,etc.
Wiegand 26, 34bit
— 16 —
ABB-Welcome M
4.6
Fig. 10
Terminal description
Nameplate module
Terminal description
No.
Functions
1
Connector for previous module
2
Connector for next module
Labeling of the nam eplate m odule can be printed by the labelling tool of the W elcome M
configuration software.
Pos: 18 /Di nA4 - A nleitu ngen Onlin e/Ueb ersc hrift en/1 ./Bedie nun g @ 18\m od_ 130 261 392 416 5_15 .docx @ 1 033 65 @ 1 @ 1
|
— 17 —
ABB-Welcome M
5
Operation
Operation
Pos: 19 /Di nA4 - A nleitu ngen Onlin e/Ueb ersc hrift en/2 ./Nor male r Bet rieb @ 18 \mo d_1 302 768 8209 65_ 15. docx @ 10 3540 @ 2 @ 1
5.1
Pushbutton outdoor station
Fig. 11
Pushbutton outdoor station
Pos: 20 /Di nA4 - A nleitu ngen Onlin e/Ueb ersc hrift en/3 ./Bedie nele men te @ 20\ mod _13 232 6022 055 9_1 5.do cx @ 1 116 47 @ 3 @ 1
5.1.1
1.
Addressing
Configure functions of the 1st / 2nd push button
001
2
1
002
DIP
3
3 4
003
1
2
3
Fig. 12
Addressing
No.
Functions
1
3->OFF, 4->OFF
2
Call apartment 01
3
Call apartment 02
4
Call apartment 03
|
4
— 18 —
ABB-Welcome M
Operation
2
1
001
DIP
3
3 4
002
4
1
2
Fig. 13
Addressing
No.
Functions
1
3-> ON, 4->OFF
2
Switch on light. The light is connected with a switch actuator, and the
address of the switch actuator must be same as the address of this outdoor
station.
3
Call apartment 01
4
Call apartment 02
Guard unit
2
1
001
DIP
3
3 4
002
1
2
Fig. 14
4
Addressing
No.
Functions
1
3-> OFF, 4-> ON
2
Call the guard unit. If there are multiple guard units in the same section, all
guard units will ring at the same time when a visitor presses the button
“call guard unit”.
3
Call apartment 01
4
Call apartment 02
|
— 19 —
ABB-Welcome M
Operation
2
1
Guard unit
DIP
3
3 4
001
4
1
Fig. 15
Addressing
No.
Functions
1
3-> ON, 4-> ON
2
Switch on lights
3
Call guard unit
4
Call apartment 01
2.
Configure push button in a single column or double column modes
001
2
002
1
3
ON
003
2
4
1
2
3
4
Fig. 16
5
Addressing
No.
Functions
1
2-> OFF
2
Call apartment 01
3
Call apartment 02
4
Call apartment 03
5
Call apartment 04
|
004
— 20 —
ABB-Welcome M
Operation
001
002
2
001
1
ON
3
003
004
005
006
4
2
5
6
7
1
3
5
7
007
8
Fig. 17
2
4
6
8
008
9
Addressing
No.
Functions
1
2-> ON
2
Call apartment 01
3
Call apartment 02
4
Call apartment 03
5
Call apartment 04
6
Call apartment 05
7
Call apartment 06
8
Call apartment 07
9
Call apartment 08
Guard unit
2
1
ON
DIP
3
001
002
4
5
003
2 3 4
6
7
005
8
Fig. 18
|
004
1
3
5
2
4
6
006
9
Addressing
— 21 —
ABB-Welcome M
Operation
No.
Functions
1
2-> ON,3-> ON, 4-> ON
2
Switch on lights
3
Call the guard unit
4
Call apartment 01
5
Call apartment 02
6
Call apartment 03
7
Call apartment 04
8
Call apartment 05
9
Call apartment 06
5.1.2
Setting the language for the voice messages (if the audio
module has a speech synthesis function)
If the audio module with a speech synthesis function (M251024A-.) is assembled, the
local language can be set.
Set OS address as "0", hold the
1st button for 3s to play the voice message.
Click on this button to select the language one by one.
After choosing the right language, hold this button to save and exit the setting.
1
2
3
4
Single column
Fig. 19
|
1st button
1
3
5
7
2
4
6
8
Double column
Addressing
— 22 —
ABB-Welcome M
Operation
Pushbutton outdoor station used as gate station
If pushbutton outdoor station is set as a gate station, gateway as an important system
device must be used and it must be set as floor gateway mode.
Apartment 01 A
Apartment 02 B
Apartment 03 C
Apartment 01 A
Apartment 04 D
Apartment 04 A
Apartment 02 B
Apartment 05 E
Apartment 06 F
Apartment 05 B
Apartment 03 C
Outdoor station
Left building
Outdoor station
Gate entrance
Apartment 06 C
Outdoor station
Right building
Fig. 20
Detailed information please refer to “Gateway “user manual,floor gateway chapter.
Pos: 71 /Di nA4 - A nleitu ngen Onlin e/Ueb ersc hrift en/3 ./Abschl usswide rsta nd @ 19\ mod _13 219 5807 990 6_1 5.do cx @ 1100 83 @ 3 @ 1
Pos: 72 /Di nA4 - A nleitu ngen Onlin e/In halt/KNX/Do orEnt ry/Bedie nun g/Abschl usswide rsta nd s etzen 83 220 -AP-xxx @ 19\ mod _13 1072 339 236 9_1 5.do cx @ 1 078 41 @ @ 1
|
— 23 —
ABB-Welcome M
5.2
Operation
Pushbutton Outdoor Station with display module
The Display and card reader module can be assembled
with a push button outdoor station and the user can
swipe cards to open the door. For such combination, a
master card is needed for an electrician to manage this
outdoor station.
Register a master card/deactivate master card (we
recommend that this work is carried out by specialized
personnel):
1.
Disconnect the power supply.
2.
Reconnect the power
3.
Hold the “program button” for 5s to enter "program
4.
Any card swiped by the reader during this time will
Fig. 21
master card" interface within 30s.
be taken to be the new MASTER card. A prompt
“Register master card successfully" will appear on
the screen.
5.
If the card exists, when you swipe it again, the
information will be deleted, and a prompt “Delete
master card successfully" will appear on the
screen.
Only 1 master card can be registered.
Enter system setting using master card:
1.
2.
Swipe the MASTER card to enter the setting menu. Three LEDs will turn on.
6 options:
Program Card;
Language;
Wiegand Output;
Choose Door
Date & Time;
Back
There is a 5s countdown for each option.
3.
Swipe the MASTER card again within 5s to change to the next option.
Or, 5s over, the current option will be chosen.
|
— 24 —
ABB-Welcome M
4.
Operation
30s Over, to exit the settings menu.
Swipe the MASTER
card
Menu_________05
Program Card--- ∧
Language
Wiegand Output ∨
5s over, choose current
option
==> ==>
Menu_________√
Program Card--- ∧
Language
Wiegand Output ∨
Swipe the MASTER
card, enter the setting
==>
Swipe the MASTER
Card within 5s to move
to next option.
Swipe the MASTER
Card within 5s to
move to next option.
==>
5.3
Menu_________05
Program Card ∧
Language-------Wiegand Output ∨
Proximity Card 05
Register Card--- ∧
Delete Card
Delete All
∨
==>
Menu_________05
Program Card ∧
Language
Wiegand Output ∨
Pushbutton Outdoor Station with keypad module
The keypad module can be assembled with a push
button outdoor station, and users can enter the
password to open the door.
Users can enter the system settings menu by the
following steps (during setting, press “#” to confirm,
press “*” to cancel, the default system password is
345678):
1.
Set the device as an Outdoor Station or a Gate
Station.
Outdoor Station:
Fig. 22
#* system password # =>
1 # => 1 #
Gate Station:
#* system password # =>
1 # => 2 #
2.
Modify "system password"
#* system password # =>
2 # => Enter new password (6-8 bits) # => Enter the password again #
|
— 25 —
ABB-Welcome M
3.
Operation
Modify "door open code"
#* system password # =>
3# => Enter new door open code (6-8 bits) # => Enter the code again #
4.
Set the voice message
If the audio module with the speech synthesis function (M251024A-.) is assembled,
the local language can be set.
#* system password # =>
4# => Press
5.
or
to choose the language => #
Enable/disable access control function
Enable access control function:
#* system password # =>
5# => 1 #
Disable access control function:
#* system password # =>
5# => 2 #
*Reset the system password of keypad module:
It is possible to reset the system password to factory-setting if you have forgotten it.
The restoration of default factory settings does not delete the rest of the
information programmed on the system, such as user names and other settings.
1.
Disconnect the power supply.
2.
Reconnect the power
3.
Hold the “program button” for 5s within 30s.
4.
A “di” will be sounded and the system password will be reset to the default
(345678).
|
— 26 —
ABB-Welcome M
5.4
5.4.1
1.
Operation
Keypad outdoor station
Call a resident (3 types)
By physical address
Physical address is the internal code which the outdoor
station will send through the bus connection to indoor
stations or other devices in the system. For each
apartment, physical address means the address of an
indoor station which is installed in the apartment. For
each building, physical address means the address of a
gateway which is installed for each building, and it is
also called the building number.
In standby mode, a visitor can press the physical
Fig. 23
address corresponding to the residence that you want to
call directly, from 001 to 250.
For a complex building, a visitor needs to press the
building number (01~60) + physical address (001~250)
or make a call in the gate station.
Enter Physical A
dd.:
01 001
2.
By logic address
Logic address is a code that a visitor can press to make a call. The code must be
assigned first and then associated with the physical address.
The apartment No. or some special codes can be used to set the logic address, which is
easy for the users to remember.
Set the logic address by taking the following steps:
Assign the logic address:
#* system password # => system setting =>
Address Book => Add => Logic Add
Physical Add.:
001
Logic Add.:
0101
|
— 27 —
ABB-Welcome M
Operation
Turn on the “logic address” call mode
#* system password # => system setting =>
Configuration => Call mode
Call Mode_______
Physical Add. ∧
Logic Add.-------∨
3.
==>
No. Of digit:
-4(1-8 Digits)
By resident name
(Remarks: this function is only available for the outdoor station with a keypad module
(M251021K-.).)
In the standby mode, press the button
Use the buttons
button
and
or the button
to display resident names.
to search for the desired residential station and press the
to make a call.
Also, a visitor can enter the resident name with a keypad directly to make a call.
Resident names must be assigned first and then associated with the physical address.
#* system password # => system setting
=> Address Book => Add => Contact List
Physical Add.:
01001
User Name:
Federico
5.4.2
Call the guard unit
Press the button
to make a call to a guard unit.
Accept the call
30 s
120 s
==>
Guard Unit
“*“ to Cancel
|
Guard Unit
“*“ to Cancel
— 28 —
ABB-Welcome M
5.4.3
Operation
If an indoor station is in "leave home mode"
If an indoor station works in the “leave home mode”, a visitor can record a
message for the resident after entering the following interface.
Playing the message...
30 s
120 s
==>
Andy
“*“ to Cancel
5.4.4
After a “di” sound, visitor
can record the message
001 s
==>
Andy
“*“ to Cancel
Recording...
“*“ to Cancel
If a guard unit is in "intercept mode"
If a guard unit works in the “intercept mode”, the call from an outdoor station to
an indoor station will be intercepted by the guard unit and after the identity is
confirmed, the guard unit will forward the call to the indoor station.
Call from an outdoor
station to an indoor
station
30 s
120 s
==>
Guard Unit
“*“ to Cancel
Guard unit transfers the
call to an indoor station
GU accept the call
==>
==>
Guard Unit
“*“ to Cancel
120 s
Andy
“*“ to Cancel
|
— 29 —
ABB-Welcome M
5.4.5
Operation
System settings
(During setting, press “#” to confirm, press “*” to cancel, default system password is
345678):
1.
Enter the system setting menu
#* system password #
Menu__________
Configurations-- ∧
Access Control
Contact
∨
2.
Configurations
(1)
Set the device as an Outdoor Station or a Gate Station.
Outdoor Station:
#* system password # =>
Configurations # => Device Type # => Outdoor St.
# (Default)
Device Type_____
Outdoor St. ● -- ∧
Gate Station
∨
Gate Station:
#* system password # =>
Configurations # => Device Type # => Gate Station #
Device Type_____
Outdoor St.
∧
Gate Station ●∨
(2)
Set the call mode: make a call by a Physical Address or a Logic Code
Set the call mode by Physical Address:
#* system password # =>
Configurations # => Call mode # => Physical Address #
Call Mode_______
Physical Add.● ∧
Logic Add.:
∨
|
— 30 —
ABB-Welcome M
Operation
Set the call mode by a Logic Code,No. of digits (1-8 digits):
#* system password # =>
Configurations # => Call mode # => Logic Code #
Call Mode_______
Physical Add. ∧
Logic Add.: ●∨
(3)
System password setting
Modify the system password
#* system password # =>
Configurations # => System code # => Modify #
New Password:
******
==>
Re-enter:
******
==>
Done!
Reset the system password
#* system password # =>
Configurations # => System code # => Reset #
Reset System
Code?
“#“ to Confirm
“*“ to Cancel
3.
==>
Done!
Access control
(1)
Door open code
The password can be set as 6-8 digits. The default door open password is
"123456”, and it can be changed with an outdoor station.
Meanwhile, users can set their own passwords with indoor stations, totally, 6000
passwords can be stored.
|
— 31 —
ABB-Welcome M
Operation
Set the door open password ON/OFF (default: 123456)
#* system password # =>
Access Control # => Door open code # => Enable / Disable #
Door Open Code__
Disable
-- ∧
Modify
Reset
∨
==>
Done!
Modify the door open password
#* system password # =>
Access control # => Door open code # => Modify #
New Password:
******
==>
Re-enter:
******
==>
Done!
Reset the door open password
#* system password # =>
Access control # => Door open code # => Reset #
Reset Door Open
Code?
“#“ to Confirm
“*“ to Cancel
(2)
==>
Done!
Proximity card (3000 cards can be registered for outdoor station.)
Register cards:
#* system password # =>
Access control # => Proximity card # => Register card #
Enter Card No.:
0123456
Or
Swipe the Card
==>
Enter Card No.:
0123456
Or
Done!
Swipe the Card
Delete cards:
#* system password # =>
Access control # => Proximity card # => Delete card #
|
— 32 —
ABB-Welcome M
Enter Card No.:
0123456
Or
Swipe the Card
==>
Operation
Enter Card No.:
0123456
Or
Done!
Swipe the Card
Delete all cards
#* system password # =>
Contact # => Proximity card # => Delete All #
Delete All
Cards?
“#“ to Confirm
“*“ to Cancel
4.
==>
Done!
Contact(3,000 names of the combination of 24 alphanumeric characters)
(1)
Add
Add the contact by user names
#* system password # =>
Contact # => Add # => User Names #
Physical Add.:
001
User Name:
Alexander.G
Resident names must be associated with physical address.
Add the contact by logic address
#* system password # =>
Contact # => Add # => Logic add. #
Physical Add.:
001
Logic Add.:
0101
Logic address must be associated with physical address.
(2)
Modify
Modify contact by user names
#* system password # =>
|
— 33 —
ABB-Welcome M
Operation
Contact # => Modify # => User Names #
_______________
Alexander.G -- ∧
Bodin.K
Christian.G
∨
Modify the resident names and its corresponding physical address.
Modify contact by logic address
#* system password # =>
Contact # => Modify # => Logic add. #
Enter Logic
Add.:
0101
Modify the logic address and its corresponding physical address using the
alphanumeric keypad.
(3)
Delete
Delete the contact by user names
#* system password # =>
Contact # => Delete # => User Names #
_______________
Alexander.G -- ∧
Bodin.K
Christian.G
∨
Delete the contact by logic address
#* system password # =>
Contact # => Delete # => Logic add. #
Enter Logic
Add.:
0101
|
— 34 —
ABB-Welcome M
(4)
Operation
Clear all
#* system password # =>
Contact # => Clear all #
Delete All Names?
“#“ to Confirm
“*“ to Cancel
==>
Done!
Clear all lists including resident names and logic address entries from this menu.
5.
System setting
(1)
Date and time
#* system password # =>
Settings # => Date & time # => Enter time and date => #
2013-01-01
07:00
==>
Done!
“#” to Confirm
(2)
Door Open Time
#* system password # =>
Settings # => Door Open Time # => Time 1-10s (default: 3s) => #
Lock(NC-NO-C) means the lock connected with COM-NC-NO terminals.
Lock(NC-NO-C)
Open
Time (1-10s)
3s
“#” to Confirm
==>
Done!
(3) Setting the voice message on/off
If the audio module with the speech synthesis function (M251024A-.) is assembled,
the speech synthesis function can be enabled or disabled. Meanwhile, the local
language can be chosen, too.
#* system password # =>
Settings # => Voice message #
|
— 35 —
ABB-Welcome M
Voice Message___
On
● -- ∧
Off
∨
==>
Operation
Done!
If the audio module is without the speech synthesis function, there will be an
indication for users if entering this menu.
No This Function!
(4) Select language
#* system password # =>
Settings # => Language #
Language_______
English
● -- ∧
Français
Italiano
∨
(5)
W elcome msg.
#* system password # =>
Settings # => Welcome Msg. #
New Message:
ABB Welcome!
“#“ to Confirm
“*“ to Cancel
==>
Done!
Max 64 characters can be entered.
(6)
Setting the W iegand output digits
#* system password # =>
Settings # => Wiegand Output #
|
— 36 —
ABB-Welcome M
Operation
Wiegand Output__
26 bit !
● -- ∧
34 bit !
∨
(7)
Set the related door lock when swiping the card
#* system password # =>
Settings # =>Choose Door #
Door Select______
1st(LOCK-GND)●∧
2nd(NC-CO-COM)
∨
Setting the lock which will be released when swiping the registered card:
1st (LOCK-GND): the lock connected with the LOCK-GND terminals will be released
when swiping the card.
2ND (NC-NO-COM): the lock connected with the NC-NO-COM terminals will be
released when swiping the card.
(8) Reset
#* system password # =>
Settings # => Reset # => #
Reset to Factory
Default?
“#“ to Confirm
“*“ to Cancel
==>
Done!
Reset all settings to factory settings, but other information, e.g. user names, logic
addresses and cards information cannot be reset.
(9)
Information
#* system password # =>
Settings # => Information #
|
— 37 —
ABB-Welcome M
Operation
Audio module: ∧
V1.07_131106
Card reader:
V0.10_131107 ∨
View the software information of each modules of the outdoor station.
*Reset the system password of keypad module:
It is possible to reset the system password to factory-setting if you have forgotten it.
The restoration of default factory settings does not delete the rest of the
information programmed on the system, such as user names and other settings.
1.
Disconnect the power supply.
2.
Reconnect the power
3.
Hold the “program button” for 5s within 30s.
4.
A “di” will be sounded and the system password will be reset to the default
(345678).
Pos: 67 /Di nA4 - A nleitu ngen Onlin e/Ueb ersc hrift en/2 ./Reini gung @ 1 9\m od_ 131 0733 980 533 _15. docx @ 10 785 3 @ 2 @ 1
|
— 38 —
ABB-Welcome M
5.5
5.5.1
Operation
Keypad outdoor station without display (Camera + audio+
keypad)
Calling a resident, just input physical address
In standby mode, a visitor can press the physical
address corresponding to the residence that you want to
call directly, from 001 to 250.
For a complex building, the visitor needs to press the
building number (01~60) + physical address (001~250)
to make a call from a gate station.
Fig. 24
5.5.2
Call guard unit
Press the button
to make a call to a guard unit.
Accept the call
30 s
120 s
==>
Guard Unit
“*“ to Cancel
5.5.3
Guard Unit
“*“ to Cancel
System settings
Users can enter the system settings by the following steps (during settings, press “#” to
confirm, press “*” to cancel. The default system password is 345678.):
1.
Set the device as an Outdoor Station or a Gate Station.
Outdoor Station:
#* system password # =>
1 # => 1 #
Gate Station:
#* system password # =>
1 # => 2 #
2.
Modify the "system password"
#* system password # =>
2 # => Enter new password (6-8 bits) # => Enter the password again #
|
— 39 —
ABB-Welcome M
3.
Operation
Modify the "door open code"
#* system password # =>
3# => Enter new door open code (6-8 bits) # => Enter the code again #
4.
Setting the voice message
If the audio module with the speech synthesis function (M251024A-.) is assembled,
the local language can be set.
#* system password # =>
4# => Press
5.
or
to choose the language => #
Enable/disable the access control function
Enable access control function:
#* system password # =>
5# => 1 #
Disable access control function:
#* system password # =>
5# => 2 #
*Reset the system password of keypad module:
It is possible to reset the system password to factory-setting if you have forgotten it.
The restoration of default factory settings does not delete the rest of the
information programmed on the system, such as user names and other settings.
1.
Disconnect the power supply.
2.
Reconnect the power
3.
Hold the “program button” for 5s within 30s.
4.
A “di” will be sounded and the system password will be reset to the default
(345678).
Pos: 21 /Di nA4 - A nleitu ngen Onlin e/In halt/KNX/Do orEnt ry/83 220 -AP-xxx/Be dienel eme nte - 8 322 0-AP-xxx @ 18\ mo d_1 3032 128 536 05_ 15.d ocx @ 103 673 @ @ 1
2149 @ @ 1
|
— 40 —
ABB-Welcome M
Advanced
configuration
Pos: 70 /Di nA4 - A nleitu ngen Onlin e/Ueb ersc hrift en/2 ./Ge raet eeins tellun gen @ 1 8\mo d_1 302 768 847 744 _15. docx @ 10 354 8 @ 2 @ 1
6
Advanced configuration
Connect to the PC to configure the keypad or display
Fig. 25
Pos: 75 /B usch-J aeg er (Neus truk tur )/M odul -Strukt ur/O nline -Doku me ntatio n/Steu er mod ule - Onlin e-Dok ume ntati on ( -- > F ür alle Dok ume nte <- -)/ +++ ++ ++ +++ ++ S eiten umb ruch + +++ ++ ++ +++ + @ 9\m od_ 126 8898 668 093 _0. docx @ 521 49 @ @ 1
|
— 41 —
ABB-Welcome M
Technical data
Pos: 76 /Di nA4 - A nleitu ngen Onlin e/Ueb ersc hrift en/1 ./T echnisc he D aten @ 18 \mo d_1 302 615 863 001 _15. docx @ 10 341 6 @ 1 @ 1
7
Technical data
Pos: 77 /Di nA4 - A nleitu ngen Onlin e/In halt/KNX/Do orEnt ry/83 220 -AP-xxx/ Tech nische Date n - 832 20-AP-x xx @ 1 8\m od_ 130 321 285 4559 _15 .docx @ 1 037 05 @ @ 1
Designation
Value
Operating temperature
-40 ℃- +70 ℃
Protection (cover frame
IP 54
assembled)
Power supply, door opener
18V 4A impulsive, 250 mA holding
(Lock-GND)
Floating output, door opener
30 V AC / DC 1A
(COM-NC-NO)
Single-wire clamps
2 x 0,28 mm 2 – 2 x 1 mm 2
Fine-wire clamps
2 x 0,28 mm 2 – 2 x 1 mm 2
Bus voltage
20-30 V
Pos: 78 /B usch-J aeg er (Neus truk tur )/M odul -Strukt ur/O nline -Doku me ntatio n/Steu er mod ule - Onlin e-Dok ume ntati on ( -- > F ür alle Dok ume nte <- -)/ +++ ++ ++ +++ ++ S eiten umb ruch + +++ ++ ++ +++ + @ 9\m od_ 126 8898 668 093 _0. docx @ 521 49 @ @ 1
|
— 42 —
ABB-Welcome M
Mounting / Installation
Pos: 79 /B usch-J aeg er (Neus truk tur )/M odul -Strukt ur/O nline -Doku me ntatio n/Übe rsch rifte n ( --> Fü r alle Doku men te < -- )/1. E bene /M - O/ Mont age / Ins tallatio n @ 18\ mod _13 0261 396 611 1_1 5.do cx @ 1 033 73 @ 1 @ 1
8
Mounting / Installation
Pos: 80 /B usch-J aeg er (Neus truk tur )/M odul -Strukt ur/O nline -Doku me ntatio n/Siche rheit (- -> Fü r alle D oku ment e < --) /War nhinweis e/Siche rheit - Nie ders pan nun gs- und 230 V-Leit ung en @ 18\ mod _13 026 178 214 91_1 5.d ocx @ 103 465 @ @ 1
Warning
Electric voltage!
Risk of death and fire due to electrical voltage of 100-240 V.
–
Low-voltage and 100-240 V cables must not be installed together in
a flush-mounted socket!
In case of a short-circuit there is the danger of a 100-240 V load on
the low-voltage line.
Pos: 81 /B usch-J aeg er (Neus truk tur )/M odul -Strukt ur/O nline -Doku me ntatio n/Siche rheit (- -> Fü r alle D oku ment e < --) /War nhinweis e/Siche rheit - Fachk enn tnisse @ 18 \mo d_1 302 774 384 017_ 15. docx @ 10 356 4 @ 2 @ 1
8.1
Requirements for the electrician
Warning
Electric voltage!
Install the device only if you have the necessary electrical engineering
knowledge and experience.
•
Incorrect installation endangers your life and that of the user of the
•
Incorrect installation can cause serious damage to property, e.g.
electrical system.
due to fire.
The minimum necessary expert knowledge and requirements for the
installation is as follows:
•
•
Apply the "five safety rules" (DIN VDE 0105, EN 50110):
1.
Disconnect from power source;
2.
Secure against being re-connected;
3.
Ensure that there is no voltage;
4.
Connect to the earth;
5.
Cover or barricade adjacent live parts.
Use suitable personal protective clothing.
•
Use only suitable tools and measuring devices.
•
Check the type supply network (TN system, IT system, TT system)
to secure the following power supply conditions (classic connection
to the ground, protective grounding, necessary additional
measures, etc.).
Pos: 82 /Di nA4 - A nleitu ngen Onlin e/In halt/KNX/Do orEnt ry/M onta ge/ Mont age hinweis e - Allg emei n @ 1 9\m od_ 131 056 367 047 8_15 .docx @ 1 077 43 @ 2 @ 1
|
— 43 —
ABB-Welcome M
8.2
Mounting / Installation
General installation instructions
•
Terminate all branches of the wiring system via a connected bus device (e.g.,
•
Do not install the system controller directly next to the bell transformer and other
•
Do not install the wires of the system bus together with 100-240 V wires.
•
Do not use common cables for the connecting wires of the door openers and wires
•
Avoid bridges between different cable types.
•
Use only two wires for the system bus in a four-core or multi-core cable.
indoor station, outdoor station, system device).
power supplies (to avoid interference).
of the system bus.
•
When looping, never install the incoming and outgoing bus inside the same cable.
•
Never install the internal and external bus inside the same cable.
Pos: 83 /B usch-J aeg er (Neus truk tur )/M odul -Strukt ur/O nline -Doku me ntatio n/Steu er mod ule - Onlin e-Dok ume ntati on ( -- > F ür alle Dok ume nte <- -)/ +++ ++ ++ +++ ++ S eiten umb ruch + +++ ++ ++ +++ + @ 9\m od_ 126 8898 668 093 _0. docx @ 521 49 @ @ 1
|
— 44 —
ABB-Welcome M
Mounting / Installation
Pos: 84 /B usch-J aeg er (Neus truk tur )/M odul -Strukt ur/O nline -Doku me ntatio n/Übe rsch rifte n ( --> Fü r alle Doku men te < -- )/2. E bene /M - O/ Mont age @ 1 8\m od_1 302 615 960 458 _15. docx @ 10 342 4 @ 2 @ 1
8.3
Mounting
Pos: 85. 1 /DinA4 - Anleit ung en O nline/I nhal t/KNX/DoorE ntry/ 832 20-AP-xxx /Mo nta ge - Mo dule/ Mon tag e - Mon tage dos e -- 83 220 -AP-xxx @ 19\ mod _132 325 040 684 8_1 5.doc x @ 1 110 98 @ @ 1
Prepare a pair of gloves to
protect yourself from cutting.
Dimension
Audio module
Pushbutton module
|
Camera module
Nameplate module
Keypad module
Display and card reader
module
— 45 —
ABB-Welcome M
Mounting / Installation
Cover frame
Flush-mounted
|
— 46 —
ABB-Welcome M
Mounting / Installation
Rain hood
Components of the Outdoor Station
3
1
4
2
Fig. 26
|
Mounting
— 47 —
ABB-Welcome M
No.
Functions
1
Cover frame
2
Modules
3
Flash-mounted box
4
Rain hood
Mounting / Installation
Mount each module at the cover frame
Fig. 27
1.
Mounting
Insert each module into the cover frame from behind until they click in place. All
modules can be inserted, e.g. the camera module, audio module, push button
module, keypad module, display and card reader module, nameplate module.
2.
|
Pay special attention to the top to bottom orientation of each module.
— 48 —
ABB-Welcome M
Mounting / Installation
Modules wiring
Fig. 28
Modules wiring
1.
Use cables to connect the modules together one by one.
2.
Ensure that the audio module is connected next to the camera module.
The distance zones for the installation of the outdoor station
When selecting the installation site ensure that the minimum distance to the right side is
adhered to for the removal of the end strip.
|
— 49 —
ABB-Welcome M
Mounting / Installation
Wires
Fig. 29
Mounting
1.
Prepare the installation box.
2.
Strip the wires.
–
The insulated section of the cable end must not be longer than 10 mm.
Assemble the frame into the flush-mounted box
Fig. 30
Mounting
1.
Hang the device in the installation box.
2.
Fasten the safety loop.
3.
Connect the wires into the enclosed clamp and plug the clamp onto the contact pins;
4.
Screw on the front of the device.
Fold the device and shut it until it audibly snaps in.
|
— 50 —
ABB-Welcome M
Mounting / Installation
Three types of installation
Option 1: Flush-mounted only with a flush-mounted box
Fig. 31
Flush-mounted only with a flush-mounted box
Option 2: Flush-mounted with a rain hood
Fig. 32
|
Flush-mounted with a rain hood
— 51 —
ABB-Welcome M
Mounting / Installation
Option 3: Surface-mounted with a rain hood
Fig. 33
Surface-mounted with a rain hood
Dismounting outdoor station
Fig. 34
Mounting
1.
2.
Use the enclosed mounting tool to remove the end strip.
Remove the screw that are used to fix the cover frame.
3.
Push up and pull out the outdoor station on the bottom of the cover frame.
|
— 52 —
ABB-Welcome M
Mounting / Installation
Dismount the modules
Fig. 35
1.
2.
Dismounting the m odules
Dismount the module from one side of the module.
Take out the modules.
Replace the name plates
Fig. 36
1.
2.
Mounting
Remove the pushbutton cover and write the user names on the label.
*Use a piece of labelling A4 sheet with software necessary for the correct format
and print the labels.
|
— 53 —
ABB-Welcome M
Mounting / Installation
Adjust the angle of the camera
Fig. 37
Adjust the angle of the camera
1.
Unscrew the camera;
2.
Adjust the angle of the camera in 4 directions(up, down, right and left)
3.
Screw on the camera.
|
— 54 —
ABB-Welcome M
Mounting / Installation
Extension of the outdoor station
Fig. 38
Mounting
1.
Make a hole for the cable.
2.
Use the joining fixtures to assemble the flush-mounted boxes horizontally.
3. Run the connection wires between the boxes for modules connection.
*The extension is useful for multi-outdoor stations connection.
Pos: 94 /B usch-J aeg er (Neus truk tur )/M odul -Strukt ur/O nline -Doku me ntatio n/Steu er mod ule - Onlin e-Dok ume ntati on ( -- > F ür alle Dok ume nte <- -)/ +++ ++ ++ +++ ++ S eiten umb ruch + +++ ++ ++ +++ + @ 9\m od_ 126 8898 668 093 _0. docx @ 521 49 @ @ 1
|
— 55 —
ABB-Welcome M
Mounting / Installation
Pos: 95 /Di nA4 - A nleitu ngen Onlin e/In halt/KNX/Do orEnt ry/Proj ektier ung -M erkbl att/Pr ojektie rPos: 9 7 /Busc h-Ja ege r (N eust ruktu r)/ Mo dul-Str uktu r/Onli ne-D oku ment ation /Rückseit en (-- > Für alle Dok um ente <- -)/R ückseit e - Bus ch-J aeg er - Allgem ein @ 20\ mod _13 273 200 748 86_1 5.d ocx @ 137 103 @ @ 1
Notice
=== E nde der Liste für Tex tma rke Ba ckcove r = ==
W e reserve the right to at all times make technical changes as well as changes to the
contents of this document without prior notice.
The detailed specifications agreed to at the time of ordering apply to all orders. ABB
accepts no responsibility for possible errors or incompleteness in this document.
W e reserve all rights to this document and the topics and illustrations contained therein.
The document and its contents, or extracts thereof, must not be reproduced, transmitted
or reused by third parties without prior written consent by ABB.
VER:1.0 │ 02.06.2014
ABB-Welcome M
Pos: 2 /DinA4 - Anl eitun gen Online /Inh alt/KNX/Doo rEntry /832 20-AP- xxx/Tit elblat t - 832 20-AP-xxx - ABB @ 1 9\m od_ 132 3249 806 476 _15. docx @ 11 108 4 @ @ 1
Platine de rue
=== E nde der Liste für Tex tma rke C over == =
ABB-Welcome M
Platine de rue
Pos: 4 /Busc h-Ja ege r (N eust rukt ur)/ Mo dul-St ruktu r/Onli ne-D oku ment ation /Inh altsve rzeich nis ( --> Fü r alle Doku men te <-- )/In haltsve rzeic hnis @ 19\ mod _13 206 490 4438 6_1 5.d ocx @ 109 653 @ @ 1
1
2
3
4
5
6
7
8
Sécurité .................................................................................................... 4
Usage prévu ............................................................................................. 4
Environnement .......................................................................................... 4
3.1
Appareils ABB........................................................................... 5
Description des modules ........................................................................... 6
4.1
Module audio ............................................................................ 6
4.1.1
Câblage des gâches et verrous ................................................. 9
4.2
Module caméra ....................................................................... 10
4.2.2
Connexion pour caméra déportée ............................................ 13
4.3
Module boutons-poussoirs....................................................... 14
4.4
Module clavier ......................................................................... 16
4.5
Module écran et lecteur de badges .......................................... 19
4.6
Module porte-étiquettes ........................................................... 22
Fonctionnement ...................................................................................... 24
5.1
Platine de rue à boutons-poussoirs .......................................... 24
5.1.1
Adressage .............................................................................. 25
5.1.2
Configuration de la langue pour la synthèse vocale (si le module
audio est équipé de cette fonction)........................................... 31
5.2
Platine de rue à boutons-poussoirs avec module écran ............ 33
5.3
Platine de rue à boutons-poussoirs avec module clavier ........... 35
5.4
Platine de rue avec clavier ....................................................... 37
5.4.1
Appeler un résident (3 types) ................................................... 37
5.4.2
Appeler l'interface gardien ....................................................... 39
5.4.3
Si un moniteur intérieur est en « mode absence » .................... 39
5.4.4
Si une interface gardien est en « mode interception »............... 39
5.4.5
Réglages système................................................................... 41
5.5
Platine de rue avec clavier sans écran (caméra, audio + clavier)51
5.5.1
Appel d'un résident, saisir uniquement l'adresse physique ........ 51
5.5.2
Appeler l'interface gardien ....................................................... 51
5.5.3
Réglages système................................................................... 51
Configuration avancée............................................................................. 53
Caractéristiques techniques..................................................................... 54
Montage / Installation .............................................................................. 55
8.1
Exigences à l'égard de l'électricien........................................... 55
—2—
ABB-Welcome M
8.2
8.3
Platine de rue
Consignes d'installation générales ........................................... 56
Montage ................................................................................. 58
=== E nde der Liste für Tex tma rke TOC == =
—3—
ABB-Welcome M
Platine de rue
Pos: 6 /Busc h-Ja ege r (N eust rukt ur)/ Mo dul-St ruktu r/Onli ne-D oku ment ation /Übe rschri ften (- -> Für alle D okum ent e < --)/ 1. Eb ene/S - T /Sicher heit @ 18\ mod _13 026 127 917 90_ 15.d ocx @ 103 357 @ 1 @ 1
1 Sécurité
Pos: 7 /Busc h-Ja ege r (N eust rukt ur)/ Mo dul-St ruktu r/Onli ne-D oku ment ation /Sicher heit (-- > Für alle Dok um ente <- -)/Wa rn hinweise /Sicher heit - 23 0 V @ 18\m od_ 130 260 681 675 0_15 .docx @ 1 033 08 @ @ 1
Avertissement
Tension électrique !
Danger de mort et d'incendie en raison de la présence d'une tension électrique
de 100-240 V.
–
Les travaux sur le système d'alimentation 100-240 V peuvent uniquement
être effectués par des électriciens autorisés !
–
Débrancher l'alimentation secteur avant l'installation et/ou le démontage !
Pos: 8 /Busc h-Ja ege r (N eust rukt ur)/ Mo dul-St ruktu r/Onli ne-D oku ment ation /Übe rschri ften (- -> Für alle D okum ent e < --)/ 1. Eb ene/A - F /Bestim mun gsge mä ßer Geb rau ch @ 18\ mod _13 027 6332 131 6_1 5.do cx @ 1034 83 @ 1 @ 1
2 Usage prévu
Pos: 9 /DinA4 - Anl eitun gen Online /Inh alt/KNX/Doo rEntry /832 20-AP- xxx/Besti mmu ngsg em aesse r Ge bra uch - 83 220 -AP-xxx- 500 @ 2 0\mo d_1 324 561 168 699 _15. docx @ 11 272 8 @ @ 1
La platine de rue fait partie intégrale du système ABB-Welcome M et fonctionne
exclusivement avec des composants de ce système. L'appareil doit uniquement être installé
dans des boites d’encastrement ABB et dans des cadres saillis avec visière.
Pos: 10 /B usch-J aeg er (Neus truk tur )/M odul -Strukt ur/O nline -Doku me ntatio n/Übe rsch rifte n ( --> Fü r alle Doku men te < -- )/1. E bene /U - Z/U mwelt @ 18\ mod _13 026 141 5896 7_1 5.d ocx @ 103 383 @ 1 @ 1
3 Environnement
Pos: 11 /B usch-J aeg er (Neus truk tur )/M odul -Strukt ur/O nline -Doku me ntatio n/Umw elt ( --> F ür all e Doku me nte <-- )/Hinweis e/Hinw eis - U mwelt - Hinweis Elektr oge räte @ 1 8\mo d_1 302 763 973 434 _15. docx @ 10 350 0 @ @ 1
Prendre en compte la protection de l'environnement !
Les appareils électriques et électroniques usagés ne doivent pas être
éliminés avec les ordures ménagères.
–
L'appareil contient des matières premières de valeur qui peuvent être
recyclées. Par conséquent, l'élimination de l'appareil doit se faire dans
un centre de collecte approprié.
—4—
ABB-Welcome M
Platine de rue
Pos: 12 /Di nA4 - A nleitu ngen Onlin e/Ueb ersc hrift en/2 ./ABB Gera ete @ 19 \mo d_1 323 162 843 832_ 15. docx @ 11 087 5 @ 2 @ 1
3.1 Appareils ABB
Pos: 13 /B usch-J aeg er (Neus truk tur )/M odul -Strukt ur/O nline -Doku me ntatio n/Umw elt ( --> F ür all e Doku me nte <-- )/Hinweis e/Hinw eis - U mwelt - ABB Elektro ger äte @ 19\ mo d_1 3231 627 458 39_ 15.d ocx @ 110 867 @ @ 1
Tous les matériaux d'emballage et appareils ABB portent les marquages et sceaux d'essai
pour une élimination correcte. Il faut toujours éliminer les matériaux d'emballage et les
produits électriques ainsi que leurs composants via des centres de collecte et entreprises
agréés.
Les produits ABB sont conformes aux exigences légales, et aux lois régissant les appareils
électroniques et électriques et au règlement REACH.
(Directive européenne 2002/96/CE DEEE et 2002/95/CE RoHS)
(Règlement REACH et loi sur l'application du règlement (CE) n°1907/2006)
—5—
ABB-Welcome M
Platine de rue
4 Description des modules
4.1 Module audio
Fig. 1
Module audio
N°
Fonction
1
La LED clignote lentement, indiquant qu'un appel est en cours
La LED clignote rapidem ent, indiquant que le système est occupé
2
La LED s'allume, indiquant qu'une communication est possible
3
La LED s'allume, indiquant que la porte est déverrouillée
4
Boutons-poussoirs d'appel
—6—
ABB-Welcome M
Fig. 2
Platine de rue
Arrière du module audio
N°
Fonctions
1
Prise pour module caméra
2
Prise pour mise à jour logicielle de l'appareil
3
Connexions par enfichage (COM-NC-NO) : contact sec NO ou NF (30 VAC/DC
1 A)
4
Connexions par enfichage (Lock-GND) : commande de gâche (impulsion
5
Connexions par enfichage (DC-GND) : Alimentation de la platine de rue
6
Connexions par enfichage (a-b) : Connexion du bus 2 fils
7
Prise pour module de boucle inductive
8
Prise pour module suivant
9
Prise pour bouton-poussoir de sortie
10
Prise pour capteur de contrôle de statut de porte
11
Bouton rotatif pour le paramétrage de l'adresse de la platine de rue (1-9)
de 18 V 4 A, 250 mA en continu)
—7—
ABB-Welcome M
Platine de rue
12
Configurer le retour de son pour les boutons-poussoirs : MARCHE/ARRÊT
13
Configurer les boutons-poussoirs en mode un appel ou deux appels
14
Configurer les fonctions du 1er / 2ème bouton-poussoir.
(MARCHE = deux appels ; ARRÊT = un appel)
3->ARRÊT, 4->ARRÊT = appel moniteur intérieur / appel moniteur
intérieur ;
3->MARCHE, 4->ARRÊT = Commande d’éclairage / appel moniteur
intérieur ;
3->ARRÊT, 4->MARCHE = appel interface gardien / appel moniteur
intérieur ;
3->MARCHE, 4->MARCHE = Commande d’éclairage / appel interface
gardien.
15
Ajuster le volume du haut-parleur.
16
Ajuster la durée de déverrouillage de la porte, 1-10 s (disponible pour
la serrure connectée à Lock-GND)
—8—
ABB-Welcome M
4.1.1
Platine de rue
Câblage des gâches et verrous
—9—
ABB-Welcome M
Platine de rue
4.2 Module caméra
Fig 3
Module Caméra
N°
Fonctions
1
Prise pour caméra analogique supplémentaire
2
Prise pour module audio
3
Cavalier pour le réglage du format vidéo : PAL /NTSC
4
Ajustement du champ de vision de la caméra
— 10 —
ABB-Welcome M
Platine de rue
4.2.1 Câblage d’une caméra déportée
Toutes les caméras avec une sortie vidéo de 1 Vp-p 75 Ω ,CVBS (signal de diffusion vidéo composite) peuvent
être connectées au module caméra.
En général, la distance de transmission entre la caméra analogique et la platine de rue peut atteindre jusqu'à
50 mètres en utilisant des câbles coaxiaux ou environ 10 mètres avec d'autres types de câbles.
Deux types de connexions :
Option 1 : La caméra analogique est allumée en permanence
Option 2 : La caméra analogique est allumée pendant les heures de travail uniquement
— 11 —
ABB-Welcome M
Platine de rue
— 12 —
ABB-Welcome M
Platine de rue
4.2.2 Connexion pour caméra déportée
Le module caméra peut être utilisé comme caméra déportée, et le câblage est illustré ci-après.
3 paires de bus 2
fils ensemble
— 13 —
ABB-Welcome M
Platine de rue
4.3 Module boutons-poussoirs
Fig 4
Module boutons poussoirs
N°
Fonctions
1
Prise pour module précédent
2
Prise pour module suivant
— 14 —
ABB-Welcome M
Fig 5
Platine de rue
Configuration des appels par B.P.
N°
Fonctions
1
Quelle que soit la structure du module boutons-poussoirs, les numéros de
boutons sont listés de haut en bas et de gauche à droite (en mode deux
colonnes)
2
Le bouton d'éclairage / la fonction appel interface gardien est toujours
3
Les noms d'utilisateur peuvent être imprimés avec l'outil d'étiquetage du
assigné(e) au 1er /2ème bouton.
logiciel de configuration W elcome M.
— 15 —
ABB-Welcome M
Platine de rue
4.4 Module clavier
Fig 6
Module Clavier
N°
Fonctions
1
Bouton reset
2
Prise pour module précédent
3
Prise pour mise à jour logicielle de l'appareil
4
Prise USB pour le raccordement au PC : téléchargement/transfert de la
configuration
5
Prise pour module suivant
— 16 —
ABB-Welcome M
Fig. 7
Platine de rue
Face avant du clavier
N°
Fonctions
1
Appeler un résident
Le visiteur tape un numéro de moniteur intérieur (001) ou un numéro
d'appartement (par ex. : 0101, programmé à l'avance) pour appeler un
résident.
*Le visiteur peut également sélectionner un nom de résident avec le bouton
ou le bouton
Le bouton
du module d'affichage pour effectuer un appel.
permet d'annuler l'appel.
*Cette fonction est uniquement disponible dans Fig. 1.
2
Appeler l'interface gardien
Un visiteur peut appeler une interface gardien en appuyant sur le bouton
si une interface gardien est installée dans le système.
3
Déverrouillage par mot de passe
Appuyer sur «
+ mot de passe+
» pour déverrouiller la serrure
connectée aux bornes « LOCK-GND » du module audio.
Appuyer sur «
+2 +
+ mot de passe +
» pour déverrouiller la 2ème
serrure connectée aux bornes « COM-NC-NO » du module audio.
Le mot de passe initial est 123456 et les résidents peuvent configurer leur
propre mot de passe personnalisé avec les stations internes.
4
Configuration du système
— 17 —
ABB-Welcome M
Appuyer sur «
Platine de rue
+
+ mot de passe système +
» pour accéder
au menu
de configuration de l'ingénierie système.
Le mot de passe initial est 345678 et peut être modifié par
l'administrateur.
— 18 —
ABB-Welcome M
Platine de rue
4.5 Module écran et lecteur de badges
Fig. 8
Module écran
N°
Fonctions
1
Bouton reset
2
Prise pour module précédent
3
Prise pour mise à jour logicielle de l'appareil
4
Prise pour sortie Wiegand
5
Prise USB pour le raccordement au PC : téléchargement/transfert de la
configuration
6
Prise pour module suivant
— 19 —
ABB-Welcome M
Fig. 9
Platine de rue
Module écran face avant
N°
Fonctions
1
Ecran LCD
2
Support badge ID ou IC.
Passer le badge enregistré pour déverrouiller la porte. Le badge peut être
programmé par le module lui-même ou à l'aide d'un PC pour télécharger
le fichier de programmes. (M251021CR est équipé d'un lecteur de
badges ID tandis que M251022CR est équipé d'un lecteur de badges IC.)
3
Support sortie Wiegand.
Le format Wiegand par défaut est 26 bits mais il peut également être étendu à
34 bits.
*Le module écran doit être raccordé après le module audio.
Spécification technique :
WM0312:Module écran avec lecteur de badges ID
Fréquence de
travail
125 KHz
— 20 —
ABB-Welcome M
Platine de rue
Norme
ISO18000-2
Badges pris en
charge
EM4100, EM4205, EM4305, EM4450, TK4100, T5567 / T5577 HID 2 compatible
Format de
sortie
Wiegand 26, 34 bits
WM0313:Module écran avec lecteur de badges IC
Fréquence de
travail
13,56 MHz
Norme
ISO 14443A
Badges pris en
charge
Mifare One S50/S70, etc.
Format de
sortie
Wiegand 26, 34 bits
— 21 —
ABB-Welcome M
Platine de rue
4.6 Module porte-étiquettes
Fig. 10
Module porte-étiquettes
N°
Fonctions
1
Prise pour module précédent
2
Prise pour module suivant
L'étiquetage du module Porte-étiquettes peut être imprimé avec l'outil d'étiquetage du
logiciel de configuration Welcome M.
— 22 —
ABB-Welcome M
Platine de rue
15.do cx @ 1 033 65 @ 1 @ 1
— 23 —
ABB-Welcome M
5
Platine de rue
Fonctionnement
Pos: 19 /Di nA4 - A nleitu ngen Onlin e/Ueb ersc hrift en/2 ./Nor male r Bet rieb @ 18 \mo d_1 302 768 8209 65_ 15. docx @ 10 3540 @ 2 @ 1
5.1 Platine de rue à boutons-poussoirs
Fig. 11
Platine de rue à boutons-poussoirs
Pos: 20 /Di nA4 - A nleitu ngen Onlin e/Ueb ersc hrift en/3 ./Bedie nele men te @ 20\ mod _13 232 6022 055 9_1 5.do cx @ 1 116 47 @ 3 @ 1
— 24 —
ABB-Welcome M
Platine de rue
5.1.1 Adressage
1.
Configuration des fonctions du 1er / 2ème bouton-poussoir
001
2
1
002
Co
3
3 4
003
1
2
3
Fig. 12
4
Adressage
N°
Fonctions
1
3->OFF, 4->OFF
2
Appel appartement 01
3
Appel appartement 02
4
Appel appartement 03
— 25 —
ABB-Welcome M
Platine de rue
2
1
001
Co
3
3 4
002
1
2
Fig. 13
4
Adressage
N°
Fonctions
1
3->ON, 4->OFF
2
Commande d’éclairage. L'éclairage est relié à un relais actionneur
(W M0808) dont l’adresse doit être identique à celle de la platine de rue.
3
Appel appartement 01
4
Appel appartement 02
— 26 —
ABB-Welcome M
Platine de rue
Interface
gardien
1
2
001
Co
3
3 4
002
1
2
Fig. 14
4
Adressage
N°
Fonctions
1
3->OFF, 4->ON
2
Appel de l'interface gardien. S'il y a plusieurs interfaces gardien dans la
même section, toutes les interfaces gardien sonnent en même temps
lorsqu'un visiteur appuie sur le bouton « appeler interface gardien ».
3
Appel appartement 01
4
Appel appartement 02
— 27 —
ABB-Welcome M
Platine de rue
2
1
Interface
gardien
Co
3
3 4
001
1
Fig. 15
4
Adressage
N°
Fonctions
1
3->ON, 4->ON
2
Commande d’éclairage
3
Appel de l'interface gardien
4
Appel appartement 01
— 28 —
ABB-Welcome M
2.
Platine de rue
Configuration des boutons-poussoirs en mode un appel ou deux appels
001
2
002
1
3
MA
003
2
4
1
2
3
4
Fig. 16
004
5
Adressage
N°
Fonctions
1
2-> OFF
2
Appel appartement 01
3
Appel appartement 02
4
Appel appartement 03
5
Appel appartement 04
001
002
2
001
1
MA
3
003
004
4
5
005
2
006
6
7
007
8
1
3
5
7
2
4
6
8
008
9
— 29 —
ABB-Welcome M
Fig. 17
Platine de rue
Adressage
N°
Fonctions
1
2-> ON
2
Appel appartement 01
3
Appel appartement 02
4
Appel appartement 03
5
Appel appartement 04
6
Appel appartement 05
7
Appel appartement 06
8
Appel appartement 07
9
Appel appartement 08
Interface
gardien
2
1
MA
Co
2 3 4
001
002
003
004
4
5
6
7
005
8
Fig. 18
3
1
3
5
2
4
6
006
9
Adressage
N°
Fonctions
1
2-> ON,3-> ON, 4-> ON
— 30 —
ABB-Welcome M
Platine de rue
2
Commande d’éclairage
3
Appel de l'interface gardien
4
Appel appartement 01
5
Appel appartement 02
6
Appel appartement 03
7
Appel appartement 04
8
Appel appartement 05
9
Appel appartement 06
5.1.2 Configuration de la langue pour la synthèse vocale (si le module audio est
équipé de cette fonction)
Si le module audio avec une fonction de synthèse vocale (WM2307) est assemblé, la langue
locale peut être configurée.
Positionner le potentiomètre d’adressage de la platine de rue sur « 0 », maintenir le 1er bouton
pendant 3 s pour lire le message vocal.
Cliquer à nouveau sur ce bouton pour sélectionner les langues, une par une.
Après avoir sélectionné la langue appropriée, maintenir le 1er bouton pour enregistrer et quitter
le réglage.
1
2
3
4
Une colonne
Fig. 19
1er bouton
1
3
5
7
2
4
6
8
Deux colonnes
Adressage
— 31 —
ABB-Welcome M
Platine de rue
Platine de rue à boutons-poussoirs utilisée comme platine de rue au portail
Si la platine de rue à boutons-poussoirs est installée au portail, il faut utiliser une passerelle
définie en mode passerelle d'étage.
Appartement 01
A
Appartement 02
Appartement 01
A
Appartement 02
B
Appartement 03
C
B
Appartement 03
C
Appartement 04
D
Appartement 05
Appartement 04
A
Appartement
05
E
Appartement 06
F
B
Appartement 06
C
Platine de rue
Platine de rue
Platine de rue
Bâtiment de
gauche
Entrée par le
portail
Bâtiment de
droite
Fig. 20
Pour plus d'informations, ce référer au mode d'emploi « Passerelle », chapitre Passerelle
d'étage.
Pos: 71 /Di nA4 - A nleitu ngen Onlin e/Ueb ersc hrift en/3 ./Abschl usswide rsta nd @ 19\ mod _13 219 5807 990 6_1 5.do cx @ 1100 83 @ 3 @ 1
Pos: 72 /Di nA4 - A nleitu ngen Onlin e/In halt/KNX/Do orEnt ry/Bedie nun g/Abschl usswide rsta nd s etzen 83 220 -AP-xxx @ 19\ mod _13 1072 339 236 9_1 5.do cx @ 1 078 41 @ @ 1
— 32 —
ABB-Welcome M
5.2
Platine de rue
Platine de rue à boutons-poussoirs avec module écran
Le module écran et lecteur de badges peut être assemblé
avec une platine de rue à boutons-poussoirs et l'utilisateur
peut passer les badges pour ouvrir la porte. Pour une telle
combinaison, un badge principal est nécessaire pour
permettre à un électricien de gérer cette platine de rue.
Enregistrer/désactiver un badge principal (nous
recommandons de faire faire ce travail par un spécialiste) :
1.
Couper le courant.
2.
Rétablir le courant
3.
Maintenir le « bouton programmer » enfoncé pendant
Fig. 21
5 s pour accéder à l'interface « programmer badge
principal » dans un délai de 30 s.
4.
Tout badge scanné par le lecteur pendant cette
période est considéré comme nouveau badge
PRINCIPAL Un message « Badge principal enregistré
avec succès » apparaît à l'écran.
5.
Si le badge existe, lorsque vous le repassez, les
informations sont supprimées et un message « Badge
principal supprimé avec succès » apparaît à l'écran.
1 seul badge principal peut être enregistré.
Accéder au réglage système à l'aide du badge principal :
1.
2.
Passer le badge PRINCIPAL pour accéder au menu réglage. Trois LED s'allument.
6 options :
Programmer badge ;
Langue ;
Sortie Wiegand ;
Sélectionner porte ;
Date & Heure ;
Retour
— 33 —
ABB-Welcome M
Platine de rue
Le compte à rebours est de 5 s pour chaque option.
3.
Repasser le badge PRINCIPAL dans un délai de 5 s pour passer à l'option suivante.
Ou, au bout de 5 s, l'option actuelle est sélectionnée.
4.
Au bout de 30 s, le menu réglages est quitté.
Au bout de 5 s,
Passer le badge
sélectionner l'option
PRINCIPAL
actuelle
Menu_________05
Menu_________√
Programmer
badge--- ∧
==> ==>
Programmer
badge--- ∧
Passer le badge
PRINCIPAL, accéder au
réglage
Badge de proximité
05
==>
Enregistrer badge-- ∧
Langue
Passer le badge
PRINCIPAL dans un délai
de 5 s pour passer à
l'option
suivante.
Menu_________05
Passer le badge
PRINCIPAL dans un
délai de 5 s pour
Menu_________05
==> Programmer badge
∧
Langue--------
==>
Programmer badge
∧Langue
Sortie Wiegand ∨
— 34 —
ABB-Welcome M
Platine de rue
5.3 Platine de rue à boutons-poussoirs avec module clavier
Le module clavier peut être assemblé avec une platine de
rue à boutons-poussoirs et l'utilisateur peut saisir un code
pour ouvrir la porte.
Les utilisateurs peuvent accéder au menu des réglages
système en suivant les étapes suivantes (pendant le
réglage, appuyer sur « # » pour valider, appuyer sur « * »
pour annuler, le mot de passe du système par défaut est
345678) :
Fig. 22
N°
Fonctions
1
Activer la fonction clavier codé
Appuyer sur «
+
+ mot de passe système +
+5+
+1+
+5+
+2+
»
Désactiver la fonction clavier codé
Appuyer sur «
+
+ mot de passe système +
»
2
Modifier le code de déverrouillage
Appuyer sur «
+
+ mot de passe système +
Nouveau code (6 ou 8 num) +
+3+
+
+ Confirmation du nouveau code +
»
3
Modifier le code système
Appuyer sur «
+
+ mot de passe système +
Nouveau code (6 ou 8 num) +
+2+
+
+ Confirmation du nouveau code +
»
4
Configuration de la langue de la synthèse vocale
Appuyer sur «
+
+ mot de passe système +
+4+
utiliser les flèches pour sélectionner la langue et valider avec
:
.
— 35 —
ABB-Welcome M
Platine de rue
*Réinitialiser le mot de passe système du module clavier :
Il est possible de restaurer le réglage d'usine du mot de passe système si vous l'avez oublié.
La restauration des réglages d'usine par défaut ne supprime pas le reste des informations
programmées dans le système, comme les noms d'utilisateur et autres réglages.
1.
Couper le courant.
2.
Rétablir le courant
3.
Maintenir le « bouton programmer » pendant 5 s dans un délai de 30 s.
4.
Un son retentit et le mot de passe du système par défaut est restauré (345678).
— 36 —
ABB-Welcome M
Platine de rue
5.4 Platine de rue avec clavier
5.4.1 Appeler un résident (3 types)
1.
Par une adresse physique
L'adresse physique est le code interne que la platine de rue
envoie par la connexion de bus aux moniteurs internes ou
autres appareils dans le système. Pour chaque
appartement, l'adresse physique est l'adresse d'un moniteur
intérieur qui est installé dans l'appartement. Pour chaque
bâtiment, l'adresse physique est l'adresse d'une passerelle
qui est installée pour chaque bâtiment et est également
appelée numéro de bâtiment.
En mode veille, un visiteur peut sélectionner l'adresse
Fig. 23
physique correspondant à la résidence qu'il veut appeler
directement, entre 001 et 250.
Pour un bâtiment complexe, un visiteur doit appuyer sur le
numéro de bâtiment (01~60) + adresse physique (001~250)
ou effectuer un appel dans la platine de rue au portail.
Saisir Adr.
physique :
01 001
2.
Par une adresse logique
L'adresse logique est un code qu'un visiteur peut sélectionner pour effectuer un appel. Le
code doit d'abord être assigné puis associé à l'adresse physique.
Le n° d'appartement ou certains codes spéciaux peuvent être utilisés pour configurer l'adresse
logique, qui est facile à mémoriser pour les utilisateurs.
Configurer l'adresse logique en suivant les étapes ci-après :
Assigner l'adresse logique :
#* mot de passe du système # => réglage système =>
Carnet d'adresses => Ajouter => Adr logique
— 37 —
ABB-Welcome M
Platine de rue
Adr. physique :
001
Adr. logique :
Activer le mode d'appel « adresse logique »
#* mot de passe du système # => réglage système =>
Configuration => Mode Appel
Mode Appel_______
Adr. physique
Nbre de chiffres :
-4-
==>
Adr. logique-------∨
3.
Par nom de résident
(Remarques : cette fonction est uniquement disponible pour la platine de rue avec un module
clavier (WM2310)
En mode veille, appuyer sur le bouton
résidents. Utiliser les boutons
appuyer sur le bouton
et
ou sur le bouton
pour afficher les noms de
pour rechercher la station résidentielle souhaitée et
pour effectuer un appel.
Un visiteur peut également saisir directement le nom de résident avec un clavier pour
effectuer un appel.
Les noms de résidents doivent d'abord être assignés puis associés à l'adresse physique.
#* mot de passe du système # => réglage système
=> Carnet d'adresses => Ajouter => Liste de contacts
Adr. physique :
01001
Nom d'utilisateur :
— 38 —
ABB-Welcome M
Platine de rue
5.4.2 Appeler l'interface gardien
Appuyer sur le bouton
pour effectuer un appel à l'interface gardien.
Accepter l'appel
30 s
120 s
==>
Interface gardien
Interface gardien
5.4.3 Si un moniteur intérieur est en « mode absence »
Si un moniteur intérieur fonctionne en « mode absence », un visiteur peut
enregistrer un message pour le résident après avoir accédé à l'interface
suivante.
Lorsqu'un son a retenti, le
visiteur peut enregistrer le
message
Lecture du message...
30 s
Andy
« * » pour annuler
120 s
==>
Andy
« * » pour annuler
001 s
==>
Enregistrement en
cours...
5.4.4 Si une interface gardien est en « mode interception »
Si une interface gardien fonctionne en « mode interception », l'appel d'une
platine de rue à un moniteur intérieur est intercepté par l'interface gardien et
une fois l'identité confirmée, l'interface gardien transmet l'appel au moniteur
intérieur.
— 39 —
ABB-Welcome M
Appel d'une platine de
rue à un moniteur
intérieur
30 s
Interface gardien
« * » pour annuler
Platine de rue
L'interface gardien
accepte l'appel
L'interface gardien
transfère l'appel à un
moniteur intérieur
120 s
==>
Interface gardien
==>
==>
« * » pour annuler
120 s
Andy
« * » pour annuler
— 40 —
ABB-Welcome M
Platine de rue
5.4.5 Réglages système
(Pendant le réglage, appuyer sur « # » pour valider, appuyer sur « * » pour annuler, le
mot de passe du système par défaut est 345678) :
1.
Accéder au menu des réglages système
# * mot de passe système #
Menu__________
Configurations-- ∧
Contrôle d'accès
2.
Configurations
(1)
Configurer l'appareil comme platine de rue ou platine de rue au portail.
Platine de rue :
#* mot de passe système # =>
Configurations # => Type d'appareil # => St. externe # (par défaut)
Type
d'appareil_____
St. externe ● -- ∧
Platine de rue au portail :
#* mot de passe système # =>
Configurations # => Type d'appareil # => Platine de rue au portail #
Type
d'appareil_____
St. externe
(2)
∧
Configurer le mode d'appel : effectuer un appel par adresse physique ou code
logique
Configurer le mode d'appel par adresse physique :
#* mot de passe système # =>
— 41 —
ABB-Welcome M
Platine de rue
Configurations # => Mode appel # => Adresse physique #
Mode
Appel_______
Adr. physique● ∧
Configurer le mode appel par code logique, nbre de chiffres (1-8 chiffres) :
#* mot de passe système # =>
Configurations # => Mode appel # => Code logique #
Mode
Appel_______
Adr. physique
(3)
∧
Réglage du mot de passe du système
Modifier le mot de passe du système
#* mot de passe système # =>
Configurations # => Code système # => Modifier #
Nouveau mot de
passe :
Ressaisir :
==>
******
Terminé !
==>
******
Réinitialiser le mot de passe du système
#* mot de passe système # =>
Configurations # => Code système # => Réinitialiser #
Réinitialiser code
système ?
==>
Terminé !
« # » pour valider
« * » pour annuler
3.
Contrôle d'accès
(1)
Code d'ouverture de porte
— 42 —
ABB-Welcome M
Platine de rue
Le mot de passe peut être configuré sous forme de 6-8 chiffres. Le mot de passe
d'ouverture de porte par défaut est « 123456 », et il peut être modifié avec une platine
de rue.
Les utilisateurs peuvent également configurer leurs propres mots de passe avec les
moniteurs intérieurs, 6 000 mots de passe peuvent être enregistrés au total.
Configurer le mot de passe d'ouverture de porte MARCHE/ARRÊT (par défaut :
123456)
#* mot de passe système # =>
Contrôle d'accès # => Code d'ouverture de porte # => Activer / Désactiver #
Code d'ouverture
de porte__
Terminé !
==>
Désactiver
∧
--
Modifier le mot de passe d'ouverture de porte
#* mot de passe système # =>
Contrôle d'accès # => Code d'ouverture de porte # => Modifier #
Nouveau mot de
passe :
Ressaisir :
==>
******
==>
Terminé !
******
Réinitialiser le mot de passe d'ouverture de porte
#* mot de passe système # =>
Contrôle d'accès # => Code d'ouverture de porte # => Réinitialiser #
Réinitialiser code
d'ouverture de porte ?
==>
Terminé !
« # » pour valider
« * » pour annuler
— 43 —
ABB-Welcome M
(2)
Platine de rue
Badge de proximité (3 000 badges peuvent être enregistrés pour une platine de
rue.)
Enregistrer badges :
#* mot de passe système # =>
Contrôle d'accès # => Badge de proximité # => Enregistrer badge #
Saisir n° de
badge :
==>
Saisir n° de
badge :
0123456
0123456
Supprimer badges :
#* mot de passe système # =>
Contrôle d'accès # => Badge de proximité # => Supprimer badge #
Saisir n° de
badge :
==>
0123456
Saisir n° de
badge :
0123456
Supprimer tous les badges
#* mot de passe système # =>
Contact # => Badge de proximité # => Supprimer tout #
Supprimer tous
les badges ?
==>
Terminé !
« # » pour valider
4.
Contact (3 000 noms de la combinaison de 24 caractères alphanumériques)
(1)
Ajouter
Ajouter le contact par noms d'utilisateur
#* mot de passe système # =>
Contact # => Ajouter # => Noms d'utilisateur #
— 44 —
ABB-Welcome M
Platine de rue
Adr. physique :
001
Nom d'utilisateur :
Les noms de résidents doivent être associés à l'adresse physique.
Ajouter le contact par adresse logique
#* mot de passe système # =>
Contact # => Ajouter # => Adr. logique #
Adr. physique :
001
Adr. logique :
L'adresse logique doit être associée à l'adresse physique.
(2)
Modifier
Modifier le contact par noms d'utilisateur
#* mot de passe système # =>
Contact # => Modifier # => Noms d'utilisateur #
_______________
Alexander.G -- ∧
Bodin.K
Modifier les noms de résidents et leurs adresses physiques correspondantes.
Modifier le contact par adresse logique
#* mot de passe système # =>
Contact # => Modifier # => Adr. logique #
Saisir adr. logique :
0101
— 45 —
ABB-Welcome M
Platine de rue
Modifier l'adresse logique et son adresse physique correspondante à l'aide du clavier
alphanumérique.
(3)
Supprimer
Supprimer le contact par noms d'utilisateur
#* mot de passe système # =>
Contact # => Supprimer # => Noms d'utilisateur #
_______________
Alexander.G -- ∧
Bodin.K
Supprimer le contact par adresse logique
#* mot de passe système # =>
Contact # => Supprimer # => Adr. logique #
Saisir adr. logique :
0101
(4)
Effacer tout
#* mot de passe système # =>
Contact # => Effacer tout #
Supprimer tous les
noms ?
==>
Terminé !
« # » pour valider
« * » pour annuler
Effacer toutes les listes avec les noms de résidents et adresses logiques à partir de ce
menu.
— 46 —
ABB-Welcome M
5.
Platine de rue
Réglage système
(1)
Date et heure
#* mot de passe système # =>
Réglages # => Date & heure # => Saisir heure et date => #
01.01.2013
==>
07:00
(2)
Terminé !
Durée d'ouverture de porte
#* mot de passe système # =>
Réglages # => Durée d'ouverture de porte # => Durée 1-10 s (par défaut : 3s) => #
Lock(NC-NO-C) indique que la serrure est connectée aux bornes COM-NC-NO.
Lock(NC-NO-C)
Durée d'ouverture
(1-10 s)
==>
Terminé !
3s
(3)
Activation/désactivation du message vocal
Si le module audio avec une fonction de synthèse vocale (WM2307) est assemblé, la
fonction de synthèse vocale peut être activée ou désactivée. La langue locale peut
également être sélectionnée.
#* mot de passe système # =>
Réglages # => Message vocal #
Message vocal___
Marche
-∧
●-
==>
Terminé !
Si le module audio n'est pas équipé de la fonction de synthèse vocale, ceci est indiqué
aux utilisateurs
lorsqu'ils accèdent à ce menu.
— 47 —
ABB-Welcome M
Platine de rue
Pas cette fonction !
(4)
Sélectionner langue
#* mot de passe système # =>
Réglages # => Langue #
Langue_______
English
● -- ∧
Français
(5)
Message d'accueil
#* mot de passe système # =>
Réglages # => Message d'accueil #
Nouveau
message :
==>
Terminé !
ABB Welcome!
« # » pour valider
La saisie doit comporter max. 64 caractères.
(6)
Configuration des valeurs de sortie Wiegand
#* mot de passe système # =>
Réglages # => Sortie Wiegand #
Sortie Wiegand__
26 bits !
● -- ∧
34 bits !
(7)
Configurer la serrure de porte associée lors du passage du badge
— 48 —
ABB-Welcome M
Platine de rue
#* mot de passe système # =>
Réglages # =>Sélectionner porte #
Sélectionner
porte______
1er (LOCK-GND)●∧
Configuration de la serrure qui est déverrouillée lors du passage du badge enregistré :
1er (LOCK-GND) : la serrure connectée aux bornes LOCK-GND est déverrouillée lors du
passage du badge.
2ème (NC-NO-COM) : la serrure connectée aux bornes NC-NO-COM est déverrouillée lors
du passage du badge.
(8)
Réinit.
#* mot de passe système # =>
Réglages # => Réinitialiser # => #
Restaurer les
réglages d'usine
par défaut ?
==>
Terminé !
« # » pour valider
Restaurer tous les réglages d'usine par défaut, mais d'autres informations comme les
noms d'utilisateur, adresses logiques et données de badges ne peuvent pas être
réinitialisées.
(9)
Informations
#* mot de passe système # =>
Réglages # => Informations #
Module audio :
∧
V1.07_131106
Lecteur de
badges :
Consulter les informations logicielles de chaque module de la platine de rue.
— 49 —
ABB-Welcome M
Platine de rue
*Réinitialiser le mot de passe système du module clavier :
Il est possible de restaurer le réglage d'usine du mot de passe système si vous l'avez oublié.
La restauration des réglages d'usine par défaut ne supprime pas le reste des informations
programmées dans le système, comme les noms d'utilisateur et autres réglages.
1.
Couper le courant.
2.
Rétablir le courant
3.
Maintenir le « bouton programmer » pendant 5 s dans un délai de 30 s.
4.
Un « di » retentit et le mot de passe du système par défaut est restauré (345678).
Pos: 67 /Di nA4 - A nleitu ngen Onlin e/Ueb ersc hrift en/2 ./Reini gung @ 1 9\m od_ 131 0733 980 533 _15. docx @ 10 785 3 @ 2 @ 1
— 50 —
ABB-Welcome M
5.5
Platine de rue
Platine de rue avec clavier sans écran (caméra, audio + clavier)
5.5.1 Appel d'un résident, saisir uniquement l'adresse physique
En mode veille, un visiteur peut sélectionner l'adresse
physique correspondant à la résidence qu'il veut appeler
directement, entre 001 et 250.
Pour un bâtiment complexe, un visiteur doit appuyer sur le
numéro de bâtiment (01~60) + adresse physique (001~250)
pour effectuer un appel à partir d'une platine de rue au
portail.
Fig. 24
5.5.2 Appeler l'interface gardien
Appuyer sur le bouton
pour effectuer un appel à l'interface gardien.
5.5.3 Réglages système
Les utilisateurs peuvent accéder aux réglages système en suivant les étapes ci-après
(pendant les réglages, appuyer sur « # » pour valider, appuyer sur « * » pour annuler. Le mot
de passe par défaut est 345678.) :
1.
Configurer l'appareil comme platine de rue ou platine de rue au portail.
Platine de rue :
#* mot de passe système # =>
1 # => 1 #
Platine de rue au portail :
#* mot de passe système # =>
1 # => 2 #
2.
Modifier le « mot de passe du système »
— 51 —
ABB-Welcome M
Platine de rue
#* mot de passe système # =>
2 # => Saisir un nouveau mot de passe (6-8 bits) # => Ressaisir le mot de passe #
3.
Modifier le « code d'ouverture de porte »
#* mot de passe système # =>
3# => Saisir nouveau code d'ouverture de porte (6-8 bits) # => Ressaisir le code #
4.
Configuration du message vocal
Si le module audio avec une fonction de synthèse vocale (WM2307.) est assemblé, la
langue locale peut être configurée.
#* mot de passe système # =>
4# => Appuyer sur
5.
ou
pour sélectionner la langue => #
Activer/désactiver la fonction de contrôle d'accès
Activer la fonction de contrôle d'accès :
#* mot de passe système # =>
5# => 1 #
Désactiver la fonction de contrôle d'accès :
#* mot de passe système # =>
5# => 2 #
*Réinitialiser le mot de passe système du module clavier :
Il est possible de restaurer le réglage d'usine du mot de passe système si vous l'avez oublié.
La restauration des réglages d'usine par défaut ne supprime pas le reste des informations
programmées dans le système, comme les noms d'utilisateur et autres réglages.
1.
Couper le courant.
2.
Rétablir le courant
3.
Maintenir le « bouton programmer » pendant 5 s dans un délai de 30 s.
4.
Un « di » retentit et le mot de passe du système par défaut est restauré (345678).
Pos: 21 /Di nA4 - A nleitu ngen Onlin e/In halt/KNX/Do orEnt ry/83 220 -AP-xxx/Be dienel eme nte - 8 322 0-AP-xxx @ 18\ mo d_1 3032 128 536 05_ 15.d ocx @ 103 673 @ @ 1
2149 @ @ 1
— 52 —
ABB-Welcome M
Platine de rue
Pos: 70 /Di nA4 - A nleitu ngen Onlin e/Ueb ersc hrift en/2 ./Ge raet eeins tellun gen @ 1 8\mo d_1 302 768 847 744 _15. docx @ 10 354 8 @ 2 @ 1
6 Configuration avancée
Se connecter au PC pour configurer le clavier ou l'écran
Fig. 25
Pos: 75 /B usch-J aeg er (Neus truk tur )/M odul -Strukt ur/O nline -Doku me ntatio n/Steu er mod ule - Onlin e-Dok ume ntati on ( -- > F ür alle Dok ume nte <- -)/ +++ ++ ++ +++ ++ S eiten umb ruch + +++ ++ ++ +++ + @ 9\m od_ 126 8898 668 093 _0. docx @ 521 49 @ @ 1
— 53 —
ABB-Welcome M
Platine de rue
Pos: 76 /Di nA4 - A nleitu ngen Onlin e/Ueb ersc hrift en/1 ./T echnisc he D aten @ 18 \mo d_1 302 615 863 001 _15. docx @ 10 341 6 @ 1 @ 1
7 Caractéristiques techniques
Pos: 77 /Di nA4 - A nleitu ngen Onlin e/In halt/KNX/Do orEnt ry/83 220 -AP-xxx/ Tech nische Date n - 832 20-AP-x xx @ 1 8\m od_ 130 321 285 4559 _15 .docx @ 1 037 05 @ @ 1
Désignation
Valeur
Température de
entre -40 °C et +70 °C
fonctionnem ent
Protection (cadre assemblé)
IP 54
Alimentation électrique, portier
18V 4 A à impulsions, 250 mA en continu
(Lock-GND)
Sortie flottante, système
30 V AC / DC 1 A
d'ouverture de porte (COM-NCNO)
Connexions unifilaires
2 x 0,28 mm 2 – 2 x 1 mm 2
Connexions à fils fins
2 x 0,28 mm 2 – 2 x 1 mm 2
Tension de bus
20-30 V
Pos: 78 /B usch-J aeg er (Neus truk tur )/M odul -Strukt ur/O nline -Doku me ntatio n/Steu er mod ule - Onlin e-Dok ume ntati on ( -- > F ür alle Dok ume nte <- -)/ +++ ++ ++ +++ ++ S eiten umb ruch + +++ ++ ++ +++ + @ 9\m od_ 126 8898 668 093 _0. docx @ 521 49 @ @ 1
— 54 —
ABB-Welcome M
Platine de rue
Pos: 79 /B usch-J aeg er (Neus truk tur )/M odul -Strukt ur/O nline -Doku me ntatio n/Übe rsch rifte n ( --> Fü r alle Doku men te < -- )/1. E bene /M - O/ Mont age / Ins tallatio n @ 18\ mod _13 0261 396 611 1_1 5.do cx @ 1 033 73 @ 1 @ 1
8 Montage / Installation
Pos: 80 /B usch-J aeg er (Neus truk tur )/M odul -Strukt ur/O nline -Doku me ntatio n/Siche rheit (- -> Fü r alle D oku ment e < --) /War nhinweis e/Siche rheit - Nie ders pan nun gs- und 230 V-Leit ung en @ 18\ mod _13 026 178 214 91_1 5.d ocx @ 103 465 @ @ 1
Avertissement
Tension électrique !
Danger de mort et d'incendie en raison de la présence d'une tension
électrique de 100-240 V.
–
Les câbles basse tension et 100-240 V ne doivent pas être installés
ensemble dans une prise encastrée !
En cas de court-circuit, il existe un risque de charge 100-240 V sur la
ligne basse tension.
Pos: 81 /B usch-J aeg er (Neus truk tur )/M odul -Strukt ur/O nline -Doku me ntatio n/Siche rheit (- -> Fü r alle D oku ment e < --) /War nhinweis e/Siche rheit - Fachk enn tnisse @ 18 \mo d_1 302 774 384 017_ 15. docx @ 10 356 4 @ 2 @ 1
8.1 Exigences à l'égard de l'électricien
Avertissement
— 55 —
ABB-Welcome M
Platine de rue
Tension électrique !
L'installation de l'appareil par un électricien est uniquement possible s'il
possède les connaissances techniques et compétences nécessaires.
•
Toute installation incorrecte peut mettre en danger votre vie et celle de
l'utilisateur du système électrique.
•
Toute installation incorrecte peut entraîner des dommages, p. ex. : en
raison d'un incendie.
Les connaissances nécessaires minimum et les exigences relatives à
l'installation sont les suivantes :
•
Appliquer les « cinq règles de sécurité » (DIN VDE 0105, EN 50110) :
1.
Débrancher l'appareil de la source d'alimentation ;
2.
Empêcher tout rebranchement de l'appareil :
3.
S'assurer de l'absence de tension ;
4.
Raccorder à la terre ;
5.
Recouvrir ou isoler les pièces voisines sous tension.
•
Porter des vêtements de protection appropriés.
•
Utiliser uniquement des outils et appareils de mesure appropriés.
•
Vérifier le type de réseau d'alimentation (système TN, système IT,
système TT) pour garantir les conditions d'alimentation électriques
suivantes (connexion à la terre classique, mise à la terre de protection,
mesures supplémentaires nécessaires, etc.).
Pos: 82 /Di nA4 - A nleitu ngen Onlin e/In halt/KNX/Do orEnt ry/M onta ge/ Mont age hinweis e - Allg emei n @ 1 9\m od_ 131 056 367 047 8_15 .docx @ 1 077 43 @ 2 @ 1
8.2 Consignes d'installation générales
•
Terminer toutes les extrémités du système de câblage via un appareil de bus connecté
(p. ex., moniteur intérieur, platine de rue, appareil système).
•
Ne pas installer le contrôleur système juste à côté du transformateur de sonnerie et
autres alimentations électriques (pour éviter les interférences).
•
Ne pas installer les câbles du bus système avec des câbles 100-240 V.
•
Ne pas utiliser des câbles communs pour les câbles de raccordement des portiers et les
câbles du bus système.
•
Éviter les ponts entre les différents types de câbles.
•
Utiliser uniquement deux câbles pour le bus système dans un câble à quatre conducteurs
ou plus.
— 56 —
ABB-Welcome M
•
Platine de rue
En cas de structure en boucle, ne jamais installer les bus de départ et d'arrivée à
l'intérieur du même câble.
•
Ne jamais installer les bus interne et externe à l'intérieur du même câble.
Pos: 83 /B usch-J aeg er (Neus truk tur )/M odul -Strukt ur/O nline -Doku me ntatio n/Steu er mod ule - Onlin e-Dok ume ntati on ( -- > F ür alle Dok ume nte <- -)/ +++ ++ ++ +++ ++ S eiten umb ruch + +++ ++ ++ +++ + @ 9\m od_ 126 8898 668 093 _0. docx @ 521 49 @ @ 1
— 57 —
ABB-Welcome M
Platine de rue
Pos: 84 /B usch-J aeg er (Neus truk tur )/M odul -Strukt ur/O nline -Doku me ntatio n/Übe rsch rifte n ( --> Fü r alle Doku men te < -- )/2. E bene /M - O/ Mont age @ 1 8\m od_1 302 615 960 458 _15. docx @ 10 342 4 @ 2 @ 1
8.3 Montage
Pos: 85. 1 /DinA4 - Anleit ung en O nline/I nhal t/KNX/DoorE ntry/ 832 20-AP-xxx /Mo nta ge - Mo dule/ Mon tag e - Mon tage dos e -- 83 220 -AP-xxx @ 19\ mod _132 325 040 684 8_1 5.doc x @ 1 110 98 @ @ 1
Porter une paire de gants pour se
protéger contre les coupures.
— 58 —
ABB-Welcome M
Platine de rue
Dimensions
Module audio
Module boutonpoussoir
Module caméra
Module porteétiquettes
Module clavier
Module écran et lecteur de
badges
— 59 —
ABB-Welcome M
Platine de rue
Cadre
— 60 —
ABB-Welcome M
Platine de rue
Boîtier encastré
— 61 —
ABB-Welcome M
Platine de rue
Visière parepluie
— 62 —
ABB-Welcome M
Platine de rue
Composants de la platine de rue
3
1
4
2
Fig. 26
Montage
N°
Fonctions
1
Cadre
2
Modules
3
Boîtier encastré
4
Visière pare-pluie
— 63 —
ABB-Welcome M
Platine de rue
Monter chaque module au niveau du cadre
Fig. 27
1.
Montage
Insérer chaque module dans le cadre par l'arrière jusqu'à ce qu'ils s'encliquètent. Tous
les modules peuvent être insérés, p. ex. : le module caméra, le module audio, le module
boutons-poussoirs, le module clavier, le module écran et lecteur de badges, le module
porte-étiquettes.
2.
Faire particulièrement attention à l'orientation de haut en bas de chaque module.
— 64 —
ABB-Welcome M
Platine de rue
Câblage des modules
Fig. 28
Câblage des modules
1.
Utiliser les câbles pour connecter les modules, un par un.
2.
Veiller à ce que le module audio soit connecté à côté du module caméra.
— 65 —
ABB-Welcome M
Platine de rue
Distances d'installation de la platine de rue
Lors de la sélection du lieu d'installation, veiller à garantir une distance minimum à droite pour
le retrait de la barre de verrouillage.
— 66 —
ABB-Welcome M
Platine de rue
Fils
Fig. 29
Montage
1.
Préparer le boîtier d'installation.
2.
Dénuder les fils.
–
La section isolée de l'extrémité de câble ne doit pas mesurer plus de 10 mm.
Assembler le cadre dans le boîtier encastré
Fig. 30
Montage
— 67 —
ABB-Welcome M
1.
Platine de rue
Suspendre l'appareil dans le boîtier d'installation.
2.
Fixer la boucle de sécurité.
3.
Brancher les fils dans la connexion fermée et brancher la connexion sur les broches de
4.
Visser à l'avant de l'appareil.
contact ; plier l'appareil et l'arrêter jusqu'à ce qu'il s'encliquète de manière audible.
Trois types d'installation
Option 1 : Encastré uniquement avec un boîtier encastré.
Fig. 31
Encastré uniquement avec un boîtier encastré.
Option 2 : Encastré avec visière pare-pluie
— 68 —
ABB-Welcome M
Fig. 32
Platine de rue
Encastré avec visière pare-pluie
Option 3 : En saillie avec visière pare-pluie
Fig. 33
En saillie avec visière pare-pluie
— 69 —
ABB-Welcome M
Platine de rue
Démontage de la platine de rue
Fig. 34
Montage
1.
2.
Utiliser l'outil de montage fermé pour retirer la bande d'extrémité.
Retirer les vis qui fixent le cadre.
3.
Relever et extraire la platine de rue par le bas du cadre.
Démonter les modules
Fig. 35
Démontage des modules
— 70 —
ABB-Welcome M
1.
2.
Platine de rue
Démonter le module d'un côté du module.
Extraire les modules.
Remplacer les porte-étiquettes
Fig. 36
1.
2.
Montage
Retirer la protection du bouton-poussoir et inscrire les noms d'utilisateur sur l'étiquette.
*Utiliser une feuille A4 avec le logiciel nécessaire pour le format correct et l'impression
des étiquettes.
Ajuster l'angle de la caméra
Fig. 37
1.
Ajuster l'angle de la caméra
Dévisser la caméra
— 71 —
ABB-Welcome M
Platine de rue
2.
Ajuster l'angle de la caméra dans 4 directions (haut, bas, droite et gauche)
3.
Visser la caméra
— 72 —
ABB-Welcome M
Platine de rue
Extension de la platine de rue
Fig. 38
Montage
1.
Percer un trou pour le câble
2.
Utiliser les éléments d'assemblage pour assembler horizontalement les boîtiers
3.
Faire passer les fils de raccordement entre les boîtiers pour le raccordement des
encastrés.
modules.
*L'extension est utile pour le raccordement des stations externes multiples.
Pos: 94 /B usch-J aeg er (Neus truk tur )/M odul -Strukt ur/O nline -Doku me ntatio n/Steu er mod ule - Onlin e-Dok ume ntati on ( -- > F ür alle Dok ume nte <- -)/ +++ ++ ++ +++ ++ S eiten umb ruch + +++ ++ ++ +++ + @ 9\m od_ 126 8898 668 093 _0. docx @ 521 49 @ @ 1
— 73 —
ABB-Welcome M
Platine de rue
Pos: 95 /Di nA4 - A nleitu ngen Onlin e/In halt/KNX/Do orEnt ry/Proj ektier ung -M erkbl att/Pr ojektie rPos: 9 7 /Busc h-Ja ege r (N eust ruktu r)/ Mo dul-Str uktu r/Onli ne-D oku ment ation /Rückseit en (-- > Für alle Dok um ente <- -)/R ückseit e - Bus ch-J aeg er - Allgem ein @ 20\ mod _13 273 200 748 86_1 5.d ocx @ 137 103 @ @ 1
Mentions légales
=== E nde der Liste für Tex tma rke Ba ckcove r = ==
Nous nous réservons le droit d'effectuer à tout moment des modifications techniques ou de
modifier le contenu de ce document sans préavis.
Les spécifications détaillées convenues au moment de la commande s'appliquent à toutes les
commandes. ABB ne peut être tenu responsable des erreurs ou omissions dans ce document.
Nous nous réservons tous les droits de propriété sur ce document, ainsi que sur les
informations et les illustrations qu'il contient. Le document et son contenu, ou extraits de celuici, ne doivent pas être reproduits, transmis ou réutilisés par des tiers sans avis écrit préalable
d'ABB.
Sistemi di Videocitofonia │ Welcome M
│ Manuale utente
Welcome M ABB
Pos: 2 /DinA4 - Anleitungen Online/Inhalt/KNX/DoorEntry/83220-AP-xxx/Titelblatt - 83220-AP-xxx - ABB @ 19\mod_1323249806476_15.docx @ 111084 @ @ 1
M25102xC M25102xA‐x‐ M25102xPx. M25102xK‐x. M25102xCR. 5102xDN Posto esterno === Ende der Liste für Textmarke Cover ===
ABB-Welcome M
Pos: 4 /Busch-Jaeger (Neustruktur)/Modul-Struktur/Online-Dokumentation/Inhaltsverzeichnis (--> Für alle Dokumente <--)/Inhaltsverzeichnis @ 19\mod_1320649044386_15.docx @ 109653 @ @ 1
1 2 3 4 5 6 7 Sicurezza .......................................................................................................4 Uso previsto...................................................................................................4 Ambiente .......................................................................................................4 3.1 Dispositivi ABB .............................................................................5 Descrizione dei morsetti ................................................................................6 4.1 Modulo audio ................................................................................6 4.1.1 Controllo serratura ai morsetti 3&4 ...............................................9 4.2 Modulo videocamera ..................................................................10 4.2.1 Videocamera analogica collegata al morsetto 1 .........................12 4.2.2 Collegamento separato videocamera .........................................13 4.3 Modulo pulsante .........................................................................14 4.4 Modulo tastiera ...........................................................................16 4.5 Modulo lettore schede e display .................................................18 4.6 Modulo targhetta .........................................................................21 Funzionamento ............................................................................................22 5.1 Pulsante posto esterno ...............................................................22 5.1.1 Indirizzamento ............................................................................22 5.1.2 Impostazione della lingua per i messaggi vocali (se il modulo
audio è dotato di funzione di sintesi vocale) ...............................28 5.2 Pulsante posto esterno con modulo tastiera ...............................30 5.3 Pulsante posto esterno con modulo tastiera ...............................32 5.4 Tastiera posto esterno .................................................................... 5.4.1 Chiama residente (3 tipi).............................................................35 5.4.2 Chiamata portineria ....................................................................37 5.4.3 Se l'interno è in modalità "leave home" ......................................38 5.4.4 Se la portineria è in modalità "intercetta" ....................................39 5.4.5 Impostazioni di sistema ..............................................................40 5.5 Tastiera posto esterno senza display (Videocamera + audio+
tastiera).......................................................................................57 5.5.1 Chiamare un residente, inserire l'indirizzo fisico .........................57 5.5.2 Chiama portineria .......................................................................57 5.5.3 Impostazioni di sistema ..............................................................58 Configurazione avanzata .............................................................................61 Dati tecnici ...................................................................................................61 | — 2 —
ABB-Welcome M
8 Montaggio/Installazione ...............................................................................62 8.1 Obblighi dell'elettricista ...............................................................63 8.2 Istruzioni generali di installazione ...............................................64 8.3 Montaggio ...................................................................................64 === Ende der Liste für Textmarke TOC ===
| — 3 —
ABB-Welcome M
Pos: 6 /Busch-Jaeger (Neustruktur)/Modul-Struktur/Online-Dokumentation/Überschriften (--> Für alle Dokumente <--)/1. Ebene/S - T/Sicherheit @ 18\mod_1302612791790_15.docx @ 103357 @ 1 @ 1
1
Sicurezza
Pos: 7 /Busch-Jaeger (Neustruktur)/Modul-Struktur/Online-Dokumentation/Sicherheit (--> Für alle Dokumente <--)/Warnhinweise/Sicherheit - 230 V @ 18\mod_1302606816750_15.docx @ 103308 @ @ 1
Attenzione Tensione elettrica!
Rischio di morte ed incendio dovuto alla presenza di tensione elettrica 100240 V.
–
Gli interventi sul sistema di alimentazione 100-240 V possono essere
effettuati solo da elettricisti autorizzati.
–
Scollegare l'alimentazione di rete prima dell'installazione e/o dello
smontaggio.
Pos: 8 /Busch-Jaeger (Neustruktur)/Modul-Struktur/Online-Dokumentation/Überschriften (--> Für alle Dokumente <--)/1. Ebene/A - F/Bestimmungsgemäßer Gebrauch @ 18\mod_1302763321316_15.docx @ 103483 @ 1 @ 1
2
Uso previsto
Pos: 9 /DinA4 - Anleitungen Online/Inhalt/KNX/DoorEntry/83220-AP-xxx/Bestimmungsgemaesser Gebrauch - 83220-AP-xxx-500 @ 20\mod_1324561168699_15.docx @ 112728 @ @ 1
Il posto esterno è parte integrante del sistema di videocitofonia Welcome di ABB e funziona
unicamente con i componenti di questo sistema. Il dispositivo deve essere utilizzato
esclusivamente con prese da incasso ABB e con copertura di protezione contro la pioggia.
Pos: 10 /Busch-Jaeger (Neustruktur)/Modul-Struktur/Online-Dokumentation/Überschriften (--> Für alle Dokumente <--)/1. Ebene/U - Z/Umwelt @ 18\mod_1302614158967_15.docx @ 103383 @ 1 @ 1
3
Ambiente
Pos: 11 /Busch-Jaeger (Neustruktur)/Modul-Struktur/Online-Dokumentation/Umwelt (--> Für alle Dokumente <--)/Hinweise/Hinweis - Umwelt - Hinweis Elektrogeräte @ 18\mod_1302763973434_15.docx @ 103500 @ @ 1
Prestare attenzione alla tutela dell'ambiente!
I dispositivi elettrici ed elettronici usati devono essere smaltiti
separatamente dai rifiuti domestici.
–
Il dispositivo è composto da materie prime che possono essere
riciclate. Occorre pertanto smaltire il dispositivo presso specifici centri
di raccolta.
| — 4 —
ABB-Welcome M
Pos: 12 /DinA4 - Anleitungen Online/Ueberschriften/2./ABB Geraete @ 19\mod_1323162843832_15.docx @ 110875 @ 2 @ 1
3.1
Dispositivi ABB
Pos: 13 /Busch-Jaeger (Neustruktur)/Modul-Struktur/Online-Dokumentation/Umwelt (--> Für alle Dokumente <--)/Hinweise/Hinweis - Umwelt - ABB Elektrogeräte @ 19\mod_1323162745839_15.docx @ 110867 @ @ 1
Tutti gli imballaggi e i dispositivi ABB riportano i marchi e i sigilli di verifica per il corretto
smaltimento. Smaltire gli imballaggi, i dispositivi elettrici e i relativi componenti presso centri di
raccolta autorizzati e società addette allo smaltimento rifiuti.
I prodotti ABB soddisfano i requisiti di legge, in particolare delle leggi relative ai dispositivi
elettrici ed elettronici, e il regolamento per la registrazione, la valutazione, l'autorizzazione e la
restrizione delle sostanze chimiche (REACH).
(Direttiva UE 2002/96/CE RAEE e 2002/95/CE RoHS)
(Regolamento 1907/2006/CE (REACH) e legge per l'implementazione del regolamento CE)
| — 5 —
ABB-Welcome M
4
Descrizione dei morsetti
4.1
Modulo audio
Fig. 1 Descrizione dei morsetti N°
Funzione
1
Il LED lampeggia lentamente per indicare una chiamata
2
Il LED si accende per indicare una comunicazione possibile.
Il LED lampeggia rapidamente per indicare che il sistema è occupato
3
Il LED si accende per indicare che la porta è sbloccata
4
Pulsanti di chiamata
| — 6 —
ABB-Welcome M
Fig. 2 Descrizione dei morsetti N°
Funzioni
1
Connettore per modulo video
2
Connettore per dispositivo di aggiornamento software
3
Morsetti (COM-NC-NA) per contatto pulito (30VCA/CC 1A)
4
Morsetti a innesto (Blocco-GND) per apriporta (18V 4A impulsivo, 250 mA
5
Morsetti a innesto (CC-GND) per alimentazione supplementare posto esterno
mantenimento)
6
Morsetti a innesto (a-b) per collegamento Bus
7
Connettore per modulo T-loop
8
Connettore per modulo successivo
9
Connettore per pulsante apriporta
10
Connettore per sensore di controllo stato porta
11
Commutatore per impostazione indirizzo OS (1-9)
12
Impostazione ritorno acustico dei pulsanti: ON/OFF
| — 7 —
ABB-Welcome M
13
Configurazione pulsanti in modalità pulsanti singoli o doppi (ON= pulsanti doppi;
14
Configurazione funzioni del 1° / 2° pulsante.
OFF= pulsanti doppi)
3->OFF, 4->OFF=chiamata interno/chiamata interno;
3->ON, 4->OFF=controllo attuatore / chiamata interno;
3->OFF, 4->ON=chiamata portineria / chiamata interno;
3->ON, 4->ON= controllo attuatore / chiamata portineria.
15
Regolazione del volume altoparlante.
16
Regolazione del tempo di sblocco porta, 1-10s (disponibile per il
blocco collegato al Blocco-GND)
| — 8 —
ABB-Welcome M
4.1.1
Controllo serratura tramite morsetti 3&4
| — 9 —
ABB-Welcome M
4.2
Modulo videocamera
Fig. 3 Descrizione dei morsetti | — 10 —
ABB-Welcome M
N°
Funzioni
1
Connettore per videocamera analogica aggiuntiva
2
Connettore per modulo audio
3
Jumper per impostazione formato video: PAL /NTSC
4
Regolare l'area di visualizzazione della videocamera
| — 11 —
ABB-Welcome M
4.2.1
Videocamera analogica collegata al morsetto 1
Tutte le videocamere con uscita video da 1Vp‐p 75Ω, CVBS (segnale video composito) possono essere collegate al modulo videocamera. In generale, la distanza di trasmissione tra la videocamera analogica e il posto esterno può arrivare a 50 metri per i cavi coassiali o circa 10 metri per cavi di altro tipo. Due tipi di collegamento: Opzione 1: La videocamera analogica è sempre accesa Opzione 2: La videocamera analogica è accesa solo durante le ore di funzionamento | — 12 —
ABB-Welcome M
4.2.2
Collegamento separato videocamera
Il modulo videocamera può essere utilizzato come videocamera separata; il cablaggio è mostrato di seguito. 3 coppie di cavo bus a due fili | — 13 —
ABB-Welcome M
4.3
Modulo pulsanti
Fig. 4 Descrizione dei morsetti N°
Funzioni
1
Connettore per modulo precedente
2
Connettore per modulo successivo
| — 14 —
ABB-Welcome M
Fig. 5 Descrizione della numerazione N°
Funzioni
1
Indipendentemente dalla struttura del modulo pulsanti, i numeri dei pulsanti
sono elencati dall'alto al basso e da sinistra a destra (in modalità pulsanti
doppi).
2
La funzione controllo attuatore / portineria è sempre assegnata al 1°/2°pulsante.
3
È possibile stampare i nomi degli utenti utilizzando il dispositivo di etichettatura
del software di configurazione Welcome M.
| — 15 —
ABB-Welcome M
4.4
Modulo tastiera
Fig. 6 Descrizione dei morsetti N°
Funzioni
1
Pulsante di programmazione
2
Connettore per modulo precedente
3
Connettore per dispositivo di aggiornamento software
4
Connettore USB per la connessione al PC: download/upload della
5
Connettore per modulo successivo
configurazione.
| — 16 —
ABB-Welcome M
Tipo 2
Tipo 1
Fig. 7 Tastierino numerico N°
Funzioni
1
Chiama residente
Il visitatore inserisce il numero di un interno (001) o appartamento (ad es.
0101, programmato in precedenza) per chiamare un residente.
*Inoltre, il visitatore può selezionare il nome di un residente con il pulsante
o
del modulo per effettuare una chiamata (necessario display)
Per annullare la chiamata premere il pulsante
.
*La funzione è disponibile solo in Fig1.
2
Chiamata portineria
Il visitatore può chiamare una portineria premendo il pulsante
se la
portineria è disponibile all'interno del sistema.
3
Sblocco tramite password
Premere "
+ password+
Premere "
+2 +
“per azionare l’elettroserratura principale.
+ password +
" per comandare il contatto ai
morsetti "COM-NC-NA" del modulo audio.
La password iniziale è 123456 e i residenti possono impostare la propria
password personalizzata dagli interni video.
4
Configurazione di sistema
Premere "
+
+ password di sistema +
" per accedere al menu
di configurazione del sistema.
La password iniziale di sistema è 345678 e può essere modificata dall'
amministratore.
| — 17 —
ABB-Welcome M
4.5
Modulo Display (Card reader)
Fig. 8 N°
Descrizione dei morsetti Funzioni
1
Pulsante programmabile
2
Connettore per modulo precedente
3
Connettore per dispositivo di aggiornamento software
4
Connettore per uscita Wiegand
5
Connettore USB per la connessione al PC: download/upload della
6
Connettore per modulo successivo
configurazione.
| — 18 —
ABB-Welcome M
Fig. 9 Modulo display N°
Funzioni
1
Display LCD
2
Lettore di prossimità ID o IC integrato.
Passare la scheda registrata nel lettore per azionare la serratura. È possibile
programmare la scheda tramite il modulo, oppure utilizzando un PC per
scaricare il file di programmazione. (il M251021CR è dotato di lettore schede
ID, mentre il M251022CR è dotato di lettore schede IC.)
3
Supporto per uscita Wiegand.
Il formato Wiegand di default è 26 bit, estendibile fino a 34 bit.
*Il modulo display deve essere collegato dopo il modulo audio. | — 19 —
ABB-Welcome M
Specifiche tecniche: M251021CR:Modulo display con lettore schede ID Frequenza di funzionamento 125KHz Standard ISO18000‐2 Scheda di supporto EM4100, EM4205, EM4305, EM4450, TK4100, T5567 / T5577 Compatibile HID 2 Formato di uscita Wiegand 26, 34bit M251022CR:Modulo display con lettore schede IC Frequenza di funzionamento 13,56MHz Standard ISO 14443A Scheda di supporto Mifare One S50/S70, ecc. Formato di uscita Wiegand 26, 34bit | — 20 —
ABB-Welcome M
4.6
Modulo Portanome
Fig. 10 Descrizione dei morsetti N°
Funzioni
1
Connettore per modulo precedente
2
Connettore per modulo successivo
8 /DinA4 - Anleitungen Online/Ueberschriften/1./Bedienung @ 18\mod_1302613924165_15.docx @ 103365 @ 1 @ 1
| — 21 —
ABB-Welcome M
5
Funzionamento
Pos: 19 /DinA4 - Anleitungen Online/Ueberschriften/2./Normaler Betrieb @ 18\mod_1302768820965_15.docx @ 103540 @ 2 @ 1
5.1
Pulsanti posto esterno
Fig. 11 Pulsanti posto esterno Pos: 20 /DinA4 - Anleitungen Online/Ueberschriften/3./Bedienelemente @ 20\mod_1323260220559_15.docx @ 111647 @ 3 @ 1
5.1.1
1.
Indirizzamento
Configurazione delle funzioni del 1°/2° pulsante
001
2
1
002
DIP
3
3 4
1
2
3
003
4
Fig. 12 Indirizzamento | — 22 —
ABB-Welcome M
N°
Funzioni
1
3->OFF, 4->OFF
2
Chiama appartamento 01
3
Chiama appartamento 02
4
Chiama appartamento 03
2
1
001
DIP
3
3 4
002
1
2
4
Fig. 13 Indirizzamento N°
Funzioni
1
3-> ON, 4->OFF
2
Controllo attuatore. L'indirizzo dell'attuatore deve corrispondere a quello del
posto esterno (vedere manuale attuatore).
3
Chiama appartamento 01
4
Chiama appartamento 02
| — 23 —
ABB-Welcome M
Portineria
2
1
001
DIP
3
3 4
002
4
1
2
Fig. 14 Indirizzamento N°
Funzioni
1
3-> OFF, 4-> ON
2
Chiamata portineria. Se all'interno della stessa sezione sono presenti portinerie
multiple, tutte le portinerie suonano contemporaneamente quando un visitatore
preme il pulsante “chiama portineria”.
3
Chiama appartamento 01
4
Chiama appartamento 02
2
1
Portineria
DIP
3
3 4
001
1
4
Fig. 15 Indirizzamento | — 24 —
ABB-Welcome M
N°
Funzioni
1
3-> ON, 4-> ON
2
Controllo attuatore
3
Chiama portineria
4
Chiama appartamento 01
2.
Configurazione del pulsante in modalità singola o doppia
Tramite lo switch numero 2 è possibilee raddopiare il numero di chiamate gestibili da un posto esterno. 001
2
1
002
ON
3
003
2
4
1
2
3
4
004
5
Fig. 16 Indirizzamento N°
Funzioni
1
2-OFF
2
Chiama appartamento 01
3
Chiama appartamento 02
4
Chiama appartamento 03
5
Chiama appartamento 04
| — 25 —
ABB-Welcome M
001
002
003
004
005
006
2
001
1
ON
3
4
2
5
6
7
007
8
1
3
5
7
2
4
6
8
008
9
Fig. 17 Indirizzamento N°
Funzioni
1
2-> ON
2
Chiama appartamento 01
3
Chiama appartamento 02
4
Chiama appartamento 03
5
Chiama appartamento 04
6
Chiama appartamento 05
7
Chiama appartamento 06
8
Chiama appartamento 07
9
Chiama appartamento 08
| — 26 —
ABB-Welcome M
Portineria
2
1
ON
DIP
2 3 4
3
001
002
003
004
4
5
6
005
8
1
3
5
7
2
4
6
006
9
Fig. 18 Indirizzamento N°
Funzioni
1
2-> ON,3-> ON, 4-> ON
2
Controllo attuatore
3
Chiamata portineria
4
Chiama appartamento 01
5
Chiama appartamento 02
6
Chiama appartamento 03
7
Chiama appartamento 04
8
Chiama appartamento 05
9
Chiama appartamento 06
| — 27 —
ABB-Welcome M
5.1.2
Impostazione della lingua per i messaggi vocali (se il modulo
audio è dotato di funzione di sintesi vocale)
Se è presente un modulo audio con funzione di sintesi vocale (M251024A-.), è possibile
impostare la lingua locale.
°
Impostare l'indirizzo del PE come "0", tenere premuto il 1 pulsante per 3s per riprodurre il
messaggio vocale.
Cliccare sul pulsante per selezionare la lingua.
Dopo aver selezionato la lingua, tenere premuto il pulsante per salvare e uscire dalle
impostazioni.
1
2
3
4
Colonna
singola
Fig. 19 1°
pulsante
1
3
5
7
2
4
6
8
Doppia colonna
Indirizzamento | — 28 —
ABB-Welcome M
Pulsante posto esterno usato come Posto esterno principale
Se il posto esterno è impostato come PE principale (installazioni residenziali), occorre
utilizzare il gateway per le montanti secondarie
Appartamento
01
A
Appartamento
02 B
Appartamento
03 C
Appartamento
04
D
Appartamento
Appartamento
01
A
Appartamento
05
E
Appartamento
06 F
02 B
Appartamento
03 C
Appartamento
04
A
Appartamento
05
B
Appartamento
06 C
Posto esterno
Posto esterno
Posto esterno
Edificio di
sinistra
Ingresso
cancello
Edificio di
destra
Fig. 20
Per maggiori informazioni fare riferimento al manuale d'uso “Gateway“.
Pos: 71 /DinA4 - Anleitungen Online/Ueberschriften/3./Abschlusswiderstand @ 19\mod_1321958079906_15.docx @ 110083 @ 3 @ 1
Pos: 72 /DinA4 - Anleitungen Online/Inhalt/KNX/DoorEntry/Bedienung/Abschlusswiderstand setzen 83220-AP-xxx @ 19\mod_1310723392369_15.docx @ 107841 @ @ 1
| — 29 —
ABB-Welcome M
5.2
Pulsante posto esterno con display
Il modulo lettore schede e display può essere installato
nel posto esterno così che passando la carta o il badge in
prossimità del lettore sia possibile aprire l’ingresso. Per
può registrare una scheda master per la gestione del
posto esterno, la scheda master permette di gestire in
maniera più rapida le impostazioni del posto esterno.
Registrazione di una scheda master/disattivare scheda
master (solo per l’installatore):
1.
Scollegare l'alimentazione.
2.
Ricollegare l'alimentazione.
3.
Fig. 21 w2 Tenere premuto il “pulsante di programmazione” per
5s per inserire l'interfaccia "scheda master di
programmazione" entro 30s.
4.
Ogni carta letta dal lettore in questo intervallo di
tempo verrà considerata come nuova scheda
MASTER. Il prompt “Registrazione scheda master
eseguita con successo" viene visualizzato sullo
schermo.
5.
Se la scheda è già presente, passandola
nuovamente nel lettore l'informazione verrà
cancellata e sul display viene visualizzato il prompt
“Eliminazione scheda master eseguita con
successo".
È possibile registrare 1 sola scheda master.
Inserire le impostazioni di sistema utilizzando una scheda master:
1.
Passare la scheda MASTER nel lettore per accedere al menu impostazioni. Si
accenderanno tre LED.
2.
6 opzioni sono disponbili:
Scheda di programmazione;
Lingua;
| — 30 —
ABB-Welcome M
Uscita Wiegand;
Seleziona porta
Data & Ora;
Indietro
E’ necessario selezionare l’opzione entro 5s.
3.
Passare la scheda MASTER nel lettore entro 5s per passare all'opzione successiva.
Dopo 5s verrà impostata l'opzione selezionata.
4.
Dopo 30s si esce dal menu delle impostazioni.
Passare scheda
MASTER nel lettore
Menu_________05
Scheda di
programmazione--- ∧
Lingua
Uscita Wiegand ∨
Passare scheda
MASTER
selezionare l'opzione corrente dopo 5s ==> ==>
Menu_________√
Scheda di
programmazione--- ∧
Lingua
==>
Uscita Wiegand ∨
Passare scheda MASTER nel lettore entro 5s per passare all'opzione Menu_________05
i
Passare scheda MASTER nel lettore entro 5s per passare ==>
Menu_________05
Scheda di
programmazione ∧
Lingua-------Uscita Wiegand ∨
Scheda di
prossimità 05
Registra Scheda--∧
Elimina scheda
==>
Scheda di
programmazione
Lingua
∧
Uscita Wiegand ∨
| — 31 —
ABB-Welcome M
5.3
Poosto esterno con Tastiera (senza display)
Se presente nel posto esterno, tramite il modulo tastiera
gli utenti possono inserire la password per aprire la porta.
Gli utenti possono accedere al menu delle impostazioni di
sistema procedendo come segue (durante l'impostazione,
premere“#” per confermare, premere “*” per annullare, la
password di default del sistema è 345678):
1.
Impostare il dispositivo come Posto Esterno o
Fig. 22 Gate Station.
Posto esterno:
Digitare:
#
*
password di sistema
#
Per entrare nel menù, poi
1
#
1
#
Per impostare il posto esterno come Posto Esterno
Gate Station:
Digitare:
#
*
password di sistema
#
Per entrare nel menù, poi
1
#
2
#
Per impostare il posto esterno come Gate Station (Posto
Esterno Principale, nelle installazioni residenziali)
| — 32 —
ABB-Welcome M
2.
Modifica "password di sistema"
Digitare:
#
*
password di sistema
#
Per entrare nel menù, poi
2
#
nuova password (6-8 bit)
#
nuova password (6-8 bit)
#
Per impostare la nuova password
3.
Modifica "codice apertura porta"
Digitare:
#
*
password di sistema
#
Per entrare nel menù, poi
3
#
nuovo codice (6-8 bit)
#
nuovo codice (6-8 bit)
#
Per impostare il nuovo codice
4.
Impostare il messaggio vocale
Se è presente un modulo audio con funzione di sintesi vocale (M251024A-.), è possibile
impostare la lingua locale.
Digitare:
#
*
password di sistema
#
Per entrare nel menù, poi
4
#
Premere
o
per selezionare la lingua
#
Per impostare il nuovo codice
| — 33 —
ABB-Welcome M
5.
Abilita/disabilita la funzione controllo accessi
Abilita la funzione controllo accessi
Digitare:
#
*
password di sistema
#
Per entrare nel menù, poi
5
#
1
#
Per disabilitare la funzione controllo accessi
5
#
2
#
Per disabilitare la funzione controllo accessi
*Reset password di sistema del modulo tastiera:
In caso abbiate dimenticato la password di sistema è possibile resettarla alle impostazioni di
fabbrica.
Il ripristino delle impostazioni di fabbrica non elimina le restanti informazioni programmate nel
sistema, ad es. nome utente e altre impostazioni.
1.
Scollegare l'alimentazione.
2.
Ricollegare l'alimentazione.
3.
Tenere premuto il “pulsante programmabile” per 5s entro 30s.
4.
Viene emesso un segnale acustico e la password di sistema sarà resettata alle
impostazioni di default (345678).
| — 34 —
ABB-Welcome M
5.4
Posto Esterno con Tastiera e Display
5.4.1
Chiamata di un interno (3 modalità)
1.
Chiamata tramite indirizzo fisico
L'indirizzo fisico è il codice inviato dal posto esterno
all'interno o agli altri dispositivi del sistema tramite
collegamento bus. L'indirizzo fisico corrisponde
all'indirizzo impostato sul posto interno..
Nel caso di sistema singolo (in cui non ci siano livelli
secondari con gateway in modalità edificio) la codifica
sarà composta da un solo numero composto da 3 cifre:
01-250.
Fig. 23 Nel caso di un sistema residenziale (in cui gli edifici
siano identificati da gateway in modalità edificio), la
codifica sarà
+
01-60
Numero edificio
001-250
Numero interno
Esempio della schermata di inserimento
Inserire indirizzo
fisico
01 001
| — 35 —
ABB-Welcome M
2.
Chiamata tramite indirizzo logico
L'indirizzo logico è un codice “virtuale” che il visitatore può usare per effettuare una chiamata,
viene assegnato tramite programmazione al codice fisico e può non corrispoendere a
quest’ultimo. Occorre creare il codice, assegnarlo alla chiamata e successivamente associarlo
all'indirizzo fisico.
L’utilizzo dell’indirizzio logico può essere fatto per agevolare l’utente, in modo da non dovere
ricordare per forza il codice a 5 cifre nel caso di complessi residenziali.
Impostare l'indirizzo logico procedendo come segue:
Assegna indirizzo logico:
Digitare:
#
*
password di sistema
#
Per entrare nel menù, poi
Rubrica => Aggiungi => Indirizzo Logico
Indirizzo fisico:
001
Indirizzo logico:
Attivare la modalità di chiamata “indirizzo logico”
Digitare:
#
*
password di sistema
#
Per entrare nel menù, poi
impostazioni di sistema => Configurazioni => Modalità di chiamata
Modalità di
chiamata_______
Indirizzo fisico
∧
Indirizzo logico-------∨
N° di caratteri:
==>
-4(1-8 caratteri)
| — 36 —
ABB-Welcome M
3.
Chiamate tramite rubrica
Nota: questa funzione è disponibile solo per il posto esterno dotato di modulo tastiera
(M251021K-.)
In modalità standby, premere il pulsante
Utilizzare i pulsanti
e
o
per visualizzare i nomi dei residenti.
per cercare la residenza desiderata e premere il pulsante
per
effettuare una chiamata.
Il visitatore può inoltre cercare la prima lettera del nome del residente tramite la tastiera per
visualizzare solamente i nomi con quella iniziale.
E’ necessario registrare i nomi dei residenti e successivamente associarli all'indirizzo fisico.
Digitare:
#
*
password di sistema
#
Per entrare nel menù, poi
impostazioni di sistema => Rubrica (Contatto) => Aggiungi => Lista Contatti
Indirizzo fisico:
01001
Nome utente:
5.4.2
Chiamata portineria
Premere il pulsante
presente sulla tastiera per chiamare la portineria.
Accetta la chiamata
120 s
30 s
==>
Portineria
Portineria
| — 37 —
ABB-Welcome M
5.4.3
Interno in modalità "leave home"
Se l'interno è in modalità “leave home”, il visitatore può registrare un messaggio per
il residente dopo l'accesso all'interfaccia seguente.
Riproduci messaggio...
==>
==>
120 s
30 s
Andy
Il visitatore può registrare
il messaggio dopo il
segnale acustico.
001 s
Andy
Registrazione in
corso...
“*“ per annullare
Funzione disponibile solo con posto interno Video Touch 7”
| — 38 —
ABB-Welcome M
5.4.4
Portineria in modalità "intercetta"
Se la portineria è in modalità “intercetta”, la chiamata dal posto esterno all'interno
verrà intercettata e dopo aver verificato l'identità la portineria potrà decidere se
inoltrare la chiamata all'interno.
Chiamata dal posto
esterno ad un interno
La portineria accetta
la chiamata
30 s
La portineria trasferisce la
chiamata all'interno
120 s
==>
Portineria
==>
==>
Portineria
120 s
Andy
| — 39 —
ABB-Welcome M
5.4.5
Impostazioni di sistema
(Durante l'impostazione premere “#” per confermare, premere “*” per annullare, la password di
default di sistema è 345678):
1.
Accedere al menu delle impostazioni di sistema
Digitare
#
*
password di sistema
#
Menu__________
Configurazioni-- ∧
Controllo accessi
2.
Configurazioni
(1)
Impostare il dispositivo come Posto Esterno o Gate Station.
Impostazione come “Posto esterno”:
Digitare
#
*
password di sistema
#
Per entrare nel menù, poi selezionare le scelte:
Configurazioni # => Tipo di dispositivo # => PE # (principale)
Tipo di
dispositivo_____
Posto esterno ● -- ∧
Gate Station
∨
| — 40 —
ABB-Welcome M
Impostazione come “Gate Station”:
Digitare
#
*
password di sistema
#
Per entrare nel menù, poi selezionare le scelte:
Configurazioni # => Tipo di dispositivo # => Gate Station #
Tipo di
dispositivo_____
∧
Posto esterno
Gate Station ●∨
(2)
Impostare la modalità di chiamata: effettua una chiamata per Indirizzo Fisico o
Codice Logico
-
Imposta modalità di chiamata per indirizzo fisico:
Digitare
#
*
password di sistema
#
Per entrare nel menù, poi selezionare le scelte:
Configurazioni # => Modalità di chiamata # => Indirizzo fisico #
| — 41 —
ABB-Welcome M
Modalità di
chiamata_______
Indirizzo fisico● ∧
Indirizzo logico:
∨
-
Impostare la modalità di chiamata per codice logico
N° di caratteri (1-8 caratteri):
Digitare
#
*
password di sistema
#
Per entrare nel menù, poi selezionare le scelte:
Configurazioni # => Modalità di chiamata # => Codice logico #
Modalità di
chiamata_______
Indirizzo fisico
∧
Indirizzo logico: ●∨
(3)
Impostazione password di sistema
Digitare
#
*
password di sistema
#
Per entrare nel menù, poi selezionare le scelte:
Configurazioni # => Codice di sistema # => Modifica #
| — 42 —
ABB-Welcome M
Nuova Password:
******
==>
Conferma
Password:
Fatto!
==>
******
(4)
Resetta la password di sistema
Digitare
#
*
password di sistema
#
Per entrare nel menù, poi selezionare le scelte:
Configurazioni # => Codice di sistema # => Reset #
Resettare codice di
sistema?
“#“ per confermare
==>
Fatto!
“*“ per annullare
| — 43 —
ABB-Welcome M
3.
Controllo accessi
(1)
Codice apertura porta
Il codice di apertura può essere impostato utilizzando 6-8 caratteri. Il codice di default è
"123456” e può essere modificato tramite posto esterno.
Gli utenti possono impostare il proprio codice personale dagli interni video. È possibile
salvare fino a 6000 codici nel sistema.
Impostare la password apertura porta ON/OFF (default: 123456)
Digitare
#
*
password di sistema
#
Per entrare nel menù, poi selezionare le scelte:
Controllo accessi # => Codice apertura porta # => Abilita / Disabilita #
Codice apertura porta
Disabilita
-- ∧
==>
Fatto!
Modifica
Reset
∨
| — 44 —
ABB-Welcome M
Modifica password apertura porta
Digitare
#
*
password di sistema
#
Per entrare nel menù, poi selezionare le scelte:
Controllo accessi # => Codice apertura porta # => Modifica #
Nuova Password:
******
==>
Conferma
Password:
==>
Fatto!
******
Resetta password apertura porta
Digitare
#
*
password di sistema
#
Per entrare nel menù, poi selezionare le scelte:
Controllo accessi # => Codice apertura porta # => Reset #
Resettare codice
apertura porta?
“#“ per confermare
==>
Fatto!
“*“ per annullare
| — 45 —
ABB-Welcome M
(2)
Scheda di prossimità (è possibile registrare 3000 schede per posto esterno.)
Registra schede:
Digitare
#
*
password di sistema
#
Per entrare nel menù, poi selezionare le scelte:
Controllo accessi # => Scheda di prossimità # => Registra scheda #
Inserisci scheda n°
0123456
Inserisci scheda n°
==>
O
0123456
O
Fatto!
Elimina schede:
Digitare
#
*
password di sistema
#
Per entrare nel menù, poi selezionare le scelte:
Controllo accessi # => Scheda di prossimità # => Elimina scheda #
Inserisci scheda n°
0123456
O
Inserisci scheda n°
==>
0123456
O
Fatto!
| — 46 —
ABB-Welcome M
Elimina tutte le schede
Digitare
#
*
password di sistema
#
Per entrare nel menù, poi selezionare le scelte
Contatti # => Scheda di prossimità # => Elimina tutti #
Eliminare tutte le
schede?
==>
Fatto!
“#“ per confermare
“*“ per annullare
4.
Contatti
(1)
Aggiungi contatto
Digitare
#
*
password di sistema
#
Per entrare nel menù, poi selezionare le scelte
Contatti # => Aggiungi # => Nome utente #
Indirizzo fisico:
001
Nome utente:
Alexander.G
I nomi dei residenti devono essere associati all'indirizzo fisico.
| — 47 —
ABB-Welcome M
Aggiungi contatti per indirizzo logico
Digitare
#
*
password di sistema
#
Per entrare nel menù, poi selezionare le scelte
Contatti # => Aggiungi # => Indirizzo logico #
Indirizzo fisico:
001
Indirizzo logico:
0101
L'indirizzo logico deve essere associato all'indirizzo fisico.
(2)
Modifica
Modifica contatti per nome utente
Digitare
#
*
password di sistema
#
Per entrare nel menù, poi selezionare le scelte
Contatti # => Modifica # => Nome utente #
_______________
Alexander.G -- ∧
Bodin.K
Modificare i nomi dei residenti e l'indirizzo fisico corrispondente.
| — 48 —
ABB-Welcome M
Modifica contatti per indirizzo logico
Digitare
#
*
password di sistema
#
Per entrare nel menù, poi selezionare le scelte
Contatti # => Modifica # => Indirizzo logico #
Inserire indirizzo
logico
0101
Modificare l'indirizzo logico e l'indirizzo fisico corrispondente utilizzando la tastiera
numerica.
(3)
Elimina
Elimina contatti per nome utente
Digitare
#
*
password di sistema
#
Per entrare nel menù, poi selezionare le scelte
Contatti # => Elimina # => Nome utente #
_______________
Alexander.G -- ∧
Bodin.K
| — 49 —
ABB-Welcome M
Elimina contatti per indirizzo logico
Digitare
#
*
password di sistema
#
Per entrare nel menù, poi selezionare le scelte
Contatti # => Elimina # => Indirizzo logico #
Inserire indirizzo
logico
0101
(4)
Elimina tutti
Digitare
#
*
password di sistema
#
Per entrare nel menù, poi selezionare le scelte
Contatti # => Elimina tutti #
Eliminare tutti i
nomi?
==>
Fatto!
“#“ per confermare
“*“ per annullare
Elimina tutte le liste inclusi i nomi dei residenti e gli indirizzi logici da questo menu.
| — 50 —
ABB-Welcome M
5.
Impostazioni di sistema
(1)
Data e ora
Digitare
#
*
password di sistema
#
Per entrare nel menù, poi selezionare le scelte
Impostazioni # => Data & ora # => Regolazione data e ora => #
01/01/2013
07:00
(2)
Fatto!
==>
Tempo apertura port
Digitare
#
*
password di sistema
#
Per entrare nel menù, poi selezionare le scelte
Impostazioni # => Tempo apertura porta # => Tempo 1-10s (default: 3s) => #
Blocco (NC-NA-C) indica il blocco collegato ai morsetti COM-NC-NA.
Blocco (NC-NA-C)
Aperto
Tempo (1-10s)
==>
Fatto!
3s
“#” per confermare
| — 51 —
ABB-Welcome M
(3)
Impostazione del messaggio vocale on/off
È possibile attivare o disattivare la funzione di sintesi vocale se il modulo audio ne è
dotato (M251024A-.). Nel frattempo è possibile selezionare anche la lingua.
Digitare
#
*
password di sistema
#
Per entrare nel menù, poi selezionare le scelte
Impostazioni # => Messaggio vocale #
Messaggio
vocale___
On
==>
● -- ∧
Fatto!
Off
∨
Se il modulo audio non è dotato di funzione di sintesi vocale l'utente verrà
avvertito non appena accede a questo menu.
Funzione non
disponibile!
| — 52 —
ABB-Welcome M
(4)
Selezione lingua
Digitare
#
*
password di sistema
#
Per entrare nel menù, poi selezionare le scelte
Impostazioni # => Lingua #
Lingua_______
IEnglish
● -- ∧
Français
∨
Italiano
(5)
Messaggio di benvenuto
Digitare
#
*
password di sistema
#
Per entrare nel menù, poi selezionare le scelte
Impostazioni # => Messaggio di benvenuto #
Nuovo Messaggio:
ABB Benvenuti!
“#“ per confermare
==>
Fatto!
“*“ per annullare
Max 64 caratteri.
| — 53 —
ABB-Welcome M
(6)
Impostazione caratteri uscita Wiegand
Digitare
#
*
password di sistema
#
Per entrare nel menù, poi selezionare le scelte
Impostazioni # => Uscita Wiegand #
Uscita Wiegand__
26 bit !
● -- ∧
34 bit !
∨
(7)
Impostare il blocco porta relativo al passaggio della carta nel lettore
Digitare
#
*
password di sistema
#
Per entrare nel menù, poi selezionare le scelte
Impostazioni # =>Selezione porta #
Selezione porta______
1° (LOCK GND)●∧
2°(NC-CO-COM)
∨
| — 54 —
ABB-Welcome M
Impostare il contatto da comandare quando la scheda viene passata nel lettore:
1° (BLOCCO-GND): sblocco dei morsetti LOCK-GND (Apriporta) quando la tessera viene
passata nel lettore.
2° (NC-NA-COM): sblocco del contatto pulito sul modulo audio
(8)
Reset
Digitare
#
*
password di sistema
#
Per entrare nel menù, poi selezionare le scelte
Impostazioni # => Reset # => #
Ripristinare le
impostazioni di
fabbrica?
==>
Fatto!
“#“ per confermare
“*“ per annullare
Ripristino di tutte le impostazioni di fabbrica; ad. es. impossibile ripristinare le altre
informazioni, ad es. nomi utente, indirizzi logici e informazioni relative alle schede.
| — 55 —
ABB-Welcome M
(9)
Info
Digitare
#
*
password di sistema
#
Per entrare nel menù, poi selezionare le scelte
Impostazioni # => Informazioni #
Modulo audio:
∧
V1.07_131106
Lettore di schede:
V0.10_131107
∨
Visualizzazione delle informazioni software di tutti i moduli del posto esterno.
*Reset password di sistema del modulo tastiera:
In caso abbiate dimenticato la password di sistema è possibile resettarla alle impostazioni di
fabbrica.
Il ripristino delle impostazioni di fabbrica non elimina le restanti informazioni programmate nel
sistema, ad es. nome utente e altre impostazioni.
1.
Scollegare l'alimentazione.
2.
Ricollegare l'alimentazione.
3.
Tenere premuto il “pulsante programmabile” per 5s entro 30s.
4.
Viene emesso un segnale acustico e la password di sistema sarà resettata alle
impostazioni di default (345678).
Pos: 67 /DinA4 - Anleitungen Online/Ueberschriften/2./Reinigung @ 19\mod_1310733980533_15.docx @ 107853 @ 2 @ 1
| — 56 —
ABB-Welcome M
Tastiera posto esterno senza display
5.4.6
Chiamare un residente, inserire l'indirizzo fisico
In modalità standby, il visitatore può premere l'indirizzo
fisico del residente che si desidera chiamare, da 001 a
250.
Nel caso di un edificio complesso, il visitatore deve
premere il numero di edificio (01~60) + indirizzo fisico
(001~250) per effettuare una chiamata dal gate station.
Fig. 24 5.4.7
Chiama portineria
Premere il pulsante
per chiamare la portineria.
Accetta la chiamata
120 s
30 s
==>
Portineria
Portineria
| — 57 —
ABB-Welcome M
5.4.8
Impostazioni di sistema
Gli utenti possono accedere alle impostazioni di sistema procedendo come segue (durante
l'impostazione, premere “#” per confermare premere “*” per annullare. La password di default
di sistema è 345678.):
1.
Impostare il dispositivo come Posto Esterno o Gate Station.
Posto esterno:
Digitare:
#
*
password di sistema
#
Per entrare nel menù, poi
1
#
1
#
Per impostare il posto esterno come Posto Esterno
Gate Station:
Digitare:
#
*
password di sistema
#
Per entrare nel menù, poi
1
#
2
#
Per impostare il posto esterno come Gate Station (Posto Esterno Principale, nelle installazioni
residenziali)
2.
Modifica "password di sistema"
Digitare:
#
*
password di sistema
#
Per entrare nel menù, poi
2
#
nuova password (6-8 bit)
#
nuova password (6-8 bit)
#
Per impostare la nuova password
| — 58 —
ABB-Welcome M
3.
Modifica "codice apertura porta"
Digitare:
#
*
password di sistema
#
Per entrare nel menù, poi
3
#
nuovo codice (6-8 bit)
#
nuovo codice (6-8 bit)
#
Per impostare il nuovo codice
4.
Impostare il messaggio vocale
Se è presente un modulo audio con funzione di sintesi vocale (M251024A-.), è possibile
impostare la lingua locale.
5.
Abilita/disabilita la funzione controllo accessi
Abilita la funzione controllo accessi
Digitare:
#
*
password di sistema
#
Per entrare nel menù, poi
5
#
1
#
Per disabilitare la funzione controllo accessi
5
#
2
#
Per disabilitare la funzione controllo accessi
*Reset password di sistema del modulo tastiera:
In caso abbiate dimenticato la password di sistema è possibile resettarla alle impostazioni di
fabbrica.
Il ripristino delle impostazioni di fabbrica non elimina le restanti informazioni programmate nel
sistema, ad es. nome utente e altre impostazioni.
1.
Scollegare l'alimentazione.
2.
Ricollegare l'alimentazione.
| — 59 —
ABB-Welcome M
3.
Tenere premuto il “pulsante programmabile” per 5s entro 30s.
4.
Viene emesso un segnale acustico e la password di sistema sarà resettata alle
impostazioni di default (345678).
Pos: 21 /DinA4 - Anleitungen Online/Inhalt/KNX/DoorEntry/83220-AP-xxx/Bedienelemente - 83220-AP-xxx @ 18\mod_1303212853605_15.docx @ 103673 @ @ 1
2149 @ @ 1
| — 60 —
ABB-Welcome M
Pos: 70 /DinA4 - Anleitungen Online/Ueberschriften/2./Geraeteeinstellungen @ 18\mod_1302768847744_15.docx @ 103548 @ 2 @ 1
6
Configurazione avanzata
Collegarsi al PC per configurare la tastiera o il display
Fig. 25 Pos: 75 /Busch-Jaeger (Neustruktur)/Modul-Struktur/Online-Dokumentation/Steuermodule - Online-Dokumentation (--> Für alle Dokumente <--)/++++++++++++ Seitenumbruch ++++++++++++ @ 9\mod_1268898668093_0.docx @ 52149 @ @ 1
Pos: 76 /DinA4 - Anleitungen Online/Ueberschriften/1./Technische Daten @ 18\mod_1302615863001_15.docx @ 103416 @ 1 @ 1
7
Dati tecnici
Pos: 77 /DinA4 - Anleitungen Online/Inhalt/KNX/DoorEntry/83220-AP-xxx/Technische Daten - 83220-AP-xxx @ 18\mod_1303212854559_15.docx @ 103705 @ @ 1
Denominazione
Valore
Temperatura di funzionamento
-40°C- +70°C
Protezione (telaio di copertura
IP 54
montato)
Alimentazione, apriporta (Blocco
18V 4A impulsivo, 250 mA mantenuto
GND)
Uscita flottante, apriporta (COM-
30 V CA / CC 1A
NC-NA)
Morsetti a filo singolo
2 x 0,28 mm2 – 2 x 1 mm2
Morsetti a filo sottile
2 x 0,28 mm2 – 2 x 1 mm2
Tensione del bus
20-30 V
Pos: 78 /Busch-Jaeger (Neustruktur)/Modul-Struktur/Online-Dokumentation/Steuermodule - Online-Dokumentation (--> Für alle Dokumente <--)/++++++++++++ Seitenumbruch ++++++++++++ @ 9\mod_1268898668093_0.docx @ 52149 @ @ 1
Pos: 79 /Busch-Jaeger (Neustruktur)/Modul-Struktur/Online-Dokumentation/Überschriften (--> Für alle Dokumente <--)/1. Ebene/M - O/Montage / Installation @ 18\mod_1302613966111_15.docx @ 103373 @ 1 @ 1
| — 61 —
ABB-Welcome M
8
Montaggio/Installazione
Pos: 80 /Busch-Jaeger (Neustruktur)/Modul-Struktur/Online-Dokumentation/Sicherheit (--> Für alle Dokumente <--)/Warnhinweise/Sicherheit - Niederspannungs- und 230 V-Leitungen @ 18\mod_1302617821491_15.docx @ 103465 @ @ 1
Attenzione Tensione elettrica!
Rischio di morte ed incendio dovuto alla presenza di tensione elettrica 1002100-240 V.
–
Non installare contemporaneamente i cavi di bassa tensione e i cavi
100-240 V in una presa da incasso!
Pericolo di carico da 100-240 V sulla linea a bassa tensione in caso di
cortocircuito.
Pos: 81 /Busch-Jaeger (Neustruktur)/Modul-Struktur/Online-Dokumentation/Sicherheit (--> Für alle Dokumente <--)/Warnhinweise/Sicherheit - Fachkenntnisse @ 18\mod_1302774384017_15.docx @ 103564 @ 2 @ 1
| — 62 —
ABB-Welcome M
8.1
Obblighi dell'elettricista
Attenzione Tensione elettrica!
L'installazione del dispositivo può essere effettuata solo se si dispone delle
necessarie competenze ed esperienze in campo elettrico.
•
Un'installazione non corretta mette a rischio la vostra vita e quella
•
Un'installazione non corretta può causare gravi danni materiali, ad
dell'utente dell'impianto elettrico.
esempio a seguito di un incendio.
Di seguito vengono specificati il livello minimo di competenze tecniche e i
requisiti necessari per poter procedere all'installazione:
•
Applicare le "cinque regole di sicurezza" (DIN VDE 0105, EN 50110):
1.
Scollegare l'alimentazione;
2.
Accertarsi che non sia possibile un reinserimento accidentale;
3.
Verificare l'assenza di tensione;
4.
Collegare a terra;
5.
Coprire o proteggere parti adiacenti sotto tensione.
•
Indossare indumenti di protezione personale adeguati.
•
Utilizzare solo attrezzi e strumenti di misura adatti.
•
Controllare il tipo di sistema di distribuzione (sistema TN, IT, TT) per
garantire le seguenti condizioni di alimentazione elettrica (messa a
terra tradizionale, messa a terra di protezione, misure di protezione
aggiuntive, ecc.).
Pos: 82 /DinA4 - Anleitungen Online/Inhalt/KNX/DoorEntry/Montage/Montagehinweise - Allgemein @ 19\mod_1310563670478_15.docx @ 107743 @ 2 @ 1
| — 63 —
ABB-Welcome M
8.2
Istruzioni generali di installazione
•
Terminare tutte le derivazioni del sistema di cablaggio con un dispositivo bus collegato
•
Non installare la centrale di sistema vicino al trasformatore campanello e alle altre fonti di
•
Non installare i fili del bus di sistema insieme ai fili 100-240 V.
•
Non usare cavi tradizionali per i fili di collegamento degli apriporta e del bus di sistema.
•
Non collegare in parallelo cavi di diverso tipo.
•
Usare solo due fili nel cavo quadripolare o multipolare del bus di sistema.
•
In fase di collegamento, non installare il bus in entrata e in uscita all'interno dello stesso
•
Non installare il bus interno ed esterno nello stesso cavo.
(ad es. posto interno, posto esterno, dispositivo di sistema).
alimentazione (per evitare interferenze).
cavo.
Pos: 83 /Busch-Jaeger (Neustruktur)/Modul-Struktur/Online-Dokumentation/Steuermodule - Online-Dokumentation (--> Für alle Dokumente <--)/++++++++++++ Seitenumbruch ++++++++++++ @ 9\mod_1268898668093_0.docx @ 52149 @ @ 1
Pos: 84 /Busch-Jaeger (Neustruktur)/Modul-Struktur/Online-Dokumentation/Überschriften (--> Für alle Dokumente <--)/2. Ebene/M - O/Montage @ 18\mod_1302615960458_15.docx @ 103424 @ 2 @ 1
8.3
Montaggio
Pos: 85.1 /DinA4 - Anleitungen Online/Inhalt/KNX/DoorEntry/83220-AP-xxx/Montage - Module/Montage - Montagedose -- 83220-AP-xxx @ 19\mod_1323250406848_15.docx @ 111098 @ @ 1
Indossare dei guanti per
proteggersi dal rischio di taglio. | — 64 —
ABB-Welcome M
Dimensioni
Modulo audio
Modulo pulsante
Modulo
Modulo targhetta
Modulo tastiera
Modulo lettore schede e
display
Telaio
| — 65 —
ABB-Welcome M
Scatola da
| — 66 —
ABB-Welcome M
Copertura
| — 67 —
ABB-Welcome M
Componenti del posto esterno
3
1
4
2
Fig. 26 N°
Montaggio Funzioni
1
Telaio
2
Moduli
3
Scatola da incasso
4
Copertura di protezione contro la pioggia.
| — 68 —
ABB-Welcome M
Montare i moduli nel telaio di copertura
Fig. 27 1.
Montaggio Inserire ciascun modulo nel telaio dalla parte posteriore finché non si innesta
nell'alloggiamento. È possibile inserire qualsiasi modulo, ad es. modulo videocamera,
modulo audio, modulo pulsante, modulo tastiera, modulo lettore schede e display,
modulo targhetta.
2.
Prestare una particolare attenzione all'orientamento verticale dei moduli.
Cablaggio moduli
| — 69 —
ABB-Welcome M
Fig. 28 Cablaggio moduli 1.
Utilizzare i cavi per collegare, uno ad uno, tutti i moduli tra loro.
2.
Verificare che il modulo audio sia collegato in prossimità del modulo videocamera.
Distanze per l'installazione del posto esterno
Nella scelta del luogo di installazione mantenere una distanza minima sul lato destro per
consentire la rimozione della striscia finale.
| — 70 —
ABB-Welcome M
Cavi
Fig. 29 Montaggio 1.
2.
Preparare la scatola di montaggio.
Spelare i cavi.
–
La sezione isolata dell'estremità del cavo non deve superare i 10 mm.
Montare il telaio in scatola da incasso
Fig. 30 Montaggio | — 71 —
ABB-Welcome M
1.
Fissare il dispositivo nella scatola di montaggio.
2.
Fissare l'anello di sicurezza.
3.
Collegare i cavi nel morsetto in dotazione e innestarlo nei poli di contatto. Richiudere il
4.
Avvitare la parte frontale del dispositivo.
dispositivo fino a sentire lo scatto.
Tre tipi di installazione
Opzione 1: Montaggio a incasso solo con scatola da incasso
Fig. 31 Montaggio a incasso solo con scatola da incasso Opzione 2: Montaggio a incasso con copertura di protezione contro la pioggia
Fig. 32 Montaggio a incasso con copertura di protezione contro la pioggia | — 72 —
ABB-Welcome M
Opzione 3: Montaggio a parete con copertura di protezione contro la pioggia
Fig. 33 Montaggio a parete con copertura di protezione contro la pioggia Smontare posto esterno
Fig. 34 1.
2.
3.
Montaggio Utilizzare l'attrezzo di montaggio in dotazione per rimuovere la striscia finale.
Rimuovere le viti utilizzate per il fissaggio del telaio di copertura.
Spingere verso l'alto ed estrarre il posto esterno partendo dal fondo del telaio di
copertura.
| — 73 —
ABB-Welcome M
Smontare i moduli
Fig. 35 1.
2.
Smontare i moduli Smontare il modulo dal lato.
Rimuovere i moduli.
Sostituire le targhette
Fig. 36 1.
2.
Montaggio Rimuovere la copertura del pulsante e scrivere i nomi degli utenti sull'etichetta.
*Utilizzare un'etichetta in formato A4 e l'apposito software per stampare le etichette.
| — 74 —
ABB-Welcome M
Regolare l'angolazione della videocamera
Fig. 37 Regolare l'angolazione della videocamera 1.
Svitare la videocamera;
2.
Regolare l'angolazione della videocamera nelle 4 direzioni (su, giù, destra e sinistra)
3.
Riavvitare la videocamera.
| — 75 —
ABB-Welcome M
Estensione del posto esterno
Fig. 38 Montaggio 1.
Praticare un foro per il cavo.
2.
Utilizzare gli attrezzi di fissaggio per montare le scatole da incasso orizzontalmente.
3. Per il collegamento dei moduli, far passare i cavi di collegamento nelle scatole.
*L'estensione è utile per collegare posti esterni multipli.
Pos: 94 /Busch-Jaeger (Neustruktur)/Modul-Struktur/Online-Dokumentation/Steuermodule - Online-Dokumentation (--> Für alle Dokumente <--)/++++++++++++ Seitenumbruch ++++++++++++ @ 9\mod_1268898668093_0.docx @ 52149 @ @ 1
| — 76 —
ABB-Welcome M
Pos: 95 /DinA4 - Anleitungen Online/Inhalt/KNX/DoorEntry/Projektierung-Merkblatt/ProjektierPos: 97 /Busch-Jaeger (Neustruktur)/Modul-Struktur/Online-Dokumentation/Rückseiten (--> Für alle Dokumente <--)/Rückseite - Busch-Jaeger - Allgemein @ 20\mod_1327320074886_15.docx @ 137103 @ @ 1
Avvertenza
=== Ende der Liste für Textmarke Backcover ===
Ci riserviamo il diritto di apportare, in qualsiasi momento, modifiche tecniche o modificare il
contenuto del presente documento senza preavviso.
Le specifiche dettagliate concordate al momento dell'ordine si applicano a tutti gli ordini. ABB
declina ogni responsabilità per eventuali errori o incompletezze in questo documento.
Ci riserviamo tutti i diritti del presente documento, degli argomenti e delle illustrazioni ivi
contenute. È vietata la riproduzione, la divulgazione a terzi o l'utilizzo dei relativi contenuti in
toto o in parte, senza il previo consenso scritto da parte di ABB.
VER:1.0 │
│ 14.07.2014
Urządzenie ABB-Welcome M
Pos: 2 /DinA4 - Anl eitun gen Online /Inh alt/KNX/Doo rEntry /832 20-AP- xxx/Tit elblat t - 832 20-AP-xxx - ABB @ 1 9\m od_ 132 3249 806 476 _15. docx @ 11 108 4 @ @ 1
M25102xC
M25102xA-xM25102xPx.
M25102xK-x.
M25102xCR.
5102xDN
Stacja zewnętrzna
=== E nde der Liste für Tex tma rke C over == =
ABB-Welcome
Pos: 4 /Busc h-Ja ege r (N eust rukt ur)/ Mo dul-St ruktu r/Onli ne-D oku ment ation /Inh altsve rzeich nis ( --> Fü r alle Doku men te <-- )/In haltsve rzeic hnis @ 19\ mod _13 206 490 4438 6_1 5.d ocx @ 109 653 @ @ 1
1
2
3
4
5
6
7
8
|
Bezpieczeństwo ........................................................................................ 4
Przeznaczenie .......................................................................................... 4
Środowisko ............................................................................................... 4
3.1
Urządzenia ABB........................................................................ 4
Opis panelu............................................................................................... 6
4.1
Moduł audio .............................................................................. 6
4.1.1
Zamek połączony z zaciskami 3 i 4 ............................................ 9
4.2
Moduł kamery ......................................................................... 10
4.2.1
Kamera analogowa połączona z zaciskiem 1 ........................... 11
4.2.2
Podłączenie oddzielnej kamery................................................ 12
4.3
Moduł przycisku ...................................................................... 13
4.4
Moduł klawiatury ..................................................................... 14
4.5
Moduł wyświetlacza i czytnika kart ........................................... 16
4.6
Moduł tabliczki z nazwiskiem ................................................... 18
Działanie................................................................................................. 20
5.1
Przycisk stacji zewnętrznej ...................................................... 20
5.1.1
Adresowanie ........................................................................... 20
5.1.2
Ustawianie języka wiadomości głosowych (jeśli moduł audio ma
funkcję syntezy mowy) ............................................................ 24
5.2
Stacja zewnętrzna z przyciskami i modułem wyświetlacza ........ 26
5.3
Stacja zewnętrzna z przyciskami i modułem klawiatury............. 27
5.4
Zewnętrzna stacja z klawiaturą ................................................ 30
5.4.1
Połączenie z rezydentem (3 rodzaje) ....................................... 30
5.4.2
Połączenie z konsolą portierską............................................... 31
5.4.3
Stacja wewnętrzna w trybie zarządzania na czas nieobecności 32
5.4.4
Konsola portierska działająca w trybie przechwytywania........... 32
5.4.5
System Settings (Ustawienia systemowe) ................................ 33
5.5
Klawiatura stacji zewnętrznej bez wyświetlacza (Kamera + audio
+ klawiatura). .......................................................................... 42
5.5.1
Aby połączyć się z mieszkańcem, wystarczy wprowadzić adres
fizyczny................................................................................... 42
5.5.2
Połączenie z konsolą portierską............................................... 42
5.5.3
Ustawienia systemowe ............................................................ 42
Zaawansowane ustawienia konfiguracyjne ............................................... 44
Dane techniczne ..................................................................................... 45
Montaż / instalacja .................................................................................. 46
8.1
Wymagania wobec elektryków ................................................. 46
—2—
ABB-Welcome
8.2
8.3
Ogólna instrukcja montażu ...................................................... 47
Montaż ................................................................................... 48
=== E nde der Liste für Tex tma rke TOC == =
|
—3—
ABB-Welcome
Pos: 6 /Busc h-Ja ege r (N eust rukt ur)/ Mo dul-St ruktu r/Onli ne-D oku ment ation /Übe rschri ften (- -> Für alle D okum ent e < --)/ 1. Eb ene/S - T /Sicher heit @ 18\ mod _13 026 127 917 90_ 15.d ocx @ 103 357 @ 1 @ 1
1
Bezpieczeństwo
Pos: 7 /Busc h-Ja ege r (N eust rukt ur)/ Mo dul-St ruktu r/Onli ne-D oku ment ation /Sicher heit (-- > Für alle Dok um ente <- -)/Wa rn hinweise /Sicher heit - 23 0 V @ 18\m od_ 130 260 681 675 0_15 .docx @ 1 033 08 @ @ 1
Ostrzeżenie
Napięcie elektryczne!
Ryzyko śmierci i pożaru z powodu napięcia elektrycznego równego 100–
240 V.
–
Prace przy układzie zasilania o mocy 100–240 V mogą być
wykonywane tylko przez uprawnionych elektryków!
– Odłączyć zasilanie elektryczne przed instalacją lub demontażem!
Pos: 8 /Busc h-Ja ege r (N eust rukt ur)/ Mo dul-St ruktu r/Onli ne-D oku ment ation /Übe rschri ften (- -> Für alle D okum ent e < --)/ 1. Eb ene/A - F /Bestim mun gsge mä ßer Geb rau ch @ 18\ mod _13 027 6332 131 6_1 5.do cx @ 1034 83 @ 1 @ 1
2
Przeznaczenie
Pos: 9 /DinA4 - Anl eitun gen Online /Inh alt/KNX/Doo rEntry /832 20-AP- xxx/Besti mmu ngsg em aesse r Ge bra uch - 83 220 -AP-xxx- 500 @ 2 0\mo d_1 324 561 168 699 _15. docx @ 11 272 8 @ @ 1
Stacja zewnętrzna stanowi integralną część systemu domofonowego ABB W elcome M,
działającą wyłącznie z elementami tego systemu. Urządzenie można używać wyłącznie
z podtynkowymi gniazdami montażowymi firmy ABB z osłoną przeciwdeszczową.
Pos: 10 /B usch-J aeg er (Neus truk tur )/M odul -Strukt ur/O nline -Doku me ntatio n/Übe rsch rifte n ( --> Fü r alle Doku men te < -- )/1. E bene /U - Z/U mwelt @ 18\ mod _13 026 141 5896 7_1 5.d ocx @ 103 383 @ 1 @ 1
3
Środowisko
Pos: 11 /B usch-J aeg er (Neus truk tur )/M odul -Strukt ur/O nline -Doku me ntatio n/Umw elt ( --> F ür all e Doku me nte <-- )/Hinweis e/Hinw eis - U mwelt - Hinweis Elektr oge räte @ 1 8\mo d_1 302 763 973 434 _15. docx @ 10 350 0 @ @ 1
Ochrona środowiska!
Nie można wyrzucać urządzeń elektrycznych ani elektronicznych z
odpadami z gospodarstwa domowego.
–
Urządzenie zawiera cenne surowce, które można ponownie
wykorzystać. Dlatego należy je oddać do odpowiedniego punktu
zbiórki.
Pos: 12 /Di nA4 - A nleitu ngen Onlin e/Ueb ersc hrift en/2 ./ABB Gera ete @ 19 \mo d_1 323 162 843 832_ 15. docx @ 11 087 5 @ 2 @ 1
3.1
Urządzenia ABB
Pos: 13 /B usch-J aeg er (Neus truk tur )/M odul -Strukt ur/O nline -Doku me ntatio n/Umw elt ( --> F ür all e Doku me nte <-- )/Hinweis e/Hinw eis - U mwelt - ABB Elektro ger äte @ 19\ mo d_1 3231 627 458 39_ 15.d ocx @ 110 867 @ @ 1
Na wszystkich materiałach pakunkowych i urządzeniach firmy ABB znajdują się
oznakowania i symbole atestujące dotyczące ich właściwej utylizacji. Materiały
pakunkowe i urządzenia elektryczne, jak również ich elementy należy zawsze oddawać
do utylizacji w autoryzowanych punktach zbiórki lub zakładach utylizacji odpadów.
|
—4—
ABB-Welcome
Produkty firmy ABB spełniają wymogi prawne i są w szczególności zgodne z ustawami o
urządzeniach elektrycznych i elektronicznych oraz rozporządzeniem REACH.
(Dyrektywa UE 2002/96/EG W EEE i RoHS 2002/95/W E)
(Rozporządzenie UE REACH i ustawa wykonawcza do rozporządzenia (W E) nr
1907/2006)
|
—5—
ABB-Welcome
4
Opis panelu
4.1
Moduł audio
Rys. 1
Nr
1
Opis panelu
Funkcja
Powolne miganie diody LED oznacza nawiązanie połączenie.
Szybkie miganie diody LED oznacza, że system jest zajęty
2
Dioda LED się świeci, co oznacza, że komunikacja jest możliwa.
3
Dioda LED się świeci, co oznacza, że drzwi są otwarte
4
Przyciski wybierania połączenia
|
—6—
ABB-Welcome
Rys. 2
Opis panelu
Nr
Funkcje
1
Złącze do modułu wideo
2
Złącze do aktualizacji oprogramowania urządzenia
3
Zaciski wtykowe (COM-NC-NO) do wyjścia pływającego, elektrozaczepu
(30 V AC/DC 1 A)
4
Zaciski wtykowe (Lock-GND) do elektrozaczepu (impulsowo 18 V 4A,
trzymanie 250 mA)
5
Zaciski wtykowe (DC-GND) do dodatkowego zasilania elektrycznego
6
Zaciski wtykowe (a-b) do połączenia magistrali
7
Złącze do modułu z pętlą indukcyjną
8
Złącze do następnego modułu
9
Złącze do przycisku wyjścia
10
Złącze do czujnika do sprawdzania stanu drzwi
11
Łącznik pokrętny do ustawiania adresu stacji zewnętrznej (1-9)
12
Ustawienie dźwięku sygnału zwrotnego przycisku: W Ł./WYŁ.
13
Konfigurowanie przycisków w trybie jedno lub dwukolumnowym (ON=
14
Konfigurowanie funkcji pierwszego i drugiego przycisku.
podwójna kolumna, OFF= pojedyncza kolumna)
3->W YŁ., 4->WYŁ. = połączenie ze stacją wewnętrzną/połączenie ze stacją
wewnętrzną;
|
—7—
ABB-Welcome
3->W Ł., 4->WYŁ. = włączanie oświetlenia/połączenie ze stacją
wewnętrzną;
3->W YŁ., 4->WŁ. = połączenie z konsolą portierską/połączenie ze stacją
wewnętrzną;
3->W Ł., 4->W Ł. = włączanie oświetlenia/połączenie z konsolą portierską.
15
Regulacja głośności głośnika.
16
Regulacja czasu odblokowania zamka od 1 do 10 sekund (funkcja
dostępna dla
zamka połączonego z elektrozaczepem Lock-GND)
|
—8—
ABB-Welcome
4.1.1
|
Zamek połączony z zaciskami 3 i 4
—9—
ABB-Welcome
4.2
Rys. 3
Moduł kamery
Opis panelu
Nr
Funkcje
1
Złącze do dodatkowej kamery analogowej
2
Złącze do modułu audio
3
Zwora do ustawiania formatu wideo: PAL/NTSC
4
Regulacja pola widzenia kamery
|
— 10 —
ABB-Welcome
4.2.1
Kamera analogowa połączona z zaciskiem 1
Wszystkie kam ery z wyjściami wideo 1Vp-p 75Ω, CVBS (zespolony sygnał wizji) mogą być
podłączone do modułu kam ery.
Ogólnie odległość transmisji z kam ery analogowej do stacji zewnętrznej wynosić do 50
metrów przy użyciu kabla koncentrycznego lub 10 metrów przy użyciu kabla innego typu.
Dwa typy połączeń:
Opcja 1: Kamera analogowa jest zasilana przez cały czas
Opcja 2: Kamera analogowa jest zasilana tylko w godzinach pracujących
|
— 11 —
ABB-Welcome
4.2.2
Podłączenie oddzielnej kamery
Moduł kam ery można użyć jako osobną kam erę. Sposób okablowania przedstawiono poniżej.
Połączone 3
pary
dwuprzewodowy
ch magistral
|
— 12 —
ABB-Welcome
4.3
Rys. 4
Moduł przycisku
Opis panelu
Nr
Funkcje
1
Złącze do poprzedniego modułu
2
Złącze do następnego modułu
Rys. 5
|
Opis panelu
— 13 —
ABB-Welcome
Nr
1
Funkcje
Bez względu na strukturę modułu przycisku numery przycisków
ułożone są rosnąco od lewej (w trybie podwójnych
kolumn)
2
Funkcja przełącznika oświetlenia/konsoli portierskiej jest zawsze
przypisana do przycisku
1st /2nd.
3
Nazwy użytkowników można wydrukować za pomocą narzędzia do
tworzenia etykiet oprogramowania
systemu W elcome M.
4.4
Rys. 6
Moduł klawiatury
Opis panelu
Nr
Funkcje
1
Przycisk programowalny
2
Złącze do poprzedniego modułu
3
Złącze do aktualizacji oprogramowania urządzenia
4
Złącze USB do podłączania do komputera: pobieranie/przesyłanie
konfiguracji
5
|
Złącze do następnego modułu
— 14 —
ABB-Welcome
Zdj. 1
Rys. 7
Nr
1
Zdj. 2
Opis panelu
Funkcje
Połączenie z mieszkańcami
Aby wykonać połączenie do mieszkańca, odwiedzający wprowadza numer
stacji zewnętrznej (001) lub numer mieszkania (np.
0101, który został wcześniej zaprogramowany).
*Odwiedzający może również wybrać nazwisko mieszkańca za pomocą
przycisku
lub
na wyświetlaczu, aby wykonać połączenie.
Natomiast naciśnięcie przycisku
powoduje anulowanie połączenia.
*Ta funkcja jest dostępna tylko dla klawiatury przedstawionej na zdj. 1.
2
Połączenie z konsolą portierską
Odwiedzający może połączyć się z konsolą portierską, naciskając przycisk
, jeżeli konsola portierska
jest dostępna w systemie.
3
Zwalnianie blokady za pomocą hasła
Naciśnięcie
+ hasło +
powoduje odblokowanie zamka połączonego
z zaciskami „LOCK-GND” modułu audio.
Naciśnięcie
+2+
+hasło+
powoduje odblokowanie drugiego
zamka połączonego z zaciskami „COM-NC-NO” modułu audio.
Początkowe hasło to 123456. Mieszkańcy mogą ustawić własne
indywidualne hasła za pomocą stacji wewnętrznych.
4
Konfiguracja inżynierii systemu
Nacisnąć przyciski
+
+ hasło systemowe +
, aby przejść do
menu konfiguracji inżynierii systemu.
Początkowe hasło systemowe to 345678 i może zostać zmienione przez
|
— 15 —
ABB-Welcome
administratora.
4.5
Rys. 8
Moduł wyświetlacza i czytnika kart
Opis panelu
Nr
Funkcje
1
Przycisk programowalny
2
Złącze do poprzedniego modułu
3
Złącze do aktualizacji oprogramowania urządzenia
4
Złącze do wyjścia W iegand
5
Złącze USB do podłączania do komputera: pobieranie/przesyłanie
konfiguracji
6
|
Złącze do następnego modułu
— 16 —
ABB-Welcome
Rys. 9
Opis panelu
Nr
Funkcje
1
Wyświetlacz LCD
2
Obsługuje karty identyfikacyjne lub karty IC.
W celu odblokowania zamka drzwi należy przeciągnąć zarejestrowaną
kartę. Można ją
zaprogramować w samym module lub za pomocą komputera — przez
pobranie
pliku programu. (urządzenie M251021CR jest wyposażone w czytnik kart
identyfikacyjnych, a
M251022CR — w czytnik kart mikroprocesorowych)
3
Obsługuje wyjście W iegand.
Domyślny format Wiegand to 26 bitów. Można go rozszerzyć do 34 bitów.
*Najpierw należy podłączyć moduł audio, a następnie moduł wyświetlacza.
Dane techniczne:
M251021CR: Moduł wyświetlacza z czytnikiem kart identyfikacyjnych
Częstotliwość 125KHz
pracy
Norm a
ISO18000-2
Obsługiwane
EM4100, EM4205, EM4305, EM4450, TK4100, T5567 / T5577
karty
kompatybilne z HID 2
Format
Wiegand 26, 34 bitowy
wyjściowy
M251022CR: Moduł wyświetlacza z czytnikiem kart mikroprocesorowych
Częstotliwość 13,56MHz
|
— 17 —
ABB-Welcome
pracy
Norm a
Obsługiwane
karty
Format
wyjściowy
4.6
ISO 14443A
Mifare One S50/S70, itp.
Wiegand 26, 34 bitowy
Moduł tabliczki z nazwiskiem
Rys. 10 Opis panelu
Nr
Funkcje
1
Złącze do poprzedniego modułu
2
Złącze do następnego modułu
Etykiety modułu tabliczek z nazwiskami można drukować za pom ocą narzędzia do tworzenia
etykiet oprogram owania
systemu W elcom e M.
|
— 18 —
ABB-Welcome
Pos: 18 /Di nA4 - A nleitu ngen Onlin e/Ueb ersc hrift en/1 ./Bedie nun g @ 18\m od_ 130 261 392 416 5_15 .docx @ 1 033 65 @ 1 @ 1
|
— 19 —
ABB-Welcome
5
Działanie
Pos: 19 /Di nA4 - A nleitu ngen Onlin e/Ueb ersc hrift en/2 ./Nor male r Bet rieb @ 18 \mo d_1 302 768 8209 65_ 15. docx @ 10 3540 @ 2 @ 1
5.1
Przycisk stacji zewnętrznej
Rys. 11 Przycisk stacji zewnętrznej
Pos: 20 /Di nA4 - A nleitu ngen Onlin e/Ueb ersc hrift en/3 ./Bedie nele men te @ 20\ mod _13 232 6022 055 9_1 5.do cx @ 1 116 47 @ 3 @ 1
5.1.1
1.
Adresowanie
Konfigurowanie funkcji pierwszego/drugiego przycisku
001
2
1
002
DIP
3
3 4
003
1
2
3
4
Rys. 12 Adresowanie
Nr
Funkcje
1
3->W YŁ., 4->WYŁ.
2
Połączenie z mieszkaniem 01
3
Połączenie z mieszkaniem 02
4
Połączenie z mieszkaniem 03
|
— 20 —
ABB-Welcome
2
1
001
DIP
3
3 4
002
4
1
2
Rys. 13 Adresowanie
Nr
Funkcje
1
3->W Ł., 4->WYŁ.
2
Włączanie oświetlenia. Oświetlenie jest połączone z siłownikiem
przełącznika i adres siłownika musi być taki sam jak adres stacji
zewnętrznej.
3
Połączenie z mieszkaniem 01
4
Połączenie z mieszkaniem 02
Konsola
portierska
1
2
001
DIP
3
3 4
002
1
2
4
Rys. 14 Adresowanie
Nr
Funkcje
1
3->W YŁ., 4->WŁ.
2
Połączenie z konsolą portierską Jeśli w tej samej sekcji istnieje wiele
konsol portierskich, po naciśnięciu przez odwiedzającego przycisku Połącz
z konsolą portierską połączenie zostanie skierowane do wszystkich konsol
portierskich jednocześnie.
3
|
Połączenie z mieszkaniem 01
— 21 —
ABB-Welcome
4
Połączenie z mieszkaniem 02
2
1
Konsola
portierska
DIP
3
3 4
001
4
1
Rys. 15 Adresowanie
Nr
Funkcje
1
3->W Ł., 4->W Ł.
2
Włączanie oświetlenia.
3
Połączenie z konsolą portierską
4
Połączenie z mieszkaniem 01
2.
Konfigurowanie przycisku w trybie pojedynczej lub podwójnej kolumny
001
2
002
1
3
ON
003
2
4
1
2
3
4
004
5
Rys. 16 Adresowanie
Nr
Funkcje
1
2-> OFF
2
Połączenie z mieszkaniem 01
3
Połączenie z mieszkaniem 02
4
Połączenie z mieszkaniem 03
|
— 22 —
ABB-Welcome
5
Połączenie z mieszkaniem 04
001
002
2
001
1
WŁ.
3
003
004
4
5
005
2
006
6
7
007
8
1
3
5
7
2
4
6
8
008
9
Rys. 17 Adresowanie
Nr
Funkcje
1
2-> ON
2
Połączenie z mieszkaniem 01
3
Połączenie z mieszkaniem 02
4
Połączenie z mieszkaniem 03
5
Połączenie z mieszkaniem 04
6
Połączenie z mieszkaniem 05
7
Połączenie z mieszkaniem 06
8
Połączenie z mieszkaniem 07
9
Połączenie z mieszkaniem 08
|
— 23 —
ABB-Welcome
Konsola
portierska
2
1
WŁ. DIP
2 3 4
001
002
003
004
005
006
4
3
5
6
7
8
1
3
5
2
4
6
9
Rys. 18 Adresowanie
Nr
Funkcje
1
2->W Ł., 2->W Ł., 4->WŁ.
2
Włączanie oświetlenia.
3
Połączenie z konsolą portierską
4
Połączenie z mieszkaniem 01
5
Połączenie z mieszkaniem 02
6
Połączenie z mieszkaniem 03
7
Połączenie z mieszkaniem 04
8
Połączenie z mieszkaniem 05
9
Połączenie z mieszkaniem 06
5.1.2
Ustawianie języka wiadomości głosowych (jeśli moduł audio
ma funkcję syntezy mowy)
Jeśli został podłączony moduł audio z funkcją syntezy mowy (M251024A-.), można
ustawić język.
Należy ustawić adres stacji zewnętrznej na „0“ i przytrzymać przycisk
1st przez 3
sekundy w celu odtworzenia wiadomości głosowej.
Naciśnięcie tego przycisku umożliwia wybranie języka.
Po wybraniu właściwego języka, nacisnąć i przytrzymać ten przycisk w celu zapisania
ustawień i wyjścia z menu.
|
— 24 —
ABB-Welcome
1
2
3
4
Przycisk
1st
Pojedyncza
kolumna
1
3
5
7
2
4
6
8
Podwójna
kolumna
Rys. 19 Adresowanie
Stacja zewnętrzna z przyciskami jako stacja bramy
Jeśli stacja zewnętrzna z przyciskami jest ustawiona jako stacja bramy, brama (ważne
urządzenie systemowe) musi być ustawiona w trybie bramy do piętra.
Apartment 01 A
Apartment 02 B
Apartment 03 C
Apartment 01 A
Apartment 04 D
Apartment 04 A
Apartment 02 B
Apartment 03 C
Apartment 05 E
Apartment 06 F
Apartment 05 B
Apartment 06 C
Stacja
zewnętrzna
Budynek po
lewej
Stacja
zewnętrzna
Brama
wejściowej
Stacja
zewnętrzna
Budynek po
prawej
Rys. 20
Szczegółowe informacje znajdują się w podręczniku użytkownika bramy,w rozdziale
poświęconym bramie piętra.
Pos: 71 /Di nA4 - A nleitu ngen Onlin e/Ueb ersc hrift en/3 ./Abschl usswide rsta nd @ 19\ mod _13 219 5807 990 6_1 5.do cx @ 1100 83 @ 3 @ 1
Pos: 72 /Di nA4 - A nleitu ngen Onlin e/In halt/KNX/Do orEnt ry/Bedie nun g/Abschl usswide rsta nd s etzen 83 220 -AP-xxx @ 19\ mod _13 1072 339 236 9_1 5.do cx @ 1 078 41 @ @ 1
|
— 25 —
ABB-Welcome
5.2
Stacja zewnętrzna z przyciskami i modułem wyświetlacza
Do stacji zewnętrznej z przyciskami można zamontować
moduł wyświetlacza i czytnika kart, dzięki czemu
możliwe jest otwieranie drzwi, przeciągając kartę. Dla
takiego układu konieczna jest karta nadrzędna dla
instalatora sieci umożliwiająca zarządzanie stacją
zewnętrzną.
Rejestracja karty nadrzędnej/deaktywacja karty
nadrzędnej (zalecane jest, aby te czynności
wykonywane były przez wykwalifikowany personel):
1.
Odłączyć zasilanie elektryczne.
2.
Podłączyć ponownie zasilanie elektryczne.
3.
Nacisnąć i przytrzymać przycisk
Rys. 21
programowalny przez 5 sekund w celu przejścia do
interfejsu programowania karty nadrzędnej na 30
sekund.
4.
Każda karta przeciągnięta w tym czasie
przez czytnik zostanie ustawiona jako nowa karta
NADRZĘDNA. Zostanie wyświetlona podpowiedź
Register master card successfully (Rejestracja
karty nadrzędnej zakończona).
5.
Jeśli karta już została zarejestrowana,
ponowne jej przeciągnięcie spowoduje usunięcie
informacji o niej i zostanie wyświetlona podpowiedź
Delete master card successfully (Usunięcie karty
nadrzędnej zakończone).
Może być zarejestrowana tylko jedna karta
nadrzędna.
Przejście do ustawień systemowych za pomocą karty nadrzędnej:
1.
W celu przejścia do menu ustawień należy przeciągnąć kartę NADRZĘDNĄ.
Zaświecą się trzy diody LED.
2.
6 opcji:
Program Card (Zaprogramuj kartę);
Language (Język);
|
— 26 —
ABB-Welcome
Wiegand Output (W yjście W iegand);
Choose Door (W ybierz drzwi);
Date & Time (Data i godzina);
Back (W stecz).
Dla każdej opcji czas odliczania wynosi 5 sekund
3.
Aby przejść do następnej opcji, należy w ciągu 5 sekund ponownie
przeciągnąć kartę NADRZĘDNĄ
lub po 5 sekundach zostaje wybrana bieżąca opcja
4.
Po 30 sekundach następuje wyjście z menu ustawień.
Przeciągnąć kartę
Przeciągnąć kartę
Po upływie 5 sekund
NADRZĘDNĄ,
NADRZĘDNĄ
zostanie wybrana
wprowadzić ustawienia
bieżącą opcję
Menu_________05
Proximity Card 05
Program Card--- ∧
Menu_________√
Register Card--- ∧
==> ==> Program Card--- ∧
==>
Language
Delete Card
Wiegand Output ∨
Language
Delete All
∨
Wiegand Output ∨
Przeciągnąć kartę
w ciągu 5 sekund, aby
przejść do następnej
opcji.
Przeciągnąć kartę
w ciągu 5 sekund,
aby przejść do
następnej opcji.
==>
5.3
|
Menu_________05
Program Card ∧
Language-------Wiegand Output ∨
==>
Menu_________05
Program Card ∧
Language
Wiegand Output ∨
Stacja zewnętrzna z przyciskami i modułem klawiatury
— 27 —
ABB-Welcome
Do stacji zewnętrznej z przyciskami można zamontować
moduł klawiatury, dzięki czemu możliwe jest otwieranie
drzwi, wprowadzając hasło.
Aby wprowadzić ustawienia systemowe, należy wykonać
następujące kroki (podczas wprowadzania ustawień
nacisnąć symbol #, aby potwierdzić lub symbol *, aby
anulować. Domyślne hasło systemowe to 345678):
1.
Ustawianie urządzenia jako stacji
zewnętrznej lub stacji bramy.
Rys. 22
Stacja zewnętrzna:
#* hasło systemowe # =>
1 # => 1 #
Stacja bramy:
#* hasło systemowe # =>
1 # => 2 #
2.
Zmiana hasła systemowego
#* hasło systemowe # =>
2 # => Wprowadzić nowe hasło (6-8 bitów) # => Wprowadzić hasło ponownie #
3.
Zmiana kodu otwierania drzwi
#* hasło systemowe # =>
3# => Wprowadzić nowy kod otwierania drzwi (6-8 bitów) # => Wprowadzić kod
ponownie #
4.
Ustawianie wiadomości głosowej
Jeśli został podłączony moduł audio z funkcją syntezy mowy (M251024A-.), można
ustawić język.
#* hasło systemowe # =>
4# => Nacisnąć przycisk
5.
lub
, aby wybrać język => #
Włączanie/wyłączanie funkcji kontroli dostępu
Włączanie funkcji kontroli dostępu:
#* hasło systemowe # =>
5# => 1 #
|
— 28 —
ABB-Welcome
Wyłączanie funkcji kontroli dostępu:
#* hasło systemowe # =>
5# => 2 #
*Resetowanie hasła systemowego modułu klawiatury:
Możliwe jest przywrócenie hasła systemowego do ustawień fabrycznych, gdyby zostało
zapomniane.
Przywrócenie domyślnych ustawień fabrycznych nie powoduje usunięcia pozostałych
informacji zapisanych w systemie, takich jak nazwa użytkownika i inne ustawienia.
1.
Odłączyć zasilanie elektryczne.
2.
Podłączyć ponownie zasilanie elektryczne.
3.
W ciągu 30 sekund przytrzymać przycisk programowalny przez 5 sekund.
4.
Po usłyszeniu sygnału dźwiękowego hasło systemowe zostanie
przywrócone do ustawień domyślnych (345678).
|
— 29 —
ABB-Welcome
5.4
5.4.1
Zewnętrzna stacja z klawiaturą
Połączenie z rezydentem (3 rodzaje)
1.
Za pomocą adresu fizycznego
Adres fizyczny jest to kod wewnętrzny wysyłany przez
stację zewnętrzną przez połączenie magistrali do stacji
wewnętrznej lub innych urządzeń w systemie. Dla
każdego mieszkania adres fizyczny oznacza adres stacji
wewnętrznej w nim zainstalowanej. Dla każdego
budynku adres fizyczny oznacza adres bramy w nim
zainstalowanej i jest także nazywany numerem budynku.
W trybie oczekiwania odwiedzający może wprowadzić
adres fizyczny mieszkańca (od 001 do 250), z którym
Rys. 23
chce nawiązać bezpośrednie połączenie.
Aby wykonać połączenie ze stacji bramy w kompleksach
mieszkalnych, odwiedzający musi wprowadzić numer
budynku (01~60) + adres fizyczny (001~250).
Enter Physical A
dd.:
01 001
2.
Za pomocą adresu logicznego
Adres logiczny oznacza kod, który odwiedzający wprowadza, aby wykonać połączenie.
Najpierw należy ustalić ten kod, a następnie przypisać go do adresu fizycznego.
Do ustawienia adresu logicznego można użyć numeru mieszkania lub innego łatwego
do zapamiętania kodu.
Aby ustawić adres logiczny, należy wykonać następujące kroki:
Ustawianie adresu logicznego:
#* hasło systemowe # => ustawienia systemowe =>
Książka adresowa => Dodaj => Adres logiczny
Physical Add.:
001
Logic Add.:
0101
Włączanie trybu połączenia za pomocą adresu logicznego
|
— 30 —
ABB-Welcome
#* hasło systemowe # => ustawienia systemowe =>
Konfiguracja => Tryb połączenia
Call Mode_______
Physical Add. ∧
Logic Add.-------∨
3.
No. Of digit:
-4==>
(1-8 Digits)
W edług nazwy użytkownika
(Uwagi: funkcja ta jest wyłącznie dostępna w stacjach zewnętrznych z modułem
klawiatury (M251021K-.).)
W trybie oczekiwania naciśnięcie przycisku
mieszkańca. Naciśnięcie przycisków
i
lub
powoduje wyświetlenie nazwiska
umożliwia wyszukanie żądanej stacji
wewnętrznej. Aby wykonać połączenie, należy nacisnąć przycisk
.
Odwiedzający może również bezpośrednio wprowadzić nazwisko mieszkańca za
pomocą klawiatury i wykonać połączenie.
Najpierw należy ustalić nazwy mieszkańców, a następnie przypisać je do adresu
fizycznego.
#* hasło systemowe # => ustawienia systemowe
=> Książka adresowa => Dodaj => Lista kontaktów
Physical Add.:
01001
User Name:
Federico
5.4.2
Połączenie z konsolą portierską
Naciśnięcie przycisku
powoduje połączenie z konsolą portierską.
Odbieranie
połączenia
120 s
30 s
Guard Unit
“*“ to Cancel
|
==>
Guard Unit
“*“ to Cancel
— 31 —
ABB-Welcome
5.4.3
Stacja wewnętrzna w trybie zarządzania na czas
nieobecności
Jeśli stacja wewnętrzna działa w trybie zarządzania domem pod nieobecność
mieszkańców, po wybraniu poniższych opcji odwiedzający może nagrać
wiadomość dla mieszkańca.
Po usłyszeniu sygnału,
Odtwarzanie
wiadomości...
30 s
120 s
Andy
“*“ to Cancel
5.4.4
odwiedzający może
nagrać wiadomość
==>
Andy
“*“ to Cancel
001 s
==>
Recording...
“*“ to Cancel
Konsola portierska działająca w trybie przechwytywania
Jeśli konsola portierska działa w trybie przechwytywania, połączenie ze stacji
zewnętrznej do stacji wewnętrznej jest przechwytywane przez konsolę
portierską i po potwierdzeniu tożsamości konsola portierska przekierowuje
połączenie do stacji wewnętrznej.
Połączenie ze stacji
zewnętrznej do stacji
wewnętrznej
KP zatwierdza
połączenie
30 s
Guard Unit
“*“ to Cancel
Konsola portierska
przekierowuje połączenie
do stacji wewnętrznej
120 s
==>
Guard Unit
“*“ to Cancel
==>
==>
120 s
Andy
“*“ to Cancel
|
— 32 —
ABB-Welcome
5.4.5
System Settings (Ustawienia systemowe)
(Podczas wprowadzania ustawień nacisnąć symbol #, aby potwierdzić lub symbol *, aby
anulować, domyślne hasło systemowe to 345678):
1.
Przejście do menu ustawień systemowych
#* hasło systemowe #
Menu__________
Configurations-- ∧
Access Control
Contact
∨
2.
Konfiguracje
(1)
Ustawianie urządzenia jako stacji zewnętrznej lub stacji bramy.
Stacja zewnętrzna:
#* hasło systemowe # =>
Konfiguracja # => Typ urządzenia # => Stacja zewnętrzna # (Domyśla)
Device Type_____
Outdoor St. ● -- ∧
Gate Station
∨
Stacja bramy:
#* hasło systemowe # =>
Konfiguracja # => Typ urządzenia # => Stacja bramy #
Device Type_____
Outdoor St.
∧
Gate Station ●∨
(2)
Ustawianie trybu połączenia: wykonywanie połączenia według adresu
fizycznego lub adresu logicznego
Ustawianie połączenia według adresu fizycznego:
#* hasło systemowe # =>
Konfiguracja # => Tryb połączenia # => Adres fizyczny #
|
— 33 —
ABB-Welcome
Call Mode_______
Physical Add.● ∧
Logic Add.:
∨
Ustawianie trybu połączenia według adresu logicznego (liczba cyfr od 1 do 8):
#* hasło systemowe # =>
Konfiguracja # => Tryb połączenia # => Adres logiczny #
Call Mode_______
Physical Add. ∧
Logic Add.: ●∨
(3)
Ustawianie hasła systemowego
Zmiana hasła systemowego
#* hasło systemowe # =>
Ustawienia # => Kod systemu # => Zmień #
New Password:
******
==>
Re-enter:
******
Done!
==>
Resetowanie hasła systemowego
#* hasło systemowe # =>
Ustawienia # => Kod systemu # => Reset #
Reset System
Code?
“#“ to Confirm
“*“ to Cancel
3.
Done!
==>
Kontrola dostępu
(1)
Kod otwierania drzwi
Długość hasła może wynosić od 6 do 8 znaków. Domyślne hasło otwierania drzwi
to 123456 i można je zmienić przez stację zewnętrzną.
Użytkownicy mogą ustawić własne hasła za pomocą stacji wewnętrznych. W
pamięci przechowywanych jest do 6000 haseł.
|
— 34 —
ABB-Welcome
Włączanie/wyłączanie opcji hasła otwierania drzwi (domyślnie: 123456)
#* hasło systemowe # =>
Kontrola dostępu # => Kod otwierania drzwi # => Włączyć / Wyłączyć #
Door Open Code__
Disable
-- ∧
Modify
Reset
∨
Done!
==>
Zmiana hasła otwierania drzwi
#* hasło systemowe # =>
Kontrola dostępu # => Kod otwierania drzwi # => Zmień #
New Password:
******
==>
Re-enter:
******
==>
Done!
Reset hasła otwierania drzwi
#* hasło systemowe # =>
Kontrola dostępu # => Kod otwierania drzwi # => Reset #
Zresetować kod
otwierania drzwi?
“#“ to Confirm
“*“ to Cancel
(2)
Done!
==>
Karta zbliżeniowa (w stacji zewnętrznej można zarejestrować do 3000 kart)
Rejestrowanie kart:
#* hasło systemowe # =>
Kontrola dostępu # => Karta zbliżeniowa # => Rejestruj kartę #
Enter Card No.:
0123456
Or
Swipe the Card
|
==>
Enter Card No.:
0123456
Or
Done!
Swipe the Card
— 35 —
ABB-Welcome
Usuwanie kart:
#* hasło systemowe # =>
Kontrola dostępu # => Karta zbliżeniowa # => Usuń kartę #
Enter Card No.:
0123456
Or
Swipe the Card
==>
Enter Card No.:
0123456
Or
Done!
Swipe the Card
Usuwanie wszystkich kart
#* hasło systemowe # =>
Kontakt # => Karta zbliżeniowa # => Usuń wszystkie #
Delete All
Cards?
“#“ to Confirm
“*“ to Cancel
4.
Done!
==>
Kontakt (3000 nazw, które składają się z kombinacji 24 znaków
alfanumerycznych)
(1)
Add (Dodaj)
Dodawanie kontaktu według nazwy użytkownika
#* hasło systemowe # =>
Kontakt # => Dodaj # => Nazwy użytkowników #
Physical Add.:
001
User Name:
Alexander.G
Nazwy mieszkańców muszą być przypisany do adresu fizycznego.
Dodawanie kontaktu według adresu logicznego
#* hasło systemowe # =>
Kontakt # => Dodaj # => Adres logiczny #
Physical Add.:
001
Adres log.:
0101
|
— 36 —
ABB-Welcome
Adres logiczny musi być przypisany do adresu fizycznego.
(2)
Modify (Zmień)
Zmiana kontaktu według nazwy użytkownika
#* hasło systemowe # =>
Kontakt # => Zmień # => Nazwy użytkowników #
_______________
Alexander.G -- ∧
Bodin.K
Christian.G
∨
Zmiana nazwisk mieszkańców i ich odpowiednich adresów fizycznych.
Zmiana kontaktu według adresu logicznego
#* hasło systemowe # =>
Kontakt # => Zmień # => Adres logiczny #
Enter Logic
Add.:
0101
Zmiana adresu logicznego i powiązanego z nim adresu fizycznego za pomocą
klawiatury alfanumerycznej.
(3)
Delete (Usuń)
Zmiana kontaktu według nazwy użytkownika
#* hasło systemowe # =>
Kontakt # => Usuń # => Nazwy użytkowników #
_______________
Alexander.G -- ∧
Bodin.K
Christian.G
∨
Usuwanie kontaktu według adresu logicznego
#* hasło systemowe # =>
Kontakt # => Usuń # => Adres logiczny #
|
— 37 —
ABB-Welcome
Enter Logic
Adr.:
0101
(4)
Clear all (W yczyść wszystko)
#* hasło systemowe # =>
Kontakt # => Wyczyść wszystko #
Delete All Names?
“#“ to Confirm
“*“ to Cancel
Done!
==>
Czyszczenie wszystkich list, włączając nazwy mieszkańców i adresy logiczne
zawarte w tym menu.
5.
System setting (Ustawienia systemowe)
(1)
Data i godzina
#* hasło systemowe # =>
Ustawienia # => Data i godzina # => Wprowadź datę i godzinę => #
2013-01-01
07:00
Done!
==>
“#” to Confirm
(2)
Czas otwarcia drzwi
#* hasło systemowe # =>
Ustawienia # => Czas otwarcia drzwi # => Czas 1-10s(domyślnie: 3s) => #
Zamek (NC-NO-C) – zamek połączony z zaciskami COM-NC-NO.
Lock(NC-NO-C)
Open
Time (1-10s)
3s
“#” to Confirm
|
Done!
==>
— 38 —
ABB-Welcome
(3)
Włączanie/wyłączanie wiadomości głosowej
Jeśli został podłączony moduł audio z funkcją syntezy mowy (M251024A-.), można
włączyć lub wyłączyć funkcję syntezy mowy. Można również wybrać język.
#* hasło systemowe # =>
Ustawienia # => Wiadomość głosowa #
Voice Message___
On
● -- ∧
Off
∨
Done!
==>
Jeśli moduł audio nie zawiera funkcji syntezy mowy, po otwarciu tego menu
zostanie wyświetlona
informacja.
No This Function!
(4)
W ybierz język
#* hasło systemowe # =>
Ustawienia # => Język #
Language_______
English
● -- ∧
Français
Italiano
∨
(5)
Wiadomość powitalna
#* hasło systemowe # =>
Ustawienia # => Wiadomość powitalna #
New Message:
ABB Welcome!
“#“ to Confirm
“*“ to Cancel
Done!
==>
Można wprowadzić nie więcej niż 64 znaków.
|
— 39 —
ABB-Welcome
(6)
Ustawianie liczby bitów wyjścia W iegand
#* hasło systemowe # =>
Ustawienia # => Wyjście Wiegand #
Wiegand Output__
26 bit.!
● -- ∧
34 bit.!
∨
(7)
Ustawianie odpowiedniego zamka drzwi podczas przeciągania karty
#* hasło systemowe # =>
Ustawienia # =>Wybór Drzwi #
Door Select______
1st(LOCK-GND)●∧
2nd(NC-CO-COM)
∨
Ustawianie zamka, który zostanie odblokowany po przeciągnięciu kartą:
Pierwszy zamek (LOCK-GND): po przeciągnięciu kartą zamek połączony z
zaciskami LOCK-GND zostanie odblokowany.
Drugi zamek (NC-NO-COM): po przeciągnięciu kartą, zamek połączony z zaciskami
NC-NO-COM zostanie odblokowany.
(8)
Resetuj
#* hasło systemowe # =>
Ustawienia # => Reset # => #
Reset to Factory
Default?
“#“ to Confirm
“*“ to Cancel
Done!
==>
Resetowanie wszystkich ustawień fabrycznych, ale pozostałych informacji, np. nazw
użytkowników, adresów logicznych ani informacji o kartach nie można zresetować.
(9)
Informacje
#* hasło systemowe # =>
Ustawienia # => Informacje #
|
— 40 —
ABB-Welcome
Audio module: ∧
V1.07_131106
Card reader:
V0.10_131107 ∨
Należy zapoznać się z informacjami o oprogramowaniu każdego modułu stacji
zewnętrznej.
*Resetowanie hasła systemowego modułu klawiatury:
Możliwe jest przywrócenie hasła systemowego do ustawień fabrycznych, gdyby zostało
zapomniane.
Przywrócenie domyślnych ustawień fabrycznych nie powoduje usunięcia pozostałych
informacji zapisanych w systemie, takich jak nazwa użytkownika i inne ustawienia.
1.
Odłączyć zasilanie elektryczne.
2.
Podłączyć ponownie zasilanie elektryczne.
3.
W ciągu 30 sekund przytrzymać przycisk programowalny przez 5 sekund.
4.
Po usłyszeniu sygnału dźwiękowego hasło systemowe zostanie
przywrócone do ustawień domyślnych (345678).
Pos: 67 /Di nA4 - A nleitu ngen Onlin e/Ueb ersc hrift en/2 ./Reini gung @ 1 9\m od_ 131 0733 980 533 _15. docx @ 10 785 3 @ 2 @ 1
|
— 41 —
ABB-Welcome
5.5
5.5.1
Klawiatura stacji zewnętrznej bez wyświetlacza (Kamera +
audio + klawiatura).
Aby połączyć się z mieszkańcem, wystarczy wprowadzić
adres fizyczny
W trybie oczekiwania odwiedzający może wprowadzić
adres fizyczny mieszkańca (od 001 do 250), z którym
chce nawiązać bezpośrednie połączenie.
Aby wykonać połączenie ze stacji bramy w kompleksach
mieszkalnych, odwiedzający musi wprowadzić numer
budynku (01~60) + adres fizyczny (001~250).
Rys. 24
5.5.2
Połączenie z konsolą portierską
Naciśnięcie przycisku
powoduje połączenie z konsolą portierską.
Odbieranie
połączenia
120 s
30 s
Guard Unit
“*“ to Cancel
5.5.3
==>
Guard Unit
“*“ to Cancel
Ustawienia systemowe
Aby wprowadzić ustawienia systemowe, należy wykonać następujące kroki (podczas
wprowadzania ustawień nacisnąć symbol #, aby potwierdzić lub symbol *, aby anulować.
Domyślne hasło to 345678):
1.
Ustawianie urządzenia jako stacji zewnętrznej lub stacji bramy.
Stacja zewnętrzna:
#* hasło systemowe # =>
1 # => 1 #
Stacja bramy:
#* hasło systemowe # =>
1 # => 2 #
2.
|
Zmiana hasła systemowego
— 42 —
ABB-Welcome
#* hasło systemowe # =>
2 # => Wprowadzić nowe hasło (6-8 bitów) # => Wprowadzić hasło ponownie #
3.
Zmiana kodu otwierania drzwi
#* hasło systemowe # =>
3# => Wprowadzić nowy kod otwierania drzwi (6-8 bitów) # => Wprowadzić kod
ponownie #
4.
Ustawianie wiadomości głosowej
Jeśli został podłączony moduł audio z funkcją syntezy mowy (M251024A-.), można
ustawić język.
#* hasło systemowe # =>
4# => Nacisnąć przycisk
5.
lub
, aby wybrać język => #
Włączanie/wyłączanie funkcji kontroli dostępu
Włączanie funkcji kontroli dostępu:
#* hasło systemowe # =>
5# => 1 #
Wyłączanie funkcji kontroli dostępu:
#* hasło systemowe # =>
5# => 2 #
*Resetowanie hasła systemowego modułu klawiatury:
Możliwe jest przywrócenie hasła systemowego do ustawień fabrycznych, gdyby zostało
zapomniane.
Przywrócenie domyślnych ustawień fabrycznych nie powoduje usunięcia pozostałych
informacji zapisanych w systemie, takich jak nazwa użytkownika i inne ustawienia.
1.
Odłączyć zasilanie elektryczne.
2.
Podłączyć ponownie zasilanie elektryczne.
3.
W ciągu 30 sekund przytrzymać przycisk programowalny przez 5 sekund.
4.
Po usłyszeniu sygnału dźwiękowego hasło systemowe zostanie
przywrócone do ustawień domyślnych (345678).
Pos: 21 /Di nA4 - A nleitu ngen Onlin e/In halt/KNX/Do orEnt ry/83 220 -AP-xxx/Be dienel eme nte - 8 322 0-AP-xxx @ 18\ mo d_1 3032 128 536 05_ 15.d ocx @ 103 673 @ @ 1
2149, 1
|
— 43 —
ABB-Welcome
Pos: 70 /Di nA4 - A nleitu ngen Onlin e/Ueb ersc hrift en/2 ./Ge raet eeins tellun gen @ 1 8\mo d_1 302 768 847 744 _15. docx @ 10 354 8 @ 2 @ 1
6
Zaawansowane ustawienia konfiguracyjne
Podłączyć do komputera w celu skonfigurowania klawiatury i wyświetlacza
Rys. 25
Pos: 75 /B usch-J aeg er (Neus truk tur )/M odul -Strukt ur/O nline -Doku me ntatio n/Steu er mod ule - Onlin e-Dok ume ntati on ( -- > F ür alle Dok ume nte <- -)/ +++ ++ ++ +++ ++ S eiten umb ruch + +++ ++ ++ +++ + @ 9\m od_ 126 8898 668 093 _0. docx @ 521 49 @ @ 1
|
— 44 —
ABB-Welcome
Pos: 76 /Di nA4 - A nleitu ngen Onlin e/Ueb ersc hrift en/1 ./T echnisc he D aten @ 18 \mo d_1 302 615 863 001 _15. docx @ 10 341 6 @ 1 @ 1
7
Dane techniczne
Pos: 77 /Di nA4 - A nleitu ngen Onlin e/In halt/KNX/Do orEnt ry/83 220 -AP-xxx/ Tech nische Date n - 832 20-AP-x xx @ 1 8\m od_ 130 321 285 4559 _15 .docx @ 1 037 05 @ @ 1
Opis
Wartość
Temperatura robocza:
-40 ℃ – +70 ℃
Stopień ochrony
IP 54
(zamontowana obudowa)
Zasilanie elektryczne,
Impulsowo 18 V 4A, trzymanie 250 mA
elektrozaczep (Lock-GND)
Wyjście pływające,
30 V AC / DC 1A
elektrozaczep (COM-NC-NO)
Zaciski do przewodów
2 x 0,28 mm 2 – 2 x 1 mm 2
jednożyłowych
Zaciski do przewodów
2 x 0,28 mm 2 – 2 x 1 mm 2
cienkożyłowych
Napięcie magistrali
20-30 V
Pos: 78 /B usch-J aeg er (Neus truk tur )/M odul -Strukt ur/O nline -Doku me ntatio n/Steu er mod ule - Onlin e-Dok ume ntati on ( -- > F ür alle Dok ume nte <- -)/ +++ ++ ++ +++ ++ S eiten umb ruch + +++ ++ ++ +++ + @ 9\m od_ 126 8898 668 093 _0. docx @ 521 49 @ @ 1
|
— 45 —
ABB-Welcome
Pos: 79 /B usch-J aeg er (Neus truk tur )/M odul -Strukt ur/O nline -Doku me ntatio n/Übe rsch rifte n ( --> Fü r alle Doku men te < -- )/1. E bene /M - O/ Mont age / Ins tallatio n @ 18\ mod _13 0261 396 611 1_1 5.do cx @ 1 033 73 @ 1 @ 1
8
Montaż / instalacja
Pos: 80 /B usch-J aeg er (Neus truk tur )/M odul -Strukt ur/O nline -Doku me ntatio n/Siche rheit (- -> Fü r alle D oku ment e < --) /War nhinweis e/Siche rheit - Nie ders pan nun gs- und 230 V-Leit ung en @ 18\ mod _13 026 178 214 91_1 5.d ocx @ 103 465 @ @ 1
Ostrzeżenie
Napięcie elektryczne!
Ryzyko śmierci i pożaru z powodu napięcia elektrycznego równego
100–240 V.
–
Przewodów niskonapięciowych i 100–240 V nie wolno układać
razem w jednej puszce podtynkowej!
Jeśli dojdzie do zwarcia, istnieje niebezpieczeństwo wystąpienia
napięcia 100–240 V w przewodach niskonapięciowych.
Pos: 81 /B usch-J aeg er (Neus truk tur )/M odul -Strukt ur/O nline -Doku me ntatio n/Siche rheit (- -> Fü r alle D oku ment e < --) /War nhinweis e/Siche rheit - Fachk enn tnisse @ 18 \mo d_1 302 774 384 017_ 15. docx @ 10 356 4 @ 2 @ 1
8.1
Wymagania wobec elektryków
Ostrzeżenie
Napięcie elektryczne!
Urządzenie wolno instalować jedynie osobom posiadającym konieczną
wiedzę i doświadczenie w dziedzinie elektrotechniki.
•
Niefachowa instalacja zagraża życiu instalatora i użytkowników
•
Niefachowa instalacja może prowadzić do poważnych szkód
instalacji elektrycznej.
rzeczowych, na przykład pożaru.
W ymagana wiedza fachowa i warunki instalacji:
•
Stosować poniższe zasady bezpieczeństwa (DIN VDE 0105, EN
50110):
1.
Odłączyć od sieci.
2.
Zabezpieczyć przed ponownym włączeniem.
3.
Sprawdzić, czy urządzenie nie jest pod napięciem.
4.
Podłączyć do uziemienia.
5.
Zakryć lub odgrodzić sąsiadujące części znajdujące się pod
napięciem.
•
Stosować odpowiednią odzież ochronną.
•
Stosować wyłącznie odpowiednie narzędzia i przyrządy pomiarowe.
•
Sprawdzić rodzaj sieci zasilającej (system TN, system IT i system
TT) i przestrzegać wynikających z tego warunków przyłączenia
|
— 46 —
ABB-Welcome
(klasyczne zerowanie, uziemienie ochronne, konieczność
wykonania dodatkowych pomiarów, itd.).
Pos: 82 /Di nA4 - A nleitu ngen Onlin e/In halt/KNX/Do orEnt ry/M onta ge/ Mont age hinweis e - Allg emei n @ 1 9\m od_ 131 056 367 047 8_15 .docx @ 1 077 43 @ 2 @ 1
8.2
•
Ogólna instrukcja montażu
Wszystkie odgałęzienia przewodów powinny zostać zakończone podłączonym
urządzeniem magistrali (np. stacja wewnętrzna, zewnętrzna lub urządzenie
systemowe).
•
Nie instalować centrali systemu bezpośrednio obok transformatorów dzwonka lub
•
Nie układać przewodów magistrali systemowej wspólnie z przewodami 100–240 V.
•
Nie używać wspólnego kabla dla przewodów przyłączowych elektrozaczepów i
•
Unikać złączeń między różnymi typami kabli.
•
W kablu, który ma cztery lub więcej żył, do magistrali systemowej należy
•
Przy łączeniu przelotowym nigdy nie prowadzić przychodzącej i wychodzącej
innych urządzeń zasilających (unikanie interferencji).
przewodów magistrali systemowej.
wykorzystać tylko dwie żyły.
magistrali w tym samym kablu.
•
Nigdy nie prowadzić magistrali wewnętrznej i zewnętrznej w tym samym kablu.
Pos: 83 /B usch-J aeg er (Neus truk tur )/M odul -Strukt ur/O nline -Doku me ntatio n/Steu er mod ule - Onlin e-Dok ume ntati on ( -- > F ür alle Dok ume nte <- -)/ +++ ++ ++ +++ ++ S eiten umb ruch + +++ ++ ++ +++ + @ 9\m od_ 126 8898 668 093 _0. docx @ 521 49 @ @ 1
|
— 47 —
ABB-Welcome
Pos: 84 /B usch-J aeg er (Neus truk tur )/M odul -Strukt ur/O nline -Doku me ntatio n/Übe rsch rifte n ( --> Fü r alle Doku men te < -- )/2. E bene /M - O/ Mont age @ 1 8\m od_1 302 615 960 458 _15. docx @ 10 342 4 @ 2 @ 1
8.3
Montaż
Pos: 85. 1 /DinA4 - Anleit ung en O nline/I nhal t/KNX/DoorE ntry/ 832 20-AP-xxx /Mo nta ge - Mo dule/ Mon tag e - Mon tage dos e -- 83 220 -AP-xxx @ 19\ mod _132 325 040 684 8_1 5.doc x @ 1 110 98 @ @ 1
Przygotować parę rękawic do
ochrony przed skaleczeniami.
Wymiary
Moduł audio
Moduł przycisku
|
Moduł kamery
Moduł tabliczki z
nazwiskiem
Moduł klawiatury
Moduł wyświetlacza i
czytnika kart
— 48 —
ABB-Welcome
Ramka
pokrywy
Skrzynka
podtynkowa
|
— 49 —
ABB-Welcome
Osłona
przeciwdes
Elementy stacji zewnętrznej
3
1
4
2
Rys. 26 Montaż
|
— 50 —
ABB-Welcome
Nr
Funkcje
1
Ramka pokrywy
2
Moduły
3
Skrzynka podtynkowa
4
Osłona przeciwdeszczowa
Montowanie wszystkich modułów na ramce pokrywy
Rys. 27 Montaż
1.
Z tyłu ramki pokrywy umieść każdy moduł, aż będzie słychać kliknięcie. Można
umieścić wszystkie moduły, np. moduł kamery, moduł audio, moduł przycisku,
moduł klawiatury, moduł wyświetlacza i czytnika kart, moduł tabliczki z nazwiskiem.
2.
|
Zwracać szczególną uwagę na orientację pionową każdego modułu.
— 51 —
ABB-Welcome
Okablowanie modułów
Rys. 28 Okablowanie modułów
1.
2.
Za pomocą przewodów połączyć moduły kolejno ze sobą.
Sprawdzić, czy moduł audio jest połączony z modułem kamery.
Miejsce instalacji stacji zewnętrznej
Przy wyborze miejsca instalacji upewnić się, czy po prawej stronie urządzenia
zachowany został minimalny odstęp umożliwiający demontaż dolnego paska.
|
— 52 —
ABB-Welcome
Okablowanie
Rys. 29 Montaż
1.
Przygotować skrzynkę instalacyjną.
2.
Odizolować przewody.
–
Izolowana część końcówki przewodu nie może być dłuższa niż 10 mm.
Montowanie ramki na skrzynce podtynkowej
Rys. 30 Montaż
1.
Zamocować urządzenie w skrzynce instalacyjnej.
2.
Podłączyć pętlę bezpieczeństwa.
3.
Połączyć przewody z obudowanymi zaciskami i podłączyć zaciski do kołków
4.
Przykręcić przedni panel urządzenia.
stykowych. Zamknąć urządzenie, aż będzie słychać wyraźne kliknięcie.
|
— 53 —
ABB-Welcome
Trzy typy instalacji
Opcja 1: Montaż tylko na skrzynce podtynkowej
Rys. 31 Montaż tylko na skrzynce podtynkowej
Opcja 2: Montaż na skrzynce podtynkowej z osłoną przeciwdeszczową
Rys. 32 Montaż na skrzynce podtynkowej z osłoną przeciwdeszczową
|
— 54 —
ABB-Welcome
Opcja 3: Montaż natynkowy z osłoną przeciwdeszczową
Rys. 33 Montaż natynkowy z osłoną przeciwdeszczową
Demontowanie stacji zewnętrznej
Rys. 34 Dem ontaż
1.
2.
Użyć narzędzia montażowego w celu zdjęcia paska dolnego.
Odkręcić śruby służące do mocowania ramki pokrywy.
3.
Popchnąć w górę i odciągnąć stację zewnętrzną od spodu ramki pokrywy.
|
— 55 —
ABB-Welcome
Demontowanie modułów
Rys. 35 Dem ontowanie modułów
1.
2.
Zdemontować moduł zaczynając od jednego jego boku.
W yjąć moduł.
Wymiana tabliczki z nazwiskiem
Rys. 36 Montaż
1.
2.
Zdjąć pokrywę przycisku i zapisać nazwy użytkowników na etykiecie.
*Użyć arkusza do etykiet w rozmiarze A4 oraz oprogramowania
dostosowanego do tego formatu i wydrukować etykiety.
|
— 56 —
ABB-Welcome
Regulowanie konta kamery
Rys. 37 Regulowanie konta kam ery
1.
Odkręcić kamerę;
2.
W yregulować kąt kamery (cztery kierunki: w górę, w dół, w prawo, w lewo)
3.
|
Przykręcić kamerę.
— 57 —
ABB-Welcome
Rozszerzenie stacji zewnętrznej
Rys. 38 Montaż
1.
Zrobić otwór na przewód.
2.
Użyć mocowania łączącego w celu połączenia skrzynek w poziomie.
3.
Poprowadzić przewody łączące pomiędzy skrzynkami, aby umożliwić
podłączenie modułów.
*Rozszerzenie jest przydatne do połączenia kilku stacji zewnętrznych.
Pos: 94 /B usch-J aeg er (Neus truk tur )/M odul -Strukt ur/O nline -Doku me ntatio n/Steu er mod ule - Onlin e-Dok ume ntati on ( -- > F ür alle Dok ume nte <- -)/ +++ ++ ++ +++ ++ S eiten umb ruch + +++ ++ ++ +++ + @ 9\m od_ 126 8898 668 093 _0. docx @ 521 49 @ @ 1
|
— 58 —
ABB-Welcome M
Error! Use the Home tab
to apply 标题 1 to the
text that you want to
appear here.
Pos: 95 /Di nA4 - A nleitu ngen Onlin e/In halt/KNX/Do orEnt ry/Proj ektier ung -M erkbl att/Pr ojektie rPos: 9 7 /Busc h-Ja ege r (N eust ruktu r)/ Mo dul-Str uktu r/Onli ne-D oku ment ation /Rückseit en (-- > Für alle Dok um ente <- -)/R ückseit e - Bus ch-J aeg er - Allgem ein @ 20\ mod _13 273 200 748 86_1 5.d ocx @ 137 103 @ @ 1
Uwaga
=== E nde der Liste für Tex tma rke Ba ckcove r = ==
Firma ABB zastrzega sobie prawo do wprowadzania zmian technicznych, jak również
zmian treści niniejszego dokumentu w dowolnym momencie i bez uprzedzenia.
Szczegółowe dane techniczne uzgodnione w czasie składania zamówienia stosuje się
do wszystkich zamówień. Firma ABB nie ponosi żadnej odpowiedzialności za błędy ani
za braki, jakie mogą pojawić się w niniejszym dokumencie.
W szelkie prawa do niniejszego dokumentu i zawartych w nim informacji s ą zastrzeżone.
Osobom trzecim zabrania się powielania, przesyłania czy ponownego wykorzystywania
niniejszego dokumentu lub jego części bez uprzedniej pisemnej zgody firmy ABB.
|
— 59 —
ABB s.r.o., Elektro-Praga
Welcome Midi
Tlačítková tabla audio, video a příslušenství
Objednací čísla:
8300-0-8050
8300-0-8051
8300-0-8052
8300-0-8053
8300-0-8054
8300-0-8055
Návod na instalaci
Pos : 2 /Di nA4 - Anleitung en Online/Inhalt/KN X/D oorEntr y/83220- AP- xxx/Titelbl att - 83220-AP- xxx - ABB @ 19\mod_1323249806476_15.doc x @ 111084 @ @ 1
=== Ende der Liste für T extmar ke Cover ===
ABB-Welcome Midi
Pos : 4 /Busch-J aeger (Neus truktur)/M odul-Str uktur/Online-Dokumentation/Inhal ts verz eic hnis (--> Für alle D okumente <--)/Inhalts verz eichnis @ 19\mod_1320649044386_15.doc x @ 109653 @ @ 1
1
2
3
4
5
6
7
8
Bezpečnost ....................................................................................................3
Zamýšlené použití přístroje............................................................................3
Ochrana životního prostředí ..........................................................................3
3.1
Zařízení ABB ................................................................................ 3
Popis svorek ..................................................................................................4
4.1
Hlasový modul ..............................................................................4
4.1.1
Zámek propojený se svorkami 3 a 4 .............................................6
4.2
Kamerový modul ...........................................................................7
4.2.1
Přídavná analogová kamera připojená ke svorce 1 ...................... 8
4.2.2
Připojení oddělené kamery ........................................................... 9
4.3
Modul tlačítek ............................................................................. 10
4.4
Modul klávesnice ........................................................................ 11
4.5
Modul displeje se snímačem karet ............................................. 12
4.6
Modul zaslepovací/adresovací ................................................... 13
Provoz ......................................................................................................... 14
5.1
Tlačítkové tablo .......................................................................... 14
5.1.1
Adresování ................................................................................. 14
5.1.2
Nastavení jazyka pro hlasové zprávy (hl.modul s hl. syntézou).. 17
5.2
Tlačítkové tablo s modulem displeje ........................................... 18
5.3
Tlačítkové tablo s modulem klávesnice ...................................... 19
5.4
Tlačítkové tablo s displejem a klávesnicí .................................... 21
5.4.1
Volání obyvatele bytu (3 typy) .................................................... 21
5.4.2
Přivolání ostrahy ......................................................................... 22
5.4.3
Je-li vnitřní stanice v režimu „nejsme doma“............................... 22
5.4.4
Je-li jednotka ostrahy v „režimu záchytu“.................................... 22
5.4.5
Nastavení systému ..................................................................... 23
5.5
Vnější klávesnice bez displeje (kamera + audio+ klávesnice) .... 29
5.5.1
Volání obyvatele vložením fyzické adresy .................................. 29
5.5.2
Přivolání ostrahy (volání systémového telefonu) ........................ 29
5.5.3
Nastavení systému ..................................................................... 29
Pokročilé nastavení ..................................................................................... 31
Technické údaje .......................................................................................... 32
Montáž / instalace........................................................................................ 33
8.1
Bezpečnostní opatření při instalaci ............................................. 33
8.2
Všeobecné pokyny pro instalaci ................................................. 33
8.3
Montáž ........................................................................................ 34
=== Ende der Liste für T extmar ke TOC ===
|
—2—
ABB-Welcome Midi
Pos : 6 /Busch-J aeger (Neus truktur)/M odul-Str uktur/Online-Dokumentation/Ü bers chriften (--> Für alle Dokumente <--)/1. Ebene/S - T/Sicherheit @ 18\mod_1302612791790_15.doc x @ 103357 @ 1 @ 1
1
Bezpečnost
Pos : 7 /Busch-J aeger (Neus truktur)/M odul-Str uktur/Online-Dokumentation/Sicherheit (--> Für all e D okumente <--)/Warnhi nweis e/Sicherheit - 230 V @ 18\mod_1302606816750_15.doc x @ 103308 @ @ 1
Výstraha
Elektrické napětí!
Nebezpečí smrti či požáru kvůli elektrickému napětí 100-240 V.
–
Na rozvodném systému 100-240 V může pracovat pouze personál s
odpovídající elektrotechnickou kvalifikací!
–
Před instalací či demontáží odpojte hlavní přívod napětí!
Pos : 8 /Busch-J aeger (Neus truktur)/M odul-Str uktur/Online-Dokumentation/Ü bers chriften (--> Für alle Dokumente <--)/1. Ebene/A - F/Bes ti mmungsgemäßer Gebrauc h @ 18\mod_1302763321316_15.doc x @ 103483 @ 1 @ 1
2
Zamýšlené použití přístroje
Pos : 9 /Di nA4 - Anleitung en Online/Inhalt/KN X/D oorEntr y/83220- AP- xxx/Besti mmungsg emaess er Gebrauch - 83220-AP- xxx- 500 @ 20\mod_1324561168699_15.doc x @ 112728 @ @ 1
Tlačítkové tablo je nedílnou součástí dveřního komunikačního systému Welcome Midi od společnosti ABB a pracuje výlučně se
součástmi tohoto systému. Zařízení se smí používat pouze s vhodnými zapuštěnými úchyty ABB a s krytem proti dešti.
Pos : 10 /Busc h-J aeg er (Neustr uktur)/Modul- Struktur /Online-Dokumentati on/Übersc hriften (--> Für alle D okumente <--)/1. Ebene/U - Z/U mwelt @ 18\mod_1302614158967_15.doc x @ 103383 @ 1 @ 1
3
Ochrana životního prostředí
Pos : 11 /Busc h-J aeg er (Neustr uktur)/Modul- Struktur /Online-Dokumentati on/U mwel t (--> Für alle D okumente <--)/Hinweis e/Hi nweis - U mwelt - Hinweis Elektrog eräte @ 18\mod_1302763973434_15.doc x @ 103500 @ @ 1
Dbejte na ochranu životního prostředí!
Použitá elektrická a elektronická zařízení se nesmějí likvidovat v rámci
běžného domovního odpadu.
–
Zařízení obsahuje cenné suroviny, které lze recyklovat. Proto je
třeba zařízení nechat zlikvidovat na vhodném sběrném místě.
Pos : 12 /DinA4 - Anl eitungen Onli ne/Ueberschriften/2./ABB Geraete @ 19\mod_1323162843832_15.doc x @ 110875 @ 2 @ 1
3.1
Zařízení ABB
Pos : 13 /Busc h-J aeg er (Neustr uktur)/Modul- Struktur /Online-Dokumentati on/U mwel t (--> Für alle D okumente <--)/Hinweis e/Hi nweis - U mwelt - ABB El ektr ogeräte @ 19\mod_1323162745839_15.doc x @ 110867 @ @ 1
Všechny obalové materiály a zařízení od společnosti ABB nesou označení a testovací pečetě pro správnou likvidaci. Obalové
materiály a elektrická zařízení i jejich součásti je nutné vždy likvidovat prostřednictv ím autorizovaných sběrných středisek a
společností zaměřených na likvidaci odpadů.
Výrobky společnosti ABB splňují stanovené zákonné požadavky, především směrnice ohledně elektronických a elektrických zařízen í a
předpisy REACH.
(Směrnice EU-2002/96/EG WEEE a 2002/95/EG RoHS)
(Předpis EU-REACH a zákon pro zavedení předpisu do praxe (EG) č.1907/2006)
|
—3—
ABB-Welcome Midi
4
Popis svorek
4.1
Hlasový modul
Obr. 1
Popis přístroje
Číslo
Funkce
1
Dioda bliká pomalu, indikuje navázaný hovor
Dioda bliká rychle, indikuje, že je systém zaneprázdněn
2
Dioda svítí, indikuje možnost komunikace
3
Dioda svítí, indikuje, že jsou dveře odemčeny
4
Tlačítka volání (0,1 nebo 2 tlačítka, podle typu hlasového modulu)
Obr. 2
Popis svorek
Číslo
Funkce
1
Konektor pro modul kamery
2
Konektor pro aktualizaci softwaru v zařízení
3
Svorky (COM-NC-NO) plovoucího výstupu, otevírač dveří (30 V ss/st 1A)
4
Svorky (Lock-GND) pro otevírač dveří (18V, 4A impulsně, 250 mA trvale)
5
Svorky (DC-GND) pro dodatečný napájecí zdroj
6
Svorky (a-b) pro připojení sběrnice
7
Konektor pro modul indukční smyčky
8
Konektor pro další modul
9
Konektor pro tlačítko otevření zevnitř (odchodvé tlačítko)
|
—4—
ABB-Welcome Midi
10
Konektor pro snímač sledující stav dveří
11
Otočný přepínač pro nastavení adresy tlačítkového tabla (1-9)
12
Nastavení tónové odezvy tlačítek: ZAP/VYP
13
Konfigurace tlačítek do režimu jednoho sloupce nebo dvou sloupců (ZAP= dva sloupce, VYP=
14
Nastavení funkcí 1. a 2. tlačítka.
jeden sloupec)
3->VYP, 4->VYP=volání vnitřní stanice / volání vnitřní stanice
3->ZAP, 4->VYP=zapnutí osvětlení / volání vnitřní stanice
3->VYP, 4->ZAP=přivolání ostrahy / volání vnitřní stanice;
3->ZAP, 4->ZAP=zapnutí osvětlení / přivolání ostrahy
15
Nastavení hlasitosti reproduktoru.
16
Nastavení doby uvolnění dveřního zámku, 1-10 s (dostupné pro
zámek spojený s Lock-GND)
|
—5—
ABB-Welcome Midi
4.1.1
|
Zámek propojený se svorkami 3 a 4
—6—
ABB-Welcome Midi
4.2
Obr. 3
Kamerový modul
Popis svorek
Číslo
Funkce
1
Konektor pro přídavnou analogovou kameru
2
Konektor pro audio modul
3
Propojka pro nastavení formátu videa: PAL /NTSC
4
Nastavení snímacího úhlu kamery
|
—7—
ABB-Welcome Midi
4.2.1
Přídavná analogová kamera připojená ke svorce 1
K modulu kamery lze připojit jakoukoli kameru s video výstupem 1Vp-p 75Ω, CVBS (kompozitní video signál).
Obecně může být vzdálenost z analogové kamery k vnější stanici až 50 metrů při přenosu pomocí koaxiálního kabelu a
zhruba 10 metrů při použití jiných typů kabelů.
Dva typy připojení:
Možnost 1: Analogová kamera je zapnuta neustále
Možnost 2: Analogová kamera je zapnuta pouze během činnosti (snímání)
|
—8—
ABB-Welcome Midi
4.2.2
Připojení oddělené kamery
Modul kamery může být rovněž připojen odděleně. Připojení ukazují následující obrázky.
3párová 2vodičová společná sběrnice
Max.:10 metrů
|
—9—
ABB-Welcome Midi
4.3
Obr. 4
Modul tlačítek
Popis svorek
Číslo
Funkce
1
Konektor pro předchozí modul
2
Konektor pro další modul
Obr. 5
Popis a funkce tlačítek
Číslo
Funkce
1
Bez ohledu na strukturu tlačítkového modulu jsou čísla tlačítek
uvedena shora dolů a zleva doprava (v režimu dvou sloupců)
2
Spínač osvětlení / přivolání ostrahy jsou vždy přiřazeny 1. a 2.
tlačítku
3
Jména uživatelů lze vytisknout pomocí nástroje na štítky, jenž je součástí
konfiguračního softwaru Welcome Midi
|
— 10 —
ABB-Welcome Midi
4.4
Obr. 6
Modul klávesnice
Popis svorek
Číslo
Funkce
1
Programovací tlačítko
2
Konektor pro předchozí modul
3
Konektor pro aktualizaci softwaru v zařízení
4
Konektor USB pro připojení k počítači: stahování / nahrávání konfigurace pomocí
konfiguračního softwaru Welcome Midi
5
Obr. 7
Konektor pro další modul
Popis a funkce modulu klávesnice
Číslo
Funkce
1
Volání obyvatele bytu
Návštěvník vloží číslo vnitřní stanice (001) nebo číslo bytu (např.
0101, naprogramované předem) a zavolá osobu bydlící v bytě.
Návštěvník může rovněž zvolit jméno obyvatele bytu pomocí tlačítka
nebo tlačítka
na modulu displeje a zavolat mu.
Stisknutím tlačítka
2
v průběhu volání lze hovor zrušit.
Přivolání ostrahy
Návštěvník může zavolat ostrahu (systémový telefon) stisknutím tlačítka
, je-li jednotka
ostrahy v systému přítomna.
3
Odemknutí pomocí hesla
Stiskněte
+ heslo +
. Uvolní se zámek, připojený ke svorkám „LOCK GND“ audio
modulu.
Stiskněte
+2 +
+ heslo +
. Uvolní se 2. zámek, připojený ke svorkám „COM-NC-
NO" audio modulu.
Původní heslo je 123456 a obyvatelé domu si mohou nastavit svá vlastní hesla pomocí
vnitřních stanic.
|
— 11 —
ABB-Welcome Midi
4
Vnitřní konfigurace systému
Stiskněte
+
+ systémové heslo +
. Spustí se systémové
konfigurační menu.
Původní heslo je 345678, upravit je může administrátor.
4.5
Obr. 8
Modul displeje se snímačem karet
Popis svorek
Číslo
Funkce
1
Programovací tlačítko
2
Konektor pro předchozí modul
3
Konektor pro aktualizaci softwaru v zařízení
4
Konektor pro výstup Wiegand
5
Konektor USB pro připojení k počítači: stahování / nahrávání
konfigurace
6
Obr. 9
Konektor pro další modul
Popis modulu
Číslo
Funkce
1
Displej LCD
2
Podpora ID a IC karet
Přejetím modulu zaregistrovanou kartou otevřete dveřní zámek. Kartu lze
naprogramovat pomocí samotného modulu nebo pomocí počítače stažením
programovacího souboru. (K modulu M251021CR se dodává čtečka ID
karet, zatímco k modulu M251022CR se dodává čtečka IC karet.
3
Podpora výstupu Wiegand.
Výchozí formát Wiegand je 26bitový, ale lze je rozšířit na 34 bitů.
*Modul displeje je nutné připojit až po audio modulu.
|
— 12 —
ABB-Welcome Midi
Technické údaje:
M251021CR: Modul displeje se čtečkou ID karet
Pracovní
125 kHz
frekvence
Norma
ISO18000-2
Podporované HID 2, kompatibilní s EM4100, EM4205, EM4305, EM4450, TK4100,
karty
T5567 / T5577
Výstupní
Wiegand 26, 34 bitů
formát
M251022CR: Modul displeje se čtečkou IC karet
Pracovní
13,56 MHz
frekvence
Norma
ISO 14443A
Podporované Mifare One S50/S70 atd.
karty
Výstupní
Wiegand 26, 34 bitů
formát
4.6
Modul zaslepovací/adresovací
Obr. 10 Popis svorek
Číslo
Funkce
1
Konektor pro předchozí modul
2
Konektor pro další modul
Štítek pro modul štítku lze vytisknout pomocí štítkovacího nástroje, jenž je součástí konfiguračního softwaru Welcome Midi
|
— 13 —
ABB-Welcome Midi
5
Provoz
Pos : 19 /DinA4 - Anl eitungen Onli ne/Ueberschriften/2./Nor maler Betrieb @ 18\mod_1302768820965_15.doc x @ 103540 @ 2 @ 1
Tlačítkové tablo
5.1
Obr. 11 Tlačítkové tablo
Pos : 20 /DinA4 - Anl eitungen Onli ne/Ueberschriften/3./Bedi enel emente @ 20\mod_1323260220559_15.doc x @ 111647 @ 3 @ 1
5.1.1
1.
Adresování
Nastavení funkcí 1. a 2. tlačítka
Pokud není nastavena jinak funkce prvního a druhého tlačítka, pak adresa talčítek začíná vždy adresou 1 .
001
2
1
002
DIP
3
3 4
003
1
2
3
4
Obr. 12 Adresování
Číslo
Funkce
1
3->VYP, 4->VYP
2
Volání bytu 01
3
Volání bytu 02
4
Volání bytu 03
2
1
001
DIP
3
3 4
002
1
2
4
Obr. 13 Adresování
Číslo
Funkce
1
3-> ZAP, 4->VYP
2
Zapnutí světla Osvětlení je připojeno ke spínacímu modulu a adresa
spínacího modulu musí být stejná jako adresa této vnější stanice.
3
Volání bytu 01
4
Volání bytu 02
|
— 14 —
ABB-Welcome Midi
Ostraha
2
1
001
DIP
3
3 4
002
4
1
2
Obr. 14 Adresování
Číslo
Funkce
1
3-> VYP, 4->ZAP
2
Přivolání ostrahy (systémový telefon). Je-li v téže sekci více ostrah,
všechny moduly ostrahy budou ve chvíli, kdy návštěvník stiskne tlačítko
„přivolání ostrahy", vyzvánět zároveň.
3
Volání bytu 01
4
Volání bytu 02
2
1
Ostraha
DIP
3
3 4
001
4
1
Obr. 15 Adresování
Číslo
Funkce
1
3-> ZAP, 4-> ZAP
2
Zapnutí světel
3
Přivolání ostrahy
4
Volání bytu 01
2.
Konfigurace tlačítka v režimu jednoho sloupce nebo dvou sloupců
001
2
002
1
3
ZAP
003
2
4
1
2
3
4
004
5
Obr. 16 Adresování
Číslo
Funkce
1
2-> VYP
2
Volání bytu 01
3
Volání bytu 02
4
Volání bytu 03
5
Volání bytu 04
|
— 15 —
ABB-Welcome Midi
001
002
2
001
1
ZAP
3
003
004
4
5
005
2
006
6
7
1
3
5
7
007
8
2
4
6
8
008
9
Obr. 17 Adresování
Číslo
Funkce
1
2-> ZAP
2
Volání bytu 01
3
Volání bytu 02
4
Volání bytu 03
5
Volání bytu 04
6
Volání bytu 05
7
Volání bytu 06
8
Volání bytu 07
9
Volání bytu 08
Ostraha
2
1
ZAP DIP
2 3 4
3
001
002
003
004
005
006
4
5
6
8
7
1
3
5
2
4
6
9
Obr. 18 Adresování
Číslo
Funkce
1
2-> ZAP,3-> ZAP, 4-> ZAP
2
Zapnutí světel
3
Přivolání ostrahy
4
Volání bytu 01
5
Volání bytu 02
6
Volání bytu 03
7
Volání bytu 04
8
Volání bytu 05
9
Volání bytu 06
|
— 16 —
ABB-Welcome Midi
5.1.2
Nastavení jazyka pro hlasové zprávy (jestliže má hlasový modul funkci hlasové syntézy)
Je-li nainstalován hlasový modul s funkcí hlasové syntézy (M251024A -.), je možné nastavit místní jazyk.
Nastavte adresu vnější stanice na „0" a přidržením
1. tlačítka na 3 sekundy přehrajte hlasovou zprávu.
Klepáním na toto tlačítko můžete postupně vybírat jazyk.
Po nalezení správného jazyka uložte nastavení přidržením tlačítka a opusťte režim nastavení.
1. tlačítko
1
2
3
4
Jeden sloupec
1
3
5
7
2
4
6
8
Dva sloupce
Obr. 19 Adresování
Tlačítkové tablo pro společný vchod
Slouží-li tlačítkové tablo jako stanice u brány do areálu, je nutné použít systémovou gateway, jež je důležitou součástí systému, a je
nutné ji nastavit do režimu brány na podlaží.
Byt 01 A
Byt 02 B
Byt 03 C
Byt 01 A
Byt 04 D
Byt 04 A
Byt 02 B
Byt 05 E
Byt 06 F
Byt 05 B
Byt 03 C
Vnější stanice
Levá budova
Vnější stanice
Brána do areálu
Byt 06 C
Vnější stanice
Pravá budova
Obr. 20 Tlačítkové tablo pro společný vchod
Podrobné informace naleznete v uživatelské příručce k bráně („ Systémovaá gateway“), kapitola o bráně na podlaží.
Pos : 71 /DinA4 - Anl eitungen Onli ne/Ueberschriften/3./Absc hlus s widerstand @ 19\mod_1321958079906_15.doc x @ 110083 @ 3 @ 1
Pos : 72 /DinA4 - Anl eitungen Onli ne/Inhalt/KN X/D oor Entr y/Bedienung/Absc hl uss widerstand setzen 83220-AP- xxx @ 19\mod_1310723392369_15.doc x @ 107841 @ @ 1
|
— 17 —
ABB-Welcome Midi
Tlačítkové tablo s modulem displeje
5.2
S tlačítkovou vnější stanicí lze spojit modul displeje a
čtečky karet a uživatel může otevřít dveře přejetím
kartou. Pro tuto kombinaci je nutné, aby měl technik k
dispozici hlavní kartu, s jejíž pomocí může spravovat
vnější stanici.
Registrace hlavní karty / deaktivace hlavní karty
(doporučujeme, aby tento úkon prováděl vyškolený
pracovník):
1.
Odpojte napájení.
2.
Připojte zpět napájení.
3.
Přidržte „programovací tlačítko" po dobu 5 sekund.
Obr. 21.
Během následujících 30 sekund lze přejít do
rozhraní pro „naprogramování hlavní karty“.
4.
Karta, kterou přejedete v této době přes čtečku, se
stane novou HLAVNÍ (MASTER) kartou. Na
obrazovce se objeví hlášení: „Register master card
successfully (registrace hlavní karty proběhla
úspěšně)“.
5.
Při opětovném přejetí touto kartou přes čtečku se
informace smaže a na displeji se objeví hlášení
„Delete master card successfully (smazání hlavní
karty proběhlo úspěšně)".
Lze zaregistrovat pouze 1 hlavní kartu.
Pomocí hlavní karty přejděte do nastavení systému:
1.
2.
Přejetím hlavní kartou otevřete nabídku nastavení. Rozsvítí se tři diody.
6 možností:
Program Card (Programování karty);
Language (Jazyk);
Wiegand Output (Výstup Wiegand);
Choose Door (Volba dveří);
Date & Time (Datum a čas);
Back (Zpět).
Pro každou z možností běží 5sekundový odpočet.
3.
Přejetím hlavní kartou během 5 s přejdete k další možnosti;
nebo se po uplynutí 5 s zvolí aktuální možnost.
4.
|
Po 30 sekundách se režim nastavení ukončí.
— 18 —
ABB-Welcome Midi
Menu_________05
Program Card--- ∧
Language
Wiegand Output ∨
Přejeďte HLAVNÍ
kartou. Systém přejde k
nastavení
Po 5 sekundách se zvolí
aktuální možnost
Přejeďte HLAVNÍ
kartou
==> ==>
Menu_________√
Program Card--- ∧
Language
Wiegand Output ∨
Proximity Card 05
==> Register Card--- ∧
Delete Card
Delete All
∨
Přejeďte HLAVNÍ
kartou během 5
sekund. Systém
přejde na další
možnost.
==>
5.3
Menu_________05
Program Card ∧
Language-------Wiegand Output ∨
Přejeďte HLAVNÍ
kartou během 5
sekund. Systém přejde
na další možnost.
==>
Menu_________05
Program Card ∧
Language
Wiegand Output ∨
Tlačítkové tablo s modulem klávesnice
S tlačítkovou vnější stanicí lze spojit modul klávesnice a
uživatelé mohou otevřít dveře pomocí hesla.
Uživatelé mohou přejít do nastavení systému
následujícím způsobem (během nastavení se
volba potvrzuje klávesou „#“, ruší se klávesou
„*“ a výchozí heslo k systému je 345678):
1.
Nastavení zařízení jako vnější stanici nebo jako
stanici u brány do areálu.
Vnější stanice
Obr. 22.
#* heslo k systému # =>
1 # => 1 #
Stanice u brány do areálu:
#* heslo k systému # =>
1 # => 2 #
2.
Změna „hesla k systému"
#* heslo k systému # =>
2 # => Vložte nové heslo (6-8 bitů) # => Vložte znovu heslo #
3.
Úprava „kódu pro otevření dveří"
#* heslo k systému # =>
3# => Vložte nový kód pro otevření dveří (6-8 bitů) # => Vložte kód znovu #
4.
Nastavení hlasové zprávy
Je-li nainstalován hlasový modul s funkcí hlasové syntézy (M251024A-.), je možné nastavit místní jazyk.
#* heslo k systému # =>
4# => Stisknutím
5.
nebo
zvolte jazyk => #
Zapnutí / vypnutí funkce řízení přístupu
Zapnutí funkce řízení přístupu:
#* heslo k systému # =>
5# => 1 #
Vypnutí funkce řízení přístupu:
#* heslo k systému # =>
5# => 2 #
|
— 19 —
ABB-Welcome Midi
*Resetování hesla k systému z modulu klávesnice:
Pokud zapomenete heslo k systému, lze je resetovat do továrního nastavení.
Obnova výchozího továrního nastavení nesmaže zbytek naprogramovaných informací v systému, například uživatelská jména a další
parametry.
1.
Odpojte napájení.
2.
Připojte zpět napájení.
3.
Během 30 s stiskněte na 5 s „programovací tlačítko".
4.
Zazní zvukové znamení a heslo k systému se nastaví na výchozí hodnotu (345678).
|
— 20 —
ABB-Welcome Midi
5.4
5.4.1
1.
Tlačítkové tablo s displejem a klávesnicí
Volání obyvatele bytu (3 typy)
Pomocí fyzické adresy
Fyzická adresa je interní kód, který vnější stanice vyšle
přes sběrnici do vnitřních stanic nebo jiných zařízení v
systému. Pro jednotlivé byty znamená fyzická adresa
adresu vnitřní stanice, která je nainstalována v bytě. Pro
každou budovu znamená fyzická adresa adresu brány,
která je v dané budově nainstalována, a říká se jí
rovněž číslo budovy.
Návštěvník může v pohotovostním režimu zadat
Obr. 23.
fyzickou adresu odpovídající bytu, který chce přímo
volat, od 001 do 250.
U složitých komplexů musí návštěvník vložit číslo
budovy (01~60) + fyzickou adresu (001~250) nebo
zavolat ze stanice u brány do areálu.
Enter Physical A
dd.:
01 001
2.
Pomocí logické adresy
Logická adresa je kód, jehož vložením návštěvník uskuteční hovor. Kód je potřeba vložit jako první a poté jej spojit s fyzick ou adresou.
Pro nastavení logické adresy lze použít číslo bytu nebo urči té speciální kódy, které si lze snadno zapamatovat.
Logická adresa se nastavuje následujícím postupem:
Přiřazení logické adresy:
#* heslo k systému # => system settings (nastavení systému) =>
Address Book (adresář) => Add (přidat) => Logic Add (logická adresa přidat)
Physical Add.:
001
Logic Add.:
0101
Zapnutí režimu volání pomocí „logické adresy"
#* heslo k systému # => system settings (nastavení systému) =>
Configuration (konfigurace) => Call mode (režim volání)
Call Mode_______
Physical Add. ∧
Logic Add.-------∨
3.
==>
No. Of digit:
-4(1-8 Digits)
Pomocí jména obyvatele
(Poznámky: tato funkce je dostupná pouze pro vnější stanici s modulem klávesnice (M251021K -.).)
V pohotovostním režimu si stisknutím tlačítka
nebo
požadovanou bytovou stanici a stisknutím tlačítka
nechte vypsat jména obyvatel. Pomocí tlačítek
a
vyhledejte
ji zavolejte.
Návštěvník může rovněž vložit jméno obyvatele přímo pomocí klávesnice a zavolat mu.
Jména obyvatel je potřeba vložit jako první a poté je spojit s fyzickou adresou.
#* heslo k systému # => system settings (nastavení systému)
=> Address Book (adresář) => Add (přidat) => Contact List (seznam kontaktů)
|
— 21 —
ABB-Welcome Midi
Physical Add.:
01001
User Name:
Frederik
5.4.2
Přivolání ostrahy
Stisknutím tlačítka
se přivolá ostraha.
Přijetí hovoru
30 s
120 s
==>
Guard Unit
“*“ to Cancel
5.4.3
Guard Unit
“*“ to Cancel
Je-li vnitřní stanice v režimu „nejsme doma“
Jestliže je vnitřní stanice v režimu „nejsme doma“, může návštěvník nahrát obyvatelům bytu vzkaz poté, co se spustí
následující rozhraní.
Po zaznění signálu může
návštěvník nahrát vzkaz
Přehrání zprávy...
30 s
120 s
==>
Andy
“*“ to Cancel
5.4.4
001 s
==>
Andy
“*“ to Cancel
Recording...
“*“ to Cancel
Je-li jednotka ostrahy v „režimu záchytu“
Jestliže jednotka ostrahy pracuje v „režimu záchytu", volání z vnější stanice směrem na vnitřní stanici se nejprve zachytí
u ostrahy a teprve po potvrzení identity přesměruje ostraha volání na stanici vnitřní.
Volání z vnější stanice
na stanici vnitřní
Ostraha přijímá
hovor
30 s
120 s
==>
Guard Unit
“*“ to Cancel
Ostraha přesměrovává
hovor na vnitřní stanici
==>
==>
Guard Unit
“*“ to Cancel
120 s
Andy
“*“ to Cancel
|
— 22 —
ABB-Welcome Midi
5.4.5
Nastavení systému
(Během nastavení se tlačítkem “#” volba potvrzuje, tlačítkem “*” se volba ruší, výchozí heslo k systému je 345678):
1.
Vstup do nabídky pro nastavení systému
#* heslo k systému #
Menu__________
Configurations-- ∧
Access Control
Contact
∨
2.
Konfigurace
(1) Nastavení zařízení jako vnější stanici nebo jako stanici u brány do areálu.
Vnější stanice:
#* heslo k systému # =>
Configurations (konfigurace) # => Device Type (typ zařízení) # => Outdoor St. (vnější stanice) # (Default, výchozí)
Device Type_____
Outdoor St. ● -- ∧
Gate Station
∨
Stanice u brány do areálu:
#* heslo k systému # =>
Configurations (konfigurace) # => Device Type (typ zařízení) # => Gate Station (stanice u brány do areálu)#
Device Type_____
Outdoor St.
∧
Gate Station ●∨
(2) Nastavení režimu volání: uskutečnění hovoru pomocí fyzické adresy nebo logického kódu
Nastavení volání pomocí fyzické adresy:
#* heslo k systému # =>
Configurations (konfigurace) # => Call mode (režim volání) # => Physical Address (fyzická adresa) #
Call Mode_______
Physical Add.● ∧
Logic Add.:
∨
Nastavení volání pomocí logického kódu, počet číslic (1-8 číslic):
#* heslo k systému # =>
Configurations (konfigurace) # => Call mode (režim volání) # => Logic Code (logický kód) #
Call Mode_______
Physical Add. ∧
Logic Add.: ●∨
(3) Nastavení hesla k systému
Změna hesla k systému
#* heslo k systému # =>
Configurations (konfigurace) # => System code (kód systému) # => Modify (změnit) #
New Password:
******
==>
Re-enter:
******
==>
Done!
Resetování hesla k systému
|
— 23 —
ABB-Welcome Midi
#* heslo k systému # =>
Configurations (konfigurace) # => System code (kód systému) # => Reset #
Reset System
Code?
“#“ to Confirm
“*“ to Cancel
3.
==>
Done!
Řízení přístupu
(1) Kód pro otevření dveří
Heslo lze nastavit v délce 6-8 číslic. Výchozí heslo pro otevření dveří je „123456" a lze je změnit pomocí vnější stanice.
Uživatele si mohou nastavit svá vlastní hesla pomocí vnitřních stanic, celkem lze uložit 6 000 hesel.
Povolení / zakázání hesla pro otevření dveří (výchozí: 123456)
#* heslo k systému # =>
Access Control (řízení přístupu) # => Door open code (kód pro otevření dveří) # => Enable / Disable (povolit / zakázat) #
Door Open Code__
Disable
-- ∧
Modify
Reset
∨
Done!
==>
Změna hesla pro otevření dveří
#* heslo k systému # =>
Access control (řízení přístupu) # => Door open code (kód pro otevření dveří) # => Modify (upravit) #
New Password:
******
==>
Re-enter:
******
==>
Done!
Resetování hesla pro otevření dveří
#* heslo k systému # =>
Access control (řízení přístupu) # => Door open code (kód pro otevření dveří) # => Reset #
Reset Door Open
Code?
“#“ to Confirm
“*“ to Cancel
==>
Done!
(2) Karty pro otevření (pro vnější stanici lze zaregistrovat 3 000 karet.)
Registrace karet:
#* heslo k systému # =>
Access control (řízení přístupu) # => Proximity card (karta pro otevření) # => Register card (registrace karty) #
Enter Card No.:
0123456
Or
Swipe the Card
==>
Enter Card No.:
0123456
Or
Done!
Swipe the Card
Smazání karet:
#* heslo k systému # =>
Access control (řízení přístupu) # => Proximity card (karta pro otevření) # => Delete card (smazat kartu) #
|
— 24 —
ABB-Welcome Midi
Enter Card No.:
0123456
Or
Swipe the Card
==>
Enter Card No.:
0123456
Or
Done!
Swipe the Card
Smazání všech karet:
#* heslo k systému # =>
Contact (kontakt) # => Proximity card (karta pro otevření) # => Delete All (smazat všechny karty) #
Delete All
Cards?
“#“ to Confirm
“*“ to Cancel
4.
==>
Done!
Kontakty (3 000 jmen, kombinace 24 alfanumerických znaků)
(1) Přidání
Přidání kontaktů pomocí jmen uživatelů
#* heslo k systému # =>
Contact (kontakt) # => Add (přidat) # => User Names (jména uživatelů) #
Physical Add.:
001
User Name:
Alexander.G
Jména obyvatel musí být spojena s fyzickou adresou.
Přidání kontaktů pomocí logické adresy
#* heslo k systému # =>
Contact (kontakt) # => Add (přidat) # => Logic add (logická adresa) #
Physical Add.:
001
Logic Add.:
0101
Logická adresa musí být spojena s fyzickou adresou.
(2) Změna
Změna kontaktů pomocí jmen uživatelů
#* heslo k systému # =>
Contact (kontakt) # => Modify (změnit) # => User Names (jména uživatelů) #
_______________
Alexander.G -- ∧
Bodin.K
Christian.G
∨
Upravte jména obyvatel a odpovídající fyzické adresy.
Změna kontaktů pomocí logické adresy
#* heslo k systému # =>
Contact (kontakt) # => Modify (změnit) # => Logic add (logická adresa) #
Enter Logic
Add.:
0101
Upravte logickou adresu a odpovídající fyzickou adresu pomocí alfanumerické klávesnice.
|
— 25 —
ABB-Welcome Midi
(3) Odstranění
Odstranění kontaktů pomocí jmen uživatelů
#* heslo k systému # =>
Contact (kontakt) # => Delete (odstranit) # => User Names (jména uživatelů) #
_______________
Alexander.G -- ∧
Bodin.K
Christian.G
∨
Odstranění kontaktů pomocí logické adresy.
#* heslo k systému # =>
Contact (kontakt) # => Delete (odstranit) # => Logic add (logická adresa) #
Enter Logic
Add.:
0101
(4) Smazat vše
#* heslo k systému # =>
Contact (kontakt) # => Clear all (smazat vše) #
Delete All Names?
“#“ to Confirm
“*“ to Cancel
==>
Done!
V této nabídce lze smazat všechny záznamy včetně jmen obyvatel a logických adres.
5.
Nastavení systému
(1) Datum a čas
#* heslo k systému # =>
Settings (nastavení) # => Date & time (datum a čas) # => Enter time and date (vložte datum a čas) => #
1. 1. 2013
7:00
==>
Done!
“#” to Confirm
(2) Doba otevření dveří
#* heslo k systému # =>
Settings (nastavení) # => Door Open Time (doba otevření dveří) # => Time 1-10 s (výchozí: 3 s) => #
Lock(NC-NO-C) znamená zámek připojený ke svorkám COM-NC-NO.
Lock(NC-NO-C)
Open
Time (1-10 s)
3s
“#” to Confirm
==>
Done!
(3) Zapnutí / vypnutí hlasové zprávy
Je-li nainstalován hlasový modul s funkcí hlasové syntézy (M251024A -.), je možné funkci hlasové syntézy povolit nebo zakázat.
Zároveň lze vybrat místní jazyk.
#* heslo k systému # =>
Settings (nastavení) # => Voice message (hlasová zpráva) #
|
— 26 —
ABB-Welcome Midi
Voice Message___
On
● -- ∧
Off
∨
==>
Done!
Jestliže audio modul funkci hlasové syntézy neobsahuje, zobrazí se uživatelům
při vstupu do této nabídky zpráva.
No This Function!
(4) Výběr jazyka
#* heslo k systému # =>
Settings (nastavení) # => Language (jazyk) #
Language_______
English
● -- ∧
Français
Italiano
∨
(5) Uvítací zpráva
#* heslo k systému # =>
Settings (nastavení) # => Welcome Msg. (uvítací zpráva) #
New Message:
ABB Welcome!
“#“ to Confirm
“*“ to Cancel
==>
Done!
Lze vložit maximálně 64 znaků.
(6) Nastavení šířky výstupu Wiegand v bitech
#* heslo k systému # =>
Settings (nastavení) # => Wiegand Output (výstup Wiegand) #
Wiegand Output__
26 bit !
● -- ∧
34 bit !
∨
(7) Nastavení zámku dveří pro odemykání kartou
#* heslo k systému # =>
Settings (nastavení) # =>Choose Door (výběr dveří) #
Door Select______
1st(LOCK-GND)●∧
2nd(NC-CO-COM)
∨
Nastavení zámku, který se odemkne při přejetí registrovanou kartou:
1. (LOCK-GND): při přejetí kartou se odemkne zámek připojený ke svorkám LOCK -GND.
2. (NC-NO-COM): při přejetí kartou se odemkne zámek připojený ke svorkám NC-NO-COM.
(8) Reset
#* heslo k systému # =>
|
— 27 —
ABB-Welcome Midi
Settings (nastavení) # => Reset # => #
Reset to Factory
Default?
“#“ to Confirm
“*“ to Cancel
==>
Done!
Proběhne reset veškerého nastavení do továrního nastavení, ale ostatní informace, např. jména uživatelů, logické adresy a
informace o kartách resetovat nelze.
(9) Informace
#* heslo k systému # =>
Settings (nastavení) # => Information (informace) #
Audio module: ∧
V1.07_131106
Card reader:
V0.10_131107 ∨
Výpis informací o softwaru v jednotlivých modulech vnější stanice.
*Resetování hesla k systému z modulu klávesnice:
Pokud zapomenete heslo k systému, lze je resetovat do továrního nastavení.
Obnova výchozího továrního nastavení nesmaže zbytek naprogramovaných informací v systému, například uživatelská jména a další
parametry.
1.
Odpojte napájení.
2.
Připojte zpět napájení.
3.
Během 30 s stiskněte na 5 s „programovací tlačítko".
4.
Zazní zvukové znamení a heslo k systému se nastaví na výchozí hodnotu (345678).
Pos : 67 /DinA4 - Anl eitungen Onli ne/Ueberschriften/2./Rei nigung @ 19 \mod_1310733980533_15.doc x @ 107853 @ 2 @ 1
|
— 28 —
ABB-Welcome Midi
5.5
5.5.1
Vnější klávesnice bez displeje (kamera + audio+ klávesnice)
Volání obyvatele vložením fyzické adresy
Návštěvník může v pohotovostním režimu zadat
fyzickou adresu odpovídající bytu, který chce přímo
volat, od 001 do 250.
U složitých komplexů musí návštěvník při volání ze
stanice u brány do areálu vložit číslo budovy (01~60) +
fyzickou adresu (001~250).
Obr. 24.
5.5.2
Přivolání ostrahy (volání systémového telefonu)
Stisknutím tlačítka
se přivolá ostraha.
Přijetí hovoru
30 s
120 s
==>
Guard Unit
“*“ to Cancel
5.5.3
Guard Unit
“*“ to Cancel
Nastavení systému
Uživatelé mohou přejít do nastavení systému následujícím způsobem (během nastavení se volba potvrzuje klávesou „#“, ruší se
klávesou „*“). Výchozí heslo k systému je 345678):
1.
Nastavení zařízení jako vnější stanici nebo jako stanici u brány do areálu.
Vnější stanice
#* heslo k systému # =>
1 # => 1 #
Stanice u brány do areálu:
#* heslo k systému # =>
1 # => 2 #
2.
Změna „hesla k systému"
#* heslo k systému # =>
2 # => Vložte nové heslo (6-8 bitů) # => Vložte znovu heslo #
3.
Úprava „kódu pro otevření dveří"
#* heslo k systému # =>
3# => Vložte nový kód pro otevření dveří (6-8 bitů) # => Vložte kód znovu #
4.
Nastavení hlasové zprávy
Je-li nainstalován hlasový modul s funkcí hlasové syntézy (M251024A -.), je možné nastavit místní jazyk.
#* heslo k systému # =>
4# => Stisknutím
5.
nebo
zvolte jazyk => #
Zapnutí / vypnutí funkce řízení přístupu
Zapnutí funkce řízení přístupu:
#* heslo k systému # =>
5# => 1 #
Vypnutí funkce řízení přístupu:
#* heslo k systému # =>
5# => 2 #
|
— 29 —
ABB-Welcome Midi
*Resetování hesla k systému z modulu klávesnice:
Pokud zapomenete heslo k systému, lze je resetovat do továrního nastavení.
Obnova výchozího továrního nastavení nesmaže zbytek naprogramovaných informací v systému, například uživatelská jména a další
parametry.
1.
Odpojte napájení.
2.
Připojte zpět napájení.
3.
Během 30 s stiskněte na 5 s „programovací tlačítko".
4.
Zazní zvukové znamení a heslo k systému se nastaví na výchozí hodnotu (345678).
Pos : 21 /DinA4 - Anl eitungen Onli ne/Inhalt/KN X/D oor Entr y/83220-AP- xxx/Bedi enelemente - 83220- AP- xxx @ 18\mod_1303212853605_15.doc x @ 103673 @ @ 1
2149 @ @ 1
|
— 30 —
ABB-Welcome Midi
Pos : 70 /DinA4 - Anl eitungen Onli ne/Ueberschriften/2./Geraeteei nstellungen @ 18\mod_1302768847744_15.doc x @ 103548 @ 2 @ 1
6
Pokročilé nastavení
Chcete-li nakonfigurovat klávesnici nebo displej, připojte systém k počítači.
Obr. 25.
Pos : 75 /Busc h-J aeg er (Neustr uktur)/Modul- Struktur /Online-Dokumentati on/Steuermodul e - Onli ne-D okumentation (--> F ür all e D okumente <--)/++++++++++++ Seitenumbruc h ++++++++++++ @ 9\mod_1268898668093_0.doc x @ 52149 @ @ 1
|
— 31 —
ABB-Welcome Midi
Pos : 76 /DinA4 - Anl eitungen Onli ne/Ueberschriften/1./Tec hnisc he D aten @ 18\mod_1302615863001_15.doc x @ 103416 @ 1 @ 1
7
Technické údaje
Pos : 77 /DinA4 - Anl eitungen Onli ne/Inhalt/KN X/D oor Entr y/83220-AP- xxx/T ec hnische D aten - 83220-AP- xxx @ 18\mod_1303212854559_15.doc x @ 103705 @ @ 1
Popis
Hodnota
Provozní teplota
-40 ℃- +70 ℃
Stupeň krytí (připevněn ochranný kryt)
IP 54
Napájení, otevírač dveří (Lock-GND)
18V, 4A impulsně, 250 mA trvale
Plovoucí výstup, otevírač dveří (COM-
30 V st/ss; 1 A
NC-NO)
Svorky pro pevné vodiče
2 x 0,28 mm 2 – 2 x 1 mm 2
Svorky pro lanka
2 x 0,28 mm 2 – 2 x 1 mm 2
Napětí sběrnice
20-30 V
Pos : 78 /Busc h-J aeg er (Neustr uktur)/Modul- Struktur /Online-Dokumentati on/Steuermodul e - Onli ne-D okumentation (--> F ür all e D okumente <--)/++++++++++++ Seitenumbruc h ++++++++++++ @ 9\mod_1268898668093_0.doc x @ 52149 @ @ 1
|
— 32 —
ABB-Welcome Midi
Pos : 79 /Busc h-J aeg er (Neustr uktur)/Modul- Struktur /Online-Dokumentati on/Übersc hriften (--> Für alle D okumente <--)/1. Ebene/M - O/Montage / Installation @ 18\mod_1302613966111_15.doc x @ 103373 @ 1 @ 1
8
Montáž / instalace
Bezpečnostní upozornění
Přístroje domovních telefonů a video telefonů ABB-Welcome pracují s elektrickým napětím 230 V AC, tj. napětím životu
nebezpečným. Sběrnicové vedení a vedení 230V nesmí být uloženo v jedné instalační krabici. V případě závady na
vedení 230V hrozí riziko zkratu na sběrnicové vedení.
8.1
Bezpečnostní opatření při instalaci
Přístroje smí instalovat pouze osoba s odpovídající elektrotechnickou kvalifikací.
Před zahájením montáže musí být příslušný elektrický obvod odpojen od napájení. Zároveň musí být zabezpečeno,
aby nemohlo dojít k nežádoucímu zapnutí jinými osobami. Před vlastní montáží je nutné se přesvědčit (zkoušečkou,
měřicím přístrojem), zda k vypnutí skutečně došlo. Totéž platí i při výměně přístrojů.
Není dovoleno užívat přístroje jinak, než je určeno, nebo na jiná vyšší napětí, než je předepsáno.
Je zakázáno používat elektroinstalační přístroje tam, kde by mohlo dojít při užívání k jejich zaplavení, zastříkání
vodou nebo kde by vlivem nadměrné prašnosti byla snížena jejich funkčnost a bezpečnost. Tato podmínka neplatí u přístrojů, které jsou pro
daný typ prostředí určeny a jsou označeny příslušným stupněm krytí IPxx dle ČSN EN 60 529.
Pos : 82 /DinA4 - Anl eitungen Onli ne/Inhalt/KN X/D oor Entr y/Montage/M ontagehinweise - Allgemein @ 19\mod_1310563670478_15.doc x @ 107743 @ 2 @ 1
8.2
•
Všeobecné pokyny pro instalaci
Všechna odbočovací vedení kabeláže zakončete na přístroji se sběrnicovou svorkou (např. vnitřní stanice, tlačítková tabla,
systémové zařízení).
•
Neinstalujte řídící jednotku systému těsně vedle zvonkového transformátoru nebo jiných napájecích zdrojů (aby nedocházelo k
rušení).
•
Neinstalujte sběrnicové vodiče společně s vodiči síťového napájení 100-240 V.
•
Nepoužívejte společné kabely pro připojení otevíračů dveří a vedení systémové sběrnice.
•
Zamezte vzniku můstků mezi různými typy kabelů.
•
Používejte pouze dva vodiče pro systémovou sběrnici ve čtyřžilovém nebo vícežilovém kabelu.
••
Při smyčkování
nikdy nezapojujte
příchozí
odchozí
sběrnici
Nikdy nezapojujte
vnitřní a vnější
sběrnicia do
jednoho
kabelu.do jednoho kabelu.
Pos : 80 /Busc h-J aeg er (Neustr uktur)/Modul- Struktur /Online-Dokumentati on/Sic herheit (--> Für alle Dokumente <--)/Warnhinweis e/Sic herheit - Ni eders pannungs- und 230 V-Leitungen @ 18\mod_1302617821491_15.doc x @ 103465 @ @ 1
Pos : 83 /Busc h-J aeg er (Neustr uktur)/Modul- Struktur /Online-Dokumentati on/Steuermodul e - Onli ne-D okumentation (--> F ür all e D okumente <--)/++++++++++++ Seitenumbruc h ++++++++++++ @ 9\mod_1268898668093_0.doc x @ 52149 @ @ 1
|
— 33 —
ABB-Welcome Midi
Pos : 84 /Busc h-J aeg er (Neustr uktur)/Modul- Struktur /Online-Dokumentati on/Übersc hriften (--> Für alle D okumente <--)/2. Ebene/M - O/Montage @ 18\mod_1302615960458_15.doc x @ 103424 @ 2 @ 1
Montáž
8.3
Pos : 85.1 /DinA4 - Anl eitungen Onli ne/Inhalt/KN X/DoorEntr y/83220-AP- xxx/M ontag e - M odul e/Montage - Montagedose -- 83220-AP- xxx @ 19\mod_1323250406848_15.doc x @ 111098 @ @ 1
Nasaďte si ochranné rukavice,
které vás ochrání před
pořezáním.
Rozměry
Audio modul
Kamerový modul
Modul štítku
Tlačítkový modul
Modul klávesnice
Modul displeje a čtečky
karet
Krycí ámeček
|
— 34 —
ABB-Welcome Midi
Vestavná instalace
Kryt proti dešti
|
— 35 —
ABB-Welcome Midi
Komponenty vnější stanice
3
1
4
2
Obr. 26 Instalace
Číslo
Funkce
1
Krycí rámeček
2
Moduly
3
Vestavná instalace
4
Kryt proti dešti
Montáž jednotlivých modulů ke krycímu rámečku
Obr. 27 Instalace
1.
Vložte jednotlivé moduly zezadu do krycího rámečku, dokud nezapadnou na své místo. Lze vložit všechny moduly, např.
kamerový modul, audio modul, tlačítkový modul, modul klávesnice, modul displeje a čtečky karet, modul pro štítky.
2.
Zvláštní pozornost věnujte správné orientaci jednotlivých modulů.
Zapojení modulů
|
— 36 —
ABB-Welcome Midi
Obr. 28 Zapojení modulů
1.
Moduly propojte mezi sebou navzájem pomocí kabelů.
2.
Ujistěte se, že je audio modul připojený vedle kamerového modulu.
Instalační mezera pro tlačítkové tablo
Při volbě umístění vnější stanice je nutné dodržet určitou minimální instalační mezeru na pravé straně, aby bylo možné vyjmou t
koncový krycí proužek.
|
— 37 —
ABB-Welcome Midi
Kabely
Obr. 29 Instalace
1.
Připravte instalační krabici.
2.
Odizolujte kabely.
Izolovaná část na konci kabelu nesmí být delší než 10 mm.
Vložení rámečku do otvoru ve zdi
Obr. 30 Instalace
1.
Zavěste zařízení do instalačního otvoru.
2.
Připevněte bezpečností úchyt.
3.
Připojte kabely do svorek a zasuňte svorky do konektorů; přiklopte přístroj a zavřete jej, dokud neuslyšíte cvaknu tí.
4.
Přišroubujte přední část zařízení.
Tři typy instalace
Možnost 1: Instalace pod omítku do krabice
Obr. 31 Instalace pod omítku do krabice
Možnost 2: Instalace pod omítku s krytem proti dešti
|
— 38 —
ABB-Welcome Midi
Obr. 32 Instalace pod omítku s krytem proti dešti
Možnost 3: Instalace na omítku s krytem proti dešti
Obr. 33 Instalace na omítku s krytem proti dešti
Demontáž vnější stanice
Obr. 34 Instalace
1.
2.
Pomocí přiloženého nástroje odstraňte koncový krycí proužek.
Vyjměte šroub, který drží krycí rámeček.
3.
Mírně zvedněte vnější stanici a vytáhněte ji za dolní část krycího rámečku.
Demontáž modulů
Obr. 35 Demontáž modulů
|
— 39 —
ABB-Welcome Midi
1.
2.
Demontujte modul na jednom konci přístroje.
Vyjměte moduly.
Výměna jmenných štítků
Obr. 36 Instalace
1.
2.
Vyjměte kryt tlačítka a napište jméno obyvatele na štítek.
*Použijte list papíru A4 a software potřebný pro správné formátování a vytištění štítků.
Nastavení úhlu kamery
Obr. 37 Nastavení úhlu kamery
1.
Odšroubujte kameru;
2.
Nastavte úhel kamery ve 4 směrech (nahoru, dolů, doprava a doleva)
3.
Zašroubujte kameru.
|
— 40 —
ABB-Welcome Midi
Rozšíření vnější stanice
Obr. 38 Instalace
1.
Vytvořte otvor pro kabel.
2.
Propojte instalační krabice pomocí spojek ve vodorovném směru.
3. Propojte jednotlivé moduly pomocí kabelů.
*Rozšíření je vhodné pro propojení více vnějších stanic.
Pos : 94 /Busc h-J aeg er (Neustr uktur)/Modul- Struktur /Online-Dokumentati on/Steuermodul e - Onli ne-D okumentation (--> F ür all e D okumente <--)/++++++++++++ Seitenumbruc h ++++++++++++ @ 9\mod_1268898668093_0.doc x @ 52149 @ @ 1
|
— 41 —
ABB-Welcome Midi
Poznámka
Výrobce si vyhrazuje právo provádět technické změny na výrobku, stejně tak v obsahu tohoto dokumentu bez předchozího upozornění. Detailní
specifikace výrobku souhlasí v čase realizace objednávky. Společnost ABB nepřijímá žádnou zodpovědnost za možné chyby nebo
nekompletnost dokumentu.
=== Ende der Liste für T extmar ke Bac kc over ===
Výrobce si vyhrazuje práva k tomuto dokumentu a jeho obsahu. Dokument, jeho obsah anebo jeho části nesmějí být reprodukovány, šířeny
nebo opětovně použity třetí stranou bez předchozího písemného svolení společností ABB.
Copyright © 2014, ABB s.r.o., Elektro-Praga. Všechna práva vyhrazena.
Kontaktujte nás
ABB s.r.o.
Elektro-Praga
Resslova 3
466 02 Jablonec nad Nisou
Tel.:
483 364 111
Fax.:
483 364 159
Technická podpora:
Tel.:
800 800 104
E-mail: [email protected]
www.domovnitelefonyabb.cz
www.abb.cz/elektropraga
Pos : 95 /DinA4 - Anl eitungen Onli ne/Inhalt/KN X/D oor Entr y/Pr ojektier ung -Mer kblatt/Proj ekti erPos: 97 /Busch-J aeger (Neus truktur)/M odul-Str uktur/Online-Dokumentation/R üc ks eiten (--> Für alle D okumente <--)/Rüc ks eite - Busc h-Jaeger - Allgemein @ 20\mod_1327320074886_15.doc x @ 137103 @ @ 1
│
│ 21.08.2014
ABB-Welcome M
Pos : 2 /Di nA4 - Anleitung en Online/Inhalt/KN X/D oorEntr y/83220- AP- xxx/Titelbl att - 83220-AP- xxx - ABB @ 19\mod_1323249806476_15.doc x @ 111084 @ @ 1
M25102xC
M25102xA-xM25102xPx.
M25102xK-x.
M25102xCR.
5102xDN
Ulkoyksikkö
=== Ende der Liste für T extmar ke Cover ===
ABB-Welcome
Pos : 4 /Busch-J aeger (Neus truktur)/M odul-Str uktur/Online-Dokumentation/Inhal ts verz eic hnis (--> Für alle D okumente <--)/Inhalts verz eichnis @ 19\mod_1320649044386_15.doc x @ 109653 @ @ 1
1
2
3
4
5
6
7
8
Turvallisuus ...................................................................................................3
Käyttötarkoitus ...............................................................................................3
Ympäristö ......................................................................................................3
3.1
ABB-laitteet...................................................................................3
Päätteen kuvaus ............................................................................................5
4.1
Audiomoduuli ................................................................................5
4.1.1
Lukko liittetty päätteillä 3 ja 4 ........................................................8
4.2
Kameramoduuli ............................................................................9
4.2.1
Analoginen kamera liitetty päätteellä 1 ....................................... 10
4.2.2
Erillinen kamerayhteys................................................................ 11
4.3
Painikemoduuli ........................................................................... 12
4.4
Näppäimistömoduuli ................................................................... 13
4.5
Näyttö ja kortinlukijamoduuli ....................................................... 15
4.6
Nimikylttimoduuli ......................................................................... 17
Toiminta....................................................................................................... 18
5.1
Ulkoasemapainike ...................................................................... 18
5.1.1
Osoitteen antaminen................................................................... 18
5.1.2
Kielen asettaminen ääniviesteille (jos audiomoduulissa on
puhesynteesitoiminto) ................................................................. 22
5.2
Painikeulkoasema ja näyttömoduuli............................................ 24
5.3
Painikeulkoasema ja näppäimistömoduuli .................................. 25
5.4
Näppäimistö-ulkoasema ............................................................. 27
5.4.1
Soita asiakkaalle (3 tyyppiä) ....................................................... 27
5.4.2
Soita valvontayksikköön ............................................................. 28
5.4.3
Jos sisäyksikkö on " leave home mode (kotoapoistumistilassa)" 29
5.4.4
Jos valvontayksikkö on " intercept mode (välipuhelutilassa)" ..... 29
5.4.5
Järjestelmäasetukset .................................................................. 30
5.5
Näppäimistöulkoyksikkö ilman näyttöä (Kamera + audio +
näppäimistö) ............................................................................... 39
5.5.1
Voit soittaa asukkaalle syöttämällä fyysisen osoitteen................ 39
5.5.2
Soita valvontayksikköön ............................................................. 39
5.5.3
Järjestelmäasetukset .................................................................. 39
Edistynyt määritys ....................................................................................... 41
Tekniset tiedot ............................................................................................. 42
Kiinnitys / Asennus ...................................................................................... 43
8.1
Sähköteknikkovaatimukset ......................................................... 43
8.2
Yleisiä asennusohjeita ................................................................ 44
8.3
Kiinnitys ...................................................................................... 45
=== Ende der Liste für T extmar ke Cover ===
|
—2—
ABB-Welcome M
Turvallisuus
Pos : 6 /Busch-J aeger (Neus truktur)/M odul-Str uktur/Online-Dokumentation/Ü bers chriften (--> Für alle Dokumente <--)/1. Ebene/S - T/Sicherheit @ 18\mod_1302612791790_15.doc x @ 103357 @ 1 @ 1
1
Turvallisuus
Pos : 7 /Busch-J aeger (Neus truktur)/M odul-Str uktur/Online-Dokumentation/Sicherheit (--> Für all e D okumente <--)/Warnhi nweis e/Sicherheit - 230 V @ 18\mod_1302606816750_15.doc x @ 103308 @ @ 1
Varoitus
Sähköjännite!
Kuoleman ja tulipalon vaara 100-240 V:n jännitteen vuoksi.
–
Ainoastaan valtuutetut sähköteknikot saavat suorittaa huoltotöitä
–
Irrota virtajohto pistorasiasta ennen tämän kokoonpanon asennusta
100–240 V:n jännitteellä toimivalla virransyttöjärjestelmällä!
ja/tai purkamista!
Pos : 8 /Busch-J aeger (Neus truktur)/M odul-Str uktur/Online-Dokumentation/Ü bers chriften (--> Für alle Dokumente <--)/1. Ebene/A - F/Bes ti mmungsgemäßer Gebrauc h @ 18\mod_1302763321316_15.doc x @ 103483 @ 1 @ 1
2
Käyttötarkoitus
Pos : 9 /Di nA4 - Anleitung en Online/Inhalt/KN X/D oorEntr y/83220- AP- xxx/Besti mmungsg emaess er Gebrauch - 83220-AP- xxx- 500 @ 20\mod_1324561168699_15.doc x @ 112728 @ @ 1
Ulkoyksikkö on ABB Welcome M -ovenavausjärjestelmän integroitu osa ja se toimii
pelkästään tämän järjestelmän komponenteilla. Laitetta on käytettävä pelkästään
sopivalla ABB:n upotuskotelolla ja sadehupulla.
Pos : 10 /Busc h-J aeg er (Neustr uktur)/Modul- Struktur /Online-Dokumentati on/Übersc hriften (--> Für alle D okumente <--)/1. Ebene/U - Z/U mwelt @ 18\mod_1302614158967_15.doc x @ 103383 @ 1 @ 1
3
Ympäristö
Pos : 11 /Busc h-J aeg er (Neustr uktur)/Modul- Struktur /Online-Dokumentati on/U mwel t (--> Für alle D okumente <--)/Hinweis e/Hi nweis - U mwelt - Hinweis Elektrog eräte @ 18\mod_1302763973434_15.doc x @ 103500 @ @ 1
Huomioi ympäristönsuojelu!
Käytettyjä sähköisiä ja elektronisia laitteita ei saa hävittää
kotitalousjätteiden mukana.
–
Laite sisältää arvokkaita raaka-aineita, jotka voidaan kierrättää.
Hävitä laite sen vuoksi asianmukaisessa keräyspisteessä.
Pos : 12 /DinA4 - Anl eitungen Onli ne/Ueberschriften/2./ABB Geraete @ 19\mod_1323162843832_15.doc x @ 110875 @ 2 @ 1
3.1
ABB-laitteet
Pos : 13 /Busc h-J aeg er (Neustr uktur)/Modul- Struktur /Online-Dokumentati on/U mwel t (--> Für alle D okumente <--)/Hinweis e/Hi nweis - U mwelt - ABB El ektr ogeräte @ 19\mod_1323162745839_15.doc x @ 110867 @ @ 1
Kaikissa ABB:n pakkausmateriaaleissa ja laitteissa on merkinnät ja testisinetit oikeaa
hävittämistapaa varten. Hävitä aina pakkausmateriaali ja sähkölaitteet osineen
valtuutetuissa keräyspisteissä ja jätehuoltoyrityksissä.
ABB-tuotteet ovat lain vaatimusten, erityisesti lakien, jotka koskevat elektronisia ja
sähköisiä laitteita, ja REACH-asetusten mukaisia.
|
—3—
ABB-Welcome M
Ympäristö
(EU-direktiivi 2002/96/EY WEEE ja 2002/95/EY RoHS)
(EU-REACH-asetus ja laki asetuksen käyttöönotosta (EY) nro 1907/2006)
|
—4—
ABB-Welcome M
4
Päätteen kuvaus
4.1
Audiomoduuli
Päätteen kuvaus
Kuva 1 Päätteen kuvaus
Nro
Toiminto
1
LED-valo vilkkuu hitaasti ilmaiseten puhelun olevan yhdistetty
LED-valo vilkkuu nopeasti ilmaisten järjestelmän olevan varattu
2
LED-valo syttyy ilmaisten mahdollisen yhteyden.
3
LED-valo palaa ilmaisten oven lukituksen olevan vapautettu
4
Puhelupainikkeet
|
—5—
ABB-Welcome M
Päätteen kuvaus
Kuva 2 Päätteen kuvaus
Nro
Toiminnot
1
Kameramoduuliliitäntä
2
Laitteen ohjelmistopäivitysliitin
3
Liiitinkiristimet (COM-NC-NO) kelluvalle lähdölle, ovenavauspainikkeelle
(30 VAC / DC 1 A)
4
Liitinkiristimet (Lukko-GND) ovenavauspainikkeelle (18 V 4 A impulssi, 250
mA pito)
5
Liitinkiristimet (DC-GND) lisävirransyötölle
6
Liitinkiristimet (a-b) väyläliitännälle
7
Induktiosilmukkamoduulin liitin
8
Seuraavan moduulin liitin
9
Lopetuspainikken liitin
10
Liitin oven tilan tarkistusantureille
11
Kiertokytkin OS:n (1–9) osoitteen asettamiselle
12
Aseta painikkeiden palauteäänet: ON/OFF (Päälle/Pois)
13
Määritä painikkeet yksi sarake tai kaksoissaraketilassa (ON= kaksois
14
Määritä toiminnot 1./2. painikkeelle.
sarake; OFF= yksi sarake)
3->POIS, 4->POIS=soita sisäyksikköön/soita sisäyksikköön;
3->PÄÄLLÄ, 4->POIS=kytke valaistus päälle / soita sisäyksikköön;
|
—6—
ABB-Welcome M
Päätteen kuvaus
3->POIS, 4->PÄÄLLÄ=soita valvontayksikköön / soita sisäyksikköön;
3->PÄÄLLÄ, 4->PÄÄLLÄ=kytke valaistus päälle / soita valvontayksikköön.
15
Säädä kaiuttimen äänenvoimakkuutta.
16
Säädä oven lukon avausaika, 1–10 s (käytettävissä lukolla, joka on
yhdistetty Lukko-GND:llä)
|
—7—
ABB-Welcome M
4.1.1
|
Päätteen kuvaus
Lukko liittetty päätteillä 3 ja 4
—8—
ABB-Welcome M
4.2
Päätteen kuvaus
Kameramoduuli
Kuva 3 Päätteen kuvaus
Nro
Toiminnot
1
Liitin lisäanalogiselle kameralle
2
Audiomoduuliliitin
3
Hyppyjohdin videomuodon asettamiseen: PAL/NTSC
4
Säädä kameran näyttöaluetta
|
—9—
ABB-Welcome M
4.2.1
Päätteen kuvaus
Analoginen kamera liitetty päätteellä 1
Kaikki kamerat, joilla on videolähtö 1 Vp-p 75 Ω ,CVBS (komposiittivideolähetyssignaali),
voidaan liittää kameramoduulilla.
Yleensä analogisen kameran läheisyysetäisyys ulkoyksikköön voi olla enimmillään 50 metriä
koaksiaalikaapeleilla tai noin 10 metriä muun tyyppisillä kaapeleilla.
Kaksi liitäntätyyppiä:
Valinta 1: Analoginen kamera on päällä koko ajan
Valinta 2: Analoginen kamera on päällä vain työtuntien aikana
|
— 10 —
ABB-Welcome M
4.2.2
Päätteen kuvaus
Erillinen kamerayhteys
Kameramoduulia voidaan käyttää erillisenä kamerana. Johdotus on esitetty alla.
3 parin 2-johtiminen
väylä yhdessä
Maksimi: 10 m
|
— 11 —
ABB-Welcome M
4.3
Päätteen kuvaus
Painikemoduuli
Kuva 4 Päätteen kuvaus
Nro
Toiminnot
1
Edellisen moduulin liitin
2
Seuraavan moduulin liitin
Kuva 5 Päätteen kuvaus
|
— 12 —
ABB-Welcome M
Päätteen kuvaus
Nro
Toiminnot
1
Painikemoduulin rakenteesta riippumatta, painikenumerot on lueteltu
2
Valaistuskytkin / soita valvontayksikköön -toiminto aina aina määritetty 1./2.
3
Käyttäjänimet voi tulostaa Welcome M - määritysohjelmiston
ylhäältä alas ja vasemmalta oikealle (kaksoissarake-tilassa)
painikkeelle.
nimiöintityökalulla
4.4
Näppäimistömoduuli
Kuva 6 Päätteen kuvaus
Nro
Toiminnot
1
Ohjelmointipainike
2
Edellisen moduulin liitin
3
Laitteen ohjelmistopäivitysliitin
4
USB-liitin tietokoneeseen liittämiseen: lataa/siirrä määritys
5
Seuraavan moduulin liitin
|
— 13 —
ABB-Welcome M
Päätteen kuvaus
Kuva 1
Kuva 2
Kuva 7 Päätteen kuvaus
Nro
Toiminnot
1
Soita asuntoon
Vierailija syöttää sisäyksikön numeron (001) tai asunnon numeron (esim.
0101, ohjelmoitu etukäteen) soittaakseen asuntoon.
*Vierailija voi myös valita näyttömoduulista asunnon nimen
- tai
-
painikkella puhelun soittamiseksi.
Painikkeen
painaminen puolestaan katkaisee puhelun.
*Tämä toiminto on käytettävissä kuva 1:ssä.
2
Soittaminen valvontayksikölle.
Vierailija voi soittaa valvontayksikköön painamalla
-painiketta, jos
valvontayksikkö on käytettävissä järjestelmässä.
3
Lukituksen vapautus salasanalla
Paina "
+ salasana +
" audiomoduulin "LOCK-GND"-päätteisiin
yhdistetyn lukon avaamiseksi.
Paina "
+2 +
+ salasana +
" audiomoduulin "COM-NC-NO"-
päätteisiin yhdistetyn 2. lukon avaamiseksi.
Alkuperäinen salasana on 123456 ja asukkaat voivat asettaa sisäyksiköillä
oman mukautetun salasanansa.
4
Järjestelmän teknikkomääritys
Paina "
+
+ järjestelmän salasana +
" siityäksesi järjestelmään
teknikkomääritysvalikko.
Alkuperäinen salasana on 345678 ja järjestelmänvalvoja voi sitä muokata.
|
— 14 —
ABB-Welcome M
4.5
Päätteen kuvaus
Näyttö ja kortinlukijamoduuli
Kuva 8 Päätteen kuvaus
Nro
Toiminnot
1
Ohjelmointipainike
2
Edellisen moduulin liitin
3
Laitteen ohjelmistopäivitysliitin
4
Liitäntä Wiegand-lähdölle
5
USB-liitäntä tietokoneen liittämiseen: lataa/siirrä määritys
6
Seuraavan moduulin liitin
Kuva 9 Päätteen kuvaus
|
— 15 —
ABB-Welcome M
Nro
Toiminnot
1
LCD-näyttö
2
Tuki ID- tai IC-kortti.
Päätteen kuvaus
Pyykäise rekisteröidyllä kortilla avataksesi oven lukon. Kortti voi olla
ohjelmoitu moduulilla itsellään tai käyttämällä tietokonetta
ohjelmatiedoston lataamiseen. (M251021CR-mallissa on mukana IDkortinlukija, kun taas M251022CR-mallissa on mukana IC-kortinlukija.)
3
Tuki Wiegand-lähdölle.
Oletus-Wiegand-muoto on 26 bittiä, mutta se on laajennettavissa 34-
bittiseksi.
*Näyttömoduuli on liitettävä audiomoduulin jälkeen.
Tekniset tiedot:
M251021CR: Näyttömoduuli ID-kortinlukijan kanssa
Työtaajuus
125 kHz
Standardi
ISO18000-2
Tukikortti
EM4100, EM4205, EM4305, EM4450, TK4100, T5567 / T5577yhteensopiva HID 2
Lähtömuoto
Wiegand 26, 34-bittinen
M251022CR: Näyttömoduuli ja ID-kortinlukija
Työtaajuus
13,56 MHz
Standardi
ISO 14443A
Tukikortti
Mifare One S50/S70, jne.
Lähtömuoto
Wiegand 26, 34-bittinen
|
— 16 —
ABB-Welcome M
4.6
Päätteen kuvaus
Nimikylttimoduuli
Kuva 10 Päätteen kuvaus
Nro
Toiminnot
1
Edellisen moduulin liitin
2
Seuraavan moduulin liitin
Nimikylttimoduulin nimiöinti voidaan tulostaa Welcome M:n määritysohjelmiston
nimiöintityökalulla.
Pos : 18 /DinA4 - Anl eitungen Onli ne/Ueberschriften/1./Bedi enung @ 18\mod_1302613924165_15.doc x @ 103365 @ 1 @ 1
|
— 17 —
ABB-Welcome M
5
Toiminta
Toiminta
Pos : 19 /DinA4 - Anl eitungen Onli ne/Ueberschriften/2./Nor maler Betrieb @ 18\mod_1302768820965_15.doc x @ 103540 @ 2 @ 1
5.1
Ulkoasemapainike
Kuva 11 Ulkoasemapainike
Pos : 20 /DinA4 - Anl eitungen Onli ne/Ueberschriften/3./Bedi enel emente @ 20\mod_1323260220559_15.doc x @ 111647 @ 3 @ 1
5.1.1
1.
Osoitteen antaminen
Määritä 1. / 2. painikkeen toiminnot
001
2
1
002
DIP
3
3 4
003
1
2
3
4
Kuva 12 Osoitteen antaminen
Nro
Toiminnot
1
3->POIS, 4->POIS
2
Soita asuntoon 01
3
Soita asuntoon 02
4
Soita asuntoon 03
|
— 18 —
ABB-Welcome M
Toiminta
2
1
001
DIP
3
3 4
002
4
1
2
Kuva 13 Osoitteen antaminen
Nro
Toiminnot
1
3->PÄÄLLÄ, 4->POIS
2
Kytke valo päälle. Valo on kytketty kytkinyksikköön ja kytkinyksikön
osoitteen on oltava sama kuin tämän ulkoaseman osoite.
3
Soita asuntoon 01
4
Soita asuntoon 02
Valvontayksikköön
2
1
001
DIP
3
3 4
002
1
2
4
Kuva 14 Osoitteen antaminen
Nro
Toiminnot
1
3-> POIS, 4-> PÄÄLLÄ
2
Soita valvontayksikköön. Jos samassa osassa on useita valvonayksikkää,
kaikki valvontayksiköt soivat samaan aikaan, kun vierailija painaa "soita
valvontayksikköön"-painiketta.
3
Soita asuntoon 01
4
Soita asuntoon 02
|
— 19 —
ABB-Welcome M
Toiminta
2
1
Valvontayksikköön
DIP
3
3 4
001
4
1
Kuva 15 Osoitteen antaminen
Nro
Toiminnot
1
3-> PÄÄLLÄ, 4-> PÄÄLLÄ
2
Kytke valot päälle
3
Soita valvontayksikköön
4
Soita asuntoon 01
2.
Määritä painike yksittäinen sarake - tai kaksoissaraketiloissa
001
2
002
1
3
ON
003
2
4
1
2
3
4
004
5
Kuva 16 Osoitteen antaminen
Nro
Toiminnot
1
2-> POIS
2
Soita asuntoon 01
3
Soita asuntoon 02
4
Soita asuntoon 03
5
Soita asuntoon 04
|
— 20 —
ABB-Welcome M
Toiminta
001
002
003
004
005
006
2
001
1
ON
3
4
2
5
6
7
1
3
5
7
007
8
2
4
6
8
008
9
Kuva 17 Osoitteen antaminen
Nro
Toiminnot
1
2-> PÄÄLLÄ
2
Soita asuntoon 01
3
Soita asuntoon 02
4
Soita asuntoon 03
5
Soita asuntoon 04
6
Soita asuntoon 05
7
Soita asuntoon 06
8
Soita asuntoon 07
9
Soita asuntoon 08
Valvontayksikköön
2
1
ON
DIP
3
001
002
4
5
003
2 3 4
004
6
7
005
8
1
3
5
2
4
6
006
9
Kuva 18 Osoitteen antaminen
|
— 21 —
ABB-Welcome M
Toiminta
Nro
Toiminnot
1
2-> PÄÄLLÄ, 3-> PÄÄLLÄ, 4-> PÄÄLLÄ
2
Kytke valot päälle
3
Soita valvontayksikköön
4
Soita asuntoon 01
5
Soita asuntoon 02
6
Soita asuntoon 03
7
Soita asuntoon 04
8
Soita asuntoon 05
9
Soita asuntoon 06
5.1.2
Kielen asettaminen ääniviesteille (jos audiomoduulissa on
puhesynteesitoiminto)
Jos audiomoduuli, jossa on puhesynteesitoiminto (M251024A-.), on koottu, paikallinen
kieli on asetettavissa.
Aseta OS-osoitteeksi "0", pidä
1.-painiketta painettuna 3 sekuntia toistaaksesi
ääniviestin.
Napsauta tätä painiketta asettaaksesi kielen yksi kerrallaan.
Kun olet valinnut oikean kielen, pidä tätä painiketta painettuna tallentaaksesi asetuksen
ja poistuaksesi.
1
2
3
4
Yksi sarake
1 painiketta
1
3
5
7
2
4
6
8
Kaksois sarake
Kuva 19 Osoitteen antaminen
|
— 22 —
ABB-Welcome M
Toiminta
Painikeulkoyksikön käyttö porttiyksikkönä
Jos painikeulkoyksikkä on asetettu porttiyksiköksi, yhdyskäytävää on käytettävä
tärkeänä järjestelmälaitteena ja se on asetettava kerrosyhdyskäytävätilaan.
Apartment 01 A
Apartment 02 B
Apartment 03 C
Apartment 01 A
Apartment 04 D
Apartment 04 A
Apartment 02 B
Apartment 05 E
Apartment 05 B
Apartment 03 C
Apartment 06 F
Apartment 06 C
Ulkoyksikkö
Vasen rakennus
Ulkoyksikkö
Ulkoyksikkö
Porttisisäänkäynti Oikea rakennus
Kuva 20
Katso yksityiskohtaiset tiedot " Gateway (Yhdyskäytävä)"-käyttöoppaan luvusta
"Kerrosyhdyskäytävä".
Pos : 71 /DinA4 - Anl eitungen Onli ne/Ueberschriften/3./Absc hlus s widerstand @ 19\mod_1321958079906_15.doc x @ 110083 @ 3 @ 1
Pos : 72 /DinA4 - Anl eitungen Onli ne/Inhalt/KN X/D oor Entr y/Bedienung/Absc hl uss widerstand setzen 83220-AP- xxx @ 19\mod_1310723392369_15.doc x @ 107841 @ @ 1
|
— 23 —
ABB-Welcome M
5.2
Toiminta
Painikeulkoasema ja näyttömoduuli
Näyttö- ja kortinlukijamoduulin voi liittää
painikeulkoyksikköön, jolloin käyttäjä voi avata oven
kortilla pyyhkäisemällä. Tällaista yhdistelmää varten
sähköteknikko tarvitsee master-kortin ulkoyksikön
hallitsemiseksi.
Rekisteröi master-kortti/estä master-kortti (on
suositeltavaa jättää tämän työn suorittaminen
erikoistuneelle henkilöstölle):
1.
Irrota virtalähde.
2.
Yhdistä virta uudelleen
3.
Pidä " program button (ohjelmointipainiketta)"
Kuva 21
painettuna 5 sekuntia siirtyäksesi " program master
card (ohjelma-master-kortti)"-käyttöliittymään 30
sekunnin kuluessa.
4.
Mikä tahansa kortti, jolla pyyhkäistään tänä aikana,
otetaan käyttöön uutena MASTER-korttina. Ilmoitus
"Pääkäyttäjän kortti rekisteröity onnistuneesti!"
tulee näkyviin näyttöön.
5.
Jos kortti on olemassa, ja kun pyykäiset sillä
uudelleen, tiedot poistetaan ja ilmoitus "Poistettu
pääkäyttäjän kortti onnistuneesti!" näkyviin
näyttöön.
Vain 1 master-kortti voidaan rekisteröidä.
Siirry järjestelmäasetukseen master-korttia käyttämällä:
1.
2.
Pyyhkäise MASTER-kortilla siirtyäksesi asetusvalikkoon. Kolme LED-valoa syttyy.
6 valintaa:
Ohjelmakortti,
Kieli,
Wiegand-lähtö,
Valitse ovi,
Päiv ja aika,
Takaisin.
Jokaisella valinnalla on 5 sekunnin laskenta.
|
— 24 —
ABB-Welcome M
3.
Toiminta
Pyyhkäise MASTER-kortilla uudelleen 5 sekunnin kuluessa vaihtaaksesi
seuraavaan valintaan.
Tai kun 5 sekuntia on kulunut, nykyinen valinta tulee valituksi.
4.
30 sekunnin kuluttua asetusvalikko sulkeutuu.
Pyyhkäise MASTERkortilla
Valikko_______05
Ohjelmakortti--- ∧
Kieli
Wiegang-lähtö ∨
yli 5 s, valitse nykyinen
valinta
==> ==>
==>
5.3
Valikko________√
Ohjelmakortti--- ∧
Kieli
Wiegang-lähtö ∨
Pyyhkäise MASTERkortilla, syötä asetus
==>
Kulkukortti 05
Rekisteröi --∧
Poista kortti
Poista kaikki
∨
Pyyhkäise MASTERkortilla 5 s kuluessa
siirtyäksesi seuraavaan
valintaan.
Pyyhkäise MASTERkortilla 5 s kuluessa
siirtyäksesi seuraavaan
valintaan.
Valikko_______05
Ohjelmakortti ∧
Kieli -------Wiegang-lähtö ∨
Valikko _______05
Ohjelmakortti ∧
Kieli
Wiegang-lähtö ∨
==>
Painikeulkoasema ja näppäimistömoduuli
Näppäimistömoduulin voi liittää painikeulkoyksikköön ja
käyttäjät voivat antaa salasanan oven avaamiseksi.
Käyttäjät voivat siirtyä järjestelmäasetukset-valikkoon
seuraavin vaihein (paina asetuksen aikana "#"
vahvistaaksesi tai "*" peruaksesi,
oletusjärjestelmäsalasana on 345678):
1.
Aseta laite Ulkoyksikkö- tai Porttiyksikkö-tilaan.
Ulkoyksikkö:
#* järjestelmäsalasana # =>
1 # => 1 #
Kuva 22
Porttiyksikkö:
#* järjestelmäsalasana # =>
1 # => 2 #
2.
Muokkaa "järjestelmäsalasanaa"
#* järjestelmäsalasana # =>
|
— 25 —
ABB-Welcome M
Toiminta
2 # => Syötä uusi salasana (6–8 bittiä) # => Sama uudestaan #
3.
Muokkaa "Ovenavauskoodi "
#* järjestelmäsalasana # =>
3# => Syötä uusi ovenavauskoodi (6–8 bittiä) # => Sama koodi uudestaan #
4.
Aseta ääniviesti
Jos audiomoduuli, jossa on puhesynteesitoiminto (M251024A-.), on koottu,
paikallinen kieli on asetettavissa.
#* järjestelmäsalasana # =>
4# => Paina
5.
tai
valitaksesi kielen => #
Ota käyttöön / pois käytöstä käytönohjaustoiminto
Ota käytönohjaustoiminto käyttöön:
#* järjestelmäsalasana # =>
5# => 1 #
Ota käytönohjaustoiminto pois käytöstä:
#* järjestelmäsalasana # =>
5# => 2 #
*Nollaa näppäimistömoduulin järjestelmäsalasana:
On mahdollista nollata järjestelmän salasana tehdasasetuksiin, jos olet unohtanut sen.
Tehtaan oletusasetuksiin palauttaminen ei poista muita järjestelemään ohjelmoituja
tietoja, kuten käyttäjänimiä ja muita asetuksia.
1.
Irrota virtalähde.
2.
Yhdistä virta uudelleen
3.
Pidä "ohjelmontipainiketta" painettuna 5 sekuntia 30 sekunnin kuluessa.
4.
Kuuluu lyhyt äänimerkki ja järjestelmän salasana nollataan oletusasetukseen
(345678).
|
— 26 —
ABB-Welcome M
5.4
5.4.1
1.
Toiminta
Näppäimistö-ulkoasema
Soita asiakkaalle (3 tyyppiä)
Fyysisellä osoitteella
Fyysinen osoite on sisäinen koodi, jonka ulkoyksikkö
lähettää väyläyhteyden kautta sisäyksikköihin tai muihin
järjestelmän laitteisiin. Kussakin asunnossa fyysinen
osoite tarkoittaa asuntoon asennetun sisäyksikön
osoitetta. Kussakin rakennuksessa fyysinen
osoitetarkoittaa sen yhdyskäytävän osoitetta, joka on
asennettu kuhunkin rakennukseen ja sitä kutsutaan
myös rakennuksen numeroksi.
Valmiustilassa käyttäjä voi painaa fyysistä osoitetta,
Kuva 23
joka vastaa asuntoa, johon halutaan soittaa suoraan
001:stä 250:een.
Jos kyseessä on rakennusryhmä, vierailijan on
painettava rakennuksen numero (01–60) + fyysinen
osoite (001–250) tai soitettava puhelu porttiyksiköllä.
Anna numero-osoite:
01 001
2.
Loogisella osoitteella
Looginen osoite on koodi, jota vierailija voi painaa sottaakseen puhelun. Koodi on
määritettävä ensin ja sitten liitettävä fyysiseen osoitteeseen.
Käyttäjän helposti muistettavia asuntonumeroa tai joitakin erikoiskoodeja voidaan
käytää loogisen osoitteen asettamiseen.
Aseta looginen osoite seuraavasti:
Määritä looginen osoite:
#* järjestelmäsalasana # => järjestelmäasetus =>
Osoitekirja => Lisää => Oikea osoite
Numero-osoite.:
001
Oikea osoite.:
0101
|
— 27 —
ABB-Welcome M
Toiminta
Kytke päälle " Oikea osoite "-puhelutila
#* järjestelmäsalasana # => järjestelmäasetus =>
Määritys => Soittotila
Soittotila _______
Numero-osoite. ∧
Oikea osoite.-------∨
3.
==>
Numerot:
-4(1-8 numeroa)
Asukkaan nimellä
(Huomautuksia: tämä toiminto on käytettävissä vain ulkoyksikössä, jossa on
näppäimistömoduuli (M251021K-.).)
Paina valmiustilassa
- ja
- tai
-painiketta tuodaksesi asukkaiden nimet näkyviin. Etsi
-painikkeella asuntoyksikkö ja paina
-painiketta soittaaksesi puhelun.
Vierailija voi myös syöttää asukkaan nimen suoraan näppäimistöllä puhelun
soitamiseksi.
Asukkaan nimi on määritettävä ensin ja sitten liitettävä fyysiseen osoitteeseen.
#* järjestelmäsalasana # => järjestelmäasetus
=> Osoitekirja => Lisää => Yhteystietoluettelo
Numero-osoite.:
01001
Käyttäjänimi:
Federico
5.4.2
Paina
Soita valvontayksikköön
-painiketta soittaaksesi valvontayksikköön.
Hyväksy puhelu
30 s
120 s
==>
Valvontayksikkö
“*“ peruttaaaksesi
|
Valvontayksikkö
“*“ peruttaaaksesi
— 28 —
ABB-Welcome M
5.4.3
Toiminta
Jos sisäyksikkö on " leave home mode
(kotoapoistumistilassa)"
Jos sisäyksikkö toimii " leave home mode (kotoapoistumistilassa)", vierailija voi
nauhoittaa asukkaalle viestin siirryttyään seuraavaan käyttöliittymään.
Lyhyen äänimerkin jälkeen
vierailija voi nauhoittaa
viestin
Toistetaan viestiä...
30 s
120 s
Andy
“*“peruttaaaksesi
5.4.4
==>
Andy
“*“peruttaaaksesi
001 s
==>
Nauhoittaa…
“*“peruttaaaksesi
Jos valvontayksikkö on " intercept mode (välipuhelutilassa)"
Jos valvontayksikkö toiii " intercept mode (välipuhelutilassa)", valvontayksikkö
ottaa välipuhelun ulkoyksiköstä sisäyksikköön menevälle puhelulle ja kun
henkilöllisyys on varmistettu, valvontayksikkö siirtää puhelun sisäyksikköön.
Puhelu ulkoyksiköstä
sisäyksikköön
Valvontayksikkö
(GU) hyväksyy
puhelun
30 s
Valvontayksikkö
“*“peruttaaaksesi
Valvontayksikkö siirtää
puhelun sisäyksikköön
120 s
==>
Valvontayksikkö
“*“peruttaaaksesi
==>
==>
120 s
Andy
“*“peruttaaaksesi
|
— 29 —
ABB-Welcome M
5.4.5
Toiminta
Järjestelmäasetukset
(Paina asetuksen aikana "#" vahvistaaksesi ja "*" peruaksesi, oletusjärjestelmäsalasana
on 345678):
1.
Siirry järjestelmäaseusvalikkoon
#* järjestelmäsalasana #
Valikko _________
Asetukset -∧
Sisäänpääsy
Yhteys
∨
2.
Määritykset
(1) Aseta laite Ulkoyksikkö- tai Porttiyksikkö-tilaan.
Ulkoyksikkö:
#* järjestelmäsalasana # =>
Asetukset # => Laitetyyppi # => Ulkoyksikkö # (oletus)
Laitetyyppi _____
Ulkoyksikkö ● --∧
Porttiyksikkö
∨
Porttiyksikkö:
#* järjestelmäsalasana # =>
Asetukset # => Laitetyyppi # => Porttiyksikkö #
Laitetyyppi _____
Ulkoyksikkö.
∧
Porttiyksikkö ●∨
(2) Aseta puhelutila: soita puhelu fyysisellä osoitteellta tai loogisella koodilla
Aseta puhelutila fyysisellä osoitteella:
#* järjestelmäsalasana # =>
Asetukset # => Soittotila # => Numero-osoite #
Soittotila _______
Numero-osoite.∧
Oikea osoite:
∨
|
— 30 —
ABB-Welcome M
Toiminta
Aseta puhelutila loogisella koodilla, numeroiden määrä (1–8 numeroa):
#* järjestelmäsalasana # =>
Asetukset # => Soittotila # => Oikea osoite #
Soittotila _______
Numero-osoite. ∧
Oikea osoite: ●∨
(3) Järjestelmäsalasana-asetus
Muokkaa järjestelmäsalasanaa
#* järjestelmäsalasana # =>
Asetukset # => Järjestelmä # => Muokkaa #
Uusi salasana :
******
==>
Uudestaan :
******
==>
Tehty!
Nollaa järjestelmäsalasana
#* järjestelmäsalasana # =>
Asetukset # => Järjestelmä # => Nollaa #
Nollaa järjestelmän
tunnus?
# vahvistaaksesi
* peruttaaaksesi
3.
==>
Tehty!
Käytönohjaus
(1) Ovenavauskoodi
Salasanan voi asettaa 6–8 numeroiseksi. Oletus-ovenavaussalasana on "123456"
ja sen voi muuttaa ulkoyksiköllä.
Käyttäjät puolestaan voivat muuttaa omia salasanojaan sisäyksiköilä, yhteensä 6
000 salasanaa voi tallentaa.
|
— 31 —
ABB-Welcome M
Toiminta
Aseta ovenavaussalasana PÄÄLLE/POIS (oletus: 123456)
#* järjestelmäsalasana # =>
Sisäänpääsy # => Ovenavauskoodi # => Salli / Estä #
Ovenavauskoodi _
Estä
-∧
Muokkaa
Nollaa
∨
Tehty!
==>
Muokkaa ovenavaussalasanaa
#* järjestelmäsalasana # =>
Sisäänpääsy # => Ovenavauskoodi # => Muokkaa #
Uusi salasana:
******
==>
Uudestaan:
******
==>
Tehty!
Nollaa ovenavaussalasana
#* järjestelmäsalasana # =>
Sisäänpääsy # => Ovenavauskoodi # => Nollaa#
Nollaa järjestelmän
tunnus?
# vahvistaaksesi
* peruttaaaksesi
==>
Tehty!
(2) Lähestymiskortti (ulkoyksikölle voi rekisteröidä 3 000 korttia.)
Rekisteröi kortit:
#* järjestelmäsalasana # =>
Sisäänpääsy # => Kulkukortti# => Rekisteröi #
Kortti N:o :
0123456
Tai
Pyyhkäise kortti
==>
Kortti N:o :
0123456
Tai
Tehty!
Pyyhkäise kortti
Poista kortteja:
#* järjestelmäsalasana # =>
Sisäänpääsy # => Kulkukortti # => Poista kortti #
|
— 32 —
ABB-Welcome M
Kortti N:o :
0123456
Tai
Pyyhkäise kortti
==>
Toiminta
Kortti N:o :
0123456
Tai
Tehty!
Pyyhkäise kortti
Poista kaikki kortit
#* järjestelmäsalasana # =>
Yhteys# => Kulkukortti# => Poista kaikki #
Poista kaikki kortit?
# vahvistaaksesi
* peruttaaaksesi
4.
==>
Tehty!
Yhteystieto (3 000 nimeä 24 aakkosnumeerisen merkin yhdistelminä)
(1) Lisää
Lisää yhteystieto käyttäjänimen mukaan
#* järjestelmäsalasana # =>
Yhteys# => Lisää # => Käyttäjänimi#
Numero-osoite:
001
Käyttäjänimi:
Alexander.G
Asukkaiden nimet on liitettävä fyysisiin osoitteisiin.
Lisää yhteystieto loogisen osoitteen mukaan
#* järjestelmäsalasana # =>
Yhteys# => Lisää # => Oikea osoite. #
Numero-osoite:
001
Oikea osoite:
0101
Loogisen osoitteen on oltava liitetty fyysiseen osoitteeseen.
(2) Muokkaa
Muokkaa yhteystietoja käyttäjänimien mukaan
#* järjestelmäsalasana # =>
|
— 33 —
ABB-Welcome M
Toiminta
Yhteys# => Muokkaa# => Käyttäjänimet#
_______________
Alexander.G -- ∧
Bodin.K
Christian.G
∨
Muokkaa asukkaan nimeä ja sen vastaavaa fyysistä osoitetta.
Muokkaa yhteystietoa loogisen osoitteen mukaan
#* järjestelmäsalasana # =>
Yhteys# => Muokkaa # => Oikea osoite. #
Syötä oikea osoite:
0101
Muokkaa loogista osoitetta ja sen vastaavaa fyysistä osoitetta aakkosnumeerisella
näppäimistöllä.
(3) Poista
Poista yhteystieto käyttäjänimien mukaan
#* järjestelmäsalasana # =>
Yhteys# => Poista # => Käyttäjänimi#
_______________
Alexander.G -- ∧
Bodin.K
Christian.G
∨
Poista yhteystieto loogisen osoitteen mukaan
#* järjestelmäsalasana # =>
Yhteys# => Poista # => Oikea osoite. #
Syötä oikea osoite:
0101
|
— 34 —
ABB-Welcome M
Toiminta
(4) Tyhjennä kaikki
#* järjestelmäsalasana # =>
Yhteys# => Poista kaikki #
Poista kaikki nimiä?
# vahvistaaksesi
* peruttaaaksesi
==>
Tehty!
Tyhjennä kaikki luettelot mukaan lukien asukkaiden nimet ja looginen osoite syötteet tästä valikosta.
5.
Järjestelmäasetukset
(1) Päiväys ja aika
#* järjestelmäsalasana # =>
Asetukset # => Päiv ja aika # => Syötä päivämäärä ja aika => #
2013-01-01
07:00
==>
Tehty!
# vahvistaaksesi
(2) Ovenavausaika
#* järjestelmäsalasana # =>
Asetukset # => Aukioloaika# => Aika 1–10 s (oletus: 3 s) => #
Lukko (NC-NO-C) tarkoittaa lukkoa, joka on yhdistetty COM-NC-NO-päätteillä.
Aukioloaika(NCNO-C)(1-10s):
3s
# vahvistaaksesi
==>
Tehty!
(3) Ääniviestin asettaminen päälle/pois
Jos audiomoduuli, jossa on puhesynteesitoiminto (M251024A-.), on koottu,
puhesynteesitoiminnon voi ottaa käyttöön tai pois käytöstä. Samalla voi myös valita
paikallisen kielen.
#* järjestelmäsalasana # =>
Asetukset # => Ääniviesti#
|
— 35 —
ABB-Welcome M
Ääniviesti_______
Käytössä ● -- ∧
Pois käytöstä
∨
==>
Toiminta
Tehty!
Jos audiomoduulissa ei ole puhesynteesitoimintoa, käyttäjä saa viestin
yrittäessään siirtyä tähän valikkoon.
Ei tätä toimintoa!
(4) Valitse kieli
#* järjestelmäsalasana # =>
Asetukset # => Kieli #
Kieli_______
English
● -- ∧
Français
Italiano
∨
(5) Tervetuloa-viesti
#* järjestelmäsalasana # =>
Asetukset # => Saapumisviesti #
Uusi viesti:
ABB Welcome!
# vahvistaaksesi
* peruttaaaksesi
==>
Tehty!
Enintään 64 merkkiä voi syöttää.
(6) Wiegand-lähtönumeroiden asettaminen
#* järjestelmäsalasana # =>
Asetukset # => Wiegang-lähtö #
|
— 36 —
ABB-Welcome M
Toiminta
Wiegang-lähtö__
26 bittiä!
● -- ∧
34 bittiä!
∨
(7) Aseta vastaava oven lukko kortilla pyyhkäisyä varten
#* järjestelmäsalasana # =>
Asetukset # =>Valitse Ovi #
Door Select______
1.(LOCK-GND)●∧
2.(NC-CO-C)
∨
Rekisteröidyllä kortilla pyyhäisemällä avattavan lukon asettaminen:
1. (LUKKO-GND): lukko, joka on yhdistetty LOCK-GND-päätteisiin avataan, kun
kortilla pyyhkäistään.
2. (NC-NO-COM): lukko, joka on yhdistetty NC-NO-COM-päätteisiin avataan, kun
kortilla pyyhkäistään.
(8) Palauta
#* järjestelmäsalasana # =>
Asetukset # => Nollaa # => #
Palauta
tehdasasetukset?
# vahvistaaksesi
* peruttaaaksesi
==>
Tehty!
Nollaa kaikki asetukset tehdasasetuksiin, mutta muita tietoja, esim. käyttäjänimet,
loogiset osoitteet ja korttien tiedot, ei voi nollata.
(9) Tiedot
#* järjestelmäsalasana # =>
Asetukset # => Informaatio#
|
— 37 —
ABB-Welcome M
Toiminta
Audiomoduuli: ∧
V1.07_131106
Card reader:
V0.10_131107 ∨
Katso ulkoyksikön moduulien ohjemistotiedot.
*Nollaa näppäimistömoduulin järjestelmäsalasana:
On mahdollista nollata järjestelmän salasana tehdasasetuksiin, jos olet unohtanut sen.
Tehtaan oletusasetuksiin palauttaminen ei poista muita järjestelemään ohjelmoituja
tietoja, kuten käyttäjänimiä ja muita asetuksia.
1.
Irrota virtalähde.
2.
Yhdistä virta uudelleen
3.
Pidä " program button (ohjelmontipainiketta)" painettuna 5 sekuntia 30 sekunnin
4.
Kuuluu lyhyt äänimerkki ja järjestelmän salasana nollataan oletusasetukseen
kuluessa.
(345678).
Pos : 67 /DinA4 - Anl eitungen Onli ne/Ueberschriften/2./Rei nigung @ 19\mod_1310733980533_15.doc x @ 107853 @ 2 @ 1
|
— 38 —
ABB-Welcome M
5.5
5.5.1
Toiminta
Näppäimistöulkoyksikkö ilman näyttöä (Kamera + audio +
näppäimistö)
Voit soittaa asukkaalle syöttämällä fyysisen osoitteen
Valmiustilassa käyttäjä voi painaa fyysistä osoitetta,
joka vastaa asuntoa, johon halutaan soittaa suoraan
001:stä 250:een.
Jos kyseessä on rakennusryhmä, vierailijan on
painettava rakennuksen numero (01–60) + fyysinen
osoite (001–250) tai soitettava puhelu porttiyksiköstä.
Kuva 24
5.5.2
Paina
Soita valvontayksikköön
-painiketta soittaaksesi valvontayksikköön.
Hyväksy puhelu
30 s
120 s
Valvontayksikkö
* peruttaaaksesi
5.5.3
==>
Valvontayksikkö
* peruttaaaksesi
Järjestelmäasetukset
Käyttäjä voi siirtyä järjestelmäasetuksiin seuraavin vaihein (paina asetusten aikana "#"
vahvistaaksesi tai "*" peruaksesi. Oletusjärjestelmäsalasana on "345678".):
1.
Aseta laite Ulkoyksikkö- tai Porttiyksikkö-tilaan.
Ulkoyksikkö:
#* järjestelmäsalasana # =>
1 # => 1 #
Porttiyksikkö:
#* järjestelmäsalasana # =>
1 # => 2 #
2.
Muokkaa "järjestelmäsalasanaa"
#* järjestelmäsalasana # =>
2 # => Syötä uusi salasana (6–8 bittiä) # => Sama uudestaan #
|
— 39 —
ABB-Welcome M
3.
Toiminta
Muokkaa "ovenavauskoodia"
#* järjestelmäsalasana # =>
3# => Syötä uusi ovenavauskoodi (6–8 bittiä) # => Sama koodi uudestaan #
4.
Ääniviestin asettaminen
Jos audiomoduuli, jossa on puhesynteesitoiminto (M251024A-.), on koottu,
paikallinen kieli on asetettavissa.
#* järjestelmäsalasana # =>
4# => Paina
5.
tai
valitaksesi kielen => #
Ota käyttöön / pois käytöstä käytönohjaustoiminto
Ota käytönohjaustoiminto käyttöön:
#* järjestelmäsalasana # =>
5# => 1 #
Ota käytönohjaustoiminto pois käytöstä:
#* järjestelmäsalasana # =>
5# => 2 #
*Nollaa näppäimistömoduulin järjestelmäsalasana:
On mahdollista nollata järjestelmän salasana tehdasasetuksiin, jos olet unohtanut sen.
Tehtaan oletusasetuksiin palauttaminen ei poista muita järjestelemään ohjelmoituja
tietoja, kuten käyttäjänimiä ja muita asetuksia.
1.
Irrota virtalähde.
2.
Yhdistä virta uudelleen
3.
Pidä " program button (ohjelmontipainiketta)" painettuna 5 sekuntia 30 sekunnin
4.
Kuuluu lyhyt äänimerkki ja järjestelmän salasana nollataan oletusasetukseen
kuluessa.
(345678).
Pos : 21 /DinA4 - Anl eitungen Onli ne/Inhalt/KN X/D oor Entr y/83220-AP- xxx/Bedi enelemente - 83220- AP- xxx @ 18\mod_1303212853605_15.doc x @ 103673 @ @ 1
2149 @ @ 1
|
— 40 —
ABB-Welcome M
Edistynyt määritys
Pos : 70 /DinA4 - Anl eitungen Onli ne/Ueberschriften/2./Geraeteei nstellungen @ 18\mod_1302768847744_15.doc x @ 103548 @ 2 @ 1
6
Edistynyt määritys
Liitä tietokoneeseen määrittääksesi näppäimistön tai näytön
Kuva 25
Pos : 75 /Busc h-J aeg er (Neustr uktur)/Modul- Struktur /Online-Dokumentati on/Steuermodul e - Onli ne-D okumentation (--> F ür all e D okumente <--)/++++++++++++ Seitenumbruc h ++++++++++++ @ 9\mod_1268898668093_0.doc x @ 52149 @ @ 1
|
— 41 —
ABB-Welcome M
Tekniset tiedot
Pos : 76 /DinA4 - Anl eitungen Onli ne/Ueberschriften/1./Tec hnisc he D aten @ 18\mod_1302615863001_15.doc x @ 103416 @ 1 @ 1
7
Tekniset tiedot
Pos : 77 /DinA4 - Anl eitungen Onli ne/Inhalt/KN X/D oor Entr y/83220-AP- xxx/T ec hnische D aten - 83220-AP- xxx @ 18\mod_1303212854559_15.doc x @ 103705 @ @ 1
Nimi
Arvo
Käyttölämpötila
-40 oC- +70 oC
Suojaus (kannen kehys koottu)
IP 54
Virransyöttö, ovenavauspainike
18 V 4 A impulssi, 250 mA pito
(Lukko-GND)
Kelluva lähtö,
30 V AC/DC 1A
ovenavauspainike (COM-NCNO)
Yksijohtoiset kiristimet
2 x 0,28 mm2 – 2 x 1 mm 2
Ohutjohtoiset kiristimet
2 x 0,28 mm2 – 2 x 1 mm 2
Väylän jännite
20-30 V
Pos : 78 /Busc h-J aeg er (Neustr uktur)/Modul- Struktur /Online-Dokumentati on/Steuermodul e - Onli ne-D okumentation (--> F ür all e D okumente <--)/++++++++++++ Seitenumbruc h ++++++++++++ @ 9\mod_1268898668093_0.doc x @ 52149 @ @ 1
|
— 42 —
ABB-Welcome M
Kiinnitys / Asennus
Pos : 79 /Busc h-J aeg er (Neustr uktur)/Modul- Struktur /Online-Dokumentati on/Übersc hriften (--> Für alle D okumente <--)/1. Ebene/M - O/Montage / Installation @ 18\mod_1302613966111_15.doc x @ 103373 @ 1 @ 1
8
Kiinnitys / Asennus
Pos : 80 /Busc h-J aeg er (Neustr uktur)/Modul- Struktur /Online-Dokumentati on/Sic herheit (--> Für alle Dokumente <--)/Warnhinweis e/Sic herheit - Ni eders pannungs- und 230 V-Leitungen @ 18\mod_1302617821491_15.doc x @ 103465 @ @ 1
Varoitus
Sähköjännite!
Kuoleman ja tulipalon vaara 100-240 V:n jännitteen vuoksi.
–
Matalajännite- ja 100–240 V:n kaapeleita ei saa asentaa yhdessä
tasa-asennettuun pistorasiaan!
Oikosulun sattuessa on vaara 100-240 V:n kuormasta
matalajännitelinjassa.
Pos : 81 /Busc h-J aeg er (Neustr uktur)/Modul- Struktur /Online-Dokumentati on/Sic herheit (--> Für alle Dokumente <--)/Warnhinweis e/Sic herheit - F ac hkenntniss e @ 18\mod_1302774384017_15.doc x @ 103564 @ 2 @ 1
8.1
Sähköteknikkovaatimukset
Varoitus
Sähköjännite!
Voit asentaa laitteen vain, mikäli sinulla on välttämätön sähköteknikon
tietämys ja kokemus.
•
Väärä asennus vaarantaa oman ja sähköisen järjestelmän
•
Väärä asennus voi aiheuttaa vakavaa vahinkoa omaisuudelle, mm.
käyttäjän hengen.
tulipalon.
Välttämätön minimiasiantuntijatietämys ja vaatimukset asentamiselle
ovat seuraavat:
•
Käytä "viittä turvallisuussääntöä" (DIN VD E 0105, EN 50110):
1.
Irrota laite verkkovirrasta,
2.
varmista, ettei laitetta liitetä uudelleen verkkovirtaan,
3.
varmista, ettei laitteessa ole jännitettä,
4.
liitä maadoitus,
5.
peitä tai eristä lähellä toisiaan olevat jännitteiset osat.
•
Käytä sopivaa henkilökohtaista suojavaatetusta.
•
Käytä ainoastaa soveltuvia työkaluja ja mittauslaitteita.
•
Tarkista jakeluverkon tyyppi (TN-järjestelmä, IT-järjestelmä, TTjärjestelmä) varmistaaksesi seuraavat virransyöttöolosuhteet
(klassinen liittäminen maahan, suojamaadoitus, välttämättömät
lisätoimenpiteet, jne.).
|
— 43 —
ABB-Welcome M
Kiinnitys / Asennus
Pos : 82 /DinA4 - Anl eitungen Onli ne/Inhalt/KN X/D oor Entr y/Montage/M ontagehinweise - Allgemein @ 19\mod_1310563670478_15.doc x @ 107743 @ 2 @ 1
8.2
•
Yleisiä asennusohjeita
Päätä kaikki johdotusjärjestelmän haarat liitetyllä väylälaitteella (esim. sisäyksikkö,
ulkoyksikkö, järjestelmälaite).
•
Älä asenna järjestelmän ohjainta suoraan kellonmuuntajan ja muiden virtalähteiden
viereen (välttääksesi häiriön).
•
Älä asenna järjestelmäväylän johtoja yhteen 100–240 V:n johtojen kanssa.
•
Älä käytä tavallisia kaapeleita oven aukaisulaitteiden yhdistämisjohdoiksi ja
järjestelmäväylän johdoiksi.
•
Vältä siltoja ei kaapelityyppien välillä.
•
Käytä ainoastaan kahta johtoa järjestämäväylässä 4-ytimisessä tai moniytimisessä
•
Tehdessäsi silmukan, älä koskaan asenna saapuvaa ja lähtevää väylää saman
•
Älä koskaan asenna sisäistä ja ulkoista väylää saman kaapelin sisälle.
kaapelissa.
kaapelin sisälle.
Pos : 83 /Busc h-J aeg er (Neustr uktur)/Modul- Struktur /Online-Dokumentati on/Steuermodul e - Onli ne-D okumentation (--> F ür all e D okumente <--)/++++++++++++ Seitenumbruc h ++++++++++++ @ 9\mod_1268898668093_0.doc x @ 52149 @ @ 1
|
— 44 —
ABB-Welcome M
Kiinnitys / Asennus
Pos : 84 /Busc h-J aeg er (Neustr uktur)/Modul- Struktur /Online-Dokumentati on/Übersc hriften (--> Für alle D okumente <--)/2. Ebene/M - O/Montage @ 18\mod_1302615960458_15.doc x @ 103424 @ 2 @ 1
8.3
Kiinnitys
Pos : 85.1 /DinA4 - Anl eitungen Onli ne/Inhalt/KN X/DoorEntr y/83220-AP- xxx/M ontag e - M odul e/Montage - Montagedose -- 83220-AP- xxx @ 19\mod_1323250406848_15.doc x @ 111098 @ @ 1
Valmista käsineet suojautua
leikkaus.
Mitat
Audiomoduuli
Painikemoduuli
|
Kameramoduuli
Nimikylttimoduuli
Näppäimistömoduuli
Näyttö- ja
kortinlukijamoduuli
— 45 —
ABB-Welcome M
Kiinnitys / Asennus
Kannen kehys
Pinta-asennusrasia
|
— 46 —
ABB-Welcome M
Kiinnitys / Asennus
Sadehuppu
Ulkoyksikön osat
3
1
4
2
Kuva 26 Kiinnitys
|
— 47 —
ABB-Welcome M
Nro
Toiminnot
1
Kannen kehys
2
Moduulit
3
Upotuskotelo
4
Sadehuppu
Kiinnitys / Asennus
Kiinnitä moduulit kannen kehykseen
Kuva 27 Kiinnitys
1.
Liitä moduulit kannen kehykseen takaapäin niin, että ne naksahtavat paikalleen.
Kaikki moduulit voi liittää, kuten kameramoduuli, audiomoduuli, painikemoduuli,
näppäimistömoduuli, näyttö- ja kortinlukijamoduuli, nimikylttimoduuli.
2.
|
Kiinnitä erityistä huomiota kunkin moduuliin ylhäältä alas -suuntaukseen.
— 48 —
ABB-Welcome M
Kiinnitys / Asennus
Moduulien johdotus
Kuva 28 Moduulien johdotus
1.
Käytä kaapeleita moduulien yhdistämiseen toisilleen yksi kerrallaan.
2.
Varmista, että audiomoduuli on liitetty kameramoduulin viereen.
Ulkoyksikön asennuksen etäisyysvyöhykkeet
Varmista asennuspaikkaa valitessasi, että minimietäisyys oikealle puolelle liittyy
päätykaistaleen poistamiseen.
|
— 49 —
ABB-Welcome M
Kiinnitys / Asennus
Johdot
Kuva 29 Kiinnitys
1.
Valmistele asennuskotelo.
2.
Kuori johdot.
- Kaapelin eristetty osa ei saa olla pitempi kuin 10 mm.
Liitä kehys upotuskoteloon
Kuva 30 Kiinnitys
1.
Ripusta laite asennuskoteloon
2.
Kiinnitä turvasilmukka.
3.
Liitä johdot toiitukseen kuuluvaan kiinnikkeeseen ja liitä kiinnike kontaktinastoihin;
4.
Ruuvaa laitteen etuosa kiinni.
Taita laite ja sulje se niin, että se napsahtaa paikalleen.
|
— 50 —
ABB-Welcome M
Kiinnitys / Asennus
Kolme asennustyyppiä
Valinta 1: Upotuskiinnitys vain upotuskotelolla
Kuva 31 Upotuskiinnitys vain upotuskotelolla
Valinta 2: Upotuskiinnitys sadehupulla
Kuva 32 Upotuskiinnitys sadehupulla
|
— 51 —
ABB-Welcome M
Kiinnitys / Asennus
Valinta 3: Pintakiinnitys sadehupulla
Kuva 33 Pintakiinnitys sadehupulla
Ulkoaseman irrottaminen
Kuva 34 Kiinnitys
1.
2.
Käytä toimitukseen kuuluvaa kiinnitystyökalua päätykaistaleen irrottamiseen.
Irrota ruuvi, jolla kannen kehys on kiinnitetty.
3.
Työnnä ulkoyksikkö ylös ja vedä ulos kannen kehyksen alaosasta.
|
— 52 —
ABB-Welcome M
Kiinnitys / Asennus
Irrota moduulit
Kuva 35 Moduulien irrottaminen
1.
2.
Irrota moduuli moduulin yhdeltä puolelta.
Ota moduulit ulos.
Aseta nimikyltit takaisin
Kuva 36 Kiinnitys
1.
2.
Irrota painikkeen kansi ja kirjoita käyttäjänimet kylttiin
*Käytä nimiöinti-A4-arkin kappaletta ja tarvittavaa ohjelmistoa oikean muodon
armistamiseks tulosta nimikyltit.
|
— 53 —
ABB-Welcome M
Kiinnitys / Asennus
Säädä kamerakulmaa
Kuva 37 Säädä kamerakulmaa
1.
Ruuvaa kamera irti;
2.
Säädä kameran kulmaa neljään suuntaan (ylös, alas, oikealle ja vasemmalle)
3.
Ruuvaa kamera kiinni.
|
— 54 —
ABB-Welcome M
Kiinnitys / Asennus
Ulkoyksikön laajennus
Kuva 38 Kiinnitys
1.
Tee reikä kaapelille.
2.
Käytä liitoskiinnikkeitä kootaksesi upotuskotelot vaakasuunnassa.
3. Vie liitäntäjohdot koteloiden välistä moduulien liintäntään.
*Jatkaminen on käytännöllistä useiden ulkoyksikköjen yhdistämisessä.
Pos : 94 /Busc h-J aeg er (Neustr uktur)/Modul- Struktur /Online-Dokumentati on/Steuermodul e - Onli ne-D okumentation (--> F ür all e D okumente <--)/++++++++++++ Seitenumbruc h ++++++++++++ @ 9\mod_1268898668093_0.doc x @ 52149 @ @ 1
|
— 55 —
ABB-Welcome M
Kiinnitys / Asennus
Pos : 95 /DinA4 - Anl eitungen Onli ne/Inhalt/KN X/D oor Entr y/Pr ojektier ung-Mer kblatt/Proj ekti erPos: 97 /Busch-J aeger (Neus truktur)/M odul-Str uktur/Online-Dokumentation/R üc ks eiten (--> Für alle D okumente <--)/Rüc ks eite - Busc h-Jaeger - Allgemein @ 20\mod_1327320074886_15.doc x @ 137103 @ @ 1
Ilmoitus
=== Ende der Liste für T extmar ke Bac kc over ===
Pidätämme oikeudet tehdä milloin tahansa teknisiä muutoksia sekä muutoksia tämän
asiakirjan sisältöön ilman edeltävää ilmoitusta.
Yksityiskohtaiset tekniset tiedot, jotka on hyväksyttyjä tilaushetkellä, pätevät kaikkiin
tilauksiin. ABB ei ota vastuuta tämän asiakirjan mahdollisista virheistä tai
epätäydellisyydestä.
Pidätämme kaikki oikeudet tähän asiakirjaan sekä asiakirjan sisältämiin aiheisiin ja
kuvituksiin. Tämän asiakirjan sisältä tai osia siitä ei saa jäljentää, välittää tai antaa
kolmannen osapuolen uudelleen käytettäväksi ilman ABB:lta etukäteen saatua kirjallista
lupaa.
VER:1.0 │
│ 21.08.2014
ABB-Welcome M
Pos: 2 /DinA4 - Anleitungen Online/Inhalt/KNX/DoorEntry/83220-AP-xxx/Titelblatt - 83220-AP-xxx - ABB @ 19\mod_1323249806476_15.docx @ 111084 @ @ 1
M25102xC
M25102xA-xM25102xPx.
M25102xK-x.
M25102xCR.
5102xDN
Utomhusstation
=== Ende der Liste für Textmarke Cover ===
ABB-Welcome
Pos: 4 /Busch-Jaeger (Neustruktur)/Modul-Struktur/Online-Dokumentation/Inhaltsverzeichnis (--> Für alle Dokumente <--)/Inhaltsverzeichnis @ 19\mod_1320649044386_15.docx @ 109653 @ @ 1
1
2
3
4
5
6
7
8
|
Säkerhet ........................................................................................................3
Avsedd användning ....................................................................................... 3
Miljö............................................................................................................... 3
3.1
ABB-enheter ................................................................................. 3
Terminalbeskrivning ...................................................................................... 5
4.1
Ljudmodul ..................................................................................... 5
4.1.1
Lås anslutet till terminalerna 3 och 4 ............................................8
4.2
Kameraläge .................................................................................. 9
4.2.1
Analog kamera ansluten till terminal 1 ........................................10
4.2.2
Frånkopplad kameraanslutning .................................................. 11
4.3
Tryckknappsmodul......................................................................12
4.4
Knappsatsmodul .........................................................................13
4.5
Display och kortläsarmodul ......................................................... 15
4.6
Namnskyltmodul .........................................................................17
Funktion .......................................................................................................18
5.1
Utomhusstation med trycknapp .................................................. 18
5.1.1
Adressera ................................................................................... 18
5.1.2
Ställ in språket för röstmeddelanden (om ljudmodulen har en
talsyntesfunktion) ........................................................................22
5.2
Utomhusstation med tryckknapp med display-modul.................. 24
5.3
Utomhusstation med tryckknapp med knappsatsmodul.............. 25
5.4
Knappsatsstation utomhus ......................................................... 27
5.4.1
Ring en boende (3 typer) ............................................................ 27
5.4.2
Ring vakt enheten .......................................................................28
5.4.3
Om en inomhusstation är i "leave home mode(Fjärrläge)" .........29
5.4.4
Om en vakt enhet är i "intercept mode(Avlyssningsläge)" ..........29
5.4.5
Systeminställningar.....................................................................30
5.5
Utomhusstation med knappsats utan display (kamera + ljud+
knappsats) .................................................................................. 39
5.5.1
Ringer en boende, ange enbart fysisk adress ............................ 39
5.5.2
Samtal till vakt enhet...................................................................39
5.5.3
Systeminställningar.....................................................................39
Avancerad konfiguration .............................................................................. 41
Tekniska data .............................................................................................. 42
Montering/Installation .................................................................................. 43
8.1
Krav för elektrikern......................................................................43
8.2
Allmänna installationsanvisningar ............................................... 44
8.3
Montering.................................................................................... 45
—2—
ABB-Welcome M
Säkerhet
Pos: 6 /Busch-Jaeger (Neustruktur)/Modul-Struktur/Online-Dokumentation/Überschriften (--> Für alle Dokumente <--)/1. Ebene/S - T/Sicherheit @ 18\mod_1302612791790_15.docx @ 103357 @ 1 @ 1
1
Säkerhet
Pos: 7 /Busch-Jaeger (Neustruktur)/Modul-Struktur/Online-Dokumentation/Sicherheit (--> Für alle Dokumente <--)/Warnhinweise/Sicherheit - 230 V @ 18\mod_1302606816750_15.docx @ 103308 @ @ 1
Varning
Elektrisk spänning!
Risk för dödsfall och brand på grund av elektrisk spänning på 100 -240 V.
–
Arbete på 100-240V energisystem får endast utföras av
auktoriserade elektriker!
–
Stäng av huvudströmmen före montering och/eller demontering!
Pos: 8 /Busch-Jaeger (Neustruktur)/Modul-Struktur/Online-Dokumentation/Überschriften (--> Für alle Dokumente <--)/1. Ebene/A - F/Bestimmungsgemäßer Gebrauch @ 18\mod_1302763321316_15.docx @ 103483 @ 1 @ 1
2
Avsedd användning
Pos: 9 /DinA4 - Anleitungen Online/Inhalt/KNX/DoorEntry/83220-AP-xxx/Bestimmungsgemaesser Gebrauch - 83220-AP-xxx-500 @ 20\mod_1324561168699_15.docx @ 112728 @ @ 1
Utomhusstationen är en integrerad del av ABB Welcome M portkommunikationssystem,
och fungerar uteslutande med komponenter från detta system. Enheten får bara
användas med passande försänkta kopplingsdosor och regnkåpor f rån ABB.
Pos: 10 /Busch-Jaeger (Neustruktur)/Modul-Struktur/Online-Dokumentation/Überschriften (--> Für alle Dokumente <--)/1. Ebene/U - Z/Umwelt @ 18\mod_1302614158967_15.docx @ 103383 @ 1 @ 1
3
Miljö
Pos: 11 /Busch-Jaeger (Neustruktur)/Modul-Struktur/Online-Dokumentation/Umwelt (--> Für alle Dokumente <--)/Hinweise/Hinweis - Umwelt - Hinweis Elektrogeräte @ 18\mod_1302763973434_15.docx @ 103500 @ @ 1
Tänk på att skydda miljön!
Använda elektriska och elektroniska enheter får inte kasseras med
hushållsavfallet.
–
Enheten innehåller värdefulla råmaterial som kan återvinnas.
Kassera därför enheten på en återvinningsstation för ändamålet.
Pos: 12 /DinA4 - Anleitungen Online/Ueberschriften/2./ABB Geraete @ 19\mod_1323162843832_15.docx @ 110875 @ 2 @ 1
3.1
ABB-enheter
Pos: 13 /Busch-Jaeger (Neustruktur)/Modul-Struktur/Online-Dokumentation/Umwelt (--> Für alle Dokumente <--)/Hinweise/Hinweis - Umwelt - ABB Elektrogeräte @ 19\mod_1323162745839_15.docx @ 110867 @ @ 1
Allt förpackningsmaterial och alla enheter från ABB är försedda med märkning och
testsigill för korrekt avyttring. Kassera alltid förpackningsmaterial samt elektriska
enheter och deras komponenter via godkända uppsamlingsplatser och sopföretag.
ABB:s produkter uppfyller de juridiska kraven, i synnerhet de lagar som styr elektroniska
och elektriska enheter, samt REACH-förordningen.
|
—3—
ABB-Welcome M
Miljö
(EU-direktiv 2002/96/EG WEEE och 2002/95/EG RoHS)
(EU-REACH-förordning och lag för implementering av förordningen (EG) nr 1907 /2006)
|
—4—
ABB-Welcome M
4
Terminalbeskrivning
4.1
Ljudmodul
Fig. 1
Terminalbeskrivning
Terminalbeskrivning
Nr
Funktion
1
Lysdiod blinkar långsamt, och indikerar samtal har etablerats
Lysdiod blinkar snabbt, och indikerar systemet är upptaget
2
Lysdiod tänds, och indikerar möjlig kommunikation.
3
Lysdiod tänds, och indikerar dörren är olåst
4
Ringknappar
|
—5—
ABB-Welcome M
Fig. 2
Terminalbeskrivning
Terminalbeskrivning
Nr
Funktioner
1
Kontakt för kameramodul
2
Kontakt för uppdatering av enhetens programvara
3
Anslutningsklämmor (COM-NC-NO) för flytande utmatning, dörröppnare
4
Anslutningsklämmor (Lock-GND) för dörröppnare (18V 4A impulsiva, 250
(30VAC/DC 1A)
mA håll)
5
Anslutningsklämmor (DC-GND) för extra strömförsörjning
6
Anslutningsklämmor (a-b) för buss-anslutning
7
Kontakt för modul för induktionsslinga
8
Kontakt för nästa modul
9
Kontakt för utgångsknapp
10
Kontakt för sensor för dörrstatuskontroll
11
Vridreglage för inställning av adressen för OS (1-9)
12
Ställ in feedback-toner för tryckknappar: "ON/OFF (PÅ / AV) "
13
Konfigurera tryckknappar i en kolumn eller två kolumner (PÅ= två
kolumner, AV= en kolumn)
14
Konfigurera funktioner för tryckknapp 1/2.
3->AV, 4->AV=ring inomhusstation/ring inomhusstation;
3->PÅ, 4->AV=tänd ljus/ring inomhusstation;
|
—6—
ABB-Welcome M
Terminalbeskrivning
3->AV, 4->PÅ=ring vakt enhet/ring inomhusstation;
3->PÅ, 4->PÅ=tänd ljus/ring vakt enhet.
15
16
Justera högtalarvolymen.
Justera dörrens upplåsningstid, 1-10 sek. (finns för lås anslutet till LockGND)
|
—7—
ABB-Welcome M
4.1.1
|
Terminalbeskrivning
Lås anslutet till terminalerna 3 och 4
—8—
ABB-Welcome M
4.2
Fig. 3
Terminalbeskrivning
Kameraläge
Terminalbeskrivning
Nr
Funktioner
1
Kontakt för extra analog kamera
2
Kontakt för ljudmodul
3
Överkopplare för inställning av videoformatet: PAL /NTSC
4
Justera kamerans visningsområde
|
—9—
ABB-Welcome M
4.2.1
Terminalbeskrivning
Analog kamera ansluten till terminal 1
Alla kameror med videoutmatning på 1Vp-p 75Ω ,CVBS (sändningssignal för kompositvideo)
kan anslutas till kameramodulen.
I allmänhet kan sändningsavståndet från analog kamera till utomhusstation nå upp till 50
meter med koaxialkablar eller ca 10 meter med andra typer av kablar.
Två typer av anslutningar:
Alternativ 1: Den analoga kameran är på hela tiden
Alternativ 2: Den analoga kameran är bara på under arbetstid
|
— 10 —
ABB-Welcome M
4.2.2
Terminalbeskrivning
Frånkopplad kameraanslutning
Kameramodulen kan användas som en frånkopplad kamera, och ledningarna visas nedan.
3 par 2-trådig
buss
tillsammans
Max: 10 meter
|
— 11 —
ABB-Welcome M
4.3
Fig. 4
Tryckknappsmodul
Terminalbeskrivning
Nr
Funktioner
1
Kontakt för föregående modul
2
Kontakt för nästa modul
Fig. 5
|
Terminalbeskrivning
Terminalbeskrivning
— 12 —
ABB-Welcome M
Terminalbeskrivning
Nr
Funktioner
1
Oberoende av tryckknappsmodulens struktur, är knapparnas nummer
listade uppifrån och ner, och från vänster till höger (i dubbelkolumn-läge)
2
Funktionen strömbytare för ljus/ring vakt enhet tilldelas alltid knappe 1/2.
3
Användarnamnen kan skrivas med märkningsverktyget från Welcome M
konfigurationsprogram
4.4
Fig. 6
Knappsatsmodul
Terminalbeskrivning
Nr
Funktioner
1
Program knappen
2
Kontakt för föregående modul
3
Kontakt för uppdatering av enhetens programvara
4
USB-kontakt för anslutning till datorn: hämta/överför konfigurationen.
5
Kontakt för nästa modul
|
— 13 —
ABB-Welcome M
Terminalbeskrivning
Pic 1
Fig. 7
Pic 2
Terminalbeskrivning
Nr
Funktioner
1
Ring boende
En besökare anger ett inomhusstationsnummer (001) eller
lägenhetsnummer (t.ex. 0101, förprogrammerat) för att ringa en boende.
*Besökaren kan även välja en boendes namn med knappen
på den
tillhörande displaymodulen för att ringa.
Trycker man samtidigt på knappen kan
samtalet avbrytas.
*Denna funktion finns enbart på Pic1.
2
Ringa vakt enheten
En besökare kan ringa en vakt enhet genom att trycka på knappen om vak t
enheten finns i systemet.
3
Låsa upp med lösenord
Tryck på
+ lösenord +
för att låsa upp låset som är anslutet till
terminalerna "LOCK-GND” på ljudmodulen.
Tryck på ''
+2+
+ lösenord +
” för att låsa upp det andra låset
som är anslutet till terminalerna "COM-NC-NO” på ljudmodulen.
Det inledande lösenordet är 123456 och boende kan ställa in sina egna
anpassade lösenord på inomhusstationerna.
4
Konfiguration av systemteknik
Tryck på "
+
+systemlösenord +
" för att öppna systemets
teknikkonfiguration.
Det inledande systemlösenordet är 345678 och det kan ändras av
administratören.
|
— 14 —
ABB-Welcome M
4.5
Fig. 8
Terminalbeskrivning
Display och kortläsarmodul
Terminalbeskrivning
Nr
Funktioner
1
Program knappen
2
Kontakt för föregående modul
3
Kontakt för uppdatering av enhetens programvara
4
Anslutning förr Wiegand-uteffekt
5
USB-kontakt för anslutning till datorn: hämta/överför konfigurationen.
6
Kontakt för nästa modul
Fig. 9
|
Terminalbeskrivning
— 15 —
ABB-Welcome M
Nr
Funktioner
1
LCD-display
2
Stödjer ID- eller IC-kort.
Terminalbeskrivning
Svep det registrerade kortet för att låsa upp dörren. Kortet kan
pogrammeras genom modulen eller med en dator för att hämta
programfilen. (M251021CR åtföljs av en ID-kortläsare, medan M251022CR
åtföljs av en IC-kortläsare).
3
Stödjer Wiegand-uteffekt.
Det normala Wiegand-formatet är 26 bitar, men det kan även utökas till 34
bitar.
*Displaymodulen måste anslutas efter ljudmodulen.
Teknisk specifikation:
M251021CR:Displaymodul med ID-kortläsare
Arbetsfrekvens 125 KHz
Standard
ISO18000-2
Stödjer kort
EM4100, EM4205, EM4305, EM4450, TK4100, T5567 / T5577 HID 2kompatibel
Uteffektformat
Wiegand 26, 34 bitar
M251022CR:Displaymodul med IC-kortläsare
Arbetsfrekvens 13,56MHz
Standard
ISO 14443A
Stödjer kort
Mifare One S50/S70 etc.
Uteffektformat
Wiegand 26, 34 bitar
|
— 16 —
ABB-Welcome M
4.6
Fig. 10
Terminalbeskrivning
Namnskyltmodul
Terminalbeskrivning
Nr
Funktioner
1
Kontakt för föregående modul
2
Kontakt för nästa modul
Märkning av namnskyltmodulen kan skrivas ut med märkningsverktyget från Welcome M
konfigurationsprogram
Pos: 18 /DinA4 - Anleitungen Online/Ueberschriften/1./Bedienung @ 18\mod_1302613924165_15.docx @ 103365 @ 1 @ 1
|
— 17 —
ABB-Welcome M
5
Funktion
Funktion
Pos: 19 /DinA4 - Anleitungen Online/Ueberschriften/2./Normaler Betrieb @ 18\mod_1302768820965_15.docx @ 103540 @ 2 @ 1
5.1
Utomhusstation med trycknapp
Fig. 11 Utomhusstation med trycknapp
Pos: 20 /DinA4 - Anleitungen Online/Ueberschriften/3./Bedienelemente @ 20\mod_1323260220559_15.docx @ 111647 @ 3 @ 1
5.1.1
1.
Adressera
Konfigurera funktioner för knapp 1/2
001
2
1
002
DIP
3
3 4
003
1
2
3
Fig. 12
Adressera
Nr
Funktioner
1
3->AV, 4->AV
2
Ring lägenhet 01
3
Ring lägenhet 02
4
Ring lägenhet 03
|
4
— 18 —
ABB-Welcome M
Funktion
2
1
001
DIP
3
3 4
002
4
1
2
Fig. 13
Adressering
Nr
Funktioner
1
3->PÅ, 4->AV
2
Tända. Belysningen är ansluten till en omkopplarmanövrerare, och
omkopplarmanövreraren måste ha samma adress som utomhusstationen.
3
Ring lägenhet 01
4
Ring lägenhet 02
Vakt enhet
2
1
001
DIP
3
3 4
002
1
2
Fig. 14
4
Adressering
Nr
Funktioner
1
3->AV, 4->PÅ
2
Ring vakt enheten. Om det finns flera vakt enheter i samma sektion,
kommer alla vakt enheter att ringa samtidigt när en besökare trycker på
knappen “Ring vakt enhet”.
3
Ring lägenhet 01
4
Ring lägenhet 02
|
— 19 —
ABB-Welcome M
Funktion
2
1
Vakt enhet
DIP
3
3 4
001
4
1
Fig. 15
Adressering
Nr
Funktioner
1
3-> PÅ, 4-> PÅ
2
Tänd belysning
3
Samtal till vakt enhet
4
Ring lägenhet 01
2.
Konfigurera tryckknapp i en- eller två-kolumnsläge
001
2
002
1
3
PÅ
(PÅ)
003
2
4
1
2
3
4
Fig. 16
5
Adressering
Nr
Funktioner
1
2-> AV
2
Ring lägenhet 01
3
Ring lägenhet 02
4
Ring lägenhet 03
5
Ring lägenhet 04
|
004
— 20 —
ABB-Welcome M
Funktion
001
002
003
004
005
006
2
001
1
ON
(PÅ)
3
4
2
5
6
7
1
3
5
7
007
8
Fig. 17
2
4
6
8
008
9
Adressering
Nr
Funktioner
1
2-> PÅ
2
Ring lägenhet 01
3
Ring lägenhet 02
4
Ring lägenhet 03
5
Ring lägenhet 04
6
Ring lägenhet 05
7
Ring lägenhet 06
8
Ring lägenhet 07
9
Ring lägenhet 08
Vakt enhet
2
1
PÅ DIP
(PÅ)
3
001
002
4
5
003
2 3 4
6
7
005
8
Fig. 18
|
004
1
3
5
2
4
6
006
9
Adressering
— 21 —
ABB-Welcome M
Funktion
Nr
Funktioner
1
2-> PÅ, 3-> PÅ, 4-> PÅ
2
Tänd belysning
3
Ring vakt enheten
4
Ring lägenhet 01
5
Ring lägenhet 02
6
Ring lägenhet 03
7
Ring lägenhet 04
8
Ring lägenhet 05
9
Ring lägenhet 06
5.1.2
Ställ in språket för röstmeddelanden (om ljudmodulen har en
talsyntesfunktion)
Om ljudmodulen med en talsyntesfunktion (M251024A-.) har monterats, kan det lokala
språket ställas in.
Ställ in OS-adressen som "0", håll knapp
1 intryckt i 3 sek. för att spela
röstmeddelandet.
Klicka på knappen för att välja ett språk åt gången.
Håll knappen intryckt när rätt språk har valts, för att spara och avsluta inställningen.
1
2
3
4
En kolumn
Fig. 19
|
Knapp 1
1
3
5
7
2
4
6
8
Två kolumner
Adressering
— 22 —
ABB-Welcome M
Funktion
Utomhusstation med tryckknapp använd som grindstation
Om utomhusstationen med tryckknapp installerats som en grindstation, måste porten
som en viktig systemenhet användas och ställas in på våningsportläge.
Lägenhet 01 A
Lägenhet 02 B
Lägenhet 03 C
Lägenhet 04 A
Lägenhet 01 A
Lägenhet 04 D
Lägenhet 02 B
Lägenhet 05 E
Lägenhet 05B
Lägenhet 03 C
Lägenhet 06 F
Lägenhet 06 C
Utomhusstation
Vänster byggnad
Utomhusstation
Gate Entré
Utomhusstation
Höger byggnad
Fig. 20
Detaljerad information, se kapitlet om våningsport i bruksanvisningen “ Gateway (Port )”.
Pos: 71 /DinA4 - Anleitungen Online/Ueberschriften/3./Abschlusswiderstand @ 19\mod_1321958079906_15.docx @ 110083 @ 3 @ 1
Pos: 72 /DinA4 - Anleitungen Online/Inhalt/KNX/DoorEntry/Bedienung/Abschlusswiderstand setzen 83220-AP-xxx @ 19\mod_1310723392369_15.docx @ 107841 @ @ 1
|
— 23 —
ABB-Welcome M
5.2
Funktion
Utomhusstation med tryckknapp med display-modul
Displayen och kortläsarmodulen kan monteras med en
utomhusstation med tryckknapp, och användaren kan
svepa korten för att öppna dörren. För en dylik
kombination krävs ett masterkort för att en elektriker ska
kunna hantera utomhusstationen.
Registrera ett masterkort/inaktivera masterkort (vi
rekommenderar att arbetet utförs av specialiserad
personal):
1.
Stäng av strömmen.
2.
Slå på strömmen igen
3.
Fig. 21
Håll “program button (program knappen)” intryckt i
5 sek. för att öppna gränssnittet "Program Master
Card (Programmera masterkort)" inom 30 sek.
4.
Alla kort som sveps på läsaren under denna tid blir
ett nytt MASTER-kort Prompten “Registrering av
Master-kort lyckades! " vissas på skärmen.
5.
Om kortet finns, när du sveper det igen, kommer
informationen att raderas och prompten “Masterkort raderat! " att visas på skärmen.
Endast 1 masterkort kan registreras.
Öppna systeminställningen med masterkort:
1.
Svep MASTER-kortet för att öppna inställningsmenyn. Tre lysdioder tänds.
2.
6 alternativ:
Programkort;
Språk;
Wiegand-output;
Välj dörr
Datum & tid;
Späť
Det är 5 sek. nedräkning för varje alternativ.
3.
Svep MASTER-kortet igen inom 5 sek. för att byta till nästa alternativ.
eller 5 sek. över så väljs det aktuella alternativet.
|
— 24 —
ABB-Welcome M
4.
Funktion
30 sek. över för att avsluta inställningsmenyn.
Svep MASTER-kortet
Meny_________05
Programkort;
∧
Språk
Wiegand-output;∨
5 s. över, välj nuvarande
alternativ
==> ==>
Meny _________√
Programkort;
∧
Språk
Wiegand-output; ∨
Svep MASTER-kortet,
öppna inställningen
==>
==>
5.3
05
∧
∨
Svep MASTER-kortet
inom 5 s. för att flytta till
nästa alternativ.
Svep MASTER-kortet
inom 5 s. för att flytta
till nästa alternativ.
Meny ________05
Programkort; ∧
Språk
Wiegand-output;∨
Passerkort
Registr. kort;
Radera kort
Radera allt
==>
Meny _________5
Programkort; ∧
Språk
Wiegand-output;∨
Utomhusstation med tryckknapp med knappsatsmodul
Knappsatsmodulen kan monteras med en
utomhusstation med tryckknapp, och användare kan
ange lösenordet för att öppna dörren.
Användare kan öppna systeminställningsmenyn med
följande steg (under inställning, tryck på “#” för att
bekräfta, tryck på “*” för att avbryta, systemets
standardlösenord som är 345678):
1.
Ställ in enheten som en utomhusstation eller en
grindstation.
Utomhusstation
Fig. 22
#* systemlösenord # =>
1 # => 1 #
Port station:
#* systemlösenord # =>
1 # => 2 #
2.
Ändra "systemlösenord"
#* systemlösenord # =>
2 # => Ange nytt systemlösenord (6-8 bitar) # => Ange lösenordet igen #
|
— 25 —
ABB-Welcome M
3.
Funktion
Ändra "Dörröppnar-kod "
#* systemlösenord # =>
3# =>Ange ny dörröppningskod (6-8 bitar) # => Ange koden igen #
4.
Ställ in röstmeddelandet
Om ljudmodulen med talsyntesfunktionen (M251024A-.) har monterats, kan det
lokala språket ställas in.
#* systemlösenord # =>
4# => Tryck på
5.
eller
för att välja språk => #
Aktivera/inaktivera åtkomstkontrollfunktionen
Aktivera åtkomstkontrollfunktionen:
#* systemlösenord # =>
5# => 1 #
Inaktivera åtkomstkontrollfunktionen:
#* systemlösenord # =>
5# => 2 #
* Återställ knappsatsmodulens systemlösenord:
Det går att återställa systemlösenordet till fabriksinställningarna om du sk ulle ha glömt
det.Återställningen till fabriksinställningarna raderar inte den övriga informationen som
programmerats på systemet, som användarnamn m.m.
1.
Stäng av strömmen.
2.
Slå på strömmen igen
3.
Håll “program knappen” intryckt i 5 sek. inom 30 sek.
4.
En ljudsignal kommer att höras och systemlösenordet återställs till standard
(345678).
|
— 26 —
ABB-Welcome M
5.4
5.4.1
1.
Funktion
Knappsatsstation utomhus
Ring en boende (3 typer)
Med fysisk adress
Fysisk adress är den interna kod som utomhusstationen
skickar genom bussanslutningen till inomhusstationer
eller andra enheter i systemet. För varje lägenhet är den
fysiska adressen adressen till en inomhusstation som är
installerad i lägenheten. För varje byggnad betyder den
fysiska adressen adressen till en port som är installerad
för varje byggnad, som också kallas byggnadens
nummer.
I standby-läge kan en besökare trycka på en fysisk
Fig. 23
adress som motsvarar bostaden som du vill ringa direkt
till, från 001 till 250.
För ett byggnadskomplex måste en besökare trycka på
byggnadens nummer (01~60) + fysisk adress (001~250)
eller ringa på grindstationen.
Ställ in fysisk
adress:
01 001
2.
Med logisk adress
Logisk adress är en kod som en besökare kan trycka in för att ringa. Koden måste först
tilldelas och därefter associeras till den fysiska adressen.
Lägenhetens nummer eller några specialkoder, som är lätta för användaren att komma
ihåg, kan användas för att ställa in den logiska adressen.
Ställ in den logiska adressen på följande sätt:
Tilldela den logiska adressen:
#* systemlösenord # => systeminställning =>
Adressbok => Lägg till => Logisk adress
Fysisk adress:
001
Logisk adress:
0101
|
— 27 —
ABB-Welcome M
Funktion
Turn on the sätt på ringläget “Logisk adress”
#* systemlösenord # => systeminställning =>
Konfiguration => Ring läge
Ring läge _______
Fysisk adress ∧
Logisk adress --∨
3.
Antal siffror:
-4==>
(1-8 siffror)
Med boendes namn
(Anmärkning: denna funktion finns bara för utomhusstation med en knappsatsmodul
(M251021K-.).)
I standby-läget, tryck på knappen
knapparna
och
eller
för att visa de boendes namn. Använd
för att söka efter boendestationer, och tryck på knappen
för
att ringa.
En besökare kan också ange den boendes namn direkt med knappsatsen, för att ringa.
Boendes namn måste först tilldelas och därefter associeras till den fysiska adressen.
#* systemlösenord # => systeminställning
=> adressbok => Lägg till => Kontaktlista
Fysisk adress:
01001
Användarnamn:
Federico
5.4.2
Ring vakt enheten
Tryck på knappen
för att ringa till en vakt enhet.
Acceptera samtalet
30 s
Övervakn. Enhet
"*" = annullera
|
120 s
==>
Övervakn. Enhet
"*" = annullera
— 28 —
ABB-Welcome M
5.4.3
Funktion
Om en inomhusstation är i "leave home mode(Fjärrläge)"
Om en inomhusstation fungerar i “leave home mode(Fjärrläget)”, kan en
besökare spela in ett meddelande till den boende, efter att man öppnat
följande gränssnitt.
Spela meddelandet…
30 s
120 s
Andy
"*" = annullera
5.4.4
Efter ett pipljud kan besökaren
spela in meddelandet
==>
Andy
"*" = annullera
001 s
==>
Upptagen...
"*" = annullera
Om en vakt enhet är i "intercept mode(Avlyssningsläge)"
Om en vakt enhet är i “intercept mode (avlyssningsläge)”, kommer ett samtal
från en utomhusstation till en inomhusstation att avlyssnas av vakt enheten,
och när identiteten har bekräftats kommer vakt enheten att vidarekoppla
samtalet till inomhusstationen.
Samtal från en
utomhusstation till en
inomhusstation
GU acceptera
samtalet
inomhusstation
30 s
Övervakn. Enhet
"*" = annullera
Vaktenhet överför
samtalet till en
120 s
==>
Övervakn. Enhet
"*" = annullera
==>
==>
120 s
Andy
"*" = annullera
|
— 29 —
ABB-Welcome M
5.4.5
Funktion
Systeminställningar
(Under inställning, tryck på “#” för att bekräfta, tryck på “*” för att avbryta, systemets
standardlösenord är 345678):
1.
Öppna systeminställningsmenyn
#* systemlösenord #
Meny __________
Konfiguration
∧
Åtkomstkontr
Kontakt
∨
2.
Konfigurationer
(1) Ställ in enheten som en utomhusstation eller en grindstation.
Utomhusstation:
#* systemlösenord # =>
Konfiguration # => Enhetstyp # => Dörrstation # (Förinställd)
Enhetstyp _____
Dörrstation ● -- ∧
Port station
∨
Port station:
#* systemlösenord # =>
Konfiguration # => Enhetstyp # => Port station #
Enhetstyp _____
Dörrstation
∧
Port station
∨
(2) Ställ in ringläget: ring med en fysisk adress eller logisk kod
Ställ in ringläget med fysisk adress:
#* systemlösenord # =>
Konfiguration # => Ring läge # => Fysisk adress #
Ring läge _______
Fysisk adress● ∧
Logisk adress:
∨
|
— 30 —
ABB-Welcome M
Funktion
Ställ in ringläget med en logic-kod Antal siffror (1-8 siffror):
#* systemlösenord # =>
Konfiguration # => Ring läge # => Logisk adress:
Ring läge _______
Fysisk adress ∧
Logisk adress: ●∨
(3) Inställnings av systemlösenord
Ändra systemlösenordet
#* systemlösenord # =>
Konfiguration # => System kod # => Redigera #
Nytt lösenord:
******
Ställ in igen:
******
==>
Klart!
==>
Återställ systemlösenordet
#* systemlösenord # =>
Konfiguration # => System kod # => Nollställ #
Nollställ
systemkoden?
"#" = bekräfta
"*" = annullera
3.
Klart!
==>
Åtkomstkontroll
(1) Dörröppningskod
Lösenordet kan ställas in som 6-8 siffror. Standardlösenordet för dörröppning är
"123456”, och det kan ändras med en dörrstation.
Samtidigt kan användare ställa in sina egna lösenord med dörrstationerna, totalt 6
000 lösenord kan lagras.
|
— 31 —
ABB-Welcome M
Funktion
Ställ in lösenord för dörröppning PÅ/AV (standard): 123456)
#* systemlösenord # =>
Åtkomstkontr. # => Dörröppnar-kod # => Aktivera / Avaktivera #
Dörröppnar-kod __
Avaktivera
-- ∧
Redigera
Nollställ
∨
Klart!
==>
Ändra lösenordet för dörröppning
#* systemlösenord # =>
Åtkomstkontr. => Dörröppnar-kod # => Redigera #
Nytt lösenord:
******
Ställ in igen:
******
==>
Klart!
==>
Återställ lösenordet för dörröppning
#* systemlösenord # =>
Åtkomstkontr. # => Dörröppnar-kod # => Nollställ #
Nollställ
systemkoden?
"#" = bekräfta
"*" = annullera
Klart!
==>
(2) Närhetskort (3 000 kort kan registreras för utomhusstation.)
Registr. kort:
#* systemlösenord # =>
Åtkomstkontr. # => Passerkort # => Registr. kort #
Mata in kortnr.:
0123456
Eller
Dra kortet
==>
Mata in kortnr.:
0123456
Eller
Klart!
Dra kortet
Radera kort:
#* systemlösenord # =>
Åtkomstkontr. # => Passerkort # => Radera kort #
|
— 32 —
ABB-Welcome M
Mata in kortnr.:
0123456
Eller
Dra kortet
==>
Funktion
Mata in kortnr.:
0123456
Eller
Klart!
Dra kortet
Radera alla kort
#* systemlösenord # =>
Kontakt # => Passerkort # => Radera allt #
Radera alla kort?
"#" = bekräfta
"*" = annullera
4.
Klart!
==>
Kontakt (3.000 namn i kombination med 24 alfanumeriska tecken)
(1)
Lägg till
Lägg till kontakten efter användarnamn
#* systemlösenord # =>
Kontakt # => Lägg till # => Användarnamn: #
Fysisk adress:
001
Användarnamn:
Alexander.G
Boendes namn måste associeras med fysisk adress.
Lägg till kontakten efter logic-adress
#* systemlösenord # =>
Kontakt # => Lägg till # => Logisk adress: #
Fysisk adress:
001
Logisk adress:
0101
Logic-adress måste associeras med fysisk adress.
(2)
Redigera
Ändra kontakt efter användarnamn
#* systemlösenord # =>
|
— 33 —
ABB-Welcome M
Funktion
Kontakt # => Redigera # => Användarnamn #
_______________
Alexander.G -- ∧
Bodin.K
Christian.G
∨
Ändra den boendes namn och motsvarande fysiska adress.
Ändra kontakt efter logic-adress
#* systemlösenord # =>
Kontakt # => Redigera # => Logisk adress #
Ställ in logisk
adress:
0101
Ändra logic-adressen och den motsvarande fysiska adressen med den alfanumeriska
knappsatsen.
(3)
Radera
Raderal kontakten efter användarnamn
#* systemlösenord # =>
Kontakt # => Radera # => Användarnamn: #
_______________
Alexander.G -- ∧
Bodin.K
Christian.G
∨
Radera kontakten efter logic-adress
#* systemlösenord # =>
Kontakt # => Radera # => Logisk adress #
Ställ in logisk
adress:
0101
|
— 34 —
ABB-Welcome M
(4)
Funktion
Ta bort allt
#* systemlösenord # =>
Kontakt #=> Ta bort allt #
Klart!
Radera alla namn?
"#" = bekräfta
"*" = annullera
==>
Rensa alla listor inklusive boendes namn och logic-adressposter från denna meny.
5.
Systeminställning
(1) Datum och tid
#* systemlösenord # =>
Inställningar # => Datum & tid # => Ange tid och datum => #
Klart!
2013-01-01
07:00
==>
"#" = bekräfta
(2) Dörröppnar tid
#* systemlösenord #=>
Inställningar # => Dörröppnar tid # => Tid 1-10 sek. (standard: 3 sek.) => #
Lock(NC-NO-C) betyder att låset är anslutet till COM-NC-NO-terminalerna.
Lås(NC-NOC)Öppnar-tid(110s):
3s
“#” to Confirm
Klart!
==>
(3) Ställa in röstmeddelandet på på/av
Om ljudmodulen med talsyntesfunktionen (M251024A-.) har monterats, kan den
lokala talsyntesfunktionen aktiveras eller inaktivers. Smatidigt kan man också välja
det lokala språket.
#* systemlösenord # =>
Inställningar # => Röstmeddelande #
|
— 35 —
ABB-Welcome M
Röstmeddelande ___
På
● -- ∧
Av
Funktion
Klart!
==>
∨
Om ljudmodulen saknar talsyntesfunktion kommer det att finnas en indikation för
användare om man öppnar menyn.
Finns inte!
(4) Välja språk
#* systemlösenord # =>
Inställningar # => Språk #
Språk _______
English
● -- ∧
Français
Italiano
∨
(5) Välkomstmeddelande
#* systemlösenord # =>
Inställningar #=> Välkomstbesked #
Nytt besked:
ABB Welcome!
"#" = bekräfta
"*" = annullera
Klart!
==>
Högst 64 tecken kan anges.
(6) Inställning av Wiegand-uteffektsiffror
#* systemlösenord # =>
Inställningar # => Wiegand-output #
|
— 36 —
ABB-Welcome M
Funktion
Wiegand-output __
26 bit !
●- -∧
34 bit !
∨
(7) Ställ in relaterat dörrlås när du sveper med kortet
#* systemlösenord # =>
Inställningar # => Välj dörr #
Door Select______
1. (LOCK-GND)● ∧
2. (NC-NO-C)
∨
Inställning av låset som öppnas när man sveper det registrerade kortet:
1 (LOCK-GND): låset som är anslutet till LOCK-GND-terminalerna kommer att låsas
upp när man sveper kortet.
2 (NC-NO-COM): låset som är anslutet till NC-NO-COM-terminalerna kommer att
låsas upp när man sveper kortet.
(8) Nollställ
#* systemlösenord # =>
Inställningar # => Nollställ # => #
Nollställ till
fabriksinställningar?
"#" = bekräfta
"*" = annullera
Klart!
==>
Återställ alla inställningar till fabriksinställningarna, men annan information, t.ex.
användarnamn, logic-adresser och kortinformation kan inte återställas.
(9) Information
#* systemlösenord # =>
Inställningar # => Information #
|
— 37 —
ABB-Welcome M
Audio modul:
V1.07_131106
Card reader:
V0.10_131107
Funktion
∧
∨
Visa programvaruinformationen för varje modul i utomhusstationen.
* Återställ knappsatsmodulens systemlösenord:
Det går att återställa systemlösenordet till fabriksinställningarna om du skulle ha glömt
det.
Återställningen till fabriksinställningarna raderar inte den övriga info rmationen som
programmerats på systemet, som användarnamn m.m.
1.
Stäng av strömmen.
2.
Slå på strömmen igen
3.
Håll “program button (program knappen)” intryckt i 5 sek. inom 30 sek.
4.
En ljudsignal kommer att höras och systemlösenordet återställs till standard
(345678).
Pos: 67 /DinA4 - Anleitungen Online/Ueberschriften/2./Reinigung @ 19\mod_1310733980533_15.docx @ 107853 @ 2 @ 1
|
— 38 —
ABB-Welcome M
5.5
5.5.1
Funktion
Utomhusstation med knappsats utan display (kamera + ljud+
knappsats)
Ringer en boende, ange enbart fysisk adress
I standby-läge kan en besökare trycka på en fysisk
adress som motsvarar bostaden som du vill ringa direkt
till, från 001 till 250.
För ett byggnadskomplex måste en besökare trycka på
byggnadens nummer (01~60) + fysisk adress (001~250)
för att ringa från en grindstationen.
Fig. 24
5.5.2
Samtal till vakt enhet
Tryck på knappen
för att ringa till en vakt enhet.
Acceptera samtalet
120 s
30 s
Övervakn. Enhet
"*" = annullera
5.5.3
==>
Övervakn. Enhet
"*" = annullera
Systeminställningar
Användare kan öppna systeminställningarna med följande steg (under inställningar,
tryck på “#” för att bekräfta, tryck på “*” för att avbryta. Standardlösenordet är 345678.):
1.
Ställ in enheten som en utomhusstation eller en grindstation.
Utomhusstation:
#* systemlösenord # =>
1 # => 1 #
Port station:
#* systemlösenord # =>
1 # => 2 #
2.
Ändra "systemlösenordet"
#* systemlösenord # =>
2 # => Ange nytt systemlösenord (6-8 bitar) # => Ange lösenordet igen #
|
— 39 —
ABB-Welcome M
3.
Funktion
Ändra "dörröppningskod"
#* systemlösenord # =>
3# => Ange ny dörröppningskod (6-8 bitar) # => Ange koden igen #
4.
Ställa in röstmeddelandet
Om ljudmodulen med talsyntesfunktionen (M251024A-.) har monterats, kan det
lokala språket ställas in.
#* systemlösenord # =>
4# => Tryck på
5.
eller
för att välja språk => #
Aktivera/inaktivera åtkomstkontrollfunktionen
Aktivera åtkomstkontrollfunktionen:
#* systemlösenord # =>
5# => 1 #
Inaktivera åtkomstkontrollfunktionen:
#* systemlösenord # =>
5# => 2 #
* Återställ knappsatsmodulens systemlösenord:
Det går att återställa systemlösenordet till fabriksinställningarna om du skulle ha glömt
det.
Återställningen till fabriksinställningarna raderar inte den övriga informationen som
programmerats på systemet, som användarnamn m.m.
1.
Stäng av strömmen.
2.
Slå på strömmen igen
3.
Håll “program button (program knappen)” intryckt i 5 sek. inom 30 sek.
4.
En ljudsignal kommer att höras och systemlösenordet återställs till standard
(345678).
Pos: 21 /DinA4 - Anleitungen Online/Inhalt/KNX/DoorEntry/83220-AP-xxx/Bedienelemente - 83220-AP-xxx @ 18\mod_1303212853605_15.docx @ 103673 @ @ 1
2149 @ @ 1
|
— 40 —
ABB-Welcome M
Avancerad
konfiguration
Pos: 70 /DinA4 - Anleitungen Online/Ueberschriften/2./Geraeteeinstellungen @ 18\mod_1302768847744_15.docx @ 103548 @ 2 @ 1
6
Avancerad konfiguration
Anslut till en dator för att konfigurera knappsatsen eller displayen
Fig. 25
Pos: 75 /Busch-Jaeger (Neustruktur)/Modul-Struktur/Online-Dokumentation/Steuermodule - Online-Dokumentation (--> Für alle Dokumente <--)/++++++++++++ Seitenumbruch ++++++++++++ @ 9\mod_1268898668093_0.docx @ 52149 @ @ 1
|
— 41 —
ABB-Welcome M
Tekniska data
Pos: 76 /DinA4 - Anleitungen Online/Ueberschriften/1./Technische Daten @ 18\mod_1302615863001_15.docx @ 103416 @ 1 @ 1
7
Tekniska data
Pos: 77 /DinA4 - Anleitungen Online/Inhalt/KNX/DoorEntry/83220-AP-xxx/Technische Daten - 83220-AP-xxx @ 18\mod_1303212854559_15.docx @ 103705 @ @ 1
Beteckning
Värde
Drifttemperatur
-40 °C- +70 °C
Skydd (skyddsram monterad)
IP 54
Strömförsörjning, dörröppnare
18V 4A impulsiva, 250 mA håll
(Lock-GND)
Flytande uteffekt, dörröppnare
30 V AC / DC 1A
(COM-NC-NO)
Entrådsklamrar
2 x 0,28 mm 2 – 2 x 1 mm2
Fintrådsklamrar
2 x 0,28 mm 2 – 2 x 1 mm2
Busspänning
20-30 V
Pos: 78 /Busch-Jaeger (Neustruktur)/Modul-Struktur/Online-Dokumentation/Steuermodule - Online-Dokumentation (--> Für alle Dokumente <--)/++++++++++++ Seitenumbruch ++++++++++++ @ 9\mod_1268898668093_0.docx @ 52149 @ @ 1
|
— 42 —
ABB-Welcome M
Montering/Installation
Pos: 79 /Busch-Jaeger (Neustruktur)/Modul-Struktur/Online-Dokumentation/Überschriften (--> Für alle Dokumente <--)/1. Ebene/M - O/Montage / Installation @ 18\mod_1302613966111_15.docx @ 103373 @ 1 @ 1
8
Montering/Installation
Pos: 80 /Busch-Jaeger (Neustruktur)/Modul-Struktur/Online-Dokumentation/Sicherheit (--> Für alle Dokumente <--)/Warnhinweise/Sicherheit - Niederspannungs- und 230 V-Leitungen @ 18\mod_1302617821491_15.docx @ 103465 @ @ 1
Varning
Elektrisk spänning!
Risk för dödsfall och brand på grund av elektrisk spänning på 100 -240
V.
–
Lågspänningskablar och 100-240 V kablar får inte installeras
tillsammans i ett försänkt uttag!
Vid kortslutning finns det risk för en 100-240 V belastning på en
lågspänningsledning.
Pos: 81 /Busch-Jaeger (Neustruktur)/Modul-Struktur/Online-Dokumentation/Sicherheit (--> Für alle Dokumente <--)/Warnhinweise/Sicherheit - Fachkenntnisse @ 18\mod_1302774384017_15.docx @ 103564 @ 2 @ 1
8.1
Krav för elektrikern
Varning
Elektrisk spänning!
Installera bara enheten om du har erforderliga kunskaper och
erfarenheter som elektriker.
•
Felaktig installation utsätter dig och andra användare av det
elektriska systemet för livsfara.
•
Felaktig installation kan orsaka allvarliga skador på egendom, t.ex.
på grund av brand.
De lägsta kraven på expertkunskap och erfarenhet för installationen är:
•
Tillämpa de "fem säkerhetsreglerna" (DIN VDE 0105, EN 50110):
1.
Stäng av strömkällan;
2.
Säkerställ så att den inte kan sättas på igen;
3.
Kontrollera att det inte finns någon spänning;
4.
Anslut till jord;
5.
Täck över eller barrikadera spänningsförande delar intill.
•
Använd lämplig personlig skyddsutrustning.
•
Använd enbart lämpliga verktyg och mätutrustning.
•
Kontrollera typen av elnätverk (TN-system, IT-system, TT-system)
för att säkra följande elförsörjningsförhållande (klassisk anslutning
till jord, skyddsjordning, erforderliga extra åtgärder etc.).
Pos: 82 /DinA4 - Anleitungen Online/Inhalt/KNX/DoorEntry/Montage/Montagehinweise - Allgemein @ 19\mod_1310563670478_15.docx @ 107743 @ 2 @ 1
|
— 43 —
ABB-Welcome M
8.2
•
Montering/Installation
Allmänna installationsanvisningar
Avsluta alla grenar av ledningssystemet via en ansluten bussenhet (t.ex.
inomhusstation, utomhusstation, systemenhet).
•
Installera inte systemstyrenheten direkt intill ringklockans transformator eller andra
kraftkällor (för att undvika interferens).
•
Installera inte systembussens ledningar tillsammans med 100 -240 V ledningar.
•
Använd inte vanliga kablar för att ansluta ledningarna för dörröppnarna och
systembussens ledningar.
•
Undvik bryggor mellan olika typer av kablar.
•
Använd enbart två ledningar för systembussen i en fyrkärnig eller flerkärnig kabel.
•
När man drar slingor ska aldrig den inkommande och utgående bussen installeras
inuti samma kabel.
•
Installera aldrig den interna och den externa bussen inuti samma kabel.
Pos: 83 /Busch-Jaeger (Neustruktur)/Modul-Struktur/Online-Dokumentation/Steuermodule - Online-Dokumentation (--> Für alle Dokumente <--)/++++++++++++ Seitenumbruch ++++++++++++ @ 9\mod_1268898668093_0.docx @ 52149 @ @ 1
|
— 44 —
ABB-Welcome M
Montering/Installation
Pos: 84 /Busch-Jaeger (Neustruktur)/Modul-Struktur/Online-Dokumentation/Überschriften (--> Für alle Dokumente <--)/2. Ebene/M - O/Montage @ 18\mod_1302615960458_15.doc x @ 103424 @ 2 @ 1
8.3
Montering
Pos: 85.1 /DinA4 - Anleitungen Online/Inhalt/KNX/DoorEntry/83220-AP-xxx/Montage - Module/Montage - Montagedose -- 83220-AP-xxx @ 19\mod_1323250406848_15.docx @ 111098 @ @ 1
Se till att du har ett par
handskar för att förhindra
att du skär dig.
Mått
Ljudmodul
Pushbutton module
|
Kameraläge
Namnskyltmodul
Knappsatsmodul
Display och
kortläsarmodul
— 45 —
ABB-Welcome M
Montering/Installation
Täckram
Försänkt kopplingsdosa
|
— 46 —
ABB-Welcome M
Montering/Installation
Regnkåpa
Utomhusstationens komponeter
3
1
4
2
Fig. 26
|
Montering
— 47 —
ABB-Welcome M
Nr
Funktioner
1
Täckram
2
Moduler
3
Försänkt kopplingsdosa
4
Regnkåpa
Montering/Installation
Montera varje modul vid täckramen
Fig. 27
1.
Montering
Sätt i vaje modul i täckramen bakifrån tills den klickar på plats. Alla moduler kan
sättas in, t.ex.. kameramodul, ljudmodul, tryckknappsmodul, knappsatsmodul,
display och kortläsarmodul, namnskyltmodul.
2.
|
Var speciellt uppmärksam på modulens orientering uppifrån och ner.
— 48 —
ABB-Welcome M
Montering/Installation
Modulernas ledningar
Fig. 28
Modulernas ledningar
1.
Använd kablar för att koppla samman modulerna en och en.
2.
Se till att ljudmodulen ansluts intill kameramodulen.
Avståndszonerna för installationen av utomhusstationen
När man väljer installationsplats måste man följa minsta avstånder på höger sida för att
kunna ta bort ändstycket.
|
— 49 —
ABB-Welcome M
Montering/Installation
Ledningar
Fig. 29
Montering
1.
Förbered installationsboxen.
2.
Skala ledningarna.
–
Den isolerade delen av kabeländen får inte vara längre än 10 mm.
Sätt ramen på den försänkta kopplingsdosan
Fig. 30
Montering
1.
Häng enheten i installationsboxen.
2.
Fäst säkerhetsöglan.
3.
Anslut ledningarna i den inneslutna klämman och anslut klämman på kontaktstiften.
Vik ihop enheten och stäng tills den snäpper hörbart på plats.
4.
|
Skruva fast framsidan på enheten.
— 50 —
ABB-Welcome M
Montering/Installation
Tre typer av installation
Alternativ 1: Försänkt enbart, med en försänkt kopplingsdosa
Fig. 31
Försänkt enbart, med en försänkt kopplingsdosa
Alternativ 2: Försänkt med en rengkåpa
Fig. 32 Försänkt med en rengkåpa
|
— 51 —
ABB-Welcome M
Montering/Installation
Alternativ 3: Ytmonterad med en rengkåpa
Fig. 33 Ytmonterad med en rengkåpa
Demontering av utomhusstation
Fig. 34
Montering
1.
2.
Använd det medföljande monteringsverktyget för att ta bort ändstycket.
Ta bort skruven som används för att fästa täckramen.
3.
Tryck upp och dra ut utomhusstationen på täckramens nederdel.
|
— 52 —
ABB-Welcome M
Montering/Installation
Demontera modulerna
Fig. 35
1.
2.
Demontering av modulerna
Demontera modulen från ena sidan av modulen.
Ta ut modulerna.
Byt namnskyltarna
Fig. 36
1.
2.
Montering
Ta bort tryckknappsskyddet och skriv användarens namn på etiketten.
*Använd ett A4 etikettarkmed programvara som krävs för korrekt format och utskrift
av etiketterna.
|
— 53 —
ABB-Welcome M
Montering/Installation
Justera kamerans vinkel
Fig. 37 Justera kamerans vinkel
1.
Skruva loss kameran.
2.
Justera kamerans vinkel i fyra riktningar (upp, ner, höger, vänster)
3.
Skruva på kameran.
|
— 54 —
ABB-Welcome M
Montering/Installation
Förlängning av utomhusstationen
Fig. 38
1.
2.
Montering
Gör ett hål för kabeln.
Använd sammanfogningsutrustningen för att montera de försänkta
kopplingsdosorna horisontellt.
3. Dra anslutningsledningarna mellan dosorna för anslutning av modulerna.
*Förlängningen är användbar för koppling av flera utomhusstationer.
Pos: 94 /Busch-Jaeger (Neustruktur)/Modul-Struktur/Online-Dokumentation/Steuermodule - Online-Dokumentation (--> Für alle Dokumente <--)/++++++++++++ Seitenumbruch ++++++++++++ @ 9\mod_1268898668093_0.docx @ 52149 @ @ 1
|
— 55 —
ABB-Welcome M
Montering/Installation
Pos: 95 /DinA4 - Anleitungen Online/Inhalt/KNX/DoorEntry/Projektierung-Merkblatt/ProjektierPos: 97 /Busch-Jaeger (Neustruktur)/Modul-Struktur/Online-Dokumentation/Rückseiten (--> Für alle Dokumente <--)/Rückseite - Busch-Jaeger - Allgemein @ 20\mod_1327320074886_15.docx @ 137103 @ @ 1
Anmärkning
=== Ende der Liste für Textmarke Backcover ===
Vi förbehåller oss rätten att när som helst göra tekniska förändringar och ändringar av
innehållet i detta dokument utan föregående information.
De detaljerade specifikationerna som accepterats vid beställningstillfället gäller alla
beställningar. ABB accepterar inget ansvar för eventuella fel eller ofullständigheter i
detta dokument.
Vi förebehåller oss alla rättigheter beträffande detta dokument samt dess innehåll och
illustrationer. Dokumentet och dess innehåll, eller utdrag därur, får inte reproduceras,
överföras eller återanvändas av tredje part utan föregående skriftligt medgivande från
ABB.