1
1 January 1990
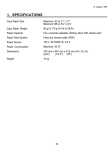
1. SPECIFICATIONS
Maximum Original Size:
A3/LDG
Error Tolerance:
+2.5 mm
Functions:
Delete Area Mode
Save Area Mode
Black in Area Mode
Color in Area Mode
Highlight Color Mode
Size Magnification Mode
Dimensions:
(W x D x H)
528 mm x 468 mm x 54 mm
(20.8" x 18.5" x 2.2")
Weight:
Approximately 2.6 kg (5.8 lb)
(including stylus and cable)
Power Source:
5V 0.25A (from copier)
9-1
1 January 1990
2. ELECTRICAL COMPONENT LAYOUT
2
1
3
1. Main PCB
2. Stylus
3. Positioning Sheet
9-2
1 January 1990
3. ELECTRICAL COMPONENT DESCRIPTIONS
PCBs
Main
Controls the Editor and drives the positioning sheet
OTHERS
Positioning Sheet
Detects the stylus position
Stylus
Initializes detection of the position
9-3
1 January 1990
4. BASIC OPERATION
[A]
[B]
Y
X
There are resistors [A] (carbon sheets) in the positioning sheet aligned in the
X and Y directions. When part of the positioning sheet is pressed with the
stylus pen, voltage corresponding to the combination of the resistors is
detected.
The detected data is transmitted to the copier as the coordinate position. This
detection method also applies to the mode selection pads [B].
9-4
1 January 1990
5. DETECTING METHOD
Example:
T1
Coodinate Point
XH
YH
YL
A/D
8 bit
[A]
XL
T2
[B]
[C]
The positioning sheets consists of two carbon sheets for X and Y direction,
and insulator dots located in-between the two carbon sheets.
When the positioning sheet is pressed with the stylus pen [A], the switch in
the stylus pen turns on and starts the detection of the coordinate point. Also,
the upper carbon sheet [B] contacts the lower carbon sheet [C] at the
coordinate point. Therefore, the voltage corresponding to the coordinate point
is sent to the A/D converter.
Coordinate Point in X Direction:
The voltage of the coordinate point in the X direction is sent to the A/D converter through the Y line as the switching transistor T1 is turned ON and the
voltage is applied to the X line. At this time, the switching transistor T2 should
be OFF.
Coordinate Point in Y Direction:
By changing the ON/OFF position of the switching transistors T1 and T2, the
voltage of the coordinate point in the Y direction is sent to the A/D converter
through the X line.
9-5
1 January 1990
Positioning
Sheet
Copier
Editor Main PCB
Serial Input
Reset
CPU
A/D
Converter
Serial Output
Request Error
The copier supplies +5 volts to the editor. The signals between the editor and
the copier are as follows:
CN No.
1
2
3
4
Signal
GND
Serial Input: TXD
(Copier to Editor)
GND
Serial Output: RXD
(Editor to Copier)
5
Request
(Editor to Copier)
6
Error
(Editor to Copier)
7
Reset
(Copier to Editor)
8
Editor Connection
9 / 10
+5v
9-6
Name Function
—
Status signal of copier
—
Coordinate data and mode
selection data from editor
Request to receive data
(Serial Input Signal) from
copier
Request to receive data
(Serial Input Signal) again
from copier when Serial
Input Signal is in error
condition
Resets the editor
Connects to GND on Editor
board
—
1 January 1990
6. ERROR DETECTION
6.1 INITIAL ERROR
Short circuit and disconnection of the resistors in the positioning sheet is
checked when the power is turned ON. If an error is found and coordinate
data input is made with the stylus pen, the buzzer sounds for five seconds
and the coordinate position at that time is not transmitted to the copier.
6.2 PARITY ERROR (Communication Error)
When data transmitted from the editor or copier has an error, the serviceman
call "SC94" is lit on the copier control panel.
9-7
1 January 1990
7. EDITOR INSTALLATION
7.1 Accessory Check
Check the quantity and condition of the accessories in the box according to
the following list:
1. Installation Procedure............................................................. 1
2. New Equipment Condition Report .......................................... 1
(17 and 27 machines)
3. Envelope for NECR (17 machine only) .................................. 1
4. Protective Plate ...................................................................... 2
5. Front Stopper.......................................................................... 2
6. Rear Stopper .......................................................................... 2
7. Sponge Plate .......................................................................... 1
8. Indicator Unit .......................................................................... 1
9. Operation Panel Sheet ........................................................... 1
10. Indicator Panel Sheet ............................................................. 1
11. Grounding Screw.................................................................... 1
12. Screw - M4 x 6........................................................................ 4
13. Truss Screw - M4 x 8.............................................................. 2
14. Multilingual Decal (16, 25, 26 and 27 machines) ................... 1
9-8
1 January 1990
7.1.1
EDITOR INSTALLATION (on Platen Cover)
[A]
[B]
[D]
[C]
[E]
[F]
[F]
[G]
[G]
1. Turn off the main switch and unplug the copier.
2. Remove the strips of shipping tape and the condition of the stylus pen.
3. Remove the platen cover [A] (lift up the leaf spring [B] and slide the platen
cover to the right).
4. Close the hinge [C] of the platen cover and remove the original holder [D]
from the platen cover.
5. Stick the sponge plate [E] and the protective plates [F] as shown.
6. Install the rear stoppers [G] to the right and left sides of the platen cover
as shown (2 screws each: M4 x 6).
9-9
1 January 1990
[A]
[B]
[B]
[C]
[E]
[D]
7. Place the editor [A] on the platen cover from the operation side as shown
and secure the right and left ends of the editor with the front stoppers [B]
(1 screw each: truss screw - M4 x 8).
8. Open the hinge [C] and reinstall the platen cover (with editor board) on
the copier.
9. Remove the toner collection bottle cover [D] (2 screws) and rear cover [E]
(5 screws).
9-10
1 January 1990
[B]
[A]
[C]
10. Remove the securing bracket [A] (1 screw).
11. Connect the editor harness [B] (white, 10P) and secure the 2 grounding
wires [C] together (1 grounding screw).
9-11
1 January 1990
[A]
[B]
[E]
[D]
[C]
12. Remove the operation panel sheet [A] and cover [B] (2 screws).
13. Install the indicator unit [C] (2 screws), and stick the indicator panel sheet
[D] on the indicator unit.
14. Stick the operation panel sheet [E] (accessory).
15. Reinstall the copier rear cover (5 screws) and toner bottle cover (2
screws).
16. Check the editor operation.
9-12
1 January 1990
7.1.2
EDITOR INSTALLATION (on Editor Table)
[A]
[B]
[D]
[C]
1. Remove the platen cover (2 screws) and set the editor on the platen
cover (from the operation side).
Refer to steps 2 to 7 on previous pages.
2. Reinstall the 2 studs [A], which were removed from the copier on the editor table [B].
3. Open the hinge [C] and install the platen cover (with editor) [D] on the editor table.
Refer to steps 9 to 16 on previous pages.
4. Check the editor operation.
9-13
1 January 1990
8. REPLACEMENT AND ADJUSTMENT
8.1 MAIN PCB REPLACEMENT
CAUTION: Do not touch the DIP switch on the main PCB as it is factory preset.
[A]
[B]
[E]
[D]
[C]
1. Disconnect the editor connectors.
2. Remove the editor from the platen cover [A] (6 screws).
3. Remove the upper cover [B] (35 screws).
NOTE: Carefully remove the upper cover as it is held down with double
sided tape.
4. Remove the connectors [C].
5. Remove the connector [D] and replace the main PCB [E] (9 screws).
9-14