1
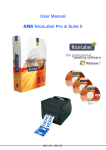
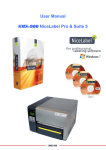
User Manual CPM NiceLabel Pro & Suite 5 CPM-100E / CPM-100HE Table of contents Table of contents ............................................................................................................ - 2 Safety Instructions .......................................................................................................... - 4 Technical information ...................................................................................................... - 5 Before using the CPM-100 .............................................................................................. - 6 Contents. ................................................................................................................. - 6 Components and functions ...................................................................................... - 7 Materials ......................................................................................................................... - 8 Tape loading ............................................................................................................ - 8 Loading the ink ribbon cartridge ............................................................................. - 10 Removing the ink ribbon cartridge ......................................................................... - 11 Cleaning the print head .......................................................................................... - 11 Cutter ............................................................................................................................ - 12 Installing and replacing the cutter blade................................................................. - 12 Adjusting the cutting depth..................................................................................... - 14 Adjusting the cutting blade ..................................................................................... - 15 Weeding cut-out characters .......................................................................................... - 17 Removing waste .................................................................................................... - 17 Transferring characters .......................................................................................... - 17 Placing the finished cut characters ........................................................................ - 18 Connecting to a computer ............................................................................................. - 20 Prepare the cable .................................................................................................. - 20 Connecting the cables ........................................................................................... - 20 Introduction NiceLabel .................................................................................................. - 21 About CPM NiceLabel............................................................................................ - 21 System requirements .................................................................................................... - 22 Contents of the package. ....................................................................................... - 22 Installation ..................................................................................................................... - 23 Step 1 of 4: Installation of the CPM NiceLabel software ........................................ - 23 Step 2 of 4: Installation of the CPM Printer driver .................................................. - 25 Step 3 of 4: Activating the CPM NiceLabel Software ............................................. - 29 Step 4 of 4: Instructions after installing NiceLabel software ................................... - 31 Functions of the CPM-100 Print Manager ..................................................................... - 32 Changing a print job/colour .................................................................................... - 32 Print all jobs and lamination function...................................................................... - 34 Printing multiple labels & Advanced options .......................................................... - 35 Advanced settings in the printer driver .......................................................................... - 36 Additional user information for your CPM...................................................................... - 38 CPM NiceLabel 5 .......................................................................................................... - 39 Description of icons................................................................................................ - 39 New Label .............................................................................................................. - 41 New Label for database / variable data use ........................................................... - 43 Tools ...................................................................................................................... - 48 Editing Tools .......................................................................................................... - 48 Alignment Tools ..................................................................................................... - 48 Create text .................................................................................................................... - 49 Fixed text ............................................................................................................... - 49 Cutting text ............................................................................................................. - 49 Text Properties. ..................................................................................................... - 50 Fixed paragraph text .............................................................................................. - 51 Rich Text Format .......................................................................................................... - 52 - CPM NiceLabel Pro/Suite 5 Rich Text Format.................................................................................................... - 52 Barcode .........................................................................................................................- 52 Fixed Barcode ........................................................................................................ - 52 Graphics ........................................................................................................................- 53 Place graphics ....................................................................................................... - 53 Rectangle ......................................................................................................................- 54 Working with rectangles ......................................................................................... - 54 Drawing a line. ....................................................................................................... - 55 Circle and Ellipse ..........................................................................................................- 55 Create a circle ........................................................................................................ - 55 Inverse ..........................................................................................................................- 55 Complete or part Inverse........................................................................................ - 55 Rotation .........................................................................................................................- 56 Rotating an object .................................................................................................. - 56 Zoom in/Zoom out .........................................................................................................- 56 Aligning objects .............................................................................................................- 56 Horizontal alignment .............................................................................................. - 57 Vertical alignment................................................................................................... - 58 Variables .......................................................................................................................- 59 Variable options ..................................................................................................... - 59 New keyboard input ............................................................................................... - 60 New Counter Variable ............................................................................................ - 62 New Date and Time field ........................................................................................ - 62 Use Existing Variable ............................................................................................. - 62 Connecting with a database or spreadsheet file .................................................... - 63 Printing – select records......................................................................................... - 66 NiceForm .......................................................................................................................- 67 Contact ..........................................................................................................................- 71 - CPM NiceLabel Pro & Suite 5 Copyright © 2011 -3- CPM NiceLabel Pro/Suite 5 Safety Instructions When set up correctly and installed according to instructions, the printer should not present any hazards. The following possible dangers exist: • Injury from the cutter assembly. • Hair, clothes and jewellery pulled into the printer, during operation with the cover open • Only use the printer in protected environments. • Do not spill any liquids into the printer. • Only have your printer repaired by specially trained service personnel. • In any event of danger or damage to the printer, turn the printer off and remove from the power supply.. • Turn the printer off and remove from the power supply before cleaning. CPM NiceLabel Pro & Suite 5 Copyright © 2011 -4- CPM NiceLabel Pro/Suite 5 Technical information Product Printer section Print method Print resolution Print speed Cutter section Cutter tolerance Cut speed Maximum print length. Interface Operating environment Voltage Capacity Dimensions Weight CPM-100 Thermal Transfer 200 dpi or 400 dpi 25 mm/sec 0,025 mm/stap 120 mm/sec. maximum 100 × 2000 mm (200 dpi) 100 x 1000 mm (400 dpi) USB: USB ver.1.1, max cable length 2m Parallel: Compliant with IEEE1284, max cable length 2m Temperature: 10-35°C, air humidity: 35-80% (avoid condensation) 230V AC ± 10%, 50/60Hz 150W maximum, 20W standby 325 (w) x 305 (d) x 315 (h) mm 9kg CPM NiceLabel Pro & Suite 5 Copyright © 2011 -5- CPM NiceLabel Pro/Suite 5 Before using the CPM-100 Contents. <1> CPM-100 machine <2> 203V AC power lead <3> Cutter Blade (1 pc.) <4> Tweezers <5> Squeegee <6> Blade holder – installed. <7> Spanner <8> This user manual. CPM NiceLabel Pro & Suite 5 Copyright © 2011 -6- CPM NiceLabel Pro/Suite 5 Components and functions [Front] Handle - left and right. Front cover Cutter button Reverse feed button Tape exit Feed button On/Off Power LED Cutting depth adjust Open/Close lever [Rear] Print head Cutter Tool Cutter Holder Bail bar Pin feed Anti dust bar (silver) 230V socket USB Connector Parallel Connector (IEEE1284) Roll hoder [Button Functions] Power Feed LED lamp : Turn device on/off : Feeds tape forward and backwards : GREEN when on, steady or blinking RED when there is an error.. CPM NiceLabel Pro & Suite 5 Copyright © 2011 -7- CPM NiceLabel Pro/Suite 5 Materials Tape loading Avoid direct contact with the material surface, grease and oil from the skin may cause poor print results. 1. After turning off, open the top cover using the release lever. 4. Feed the tape under the dust bar and over the black roller. * Black rubber roller 5. Feed the tape forward until it sits under the two pinch rollers. 2. Raise the dust bar.. Material pinch rollers Dust bar Pinch rollers 3. Place the roll in the roll holder. Black roller 6. Align the feed holes with the left and right feed pins. Pin sprockets Roll holder CPM NiceLabel Pro & Suite 5 Copyright © 2011 -8- CPM NiceLabel Pro/Suite 5 7. Lower the dust bar in place to secure the 8. Close the top cover, ensure you hear a positive tape. ‘click’. It is important to locate the material holes onto the corresponding pins. If pins are out of alignment/slanted then bad feed and jamming is very probable. WARNING To avoid injury from accidental operation, please ensure the unit is switched off before loading tapes and materials. CPM NiceLabel Pro & Suite 5 Copyright © 2011 -9- CPM NiceLabel Pro/Suite 5 Loading the ink ribbon cartridge 1. Open the top cover.. 3. Insert the two flat location tabs into the slots in the top cover.. 4. Secure the cassette with an upward movement, ensuring the cassette ‘clicks’ into place. 2. Holding the cartridge as shown, turn the gear OPEN cog indicated to ensure there is no slack in the ribbon. Location Tabs OPEN Click CPM NiceLabel Pro & Suite 5 Copyright © 2011 - 10 - CPM NiceLabel Pro/Suite 5 Removing the ink ribbon cartridge 1. Open the top cover. Pressing down on the 2. Pull the cassette forward and out. projecting flange, pull out the cassette. WARNING Do not touch the thermal print head to avoid burns. Cleaning the print head There are 2 methods to clean the print head: 1. Use the provided cleaning pen. Stroke the pen from right to left across the face of the print head several times. Do not move the pen continuously left and right. 2. A lint free cloth or cotton bud, soaked in isopropyl alcohol can also be used in the above manner. CPM NiceLabel Pro & Suite 5 Copyright © 2011 - 11 - CPM NiceLabel Pro/Suite 5 Cutter Installing and replacing the cutter blade 1. After turning off, open the top cover. 3. Use the supplied spanner, turn the blade holder anti-clockwise to remove it. Do not use any other spanner or tool, use of the incorrect tool can cause permanent damage. Use this end. 2. Move the cutting head to the center by hand. Caution Store cutter blades away from children, seek urgent medical advice if swallowed. Warning Turn the system off before replacing or installing the cutter blade. Avoid touching the tip of the cutting tool to avoid accidental injury. CPM NiceLabel Pro & Suite 5 Copyright © 2011 - 12 - CPM NiceLabel Pro/Suite 5 4. Unscrew the top cap anti-clockwise to remove 6. Place the blade lightly into the blade holder, it. ensure the end that had the protective cap faces down into the holder. 5. Remove the protective cap from the cutter 7. Replace the top cap. The blade will be positioned correctly when the top cap is screwed in place using finger pressure. blade. 8. Replace the tool holder back into the cutting head. Blade CPM NiceLabel Pro & Suite 5 Copyright © 2011 - 13 - CPM NiceLabel Pro/Suite 5 Adjusting the cutting depth The cutting quality is adjusted using the cutting depth dial on the right side of the CPM100. On delivery the cutting depth is defaulted to 4. Temperature and thickness of material can affect the cut quality, depending on the material it is recommended a test cut is made. An ideal setting will cut the material and leave a slight indent in the backing paper. 1. If characters are not cutting completely and it is difficult to remove from the backing paper, increase the depth in half graduations until the ideal result is achieved. 2. If the cutter is also cutting through the material and the backing paper, decrease the depth in half graduations. Lower Higher Special materials that are thicker than standard vinyl will normally require at least another graduation turn in pressure Constant cutting at high cut depths will reduce the cutting life of the blade accordingly. CPM NiceLabel Pro & Suite 5 Copyright © 2011 - 14 - CPM NiceLabel Pro/Suite 5 Adjusting the cutting blade If the material cannot be cut with a high cut depth setting, it may be necessary to increase the amount the cut blade is projecting out of the holder. 1. Turn the CPM off and move the cutting head to the center. Use this end 2. Remove the cutting tool using the supplied 4. Holding the cutting tool in your hand, try cutting spanner. the material to see if the correct cut depth has been achieved. Use this end 5. Repace the tool into the tool head. 3. Turning the lower white part of the tool clockwise increase the amount the point of the cutter projects, default is 0.2 mm. One full turn equals 0.75 mm (.03"). WARNING Cutting tool tip is very sharp, avoid contact. CPM NiceLabel Pro & Suite 5 Copyright © 2011 - 15 - CPM NiceLabel Pro/Suite 5 CPM NiceLabel Pro & Suite 5 Copyright © 2011 - 16 - CPM NiceLabel Pro/Suite 5 Weeding cut-out characters Removing waste 2. Smooth the application tape down using a 1. After cutting, follow these steps; Remove the ‘hatched’ area. squeegee, reversing the tape and smoothing from the release paper side can improve this process. Back of release paper. 3. Place the tape with the application tape facing Transferring characters Place application tape face down on the exposed cut characters. down. Peel away the release liner, leaving the characters adhered to the transfer tape. 1. Ensure the adhesive face is pressed down firmly onto the characters Application Tape Backing Sheet Vinyl CPM NiceLabel Pro & Suite 5 Copyright © 2011 - 17 - CPM NiceLabel Pro/Suite 5 Placing the finished cut characters There are two methods.The choice depends of the size of the text and the surface it must be adhered to: Dry method, length of 50 cm or less Application Tape 1. With the release paper attached, align the characters in the area to be placed. 2. Peel back approx 2cm of the release liner 2cm Position tape Release liner. 3. Press down the exposed area where the release liner has been peeled back onto the surface. Squeegee 4. Slowly pull back the release liner, pressing the exposed characters down with a squeegee. Application Tape 5. Press down the characters firmly with the squeegee. Squeegee 6. Carefully remove the application tape. Air bubbles can easily be removed by pricking them with a pin. CPM NiceLabel Pro & Suite 5 Copyright © 2011 - 18 - CPM NiceLabel Pro/Suite 5 Wet method, length over 50 cm. Position marks Application tape. 1. Spray application solution over the exposed adhesive side of the characters and onto the surface they are to be applied to. Application solution is a mix of detergent and water – usually two spoons for each 4 litres of water. 2. Place the cut characters on the application tape and place in position. Application Tape Using the squeegee, press the application solution out from under the application tape – working from the centre to the edges, Application Tape 4. Carefully remove the application tape. Application Tape CPM NiceLabel Pro & Suite 5 Copyright © 2011 - 19 - CPM NiceLabel Pro/Suite 5 Connecting to a computer Connection can be made with a USB or a parallel cable (IEEE1284). Prepare the cable Parallel (IEEE1284) cable. * Max length 2m. USB cable * Max length 2m. Parallel USB Connecting the cables 1. Install NiceLabel software on your PC before connecting the cables. 2. Connect the correct cable to its socket on the rear of the CPM-100 * Ensure power to the PC is off when connecting the parallel cable(IEEE1284). Secure with spring clips. Parallel Port (IEEE1284) USB Port 3. Connect to your PC and follow the installation instructions in NiceLabel. WARNING Do not connect both cables simultaneously to the CPM-100.. CPM NiceLabel Pro & Suite 5 Copyright © 2011 - 20 - CPM NiceLabel Pro/Suite 5 Introduction NiceLabel About CPM NiceLabel NiceLabel is a software package written for the Microsoft Windows operating system, which lets you create and print labels and fully supports WYSIWYG (What you see is what you get). Using NiceLabel, you can easily design any label or sign to include barcodes, text, lines, circles, rectangles and graphics. The tools for designing labels are user-friendly and flexible. NiceLabel has intuitive design menus, design wizards and professional design tools to make label creation quick and easy. Data can be entered when designing labels or later, using variable data fields (keyboard, file, date/time, and database). Use your own database to place information in labels with the extensive data base links included in NiceLabel. The OLE function allows you to use other Windows applications to create special objects on your label. (e.g. using MS Word for text objects or Corel Draw for Graphics) DDE (Dynamic Data Exchange) lets other applications control NiceLabel. You can write your own front-end applications in any of the program languages (Delphi, Borland, Microsoft Visual Basic…),to develop specific data preparation and then send commands for printing to NiceLabel. NiceLabel supports all Windows printers, including inkjet- and laser printers. For working with thermal printers we advise use of the supplied NiceLabel Printer drivers to get optimum print performance. NiceLabel supports more than 450 Thermal Transfer printers. For all CPM-100 printers the Rebo CPM-100 printer driver is recommended for optimum output quality and performance. CPM NiceLabel Pro & Suite 5 Copyright © 2011 - 21 - CPM NiceLabel Pro/Suite 5 System requirements • • • • AMD or Intel processor with at least 256MB of RAM. 32 or 64 bit Windows operating system: Windows XP up to and including Windows 7. CD-ROM drive. Administrator rights during installation. Contents of the package. For the installation: Check the package. It should consist of: • CPM NiceLabel CD-ROM • Installation Guide • Instructions for use • Serial number or Dongle to activate the programme Should you require more information on NiceLabel products and the CPM-100 please contact your supplier. CPM NiceLabel Pro & Suite 5 Copyright © 2011 - 22 - CPM NiceLabel Pro/Suite 5 Installation Step 1 of 4: Installation of the CPM NiceLabel software Before you start with the installation it is recommended to have your company IT support present with administration rights or someone with this authority to take care of: • • A local administrator account with all rights on the system for the installation of software and printers. Ensure that all future users have their read and write rights in the following locations: 1.Read rights in the NiceLabel installation folder, the standard location is: C:\Program Files\EuroPlus\NiceLabel 5 2. Read rights in the NiceLabel shared folder, the standard location is: C:\Program Files\Common Files\EuroPlus Shared 3. Read and Write rights in the NiceLabel system folder, the standard location is: C:\Documents and Settings\All Users\Application Data\EuroPlus\NiceLabel 5\System 4. Read rights for the registry folder: HKEY_LOCAL_MACHINE\SOFTWARE\EuroPlus\NiceLabel 5. Read and Write rights for the registry folder: HKEY_CURRENT_USER\SOFTWARE\EuroPlus\NiceLabel This will guarantee the 100% functionality of NiceLabel 5 To start the installation, follow these steps: 1. Place the CPM CD Rom in the CD-ROM drive. 2. If the auto run do not start, double click on the start.exe file on the CD. 3. The following screen appears: 4. Click on install 5. Click on the NiceLabel version you have purchased for installation. 6. Select the language, click OK and click next CPM NiceLabel Pro & Suite 5 Copyright © 2011 - 23 - CPM NiceLabel Pro/Suite 5 7. If you accept the license agreement, check this box: and click on next 8. Click on next after you have the read the agreement. 9. Enter user names and your company information. 10. Select the version of NiceLabel you have purchased, the license will only release the purchased version, click on next. 11. The standard version of NiceLabel will be installed. You have the option to customise the installation. Follow the steps indicated in the window. Click on next 12. a short cut is placed on your desktop 13. a short cut is placed on your task bar. 14. This is the last window before installation starts.. If you want to make any changes use the back button. Click to start the installation After installation, the following screen will appear: Click Finish to end the NiceLabel installation and start with the CPM printer driver installation. Take a look at the next page at step 2 of 4 for the instructions. CPM NiceLabel Pro & Suite 5 Copyright © 2011 - 24 - CPM NiceLabel Pro/Suite 5 Step 2 of 4: Installation of the CPM Printer driver 1. Connect the CPM printer with a Parallel or USB cable to the computer and turn the printer on. Wait for half a minute until Windows has installed the “USB Printing Support” device. 2. Start the Install Printer driver wizard from the NiceLabel CD (it starts automatically after completing the NiceLabel installation). 3. Click Next: 4. Click I accept the terms… then click Next: CPM NiceLabel Pro & Suite 5 Copyright © 2011 - 25 - CPM NiceLabel Pro/Suite 5 5. Click on Manufacturer MAX, select your CPM model: CPM-100E or CPM-100HE. 6. Select the correct port. The Parallel port is called LPT1. When the printer is connected via USB cable the port will be called USB001, USB002 or USB003, depending on the amount of connected USB printers to the computer. CPM NiceLabel Pro & Suite 5 Copyright © 2011 - 26 - CPM NiceLabel Pro/Suite 5 7. The printer is being installed: 8. When the progress is complete, the printer appears in the Windows printer overview (Control Panel -> Printers & Faxes). CPM NiceLabel Pro & Suite 5 Copyright © 2011 - 27 - CPM NiceLabel Pro/Suite 5 9. Start NiceLabel and create a new label. Place a random text and test the printer by printing the label. 10. When the printer is not printing, change the Virtual USB port (in het Windows printer overview > properties of the MAX CPM-100 > Ports tab). When you are using the USB cable it should be one of the USB001 or USB002 (and 3,4 etc.) ports. Make sure the printer LED is green and the printer is not in “Use Offline” mode. CPM NiceLabel Pro & Suite 5 Copyright © 2011 - 28 - CPM NiceLabel Pro/Suite 5 Step 3 of 4: Activating the CPM NiceLabel Software 1. After the NiceLabel programme starts. 2. If software is not yet activated, the following screen appears: 3. Select activate the package, the second option and click on next 4. Choose the correct activation method. You normally have a serial number (single user software key), or a hardware key. This is USB dongle which transfers the license data to the PC. Indicate which type you have.. If you have a serial number, follow the following steps. If you have a hardware key, follow the instructions on the screen and then move on to the next chapter on using the programme. Click on next. 5. Enter the required information. At ‘serial number’ you fill in the number supplied on the licence included in the software box. Click on next. CPM NiceLabel Pro & Suite 5 Copyright © 2011 - 29 - CPM NiceLabel Pro/Suite 5 6. The next window appears: If you are connected to the Internet, click connect to the activation server and the activation code will be automatically filled in. If the workstation has no internet access, you must enter the code manually on another workstation that does have internet access. Go to http://www.nicelabel.com/nlactivation_dlp.html. Fill in your key number and registration number, the activation code will be created. 7. If you have problems activating your software, contact your supplier. 8. After activation, click on next and afterwards on close. Installation and activation is now complete. Important: see the next page for the preferences which must be set up first in the program! CPM NiceLabel Pro & Suite 5 Copyright © 2011 - 30 - CPM NiceLabel Pro/Suite 5 Step 4 of 4: Instructions after installing NiceLabel software 1. Go to Start, Programmes, NiceLabel 5 and choose . There is also an icon on your desktop, if you chose this during installation. Cancel the start wizard and/or new label wizard. The programme preferences must be set up first, see below: 2. Go to tools| Users interface | settings and there click on Set Advanced Mode. Check Label Set Up Wizard, and click on OK. 3. Go back to Tools, Options, and select Printers. Uncheck ‘Use System Default Printer’ and select the CPM-100E (200dpi) or the HE (400 dpi) from the drop down menu and click on OK. 4. Click and hold on the 4 dots located at the top of the vertical toolbar above the crayon icon, on the right of the screen. Drag this to the top, horizontal tool bar. This allows the colour selection bar to be shown as a drop down menu. 5. IMPORTANT - Any object assigned the colour Magenta will automatically be treated as a cut object by the software. For example, you can place a rectangle on the screen, double click to bring up the properties window, see below, and here you can set the outline colour to default to magenta – ensuring all rectangles and squares will ‘cut’ unless altered. CPM NiceLabel Pro & Suite 5 Copyright © 2011 - 31 - CPM NiceLabel Pro/Suite 5 Functions of the CPM-100 Print Manager The CPM Print Manager screen appears when you print a label in NiceLabel. The Print Manager is an extra ‘built in’ feature. It gives total control over the use of colour cartridges and other print options that we need for the CPM. Any object assigned the colour Magenta will automatically be treated as a cut object by the CPM Manager. When you did not place a cut object (magenta colour) on the label, you can choose what cut border to place around the label in the CPM Manager. This window opens immediately after selecting the print command: When you did place a rectangle or circle with the colour Magenta, the Cut outline window will not pop up because you already provided a cut shape. Magenta has the RGB values: R: 255 G: 0 B: 255. When you use another program (Illustrator, Corel) also make sure you are working in a RGB document, not in the default CMYK document. Export your image/drawing to WMF if you want to import it in NiceLabel. Other filetypes will not work: in a WMF file the Magenta Cut shape/line will be kept intact because WMF is a scalable vector format. You can also print directly from Illustrator / Corel or your own program. Cut colour CPM NiceLabel Pro & Suite 5 Copyright © 2011 - 32 - CPM NiceLabel Pro/Suite 5 Changing a print job/colour Select the job/colour and click on of the buttons indicated below: - Print Job, only prints the selected job.. Disable job: this job will not be executed. Re- enable: enables a previously disabled job. Move up or down: changes the order in which the colours are printed. Undercoat colour: printing a white under colour when printing a light colour onto a dark tape colour (yellow on Black) keeps the hue of the lighter colour. Check the box for each colour requiring a white undercoat colour in the window. CPM NiceLabel Pro & Suite 5 Copyright © 2011 - 33 - CPM NiceLabel Pro/Suite 5 Print all jobs and lamination function Printing a label To process all the jobs in the list, click on Print all. When you are done printing and want to print the current label again, click Reset all and then Print all. Laminating a label (only available on CPM-100HE) The best way to laminate a label is to manually laminate it using an external laminating machine. Using a laminating cartridge does not work very effectively: it’s the same as printing an extra translucent layer of ink over the label and does not fully protect the label from extreme conditions. This is the way it works: - Click on Print only to automatically move the tape roll to the start position and start printing. Follow the on-screen instructions that will appear and load the necessary cartridges. - When the printer is done printing it will not cut off the sheet. - Remove the complete tape roll from the machine and laminate it using a real laminator. - When laminating is done, place the tape roll back into the machine, it does not matter where you place the tape on the pin feed, the machine will set this to the correct position when it will start plotting. - Click on Cut Only to start the CPM cutting. It will automatically move to the same position from where it had started printing. CPM NiceLabel Pro & Suite 5 Copyright © 2011 - 34 - CPM NiceLabel Pro/Suite 5 Printing multiple labels & Advanced options At the Multiple labels option, select the amount of labels you want from the drop down menu. The CPM Manager will automatically place the labels in such a way that as many labels as possible are placed on the tape to prevent an unnecessary waste of tape. Click on the advanced button to setup the Print Head Temperature and the Knife Offset. Click on Close when you’re done printing or want to exit the CPM Manager. CPM NiceLabel Pro & Suite 5 Copyright © 2011 - 35 - CPM NiceLabel Pro/Suite 5 Advanced settings in the printer driver Go to the printer overview dialogue in Windows; right click on the printer properties of the CPM-100. There are two pages with settings: 1. Click Preferences, in the new window click Advanced to see the options in the bottom image: Here you can change the following options: - Set a default paper size, this size will be used when creating a new label in NiceLabel. You can also create a custom size for when you want to use the driver with other software than NiceLabel. - Enable or disable Black Separation. Black separation is a function that makes sure that when black is printed, the underlying colours are not cut out of the black print. This way you will never see a white line between black and another colour. Black Separation must be disabled if you want to print an object with a colour inside a larger black object. CPM NiceLabel Pro & Suite 5 Copyright © 2011 - 36 - CPM NiceLabel Pro/Suite 5 2. Device Settings tab. In this dialogue you can: - Turn auto rotate off and on Change the CPM Manager language View the driver version The Rebo CPM-100 print manager is a licensed, proprietary development by Rebo B.V.. All development and ownership rights belong solely to Rebo B.V. and not to Max Co or to NiceLabel. Any technical or user issues related to the operation or performance of the Rebo Print Manager should be referred to your supplier. CPM NiceLabel Pro & Suite 5 Copyright © 2011 - 37 - CPM NiceLabel Pro/Suite 5 Additional user information for your CPM - When making images in a program like CorelDraw or Adobe Illustrator to use in NiceLabel, use RGB colours and use 100% black, 100% red etc. - In the CPM Manager, click on a colour in the preview field on the left to see which colour is assigned to it. - If a colour is assigned incorrectly, for example a light-yellow object is recognized by the driver as grey; you can override the CPM. Because the tapes and cartridges are not recognized by the machine you can simply place a yellow cartridge instead of the required grey into the machine. - Any object assigned the colour Magenta will automatically be treated as a cut object by the CPM Manager. When you did not place a cut object (magenta colour) on the label, you can choose what cut border to place around the label in the CPM Manager. This window opens immediately after selecting the print command. - Magenta has the RGB values: R: 255 G: 0 B: 255. When you use another program (Illustrator, Corel) also make sure you are working in a RGB document, not in the default CMYK document. Export your image/drawing to WMF if you want to import it in NiceLabel. Other filetypes will not work: in a WMF file the Magenta Cut shape/line will be kept intact because WMF is a scalable vector format. You can also print directly from Illustrator / Corel or your own program. Cut colour CPM NiceLabel Pro & Suite 5 Copyright © 2011 - 38 - CPM NiceLabel Pro/Suite 5 CPM NiceLabel 5 Description of icons List of all the user tools available as ‘icons’ in the Tool Bars: New label. Open label. Save label. Cut the selected objects. Copy the selected objects. Paste the selected objects. Undo last action. Redo last action. Print. Click the drop arrow to the right of the icon for printer settings . Zoom In. Click on the drop down arrow for more functions. Variables. Click on the drop down arrow for more functions. Database Tool. Click on the drop down arrow for more functions. Help. Show True Type fonts. Show printer fonts. Increase type size. Decrease type size. Bold. Italic. Underline. Text align left. Text align centre. Text align right. CPM NiceLabel Pro & Suite 5 Copyright © 2011 - 39 - CPM NiceLabel Pro/Suite 5 New variable wizard. New variable - without wizard. Edit variable. Delete variable. Disconnect object from variable. Functions. Click on drop menu for list of functions. New Database connection wizard. New data base connection – without wizard. Edit database. Delete database. Open database tool. First database record. Previous database record. Next database record. Last database record. CPM NiceLabel Pro & Suite 5 Copyright © 2011 - 40 - CPM NiceLabel Pro/Suite 5 New Label For the following instructions it is assumed that you have set the user interface to advanced mode. To do this, go to Tools > User Interface > Settings. Click on Set Advanced mode. Tick the top wizard: New Label Wizard, and click on OK. In NiceLabel, click File > New or - At the start of the wizard, choose your printer: CPM-100E or CPM-100HE. Click Next. - Follow the screenshots underneath and choose per window: Stock Type: NONE – Choose page size: - CPM (100 x 400mm): Choose Landscape, then click Finish (You can change the label size as you can see at the 4th screenshot). ATTENTION Do not change the label’s margins in the last window (Label Dimensions). The Rebo CPM-100 printer driver does this automatically for you. CPM NiceLabel Pro & Suite 5 Copyright © 2011 - 41 - CPM NiceLabel Pro/Suite 5 Your screen will look like this: CPM NiceLabel Pro & Suite 5 Copyright © 2011 - 42 - CPM NiceLabel Pro/Suite 5 New Label for database / variable data use For the following instructions it is assumed that you have set the user interface to the settings as shown in paragraph "Settings after installing NiceLabel". The difference with a standard label is we’re now going to use columns and rows. This way the amount of labels with variable data is selected in NiceLabel instead of the CPM Manager. Follow the instructions carefully. Go to File > New. You will see the “Label Setup Wizard”. Fill in the values as described above the screenshots. Of course you’re free to fill in your own values, but as an exercise use the given values. - Select your printer: CPM-100E or HE - Click Next - Leave the Stock type set to NONE - Click Next > - Select the bottom page size: “Adjusted” - Click on automatically set (…) - Click Next > CPM NiceLabel Pro & Suite 5 Copyright © 2011 - 43 - CPM NiceLabel Pro/Suite 5 - Leave the layout at Landscape - Click Next - Fill in: width 6 and height 2 - Set the margins top, bottom, left and right to 0.5. - Set the amount of rows to 5 and the columns to 4. - Click Finish > - Go to File > Label Setup > Printing tab - Set the printing direction to Vertical - Click OK CPM NiceLabel Pro & Suite 5 Copyright © 2011 - 44 - CPM NiceLabel Pro/Suite 5 - Place a rectangle on the label Select the rectangle and click in the top toolbar in the colour selection field: select Magenta (3rd from below). Double click on the rectangle and change the following values: - Go to the tab Appearance - Fill in Width: 6 and Height: 1,9 - Go to the tab General - Tick Rounded Rectangle - Fill in: Thickness 0, this will change to 0,013 for the CPM-100E and 0,006 for the CPM-100HE - Fill in Radius: 0,2 - Click OK - Click once on the rectangle to select it, then hold the CTRL key on your keyboard and click in the Alignment toolbar on Centre and Vertical Centre. Now the rectangle is exactly in the middle of your label preview. The rectangle is the colour Magenta. This colour is set up as the plot colour in the CPM Manager. Your cut out label will of course have the same size as you have given the Magenta rectangle. CPM NiceLabel Pro & Suite 5 Copyright © 2011 - 45 - CPM NiceLabel Pro/Suite 5 - Create a new database connection (see page 68, “Connection to a database or Spreadsheet file”) or a Keyboard Input field or a counter. Place the variables on the label as you can see on the previous page (for the example a counter with a prefix is placed on the label). - Click Print in the toolbar and print for example 8 labels (in case of a database connection: select 8 records). - You will see the following preview: Does the preview look alright? Click Print in the bottom/right corner. Now see the next page. CPM NiceLabel Pro & Suite 5 Copyright © 2011 - 46 - CPM NiceLabel Pro/Suite 5 The CPM Manager will appear. Click Print all under the text “Apply on all jobs”. It is important to understand that when using variable data on multiple labels the amount of labels to be printed is entered in NiceLabel, and not in the CPM Manager. When using a single, standard label you select the amount of copies in the CPM Manager. CPM NiceLabel Pro & Suite 5 Copyright © 2011 - 47 - CPM NiceLabel Pro/Suite 5 Tools On the left and right ride of the workspace are tools with which you can edit the objects on the label. Editing Tools Alignment Tools Selection curser Colour Text Align Left Textbox Align Vertical centre RTF text Align Right Barcode Align Top Image Align Horizontal centre Rectangle Align Bottom Line Horizontal Space Equally Ellipse Vertical Space Equally Inverse Field Rotate 90° To front To back One forward One backward Group Ungroup Rotate label CPM NiceLabel Pro & Suite 5 Copyright © 2011 - 48 - CPM NiceLabel Pro/Suite 5 Create text Fixed text Click the in the left toolbar. Click on the label where you want to place text. Type in your text. When you’re done, click outside the typing area to finish typing (or press CTRL + ENTER). Changing the font height and other text properties is the same as in, for example, Microsoft Word as you can see in the screenshot below: Cutting text 1. Place text. 2. To both print and cut text:Copy and paste the text, select the copy and apply the colour Magenta. 3. Select both texts and click horizontal and vertical align. 4. Go to Print and click Print again to open the CPM Manager. The CPM Manager will show that the text will be printed & cut. 5. To only cut the text: don’t make a copy and apply the Magenta colour. CPM NiceLabel Pro & Suite 5 Copyright © 2011 - 49 - CPM NiceLabel Pro/Suite 5 Text Properties. Double click on the text, or right click and select properties, the following screens become available: Value: Here you can re-enter and edit the text. Mask: This allows you to create ‘masks’ that are placed in every text field. For example, with the illustrated mask – entering 0356012345 will appear in the text box as +31 (0)35 60 123 45 Style Font: You can change font, using select. Inverse: Inverts text out of a solid background Mirror: Mirrors the text. Stacked Text: Places the text vertically. RTL: Allows each text character to edited Spacing: Increase gap between characters and lines of text. Color: Change text colour. NOTE: If you click set default, this will set the size and appearance of the text each time you create new text CPM NiceLabel Pro & Suite 5 Copyright © 2011 - 50 - CPM NiceLabel Pro/Suite 5 Appearance: Position and size: Allows accurate placing and sizing of text. Rotation: You can select any angle to rotate the text. Object Anchoring Point: Sets the point from which the text will be sized i.e.: from the corner or outwards equally from the centre. Fixed paragraph text Paragraph text allows you to enter a large amount of text, this can be formatted for alignment and size with a paragraph text box. Unlike normal text entry, where you cannot format a large amount of text at one time, changes will affect the complete ‘paragraph’ of text. The main tab differences from fixed text are: Detailed: Best Fit: Options for how text will be placed into the paragraph text box. This is useful with text fields linked to data bases with varied amounts of information in each cell. Appearance: Rotation is fixed and not free CPM NiceLabel Pro & Suite 5 Copyright © 2011 - 51 - CPM NiceLabel Pro/Suite 5 Rich Text Format Rich Text Format With a RTF text, you can select other font and text sizes within a word or sentence. mp le Like this: Exa RTF text cannot be linked to a variable, this is always fixed text. Working with text works in the same way as working with paragraph text. Click on and drag a box using the left mouse click.. When you release the mouse button, a fill in screen appears. Enter your text and select and change the details you want. Enter your settings and click OK. Barcode Fixed Barcode Click and click on the label where you want the barcode to be placed. The following display appears: CPM NiceLabel Pro & Suite 5 Copyright © 2011 - 52 - CPM NiceLabel Pro/Suite 5 Enter the data (see above example). You can change the barcode definition in the tab Barcode and under the button Define. Graphics Place graphics Click opens: on the label where want the graphic to appear. The following screen To see all the available graphics click on and select your category. Some categories have a +sign. This means that this category has several sub categories. You open these by clicking on the +sign. Click on the graphic you want and the graphic appears in the Clip Preview. Click OK and you will see the graphic on your label. CPM NiceLabel Pro & Suite 5 Copyright © 2011 - 53 - CPM NiceLabel Pro/Suite 5 You can change the size of the graphic by clicking and dragging the mouse arrow on one of the anchor points .until the mouse arrow changes to: the proportions, you hold down the Shift Key at the same time. . To keep Rectangle Working with rectangles Click on and click on the label. A rectangle will appear. The small printer icon in the right corner shows that this is a print function (this icon will not be printed). If this small icon does not appear, this means that the rectangle will be send to the printer as a graphic. This can cause a slower print speed. By dragging the anchor points with the mouse, you can change the size. By double clicking in the right corner, a dialog box appears where you can select dimensions, rounded corners and line thickness. CPM NiceLabel Pro & Suite 5 Copyright © 2011 - 54 - CPM NiceLabel Pro/Suite 5 Drawing a line. Click on and click on the label. A line appears. By dragging the anchor points with the mouse, you can change line dimensions. By double clicking on the line, a dialog box appears where you can set several options for thickness, colour and fill. Circle and Ellipse Create a circle Click on and click on the label. A circle appears. By dragging the anchor points with the mouse, you can change circle dimensions. By double clicking on the circle, a dialog box appears where you can set several options. Inverse Complete or part Inverse Click on and click on the label. A black rectangle will appear. Where this box is placed or dragged over text or graphics, an inverse image is created. CPM NiceLabel Pro & Suite 5 Copyright © 2011 - 55 - CPM NiceLabel Pro/Suite 5 By dragging the anchor points with the mouse, you can change the Inverse field dimensions. Rotation Rotating an object Select the object you would like to rotate and click . The text or graphic rotates 90°. Every time you click on the element rotates 90º. To rotate to a fixed number of degrees, use the rotate function found under text properties. Zoom in/Zoom out Zoom. Click on , drag a box, with your left mouse button, around the object you would like to increase. Release the mouse button and the selected object will increase in size on the screen. Zoom out. Click on and the screen zooms out. Aligning objects After placing several objects (text or graphic) on the screen Click on one of the object after this selection, you can select other objects by holding the SHIFT button and using the left mouse click. Do this with every object you wish to align. See the example below: CPM NiceLabel Pro & Suite 5 Copyright © 2011 - 56 - CPM NiceLabel Pro/Suite 5 Horizontal alignment Align all selected objects to the Top. Align Bottom. Align Horizontal Centres. CPM NiceLabel Pro & Suite 5 Copyright © 2011 - 57 - CPM NiceLabel Pro/Suite 5 Vertical alignment Align Left. Align Right. Align vertical centred. CPM NiceLabel Pro & Suite 5 Copyright © 2011 - 58 - CPM NiceLabel Pro/Suite 5 You can also “Align” objects by using your right mouse button after all the objects are selected. If you check the box ‘align to label’ borders of the created label. – the text will position itself within the Variables Using the drop down arrows next to Text, Paragraph, Barcode and Graphics you can insert variables. A variable is an element which generates data and which can be used with all object options mentioned above. There is also the option to insert fields connected to a database in the variable option. A variable can be used by several objects at the same time. For example, you can display ‘variable’ information as a barcode and also as a text field.. Variable options Fixed Text no variable, normal text function. CPM NiceLabel Pro & Suite 5 Copyright © 2011 - 59 - CPM NiceLabel Pro/Suite 5 New keyboard input With this option you create a variable that generates an input field before printing. For example: a field with a serial number of 8 digits Click on the arrow next to and choose “New keyboard input”. Enter the Prompt for the variable field. For example: “Enter Serial No”. The serial number is numeric so you will have to check Numeric - only numerals can be entered. With “All characters” you can enter text, numerals and punctuation marks. Alpha-numeric you can enter text and numerals. The maximum number of characters ensures data entered isn’t too long for the application. For example: if the serial number used is 8 characters maximum: click next: The next screen gives you the option to add a Prefix and a Suffix - for example you may require the data to always have AA before and ZZ after the numbers. To achieve this see the following screen shot: CPM NiceLabel Pro & Suite 5 Copyright © 2011 - 60 - CPM NiceLabel Pro/Suite 5 Click Finish and click on the label. The serial number ‘text field’ now is placed on the label. The field content can be displayed in 4 ways. Max. Number of characters shown as ‘?” on screen Shown with the variable name displayed. Shown with a character example. Shown as above with a variable name. These views can be selected with the “View” button in the toolbar. As with the fixed text, you can also change the font type and font size. After clicking on print appears: , this dialogue box Enter the first number in the sequence and the numbers of labels to be printed and click PRINT. Your field information on screen would appear like this: CPM NiceLabel Pro & Suite 5 Copyright © 2011 - 61 - CPM NiceLabel Pro/Suite 5 New Counter Variable This variable allows you to enter a field with an automatic counter. This option also allows you to set a visual prompt and to enter increasing and decreasing steps. Data is entered following a similar set of dialogue boxes as found using the New Keyboard Input Variable. New Date and Time field Choose between New Date or New Time field. Both options have a second dialogue box after clicking NEXT allowing the set up of suffix and prefix. Date and time offset allow the label to retain information for a fixed period, so that a specific date or time can be printed on all labels for a period of, say, 3 weeks. Use Existing Variable CPM NiceLabel Pro & Suite 5 Copyright © 2011 - 62 - CPM NiceLabel Pro/Suite 5 All variables can be applied to: Text, Paragraph Text, RTF Barcode, Graphic Graphics can only be connected to a variable where the graphic objects name is referenced. This only works with an input field or in a database field. Connecting with a database or spreadsheet file To make a connection with a spreadsheet file, the Excel file must be closed. This does not apply to database files. Make sure that in NiceLabel a new label or an existing label is open. To access the database tool click on Click on the New Data Base Wizard Icon drop down menu DATA. or select Database Access from the Click browse to find the location of your data base file. The default search location is: My Documents\My labels\Database\........ After clicking on OPEN, the database file will be connected and, if available, you can then select the Sheet Number to use in the database. Click NEXT CPM NiceLabel Pro & Suite 5 Copyright © 2011 - 63 - CPM NiceLabel Pro/Suite 5 In the next dialogue, you can choose the header field/data from the database file you want to include in your label. Here you specify how the information from the database is printed. The best option is to choose as shown in the above screen shot. One option available is to take the quantity to be printed from a field in the chosen database. Click NEXT. CPM NiceLabel Pro & Suite 5 Copyright © 2011 - 64 - CPM NiceLabel Pro/Suite 5 Here you can choose to have a text object for each chosen field. This effectively means that each field created will then be placed directly into the label design.. The alternative is to create a field in the label first and to then associate it to a field in the data sheet afterwards. How the fields will appear on the label and what information is displayed – normal, data, variable name and object name can be chosen from the drop down menu under VIEW: All data base variable fields created can be connected to: Text, Paragraph Text, RTF Barcode, Graphic CPM NiceLabel Pro & Suite 5 Copyright © 2011 - 65 - CPM NiceLabel Pro/Suite 5 Printing – select records The print dialogue opens: Here you click on Select Records. The fields you have selected from your data base are displayed. You can select all or those you require at this stage. After selection and clicking OK, the Number of records selected is indicated: You can choose to print ‘All’ of your Selected records/fields or to print Variable quantities By selecting preview, prior to print, you can review the layout of the label, with all the chosen fields displaying data and move forward label by label using the Next button to check the label formats before selecting print: CPM NiceLabel Pro & Suite 5 Copyright © 2011 - 66 - CPM NiceLabel Pro/Suite 5 NiceForm Only available in NiceLabel Suite NiceLabel Form is a program module that creates a simple template of ‘form’ from any label created in NiceLabel. The advantage of the ‘form’ is it displays all fields as “text entry only”, keeping the appearance and label design intact and unable to be changed or altered. This module effectively gives the user Visual Basic Programming, in an easy to use, menu driven system. Start NiceForm in NiceLabel under the Tools menu: Use NiceForm if the label is saved in a folder. Use Design Form if the label is open in Nice Label Using Design Form, the Form software will open in a new window and the New Form Wizard will open, click on NEXT. Select standard windows desktop application. CPM NiceLabel Pro & Suite 5 Copyright © 2011 - 67 - CPM NiceLabel Pro/Suite 5 As the label is already open in NiceLabel, it is automatically selected. In NiceForm you would browse to the required label file Select both check boxes shown. Select Default Template Select Field Arrangement Select caption arrangement CPM NiceLabel Pro & Suite 5 Copyright © 2011 - 68 - CPM NiceLabel Pro/Suite 5 Here all the selected parameters chosen for the Form are shown, if they are as required – click FINISH Using the for After selecting Finish, the elements of the label selected will appear on screen in an unordered format. Here we chose to use the existing variable and to include a preview. The quantity field is a default in the form template. Using drag and drop with the mouse and the editing tools, the label layout can be constructed into the layout you require and then saved as a form (**.xff) in your chosen location. CPM NiceLabel Pro & Suite 5 Copyright © 2011 - 69 - CPM NiceLabel Pro/Suite 5 When the file is double clicked, the user will only see the form shown here and be able to only enter data into the two available fields. The only other options available are Print and Quit. Note: Forms open as independent applications in themselves. They do not have access to any menu or editing tools. CPM NiceLabel Pro & Suite 5 Copyright © 2011 - 70 - CPM NiceLabel Pro/Suite 5 Contact NiceLabel is professional label software, it includes an enormous number of capabilities. In this manual we have focused on the most relevant and important functions, especially those required for sign and label creation in combination with the CPM. You can get further information on NiceLabel from: Your CPM-100 supplier directly. Tutorials on NiceLabel from www.nicelabel.com/learning-centre/tutorials CPM NiceLabel Pro & Suite 5 Copyright © 2011 - 71 - CPM-100E / CPM-100HE