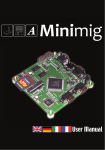
Download Sam460cr User Guide
Transcript
Sam460cr
User Guide
version 1.0 – 22 October 2014
ACube Systems S.r.l.
Via Tabacco, 58 - 36061 Bassano del Grappa, (Vi) – Italy
Tel. +39 0424 393119 fax +39 0424 393119
www.acube-systems.biz - www.sam4x0.com
[email protected]
VAT ID 03367150244 –REA VI-319762
Introduction
Your Sam460cr board is ready to customsize as your wish. Select the desired graphic card,
sound card and SATA card using the expansion slots of the board.
It can be housed into a flex-ATX, micro-ATX or full ATX computer case.
The use of a good quality ATX power supply is strongly advised for a correct operation of the
board.
Sam460cr Hardware Specifications
flex-ATX form factor (21.6 x 17 cm)
8 layers PCB
AMCC 460ex SoC – upto 1.10 Ghz
max 2 GB DDR2 Ram – 200-pin SODIMM
PCI-express 4x lanes slot (16x mechanical connector)
PCI-express 1x lane slot
PCI slot, 32 bits, 33/66 Mhz, 3.3V
6x USB2 EHCI/OHCI ports + 1 USB1.1 port
1x 10/100/1000 Ethernet port (second 10/100/1000 Ethernet port is optional)
Lattice XP2 FPGA with 80 I/O pins expansion connector (connector is optional)
UMTS/GSM module (optional requires add-on card)
512 MB NAND Flash (optional)
integrated SD card reader
RTC clock
Serial port, 8-wires
I2C and SPI/I2C buses
U-Boot 2010.06
Connectors
Case panel connector (near the ATX Power connector) - J29
1-2 HD led
3-4 Power led
5-6 Power Switch
7-8 Reset Switch
Note: on computer cases with a single switch off/reset button, connect the button to pins 5-6
on J29. To reset the board, press shortly the button. To switch it off, keep pressed the button
for 2-3 seconds.
ATX Power connector - J36
RAM (DDR2 - 200-pin SODIMM) max 2 GB – J4 (we suggest the use of a 667/800 Mhz module)
USB
J11 - External USB ports (EHCI/OHCI)
J12, J13 - Internal USB ports (EHCI/OHCI)
J28 - Internal USB Port (OHCI)
J12a (port 3) 1 – VCC
3 – D5 – D+
7 – GND
J12b (port 4) 2 – VCC
4 – D6 – D+
8 – GND
J13a (port 5) 1 – VCC
3 – D5 – D+
7 – GND
J13b (port 6) 2 – VCC
4 – D6 – D+
8 – GND
J28 (port 7) 1 – VCC
2 – D3 – D+
4 – GND
Ethernet
J5, J8 - Dual 10/100/1000 Ethernet ports
Miscellaneous
J6 - Serial port (8-wires)
J9 – I2C bus port
1 – SCLK
2 – 3.3V
3 – SDATA
4 – GND
5 – NC
J10 - SPI/I2C bus port
1 – I2C SCLK / SPI SCL
2 – 3.3V
3 – I2C SDATA / SPI SDA
4 – GND
5 – SPI SDO
J19 - Lattice XP2 FPGA JTAG
J31 - SD card: (solder side)
J37 - service (factory setting: open)
J38 - service (factory setting: closed)
J39 - service (factory setting: closed)
Boot
The current U-Boot version supports booting from the following devices:
- PATA hard disk and/or DVD connected to a Silicon Image 0680 controller on PCI slot (*)
- SATA hard disk and/or DVD connected to a Silicon Image 3512 controller on PCI slot (*)
- SATA hard disk and/or DVD connected to a Silicon Image 3114 controller on PCI slot (*)
- USB mass storage
- internal SD card reader J31
- Network
(*) check page 8 on how to recognize a suitable PCI card for your Sam460cr
Video output
The current U-Boot version supports video output from:
- Radeon card on PCI slot
- Radeon card on PCI-Express slot
To suppress most of the boot messages, select “Silent” in the “Console” U-Boot menu.
Notes
2 - the Sam460cr board is built to work standalone in a fanless environment but particular care
must be taken when housing the board in a closed metalic cabinet with other electronic
devices (such as hard drives, CD/DVD, DC-DC converter etc..)
In these cases, ensure to have free circulation of fresh air inside the cabinet, via holes or a
small fan.
3 - when using a PCI-Express graphic card, we suggest to use a Radeon HD2400 or newer
models. Older models like X600, X800 are not fully compatible with the Sam460cr and may
not work. Some X1550 cards are reported to work OK.
4 – after switching OFF the board, it's strongly advised to wait at least 15 seconds before
switching it ON again, otherwise the onboard devices may not work correctly. The current
firmware doesn't allow to switch on the board again after 3 seconds.
5 – We suggest that you use RAM modules which are CL 6 (Cas Latency).
Frequently Asked Questions
How can the operating system be loaded?
It is possible to load the operating system from a PATA/SATA harddisk, a CDROM connected
on PATA/SATA, an USB key, a SD card or from the network.
How to enable DMA for SATA devices?
Check the documentation which comes with the operating system on how to enable DMA for
SATA devices. By default, all devices are set to PIO mode (slow).


