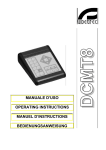
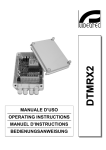
1
& %=
MANUALE D’USO
__________________________
OPERATING INSTRUCTIONS
__________________________
MANUEL D’INSTRUCTIONS
__________________________
BEDIENUNGSANWEISUNG
& %=
MANUALE
D’USO
INDICE
INDICE ....................................................................................................................................................................................1
INTRODUZIONE .....................................................................................................................................................................2
Contenuto dell’imballaggio ........................................................................................................................................................................ 2
Cosa contiene questo Manuale d’Uso ....................................................................................................................................................... 2
A chi è rivolto il Manuale d’Uso.................................................................................................................................................................. 2
Cosa leggere ............................................................................................................................................................................................. 2
Convenzioni tipografiche ........................................................................................................................................................................... 2
NORME DI SICUREZZA.........................................................................................................................................................3
DATI DI MARCATURA ...........................................................................................................................................................3
DESCRIZIONE DELLA TASTIERA CBZ220/CBZ24 .............................................................................................................4
Apparecchi collegabili con la tastiera CBZ220/CBZ24 .............................................................................................................................. 4
INSTALLAZIONE ....................................................................................................................................................................5
Apertura dell’imballaggio ........................................................................................................................................................................... 5
Controllo della marcatura .......................................................................................................................................................................... 5
Accensione e spegnimento ....................................................................................................................................................................... 5
CONNETTORI E COLLEGAMENTI .......................................................................................................................................6
Esempio di installazione ............................................................................................................................................................................ 6
Cavi............................................................................................................................................................................................................ 6
Connettori .................................................................................................................................................................................................. 7
Collegamento della tastiera CBZ220/CBZ24 alle periferiche .................................................................................................................... 7
Collegamento della tastiera CBZ220/CBZ24 al brandeggio .................................................................................................................. 7
Collegamento della tastiera CBZ220/CBZ24 all’ottica ........................................................................................................................... 8
Collegamento dei cavi di alimentazione del CBZ24............................................................................................................................... 8
CONFIGURAZIONE DELLA TASTIERA CBZ220/CBZ24 .....................................................................................................8
USO DELLA TASTIERA.........................................................................................................................................................9
Tasti di controllo del brandeggio................................................................................................................................................................ 9
Tasti di controllo delle ottiche .................................................................................................................................................................... 9
MANUTENZIONE..................................................................................................................................................................10
RISOLUZIONE DEI PROBLEMI DI INSTALLAZIONE ........................................................................................................10
CARATTERISTICHE TECNICHE .........................................................................................................................................10
Il produttore declina ogni responsabilità per eventuali danni derivanti da un uso improprio delle apparecchiature
menzionate in questo manuale, si riserva inoltre il diritto di modificarne il contenuto senza preavviso. Ogni cura è stata
posta nella raccolta e nella verifica della documentazione contenuta in questo manuale: tuttavia il produttore non può
assumersi alcuna responsabilità derivante dall’utilizzo della stessa. Lo stesso dicasi per ogni persona o società
coinvolta nella creazione e nella produzione di questo manuale.
Pag. 1
CBZ220/CBZ24 3201
Introduzione
Contenuto dell’imballaggio
• 1 tastiera CBZ220/CBZ24
• 1 manuale d’uso
Alla consegna del prodotto verificare che l’imballaggio sia integro e non abbia segni evidenti di cadute o abrasioni. In
caso di danno all’imballaggio contattare immediatamente il fornitore.
Controllare che il contenuto sia rispondente alla lista del materiale sopra indicata.
Cosa contiene questo Manuale d’Uso
In questo manuale é descritta la tastiera di comando CBZ220/CBZ24, con le particolari procedure di installazione,
configurazione e utilizzo.
E’ necessario leggere attentamente questo manuale, in particolar modo il capitolo riguardante le norme di sicurezza,
prima di installare ed utilizzare la tastiera.
A chi è rivolto il Manuale d’Uso
Le diverse parti di questo manuale sono intese a soddisfare due diverse necessità operative: quella del tecnico
installatore e quella dell’operatore.
Tecnico installatore: è un tecnico adeguatamente competente che esegue l’installazione dell’impianto di sicurezza e
ne verifica la funzionalità.
Dispone delle conoscenze tecniche necessarie a installare, collegare e configurare l’impianto. Solo il tecnico
installatore può effettuare quelle operazioni descritte in questo manuale come riservate al “Personale tecnico”.
Operatore: è l’utilizzatore finale che opera sulla tastiera di controllo per stabilire le modalità di operazione dell’intero
sistema.
Cosa leggere
Le procedure di installazione, prevalentemente rivolte al tecnico installatore, sono descritte a partire da pagina 5.
L’operatore deve leggere a pagina 9, per la descrizione dell’uso della tastiera.
Convenzioni tipografiche
Nel presente manuale si fa uso di diversi simboli grafici, il cui significato è riassunto di seguito:
Rischio di scosse elettriche; togliere l’alimentazione prima di procedere con le operazioni, se non è
espressamente indicato il contrario.
Si prega di leggere attentamente la procedura o le informazioni indicate, ed eventualmente eseguire quanto
prescritto secondo le modalità previste. La non corretta esecuzione della procedura può portare a un errato
funzionamento del sistema o ad un danneggiamento dello stesso.
Si consiglia di leggere per comprendere il funzionamento del sistema.
Pag. 2
CBZ220/CBZ24 3201
Norme di sicurezza
La tastiera CBZ220/CBZ24 è conforme alle normative vigenti all’atto della pubblicazione del presente manuale,
per quanto concerne la sicurezza elettrica, la compatibilità elettromagnetica ed i requisiti generali.
Si desidera tuttavia garantire gli utilizzatori (tecnico installatore e operatore) specificando alcune avvertenze per
operare nella massima sicurezza:
• Collegare ad una linea di alimentazione corrispondente a quella indicata sulle etichette di marcatura (vedere il
successivo capitolo Dati di marcatura)
• L’installazione dell’apparecchio (e dell’intero impianto di cui esso fa parte) deve essere effettuata da personale
tecnico adeguatamente qualificato
• Per l’assistenza tecnica rivolgersi esclusivamente al personale tecnico autorizzato.
• L’apparecchio non deve mai essere aperto.
• La manomissione dell’apparecchio fa decadere i termini di garanzia.
• La presa di alimentazione deve essere connessa a terra secondo le norme vigenti
• Non sfilare la spina dalla presa tirando il cavo
• Prima di spostare o effettuare interventi tecnici sull’apparecchio, disinserire la spina di alimentazione: l’apparecchio
si considera disattivato soltanto quando la spina di alimentazione è disinserita e i cavi di collegamento con altri
dispositivi sono stati rimossi
• Non utilizzare cavi di prolunga con segni di usura o invecchiamento, in quanto rappresentano un grave pericolo per
l’incolumità degli utilizzatori
• Evitare di bagnare con qualsiasi liquido o di toccare con le dita bagnate l’apparecchio in funzione
• Non lasciare l’apparecchio esposto ad agenti atmosferici
• Non utilizzare l’apparecchio in presenza di sostanze infiammabili
• Non permettere l’uso dell’apparecchio a bambini o incapaci
• Accertarsi che l’apparecchio poggi sempre su una base sufficientemente larga e solida
Conservare con cura il presente manuale per ogni futura consultazione
Dati di marcatura
Sulla parte inferiore della tastiera CBZ220/CBZ24 sono riportate due etichette conformi alla marcatura CE.
La prima etichetta contiene:
• Codice di identificazione del modello (Codice a barre EXT3/9 )
• Tensione di alimentazione (Volt)
• Frequenza (Hertz)
• Consumo massimo (Watt)
La seconda etichetta indica il numero di serie del modello (Codice a barre EXT3/9)
All’atto dell’installazione controllare se le caratteristiche di alimentazione della tastiera corrispondono a quelle richieste.
L’uso di apparecchi non idonei può portare a gravi pericoli per la sicurezza del personale e dell’impianto.
Pag. 3
CBZ220/CBZ24 3201
Descrizione della tastiera CBZ220/CBZ24
La tastiera CBZ220/CBZ24 è un prodotto professionale per applicazioni nell’ambito della sicurezza e della
sorveglianza. In un sistema di sicurezza la tastiera consente il controllo di un brandeggio con alimentazione a
230/24V~ e di controllare le funzioni ZOOM, FOCUS, IRIS dell’ottica. Viene fornita in due versioni: per il controllo di
brandeggi a 230 V~ e per il controllo di brandeggi a 24 V~ (riferirsi ai dati di marcatura).
ATTENZIONE: prima di eseguire i collegamenti assicurarsi che la tensione in uscita dalla tastiera
CBZ220/CBZ24 corrisponda alla tensione del brandeggio (Fare riferimento ai dati di marcatura della tastiera e del
brandeggio).
Caratteristiche:
• 5 Funzioni di controllo brandeggio: ALTO, BASSO, SINISTRA, DESTRA, AUTO
• 6 Funzioni di controllo ottiche: ZOOM IN, ZOOM OUT, IRIS OPEN, IRIS CLOSE, FOCUS NEAR, FOCUS FAR
• Possibilità di comandare ottiche con alimentazione a inversione di polarità oppure a filo
• Controllo di Brandeggi con alimentazione a 230 V~ ( riferirsi ai dati di marcatura )
• Controllo di Brandeggi con alimentazione a 24 V~ ( riferirsi ai dati di marcatura )
• Facilità d’uso
Apparecchi collegabili con la tastiera CBZ220/CBZ24
Solo gli apparecchi successivamente elencati possono essere collegati alla tastiera CBZ220/CBZ24 senza richiedere
nessun tipo di modifiche:
• Brandeggio PTH910-PTH911: Outdoor Pan & Tilt; brandeggio a 230 / 24 V~ per installazioni esterne con funzioni
PAN (movimento in orizzontale), TILT (movimento in verticale) e AUTOPAN(movimento automatico orizzontale)
• Brandeggio IPT721-IPT720: Indoor Pan & Tilt; brandeggio a 230 / 24 V~ per installazioni interne con funzioni PAN
(movimento in orizzontale), TILT (movimento in verticale) e AUTOPAN(movimento automatico orizzontale).
• Brandeggio PTH310-PTH311: Outdoor/Indoor Pan & Tilt; brandeggio a 230 / 24 V~ per installazioni esterne ed
interne con funzioni PAN (movimento in orizzontale), TILT (movimento in verticale) e AUTOPAN (movimento
automatico orizzontale).
Pag. 4
CBZ220/CBZ24 3201
Installazione
Le seguenti procedure sono da effettuare in assenza di alimentazione, se non diversamente indicato.
La fase di installazione deve essere effettuata solo da personale tecnico qualificato.
Apertura dell’imballaggio
Se l’imballaggio non presenta evidenti difetti dovuti a cadute o abrasioni anomale, procedere al controllo del materiale
in esso contenuto, secondo la lista fornita al capitolo Introduzione, Contenuto dell’imballaggio (pag.2).
Sarà cura del tecnico installatore smaltire il materiale d’imballaggio secondo le modalità di raccolta differenziata o
comunque secondo le norme vigenti nel Paese di utilizzo.
Controllo della marcatura
Prima di procedere all’installazione controllare se il materiale fornito corrisponde alle specifiche richieste,
esaminando le etichette di marcatura, secondo quanto descritto al capitolo Dati di marcatura (pag. 3). Non effettuare
per nessun motivo alterazioni o collegamenti non previsti in questo manuale: l’uso di apparecchi non idonei può portare
a gravi pericoli per la sicurezza del personale e dell’impianto.
Accensione e spegnimento
Prima di fornire alimentazione:
• Controllare che la tensione di alimentazione del brandeggio corrisponda con la tensione specificata nell’etichetta di
marcatura della tastiera
• controllare se il materiale fornito corrisponde alle specifiche richieste, esaminando le etichette di marcatura,
secondo quanto descritto al capitolo Dati di marcatura (pag.3)
• controllare che la tastiera e gli altri componenti dell’impianto siano chiusi e sia quindi impossibile il contatto diretto
con parti in tensione
• la tastiera e gli altri apparecchi dell’impianto devono poggiare su una base ampia e solida
• i cavi di alimentazione non devono essere d’intralcio alle normali operazioni del tecnico installatore
• controllare che le fonti di alimentazione ed i cavi di prolunga eventualmente utilizzati siano in grado di sopportare il
consumo del sistema.
ACCENSIONE: la tastiera è sprovvista di interruttore: collegare i cavi di alimentazione.
SPEGNIMENTO: scollegare i cavi dall’alimentazione.
Pag. 5
CBZ220/CBZ24 3201
Connettori e collegamenti
La procedura di installazione deve essere effettuata soltanto da personale tecnico qualificato: il collegamento
non corretto delle varie periferiche può comportare l’isolamento della tastiera dal resto del sistema.
Esempio di installazione
Impianto controllato da un operatore con un monitor: l’operatore controlla un brandeggio e le funzioni di FUOCO
(FOCUS), ZOOM, DIAFRAMMA (IRIS) della telecamera:
MATERIALE IMPIEGATO
Tastiera di controllo:
• 1 tastiera di controllo
Cavo 7 fili
per il controllo
del brandeggio
CBZ220/CBZ24
Gestione del video:
• 1 monitor
Gestione della telemetria:
• 1 brandeggio
• 1 ottica motorizzata
CBZ220/CBZ24
Cavi
Negli schemi d’esempio sono stati utilizzati di versi tipi di tratto per indicare cavi di diversa funzione:
cavo video:
coassiale RG 59 o cavo equivalente.
cavo multipolare:
ogni funzione di controllo del brandeggio viene attivata / disattivata da un relè interno al ricevitore.
Stabilire il numero finale di cavi, seguendo le indicazioni seguenti:
7 fili per la movimentazione del brandeggio: destra, sinistra, alto, basso, autopan, comune, terra
6 fili di controllo per ottiche ad inversione di polarità (zoom, focus, iris)
4 fili di controllo per ottiche a filo comune (zoom, focus, iris)
2 fili per l’ ausiliare
Nota: è consigliato l’utilizzo di differenti cavi multipolari per le funzioni in bassa tensione ed in alta tensione.
Sezione minima consigliata:
0,56 mm.² (AWG 20) per fili in alta tensione (brandeggio)
0,34 mm.² (AWG 22) per fili in bassa tensione (ottica, ausiliare)
Pag. 6
CBZ220/CBZ24 3201
Connettori
Sul retro della meccanica la tastiera CBZ220/CBZ24 presenta 3 cavi per il collegamento dell’alimentazione, del
brandeggio e dell’ottica:
Cavo
Cavo76fili
filiper
perilil
collegamento
collegamentodel
del
brandeggio
brandeggio
Cavo da 3 poli per alimentazione
Cavo 3 fili per il
(versione 24V~)
Cavo 6 fili per il collegamento dell’ottica
collegamento
dell’alimentazione
Cavo con Spina SHUCO
(versione 230V~)
Collegamento della tastiera CBZ220/CBZ24 alle periferiche
La procedura di collegamento della tastiera CBZ220/CBZ24 alle periferiche è composta dalle seguenti fasi :
• Collegamento della tastiera al brandeggio
• Collegamento della tastiera all’ottica
• Collegamento dei cavi di alimentazione
Collegamento della tastiera CBZ220/CBZ24 al brandeggio
ATTENZIONE: prima di eseguire i collegamenti assicurarsi che la tensione in uscita dalla tastiera
CBZ220/CBZ24 corrisponda alla tensione del brandeggio (Fare riferimento ai dati di marcatura della tastiera e del
brandeggio).
Dove Agire: cavo in uscita per il collegamento del brandeggio
Impostazioni: collegare i fili al brandeggio secondo la tabella seguente :
Fili in uscita da CBZ220/CBZ24
Collegamento al
brandeggio
BIANCO
MARRONE
GIALLO
GRIGIO
ROSA
VERDE
GIALLO/VERDE
Comune
Basso
Alto
Destra
Sinistra
Automatico
Pag. 7
CBZ220/CBZ24 3201
Collegamento della tastiera CBZ220/CBZ24 all’ottica
Collegamenti di ottiche a inversione di polarità :
Dove Agire: cavo in uscita per il collegamento dell’ottica
Impostazioni: collegare i fili all’ottica secondo la tabella seguente :
Fili in uscita dal CBZ220/CBZ24
Collegamento all’ottica
NERO
VIOLA
ROSSO
BLU
ROSSO/BLU
GRIGIO/ROSA
Zoom
Zoom
Fuoco (FOCUS)
Fuoco (FOCUS)
Diaframma (IRIS)
Diaframma (IRIS)
Collegamenti di ottiche a filo comune :
Dove Agire: cavo in uscita per il collegamento dell’ottica
Impostazioni: collegare i fili all’ottica secondo la tabella seguente :
Fili in uscita dal CBZ220/CBZ24
Collegamento
all’ottica
NERO
ROSSO
ROSSO/BLU
VIOLA
BLU
GRIGIO/ROSA
Zoom
Fuoco (FOCUS)
Diaframma (IRIS)
Comune
Comune
Comune
Collegamento dei cavi di alimentazione del CBZ24
ATTENZIONE: prima di eseguire i collegamenti assicurarsi che la linea di alimentazione corrisponda a quella
indicata nelle etichette di marcatura della tastiera.
Dove Agire: cavo in uscita per il collegamento dell’alimentazione
Impostazioni: collegare i tre fili secondo la tabella seguente:
Fili in uscita dal CBZ24
Collegamento
all’alimentazione
BLU
MARRONE
GIALLO/VERDE
24 V~
24 V~
Nel caso di CBZ220 in versione 230V~ è presente una spina SHUCO.
Configurazione della tastiera CBZ220/CBZ24
La tastiera CBZ220/CBZ24 è predisposta per una tensione di uscita sui contatti dell’ottica di 12 VÙ. E’ possibile
portare questa tensione a 6 VÙ:
Dove agire : Jumper localizzato nella parte superiore del circuito all’interno della tastiera
Impostazioni :
1.
2.
3.
4.
Togliere alimentazione all’unità
Togliere le tre viti di fissaggio del fianco destro
Posizionare il jumper secondo lo schema a fianco
Richiudere il fianco serrando le viti
Pag. 8
èý7ÙýCA
íìý7ÙýCA
CBZ220/CBZ24 3201
Uso della Tastiera
Led di
accensione
Led di
segnalazione del
movimento
automatico del
brandeggio
Tasti per il
controllo del
brandeggio
Tasti per il controllo
delle ottiche
Tasti di controllo del brandeggio
Tasti di PAN & TILT
Destra (PAN)
Tasto per l’AUTOPAN
viceversa (AUTOPAN)
: permettono il movimento del brandeggio nelle posizioni Alto, Basso (TILT) e Sinistra,
ã : pone il brandeggio in movimento continuo tra i fine corsa in direzione sinistra-destra e
Tasti di controllo delle ottiche
Tasti Focus near, Focus far: attivano le azioni di Focus corrispondenti
Tasti Zoom in, Zoom out: attivano le azioni di Zoom corrispondenti
Tasti Iris open, Iris close: attivano le azioni di Iris corrispondenti
Pag. 9
CBZ220/CBZ24 3201
Manutenzione
La tastiera CBZ220/CBZ24 non necessita di particolare manutenzione.
Si raccomanda di utilizzarle poggiate su una base solida, con i cavi di alimentazione e di collegamento in posizione tale
da non essere causa di intralcio all’operatore.
La pulizia deve sempre essere effettuata ad apparecchio spento. Pulire la tastiera periodicamente con un
panno di cotone asciutto, evitando l’uso di detergenti o di panni bagnati.
Risoluzione dei problemi di installazione
La tastiera CBZ220/CBZ24 é caratterizzata da una notevole facilità d’uso, ma ciononostante possono insorgere dei
problemi sia in fase di installazione, di configurazione o durante l’uso.
Problema
All’accensione il led
POWER non si accende
I tasti funzionano ma il
brandeggio non risponde
I tasti funzionano ma
l’ottica non risponde
Possibile causa
Non è fornita alimentazione
Soluzione
Controllare il cavo di alimentazione
Si sta fornendo un’alimentazione sbagliata
Il fusibile è bruciato
Collegamenti errati
Controllate le caratteristiche di marcatura
Sosituire il fusibile
Controllare i collegamenti tra tastiera e
brandeggio
La tensione fornita da CBZ220/CBZ24 non Controllare i dati di marcatura della tastiera
corrisponde a quella richiesta dal brandeggio
e del brandeggio
Collegamenti errati
Controllare i collegamenti tra tastiera e
ottica
Caratteristiche tecniche
Tensione di alimentazione:
Potenza:
Potenza commutabile:
Fusibili di protezione:
Temperatura di funzionamento:
Tensione di controllo brandeggio:
Costruzione:
Finitura:
Dimensioni:
Peso:
24 V~ / 230 V~, 50-60 Hz ( riferirsi ai dati di marcatura )
4W
45 W
Versione 24V~ F1 500mA F 250V; F2 1.6A T 250V
Versione 230V~ F1 50mA F 250V; F2 630mA T 250V
da 0°C a 40°C
24 V~ / 230 V~, 50-60 Hz ( riferirsi ai dati di marcatura )
estruso di alluminio e parti in gomma
verniciatura a polveri epossidiche
115 x 190 x 50 mm
900 g
Pag. 10
CBZ220/CBZ24 3201
& %=
OPERATING
INSTRUCTIONS
INDEX
INDEX......................................................................................................................................................................................1
INTRODUCTION.....................................................................................................................................................................2
Packing contents ....................................................................................................................................................................................... 2
Contents of this Instruction Manual ........................................................................................................................................................... 2
Addressee of the Instruction Manual ......................................................................................................................................................... 2
What to read .............................................................................................................................................................................................. 2
Typographic conventions........................................................................................................................................................................... 2
SAFETY RULES .....................................................................................................................................................................3
IDENTIFICATION DATA.........................................................................................................................................................3
DESCRIPTION OF THE CBZ220/CBZ24 KEYBOARD .........................................................................................................4
Appliances which can be connected to the CBZ220/CBZ24 keyboard ..................................................................................................... 4
INSTALLATION ......................................................................................................................................................................5
Unpacking.................................................................................................................................................................................................. 5
Check of identification data ....................................................................................................................................................................... 5
Switching on and off .................................................................................................................................................................................. 5
CONNECTORS AND CONNECTIONS ..................................................................................................................................6
Installation example ................................................................................................................................................................................... 6
Cables ....................................................................................................................................................................................................... 6
Connectors ................................................................................................................................................................................................ 7
Connection of the CBZ220/CBZ24 keyboard to peripheral units............................................................................................................... 7
Connection of the CBZ220/CBZ24 keyboard to pan & tilt motor ........................................................................................................... 7
Connection of the CBZ220/CBZ24 keyboard to zoom lens ................................................................................................................... 8
Connection of CBZ24 power supply cables........................................................................................................................................... 8
CONFIGURATION OF THE CBZ220/CBZ24 KEYBOARD ...................................................................................................8
USE OF THE KEYBOARD .....................................................................................................................................................9
Pan & tilt control keys ................................................................................................................................................................................ 9
Zoom lens control keys.............................................................................................................................................................................. 9
MAINTENANCE ....................................................................................................................................................................10
SOLUTION OF INSTALLATION PROBLEMS .....................................................................................................................10
SPECIFICATIONS ................................................................................................................................................................10
The manufacturer declines all responsibility for any damage caused by an improper use of the appliances mentioned in
this manual; furthermore, the manufacturer reserves the right to modify its contents without any prior notice. The
documentation contained in this manual has been collected with great care: the manufacturer, however, cannot take
any liability for its use. The same thing can be said for any person or company involved in the creation and production
of this manual.
Pag. 1
CBZ220/CBZ24 3201
Introduction
Packing contents
• 1 keyboard CBZ220/CBZ24
• 1 instruction manual
After the delivery, check that the packing is not damaged and shows no evident signs of falls or abrasion. Should this
be so, contact immediately the supplier. Check that the contents correspond to the above-mentioned list of materials.
Contents of this Instruction Manual
This manual describes CBZ220/CBZ24 control keyboard, together with their specific procedures of installation,
configuration and use.
Read carefully this manual, in particular the chapter concerning the safety rules, before the keyboard installation
and use.
Addressee of the Instruction Manual
The different parts of this manual are meant to satisfy two operative requirements, those of the installer technician and
those of the operator.
Installer technician: skilled technician able to carry out the safety system installation and to verify its functionality.
He has the necessary technical knowledge to install, connect and configurate the system. Only the installer technician
is allowed to carry out the operations reserved to “Technical staff”.
Operator: end user who operates on the control keyboard to set up the operating modes of the whole system.
What to read
The installation procedures, mainly addressed to the installer technician are described from page 5.
The operator is supposed to read from page 9, for the use of the keyboard.
Typographic conventions
Different graphic symbols are used in this manual, the meaning of which is here described:
Hazard of electric shock; disconnect the power supply before proceeding, if not otherwise specified.
Read carefully the procedures or information indicated, and if necessary carry out what is prescribed according
to the required modalities. An incorrect procedure may compromise the system operation or damage it.
Read carefully to understand the system operation.
Pag. 2
CBZ220/CBZ24 3201
Safety rules
The CBZ220/CBZ24 keyboard complies with the normative laws in force at the time of editing of this manual,
concerning electric safety, electromagnetic compatibility and general requirements.
Anyway, in order to ensure the users (installer technician and operator), the following warnings are specified for
safety’s sake:
• Connect to a feeder corresponding to the specifications indicated on the data plate (see next chapter Identification
data)
• The appliance (and the complete system, which it belongs to) must be installed only by a qualified technician
• For after-sale service call only authorized technical staff.
• Never open the appliance.
• The tampering of the appliance may void the guarantee terms.
• The outlet must be correctly earthed according to the normative laws in force.
• Do not unplug the appliance by pulling the power supply cable.
• Before any shifting or technical operations on the appliance, unplug it from the mains: the appliance is completely
off-line only when the plug is disconnected and the cables connected to other appliances have been removed
• Do not use extensions showing wear or ageing, since they may seriously compromise the users’ safety
• Avoid wetting the appliance or touching it with wet hands, while it is in operation
• Do not leave the appliance exposed to atmospheric agents
• Do not use the appliance in the presence of inflammable substances
• Do not allow children or people not familiar with the appliance to use it
• Make sure the appliance always rests on a solid and large enough base
Keep this manual close to hand for any future reference
Identification data
On the lower side of the CBZ220/CBZ24 keyboard there are two plates complying with EC specifications.
The first plate includes:
• Model identification code (Bar code EXT3/9 )
• Mains voltage (Volt)
• Frequency (Hertz)
• Maximum power consumption (Watt)
The second plate shows the model serial number (Bar code EXT3/9)
When installing the appliance, check that the power supply specifications of the keyboard correspond to those
required. The use of improper appliances may seriously compromise the safety of the personnel and the installation.
Pag. 3
CBZ220/CBZ24 3201
Description of the CBZ220/CBZ24 keyboard
The CBZ220/CBZ24 keyboard is a professional product for applications within the sphere of safety and
surveillance. In a safety system, it allows the control of one pan & tilt motor with 230 / 24 V~ power supply and the
control of the zoom lens functions ZOOM, FOCUS, IRIS.
The keyboards is supplied in two versions: for 230 V~ pan & tilt control, and for 24 V~ pan & tilt control (refer to
identification data).
WARNING : before the connection, make sure that the output voltage of the CBZ220/CBZ24 keyboard
corresponds to pan & tilt voltage (Refer to the identification data of the keyboard and pan & tilt motor).
Features:
• 5 Pan & tilt control functions: UP, DOWN, LEFT, RIGHT, AUTO
• 6 Zoom lens control functions: ZOOM IN, ZOOM OUT, IRIS OPEN, IRIS CLOSE, FOCUS NEAR, FOCUS FAR
• Zoom lens control with polarity inversion or common ground power supply
• 230 V~ pan & tilt motion control (refer to identification data)
• 24 V~ pan & tilt motion control (refer to identification data)
• Easiness of use
Appliances which can be connected to the CBZ220/CBZ24 keyboard
• PTH910-PTH911 pan & tilt : Outdoor Pan & Tilt; 230 / 24 V~ pan & tilt for outdoor installations with PAN (horizontal
movement) and TILT (vertical movement) functions and AUTOPAN (horizontal automatic movement)
• IPT720-IPT721 pan & tilt : Indoor Pan & Tilt; 230 / 24 V~ pan & tilt for indoor installations with PAN (horizontal
movement) and TILT (vertical movement) and AUTOPAN (horizontal automatic movement) functions.
• PTH310 / PTH311 pan & tilt : Outdoor/Indoor Pan & Tilt; 230 / 24 V~ pan & tilt for outdoor and indoor installations
with functions: PAN (horizontal movement), TILT (vertical movement) and AUTOPAN (horizontal automatic
movement )
Pag. 4
CBZ220/CBZ24 3201
Installation
The following procedures must be carried out with power supply off, if not otherwise specified.
The installation must be carried out only by qualified technical staff.
Unpacking
If the packing shows no relevant defects (due to falls or anomalous abrasions), check the material contained,
according to the list given at chapter Introduction, Packing contents (page 2)
The installer technician is required to dispose of the packing material according to the differentiated collecting
modalities or ,anyway, according to the normative laws in force in the Country of use.
Check of identification data
Before installing the appliance, check that the material supplied corresponds to the specifications indicated on
the data plate, following the chapter Identification data (page 3). Do not carry out any modification or connections which
are not provided for in this manual: the use of improper appliances may seriously compromise the safety of the
personnel and the installation.
Switching on and off
Before connecting the appliance:
• Check that the power supply of pan & tilt motor corresponds to the mains voltage specified in the keyboard data
plate
• check that the material supplied corresponds to the specifications indicated on the data plate, following the chapter
Identification data (page 3)
• check that the keyboard and the other components of the installation are closed in order to avoid a direct contact
with energized parts
• the keyboard and the other appliances of the installation must rest on a large and solid base
• the power supply cables do not have to hinder the common operations of the installer technician
• check that the electrical capacity and the extensions eventually used will support the power consumption of the
system.
SWITCHING ON: the keyboard has no switch: connect the power supply cables.
SWITCHING OFF: disconnect the power supply cables.
Pag. 5
CBZ220/CBZ24 3201
Connectors and connections
The installation must be carried out only by qualified technical staff: an improper connection of the peripheral
units may cause the keyboard to be isolated from the rest of the system.
Installation example
Installation controlled by one operator with one monitor: the operator controls one pan & tilt motor and the camera
functions FOCUS, ZOOM, IRIS:
MATERIAL USED
7 wires-cable for the
control of the P&T head
Control keyboard:
• 1 control keyboard CBZ220/CBZ24
Video handling:
• 1 monitor
Telemetry handling:
• 1 pan & tilt motor
• 1 motorized zoom lens
CBZ220/CBZ24
Cables
Different types of stroke have been used in the previous examples, in order to indicate cables with different functions:
video cable:
RG 59 coaxial cable or equivalent cable
multipolar cable:
each control function of the positioning device is activated /deactivated by a relay positioned inside the receiver.
Fix the final numbers of wires according to the following directions:
7 wires for the motion of the positioning device: right, left, up, down, autopan, common, ground
6 wires for the control of polarity reversal lenses (zoom, focus, iris)
4 wires for the control of common wire lenses (zoom, focus, iris)
2 wires for the auxiliary device
Note: We recommend the use of different multipolar cables for high tension and low tension functions.
Minimum section area recommended: 0.56 mm.² (AWG 20) for high tension wires (positioning device)
0.34 mm.² (AWG 22) for low tension wires (lens, auxiliary device)
Pag. 6
CBZ220/CBZ24 3201
Connectors
At the rear of the mechanics the CBZ220/CBZ24 keyboard features one protection fuse and 3 connection
cables for power supply, pan & tilt and zoom lens (this last cable is present only in the CBZ220/CBZ24 keyboard) :
7-wire cable for
pan & tilt
connection
3-wire cable for
power supply
connection
6-wire cable for zoom lens connection
Connection of the CBZ220/CBZ24 keyboard to peripheral units
The connection of the CBZ220/CBZ24 keyboard to the peripheral units presents the following phases:
• Connection of the keyboard to pan & tilt motor
• Connection of the keyboard to zoom lens
• Connection of power supply cables
Connection of the CBZ220/CBZ24 keyboard to pan & tilt motor
WARNING : before the connection, make sure that the output voltage of the CBZ220/CBZ24 keyboard
corresponds to pan & tilt voltage (Refer to the identification data of the keyboard and pan & tilt motor).
Where to operate: output cable for pan & tilt connection
Settings : connect the wires to pan & tilt motor according to the following table:
Output wires from CBZ220/CBZ24
Connection to pan & tilt
WHITE
BROWN
YELLOW
GREY
PINK
GREEN
YELLOW/GREEN
Common
Down
Up
Right
Left
Automatic
Pag. 7
CBZ220/CBZ24 3201
Connection of the CBZ220/CBZ24 keyboard to zoom lens
Connections of polarity inversion zoom lenses :
Where to operate : output cable for zoom lens connection
Settings: connect the wires to the zoom lens according to the following table:
Output wires from CBZ220/CBZ24
Connection to the
zoom lens
BLACK
VIOLET
RED
BLEU
RED/BLEU
GREY/PINK
Zoom
Zoom
Focus
Focus
Diaphragm (IRIS)
Diaphragm (IRIS)
Connections of common ground zoom lenses :
Where to operate : output cable for zoom lens connection
Settings: connect the wires to the zoom lens according the following table :
Output wires from CBZ220/CBZ24
Connection to the zoom
lens
BLACK
RED
RED/BLEU
VIOLET
BLEU
GREY/PINK
Zoom
Focus
Diaphragm ( IRIS )
Common
Common
Common
Connection of CBZ24 power supply cables
WARNING: before connecting, make sure that the mains corresponds to the voltage indicated in the keyboard
data plate.
Where to operate : output cable for power supply connection
Settings: connect the three wires according to the following table:
Output wires from CBZ24
BLEU
BROWN
YELLOW/GREEN
Connection to power
supply
24 V~
24 V~
For CBZ220, version 230V~, there is one SHUCO plug.
Configuration of the CBZ220/CBZ24 keyboard
The CBZ220/CBZ24 keyboard is preset for 12 VÙ output voltage on zoom lens contacts. It is possible to take this
voltage to 6 VÙ:
Where to operate: Jumper placed in the upper part of the circuit inside the keyboard
Settings:
1.
2.
3.
4.
Disconnect the appliance
Remove the three clamping screws on the right side
Set the jumper according to the scheme
Close the side by locking the screws
Pag. 8
èý7ÙýCA
íìý7ÙýCA
CBZ220/CBZ24 3201
Use of the keyboard
Switching on led
Autopan Led
Pan & tilt
control keys
Zoom lens control keys
Pan & tilt control keys
Keys for PAN & TILT
ã
: allow the pan & tilt movement towards Up, Down (TILT) and Left, Right (PAN)
Key for AUTOPAN
: makes the pan & tilt move continuously between the limit switches in the direction left-right
and vice versa (AUTOPAN)
Zoom lens control keys
Keys Focus near, Focus far: activate the corresponding Focus actions
Keys Zoom in, Zoom out: activate the corresponding Zoom actions
Keys Iris open, Iris close: activate the corresponding Iris actions
Pag. 9
CBZ220/CBZ24 3201
Maintenance
The CBZ220/CBZ24 keyboard doesn’t need a special maintenance.
Make sure they always rest on a solid base, and that the power supply and connection cables do not hinder the
operator.
Switch off the appliance to clean it. Clean the keyboard at regular intervals with a cotton dry cloth, avoiding the
use of detergents or wet cloths.
Solution of installation problems
Even if the CBZ220/CBZ24 keyboard are easy to use, some problems may arise during installation, configuration or
use.
Problem
At the swicthing on, the
POWER led does not turn on
The keys work, but the pan &
tilt does not respond
The keys work, but the zoom
lens does not respond
Possible cause
Power supply disconnected
Remedy
Check the power supply cable
Improper power supply
The fuse is blown
Incorrect connections
Check the identification data
Replace the fuse
Check the connections between the
keyboard and the pan & tilt
Check the keyboard and pan & tilt
identification data
The voltage supplied by the CBZ220/CBZ24
does not correspond to the voltage required by
the pan & tilt
Incorrect connections
Check the connections between the
keyboard and the zoom lens
Specifications
Power supply:
Power consumption:
Max switching power:
Protection fuses:
24 V~ / 230 V~, 50 - 60 Hz ( refer to identification data)
4W
45 W
24V~ Version F1 500mA F 250V; F2 1.6A T 250V
230V~Version F1 50mA F 250V; F2 630mA T 250V
from 0°C to 40°C
24 V~ / 230 V~, 50 - 60 Hz (refer to identification data)
extruded aluminium with rubber parts
coated with epoxy powder
115 x 190 x 50 mm
900 g
Operative temperature:
Pan & tilt control voltage:
Construction:
Finish:
Dimensions:
Weight:
Pag. 10
CBZ220/CBZ24 3201
& %=
MANUEL
D’INSTRUCTIONS
INDEX
INDEX......................................................................................................................................................................................1
INTRODUCTION.....................................................................................................................................................................2
Contenu de l’emballage............................................................................................................................................................................. 2
Contenu de ce Manuel d’Emploi................................................................................................................................................................ 2
Destinataire du Manuel d’Emploi ............................................................................................................................................................... 2
Ce qu’on doit lire........................................................................................................................................................................................ 2
Conventions typographiques ..................................................................................................................................................................... 2
NORMES DE SÉCURITÉ .......................................................................................................................................................3
CARACTÉRISTIQUES TECHNIQUES ...................................................................................................................................3
DESCRIPTION DU PUPITRE CBZ220/CBZ24 ......................................................................................................................4
Appareils qui se raccordent au pupitre CBZ220/CBZ24............................................................................................................................ 4
INSTALLATION ......................................................................................................................................................................5
Déballage .................................................................................................................................................................................................. 5
Contrôle des caractéristiques techniques.................................................................................................................................................. 5
Allumage et coupure.................................................................................................................................................................................. 5
CONNECTEURS ET RACCORDEMENTS.............................................................................................................................6
Exemple d’installation ................................................................................................................................................................................ 6
Câbles ....................................................................................................................................................................................................... 6
Connecteurs .............................................................................................................................................................................................. 7
Raccordement du pupitre CBZ220/CBZ24 aux périphériques .................................................................................................................. 7
Raccordement du pupitre CBZ220/CBZ24 à la tourelle ........................................................................................................................ 7
Raccordement du pupitre CBZ220/CBZ24 à l’objectif ........................................................................................................................... 8
Raccordement des câbles d’alimentation du CBZ24 ............................................................................................................................. 8
CONFIGURATION DU PUPITRE CBZ220/CBZ24 ................................................................................................................8
EMPLOI DU PUPITRE............................................................................................................................................................9
Touches de contrôle de la tourelle ............................................................................................................................................................ 9
Touches de contrôle des objectifs ............................................................................................................................................................. 9
ENTRETIEN ..........................................................................................................................................................................10
RÉSOLUTION DES PROBLÈMES D’INSTALLATION........................................................................................................10
DONNÉES TECHNIQUES ....................................................................................................................................................10
Le producteur décline toute responsabilité pour les dommages éventuels dus à une utilisation non appropriée des
appareils mentionnés dans ce manuel; on réserve en outre le droit d’en modifier le contenu sans préavis. La
documentation contenue dans ce manuel a été rassemblée et vérifiée avec le plus grand soin: cependant, le
producteur ne peut pas s’assumer aucune responsabilité dérivante de l’emploi de celle-là. La même chose vaut pour
chaque personne ou société impliquées dans la création et la production de ce manuel.
Pag. 1
CBZ220/CBZ24 3201
Introduction
Contenu de l’emballage
• 1 pupitre CBZ220/CBZ24
• 1 manuel d’emploi
Lors de la livraison du produit, vérifier si l’emballage est intègre et s’il n’a pas subi des signes évidents de chutes ou de
choc. Si l’emballage présente des signes évidents de dommage, contacter immédiatement le transporteur. Vérifier que
le contenu correspond à la liste du matériel indiqué ci-dessus.
Contenu de ce Manuel d’Emploi
Dans ce manuel on décrit le pupitre CBZ220/CBZ24 et les procédures particulières d’installation, configuration et
emploi.
Il est nécessaire de lire attentivement ce manuel, surtout le chapitre concernant les normes de sécurité, avant
d’installer et employer le pupitre.
Destinataire du Manuel d’Emploi
Les différentes parties de ce manuel veulent satisfaire deux exigences opérationnelles: celle du technicien installateur
et celle de l’opérateur.
Technicien installateur: c’est le technicien qualifié qui effectue l’installation de sécurité et en vérifie le caractère
fonctionnel.
Il a les connaissances techniques nécessaires pour installer, raccorder et configurer l’installation. Seulement le
technicien installateur peut effectuer les opérations contenues dans ce manuel réservées au “Personnel technique”.
Opérateur: c’est l’utilisateur final qui emploie le pupitre pour établir les modalités d’opération du système entier.
Ce qu’on doit lire
Les procédures d’installation , adressées principalement au technicien installateur, sont décrites à partir de la page
5.
L’opérateur doit lire à partir de la page 9, pour la description de l’emploi du pupitre.
Conventions typographiques
Dans ce manuel on emploie des symboles graphiques différents, dont le sens est résumé ci-dessous:
Risque de décharge électrique; couper l’alimentation avant de procéder avec toute opération, si le contraire
n’est pas expressément indiqué.
Lire attentivement la procédure ou les renseignements indiqués, et éventuellement les exécuter suivant les
modalités prévues. Une execution incorrecte de la procédure peut entraîner un fonctionnement erroné du système ou
un endommagement du même.
Lire attentivement pour comprendre le fonctionnement du système.
Pag. 2
CBZ220/CBZ24 3201
Normes de sécurité
Le pupitre CBZ220/CBZ24 est conforme aux normes en vigueur au moment de la publication de ce manuel
pour ce qui concerne la sécurité électrique, la compatibilité électromagnétique et les conditions requises generales.
On désire toutefois garantir les utilisateurs (technicien installateur et opérateur) en précisant certaines instructions pour
opérer en toute sécurité:
• Raccorder à un feeder suivant les indications des plaques des caractéristiques techniques (voir le chapitre suivant
Caractéristiques techniques)
• L’installation de l’appareil (et du système complet dont il fait partie) doit être effectuée par une personne qualifiée du
point de vue technique.
• Pour le service après-vente s’adresser exclusivement à personnel technique autorisé.
• L’appareil ne doit jamais être ouvert.
• Le démontage de l’appareil fait déchoir les termes de garantie.
• La prise d’alimentation doit être raccordée à la terre conformément aux normes en vigueur.
• Ne pas tirer le cordon d’alimentation pour débrancher la fiche de la prise.
• Avant de déplacer ou effectuer des interventions techniques sur l’appareil, débrancher la prise d’alimentation:
l’appareil est désactivé seulement quand la prise d’alimentation est débranchée et les câbles de raccordement avec
d’autres dispositifs ont été enlevés.
• Ne pas employer de rallonges avec signes d’usure ou vieillissement, parce qu’ils peuvent compromettre
sérieusement la sécurité des utilisateurs.
• Éviter d’exposer l’appareil en fonction à tout liquide ou de le toucher avec les mains mouillées.
• Ne pas laisser l’appareil exposé aux agents atmosphériques
• Ne pas employer l’appareil en présence de substances inflammables
• Ne pas laisser des enfants ou des personnes non qualifiees utiliser l’appareil
• Vérifier si l’appareil est appuyé sur une base suffisament large et solide
Conserver soigneusement ce manuel pour toute consultation ultérieure
Caractéristiques techniques
Sur la partie infèrieure du pupitre CBZ220/CBZ24 il y a deux plaques conformes aux caractéristiques
techniques CE.
La première plaque contient:
• Code d’identification du modèle (Code à barre EXT3/9 )
• Tension d’alimentation (Volt)
• Fréquence (Hertz)
• Max. consommation (Watt)
La deuxième plaque indique le numéro de série du modèle (Code à barre EXT3/9)
Lors de l’installation vérifier si les caractéristiques d’alimentation du pupitre correspondent aux caractéristiques
requises. L’emploi d’appareils non appropriés peut compromettre sérieusement la sécurité du personnel et de
l’installation.
Pag. 3
CBZ220/CBZ24 3201
Description du pupitre CBZ220/CBZ24
Le pupitre CBZ220/CBZ24 est un produit professionel pour le domaine de la sécurité et de la surveillance.
Dans un système de sécurité, le pupitre permet le contrôle d’une tourelle avec alimentation à 230 / 24 V~ et de
contrôler les fonctions ZOOM, FOCUS, IRIS des objectifs.
Le pupitre est fourni en deux versions: pour le contrôle de tourelles à 230 V~ et pour le contrôle de tourelles à 24 V~
(se rapporter aux caractéristiques techniques).
ATTENTION: avant d’effectuer les raccordements, vérifier si la tension en sortie du pupitre CBZ220/CBZ24
correspond à la tension de la tourelle (Se rapporter aux caractéristiques techniques du pupitre et de la tourelle).
Caractéristiques:
• 5 Fonctions de contrôle tourelle: HAUT, BAS, GAUCHE, DROITE, AUTO
• 6 Fonctions de contrôle objectif: ZOOM IN, ZOOM OUT, IRIS OUVERT, IRIS FERMÉ, FOCUS PRÈS, FOCUS
LOIN
• Possibilité de commander objectifs avec alimentation à inversion de polarité ou à fil commun
• Contrôle de Tourelles avec alimentation à 230 V~ ( se rapporter aux caractéristiques techniques )
• Contrôle de Tourelles avec alimentation à 24 V~ ( se rapporter aux caractéristiques techniques )
• Facilité d’emploi
Appareils qui se raccordent au pupitre CBZ220/CBZ24
• Tourelle PTH910-PTH911 : Exterieur Pan & Tilt; tourelle à 230 / 24 V~ pour installations externes avec fonctions
PAN (mouvement horizontal), TILT (mouvement vertical) et AUTOPAN (mouvement horizontal automatique)
• Tourelle IPT720-IPT721 : Interieur Pan & Tilt; tourelle à 230 / 24 V~ pour installations internes avec fonctions PAN
(mouvement horizontal), TILT (mouvement vertical) et AUTOPAN (mouvement horizontal automatique)
• Tourelle PTH310 / PTH311: Exterieur /Interieur Pan & Tilt; tourelle à 230 / 24 V~ pour installations externes et
internes avec fonctions PAN (mouvement horizontal), TILT (mouvement vertical) et AUTOPAN (mouvement
horizontal automatique)
Pag. 4
CBZ220/CBZ24 3201
Installation
Les procédures suivantes sont effectuées hors tension, si le contraire n’est pas indiqué.
L’installation doit être effectuée seulement par un technicien qualifié.
Déballage
Si l’emballage ne présente pas d’évidents défauts dus à chutes ou abrasions anormales, procéder au contrôle du
matériel contenu, suivant la liste fournie au chapitre Introduction, Contenu de l’emballage (page 2).
Le technicien installateur devra éliminer l’emballage selon les modalités de recolte diversifiée ou en tout cas suivant les
normes en vigueur dans le Pays d’emploi.
Contrôle des caractéristiques techniques
Avant d’installer l’appareil, vérifier si les caractéristiques techniques du matériel fourni, figurant sur les plaques,
correspondent aux spécifications requises, en se rapportant au chapitre Caractéristiques techniques (page 3). Ne
jamais effectuer d’altérations ou de raccordements non prévus dans ce manuel: l’emploi d’appareils non appropriés
peut compromettre sérieusement la sécurité des personnes et de l’installation.
Allumage et coupure
Avant d’alimenter l’appareil:
• vérifier si la tension d’alimentation des tourelles correspond à la tension spécifiée sur la plaque des caractéristiques
techniques
• vérifier si le matériel fourni correspond aux spécifications requises, suivant les plaques des caractéristiques
techniques, en se rapportant au chapitre Caractéristiques techniques (page 3)
• vérifier si le pupitre et les composantes de l’installation sont fermés afin d’éviter le contact direct avec parties sous
tension
• le pupitre et les autres appareils de l’installation doivent être appuyés sur une base large et solide
• les câbles d’alimentation ne doivent pas gêner les normales opérations du technicien installateur
• vérifier si les sources d’alimentation et les rallonges éventuellement employés sont aptes à supporter la
consommation du système.
ALLUMAGE: le pupitre est dépourvu d’interrupteur: raccorder les câbles d’alimentation.
COUPURE: débrancher les câbles de l’alimentation.
Pag. 5
CBZ220/CBZ24 3201
Connecteurs et raccordements
La procedure d’installation doit être effectuée seulement par personnel technique qualifié: un raccordement
incorrect des différentes périphériques peut entraîner l’isolation du pupitre du reste du système.
Exemple d’installation
Installation contrôlée par un opérateur avec un moniteur: l’opérateur contrôle une tourelle et les fonctions de FOYER
(FOCUS), ZOOM, DIAPHRAGME (IRIS) de la télécaméra :
MATERIEL EMPLOYÉ
Câble 6 fils pour
le raccordement
de l’objectif
Câble 7 fils
pour le
raccordement
de la tourelle
Pupitre de contrôle:
• 1 pupitre CBZ220/CBZ24
Gestion du vidéo:
• 1 moniteur
Gestion de la télémétrie:
• 1 tourelle
• 1 objectif motorisé
CBZ220/CBZ24
Câbles
Dans les exemples, des traits différents ont été employés pour indiquer des câbles à fonctions diversifiées:
câble vidéo:
coaxial RG 59 ou câble équivalent
câble multipolaire:
chaque fonction de commande tourelle est activée / désactivée par un relais à l’intérieur du récepteur.
Déterminer le nombre final de câbles, suivant les indications ci-dessous:
7 fils pour le mouvement de la tourelle: droite, gauche, haut, bas, autopan, commun, terre
6 fils de commande pour objectif fonctionnant par inversion de polarité (objectif, focus, iris)
4 fils de commande pour objectif fonctionnant par fil commun (objectif, focus, iris)
2 fils pour l’auxiliaire
Note: on conseille l’emploi de câbles multipolaires différents pour les fonctions en basse tension et haute tension.
Section conseillée de minimum:
0,56 mm.² (AWG 20) pour fils en haute tension (tourelle)
0,34 mm.² (AWG 22) pour fils en basse tension (objectif, auxiliaire)
Pag. 6
CBZ220/CBZ24 3201
Connecteurs
Derrière la mécanique, le pupitre CBZ220/CBZ24
raccordement de l’alimentation, de la tourelle et de:
présente un fusible de protection et 3 câbles pour le
Câble 7 fils pour le
raccordement de
la tourelle
Câble 3 fils pour le
raccordement de
l’alimentation
Câble 6 fils pour le raccordement de l’objectif
Raccordement du pupitre CBZ220/CBZ24 aux périphériques
La procédure de raccordement du pupitre CBZ220/CBZ24 aux périphériques se compose des phases suivantes :
• Raccordement du pupitre à la tourelle
• Raccordement du pupitre à l’objectif
• Raccordement des câbles d’alimentation
Raccordement du pupitre CBZ220/CBZ24 à la tourelle
ATTENTION: avant d’effectuer les raccordements, vérifier si la tension en sortie du pupitre CBZ220/CBZ24
correspond à la tension de la tourelle (Se rapporter aux caractéristiques techniques du pupitre et de la tourelle).
Où l’on doit agir : câble en sortie pour le raccordement de la tourelle
Sélections: raccorder les fils à la tourelle suivant le tableau ci-dessous :
Fils en sortie du CBZ220/CBZ24
Raccordement à la
tourelle
BLANC
MARRON
JAUNE
GRIS
ROSE
VERT
JAUNE/VERT
Commun
Bas
Haut
Droite
Gauche
Automatique
Pag. 7
CBZ220/CBZ24 3201
Raccordement du pupitre CBZ220/CBZ24 à l’objectif
Raccordements d’objectifs à inversion de polarité:
Où l’on doit agir : câble en sortie pour le raccordement de l’objectif
Sélections: raccorder les fils à l’objectif suivant le tableau ci-dessous:
Fils en sortie du CBZ220/CBZ24
Raccordement à l’objectif
NOIR
VIOLET
ROUGE
BLEU
ROUGE/BLEU
GRIS/ROSE
Zoom
Zoom
Foyer ( FOCUS )
Foyer ( FOCUS )
Diaphragme ( IRIS )
Diaphragme ( IRIS )
Raccordements d’objectifs à fil commun:
Où l’on doit agir : câble en sortie pour le raccordement de l’objectif
Sélections: raccorder les fils à l’objectif suivant le tableau ci-dessous :
Fils en sortie du CBZ220/CBZ24
Raccordement à l’objectif
NOIR
ROUGE
ROUGE/BLEU
VIOLET
BLEU
GRIS/ROSE
Zoom
Foyer ( FOCUS )
Diaphragme ( IRIS )
Commmun
Commmun
Commmun
Raccordement des câbles d’alimentation du CBZ24
ATTENTION: avant d’effectuer les raccordements, vérifier si la ligne d’alimentation correspond à celle qui est
indiquée sur les plaques des caractéristiques techniques du pupitre.
Où l’on doit agir: câble en sortie pour le raccordement de l’alimentation
Sélections: raccorder les trois fils suivant le tableau ci-dessous:
Fils en sortie du CBZ24
Raccordement à
l’alimentation
BLEU
MARRON
JAUNE/VERT
24 V~
24 V~
Pour CBZ220,dans la version 230V~, il y a une fiche SHUCO.
Configuration du pupitre CBZ220/CBZ24
Le pupitre CBZ220/CBZ24 est prédisposé pour une tension de sortie sur les contacts de l’objectif de íìý7Ùý. On peut
régler cette tension à 6ý7Ùý:
Où l’on doit agir : Pontet placé dans la partie supérieure du circuit à l’intérieur du pupitre
Réglages :
1.
2.
3.
4.
Couper l’alimentation de l’unité
Enlever les trois vis de fixage du côté droite
Positionner le pontet suivant le schéma ci-contre
Refermer le côté en serrant les vis
Pag. 8
èý7ÙýCA
íìý7ÙýCA
CBZ220/CBZ24 3201
Emploi du Pupitre
Led d’allumage
Led de
signalisation du
mouvement
automatique de la
tourelle
Touches pour
le contrôle de
la tourelle
Touches pour le
contrôle des objectifs
Touches de contrôle de la tourelle
Touches de PAN & TILT
Droite (PAN)
: permettent le mouvement de la tourelle dans les positions Haut, Bas (TILT) et Gauche,
ã
Touche pour l’AUTOPAN
: pose la tourelle en mouvement continu entre les fins de course en direction gauchedroite et vice versa (AUTOPAN)
Touches de contrôle des objectifs
Touches Focus près, Focus loin: activent les actions de Focus correspondantes
Touches Zoom in, Zoom out: activent les actions de Zoom correspondantes
Touches Iris ouvert, Iris fermé: activent les actions de Iris correspondantes
Pag. 9
CBZ220/CBZ24 3201
Entretien
Le pupitre CBZ220/CBZ24 n’a pas besoin d’un entretien particulier.
On recommande de les appuyer sur une base solide, en faisant attention que les câbles d’alimentation et de
raccordement ne gênent pas l’opérateur.
Le nettoyage doit toujours être effectué à appareil éteint. Nettoyer le pupitre périodiquement avec un chiffon
de coton sec, en évitant l’emploi de détergents ou de chiffons mouillés.
Résolution des problèmes d’installation
Bien que le pupitre CBZ220/CBZ24 se caractérise par une excellente fiabilité d’emploi, des problèmes peuvent se
produire en phase d’installation, de configuration ou pendant l’emploi.
Problème
A l’allumage le led POWER
ne s’allume pas
Les touches fonctionnent
mais la tourelle ne repond
pas
Les touches fonctionnent
mais l’objectif ne repond pas
Cause éventuelle
Alimentation non raccordée
Solution
Contrôler le câble d’alimentation
Alimentation incorrecte
Contrôler les caractéristiques
techniques
Remplacer le fusible
Contrôler les raccordements entre
pupitre et tourelle
Le fusible est claqué
Raccordements erronés
La tension fournie par le CBZ220/CBZ24 ne
correspond pas à la tension requise par la
tourelle
Raccordements erronés
Contrôler les caractéristiques
techniques du pupitre et de la tourelle
Contrôler les raccordements entre
pupitre et objectif
Données techniques
Alimentation:
Puissance:
Puissance commutable:
Fusibles de protection:
Température de fonctionnement:
Tension de contrôle tourelle:
Construction:
Finition:
Dimensions:
Poids:
24 V~ / 230 V~, 50-60 Hz (se rapporter aux caractéristiques techniques)
4W
45 W
Version 24V~ F1 500mA F 250V; F2 1.6A T 250V
Version 230V~ F1 50mA F 250V; F2 630mA T 250V
de 0°C à 40°C
24 V~ / 230 V~, 50-60 Hz (voir les caractéristiques techniques)
extrudé en aluminium et parties en caoutchouc
peinture epoxy
115 x 190 x 50 mm
900 g
Pag. 10
CBZ220/CBZ24 3201
& %=
BEDIENUNGSANWEISUNG
INHALT
INHALT ...................................................................................................................................................................................1
EINLEITUNG...........................................................................................................................................................................2
Verpackungsinhalt ..................................................................................................................................................................................... 2
Inhalt dieses Bedienungshandbuches....................................................................................................................................................... 2
Für wen ist das Bedienungshandbuch bestimmt? ..................................................................................................................................... 2
Wie ist das Handbuch zu benützen? ......................................................................................................................................................... 2
Typographische Symbole .......................................................................................................................................................................... 2
SICHERHEITSBESTIMMUNGEN ..........................................................................................................................................3
BETRIEBSEIGENSCHAFTEN AUF DEN DATENSCHILDERN ............................................................................................3
BESCHREIBUNG DER TASTATUR CBZ220/CBZ24............................................................................................................4
An die Tastatur CBZ220/CBZ24 anschließbare Geräte ............................................................................................................................ 4
INSTALLATION ......................................................................................................................................................................5
Öffnen der Verpackung.............................................................................................................................................................................. 5
Überprüfung der Betriebseigenschaften .................................................................................................................................................... 5
Ein- und Ausschalten................................................................................................................................................................................. 5
VERBINDER UND ANSCHLÜSSE.........................................................................................................................................6
Installationsbeispiel ................................................................................................................................................................................... 6
Kabel ......................................................................................................................................................................................................... 6
Verbinder ................................................................................................................................................................................................... 7
Anschluß der Tastatur CBZ220/CBZ24 an die Peripheriegeräte.............................................................................................................. 7
Anschluß der Tastatur CBZ220/CBZ24 an die Schwenkvorrichtung.................................................................................................... 7
Anschluß der Tastatur CBZ220/CBZ24 an die Linse............................................................................................................................ 8
Anschluß der CBZ24- Stromkabel ......................................................................................................................................................... 8
KONFIGURATION DER TASTATUR CBZ220/CBZ24 ..........................................................................................................8
VERWENDUNG DER TASTATUR .........................................................................................................................................9
Bedienungstasten der Schwenkvorrichtung .............................................................................................................................................. 9
Bedienungstasten der Linsen .................................................................................................................................................................... 9
WARTUNG............................................................................................................................................................................10
LÖSUNG VON INSTALLATIONSPROBLEMEN .................................................................................................................10
TECHNISCHE EIGENSCHAFTEN .......................................................................................................................................10
Der Hersteller lehnt jede Haftung für eventuelle Schäden ab, die aufgrund unsachgemäßer Anwendung der in diesem
Handbuch erwähnten Geräte entstanden ist. Ferner behält er sich das Recht vor, den Inhalt ohne Vorankündigung
abzuändern. Die Dokumentation in diesem Handbuch wurde sorgfältig ausgführt und überprüft, dennoch kann der
Hersteller keine Haftung für die Verwendung übernehmen. Dasselbe gilt für jede Person oder Gesellschaft, die bei der
Schaffung oder Produktion von diesem Handbuch miteinbezogen ist.
.
Seite 1
CBZ220/CBZ24 3201
Einleitung
Verpackungsinhalt
• 1 Tastatur CBZ220/CBZ24
• 1 Bedienungshandbuch
Bei der Lieferung des Produktes ist der einwandfreie Zustand der Verpackung sowie auch das Vorhandensein von
Beschädigungen durch Fall oder Abnützungen zu prüfen. Sollte die Verpackung beschädigt sein, dann ist der
Hersteller sofort zu kontaktieren.
Kontrollieren Sie, daß der Inhalt mit der oben angeführten Materialliste übereinstimmt.
Inhalt dieses Bedienungshandbuches
In diesem Handbuch ist die Bedienungstastatur CBZ220/CBZ24 beschrieben sowie die jeweiligen Vorgangsweisen zur
Installation, Konfiguration und Verwendung.
Es ist notwendig das Handbuch und insbesondere das Kapitel in Bezug auf die Sicherheitsbestimmungen vor der
Installation und Verwendung der Tastatur aufmerksam zu lesen.
Für wen ist das Bedienungshandbuch bestimmt?
Die verschiedenen Teile dieses Handbuches verfolgen die Absicht, den unterschiedlichen Arbeitserfordernissen zu
entsprechen: jenen des Installationstechnikers und jenen des Operators.
Installationstechniker: ist ein entsprechend geschulter Techniker, der die Installation der Sicherheitsanlage
durchführt und ihre Funktionstüchtigkeit überprüft.
Er verfügt über jene technischen Kenntnisse, die für die Installation, den Anschluß und die Konfiguration der Anlage
erforderlich sind. Nur der Installationstechniker darf die in diesem Handbuch beschriebenen und dem „technischen
Personal“ vorbehaltenen Arbeitsschritte durchführen.
Operator: er ist der Endbenutzer, der die Bedienungstastatur bedient, um die Arbeitsmodalitäten des gesamten
Systems festzulegen.
Wie ist das Handbuch zu benützen?
Die in erster Linie an den Installationstechniker gerichteten Vorgangsweisen zur Installation sind ab Seite 5
beschrieben.
Der Operator muß ab Seite 9 fü die Beschreibung der Verwendung der Tastatur und der direkten Umschaltung lesen.
Typographische Symbole
Im vorliegenden Handbuch werden verschiedene graphische Symbole verwendet, deren Bedeutung hier in der Folge
angeführt sind:
Gefahr von elektrischen Schlägen; die Versorgung vor dem Durchführen der Arbeitsschritte, sofern nicht
ausdrücklich Gegenteiliges angegeben ist, unterbrechen.
Es wird empfohlen, aufmerksam die angegebenen Vorgangsweisen und Informationen zu lesen, und eventuell
enstsprechend den vorgesehenen Modalitäten durchzuführen. Die unkorrekte Ausführung der Vorgangsweise kann zu
einem falschen Betrieb des Systems führen oder sogar zu ihrer Beschädigung führen.
Es ist ratsam, dies aufmerksam zu lesen, um den Betrieb des Systemes zu verstehen.
Seite 2
CBZ220/CBZ24 3201
Sicherheitsbestimmungen
Die Tastatur CBZ220/CBZ24 entspricht den bei Erscheinen des vorliegenden Handbuches gültigen
Vorschriften in Bezug auf die elektrische Sicherheit, die elektromagnetische Kompatibilität und die allgemeinen
Forderungen.
Man möchte den Anwendern (Installationstechniker und Operator) durch einige Hinweise maximale Sicherheit bei der
Anwendung garantieren:
• An eine Versorgungsleitung anschließen, die den Angaben auf den Datenschildern enstpricht (siehe Folgekapitel
Betriebseigenschaften auf den Datenschildern)
• Die Installation des Gerätes (und der gesamten Anlage zu der es zählt) muß von entsprechend geschultem
Personal durchgeführt werden
• Sich für den technischen Kundendienst ausschließlich an autorisiertes Fachpersonal wenden.
• Das Gerät darf nie offen sein.
• Die Verletzung des Gerätes verfällt die Garantie.
• Die Strombuchse muß entsprechend den ültigen Bestimmungen geerdet sein.
• Den Stecker nicht durch Ziehen am Kabel aus der Buchse ziehen.
• Die Strombuchse muß entsprechend den ültigen Bestimmungen geerdet sein
• Keine Verlängerungskabel verwenden, die Abnützungen und Alterungserscheinungen aufweisen, da diese eine
große Gefahr für die Anwender darstellen.
• Es darauf zu achten, daß das in Betrieb befindliche Gerät nicht mit Flüssigkeiten in Berührung kommt oder mit
nassen Fingern berührt wird.
• Das Gerät darf Witterungseinflüssen nicht ausgesetzt werden.
• Das Gerät nicht bei Vorhandesein entzündbarer Substanzen verwenden.
• Das Gerät darf von Kindern oder Unbefugten nicht verwendet werden.
• Sich vergewissern, daß sich das Gerät auf einer ausreichend breiten und festen Unterlage aufliegt.
Das vorliegende Handbuch ist sorgfältig aufzubewahren.
Betriebseigenschaften auf den Datenschildern
Auf dem unteren Teil der Tastatur CBZ220/CBZ24 sind zwei Etiketten entsprechend der CE-Markierung
angeführt.
Die erste Etikette enthält:
• Identifikationscode des Modells (Barcode EXT3/9 )
• Stromspannung (Volt)
• Frequenz (Hertz)
• Maximaler Verbrauch (Watt)
Die zweite Etikette gibt die Seriennummer des Modells an (Barcode EXT3/9)
Bei der Installation ist zu prüfen, ob die Merkmale der Versorgung der Tastatur den Anforderungen entsprechen. Die
Verwendung von ungeeigneten Geräten kann zu einer großen Gefahrenquelle für die Sicherheit des Personals und der
Anlage werden.
Seite 3
CBZ220/CBZ24 3201
Beschreibung der Tastatur CBZ220/CBZ24
Die Tastatur CBZ220/CBZ24 ist ein professionelles Produkt zur Anwendung im Sicherheits- und
Überwachungsbereich. In einem Sicherheitssystem ermöglich die Tastatur die Bedienung der Schwenkvorrichtung mit
einer Versorgung von 230 / 24 V~ und ermöglicht außerdem die ZOOM-, FOCUS-, IRIS-Funktionen der Linse zu
bedienen. Sie wird in zwei Versionen geliefert: zur Steuerung der Schwenkvorrichtungen bei 230 V~ und zur Steuerung
der Schwenkvorrichtungen bei 24 V~ (siehe Betriebseigenschaften auf den Datenschildern).
ACHTUNG: vergewissern Sie sich vor dem Durchführen der Anschlüsse, daß die Ausgangsspannung von der
Tastatur CBZ220/CBZ24 der Spannung der Schwenkvorrichtung entspricht (Siehe Betriebsdaten der Tastatur und der
Schwenkvorrichtung).
Eigenschaften:
• 5 Kontrollfunktionen der Schwenkvorrichtung: OBEN, UNTEN, LINKS, RECHTS, AUTO
• 6 Kontrollfunktionen der Linsen: ZOOM IN, ZOOM OUT, IRIS OPEN, IRIS CLOSE, FOCUS NEAR, FOCUS FAR
• Möglichkeit der Linsenbedienung mit Umpolungsvrsorgung oder Versorgung mit gemeinsamen Draht
• Bedienung der Schwenkvorrichtung mit Versorgung bei 230 V~ (siehe Betriebseigenschaften auf den
Datenschildern)
• Bedienung der Schwenkvorrichtungen mit Versorgung bei 24 V~ (siehe Betriebseigenschaften auf den
Datenschildern)
• Einfache Anwendung
An die Tastatur CBZ220/CBZ24 anschließbare Geräte
• Schwenkvorrichtung PTH910-PTH911: Outdoor Pan & Tilt; Schwenkvorrichtung bei 230 / 24 V~ für
Außeninstallationen mit PAN (horizontale Bewegung), TILT (vertikale Bewegung) und AUTOPAN (horizontale
automatische Bewegung)-Funktionen
• Schwenkvorrichtung IPT720-IPT721: Indoor Pan & Tilt; Schwenkvorrichtung bei 230 / 24 V~ für Inneninstallationen
mit PAN (horizontale Bewegung), TILT (vertikale Bewegung) und AUTOPAN (horizontale automatische Bewegung)Funktionen
• Schwenkvorrichtung PTH310 / PTH311: Outdoor/Indoor Pan & Tilt; Schwenkvorrichtung bei 230 / 24 V~ für Innenund Außeninstallationen mit PAN (horizontale Bewegung), TILT (vertikale Bewegung) und AUTOPAN
(automatische horizontale Bewegung )
Seite 4
CBZ220/CBZ24 3201
Installation
Die folgenden Arbeitsschritte sind, sofern nicht anders vermerkt, ohne Stromversorgung durchzuführen.
Die Installationsphase darf nur von technischem Fachpersonal durchgeführt werden..
Öffnen der Verpackung
Wenn die Verpackung keine offensichtlichen Fehler aufgrund von Fall oder Abnützungen aufweist, ist die Kontrolle des
Materials mit der unter dem Kapitel Einleitung, Verpackungsinhalt (S. 2) mitgelieferten Liste vorzunehmen.
Es ist die Aufgabe des Installationstechnikers, das Verpackungsmaterial entsprechend den Modalitäten der
Mülltrennung oder entsprechend den, im jeweiligen Einsatzland gültigen Vorschriften, zu entsorgen.
Überprüfung der Betriebseigenschaften
Vor der Installation ist zu kontrollieren, ob das Material den gewünschten Eigenschaften entspricht, indem die
Etiketten mit den Betriebseigenschaften laut Beschreibung unter dem Kapitel Betriebseigenschaften auf den
Datenschildern (pag. 3). geprüft werden. Es dürfen keinesfalls Änderungen oder in diesem Handbuch nicht
vorgesehene Anschlüsse vorgenommen werden: die Verwendugn ungeeigneter Geräte kann zu großer Gefahr für die
Sicherheit des Personals und der Anlage führen.
Ein- und Ausschalten
Vor der Stromversorgung:
• ist zu kontrollieren, daß die Stromspannung der Schwenkvorrichtung mit der am Datenschild der Tastatur
angegebenen Spannung übereinstimmt.
• ist zu kontrollieren, ob das gelieferte Material den gewünschten Erfordernissen entspricht, indem die Etiketten mit
den Betriebsdaten laut der Beschreibung unter dem Kapitel Betriebseigenschaften auf den Datenschildern (pag.3)
überprüft werden.
• kontrollieren, ob die Tastatur und andere Komponenten der Anlage geschlossen sind und daher der direkte Kontakt
mit unter Spannung stehenden Teilen unmöglich ist.
• die Tastatur und die anderen Geräte der Anlage müssen auf einer breiten und festen Unterlage aufliegen
• die Stromkabel dürfen den Installationstechniker bei seinen normalen Arbeitsschritten nicht behindern.
• Es ist zu kontrollieren, daß die Stromquellen und die eventuell verwendeten Verlängerungskabel dem
Systemverbrauch standhalten können.
EINSCHALTEN: die Tastatur ist mit einem Schalter versehen: den Stecker in die Strombuchse einstecken.
AUSSCHALTEN: die Stromkabel ausstecken.
Seite 5
CBZ220/CBZ24 3201
Verbinder und Anschlüsse
Die Installation darf ausschließlich von qualifiziertem technischen Personal durchgeführt werden: der
unkorrekte Anschluß der verschiedenen Peripheriegeräten kann zur Isolierung des Video-Umschalters vom
Gesamtsystem führen.
Installationsbeispiel
Von einem Operator mit einem Monitor kontrollierte Anlage: der Operator kontrolliert eine Schwenkvorrichtung sowie
die FOCUS-, ZOOM- und BLENDEN (IRIS)-Funktionen der Kameras:
VERWENDETES MATERIAL
PTH
Kabel mit 6
Drähten zum
Linsensteuerung
Kabel mit 7 Drähten
zum Steuerung der
Schwenkvorrichtung
Bedienungstastatur:
• 1 Bedienungstastatur
CBZ220/CBZ24
Videosteuerung:
• 1 Monitor
Verwaltung der Fernmessungssektion:
• 1 Schwenkvorrichtung
• 1 motorisierte Linse
CBZ220/CBZ24
Kabel
In den Exemplifizierungen wurden verschiedene Stricharten angewandt, um die mehreren Funktionen der Kabel zu
bezeichnen.
Video-Kabel:
Koaxialkabel RG 59 oder gleichartiges Kabel
Mehradriges Kable:
Jede Steuerfunktion der Schwenkvorrichtung wird von einem im Empfänger eingebauten Relais
aktiviert/deaktiviert.
Die endgültige Kabelnummer folgendermaßen festlegen:
7 Drähte für die Bewegung der Schwenkvorrichtung: rechts, links, oben, unten, autopan, gemeinsam, Erde
6 Drähte für die Steuerung der Umpolungslinsen (Zoom, Focus, Iris)
4 Drähte für die Linsen mit gemeinsamem Draht (Zoom, Focus, Iris)
2 Drähte für das Zusatzgerät.
Anmerkung: Es wäre empfehlenswert, verschiedene mehradrige Kabel für die Hochspannungs- und
Niederspannungsfunktionen zu benutzen.
Empfohlener Minimalquerschnitt:
0,56 mm.² (AWG 20) für Hochspannungsdrähte (Schwenkvorrichtung)
0,34 mm.² (AWG 22) für Niederspannungsdrähte (Linse, Zusatzgerät)
Seite 6
CBZ220/CBZ24 3201
Verbinder
Auf der Rückseite der Mechanik verfügt die Tastatur CBZ220/CBZ24 über eine Schutzsicherung sowie 3 Kabel
zum Anschluß der Versorgung, der Schwenkvorrichtung und der Linse:
Kabel mit 7 Drähten zum
Anschluß der Schwenkvorrichtung
Kabel mit 3 Drähten
zum Stromanschluß
Kabel mit 6 Drähten zum
Anschluß der Tastatur CBZ220/CBZ24 an die Peripheriegeräte
Der Anschluß der Tastatur CBZ220/CBZ24 an die Peripheriegeräte besteht aus folgenden Phasen :
• Anschluß der Tastatur an die Schwenkvorrichtung
• Anschluß der Tastatur an die Linse
• Anschluß der Stromkabel
Anschluß der Tastatur CBZ220/CBZ24 an die Schwenkvorrichtung
ACHTUNG: vergewissern Sie sich vor dem Durchführen der Anschlüsse, daß die Ausgangsspannung von der
Tastatur CBZ220/CBZ24 der Spannung der Schwenkvorrichtung entspricht (Siehe Betriebsdaten der Tastatur und der
Schwenkvorrichtung).
Wo: Ausgangskabel für den Anschluß der Schwenkvorrichtung
Einstellungen: die Drähte an die Schwenkvorrichtung laut folgender Tabelle anschließen :
Ausgangsdrähte von CBZ220/CBZ24
Anschluß an die
Schwenkvorrichtung
WEISS
BRAUN
GELB
GRAU
ROSA
GRÜN
GELB/ GRÜN
Gemeinsam
Unten
Oben
Rechts
Links
Automatisch
Seite 7
CBZ220/CBZ24 3201
Anschluß der Tastatur CBZ220/CBZ24 an die Linse
Anschluß von Umpolungslinsen :
Wo: Ausgangskabel für den Anschluß der Linse
Einstellungen: die Drähte an die Linse laut folgender Tabelle anschließen :
Ausgangsdrähte von CBZ220/CBZ24
Anschluß an die Linse
SCHWARZ
VIOLETT
ROT
BLAU
ROT/BLAU
GRAU/ROSA
Zoom
Zoom
FOCUS
FOCUS
Blende (IRIS)
Blende (IRIS)
Anschluß der Linsen mit gemeinsamen Draht:
Wo: Ausgangskabel zum Anschluß der Linse
Einstellungen: die Drähte laut folgender Tabelle an die Linse anschließen :
Ausgangsdrähte von CBZ220/CBZ24
Anschluß an die Linse
SCHWARZ
ROT
ROT/BLAU
VIOLETT
BLAU
GRAU/ROSA
Zoom
FOCUS
Blende ( IRIS )
Gemeinsam
Gemeinsam
Gemeinsam
Anschluß der CBZ24- Stromkabel
ACHTUNG: sich vor dem Anschließen vergewissern, daß die Stromleitung jener auf den Datenschildern der
Tastatur angebrachten, entspricht.
Wo: Ausgangskabel für den Stromanschluß
Einstellungen: die drei Drähte laut folgender Tabelle anschließen:
Ausgangsdrähte von CBZ24
Stromanschluß
BLAU
BRAUN
GELB/GRÜN
24 V~
24 V~
Für CBZ220, in der 230V~ Version, liegt es einen SHUCO Stecker.
Konfiguration der Tastatur CBZ220/CBZ24
Die Tastatur CBZ220/CBZ24 ist für eine Ausgangsspannung an den Kontakten der Linse von 12 VÙ voreingestellt. Es
ist möglich, diese Spannung auf 6 VÙ zu bringen:
Wo: Anschluß am oberen Teil des Kreislaufes im Tastaturinneren
Einstellungen:
1. Eineheit spannungslos machen
2. Die drei Befestigungsschrauben der rechte Seite
entfernen
3. Den Anschluß laut Schema an der Seite positionieren
4. Die Seite durch Anziehen der Schrauben wieder
schließen
Seite 8
èý7ÙýCA
íìý7ÙýCA
CBZ220/CBZ24 3201
Verwendung der Tastatur
Power-Led
Led für die
automatische
Bewegung
der Schwenkvorrichtung
Bedientasten
der Schwenkvorrichtung
Tasten zur Bedienung
der Linsen
Bedienungstasten der Schwenkvorrichtung
Tasten PAN & TILT
: ermöglichen die Bewegung der Schwenkvorrichtung in die Positionen Oben, Unten (TILT)
und Links, Rechts (PAN)
ã
Taste für AUTOPAN
: setzt die Schwenkvorrichtung in ständige Bewegung zwischen den Endanschlägen in
Richtung links-rechts und umgekehrt (AUTOPAN)
Bedienungstasten der Linsen
TastenFocus near, Focus far: aktivieren die jeweiligen Focus-Tätigkeiten
Tasten Zoom in, Zoom out: aktivieren die jeweiligen Zoom-Tätigkeiten
Tasten Iris open, Iris close: aktivieren die jeweiligen Iris-Tätigkeiten
Seite 9
CBZ220/CBZ24 3201
Wartung
Die Tastatur CBZ220/CBZ24 benötigt keine besondere Wartung.
Es ist ratsam, sie auf einer festen Unterlage aufgestellt zu verwenden, mit den Strom- und Anschlußkabel in einer
Lage, in der sie den Operator nicht behindern können.
Die Reinigung muß immer bei ausgeschaltetem Gerät durchgeführt werden. Die Tastatur regelmäßig mit
einem trockenen Baumwolltuch reinigen und auf Reinigungsmittel und nasse Tücher verzichten.
Lösung von Installationsproblemen
Die Tastatur CBZ220/CBZ24 zeichnet sich durch eine extrem einfache Anwendung aus. Trotzdem können während
der Installation, Konfiguration und während der Anwendung Probleme auftreten.
Problem
Mögliche Ursache
Beim Einschalten aktiviert sich Kein Strom vorhanden
das POWER-Led nicht
Falscher Strom wird geliefert
Die Sicherung ist durchgebrannt
Die Tasten funktionieren, aber Falsche Anschlüsse
die Schwenkvorrichtung
reagiert nicht
Die von CBZ220/CBZ24 gelieferte
Spannung entspricht nicht der von der
Schwenkvorrichtung erforderlichen
Die Tasten funktionieren, aber Falsche Anschlüsse
die Linse reagiert nicht
Behebung
Das Stromkabel kontrollieren
Die Betriebseigenschaften prüfen
Sicherung austauschen
Die Anschlüsse zwischen Tastatur und
Schwenkvorrichtung kontrollieren
Die Betriebseigenschaften der Tastatur
und der Schwenkvorrichtung prüfen
Die Anschlüsse zwischen Tastatur und
Linse prüfen
Technische Eigenschaften
Stromspannung:
Leistung :
Schaltbare Leistung:
Schutzsicherung:
24 V~ / 230 V~, 50-60 Hz (siehe Betriebseigenschaften auf den Datenschildern)
4W
45 W
Modell 24V~ F1 500mA F 250V; F2 1.6A T 250V
Modell 230V~ F1 50mA F 250V; F2 630mA T 250V
von 0°C bis 40°C
Betriebstemperatur:
Bedienungsspannung der SchwenkVorrichtung:
24 V~ / 230 V~, 50-60 Hz ( siehe Betriebseigenschaften auf den Datenschildern)
Konstruktion:
Fliessgepresses Aluminium und Gummiteile
Fertigbearbeitung:
Lackierung mit Epoxydstauben
Abmessungen:
115 x 190 x 50 mm
Gewicht:
900 g
Seite 10
CBZ220/CBZ24 3201