1
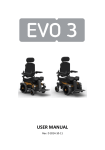
USER MANUAL
with CE Mark Statement
DECLARATION OF CONFORMITY
The manufacturer
Neatech.it
4/A A. De Curtis St. 80040 Cercola (NA), Italy
under its responsibility, states that
the wheelchair Pegasus Evo
satisfies the conditions laid down by European Directive 93/42;
according to the criteria for classification of annex IX of this Directive, the Pegasus
Evo is classified as
class I medical device
It also complies with the requirements of the harmonized standards:
UNI EN 12182 Ausili tecnici per persone disabili
UNI EN 12184 Sedie a rotelle a propulsione elettrica, motorette e loro sistemi di
carica
Table of contents
PEGASUS EVO PRESENTATION .......................................................................... 1
STARTING UP ..................................................................................................... 2
USE OF THE WHEELCHAIR ................................................................................. 4
ADJUSTMENTS ................................................................................................ 10
ACCESSORIES ................................................................................................... 15
CONTROL AND MAINTENANCE ....................................................................... 19
FAULT, REPAIR AND ASSISTANCE .................................................................... 21
TIPPING HAZARD
Any transport on a slope greater than the maximum
security slope can be dangerous.
ELECTROMAGNETIC RADIATION DANGER
The behavior of the wheelchair while driving may be
affected by electromagnetic fields such as mobile
phones and other devices.
It is recommended to avoid the use of the wheelchair
in the presence of such devices.
TEMPERATURE
The temperature of some surfaces may increase
when the chair is exposed to external heat sources as
sunlight.
DISPOSING
This product and all its components can not be
treates as household waste. For more detailed
information on how recycling and disposal this
product contact your local waste disposal service.
1. PEGASUS EVO PRESENTATION
Thank you for purchasing the electronic wheelchair Pegasus Evo.
Pegasus Evo was designed to be used mainly outdoor.
The aeronautical technology, used to manufacture all Neatech.IT
products, made possible to create rigid and foldable frame highly
customizable and reliable. Frame and canvas are available in
different colors.
Characteristic
Adjustable armrests
Adjustable footrest
Customizable colors
Electronic tilting
Maximum speed 15 km/h
Elevating seat
Reclining backrest
Range of 35 km
Fully charged in 7 ore
Maximum slope 18%
WARNING: It is prohibited to use wheelchair or its parts for any
purpose other than that indicated; for a correct use please follow
the instructions given in this manual. NEATECH.IT disclaims any
responsibility for damages caused by improper use of aids
www.neatech.it
1
2. STARTING UP
Checks to be made on delivery
Check the integrity of the original packaging.
Check for any anomalies on the shipping documents.
Check the functionality and integrity of the device in all of its
parts, at the time of or immediately thereafter, to ensure that no
damage is caused by a careless transport.
Make sure the surface of the device is not damaged, scratched,
bended, etc.
Any fault or damage found must be immediately reported on the
shipping documents and promptly communicated to the carrier.
For any other questions, please contact the manufacturer.
If you don’t want to use the Pegasus Evo for a long time, store it
in a safe place frre from dust and moisture.
Inside the box there is:
Pegasus Evo wheelchair
N. 1 pair of footrests
N. 1 pair of armrests
N. 1 joystick
N. 1 Charger
Documentation and manuals
PACKAGING DIASPOSAL
To properly recycle the packaging materials follow the
instructions provided by your local waste disposal
service.
www.neatech.it
2
2. STARTING UP
Connection of the Joystick
Connect the cable of the joystick as shown in Figure 1. Make sure it
is fully engaged. If it appears difficult to insert the connector try to
invert and reinsert
Figure 1
Transport and storage
If you don’t use the Pegasus Evo for a long time make sure you set
the switch (I) OFF as shown in Figure 2. You should keep the
Pegasus Evo in a place free from dust and moisture and away from
heat sources.
If you must ship the Pegasus Evo, turn off the switch (I), unplug the
joystick and remove the footrests and armrests.
Figure 2
www.neatech.it
3
3. USE OF THE WHEELCHAIR
Checks before use
For a safe use and to avoid any situations of risk
to the user before using the product perform the
following checks .
Checking tire pressure
Verify that the tire pressure is consistent with the values
given in table
Front wheels
3,0 bar
Rear wheels
1,5 bar
Checking battery charge level
Check the battery charge level on the indicator located on
the joystick. (N.1 in Errore. L'origine riferimento non è
stata trovata.)
Check of electric cables
Check that the wires don’t constitute a hindrance to the
movements of the wheelchair..
Please follow these advices for safe use and long lasting of the
wheelchair.
Prevent extended contact with the water, this may cause oxidation
of the metal and the change in the characteristics of the used
materials.
Prevent long exposure to sunlight.
Practice with the guidance of the wheelchair in a safe and free of
obstacles place.
Initially adjust the control device to the low speed.
www.neatech.it
4
3. USE OF THE WHEELCHAIR
Control console
1.
2.
3.
4.
5.
6.
7.
8.
9.
10.
11.
Battery level
Low battery indicator
Beeper
MIN speed selector
Remotely controlled
joystick indicator
Error indicator
On-off button
Fully charged battery
indicator
Speedometer
MAX speed selector
Controller
Figure 3
Figure 4
NOTA: it is possible that the control console of the Pegasus Evo is different
depending on the accessories chosen. Main controls remain unchanged .
www.neatech.it
5
3. USE OF THE WHEELCHAIR
Powered mode
Set the release engine lever located in the back of Pegasus Evo as
shown in Figure 5. In this configuration, wheels are normally brake.
Use the switch (I), see Figure 2, to turn on and turn off the Pegasus
Evo.
L1
L2
Figure 5
Seeing Figure 5 use the button 6 to turn on the command console.
Use button 4 and 10 to select the travel speed. Chosen level is
shown by the indicator 9.
Use the controller 11 to get in gear. Its proportional functionality
allows you to adjust speed and direction according to the intensity
with which you act on the controller.
By re leasing the lever of the controller automatically starts the
electromagnetic brake that looks the wheels of the Pegasus Evo.
Don’t turn on or turn off the command console
while the wheelchair is moving.
www.neatech.it
6
3. USE OF THE WHEELCHAIR
Push mode
If you need to use the push mode use switch (I), see Figure 2 to turn
off the Pegasus Evo and set the release engine lever as shown in
Figure 6.
L1
L2
Figure 6
In the push mode electromechanical brakes
are off and therefore use of the Pegasus Evo in
presence of slopes may be dangerous.
www.neatech.it
7
3. USE OF THE WHEELCHAIR
Charge of the batteries
To recharge the batteries use only the provided charger. The
manufacturer is not responsible for damage to person or property
resulting from the use of non original product
Connect the power cord to a power
supply 230 V.
If the led A doesn’t turn on check the
voltage and the fuse inside the
charger.
Connect the cable to the joystick as
shown in figure.
All led of the charger light up and after
a second led C turns off and the charge
starts. If not, check the connections
made.
Battery correctly loaded.
Unplug the power cord and the
battery cable.
www.neatech.it
8
3. USE OF THE WHEELCHAIR
It is recommend to charge the batteries when the indicators 1 in
Figure 3 are red. Each battery is subject to a normal “self
discharge”, so batteries that are not used for long time will
discharge by itself.
Charging time is influenced by multiple factors such as remaining
battery power, battery state of aging and temperature. However the
approximate charging time is about 7-9 hours. If the charge
duration was reduced (about 1 hour), that is a sign of failure:
contact the vendor for a possible replacement of batteries.
Don’t use the wheelchair during the charge.
SHOCK HAZARD
Check if charger data sheet matches with the
network power (voltage, frequency).
RELEASE DANGER
Any impact to the batteries could cause a loss of
fluids. Pay attention
ENVIRONMENTAL HAZARD
It is recommended to properly recycle used
batteries. Contact your local agency for waste
disposal for more information.
www.neatech.it
9
4. ADJUSTMENTS
Armrest
It is possible to make several adjustments on the armrests: height,
width and depth of the aid and position of the joystick. Shown
operations can be performed on both armrests.
Height
A
A
Figure 7
Seeing Figure 7, loosen the screws (A), and set armrests height to
desired value and retighten the screws (A).
NOTE: for this operation use a 6 mm allen wrench.
www.neatech.it
10
4. ADJUSTMENTS
Depth
To adjust armrests depth and width act under the seating floor as
shown in Figure 8.
Figure 8
Loosen the 4 screws indicated
in Figure 9 and move the
armrest till the desired
position; tighten the screws
again. Be sure that the armrest
can’t move at all.
NOTE: for this operation use a
10 mm open-end wrench.
C
Figure 9
www.neatech.it
11
4. ADJUSTMENTS
Joystick
Loosen the lever (L), as shown in Figure 10, so it is possible to move
the joystick in accordance with the directions indicated to reach the
desired position. Retighten the lever.
L
V
Figure 10
Footrests height
Figure 11
Unscrew the pin shown in Figure 11 to release the footrest. Choose
the desired height aligning the footrest to one of available holes.
NOTE: for this operation use a 6 mm allen wrench and a 13 mm
open-end wrench.
www.neatech.it
12
4. ADJUSTMENTS
Footrests inclination
Loosen the screws shown in Figure 12, so it is possible to adjust
footrest inclination: rotate it to reach the desired position. Tighten
the screws again.
NOTE: for this operation use
a 4 mm allen wrench.
Figure 12
Footrests depth
Unscrew the screws shown in Figure 12, put the footrest in one of
three positions shown indicate in Figure 13. Tighten the screws
again.
NOTE: for this operation use
a 4 mm allen wrench.
Figure 13
www.neatech.it
13
4. ADJUSTMENTS
Backrest depth
V
Figure 14
Seeing Figure 14 loosen the screws (V), move the backrest to the
desired position and tighten the screws again.
NOTE: for this operation use a 4 mm allen wrench.
Backrest inclination
Remove the screws shown
in Figure 15 on both sides
(total 8 screws), incline
the backrest to the desired
position and put the
screws again
NOTE: for this operation
use a 4 mm allen wrench.
Figure 15
www.neatech.it
14
5. ACCESSORIES
Pegasus Evo can be equipped with many accessories that NEATECH
make available to meet different customer’s needs. There is the
possibility that the joystick changes depending on desired
accessories.
Removable flip-up adjustable active footrests
With this equipment, you can adjust the inclination of the footrests
with the aid of the joystick.
Controller allows you to select the type of movement (only left
footrest, only right footrest, both footrests).
Z
X
To extract the electronic footrest
unhook the connector (Z), (X) and
pull in the direction of the arrow.
Figure 16
Removable flip-up adjustable footrests
With this device you can adjust the
inclination of the footrest.
Seeing Figure 16 loosen the pin (Z)
and move the platform to the
desired height. Retighten the pin
(Z).
www.neatech.it
15
5. ACCESSORIES
Dynamic reclining backrest
X
This equipment allows you to
recline the backrest with the
help of a lever installed on
the back. Pull the lever (X)
and recline the backrest to
the desired inclination, so
release the lever (X).
Figure 17
Powered reclining backrest
With the aid of two electronic
pistons user can recline the
backrest with the joystick
Figure 18
Side pad right - left
Figure 19
It is an adjustable support
thath acts laterally on the
chest of the user to keep the
desired position. It can be
mounted either in pairs or
individually.
www.neatech.it
16
5. ACCESSORIES
Adjustable headrest
It is a headrest mounted on the
back; you can adjust either height
and inclination. With a pin you can
also rotate it.
Figure 20
Powered seat lift and tilt
(max 300mm/0°-30°): with this device the user can vertically lift
and tilt the seat controlling its running with the joystick.
During tilting operations make sure that your
elbows rest on the armrests to eliminate risk of
entrapment
www.neatech.it
17
5. ACCESSORIES
Transparent table with mounting brackets
This table is designed to provide a
wide usable area and at the same
time to offer support to rest the
arms. It is adjustable in different
positions and requires a simple
assembly.
Figure 21
Seat belt
Speedstar has the predisposition for the installation of a seat belt
that can be mounted on request.
You can also request: heel straps, calf straps and foot straps.
www.neatech.it
18
6. CONTROL AND MAINTENANCE
Specifications
Maximum allowed mass
Intended use
Working temperature
Class
(UNI EN 12184)
Dimensions [mm]
Empty weights [kg]
Inclinazione massima di
sicurezza [°]
Maximum height of the
platform from which the
chair can descend safely
[mm]
Autonomia su percorsi
piani [km]
Batteries
125 kg
Pegasus Evo is intended for all those groups of
users that are confined to a sitting position who
have the opportunity and the need to travel
autonomously in areas predominantly inside
with the possibility of overcome some external
obstacles.
The wheelchair cannot be used as a seat on
motor vehicles.
da -10 °C a 40 °C
Classe B
width
lebgth
heigthaltezza
68kg
61cm
72cm
90cm
18%
50mm
35km
2 batteries ZGL 12054
12 V 45Ah
www.neatech.it
19
6. CONTROL AND MAINTENANCE
Maintenance and cleaning
Regular maintenance help to preserve functionality and safety of
the Pegasus Evo. The lack or inadequacy of care and maintenance
implies a limitation of the warranty from the manufacturer.
To clean the chair don’t use any device to spray water at high
pressure and in any case protect the control device from water and
humidity. For plastic or metal parts use a soft cloth moistened with
a non-aggressive detergent. For pads, linings and covers of the seat
and backrest use warm water and mild detergent.
Do not use chemical cleaners, solvents, acids, etc
Tires can be cleaned with water and detergent.
OPERATION
PERIODICITY
Checking tightness of chassis screws
For this operation contact your
vendor
Replacing the batteries
For this operation contact your
vendor
Tire pressure monitoring
Annual
Biennial
Checking of tire usury
Monthly
Complete cleaning
Monthly
www.neatech.it
20
Weekly
7. FAULT, REPAIR AND ASSISTANCE
POSSIBLE FAULT
Joystick does not turn
on
Joystick is turned on but
the chair doesn’t drive
PROBABLE CAUSE
ACTION
power button is set to OFF
set power button to ON
(see Figure 2)
joystick cable not
properly inserted
insert properly joystick
cable
batteries are low
charge batteries
electrical fault
contact assistance
wheelchair in push mode
mechanical failure
wheelchair in push mode
Error light 10 turns on
(Errore. L'origine
set the lever as shown in
Figure 5
contact assistance
set the lever as shown in
Figure 5
electrical fault
contact assistance
you has acted with the
release lever whith the
command console turned
on
turn off and on the
command console
Footrest doesn’t engage
mechanical failure
contact assistance
Joystick in alarm
electrical fault
contact assistance
riferimento non è stata
trovata.)
www.neatech.it
21
7. FAULT, REPAIR AND ASSISTANCE
POSSIBLE FAULT
PROBABLE CAUSE
ACTION
procedure error
follow the instructions of this
manual on page 21
electrical fault
contact assistance
release lever not properly
inserted
insert correctly the
release lever
mechanical failure
contact assistance
Wheelchair doesn’t have
a good grip
Tires are not set to the
correct value of pressure
Set the tires pressure to
the correct value
Puncture
puncture
contact a qualified
technician
Low autonomy of
batteries
end of the life cycle of the
batteries
contact assistance for the
replacement of the
batteries
Wheelchair doesn’t tilt
Wheelchair makes noise
Serial number
For any report or assistance request communicate the unique
identification code on the chassis of each Pegasus Evo.
www.neatech.it
22
7. FAULT, REPAIR AND ASSISTANCE
Spare parts list
DESCRIPTION
Tire wheel
Inner tube wheel
NOTES
Specify Pegasus Evo version (66 – 55),
front wheel or rear wheel, right or left
wheel
Specify Pegasus Evo version (66 – 55),
front wheel or rear wheel
Cover
Specify Pegasus Evo version (66 - 55)
Motor
Specify left or right
Footrest
Specify seat width and type of footrest
(single or splitted)
Backrest canvas
Specify seat width and backrest height
Seat canvas
Specify seat width and depth
Headrest
Specify left or right
Bearing pair for front
forks
Front forks
Specify Pegasus Evo version (66 - 55)
Lights
Specify if position light, directions light or
headlights
NOTE: For any other problem, contact the manufacturer.
www.neatech.it
23
7. FAULT, REPAIR AND ASSISTANCE
Warranty terms
Pegasus Evo is a product globally guaranteed for 24 months with
the exception of batteries that are guaranteed for six months. The
warranty covers defects in materials or workmanship. The
warranty doesn’t cover parts subject to usury or damaged parts by:
overload, misuse, alterations and repairs made by unauthorized
third parties.
The warranty expires in case of tampering, improper storage,
unauthorized or incorrect maintenance.
MODEL:
Pegasus Evo
SERIAL NUMBER:
MANUFACTURING
DATE:
www.neatech.it
24
8. FAULT, REPAIR AND ASSISTANCE
8. FAULT, REPAIR AND ASSISTANCE
USER MANUAL
PEGASUS EVO
NEATECH.IT
Our Mission is transfer technology and solution from the
aerospace industry to disability sector. We are proud to
offer the highest quality products and solution on the
market.
www.neatech.it