1
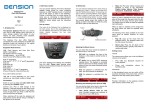
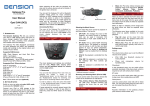
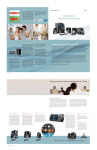
Webradio FM
User Manual
2. GETTING STARTED
3. HOW TO CONTROL
Plug the Webradio FM into the cigar lighter
socket and turn it ON, then select FM 88.7 MHz
on the car radio (default frequency of the
Webradio FM) where the Dension demo track will
be audible via the speakers. If the quality is not
good enough, you may need to change the
default FM frequency which is possible in 2
different ways manually or automatically.
The menu of the Webradio FM is displayed on
the device only. The music playback and settings
are controlled from the device. If no device is
connected AUX-IN as a source will be visible and
active. Please note: no song selection is
possible in this mode.
Manual selection: press & hold the ‘SOURCE’
button for 2 seconds till the ‘FM Frequency’
menu appears on the screen. Use the
‘SOURCE’, ‘MENU’, previous (<<) or next (>>)
track buttons on the device for selecting the
proper frequency (between 88.0 – 107.00 MHz)
and press the ‘Play/Pause’ (►II) button to
confirm your selection then set the new
frequency on your radio.
v.1.0
IRF-9201-1
1. INTRODUCTION
The Webradio FM transforms the audio signal to
a standard Stereo FM radio signal and makes
sound available through the car’s radio. This
solution is universal so it is not a problem
anymore if you don’t have a compatible CDChanger port or AUX-IN in the Head Unit, you
just need to have a single cigar lighter socket
which is present in all cars. Webradio FM is not a
simple mp3 FM transmitter because it lets you to
stream thousands of different internet radio
stations via 3G capable phone or 3G USB
modem.
This user guide will explain how easy to use the
Webradio FM with USB stick, SD Card or to
listen to a Webradio stream. Please take the time
to read this user guide through carefully and
keep it handy in case of any questions which
arise later on.
Supported Audio devices
USB: Flash Memory (UBS1.1 and higher), SD
Card (SDHC also supported), Micro SD with SD
adapter
File System: FAT16 or FAT32
Storage capacity: up to 64 GB
Music Format:
MP3
WMA 4 - 44.1 kHz at sample rates up to
320 kb/s. Except for DRM protected files
AUX: 3.5mm stereo aux input
Automatic selection: press & hold the ‘MENU’
button for 3 seconds then wait till the new
frequency value will be visible on the top right
corner of the Webradio display, which takes
maximum 20 seconds. Depending on your car
stereo type you may need to set the new value
manually on the radio.
If the new frequency has been set you are ready
to use the device.
Please note: For safety reasons turn the device
OFF or pull it out from cigar lighter everytime you
leave your car in order to avoid car’s battery
draining.
Accessing the Settings menu
If no device is connected press the ‘MENU’
button. If USB or SD card is the active at first you
need to get back to the root. For example: during
playback press the ‘MENU’ button then press the
previous (<<) until the root directories are visible.
Use the MENU / SOURCE buttons to find the
Settings menu and then press the OK button to
enter.
Settings menu
USB / SD reader
When you firstly connect the USB stick or SD
card the root directories of the USB stick or SD
card will be displayed. Use the ‘MENU’ (up) and
‘SOURCE’ (down) buttons for browsing and
press play/pause (OK) or next button (>>) to
enter the selected directory or press the previous
(<<) button to return to the previous directory.
During playback press shortly the menu button
and previous track button to get back to the
previous directory. When a song is selected the
id3 tags (only v1) will be displayed on the Radio
screen’s if the radio is Tuner RDS capable.
Please note: the Webradio FM menu items will
not be displayed on the radio while you are
browsing in the menu.
•
Volume: use this menu option to
increase or decrease the volume
output of the Webradio FM
•
Source: you can select the music
source for playback in the Source
menu: Please note: only the currently
connected devices can be selected
(e.g. if no USB stick is connected, this
option won’t be accessible) except
AUX-In.
•
3G settings: In this menu you have 3
submenus: 1. PIN code: You need to
use this menu option only if you use
3G USB modem which requires a PIN
security code in order to get connected
to the Internet. Please note: only 4
digits can be entered. You need to turn
the PIN security option OFF if the PIN
security code is longer on your 3G
USB modem. 2. Country: select the
country of your phone provider. 3.
Provider: (this option only visible if
Country has been set) In this menu
you can set your provider information
•
About: Provides information on the
Webradio FM product (HW version,
SW version and RadioTime registration
code)
•
Clear Cache: This option deletes the
earlier played Webradio station
information
The Webradio FM saves the playing position
automatically therefore if the USB stick or SD
card has been in use earlier, the music will play
from USB stick or SD card from the point at
which they last played.
Webradio: Use the same buttons for browsing
and selecting as above.
4. HOW TO USE THE WEBRADIO FUNCTION
How to use the Webradio menu
Troubleshooting
Bluetooth set-up (if needed)
Webradio main menu appears automatically
when your phone or 3G USB dongle is
connected to the Webradio FM and the internet
connection is available. Use the same buttons for
navigation as we wrote in the ‘How to control’
section. When a Webradio station is selected the
station info will be displayed on the radio screen
(only on RDS tuner capable radio). The currently
played song details can be also seen on the
display if the selected Webradio station provides
this information and your car stereo has radio
text support.
Bluetooth connection is not possible
Before using your Webradio FM, please make
sure that the Bluetooth dongle (included in the
package) is inserted to the USB connector of the
device.
The Webradio FM can be paired with a Bluetooth
and internet tethering capable mobile phone.
No pre-configuration is needed for using a phone
with PAN Bluetooth profile (typically iPhone and
Sony Ericsson phones) .
Using a phone with DUN Bluetooth profile
(typically Nokia, LG and Samsung) requires the
pre-configuration in the Settings\ 3G Settings
submenu of the Webradio FM where you have to
set the country and provider contract details and
then the configuration procedure is done
automatically.
•
Then re-start your Dension Webradio
(by removing and re-connecting it) or
pair the phone with Webradio again
Selected station does not play
•
First check that other RadioTime
station plays correctly
•
If the problem still persist, please
check your 3G connection
Dension may issue firmware updates to the
Webradio FM. Such updates will be made
available on www.dension.com and can be
installed through the USB port of the Webradio
FM with a USB pendrive. Detailed instructions
specific to a particular firmware update will be
included in the corresponding release note.
Pairing your phone
The Dension Webradio FM can store the data of
the last three connected phones. At start-up, it
searches for the last connected phone first. The
paired phone and its Bluetooth connection has to
be ’ON’ before connecting the Webradio to the
cigar lighter or (if already plugged in) before
turning it ON. Please note: depending on your
car specification you may not need to turn the
ignition ON to get powered the Webradio FM via
cigar lighter.
First check that the Bluetooth
connection and tethering is switched
ON in your phone
Firmware update
Please refer to the documentation provided by
the phone manufacturer for the capabilities and
Bluetooth options of your phone.
Pair the phone to the Webradio FM from your
phone’s Bluetooth menu. Select the Bluetooth
option on your phone (usually in tools or settings)
search for available devices, select Webradio FM
and enter 0000 for connection. When a phone is
connected you can see the connection status on
the phone screen (e.g. ‘Internet tethering’ on
iPhone). Your device is now paired and will
automatically connect each time you return to the
car if the Bluetooth option is turned ON.
•
Registering the Dension Webradio FM
5. DISCLAIMER AND WARRANTY
You need to register your product on the
RadioTime homepage if you want to add specific
stations to the preset menu. Preset menu is not
visible by default, this menu option appears only
if you add a preset station via RadioTime or
manually.
Warranty
If you don’t have RadioTime account, go to
www.dension.com/radiotime and enter the
Registration Code (starting ’DENWWR’) that you
can find inside of the Settings \About menu.
If you already have an account in that case you
can use your existing one for registering your
Webradio FM.
Adding manually a Preset station
This option is only available while you are playing
the Webradio station. Press the ’MENU’ button
and press and hold the next button for 3
seconds. If it was successful the selected preset
station will be accessible from the ‘My Presets’
directory on the Main Menu. For removal go to
‘My presets’, select and play the station then
press the ‘MENU’ button and finally press & hold
the previous track button for 3 seconds. Please
note: Preset stations list will be refreshed only if
you exit and enter again to the ‘My Presets’
folder.
Dension devices carry a one-year limited
warranty that protects you from defects in
material and workmanship of products sold by
Dension or its authorized distributors and
retailers. Dension does not warrant or assume
liability for any damage caused due to improper
operation or usage. For warranty claims, proof of
purchase is required.
Disclaimer
The use of electronic devices while driving may
be subject to government legislation. Please
ensure that your use of the Dension device
complies with applicable traffic laws. Dension
does not assume liability for any events resulting
from the illegal or irresponsible use of handheld
devices while driving.
Dension reserves the right to modify its products
or specifications without prior notice.
Further assistance
If you need further assistance in using your
Dension Gateway, please contact your local
supplier or visit www.dension.com and click on
‘Support’.
Please check the download section for the latest
firmware version and product documentation, as
these may provide additional features or easier
use of the product.